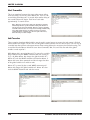
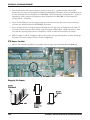
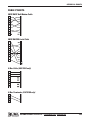
1
GSC3000
VRC2500
Transmitter Remote
Control Systems
INSTALLATION &
OPERATION MANUAL
5 SERIES
Includes Instructions
for Lynx Software
GSC3000 & VRC2500 Installation & Operation Manual
System Series 5
Lynx Software version 5.0
Revision A (August 2004)
Copyright © 2004 Burk Technology, Inc. All rights reserved. No part of this manual may be reproduced in any form or by any
means without written permission from Burk Technology. Information in this manual is subject to change without notice.
Contents
CHAPTER 1: INTRODUCTION .................................................................................................................1
Contacting Burk Technology.......................................................................................................................................................1
Unpacking........................................................................................................................................................................................2
VRC2500 ..............................................................................................................................................................2
GSC3000 I/O 8 & I/O 16 unit ............................................................................................................................3
Voice Interface Unit ................................................................................................................................................3
Command Relay Unit..............................................................................................................................................4
Wiring Interface Unit..............................................................................................................................................4
Computer Requirements ..............................................................................................................................................................4
System Overview ............................................................................................................................................................................5
GSC3000 Hardware Components..........................................................................................................................5
VRC2500 Hardware Components...........................................................................................................................5
Lynx Software .........................................................................................................................................................5
New in Lynx 5 ........................................................................................................................................................6
Alarm Reporting .....................................................................................................................................................6
Automatic Functions ...............................................................................................................................................7
Data Collection & Automatic Logging .....................................................................................................................7
Command Relays & Wiring Interfaces .....................................................................................................................7
Power Supply & Surge Protection..............................................................................................................................................7
Battery Backup.......................................................................................................................................................7
Surge Protection .....................................................................................................................................................7
Important Safety Information .....................................................................................................................................................8
Controls & Connections..............................................................................................................................................................8
VRC2500 ..............................................................................................................................................................8
GSC3000 I/O Unit.............................................................................................................................................10
Voice Interface Unit ..............................................................................................................................................12
Wiring Interface Unit ............................................................................................................................................13
Command Relay Unit ............................................................................................................................................13
CHAPTER 2: SOFTWARE & SITE SETUP.................................................................................................15
Upgrading From A Previous Software Version .......................................................................................................................15
Software Installation....................................................................................................................................................................15
Starting Lynx .................................................................................................................................................................................16
Setup Functions............................................................................................................................................................................16
Site List ................................................................................................................................................................16
New Site...............................................................................................................................................................17
Edit Site ...............................................................................................................................................................17
CUSTOMER SUPPORT: 978-486-3711 • [email protected] • www.burk.com
iii
CONTENTS
Connect/Disconnect..............................................................................................................................................17
Unit Configuration................................................................................................................................................17
Creating A New Site In Lynx: The Site Wizard ......................................................................................................................17
Site Name ............................................................................................................................................................17
Time Zone.............................................................................................................................................................18
Primary Connection...............................................................................................................................................18
Backup Connection ...............................................................................................................................................19
Site Sharing..........................................................................................................................................................19
Logging ................................................................................................................................................................20
Editing Site Settings....................................................................................................................................................................21
Connection Settings ...................................................................................................................................................................21
Setting I/O Unit Numbers .........................................................................................................................................................21
Creating The G-Bus Network ...................................................................................................................................................22
Connecting To Sites....................................................................................................................................................................23
After Site Setup............................................................................................................................................................................23
CHAPTER 3: LYNX SOFTWARE OVERVIEW ............................................................................................25
Menus & Icons.............................................................................................................................................................................25
The File Menu.......................................................................................................................................................25
Site Menu.............................................................................................................................................................26
View Menu............................................................................................................................................................26
Tools Menu...........................................................................................................................................................27
Help Menu ...........................................................................................................................................................28
Site List: In Detail.................................................................................................................................................28
Event List: In Detail ..............................................................................................................................................29
Alarms List: In Detail ............................................................................................................................................29
Macro Status: In Detail........................................................................................................................................30
Network Clients: In Detail ....................................................................................................................................30
Captures Window: In Detail ..................................................................................................................................30
Status Bar ......................................................................................................................................................................................31
CHAPTER 4: I/O UNIT CONFIGURATION..............................................................................................33
Opening An Archived Unit Configuration..............................................................................................................................34
Setting Up Or Modifying I/O Unit Configuration ...............................................................................................................34
Description...........................................................................................................................................................34
Site Dialing ..........................................................................................................................................................35
Metering...............................................................................................................................................................35
Status ..................................................................................................................................................................38
Commands ...........................................................................................................................................................39
Timed Events ........................................................................................................................................................39
Muting .................................................................................................................................................................40
Meter & Status Colors .........................................................................................................................................41
Saving & Printing Configurations.............................................................................................................................................41
Saving to the I/O Unit .........................................................................................................................................41
Saving to an Archive .............................................................................................................................................41
Abandoning Changes/Restoring Default Settings...................................................................................................42
Printing the Unit Configuration.............................................................................................................................42
Calibration.....................................................................................................................................................................................42
Unit Properties.............................................................................................................................................................................43
Clear Cache ..................................................................................................................................................................................43
CHAPTER 5: VOICE INTERFACE CONFIGURATION ...............................................................................45
Description....................................................................................................................................................................................45
iv
GSC3000 & VRC2500 INSTALLATION & OPERATION MANUAL
CONTENTS
Site Dialing....................................................................................................................................................................................45
Users...............................................................................................................................................................................................47
Voice Setup...................................................................................................................................................................................47
Saving & Printing Configurations ............................................................................................................................................48
Unit Properties.............................................................................................................................................................................48
Clear Cache ..................................................................................................................................................................................48
After Configuring Your Unit......................................................................................................................................................48
CHAPTER 6: MODEM & SITE EQUIPMENT CONNECTIONS...................................................................49
Supported Modems ....................................................................................................................................................................49
Dial-Up Modems..................................................................................................................................................49
Full-Time Modems.................................................................................................................................................49
Dial-Up Modem Configuration & Connection .....................................................................................................................49
Configuration .......................................................................................................................................................49
Connection...........................................................................................................................................................50
Full-Time Modem Configuration & Connection ...................................................................................................................52
Configuration .......................................................................................................................................................52
Connection...........................................................................................................................................................54
Connecting a Wiring Interface .................................................................................................................................................56
Voltage Inputs ......................................................................................................................................................56
Floating Grounds..................................................................................................................................................56
Connecting Input Channels...................................................................................................................................56
Connecting a Command Relay Unit........................................................................................................................................58
Power Supply ........................................................................................................................................................58
Connecting Output Channels................................................................................................................................58
Before Leaving Your Site ............................................................................................................................................................58
CHAPTER 7: SITE DATA & REPORTS .....................................................................................................61
Logging ..........................................................................................................................................................................................61
Captures ........................................................................................................................................................................................61
Taking Captures ...................................................................................................................................................62
Viewing Captures ..................................................................................................................................................62
Using The Report Writer ...........................................................................................................................................................62
Creating A New Report.........................................................................................................................................63
Saving Report Settings .........................................................................................................................................66
Opening a Saved Report ......................................................................................................................................66
Printing Reports ...................................................................................................................................................66
Scheduling Print Jobs .................................................................................................................................................................67
Using the Data Browser .............................................................................................................................................................67
Import/Export Wizard ................................................................................................................................................................67
Export History .....................................................................................................................................................68
Export Configuration............................................................................................................................................68
Import Configuration............................................................................................................................................69
Using the Charting Function ....................................................................................................................................................69
Creating a New Chart ..........................................................................................................................................69
Editing Chart Settings ..........................................................................................................................................72
Saving Your Chart ................................................................................................................................................72
CHAPTER 8: CUSTOM VIEW EDITOR.....................................................................................................73
Opening a Custom View ............................................................................................................................................................73
Creating & Editing Custom Views ...........................................................................................................................................73
Customizing the Standard View.............................................................................................................................73
Tools in the Custom View Editor ............................................................................................................................74
CUSTOMER SUPPORT: 978-486-3711 • [email protected] • www.burk.com
v
CONTENTS
Custom View Settings............................................................................................................................................74
Adding, Moving & Deleting Custom View Components...........................................................................................75
Component Properties...............................................................................................................................................................75
General Properties & Click Actions........................................................................................................................76
Meter Components .....................................................................................................................................................................76
Meter (Text) .........................................................................................................................................................76
Meter (Angular) ...................................................................................................................................................76
Meter (Linear)......................................................................................................................................................77
Thermometer ........................................................................................................................................................78
Charts .................................................................................................................................................................79
Status Components ....................................................................................................................................................................79
LED (Round, Rectangular, Diamond or Arrow).......................................................................................................79
Status Label.........................................................................................................................................................80
Status Picture ......................................................................................................................................................80
Status Sound........................................................................................................................................................81
Command Components .............................................................................................................................................................81
Command & LED..................................................................................................................................................81
Command.............................................................................................................................................................82
Sticky Button........................................................................................................................................................82
Other Components.....................................................................................................................................................................82
Picture..................................................................................................................................................................82
Lines.....................................................................................................................................................................83
Shapes .................................................................................................................................................................83
Label ....................................................................................................................................................................84
Saving Custom Views ..................................................................................................................................................................84
Building a Drill Down Approach with Custom Views...........................................................................................................84
CHAPTER 9: SOUNDS, OPTIONS & PASSWORDS.................................................................................85
Sounds ...........................................................................................................................................................................................85
Options..........................................................................................................................................................................................85
General ................................................................................................................................................................86
Startup ................................................................................................................................................................86
Connectivity .........................................................................................................................................................86
Logging ................................................................................................................................................................87
Alerts ...................................................................................................................................................................87
Warnings ..............................................................................................................................................................88
Data ....................................................................................................................................................................88
Set Time.........................................................................................................................................................................................89
Changing the Site Password .....................................................................................................................................................89
Lynx Users & Passwords ............................................................................................................................................................90
CHAPTER 10: MACROS .........................................................................................................................91
Viewing Macros ............................................................................................................................................................................91
Starting & Stopping Macros.....................................................................................................................................................91
Running Macros as Timed Events ..........................................................................................................................92
Running Macros as Alarm Actions.........................................................................................................................92
Stopping Macros..................................................................................................................................................92
Launching Macros with a Voice Interface ...............................................................................................................92
The Macro Editor ........................................................................................................................................................................92
Opening the Macro Editor ....................................................................................................................................92
Startup Macro .....................................................................................................................................................92
vi
GSC3000 & VRC2500 INSTALLATION & OPERATION MANUAL
Creating & Editing Macros ...........................................................................................................................................................93
Creating a New Macro .........................................................................................................................................93
Editing an Existing Macro .....................................................................................................................................93
Entering Source Code ...........................................................................................................................................93
Saving Macros to the I/O Unit .............................................................................................................................93
Abandoning Changes to a Macro..........................................................................................................................94
Macro Source Code....................................................................................................................................................................94
Syntax..................................................................................................................................................................94
Macro Expressions................................................................................................................................................94
Types of Macros...........................................................................................................................................................................97
Mathematical Statements........................................................................................................................................................102
Metering Macros .......................................................................................................................................................................106
Macro Examples.........................................................................................................................................................................108
CHAPTER 11: VOICE INTERFACE OPERATION....................................................................................113
GSC3000 Hardware Connections.........................................................................................................................................113
Dialing In & Disconnecting......................................................................................................................................................114
Dialing In ............................................................................................................................................................114
Disconnecting......................................................................................................................................................114
Selecting an I/O Unit................................................................................................................................................................114
Alarm Reporting..........................................................................................................................................................................115
Check for Alarms .................................................................................................................................................115
Clearing Alarms...................................................................................................................................................115
Suspending Alarm Dial-Out.................................................................................................................................115
Meter & Status Readings .........................................................................................................................................................116
List Channel Labels..............................................................................................................................................116
Channel Readings................................................................................................................................................116
Commands, Macros & Captures.............................................................................................................................................116
Command List .....................................................................................................................................................116
Issuing Commands...............................................................................................................................................116
Cancelling Commands .........................................................................................................................................117
Macro List...........................................................................................................................................................117
Running Macros...................................................................................................................................................117
Cancelling Macros ...............................................................................................................................................117
Taking Captures ..................................................................................................................................................117
Audio & Microphone Functions..............................................................................................................................................117
Using the Audio Out Connector...........................................................................................................................117
Using the Audio In Connector ..............................................................................................................................118
Using the Internal Microphone.............................................................................................................................118
Additional Voice Interface Functions .....................................................................................................................................118
Checking Current Date/Time................................................................................................................................118
Remote/Local Status ...........................................................................................................................................118
Check Unit Number & Security Level....................................................................................................................118
Requery Network .................................................................................................................................................118
Firmware Version ..................................................................................................................................................118
Voice Interface Code Reference .............................................................................................................................................119
APPENDIX A: UPLOADING FIRMWARE ................................................................................................121
APPENDIX B: SPECIFICATIONS & WARRANTY ....................................................................................125
APPENDIX C: PINOUTS .......................................................................................................................133
APPENDIX D: TROUBLESHOOTING.....................................................................................................137
CUSTOMER SUPPORT: 978-486-3711 • [email protected] • www.burk.com
vii
viii
GSC3000 & VRC2500 INSTALLATION & OPERATION MANUAL
1
Introduction
The GSC3000 and VRC2500 transmitter remote control systems are designed to streamline your remote
facilities management by providing a single interface for monitoring your remote site while offering flexibility in
the number and type of control points and a variety of possible communication links. The system is built to
easily accommodate future needs, providing a highly customizable transmitter remote control solution. Burk
Technology’s promise of product quality and continuing development and means that you can expect longlasting benefit from your system.
Both the GSC3000 and VRC2500 share many of the same features and functionality, so this manual applies to
both systems. We have indicated in the manual where instructions vary depending on which system you are
using. The primary difference between the two systems is the ability with the GSC3000 to link multiple I/O units
to expand channel capacity without setting up a separate site and a separate communication link. Additionally,
the VRC2500 includes an integrated Voice Interface. For the GSC3000, the Voice Interface is an optional unit
that may be added to a system. The instructions pertaining to the Voice Interface apply to both the GSC3000
and VRC2500 systems, even though the unit is integrated in the latter.
CONTACTING BURK TECHNOLOGY
Customer Support
Visit the Support section of our web site at www.burk.com for answers to frequently asked questions, links to
support documents, and downloads. If you still need help, please contact Burk Technology customer support:
Phone: 978-486-3711
Fax:
978-486-0081
Email: [email protected]
Sales
For information on Burk Technology’s complete line of transmitter remote control systems and accessories, please
visit our web site at www.burk.com, or contact one of our sales engineers:
Phone: 800-255-8090 (Main Office)
800-736-9165 (Kansas City)
Fax:
978-486-0081
Email: [email protected]
CUSTOMER SUPPORT: 978-486-3711 • [email protected] • www.burk.com
1
CHAPTER 1: INTRODUCTION
UNPACKING
For each item you ordered, please make sure that you have received all listed parts. If anything is missing, contact
Burk Technology customer support at the phone number or email address on page 1. In case of shipping
damage, file a claim directly with the freight carrier.
VRC2500
Customer Support
GSC3000 & VRC2500 QUICK START GUIDE
The GSC3000 and VRC25000 transmitter remote control systems are designed to streamline your remote facilities management by providing a single control interface for your
equipment while offering flexibility in control points and communication links. This Quick Start guide will take you through each step of installing and connecting to your GSC3000 or
VRC2500 system. The Installation and Operation manual contains a system overview and diagrams of all included equipment, details on the systems' advanced features, and complete
instructions for making use of all the features in the Lynx 5 software.
1
2
UNPACKING
INSTALL LYNX SOFTWARE
3
7 Beaver Brook Road
Littleton, MA 01460
www.burk.com
Phone:
978-486-3711
M-F, 9AM-5PM ET
Email:
[email protected]
PC CONNECTION
In addition to this Quick Installation and Setup Guide, you
will find the following in each package:
You must install the Lynx software before you can configure your new GSC3000 or VRC2500
system.
Once you have installed Lynx, you are ready to establish a connection from your PC to your GSC3000 or VRC2500.
GSC3000 I/O Unit
If you wish to set up hardware connections first, proceed to step 5 and then come back to
steps 2-4.
If you wish to set up hardware connections first, proceed to step 5
and then come back to steps 2-4.
Before installing Lynx 5, please make sure your computer meets the following minimum system
requirements:
To establish a connection with your PC:
(1) GSC3000 I/O Unit (I/O 8 or I/O 16)
(1) GSC3000 & VRC2500 Installation & Operation Manual
(1) Lynx Software CD
(1) DB9-DB9 Null Modem Cable
(1) DB9-DB25 Serial Cable
(1) Power Cord
(4) DB37 Hood
(4) DB37F Connectors
(1) G-Bus Cable
(1) G-Bus Terminator
VRC2500
•
•
•
•
•
•
•
•
Microsoft Windows® 2000 Pro. or XP (Home or Pro.)
400 MHz processor
128MB RAM
100MB free hard drive space
Available COM port for direct connection
Modem for dial-up access
Network Interface Card or dial-up networking for LAN/WAN (TCP/IP connectivity)
Speakers for audible alarms
Note: Large or complex operations may require greater computer resources.
Installation Instructions
If you are upgrading from a previous version of Lynx, please refer to Chapter 2 in the
GSC3000 & VRC2500 Installation & Operations manual which you received with your system.
1. Connect the supplied null modem cable to your PC’s COM port
and to the COM2 port on the GSC3000 or DIRECT port on the
VRC2500.
Note: The COM1 port on the GSC3000 and the FULL-TIME port on
the VRC2500 can also be used for a direct cable connection, but for
the purposes of this Quick Setup Guide please use COM2 or DIRECT.
2. Start Lynx 5 (if not already running) by double-clicking the Lynx
icon on your desktop.
To install Lynx:
Note: Installing Lynx requires administrative privileges.
(1) VRC2500 Unit
(1) GSC3000 & VRC2500 Installation & Operation Manual
(1) Lynx Software CD
(1) DB9-DB9 Null Modem Cable
(1) DB9-DB25 Serial Cable
(1) Power Cord
(4) DB37 Hood
(4) DB37F Connectors
(1) Telephone Cable
Voice Interface, Wiring Interface & Command Relay
If you received a Voice Interface, Wiring Interface and/or
Command Relay Unit as part of your system order, please
refer to Chapter 1 in the GSC3000 & VRC2500 Installation
& Operation Manual for a list of package contents.
1. Insert the Lynx CD in your CD ROM drive. If AutoRun is enabled, the install window will open
automatically. Otherwise, go to the Start menu, choose Run and type d:\launch.exe (where d:\ is
your CD-ROM drive).
2. Click the Install option and follow the on-screen instructions to complete Lynx installation. The
installer will ask for your CD Key, which is located on the Lynx 5 CD sleeve.
IMPORTANT! You must use the provided Lynx 5 CD key in order to activate the software. Although the
Lynx 5 installer will automatically detect your Lynx 4 CD key, this key cannot be used for activation.
Note: Lynx 5 CD keys do not use the letter “O”, only the number zero. If you enter the letter “O”, the
activation process will fail. Uninstall and reinstall Lynx 5 to re-enter the CD key correctly.
Note: The standard Lynx 5 license included with each GSC3000 or VRC2500 unit is for use with one station computer and on one personal computer. To add more licenses, please contact Burk Technology.
Registering your copy is intended to be as easy as possible. If you have any trouble at all, please do not
hesitate to contact Customer Support.
Once Lynx has been installed, you can start it by double-clicking the desktop icon or launch it
from the Start Menu at Programs > Burk Technology > Lynx 5.
3. Create a new site by clicking on the New Site icon
toolbar. This will open the Site Wizard.
from the
4. The Site Wizard asks you
to define specific settings for
your Site. Click Next and back to
navigate through the pages.
When you are asked to setup
your Primary Connection, choose
Direct and select the PC COM
port being used to connect to
you GSC3000 or VRC2500. You will be able to Edit the Site later
and change your connection method if desired.
For help with the available options in Site Wizard, refer to Chapter 2
in in the GSC3000 & VRC2500 Installation & Operations manual.
5. Once your Site has been set up, it will appear in the Site
List. Select the site
you just created from the Site List
and click on the green Connect icon .
Note: While the VRC2500 and GSC3000 systems are intended to be used with the Wiring Interface and Command
Relay Units, the DB37 hood and connector are included for those operators who choose to wire their equipment
directly to the VRC2500 or GSC3000 I/O unit.
2
GSC3000 & VRC2500 INSTALLATION & OPERATION MANUAL
CHAPTER 1: INTRODUCTION
GSC3000 I/O 8 & I/O 16 Unit
Customer Support
GSC3000 & VRC2500 QUICK START GUIDE
The GSC3000 and VRC25000 transmitter remote control systems are designed to streamline your remote facilities management by providing a single control interface for your
equipment while offering flexibility in control points and communication links. This Quick Start guide will take you through each step of installing and connecting to your GSC3000 or
VRC2500 system. The Installation and Operation manual contains a system overview and diagrams of all included equipment, details on the systems' advanced features, and complete
instructions for making use of all the features in the Lynx 5 software.
1
UNPACKING
2
3
INSTALL LYNX SOFTWARE
7 Beaver Brook Road
Littleton, MA 01460
www.burk.com
Phone:
978-486-3711
M-F, 9AM-5PM ET
Email:
[email protected]
PC CONNECTION
In addition to this Quick Installation and Setup Guide, you
will find the following in each package:
You must install the Lynx software before you can configure your new GSC3000 or VRC2500
system.
Once you have installed Lynx, you are ready to establish a connection from your PC to your GSC3000 or VRC2500.
GSC3000 I/O Unit
If you wish to set up hardware connections first, proceed to step 5 and then come back to
steps 2-4.
If you wish to set up hardware connections first, proceed to step 5
and then come back to steps 2-4.
Before installing Lynx 5, please make sure your computer meets the following minimum system
requirements:
To establish a connection with your PC:
(1) GSC3000 I/O Unit (I/O 8 or I/O 16)
(1) GSC3000 & VRC2500 Installation & Operation Manual
(1) Lynx Software CD
(1) DB9-DB9 Null Modem Cable
(1) DB9-DB25 Serial Cable
(1) Power Cord
(4) DB37 Hood
(4) DB37F Connectors
(1) G-Bus Cable
(1) G-Bus Terminator
VRC2500
•
•
•
•
•
•
•
•
Microsoft Windows® 2000 Pro. or XP (Home or Pro.)
400 MHz processor
128MB RAM
100MB free hard drive space
Available COM port for direct connection
Modem for dial-up access
Network Interface Card or dial-up networking for LAN/WAN (TCP/IP connectivity)
Speakers for audible alarms
Note: Large or complex operations may require greater computer resources.
1. Connect the supplied null modem cable to your PC’s COM port
and to the COM2 port on the GSC3000 or DIRECT port on the
VRC2500.
Note: The COM1 port on the GSC3000 and the FULL-TIME port on
the VRC2500 can also be used for a direct cable connection, but for
the purposes of this Quick Setup Guide please use COM2 or DIRECT.
Installation Instructions
If you are upgrading from a previous version of Lynx, please refer to Chapter 2 in the
GSC3000 & VRC2500 Installation & Operations manual which you received with your system.
2. Start Lynx 5 (if not already running) by double-clicking the Lynx
icon on your desktop.
To install Lynx:
3. Create a new site by clicking on the New Site icon
toolbar. This will open the Site Wizard.
Note: Installing Lynx requires administrative privileges.
(1) VRC2500 Unit
(1) GSC3000 & VRC2500 Installation & Operation Manual
(1) Lynx Software CD
(1) DB9-DB9 Null Modem Cable
(1) DB9-DB25 Serial Cable
(1) Power Cord
(4) DB37 Hood
(4) DB37F Connectors
(1) Telephone Cable
Voice Interface, Wiring Interface & Command Relay
If you received a Voice Interface, Wiring Interface and/or
Command Relay Unit as part of your system order, please
refer to Chapter 1 in the GSC3000 & VRC2500 Installation
& Operation Manual for a list of package contents.
1. Insert the Lynx CD in your CD ROM drive. If AutoRun is enabled, the install window will open
automatically. Otherwise, go to the Start menu, choose Run and type d:\launch.exe (where d:\ is
your CD-ROM drive).
2. Click the Install option and follow the on-screen instructions to complete Lynx installation. The
installer will ask for your CD Key, which is located on the Lynx 5 CD sleeve.
IMPORTANT! You must use the provided Lynx 5 CD key in order to activate the software. Although the
Lynx 5 installer will automatically detect your Lynx 4 CD key, this key cannot be used for activation.
Note: Lynx 5 CD keys do not use the letter “O”, only the number zero. If you enter the letter “O”, the
activation process will fail. Uninstall and reinstall Lynx 5 to re-enter the CD key correctly.
Note: The standard Lynx 5 license included with each GSC3000 or VRC2500 unit is for use with one station computer and on one personal computer. To add more licenses, please contact Burk Technology.
Registering your copy is intended to be as easy as possible. If you have any trouble at all, please do not
hesitate to contact Customer Support.
Once Lynx has been installed, you can start it by double-clicking the desktop icon or launch it
from the Start Menu at Programs > Burk Technology > Lynx 5.
from the
4. The Site Wizard asks you
to define specific settings for
your Site. Click Next and back to
navigate through the pages.
When you are asked to setup
your Primary Connection, choose
Direct and select the PC COM
port being used to connect to
you GSC3000 or VRC2500. You will be able to Edit the Site later
and change your connection method if desired.
For help with the available options in Site Wizard, refer to Chapter 2
in in the GSC3000 & VRC2500 Installation & Operations manual.
5. Once your Site has been set up, it will appear in the Site
List. Select the site
you just created from the Site List
and click on the green Connect icon .
Voice Interface Unit (GSC3000 only)
Voice Interface Unit
CUSTOMER SUPPORT: 978-486-3711 • [email protected] • www.burk.com
3
CHAPTER 1: INTRODUCTION
Command Relay Unit
Wiring Interface Unit
COMPUTER REQUIREMENTS
Before installing the Lynx 5 software, verify that your computer meets the following
minimum system requirements:
•
•
•
•
•
•
•
•
Microsoft Windows® 2000 Professional or XP (Home or Professional)
400 MHz processor
128MB RAM
100MB free hard drive space
Available COM port for direct connection
Modem for dial-up access (see page 49 for supported modems)
Network Interface Card or dial-up networking for LAN/WAN (TCP/IP connectivity)
Speakers for audible alarms
Note: Large or complex operations may require greater computer resources.
Lynx 5 requires firmware version 4 or later for your I/O and Voice Interface units. Factory new units shipping with
Lynx 5 already contain the latest firmware and are ready to use immediately. If you are upgrading to Lynx 5 from
a 1.x-3.x version software, first install Lynx, and then see Appendix A for instructions on uploading the new
firmware.
4
GSC3000 & VRC2500 INSTALLATION & OPERATION MANUAL
CHAPTER 1: INTRODUCTION
SYSTEM OVERVIEW
GSC3000 Hardware Components
The central component of a GSC3000 system is the I/O (input/output) unit, labeled I/O 8 or I/O 16
depending on the number of available metering, status and command channels. The I/O unit physically controls
your command outputs and receives metering and status inputs. Alarm settings, programmed commands,
calibration and all other setup and configuration data are stored on the I/O unit. Up to sixteen I/O units may be
networked to expand your channel capacity at any location to a maximum of 256 channels of metering, status
and command.
Note: Regardless of the number of I/O units at your location, the installation is considered one GSC3000 system, or
a single site. A site simply refers to an independently linked group of one or more I/O units.
A GSC3000 system may also contain a Voice Interface. This optional hardware allows dial-up voice control and
monitoring of your remote site, dial-out alarm notification, as well as the audio input/output functions described
in Chapter 11.
To network multiple I/O units (up to sixteen) and connect a Voice Interface at your site, each I/O unit and Voice
Interface ships with a 14” RS-485 cable with RJ-45 connectors. This cable connects one unit to the next to allow
bi-directional data flow over a high-speed digital bus (called the G-Bus). Instructions for making the G-Bus
connections are in Chapter 2.
VRC2500 Hardware Components
The VRC2500 contains two hardware components in a single two rack-unit chassis: the I/O (input/output) unit
and the Voice Interface. Like the GSC3000, the I/O component physically controls your command outputs and
receives metering and status inputs. Alarm settings, programmed commands (macros) calibration and all other
setup and configuration data are stored on the I/O unit. The Voice Interface is built into the VRC2500 to
provide monitoring and control access from any touch-tone phone, as well as alarm reporting and audio
input/output functions. See Chapter 11 for more on the Voice Interface component of the VRC2500.
Note: When you set up and control your sites using the included Lynx software (see below), you will notice that Lynx
identifies the VRC2500 I/O and Voice Interface components separately, as two different units. It is important to
remember that even though the VRC2500 is a single system, the I/O and Voice Interface are set up individually
during the configuration process, and they use separate firmware files.
Lynx Software
The Lynx software package you received with your system provides easy setup, monitoring and control from any
PC. Channel labels, limits, alarms, scheduled actions, and setup information is entered directly from your
computer and then saved to the I/O unit. After configuration is complete, the system can run without a
dedicated PC connection. However, a computer connection allows convenient control and monitoring of your site
equipment, as well as the ability to automatically log data at your site.
You can connect your PC to a GSC3000 or VRC2500 site via dial-up and dedicated telephone lines, radio links
(RF), or a direct serial port connection. When you set up your site in Lynx, you will specify a primary and backup
connection method. If the primary connection fails, Lynx will activate the backup connection and provide onscreen notification that the backup connection is in use.
Available connection methods are:
Direct
A direct connection can be a null modem cable connection between the PC serial port the
remote control unit or a full-time (leased-line) modem connection, RF link, or another
connection type that requires no dialing.
CUSTOMER SUPPORT: 978-486-3711 • [email protected] • www.burk.com
5
CHAPTER 1: INTRODUCTION
Modem
A modem connection uses a dial-up modem to connect to the remote unit. Modem
configuration and installation instructions are in Chapter 6.
Network
Lynx also supports TCP/IP connectivity, allowing you to monitor and control a GSC3000 or
VRC2500 site from one computer by accessing the communication link on another computer.
Both PCs must have Lynx installed, and they must be on the same LAN/WAN.
Web
Using the Burk Technology GSC/VRC Web Interface, you can connect to a GSC3000 or
VRC2500 site over your LAN/WAN. The Web Interface allows a direct TCP/IP connection
without a separate, dedicated host computer. For More information on the Web Interface, visit
www.burk.com.
When you specify the connection method in the Site Wizard (see Chapter 2), you will be asked to fill in
additional information about the connection.
New In Lynx 5
Lynx 5 features major new advancements designed to offer even more power and flexibility for remote site
management:
Real-Time Data Updates. The 5 series I/O firmware included with the Lynx 5 software and pre-installed on new
units provides real-time data updates, so that Lynx 5 displays changes in metering and status data as soon as
they take place. The “polling” interval is no longer used, resulting in better responsiveness, especially when
multiple I/O units are in use.
New Custom Views Controls, Map Views. The expanded Custom Views Utility is expanded, providing new
controls, indicators and editing tools. Professionally produced U.S. maps for all fifty states are included, making it
even easier to create a map-based drill-down display for operations monitoring multiple sites.
Real-Time Data Charting. The Data Charting tool allows you to view historical graphs showing channel data from
multiple channels over time, offering a good solution for comparison and troubleshooting.
New Import/Export Wizard. The Import/Export Wizard makes it easy to import and export Lynx configuration,
history, telemetry, report templates, etc so that users in a multi-computer environment have access to the same
setup and configuration data.
Offline Unit Configuration. With offline unit configuration, you can set up the configuration settings for an I/O or
Voice Interface without an active connection to the site.
New Capture Browser and Data Browser. The Capture Browser and Data Browser provide easy to digest
snapshots of site data that you can view without creating a customized report.
Alarm Reporting
When you configure your metering and status channels (see Chapter 4), you can define limits for each channel
and set up an alarm to occur when the channel value falls out of tolerance. Both the GSC3000 and VRC2500
feature dial-out capability to report alarms to a computer running Lynx (if dial-up modem present), a numeric
pager (dial-up modem required for GSC3000 I/O only), and a voice number (if Voice Interface is present). If
your Lynx PC is connected to the site, alarms are logged in the Lynx database and a history of alarms can be
viewed when you create a report. See the Site Dialing section under I/O and Voice Interface configuration
(chapters 4 and 5) for information on setting dialing properties.
6
GSC3000 & VRC2500 INSTALLATION & OPERATION MANUAL
CHAPTER 1: INTRODUCTION
Automatic Functions
In addition to remote monitoring and control, the GSC3000 and VRC2500 provide automatic control with
macros, actions and timed events. Macros are instructions for automated activities, which can include corrective
action in response to out-of-tolerance equipment, or complex routines such as a start-up procedures, power
trims, generator activation, etc. Actions runs when a channel has exceeded a limit and can issue commands, take
captures, or run a macro. Timed events initiate activities based on a schedule specified by you. Timed events may
be used to issue single commands, run macros or save site data for logging.
Data Collection & Automatic Logging
The GSC3000 and VRC2500 can store site data in onboard memory in the form of captures. Captures are
“snapshots” of instantaneous I/O unit conditions that are stored by the I/O unit, downloaded by Lynx, and
retained in the database for viewing and logging. Captures include metering values, status conditions, channel
muting status, and the current command state for each channel. When Lynx downloads these captures from the
I/O unit, the data they contain can be used for your site logs. Captures can also be set up to coincide with outof-tolerance channel conditions to provide operators with a complete summary of the unit data at the time the
condition occurred. Chapter 7 explains captures in more detail.
Logging is set up in the Site Wizard when you initially create your site in Lynx (see Chapter 2). Lynx can log site
data in two ways, and they can be used simultaneously or independently. The first method is to log site data
directly to Lynx (the software connects to your site and saves site data directly to your computer), and the other
is to download I/O unit captures (you set up captures to occur as timed events, and Lynx connects and
downloads the capture data). Direct logging is the simplest and most efficient way to log your site data.
Once you have logged data from your site, you can open the Report Writer (see chapter 9) to create and print
customized site reports. Data from captures, along with logging data, can also be viewed using the Capture
Browser and Data Browser, respectively (see pages 62 and 67).
Command Relays and Wiring Interfaces
Separate Command Relays and Wiring Interfaces provide a straightforward interface between your facility
equipment and the main unit. The Command Relay also provides isolation between the unit’s solid-state opencollector outputs and your connected equipment.
POWER SUPPLY & SURGE PROTECTION
The power supply in the GSC3000 and the VRC2500 accepts an AC voltage input range of 100-240 VAC,
50/60 Hz. No modifications are needed for 120V or 240V operation. Power spikes and brownouts within this
range have no effect on unit operation.
Note: For additional specifications, see Appendix B.
Battery Backup
Both the GSC3000 and VRC2500 use an internal battery to retain configuration settings during a power outage.
Nonetheless, we strongly recommend connecting your GSC3000 or VRC2500 to a UPS battery backup system
so that it can remain powered long enough to start a generator or take other steps which you have programmed
to occur during a power loss. This will also allow the GSC3000 or VRC2500 to continue providing dial-out
alarm notifications. When choosing a UPS, make sure it provides enough power to operate all GSC3000 I/O and
Voice Interface Units, or VRC2500s, at your site. Power output specifications for the I/O, Voice Interface, and
VRC2500 can be found in Appendix B.
CUSTOMER SUPPORT: 978-486-3711 • [email protected] • www.burk.com
7
CHAPTER 1: INTRODUCTION
Surge Protection
Although the GSC3000 and VRC2500 have built-in resistance to voltage surges, we recommend that you use a
surge protector or line conditioner on the incoming AC line. Lightning strikes and other surges may damage your
system and connected equipment if they are not properly protected. Contact Burk Technology for information
on available surge protectors. The factory warranty does not cover repairs for damage caused by voltage surges.
IMPORTANT SAFETY INFORMATION
Severe injury may occur if a command channel is activated while you are performing maintenance on your
equipment. To prevent the I/O unit from issuing command outputs, switch the unit from REMOTE to LOCAL
mode before working with connected equipment.
To make the switch to LOCAL mode, press the REMOTE/LOCAL button on your I/O unit. The REMOTE/LOCAL
LED will turn red to confirm the change. When you place a unit in LOCAL mode, all metering and status
information is still available, and alarms will still be issued. To return to REMOTE mode, press the
REMOTE/LOCAL button again. The REMOTE/LOCAL LED will turn green.
In a GSC3000 system with multiple units, pressing the REMOTE/LOCAL button on one I/O unit places all G-Bus
connected I/O units in LOCAL mode. G-Bus networked I/O units placed in LOCAL mode by another I/O display
a flashing red Remote/Local LED. The I/O unit that performed the switch displays a solid red LED. Press the
REMOTE/LOCAL button on this unit to return all G-Bus networked units to REMOTE mode.
The Lynx software will also indicate in the Site List and Event List when a unit has been placed in LOCAL mode or
has returned to REMOTE mode. In the Site List, the icon for a unit in local mode appears with a lock ( ).
CONTROLS & CONNECTORS
Before you set up your GSC3000 or VRC2500, it is a good idea to familiarize yourself with the controls and
connectors for each unit you ordered. Below are diagrams and descriptions of the VRC2500, GSC3000 I/O
unit, Voice Interface, Wiring Interface, and Command Relay.
Note: For product specifications, see Appendix B.
VRC2500
The I/O component provides the input and output channels used to physically control your site. To activate
those channels, the unit contains nonvolatile onboard memory and a microprocessor. This means that once you
save all your configuration data – limits, alarms, actions, macros, etc. – the unit will operate without a dedicated
computer connection. The Voice Interface component provides telephone control, detailed in Chapter 11.
Power LED
8
Indicates whether the unit is currently powered.
GSC3000 & VRC2500 INSTALLATION & OPERATION MANUAL
CHAPTER 1: INTRODUCTION
Remote/Local Button
There are two modes of operation: REMOTE and LOCAL. REMOTE mode (indicated
by a solid green LED) is for standard operation. LOCAL mode (solid red LED)
disables command outputs. This is for the operator’s safety during unit maintenance.
Use the REMOTE/LOCAL button to toggle between these modes.
Remote/Local LED
The REMOTE/LOCAL LED indicates whether the unit is in REMOTE or LOCAL mode.
If the REMOTE/LED is amber in color, or does not match any of the below
conditions, refer to Appendix D for troubleshooting.
Status LED
Line LED
Mic
Solid GREEN:
The unit is in REMOTE mode.
Solid RED:
The unit in LOCAL mode.
Flashing RED:
The unit is in LOCAL mode, but another networked unit performed
the switch. Take the unit out of LOCAL mode by pressing the
REMOTE/LOCAL button on the unit that performed the switch (it
will have a solid red LED).
The status LED indicates the Voice Interface operating condition.
Solid GREEN:
Normal Voice Operation.
Flashing RED:
The site is in LOCAL mode, but another networked unit performed
the switch. Take the unit out of LOCAL mode by pressing the
Remote/Local button on the unit that performed the switch (it will
have a solid red LED).
Off:
Voice Interface firmware is not loaded.
The line LED indicates how the VRC2500 is currently using the telephone line.
Solid GREEN:
The system is in a voice session (connected to a telephone).
Solid RED:
The system is in a data session (connected to a computer).
Off:
The telephone line is not in use.
The onboard microphone allows dial-up callers to audibly monitor the remote
location. See Chapter 11 for more on using the Mic function.
CUSTOMER SUPPORT: 978-486-3711 • [email protected] • www.burk.com
9
CHAPTER 1: INTRODUCTION
Power Connector
Accepts an AC voltage input range of 100-240VAC, 50/60Hz, 15W, without manual
switching.
FULL-TIME
Used to connect a four-wire modem (using the cable supplied with the modem).
DIRECT
Used to directly connect a PC to the VRC2500, using the supplied null modem
cable. Also for loading I/O firmware.
Metering
Monitors analog DC voltages.
Status
Monitors high or low status inputs or contact closures.
Command 1-8
Solid-state open collector outputs for channels 1-8, definable as momentary or
latching.
Command 9-16
Solid-state open collector outputs for channels 9-16, definable as momentary or
latching.
Set/Modem
Standard RJ-11 telephone connector for a dial-up modem or a standard touch-tone
phone. Do not connect the phone line to this connection.
Line
Standard RJ-11 telephone connector to connect the VRC2500 to your phone line.
Audio In, Audio Out
1/8” mono audio connectors to send telephone audio out to another device (Audio
Out) or send audio from a connected source to the telephone line (Audio In). See
Chapter 11 for more on using the Audio In / Out functions.
DIAL-UP
Connects a dial-up modem (using a standard DB9 to DB25 serial cable) and is used
for uploading voice firmware.
GSC3000 I/O Unit
The I/O unit provides the input and output channels used to physically control your site. To activate those
channels, the unit contains nonvolatile onboard memory and a microprocessor. This means that once you save
all your configuration data to the I/O – limits, alarms, actions, macros, etc. – the unit can operate without a
dedicated computer connection.
10
GSC3000 & VRC2500 INSTALLATION & OPERATION MANUAL
CHAPTER 1: INTRODUCTION
Power LED
Indicates whether the unit is currently powered.
Remote/Local LED
The REMOTE/LOCAL LED indicates whether the unit is in REMOTE or LOCAL mode.
If the REMOTE/LED is amber in color, or does not match any of the below
conditions, refer to Appendix D for troubleshooting.
Solid GREEN:
The unit is in REMOTE mode.
Solid RED:
The unit in LOCAL mode.
Flashing RED:
The unit is in LOCAL mode, but another networked unit performed
the switch. Take the unit out of LOCAL mode by pressing the
REMOTE/LOCAL button on the unit that performed the switch (it
will have a solid red LED).
Remote/Local Button
There are two modes of I/O unit operation: REMOTE and LOCAL. REMOTE mode
(indicated by a solid green LED) is for standard operation. LOCAL mode (solid red
LED) disables command outputs. This is for the operator’s safety during unit
maintenance. Use the REMOTE/LOCAL button to toggle between these modes.
Power Connector
Accepts an AC voltage input range of 100-240VAC, 50/60Hz, 15W, without manual
switching.
G-Bus 1 & 2
Uses RS-485 cable to allow up to sixteen I/O units and one Voice Interface unit to
be linked, forming the G-Bus network.
COM1
Used to connect a four-wire modem (using the cable supplied with the modem) or
to establish a direct connection from a PC to the I/O unit (using the null modem
cable provided with the I/O unit).
COM2
Connects a dial-up modem (using a standard DB9 to DB25 serial cable) and is used
for uploading firmware or establishing a direct connection (using the supplied null
modem cable).
Metering
Monitors analog DC voltages. On an I/O 8 unit, the metering and status channels
share the same DB37 connector (labeled Metering/Status).
Status
Monitors high or low status inputs or contact closures.
Command 1-8
Solid-state open collector outputs for channels 1-8, definable as momentary or
latching.
Command 9-16
Solid-state open collector outputs for channels 9-16, definable as momentary or
latching. An I/O 8 unit has connections for commands 1-8 only.
CUSTOMER SUPPORT: 978-486-3711 • [email protected] • www.burk.com
11
CHAPTER 1: INTRODUCTION
Voice Interface Unit
The Voice Interface unit is optional hardware for the GSC3000 that uses a standard telephone line to dial out
and alert operators to alarms. The unit uses a text-speech synthesizer to read the text of the alarms and
warnings, and allows users to enter a password and take control of the remote site. The Voice Interface can dial
multiple phone numbers and leave messages.
Power LED
Indicates whether the unit is currently powered.
Remote/Local LED
Indicates whether the unit is in REMOTE or LOCAL mode (see above). If the Remote
LED is amber in color, or does not match any of the below conditions, refer to
Appendix D for troubleshooting.
Solid GREEN:
Normal Voice Operation.
Flashing RED:
The site is in LOCAL mode, but another networked unit performed
the switch. Take the unit out of LOCAL mode by pressing the
Remote/Local button on the unit that performed the switch (it will
have a solid red LED).
Line LED
Indicates how the Voice Interface is currently using the telephone line. A green LED
indicates a voice session is in progress. A red LED indicates a data session is in
progress. When the LED is dark, the telephone line is not in use.
Mic
The onboard microphone allows dial-up callers to audibly monitor the remote
location. See Chapter 11 for more on using the Mic function.
Power Connector
Accepts 100-240VAC, 50/60Hz, 15W, without manual switching.
Set/Modem
Standard RJ-11 telephone connector for a dial-up modem or a standard touch-tone
phone. Do not connect the phone line to this connection.
Line
Standard RJ-11 telephone connector to connect the Voice Interface to your phone
line.
G-Bus 1 & 2
G-Bus connections RS-485 cable to allow up to 16 I/O units and one Voice
Interface unit to be linked. This forms the G-Bus network.
Audio In, Audio Out
1/8” mono audio connectors to send telephone audio out to another device (Audio
Out) or send audio from a connected source to the telephone line (Audio In). See
Chapter 11 for more on using the Audio In / Out functions.
12
GSC3000 & VRC2500 INSTALLATION & OPERATION MANUAL
CHAPTER 1: INTRODUCTION
COM1
Standard RS-232 DB9 connector to use with the supplied null-modem cable.
Connects to either a dial-up modem or your computer COM port for uploading
firmware. COM1 is also used for establishing a direct connection with a PC.
Wiring Interface Unit
The Wiring Interface facilitates the connection of your site equipment to the GSC3000 or VRC2500. It
supports 16 metering or status inputs (use two Wiring Interfaces to fully utilize the VRC2500 or GSC3000 I/O
16 channel capacity). It has no front panel controls.
Note: If you are using a GSC3000 I/O 8, connect your metering and status inputs into a single Wiring Interface.
Channel Connectors
Accepts two-terminal push-on-block connectors to accommodate up to 16 metering
or status channels from your site equipment. If you are using an I/O 16, you will
need two Wiring Interfaces to make all the connections.
Site Controller
Connects to the metering or status connection on the VRC2500 or GSC3000 I/O
unit using the included DB37-to-DB37 cable.
Note: See page 56 for instructions on connecting site equipment to the Wiring Interface. For input specifications, see
Appendix B.
Command Relay Unit
The Command Relay unit provides isolation between the GSC3000 or VRC2500 solid-state open-collector
outputs and your equipment. Each Command Relay Unit connects up to eight command output channels on
your system, each with two command states per channel. It has no front panel controls.
Note: See page 58 for instructions on connecting site equipment to the Command Relay. For command output
specifications, see Appendix B.
Power LED
Indicates power to the Command Relay (received from the I/O unit). When the I/O
unit is powered up, both power LEDs on the command relay should be green,
indicating 5VDC power.
Channel Connectors
Accepts three-terminal push on blocks to link the Command Relay to your site
equipment.
Site Controller
Connects to the Command 1-8 or Command 9-16 connection on the system.
Note: The power connector on the left side of the rear panel is for VRC1000 and 2000 systems and is not used with
the GSC3000 or VRC2500.
CUSTOMER SUPPORT: 978-486-3711 • [email protected] • www.burk.com
13
14
GSC3000 & VRC2500 INSTALLATION & OPERATION MANUAL
2
Software & Site Setup
When you create a site in Lynx, you will specify primary and backup connection parameters, logging preferences,
and other setup information. During initial setup, this task is accomplished using a direct connection. You can
later edit your site settings (connection method, logging preferences, etc) using a remote connection. Also
during initial setup, if you will have multiple GSC3000 I/O units at your site, you need to use Lynx to assign
each of them a unique unit number so the GSC3000 system will properly communicate over the G-Bus. For a
VRC2500 system you will not need to assign unit numbers.
UPGRADING FROM A PREVIOUS SOFTWARE VERSION
While Lynx 5 is backwards compatible with firmware version 4, Burk Technology recommends upgrading your
existing units to the latest version of firmware. If you are upgrading from a series 3 version software or earlier,
you will need to upgrade the firmware in order for your units to communicate with the new software. To update
the firmware, first install the Lynx 5 software (see below), and then refer to Appendix A for instructions.
SOFTWARE INSTALLATION
Be sure to close any open applications before installing Lynx. Installation may require several system reboots.
Note: Installing Lynx requires administrative privileges.
1. If you have been using a previous version of Lynx or VRC2500 software, use the older software to archive
existing unit configurations. This will allow you to use your current unit configurations in the new software.
To archive your settings in Lynx 3.x or VRC2500 1.x software, open the Unit Configuration window, and
from the Edit menu, choose Select All Setups. Then click the Archive Item icon in the toolbar. Select a
name for the archive and click Save. If you have been using GSC3000 software version 1.9, you will have
to go back and edit some of your unit configuration settings in Lynx 5 after restoring the archive.
2. Insert the Lynx CD in your CD ROM drive. If AutoRun is enabled on your computer, the install window will
open automatically. Otherwise, go to the Start menu, choose Run and type d:\launch.exe (where d:\ is
your CD-ROM drive).
3. Click the Install option and follow the on-screen instructions to complete Lynx installation. The installer
will ask for your CD Key, which is located on the Lynx 5 CD sleeve. If you downloaded your copy of Lynx,
you will need to call or email Burk Technology’s sales department to purchase a license and receive your
CD key.
CUSTOMER SUPPORT: 978-486-3711 • [email protected] • www.burk.com
15
CHAPTER 2: SOFTWARE & SITE SETUP
IMPORTANT! You must use the provided Lynx 5 CD key in order to activate the software. Although the Lynx 5 installer
will automatically detect your Lynx 4 CD key, this key is not registered, so it cannot be used for activation.
Note: Lynx 5 CD keys do not use the letter “O”, only the number zero. If you enter the letter “O”, the activation
process will fail. Uninstall and reinstall Lynx 5 to re-enter the CD key correctly.
Note: The standard Lynx 5 license included with each GSC3000 or VRC2500 unit is for use with one station
computer and on one personal computer. To add more licenses, please contact Burk Technology. Registering your
copy is intended to be as easy as possible. If you have any trouble at all, please do not hesitate to contact Customer
Support.
STARTING LYNX
1. Once the software is installed on your computer, double-click the Lynx icon on your desktop to
run the application.
2. The first time you run Lynx, you will be asked to complete product registration. Follow the instructions onscreen.
3. When the login screen appears, the default user name is Administrator. Leave the password blank. Click
Login to begin.
When you first run Lynx, there is only one user account: Administrator. You will be able to establish unique user
names and assign passwords later on (see page 90).
SETUP FUNCTIONS
The Lynx Main View and advanced application features are detailed later on in the manual, but for now you
should take a look at a few basic functions you will use to set up your sites. You can access all of the following
operations from the icons in the standard toolbar (the row of buttons beneath the File menu). To find out what
any toolbar icon does, scroll your mouse over the icon and its title will appear.
After familiarizing yourself with the software functions you will use during setup, continue on to Creating a New
Site in Lynx on page 17.
Site List
When log in for the first time, Lynx opens with the Site List docked to the left of a blank
background screen. You can open and close the Site List window by clicking the Site List icon
( ) in the toolbar (leave it open during setup and configuration). Once you have sites set
up, the Site List will show icons for each of them ( ), and a green or yellow box will appear
inside the site icon to indicate an active primary ( ) or backup ( ) connection,
respectively. Click the expand button to the left of the site icon to show icons and names for
all connected units at the site.
If a unit has an active alarm condition, the unit icon will turn red (
turn red ( ).
) and the corresponding site icon will also
The Site List also serves as a navigation and selection tool. When you highlight a particular unit in the Site List,
that unit’s meter and status conditions are displayed in the main view, and any unit-specific functions you access
will apply to the unit you selected. For example, if you wish to access the configuration menu for a particular
unit, first click on the unit’s icon in the Site List and then click the Unit Configuration icon in the toolbar.
16
GSC3000 & VRC2500 INSTALLATION & OPERATION MANUAL
CHAPTER 2: SOFTWARE & SITE SETUP
Any time these instructions ask you to “select a site” or “select a unit,” go to the Site List and click on that site
or unit to highlight it.
New Site
Before you can connect to any units, you must set up your site in Lynx. Clicking the New Site icon opens the
Site Wizard, which will guide you through each step of creating a site.
Edit Site
After you have created a site, you can edit its settings by clicking the Edit Site icon. The Site Wizard will open,
allowing you to use the Next and Back buttons to navigate through each screen and edit the desired settings.
Connect/Disconnect
With your site selected in the Site List, click the green Connect icon ( ) to establish a connection to your site
using the primary connection method you specify in the Site Wizard. If you want to connect using your backup
connection, click the yellow Connect to Backup icon ( ). To disconnect from the site selected in the Site List,
click the Disconnect icon ( ).
When you set up your site, you will be able to configure a backup connection to automatically activate in case
the primary fails.
Unit Configuration
When a site is selected in the Site List, click the Unit Configuration icon to open the Unit Configuration window.
From there, you can set up channel properties, site dialing and other unit settings. The available configuration
options depend on whether a Voice Interface or I/O unit is selected.
CREATING A NEW SITE IN LYNX: THE SITE WIZARD
Before Lynx will recognize any connected units, you need to set up the site containing those units. Click the New
Site icon in the toolbar, and the Site Wizard will open and guide you through each step of configuring your
computer connection and site settings. Refer to the descriptions below for explanations of each step of the site
setup process:
Site Name
1. Enter a name and password for this site. The site
name can include up to 20 characters. If you will
be connecting to a factory-new unit, or if you have
cleared and reloaded firmware, the default
password is PASSWORD. Otherwise, enter the
password previously assigned to the unit.
2. Click Next when you are finished.
CUSTOMER SUPPORT: 978-486-3711 • [email protected] • www.burk.com
17
CHAPTER 2: SOFTWARE & SITE SETUP
Time Zone
1. Select the time zone where the site is located and
enter the abbreviations for standard time and
daylight time. Indicate whether this site observes
Daylight Saving Time. Once these are set, Lynx will
adjust for time zones and Daylight Saving Time
automatically.
2. Select whether you would like to synchronize the
GSC3000 and VRC2500’s onboard real-time clock
with the local time on this PC, and the interval at
which you’d like this to happen.
Note: Time synchronization will only occur when Lynx is
connected to the site.
3. Click Next.
Primary Connection
1. Refer to the descriptions below to choose a
primary connection method for this site.
Tip: If you are setting up factory new units that are not
already configured with channel labels, limits, alarms,
etc., consider selecting a Direct connection for the
connection method. This will allow you to connect
locally to your unit using your PC and a null modem
cable so you can finish configuration on the bench.
Later, you can click the Edit Site icon to come back here
and select a new connection method.
Direct (Serial or 4-Wire). Your computer is locally connected to the site using a null modem cable or your
site is in a remote location and connected using a leased line, a bi-directional RF data link, or another fulltime connection method that does not require dial-out. When you choose Direct, specify the PC COM
port you will use from the drop-down menu.
Modem. You will use a dial-up modem to connect to your site. For this option, use the drop-down menu
to select the desired modem from the list of all the modems installed on your PC. Then enter the phone
number for this modem to dial. If a dial-out prefix is required, it should be set up in Windows Phone and
Modem Options. If it is not, you may enter it in the dialing string prior to the phone number. If a pause
is necessary after the prefix, enter a comma between the prefix and the phone number.
If you are dialing a modem connected to a Voice Interface, follow the phone number with a series of
commas and 020. For example ,,,020. Each comma represents a two-second pause and is used to allow
time for the greeting message to be played before the sending modem enters the code to switch to data
mode. If you change the default greeting to a longer or short message, you may need to add or remove
commas to generate a pause that is the correct length.
18
GSC3000 & VRC2500 INSTALLATION & OPERATION MANUAL
CHAPTER 2: SOFTWARE & SITE SETUP
Remote PC Running Lynx. Your PC will access another computer on your LAN/WAN to get site data from
Lynx. Enter the name of the Remote Host (or IP address) of the computer and the Site ID assigned to the
remote site. The Site ID is set up in the Site Sharing section of the Site Wizard (see below). If you are not
sure of the remote Site ID, contact the administrator of the remote site. Lynx adds the numeric value of
the site ID to the default TCP/IP port in order to utilize a unique port for every connected site. The
default TCP/IP port can be changed from the Options menu (see page 82).
Web Interface. The GSC3000 or VRC2500 is connected to a Burk Technology Web Interface (directly or
using a full-time modem) and the PC will access the site over the LAN/WAN. Enter the name of the
remote host (or IP address) and select the TCP/IP port to use (1-65535). The port setting should match
the number entered during configuration of the Web Interface. When using more than one Web Interface
and connecting to multiple sites, each connection needs a unique TCP/IP port.
2. Check Connect automatically at startup if you want Lynx to automatically connect to this site when the
application is started.
3. Click Next.
Backup Connection
1. Check Enable Backup Connection if you want Lynx
to establish a backup connection if the primary
connection fails. Then specify the type of backup
connection desired.
2. The Retry Primary Connection check box instructs
Lynx to retry the primary connection at the
assigned interval when there is a connection loss.
When this feature is used simultaneously with a
backup connection, Lynx will disconnect from the
backup connection each time it retries the primary
connection.
3. Click Next.
Site Sharing
Site Sharing allows other networked computers to connect
to the site and use this PC’s direct or modem connection
to an the GSC3000 or VRC2500. In order to share the
connection, the client PC must specify the same default
TCP/IP port as the server PC. The default TCP/IP can be
changed in the Options menu. See page 87.
1. If desired, check the Enable Site Sharing box and
assign this site a unique site ID (any number from 1
to 50000). Other computers must specify this
number in the Site Wizard when they are configured
to share this computer’s connection.
2. Click Next.
CUSTOMER SUPPORT: 978-486-3711 • [email protected] • www.burk.com
19
CHAPTER 2: SOFTWARE & SITE SETUP
Logging
Lynx can save site data directly to your computer and
store it in a database for use in reports. This is called
Logging, and it allows you to generate detailed reports
using the Report Writer. For more on logging, see Chapter
7.
Lynx can log site information in two different ways, which
may be used simultaneously or independently:
To set up your logging preferences:
1. If logging is desired, check the Enable Logging box.
2. Choose a logging method:
Log this site directly in Lynx. This is the simplest and most efficient way to log your site data, and it is
especially beneficial when you use a full-time PC connection the remote site. Real-time information is
taken from the I/O units and saved to the Lynx database at the interval specified. This method requires
that Lynx is running on your computer at the time of the log in order for the information to be saved at
the correct time. If Lynx is running, but you are not already connected, Lynx will automatically establish a
connection at the specified logging time, take the log, and disconnect when finished. You will be prompted
before Lynx disconnects from one site to log another site (for unattended operation, this prompt can be
disabled from the Warnings tab in the Options menu). If Lynx is unable to connect at the specified logging
time, it will continue to retry the connection until a successful connection is made.
Log onboard captures and download to Lynx. The advantage to logging with onboard captures is that you
may not need to connect to the remote site as frequently to download the same volume of data as
logging directly. This may be significant if you are using a dial-up modem that requires a toll call to
connect, or the phone line is in high demand for other purposes. With this method, Lynx will download
captures already stored in the I/O unit’s memory and store the information in the database. To make use
of this method, set up a capture schedule as part of the I/O unit’s Timed Events configuration (see page
34), and coordinate the logging interval to download those captures as frequently or infrequently as
practical. For example, you could program each I/O unit to take a capture every hour, and set the logging
interval to download those captures only once or twice a day.
IMPORTANT! Each unit can hold a maximum of 192 captures. Once this capacity is reached, the unit will
completely clear its capture buffer before storing additional captures. To avoid losing capture data before your
computer downloads it, check Clear Capture Queue after downloading to permanently erase the captures from the
unit after Lynx saves the data.
Note: Logging using captures relies on captures already stored on the unit; it will not actually take new captures. You
have to separately set up captures to occur as timed events (see page 39).
3. In the interval field, specify how often Lynx should take data for the log (in hours or minutes). Then assign
the time at which you would like the next log to take place. This affects the “log offset.” For example: if
you specify hourly logging and set the Next Log time to 2:15, the next log will occur at 2:15, and
subsequent logs will be taken at fifteen minutes past each hour. When logging multiple sites, you may wish
to stagger the Next Log times when you set up each site.
4. Click Next. The Site Wizard will confirm that you have successfully set up the site in Lynx.
20
GSC3000 & VRC2500 INSTALLATION & OPERATION MANUAL
CHAPTER 2: SOFTWARE & SITE SETUP
5. Click Finish. The Site List will refresh to display the new site you added.
6. If you have multiple sites, you can add the others now by once again clicking the New Site icon in the
toolbar. Alternatively, you can go on to set up unit numbers and configuration options for this site and
add any other sites later.
EDITING SITE SETTINGS
Once you create the site in the Site Wizard, you can later go back to edit your site settings by highlighting that
site in the Site List and clicking the Edit Site icon
in the toolbar. The Site Wizard will appear and allow you to
modify the site’s settings. Navigate through the setup screens using the Next and Back buttons, and click the
Finish button when you are done.
Note: If you are currently connected to the site when you go to edit site settings, a dialog box appears to inform you
that some fields cannot be edited. To make changes to the Site Name or Password, disconnect from the site before
opening the Site Wizard.
CONNECTION SETTINGS
Connection Settings determine how many times Lynx will
attempt to issue the same command to the remote site, how
long it will wait to receive a response from the unit to respond,
and how long it will wait before retrying the command. In the
Options Menu (see page 86), you can set the default settings
that will affect every site set up on the computer. To specify
unique connection settings that will affect one site only, select
site in the Site List, select Connection Settings from the Site
menu and uncheck Use Default Connectivity Settings box.
Then specify the unique connection settings for this site’s
primary and backup connection.
SETTING I/O UNIT NUMBERS
To set unique connection settings for each site, use the
connection settings window from the site menu.
(GSC3000 ONLY)
After you have created the site in Lynx, you are ready to set the unit number for each of your I/O units. Because
you may connect up to sixteen I/O units plus a Voice Interface, each unit must have a unique identification
number. If you have only one I/O, leave the unit number at the factory default of 0 and skip this section.
The unit number is stored directly on the I/O and set using a direct PC connection. Be sure to complete this
process before installing at your remote site, because you will be physically connecting to each individual unit.
Note: A Voice Interface is always identified as unit 16, and this unit number cannot be changed.
To set the unit number for each I/O unit:
1. Use the supplied null modem cable to connect your PC serial port directly to COM1 on the I/O unit.
2. From the Tools menu, select Assign Unit Number…
CUSTOMER SUPPORT: 978-486-3711 • [email protected] • www.burk.com
21
CHAPTER 2: SOFTWARE & SITE SETUP
3. When the Assign Unit Number dialog appears, select which PC COM port you are
using to connect to the I/O unit. Then enter the password for the unit (the
default password on a factory new unit is PASSWORD). Finally, use the drop-down
list to choose a unique unit number for your I/O unit (0-15). Be sure one (and
only one) I/O at each site is identified as unit 0.
4. Click Set to save the unit number to the I/O unit. If you have additional I/O units
that need unit number assignments, repeat the steps above until all units have a
unique number.
IMPORTANT! Macros, actions and timed events refer to specific unit numbers. If you change the unit number of
an I/O unit already installed at your site, you may have to edit macros, actions and timed events in other units
at that site in order for the activities to run as intended.
CREATING THE G-BUS NETWORK
(GSC3000 ONLY)
Once every I/O has a unique unit number, physically connect your units on the G-Bus Network so that Lynx will
recognize them at your site.
1. Disconnect from any Lynx connection to your site.
2. Use the included RJ-45 jumper cables to link a G-Bus port on the rear panel of one I/O to a G-Bus port
on the next I/O. It makes no difference whether you link G-Bus 1 to G-Bus 2 or vice-versa.
3. If you are using a Voice Interface, connect it to the G-Bus network in the same way as an I/O unit.
4. After linking each unit, connect a G-Bus terminator to the unused G-Bus port on the first unit and to the
unused G-Bus port on the last unit.
22
GSC3000 & VRC2500 INSTALLATION & OPERATION MANUAL
CHAPTER 2: SOFTWARE & SITE SETUP
Once your units are networked, you may choose to connect your computer or modem to any one of them.
Commands sent to the site will be directed to the appropriate I/O unit, provided the unit numbers are properly
identified and the G-Bus connections are complete. For dial-out functions, you must enable site dialing for the
unit with the dial-up modem connection, except when you are using a Voice Interface. If a unit does not have a
physical modem connection, leave the Site Dialing fields empty.
CONNECTING TO SITES
Once you set up your site(s), you can connect to a site by highlighting it in the Site List and
clicking the Connect toolbar icon. Once Lynx connects and identifies all the units at your site,
expand the site list to see icons for each I/O and Voice Interface. Remember that VRC2500
systems will display as two units – one I/O and one Voice Interface, even though both
components are integrated on one platform. If you click on an I/O unit icon, you will see all the
metering, status and command channels that you defined for that unit. Because factory new
units ship with no channels set up, the main view will be blank.
To switch between sites and units, just click the desired icon in the Site List.
To disconnect from your site, click the Disconnect icon ( ) in the toolbar. To automatically disconnect from the
site after a predetermined amount of time, open the Connection Settings dialog from the Options Menu (under
Tools) or highlight the site in the Site List, choose Connection Settings from the Site menu, and check the
“Automatically Disconnect” box. Enter the desired amount of time.
AFTER SITE SETUP
Once you are connected to your site, you can set up or modify any unit’s configuration settings. The Unit
Configuration menu allows you to set up channel labels, limits, timed events and other unit settings. For site
settings, such as connection setup, site sharing, logging, etc., use the Site Wizard (earlier in this chapter).
To open the Unit Configuration window, select the desired unit in the site list and click the Unit Configuration
icon in the main toolbar. Before configuring your units, you may find it helpful to read the next chapter, which
offers an overview of all the menus and windows available in Lynx. Chapters 4 and 5 provide step-by-step
descriptions of every I/O and Voice Interface configuration option.
If you later add additional I/O or Voice Interface units to an existing GSC3000 site, you can configure each unit
individually on the bench and then take it to the remote site to install. You can use a dial-up or full-time
connection to set up or edit your unit configuration remotely, however changing the unit number must be set via
a direct connection. You must set the unit number for each I/O unit in a GSC3000 site.
When you are finished configuring each unit, go to Chapter 6: Connecting Modems & Site Equipment.
Note: You may find it helpful to print a copy of your configuration before going to install Command Relays and
Wiring Interfaces. See Saving and Printing Unit Configurations on page 41.
CUSTOMER SUPPORT: 978-486-3711 • [email protected] • www.burk.com
23
24
GSC3000 & VRC2500 INSTALLATION & OPERATION MANUAL
3
Lynx Software Overview
Before working more with the software, it is a good idea to familiarize yourself with the menus and toolbars in
the Lynx main window. You have already used a few of them to set up your sites and units.
MENUS & ICONS
The menu bar is the row of menus at the top of the main Lynx window. You can access the File, Site, View, Tools
and Help menus from the menu bar. The toolbar is the row of icons below the menu bar. The menus and toolbar
icons allow you to display more site information and access advanced application features. The section that
follows gives a brief description of what each menu item is for.
The File Menu
New Custom View (page 73)
Opens the Custom View Editor and allows you to design a new Custom View.
New Standard View (page 73)
The New Standard View option opens the Custom View Editor with a template for the standard Lynx monitor
view. Here you can customize the appearance of the ‘standard’ monitor view using the same tools available in
other custom views.
New Chart (page 69)
The chart function displays metering data from one or more channels over a period of time. Once you have
created at least one chart, you can display it in a separate window (accessible in the Views List), or integrate it in
a custom view. See Chapter 7 for how to create a chart.
Users (page 90)
Set up users, privileges and login passwords (requires system privileges)
Change User Login Password (page 90)
Allows the currently logged in user to change the password for his or her own user name.
Report Writer (page 63)
Launches the Report Writer, where you can create customized reports based on data stored in logs.
Import/Export Wizard (page 67)
The Import/Export Wizard allows you to save your Lynx setup data in a file so that you can duplicate it on
another computer without having to manually reenter your configuration. You can also export your history file so
that you can recreate logging data another computer.
CUSTOMER SUPPORT: 978-486-3711 • [email protected] • www.burk.com
25
CHAPTER 3: LYNX SOFTWARE OVERVIEW
Clear Cache (page 43)
Lynx stores unit configuration data in the cache so that it can be reloaded quickly when Lynx connects to the
unit. For troubleshooting purposes, the Clear Cache function deletes this stored information. It does not affect
archived unit configurations (.set files).
Offline Configuration (page 33)
The offline configuration utility allows you to create a configuration file (.set file) from scratch without
connecting to a unit. This allows you to complete the configuration for any or all of your units and then connect
briefly to upload the configuration.
Log Off
Logs off the current user and prompts a new one to log in.
Exit
Closes Lynx.
Site Menu
Connect (page 17)
Connects to the selected site using the Primary connection specified in the Site Wizard.
Connect Backup (page 17)
Connects to the selected site using the Backup connection specified in the Site Wizard.
Disconnect (page 17)
Disconnects from the selected site.
Connection Settings (page 21)
Allows you to choose whether to use the global connection settings (set up in Tools > Options > Connectivity)
or to specify unique connection settings for the selected site.
Set Password (page 17)
Sets the password for all units at the site.
Set Time (page 89)
Sets the time at the selected site.
New Site (page 17)
Opens the Site Wizard so you can create a new site to monitor with Lynx.
Edit Site (page 21)
Opens the Site Wizard and allows you to edit the setup settings for a site you already created.
Delete Site
Removes the selected site from Lynx.
Selected Unit
Selected Unit expands to allow configuration of unit-level parameters. Some of these functions have toolbar icons
for direct access.
View Menu
Events (page 29)
The Event List is where Lynx logs activity related to each monitored site.
26
GSC3000 & VRC2500 INSTALLATION & OPERATION MANUAL
CHAPTER 3: LYNX SOFTWARE OVERVIEW
Alarms (page 29)
Displays all critical alarms at any connected site.
Sites (page 28)
The Site List displays icons for all of your sites, and the menu expands to show all the units connected at that
site. The Site List is also a selection tool. When a site or unit is selected in the site list, site- and unit-specific
functions will apply to that selected unit.
Macro Status (page 30)
The Macro Status window indicates which macros, if any, are currently running. You can also start or stop macros
from the Macro Status window.
Captures (page 61)
Shows all captures currently stored on the selected I/O unit. You can also print capture data from the Captures
window, as well as save it directly to the logging database.
Network Clients (page 30)
Helpful when Site Sharing is used, the Network Clients window shows any other computers currently using this
PC’s connection to the remote site.
View List (page 73)
Shows all Custom Views saved to this computer and allows you to select a new view for display. Also allows you
to select a chart that you have created, and displays it in a new window.
Data Browser (page 67)
The Data Browser provides a digest of all logging data stored in the database, allowing you to access the data
without generating a customized report.
Refresh
While site data updates in real time on its own, you may occasionally need to refresh the main view in order to
view recent setup changes you made.
Tools Menu
Insert Log Message (page 61)
Allows you to enter a user-defined text message in the Event List. Messages are saved to the database and may
be included in printed reports.
Enable/Disable Logging (page 61)
Initiates or suspends logging for all sites that have logging set up in the Site Wizard.
Print Jobs (page 67)
Allows you to schedule print jobs for automatic report printing (logging must be enabled).
Upload Firmware (page 121)
Launches the Firmware Upload Wizard, allowing you to update or reload firmware to your unit.
Assign Unit Number (page 21)
This is where you assign the unit number when you are configuring a new GSC3000 I/O unit.
Customize
Allows you to modify the appearance and behavior of the menu bar and toolbar. You can also set new keyboard
shortcuts.
CUSTOMER SUPPORT: 978-486-3711 • [email protected] • www.burk.com
27
CHAPTER 3: LYNX SOFTWARE OVERVIEW
Sounds (page 85)
Selects the sound files that Lynx will play for events.
Options (page 85)
This is where you customize the Lynx application settings to suit your preferences.
Help Menu
The onboard help file duplicates the information found in this manual.
Contents
Opens the Help File table of contents so you can browse to the topic you would like more information on.
Search
Opens the Search field of the Help File.
What’s This
Select What’s This and then click on a window or control object for an explanation of a function. What’s This
help is available for most objects, but not all.
About Lynx
Displays the Lynx version number and the person or organization who owns the program license. When
contacting Customer Support, it is helpful to know the exact version number you are using.
Site List: In Detail
When you first login, Lynx opens with the Site List docked to the left of a blank background
screen. You can open and close the Site List window by clicking the Site List icon ( ) in the
toolbar (leave it open during set up and configuration). Once you have sites set up, the Site
List will show icons for each of them, and a green or yellow box will appear inside the site
icon to indicate an active primary ( ) or backup ( ) connection, respectively. Click the
expand button to the left of the site icon to show icons and names for all connected units at
the site.
If a unit has an active alarm condition, the unit icon will turn red (
site icon will also turn red ( ).
) and the corresponding
The Site List also serves as a navigation and selection tool. When you highlight a particular unit in the Site List,
that unit’s meter and status conditions are displayed in the main view, and any unit-specific functions you access
will apply to the unit you selected. For example, if you wish to access the configuration menu for a particular
unit, first click on the unit’s icon in the Site List and then click the Unit Configuration icon in the toolbar.
Any time these instructions ask you to “select a site” or “select a unit,” go to the Site List and click on that site
or unit to highlight it.
Note: The default view only shows units with channel labels assigned. If an I/O unit with a default (blank)
configuration is selected, the default view displays a shortcut to the Unit Configuration window. Since a Voice
Interface does not directly control its own channels, the default view for a Voice Interface also shows a Unit
Configuration window shortcut.
28
GSC3000 & VRC2500 INSTALLATION & OPERATION MANUAL
CHAPTER 3: LYNX SOFTWARE OVERVIEW
Event List: In Detail
The Event List is where Lynx logs activity related to each monitored site. Four categories of activities are
recorded, and you can elect to view events from one category only by choosing that category from the Event
Types drop-down menu.
Application
Events that relate to the Lynx software, such as starting Lynx or users logging on and off.
Site
These are events pertaining to an individual site, such as connecting or disconnecting.
Commands
Commands and macros issued by Lynx users.
User
Users can enter custom messages by selecting Insert Log Message from the Tools menu.
Alarm
Lists a history of all alarms registered. Alarms in the Event List are not erased when the
Alarm List is cleared (see below).
Note: To adjust the number of rows displayed in the Event List, go to the Tools menu, select Options, and in the
General tab, use the Max rows in Event List slider.
Alarms List: In Detail
The Alarms window displays all alarms at any connected site. When an alarm occurs, you will see the time that
the alarm occurred, which site, unit and channel registered the alarm, whether it is a critical or warning alarm,
and any corresponding message.
From the Alarms for drop-down menu, you can choose to view all alarms, or only those at the Selected Site or
Selected Unit.
To clear the currently displayed alarms, click the Clear Alarms button in the Alarms window toolbar. This will
remove all the alarms from this window, but if logging is set up and enabled for this site, the alarm will remain in
the log.
CUSTOMER SUPPORT: 978-486-3711 • [email protected] • www.burk.com
29
CHAPTER 3: LYNX SOFTWARE OVERVIEW
Macro Status: In Detail
The Macro Status window indicates which macros, if any, are currently running on the selected unit. The window
displays all the macros you have saved to the unit, and a triangular “play” icon in the left column signifies a
currently running macro. You may not see notification for macros that execute for only a brief moment.
You can use the Macro Status toolbar to start or stop macros. Click Run or Stop as desired, or press the red
Stop All button to suspend all macros on this unit. A macro that is manually stopped will execute again when the
conditions that normally trigger the macro recur.
You can edit the source code for any macro by right-clicking the desired macro in the Macro List. For more on
using macros, see Chapter 10.
Network Clients: In Detail
In the Network Clients window, you can see all PCs that are currently sharing your computer’s connection to any
of your sites. The Network Clients window displays the site to which the remote computer is connected, the
computer’s IP address, network host name, and the time the connection was made. If the network host name is
unavailable, Lynx will redisplay the IP address in the network host name field.
Captures Window: In Detail
The Captures window shows all captures
currently stored on the selected unit. You
can print capture data directly from this
window, as well as save it to your site log.
For more on captures, see page 61.
30
GSC3000 & VRC2500 INSTALLATION & OPERATION MANUAL
CHAPTER 3: LYNX SOFTWARE OVERVIEW
STATUS BAR
The Status Bar on the bottom of the main Lynx window shows information about the current connection. From
left to right, the status bar displays:
•
•
•
•
•
the name of the site and unit you are connected to
the current view (either “Default View” or the name of the custom view)
the time the last data update was received from the site
the percentage of data packets received successfully
the name of the current user and the user’s privilege level
Warning icons appear in the Last Update field to alert you to a possible connection problem. In the Last Update
Field, a yellow alert icon indicates Lynx has missed one data update, and a red icon indicates Lynx has missed two
or more updates.
There are similar icons in the Link Quality field to alert you to a weak connection.
CUSTOMER SUPPORT: 978-486-3711 • [email protected] • www.burk.com
31
32
GSC3000 & VRC2500 INSTALLATION & OPERATION MANUAL
4
I/O Unit Configuration
The Unit Configuration menu is where you set up the metering, status and command functions for each unit.
When an I/O unit is selected, you can configure channel labels, limits, alarms, timed events and meter colors. If
you are using the I/O unit for PC or pager dial-out, you will also set up Site Dialing settings for that unit.
If you are using the Voice Interface (optional with the GSC3000 system), you will access its configuration
options in the same way as you do an I/O unit. See the next chapter for a description of the available Voice
Interface configuration options.
To open the Unit Configuration Window:
1. First, connect to the site containing the unit you would like to configure (highlight the site in the Site List
and click the Connect icon).
Note: You can also configure units offline – that is, set up all of the configuration parameters without connecting to
the unit. To do this, go to the File Menu, select Offline Configuration, and select the type of unit you would like to
configure. You will have to save the configuration file as an archive when you are done (41). Then, when connected
to the desired unit, open the unit configuration window and load the archived configuration.
2. Select the desired unit within the Site List. Then click the Unit Configuration icon (
toolbar.
) in the standard
3. The Unit Configuration window will appear, showing you several menu tabs, along with a File menu and
toolbar icons.
Within the menu tabs you can:
•
•
•
•
•
•
Assign a unit name
Establish Site Dialing settings (to be notified of alarm conditions)
Configure your metering, status and command channels (including limits and alarms)
Schedule Timed Events
Mute a channel’s alarm reporting based on user-specified conditions
Customize the colors that represent metering channel ranges in the Default View
CUSTOMER SUPPORT: 978-486-3711 • [email protected] • www.burk.com
33
CHAPTER 4: I/O UNIT CONFIGURATION
The File menu and toolbar icons allow you to:
Open archived configuration files (.set files)
Save settings in an archive file
Restore the default configuration
Open the Macro Editor
Save your configuration to the I/O unit
Revert to settings last saved to the I/O unit
Print your site’s configuration
Close the Unit Configuration window
OPENING AN ARCHIVED UNIT CONFIGURATION
If you have .set files on your computer from a previously saved unit configuration, you can open them in the
Configuration window, edit them (if necessary), and upload them to the selected unit.
Note: When you uninstall previous versions of Lynx or VRC2500 software, your archived configuration files (.set files)
will be retained. Your new version of Lynx can read archived .set files from Lynx 3.x and VRC2500 1.x software. When
upgrading from GSC version 1.x software, you will have to reconfigure your units when you upgrade to Lynx 4 or
later.
To open an archived unit configuration file:
1. Click the Open Archive icon in the toolbar. Browse for the desired file (or manually enter the path and file
name), and click Open. .
2. The Configuration Window will display your saved settings within the appropriate menu tabs. You can then
modify this configuration (see below) or save the settings to the selected unit (see SAVING AND
PRINTING CONFIGURATIONS at the end of this chapter).
SETTING UP OR MODIFYING I/O UNIT CONFIGURATION
Moving from left to right across the menu tabs, the following section details all the fields within the
Configuration window. You can edit a unit’s configuration at any time as you change equipment connections, add
or remove channels, or require new control functions.
First, verify that the I/O unit you wish to configure is selected and the Unit Configuration window is open. Then
enter your settings for each tab, using the descriptions below as a guide.
Description
In the description tab, you can customize the name of the
I/O unit using up to 20 characters. Be sure to assign each
unit a unique name.
34
GSC3000 & VRC2500 INSTALLATION & OPERATION MANUAL
CHAPTER 4: I/O UNIT CONFIGURATION
Site Dialing
When connected to an external dial-up modem, I/O units
feature dial-out capability so that station personnel can be
notified when a critical alarm occurs. The I/O unit can dialout report alarms to a PC running Lynx or to a numeric
pager. If you have a Voice Interface in the system, use the
Site Dialing setup for the Voice instead of the I/O unit.
Note: The optional Voice Interface unit offers voice callout
functions and touch-tone site control. See Chapter 11. If you
are using the Voice Interface for dial-out and do not need the
I/O unit to dial, leave I/O site dialing disabled.
All networked units at the same site will share one I/O unit’s
dial-out connection(s). Therefore, you only need
to enable site dialing for the I/O unit that has the modem
connection.
Phone Number. Enter up to five phone numbers (up to 48 characters) to call when an alarm is detected. For
pagers, include a comma in the dialing string for every two-second wait needed before the receiving pager can
accept DTMF tones. After the commas, enter the numeric string to be sent to the pager. Leave the number field
blank to disable site dialing.
Mode. Specify in the Mode field whether the phone number entered is a data line (calling a computer) or a
pager number.
Attempts. Select the number of dialing attempts the unit should make before moving to the next entry in the
phone number list. There is a one-minute pause between attempts, and after it exhausts the specified number
of attempts, the modem will call the next number that meets the “Dial When” criteria (see below).
Dial When, Start/End. For each phone number entry, specify the days of the week and time-of-day the number
should be used. Every day instructs the I/O to include this number among its dialing attempts on any day of the
week between the Start and End times you specify. For example, you could specify a particular number to be
dialed seven days a week, but only between the hours of 9AM and 6PM. Weekdays means the number will be
dialed Monday through Friday between the Start and End times, and Weekends means the number will be dialed
on Saturday and Sunday between the Start and End times. Always tells the unit to include this number among its
dialing attempts at any hour of the day, any day of the week.
Metering
Use the Metering tab to set up channel names, limits, and
alarm settings for your site’s metering inputs. The main
Meters view allows you to modify the names, measurement
units and the input type for each of your metering channels:
Name. Choose a name (up to 32 characters) for this
metering channel. The Voice Interface will speak this name
when it reports the value of the channel, and the name will
appear on the default view in Lynx.
CUSTOMER SUPPORT: 978-486-3711 • [email protected] • www.burk.com
35
CHAPTER 4: I/O UNIT CONFIGURATION
Unit. Enter the unit of measurement (i.e. volts, watts, amps, etc.) used by this metering channel (up to four
characters). The Voice Interface is able to recognize the following abbreviations and speak the full unit name:
%
AMPS
DB
DEG
GAL
KV
KW
LBS
MA
MIN
MV
POWR
SEC
VLTS
WATT
Percent
Amps
Decibels
Degrees
Gallons
Kilovolts
Kilowatts
Pounds
Milliamps
Minutes
Millivolts
Power
Seconds
Volts
Watts
Type. Click in the Type field and use the drop down menu to select the type of metering this channel uses:
0 to 10
Allows an analog input of 0VDC up to +10VDC with the same ratio assigned for all
values in that range.
-5 to +5
Allows an analog input of –5VDC to +5VDC with the same ratio assigned for all
values in that range.
Linear to Power
Allows an analog input to this channel of 0VDC up to +10VDC with an exponential
ratio calculated for all values in that range.
Indirect Power
Disables direct input to the channel. The displayed value is based on the input
values of the previous two channels. For example, the value of Channel 2 and the
value of Channel 3 are multiplied to give the value for Channel 4.
After you set up names, units and input types for your
channels, click the + sign to the left of the channel
number to set up limits and alarms, and to associate
events with those channel alarms.
Limits. You can set up four separate limit parameters for each channel (two lower limits and two upper limits),
allowing different alarms to be issued and actions to be taken depending on which limit has been exceeded.
Enter the limits in ascending order, according to the metering value:
36
Second Lower
The lowest limit value. Any meter reading at or below this value will cause the
alarm/action associated with the Second Lower limit.
First Lower
The higher of the two lower limits. When the monitored value reaches the First
Lower limit, the associated alarm/action is initiated until the value reaches the
Second Lower limit. If only one lower limit is needed, use the second lower limit, as
the system responds only to the second limit when both are exceeded. Leave the
first lower limit set to 0.
GSC3000 & VRC2500 INSTALLATION & OPERATION MANUAL
CHAPTER 4: I/O UNIT CONFIGURATION
First Upper
The lower of the two upper limits. When the monitored value reaches the First
Upper limit, the associated alarm/action is initiated until the value reaches the
Second Upper limit. If only one upper limit is needed, use the second upper limit, as
the system responds only to the second limit when both are exceeded. Leave the
first upper limit set to 0.
Second Upper
The highest limit value. Any meter reading at or above this value will initiate the
alarm/action associated with the Second Upper limit.
Note: If a meter value advances to a second lower or second upper limit without registering any value in the first
upper or first lower limit, then no alarm or warning will occur for the first limit. The same is true when returning from
an alarm state – the first lower or first upper limit only occurs if the channel actually reports a value in that range.
Value. Enter the value that defines the limit you wish to set up.
Alarm. Use the drop-down menu to choose the type of alarm you want issued when an out-of-limits condition
occurs: Critical, Warning or None.
Critical
The I/O or Voice Interface unit will use the Site Dialing settings to notify you of the out-oflimits condition.
Warning
Alarms will be registered in the site log and alarm list, but the unit will not call out to report
the condition.
None
Check none if you do not want to receive alarms for this limit.
Event Delay. The Event Delay is the amount of time (definable to tenths of a second) that the unit waits after
the alarm condition is continuously asserted before executing the programmed action and/or issuing an alarm.
If the input status changes back to the non-alarmed state before the delay time has elapsed, alarms or actions
will not occur at that time.
Action. You can program the unit to execute a Command, run a Macro, or take a Capture whenever the alarm
state is achieved and the specified delay has been exceeded. Actions can be executed from any connected unit
on the G-Bus network. Click in the Action field, followed by the drop-down arrow that appears, and select the
desired action, and fill in additional information as required:
Command
Select the I/O unit that controls the output channel you wish to control. Then choose the
desired command from the drop-down menu.
Macro
Select the I/O unit that contains the macro you wish to use. Choose the desired macro
from the drop-down menu, and indicate whether you wish to Start or Stop this macro.
Capture
Select the I/O unit whose settings you wish to capture.
None
Lynx will log the alarm, but no action will be taken to correct the condition.
CUSTOMER SUPPORT: 978-486-3711 • [email protected] • www.burk.com
37
CHAPTER 4: I/O UNIT CONFIGURATION
Status
The Status tab is where you configure your status input channels.
Type. In the main Status view, select Pull-Up or Pull-Down
for each channel, depending on the type of output the
monitored device uses. Pull-Up is for equipment that
provides a contact closure to indicate a Low state. Select
Pull-Down if the equipment provides a DC voltage to
indicate a High state.
Name. For each status channel, two conditions are possible,
LOW (off) or HIGH (on). Choose names to describe each
condition (such as “Main Filaments ON” for the HIGH state
and “Main Filaments OFF” for the LOW state) and enter
them in the appropriate rows for each channel.
Alarm. Use the drop-down menu to choose the type of
alarm you want issued for each condition: Critical, Warning
or None.
Critical
The I/O or Voice Interface unit will use the Site Dialing settings to notify you of the
condition.
Warning
Alarms will be registered in the site log and alarm list, but the unit will not call out to report
the condition.
None
Check none if you do not want to receive alarms for this channel.
Event Delay. As with the metering inputs, you can specify a delay for each alarm, programmable to tenths of a
second.
Action. You can also program the unit to execute a command, run a macro, take a capture or initiate no action
when the status channel is in the corresponding state. Actions can be executed from any I/O unit connected on
the G-Bus network. Fill in the Action fields for the status channels in the same way as you did for your metering
channels.
Note: By default, the LOW status state is represented by a red status indicator, and the HIGH status state is
indicated by a green status indicator. To change these colors, right-click the I/O unit in the Site List and select Edit
Default View. Then click on the color swatch you would like to change. Muted channels always appear in gray.
38
GSC3000 & VRC2500 INSTALLATION & OPERATION MANUAL
CHAPTER 4: I/O UNIT CONFIGURATION
Commands
Set up your command (output) channels from the Commands tab.
Mode. Use the drop-down menu in the Mode field to select
whether the output type is Momentary or Latching.
Momentary is for command signals that last for as long as
the specified duration setting. Select Latching if the
command signal stays active until changed by another
command. Latching command outputs ignore any duration
setting.
Note: If you change the mode from latching to momentary
while the latching command is active, the channel will remain
latched until a new command is issued on that channel.
Note: When you set a channel for latching, both the A and B
output for that channel must be configured as latching since
the two work in conjunction with each other. Similarly, if your
output is configured for momentary, both the A and B state
must be set for momentary even though the A and B states
work independently.
Duration. In the Duration field, specify the amount of time the command output is to be active – anywhere from
0.1 to 25.5 seconds, definable in 1/10-second increments. Command channels A and B are mutually exclusive
(when channel B is active, channel A is inactive, and vice-versa).
A Label / B Label. A and B labels correspond to A and B output channels on the Command Relay. Specify a label
to identify both command actions. These labels are displayed in the command buttons in the Lynx monitor view,
as well as in the drop-down menus you use during alarm/action setup. If you are using a Voice Interface,
command labels will also be announced during a voice session.
Timed Events
Use the Timed Events tab to schedule activities at your site.
The GSC3000 and VRC2500 can perform data captures,
commands and macros on the schedule you determine here.
Events saved to one I/O can involve actions on any I/O unit
at the same site.
Time. Click the Time field, followed by the drop-down arrow
that appears, for a pop-up dialog allowing you to set the
schedule for this action.
In the Date area, choose whether the event will occur Every
Day, on one Specific Weekday, or on one Specific Day of the
Month, and choose the day within the week or month as
appropriate. For the Month field, indicate whether this event
will occur Every Month or during one Specific Month. In the
Time area, select whether this event will occur Every Hour,
Every Minute, or Every Second on the specified day(s), or
designate the Specific Time for the event to take place.
CUSTOMER SUPPORT: 978-486-3711 • [email protected] • www.burk.com
39
CHAPTER 4: I/O UNIT CONFIGURATION
The standard Time view offers the flexibility to schedule typical activities. Click the Advanced button to schedule
events on an even more precise schedule, but use care to avoid date/day conflicts. For example, choosing April 5
for the month and day – and selecting a specific day of the week – would cause that event to occur only in the
years when April 5 happens to fall on the specified day of the week.
Action. Click in the Action field, followed by the drop-down arrow that appears. You will see a pop-up dialog
that allows you to assign the desired action for the time you just specified. The GSC3000 and VRC2500 can
execute a Command, run a Macro, or take a Capture. Actions can be executed from any connected unit at the
same site. Select the desired response and fill in additional information as required:
Command
Select the I/O unit that controls the output channel you wish to activate. Then choose the
desired command from the drop-down menu.
Macro
Select the I/O unit that contains the desired macro. Choose the macro from the drop-down
menu, and indicate whether you wish to Start or Stop this macro.
Capture
Select the I/O unit whose settings you wish to capture.
None
No action will be taken. Specify None when you wish to disable a Timed Event without
deleting its schedule.
The unit will initiate scheduled events according to the time they are scheduled. When multiple events are
scheduled to occur at the same time, they are executed in the order they appear in the Timed Events window.
To change the order of events, click in the Time or Action field for the event you would like to move, and then
use the blue up and down arrows to change the position of the entry. To delete a scheduled event, click in the
Time or Action field for that event, and click the red “X” button.
Muting
The Muting function allows you to define a status condition or command state that causes one or more metering
or status channels to ignore alarms, macros or commands that would otherwise occur in the un-muted state.
To set up muting:
1. Click in the Source field and press the down-arrow to
show the Mute Source dialog.
2. Choose whether you wish for a Status or Output
condition to cause the mute, and then select the
desired status or output from the drop-down menu.
Click OK.
3. Click in the corresponding Mute field and press the
down-arrow to show the Mute Channel dialog.
4. Choose whether you wish to mute a metering or
status channel, and then select the desired channel
from the drop-down menu. Click OK.
40
GSC3000 & VRC2500 INSTALLATION & OPERATION MANUAL
CHAPTER 4: I/O UNIT CONFIGURATION
Muting entries are executed in the order in which they are listed. If multiple entries for the same channel are
entered, the desired result may not occur due to the command sequence. To change the order of the muting
entries, highlight a field within the entry you would like to move, and use the blue arrows
to change its
position. To delete an entry, highlight a field within the entry and click the red .
Note: The default monitor view displays muted channels in gray.
Note: Muting a channel with a pending alarm does not clear that alarm. Only new alarms will be ignored while the
channel is muted.
Meter and Status Colors
In the Meter Colors and Status Colors tabs you can
customize the colors that define the value ranges of your
metering channel bar graphs and the colors that indicate
high and low states in the default view. The major difference
starting in version 5 software is that these colors are saved
directly to the I/O unit and not stored locally on a single
PC. This way, any computer accessing the remote site will
view the same colors ranges and status indicators for each
channel, avoiding confusion.
To set up meter and status colors colors:
1. Click the Meter or Status Color tab in the unit
configuration window.
2. For each channel, select a color to represent each
metering range or status indicator.
Note: You do not need to configure alarms for each metering limit in order to use the limit value to define color
ranges.
SAVING & PRINTING CONFIGURATIONS
After making changes in the Unit Configuration window, you can save the settings to an archive (stored on your
hard drive or a floppy disk), save them to your I/O unit, or abandon them and revert to the last uploaded unit
configuration. You can also print your settings for convenient hard-copy access.
Saving to the I/O Unit
To save the configuration to the selected I/O unit, select Save to Unit from the File menu. Lynx will transfer the
configuration settings to the unit and notify you when the upload is complete.
To see the changes in the Lynx default monitor view, close the configuration window, and with the appropriate
unit selected in the Site List, click Refresh in the main toolbar. Any changes you made to labels, limits, unit
names, etc. will be displayed.
Saving to an Archive
You can save your configuration settings in an archive so that they may be easily restored in the future. To
archive your settings, select Save in Archive from the Configuration window’s File menu. The Save dialog will ask
you for a file name for your archive. After entering the file name, click Save. Lynx will notify you when the settings
have been successfully archived.
CUSTOMER SUPPORT: 978-486-3711 • [email protected] • www.burk.com
41
CHAPTER 4: I/O UNIT CONFIGURATION
Abandoning Changes / Restoring Default Settings
There are two ways to abandon configuration changes:
To abandon changes and stop editing, simply close the Configuration window and choose No when asked if you
would like to save your changes. No changes will be made to the unit configuration.
To abandon changes and restart editing with the last-saved settings, select Revert from the Configuration
window toolbar. This will restore the settings last saved to the I/O unit.
Note: If you are working from an archived .set file and wish to discard changes, re-open the archive file or close the
Configuration window.
To restore the factory-default settings to your I/O unit, select Set to Default Values from the Configuration
window’s File menu.
Note: To restore previously saved data for the current menu tab only, select Re-Download Selected Data from the
File Menu in the Unit Configuration window.
Printing the Unit Configuration
So that operators may easily reference channel assignments and other configuration settings, it may be useful to
print your unit configuration. To do so, click the Print icon in the Configuration window toolbar. You may also
preview the printout by choosing Print Preview from the File menu.
Note: The File menu in the Configuration Window also provides access to the Macro Editor. See chapter 10).
CALIBRATION
The Calibration window is where you calibrate the I/O
unit’s meter readings so that the values reported by
the unit match those of the monitored equipment. If
you are setting up a new site, you need to finish
configuring all the units at your site and go on to set
up modems and connect your site equipment before
calibrating your I/O unit (see Chapter 6). Once this is
done, you are ready to calibrate.
In order to correctly calibrate the metering channels,
you must be direct-connected at the transmitter site or
remotely connected and in communication with
someone in the field who can report actual equipment
values.
To calibrate an I/O unit’s metering channels:
1. Select the desired unit in the Site List.
2. Open the calibration window by expanding Selected Unit from the Site menu and choosing Calibration.
3. Click on the metering channel you would like to calibrate, enter the correct metering value at the bottom
of the dialog box, and click Calibrate.
42
GSC3000 & VRC2500 INSTALLATION & OPERATION MANUAL
CHAPTER 4: I/O UNIT CONFIGURATION
4. When you are finished calibrating the channels, click Save to Unit to upload the new values to the I/O
unit. To abandon changes, click Undo Changes.
When you update a metering value, Lynx compares the old value to the calibrated value and computes a
Calibration Constant to correct readings along the channel’s entire operating range. If you wish to enter your
own calibration constant, click the Advanced button, highlight the desired channel, and enter the calibration
constant at the bottom of the dialog box. Click Set when you are finished, and click Save to upload the new data
to the I/O unit. Click Close to exit.
UNIT PROPERTIES
The Unit Properties window provides details on the unit name, number,
firmware version and connection information. To view properties for a
selected unit, click Unit Properties from the expanded Selected Unit item in
the Site menu.
CLEAR CACHE
When Lynx connects to a site, it compares configuration data from the
connected units to the data Lynx has stored in its cache. If no changes to
the site’s configuration have taken place since the last disconnect, Lynx uses
the cached unit information so you do not have to wait for it to download
all the settings. There is Clear Cache function in the File menu, which will
delete all configuration data stored in the cache and force Lynx to download
the data the next time you connect to the site. This is a troubleshooting
feature not needed for normal use.
Unit Properties Window
CUSTOMER SUPPORT: 978-486-3711 • [email protected] • www.burk.com
43
44
GSC3000 & VRC2500 INSTALLATION & OPERATION MANUAL
5
Voice Interface
Configuration
The Voice Interface provides telephone dial-out capability for alarm reporting and dial-in touch-tone control.
This feature is integrated on the VRC2500 platform; it is an optional unit that can be added to the GSC3000
system. When you configure a Voice Interface, you will assign its dial-out settings and set up Voice Interface
users and passwords (which can be different from users and passwords used for computer access).
The Unit Configuration window for a Voice Interface is very similar to that of an I/O unit, and you can open
archived configurations for a Voice Interface just as you can for an I/O unit. See the previous chapter for
instructions.
Note: For instructions on operating the Voice Interface unit, including touch-tone command codes, see Chapter 11.
To configure your Voice Interface, select the unit in the Site List and click the Unit Configuration toolbar icon.
When the Unit Configuration window opens, you will see menu tabs for Description, Site Dialing, Users and Voice
Setup. Enter information for each tab, using the descriptions below as a guide:
DESCRIPTION
There is only one field in the Description tab: Unit
Name. Enter a name for your Voice Interface, using up
to 20 characters.
SITE DIALING
The Site Dialing tab for the Voice Interface offers all
the functionality of the I/O Unit site dialing options,
but adds the option of voice dial-out for alarm
reporting.
Phone Number. Enter up to five phone numbers (up to
48 characters each) to call when an alarm is detected.
Include all dial-out prefixes and area codes, if required.
For pager numbers, follow the phone number with one
comma for every two-second pause needed before
sending numbers to the receiving pager. Then enter
the numeric string to be sent to the pager. Leave the
phone number field blank to disable site dialing.
CUSTOMER SUPPORT: 978-486-3711 • [email protected] • www.burk.com
45
CHAPTER 5: VOICE INTERFACE CONFIGURATION
If a dial-up modem is connected to the Voice Interface and you are using it to dial a computer, enter the phone
number for the computer and ensure that auto-answer is enabled for the modem you are dialing. In order for
Lynx to receive a call from the remote site, check the Answer Incoming Calls box in the Connectivity tab of the
Options menu (see page 86). This box needs to be checked for each computer the unit is set to dial.
Mode. Like the I/O unit, the Voice Interface can dial pagers and report alarms to computers. Two additional dialout options are specific to the Voice Interface: Voice (Password) and Voice (Message):
Pager
The Voice Interface is dialing a numeric pager.
Data
The Voice Interface is dialing a modem connected to a PC running Lynx.
Voice (Password)
The Voice Interface is dialing a standard touch-tone telephone, and when the line
is answered, the Voice Interface will play the programmed greeting. The user then
must enter a password to receive the alarm report and issue commands or macros.
Voice (Message)
The Voice Interface is dialing a standard touch-tone telephone, and when the line
is answered, the Voice Interface will report the alarm condition and disconnect.
Attempts. Select the number of dialing attempts the unit should make before moving to the next entry. There is
a one-minute pause between attempts, and after it exhausts the specified number of attempts, the modem will
call the next number that meets the “Dial When” criteria. When the Voice Interface reaches the end of the phone
number list, it will pause for fifteen minutes before restarting from the top.
Dial When, Start/End. For each phone number entry, you can specify the days of the week and time-of-day the
number should be used.
46
Every day
Instructs the unit to include this number among its dialing attempts every day of the
week between the Start and End times you specify. For example, you could specify a
particular number to be dialed seven days a week, but only between the hours of
9AM and 6PM.
Weekdays
The number will be dialed Monday through Friday between the Start and End times.
Weekends
The number will be dialed on Saturday and Sunday between the Start and End
times.
Always
The unit will include this number among its dialing attempts at any hour of the day,
every day of the week.
GSC3000 & VRC2500 INSTALLATION & OPERATION MANUAL
CHAPTER 5: VOICE INTERFACE CONFIGURATION
USERS
In the Users tab, anyone with System privileges can
establish up to 32 unique Voice Interface users and
passwords and assign access levels for each. Voice
Interface users and passwords are distinct from those
set up for the Lynx application itself. To set up Lynx
users, passwords, and access levels, see page 90.
User Name. Assign a name for each user to easily
identify the owner of each password you assign.
Password. For each user name, enter a password of up
to eight letters or numbers. The Voice Interface will
prompt the user for this password on each dial-in
attempt. When the user dials in, any letters in the
password need to be entered using the corresponding
numbers on the telephone’s keypad (for Q and Z, use
7 and 9 on the keypad). In addition, passwords
shorter than 8 characters must be followed by the #
key when they are entered over the phone.
Access Level. There are three access levels that administrators can assign users – System, Operator and Observer:
System
Full privileges.
Operator
Access to metering and status conditions, as well as issue commands and macros.
Observer
Access only to metering and status conditions.
VOICE SETUP
The Voice Setup tab is where you configure speech
properties, command and audio timing parameters,
and greeting and sign-off messages.
Personality. There are slight differences in the voice
characteristics for each personality. Make your
selection from the list.
Volume. Adjusts the volume level of the voice.
Pitch. Selects whether the voice speaks in high (treble)
low (bass) or normal pitch.
Speed. Determines how fast the voice speaks.
Audio Input Timeout can be set from 1 to 15 minutes.
When audio is sent to the unit over the phone line or
from the rear panel Audio IN phono jack, the Voice
Interface will stop transmitting that audio when the timeout is reached.
Note: The audio input timeout duration is accurate to within 60 seconds of the specified setting.
CUSTOMER SUPPORT: 978-486-3711 • [email protected] • www.burk.com
47
CHAPTER 5: VOICE INTERFACE CONFIGURATION
Command Delay. The command delay function can be set from 0 to 15 seconds to delay commands issued to
the site by DTMF tones. This function allows time for the operator to cancel a miskeyed command (0#) before
it is performed. See Chapter 11 for more on Voice Interface command codes.
Inactivity Timeout. If the Voice Interface expects a DTMF entry and none is received within the time specified,
the Voice Interface will disconnect from the call.
Rings. This is the number of rings the Voice Interface waits before it answers a call.
Welcome / Goodbye Message. You can customize the greeting and signoff messages that are played when users
dial in or disconnect from the Voice Interface. Note that there are 15 seconds allotted for the sign-on greeting
and password entry, so a longer welcome message will result in less time to enter the password.
SAVING & PRINTING CONFIGURATIONS
The File menu and toolbars in the Voice Interface Configuration window are identical to those in the I/O unit
Configuration Window. When you are done making changes to Voice Interface configuration, see page 41 for
instructions on saving, archiving and printing the configuration.
UNIT PROPERTIES
The Unit Properties window provides details on the unit name, number, firmware version and connection
information. To view properties for a selected unit, click Unit Properties from the expanded Selected Unit item in
the Site menu.
CLEAR CACHE
When Lynx connects to a site, it compares configuration data from the connected units to the data Lynx has
stored in its cache. If no changes to the site’s configuration have taken place since the last disconnect, Lynx uses
the cached unit information so you do not have to wait for it to download all the settings. There is Clear Cache
function in the File menu, which will delete all configuration data stored in the cache and force Lynx to download
the data the next time you connect to the site. This is a troubleshooting feature not needed for normal use.
AFTER CONFIGURING YOUR UNIT
When you are done configuring all I/O and Voice Interface units, go on to Chapter 6: Modem & Site Equipment
Connection.
48
GSC3000 & VRC2500 INSTALLATION & OPERATION MANUAL
6
Modem & Site
Equipment Connections
Now that your site is set up in Lynx and you have completed unit configuration, you are ready to connect your
modems and site equipment to the system. We recommend configuring and testing your modems before taking
them to the remote site. You should also read the Command Relay and Wiring Interface installation instructions
(later in this chapter) before you go to connect your site equipment to them.
SUPPORTED MODEMS
Note: Changes in modem availability or functionality may result in new modem recommendations. The supported
modems are available from Burk Technology.
Dial-Up Connections
For dial-up connections, we support the US Robotics 56K V.92 External modem for use with the monitoring PC
and at the remote site. If you use an unsupported modem with your computer, it must be a full-feature internal
or external modem, compatible with the recommended US Robotics modem, and capable of 19.2kbps or faster
communication. The VRC2500 does not support cellular or software modems (such as a Winmodem®). Note that
some users of unsupported modems have reported trouble establishing the modem settings necessary to
communicate with the US Robotics modem at the remote site.
Full-Time Connections
For a full-time (two- or four-wire) connection, we support the Multi-Tech MultiModem II MT5600BL modem. If
you are using the previously recommended MT2834BL modem, you can find configuration instructions in the
support section of the Burk Technology website at www.burk.com.
DIAL-UP MODEM CONFIGURATION & CONNECTION
Configuration
The required DIP switch settings for the U.S. Robotics External modem are shown on the following page. When
connecting to a GSC3000 I/O, set DIP-switch 5 to the up position to enable Auto Answer. Leave switch 5 down
when the modem is used with a PC, when connected to the Voice Interface in a GSC3000 setup, or to the DIALUP port on a VRC2500.
CUSTOMER SUPPORT: 978-486-3711 • [email protected] • www.burk.com
49
CHAPTER 6: MODEM & SITE EQUIPMENT CONNECTIONS
DIP
SWITCH
POSITION
FUNCTION
1
UP
Data Terminal Ready
2
UP
Verbal Result Codes
3
DOWN
Enables Result Code Display
4
DOWN
No echo, offline commands
5
UP (I/O unit)
DOWN (Voice Interface)
Enables auto answer. The modem will answer the incoming call for the I/O unit.
Disables auto answer. The voice interface will automatically answer the call.
6
UP
Carrier detect normal
7
UP
Load NVRAM defaults
8
DOWN
Smart mode
Burk Technology is able to offer only limited support for other modems used with GSC3000 or VRC2500. If
you are using an unsupported modem, please refer to the US Robotics DIP switch settings for help configuring
the appropriate functions for the modem you are using.
Connection
Note: Be sure your modem is correctly installed in Windows and that it is properly functioning before using it with
the GSC3000 or VRC2500 system.
Follow the steps below to connect the US Robotics modem to the system. Refer to Chapter 11: Voice Interface
Operation if you are connecting your modem to a Voice Interface in a GSC3000 setup.
1. When connecting to a GSC3000 I/O unit, connect the modem to the I/O unit’s COM2 port with the
supplied DB9 to DB25 serial cable (as shown below). For a VRC2500 unit, connect the null modem cable
to the DIAL-UP port (as shown below).
2. Use a standard telephone cord to connect the TELCO jack on the modem to the RJ-11 wall jack.
3. In order for the GSC3000 or VRC2500 to detect the newly installed modem, cycle the power on the unit.
Note: Always use a telephone line surge suppressor when connecting a modem or Voice Interface to the RJ-11 wall
jack. Damage caused by voltage surges, including lightning strikes, is not covered by the factory warranty. Visit our
web site at www.burk.com or contact our sales department for information on suppressors we recommend.
50
GSC3000 & VRC2500 INSTALLATION & OPERATION MANUAL
CHAPTER 6: MODEM & SITE EQUIPMENT CONNECTIONS
Connecting a Dial-Up Modem to a GSC3000 I/O
Connecting a Dial-Up Modem to a VRC2500
CUSTOMER SUPPORT: 978-486-3711 • [email protected] • www.burk.com
51
CHAPTER 6: MODEM & SITE EQUIPMENT CONNECTIONS
FULL-TIME MODEM CONFIGURATION & CONNECTION
Configuration
Program and configure your four-wire modems before you make connections to any equipment. Because they are
configured slightly differently, label one modem as Studio and the other as Transmitter (the former is considered
the Originator modem and the latter the Answer modem). Also, make sure you have the latest MultiModem II
MT5600BL firmware. Updates are available at www.multitech.com. These configuration instructions are
consistent with version 2.300G.
Use the MT5600BL front panel to configure your studio and transmitter modems. Refer to the instructions
below and the expanded menu diagram on the following page:
1. Set the Studio modem to 4 WIRE LEASE ORIG mode or 2 WIRE LEASE ORIG mode, depending on the
type of circuit.
2. Set the Transmitter modem to 4 WIRE LEASE ANSWER mode or 2 WIRE LEASE ANSWER mode,
depending on the type of circuit.
3. Set Error Correction to EC Off
4. Set Command Mode to Command Mode Disabled
5. Set Sync/Async to ASYNC Norm
6. Set Serial baud rate to 19200
7.
Set modem connection speed to 56000
8. Set DTR to IGNORE DTR
9. Set Carrier Detect to CD Normal
10. Set CTS to CTS On
52
GSC3000 & VRC2500 INSTALLATION & OPERATION MANUAL
CHAPTER 6: MODEM & SITE EQUIPMENT CONNECTIONS
CUSTOMER SUPPORT: 978-486-3711 • [email protected] • www.burk.com
53
CHAPTER 6: MODEM & SITE EQUIPMENT CONNECTIONS
Connection
Be sure your modem is correctly installed in Windows and that it is properly functioning before connecting it to
your system. Note that a full-time modem needs to be connected to COM1 on a GSC3000 I/O unit or to the
FULL-TIME port on a VRC2500 – it cannot be connected to a Voice Interface.
To connect a full-time modem to your I/O unit:
1. The serial interface port on the back of the modem is a DB25 female connector. Use the provided serial
cable to connect the modem to your PC and your or VRC2500 or GSC3000 I/O. Always use COM1 on
the GSC3000 I/O unit, not COM2. Use the FULL-TIME port on the VRC2500, not DIRECT.
2. For a two-wire connection, plug one end of a two-wire phone cable into the LEASED jack on the modem
and connect the other end to your leased line wall jack or terminals, or to your communication link. For a
four-wire connection, plug one end of a four-wire phone cable into the LEASED jack on the modem and
connect the other end to your leased line wall jack or terminals, or to your communication link.
A typical four-wire phone cable with RJ-11 connectors is broken out as follows:
3. In order for the system to detect the newly installed modem, cycle the power on the unit.
Note: Always use a telephone line surge suppressor when connecting a modem or Voice interface to the RJ-11 wall
jack. Damage caused by voltage surges (including lightning strikes) is not covered by the factory warranty. Visit our
web site at www.burk.com or contact our sales department for information on suppressors we recommend.
54
GSC3000 & VRC2500 INSTALLATION & OPERATION MANUAL
CHAPTER 6: MODEM & SITE EQUIPMENT CONNECTIONS
Connecting a Full-Time Modem to a GSC3000 I/O
Connecting a Full-Time Modem to a VRC2500
CUSTOMER SUPPORT: 978-486-3711 • [email protected] • www.burk.com
55
CHAPTER 6: MODEM & SITE EQUIPMENT CONNECTIONS
CONNECTING A WIRING INTERFACE
The Wiring Interface uses push-on blocks to simplify the connection of metering and status inputs to your
GSC3000 I/O or VRC2500 unit. No soldering is required. To utilize all input channels on a VRC2500 or a
GSC3000 I/O 16, you will need two wiring interfaces.
Voltage Inputs
The Wiring Interface is designed for status inputs of ±30VDC and metering inputs of 0-10VDC or -5 to +5VDC
(specified when you configure the channel in Lynx). Metering samples should be at least 2VDC to provide
accurate readings. If the sample voltage is too small, a large calibration constant is required and may result in
widely fluctuating readings.
Floating Grounds
The GSC3000 and VRC2500 units will not tolerate a floating ground. If any of your inputs has a floating
ground, use an isolation amplifier before connecting it to the Wiring Interface.
Connecting Input Channels
To connect inputs:
1. If you have two Wiring Interfaces, you must designate one for status and one for metering channels. For
GSC3000 I/O 8 units only, the Wiring Interface will be used for both metering and status inputs.
Note: When using the Wiring Interface with an I/O 8, connect metering
inputs to the channels on the Wiring Interface marked 1-8, and connect
Status to 9-16.
2. Connect the site equipment input wires to the Wiring
Interface push-on block and secure the wires with the built-in
setscrews. The status or metering input connects to the +
terminal, and a common ground connects to the – terminal.
3. Connect the push-on blocks to the Wiring Interface with the setscrews facing up. Be sure to precisely
align the connector terminals to the + and – contacts on the back panel of the Wiring Interface.
Misalignment will result in faulty readings and may damage the I/O unit. If you set up all your channel
properties (labels, limits, alarms, etc.) in Lynx before installing the Wiring Interface, be sure to connect
your equipment to the channels you specified during unit configuration.
4. Use the provided DB37 cable to connect the SITE CONTROLLER I/O port on the Wiring Interface to the
METERING or STATUS port (as appropriate) on the VRC2500 or GSC3000 I/O 16 unit. An I/O 8 has
one METERING/STATUS port for both types of inputs.
56
GSC3000 & VRC2500 INSTALLATION & OPERATION MANUAL
CHAPTER 6: MODEM & SITE EQUIPMENT CONNECTIONS
Connecting a Wiring Interface to a GSC3000 I/O
Connecting a Wiring Interface to a VRC2500
CUSTOMER SUPPORT: 978-486-3711 • [email protected] • www.burk.com
57
CHAPTER 6: MODEM & SITE EQUIPMENT CONNECTIONS
CONNECTING A COMMAND RELAY UNIT
The Command Relay unit is used to provide isolation between the GSC3000 or VRC2500 unit and your site
equipment. The command outputs on the rear panel of the remote control unit are open collector outputs,
capable of momentary or latching output. They support a maximum of 30VDC, 250mA. Each Command Relay
connects up to eight channels. To fully utilize the command channels on the VRC2500 or GSC3000 I/O 16, use
two Command Relays.
Power Supply
Power to the Command Relay is supplied by the GSC3000 or VRC2500 through the DB37 connector. The DC
power connector on the left side of the Command Relay rear panel is for use with VRC2000 and VRC1000
systems and is not used with the GSC3000 and VRC2500.
When the I/O unit is powered and the Command Relay connected, two green LEDs on the rear panel of the
Command Relay indicate 5VDC power is being received. If both lights do not illuminate when you connect power,
see Appendix D for troubleshooting.
Connecting Output Channels
Each command channel has two relays, A and B, and there is one three-terminal push-on block for each relay.
To connect output channels:
1. Wire your equipment to the provided three-terminal push-on connectors. Insert the wires into the correct
connector openings (refer to the diagram below) and tighten using the built-in setscrews.
2. Connect the push-on blocks to the rear panel of the
command relay with the setscrews facing up. Use care to
properly align each terminal with the contacts on the back
panel of the Command Relay unit. Connections are standard
Form C, from left to right: normally open (NO), normally
closed (NC) and common (C). If you set up all your channel
properties (labels, limits, alarms, etc.) in Lynx before installing
the Command Relay, be sure to connect your equipment to
the channels you specified during unit configuration.
3. Use the provided DB37 cable to connect the port on the Command Relay to COMMAND 1-8 or
COMMAND 9-16 on the VRC2500 or GSC3000 I/O unit.
BEFORE LEAVING YOUR SITE
After you install the Command Relay and Wiring Interface units, take a moment to verify your equipment
connections. Worksheets are provided in the back of this manual for you to document which units and channels
correspond with your site equipment. Careful notation of your connections will make future editing of your
settings much easier.
58
GSC3000 & VRC2500 INSTALLATION & OPERATION MANUAL
CHAPTER 6: MODEM & SITE EQUIPMENT CONNECTIONS
Connecting a Command Relay to a GSC3000 I/O
Connecting a Command Relay to a VRC2500
CUSTOMER SUPPORT: 978-486-3711 • [email protected] • www.burk.com
59
60
GSC3000 & VRC2500 INSTALLATION & OPERATION MANUAL
7
Site Data & Reports
In addition to providing control and configuration functions, Lynx can also manage your site data and allow you
to create customized reports for your station records. In order to create reports, you will first need to save site
data to your computer – this is usually accomplished through Logging.
LOGGING
Logging is set up in the Site Wizard when you initially create your site. Lynx can log site data in two ways, and
they can be used simultaneously or independently. The first method is to log site data directly to Lynx, and the
other is to download captures from the VRC2500 or GSC3000 I/O unit(s). Both of these options are described
on page 16. If you ever want to change your logging setup, click the Edit Site icon in the standard toolbar and
use the Next button to navigate to the Logging page in the Site Wizard.
IMPORTANT! In addition to setting up logging in the Site Wizard, logging must be enabled in order to for
logging to take place. Enable/Disable logging by clicking the toolbar icon ( ). This turns logging on and off for
all sites.
Log Messages
You can insert custom messages into the logs, which can be then be printed and included with your logging
reports. This is a good way for operators to leave notes about activity not otherwise recorded by Lynx (such as
equipment maintenance, shift duties, etc). Click the Insert Log Message toolbar icon ( ) and type the log
message. When you create the printed log using the report writer (later in this chapter), you will have the option
to include these log messages in the report.
CAPTURES
Captures are “snapshots” of the conditions at the remote site in a given instant. Captures include metering
values and status conditions, channel muting status, and the current command state for each channel. When
Lynx downloads these captures from the unit, the data they contain can be used for your site logs. You can also
configure the unit to take a capture when a channel is out-of-tolerance, providing operators with a complete
digest of the unit data at the time the condition occurred.
A unit will save 192 captures before erasing the capture buffer to make room for new ones. You can also erase
captures manually (see Viewing Captures on page 58), or instruct Lynx to delete the captures when it downloads
them for the log (see Logging, page 20).
CUSTOMER SUPPORT: 978-486-3711 • [email protected] • www.burk.com
61
CHAPTER 7: SITE DATA & REPORTS
Taking Captures
Since captures can be used for a variety of purposes, there are a number of ways to set them up. To manually
take a capture, just click the Take Capture icon
in the standard toolbar icon. This will save the capture to the
unit. The data is then viewable in Lynx (see viewing captures below).
Captures as Alarm Actions
If you want to capture site conditions when a metering or status channel reaches an out-of-tolerance condition,
set up the capture as an Action when you configure that channel’s limits and alarms:
1. From the I/O Unit Configuration window, click on the Metering or Status tab to access the desired
channel.
2. Click the expand button ( ) by the channel number, and click in the Action field.
3. Specify Capture as the desired action, and choose the unit containing the data you want capture.
Note: You can only associate one action with an out-of-tolerance channel condition. If you want to issue a command
and take a capture, program a macro to this effect and then specify the macro as the associated action, as above.
See Chapter 10 for more on using macros.
Captures as Timed Events
For logging, it is best to schedule captures to occur as Timed Events:
1. Open the Unit Configuration window for the I/O unit and go to the Timed Events tab.
2. Set up the schedule for the capture in the Time field, and specify Capture in the Action field.
3. Select the unit containing the data you want to capture.
This will tell the I/O unit when to take the captures. In order to use the captures for site logging, make sure that
logging is enabled and configured for your site (see Logging, page 20).
Note: The CAPTURE macro command can also be used take a capture. See Chapter 10.
Viewing Captures
To view all the captures stored on the selected
I/O unit, click the View Captures ( ) toolbar
icon. The Captures Window will appear,
showing you a table containing all the capture
data saved on the I/O unit. The Refresh button
(
) in the Captures Window toolbar
updates the Captures window to include the
most recent captures taken, and the Clear
Captures button (
) permanently
erases all Captures Window entries and
removes the captures from the I/O.
Note: If you use captures for your site logging,
avoid clearing the captures until Lynx has
downloaded them. To change how frequently
Lynx downloads the captures, click the Edit Site
toolbar icon and advance to the logging page
of the Site Wizard.
62
GSC3000 & VRC2500 INSTALLATION & OPERATION MANUAL
CHAPTER 7: SITE DATA & REPORTS
If you have not enabled logging for this site, you can click the Save to Database button to manually save the
captures to the Lynx database. Captures saved in this manner will be available for use in reports just as if they
had been logged automatically.
USING THE REPORT WRITER
The Report Writer uses the data logged from your sites to create customized reports. To launch the Report
Writer, click the
toolbar icon. The Report Writer opens with the last settings used.
Creating a New Report
To create a new report, choose New from the File menu in the Report Writer. This will reset all the fields in the
report writer to their default settings. You can then fill in those fields to specify the data you would like included
in the report and how it should be presented. Use the descriptions below as a guide to each step in the Report
Writer, and then go on to Saving and Printing Reports, later in this chapter.
General
Select a Site. Specify the site you would like included in the report. For logging multiple sites, simply run multiple
reports.
Paper Orientation. Choose Portrait or Landscape as desired. This affects the number of columns that will fit on
each page.
Time Zones. Choose Leave times in remote time zones to print the date and time of each event as it was
recorded at the remote site. Choose Convert time to local time zone to report all times in the time zone local to
the computer you are currently using.
CUSTOMER SUPPORT: 978-486-3711 • [email protected] • www.burk.com
63
CHAPTER 7: SITE DATA & REPORTS
Date
Date Range. Use the check boxes and drop down menus to specify the dates you would like included in the
report. The Include Most Recent Data option is useful for automatic report printing (see page 67).
After you choose the data range, specify whether the report should sort the data in ascending or descending
order, and whether you want a page break after each day.
Columns
In the columns field, first choose the Number of columns to use in your report. For each column in your report,
click each field and use the drop-down menus to specify the Unit number, Type of input channel and Channel
number to display in each column. Then indicate the desired column width (in inches) or leave blank for the
default. If some of your channel labels are much larger or shorter than others, adjusting the column widths can
avoid truncating the channel labels on the printed report. Note that the number of columns impacts the number
of channel labels that will fit on your report. You can always create separate reports with fewer columns in order
to fit longer channel labels on the page without truncating.
64
GSC3000 & VRC2500 INSTALLATION & OPERATION MANUAL
CHAPTER 7: SITE DATA & REPORTS
Other Fields
In addition to displaying data from status and metering channels, you can choose to include any of the following
in your report: Application Events, Site Events, Commands Issued, User Messages, and Alarms.
Header
The Report Header appears at the top of the first page in your report. You can include the Report Title, as well
as the date range, time zone information, and/or additional text specified by you.
The Page Header appears at the top of every page in your report. You can include the Site Name, the Channel
Name of the first channel appearing on that page, and/or additional text specified by you.
CUSTOMER SUPPORT: 978-486-3711 • [email protected] • www.burk.com
65
CHAPTER 7: SITE DATA & REPORTS
Footer
The Report Footer appears at the bottom of the last page in your report. You can include user-defined
Additional text in the Report Footer.
The Page Footer appears at the bottom of each page. You can print the date of the report and/or the page
number in the page footer.
Saving Report Settings
The Report Writer opens with the last settings used. However, it is a good idea to save your report settings so
that you or another user can modify the settings and easily restore them.
When you are done setting up the report, click the
icon in the Report Writer toolbar. Choose a name for the
report, and click OK. When you open the report settings for a future report, you may have to modify the date
range.
Note: Saving the report settings does not affect how long Lynx retains the actual data used in the report. Data is
removed from the database at the interval specified in the Data tab of the Options window (see page 88).
Opening a Saved Report
You can access a saved report by clicking the Open
icon in the Report Writer toolbar. Choose the file name
of the report you want to use and click Open. The Report Writer will display the saved report settings. If
necessary, you can modify these settings (such as the date range) before printing the report (see below).
Printing Reports
To print your report, select Print from the File menu (or click the
toolbar icon). The Report Writer will
assemble the specified data, and the Print dialog will appear, where you can specify printing preferences. Be sure
the printer settings match the Paper Orientation you specified when you set up your report. After selecting your
printing preferences, click Print.
To see what your report will look like when printed, click the Print Preview
icon in the Report Writer toolbar.
You can print your report from the preview window by clicking the Print
icon, and you can export the report
data to an html or text file by clicking the Export
icon.
66
GSC3000 & VRC2500 INSTALLATION & OPERATION MANUAL
CHAPTER 7: SITE DATA & REPORTS
SCHEDULING PRINT JOBS
In addition to manually printing reports from the Report Writer, you can
schedule automatic print jobs. After you save your report, select Print
Jobs from the Tools menu. Click New Print Job to create a new entry.
Select the file name of the report, and click in the Schedule field to
specify how frequently this report should be printed. When you are
done, click Save. The report will be sent to the computer’s default
printer on the schedule you specified.
Note: Print jobs are executed from the Lynx Logger, so logging must be
enabled for reports to print automatically. Placing Lynx or the Lynx Logger
utility in the Windows Startup folder will ensure print jobs continue if the
computer is rebooted by another user or a power failure.
USING THE DATA BROWSER
When you need to view specific log data but
do not want to create a customized report,
you can use the Data Browser to view all
logged data sorted by date and unit. Select
Data Browser
from the View menu, and a
window appears with a menu tree showing all
of your sites. You can expand each site to
see every unit at that site. Click on the unit
where the logged data originated to see a
list of all the times data was logged from
that unit. Click on the desired log time, and
a digest of all logged data appears in the
Data Browser. You can print this data using
the Print... icon in the Data Browser toolbar.
IMPORT/EXPORT WIZARD
The Import/Export Wizard allows you to save your Lynx
configuration data to a file that can later be imported to the
same or a different installation of Lynx. In a multi-computer
environment, this allows you to easily duplicate settings so
you can avoid manually reentering them and so that you are
assured that operation at one computer will be the same as
operation at another. You can also export your Lynx history –
the data used for logs – so that you can view it in another
analysis program, like Excel or Access.
Launch the Import/Export wizard from the File Menu. When
the wizard starts, you can choose to either Export History or
Export Configuration, or you can import a previously saved
configuration.
CUSTOMER SUPPORT: 978-486-3711 • [email protected] • www.burk.com
67
CHAPTER 7: SITE DATA & REPORTS
Export History
While the Report Writer allows you to save report data in text
or HTML files, the Import/Export Wizard gives you the option
to save it in Comma Separated Value (.csv) format for analysis
in other applications.
To Export Data in .csv format:
1. Launch the Import/Export Wizard and select Export
History. Click Next.
2. Choose the type of data to export: Alarms, Telemetry
or Events.
3. Assign a date range, or leave the date box unchecked if
you want data from all dates.
4. To limit the data to just one site, check the Select a Site box and use the drop-down menu to specify the
site.
5. Click Next. You will be asked to select a file name. Select the file name, and then press Next.
Note: Exporting data will not delete it from the Lynx database. To remove data from Lynx, set up data purge settings
in the Data tab of the Options window (see page 88).
Your data is now saved in the file you specified. You can now open it in any application that reads .csv files.
Export Configuration
When you export Lynx configuration, you are saving Lynx
setup parameters in a file so that they can be loaded on
another computer, or saved as backup so you will not have to
reenter them. This allows you to duplicate users, custom
views, templates, site setup, etc, making operation in a multiuser, multi-computer environment more manageable.
To export Lynx configuration:
1. Launch the Import/Export Wizard from the File Menu.
2. Select Export Configuration and click Next.
3. Choose which setup parameters you want to save. Click
Next.
4. Choose a file name for your configuration backup. Click Next.
5. Click next to save your selected Lynx configuration parameters.
Note: The export configuration utility saves only those setup parameters that are stored on the local PC. Unit
configuration is saved on the I/O and Voice Interface units directly. In order to export unit configurations, you will
need to save them as archives (see page 41) and then export your Lynx configuration.
68
GSC3000 & VRC2500 INSTALLATION & OPERATION MANUAL
CHAPTER 7: SITE DATA & REPORTS
Import Configuration
Once you have exported (saved) a Lynx configuration, you
can load it on another computer, or reload it on this
computer if you ever make changes and want to restore the
original. Note that the importing a configuration will overwrite
the current configuration.
To import Lynx configuration:
1. Launch the Import/Export Wizard from the File Menu.
2. Select Import Configuration and click Next.
3. Choose the file name of the configuration you would like
to load. Click Next.
4. Select which setup parameters from the configuration file you will use. Click Next.
5. Click Next to load the new configuration parameters. They will overwrite your existing Lynx configuration.
USING THE CHARTING FUNCTION
The charting function in Lynx gives you the ability to display history for up to ten different metering channels,
from any site or unit number. This is useful for comparing channel history over time, and for monitoring
relationships between multiple parameters at the remote site.
Creating a New Chart
To set up a new chart, open the View List and click on the Charts separator. right click a blank area in the list of
charts, and select New Chart. A blank chart will appear. Click on the Chart Properties icon in the chart toolbar,
and enter the chart properties that define the data you would like to appear in your chart and how you wold like
it displayed.
CUSTOMER SUPPORT: 978-486-3711 • [email protected] • www.burk.com
69
CHAPTER 7: SITE DATA & REPORTS
General
Title. Enter a name for your chart. The name will appear in the View List
so you can easily identify it. When you save the chart, you can give it
the same name, or select a different file name if preferred.
Title color. This selects the text color of the title, as it will appear on
the chart.
Background color. This is the background color of the chart window the color displayed behind the chart. You will be able to select a
background color for the chart itself (that is, the color on which the
values or displayed) later on.
Grid
Show Grid. Click the Show Grid checkbox if you want the chart grid to
appear behind the graph. The chart grid extends lines from the X-axis
and Y-axis and can make it easier to read the chart values.
Grid Style/Grid Color. Choose your preferred line style and color for
the grid lines. Choose a grid color that will not interfere with the colors
you choose for the channel values later on.
Grid Background. This is the background color of the grid itself, which
will appear on top the background color you chose in the General tab.
Legend
Show Legend. Check the Show Legend checkbox if you want a legend
on your chart, indicating which line colors represent which channels.
Legend Color. Select a color for the legend text.
Legend Width. This determines how much horizontal space is allotted
for the legend. Long channel labels will require more space. After setting
up all the channels that will appear in your chart, you can always come
back here later to adjust the legend width.
70
GSC3000 & VRC2500 INSTALLATION & OPERATION MANUAL
CHAPTER 7: SITE DATA & REPORTS
X-Axis
Title. Choose a title for the X-axis (the horizontal row of values), or
leave it blank. The X-axis always represents time.
Label Color. Choose a color for the X-axis title and value labels.
Large Ticks. Indicate how many large ticks you want dividing the
horizontal axis. Each large tick will generate a time readout on the
horizontal axis. The more ticks you have, the more time labels will be
displayed on your chart.
Small Ticks. Choose the number of small ticks you want to divide each
large tick. Small ticks divide the large ticks into sections, but no times
are displayed under the small ticks.
Tick Length. Determine the length (in pixels) of the large ticks. Small ticks will appear in proportion to the large
ticks.
Time Range. Choose a time range for the chart. You can view data history over a span as short as a few seconds,
or up to 999 hours. In firmware version 5 and later, data is updated in real time, allowing highly responsive charts
with short time ranges (below thirty seconds). In firmware version 4, the frequency of data updates is
determined by the number of I/O units in the system. Time ranges below thirty seconds may not appear as
responsive.
Note: It is normal for the X-axis grid lines to become temporarily offset from the large ticks and time values at the
bottom of the chart. This is due to the rounding that occurs when the time interval is divided by the number of large
ticks.
Y-Axis
Title. Enter a title for your Y-axis (the vertical axis). This title will usually
indicate what type of value is being charted (i.e. output power,
temperature, line voltage, etc.).
Label Color. Enter a color for the text of your Y-axis title and the Y-axis
value labels.
Large Ticks. Indicate how many large ticks you would like to divide the
Y-axis. Each large tick will generate a value readout on the Y-axis.
Small Ticks. Indicate the number of small ticks you want between each
large tick. Small ticks divide the large ticks into sections, but no value
label is shown for the small tick.
Tick Length. Determine the length (in pixels) of the large ticks. Small ticks will appear in proportion to the large
ticks.
Min Value/Max Value. The min and max values of the Y-axis determine the value range of the chart. Enter the
lowest and the highest values you want shown by the chart.
CUSTOMER SUPPORT: 978-486-3711 • [email protected] • www.burk.com
71
CHAPTER 7: SITE DATA & REPORTS
Channels
Up to ten channels may be included in any graph. The more channels
you use, the “busier” the chart will be. Keep in mind that the channels
will share the same Y-axis.
Configure each channel separately by clicking on a channel tab on the
left side of the Channels page. Start with the tab marked 1 and
continue in order until you have entered all the channels you want to
appear on this chart.
Automatically Set the Label. Check the Automatically Set Label box to
use the channel label set up during unit configuration.
Label. If you want the channel label to be different from the label set up
during unit configuration, enter that label here.
Site/Unit. Choose the site and unit where the desired channel is located.
Channel. Select the desired channel.
Line Color. Using automatic line color selection will assign unique colors to each channel you insert into the
graph. You can also set your own by choosing from the drop-down list.
Line Style. Select the desired line style from the drop-down list. This is the chart line representing the actual
channel reading.
Line Width. This sets the line width (in pixels) for this channel’s line.
Editing Chart Settings
Editing your chart settings is very similar to setting them up for the first time. From the View List, click the Charts
separator, and right-click the chart you want to edit. Click Edit Chart, and then change the desired chart settings
using the Chart Properties window.
Saving Your Chart
When you are done creating or editing your chart, click OK in th e Chart Properties window. The chart will
update to reflect your new settings. Click the Save icon in the Lynx Chart toolbar to save your chart.
72
GSC3000 & VRC2500 INSTALLATION & OPERATION MANUAL
8
Custom View Editor
With custom views, you can tailor the appearance of your site and channel data in the Lynx interface. The
Custom View Editor lets you place metering and status indicators and command controls exactly where you want
them, and you can insert additional text and graphics anywhere on the screen. For quick assessment of multiple
locations, one custom view can contain channel indicators for more than one site and unit. You can also create
multiple tiers of custom views for a detailed drill-down approach to site management (see page 84). A complete
package of U.S. maps is included to make this easier.
In addition, a chart utility gives you the ability to view readings from one more more channels on a historical
graph, with a user-defined time interval (see page 69).
OPENING A CUSTOM VIEW
The View List contains a list of your custom views, sorted by category. When you create a new
view, you will be able to create new category names. To open the View List, select View List from
the View menu.
Click on the name of the view to see it displayed in the Lynx main window. If your custom views
are arranged in more than one category, click the category name in the View List to display all
the custom views for that category.
CREATING & EDITING CUSTOM VIEWS
The Custom View Editor is where you create and edit all of your custom views. To create a new custom view, click
New Custom View in the File menu. To edit an existing view, right-click the name of the view you want to edit and
select Edit View. This will open the Custom View Editor.
Customizing the Standard View
You do not have to start from scratch to customize the display of your site information. It is possible to open the
default view template in the Custom View Editor, and then use the tools in the Custom View Editor to change the
standard view. To do this, click New Standard View in the main application File Menu.
CUSTOMER SUPPORT: 978-486-3711 • [email protected] • www.burk.com
73
CHAPTER 8: CUSTOM VIEW EDITOR
Tools in the Custom View Editor
With the Custom View Editor open, you will find the tools for creating your custom views in the menus at the top
of the screen, the row of toolbar icons below the menus, and the toolbox and properties windows.
Toolbar Icons
Icon
Menu Function
New
Open
Save
Description
Opens a blank Custom View Editor window so you can create a new custom view.
Loads an existing custom view for editing.
Saves the Custom View. Once saved, the Custom View will appear in the View List.
Cut
Removes the selected Custom View component and places it on the "clipboard" so
you may paste it somewhere else.
Copy
Puts a copy of the selected Custom View component on the clipboard so you may
duplicate it somewhere else.
Paste
Delete
Group/Ungroup
Inserts the Custom View component that you have cut or copied to the clipboard.
Deletes the selected Custom View component.
Allows you to combine multiple Custom View Components so that you can move
them or delete them together, instead of individually.
Bring to Front,
Send to Back
When you overlap Custom View components, you can adjust their order. Bring to
front places the component on top of others, and Send to back places the
component behind others.
Shows or hides the Toolbox window.
Shows or hides the Properties window.
Shows or hides the gridlines (used for aligning objects).
Opens the Help File.
View Toolbox
View Properties
View Grid
Help
The Format window provides three alignment functions not available in the toolbar. Align to grid moves the
selected component to line up with the nearest grid lines. Size to grid adjusts the size of the component so the
top-left corner of the component fits evenly within the surrounding grid lines. Snap to grid, when turned on,
moves components as they are placed so that they line up with the nearest grid lines.
In the Tools window, select Customize to edit the menu bar and toolbar functions. Selecting Options allows you
to adjust the size of each grid square. Smaller grid squares allow more precise component placement using the
Align, Size and Snap to grid functions.
Custom View Settings
Each custom view has general settings that you define in the Properties window (click the View Properties icon to
show or hide the Properties window). The Custom View Settings tab is available when no custom view
components are selected. Click a blank area in the Custom View Editor to deselect a component and see the
Custom View Settings tab.
In the View Name and Category fields, specify a name for the custom view and assign it a category. The name
and category will appear in the View List, and are unrelated to the file name you choose when you save the
custom view.
74
GSC3000 & VRC2500 INSTALLATION & OPERATION MANUAL
CHAPTER 8: CUSTOM VIEW EDITOR
You can customize the background color of the custom view screen by unchecking the Use Default box and
clicking the browse button. You can select different background colors to display depending on a certain
condition at the remote site. Select a color for when the condition is true (or the status channel is in the HIGH
state) and a color for when the condition is false (or the status channel is in the LOW state). If you want the
same background color displayed at all times, choose the same color for both. Then decide if you want a
background image displayed and enter your preference in the Background Image box.
Next, click on the Status Data tab and define the site or unit condition you want associated with the background
color.
Adding, Moving & Deleting Custom View Components
Custom view Components are the meters, status indicators, images, labels, etc. that you will see in Lynx when
your custom view is complete. Add a component by clicking the component in the toolbox window and dragging
it into the editing area. To resize a component, click on the component and use the resizing handles, or specify
the desired size in the General tab of the Properties window.
You can move the component by clicking and dragging, or by going to the General tab of the Properties window
and specifying X and Y coordinates for the top-left corner of the component. To delete the selected component,
click the Delete
icon in the toolbar, or press the delete key.
Grouping Components
When you use multiple components in a single display area (i.e. a status indicator with a label next to it), it is
helpful to group those components so that you can later move them around together instead of individually. To
group components, click on one of them, then press and hold the Control key while you click the remaining
components. Then click the Group icon in the toolbar. Now when you click on one of the components to move it
or delete it, then entire group will be selected. Once selected, you can ungroup a cluster of components by
simply clicking the Ungroup toolbar icon.
COMPONENT PROPERTIES
When you add a custom view
component, you will need to define
properties for that object in the
Properties window. If the Properties
window has been closed, you can
display it by clicking the View Tool
Properties icon in the toolbar. The
Properties window shows properties for
the component you have selected in
the Editor. To select a component, click
on it. To deselect a component, click a
blank area in the designer. The
properties for the selected component
are sorted into different category tabs.
Click the tab to display the properties.
CUSTOMER SUPPORT: 978-486-3711 • [email protected] • www.burk.com
75
CHAPTER 8: CUSTOM VIEW EDITOR
General Properties & Click Actions
Every component you add to the custom view has General properties and Click Actions that need to be defined.
In the General tab, define the sizing and placement parameters – this affects where on the screen you will see
this component, and how large an area the component will occupy. Enter the desired height and width of the
component (in pixels), and define the horizontal (X) and vertical (Y) distance between the top left corner of the
screen and the top left corner of the object.
You can also click and drag to move the object, and use the sizing handles to resize. To align multiple objects
precisely, use the Snap to Grid and Align to Grid functions from the Format menu (described on page 70).
The Action you set up for the component determines what happens when an operator clicks on the object. You
can set up a Click Action for any object in your custom view, and the available actions are the same for each: No
Action, Issue Command, Run Macro, Stop Macro, Clear Alarms, and Open Custom View. The last option is useful
if you are using multiple custom views and wish to provide a means to navigate from one view to the next without
using the View List.
When you check the Require Ctrl-Click option, operators have to press and hold the Control key while clicking
the component. This prevents critical actions from being executed inadvertently.
METER COMPONENTS
Three types of custom view components provide metering channel data: text, angular and linear meters. Text
meters display a readout of the meter value, angular meters provide a gauge-style appearance, and linear meters
show the value on a straight-line scale. Every meter has a Meter Data properties tab, where you specify the site
name and unit number containing the metering channel, along with the channel number and the number of
decimal places to show. The other properties you define depend on the type of meter you use.
Meter (Text)
In the Meter (Text) properties tab, you can assign a background color to the meter display, change the font and
font size, adjust the text alignment, and choose the type of border for the meter.
Meter (Angular)
The Meter (Angular) tab lets you customize the appearance of the meter:
Range. Determines how far the gauge “wraps” around, allowing a short arc or a circular meter.
Start. Determines where the low-end of the scale begins (in degrees measured from the center point of the
meter).
Radius. Determines the size of the meter.
Offset X and Y. Moves the meter within the allotted component space.
Transparent. Removes the meter background so that background images will show through.
76
GSC3000 & VRC2500 INSTALLATION & OPERATION MANUAL
CHAPTER 8: CUSTOM VIEW EDITOR
Use Default Colors. Check the box if you would like to use default colors for the meter background. Otherwise,
leave it unchecked and choose your own background colors. Choose two different colors if you would like the
background of this meter to respond to a certain condition at the site or unit (i.e. command state, status
condition, alarm, etc). Be sure to complete the Status Data tab for this component if you want the meter to
respond to a status condition.
Border style. You can change the type of border around the meter.
Reverse Scale. By default, meters start in the low end of the scale and run to the high end. Reverse scale results
in the opposite order.
Show inside/outside radius. Hides or shows the line that highlights the inside or outside edge of the meter.
Band Width. Adjusts the thickness of the meter.
Show Values. Hides or shows the meter values.
Large Ticks/Small Ticks. Determines the number of divisions that appear on the meter.
Font, Color and Spacing. You can change the color used to display meter values, as well as the font and font
size. Font spacing determines how far from the meter the value is displayed.
Pointer
Show hub. Hides or shows the circular pivoting point for the gauge’s pointer.
Hub size. Adjusts the size of the hub.
Hub color. Changes the color of the hub.
Pointer style. Changes the way the pointer appears.
Pointer size. Determines the thickness of the pointer.
Pointer length. Adjusts the length of the pointer.
Pointer color. Changes the color of the pointer.
The Positions and Colors tab is where you determine what colors separate the meter value ranges, and where
the separations occur. The Set Positions Automatically feature sets the meter separations to correspond to the
channel’s limits. Uncheck the box to change this setting. To define new colors for the value ranges, click the
button for the appropriate range and choose a color.
Meter (linear)
The Meter (Linear) tab is where you customize the appearance of the meter.
Orientation. Choose whether the meter will be displayed horizontally or vertically.
Transparent. Removes the meter background so that background images will show through.
Background color. Click the browse button to change the background color of the meter. To restore the default
background, click Use Default.
Border style. You can change the type of border around the meter.
CUSTOMER SUPPORT: 978-486-3711 • [email protected] • www.burk.com
77
CHAPTER 8: CUSTOM VIEW EDITOR
Meter Display
Reverse Scale. By default, meters start in the low end of the scale and run to the high end. Reverse scale results
in the opposite order.
Band Width. Adjusts the thickness of the meter.
Show Values. Hides or shows the meter values.
Font, Color and Spacing. You can change the color used to display meter values, as well as the font and font
size. Font spacing determines how far from the meter the value is displayed.
Pointer
Size. Determines how large or small the pointer appears.
Offset. Adjusts the distance between the scale and the pointer.
Color. Selects the color of the pointer.
Thermometer
The thermometer component provides another method of showing analog data. Obviously well-suited to
showing temperature readings, you may find the thermometer component useful for other types of data, as well.
The Thermometer tab in the properties window is where you define the appearance of the thermometer.
Vertical/Horizontal. Determines the orientation of the thermometer on the screen.
Transparent. Removes the meter background so that background images will show through.
Background color. You can use the default background color, or choose your own.
Border style. You can choose no border, or for the thermometer to have a ‘raised’ or ‘lowered’ look.
Offset X and Y. Moves the meter within the allotted component space.
Padding. Defines the number of pixels from the edge of the component space to the actual thermometer.
Style. Choose from several styles of thermometer.
Min/Max. Defines the highest and lowest values shown on the thermometer.
Reverse scale. By default, meters run from low to high. To change to a descending value display, check this box.
Width. Determines the width of the thermometer (as opposed to the width of the entire space allotted to the
thermometer component).
Bulb size. If using a bulb-style thermometer, this determines the diameter of the bulb that appears at the bottom.
Background color/Fill color. The background color is for the portions of the meter beyond the current value
reading. The fill color is for the portion of the thermometer that represents the reading.
Show values. Determines whether intermediate values are shown on the meter.
78
GSC3000 & VRC2500 INSTALLATION & OPERATION MANUAL
CHAPTER 8: CUSTOM VIEW EDITOR
Font/Font Color. Determines the font and font color used to show the meter values.
Spacing. This sets how far from the meter the intermediate values will be shown.
Show large/small ticks. If you want tick marks along the side of the thermometer, check the box.
Large ticks. Enter how many large and how many small ticks you want to divide the meter.
Length. This sets the size (in pixels) of the large ticks.
Tick color. Pick a color for the ticks.
Charts
To integrate a chart in your custom views, all you need to do is click and drag the chart component into the
Custom View Editor, click on the Chart tab in the properties window, and specify the file name of the chart you
will use. If the chart is not already set up, you will need to create the chart (see page 69) before you can use it
in the Custom View.
STATUS COMPONENTS
There are four ways to show status data: LED (round or rectangular); Status Label; Status Picture; and Command
and LED. Every status component has a Status Data tab, where you specify what information is conveyed by the
component. You can use status components to show:
•
•
•
•
•
•
•
•
The condition of a status channel or command state
Whether a macro is running
If a meter limit has been exceeded
If an alarm is active
If a status or metering channel is currently muted
If the site is currently connected using the primary or backup method
If the unit has been placed in local mode
If there are captures stored on the unit that have not been downloaded to a computer
Other properties tabs depend on the type of status component you are using.
LED (Round, Rectangular, Diamond, Arrow)
The LED status components show a simple on/off indication of the condition you specify. Click on the LED
(Round), LED (Rectangular), LED (Diamond) or LED (Arrow) tab to adjust the appearance of the LED.
Bevel style. Adds dimension to the LED by giving it a raised or lowered appearance.
Show reflection. Hides or shows the “reflection” on the LED.
On color. Specifies the color of the LED when the condition you specify is true (i.e. the status channel is in the
HIGH state, the command channel is active, the alarm condition is present, etc.).
Automatically determine off color. The LED will appear dark without separately defining an off color.
Off color. Specifies the color of the LED when the condition you specify is false.
CUSTOMER SUPPORT: 978-486-3711 • [email protected] • www.burk.com
79
CHAPTER 8: CUSTOM VIEW EDITOR
Arrow Style, Length and Head Size. When configuring an arrow LED, you will also need to indicate the arrow style
(orientation) and length, along with the size of the arrow head.
Status Label
A status label provides a textual representation of the condition it monitors. When the status condition is true
(or the channel is in the HIGH state), the ON label appears. When the condition is false (or the channel is in the
LOW state), the OFF label appears.
The Status Label tab is where you specify the appearance of the label and what text is printed for the on and off
conditions.
Transparent. Removes the meter background so that background images will show through.
Background color. Click the browse button to change the background color of the meter. To restore the default
background, click Use Default.
Border style. You can change the type of border around the meter.
Automatically set On/Off captions. Displays On/Off captions according to monitored condition. In the case of a
status channel, the label would use the channel labels for the HIGH and LOW channel conditions.
On/Off labels. Determines the text displayed when the condition is true. or false, or the status input is HIGH or
LOW.
Color. Allows you to change the font color.
Font. Allows you to specify a different font or font size for the label.
Alignment. Determines how the label is aligned within the space allotted to the component.
Status Picture
The status picture component displays an image based on the monitored condition. When the condition
changes from ON to OFF (or HIGH to LOW), the image changes to indicate the switch.
The Status Picture tab is where you assign pictures to the ON and OFF states and adjust other appearance
properties.
Bevel style. Adds dimension to the image by giving it a raised or lowered appearance.
Background color. Click the browse button to change the background color of the picture. To restore the default
background, click Use Default.
On Image File. Sets the image displayed for the ON condition.
Off Image File. Sets the image displayed for the OFF position.
Alignment. Determines how the image is aligned within the space allotted for the component.
Use Transparency Mask. Check the box if you want to select a color to show as transparent (the status picture
component’s background color will show through instead).
Mask Color. Select the transparent color.
80
GSC3000 & VRC2500 INSTALLATION & OPERATION MANUAL
CHAPTER 8: CUSTOM VIEW EDITOR
Caption
Automatically set On/Off captions. Displays On/Off captions according to monitored condition. In the case of a
status channel, the label would use the channel labels for the HIGH and LOW channel conditions.
On/Off captions. In addition to displaying the status image, you can assign a caption to label the status
conditions. Enter the text to display when the condition is true (ON) or false (OFF), or the status input is HIGH
or LOW.
Color. Allows you to change the font color.
Font. Allows you to specify a different font or font size for the label.
Alignment. Determines how the label is aligned within the space allotted to the component.
Status Sound
The Status Sound component does not appear visually in the Custom View - only in the designer so that you
can click on it to change its properties. Accordingly, the setting under the General tab are not important. Once
the Custom View is saved and loaded, the Status Sound indicator will play to alert operators to the specified
condition.
Sound
Sound file. This determines the sound file that will play upon the condition you specify below.
Play mode. You can have the sound file plan whenever the status changes in any direction (i.e. high to low and
low to high) or whenever the status changes in one direction (i.e. on to off or off to on). The sound can also
loop while the status is in one condition. When you choose to loop the sound, the sound will stop playing only
when the status condition reverts to the opposite state.
Status Data
Fill in the status data settings as you would any other status component.
COMMAND COMPONENTS
Command & LED
The Command and LED component provides an LED to show a status condition, along with a command button.
This lets you verify a status condition and act on that status condition using the same custom view component.
The Command and LED tab is where you set the caption for the command button, as well as the color of the
LED.
Automatically set caption. Assigns the caption based on the Click Action you specify in the Action tab.
Caption. Allows you to assign your own label to the button.
Font. Lets you change the font and font size.
Font color. Changes the color of the caption font.
LED color. Determines the color of the LED when lit.
CUSTOMER SUPPORT: 978-486-3711 • [email protected] • www.burk.com
81
CHAPTER 8: CUSTOM VIEW EDITOR
LED position. Lets you choose where the LED appears on the command button.
Command
When a click action is defined, any component can be used to issue a command. The Command component
provides a convenient button dedicated to the Click Action you assign to it.
The Command tab is where you specify the caption displayed on the command button, as well as any picture
you want displayed on the button.
Automatically set caption. Assigns the label based on the Click Action you specify in the Action tab.
Caption. Allows you to assign your own label to the button.
Font. Lets you change the font and font size.
Font Color. Changes the color of the caption font.
Image File. If you want an image displayed on the command button, click
to browse for the file name.
Alignment. Determines where the image is placed on the command button.
Use Transparency Mask. Check the Use Transparency Mask box if you want to select a color in the image to
show as transparent (the command button’s background color will show through instead).
Mask Color. Select the transparent color.
Sticky Button
The Sticky Button component is nearly identical to the the standard Command component, with the exception
that the the button will remain “pressed in” as long as the status data you select is true. Configure the sticky
button in the same way as you would a command button. Then fill in the status data that you want to control the
button’s “pressed in” characteristic. A common use for the sticky button is to set the status data to monitor the
same command channel that the button controls. Thus, when the command is active, the button is pressed in.
You can also use the sticky button to indicate which macros are running, so that it is more clear which macros
are not in use (and available to be run) and which macros are in use (and may be manually stopped).
OTHER COMPONENTS
Picture
The Picture Component allows you to place an image anywhere on the screen. You can assign an action to the
image and use the picture as a command button, or you can use the image without any action assigned.
The Picture tab is where you assign the image file name and determine how the picture appears in your custom
view.
Image File. Click browse button to browse for the file name of the image you want to use.
Fill Style. Determines how the picture appears within the space assigned to the picture component: centered,
stretched or tiled.
82
GSC3000 & VRC2500 INSTALLATION & OPERATION MANUAL
CHAPTER 8: CUSTOM VIEW EDITOR
Use Transparency Mask. Check the box if you want to select a color to show as transparent (the picture
component’s background color will show through instead).
Mask Color. Select the transparent color.
Bevel style. Adds dimension to the picture by giving it a raised or lowered appearance.
Background color. Click the browse button to change the background color of the image. To restore the default
background, click Use Default.
Lines
The Lines component is frequently used as a design tool for aesthetic purposes, but the ability to link the line
color to status data provides significant flexibility in how you can make use of the line component. Configure the
line parameters in the Properties window Line tab.
Mode. Determines the angle and orientation of the line. You will be able to resize it by clicking and dragging, but
be sure to set the line mode first.
Style. Several line types are available in addition to the standard solid line.
Width. This determines the width of the line (in pixels).
Color Off/On. When linked to status data, the line color will switch depending on the current status condition.
Choose a color to display when the status condition is Off (or false) or On (true). If you do not link the line to
status data, you can configure both the On and Off colors to be the same.
Shapes
Shapes can be inserted into your Custom View for a number of purposes - for creating borders around a cluster
of command or status components; creating backgrounds for text boxes (labels); or for virtually any other
purposes. Configure the Shape properties in the Shape tab of the Properties window.
Shape. Select the desired shape from the drop down list. You can choose from several types of squares,
rectangles, ovals and circles.
Transparent/Background Color. Choose whether you want the shape to appear transparent (so that objects
behind it can be viewed); otherwise select a background color.
Border Style. Several styles of borders are available. Select your preference from the drop-down list.
Border Width/Color. These settings determine the width of the border (in pixels) and the color of the border.
Fill Style. Your selections for fill are different from your selections from Background in that objects placed on top
of the background will appear, while objects on top of a fill will not. For no fill, select Transparent for your
background style. Otherwise select solid for a uniform, solid fill, or choose any of the other patterns.
Fill Color. Choose the color for you fill selection.
CUSTOMER SUPPORT: 978-486-3711 • [email protected] • www.burk.com
83
CHAPTER 8: CUSTOM VIEW EDITOR
Label
The Label component can be used to insert text anywhere in the custom view. As with all components, you can
assign an action to the label or leave the action unassigned.
The Label tab is where you specify the text that will appear on the label, as well as the label’s appearance
properties.
Caption. Assigns text to the label.
Color. Determines the font color of the label.
Font. Allows you to change the font or font size used for the label.
Alignment. Lets you decide how the text is placed within the label box.
Transparent. Removes the label background so that other components or background images will show through.
Background color. Click the browse button to change the background color of the label. To restore the default
background, click Use Default.
Border style. You can change the type of border around the label.
SAVING CUSTOM VIEWS
When you are done creating a custom view, click the Save icon to save your work. When you close the Custom
View Editor, you will see the custom view in the View List.
Note: If you have been editing the view that is currently displayed in the Lynx main window, click Refresh to see your
changes. If you have added components that depend on channel configurations for their appearance (such as a
command that uses the “automatically set caption” feature), you will have to connect to the site before the label will
appear as intended.
BUILDING A DRILL DOWN APPROACH WITH CUSTOM VIEWS
Whether you monitor just one or two sites or a larger operation, you can use custom views to build a drill-down
approach to zero in on site detail. In a multi-site system, this could involve a map view with status LEDs to show
any sites with alarm conditions. The click action on each LED could open a new custom view dedicated to a
specific site, where the operator would then trace the cause of the alarm. In this setup, custom views are used to
display critical information from multiple sites, with site-specific detail available on demand.
Using Maps
Starting in Lynx 5, a complete package of U.S. maps is included to make it easier to create a geographic view of
your sites. Inserting a map is the same as inserting a picture (see above). When selecting the file name, browse
to the directory containing the Lynx 5 maps, and select which one you want to use. The default location is
C:\Program Files\Burk Technology\Lynx 5\Media\Maps.
Align the image in the center or top-left of the screen (do not use the stretch or tile alignment options). You
can then overlay components on the map. A basic approach is to use LEDs to indicate which sites are online, but
you could add status pictures, Command-and-LED components, or any other object useful to your operation.
When placing components on top of one another, use the transparency options in the Properties window and
the Send to Back and Bring to Front features in the Format window to create the desired appearance.
84
GSC3000 & VRC2500 INSTALLATION & OPERATION MANUAL
9
Sounds, Options
& Passwords
A number of user-definable functions are available to help you customize your operation. Set up Sounds,
Options, and Passwords to keep the application secure and running just the way you want it.
SOUNDS
When an alarm condition occurs or a site connection is lost, Lynx can
play a sound file to notify you. To enable this feature:
1. Select Sounds from the Tools menu. This opens Sounds and
Multimedia Properties from the Windows Control Panel. The title
may vary depending on the Windows version you are running.
2. In the Sounds tab of this window, scroll through the Sound Events
list and find the entries for Lynx. There are two events for which
you can set up sounds: Alarm and Link Loss.
3. To assign a sound to one or both of these events, click the event
in the Program Events list and in the Name field, select the name
of the sound file you would like played, or click Browse… to
select a file not listed).
4. Press OK to close the window when you are finished selecting
sounds.
OPTIONS
Go to the Tools menu and select Options to access application and connectivity preferences. Items configured
here are local to this PC and must be set up separately for additional Lynx installations.
The following section details each tab in the Options menu. Navigate through the tabs and configure your
options as desired, and click OK to activate the new changes.
CUSTOMER SUPPORT: 978-486-3711 • [email protected] • www.burk.com
85
CHAPTER 9: SOUNDS, OPTIONS & PASSWORDS
General
Disable Default Views. If checked, Lynx will not show
the “default view” when a unit is selected in the site
list. This option is intended to facilitate using Custom
Views as the only method of displaying site data.
Show Connected Sites in Bold. Site names shown in
the Site List will appear in bold text when the site is
connected.
Require Ctrl-Click to Issue Command. When selected,
commands can only be issued by holding the Control
key while clicking the command button.
Grid Navigation. In a table, the tab button can function in one of two ways. Tab to next control means the tab
button will move from the grid to the next control object (such as an OK or Cancel button). Tab to next field
means the tab button will move to the next cell within the grid.
Background. The default background for the main view is the Lynx logo wallpaper. In the Image field you can
specify a different background and choose whether Lynx centers the image on the window, stretches it to fit the
window, or displays the image in tiles.
Max rows in Event List. Use the slider to indicate the maximum number of events Lynx will display in the Event
List. Limiting the size of the Event List may improve computer performance.
Startup
Enable Auto Login. When checked, Lynx will
automatically enter the specified User Name and
Password when the application is started. Anyone
using this computer will have access to Lynx when
this option is active, so Auto Login is best used in a
single-user environment or where Lynx runs
unattended.
Show Custom View on Startup. If you want Lynx to
open with a particular Custom View displayed on the
main screen, check the Show Custom View on Startup
box and enter the name of the Custom View.
Connectivity
Max Command Attempts. If a command instruction
fails due to a communications error, Lynx will retry
the command up to the specified maximum number
of attempts.
Command Attempt Delay. The number of seconds
Lynx will wait before retrying a command that did not
execute properly.
86
GSC3000 & VRC2500 INSTALLATION & OPERATION MANUAL
CHAPTER 9: SOUNDS, OPTIONS & PASSWORDS
Max Site Response Time. When Lynx sends commands to a unit, it will allow up to the specified amount of time
for a response from that unit. Slow links may require a longer response time.
Answer incoming calls. When this box is checked, Lynx will answer an incoming data call from a remote site.
Disconnect Timeout. If Lynx stops receiving data from a connected site for more than the specified amount of
time, it will disconnect from the site.
Dial-in Timeout. When a site dials in to Lynx, the application will allow the specified amount of time to negotiate
a connection. If a connection is not established after the timeout period, Lynx will drop the incoming call. This
prevents misdialed voice or fax numbers from tying up your site connection.
Default TCP/IP Port. Lynx adds the numeric value of the site ID to the default TCP/IP port in order to utilize a
unique port for every connected site. Unless you have specific needs, the default setting of 10000 should be
acceptable. To prevent conflicts with other TCP/IP functions, avoid using a default port below 1025.
Note: If Site Sharing is enabled (see page 15), the client PC must specify the same default TCP/IP port as the server
PC.
Note: The connection settings you enter in the Connectivity tab determine global connection settings. When you
create a new site in Lynx, these are the default settings for that site. To specify different connection settings for one
site without altering connection settings for others, use the Connection Settings window (see page 21).
Logging
Logging Timeout. Specifies the amount of time
allowed for each attempt to download site data. Lynx
will abandon the attempt after the specified period
has lapsed.
Min Wait after Timeout. Specifies the amount of time
Lynx will wait before it retries a logging attempt after
a Logging Timeout has occurred.
Stop logging on exit. Lynx will suspend logging when
the application is closed.
Alerts
In the Alerts tab, you can specify how Lynx notifies
you about certain events.
When an alarm occurs, Lynx can:
•
•
•
•
Show the alarm list (if the window is not
already open).
Play the Alarm sound specified in the Sounds
and Multimedia Properties window (see
Sounds earlier in this chapter).
Loop the alarm sound until someone clears the
alarm.
Execute a Windows command automatically
CUSTOMER SUPPORT: 978-486-3711 • [email protected] • www.burk.com
87
CHAPTER 9: SOUNDS, OPTIONS & PASSWORDS
If a connection is lost, Lynx can:
•
•
•
Show the Link Loss Notification Dialog.
Automatically close the dialog after the specified amount time (useful if this computer runs unattended).
Play the Link Loss sound specified in the Sounds and Multimedia Properties window (see Sounds earlier in
this chapter).
Warnings
From the Warnings tab, you can disable two warning
dialog boxes:
Disconnect one site to log another site. If you use
the same modem to log multiple sites, Lynx will no
longer alert you when dropping the connection at
one site to log a different one.
Cannot edit all values for a site while connected. Lynx
will no longer remind you that some fields in the Site
Wizard cannot be modified while there is an active
connection to the site you are editing.
Automatic Disconnect Warning. Check the box if you do not want Lynx to notify you when it is automatically
disconnecting from one site to connect to another (for logging).
Administrator password is blank. It is strongly recommended that you change the default (blank) password on
the Administrator account. If you do not want Lynx to warn you when you log in with a blank administrator
password, check the box.
Data
The settings in the Data tab to tell Lynx when to
erase data from your site logs and how often to
compact the database. These functions save disk
space and may improve performance. Check the box
beside the type of data you would like purged
(Telemetry, Alarms, or Events) and for each box you
check, specify how long the database should save the
data.
Once data is purged, it cannot be restored, and it
cannot be used in reports. If you would like to export
data to a comma separated value (.csv) file before it
is removed, click the Export before purging box. The
default destination of these files is C:\Program
Files\Burk Technology\Lynx 4\Exported Data. If you change the default destination directory when you install
Lynx, the location of the Exported Data subdirectory will be different.
After setting up your purge parameters, choose the interval at which Lynx should compact the database (to save
disk space). Lynx compacts data at the specified interval on startup only, so if you run Lynx continuously, you
may wish to periodically restart the application.
88
GSC3000 & VRC2500 INSTALLATION & OPERATION MANUAL
CHAPTER 9: SOUNDS, OPTIONS & PASSWORDS
SET TIME
There are two options for setting the time at your sites. You can choose to
synchronize the time with your computer or to input the time manually.
To set the time at your site:
1. In the Site List, select the desired site (or click on any unit at that site).
2. From the Site Menu, choose Set Time.
3. Click the Synchronize with the Computer button if you want the site to
update its time to match that of your computer (while still accounting
for the time zone and Daylight Saving Time). Click the Set Manually
button to enter the site time yourself.
4. Click Set Time when you are done. The site will update its time to the
new settings and then resume keeping time independently.
CHANGING THE SITE PASSWORD
Each I/O and Voice Interface unit stores the site password that Lynx uses to
gain access to your site. This is the password entered in the Site Wizard when
you first set up your site (see page 17). Once you have your units networked,
it is strongly recommended that you change the default password (which is
PASSWORD).
Note: The site password is distinct from the login password you use to access Lynx, and it is distinct from Voice
Interface passwords used for telephone dial-in. To change those passwords, see the next section for Lynx users and
passwords, or go to page 47 for Voice Interface users and passwords.
To change the site password:
1. Connect to your site and select that site in the Site List (if it is not already selected).
2. From the Site menu, choose Set Password.
3. When the Change Site Password dialog appears, enter the current password and new password where
prompted, and then confirm the new password.
4. Click OK to change the password. Lynx will then change the password on all connected units.
Note: When Lynx verifies the site password on the initial connection, it is only concerned with the password saved on
the unit with the direct or modem connection. This means you can add or remove units from your site without
separately changing the password for each one. However, when you change the site password, Lynx uploads the new
password to all networked units.
CUSTOMER SUPPORT: 978-486-3711 • [email protected] • www.burk.com
89
CHAPTER 9: SOUNDS, OPTIONS & PASSWORDS
LYNX USERS & PASSWORDS
In addition to password protection for the remote control units, there are user
names and passwords used to access the Lynx application itself. A user with
System privileges may create users and edit passwords and privileges for all
profiles, while Operators and Observers may only update their own passwords.
To create or modify user profiles (available to System users only):
1. From the File menu, select Users. The Users window will appear, showing you a table of all user names and
their corresponding privileges and passwords.
2. To set up a new user, click New User and Lynx will generate a new user profile with a default user name,
Observer privileges and a blank password.
3. To change the user name, privilege level or password for any user, click in the field you would like to
modify and make the desired changes.
Note: System users have full access to all program functions, and Operators may: issue commands, run macros, clear
alarms, take captures, set site time, insert log messages, enable/disable logging, and edit Lynx options. Observer
users may only log in, connect to sites and view metering and status data.
You can create a user with Custom privileges by selecting Custom in the Access Level field and choosing
which functions will be available to this user.
4. Click Save to keep the changes, or Undo Changes to restore original settings. When you are done, click
Close to exit the Users window.
Note: To delete a user, click any field in the user’s profile and select Delete User.
To change your own user password (available to all users):
1. Log in to Lynx and select Change User Login Password from the File menu.
2. Enter your current password, then your new password, and confirm your new password.
3. Click OK.
90
GSC3000 & VRC2500 INSTALLATION & OPERATION MANUAL
10
Macros
Macros allow you to run detailed and complex command routines for a wide variety of tasks. Examples include
procedures for restarting equipment after a power outage, activating a backup transmitter at your site,
controlling heating and cooling equipment, etc. These routines are sets of software instructions that you create
in Lynx and save to your VRC2500 or GSC3000 I/O units. Macros will run when commanded by a timed event
or when the macro is selected as an action for a high limit, low limit, or status change. You can also execute them
manually via voice or computer access.
Since macros are stored on the remote unit and not on your computer, they will run without a dedicated
computer connection. Macros can reference metering, status, and command channels – as well as other macros –
located on any networked unit at the same site. Each I/O unit holds a maximum of 32 macros, and the 10KB
storage capacity is sufficient space for extensive macros. The I/O unit can run up to eight macros simultaneously.
VIEWING MACROS
The quickest way to view a list of the macros currently stored on the selected I/O unit is to click the Macro
Status icon in the standard toolbar. You will see a list of all the macros on that I/O unit and a triangular “play”
icon in the left column indicates that the macro is currently running. To view the source code for any macro, use
the Macro Editor (see next page).
Note: The “play” indicator may not appear for macros that run for only a brief moment.
STARTING & STOPPING MACROS
There are several ways to execute or terminate macros. The manual method is to select the macro in the Macro
Status window (see above) and click the Run, Stop or Stop All buttons. You can also right-click the macro and
select Run or Stop. If you set up the macro to run automatically as a Timed Event or Alarm Action (see next
page), make sure to create the macro in the Macro Editor before selecting it as a Timed Event or Alarm Action.
CUSTOMER SUPPORT: 978-486-3711 • [email protected] • www.burk.com
91
CHAPTER 10: MACROS
Running Macros as Timed Events
You can configure macros to run on specific dates and/or times by setting them up as Timed Events in the Unit
Configuration window (see page 39).
Running Macros as Alarm Actions
You can also instruct the macro to run when a channel reaches an out-of-tolerance condition. To do this,
identify the macro as the Action associated with the meter or status channel limits. These are set up in the Unit
Configuration window (see pages 35 and 38).
Stopping Macros
A macro will cease running when it reaches its own stop instruction, when it is terminated manually from the
Macro Status window, or when it is stopped by another timed event, action, or macro.
Launching Macros with a Voice Interface
If you are using the optional Voice Interface, you can also execute and stop macros via telephone control. See
Chapter 11 for Voice Interface operation and command codes.
THE MACRO EDITOR
Opening the Macro Editor
The Macro Editor allows you to create a new macro or
edit the source code for a macro already saved on the
selected I/O unit. Open the Macro Editor by right-clicking
any macro in the Macro Status window and selecting Edit
Macro.
To open the Macro editor directly, click the Edit Macros
toolbar icon.
When the Macro Editor opens, you will see a drop-down
menu in the toolbar that lists all 32 macro entries for the
unit. The macro name appears next to the entry number if
a macro is saved in that position. When you select a
macro from the drop-down list, the programming window
displays the source code for that macro.
Startup Macro
Notice that macro Number 1 displays (Startup) in the name field. If the I/O unit loses power, it will automatically
run this macro when power is restored. For example, you could program the macro to determine the time of day
and automatically reset the appropriate transmitter power. level.
Note: Be sure that any macro stored in the number one location will have a desired effect when executed on powerup. If you do not want the unit to run a macro on startup, just leave the first position empty.
92
GSC3000 & VRC2500 INSTALLATION & OPERATION MANUAL
CHAPTER 10: MACROS
CREATING & EDITING MACROS
You can make your macros as simple or complex as you want. For a guide to all macro commands, operators and
expressions, see MACRO SOURCE CODE on pages 94-96.
Creating a New Macro
To create a new macro, open the Macro Editor and select an empty macro entry from the drop-down list. The
programming window will be blank, and you can then enter source code from scratch. If all of your macro entries
are in use, you can either program the macro on a different unit with empty macro positions, or select an existing
macro and replace it with new source code.
In order to be properly identified by the I/O unit, the first line of all macros must consist of the word macro
followed by the name of the macro in quotation marks, All macros must conclude with the end statement “mend”
on the last line (for macro end).
Editing an Existing Macro
To edit a macro that is already saved to the I/O unit, select the desired macro from the drop-down list. The
programming window will open, and you can edit the macro’s source code as needed.
Note: Editing macros requires system or operator privileges.
Entering Source Code
Entering text in the macro editor is straightforward. You will find standard text editing functions in the Edit menu,
and there are toolbar shortcuts for cut, paste, copy, indent/outdent and undo. At any time during the editing
process, you can check the macro syntax by clicking the Check Syntax
icon. The macro editor will verify that
the source code has been entered correctly.
Note: The Macro Editor automatically checks syntax before it saves the macro to the I/O unit. The manual Check
Syntax function is useful if you would like to make corrections as you edit, rather than after writing the entire macro.
Within the body of your macro, you can insert remarks within single-quotation marks separated from the macro
syntax by a colon:
If Status(9) = Low Then : ‘IF NO AC POWER’
Command Me, Me, 14A : ‘TURN BREAKER ON’
Command Me, Me, 11A : ‘DIRECT POWER TO AC’
Remarks can be used to clarify each step of the macro, or to explain to other operators how macro works.
Saving Macros to the I/O Unit
When you are finished creating or modifying macros, save them to the I/O unit by clicking the Save to Unit
icon in the Macro Editor toolbar. A pop-up window confirms a successful save.
Note: Any currently running macros will be stopped when you save new macros the I/O unit. To manually restart
them, open the Macro Status window, select the desired macro, and click Run.
If you wish to save a copy of your macro to disk, use the select all function from the Edit menu and copy the
contents of the programming window into a text file (such as a Notepad document). Then save the text file to
your computer or floppy disk. This method allows you to save a work-in-progress macro for future editing. To
continue working on the macro, open the text file and copy the macro back into the Macro Editor.
CUSTOMER SUPPORT: 978-486-3711 • [email protected] • www.burk.com
93
CHAPTER 10: MACROS
Abandoning Changes to a Macro
If you make changes to a macro that you do not wish to keep, click the Revert Macro
icon. The Macro Editor
will restore the current macro to its previously saved state. If you wish to abandon changes for all macros, select
Revert All Macros from the File Menu. You can also abandon changes by closing the Macro Editor and choosing
No when asked if you would like to save macros to the selected I/O unit.
MACRO SOURCE CODE
Syntax
Macros are not case sensitive, but each macro instruction needs to be entered on a new line, or separated from
another instruction on the same line with a colon (:).
Many macros require site and unit numbers to direct the macro instructions to the appropriate channel or unit.
The site ID is always ME because macros must refer to the channel and units located at the same remote site.
The unit ID is the number for the I/O unit referenced in the macro. You can also use ME if the macro refers to
the same I/O unit where the macro is stored. The macro examples in the following section indicate when and
how to use the site and unit numbers.
Macro Expressions
The table on the following pages shows all expressions that may be used in your macros. Detailed explanations
of each expression and several macro examples start on page 97.
Note that when expressions call for a site and unit number, the site will always be ME since the unit is referring to
its own site. For a GSC3000, the unit number may be 0-15, and for a VRC2500 the unit number will be ME.
Note: For a tangent function, use SIN(x)/COS(x).
Source Code Component
Description
A to Z (with the exception of G)
LOCAL VARIABLES – Used internally by a single macro
G(1) to G(8)
GLOBAL VARIABLES – Usable by other macros in I/O. When a
global variable changes in one macro, a change is seen in all
macros using that variable.
HIGH
1 – A constant that cannot have any other value
LOW
0 – A constant that cannot have any other value
ON
1 – A constant that cannot have any other value
OFF
0 – A constant that cannot have any other value
>
GREATER THAN – Comparison
<
LESS THAN – Comparison
<>
NOT EQUAL TO – Comparison
=
EQUAL TO – Comparison
+
–
ADD – Mathematical function
SUBTRACT – Mathematical function
*
MULTIPLY – Mathematical function
/
DIVIDE – Mathematical function
94
GSC3000 & VRC2500 INSTALLATION & OPERATION MANUAL
CHAPTER 10: MACROS
Source Code Component
Description
%
MOD OPERATOR – Returns the integer remainder
()
PARENTHESIS – Used to maintain mathematical hierarchy
:
STATEMENT SEPARATOR
!
BOOLEAN OPERATOR – Reverses value of expression
AND
BOOLEAN OPERATOR – Requires both conditions to be true
COS(x)
COSINE – Expressed in radian values, not degrees
EXP(x)
EXPONENT – Returns the exponential of x
LOGE(x)
NATURAL LOG
OR
BOOLEAN OPERATOR – Requires either condition to be true
POW(x,y)
POWER – x to the power of y
SIN(x)
SINE – expressed in radian values, not degrees
SQR(x)
SQUARE ROOT
YEAR
Returns the current 4-digit year (2002, 2003, etc...)
MONTH
Returns numeric equivalent of the current month (1-12)
DAY
Returns the current day of the month (13, 17, 31, etc...)
DAYOFWEEK
Returns numeric equivalent of the day of the week:
1-7 (Sunday-Saturday)
HOUR
Returns current hour (0-23)
MINUTE
Returns current minute (0-59)
SECOND
Returns current second (0-59)
ALARM “text string”
Alarm text message displayed in Lynx alarm window and
announced by Voice Interface
CAPTURE X, Y
Captures data at site (X), on unit (Y)
COMMAND X, Y, ZA or ZB
Closes A or B contact for particular command channel on site
(X), unit (Y) and channel (Z)
DELAY X
Delays X seconds before processing next line. Adjustable in
tenths of seconds
ELSE [instruction]
Used when IF condition is not met
END
Exits macro prematurely
IF [condition] THEN [instructions]
Used to execute commands IF certain conditions are met
KILL X
Terminates macro #(X) on this I/O unit
L1METER(X)
Returns 1st Lower Limit value for metering channel (X)
L1METER(X)=[NUM]
Assigns new value to 1st Lower Limit of metering channel (X)
L2METER(X)
Returns 2nd Lower Limit value for metering channel (X)
L2METER(X)=[NUM]
Assigns new value to 2nd Lower Limit of metering channel (X)
MACRO X, Y, Z
Executes macro #(Z) located on site (X), unit (Y)
MACRO “text string”
First line in every macro – names that particular macro
CUSTOMER SUPPORT: 978-486-3711 • [email protected] • www.burk.com
95
CHAPTER 10: MACROS
Source Code Component
Description
ME
Can be used to identify both the current site and/or unit
which the macro resides on
MEND
Last line in any macro – ends that particular macro
METER(X)
Returns the calibrated value of metering channel (X)
METERAD(X)=[NUM]
Assigns new A/D value to metering channel (X)
METERCC(X)=[NUM]
Sets calibration constant for metering channel (X)
METERF(N)=[NewValue]
The NewValue is a floating point number and must be within
the calibrated A/D range of the given channel
METEROFF(X)
Turns off the A/D sampling for metering channel (X) on the
current I/O unit
METERON(X)
Turns on the A/D sampling for metering channel (X) on the
current I/O unit
MUTEMETER(X)
Mutes metering channel (X) on current I/O unit
MUTESTATEMETER(X)
Returns True (1) if the metering channel (X) is muted
MUTESTATESTATUS(X)
Returns True (1) if the status channel (X) is muted
MUTESTATUS(X)
Mutes status channel (X) on current I/O unit
REMLOC
Remote/Local state – returns 1 for local mode, 0 for remote
STATUS(X)
Returns HIGH (1) or LOW (0) for status channel (X)
U1METER(X)
Returns 1st Upper Limit value for metering channel (X)
U1METER(X)=[NUM]
Assigns new value to 1st Upper Limit of metering channel (X)
U2METER(X)
Returns 2nd Upper Limit value for metering channel (X)
U2METER(X)=[NUM]
Assigns new value to 2nd Upper Limit of metering channel (X)
UNMUTEMETER(X)
Unmutes metering channel (X) on current I/O unit
UNMUTESTATUS(X)
Unmutes status channel (X) on current I/O unit
WARNING “text string”
Warning text message displayed in Lynx alarm window
WEND
Encloses commands with WHILE statements
WHILE [condition]
Executes commands that follow the while command and will
loop until the WHILE condition is no longer true
96
GSC3000 & VRC2500 INSTALLATION & OPERATION MANUAL
CHAPTER 10: MACROS
TYPES OF MACROS
The macro examples in this manual show line separations by the use of [CR]. When you see [CR] in the
examples, press enter to start a new line for the next instruction.
Commands
To issue a command in a macro, begin a new line with the word COMMAND, followed by the site ID (ME), the
unit number, and the command channel and command state (A or B) to activate:
Example 1
COMMAND ME, ME, 10A [CR]
Command tells the macro it will issue a
command. The first ME refers to the site.
The second ME indicates the channel is
located on this unit. 10A refers to the
command channel and output state to be
activated. [CR] indicates carriage return
(press ENTER or RETURN) to start the
next line.
Example 2
COMMAND ME, 5, 10A [CR]
Same as above, but in this example, the
macro refers to channel 10A on I/O unit
number 5.
Note: If desired, a number based on a variable can be inserted into the command channel location instead of a
channel number and letters A or B. This can be useful in “While Loops” that increment the variable value each pass.
Switch A for channels 1-16 would equal a variable value of 1-16. Switch B would equal 17-32.
Nested Macros
A macro can be used to initiated another macro. Start the line with the word MACRO, followed by the site and
unit numbers, and the macro number to run.
Example 1
MACRO ME, ME, 5 [CR]
Macro indicates that this instruction will
initiate another macro. The first ME refers
to the site. The second ME indicates the
channel is located on this unit. "5" means
that Macro #5 will be run. [CR] indicates
carriage return (press ENTER or RETURN)
to start the next line.
Example 2
MACRO ME, 3, 5 [CR]
Same as above, but in this example, the
macro refers to Macro #5 on I/O unit
number 3.
Note: Nested macros do not act as subroutines – they run concurrently with the originating macro. If you need to
execute a full macro sequence prior to running another macro, see the sub-procedure on page 110.
CUSTOMER SUPPORT: 978-486-3711 • [email protected] • www.burk.com
97
CHAPTER 10: MACROS
Capture
Macros can take a capture to record unit conditions at any time during the macro sequence (see page 52 for
more on captures). This could be useful to record site conditions at the beginning and end of a macro routine
so that you can go back and review the effectiveness of the macro.
To take a capture as part of a macro, begin a new line with the word CAPTURE followed by the site number and
the unit whose settings you want to capture.
Example 1
CAPTURE ME, ME [CR]
The macro will instruct this I/O unit to
take a capture.
Example 2
CAPTURE ME, 11 [CR]
The macro will instruct unit 11 to take a
capture.
Note: When a macro initiates a capture, the data is stored on the unit actually performing the capture, not the unit
containing the macro.
Delay
To insert a time delay into a macro routine, use the DELAY command. You can specify a delay accurate to a
tenth of a second, with a maximum value of 6,553.5 seconds (1 hour, 49 minutes and 13.5 seconds).
Example 1
DELAY 1.5 [CR]
Waits 1.5 seconds before executing the
next line of macro code.
Example 2
DELAY 220 [CR]
Waits two minutes before executing the
next line of macro code.
Alarm
An alarm message can be generated within a macro by using the word “ALARM” followed by the descriptive text
within double quotation marks (“ ”). The alarm messages will show up in the Alarm window whenever the alarm
statement is executed. Macro alarms are treated as critical alarms. All normal alarm notification procedures will
apply including dial-out messaging. Each alarm message can contain up to 32 characters.
Example
ALARM “The building is on fire!” [CR]
98
The statement in quotes will appear
in the alarm window when this line is
executed.
GSC3000 & VRC2500 INSTALLATION & OPERATION MANUAL
CHAPTER 10: MACROS
Warning
A warning message can be generated within a macro by using the word “WARNING” followed by the desired text
within double quote (“ ”) marks (the warning message will show up in the alarm window whenever the next
critical alarm condition occurs). Macro warnings are treated as non-critical alarms. No alarm notification will
occur until a critical alarm occurs. Up to 32 characters may be in each warning message. Multiple warning
statements may be in a single macro if more characters are needed.
Example
WARNING “Power change complete” [CR]
The statement in double-quotes will
appear in the alarm window when the
next critical alarm occurs.
If/Then/Else
This feature allows the macro to perform conditional functions, such as initiating a command output if a
metering or status channel gives a certain reading. IF/THEN/ELSE statements can be placed anywhere within a
macro. The “IF” and the “THEN” must be on the same line in the macro. The “ELSE” statement is on a line by
itself and is not required in order for the IF/THEN condition to be evaluated. The “ENDIF” statement must be
included as the last line for any IF/THEN statement.
Example 1
IF STATUS(3)=LOW THEN [CR]
COMMAND ME, ME, 1A [CR]
DELAY 50 [CR]
COMMAND ME, 2, 16A [CR]
“IF” begins the IF/THEN statement.
These command lines will execute only if status
input is equal to LOW
“ENDIF” ends the IF/THEN statement (more
command statements in a macro can be included
before and/or after this IF/THEN portion).
ENDIF
Example 2
IF MUTESTATESTATUS(5)=1 AND METER(12)>3500 THEN [CR]
MACRO ME, 3, 2 [CR]
ELSE
COMMAND ME, 1, 9B [CR]
ENDIF [CR]
Status channel 5
must be muted AND
metering channel 12
must be more than
3500 before Macro
#2 on Unit 3
executes
If the above is FALSE,
command 9B on
Unit 1 will be issued
CUSTOMER SUPPORT: 978-486-3711 • [email protected] • www.burk.com
99
CHAPTER 10: MACROS
While/Wend
This statement is used to repeat a command or set of commands as long as a specific condition exists. The
statement begins with the word “WHILE” followed by a specific condition. The next few lines are instructions that
are followed while that condition is still valid. The “WEND” instruction is the last line of the WHILE statement
and concludes the set of instructions.
Example 1
WHILE METER(5)<50 [CR]
COMMAND ME, ME, 12A
While metering channel 5’s value is less than 50,
execute command channel 12’s “A” output.
WEND
Ends the WHILE statement – macro may continue
A WHILE statement can also be set up as a variable loop which executes a specific set of commands as long as
the value of the variable is within a specified parameter.
Example 2
X=1
Initializes the variable ‘X’ to a value of 1
WHILE X<10 [CR]
While ‘X’ is less than 10, the next few lines will be
repeated
COMMAND ME, ME, 6B [CR]
Command channel 6 on this unit activates the ‘B’
output
CAPTURE ME, ME [CR]
A snapshot of this unit will occur each pass at
this point
X=X+1
The value of variable ‘X’ is increased by 1
While loop ends here when X=10
WEND
Note: This example will create 10 captures within a few seconds
Mute/Unmute
Any or all metering and status inputs can be muted so that any alarm conditions that may be caused by an outof-tolerance meter reading or by an unwanted status condition will not occur as it normally would. The
“UNMUTE” statement can return any selected muted inputs to their nominal states. This may be useful if site
maintenance work is being done. If a critical alarm is inadvertently triggered, it will take no action.
Monitoring views have a background change on any meter or status input channel that is muted. The view
returns to normal when unmuted.
To mute either a meter or status channel, begin the macro line with the words “MUTEMETER” or “MUTESTATUS”
followed by the channel number in parentheses. To unmute either a meter or status channel, begin the macro line
with the words “UNMUTEMETER” or “UNMUTESTATUS” followed by the channel number in parentheses.
Example
MUTEMETER(5) [CR]
Metering channel 5 on this unit is now muted
MUTESTATUS(12) [CR]
Status channel 12 on this unit is now muted
UNMUTEMETER(5) [CR]
Metering channel 5 on this unit is now unmuted
UNMUTESTATUS(12) [CR]
Status channel 12 on this unit is now unmuted
100
GSC3000 & VRC2500 INSTALLATION & OPERATION MANUAL
CHAPTER 10: MACROS
MUTESTATEMETER/MUTESTATESTATUS
These commands check to see if the input channel selected is in a muted state. They do nothing to modify the
state. When the channel is muted it will return a value of 1. When the channel is un-muted, it will return a value
of 0.
To find out what the state of an input channel is, begin the macro line with the words “MUTESTATEMETER” or
“MUTESTATESTATUS” followed by the channel number in parentheses.
Example
WHILE MUTESTATUSMETER(5)=1
While status channel 5 on this unit is
muted, execute the WHILE statement
Variables
There are two types of variables available for use in a macro. The first type is a LOCAL variable. This type of
variable is usable only in the currently running macro. Any results saved or equated to a variable inside of a
particular macro will be deleted or lost as soon as that macro is finished. There may be up to 32 local variables.
Local variable names may be from 1 up to 64 characters in length and must start with an alphabetic character.
Local variables cannot use reserved names that are on the source code list.
The second type of variable is a GLOBAL variable. This type of variable can be used by multiple macros on the
same I/O unit and is not lost unless power to an I/O unit is lost. Global variables must start with the letter “G”
followed by the variable number in parentheses. There are eight variable names available for global variables
(G(1) to G(8)).
Example 1
POWER=METER(3)/METER(9) [CR]
Sets the variable POWER equal to this
unit’s metering channel 3 divided by the
unit’s metering channel 9
Example 2
G(1)=STATUS(9) [CR]
Sets Global Variable 1 to 0 if status
channel 9 on this unit is LOW, and to 1 if
it is HIGH.
Note: A global variable, changed on one macro, will cause a change to the corresponding global variable in all macros
on that unit. The global variable on one unit will not affect the global variables on other units in the network.
Constants
There are constants that cannot have any other value. These constants may be used in any macro or
combination and may have other variable’s values set to theirs.
HIGH
LOW
ON
OFF
=1
=0
=1
=0
CUSTOMER SUPPORT: 978-486-3711 • [email protected] • www.burk.com
101
CHAPTER 10: MACROS
REMLOC
The REMLOC statement allows the I/O unit to return a value to indicate if it is in a REMOTE or LOCAL state.
This equates to the front panel push button on each I/O unit that causes the REMOTE/LOCAL LED to illuminate
solid or flash RED when pressed. It does not matter which I/O unit caused the change of state as each I/O unit
on the site’s network returns the same value.
Example
IF REMLOC=1 THEN [CR]
END [CR]
ELSE [CR]
MACRO ME, 2, 4
ENDIF
Check REMOTE/LOCAL state. If in local
mode, end macro.
If not in local mode, run Macro #4 on
unit 2.
End Statement.
Status
The status statement returns the high or low state of the desired status channel. Enter the word “STATUS”
followed immediately by the channel number inside of parentheses.
Example
IF STATUS(3)=LOW THEN [CR]
If status channel 3 is low, then the
instruction continues
MATHEMATICAL STATEMENTS
The macro program has a wide range of mathematical statements that may be used to achieve your desired
outcome. Each statement will use standard notation with parentheses being used to define a computational
hierarchy. Some standard trigonometric operators may be used as well.
Numerical results of mathematical computations are not always exact. For example, 4 would not come back as 2.
It would come back as 1.9999 or 2.0001. Take this into consideration when using mathematical statements in
any macro.
A list of supported mathematical statements is available in the macro source code.
> GREATER THAN
IF METER(3)>50 THEN [CR]
END [CR]
ELSE [CR]
COMMAND ME, ME, 1A [CR]
ENDIF [CR]
Compares metering channel 3 of this unit to the
value of 50. If metering channel 3 is GREATER
THAN 50, the macro ends. If metering channel 3
is NOT GREATER THAN 50 then issue command
1A on this unit.
< LESS THAN
IF METER(3)<50 THEN [CR]
END [CR]
ELSE [CR]
COMMAND ME, ME, 1A [CR]
ENDIF [CR]
102
Compares metering channel 3 of this unit to the
value of 50. If metering channel 3 is LESS THAN
50, the macro ends. If metering channel 3 is NOT
LESS THAN 50 then issue command 1A on this
unit.
GSC3000 & VRC2500 INSTALLATION & OPERATION MANUAL
CHAPTER 10: MACROS
< > NOT EQUAL TO
IF METER(3)<>50 THEN [CR]
END [CR]
ELSE [CR]
COMMAND ME, ME, 1A [CR]
ENDIF [CR]
Compares metering channel 3 of this unit to the
value of 50. If metering channel 3 is NOT EQUAL
TO 50, the macro ends. If metering channel 3 is
EQUAL TO 50 then issue command 1A on this
unit.
= EQUAL TO
IF METER(3)=50 THEN [CR]
END [CR]
ELSE [CR]
COMMAND ME, ME, 1A [CR]
ENDIF [CR]
Compares metering channel 3 of this unit to the
value of 50. If metering channel 3 is EQUAL TO
50, the macro ends. If metering channel 3 is NOT
EQUAL TO 50 then issue command 1A on this
unit.
+ ADD
Z=METER(1)+METER(2) [CR]
The variable Z is now equal to the floating point
value of metering channels 1 and 2 ADDED
together.
– SUBTRACT
Z=METER(1)-METER(2) [CR]
The variable Z is now equal to the floating point
value of metering channel 1 MINUS metering
channel 2.
* MULTIPLY
Z=METER(1)*METER(2) [CR]
The variable Z is now equal to the floating point
value of metering channels 1 and 2 MULTIPLIED
together.
/ DIVIDE
Z=METER(1)/METER(2) [CR]
The variable Z is now equal to the floating point
value of metering channel 1 DIVIDED by metering
channel 2.
% – Returns the INTEGER VALUE OF THE REMAINDER of a division problem
X=METER(3)%98 [CR]
The value of X is now equal to the integer
remainder of metering channel 3 divided by 98.
() – PARENTHESES
Parentheses must be in pairs. The computation of the innermost pair is resolved before moving outward to the
next computation.
Z=(METER(1)+METER(2))/35 [CR] The variable Z is now equal to the floating point
value of metering channels 1 and 2 ADDED
together, then divided by 35.
CUSTOMER SUPPORT: 978-486-3711 • [email protected] • www.burk.com
103
CHAPTER 10: MACROS
! – BOOLEAN NOT OPERATOR
The “!” operator makes the statement following it the opposite of what it normally would have been.
IF !(MONTH=12) THEN [CR]
MACRO ME, 3, 18 [CR]
ELSE
MACRO ME, 3, 19 [CR]
ENDIF
If the current month on this unit is NOT 12, run
macro #18 on unit 3. If the current month IS 12,
run macro #19 on unit 3.
AND – BOOLEAN OPERATOR
All conditions joined by the AND operator must be true or the whole statement is considered false.
IF (A=B) AND (B=C) THEN [CR]
Both statements must be TRUE before THEN will
execute.
OR – BOOLEAN OPERATOR
At least one statement, separated by an OR operator, must be true for the whole expression to be considered
true.
IF (A=B) OR (B=C) THEN [CR]
IF either statement is TRUE, THEN execute.
COS – COSINE
Returns the cosine value of variable X in
comparison to .5 (values expressed in radians).
IF COS(x)>.5 THEN [CR]
SIN – SINE
Returns the sine value of variable X in comparison
to .5 (values expressed in radians).
IF SIN(x)<.5 THEN [CR]
SIN(x)/COS(x) – TANGENT
WHILE SIN(x)/COS(x)>1.0 [CR]
EXP – EXPONENTIAL
exp(x + y)=exp(x)exp(y)
Will stay in WHILE loop as long as the tangent
of Y is above 1 (values expressed in radians).
exp(0)=1
Z=EXP(METER(3)) [CR]
exp(-x)=1/exp(x)
Variable Z is now equal to the exponential of
metering channel 3.
LOGE – NATURAL LOGARITHM
Returns the natural logarithm of a number. Natural logarithms are based on the constant e(2.71828182845904).
Values entered must be positive a real number for which you want the logarithm.
Z=LOGE(METER(4)*METER(2)) [CR]
Variable Z is now equal to the natural
logarithm of the product of metering channels
4 and 12 of this unit.
POW – POWER
Raises variable X to the power of Y.
Z=POW(METER(3), METER(2)) [CR]
104
Variable Z is now equal to the floating point
value of metering channel 3 raised to the
power of the floating point value of metering
channel 2.
GSC3000 & VRC2500 INSTALLATION & OPERATION MANUAL
CHAPTER 10: MACROS
SQR – SQUARE ROOT
Returns the square root of X.
METER(10)=SQR(METER(3)) [CR]
Metering channel 10 is now equal to the
SQUARE ROOT of metering channel 3.
YEAR
Returns the four-digit year in the current I/O unit.
IF YEAR<2003 THEN [CR]
Compares the four-digit year of this I/O unit
to 2003.
MONTH
Returns the decimal equivalent of the current month (1-12).
IF MONTH=4 THEN [CR]
Compares the current month of this I/O unit
to 4 (April).
DAY
Returns the decimal equivalent of the Day of the Month (1-31).
IF DAY<16 THEN [CR]
Executes the statement if it is before the 16th
day of the month.
DAYOFWEEK
Returns the decimal equivalent of the Day of the Week starting with Sunday (1-7).
IF DAYOFWEEK=1 THEN [CR]
Executes statement only on Sunday.
HOUR
Returns the current hour of this I/O unit based on a 24-hour clock.
Executes following command statements
WHILE HOUR=0 [CR]
continuously during the first HOUR of each
day.
MINUTE
Returns the current minute (0-59)
WHILE MINUTE=30 [CR]
Executes following command statements
continuously during the 30th MINUTE of an
hour.
SECOND
Returns the current second (0-59).
IF SECOND=45 THEN [CR]
Executes statement if SECOND equals 45
CUSTOMER SUPPORT: 978-486-3711 • [email protected] • www.burk.com
105
CHAPTER 10: MACROS
METERING MACROS
Macros can be used to modify all parameters pertaining to the metering input channels, including the A/D
values, calibration constants, and upper and lower alarm limits. They can enable/disable each channel’s input and
retrieve the current floating point value of any meter channel.
This ability is useful for long-term functions such as when a transmitter changes its power output. A macro can
make the power change and also change the upper and lower limits.
When making these changes, it is suggested that the meter channel being modified use the previously described
MUTEMETER command as one of its first lines of code. Also, remember to use the UNMUTEMETER command
when finishing the macro.
METER
The METER command allows a macro to retrieve the floating point value of a particular meter channel. A
metering channel can be set to the same value as another metering channel or to a set value. For these values
to remain unchanged, the meter channel must stop collecting new data by the use of the METEROFF command
explained later.
The METER statement must be immediately followed by parentheses with the channel number inside.
Example 1
METER(5)=METER(9) [CR]
Metering channel 5 of this unit is now
equal to metering channel 9.
Example 2
WHILE METER(12)<100 [CR]
As long as metering channel 12 is less than
100, the WHILE loop will cycle.
METERAD
After receiving the analog input voltage on a meter input, it is converted to a digital integer value. This value is
called the A/D (A to D) value. A macro can read or modify that value. The A/D hardware has 4096 “bins” (04095) that it fills up in proportion to the maximum input value (typically +10VDC) and the actual input value.
If the input range was set to 0VDC to +10VDC and the actual input value was +5VDC, then the A/D value
would be 2047 ((4096÷2)-1).
The METERAD statement is immediately followed by the channel number inside of parentheses.
Example 1
METERAD(5)=390 [CR]
Sets the A/D value of metering channel 5 to 390.
Example 2
METERAD(3)=METERAD(13) [CR]
106
Sets the A/D value of metering channel 3 on this
unit to the same value as metering channel 13
GSC3000 & VRC2500 INSTALLATION & OPERATION MANUAL
CHAPTER 10: MACROS
METERCC
The calibration constant of each metering channel is unique and may be modified manually or by a macro. The
calibration constant is a multiplier that is applied to the input A/D value before being usable by monitoring
software or mathematical functions in a macro. This way a +3VDC input can be made to equate to 2.1KW
(Kilowatts). The calibration constant in this instance would be approximately 0.00171 (2.1÷(4096*.3)). For a
displayed reading of 50,000 and an input of +8.5VDC, the calibration constant would be approximately
14.3596 (50000÷(4096*.85)). The .3 and .85 in the above equations represent a percentage of a maximum
value: 3 volts of 10 volts possible and 8.5 volts out of 10 volts possible.
The METERCC value is a floating point value and is entered in an equation form with METERCC followed by the
channel number inside of parentheses on one side of the equation and its floating point value on the other.
Example 1
METERCC(14)=2.583 [CR]
Assigns the value of 2.583 to metering
channel 14’s calibration constant.
Example 2
METERCC(12)=METERCC(3)/14 [CR]
Assigns the value of metering channel 13’s
calibration constant divided by 14, to
metering channel 12’s calibration constant.
L1METER, U1METER, L2METER, U2METER
The definition of a meter channel’s lower or upper limit is defined in the configuration section. The use of these
statements allows a macro to receive a limit’s value or change that setting to a predefined value. This is useful
when changing existing limits in a pre-planned manner, without the need to mute one input channel and unmute
another. See the Power Change macro example on the following page.
The statement is followed by the channel number within parentheses and is then set equal to another floating
point value. All values are after the calibration constant is applied.
Example 1
L1METER(1)=65 [CR]
Sets the 1st Lower Limit on metering
channel 1 of this unit to 65.
Example 2
U2METER(1)=115 [CR]
Sets the 2nd Upper Limit on metering
channel 1 of this unit to 115.
METERF(n)
The NewValue is a floating point number and must be within the calibrated A-D range of the given channel.
Example
METERF(16)=8.321 [CR]
Metering channel 16 will now the display
the value of 8.321.
CUSTOMER SUPPORT: 978-486-3711 • [email protected] • www.burk.com
107
CHAPTER 10: MACROS
METEROFF/METERON
The METERON/METEROFF commands allow a macro to start or stop a metering channel from converting the
analog value into a digital value. This is useful when a calculated value needs to be displayed in a monitoring
view. When given the command of Meteroff, the meter channel will not display analog readings taken from the
input. A value can now be entered by using meterAD(x) or meterF(x) statements.
Either statement is followed by the metering channel number to be turned on or off inside of parentheses.
Example 1
METEROFF(14) [CR]
Turns off metering channel 14 from
displaying new values.
Example 2
METERON(15) [CR]
Turns on metering channel 15, allowing
this channel to display new values.
MACRO EXAMPLES
The following pages contain several examples of typical macros. For additional macro examples or further
assistance, visit the support section of the Burk Technology web site at www.burk.com.
Power Change
This example shows a power change and a limit change. First,
the macro mutes Meter Channel 2 to prevent any alarms that
might be triggered before the new limits are established. The
macro issues three commands to initiate the power change.
Then the macro sets new limits for Meter Channel 2. The 2nd
Lower Limit is set to 7 and the 1st Lower Limit is set to 7.4. The
1st Upper Limit is set to 7.6 and the 2nd Upper Limit is set to
8. The macro also sets new upper and lower limits for Meter
Channel 3 but does not mute the channel. After all adjustments
are completed, the macro unmutes Meter Channel 2 and ends.
While Delay
This example shows how a While statement can set up a variable
loop which pauses a macro until a defined set of conditions are
met. First, the macro mutes Status Channel 11, then issues
Command 13a. The While statement checks the reading of
Status Channel 11. As long as Status Channel 11 is “High,” the
macro will continue to loop and check the status. When Status
Channel 11 is no longer High, the While statement ends and
the macro issues Command 13b. Last, the macro unmutes
Status Channel 11 and ends.
108
GSC3000 & VRC2500 INSTALLATION & OPERATION MANUAL
CHAPTER 10: MACROS
OR in an IF/THEN Statement
Example 1 shows how a macro can examine a situation, then
choose the appropriate course of action. The first line sets an
individual variable “X.” This line is important because it enables
the macro to recognize whether or not it has already taken
some kind of action. The first “IF” statement checks Status
Channel 2. If the reading on this channel is “High,” then the
macro issues Commands 16b and 12a, and changes the
individual variable to X = 1. If the reading on Status Channel 2
is not “High,” the “IF” statement ends without issuing the
commands or changing the variable.
The next “IF” statement checks the individual variable. IF X = 1,
then commands have been issued, the “IF” statement is skipped
and the macro ends. If X = 0 still, then the “IF” statement
continues execution. Here another “IF” statement checks Status
Channel 5. If the reading on this channel is “High,” the macro
issues Commands 16b and 12a, then ends the macro.
Example 1
Example 2 shows how the same results can be achieved by the
use of the “OR” statement in an “IF/THEN” command.
Example 2
AND in an IF/THEN Statement
Example 1 shows a macro examining two factors in a situation and then taking action if both factors require it.
First, the macro checks Status Channel 5. If the reading on this channel is not “Low,” the IF statement is skipped
and the macro ends. If the reading on Status Channel 5 is “Low,” then the macro checks Status Channel 6. If the
reading on Status Channel 6 is also “Low,” the macro then issues Commands 10a and 11a. If Status Channel 6 is
not “Low,” then no action is taken and the macro ends.
In order for any commands to be issued, both conditions must be true.
Example 2
shows how the
same results
can be
achieved by
the use of the
“AND”
statement in
the “IF/THEN”
command.
Example 1
Example 2
CUSTOMER SUPPORT: 978-486-3711 • [email protected] • www.burk.com
109
CHAPTER 10: MACROS
Start Transmitter
This is an example of a macro that starts other macros after a
short time delay. The first line starts Macro #2. There is a 10second delay, then Macro #3 is started. After another delay of
ten seconds, Macro #5 begins. Each line of code takes
approximately .2 seconds to run.
Note: This macro shows a time delay only. Each macro will start
immediately after the specified amount of delay time whether or
not the previous macro has finished. This type of macro should be
used with caution because too many macros running simultaneously
(more than eight) will cause an alarm. If a macro needs to be
completed before continuing on to the next part of the macro,
follow the sub-procedure example.
Sub Procedure
These examples show how global variables may be used in nested macros to ensure that each macro is finished
before another one begins. The first line sets the global variable number one to a value of zero. This line sets up
a variable loop that prevents subsequent macros from starting before the current one has finished running. The
second line launches Macro #8 which issues three Commands; 10A, 11A, and 12A, after which the global
variable is made equal to 1.
While Macro #8 is executing, Macro #7 is paused in a variable
loop established by the WHILE statement that lasts as long as
G(1) = 0. When Macro #8 changes the global variable to 1,
Macro #7 ends the WHILE statement and launches Macro 9.
Macro #9 issues three commands and then changes the value
of the global variable to 2 and then ends.
Macro #7 is paused by the second WHILE statement until
Macro #9 changes the global variable to 2. Macro #7 then
ends the WHILE statement and ends the macro.
Macro #8
Macro #7
Macro #9
110
GSC3000 & VRC2500 INSTALLATION & OPERATION MANUAL
CHAPTER 10: MACROS
Self-Directed Startup
This example shows some more of the versatility of the macro
language. Here, a status channel triggered Macro #10 to run.
The macro first tests to find out if the REMOTE/LOCAL button
on the front panel is in LOCAL mode. If it is, the macro ends
immediately.
If the unit is in REMOTE mode, then the macro proceeds. The
unit MUTES the status channel that starts the macro. Meter
Channel 1 is then turned off along with the muting of Meter
Channels 2, 3, and 4. The Calibration Constants of Meter
Channels 2, 3, and 4 are adjusted for the new power output
levels of the backup transmitter. The displayed value viewed by
monitoring software of Meter Channel 1 is equated to the
product of Meter Channels 5 and 6.
Since other macros could have made changes to various meter
or status input channels, Status Channel 4 and Meter Channel
10 are tested to make sure they are active or unmuted. Then
Macro #20 on this unit is started, which is the full power-up
routine. This macro waits 2 minutes for Macro #20 to finish.
Status Channel 3 is unmuted. An alarm is generated, notifying
the dial-out connections and any full-time direct connect
stations that the backup transmitter is now going on-air. A
capture is made to show the current state of all inputs and
outputs for database use as needed. Just in case any other
macros dealing with the backup transmitter are running, they
are terminated to stop any interference. The macro then ends
normally.
CUSTOMER SUPPORT: 978-486-3711 • [email protected] • www.burk.com
111
112
GSC3000 & VRC2500 INSTALLATION & OPERATION MANUAL
11
Voice Interface Operation
When used with a GSC3000, the Voice Interface is an optional unit that provides dial-up telephone access to
your site. In a VRC2500, the Voice Interface unit is integrated with the system, but is still shown as a separate
unit in the Lynx software. The Voice Interface is configured using the Lynx software. For descriptions of each
Voice Interface configuration option, refer to Chapter 4. Hardware connections are detailed below, and the rest
of this chapter is dedicated to Voice Interface operation.
For a condensed list of DTMF (touch-tone) codes used to operate the Voice Interface, refer to the Voice
Interface Code Reference at the end of this chapter.
GSC3000 HARDWARE CONNECTIONS
All that is required to hook up the VRC2500 to a telephone line is connecting a line cord to the LINE
connector on the rear panel of the VRC2500.
The Voice Interface can be used for telephone access only, or you can pair it with a dial-up modem for both
voice and computer access to your site. See Chapter 6 for configuring the recommended dial-up modem.
To connect your Voice Interface to voice and data lines:
1. If it is not already linked, connect the Voice Interface to an I/O unit using the G-Bus ports and the
included G-Bus cable. Because the Voice Interface is always identified as unit 16, you do not need to edit
the Voice Interface unit number before connecting it to I/O units.
2. Plug the RJ-11 line cord from the wall
jack into the LINE jack on the Voice
Interface. If you want to make a data
connection through your Voice
Interface, connect the SET/MODEM
jack on the Voice Interface to the LINE
IN jack on your external modem. Use
the supplied DB9-25 straight-through
serial cable to plug the modem into
COM1 on the Voice Interface.
Connecting a Dial-Up Modem to GSC3000 Voice Interface
CUSTOMER SUPPORT: 978-486-3711 • [email protected] • www.burk.com
113
CHAPTER 11: VOICE INTERFACE OPERATION
3. If you are using a dial-up modem with the Voice Interface, disable auto-answer. With the recommended
U.S. Robotics modem, this is accomplished by setting DIP switch number 5 to the DOWN position. With
auto-answer disabled, the Voice Interface will answer voice calls in Voice Mode and when data calls are
received, the dialing modem sends the code to enter data mode (see page 18).
Note: If you are not using a dial-up modem with the Voice Interface, you can plug a telephone set into the
Set/Modem jack. This allows a single wall jack to accommodate your Voice Interface and a telephone.
DIALING IN & DISCONNECTING
Dialing In
When you dial the telephone number for the Voice Interface, the unit answers with the programmed greeting
message after the number of rings you specified during unit configuration (see page 47). After the greeting,
enter an access code, which is also set up in unit configuration. The default password is the telephone keypad
equivalent of PASSWORD (72779673). Press # after entering the access code.
Note: The Voice Interface allows three attempts to enter the password. If you make a mistake on the third attempt,
the unit will disconnect.
If there are alarms at your site, the Voice Interface will identify the I/O units on which they are located and
immediately connect to the first I/O unit with an alarm. If there are no alarms, the unit will connect to Unit 0
and report, “No alarms pending.”
Disconnecting
You can end your call at any time by entering 999. The Voice Interface will play the goodbye message and
disconnect.
The Voice Interface will also disconnect if it is expecting a response from the user and none is received within an
allotted timeout period. The Inactivity Timeout is set up under the Voice Setup tab in Unit Configuration (see
page 47).
SELECTING AN I/O UNIT
(GSC3000 ONLY)
While in a voice session, you are always connected to a particular I/O unit, and the commands, status reports,
captures, etc. all refer to that I/O unit.
To switch from one I/O unit to the next, enter 9, followed by the two-digit unit number for the I/O you would
like to connect to. Valid entries are 900-915.
Example
Input:
904
Response: Connecting to Unit 4 [BEEP] … [BEEP]
Connection to Unit 4 Complete.
If you enter an I/O unit number that has not been assigned to any unit, or a number higher than 15, the unit will
respond, “I/O unit does not exist.”
114
GSC3000 & VRC2500 INSTALLATION & OPERATION MANUAL
CHAPTER 11: VOICE INTERFACE OPERATION
ALARM REPORTING
Check for Alarms
If alarms are present when you first dial in to your site, the Voice Interface will connect to the first unit with
alarms, and then report those alarms, beginning with the oldest. After the initial connection, check alarms on the
current I/O unit by entering 000. The Voice Interface will look for alarms, and if there are any, the unit will enter
Alarm Reporting and announce the first pending alarm.
Use the following commands to navigate through Alarm Reporting:
#
*
8
6*
3 (or 0#)
010
Alarm Reporting Actions
Step forward to next alarm
Step back to previous alarm
Repeat last alarm
Report security mode (Operator / Observer)
Exit Alarm Reporting
Clear alarms on all units and exit
Clearing Alarms
To clear all the alarms stored on the Voice Interface unit, enter 010. A cleared alarm will not be reported again
until the channel returns to its normal condition and the alarm state recurs.
Clearing an alarm does not affect any channel conditions; it simply removes the alarm from the Voice Interface.
It will remain on the Alarm List in Lynx, and it will appear in the site log. However, once you clear alarms, they
cannot be restored.
Suspending Alarm Dial-Out
If you want the Voice Interface to stop dialing, but also keep the alarm active, you can suspend alarm reporting
for any or all telephone numbers.
Enter 030* to disable alarm reporting on all telephone numbers for a one-hour period. This is also useful if you
will be disconnecting equipment to perform maintenance and do not want alarms reported to station personnel
during the maintenance period. After one hour, alarm reporting will be automatically restored. You can manually
enable it prior to that time by entering 030#.
If you would like to indefinitely disable alarm reporting for specific phone numbers, enter 10 _ *, where the blank
represents a telephone number entry (1-5) in the unit’s site dialing settings.
Example
Input:
103*
Response: Phone number 3 disabled
The Voice Interface will not dial this phone number until you enter 10 _ # to resume alarm reporting for that
entry. You can disable alarm reporting for as many phone numbers as you wish.
CUSTOMER SUPPORT: 978-486-3711 • [email protected] • www.burk.com
115
CHAPTER 11: VOICE INTERFACE OPERATION
METER & STATUS READINGS
In addition to alarm reporting, the Voice Interface can report status conditions and meter readings for the
connected unit.
List Channel Labels
For reference, you can receive a report of all the metering and status channel labels. Enter 6# for metering
channels or 7# for status channels. The Voice Interface will report the channel labels you set up during I/O unit
configuration (see chapter 4).
Channel Readings
To receive metering channel readings, enter 6 _ _ * (fill in the blank with the two-digit channel number you want
reported). For status readings, enter 7 _ _ *. Valid entries are 601-616 and 701-716 for an I/O 16 or VRC2500,
and 601-608 and 701-708 for an I/O 8.
Examples
Input:
609*
The voice interface will read the label assigned to metering channel 9 and report the value
Response:
for that channel.
Input:
712*
Response: The voice interface will read the label assigned to current condition at status channel 12.
If you want the channel reading reported three times at five-second intervals, enter the code using # instead of
*. The reading will be current each time it is read, so you can tell whether the value is fluctuating or constant
throughout the fifteen-second period.
COMMANDS, MACROS & CAPTURES
If you have Operator or System privileges (set up during Voice Interface unit configuration, Chapter 5), you can
issue commands and run macros using the Voice Interface. All users can take data captures. Voice Interface users
are set up in the Users tab of the Voice Interface configuration window (see page 47).
Command List
To list the labels for all of your command channels, enter 2#. The Voice Interface will report all the command
channel labels set up during I/O unit configuration (see page 33).
Issuing Commands
To issue commands to the unit you are connected to, enter 2 _ _ * for the A command, or 2 _ _ # for the B
command. Fill in the blanks with the two-digit channel number. Valid entries are 201-216 for a GSC3000 I/O
16 or VRC2500, and 201-208 for a GSC3000 I/O 8.
Example
Input:
202*
The Voice Interface reads the label for the A command on channel 2, and then issues the
Response:
command.
116
GSC3000 & VRC2500 INSTALLATION & OPERATION MANUAL
CHAPTER 11: VOICE INTERFACE OPERATION
The * or # key can be used more than once to adjust the output as desired (202***, for example). After the
command has been issued, you can enter additional commands for the same channel by simply keying an
additional * or # as needed. You can also use this method to toggle between the A and B state without
reentering the channel number.
Note: Command durations are specified when you set up your Command channels during I/O unit configuration (see
page 39).
Cancelling Commands
Under the Voice Setup tab in the Unit Configuration menu, you can specify a command delay. This is the amount
of time the Voice Interface waits before executing a command issued over the phone. A delay period allows time
to cancel a command or macro entered by mistake.
To cancel all commands awaiting activation, press 0#. You can then enter new commands or other Voice
Interface codes.
Macro List
To list all of the macros stored on the I/O unit you are connected to, enter 5#. The Voice Interface will read the
macro number and the corresponding title for each macro saved to the unit.
Running Macros
To run a macro, enter 5 _ _ #. Fill in the blanks with the appropriate two-digit macro number. The Voice
Interface will then execute the macro. Valid entries are 501-532.
Cancelling Macros
Macros respond to the command delay setting in the same way as commands (see CANCELING COMMANDS,
above). A macro may be canceled by pressing 0# prior to the expiration of the command delay. Note that this
will not stop a macro that is already running. If a macro is not canceled within the command delay period, it will
continue to run until it reaches its programmed ending point or it is stopped from the Macro Status window in
Lynx (see page 30).
Taking Captures
The Voice Interface can instruct the I/O unit to take a data capture, which later can be downloaded to Lynx and
used for logging and reports.
To take a data capture on the I/O unit you are connected to, enter 040*. The Voice Interface confirms the
capture by saying, “Unit information captured.” To capture data from another I/O unit, you have to first switch
to that unit (see SELECTING AN I/O UNIT, earlier in this chapter).
AUDIO & MICROPHONE FUNCTIONS
Using the Audio Out Connector
The rear panel Audio Out connector (1/8”, mono audio) sends audio from the telephone line to a connected
device. This function can be used to broadcast audio directly from the telephone.
To turn the Audio Out function on, enter 080#. The Voice Interface responds, “External audio output On.”
Audio Out is active for the period specified in the Audio Input Timeout field, under the Voice Setup tab in Unit
Configuration (see page 47). To stop Audio Out prior to the timeout, enter 080*.
CUSTOMER SUPPORT: 978-486-3711 • [email protected] • www.burk.com
117
CHAPTER 11: VOICE INTERFACE OPERATION
Using the Audio In Connector
The rear panel Audio In connector (1/8”, mono audio) sends audio from a connected device to the phone line.
This is useful to monitor transmitter audio when you are beyond the station’s broadcast range.
To turn the Audio In function on, enter 070#. The Voice Interface responds, “External audio input On.” Audio
In is active for the period specified in the Audio Input Timeout field, under the Voice Setup tab in Unit
Configuration (see page 47). To stop Audio In prior to the timeout, enter 070*.
Using the Internal Microphone
A small condenser microphone is built into the front panel of the Voice Interface, and can be activated via touchtone commands to pick up sound near the Voice Interface. This function can be used to monitor operation of
blowers, verify audible security or fire alarms, or listen for voices.
To activate the internal microphone, enter 050#. The microphone is active for the period specified in the
Audio Input Timeout field, under the Voice Setup tab in Unit Configuration (see page 47). To stop Audio In
prior to the timeout, enter 050*.
Note: At high levels of audio input, DTMF commands may become ineffective. If this happens, wait until the timeout
duration has lapsed before entering new commands.
ADDITIONAL VOICE INTERFACE FUNCTIONS
Checking Current Date/Time
Enter 060 for the current date and time (24-hour format), reported by the unit’s real-time clock.
Remote/Local Status
To check whether the current I/O unit is in Remote or Local mode, enter 090. Local mode disables remote
commands.
Check Unit Number and Security Level
To verify the current I/O unit number and security level, enter 0*. The Voice Interface will report the unit
number and identify which access privileges are available: observer, or operator.
An alternate code for reporting the security mode is 6*. The Voice Interface will report the access level only.
Requery Network
When you initially dial in to the Voice Interface, the unit scans the network to identify all connected I/O units.
To rescan your site, enter 040#.
Firmware Version
To report the firmware version currently loaded on the Voice Interface, enter 800.
118
GSC3000 & VRC2500 INSTALLATION & OPERATION MANUAL
CHAPTER 11: VOICE INTERFACE OPERATION
VOICE INTERFACE CODE REFERENCE
The following is a complete list of the DTMF (touch-tone) codes used to control and monitor your remote site
with the Voice Interface. For descriptions of each function, see earlier in this chapter. Codes in the shaded areas
require Operator privileges.
Command
Function
Page Ref.
Basic Functions
900-915
0#
999
Select I/O Unit
Escape/Cancel
Disconnect
114
117
114
Metering, Status and Commands
201* – 216*
201# – 216#
501# – 532#
601* – 616*
601# – 616#
701* – 716*
701# – 716#
2#
5#
6#
7#
040*
Command channel – switch A
Command channel – switch B
Run macro
Metering channel 1-16 – Report Once
Metering channel 1-16 – Report Three Times
Status channel 1-16 – Report Once
Status channel 1-16 – Report Three Times
List command channel labels
List macro titles
List metering channel labels
List status channel labels
Take capture (current I/O unit)
116
116
117
116
116
116
116
116
117
116
116
117
Alarm Reporting and Dial-Out
000
#
*
8
3
6*
010
030*
030#
101* – 105*
101# – 105#
Enters the Alarm Reporting mode to check for alarms on the current I/O unit.
115
Report next alarm
Report previous alarm
Repeat current alarm
Exit Alarm Reporting (or 0# for escape/cancel)
Report security mode (Operator / Observer)
Clear all alarms and exit Alarm Reporting
115
115
115
115
115
115
Disable Alarm Reporting for one hour
Enable Alarm Reporting before the one hour period lapses
Disable dial-out number 1-5
Enable dial-out number 1-5
115
115
115
115
External audio input ON
External audio input OFF
External audio output ON
External audio output OFF
Internal microphone ON
Internal microphone OFF
118
118
117
117
118
118
Report current date and time
Report Voice Interface firmware version
Report Remote/Local mode
Requery Network
Report current I/O unit and security level
Report security level only
At dial-in, switches from Voice to Data mode
118
118
118
118
118
118
118
Audio Functions
070#
070*
080#
080*
050#
050*
Other Functions
060
800
090
040#
0*
6*
020
CUSTOMER SUPPORT: 978-486-3711 • [email protected] • www.burk.com
119
120
GSC3000 & VRC2500 INSTALLATION & OPERATION MANUAL
A
Appendix A:
Uploading Firmware
The I/O and Voice Interface firmware for the GSC3000 and VRC2500 can be reloaded or updated using the
Lynx software and a direct connection to the unit. The systems ship with current firmware already installed, so
there is no need to upload firmware prior to using a new unit. However, if you have been using a software version
previous to Lynx 4, your existing I/O and Voice units need to be updated with the latest firmware in order to
communicate with the new software.
To determine the firmware version currently loaded on any Voice Interface or I/O unit, right-click the unit in the
Site List and select Unit Properties.
Note: In some circumstances, it may be necessary to manually clear the unit’s memory prior to uploading firmware.
Appendix D: Troubleshooting indicates where this is necessary. If you need to clear the memory, refer to CLEARING
UNIT MEMORY at the end of this appendix.
UPLOADING FIRMWARE
Important! Uploading firmware will erase your unit’s memory, including configuration settings. You should archive your
configuration prior to uploading firmware. See pages 34 and 41 for instructions on saving and restoring archives.
To upload new firmware:
1. Unplug the unit, remove the cover, engage the JP9 jumper (JP1 on a Voice Interface), and power up the
unit. The jumpers are detailed in the images on the next page.
2. Unplug the unit again, disengage the jumper, and reapply power. For a GSC300 I/O, the Remote/Local
LED should be off now, indicating the firmware has been cleared. After clearing I/O firmware on a VRC500,
the the Status LED turns off and the LINE LED is green.
3. Connect the supplied null modem cable from any PC serial port to the proper port on the I/O or Voice
Interface:
GSC3000 I/O 8 or I/O 16
GSC3000 Voice Interface
VRC2500 I/O
VRC2500 Voice Interface
COM 2
COM 1
DIRECT
DIAL-UP
4. Go to the Tools menu and click Upload Firmware to start the Firmware Wizard.
CUSTOMER SUPPORT: 978-486-3711 • [email protected] • www.burk.com
121
APPENDIX A: UPLOADING FIRMWARE
5. Enter the File Name of the desired firmware version, or click the […] button to browse. By default,
firmware files are stored in C:\Program Files\Burk Technology\Lynx 5\Firmware. If you are uploading to an
I/O unit (including the I/O component of a VRC2500), use the firmware file starting with IO… If you are
uploading to a Voice Interface (including the Voice component of a VRC2500), use the firmware file
starting with VI… Click Next.
6. Select the PC COM port you are using to connect to the unit, and enter the current unit password (in
new units, the default password is PASSWORD). Click Next.
7.
Select the type of unit receiving the firmware. Beneath the unit type, you can change the unit number if
necessary, or leave the boxes unchecked to retain the original settings. When editing unit numbers, make
sure that one (and only one) I/O unit is identified as unit 0, and that all unit numbers are unique.
8. While the power is still on, reengage the JP9 (or JP1) jumper for approximately three seconds. Disengage
the jumper. The unit is ready to receive new unit configuration.
JP9 Jumper Location
Note: For a Voice Interface, the jumper is located at JP1, in the rear right corner of the board (below the SRAM chip).
JP9 Jumper
Engaging the Jumper
122
GSC3000 & VRC2500 INSTALLATION & OPERATION MANUAL
APPENDIX A: UPLOADING FIRMWARE
CLEARING UNIT MEMORY
The previous instructions allow you to clear firmware and unit memory so that you may load new firmware and
reprogram the unit. If you need to erase unit memory without also clearing the firmware, perform step 8 in the
uploading firmware instructions. Do not cycle the power while the jumper is engaged, as this will erase the
firmware.
CUSTOMER SUPPORT: 978-486-3711 • [email protected] • www.burk.com
123
124
GSC3000 & VRC2500 INSTALLATION & OPERATION MANUAL
B
Appendix B:
Specifications & Warranty
GSC3000 I/O UNIT
Dimensions:
19” W x 10” D x 1.75” H (48.3cm W x 25.4cm D x 4.45cm H)
Weight:
9.1 lbs. (4.3 kg) – dry
Operating Temperature:
0 to 50°C
Power Requirements:
100 to 240 VAC, 50 to 60Hz, at 15W
Front Panel Controls:
“Remote/Local” button for suspending the generation of command outputs
Rear Panel Connections:
COM1: DB9; serial communication at 19.2kbps
COM2: DB9; serial communication at 19.2kbps
Command 1–8: DB37; open collector, 30VDC, 250mA maximum, clamped, momentary or latching, momentary
duration programmable 0.1-25.5 seconds
Command 9–16*: DB37; open collector, 30VDC, 250mA maximum, clamped, momentary or latching duration
programmable 0.1-25.5 seconds
Metering**: DB37; input impedance >100kOhms, unbalanced during measurement; >10mOhms, unbalanced,
quiescent (nonsampling); 0-10VDC and -5 to 5VDC nominal; 2.44mVDC resolution (12-bit resolution over 10V
range); input limits not to exceed -16VDC or 16VDC; sampling rate eight times per second per channel; RFI
immunity at 70dB at 1MHz, 140dB at 100MHz, 170dB at 500MHz
CUSTOMER SUPPORT: 978-486-3711 • [email protected] • www.burk.com
125
APPENDIX B: SPECIFICATIONS & WARRANTY
Status**: DB37; 16 binary (low/high) channels; input impedance >24kOhms; input voltage range -30 to 30VDC
continuous; toggle threshold low-to-high with pull-down at 2.5VDC (CMOS compatible), high-to-low with
pull-up at 1.5VDC (TTL compatible); RFI immunity 70dB at 1MHz, 140dB at 100MHz, 170dB at 500MHz
G-Bus 1: RS-485; 115.2kbps; 110ohm impedance, category-five twisted-pair cable; 1,000-foot limit for all units
networked combined
G-Bus 2: RS-485; 115.2kbps; 110ohm impedance, category-five twisted-pair cable; 1,000-foot limit for all units
networked combined
System Type:
Embedded microprocessor-based with battery backed real-time clock.
Memory Type:
CMOS Static RAM/Flash EPROM (battery backed)
Accessory Power:
5VDC, fused at 100mA (pin 17, J4: Metering)
12VDC, fused at 100mA (pin 18, J4: Metering)
-12VDC, fused at 100mA (pin 19, J4: Metering)
5VDC, fused at 100mA (pin 17, J3: Status)
5VDC, fused at 100mA (pin 18, J3: Status)
5VDC, fused at 500mA (pin 17, J2: Command 1–8)
5VDC, fused at 500mA (pin 18, J2: Command 1–8)
5VDC, fused at 500mA (pin 17, J1: Command 9–16)*
5VDC, fused at 500mA (pin 18, J1: Command 9–16)*
Supplied Cables:
(1) AC power cord
(1) G-Bus Cable
(1) G-Bus Terminator
(1) DB9F to DB25M serial cable
(1) DB9F to DB9F null-modem cable
*Not available on I/O 8 units.
**I/O 16 units have 16 channels each of Metering, Status, and Command consisting of one Status port (16
channels), one Metering port (16 channels), and two Command ports (8 channels each). An I/O 8 unit has one
Metering/Status port (8 channels of Metering and 8 of Status combined in one port) and one Command port (8
channels).
126
GSC3000 & VRC2500 INSTALLATION & OPERATION MANUAL
APPENDIX B: SPECIFICATIONS & WARRANTY
VRC2500
Dimensions:
19” W x 10.75” D x 3.5” H (48.3cm W x 27.3cm D x 8.9cm H); two rack units high
Weight:
11 lbs. (4.99 kg) – dry
Operating Temperature:
0 to 50°C
Power Requirements:
100 to 240 VAC, 50 to 60Hz, at 15W
Front Panel Controls:
“Remote/Local” button for suspending the generation of command outputs
Rear Panel Connections:
DIRECT: DB9; serial communication at 19.2kbps; for direct cable connection
FULL-TIME: DB9; serial communication at 19.2kbps; for full-time modem connection
DIAL-UP: DB9; serial communication at 19.2kbps; for dial-up modem connection
Command 1–8: DB37; open collector, 30VDC, 250mA maximum, clamped, momentary or latching, momentary
duration programmable 0.1-25.5 seconds
Command 9–16: DB37; open collector, 30VDC, 250mA maximum, clamped, momentary or latching duration
programmable 0.1-25.5 seconds
Metering: DB37; input impedance >100kOhms, unbalanced during measurement; >10mOhms, unbalanced,
quiescent (nonsampling); 0-10VDC and -5 to 5VDC nominal; 2.44mVDC resolution (12-bit resolution over 10V
range); input limits not to exceed -16VDC or 16VDC; sampling rate eight times per second per channel; RFI
immunity at 70dB at 1MHz, 140dB at 100MHz, 170dB at 500MHz
Status: DB37; 16 binary (low/high) channels; input impedance > 24kOhms; input voltage range -30 to 30VDC
continuous; toggle threshold low-to-high with pull-down at 2.5VDC (CMOS compatible), high-to-low with
pull-up at 1.5VDC (TTL compatible); RFI immunity 70dB at 1MHz, 140dB at 100MHz, 170dB at 500MHz
Line: RJ-11; two-wire line interface with DC loop supervision
Set/Modem: RJ-11; two-wire line interface with DC loop supervision
Audio In: 3.5mm stereo jack; line-level 0.0dBm, 600 Ohm active balanced, +10dBm clip point
Audio Out: 3.5mm stereo jack; line-level 0.0dBm, 600 Ohm active balanced, +10dBm clip point
CUSTOMER SUPPORT: 978-486-3711 • [email protected] • www.burk.com
127
APPENDIX B: SPECIFICATIONS & WARRANTY
Interconnection Circuit:
Standard toll-grade telephone circuit or dedicated two or four-wire interconnection with toll-grade performance;
FCC Registered; Automatic answering
System Type:
Embedded microprocessor-based with battery backed real-time clock.
Memory Type:
CMOS Static RAM/Flash EPROM (battery backed)
Accessory Power:
5VDC, fused at 100mA (pin 17, J4: Metering)
12VDC, fused at 100mA (pin 18, J4: Metering)
-12VDC, fused at 100mA (pin 19, J4: Metering)
5VDC, fused at 100mA (pin 17, J3: Status)
5VDC, fused at 100mA (pin 18, J3: Status)
5VDC, fused at 500mA (pin 17, J2: Command 1–8)
5VDC, fused at 500mA (pin 18, J2: Command 1–8)
5VDC, fused at 500mA (pin 17, J1: Command 9–16)
5VDC, fused at 500mA (pin 18, J1: Command 9–16)
Supplied Cables:
(1) AC power cord
(1) DB9F to DB25M serial cable
(1) DB9F to DB9F null-modem cable
(1) Telephone Cable
128
GSC3000 & VRC2500 INSTALLATION & OPERATION MANUAL
APPENDIX B: SPECIFICATIONS & WARRANTY
GSC3000 VOICE INTERFACE
Dimensions:
19” W x 10” D x 1.75” H (48.3cm W x 25.4cm D x 4.45cm H)
Weight:
7 lbs. (3.2kg) – dry
Operating Temperature:
0 to 50°C
Power Requirements:
100 to 240 VAC, 50 to 60Hz, at 15W
Rear Panel Connections:
COM1: DB9; serial communication at 19.2kbps
G-Bus 1: RS-485; 115.2kbps; 110ohm impedance, category-five twisted-pair cable; 1,000-foot limit for all units
networked combined
G-Bus 2: RS-485; 115.2kbps; 110ohm impedance, category-five twisted-pair cable; 1,000-foot limit for all units
networked combined
Line: RJ-11; two-wire line interface with DC loop supervision
Set/Modem: RJ-11; two-wire line interface with DC loop supervision
Audio In: 3.5mm stereo jack; line-level 0.0dBm, 600 Ohm active balanced, +10dBm clip point
Audio Out: 3.5mm stereo jack; line-level 0.0dBm, 600 Ohm active balanced, +10dBm clip point
Interconnection Circuit:
Standard toll-grade telephone circuit or dedicated two or four-wire interconnection with toll-grade performance;
FCC Registered; Automatic answering
Supplied Cables:
(1) AC power cord
(1) G-Bus Cable
(1) G-Bus Terminator
(1) Telephone Cable
CUSTOMER SUPPORT: 978-486-3711 • [email protected] • www.burk.com
129
APPENDIX B: SPECIFICATIONS & WARRANTY
WIRING INTERFACE
Dimensions:
19” W x 1” D x 1.75” H (48.3cm W x 2.5cm D x 4.45cm H)
Weight:
1.2 lbs. (0.55kg) – dry
Rear Panel Connections:
Terminal Block: Accepts two-pin push-on block style connectors; +/- contacts are provided at terminal block for
polarized status/metering inputs
Site Controller: DB37 female
Supplied Cables:
(1) DB37F to DB37M Cable
COMMAND RELAY UNIT
Dimensions:
19” W x 11.25” D x 1.75” H (48.3cm W x 28.6cm D x 4.45cm H)
Weight:
6 lbs. (2.72kg) – dry
Power Requirements:
5VDC, 750mA, supplied by GSC3000 I/O unit
Rear Panel Connections:
Terminal Block: Accepts three-pin push-on block style connectors; NO, NC, C contacts are provided at terminal
block for each relay (total of 16 relays), each relay rated at 5A, 125VAC or 3A, 48VDC
Site Controller: DB37 female
Supplied Cables:
(1) DB37F to DB37M Cable
All Specifications are subject to change without notice.
130
GSC3000 & VRC2500 INSTALLATION & OPERATION MANUAL
APPENDIX B: SPECIFICATIONS & WARRANTY
FCC PART 15 COMPLIANCE STATEMENT
This equipment has been tested and found to comply with the limits for a Class A digital device, pursuant to Part
15 of the FCC rules. These limits are designed to provide reasonable protection against harmful interference
when the equipment is operated in a commercial environment. This equipment generates, uses, and can radiate
radio frequency energy and, if not installed and used in accordance with the instruction manual, may cause
harmful interference to radio communications. Operation of this equipment in a residential area is likely to cause
harmful interference, in which case the user will be required to correct the interference at his/her own expense.
Changes or modifications not expressly approved by Burk Technology, Inc. could void the user’s authority to
operate the equipment.
WARRANTY
Burk Technology, Inc. warrants the GSC3000 and VRC2500 transmitter remote control systems to be free of
defects in materials and workmanship for a period of 24 months from the date of purchase. Equipment will be
repaired or replaced at the option of Burk Technology and returned freight prepaid to the customer. Damage
due to abuse or improper operation or installation of the equipment or caused by fire or flood or harsh
environment is not to be covered by this warranty. Damage in shipping is not the responsibility of Burk
Technology. A return authorization must be obtained before returning any equipment. Materials returned under
this warranty must be shipped freight prepaid and insured in the original shipping carton or suitable substitute
to Burk Technology, 7 Beaver Brook Road, Littleton, MA 01460. Repairs not covered under this warranty will be
made at prevailing shop rates established by Burk Technology, Inc.
THE WARRANTY SET FORTH ABOVE IS IN LIEU OF ALL OTHER WARRANTIES, EXPRESS OR IMPLIED,
INCLUDING BUT NOT LIMITED TO THE WARRANTIES OF MERCHANTABILITY AND FITNESS FOR A
PARTICULAR PURPOSE. BURK TECHNOLOGY, INC. SHALL NOT BE LIABLE TO ANY PARTY FOR ANY
INCIDENTAL, SPECIAL, INDIRECT OR CONSEQUENTIAL DAMAGES ARISING FROM THE USE OF THIS
EQUIPMENT.
CUSTOMER SUPPORT: 978-486-3711 • [email protected] • www.burk.com
131
132
GSC3000 & VRC2500 INSTALLATION & OPERATION MANUAL
C
Appendix C:
Pinouts
COMMAND 1-8
Pin
Description
Pin
Description
Pin
Description
1
Command 1A
9
Command 5A
17-19
Reserved
2
Command 1B
10
Command 5B
20-35
Command Return
3
Command 2A
11
Command 6A
36-37
Reserved
4
Command 2B
12
Command 6B
5
Command 3A
13
Command 7A
6
Command 3B
14
Command 7B
7
Command 4A
15
Command 8A
8
Command 4B
16
Command 8B
COMMAND 9-16
Pin
Description
Pin
Description
Pin
Description
1
Command 9A
9
Command 13A
17-19
Reserved
2
Command 9B
10
Command 13B
20-35
Command Return
3
Command 10A
11
Command 14A
36-37
Reserved
4
Command 10B
12
Command 14B
5
Command 11A
13
Command 15A
6
Command 11B
14
Command 15B
7
Command 12A
15
Command 16A
8
Command 12B
16
Command 16B
CUSTOMER SUPPORT: 978-486-3711 • [email protected] • www.burk.com
133
APPENDIX C: PINOUTS
METERING
Pin
Description
Pin
Description
Pin
Description
1
Metering 1
9
Metering 9
17-19
Reserved
2
Metering 2
10
Metering 10
20-35
Metering Return
3
Metering 3
11
Metering 11
36-37
Reserved
4
Metering 4
12
Metering 12
5
Metering 5
13
Metering 13
6
Metering 6
14
Metering 14
7
Metering 7
15
Metering 15
8
Metering 8
16
Metering 16
STATUS
Pin
Description
Pin
Description
Pin
Description
1
Status 1
9
Status 9
17-19
Reserved
2
Status 2
10
Status 10
20-35
Status Return
3
Status 3
11
Status 11
36-37
Reserved
4
Status 4
12
Status 12
5
Status 5
13
Status 13
6
Status 6
14
Status 14
7
Status 7
15
Status 15
8
Status 8
16
Status 16
METERING/STATUS
(GSC3000 I/O 8 ONLY)
Pin
Description
Pin
Description
Pin
Description
1
Metering 1
9
Status Input 1
17-19
Reserved
2
Metering 2
10
Status Input 2
20-27
Metering Return
3
Metering 3
11
Status Input 3
28-35
Status Return
4
Metering 4
12
Status Input 4
36-37
Reserved
5
Metering 5
13
Status Input 5
6
Metering 6
14
Status Input 6
7
Metering 7
15
Status Input 7
8
Metering 8
16
Status Input 8
134
GSC3000 & VRC2500 INSTALLATION & OPERATION MANUAL
APPENDIX C: PINOUTS
CABLE PINOUTS
DB9F-DB9F Null-Modem Cable
DB9F-DB25M Serial Cable
G-Bus Cable (GSC3000 only)
G-Bus Terminator (GSC3000 only)
CUSTOMER SUPPORT: 978-486-3711 • [email protected] • www.burk.com
135
136
GSC3000 & VRC2500 INSTALLATION & OPERATION MANUAL
D
Appendix D:
Troubleshooting
Some problems experienced by GSC3000 and VRC2500 users are easily resolved in the field. If you encounter
difficulty, refer to the following troubleshooting table for suggestions. Before starting, be sure your I/O and
Voice Interface units are powered, that your modems are turned on, and that all cables are securely connected to
the correct ports.
If you still have trouble, please do not hesitate to contact Burk Technology customer support:
Phone: 978-486-3711
Fax:
978-486-0081
Email: [email protected]
You can find answers to frequently asked questions on the Burk Technology web site at www.burk.com.
If this happens....
It could be that...
Try this...
Lynx won't establish a direct / fulltime connection to my site.
The wrong COM port is specified
in the Site Wizard.
Click the Edit Site icon and
advance through the Site Wizard
until you reach the Primary or
Backup Connection page. Verify
that the COM port specified in the
Site Wizard matches the COM port
your I/O or Voice unit is connected
to.
You are not connected to the
appropriate COM port on the
GSC3000 or VRC2500 unit.
For a GSC3000. ..
You may use any COM port for a
direct connection, but if you are
using a full-time modem, be sure it
is connected to COM 1. For a dialup modem connection, the modem
must be connected to COM2.
For a VRC2500...
Use the DIRECT port for a direct
PC connection, the DIAL-UP port
for a dial-up modem connection,
and the FULL-TIME port for a fulltime modem connection.
CUSTOMER SUPPORT: 978-486-3711 • [email protected] • www.burk.com
137
APPENDIX D: TROUBLESHOOTING
If this happens....
It could be that...
Try this...
Lynx won't establish a direct / fulltime connection to my site.
(continued)
You are not using the appropriate
cable to make your connection.
For a direct serial connection to
the I/O unit, use the supplied null
modem cable. For a full-time
(dedicated line) connection, use
the DB9 to DB25 serial cable
supplied with the full-time modem.
If using a full-time modem, it is not
configured properly.
Refer to Chapter 6 for full-time
modem configuration.
The wrong modem is specified in
the Site Wizard.
Click the Edit Site icon and
advance through the Site Wizard
until you reach the Primary or
Backup Connection page. Verify
that the correct modem is specified
in the Site Wizard.
The phone number is not specified
correctly in the Site Wizard.
Verify the phone number entered
on the Primary or Backup
Connection page in the Site
Wizard. Any dial-out prefixes
should be entered in Windows
when you set up your modem; they
do not have to be reentered in the
Site Wizard. If the modem is
connected to a Voice Interface, be
sure ,,,020 is entered in the dialing
string (see page 18).
Either your PC modem or the
external modem at the remote site
is not set up properly.
Check that the modems are
configured as described in Chapter
6.
The remote modem was not
identified by the I/O unit.
After installing the modem at the
remote site, cycle the power on the
unit you just connected it to.
Radio Frequency Interference is
inhibiting communications.
Install an RFI filter next to the
modem at the remote site.
The modem's auto-answer function
is configured incorrectly.
When you connect a dial-up
modem to a unit, the modem's
auto-answer function must be
enabled in order for the unit to
answer incoming calls. When you
connect a dial-up modem to a
Voice Interface or the DIAL-UP port
on the VRC2500, leave autoanswer off to avoid connection
conflicts.
Lynx won't establish a dialup
modem connection to my site.
138
GSC3000 & VRC2500 INSTALLATION & OPERATION MANUAL
APPENDIX D: TROUBLESHOOTING
If this happens....
It could be that...
Try this...
My dial-up modem connection is
unreliable.
Radio Frequency Interference is
inhibiting communications.
Install an RFI filter for the modem
at the remote site. Refer to Chapter
6 for full-time modem
configuration.
One or both of the power LEDs on
the Command Relay is off, even
though the I/O or VRC2500 unit is
powered.
The Command Relay is not
securely connected to the remote
control unit.
Check and tighten the DB37
connection.
A fuse may have blown.
The Command Relay is protected
by fuses that automatically reset
about 30 seconds after the
overload load has been removed.
Unplug the DB37 connector,
deactivate any command outputs,
and reconnect the cable after 30
seconds. If both LEDS still do not
light, contact Burk Technology
customer support.
No commands are being issued and
the Remote/Local LED on the
GSC3000 I/O or VRC2500 is solid
red.
The unit is in Local mode, which
disables commands for equipment
maintenance purposes.
Press the Remote/Local button to
return the unit to Remote mode.
No commands are being issued and
the Remote/Local LED on my
GSC3000 I/Os and the Voice
Interface’s Remote/Local LED is
flashing red.
The unit is in local mode.
The Remote/Local LED on my unit
is off.
The firmware needs to be cleared
and reloaded.
For an I/O unit, engage the JP9
jumper (see Appendix A) and
power cycle the unit. Remove the
jumper and proceed with the
firmware upload process. For a
Voice Interface, the jumper is at
JP1.
I can't upload firmware to my
GSC3000 I/O unit or I can't
change the unit number.
You are not connected to COM2
on the I/O unit.
Connect to COM2 on the rear
panel of the I/O unit.
You are not using the correct cable
to make your connection.
Use the supplied null modem cable.
Find the I/O unit with the solid red
Remote/Local LED and press the
Remote/Local button on that unit
to return all networked units to
Remote mode.
CUSTOMER SUPPORT: 978-486-3711 • [email protected] • www.burk.com
139
APPENDIX D: TROUBLESHOOTING
If this happens....
It could be that...
Try this...
I can't upload firmware to my
GSC3000 I/O unit or I can't
change the unit number.
(continued)
The unit's firmware needs to be
cleared and reloaded.
Engage the JP9 jumper (see
Appendix A) and power cycle the
unit. Remove the jumper, proceed
with the upload firmware process
and assign the unit number.
I can't upload firmware to my Voice
Interface.
You are connected to the I/O unit.
Make sure you are direct-connected
to COM1 on the Voice Interface.
You are connected using the wrong
cable.
Use the supplied null modem cable.
You are not connected to the
DIRECT port on the VRC2500.
Connect to the DIRECT port.
You are not using the correct cable
to make your connection.
Use the supplied null modem cable.
The unit’s firmware needs to be
cleared and reloaded.
Engage the JP9 jumper (see
Appendix A) and power cycle the
unit. Remove the jumper, proceed
with the upload firmware process
and assign the unit number.
You are connected to the wrong
port.
Make sure you are connected to
the DIAL-UP port.
You are connected using the wrong
cable.
Use the supplied null modem cable.
The front panel LEDs blink green
and amber.
There is hardware failure.
Contact Burk Technology customer
support.
The power LED is lit and the unit
accepts programming, but the
Remote/Local LED is off.
There is hardware failure.
Contact Burk Technology customer
support.
The LEDs are solid Amber in color.
There is hardware failure.
Contact Burk Technology customer
support.
I can’t upload I/O firmware to my
VRC2500.
I can't upload firmware to my
VRC2500.
140
GSC3000 & VRC2500 INSTALLATION & OPERATION MANUAL
APPENDIX D: TROUBLESHOOTING
If this happens....
It could be that...
Try this...
The Firmware Wizard reports an
error when I attempt to upload
firmware.
If the wizard completed all three
upload sections and the Remote /
Local LED is on, the firmware
uploaded successfully but Lynx is
unable to reset the unit.
With the power on, engage the JP9
jumper to clear the memory (see
Appendix A). Then disengage the
jumper and try connecting. If the
connection does not succeed, retry
the firmware upload.
The wrong PC COM port is
specified in the Firmware Wizard.
Make sure the COM port setting in
the Firmware Wizard matches the
COM port you are using to
connect to your unit.
You are connecting your computer
to the wrong COM port on the
GSC3000 I/O or VRC2500 unit.
See Appendix A: Uploading
Firmware for the correct port
connections.
You are using the wrong cable to
connect to your unit.
Use the supplied null modem cable.
The JP9 or JP1 jumper is engaged.
For normal I/O unit operation, the
JP9 jumper should be connected to
one pin only (for a Voice Interface,
the jumper is at JP1). Verify that
the jumper is connected correctly
(see the diagram in Appendix A).
There is memory failure.
Contact Burk Technology customer
support.
The phone line is not connected or
it is connected to the wrong jack
on the Voice Interface.
Use a telephone set to verify the
line you are using is functional.
Then make sure to connect the
phone cord to the LINE jack on the
Voice Interface or VRC2500.
The Voice Interface firmware needs
to be cleared and reloaded.
Engage the JP1 jumper and power
cycle the unit (see Appendix A).
Remove the jumper and use the
Firmware Wizard to upload new
firmware.
The unit took a voltage surge that
overloaded the onboard
protection.
Contact Burk Technology customer
support.
The I/O or Voice Interface unit
loses its programming every time
the power is cycled.
The Voice Interface doesn't answer
incoming calls.
CUSTOMER SUPPORT: 978-486-3711 • [email protected] • www.burk.com
141