Transcript
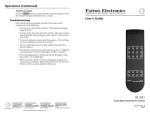
IN1508 Scaling Presentation Switcher
Installation and Connections
1. Turn off power to the Extron IN1508 and all other devices that will be connected to it.
Operation
2. If desired, attach the included ears and mount the scaler in a rack or furniture. For
rack mounting, remove the self-adhesive rubber feet if they have been attached.
Input buttons and LEDs — Press the Input buttons on the
front panel or IR remote control to select an input to scale and
output. The LEDs indicate the selected input.
Output Rate button and LEDs — Press the Output Rate
button to cycle through most of the the available resolutions.
The LEDs indicate the selected resolution. All selections
automatically select the 60 Hz refresh rate.
NOTE Some rates cannot be selected using this button.
PIP (picture-in-picture) button and LED — Press the PIP
On button on the front panel or IR remote control to toggle the
PIP feature on and off. The LED lights when PIP mode is on.
PIP Swap button — Press the PIP Swap button on the front
panel or IR remote control when the PIP feature is on to swap
the main and PIP images.
Picture Control buttons — Press the desired Picture Control
button on the front panel or IR remote control to change the
centering, size, contrast, brightness, color, or tint. See the
applicable Input submenu or Picture submenu selections at
right for more details.
Menu button — Press the Menu button on the front panel or
IR remote control to activate the on-screen display menu
system (shown at right) or to back up one level from the
currently selected menu or submenu.
, , , and buttons — Press the , , , and buttons
on the front panel or IR remote control to move the highlight
bar over submenus or selections and to increase and
decrease selected settings.
Enter button — Press the Enter button on the front panel or IR
remote control to select a highlighted submenu or selection.
NOTE To return to normal operation (no on-screen display),
let the scaler remain idle for 20 seconds until the
selected screen times out, or press the Menu button
repeatedly until the main menu is deselected.
3. Connect source video devices to the scaler's video inputs:
1
I
Inputs 1 and 2: Connect two composite video sources to
the BNC connectors, shown at right.
N
Inputs 3 and 4: Connect two S-video sources to the 4-pin
mini DIN connectors, shown at right.
U
P
3
VID
VID
T
2
YC
Input 5: Connect an interlaced (Y, B-Y, R-Y),
progressive (Y, B-Y, R-Y), or HDTV (Y, B-Y, R-Y)
component video source to the BNC
connectors, shown at right.
R-Y
B-Y
Y
5
NOTE Once power is applied, use the
6
menu system to set the video
type (interlaced, progressive, or
HDTV) for input 5. See
RGB
Operation and Menu System
and the Input submenu at right.
Inputs 6 and 7: Connect two VGA –
UXGA (RGB) video sources to the
DVI
RGB
8
7
15-pin HD connectors, shown at right.
Input 8: Connect a single link of DVI-D video to the DVI connector, shown
above right.
L
4. Connect source audio devices to the scaler's audio inputs:
Inputs 1 through 5: Connect unbalanced stereo or mono audio sources
to the left and right RCA connectors, shown at right.
YC
4
1
R
6
Inputs 6 through 8: Connect unbalanced stereo or mono audio sources to
the 3.5 mm mini stereo jacks, shown at right.
RGB
Y, B-Y, R-Y
5. Connect an RGB or component video (Y, B-Y, R-Y) display or
other output device to the scaler's 15-pin HD video output
connector, shown at right.
6. Connect audio devices to the scaler's audio outputs:
RCA audio
(Output A)
connections
Output A: Connect an audio device, such as an amplifier or
powered speakers, to these left and right RCA
connectors.
Beeldschermweg 6C
3821 AH Amersfoort, The Netherlands
+800.3987.6673 +31.33.453.4040
FAX +31.33.453.4050
Extron Electronics, Asia
135 Joo Seng Rd. #04-01
PM Industrial Bldg., Singapore 368363
+800.7339.8766 +65.6383.4400
FAX +65.6383.4664
1
INPUT
2
PICTURE
3
OUTPUT
4
AUDIO
5
ADVANCED
•
•
•
20 seconds
IN1508 SCALING PRESENTATION SWITCHER
1 Input submenu
• Center — Use the and buttons to select between the adjustment bars. Use
the and buttons to move the image left and right or up and down on the
screen. The range varies depending on the input signal applied and the output
rate selected.
• Size — Use the and buttons to select between the adjustment bars. Use the
and buttons to to make the image taller or shorter. The range varies
depending on the input signal applied and the output rate selected.
• Zoom — Use the and buttons to zoom in and zoom out of the scaled image.
• Pan — Use the and buttons to select between the adjustment bars. Use the
and buttons to pan left and right or up and down.
Aspect — Select the appropriate aspect ratio: 4:3 or 16:9. The default is 4:3.
Advanced — Provides a submenu of advanced selection options: active pixels, active lines, phase,
horizontal and vertical blanking, and total pixels. Refer to the Optimizing the Video section in the IN1508
User's Manual.
Input 5 — Select the correct video type: interlaced (NTSC/PAL [Y, B-Y, R-Y]), progressive (480p/576p
[Y, B-Y, R-Y]), or HDTV (720p/1080i [Y, B-Y, R-Y]), for the input 5 component video.
2 Picture submenu — Use the
•
•
•
•
•
and buttons to select among the adjustment bars.
Brightness — Adjust the brightness of the selected input through a range of 0 through 128. The default
setting is 64.
Contrast — Adjust the contrast through a range of 0 to 128. The default setting is 45.
Color — Adjust the contrast through a range of 0 to 128. The default setting is 64. This adjustment is
not available for the RGB and DVI inputs (inputs 6 through 8).
Tint — Adjust the contrast through a range of 0 to 128. The default setting is 64. This adjustment is not
available for the RGB and DVI inputs (inputs 6 through 8).
Sharpness — Adjust the contrast through a range of 0 to 128. The default setting is 64.
3 Output submenu
•
•
•
•
•
Resolution — Set the desired output resolution. The default setting is 1024 x 768.
Refresh Rate — Set the desired output vertical refresh rate. The default setting is 60 Hz.
Sync Polarity — Set the desired output horizontal and vertical sync polarity (H–/V–, H–/V+, H+/V–, or
H+/V+). The default setting is H–/V–.
Signal Type — Select the desired output signal format (RGBHV, RGBS, RGsB, or HDTV component
video [Y, B-Y, R-Y]). The default setting is RGBHV.
•
•
•
•
33-851-01 C
02 07
NATION OF ORIGIN
STICKER HERE
Input Volume — Adjust the volume of the selected input through a range of –53 dB through +9 dB. The
default is 0 dB (no gain or attenuation).
Audio Delay — Select On or Off. Audio delay compensates for the latency period inherent in deinterlacing
NTSC, PAL, and SECAM video by delaying the audio output to match the video output. The default is off.
5 Advanced submenu
•
Kyodo Building, 16 Ichibancho
Chiyoda-ku, Tokyo 102-0082
Japan
+81.3.3511.7655 FAX +81.3.3511.7656
Menu
4 Audio submenu
Pin RS-232 Function
1
—
Not used
2
TX
Transmit data
3
RX
Receive data
4
—
Not used
5
Gnd Signal ground
6
—
Not used
7
—
Not used
8
—
Not used
9
—
Not used
Extron Electronics, Japan
Menu System
Extron Electronics
R
Extron Electronics, Europe
B
www.extron.com
1230 South Lewis Street
Anaheim, CA 92805
800.633.9876 714.491.1500
FAX 714.491.1517
L
Extron Electronics, USA
R
9. Use the front panel or IR remote control and the on-screen menus (see
Operation and Menu System at right) or RS-232 programming to configure
input 5, configure the output, and adjust the video and audio. Refer to the
IN1508 User's Manual for RS-232 programming information.
Balanced
Tip
Ring
Sleeve (s)
Tip
Ring
Menu
•
CAUTION Connect the sleeve to
ground (GND). Connecting
the sleeve to a negative
terminal will damage the
audio output circuits.
L
8. Plug the IN1508, the input devices, and the output devices into a grounded
AC source, and turn on the input and output devices.
1
9
6
Female
B
7. If desired, connect a PC or control system to the IN1508's RS-232 port. See
RS-232 port, at right.
5
L
CAUTION Incorrect audio connector wiring can damage the
switcher. See Captive screw output audio connections, at right.
Tip
See Caution
Sleeve (s)
Tip
See Caution
R
Tip
Sleeve
(Signal) (Gnd)
RS-232 port
Unbalanced
L
Output B: Connect an audio device, such as powered
speakers, to this 3.5 mm, 5-pole captive screw connector
for balanced or unbalanced audio output as shown at
right.
Captive screw (Output B)
audio connections
Operation and Menu System
No
menu
display
•
•
Freeze — Set freeze mode on or off. The default setting is off. Frozen images are also unfrozen when a
new input is selected. On-screen displays are not affected by freeze mode.
Blank — Set the blank mode (video and audio mute) On or Off. The default is Off. The output is also
unmuted when a new input is selected. On-screen displays are not affected by blank mode.
Swap — Swaps the main and PIP images. This menu option functions the same as the front panel Swap
button.
PIP mode — Set the size of the secondary picture (1/4 screen, 1/9 screen, 1/16 screen, 1/25 screen,
side-by-side normal aspect ration, and side-by-side full screen). The default setting is 1/4 screen.
Fade Switch — Set the fade switching feature On or Off. The image fades to black when you select a
new input when fade switching is on. The default setting is on.
Blue Mode — Set the blue mode feature on or off. Blue mode is helpful for color adjustments. The
default setting is off.
Reset — Select Ok to return all settings to their default values. Select Cancel to exit without resetting.