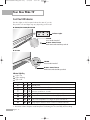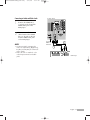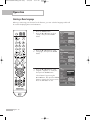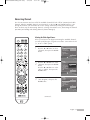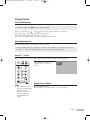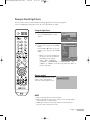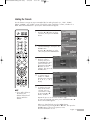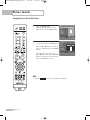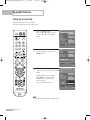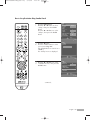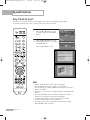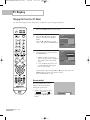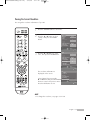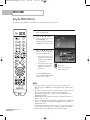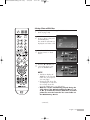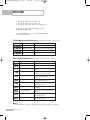
1
BP68-00588H-00Eng(cover) 4/25/06 3:27 PM Page 3 Owner’s Instructions HL-S5088W HL-S5688W HL-S6188W HL-S7178W This device is a Class B digital apparatus. Register your product at www.samsung.com/global/register BP68-00588H-01Eng(002~017) 5/16/06 11:31 AM Page 2 Trademark Notice In the United States, TV GUIDE and other related marks are registered marks of Gemstar-TV Guide International, Inc. and/or one of its affiliates. In Canada, TV GUIDE is a registered mark of Transcontinental Inc., and is used under license by Gemstar-TV Guide International, Inc. Aux États Unis TV GUIDE et d’autres marques relatives sont des marques déposées de Gemstar-TV Guide International, Inc. et/ou d’une de ses sociétés affiliées. Au Canada TV GUIDE est une marque déposée de Transcontinental Inc., utilisée sous licence de Gemstar-TV Guide International, Inc. License Notice The TV Guide On Screen system is manufactured under license from Gemstar-TV Guide International, Inc. and/or one of its affiliates. Le système TV Guide On Screen est fabriqués sous licence de Gemstar-TV Guide International, Inc. et/ou d’une de ses sociétés affiliées. Disclaimer Notice Gemstar-TV Guide International Inc. and/or its related affiliates are not in any way liable for the accuracy or availability of the program schedule information or other data in the TV Guide On Screen system and cannot guarantee service availability in your area. In no event shall Gemstar-TV Guide International, Inc. and/or its related affiliates be liable for any damages in connection with the accuracy or availability of the program schedule information or other data in the TV Guide On Screen system. Gemstar-TV Guide International, Inc. et/ou ses filiales ne sont responsables en aucune manière de l’exactitude ou de la disponibilité des informations relatives aux programmes de télévision ou des autre informations fournies dans le système TV Guide On Screen et ne peut pas garantir la disponibilité du service dans votre région. En aucun cas, Gemstar-TV Guide International, Inc., et/ou ses filiales ne peuvent être tenues responsables pour tout dommage en relation avec l’exactitude ou la disponibilité des informations relatives aux programmes de télévision ou des autre informations fournies dans le système TV Guide On Screen. © 2006 Samsung Electronics Co., Ltd. All rights reserved. English - 2 BP68-00588H-00Eng(002~017) 4/25/06 3:32 PM Page 3 A Guide to Digital TV • What is Digital Television? Digital television (DTV) is a new way of transmitting high quality video and audio to your TV set. Using DTV, broadcasters can transmit high definition TV (HDTV) images, Dolby digital surround audio, and new services such as multicasting (transmitting more than one program on the same TV channel) and datacasting. Several of these services can be combined into a single digital broadcast. Digital Television Services • Digital Picture Quality DTV programs are transmitted in two different formats. The first is Standard Definition Television (SDTV) and the second is High Definition Television (HDTV). • SDTV program formats include 480-line interlaced (480i) and 480-line progressive (480p) video. 480i programs are essentially a digital version of our current analog TV programs, while the 480p format offers improved image detail over 480i. Some 480p programs are broadcast in widescreen and are comparable to progressive-scan DVD movies in image quality. • HDTV program formats include 1080-line interlaced (1080i) and 720-line progressive (720p). Both HDTV formats are always broadcast in widescreen, and offer much higher picture quality than SDTV. • Dolby Surround Sound With DTV, you can listen to a variety of Dolby digital audio formats from Dolby Surround 2.0 to Dolby Digital 5.1 surround, using your home audio system. Many HDTV programs are now broadcast with DD 5.1 soundtracks. English - 3 BP68-00588H-00Eng(002~017) 4/25/06 3:32 PM Page 4 CableCARD and Digital Cable Ready TVs CableCARD and Digital Cable Ready TVs are the products of a new digital cable standard. This new standard is called OpenCable and it is a concerted effort to standardize the digital cable service network interface in North America. For more information, please refer to www.cablelabs.com. Digital Cable Ready TVs are equipped with a proper digital cable tuner to receive digital cable signals from your local cable service provider. They are also designed to work with digital cable card modules (PCMCIA card modules called CableCARDs). These PCMCIA card modules or CableCARDs will be provided by your local cable service provider after a proper subscription process. The provided CableCARD from your local cable service provider needs to be inserted into the CableCARD slot of a Digital Cable Ready TV. Please refer to page 22 for how to insert the CableCARD. A digital set-top box which used to be provided by the cable service provider is no longer needed with Digital Cable Ready TVs and CableCARDs. When CableCARD is inserted into the slot, the TV screen will show the message that CableCARD is inserted and tries to download necessary data such as channel information or subscription information from your digital cable service provider. When you insert CableCARD for the first time, this process may take a few minutes depending on the amount of data your cable provider needs to send. During this process the digital cable service provider or CableCARD may display messages on the TV screen to help or give you further information. Please contact your local cable provider for more information on service availability and how to acquire a CableCARD. NOTE • This television receiver supports the copy protection system regulated by DTLA (Digital Transmission Licensing Administrator). It should be noted that copy protected content may not be viewable depending on your particular connections. English - 4 BP68-00588H-00Eng(002~017) 4/25/06 3:32 PM Page 5 Q&A 1. Is the antenna I use for existing TV reception good enough for DTV? Over-the-air (OTA) digital TV broadcasting uses the same channels as analog TV and works well with many existing TV antennas. However, DTV broadcast channel assignments are different than analog channels. You should find out whether your local DTV broadcasts are on VHF (channels 2-13) or UHF (channels 14-69) to see if you need a different antenna. If your DTV channels are on UHF and you already get good UHF reception, your present antenna may work fine. The same holds true for VHF DTV reception. Note that in some markets, both VHF and UHF channels are used for DTV broadcasts. You can find out the latest DTV channel assignments for your area by browsing selected Internet web sites such as www.titantv.com, www.10000watts.com, and www.fcc.gov. 2. How difficult is it to receive DTV signals indoors? This depends on whether your local DTV stations are running full power or not and how close your location is to the transmission tower. DTV receivers do not require as much signal as analog TV receivers to produce high-quality images and sound. Once the DTV signal level exceeds a certain threshold at the receiver, the digital video and audio data is decoded at the same quality it was originally encoded for broadcast. This is a big advantage for DTV over analog TV - there is no noise, ghosting, static, or scratchy audio. 3. How can I connect an antenna in my townhouse, cooperative apartment, condominium, or apartment? The Federal Communications Commission’s OTARD Rule (part of the Telecommunications Act of 1996) allows residents of condominiums, townhouse, or members of neighborhood associations to put up outside antennas for reception of broadcast TV signals as long as those antennas are not located in common areas and are no more than 12’ in height. Residents of rental units (apartments, etc.) are not covered by the OTARD rules and will have to use indoor antennas to receive DTV broadcasts. It is possible that the landlord of an apartment complex can provide broadcast DTV signals via a master TV antenna system to each apartment. 4. Can I connect my DTV set top receiver to my cable TV service? Cable TV systems use a different method for transmitting digital TV programs that is currently incompatible with broadcast DTV set-top receivers. So you will still need to use an outdoor or indoor antenna to receive OTA broadcast DTV programs. The good news is that you won’t have to pay a monthly or per-program charge to watch OTA DTV and HDTV programs. They’re free, unlike subscription satellite TV or premium cable TV. All you need is an antenna and a DTV set-top receiver to enjoy clear, sharp widescreen images and high-quality audio. 5. I hear a Clicking sound in standby mode. You will hear the sound if you have set both ANTENNA (Air) and Cable to “Yes” in the TV Guide On ScreenTM Setup. However, do not worry about this since the sound comes from inside your TV while it receives data for your TV Guide. English - 5 BP68-00588H-01Eng(002~017) 5/16/06 11:32 AM Page 6 Table of Contents Your New Wide TV.................................................................................10 Viewing Position ....................................................................................................10 List of Features.......................................................................................................11 Accessories ...........................................................................................................11 Front Panel Indicators .............................................................................................12 Front/Right Side Buttons .........................................................................................13 Side Panel Jacks ....................................................................................................13 Rear Panel Jacks ....................................................................................................14 Remote Control......................................................................................................15 Connections ...........................................................................................18 Connecting VHF and UHF Antennas ........................................................................18 Antennas with 75-ohm Round Leads ..............................................................18 Connecting Cable TV .............................................................................................19 Cable without a Cable Box...........................................................................19 Cable with a Cable Box that Descrambles All Channels...................................19 Cable with a Cable Box that Descrambles Some (But Not All) Channels ............20 Connecting a VCR .................................................................................................21 Connecting a VCR to the Video or S-Video/Audio jack....................................21 Connecting CableCARD .........................................................................................22 Connecting a Camcorder .......................................................................................23 Connecting a DVD Player .......................................................................................24 Connecting to HDMI (High Definition Multimedia Interface) ..............................24 Connecting to Y, PB, PR .................................................................................24 Connecting to Audio and Video Jacks............................................................25 Connecting a DTV Set-Top Box ................................................................................26 Connecting to Y, PB, PR .................................................................................26 Connecting to DVI (Digital Visual Interface) ....................................................26 Connecting a VCR and DTV Set-Top Box ........................................................27 Connecting to HDMI (High Definition Multimedia Interface) ..............................27 Connecting a Digital Audio System..........................................................................28 Connecting to an Analog Amplifier..........................................................................29 Operation ..............................................................................................32 Turning the TV On and Off .....................................................................................32 Dynamic Menus and On-Screen Displays .................................................................32 Navigating Menus by Using the Menu Map .............................................................33 Selecting a Menu Language....................................................................................34 Memorizing Channels ............................................................................................35 Changing Channels ...............................................................................................37 Customizing Your Remote Control ............................................................................38 Remote Control Codes............................................................................................42 Setting the Clock....................................................................................................45 Setting the On/Off Timer ........................................................................................47 Setting the Sleep Timer ...........................................................................................48 Viewing an External Signal Source ..........................................................................49 Assigning Names to External Input Mode .................................................................50 Channel Control .....................................................................................52 Selecting Your Favorite Channels .............................................................................52 Viewing the Channel Lists .......................................................................................53 Adding and Erasing Channels.................................................................................54 Labeling the Channels ............................................................................................55 Fine Tuning Analog Channels Analog ........................................................................56 Checking the Digital-Signal Strength Digital ..............................................................57 LNA (Low Noise Amplifier) .....................................................................................58 Picture Control ........................................................................................60 Picture Control.......................................................................................................60 Changing the Picture Size.......................................................................................63 English - 6 BP68-00588H-00Eng(002~017) 4/25/06 3:32 PM Page 7 Digital Noise Reduction ..........................................................................................64 DNIe (Digital Natural Image engine)........................................................................65 Setting the My Color Control Mode .........................................................................66 Using the Color Weakness Enhancement Feature.......................................................68 Setting the Film Mode ............................................................................................69 Viewing Picture-In-Picture.........................................................................................70 Freezing the Picture................................................................................................76 Setting the Blue Screen Mode..................................................................................77 Sound Control ........................................................................................80 Sound Control .......................................................................................................80 Setting the SRS TSXT ..............................................................................................82 Auto Volume..........................................................................................................83 Choosing a Multi-Channel Sound (MTS) track Digital .................................................84 Choosing a Multi-Channel Sound (MTS) track Analog .................................................85 Selecting the Internal Mute......................................................................................86 Setting the On/Off Melody.....................................................................................87 Special Features .....................................................................................90 Setting the Function Help ........................................................................................90 Menu Transparency Level........................................................................................91 Using Game Mode ................................................................................................92 Using the V-Chip....................................................................................................93 Using the V-Chip for Digital channels .....................................................................103 Viewing Closed Captions (On-Screen Text Messages) Analog ....................................105 Viewing Closed Captions (On-Screen Text Messages) Digital ....................................107 Using the CableCARD ..........................................................................................109 Using the CableCARD Setup Function ....................................................................110 Using TV Guide On ScreenTM ................................................................................112 Using TV Guide On ScreenTM Setup........................................................................113 Using the D-Net ....................................................................................116 How to connect compatible IEEE1394 Devices........................................................116 Connection Options .............................................................................................118 4-Pin and 6-Pin Connectors ...................................................................................119 Selecting a D-Net device ......................................................................................120 The D-Net control panel........................................................................................122 Operating Tips ....................................................................................................124 Recording Tips.....................................................................................................126 Tips on stopping recording ...................................................................................126 Troubleshooting (D-Net) ........................................................................................127 PC Display ...........................................................................................132 Using Your TV as a Computer (PC) Display .............................................................132 Adjusting the Picture Quality .................................................................................135 Changing the Picture Position ................................................................................136 Adjusting the Picture Quality and Position Automatically...........................................137 Changing the Picture Size (PC Mode) ....................................................................138 Viewing the Current Resolution ..............................................................................139 Initializing the Picture Settings ...............................................................................140 WISELINK ............................................................................................142 Using Using Using Using Using the the the the the WISELINK Function................................................................................142 WISELINK Menu ...................................................................................143 PHOTO (JPEG) List.................................................................................144 MP3 List ...............................................................................................151 Setup Menu ..........................................................................................153 Appendix.............................................................................................156 Troubleshooting ...................................................................................................156 Cleaning and Maintaining Your TV ........................................................................158 Using Your TV in Another Country .........................................................................158 Specifications ......................................................................................................159 English - 7 BP68-00588H-00Eng(002~017) 4/25/06 3:32 PM Page 8 SAMSUNG BP68-00588H-00Eng(002~017) 4/25/06 3:32 PM Page 9 Your New Wide TV BP68-00588H-00Eng(002~017) 4/25/06 3:32 PM Page 10 Your New Wide TV Viewing Position To optimize your viewing comfort, please follow the guidelines below for viewing distance. If viewing for an extended period of time, sit as far back from the screen as possible. When installing the product, make sure to keep it away from the wall (more than 10cm/4 inches) for ventilation purposes. • Poor ventilation may cause an increase in the internal temperature of the product, resulting in a shortened component life and degraded performance. English - 10 BP68-00588H-01Eng(002~017) 5/16/06 3:04 PM Page 11 List of Features Your TV is designed and engineered using the latest technology. It is a full-featured, high-performance unit that exceeds industry standards. In addition, it has these special features: • • • • • • • • • • • • • • • • • • • • • • • • Easy-to-operate remote control Dynamic, easy to navigate menus Easy-to-use on-screen menu system you can access from the front/right side panel, or remote control Automatic timer to turn the TV on and off at any time you choose Adjustable picture and sound settings and the ability to memorize your favorite settings Automatic channel tuning for up to 181 channels A special filter to reduce or eliminate reception problems Fine tuning control for the sharpest picture possible A built-in multi-channel sound decoder for stereo and bilingual listening Built-in, dual channel speakers A special sleep timer Picture-in-Picture capability that lets you watch two channels at once Widescreen TV with adjustable image size Life-like clear images provided by DNle technology My Color Control mode to correspond with your color preference Color Weakness Enhancement Feature Digital Input jack Digital Audio Output (OPTICAL) jack CableCARD slot D-Net (IEEE1394) TV Guide On Screen™ Game mode Easy-to-use channel manager menu. WISELINK enables you to view and play photo (JPEG) and audio files (MP3) through the TV’s WISELINK jack. Accessories Once you have unpacked your TV, check to make sure that you have all the parts shown here. If any piece is missing or broken, call your dealer. Remote Control (BP59-00115A)/ AAA Batteries Owner’s Instructions Warranty Card/ Registration Card/ Safety Guide Manual/ Quick Guide Manual/ Power Cord (3903-000144) G-LINKTM Cable (MD96-00036A) Cloth-Clean English - 11 BP68-00588H-01Eng(002~017) 5/16/06 3:04 PM Page 12 Your New Wide TV Front Panel LED Indicators The three lights on the front panel indicate the status of your TV. The product color and shape may vary depending on the model. HL-S5088W/HL-S5688W/HL-S6188W Indicator Lights POWER Press to turn the TV on and off. Remote Control Sensor Aim the remote control towards this spot on the TV. HL-S7178W POWER Press to turn the TV on and off. Remote Control Sensor Aim the remote control towards this spot on the TV. Indicator Light Key : Light is On : Light is Blinking : Light is Off STAND BY/TEMP TIMER LAMP Indication Standby state. The picture will automatically appear in about 15 seconds. Auto Timer ON/OFF has been set and the set will automatically be turned on in about 15 seconds. A cooling fan inside the set is not operating normally. Lamp cover on the rear of the set is not properly shut. Check if the ventilation hole on the rear of the set is blocked, because if the inner temperature is too high, the power will shut off. Lamp may be defective. Please contact a certified technician. • It takes about 30 seconds for the TV to warm up, so normal brightness may not appear immediately. • The TV has a fan to keep the inside lamp from overheating. You’ll occasionally hear it working. English - 12 BP68-00588H-01Eng(002~017) 5/16/06 3:04 PM Page 13 Front/Right Side Buttons The buttons on the front/right side panel control your TV’s basic features, including the on-screen menu system. To use the more advanced features, you must use the remote control. The product color and shape may vary depending on the model. HL-S5088W/HL-S5688W/HL-S6188W Œ Press to switch between viewing TV programs and signals from connected components. ´ Press to see the on-screen menu. ˇ Press to raise or lower the volume and to select items when using the on-screen menu. ¨ Press to change channels and move between items on the on-screen menu. ˆ Press to activate (or change) a particular item. HL-S7178W Press to switch between viewing TV programs and signals from connected components. Press to see the on-screen menu. Press to raise or lower the volume and to select items when using the on-screen menu. Press to change channels and move between items on the on-screen menu. Press to activate (or change) a particular item. Side Panel Jacks Use the right side panel jacks to connect a component that is used only occasionally (a camcorder or video game, for example). The product color and shape may vary depending on the model. Connect the video signal from a camcorder or video game. Connect the audio signal from a camcorder or video game. You can connect a USB mass storage device to view photo files (JPEG) and play audio files (MP3). English - 13 BP68-00588H-01Eng(002~017) 5/16/06 11:34 AM Page 14 Your New Wide TV Rear Panel Jacks Œ CableCARDTM Insert a CableCARD into the slot. (Refer to page 22) ´ S-VIDEO INPUT jacks Connects an S-Video signal from an S-VHS VCR or DVD player. (Refer to page 21) ˇ VIDEO/AUDIO INPUT jacks Connect video/audio signals from external sources, such as VCR or DVD players. (Refer to pages 21 and 25) ¨ VIDEO/AUDIO OUTPUT jacks Sends video/audio signals from the TV to an external source, such as a VCR. These jacks are available only in TV, Video and S-Video modes. (Refer to pages 21 and 27) ˝ DVI AUDIO (L/R) IN Connect to the DVI audio output jack of an external device. (Refer to page 26) Ô DIGITAL AUDIO OUT (OPTICAL) jack Connect to a Digital Audio Component. (Refer to page 28) G-LINK TM Connect the IR controller cable to the G-LINKTM terminal on your TV. Ò RS232C Connection for professional linking network and service usage. Ú D-Net (IEEE1394) S400 MPEG Connect to external IEEE1394 digital products such as digital VCRs and camcorders. Two jacks are provided for this purpose, which allow for a high degree of flexibility for connecting your ˆ COMPONENT IN 1, 2 jacks (Y, PB, PR, AUDIO L/R) D-Net controlled system. (Refer to pages 116~130) Use these jacks to connect the component video/audio signals from a DVD player or a Set-Top Box. (Refer to pages 24 and 26) Æ ANTENNA terminals Ø PC VIDEO INPUT jack Connect to the video output jack on your PC. ∏ PC AUDIO INPUT jack Connect to the audio output jack on your PC. (Refer to page 132) ” HDMI (High Definition Multimedia Interface) INPUT jacks (HDMI IN 2) Connect to the HDMI jack of a device with HDMI output. ’ HDMI (High Definition Multimedia Interface)/ DVI INPUT jack (HDMI 1/DVI IN) Connect to the HDMI jack of a device with HDMI output. These inputs can also be used as a DVI connection with separate analog audio inputs. An optional HDMI/DVI cable will be necessary to make this connection. When using an optional HDMI/DVI adapter, the DVI analog audio inputs on your TV allow you to receive left and right audio from your DVI device. (Not compatible with PC) (Refer to pages 24 and 27) English - 14 Two independent cables or antennas can be connected to these terminals. Use “ANT 1 IN (CABLE)” and “ANT 2 IN (AIR)” terminals to receive a signal from VHF/UHF antennas or your cable system. (Refer to pages 18~20) ı POWER IN Connect the supplied power cord. BP68-00588H-01Eng(002~017) 5/16/06 11:34 AM Page 15 Remote Control You can use the remote control up to about 23 feet from the TV. When using the remote control, always point it directly at the TV. You can also use your remote control to operate your VCR, Cable box, DVD player and Set-top box. See pages 38~44 for details. 1. POWER 20. SOURCE Turns the TV on and off. 2. Channel Number Press to directly tune to a particular channel. 3. - Press to select additional channels (digital and analog) being broadcast by the same station. For example, to select channel “54-3”, press “54”, then press “-” and “3”. 4. ANTENNA Press to select “AIR” or “CABLE”. 21. PRE-CH Tunes to the previous channel. 22. WISELINK This function enables you to view and play photo (JPEG) and audio files (MP3) from an external device. (Refer to page 143) 23. REC 5. CH MGR It display “Channel Manager” on the screen. 6. VCR/DVD Controls Controls VCR or DVD functions: Rewind, Stop, Play/Pause, Fast Forward. 7. VOL +, VOL - Press to increase or decrease the volume. 8. MUTE Press to mute the TV sound. Use to record in TV Guide menu. (Refer to the TV Guide On ScreenTM manual and TV Guide On ScreenTM Quick Setup Sheet for further information on G-LINKTM.) 24. œœ/Day-, Day+/√√ Moves forward or backwards in 24 hour increments in the Listings Grid in the TV Guide on screenTM. 25. CH / Press to change channels. Moves from one set of screen information to the next in the TV Guide On ScreenTM. 9. MENU Displays the main on-screen menu. 10. ▲, ▼, œ, √, ENTER Press to move highlight up, down, left, or right. While using the on-screen menus, press ENTER to activate (or change) a particular item. 11. INFO Press to display information on the TV screen. 12. TV GUIDE Press to display all of the available video sources (TV, AV1, AV2, AV3, S-Video1, S-Video2, Component1, Component2, PC, HDMI1, and HDMI2). 26. EXIT Press to exit the menu. 27. D-NET Runs the D-Net view function. (Refer to pages 116~130) 28. STILL Press to pause the current screen. (Refer to page 76) Press to display the TV Guide On Screen lnteractive Program Guide (IPG). (Refer to the TV Guide On ScreenTM manual and TV Guide On ScreenTM Quick Setup Sheet for further information on G-LINKTM.) TM 13. P.MODE Adjust the TV picture by selecting one of the preset factory settings (or select your personal, customized picture settings.) (Refer to page 60) 14. S.MODE Select Sound effect. (Refer to page 81) 15. MTS (Multichannel Television Stereo) Press to choose Stereo, Mono or SAP (Secondary Audio Program). 16. SRS Activates TruSurround. (Refer to page 82) 17. CAPTION Controls the caption decoder. 18. SLEEP Press to select a preset time interval for automatic shut off. (Refer to page 48) 19. Mode (TV/DVD/STB/CABLE/VCR) Selects a target device to be controlled by the Samsung remote control (i.e., TV, DVD, STB, CABLE, or VCR). 29. P.SIZE Press to change the screen size. (Refer to page 63) 30. PIP (Picture In Picture) Displays the available channels in sequence. (These buttons change channels in the PIP window only.) When in the TV Guide On ScreenTM mode, toggles the state between locked and unlocked in the Video Window. (For further explanation, see the TV Guide user’s manual.) 31. PIP Controls CH / : Press to display the available channels in sequence. (These buttons change channels in the PIP window only.) (Refer to page 75) 32. FAV.CH (Favorite Channel) Press to switch between your favorite channels. 33. RESET If your remote control is not functioning properly, take out the batteries and press the reset button for about 2~3 seconds. Re-insert the batteries and try using the remote control again. 34. SET Used during set up of this remote control, so that it will work compatibly with other devices (Set-top box, VCR, Cable box, DVD, etc.) NOTES • The Color buttons are used for the channel list function. (Refer to pages 52~55) • This is a special remote control for the visually impaired, and has Braille points on the POWER, VOL +, VOL -, CH / , STOP, and PLAY/PAUSE buttons. • If you are using a cable box, the TV Guide On ScreenTM system needs to be able to change channels on your cable box to download program listings when the TV is not in use. Please connect the supplied G-LINKTM cable to the G-LINKTM jack of the TV. After you connect the G-LINKTM cable you will be able to control your cable box using the TV’s remote. (Refer to the TV Guide On ScreenTM Quick Setup Sheet for further information on G-LINKTM.) English - 15 BP68-00588H-00Eng(002~017) 4/25/06 3:32 PM Page 16 Your New Wide TV Installing Batteries in the Remote Control With normal use, the batteries in the remote control should last about a year. If you notice a performance degradation while using the remote, the batteries may need to be replaced. Make sure you replace both batteries and do not mix old and new batteries in the remote control. If you won’t be using the remote control for a long time, remove the batteries and store them in a cool, dry place. 1 Lift the cover at the back of the remote control upward as shown in the figure. 2 Install two AAA size batteries. Make sure to match the “+” and “–” ends of the batteries with the diagram inside the compartment. 3 Close the cover as shown in the figure. NOTE • Do not mix battery types, i.e, alkaline and manganese. English - 16 BP68-00588H-00Eng(002~017) 4/25/06 3:32 PM Page 17 Connections BP68-00588H-00Eng(018~031) 4/27/06 7:52 PM Page 18 Connections Connecting VHF and UHF Antennas If you do not have a cable system, you will need to connect an antenna to your TV. Antennas with 75-ohm Round Leads If your antenna looks like this: 1 Plug the antenna lead into the ANT 2 IN (AIR) on the rear panel of your TV. English - 18 it has 75-ohm round leads. BP68-00588H-00Eng(018~031) 4/27/06 7:52 PM Page 19 Connecting Cable TV You can connect different cable systems to your TV, including cable without a Cable box, and cable with a Cable box that descrambles some or all channels. Cable without a Cable Box 1 Plug the incoming cable into the ANT 1 IN (CABLE) on the rear panel of your TV. Cable with a Cable Box that Descrambles All Channels 1 Find the cable connected to the ANTENNA OUT terminal on your Cable box. This terminal might be labeled “ANT OUT”, “VHF OUT” or simply “OUT”. 2 Connect the other end of the cable to the “ANT 1 IN (CABLE)” terminal on the rear panel of your TV. English - 19 BP68-00588H-00Eng(018~031) 4/27/06 7:52 PM Page 20 Connections Cable with a Cable Box that Descrambles Some (But Not All) Channels To complete this connection you will need a two-way splitter, an RF (A/B) switch, and four coaxial cables (which you can buy from your Samsung dealer or any electronics store). 1 Find and disconnect the cable that is connected to the ANTENNA IN terminal of your Splitter. This terminal might be labeled “ANT IN”, “VHF IN” or simply, “IN”. Connect this cable to a two-way splitter. 2 Connect a coaxial cable between an OUT terminal of the splitter and the IN terminal of the Cable box. 3 Connect a coaxial cable between the ANTENNA OUT terminal of the Cable box and the B-IN terminal of the RF (A/B) switch. 4 Connect another cable between the other OUT terminal on the splitter and the A–IN terminal on the RF (A/B) switch. 5 Connect the last coaxial cable between the OUT terminal of the RF (A/B) switch and the ANT 1 IN (CABLE) on the TV. After you’ve made this connection, set the A/B switch to the “A” position for normal viewing. Set the A/B switch to the “B” position to view scrambled channels. (When you set the A/B switch to “B”, you will need to tune your Set-Top Box to the Cable box's output channel, which is usually channel 3 or 4.) English - 20 BP68-00588H-00Eng(018~031) 4/27/06 7:52 PM Page 21 Connecting a VCR Connecting a VCR to the Video or S-Video/Audio jack 1 Connect a video cable between the VIDEO IN (1 or 2) (or S-VIDEO IN 1 or 2) jack on the TV and the VIDEO (or S-VIDEO) output jack on the VCR. 2 Connect a set of audio cables between the AUDIO IN (1 or 2) jacks on the TV and the AUDIO output jacks on the VCR. 3 Connect a video cable between the VIDEO OUT jack on the TV and the VIDEO input jack on the VCR. 4 TV Rear Panel Incoming Cable or Antenna 4 2 1 or 3 Connect a set of audio cables between the AUDIO OUT jacks on the TV and the AUDIO input jacks on the VCR. Stereo VCR NOTES • For better video, use an S-Video cable. • Please be sure to match the color coded input terminals and cable jacks. • Connecting Video/Audio cables from the Video and Audio Out jacks on the TV to the A/V In jacks on your VCR enables you to record from the TV onto the VCR. • For information about VCR timer recording using the TV Guide On ScreenTM system, see page 112 in the TV Guide On ScreenTM manual. English - 21 BP68-00588H-00Eng(018~031) 4/27/06 7:52 PM Page 22 Connections Connecting CableCARD You must obtain a CableCARD from a local cable service provider. 1 2 Insert the CableCARD into the “CableCARD” slot and the message “CableCARDTM Inserted” is displayed on the screen. If the channel information does not already exist, the message “Updating Channel List” is displayed during channel information configuration. When channel information configuration is finished, the message “Updating is Completed” is displayed. It indicates that the channel list is now updated. English - 22 TV Rear Panel Please insert the card as shown. Incoming Cable or Antenna BP68-00588H-01Eng(018~031) 5/16/06 11:35 AM Page 23 Connecting a Camcorder The side panel jacks on your TV make it easy to connect a Camcorder to your TV. You can use your camcorder to view tapes without using a VCR. 1 2 3 Locate the A/V output jacks on the camcorder. They are usually found on the side or back of the camcorder. Connect a video or S-Video cable between the VIDEO IN (or S-VIDEO IN) jack on the TV and the VIDEO (or S-VIDEO) output jack on the Camcorder. The audio-video cables shown here are usually included with a Camcorder. (If not, check your local electronics store.) If your Camcorder is stereo, you need to connect a set of two cables. Connect a set of audio cables between the AUDIO IN jacks on the TV and the AUDIO output jacks on the camcorder. If you have a mono Camcorder, connect L(mono) to the Camcorder audio out using only one audio cable. 1 Camcorder Output Jacks TV Rear and right side Camcorder or 2 3 NOTE • Please be sure to match the color coded input terminals and cable jacks. English - 23 BP68-00588H-01Eng(018~031) 5/16/06 11:35 AM Page 24 Connections Connecting a DVD Player The rear panel jacks on your TV make it easy to connect a DVD player to your TV. Connecting to HDMI (High Definition Multimedia Interface) 1 TV Rear Panel Connect an HDMI cable between the HDMI IN 2 (or HDMI 1/DVI IN) jack on the TV and the HDMI OUT jack on the DVD player. Incoming Cable or Antenna 1 DVD Player Connecting to Y, PB, PR 1 To enable Component video viewing, connect a set of Component video cables between the COMPONENT (1 or 2) VIDEO (Y, PB, PR) IN jacks on the TV and the COMPONENT (Y/PB/PR or Y/CB/CR) OUT jacks on the DVD player. 2 Connect a set of audio cables between the COMPONENT (1 or 2) AUDIO (L, R) IN jacks on the TV and the AUDIO OUT jacks on the DVD player. TV Rear Panel Incoming Cable or Antenna 2 1 NOTE • Please be sure to match the color coded input terminals and cable jacks. English - 24 DVD Player BP68-00588H-00Eng(018~031) 4/27/06 7:52 PM Connecting to Audio and Video Jacks 1 Connect a video cable between the VIDEO IN (1 or 2) jack on the TV and the VIDEO OUT jack on the DVD player. 2 Connect a set of audio cables between the AUDIO IN (1 or 2) jacks on the TV and the AUDIO OUT jacks on the DVD player. NOTES • Component Video separates the video into Y(Luminance (Brightness)), Pb (Blue) and Pr (Red) for enhanced video quality. • Please be sure to match the color coded input terminals and cable jacks. Page 25 TV Rear Panel Incoming Cable or Antenna 2 1 DVD Player English - 25 BP68-00588H-00Eng(018~031) 4/27/06 7:52 PM Page 26 Connections Connecting a DTV Set-Top Box Connecting to Y, PB, PR 1 Connect a set of Component cables between the COMPONENT (1 or 2) VIDEO (Y, PB, PR) IN jacks on the TV and VIDEO (Y/PB/PR or Y/CB/CR) OUT jacks on the Set-Top Box. 2 Connect a set of audio cables between the COMPONENT (1 or 2) AUDIO (L, R) IN jacks on the TV and the AUDIO OUT jacks on the Set-Top Box. NOTES • Please be sure to match the color coded input terminals and cable jacks. • Component Video separates the video into Y(Luminance (Brightness)), Pb (Blue) and Pr (Red) for enhanced video quality. TV Rear Panel 1 2 Incoming Cable or Antenna DTV Set-Top Box TV Rear Panel Connecting to DVI (Digital Visual Interface) 1 Connect an HDMI/DVI cable between the HDMI 1/DVI IN jack on the TV and the DVI OUT jack on the Set-Top Box. 2 Connect a set of audio cables between the DVI AUDIO (L, R) IN jacks on the TV and the AUDIO OUT jacks on the Set-Top Box. 2 NOTES • Requires a Cable Converter. • To use the TV Guide On ScreenTM, you have to connect the G-LINKTM cable. • Make sure the HDMI/DVI source’s power is on, or you will be unable to select it in the TV menu's source list. • The HDMI 1/DVI IN jack is not compatible with PC. English - 26 1 Incoming Cable or Antenna DTV Set-Top Box BP68-00588H-01Eng(018~031) 5/16/06 11:35 AM Page 27 Connecting a VCR and DTV Set-Top Box 1 Connect the Video or S-Video/ Audio cables between the VIDEO or S-VIDEO/AUDIO input jacks on the TV and VIDEO or S-VIDEO/AUDIO output jacks on the VCR. 2 Connect the Video/Audio cables between the VIDEO or S-VIDEO/AUDIO input jacks on the TV and VIDEO or S-VIDEO/AUDIO output jacks on the Set-Top Box. 3 Connect a video cable between the VIDEO OUT jack on the TV and the VIDEO input jack on the VCR. 4 Connect a set of audio cables between the AUDIO OUT jacks on the TV and the AUDIO input jacks on the VCR. 5 Use the coaxial cable to connect between the splitter and the ANT 1 IN (CABLE) on the TV and between the splitter and the ANT IN on the Set-Top Box. Incoming Cable or Antenna 5 or 2 1 DTV Set-Top Box Stereo VCR Stereo VCR TV Rear Panel 3 Connecting to HDMI (High Definition Multimedia Interface) 1 TV Rear Panel 4 TV Rear Panel Connect an HDMI cable between the HDMI IN 2 (or HDMI 1/DVI IN) jack on the TV and the HDMI OUT jack on the Set-Top Box. NOTE 1 • Please be sure to match the color coded input terminals and cable jacks. Incoming Cable or Antenna DTV Set-Top Box English - 27 BP68-00588H-00Eng(018~031) 4/27/06 7:52 PM Page 28 Connections Connecting a Digital Audio System There are many types of digital audio systems on the market today. A simplified illustration of an audio system is shown below. For more information, see your audio system owner’s manual. 1 If your audio system has an optical digital audio input, connect to the “DIGITAL AUDIO OUT(OPTICAL)” jack on the TV. TV Rear Panel NOTES • OPTICAL: converts the electric signal into an optical light signal, and transmits it through glass fibers. • When a Digital audio system is connected to the Digital Audio Out (Optical) terminal: Decrease the gain (volume) of the TV, and adjust the volume level with the audio system's volume control. 1 Audio System Internal Speakers Audio Out (Optical, L/R Out) Internal Mute Off Internal Mute On Internal Mute Off Internal Mute On Video Output RF AV S-Video Active Inactive Active Active Active Component PC HDMI Active Inactive Active Active Inactive When “Internal mute” is set to “On”, Sound menus except “Multi-Track Options” cannot be adjusted. English - 28 BP68-00588H-01Eng(018~031) 5/16/06 11:35 AM Page 29 Connecting to an Analog Amplifier 1 The “AV OUT (AUDIO L/R)” jacks cannot be used for external speakers. You must hook them up to an amplifier. TV Rear Panel NOTES • When an audio amplifier is connected to the “AV OUT (AUDIO L/R)” jacks: Decrease the gain (volume) of the TV, and adjust the volume level with the volume control on the audio amplifier. • If using the HDMI/DVI, PC, or Component input on the TV, the audio output signal is available only when the TV’s Internal Mute is set to on. (Refer to page 86) • Please be sure to match the color coded input terminals and cable jacks. 1 Amplifier English - 29 BP68-00588H-00Eng(018~031) 4/27/06 7:52 PM Page 30 SAMSUNG BP68-00588H-00Eng(018~031) 4/27/06 7:52 PM Page 31 Operation BP68-00588H-01Eng(032~059) 5/16/06 11:37 AM Page 32 Operation Turning the TV On and Off Press the POWER button on the remote control. You can also use the (Power) button on the front panel. Dynamic Menus and On-Screen Displays The on-screen menu system allows you to control the settings of your TV. Access the on-screen menu system by pressing the MENU button on the remote control. Once the on-screen menu appears, use the …/†/œ/√/ENTER buttons on your remote control to select menu items and make adjustments. You can also view the on-screen menu system and make some adjustments using the TV’s front/right side panel buttons. Viewing the Menus 1 2 Press the MENU button. The main menu will appear at the bottom of the screen. There are nine menu groups: “Input”, “Picture”, “Sound”, “Channel”, “Setup”, “PIP”, “Listings”, “Application”, and “Menu Map”. Selects the input options. Enter Press the œ or √ button, then press the ENTER button to select an item you want in the menu. Press the …/†/œ/√/ENTER button to display, change, or use the selected items. Picture Return Mode Size Digital NR DNle My Color Control Film Mode √ 16:9 On On Off Picture Select “Return” by pressing the … or † button, then press the ENTER button to return to the previous menu. Press the EXIT button to exit. Enter Viewing the Display Press the INFO button on the remote control. The TV displays the current channel, the status of certain picture, sound settings and the current time. The information displayed varies according to the selected source. English - 32 No Time Information Cable 3 BP68-00588H-00Eng(032~059) 4/25/06 3:34 PM Page 33 Navigating Menus by Using the Menu Map Using the Menu Map of the main menu enables you to view all menus and select a function quickly. You can select any menu by using the menu map. 1 Press the MENU button. The main menu will appear at the bottom of the screen. 2 Press the œ or √ button to select “Menu Map”, then press the ENTER button. The menu map will appear. 3 Press the … or † button to select a menu, then press the ENTER button. The selected menu will appear. 4 Press the …/†/œ/√/ENTER buttons to display, change, or use the selected items. • • • • • Red button: Displays menus in alphabetical order. Green button: Moves to the previous page. Yellow button: Moves to the next page. Blue button: Exit from the menu. ENTER button: Moves to the selected menu. Press the EXIT button to exit. English - 33 BP68-00588H-00Eng(032~059) 4/25/06 3:34 PM Page 34 Operation Selecting a Menu Language When you start using your television for the first time, you must select the language which will be used for displaying menus and indications. 1 Press the MENU button. Press the œ or √ button to select “Setup”, then press the ENTER button. Setup Return Language Clock Timer Game Mode V-Chip Caption Menu Transparency Blue Screen † Color Weakness English Off Medium Off Setup Enter 2 Press the … or † button to select “Language”, then press the ENTER button. Setup Return Language Clock Timer Game Mode V-Chip Caption Menu Transparency Blue Screen † Color Weakness English Off Medium Off Setup Enter 3 Press the … or † button to select “English”, “Español” or “Français”, then press the ENTER button. Select “Return” by pressing the … or † button, then press the ENTER button to return to the previous menu. Press the EXIT button to exit. Setup Return English Language Clock Español Timer Français Game Mode V-Chip Caption Menu Transparency Medium Blue Screen Off † Color Weakness Setup Enter English - 34 BP68-00588H-00Eng(032~059) 4/25/06 3:34 PM Page 35 Memorizing Channels Your TV can memorize and store all of the available channels for both “off-air” (antenna) and cable channels. After the available channels are memorized, use the CH and CH buttons to scan through the channels. This eliminates the need to change channels by entering the channel digits. There are three steps for memorizing channels: selecting a broadcast source, memorizing the channels (automatic) and adding and deleting channels (channel manager). Selecting the Video Signal Source Before your television can begin memorizing the available channels, you must specify the type of signal source that is connected to the TV (i.e., an air or cable system). 1 Press the MENU button. Press the œ or √ button to select “Channel”, then press the ENTER button. Channel Return Antenna Auto Program Channel Manager Fine Tune Signal Strength LNA Cable Off Channel Enter 2 Press the … or † button to select “Antenna”, then press the ENTER button. Press the … or † button to select “Air” or “Cable”, then press the ENTER button. Channel Return Antenna Air Auto Program Cable Channel Manager Fine Tune Signal Strength LNA On Channel Enter 3 Press the … or † button to select “Auto Program”, then press the ENTER button. Channel Return Antenna Auto Program Channel Manager Fine Tune Signal Strength LNA Air √ On Channel Enter continued... English - 35 BP68-00588H-01Eng(032~059) 5/16/06 11:38 AM Page 36 Operation 4 Press the œ or √ button to select the Antenna connection, then press the ENTER button. Auto Program Select the antennas to Memorize Air Cable • Air : “Air” antenna signal Cable : “Cable” antenna signal Air+Cable : “Air” and “Cable” antenna signals • If a CableCARD is inserted into the “CableCARD” slot on the rear panel, “Cable” and “Air+Cable” are not available. When selecting Cable TV system: Press the ENTER button to start the auto program. By default, the cable TV system is set to “STD”. If you want to select another type of cable system, press the œ or √ button to select Analog or Digital “STD”, “HRC” or “IRC”. Air+Cable Move Enter Return Auto Program Analog Digital Select the cable system. STD HRC STD HRC Move Enter IRC IRC Return • STD, HRC and IRC identify various types of cable TV systems. Contact your local cable company to identify the type of cable system that exists in your particular area. At this point the signal source has been selected. 5 Press the ENTER button to start the auto program. The TV begins memorizing all available stations. Press the ENTER button at any time to interrupt the memorization process. Auto Program Select “Return” by pressing the … or † button, then press the ENTER button to return to the previous menu. Press the EXIT button to exit. Auto Program • The TV must be connected to an air/cable in order to receive digital TV signals. Even if a particular channel is deleted from the memory, you can always tune to that channel directly by using the number buttons on the remote control. • When connecting Digital Cable to a Set-Top Box, Channel Memorization is done on the STB. To view the STB on your TV, select the Input jack the STB is connected to with the SOURCE button on the TV’s remote. (see page 49) Analog Digital Select the cable system. STD HRC STD Move Enter Auto Program in progress. IRC IRC Return Cable 3 85% Stop Enter Return Enter Return Auto Program Auto Program is incomplete. 8 channels were memorized. Air : 7. Cable : 1 NOTES • All available DTV and analog channels are automatically stored in memory. • When a Cable card is inserted, you do not need to save channels. English - 36 HRC OK BP68-00588H-00Eng(032~059) 4/25/06 3:34 PM Page 37 Changing Channels Using the Channel Buttons Press the CH or CH button to change channels. When you press the CH or CH button, the TV changes channels in sequence. You will see all the channels that the TV has memorized. (The TV must have memorized at least three channels.) You will not see channels that were either erased or not memorized. Using the Number Buttons Use the number buttons to quickly switch to any channel. Press the number buttons to go directly to a channel. For example, to select channel 27, press “2,” then “7.” The TV will change channels when you press the second number. Using the “-” Button The “-” button is used to select stations that broadcast both a digital and analog signal. For example, for channel 7-1 (digital), press “7”, then “-”, then “1”. NOTE • HD indicates the TV is receiving a Digital High Definition signal. SD indicates the TV is receiving a Analog standard definition signal. DTV Air 7-1 Using the Previous Channel Press the PRE-CH button. The TV changes to the last channel you were watching. English - 37 BP68-00588H-00Eng(032~059) 4/25/06 3:34 PM Page 38 Operation Customizing Your Remote Control After it has been set up properly, your remote control can operate in five different modes: TV, VCR, Cable, DVD, or Set-Top Box. Pressing the corresponding button on the remote control allows you to switch between these modes, and control whichever piece of equipment you choose. NOTE • The remote control might not be compatible with all DVD Players, VCRs, Cable boxes, and Set-Top Boxes. Setting Up the Remote to Operate Your VCR 1 2 3 4 Turn off your VCR. 5 Press the POWER button on the remote control. Your VCR should turn on if your remote is set up correctly. Press the VCR button on your TV’s remote control. Press the SET button on your TV's remote control. Using the number buttons on your remote control, enter three digits of the VCR code listed on page 42 of this manual for your brand of VCR. Make sure you enter three digits of the code, even if the first digit is a “0”. (If more than one code is listed, try the first one.) If your VCR does not turn on after set-up, repeat steps 2, 3 and 4, but try one of the other codes listed for your brand of VCR. If no other codes are listed, try each VCR code, 000 through 080. Note on Using Remote Control Modes: VCR When your remote control is in “VCR” mode, the volume buttons still control your TV’s volume. English - 38 BP68-00588H-01Eng(032~059) 5/16/06 11:38 AM Page 39 Setting Up the Remote to Operate Your Cable Box 1 2 3 4 Turn off your cable box. 5 Press the POWER button on the remote control. Your cable box should turn on if your remote is set up correctly. Press the CABLE button on your TV’s remote control. Press the SET button on your TV's remote control. Using the number buttons on your remote control, enter three digits of the cable box code listed on page 43 of this manual for your brand of cable box. Make sure you enter three digits of the code, even if the first digit is a “0”. (If more than one code is listed, try the first one.) If your cable box does not turn on after set-up, repeat steps 2, 3 and 4, but try one of the other codes listed for your brand of cable box. If no other codes are listed, try each code, 000 through 046. Note on Using Remote Control Modes: Cable Box When your remote control is in “CABLE” mode, the volume buttons still control your TV’s volume. English - 39 BP68-00588H-00Eng(032~059) 4/25/06 3:34 PM Page 40 Operation Setting Up the Remote to Operate Your DVD 1 2 3 4 Turn off your DVD. 5 Press the POWER button on the remote control. Your DVD should turn on if your remote is set up correctly. Press the DVD button on your TV’s remote control. Press the SET button on your TV's remote control. Using the number buttons on your remote control, enter three digits of the DVD code listed on page 44 of this manual for your brand of DVD. Make sure you enter three digits of the code, even if the first digit is a “0”. (If more than one code is listed, try the first one.) If your DVD does not turn on after set-up, repeat steps 2, 3 and 4, but try one of the other codes listed for your brand of DVD. If no other codes are listed, try each code, 000 through 141. Note on Using Remote Control Modes: DVD When your remote control is in “DVD” mode, the volume buttons still control your TV’s volume. English - 40 BP68-00588H-00Eng(032~059) 4/25/06 3:34 PM Page 41 Setting Up the Remote to Operate Your Set Top Box 1 2 3 4 Turn off your STB. 5 Press the POWER button on the remote control. Your STB should turn on if your remote is set up correctly. Press the STB button on your TV’s remote control. Press the SET button on your TV's remote control. Using the number buttons on your remote control, enter three digits of the STB code listed on page 43 of this manual for your brand of STB. Make sure you enter three digits of the code, even if the first digit is a “0”. (If more than one code is listed, try the first one.) If your STB does not turn on after set-up, repeat steps 2, 3 and 4, but try one of the other codes listed for your brand of STB. If no other codes are listed, try each code, 000 through 074. Note on Using Remote Control Modes: STB When your remote control is in “STB” mode, the volume buttons still control your TV’s volume English - 41 BP68-00588H-00Eng(032~059) 4/25/06 3:34 PM Page 42 Operation Remote Control Codes VCR Brand SAMSUNG ADMIRAL AIWA AKAI AUDIO DYNAMICS BELL&HOWELL BROKSONIC CANDLE CANON CITIZEN COLORTYME CRAIG CURTIS MATHES DAEWOO DB DIMENSIA DYNATECH ELECTROHOME EMERSON FISHER FUNAI GENERAL ELECTRIC GO VIDEO LG(Goldstar) HARMAN KARDON HITACHI INSTANT REPLAY JC PENNEY JCL KENWOOD KLH LIOYD LOGIK LXI JVC MAGNAVOX MARANTZ MARTA KONIA ORION MEI MEMOREX MGA MIDLAND MINOLTA Code 000 001 002 003 004 005 077 078 079 020 025 004 027 032 007 026 018 022 002 003 006 008 015 055 021 056 002 003 006 008 015 055 007 002 024 002 007 008 017 021 025 056 064 066 003 010 011 012 013 014 015 016 007 026 017 025 034 001 003 006 021 022 025 030 032 034 040 047 050 052 060 063 065 066 067 069 073 018 024 028 029 048 051 061 025 002 005 017 021 056 002 006 007 008 009 010 007 019 025 041 042 074 021 002 007 018 019 021 026 037 041 054 056 007 008 018 021 026 037 007 008 018 026 037 070 025 038 025 081 082 083 021 056 059 007 008 018 021 026 037 062 006 036 073 074 075 076 021 006 021 024 025 034 005 019 041 075 Brand MITSUBISHI MONTGOMERY WARD MTC MULTITECH NEC OPTIMUS PANASONIC PENTAX PENTEX RESEARCH+ PHILCO PHILIPS PIONEER PORTLAND PROSCAN QUARTZ QUASAR RADIO SHACK/REALISTIC RCA SANSUI SANYO SCOTT SEARS SHARP SHIMTOM SIGNATURE SONY SYLVANIA SYMPHONIC TANDY TASHIKA TATUNG TEAC TECHNICS TEKNIKA TMK TOSHIBA TOTEVISION UNITECH VECTOR RESEARCH VICTOR VIDEO CONCEPTS VIDEOSONIC WARDS YAMAHA ZENITH Code 019 034 041 046 020 002 025 002 005 025 038 007 008 018 026 037 062 064 020 021 056 071 072 019 041 075 008 021 056 059 021 080 019 026 039 053 015 049 055 017 018 021 056 006 018 020 021 024 025 029 034 048 056 002 017 019 021 035 041 043 057 068 076 026 018 024 003 047 052 067 006 018 019 024 028 029 041 048 051 020 034 045 015 027 033 038 058 025 027 033 044 021 025 056 059 025 018 025 006 037 025 037 068 021 006 021 025 031 066 003 019 029 051 052 002 006 002 007 026 026 007 026 002 002 003 006 019 020 021 024 025 034 038 041 007 008 018 026 037 023 027 033 continued... English - 42 BP68-00588H-00Eng(032~059) 4/25/06 3:34 PM Page 43 Remote Control Codes CABLE BOX Brand SAMSUNG GI HAMLIN HITACHI JERROLD MACOM MAGNAVOX OAK PANASONIC PHILIPS PIONEER RCA REGAL Code 000 001 002 003 004 005 006 007 041 003 024 031 025 030 038 039 025 030 019 023 028 026 003 022 027 037 044 019 021 023 028 004 018 020 044 014 022 040 003 Brand REGENCY SA SCIENTIFIC ATLAN SPRUCER STARGATE 2000 SYLVANIA TEXSCAN TOCOM UNIVERSAL VIEWSTAR WAMER AMEX ZENITH Code 015 023 042 043 042 043 022 036 016 016 032 033 034 019 021 023 028 046 017 029 035 037 045 SAMSUNG SET-TOP BOX Product Ground wave STB Satellite STB CABLE STB STB DVD COMBO Satellite STB HDD COMBO Standard Code 001 002 003 004 008 009 Product Satellite STB HDD COMBO Premium CABLE STB HDD COMBO Standard CABLE STB HDD COMBO Premium Ground wave STB HDD COMBO Standard Ground wave STB HDD COMBO Premium Code 010 011 012 013 014 SET-TOP BOX Code 023 043 018 034 019 035 015 016 017 019 022 045 060 061 062 065 066 067 068 074 DAEWOO DISH NETWORK SYSTEM 069 070 069 DISHPRO 018 024 032 DRAKE 027 DX ANTENNA 025 069 070 071 ECHOSTAR 069 EXPRESSVU 069 GOI 065 GE GENERAL INSTRUMENT 046 047 048 063 064 069 HTS 056 HOME CABLE 022 HITACHI HUGHES NETWORK 015 017 020 IQ 020 IQ PRISM 059 JANEIL 063 JERROID 069 070 JVC Brand ALPHASTAR ANAM CHANNEL MASTER CROSSDIGITAL CHAPARRAL DIRECT TV Brand LG(Goldstar) MAGNAVOX MEMOREX MOTOROLA MACOM MITSUBISHI NEXT LEVEL PHILIPS PRIMESTAR PANASONIC PAYSAT PROSCAN RCA RADIOSHACK REALISTIC STS STAR TRAK SKY SKY LIFE SHACK STAR CHOICE SONY TOSHIBA ULTIMATE TV UNIDEN ZENITH Code 044 073 016 021 036 038 039 040 041 042 016 064 018 015 047 048 064 015 016 017 021 033 036 038 039 040 041 042 067 046 049 050 063 058 059 061 062 016 065 066 051 052 053 065 066 064 057 020 027 026 031 005 006 007 064 064 054 060 015 017 028 029 030 072 060 066 016 021 037 055 056 057 024 031 068 continued... English - 43 BP68-00588H-00Eng(032~059) 4/25/06 3:34 PM Page 44 Operation Remote Control Codes SAMSUNG DVD Product DVD DVDR BD Record VCR COMBO VCR Record DHR COMBO Code 000 001 002 003 004 005 006 007 008 009 010 011 012 013 Product Home Theater VCR COMBO HDD Record COMBO TWIN TRAY COMBO STB DVD COMBO DVD Receiver AV Receiver Code 014 015 016 017 018 019 020 021 Code 030 075 085 072 070 071 074 086 083 084 088 111 112 114 062 074 122 123 027 065 077 078 079 082 080 125 081 095 066 146 067 068 090 060 061 089 133 135 069 074 074 064 113 071 073 091 110 089 092 091 022 033 115 116 073 051 108 109 073 059 100 106 107 074 075 025 031 057 058 054 055 056 076 093 074 094 073 Brand NORCENT NEXT BASE NEC NANTAUS NESA OPTOMEDIA ELECTRONICS OPTIVIEW ONKYO PHILCO PRINCETON PROSCAN PANASONIC PHILIPS ROTEL RIO RCA RAITE ROWA SAMPO SONY SHERWOOD SVA SYLVANIA SHARP SANSUI SANYO SHINSONIC SANYO THOMSON TOSHIBA TECHNICS TVIEW TOKAI TEAC TECHWOOD TREDEX URBAN CONCEPTS VENTURER VOCOPRO YAMAHA YAMAKAWA XWAVE ZENITH Code 048 049 050 052 053 144 074 105 072 076 092 119 044 045 046 047 023 024 034 124 134 136 137 138 036 076 117 118 120 023 035 074 075 131 132 073 038 104 026 029 126 127 128 129 130 141 039 041 042 043 093 140 062 062 094 090 145 028 062 076 139 072 073 096 097 098 099 101 076 075 102 032 063 040 073 103 076 121 DVD Brand ANAM AUDIOVOX AUDIOLOGIC ANABA APEX DIGITAL AIWA BROKSONIC BLAUPUNKT B&K CURTIS MATHES CYBER HOME CLARION CIRRUS CINEVISION DAEWOO DENON FARENHEIT FISHER GPX GO VIDEO GE GREENHILL HITACHI HITEKER HOYO HARMAN / KARDON IRT INTEGRA JBL JVC JATON KENWOOD KISS KONKA KLH LG(Goldstar) LOEWE LASONIC MOBILE AUTHORITY MEMOREX MALATA MAGNAVOX MINTEK MONYKA English - 44 BP68-00588H-00Eng(032~059) 4/25/06 3:34 PM Page 45 Setting the Clock Setting the clock is necessary in order to use the various timer features of the TV. Also, you can check the time while watching the TV. (Just press the INFO button.) Option 1: Setting the Clock Manually 1 Press the MENU button. Press the œ or √ button to select “Setup”, then press the ENTER button. Setup Return Language Clock Timer Game Mode V-Chip Caption Menu Transparency Blue Screen † Color Weakness English Off Medium Off Setup Enter 2 Press the … or † button to select “Clock”, then press the ENTER button. Clock Return Clock Mode Clock Set Month / Day / Year -- . -- . ---Time Zone DST 3 Hour / Minute -- : -- -- Off Setup Press the … or † to select “Clock Mode”, then press the ENTER button. Press … or † to select “Manual”, then press the ENTER button. Enter Clock Return Clock Mode Clock Set Month / Day / Year -- . -- . ---- 4 Auto -- : -- -- Press the … or † button to select “Clock Set”, then press the ENTER button. Time Zone DST Manual Auto -- : -- -Hour / Minute -- : -- -- Off Setup Enter 5 Press the œ or √ button to move to “Month”, “Day”, “Year”, “Hour”, “Minute”, or “am/pm”. Set the time you want by pressing the … or † button, then press the ENTER button. The time set in the Clock Set will appear. Clock Return Clock Mode Clock Set Month / Day / Year -- . -- . ---Time Zone DST Manual -- : -- -Hour / Minute -- : -- -- Off Setup Enter NOTE • The current time will appear every time you press the INFO button. • You can set the month, day, year, hour and minute directly by pressing the number buttons on the remote control. Clock Return Clock Mode Clock Set Month / Day / Year 1 . 1 . 2006 … Select “Return” by pressing the … or † button, then press the ENTER button to return to the previous menu. Press the EXIT button to exit. Manual Hour / Minute 12 : 00 am † Time Zone DST Off Setup Adjust Enter English - 45 BP68-00588H-00Eng(032~059) 4/25/06 3:34 PM Page 46 Operation Option 2: Setting the Clock Automatically The Clock can be set automatically if you are receiving a digital signal. 1 Setup Press the MENU button. Press the œ or √ button to select “Setup”, then press the ENTER button. Return Language Clock Timer Game Mode V-Chip Caption Menu Transparency Blue Screen † Color Weakness English Off Medium Off Setup Enter 2 Clock Press the … or † button to select “Clock”, then press the ENTER button. Return Clock Mode Clock Set Manual -- : -- -- Month / Day / Year -- . -- . ---- Hour / Minute -- : -- -- Time Zone DST Off Setup Enter 3 Clock Press the … or † button to select “Clock Mode”, then press the ENTER button. Press the … or † button to select “Auto”, then press the ENTER button. Return Clock Mode Clock Set Manual Auto -- : -- -Hour / Minute -- : -- -- Month / Day / Year -- . -- . ---Time Zone DST Off Setup Enter 4 Press the … or † button to select “Time Zone”, then press the ENTER button. Press the … or † button to highlight the time zone for your local area (and to move the highlight to the appropriate time zone on the map of the United States), then press the ENTER button. Time Zone Select the time zone where you are located. Newfoundland Atlantic Eastern Central Mountain Pacific Alaska Hawaii • When you set up Auto Time, the set time may not be correct depending on the broadcasting station and signal. If there is a difference between the real time and set time, please set the time manually. 5 Press the … or † button to select “DST”(Daylight Saving Time), then press the ENTER button. Press the … or † button to select “Off” or “On”, then press the ENTER button. Select “Return” by pressing the … or † button, then press the ENTER button to return to the previous menu. Press the EXIT button to exit. Move Enter Return Clock Return Clock Mode Clock Set Month / Day / Year -- . -- . ---Time Zone DST Auto -- : -- -Hour / Minute -- : -- -Off On Setup Enter English - 46 BP68-00588H-00Eng(032~059) 4/25/06 3:34 PM Page 47 Setting the On/Off Timer 1 Press the MENU button. Press the œ or √ button to select “Setup”, then press the ENTER button. Setup Return Language Clock Timer Game Mode V-Chip Caption Menu Transparency Blue Screen † Color Weakness English Off Medium Off Setup Enter 2 Press the … or † button to select “Timer”, then press the ENTER button. Press the … or † button to select “On Timer”, then press the ENTER button. Press the … or † button to adjust “Hour/Minute”, then press the √ button to move to the next step. Set other items using the same method as above. To activate On Timer with the setting entered, set Options to “Once, Daily, Mon~Fri, Mon~Sat, or Off” by pressing … or † button. Press the ENTER button. Timer Return On Timer Channel Air 3 Volume 10 Options Off Off Timer Hour / Minute 12 : 00 am Sleep Timer --- Enter Timer Return On Timer Hour / Minute 12 : 00 am Channel Air 3 † Volume 10 Off Timer Hour / Minute 12 : 00 am Sleep Timer NOTE • Auto Power Off When you set the timer “On”, the television will eventually turn off, if no controls are operated for 3 hours after the TV was turned on by the timer. This function is only available in timer “On” mode and prevents overheating, which may occur if a TV is on for too long (When you are on vacation, for example). Off Options Off Setup … • You can set the hour, minute, and channel directly by pressing the number buttons on the remote control. Off Hour / Minute 12 : 00 am Options Off Off Options Off --- Setup Adjust 3 Press the … or † button to select “Off Timer”, then press the ENTER button. Press the … or † button to adjust “Hour/Minute”, then press the √ button to move to the next step. Set other items using the same method as above. Timer Return On Timer 12 : 00 am Hour / Minute 12 : 00 am Channel Air 3 Volume 10 Options Once Off Timer Hour / Minute 12 : 00 am … To activate Off Timer with the setting entered, set Options to “Once, Daily, Mon~Fri, Mon~Sat, or Off” by pressing … or † button. Press the ENTER button. Enter Options Off † Sleep Timer --- Setup Adjust Enter When finished, select “Return” by pressing … or † button and ENTER button to return to the previous menu. Press the EXIT button to exit. English - 47 BP68-00588H-00Eng(032~059) 4/25/06 3:34 PM Page 48 Operation Setting the Sleep Timer The sleep timer automatically shuts off the TV after a preset time (from 30 to 180 minutes). 1 Press the MENU button. Press the œ or √ button to select “Setup”, then press the ENTER button. Setup Return Language Clock Timer Game Mode V-Chip Caption Menu Transparency Blue Screen † Color Weakness English Off Medium Off Setup Enter 2 Press the … or † button to select “Timer”, then press the ENTER button. Press the … or † button to select “Sleep Timer”, then press the ENTER button. Timer Return On Timer 12 : 00 am Hour / Minute 12 : 00 am Channel Air 3 Volume 10 Options Once Off Timer 12 : 00 am Hour / Minute 12 : 00 am Options Daily Sleep Timer --- Setup Enter 3 Press the … or † button to set sleep timer to “- - - (off)”, “30 min, 60 min, 90 min, 120 min, 150 min, or 180 min”, then press the ENTER button. Timer Select “Return” by pressing the … or † button, then press the ENTER button to return to the previous menu. Press the EXIT button to exit. Off Timer Return On Timer 12 : 00 am Hour / Minute 12 : 00 am Channel Air 3 Volume 10 Options Once 12 : 00 am Hour / Minute 12 : 00 am Options Daily … Sleep Timer 30 min † Setup Adjust Alternate method Press the SLEEP button on the remote control repeatedly until the appropriate time interval appears (any of the preset values from “30 min” to “180 min”). Sleep Timer : 90 min English - 48 Enter BP68-00588H-00Eng(032~059) 4/25/06 3:34 PM Page 49 Viewing an External Signal Source Use the remote control to switch between viewing signals from connected equipment, such as a VCR, DVD, Set-Top Box or the TV source (broadcast or cable). Setting the Signal Source 1 Input Press the MENU button. Press the ENTER button to select “Input”. Return Source List Edit Name TV Input Enter 2 Press the … or † button to select “Source List”, then press the ENTER button. Press the … or † button to select a signal source, then press the ENTER button. Source List Return TV AV1 AV2 AV3 S-Video1 S-Video2 Component1 Component2 † PC √ ------------------------- • When you connect equipment to the TV, you can choose between Input the following sets of jacks: Enter “AV1”, “AV2”, “S-VIDEO1”, “S-VIDEO2”, “COMPONENT1”, “COMPONENT2”, “PC”, “HDMI1”, or “HDMI2” on the TV’s rear panel and “AV3” on the TV’s side panel. Alternate method Press the SOURCE button on the remote control repeatedly to select an external signal source. AV1 NOTES • Only connected devices can be selected. • Before selecting an input source, make sure the corresponding external device is connected first. • HDMI input can be selected only when the external device is turned on and connected to the TV. English - 49 BP68-00588H-01Eng(032~059) 5/16/06 11:39 AM Page 50 Operation Assigning Names to External Input Mode This feature enables you to name the input source you have connected. 1 Press the MENU button. Press the ENTER button to select “Input”. Input Return Source List Edit Name TV Input Enter 2 Press the … or † button to select “Edit Name”, then press the ENTER button. Input Return Source List Edit Name TV √ Input Enter 3 Press the … or † button to select a signal source to be edited, then press the ENTER button. Edit Name Return AV1 AV2 AV3 S-Video1 S-Video2 Component1 Component2 PC † HDMI1 ---------------------------- Input Enter 4 Press the … or † button to select the external device : VCR, DVD, D-VHS, Cable STB, HD STB, Satellite STB, PVR STB, AV Receiver, DVD Receiver, Game, Camcorder, DVD Combo, DVD HDD Recorder, PC, Internet TV Recv., Interactive TV Recv., VOD (Video On Demand) STB, TV. Edit Name Return AV1 AV2 AV3 S-Video1 S-Video2 Component1 Component2 PC † HDMI1 ---VCR DVD D-VHS Cable STB HD STB Satellite STB † PVR STB Input Press the ENTER button. Enter Set other signal sources (AV2, AV3, S-Video1, S-Video2, Component1, Component2, PC, HDMI1, HDMI2) using the same method as listed above. Select “Return” by pressing the … or † button, then press the ENTER button to return to the previous menu. Press the EXIT button to exit. English - 50 BP68-00588H-00Eng(032~059) 4/25/06 3:34 PM Page 51 Channel Control BP68-00588H-00Eng(032~059) 4/25/06 3:35 PM Page 52 Channel Control Selecting Your Favorite Channels You can store your favorite channels for each available input source (such as TV and CATV). This allows you to quickly and easily find frequently watched channels by pressing the FAV.CH button on the remote control. Preset : To use the Channel Manager function, first run Auto Program (see pages 35~36). To Store Your Favorite Channels: 1 Press the MENU button. Press the œ or √ button to select “Channel”, then press the ENTER button. Channel Return Antenna Auto Program Channel Manager Fine Tune Signal Strength LNA Air On Channel Enter 2 Press the … or † button to select “Channel Manager”, then press the ENTER button. Press the … or † button to select “All”, then press the ENTER button. Channel Manager Return All Added Favorite Default List Mode All Channel Enter 3 All Channel List Air 2 Added Favorite Press the …/†/œ/√ button to select a 2 4 Watch 5 7 Add channel, then press 8 10 Delete 11 13 Name the ENTER button and 14 16 Favorite Return 17 19 option window will 20 21 22 appear. Press the Enter Return … or † button to select “Favorite”, then press the ENTER button and a mark, designating the channel as a Favorite Channel will appear. Press the ENTER button again to deselect the selected channel and the mark will disappear. 1/4 List Mode Delete All • Red button (List Mode) : If you press the Red button repeatedly, the All Channel List, the Added Channel List or the Favorite Channel List is selected sequentially. NOTE • Only memorized channels can be set as Favorite channels. Select “Return” by pressing the … or † button, then press the ENTER button to return to the previous menu. Press the EXIT button to exit. To View Your Favorite Channels: No Time Information Select Channel menu ➔ Channel Manager ➔ Favorite Press the FAV.CH button repeatedly to jump from one favorite channel to another. English - 52 Air 2 BP68-00588H-00Eng(032~059) 4/25/06 3:35 PM Page 53 Viewing the Channel Lists You can display a list of all channels, added channels, or your favorite channels. Preset : To use the Channel Manager function, first run Auto Program (see pages 35~36). 1 Press the MENU button. Press the œ or √ button to select “Channel”, then press the ENTER button. Channel Return Antenna Auto Program Channel Manager Fine Tune Signal Strength LNA Air On Channel Enter 2 Press the … or † button to select “Channel Manager”, then press the ENTER button. Press the … or † button to select “All”, then press the ENTER button. Channel Manager Return All Added Favorite Default List Mode All Channel Enter 3 4 If you want to watch the channel, press the …/†/œ/√ buttons to select a channel, then press the ENTER button and the option window will appear. All Channel List Air 2 Added 1/4 2 3 4 5 6 7 8 9 10 11 12 13 14 15 16 17 18 20 21 19 22 List Mode Page Move Enter Delete All Return All Channel List Press the ENTER button to select “Watch”, then press the ENTER button again. The selected channel broadcasting window will appear. Air 8 Added 1/4 2 Watch 4 5 Add 7 8 Delete 10 11 Name 13 14 Favorite 16 17 Return 20 21 19 22 List Mode Enter Delete All Return Alternate method All Channel List Press the CH MGR button on the remote control to display a list of channels. Air 2 Added 1/4 2 4 3 6 7 8 9 10 11 12 13 14 15 16 17 18 20 21 5 19 22 List Mode Page Move Enter Delete All Exit English - 53 BP68-00588H-00Eng(032~059) 4/25/06 3:35 PM Page 54 Channel Control Adding and Erasing Channels Preset : To use the Channel Manager function, first run Auto Program (See pages 35~36). 1 Press the MENU button. Press the œ or √ button to select “Channel”, then press the ENTER button. Channel Return Antenna Auto Program Channel Manager Fine Tune Signal Strength LNA Air On Channel Enter 2 Channel Manager Press the … or † button to select “Channel Manager”, then press the ENTER button. Press the … or † button to select “Added” then press the ENTER button. Return All Added Favorite Default List Mode All Channel Enter 3 Add Channel List Air 2 Press the …/†/œ/√ button to select a 2 Watch 5 Add channel, then press 8 Delete 11 Name the ENTER button and Favorite 14 Return 17 option window will 20 21 appear. Press the … or † Add Channel List button to select “Add”, Air 2 then press the ENTER 2 Watch button; the mark 5 Add 8 Delete will appear and the 11 Name 14 Favorite channel will be added. Return 17 20 21 To deselect the selected channel, press the … or † button to select “Delete”, then press the ENTER button. The mark will disappear. 1/4 4 7 10 13 16 19 22 List Mode Add All Enter Delete All Return Added 1/4 4 7 10 13 16 19 22 List Mode Enter Delete All Return • Red button (List Mode) : If you press the Red button repeatedly, the All Channel List, the Added Channel List or the Favorite Channel List is selected sequentially. • Green button (Add All) : Press to add all channels of the channel list. • Yellow button (Delete All) : Press to delete all channels of the channel list. Select “Return” by pressing the … or † button, then press the ENTER button to return to the previous menu. Press the EXIT button to exit. English - 54 BP68-00588H-00Eng(032~059) 4/25/06 3:35 PM Page 55 Labeling the Channels Use this feature to assign an easy-to-remember label to analog channels (i.e., “CBS”, “ESPN”, “PBS2”, CNN02”, etc.) A label consists of five fields, where each field is a letter, a number or a blank. When the INFO button is pressed, the channel label will appear. 1 Channel Press the MENU button. Press the œ or √ button to select “Channel”, then press the ENTER button. Return Antenna Auto Program Channel Manager Fine Tune Signal Strength LNA Air On Channel Enter 2 Press the … or † button to select “Channel Manager”, then press the ENTER button. Press the … or † button to select “All”, then press the ENTER button. Channel Manager Return All Added Favorite Default List Mode All Channel Enter 3 4 Press the …/†/œ/√ button to select a channel, then press the ENTER button and option window will appear.Press the … or † button to select “Name”, then press the ENTER button. Press the … or † button to select a letter, a number or a blank. (Results in this sequence: A...Z, 0...9, +, -, ✽, /, blank). All Channel List Air 2 Added 1/4 2 Watch 4 5 Add 7 8 Delete 10 11 Name 13 14 Favorite 16 17 Return 20 21 19 22 List Mode Enter 2 Added 1/4 2 ▲ Watch 4 5 Add 7 A ▼ 8 Delete 10 11 Name 13 14 Favorite 16 17 Return 20 21 19 22 Adjust NOTE • If you add or delete a TV channel, the labeled channels will also be added or deleted. Press the œ or √ button to switch to the next field, which will be selected. Select a second letter or digit by pressing … or † button, as above. Return All Channel List Air List Mode 5 Delete All Enter Delete All Return All Channel List Air 2 Added 1/4 2 ▲ Watch 4 5 Add 7 C N N 0 ▼2 8 Delete 10 11 Name 13 14 Favorite 16 17 Return 20 21 19 22 List Mode Adjust Enter Delete All Return Repeat the process to select the last three digits. To erase the assigned new name, press and hold the … or † button until a blank appears. When you have finished, press the MENU button. Select “Return” by pressing the … or † button, then press the ENTER button to return to the previous menu. Press the EXIT button to exit. English - 55 BP68-00588H-00Eng(032~059) 4/25/06 3:35 PM Page 56 Channel Control Fine Tuning Analog Channels Analog Use fine tuning to manually adjust a particular channel for optimal reception. 1 Press the MENU button. Press the œ or √ button to select “Channel”, then press the ENTER button. Channel Return Antenna Auto Program Channel Manager Fine Tune Signal Strength LNA Air On Channel Enter 2 Press the … or † button to select “Fine Tune”, then press the ENTER button. Channel Return Antenna Auto Program Channel Manager Fine Tune Signal Strength LNA Air √ On Channel Enter 3 Press the † button. Press the œ or √ button to adjust the fine tuning. To store the fine tuning setting in the TV’s memory, press the ENTER button. Fine Tune Return Air 7 * +3 OK Reset Channel Adjust 4 To reset the fine tuning setting, press the † button to select “Reset”, then press the ENTER button. Select “Return” by pressing the … or † button, then press the ENTER button to return to the previous menu. Press the EXIT button to exit. Save Fine Tune Return Air 7 0 OK Reset Channel Move NOTE • Only analog TV channels can be fine tuned. • “*” will appear next to the name of fine-tuned channels. English - 56 Enter BP68-00588H-00Eng(032~059) 4/25/06 3:35 PM Page 57 Checking the Digital-Signal Strength Digital Unlike analog channels, which can vary in reception quality from “snowy” to clear, digital (HDTV) channels have either perfect reception quality or you will not receive them at all. So, unlike analog channels, you cannot fine tune a digital channel. You can, however, adjust your antenna to improve the reception of available digital channels. 1 Press the MENU button. Press the œ or √ button to select “Channel”, then press the ENTER button. Channel Return Antenna Auto Program Channel Manager Fine Tune Signal Strength LNA Air On Channel Enter 2 Press the … or † button to select “Signal Strength”, then press the ENTER button. Channel Return Antenna Auto Program Channel Manager Fine Tune Signal Strength LNA Air √ On Channel Enter If the signal strength meter indicates that the signal is weak, physically adjust your antenna to increase the signal strength. Continue to adjust the antenna until you find the best position with the strongest signal. Signal Strength Return Channel Enter Select “Return” by pressing the ENTER button, to return to the previous menu. Press the EXIT button to exit. English - 57 BP68-00588H-00Eng(032~059) 4/25/06 3:35 PM Page 58 Channel Control LNA (Low Noise Amplifier) If the TV is operating in a weak-signal area, sometimes the LNA function can improve the reception (a low-noise preamplifier boosts the incoming signal). 1 Press the MENU button. Press the œ or √ button to select “Channel”, then press the ENTER button. Channel Return Antenna Auto Program Channel Manager Fine Tune Signal Strength LNA Air On Channel Enter 2 Press the … or † button to select “LNA”, then press the ENTER button. Channel Return Antenna Auto Program Channel Manager Fine Tune Signal Strength LNA Air On Channel Enter 3 Press the … or † button to select “Off” or “On”, then press the ENTER button. Select “Return” by pressing the … or † button, then press the ENTER button to return to the previous menu. Press the EXIT button to exit. Channel Return Antenna Auto Program Channel Manager Fine Tune Signal Strength LNA Air Off On Channel NOTES • LNA functions only when antenna is set to Air. The LNA setting must be made separately for each channel. • If the picture is noisy with the LNA set to On, select Off. English - 58 Enter BP68-00588H-00Eng(032~059) 4/25/06 3:35 PM Page 59 Picture Control BP68-00588H-01Eng(060~079) 5/16/06 11:40 AM Page 60 Picture Control Picture Control You can select the type of picture which best corresponds to your viewing requirements. Changing the Picture Standard 1 Press the MENU button. Press the œ or √ button to select “Picture”, then press the ENTER button. Picture Return Mode Size Digital NR DNIe My Color Control Film Mode 16:9 On On Off Picture Enter 2 Press the … or † button to select “Mode”, then press the ENTER button. Press the … or † button again to select “Mode”, then press the ENTER button. Mode Return Mode Contrast Brightness Sharpness Color Tint Color Tone Reset Dynamic 100 45 75 55 G50 R50 Cool1 OK Picture Enter 3 Press the … or † button to select the desired picture mode (Dynamic, Standard, Movie, or Custom), then press the ENTER button. Select “Return” by pressing the … or † button, then press the ENTER button to return to the previous menu. Press the EXIT button to exit. Mode Return Mode Contrast Brightness Sharpness Color Tint Color Tone Reset Standard Dynamic Standard Movie Custom 80 50 50 50 G50 R50 Cool1 OK Picture Enter Alternate method Press the P.MODE button on the remote control repeatedly to select the desired picture mode. Dynamic English - 60 • Choose “Dynamic” for viewing the TV during the day or when there is a bright light in the room. • Choose “Standard” for general TV watching mode. • Choose “Movie” when viewing the movie. • Choose “Custom” if you want to adjust the settings according to personal preference (see “Customizing the Picture Settings”, page 61). BP68-00588H-01Eng(060~079) 5/16/06 11:40 AM Page 61 Customizing the Picture Settings You can use the on-screen menus to change the “Contrast”, “Brightness”, “Sharpness”, “Color”, “Tint”, and “Color Tone” according to personal preference. 1 Picture Press the MENU button. Press the œ or √ button to select “Picture”, then press the ENTER button. Return Mode Size Digital NR DNIe My Color Control Film Mode 16:9 On On Off Picture Enter 2 Mode Press the … or † button to select “Mode”, then press the ENTER button. Press the … or † button again to select “Mode”, then press the ENTER button. Return Mode Contrast Brightness Sharpness Color Tint Color Tone Reset Dynamic 100 45 75 55 G50 R50 Cool1 OK Picture Enter 3 Press the … or † button to select the desired picture mode (Dynamic, Standard, Movie, or Custom), then press the ENTER button. Mode Return Mode Contrast Brightness Sharpness Color Tint Color Tone Reset Standard Dynamic Standard Movie Custom 80 50 50 50 G50 R50 Cool1 OK Picture Enter 4 Press the … or † button to select a particular option (Contrast, Brightness, Sharpness, Color, or Tint), then press the ENTER button. Mode Return Mode Contrast Brightness Sharpness Color Tint Color Tone Reset Press the œ or √ button to decrease or increase the value of a particular item. NOTE • In PC mode, only the Contrast and Brightness can be selected. • While adjusting a picture option, you can also select another option (Contrast, Brightness, Sharpness, Color, or Tint) by pressing the … or † button. 80 √ 40 50 50 G50 R50 Cool1 OK Picture Adjust Mode Standard Enter ▲ Contrast ▼ 100 continued... English - 61 BP68-00588H-01Eng(060~079) 5/16/06 11:40 AM Page 62 Picture Control 5 Press the ENTER button to return to “Mode”. Press the … or † button to select “Color Tone”, then press the ENTER button. Mode Return Mode Contrast Brightness Sharpness Color Tint Color Tone Reset Standard 80 40 50 50 G50 R50 Cool1 OK Picture Enter 6 Press the … or † button to select a particular item (Cool2, Cool1, Normal, Warm1, or Warm2), then press the ENTER button. Mode Return Mode Contrast Brightness Sharpness Color Tint Color Tone Reset Standard 80 Cool2 Cool1 Normal G50 Warm1 Cool1 Warm2 OK 45 75 55 R50 Picture Enter Resetting the Picture Settings to the Factory Defaults 7 To return the factory defaults, select “Reset” by pressing the … or † button. Press the ENTER button. Press the … or † button to select “OK” or “Cancel”, then press the ENTER button. Select “Return” by pressing the … or † button, then press the ENTER button to return to the previous menu. Press the EXIT button to exit. • If you set “Reset” to “OK”, the previously adjusted settings will be reset to the factory defaults. Mode Return Mode Contrast Brightness Sharpness Color Tint Color Tone Reset Standard 80 40 50 50 G50 R50 Cool1 OK Picture Enter NOTE • The reset function must be set separately for each mode (Dynamic, Standard, Movie, or Custom). English - 62 BP68-00588H-01Eng(060~079) 5/16/06 11:40 AM Page 63 Changing the Picture Size You can select the picture size which best corresponds to your viewing requirements. 1 Press the MENU button. Press the œ or √ button to select “Picture”, then press the ENTER button. Press the … or † button to select “Size”, then press the ENTER button. Picture Return Mode Size Digital NR DNIe My Color Control Film Mode 16:9 On On Off Picture Enter 2 Press the … or † button to select the screen format you want, then press the ENTER button. Select “Return” by pressing the … or † button, then press the ENTER button to return to the previous menu. Press the EXIT button to exit. Picture Return Mode Size Digital NR DNIe My Color Control Film Mode 16:9 Zoom14:3 On Zoom2 Off Wide Fit 4:3 Off Picture Enter Alternate method Press the P.SIZE button on the remote control repeatedly to select one of the picture size settings. • “16:9”: Sets the picture to 16:9 wide mode. • “Zoom1”: Magnifies the size Zoom1 Move of the picture on screen. • “Zoom2”: Magnifies the size of the picture more than “Zoom1”. • “Wide Fit”: Enlarges the aspect ratio of the picture to fit the entire screen. • “4:3”: Sets the picture to 4:3 normal mode. ▲ ▼ NOTES • You can select the 16:9, 4:3 and Wide Fit screen sizes in the DTV Component (720p, 1080i) or HDMI (720p, 1080i) mode. • When Double ( , ) mode has been set in PIP, the Picture Size cannot be set. • For Zoom1, Zoom2, and Wide Fit (DTV’s HD signal only), you can adjust the vertical position using the … or† button after pressing the P.SIZE button on the remote control. • When watching a DTV’s HD signal, you can use Wide Fit. Horizontal zoom(Wide Fit) sets the optical picture format by expanding it both horizontally and vertically. 4:3 Wide Fit For example, you can reset the picture in 4:3 format to 16:9. Wide Fit does not support all external devices. English - 63 BP68-00588H-00Eng(060~079) 4/25/06 3:36 PM Page 64 Picture Control Digital Noise Reduction If the broadcast signal received by your TV is weak, you can activate the Digital Noise Reduction feature to help reduce any static and ghosting that may appear on the screen. 1 Press the MENU button. Press the œ or √ button to select “Picture”, then press the ENTER button. Picture Return Mode Size Digital NR DNIe My Color Control Film Mode 16:9 On On Off Picture Enter 2 Press the … or † button to select “Digital NR”, then press the ENTER button. Picture Return Mode Size Digital NR DNIe My Color Control Film Mode 16:9 On On Off Picture Enter 3 Press the … or † button to select “Off” or “On”, then press the ENTER button. Select “Return” by pressing the … or † button, then press the ENTER button to return to the previous menu. Press the EXIT button to exit. English - 64 Picture Return Mode Size Digital NR DNIe My Color Control Film Mode Off On 16:9 On Off Off Picture Enter BP68-00588H-00Eng(060~079) 4/25/06 3:36 PM Page 65 DNIe (Digital Natural Image engine) This TV includes the DNIe function so as to provide a high visual quality. If you set DNIe to on, you can view the screen with the DNIe feature activated. If you set the DNIe to Demo, you can view the applied DNIe and normal pictures on the screen, for demonstration purposes. Using this function, you can view the difference in the visual quality. 1 Press the MENU button. Press the œ or √ button to select “Picture”, then press the ENTER button. Picture Return Mode Size Digital NR DNIe My Color Control Film Mode 16:9 On On Off Picture Enter 2 Press the … or † button to select “DNIe”, then press the ENTER button. Picture Return Mode Size Digital NR DNIe My Color Control Film Mode 16:9 On On Off Picture Enter 3 Press the … or † button to select “Off”, “Demo”, or “On”, then press the ENTER button. • Off : Switches off the DNIe mode. • Demo : The screen before applying DNIe appears on the left and the screen after applying DNIe appears on the right. • On : Switches on the DNIe mode. Picture Return Mode Size Digital NR DNIe My Color Control Film Mode 16:9 On Off Off Demo On Off Picture Enter Select “Return” by pressing the … or † button, then press the ENTER button to return to the previous menu. Press the EXIT button to exit. NOTE • DNIeTM (Digital Natural Image engine) This feature brings you a more detailed image with 3D noise reduction and detail, contrast and white enhancement. • This function doesn’t work when the Input Source is PC. • The DNle function is not supported in the Movie mode. (It is inactivated.) English - 65 BP68-00588H-00Eng(060~079) 4/25/06 3:36 PM Page 66 Picture Control Setting the My Color Control Mode My Color Control allows you to adjust colors according to your preference, by adjusting skin, sky, and grass tones using the predefined settings (Red, Green, Blue, Yellow, Pink, Standard, and Custom) without affecting other colors on the screen. Using the My Color Control Function in the Easy Control Menu Skin, sky and grass tones are easily adjustable to suit your preferences. 1 Press the MENU button. Press the œ or √ button to select “Picture”, then press the ENTER button. Picture Return Mode Size Digital NR DNIe My Color Control Film Mode 16:9 On On Off Picture Enter 2 Press the … or † button to select “My Color Control”, then press the ENTER button. Picture Return Mode Size Digital NR DNIe My Color Control Film Mode 16:9 On On √ Off Picture Enter 3 Press the … or † button to select “Easy Control”, then press the ENTER button. My Color Control Return Easy Control Detail Control √ Picture Enter 4 NOTES • Changing the settings in the “Detail Control” menu (see page 67) will automatically set the My Color Control mode to “Custom”. • Pressing the ENTER button on the remote control for 3 seconds when there is no OSD on the screen will display the My Color Control menu. English - 66 Press the œ or √ button to select from the various picture settings. The original picture (before adjustment) is shown on the left side, while the selected mode is shown on the right side. • Original Easy Control Red Green Blue Yellow Pink Move There are seven My Color Control modes: Red, Green, Blue, Yellow, Pink, Standard, and Custom. Select “Return” by pressing the … or † button, then press the ENTER button to return to the previous menu. Press the EXIT button to exit. Custom Original Standard Enter Custom Return Red Easy Control Red Green Blue Yellow Pink Move Standard Enter Custom Return BP68-00588H-00Eng(060~079) 4/25/06 3:36 PM Page 67 My Color Control Custom Settings Users can adjust the 5 My Color Control colors (Red, Green, Blue, Yellow, and Pink). 1 Picture Press the MENU button. Press the œ or √ button to select “Picture”, then press the ENTER button. 2 Press the … or † button to select “My Color Control”, then press the ENTER button. 3 Press the … or † button to select “Detail Control”, then press the ENTER button. Return Mode Size Digital NR DNIe My Color Control Film Mode 16:9 On On √ Off Picture Enter My Color Control Return Easy Control Detail Control √ Picture 4 Press the … or † button to select the desired color and then press the ENTER or √ button. Enter Detail Control Return Red Green Blue Yellow Pink Reset • The original picture (before adjustment) is shown on the left side, while the picture after adjustment is shown on the right side, and an adjustment bar is shown on the bottom of the screen. 5 Press the œ or √ button to adjust the settings. Press the … or † button to choose other colors. 6 Press the ENTER or MENU button to confirm the changes and return to the previous menu. √ 50 50 50 50 50 Picture Adjust Enter Original Adjusted Detail Control ▲ Red 50 ▼ Adjust Enter Return Resetting the My Color Control Colors to the Factory Defaults You can return to the factory default settings for My Color Control colors. 7 Press the … or † button to select “Reset”, then press the ENTER button. The previously adjusted My Color Control colors will be reset to the factory defaults. Select Return by pressing the … or † button then press the ENTER button to return to previous menu. Press the EXIT button to exit. Detail Control Return Red Green Blue Yellow Pink Reset 50 50 50 50 50 Picture Enter English - 67 BP68-00588H-00Eng(060~079) 4/25/06 3:36 PM Page 68 Picture Control Using the Color Weakness Enhancement Feature This feature adjusts the Red, Green or Blue color to compensate for the user’s particular color weakness. 1 Press the MENU button. Press the œ or √ button to select “Setup”, then press the ENTER button. Setup Return Language Clock Timer Game Mode V-Chip Caption Menu Transparency Blue Screen † Color Weakness English Off Medium Off Setup Enter 2 Press the … or † button to select “Color Weakness”, then press the ENTER button. Setup Return Language Clock Timer Game Mode V-Chip Caption Menu Transparency Blue Screen † Color Weakness English Off Medium Off √ Setup Enter 3 Press the … or † button to select “Color Weakness”, then press the ENTER button. Press the … or † button to select “On”, then press the ENTER button. Color Weakness Return Color Weakness Red Green Blue Off Off On 0 0 0 Setup Enter 4 Press the … or † button to select a color to be adjusted, then press the ENTER button. Color Weakness Return Color Weakness Red Green Blue Press the œ or √ button to adjust the value of a color selected. 0 0 Enter Color Weakness ▲ Red ▼ 0 Select “Return” by pressing the … or † button, then press the ENTER button to return to the previous menu. Press the EXIT button to exit. English - 68 √ 0 Setup Adjust • You can also select these options (Red, Green or Blue) by pressing the … or † button. Off On BP68-00588H-00Eng(060~079) 4/25/06 3:36 PM Page 69 Setting the Film Mode You can automatically sense and process film signals and adjust the picture for optimum quality. 1 Press the MENU button. Press the œ or √ button to select “Picture”, then press the ENTER button. Picture Return Mode Size Digital NR DNIe My Color Control Film Mode 16:9 On On Off Picture Enter 2 Press the … or † button to select “Film Mode”, then press the ENTER button. Picture Return Mode Size Digital NR DNIe My Color Control Film Mode 16:9 On On Off Picture Enter 3 Press the … or † button to select “Off” or “On”, then press the ENTER button. Select “Return” by pressing the … or † button, then press the ENTER button to return to the previous menu. Press the EXIT button to exit. Picture Return Mode Size Digital NR DNIe My Color Control Film Mode 16:9 On Off Off On Off Picture Enter NOTE • The Film Mode can only be set when viewing an analog signal in AV modes (AV, S-Video or Component) that support SD (Standard Definition) signals (480i). English - 69 BP68-00588H-00Eng(060~079) 4/25/06 3:36 PM Page 70 Picture Control Viewing Picture-In-Picture One of the best features of your TV is the Picture-In-Picture (PIP) feature. The advanced PIP system allows you to watch two different pictures at once, even if you don’t have a VCR or DVD connected to your TV. Activating the PIP 1 Press the MENU button. Press the œ or √ button to select “PIP”, then press the ENTER button. PIP Return PIP Swap Size Position Air/Cable Channel Off Cable Cable 3 PIP Enter 2 Press the … or † button to select “PIP”, then press the ENTER button. PIP Return PIP Swap Size Position Air/Cable Channel Off Cable Cable 3 PIP Enter 3 Press the … or † button to select “On”, then press the ENTER button. The sub (PIP) picture appears in the corner of the screen. Select “Return” by pressing the … or † button, then press the ENTER button to return to the previous menu. Press the EXIT button to exit. PIP Return PIP Swap Size Position Air/Cable Channel Off Off On Cable Cable 3 PIP Enter Alternate method Press the PIP button on the remote control repeatedly to activate or deactivate the PIP. NOTES • This feature doesn’t function when the “V-Chip” is active. • If you turn the TV off while watching and turn it on again, then the mode will return to normal video. • Digital channels can be viewed in PIP when the main picture is from an external input such as a DVD, VCR or STB. • PIP is supported even when both the main and the sub pictures are analog. For more information, refer to the PIP Settings table on page 71. • When in the TV Guide On ScreenTM mode, toggles the state between locked and unlocked in the Video Window. (For further explanation, see the TV Guide user’s manual.) English - 70 BP68-00588H-00Eng(060~079) 4/25/06 3:36 PM Page 71 Swapping the Sub (PIP) Picture and Main Picture 1 PIP Press the MENU button. Press the œ or √ button to select “PIP”, then press the ENTER button. Return PIP Swap Size Position Air/Cable Channel On Cable Cable 3 PIP Enter 2 Press the … or † button to select “Swap”, then press the ENTER button. The sub picture appears as the main picture, and vice versa. PIP Return PIP Swap Size Position Air/Cable Channel On Cable Cable 3 Select “Return” by pressing the … or † button, then press the ENTER button to return to the previous menu. Press the EXIT button to exit. PIP Enter PIP Settings O : PIP and swap operate ▲ : PIP operates. Swap does not operate X : PIP doesn’t operate Main ATSC QAM NTSC AV1 AV2 AV3 S-Video1 S-Video2 Component1 Component2 HDMI PC D-Net (Air DTV) (Cable DTV) (Analog) Sub ATSC (Air DTV) QAM (Cable DTV) NTSC (Analog) X X X ▲ ▲ ▲ ▲ ▲ ▲ ▲ ▲ ▲ X X X X ▲ ▲ ▲ ▲ ▲ ▲ ▲ ▲ ▲ X ▲ ▲ O ▲ ▲ ▲ ▲ ▲ ▲ ▲ ▲ ▲ X NOTES • PIP is only available in RF (TV) mode. • The PIP swap function is only supported in RF (TV) mode. (Analog) English - 71 BP68-00588H-00Eng(060~079) 4/25/06 3:36 PM Page 72 Picture Control Changing the Size of the Sub (PIP) Picture 1 Press the MENU button. Press the œ or √ button to select “PIP”, then press the ENTER button. PIP Return PIP Swap Size Position Air/Cable Channel On Cable Cable 3 PIP Enter 2 Press the … or † button to select “Size”, then press the ENTER button. Press the … or † button to select a size you want, then press the ENTER button. PIP Return PIP Swap Size Position Air/Cable Channel On Cable Cable 3 PIP Select “Return” by pressing the … or † button, then press the ENTER button to return to the previous menu. Press the EXIT button to exit. NOTE • Double ( English - 72 , ) mode is not available in PC mode. Enter BP68-00588H-00Eng(060~079) 4/25/06 3:36 PM Page 73 Changing the Location of the Sub (PIP) Picture 1 Press the MENU button. Press the œ or √ button to select “PIP”, then press the ENTER button. PIP Return PIP Swap Size Position Air/Cable Channel On Cable Cable 3 PIP Enter 2 Press the … or † button to select “Position”, then press the ENTER button. Press the … or † button to select a position you want, then press the ENTER button. PIP Return PIP Swap Size Position Air/Cable Channel On Cable Cable 3 PIP Enter Select “Return” by pressing the … or † button, then press the ENTER button to return to the previous menu. Press the EXIT button to exit. NOTE • In Double ( , ) mode, you cannot set the Position. English - 73 BP68-00588H-00Eng(060~079) 4/25/06 3:36 PM Page 74 Picture Control Selecting a Signal Source (Air or Cable) for PIP If the PIP source is TV while PIP is On, you can select a different broadcasting source for the PIP picture from the main picture. 1 Press the MENU button. Press the œ or √ button to select “PIP”, then press the ENTER button. PIP Return PIP Swap Size Position Air/Cable Channel On Cable Cable 3 PIP Enter 2 Press the … or † button to select “Air/Cable”, then press the ENTER button. PIP Return PIP Swap Size Position Air/Cable Channel On Air Cable Cable Cable 3 PIP Enter 3 Press the … or † button to select “Air” or “Cable”, then press the ENTER button. • Air : “Air” antenna signal Cable : “Cable” antenna signal PIP Return PIP Swap Size Position Air/Cable Channel On Air Cable Cable Cable 3 PIP Select “Return” by pressing the … or † button, then press the ENTER button to return to the previous menu. Press the EXIT button to exit. English - 74 Enter BP68-00588H-00Eng(060~079) 4/25/06 3:36 PM Page 75 Changing the Channel of the Sub (PIP) Picture After you set the signal source (antenna or cable) of the sub picture, it is easy to change channels. 1 Press the MENU button. Press the œ or √ button to select “PIP”, then press the ENTER button. PIP Return PIP Swap Size Position Air/Cable Channel On Cable Cable 3 PIP Enter 2 Press the … or † button to select “Channel”, then press the ENTER button. PIP Return PIP Swap Size Position Air/Cable Channel On ▲ ▼ Cable Cable 3 3 Cable PIP Enter 3 Press the … or † button to select a channel you want, then press the ENTER button. • Air : “Air” antenna signal Cable : “Cable” antenna signal PIP Return PIP Swap Size Position Air/Cable Channel On ▲ ▼ Cable Cable 11 3 Cable PIP Select “Return” by pressing the … or † button, then press the ENTER button to return to the previous menu. Press the EXIT button to exit. Enter Alternate method Press the CH or CH button at the button of the remote control to change the sub picture channels while PIP is on. • You can set a channel by pressing the number buttons on the remote control. This can be performed in the PIP-channel menu. English - 75 BP68-00588H-00Eng(060~079) 4/25/06 3:36 PM Page 76 Picture Control Freezing the Picture Press the STILL button to freeze a moving picture. (Normal sound will still be heard.) To cancel this function, press the STILL button again or press any button on the remote control. NOTE • In the PIP mode, the main and sub pictures are stilled at the same time. English - 76 BP68-00588H-00Eng(060~079) 4/25/06 3:36 PM Page 77 Setting the Blue Screen Mode If no signal is being received or the signal is very weak, a blue screen automatically replaces the noisy picture background. If you wish to continue viewing the poor picture, you must set the “Blue Screen” mode to “Off”. 1 Press the MENU button. Press the œ or √ button to select “Setup”, then press the ENTER button. Setup Return Language Clock Timer Game Mode V-Chip Caption Menu Transparency Blue Screen † Color Weakness English Off Medium Off Setup Enter 2 Press the … or † button to select “Blue Screen”, then press the ENTER button. Setup Return Language Clock Timer Game Mode V-Chip Caption Menu Transparency Blue Screen † Color Weakness English Off Medium Off Setup Enter 3 Press the … or † button to select “Off” or “On”, then press the ENTER button. Select “Return” by pressing the … or † button, then press the ENTER button to return to the previous menu. Press the EXIT button to exit. Setup † Return English Language Clock Timer Off Game Mode V-Chip Caption Medium Menu Transparency Off Off Blue Screen On Color Weakness Setup Enter English - 77 BP68-00588H-00Eng(060~079) 4/25/06 3:36 PM Page 78 SAMSUNG BP68-00588H-00Eng(060~079) 4/25/06 3:36 PM Page 79 Sound Control BP68-00588H-01Eng(080~089) 5/16/06 11:40 AM Page 80 Sound Control Sound Control You can control and customize the sound levels and settings of the TV with the remote control. Adjusting the Volume Press the VOL+ or VOL– button to increase or decrease the volume. Using the MUTE Button At any time, you can temporarily cut off the sound. Press the MUTE button on the remote control. The message “Mute” is displayed and the sound cuts off. To turn mute off, press the MUTE button again or press either the VOL+ or VOL– button. Mute Using Automatic Sound Settings Your TV has automatic sound settings (“Standard”, “Music”, “Movie”, and “Speech”) that are preset at the factory. You can select “Custom”, which automatically recalls your personalized sound settings. 1 Press the MENU button. Press the œ or √ button to select “Sound”, then press the ENTER button. Sound Return Mode SRS TSXT Multi-Track Options Auto Volume Internal Mute Melody Off Off Off On Sound Enter NOTE 2 Press the … or † button to select “Mode”, then press the ENTER button. 3 Press the … or † button to select a particular item (Standard, Music, Movie, Speech, or Custom), then press the ENTER button. • The VOL+, VOL– and MUTE buttons do not operate when the Internal Mute is set to on. Return Mode Standard Music Movie Speech Custom Balance 100Hz 300Hz 1kHz 3kHz 10kHz Reset OK Sound Select “Return” by pressing the … or † button, then press the ENTER button to return to the previous menu. Press the EXIT button to exit. • • • • English - 80 Mode Choose “Standard” for the standard factory settings. Choose “Music” when watching music videos or concerts. Choose “Movie” when watching movies. Choose “Speech” when watching a show that is mostly dialog (i.e., news). • Choose “Custom” to recall your personalized settings (see “Customizing the Sound”, page 81). Enter BP68-00588H-01Eng(080~089) 5/16/06 11:40 AM Page 81 Customizing the Sound The sound settings can be adjusted to suit your personal preference. (Alternatively, you can use one of the automatic settings. See previous page.) 1 Press the MENU button. Press the œ or √ button to select “Sound”, then press the ENTER button. Sound Return Mode SRS TSXT Multi-Track Options Auto Volume Internal Mute Melody Off Off Off On Sound Enter 2 Press the … or † button to select “Mode”, then press the ENTER button. Press the … or † button to select a particular item (Standard, Music, Movie, Speech, or Custom), then press the ENTER button. Mode Return Mode Standard Music Movie Speech Custom Balance 100Hz 300Hz 1kHz 3kHz 10kHz Reset OK Sound Enter 3 Press the † button. Press the œ or √ button to select a particular item (Balance, 100Hz, 300Hz, 1kHz, 3kHz, 10kHz) to be changed, then press the ENTER button. Press the … or † button to increase or decrease the selected frequency. Press the ENTER button. • The equalizer function is set for each mode (Standard, Music, Movie, Speech, or Custom). Mode Return Mode Custom Balance 100Hz 300Hz 1kHz 3kHz 10kHz Reset OK Sound Enter 4 To return the factory defaults, select “Reset” by pressing the … or † button. Press the ENTER button. Press the … or † button to select “OK” or “Cancel”, then press the ENTER button. Select “Return” by pressing the … or † button, then press the ENTER button to return to the previous menu. Press the EXIT button to exit. Mode Return Mode Custom Balance 100Hz 300Hz 1kHz 3kHz 10kHz Reset OK Sound Enter Alternate method Press the S.MODE button on the remote control repeatedly to select one of the standard sound settings. NOTES • L/R Sound Balance Adjustment To adjust the sound balance of the L/R speakers. • Bandwidth Adjustment (100Hz, 300Hz, 1kHz, 3kHz, 10kHz) To adjust the level of different bandwidth frequencies. Standard English - 81 BP68-00588H-00Eng(080~089) 4/25/06 3:38 PM Page 82 Sound Control Setting the SRS TSXT TruSurround XT is a patented SRS technology that solves the problem of playing 5.1 multichannel content over two speakers. Trusurround delivers a compelling, virtual surround sound experience through any two-speaker playback system, including internal television speakers. It is fully compatible with all multichannel formats. 1 Press the MENU button. Press the œ or √ button to select “Sound”, then press the ENTER button. Sound Return Mode SRS TSXT Multi-Track Options Auto Volume Internal Mute Melody Off Off Off On Sound Enter 2 Press the … or † button to select “SRS TSXT”, then press the ENTER button. Sound Return Mode SRS TSXT Multi-Track Options Auto Volume Internal Mute Melody Off Off Off On Sound Enter 3 Press the … or † button to select “Off” or “On”, then press the ENTER button. Select “Return” by pressing the … or † button, then press the ENTER button to return to the previous menu. Press the EXIT button to exit. Sound Return Mode SRS TSXT Off Multi-Track OptionsOn Auto Volume Internal Mute Melody Off Off On Sound Enter Alternate method Press the SRS button on the remote control repeatedly to select “Off” or “On”. Off English - 82 Off BP68-00588H-00Eng(080~089) 4/25/06 3:38 PM Page 83 Auto Volume Each broadcasting station has its own signal conditions, and it is inconvenient to adjust the volume every time the channel is changed. “Auto Volume” automatically adjusts the volume of the desired channel by lowering the sound output when the volume is high or by raising the sound output when the volume is low. 1 Press the MENU button. Press the œ or √ button to select “Sound”, then press the ENTER button. Sound Return Mode SRS TSXT Multi-Track Options Auto Volume Internal Mute Melody Off Off Off On Sound Enter 2 Press the … or † button to select “Auto Volume”, then press the ENTER button. Sound Return Mode SRS TSXT Multi-Track Options Auto Volume Internal Mute Melody Off Off Off On Sound Enter 3 Press the … or † button to select “Off” or “On”, then press the ENTER button. Select “Return” by pressing the … or † button, then press the ENTER button to return to the previous menu. Press the EXIT button to exit. Sound Return Mode SRS TSXT Multi-Track Options Auto Volume Off Internal Mute On Melody Off Off Off On Sound Enter English - 83 BP68-00588H-00Eng(080~089) 4/25/06 3:38 PM Page 84 Sound Control Choosing a Multi-Channel Sound (MTS) track Digital The digital-TV transmission system is capable of simultaneous transmission of many audio tracks (for example, simultaneous translations of the program into foreign languages). The availability of these additional “multitracks” depends upon the program. 1 Press the MENU button. Press the œ or √ button to select “Sound”, then press the ENTER button. Sound Return Mode SRS TSXT Multi-Track Options Auto Volume Internal Mute Melody Off Off Off On Sound Enter 2 Press the … or † button to select “Multi-Track Options”, then press the ENTER button. Sound Return Mode SRS TSXT Multi-Track Options Internal Mute Melody Off √ Off Off On Sound Enter 3 Press the … or † button to select “Preferred Language”, then press the ENTER button. Press the … or † button to choose the language (English, Spanish or French) you want, then press the ENTER button. Multi-Track Options English Return Spanish Preferred Language TV Multi-Track Sound FrenchTV Sound Enter Select “Return” by pressing the … or † button, then press the ENTER button to return to the previous menu. Press the EXIT button to exit. Alternate method Press the MTS button on the remote control. You can listen in a language other than the favorite language by pressing the MTS button. 1. English English - 84 BP68-00588H-00Eng(080~089) 4/25/06 3:38 PM Page 85 Choosing a Multi-Channel Sound (MTS) track Analog Depending on the particular program being broadcast, you can listen to Mono, Stereo or SAP. 1 Press the MENU button. Press the œ or √ button to select “Sound”, then press the ENTER button. Sound Return Mode SRS TSXT Multi-Track Options Auto Volume Internal Mute Melody Off Off Off On Sound Enter 2 Press the … or † button to select “Multi-Track Options”, then press the ENTER button. Sound Return Mode SRS TSXT Multi-Track Options Internal Mute Melody Off √ Off Off On Sound Enter 3 Press the … or † button to select “Multi-Track Sound”, then press the ENTER button. Press the … or † button to select a setting you want, then press the ENTER button. Multi-Track Options Mono Return Stereo Preferred Language TV Multi-Track Sound SAP TV Sound Enter Select “Return” by pressing the … or † button, then press the ENTER button to return to the previous menu. Press the EXIT button to exit. Alternate method Press the MTS button on the remote control repeatedly to select a Multi-Channel Sound track. Stereo NOTES • Choose “Mono” for channels that are broadcasting in mono, or if you are having difficulty receiving a stereo signal. • Choose “Stereo” for channels that are broadcasting in stereo. • Choose “SAP” to listen to the Separate Audio Program, which is usually a foreign-language translation. English - 85 BP68-00588H-00Eng(080~089) 4/25/06 3:38 PM Page 86 Sound Control Selecting the Internal Mute When using a device such as a Home Theater or Amplifier with external speakers, you can set Internal Mute to On to cut off sound from the TV's internal speakers. 1 Press the MENU button. Press the œ or √ button to select “Sound”, then press the ENTER button. Sound Return Mode SRS TSXT Multi-Track Options Auto Volume Internal Mute Melody Off Off Off On Sound Enter 2 Press the … or † button to select “Internal Mute”, then press the ENTER button. Sound Return Mode SRS TSXT Multi-Track Options Auto Volume Internal Mute Melody Off Off Off On Sound Enter 3 Press the … or † button to select “On”, then press the ENTER button. Pressing the … or † button will alternate between “Off” and “On”. Select “Return” by pressing the … or † button, then press the ENTER button to return to the previous menu. Press the EXIT button to exit. Sound Return Mode SRS TSXT Multi-Track Options Auto Volume Off Internal Mute On Melody Off Off Off On Sound Enter NOTES • The VOL +, VOL - and MUTE buttons do not operate when the Internal Mute is set to On. • When Internal Mute is on, only the Multi-Track Options menu is available in the Sound menu. • To watch TV with an external speaker system such as a home theater system, set Internal Mute to On. To watch TV with the internal speaker or to record video with a VCR through AV OUT of the TV, set Internal Mute to Off. English - 86 BP68-00588H-00Eng(080~089) 4/25/06 3:38 PM Page 87 Setting the On/Off Melody A melody sound can be set to come on when the TV is powered On or Off. 1 Press the MENU button. Press the œ or √ button to select “Sound”, then press the ENTER button. Sound Return Mode SRS TSXT Multi-Track Options Auto Volume Internal Mute Melody Off Off Off On Sound Enter 2 Press the … or † button to select “Melody”, then press the ENTER button. Press the … or † button to select “Off” or “On”, then press the ENTER button. Sound Return Mode SRS TSXT Multi-Track Options Auto Volume Internal Mute Melody Off Off Off On Sound Select “Return” by pressing the … or † button, then press the ENTER button to return to the previous menu. Press the EXIT button to exit. Enter Sound Return Mode SRS TSXT Multi-Track Options Auto Volume Off Internal Mute On Melody Off Off Off On Sound Enter English - 87 BP68-00588H-00Eng(080~089) 4/25/06 3:38 PM Page 88 SAMSUNG BP68-00588H-00Eng(080~089) 4/25/06 3:38 PM Page 89 Special Features BP68-00588H-00Eng(090~113) 4/25/06 3:39 PM Page 90 Special Features Setting the Function Help Displays Help on the menu functions. The Help appears at the top of the screen. 1 Press the MENU button. Press the œ or √ button to select “Setup”, then press the ENTER button. Setup Return Language Clock Timer Game Mode V-Chip Caption Menu Transparency Blue Screen † Color Weakness English Off Medium Off Setup Enter 2 Press the … or † button to select “Function Help”, then press the ENTER button. Setup … Game Mode V-Chip Caption Menu Transparency Blue Screen Color Weakness PC Function Help CableCARDTM CableCARDTM Setup Off Medium Off Off Setup Enter 3 Press the … or † button to select “Off” or “On”, then press the ENTER button. Select “Return” by pressing the … or † button, then press the ENTER button to return to the previous menu. Press the EXIT button to exit. Switches the Function Help on. Setup … Game Mode Off V-Chip Caption Menu Transparency Medium Blue Screen Off Color Weakness PC Function Help Off CableCARDTM On CableCARDTM Setup Setup Enter NOTE • The Function Help default setting is On. English - 90 BP68-00588H-01Eng(090~113) 5/16/06 1:00 PM Page 91 Menu Transparency Level Adjusts the transparency of the menu screen. 1 Press the MENU button. Press the œ or √ button to select “Setup”, then press the ENTER button. Setup Return Language Clock Timer Game Mode V-Chip Caption Menu Transparency Blue Screen † Color Weakness English Off Medium Off Setup Enter 2 Press the … or † button to select “Menu Transparency”, then press the ENTER button. Press the … or † button to select a level, then press the ENTER button. Select “Return” by pressing the … or † button, then press the ENTER button to return to the previous menu. Press the EXIT button to exit. Setup Return English Language Clock Timer Off Game Mode V-Chip High Caption Medium Medium Menu Transparency Low Off Blue Screen Opaque † Color Weakness Setup Enter English - 91 BP68-00588H-01Eng(090~113) 5/16/06 1:00 PM Page 92 Special Features Using Game Mode When connecting to a game console such as PlayStationTM or XboxTM, you can enjoy a more realistic gaming experience by setting the Game Mode to On. 1 Press the MENU button. Press the œ or √ button to select “Setup”, then press the ENTER button. Setup Return Language Clock Timer Game Mode V-Chip Caption Menu Transparency Blue Screen † Color Weakness English Off Medium Off Setup Enter 2 Press the … or † button to select “Game Mode”, then press the ENTER button. Setup Return Language Clock Timer Game Mode V-Chip Caption Menu Transparency Blue Screen † Color Weakness English Off Medium Off Setup Enter 3 Press the … or † button to select “Off” or “On”, then press the ENTER button. Select “Return” by pressing the … or † button, then press the ENTER button to return to the previous menu. Press the EXIT button to exit. Setup Return English Language Clock Timer Game Mode Off Off V-Chip On Caption Medium Menu Transparency Off Blue Screen † Color Weakness Setup Enter Restrictions on Game Mode (Caution) NOTES • Game Mode is not available in TV mode. • If the picture is poor when an external device (DVD, VCR etc.) is connected to the TV, check if the Game Mode is On. The Game Mode should be set to Off. English - 92 • To disconnect the game console and connect another external device, set Game Mode to Off in the setup menu. • If you display the TV menu in Game Mode, the screen shakes slightly. If Game Mode is On • Picture Mode is automatically changed to Custom and users cannot change the mode. • Sound Mode in the Sound menu is deactivated. Adjust the sound using the equalizer. • The Reset Sound function is activated. Selecting the Reset function after setting the equalizer resets it to the factory defaults. BP68-00588H-01Eng(090~113) 5/16/06 1:00 PM Page 93 Using the V-Chip Access to channels and programs is controlled by a password (i.e., a 4-digit secret code that is defined by the user). The on-screen menu will instruct you to assign a password (you can change it later, if necessary). How to Change Your Password 1 Press the MENU button. Press the œ or √ button to select “Setup”, then press the ENTER button. Press the … or † button to select “V-Chip”, then press the ENTER button. Setup Return Language Clock Timer Game Mode V-Chip Caption Menu Transparency Blue Screen † Color Weakness English Off Medium Off Setup Enter 2 Press the † button. Press the number buttons to enter your current 4-digit PIN. (The default PIN for a new TV set is “0000”.) The “V-Chip” menu is displayed. V-Chip Return Enter PIN * Setup Enter 3 Press the … or † button to select “Change PIN”, then press the ENTER button. V-Chip Return V-Chip Lock Off TV Parental Guidelines MPAA Rating Canadian English Canadian French Downloadable U.S.Rating Change PIN Setup Enter NOTES • The PIP doesn’t function when the V-Chip is active. • If you forget the pin number, press the remote control buttons in the following sequence, which resets the pin to 0-0-0-0: POWER (Off), MUTE, 8, 2, 4, POWER (On). • The V-Chip function only works in TV, AV mode and S-Video mode. 4 Press the † button. Press the number buttons to enter your new 4-digit PIN. Re-enter your new PIN to confirm. The message will automatically disappear, and return to the previous menu after a few seconds, even if the ENTER button is not pressed. Change PIN Return Enter New PIN * Confirm New PIN Setup Enter Select “Return” by pressing the … or † button, then press the ENTER button to return to the previous menu. Press the EXIT button to exit. English - 93 BP68-00588H-01Eng(090~113) 5/16/06 1:00 PM Page 94 Special Features How to Enable/Disable the Rating Controls 1 Press the MENU button. Press the œ or √ button to select “Setup”, then press the ENTER button. Press the … or † button to select “V-Chip”, then press the ENTER button. Setup Return Language Clock Timer Game Mode V-Chip Caption Menu Transparency Blue Screen † Color Weakness English Off Medium Off Setup Enter 2 Press the † button. Press the number buttons to enter your current 4-digit PIN. (The default PIN for a new TV set is “0000”.) The “V-Chip” menu is displayed. V-Chip Return Enter PIN * Setup Enter 3 Press the … or † button to select “V-Chip Lock”. To enable the V-Chip feature, press the ENTER button so that the “V-Chip Lock” field is “On”. (Pressing the … or † button will alternate between “On” and “Off”.) Press the ENTER button. V-Chip Return V-Chip Lock Off Off TV Parental Guidelines On MPAA Rating Canadian English Canadian French Downloadable U.S.Rating Change PIN Setup Enter Select “Return” by pressing the … or † button, then press the ENTER button to return to the previous menu. Press the EXIT button to exit. English - 94 BP68-00588H-01Eng(090~113) 5/16/06 1:00 PM Page 95 How to Set up Restrictions Using “TV Parental Guidelines” The parental restrictions can be set up using either of two methods: The “TV Parental Guidelines” or “MPAA Rating”. 1 Press the MENU button. Press the œ or √ button to select “Setup”, then press the ENTER button. Press the … or † button to select “V-Chip”, then press the ENTER button. Setup Return Language Clock Timer Game Mode V-Chip Caption Menu Transparency Blue Screen † Color Weakness English Off Medium Off Setup Enter 2 Press the † button. Press the number buttons to enter your current 4-digit PIN. (The default PIN for a new TV set is “0000”.) The “V-Chip” menu is displayed. V-Chip Return Enter PIN * Setup Enter 3 Press the … or † button to select “TV Parental Guidelines”, then press the ENTER button. V-Chip Return V-Chip Lock On TV Parental Guidelines MPAA Rating Canadian English Canadian French Downloadable U.S.Rating Change PIN √ Setup Enter continued... English - 95 BP68-00588H-01Eng(090~113) 5/16/06 1:00 PM Page 96 Special Features 4 You can independently lock the TV ratings. The locked TV (FCC) ratings are indicated by the symbol “ ”. Press the …/†/œ/√ buttons and the ENTER button to activate the appropriate restrictions for TV (FCC) rating system. To unlock items that are locked, press the ENTER button again. TV-Y TV-Y7 TV-G TV-PG TV-14 TV-MA : : : : : : Young children. Children 7 and over. General audience. Parent guidance. Viewers 14 and over. Mature audience. Select “Return” by pressing the … or † button, then press the ENTER button to return to the previous menu. Press the EXIT button to exit. TV Parental Guidelines Return Setup Enter NOTES • Allow All : Press to unlock all TV ratings. • Block All : Press to lock all TV ratings. NOTES • These categories consist of two separate groups: “TV-Y” and “TV-Y7” (young children through age 7), and “TV-G” through “TV-MA” (everybody else). • The restrictions for these two groups work independently: If a household includes very young children as well as young adults, the TV parental guidelines must be set up separately for each age group. (See page 98.) English - 96 BP68-00588H-01Eng(090~113) 5/16/06 1:00 PM Page 97 How to Set up Restrictions Using “MPAA Rating” The Movie rating system uses the “MPAA” (Motion Picture Association of America) system, and its main application is for movies. When the rating control is on, the TV will automatically block any programs that are coded with objectionable ratings (either “MPAA Rating” or “TV Parental Guidelines”). 1 Press the MENU button. Press the œ or √ button to select “Setup”, then press the ENTER button. Press the … or † button to select “V-Chip”, then press the ENTER button. Setup Return Language Clock Timer Game Mode V-Chip Caption Menu Transparency Blue Screen † Color Weakness English Off Medium Off Setup Enter 2 Press the † button. Press the number buttons to enter your current 4-digit PIN. (The default PIN for a new TV set is “0000”.) The “V-Chip” menu is displayed. V-Chip Return Enter PIN * Setup Enter 3 Press the … or † button to select “MPAA Rating”, then press the ENTER button. V-Chip Return V-Chip Lock On TV Parental Guidelines MPAA Rating Canadian English Canadian French Downloadable U.S.Rating Change PIN √ Setup Enter 4 NOTES • Allow All : Press to unlock all movie ratings. • Block All : Press to lock all movie ratings. You can independently lock the movie ratings. The locked movie ratings are indicated by the symbol “ ”. Press the …/†/ENTER buttons to activate the appropriate restrictions for movie rating system. To unlock items that are locked, press the ENTER button again. MPAA Rating Return Setup Enter Select “Return” by pressing the … or † button, then press the ENTER button to return to the previous menu. Press the EXIT button to exit. English - 97 BP68-00588H-01Eng(090~113) 5/16/06 1:00 PM Page 98 Special Features Important Notes About Parental Locks Explanation of the MPAA and TV (FCC) Rating Systems: TV (FCC) Age-Based Ratings TV-Y All children. The themes and elements in this program are specifically designed for a very young audience, including children from ages two to six. TV-Y7 Directed to older children. The Themes and elements in this program may include mild physical or comedic violence, or may frighten children under the age of seven. TV-G General audience. It contains little or no violence, no strong language, and little or no sexual dialog or situations. TV (FCC) Content Category FV D L S V Fantasy violence. Sexually suggestive dialog. Adult language. Sexual situation. Violence. TV-PG Parental guidance suggested. This program may contain infrequent coarse language, limited violence, some suggestive sexual dialog and situations. TV-14 Parents strongly cautioned. This program may contain sophisticated themes, sexual content, strong language and more intense violence. TV-MA Mature audiences only. This program may contain mature themes, profane language, graphic violence and explicit sexual content. MPAA Rating System (Movies) G General audience (no restriction). PG Parental guidance suggested. PG-13 Parents strongly cautioned. R Restricted. Children under 17 should be accompanied by an adult. NC-17 No children under age 17. X Adults only. NR Not rated. • TV (FCC) ratings : The particular rating that you have selected will be locked (and indicated as a red “L” on a blue background). Also, all of the age-based ratings will be locked within the particular group (i.e., “group 1” or “group 2”). Suppose that the TV-G rating and all of its contents (V, S, L, and D) are locked. In that case, more restrictive ratings (TV-PG, TV-14, and TV-MA) and all of their contents (V, S, L, and D) are automatically locked as well. • MPAA ratings : The particular rating that you have selected will be locked. In addition, more restrictive ratings will be locked as well. • Neither TV (FCC) ratings nor MPAA ratings apply to news programs. English - 98 BP68-00588H-01Eng(090~113) 5/16/06 1:00 PM Page 99 How to Set up Restrictions Using Canadian English 1 Press the MENU button. Press the œ or √ button to select “Setup”, then press the ENTER button. Press the … or † button to select “V-Chip”, then press the ENTER button. Setup Return Language Clock Timer Game Mode V-Chip Caption Menu Transparency Blue Screen † Color Weakness English Off Medium Off Setup Enter 2 Press the † button. Press the number buttons to enter your current 4-digit PIN. (The default PIN for a new TV set is “0000”.) The “V-Chip” menu is displayed. V-Chip Return Enter PIN * Setup Enter 3 Press the … or † button to select “Canadian English”, then press the ENTER button. V-Chip Return V-Chip Lock On TV Parental Guidelines MPAA Rating Canadian English Canadian French Downloadable U.S.Rating Change PIN √ Setup Enter continued... English - 99 BP68-00588H-01Eng(090~113) 5/16/06 1:00 PM Page 100 Special Features 4 Press the … or † button to select a appropriate restriction. Canadian English Return Press the ENTER button to activate the restriction selected. The “ ” symbol is indicated. To unlock items that are locked, press the ENTER button again. Select “Return” by pressing the … or † button, then press the ENTER button to return to the previous menu. Press the EXIT button to exit. Setup Enter NOTES • Allow All : Press to unlock all TV ratings. • Block All : Press to lock all TV ratings. E Exempt programming includes...news, sports, documentaries and other information programming, talk shows, music videos, and variety programming. C Programming intended for children under age 8. C8+ Programming generally considered acceptable for children 8 years and over to watch on their own. G General programming, suitable for all audiences. PG Parental guidance. 14+ Programming contains themes or content which may not be suitable for viewers under the age of 14. 18+ Adult programming. English - 100 BP68-00588H-01Eng(090~113) 5/16/06 1:00 PM Page 101 How to Set up Restrictions Using Canadian French 1 Press the MENU button. Press the œ or √ button to select “Setup”, then press the ENTER button. Press the … or † button to select “V-Chip”, then press the ENTER button. Setup Return Language Clock Timer Game Mode V-Chip Caption Menu Transparency Blue Screen † Color Weakness English Off Medium Off Setup Enter 2 Press the † button. Press the number buttons to enter your current 4-digit PIN. (The default PIN for a new TV set is “0000”.) The “V-Chip” menu is displayed. V-Chip Return Enter PIN * Setup Enter 3 Press the … or † button to select “Canadian French”, then press the ENTER button. V-Chip Return V-Chip Lock On TV Parental Guidelines MPAA Rating Canadian English Canadian French Downloadable U.S.Rating Change PIN √ √ Setup Enter continued... English - 101 BP68-00588H-01Eng(090~113) 5/16/06 1:00 PM Page 102 Special Features 4 Press the … or † button to select a appropriate restriction. Canadian French Return Press the ENTER button to activate the restriction selected. The “ ” symbol is indicated. To unlock items that are locked, press the ENTER button again. Select “Return” by pressing the … or † button, then press the ENTER button to return to the previous menu. Press the EXIT button to exit. Setup Enter NOTES • Allow All : Press to unlock all TV ratings. • Block All : Press to lock all TV ratings. E Exempt programming includes...news, sports, documentaries and other information programming, talk shows, music videos, and variety programming. G General. 8 ans+ Not recommended for young children. 13 ans+ Programming may not be suitable for children under the age of 13. 16 ans+ Programming is not suitable for children under the age of 16. 18 ans+ Programming restricted to adults. English - 102 BP68-00588H-01Eng(090~113) 5/16/06 1:00 PM Page 103 Using the V-Chip for Digital channels Parental restriction information can be used while watching DTV channels. 1 Press the MENU button. Press the œ or √ button to select “Setup”, then press the ENTER button. Press the … or † button to select “V-Chip”, then press the ENTER button. Setup Return Language Clock Timer Game Mode V-Chip Caption Menu Transparency Blue Screen † Color Weakness English Off Medium Off Setup Enter 2 Press the † button. Press the number buttons to enter your current 4-digit PIN. (The default PIN for a new TV set is “0000”.) The “V-Chip” menu is displayed. V-Chip Return Enter PIN * Setup Enter 3 Press the … or † button to select “Downloadable U.S. Rating”, then press the ENTER button. V-Chip Return V-Chip Lock On TV Parental Guidelines MPAA Rating Canadian English Canadian French Downloadable U.S.Rating Change PIN √ √ √ Setup Enter NOTES • If information is not downloaded from the broadcasting station, the Downloadable U.S. Rating menu is deactivated. • Parental restriction information is automatically downloaded while watching DTV channels. It may take several seconds. • The Downloadable U.S. Rating menu is available for use after information is downloaded from the broadcasting station. However, depending on the information from the broadcasting station, it may not be available for use. continued... English - 103 BP68-00588H-01Eng(090~113) 5/16/06 1:00 PM Page 104 Special Features Rating title 4 You can independently lock the TV ratings. The locked TV ratings are indicated by the symbol “ ”. To unlock a locked channel, press the ENTER button again. Press the …/†/œ/√ buttons and the ENTER button to activate the appropriate restrictions for TV rating system. Select “Return” by pressing the … or † button, then press the ENTER button to return to the previous menu. Press the EXIT button to exit. Downloadable U.S. Rating Return Humor Level √1 /2 The number of current rating title The number of all rating title DH MH H VH EH Setup Enter NOTES • Allow all: Press to unlock all TV ratings. / Block all: Press to lock all TV ratings. • Parental restriction levels differ depending on the broadcasting station. • The default menu name and Downloadable U.S. Rating changes depending on the downloaded information. • Even if you set the On-screen display to your desired language, the "Downloadable U.S. Rating" menu will appear in English only. • The rating will automatically block certain categories that are more restrictive. • The rating titles (For example : Humor Level..etc) and TV ratings (For example : DH, MH, H..etc) may differ depending on the broadcasting station. English - 104 BP68-00588H-00Eng(090~113) 4/25/06 3:39 PM Page 105 Viewing Closed Captions (On-Screen Text Messages) Analog The Analog Caption function operates in either analog TV channel mode or external source mode. (Depending on the broadcasting signal, the Analog Caption function may operate on digital channels.) 1 Press the MENU button. Press the œ or √ button to select “Setup”, then press the ENTER button. Setup Return Language Clock Timer Game Mode V-Chip Caption Menu Transparency Blue Screen † Color Weakness English Off Medium Off Setup Enter 2 Press the … or † button to select “Caption”, then press the ENTER button. Setup Return Language Clock Timer Game Mode V-Chip Caption Menu Transparency Blue Screen † Color Weakness English Off √ Medium Off Setup Enter 3 Press the … or † button to select “Caption”, then press the ENTER button. Press the … or † button to select “On”, then press the ENTER button. Caption Return Caption Mode Caption Options Off On Setup Enter continued... English - 105 BP68-00588H-00Eng(090~113) 4/25/06 3:39 PM Page 106 Special Features 4 Press the … or † button to select “Mode”, then press the ENTER button. Press the … or † button to select submenu (CC1~CC4 or Text1~Text4) you want, then press the ENTER button. Caption Select “Return” by pressing the … or † button, then press the ENTER button to return to the previous menu. Press the EXIT button to exit. Return Caption Mode Caption Options Default † CC1 Setup NOTES • The default is “Default”. CC1 : The Primary Synchronous Caption Service. These are captions in the primary language that must be in sync with the sound, preferably matched to a specific frame. CC2 : The Special NonSynchronous Use Captions. This channel carries data that is intended to augment information carried in the program. CC3 : Secondary Synchronous Caption Service. Alternate program-related caption data, typically second language captions. CC4 : Special Non-Synchronous Use Captions. Similar to CC2. Text1 : First Text Service. This may be various non-program related data. Text2 : Second Text Service. Additional data, usually not program related. Text3/Text4 : Third and Fourth Text Services. These data channels are used only if Text1 and Text2 data bandwidth is not sufficient. • The Caption feature only works in TV, AV and S-Video mode. • The availability of captions depends on the program being broadcast. English - 106 Enter BP68-00588H-00Eng(090~113) 4/25/06 3:39 PM Page 107 Viewing Closed Captions (On-Screen Text Messages) Digital The Digital Captions function operates on digital channels. 1 Press the MENU button. Press the œ or √ button to select “Setup”, then press the ENTER button. Setup Return Language Clock Timer Game Mode V-Chip Caption Menu Transparency Blue Screen † Color Weakness English Off Medium Off Setup Enter 2 Press the … or † button to select “Caption”, then press the ENTER button. Setup Return Language Clock Timer Game Mode V-Chip Caption Menu Transparency Blue Screen † Color Weakness English Off √ Medium Off Setup Enter 3 Press the … or † button to select “Caption”, then press the ENTER button. Caption Return Caption Mode Caption Options Press the … or † button to select “On”, then press the ENTER button. 4 NOTE • “Caption Options” are available only when “Service1~Service6” can be selected in “Mode”. 5 Press the … or † button to select “Mode”, then press the ENTER button. Press the … or † button to select submenu (Service1~Service6, CC1~CC4 or Text1~Text4) you want, then press the ENTER button. Press the … or † button to select “Caption Options”, then press the ENTER button. Off On Setup Enter Caption Return Caption Mode Caption Options … CC1 † CC2 Setup Enter Caption Return Caption Mode Caption Options On Default √ Setup Enter continued... English - 107 BP68-00588H-00Eng(090~113) 4/25/06 3:39 PM Page 108 Special Features 6 Press the … or † button to select “Size”, then press the ENTER button. Press the … or † button to select the desired item in the Size menu, then press the ENTER button. Set other listed options below using the same method as above. Select “Return” by pressing the … or † button, then press the ENTER button to return to the previous menu. Press the EXIT button to exit. Caption Options Return Size Font Style Foreground Color Background Color Foreground Opacity Background Opacity Return to Default Default Default Default Default Default Default Setup Enter NOTES • The availability of captions depends on the program being broadcast. • “Default” means to return to the original caption options set by the broadcaster. Size This option consists of “Default”, “Small”, “Standard”, and “Large”. The default is “Default”. Font Style This option consists of “Default”, “Style0 ~ Style 7”. You can change the font you want. The default is “Default”. Foreground Color This option consists of “Default”, “White”, “Black”, “Red”, “Green”, “Blue”, “Yellow”, “Magenta”, and “Cyan”. You can change the color of the letter. The default is “Default”. Background Color This option consists of “Default”, “White”, “Black”, “Red”, “Green”, “Blue”, “Yellow”, “Magenta”, and “Cyan”. You can change the background color of the caption. The default is “Default”. Foreground Opacity This option consists of “Default”, “Transparent”, “Translucent”, “Solid”, and “Flashing”. You can change the opacity of the letter. The default is “Default”. Background Opacity This option consists of “Default”, “Transparent”, “Translucent”, “Solid”, and “Flashing”. You can change the background opacity of the caption. The default is “Default”. Return to Default This option sets each of “Size”, “Font Style”, “Foreground Color”, “Background Color”, “Foreground Opacity”, and “Background Opacity” Color to its default. Alternate method Press the CAPTION button on the remote control repeatedly to select “On” or “Off”. Caption : On English - 108 BP68-00588H-00Eng(090~113) 4/25/06 3:39 PM Page 109 Using a CableCARD This menu works with a CableCARD provided by a local cable service provider. Prior to accessing this menu, a CableCARD should be connected to the rear panel of the TV. For detailed connection instructions, refer to the “Connecting CableCARD” section on page 22 of this manual. Displaying CableCARD related information To access information on Status, Pairing, Network Setup of the CableCARD provided by the service provider in CableCARD menu. 1 Press the MENU button. Press the œ or √ button to select “Setup”, then press the ENTER button. Setup Return Language Clock Timer Game Mode V-Chip Caption Menu Transparency Blue Screen † Color Weakness English Off Medium Off Setup Enter 2 Press the … or † button to select “CableCARDTM”, then press the ENTER button. Select “Return” by pressing the … or † button, then press the ENTER button to return to the previous menu. Press the EXIT button to exit. Setup … Game Mode V-Chip Caption Menu Transparency Blue Screen Color Weakness PC Function Help CableCARDTM CableCARDTM Setup Off Medium Off Off √ Setup Enter English - 109 BP68-00588H-00Eng(090~113) 4/25/06 3:39 PM Page 110 Special Features Using the CableCARD Setup Function Sets up relevant CableCARD options. CableCARD Reset Resets CableCARD when the channels provided by CableCARD are not available. 1 Press the MENU button. Press the œ or √ button to select “Setup”, then press the ENTER button. Setup Return Language Clock Timer Game Mode V-Chip Caption Menu Transparency Blue Screen † Color Weakness English Off Medium Off Setup Enter 2 Press the … or † button to select “CableCARDTM Setup”, then press the ENTER button. Setup … Game Mode V-Chip Caption Menu Transparency Blue Screen Color Weakness PC Function Help CableCARDTM CableCARDTM Setup Off Medium Off Off √ Setup Enter 3 Press the … or † button to select “CableCARDTM Reset”, then press the ENTER button. CableCARDTM Setup Return CableCARD™ Reset Channel List Reorganization Setup Enter English - 110 BP68-00588H-00Eng(090~113) 4/25/06 3:39 PM Page 111 Channel List Reorganization Deletes and reorganizes the channel list provided by CableCARD. This feature should be used if you change or upgrade your CableCARD service. 1 Press the MENU button. Press the œ or √ button to select “Setup”, then press the ENTER button. Setup Return Language Clock Timer Game Mode V-Chip Caption Menu Transparency Blue Screen † Color Weakness English Off Medium Off Setup Enter 2 Press the … or † button to select “CableCARDTM Setup”, then press the ENTER button. Setup … Game Mode V-Chip Caption Menu Transparency Blue Screen Color Weakness PC Function Help CableCARDTM CableCARDTM Setup Off Medium Off Off √ Setup Enter 3 Press the … or † button to select “Channel List Reorganization”, then press the ENTER button. CableCARDTM Setup Return CableCARD™ Reset Channel List Reorganization Setup Enter English - 111 BP68-00588H-00Eng(090~113) 4/28/06 8:53 AM Page 112 Special Features Using TV Guide On ScreenTM Shows the on-screen information on the program, and sets the scheduled program options. To activate TV Guide On ScreenTM feature, follow the instructions below. 1 Press the MENU button. Press the œ or √ button to select “Listings”, then press the ENTER button. Listings Return TV Guide On ScreenTM TV Guide On ScreenTM Setup Listings Enter 2 Press the … or † button to select “TV Guide On ScreenTM”, then press the ENTER button. Press the EXIT button to exit. Listings Return TV Guide On ScreenTM TV Guide On ScreenTM Setup Listings Enter NOTES • Refer to TV Guide On ScreenTM manual for details. • If the TV Guide On ScreenTM system is used during the timer-recording using VCR or IEEE1394 connections, TV output signal is recorded. • However, you can only record digital channels using IEEE1394 devices. • TV is automatically turned on and then searches the specific channel to record at the scheduled recording time. • TV will automatically be turned off when timer-recording completes without remote control activation. • See page 21 and 116 for information about timer-recording VCR and IEEE1394 connections. English - 112 BP68-00588H-00Eng(090~113) 4/25/06 3:39 PM Page 113 Using TV Guide On ScreenTM Setup 1 Press the MENU button. Press the œ or √ button to select “Listings”, then press the ENTER button. Listings Return TV Guide On ScreenTM TV Guide On ScreenTM Setup Listings Enter 2 Press the … or † button to select “TV Guide On ScreenTM Setup”, then press the ENTER button. Listings Return TV Guide On ScreenTM TV Guide On ScreenTM Setup Listings Enter Reminder Screen To make a selection, use the up or down arrow key to highlight an option, and press ENTER: 1 If you want to set up the TV Guide On ScreenTM now, select “Set up TV Guide On Screen now“. For more information, refer to INITIAL GUIDE SETUP in the TV Guide Manual. 2 If you want to set up TV Guide On ScreenTM later and want the reminder screen to be displayed each time you turn your TV on, select “Remind me to set it up later”. This option will return you to watching TV. 3 If you don’t want to set up TV Guide On ScreenTM now and also don’t want the reminder screen to be displayed each time you turn your TV on, select “Don’t remind me again”. “Don’t remind me again” will return you to watching TV and stops the reminder screen from appearing upon power On. Even if you select “Don’t remind me again” or close the screen by pressing the EXIT or TV Guide button, you can set up TV Guide On ScreenTM any time you want by pressing the TV Guide button on your remote control. NOTES • Press the EXIT or TV Guide button on the remote control to close the Reminder screen without selecting any icon. The Reminder screen will disappear. • Refer to TV Guide On ScreenTM manual for details. English - 113 BP68-00588H-00Eng(114~129) 4/25/06 3:40 PM Page 114 SAMSUNG BP68-00588H-00Eng(114~129) 4/25/06 3:40 PM Page 115 Using the D-Net BP68-00588H-00Eng(114~129) 4/25/06 3:40 PM Page 116 Using the D-Net What’s D-Net? This refers to a home network consisting of devices supporting D-Net (IEEE1394) connections (such as digital VCRs and Set-Top Boxes) for digital audio and video data. D-Net (IEEE1394) interface is capable of supporting various high-end digital A/V applications, such as A/V device control and signal routing, Digital Video (DV) editing, home networking. How to connect compatible IEEE1394 Devices Connecting compatible IEEE1394 devices is simple using this TV equipped with IEEE1394. A secure digital interface is provided to other digital home entertainment units, such as a DTV, Set-Top Box, AVHDD, digital VCR, or Mini-DV Camcorder. 1 Connect the IEEE1394 cable from the jack of the component with IEEE1394 capability, such as a Set-Top Box or a Digital VCR to the IEEE1394 jack on the TV. 2 Press the D-Net button on the Remote Control. 3 Select the D-Net (IEEE1394) Compatible device. TV Rear Panel 1 IEEE1394 cable Digital VCR (D-VHS) NOTES • To access D-Net (IEEE1394) in the menu, see page 121. • The IEEE1394 interface is equipped with a copy protection standard called Digital Transmission Content Protection (DTCP). • The name of 1394 Jack may be different according to the manufacturer (i.e., DTV LINK or i.LINK). • The supported video format is MPEG-2 Digital video. Other digital video formats (e.g. DV format...) are not supported. For audio, Dolby Digital and MPEG Digital Audio are supported, other digital audio formats (e.g. MP3, DTS) are not supported. • Because IEEE1394 is an evolving technology, it is possible that some or all of the connectivity features of a device you connect to the TV through the IEEE1394 port may not operate. • There may be a single IEEE1394 jack depending on the specifications of the external device. • If only a single IEEE1394 jack is supported, connect the cable to the IEEE1394 jack of the IEEE1394 device that supports D-Net. English - 116 BP68-00588H-00Eng(114~129) 4/25/06 3:40 PM Page 117 When Connecting D-Net (IEEE1394) Compatible devices 1 The last device in the chain may not be looped back to the TV as the TV may not be able to work with the other devices. To connect two or more D-Net (IEEE1394) Compatible devices, follow the diagram below. A maximum 10 D-Net (IEEE1394) Compatible devices can be connected. IEEE1394 cable IEEE1394 cable IEEE1394 cable IEEE1394 cable IEEE1394 cable IEEE1394 cable IEEE1394 cable Do not connect D-Net (IEEE1394) Compatible devices in a way that creates a loop. IEEE1394 cable IEEE1394 cable IEEE1394 cable IEEE1394 cable IEEE1394 cable IEEE1394 cable IEEE1394 cable NOTE • IEEE1394 cables longer than 14.76 feet (177.16 inches) should not be used between devices. English - 117 BP68-00588H-00Eng(114~129) 4/25/06 3:40 PM Page 118 Using the D-Net Connection Options There are two different connection options for connecting D-Net (IEEE1394) compatible devices. Select the most suitable option according to your network of audio/video products. The Direct Device-To-Device Option D-Net (IEEE1394) permits the chaining of devices, unlike analog audio and video connections where each device needs to be individually connected to the TV. This allows you to connect your D-VHS to your 1394 Set-Top Box only, then connect the Set-Top Box to the TV. More IEEE1394 devices can be added to the chain as needed. Each video device can be viewed on the TV’s D-Net and information can be sent from any IEEE1394 device to other compatible devices. DTV STB Digital VCR The Hub Connection Option D-Net (IEEE1394) also permits connecting devices using the TV as a hub. Each device is capable of sending information, which may include audio and video, to any other device on the network. Other 1394 Device 1394 Monitor English - 118 Digital VCR DTV STB Digital VCR BP68-00588H-00Eng(114~129) 4/25/06 3:40 PM Page 119 4-Pin and 6-Pin Connectors Two different types of connectors are used for IEEE1394 terminals and cables, a 4-pin and a 6-pin. The 4-pin connector sends digital audio, digital video and digital control signals to and from devices. The TV has two available 4-pin connection jacks, of which two are at the back. The 6-pin connector also sends digital audio, video and control signals, but in addition, sends low voltage electrical power. There are no 6 pin connectors on this TV. It is not possible to directly connect a 6-pin connector to a 4-pin jack, and vice versa. In order to connect a 6-pin device to a 4-pin device, an adaptor or adaptor cable is required, easily purchased from an electronic or computer store. Connecting a 6-pin device (such as a camcorder) via an adapter to the TV, (if it is designed to receive electrical power from another 6-pin device) will require that the camcorder be directly connected to the AC supply, or that the camcorder’s battery power be used. English - 119 BP68-00588H-00Eng(114~129) 4/25/06 3:40 PM Page 120 Using the D-Net Selecting a D-Net device Prior to viewing an IEEE1394 device, it first needs to be selected in the D-Net Device List. 1 Connect the relevant D-Net (IEEE1394) Compatible device in the list. (See “How to connect compatible IEEE1394 Devices” on page 116) 2 Press the D-Net button on the remote control. 3 • The TV and all other devices connected on the D-Net (IEEE1394) chain appear in the D-Net device list. • If “UNCONTROLLABLE” is listed in the device list, the device is not supported by the TV, and cannot be controlled with the TV remote control or the D-Net control panel on the screen. • The device list is in the order of DTV, STB, AVHDD, DVHS, Camcorder and UNCONTROLLABLE. If there are multiple devices of the same type, the devices will be listed in ascending order of the manufacturer name with Samsung first as the exception. If there are multiple devices of the same type and they are manufactured by the same company, they will be listed in the order of their serial number. Select a connected D-Net device by pressing the … or † button. • It is possible to connect a D-Net device to another device and to the TV while the TV is ON. The D-Net device list automatically adds the newly-connected device to the list. See “How to connect compatible IEEE1394 Devices”, page 116 for connecting D-Net (IEEE1394) Compatible devices. 4 To select a device, press the ENTER button. Then display the D-Net device control panel and operate the selected device. • At this time, the screen changes to the picture from the selected device. Copy-free English - 120 BP68-00588H-00Eng(114~129) 4/25/06 3:40 PM Page 121 Follow the instructions below to activate D-Net in the menu. 1 Press the MENU button. Press the œ or √ button to select “Application”, then press the ENTER button. Application Return D-Net WISELINK Application Enter 2 Press the … or † button to select “D-Net”, then press the ENTER button. • The TV and all other devices, connected on the D-Net (IEEE1394) chain, appear in the D-Net device list. • This is also available using the D-Net button on the remote control. 3 Application Return D-Net WISELINK Application Enter Press the … or † button to select a D-Net (IEEE1394) connected device. English - 121 BP68-00588H-00Eng(114~129) 4/25/06 3:40 PM Page 122 Using the D-Net The D-Net control panel Select an IEEE1394 device from the D-Net device list. The TV will then display the D-Net control panel. This panel allows you to use the TV remote control to control the selected IEEE1394 device. 1 Press the D-Net button on the remote control. 2 Press the … or † button to select a D-Net (IEEE1394) connected device. Press the ENTER button. • The D-Net control panel appears on the bottom of the screen. Copy-free 3 Use the …, †, œ, √ buttons on the remote control to move through the options (see next page) available in the D-Net control panel. 4 Press the ENTER button to select an option. 5 To view the IEEE1394 device in FULL SCREEN, press the EXIT button on the remote control. • To exit D-Net mode, select DTV from the D-Net device list or press the SOURCE button on the remote control. NOTE • For information about how to use the icons, refer to the following page. English - 122 Copy-free BP68-00588H-00Eng(114~129) 4/25/06 3:40 PM Control Panel ( Button Page 123 ) Name To do this Return Move to the previous menu. Target Start and stop recording a Digital stream. Program List Display the AVHDD program list. Play Play the digital stream from the selected digital device. Stop Stop the digital stream from the selected digital device. Rewind Fast rewind a digital stream from the selected digital device. Forward Fast forward a digital stream from the selected digital device. Device menu Display the EIA-775 OSD receive to connected 1394 device. Display only EIA-775 support device. Power Turn the Power of the selected device ON/OFF. Go to recording position When in time shift mode on AVHDD, this moves to the recording position. Recording Display only Camcoder recordings. Pause Pause Play. Recording stop Display only AVHDD recordings. NOTES • Press the …, †, œ, √ buttons on the remote control to select a control panel button and press the ENTER button on the remote control. • Depending on the device being controlled, not all options on the D-Net control panel may be available. • Not all functions are supported for all IEEE1394 devices. • It is possible to use direct keys on the remote control (rewind, stop, play/pause, fast forward) to control external devices. * What is EIA-775? : EIA-775 is an OSD standard that enables the control of external 1394 devices using functions such as Play, Stop, etc. * What is CEA-931? : This is a standard for controlling external IEEE1394 devices with the TV remote control and not the remote control of the external device. For example, to play DVHS, you press the Play button of the TV instead of the Play button of the DVHS, the Play command is transmitted to the DVHA through the IEEE1394 connection. English - 123 BP68-00588H-00Eng(114~129) 4/25/06 3:40 PM Page 124 Using the D-Net Operating Tips 1) When the screen is switched to the TV program. - When you select the TV button, the TV button, in the Device List, it switches to the TV program. - Although you have selected another device from the Device List, if detecting a video signal from the device fails, the “Connection failed” message appears and the screen automatically switches to the TV program. - When the 1394 connection to the selected device is disconnected, the screen automatically switches to the TV program. If you reconnect the device, the reconnected device is automatically selected. 2) AVHDD, DVHS and camcorders automatically stop when you select another device. 3) Some devices may be displayed in the Device List as ‘UNCONTROLLABLE’. This may happen when the device does not contain the proper information or it cannot be read. 4) Some devices may not be recognized and may be disconnected from the 1394 connection when they are turned off. 5) Through D-Net, you can connect another IEEE1394 compatible TV. If the TV is connected, the TV is listed in the D-Net Devices. At this point, the screen that appears when the TV is selected is determined by the specifications of the connected TV. That is, the screen of the connected TV or another connected IEEE1394 device may be displayed. * What is Digital TS : DTV packages digital data (video, audio and data) into 188 byte units using the MPEG-2 algorithm and transmits the data unit (unlike for analog). It is called Digital Transport Stream or Digital TS. 6) When connected to another STB, some STBs may not be displayed in the Device List due to device specifications or defects when multiple devices are connected. Even if the device is displayed in the Device List, the connection to the device may fail. Otherwise, due to STB trouble, the video stream may be stopped while recording, or the recording may fail. In this case, you have to discover which device is defective by removing the devices one by one. 7) When connected to an AVHDD - Do not move the AVHDD disc while it is in use as it may cause a disruption in the video. - Some AVHDDs may provide two playbacks or recordings simultaneously. In this case, there may be two Play icons in the Program List and 2 AVHDD buttons in the Target List. - If you copy a program from the Program List, the selected AVHDD program is played on the TV screen and recorded using the device selected from the Target List. Even if the program reaches its end, the recording device does not stop automatically. - Some AVHDDs may display the wrong program information after recording, depending on the situation. - A program currently being recorded on the AVHDD can be viewed by selecting AVHDD from the Device List. (PVR(Person Video Recorder) function.) - When using the “Go to recording position” function, the recording and playing time are displayed. The difference between them must be longer than 30 seconds to avoid overlapping. 8) When connected to DVHS - Some devices support an automatic connect function (I-mode). These devices may cause a malfunction when multiple devices are connected. - Some DVHS devices may not record properly when multiple devices are connected and the mode is I-mode. 9) When connected to a camcorder - Depending on if the camcorder is in Tape or Camera Mode, the control panel changes. If the camcorder turns off the power (power saving mode), the camcorder may disappear from the Device List. English - 124 continued... BP68-00588H-00Eng(114~129) 4/25/06 3:40 PM Page 125 10) When multiple devices are connected, some devices may appear and then disappear periodically in the Device List. This is because some devices malfunction when multiple devices are connected. If this occurs, you have to discover and remove the defective device from the connection by removing the devices one by one. 11) When multiple devices are connected, the response time may be relatively long when selecting a device. This may happen when there is a device(s) that malfunctions and degrades the 1394 connection speed. At this time, some of the functions of AVHDD or DVHS may not work, and the stream connection may fail. If this occurs, you have to discover and remove the defective device from the connection by removing the devices one by one. 12) Copy Protection - You can record a 'Copy-Free', or 'Copy-One-Generation' program. - Although you cannot record a Copy-No-More, or Copy-Never screen, you can view it through another device. - If you change the channel to a ‘copy never’ channel while recording a ‘copy free’ channel, the recording is automatically stopped in some devices. Even if the program was recorded, you will not be able to view the recorded ‘copy never’ channel. At this time, therefore, the user has to manually stop the recording. Copy information Message Descriptions Copy_free Able to copy. No_more_copies Unable to copy anymore. Copy_one_generation Able to copy once. Copy_never Unable to copy. 13) When multiple devices are connected, and a device malfunctions while playing DVHS or AVHDD, the user may experience interrupted screen play. 14) When playing and recording a program simultaneously using AVHDD, and the program is copy protected, the program may not play depending on whether the AVHDD device supports simultaneous copy protection. 15) When AVHDD or DVHS is being played, and you press the Pause button, some products may show the “No Signal or Weak Signal” message on the TV screen instead of a still picture as there is no video stream from the product. 16) If the number of connected IEEE 1394 devices exceeds 10, it may cause abnormal operation. - Yes and Play may not operate smoothly, if you play after recording. - Yes and the Play, Record and Copy functions do not work properly. - Disconnect the malfunctioning device and then try again. English - 125 BP68-00588H-00Eng(114~129) 4/25/06 3:40 PM Page 126 Using the D-Net Recording Tips 1) Recording using the Target List while also watching the screen being recorded. - Check that the AVHDD and DVHS devices are connected. - Select a source device to be recorded and press the Target button in the menu. (Target button : The Target button is used for making a recording. When pressing this button, a menu appears where you can select a device that will be used to make a recording of the current screen of the current device. At this point, the menu shows only DVHS and AVHDD which are recordable from among D-Net devices.) - Select a device to be recorded from the Target List. 2) Recording a program in the Program List of AVHDD using another device. - Select an AVHDD program to be recorded from the Program List and press Copy. - Select the target device from the Target List. NOTES • In this case, the selected program is automatically played and displayed on the TV screen and the target device automatically starts recording. • Controlling a device with another device's remote control or through manual operation, may cause a malfunction when controlling a device through the TV. When copying a program, the recording will not stop automatically when the program reaches its end. • Although you can make a recording to connected devices regardless of copy protection, you may not be able to watch the copy-protected recording as the playback picture may be distorted. • When recording an HD program on cable TV or from satellite, programs on some channels may not be recorded if the program exceeds the limit of the allowable range of recording devices such as D-VHS. • If a recording is in process and another command is issued while the ”Recording...” D-Net Notice is displayed on the screen, the recording may fail. Tips on stopping recording 1) In general, you can instantly evaluate the current recording device through the Target List. If you select a device that you wish to stop, a message appears asking if you really want to stop recording. 2) For DVHS. If you select a recording DVHS from the Device List, a message appears asking if you really want to stop recording. 3) For AVHDD, if the program currently being recorded is selected, you can stop the recording using the Recording stop button. NOTE • Controlling a device through another device or through a manual operation may cause a malfunction when controlling a device through the TV. English - 126 BP68-00588H-00Eng(114~129) 4/25/06 3:40 PM Page 127 Troubleshooting (D-Net) Problem Possible Solution The device is displayed as being “UNCONTROLLABLE”. Only DTVs, STBs, AVHDDs, DVHSs and MPEG camcorder IEEE 1394 devices are controllable. Other devices will display “UNCONTROLLABLE” in the device list. Some supported devices may display as “UNCONTROLLABLE” due to an initialization error. ➔ If a device is supported but is displayed as “UNCONTROLLABLE”, reconnect the 1394 cable. If this does not work, this is because the information about the device is unreadable due to an internal error. A connected device is not displayed in the device list. A device, which has experienced an error during initialization, may malfunction and affect the operation of other connected devices. Other devices may not be displayed in the list. ➔ Disconnect and reconnect the1394 cable. ➔ Remove a device which does not guarantee compatibility when multiple devices are connected. “Check the connection with IEEE 1394 cable.” message appears. This message appears when there is a problem with the connected device or the 1394 cable. Initialization might fail when multiple devices are connected due to limitations of some connected devices. ➔ Check that the 1394 cable is making a loop and reconnect the 1394 cable. Check that cables are correctly connected to all connected devices. This message may appear due to an operating error of the 1394 port of a particular device. “Connection is failed. Exceeds the limit of 1394 network connection.” message appears. IEEE 1394 supports a limited number of screen connections. This message appears when the limit has been exceeded. ➔ Stop unnecessary operations such as playing, recording, etc. and try it again. Turn the auto screen connection function (I-mode) of DVHS devices OFF, and retry. If a camcorder is connected and it is not currently being used, turn it off or disconnect it from the 1394 network. continued... English - 127 BP68-00588H-00Eng(114~129) 4/25/06 3:40 PM Page 128 Using the D-Net Problem Possible Solution “Connection is failed. 1394 network speed is not compatible.” message appears. This message appears when the connection speed of the connected device and the device selected from the Target List are different when copying data. ➔ Connect a low speed device between the two devices. (See figure) S400 GROUP DEVICE D-Net DTV S400 IEEE1394 cable IEEE1394 cable S200 DEVICE S100 GROUP DEVICE IEEE1394 cable S200 DEVICE IEEE1394 cable D-Net DTV S400 S200 GROUP DEVICE IEEE1394 cable S400 DEVICE IEEE1394 cable IEEE1394 cable S400 DEVICE D-Net DTV S400 A 1394 device has a maximum connection speed which will be marked near the IEEE 1394 connector with an “S” number (i.e., S100,S200,S400). The higher the number, the faster the maximum connection speed. This TV has a maximum connection speed of S400. “This device is occupied by another device.” message appears. This message appears when you try to record a device, which is currently being recorded manually or by another device, through the TV. ➔ Stop the recording device and retry. “Authentication is failed” message appears. Check that the connected device supports DTCP. “Recording is prevented.” message appears. This message appears when trying to copy protected content. Although DV Camcorder is in the device list, no picture is displayed on the screen when the DV camcorder is selected. Although a camcorder which supports the DV format appears in the device list, you cannot watch video from the camcorder even if you select the camcorder as an input source, because the TV supports the MPEG format only. continued... English - 128 BP68-00588H-00Eng(114~129) 4/25/06 3:40 PM Page 129 Problem Possible Solution No picture on the screen after selecting a device Check if the current mode for DTV and STB is set to analog by mistake. For AVHDD, check if the played content reaches to the end. (Select the item from the content list again.) For DVHS, check if a D-VHS tape is being used. If the camcorder supports the DV format, no picture will be displayed on the screen. “Initializing D-Net” message appears. This message appears when the D-Net function is being initialized. Retry after a short wait to use the D-Net function. “Exceeds the limit of device numbers.” message appears. This message appears when the number of currently connected D-Net devices exceeds 10. Retry after disconnecting unnecessary devices. “Recordable device is not connected” message appears. This message appears when the recordable device is not on the network when you try to make a recording using a D-Net device. Retry after connecting a recordable device (DVHS, AVHDD). “Not available while recording” message appears The message appears informing you that you cannot change the channels or change the input source using the remote control because a recording is in progress through D-Net. Retry after stopping the current recording through D-Net. “The connected device is unavailable to perform this function for temporary problems.” message appears. This message appears when the selected function is not supported by the relevant device or the relevant device cannot execute the selected function. Most STBs, DTVs and camcorders do not support the power on/off command. This message may appear when you issue the power command for these devices. This message also appears when the command is supported but the relevant device cannot follow the command. Retry after checking the current mode of the relevant device. D-Net cannot record video from analog channels from connected external equipment. This message appears when the user presses the RECORD button in analog mode. D-Net only supports recording for digital. “Not available format is selected.” message appears. This message appears when the selected device does not support the MPEG format. At present, D-Net supports MPEG TS only. continued... English - 129 BP68-00588H-00Eng(130~141) 4/25/06 3:41 PM Page 130 Using the D-Net Problem Possible Solution This device is unavailable for D-Net. This message appears if you have connected a 1394 device or equipment other than a supported device (DVHS, DTV, STB, AVHDD, Camcorder), or if the connected device does not support the AVC defined in the 1394 specifications, even if the device is a supported device, when you have selected the device to use it. Connection failed. Check if the 1394 cable is connected. This message appears if there is a connection problem when trying to use a D-Net device. Initializing… This message appears if the AVHDD is booting when trying to use the AVHDD. Please wait. A recordable device is on standby. This message appears if the recording device is turned off when trying to record using the D-Net device. Please wait a moment until it is turned on. Connection failed. The device is not responding. This message appears if there is a connection problem when trying to use a D-Net device. This message appears when the response of the component device malfunctions or is incorrect. No space left on disc. This message appears if the AVHDD has no space to record. The D-NET ERROR message appears on the screen. Although you have connected external devices according to the procedures described in the manual to use the D-Net function, the D-NET ERROR message may appear on the screen. In this case, check to see if the jacks are damaged. English - 130 BP68-00588H-00Eng(130~141) 4/25/06 3:41 PM Page 131 PC Display BP68-00588H-01Eng(130~141) 5/16/06 1:01 PM Page 132 PC Display Using Your TV as a Computer (PC) Display How to Connect Your PC to the TV This figure shows the Standard Connector-jack panel. The actual configuration on your TV may be different, depending on the model. Connecting a PC (15p D-SUB) to the TV 1 Connect a PC cable between the PC output jack on the PC and the RGB input jack (PC IN) on the TV. 2 Connect a Audio cable between the Audio output jack on the PC and the Audio input jack (PC AUDIO IN) on the TV. TV Rear Panel 15Pin (D-Sub) Cable 2 1 Audio Cable NOTE • You cannot connect this TV to a PC via HDMI/DVI. PC English - 132 BP68-00588H-01Eng(130~141) 5/16/06 1:01 PM Page 133 Setting up Your PC Software (Based on Windows XP) The Windows display-settings for a typical computer are shown below. But the actual screens on your PC will probably be different, depending upon your particular version of Windows and your particular video card. But even if your actual screens look different, the same, basic set-up information will apply in almost all cases. (If not, contact your computer manufacturer or Samsung Dealer.) 1. Right click the mouse on the Windows Desktop, then click on Properties. The Display Properties dialog-box will be displayed. 2 Click on Settings, then set the Display Mode with reference to the Display Modes Table. (See next page) You do not need to change the Colors settings. 3 Click on Advanced. A new settings dialog box will be displayed. 4 Click on the Monitor tab, then set the Screen Refresh Rate with reference to the Display Modes Table. Set the Vertical Frequency and Horizontal Frequency individually if you can do so, instead of setting the Screen Refresh Rate. 5 Click “OK”, then the dialog-box will disappear. Click “OK” on the “Display Properties” dialog-box. 6 Shutdown the PC, and connect it to your TV. * The actual screens on your PC may look different, depending on your particular version of Windows and the type of your PC. * When you use your TV as a PC monitor, it supports Colors up to 32 bits. * In this case, the display on the TV may look different depending on your particular version of Windows or the PC manufacturer. * When connecting a PC, you must set it to the display settings that are supported by the TV. Otherwise, the message “Out of input range” will be displayed. 2 3 4 5 continued... English - 133 BP68-00588H-00Eng(130~141) 4/25/06 3:41 PM Page 134 PC Display Checklist Before Connecting to a PC • Adjust the PC Display Setup to the resolution and frequency values that are supported by the TV. • Please read the user’s manual provided with the PC (Graphic Card & Sound Card). • Do not supply power to either device until all connections are complete. Supplying power in the middle of connecting may cause damage to the product. • Check the terminal types for the PC’s graphic card. Setting the Display Modes to be Compatible with Your TV Mode IBM Resolution 640 x 350 640 x 480 640 x 480 800 x 600 1024 x 768 VESA 1152 x 864 1280 x 960 1280 x 1024 1600 x 1200 1920 x 1200RB Vertical Frequency [Hz] 70.086 59.94 72.809 75 60.317 72.188 75 60.004 70.069 75.029 75 60 60.02 75.025 60 59.885 Horizontal Frequency [KHz] 31.469 31.469 37.861 37.5 37.879 48.077 46.875 48.363 56.476 60.023 67.5 60 63.981 79.976 75 74.556 Vertical Polarity N N N N P P P N N P P P P P P P Horizontal Polarity P N N N P P P N N P P P P P P N NOTES • The Modes Table conforms to the regulations of IBM/VESA and is prepared based on analog input standards. • Resolutions other than the resolutions above are not supported in PC mode. English - 134 BP68-00588H-00Eng(130~141) 4/25/06 3:41 PM Page 135 Adjusting the Picture Quality The purpose of picture quality adjustment is to remove or reduce picture noise. If the noise is not removed by fine tuning alone, then do the frequency adjustments to the utmost and fine tune again. After the noise has been reduced, re-adjust the picture so that it is aligned on the center of screen. 1 Press the SOURCE button to select “PC”. 2 Press the MENU button. Press the œ or √ button to select “Setup”, then press the ENTER button. Setup Return Language Clock Timer Game Mode V-Chip Caption Menu Transparency Blue Screen † Color Weakness English Off Medium Off Setup Enter 3 Press the … or † button to select “PC”, then press the ENTER button. Setup … Game Mode V-Chip Caption Menu Transparency Blue Screen Color Weakness PC Function Help CableCARDTM CableCARDTM Setup Off Medium Off √ Off Setup Enter 4 Press the … or † button to select “Image Lock”, then press the ENTER button. PC Return Image Lock √ Position Auto Adjustment Image Reset 1024x768 @75Hz Resolution Setup Enter NOTE • This feature may change the width of the image. If necessary, adjust the position to center. 5 Press the … or † button to select “Coarse” or “Fine”, then press the ENTER button. Image Lock Return Coarse Fine 1344 0 Setup Enter Adjust 6 Press the œ or √ button to remove the picture noise. Select “Return” by pressing the … or † button, then press the ENTER button to return to the previous menu. Press the EXIT button to exit. Image Lock Return Coarse Fine 1344 0 Setup Adjust Enter English - 135 BP68-00588H-00Eng(130~141) 4/25/06 3:41 PM Page 136 PC Display Changing the Picture Position After connecting the TV to your PC, adjust the position of the picture if it is not well-aligned. 1 Press the SOURCE button to select “PC”. 2 Press the MENU button. Press the œ or √ button to select “Setup”, then press the ENTER button. Setup Return Language Clock Timer Game Mode V-Chip Caption Menu Transparency Blue Screen † Color Weakness English Off Medium Off Setup Enter 3 Setup Press the … or † button to select “PC”, then press the ENTER button. … Game Mode V-Chip Caption Menu Transparency Blue Screen Color Weakness PC Function Help CableCARDTM CableCARDTM Setup Off Medium Off √ Off Setup Enter 4 PC Press the … or † button to select “Position”, then press the ENTER button. Return Image Lock Position √ Auto Adjustment Image Reset 1024x768 @75Hz Resolution Setup Enter Position ▲ ▼ ▼ 5 Adjust the position of picture by pressing the …/†/œ/√ button. Press the ENTER button. ▼ Select “Return” by pressing the … or † button, then press the ENTER button to return to the previous menu. Press the EXIT button to exit. English - 136 Adjust Enter Return BP68-00588H-00Eng(130~141) 4/25/06 3:41 PM Page 137 Adjusting the Picture Quality and Position Automatically This feature allows the TV to self-adjust to the incoming video signal. The values of fine, coarse and position are adjusted automatically. 1 Press the SOURCE button to select “PC”. 2 Press the MENU button. Press the œ or √ button to select “Setup”, then press the ENTER button. Setup Return Language Clock Timer Game Mode V-Chip Caption Menu Transparency Blue Screen † Color Weakness English Off Medium Off Setup Enter 3 Press the … or † button to select “PC”, then press the ENTER button. Setup … Game Mode V-Chip Caption Menu Transparency Blue Screen Color Weakness PC Function Help CableCARDTM CableCARDTM Setup Off Medium Off √ Off Setup Enter 4 Press the … or † button to select “Auto Adjustment”, then press the ENTER button. The picture quality and position are automatically adjusted, and the picture returns to original view a few seconds later. Select “Return” by pressing the … or † button, then press the ENTER button to return to the previous menu. Press the EXIT button to exit. PC Return Image Lock Position Auto Adjustment Image Reset 1024x768 @75Hz Resolution Setup Enter Auto Adjustment in Progress Please Wait. English - 137 BP68-00588H-00Eng(130~141) 4/25/06 3:41 PM Page 138 PC Display Changing the Picture Size (PC Mode) You can select the picture size which best corresponds to your viewing requirements. 1 Press the SOURCE button to select “PC”. 2 Press the MENU button. Press the œ or √ button to select “Picture”, then press the ENTER button. Press the … or † button to select “Size”, then press the ENTER button. Picture Return Mode Size Digital NR DNIe My Color Control Film Mode Wide On Off Off Picture Enter 3 Press the … or † button to select the screen format you want, then press the ENTER button. • “Wide”: Scales the picture to 92% of the TV screen, regardless of the aspect ratio of the input source. • “4:3”: Displays the picture as it is without changing the aspect ratio of input source. Picture Return Mode Size Digital NR DNIe My Color Control Film Mode Wide Wide 4:3 On On Off Picture Enter Select “Return” by pressing the … or † button, then press the ENTER button to return to the previous menu. Press the EXIT button to exit. Alternate method Press the P.SIZE button on the remote control repeatedly to change the picture Size. • “Wide”: The picture position ( , ) and size ( ) adjustments are available by pressing the …/†/œ/√ button. English - 138 Wide ▲ ▼ BP68-00588H-00Eng(130~141) 4/25/06 3:41 PM Page 139 Viewing the Current Resolution You can get the resolution information of your PC. 1 Press the SOURCE button to select “PC”. 2 Press the MENU button. Press the œ or √ button to select “Setup”, then press the ENTER button. Setup Return Language Clock Timer Game Mode V-Chip Caption Menu Transparency Blue Screen † Color Weakness English Off Medium Off Setup Enter 3 Press the … or † button to select “PC”, then press the ENTER button. Setup … Game Mode V-Chip Caption Menu Transparency Blue Screen Color Weakness PC Function Help CableCARDTM CableCARDTM Setup Off Medium Off √ Off Setup Enter The resolution information is displayed on the screen. Select “Return” by pressing the … or † button, then press the ENTER button to return to the previous menu. Press the EXIT button to exit. PC Return Image Lock Position Auto Adjustment Image Reset 1024x768 @75Hz Resolution Setup Enter NOTE • To change the resolution, see pages 133~134. English - 139 BP68-00588H-00Eng(130~141) 4/25/06 3:41 PM Page 140 PC Display Initializing the Picture Settings You can replace all picture settings with the factory default values. 1 Press the SOURCE button to select “PC”. 2 Press the MENU button. Press the œ or √ button to select “Setup”, then press the ENTER button. Setup Return Language Clock Timer Game Mode V-Chip Caption Menu Transparency Blue Screen † Color Weakness English Off Medium Off Setup Enter 3 Press the … or † button to select “PC”, then press the ENTER button. Setup … Game Mode V-Chip Caption Menu Transparency Blue Screen Color Weakness PC Function Help CableCARDTM CableCARDTM Setup Off Medium Off √ Off Setup Enter 4 Press the … or † button to select “Image Reset”, then press the ENTER button. The picture settings are replaced with the factory default values. Select “Return” by pressing the … or † button, then press the ENTER button to return to the previous menu. Press the EXIT button to exit. English - 140 PC Return Image Lock Position Auto Adjustment Image Reset 1024x768 @75Hz Resolution Setup Enter Image Reset is completed. BP68-00588H-00Eng(130~141) 4/25/06 3:41 PM Page 141 WISELINK BP68-00588H-00Eng(142~159) 4/25/06 3:42 PM Page 142 WISELINK Using the WISELINK Function This function enables you to view and listen to photo (JPEG) and audio files (MP3)saved on a USB Mass Storage Class (MSC) device. Press the power button on the remote control or front panel. TV Side Panel Example Connect a USB device containing JPEG and/or MP3 files to the WISELINK jack (USB jack) on the side of the TV. NOTES • If you enter the WISELINK mode with no USB device connected. “There is no device connected” message will appear. In this case, insert the USB device, exit the screen by pressing the WISE LINK button on the remote control and enter the WISELINK screen again. • Photo and audio files must be named in English, French, or Spanish. If not, the files can not be played. Change the file names to English, French, or Spanish if necessary. • Folder or file names can not exceed 128 characters. If exceeded, they won't function. • The file system only supports the FAT16/32. • Certain types of USB Digital camera and audio devices may not be compatible with this TV. • Wiselink only supports the USB Mass Storage Class device (MSC). MSC is a Mass Storage Class Bulk-Only Transport device. Examples of MSC are Thumb drives and Flash Card Readers. • Before connecting your device to the TV, please back up your files to prevent them from damage or loss of data. SAMSUNG is not responsible to any data file damage or data loss. Using the Remote Control Button in WISELINK Menu Button Operations Move the cursor and select an item Select the currently selected item. Play or pause the Slide Show or MP3 file. Stop the current function and return to the previous high-level menu. Run various functions from the Photo and Music menus. Stop the current slide show or MP3 file. Page Up or Down (file list item) English - 142 BP68-00588H-00Eng(142~159) 4/25/06 3:42 PM Page 143 Using the WISELINK Menu 1 Press the MENU button. Press the œ or √ button to select “Application”, then press the ENTER button. Application Return D-Net WISELINK Application Enter 2 Press the … or † button to select “WISELINK”, then press the ENTER button. Application Return D-Net WISELINK Application Enter 3 Press the … or † button to select the corresponding MSC Memory Device, then press the ENTER button. A menu for selecting the format of the files saved on the selected MSC Memory Device will be displayed. 4 Move Enter Exit Move Enter Return Move Enter Exit Press the œ or √ button to move to an icon, then press the ENTER button. To exit WISELINK mode, press the WISE LINK button on the remote control. Alternate method Press the WISE LINK button on the remote control to display a WISELINK menu. English - 143 BP68-00588H-00Eng(142~159) 4/25/06 3:42 PM Page 144 WISELINK Using the PHOTO (JPEG) List This menu shows JPEG files and folders saved on an MSC memory device. 1 Complete Steps 1 to 4 of Using the WISELINK Menu. (Refer to page 143) 2 Press the œ or √ button to move to “Photo”, then press the ENTER button. The saved file information is displayed as a folder or file. Move 3 Press the …, †, œ and √ buttons to select a file, then press the ENTER button. • Pressing the button over a photo icon shows the currently selected photo in full screen. • Pressing the button over a folder icon shows the JPEG files included in the folder. Enter Return 709x531 2006-1-30 1/14 Move Enter Photo menu Return : folder icon : photo icon : Move to the previous folder stage icon To exit WISELINK mode, press the WISE LINK button on the remote control. NOTES English - 144 • Moving to a photo may take a few seconds to load the file. At this point, the icon will appear at the top left of the screen. • This menu only shows files whose file extension is jpeg. Files of other formats such as bmp or tiff will not be displayed. • The files are displayed on a page. 15 thumbnail photos are displayed per page. • The thumbnails are numbered from left to right and from top to bottom, from 1 to 15. • Folders are displayed first and they are followed by all JPEG files in the current folder. The folders and JPEG files are sorted in alphabetical order. • If the photo is displayed in full screen, you can zoom in and out or rotate the photo on the screen. (Refer to pages 148~150) • It takes time to show JPEG files as Thumbnail images. BP68-00588H-00Eng(142~159) 4/25/06 3:42 PM Page 145 Selecting a Photo and Slide Show 1 Complete Steps 1 to 4 of Using the WISELINK Menu. (Refer to page 143) 2 Press the œ or √ button to move to “Photo”, then press the ENTER button. The saved file information is displayed as a folder or file. Move 3 Press the INFO button to display “View” or “Slide Show”. Enter Return 709x531 2006-1-30 1/14 View Slide Show Exit 4 Press the … or † button to select “Slide Show”, then press the ENTER button. NOTES 709x531 2006-1-30 1/14 View Slide Show • Slideshow displays all JPEG files in the selected folder at a pre-set speed (see next page). • During the slide show, files are displayed in order from the currently shown file. Press the INFO button to run Slide Show. • MP3 files can be automatically played during the Slide Show if the Default Background Music is set to On. To enable this function, MP3 files and other photo files must be located in the same folder on the MSC Memory Device. Exit continued... English - 145 BP68-00588H-00Eng(142~159) 4/25/06 3:42 PM Page 146 WISELINK 5 Press the INFO button during “Slide Show” to set the option(Slide Show Speed, Background Music On/Off, Background Music Setting, List). Slide Show Speed Background Music On/Off Press the … or † button to select the option, then press the ENTER button. Background Music Setting List Exit • Select an each option menu and then press the ENTER button to make a change. Using the Menu during a Slide Show Slide Show Speed: Select to control the slide show speed. You can select Slow, Normal, or Fast. • Press the INFO button. Select “Slide Show Speed” and press the ENTER button. Repeat this step to change the slide show speed. Background Music On/Off: Select to choose whether you want to play MP3 file during a slide show. You can select Music On or Music Off. Fast Music On Background Music Setting: The saved file information is displayed as folder or MP3 file. • Select the Background Music Settings and press the ENTER button. Select a folder for the background music by using the … or † buttons and press the ENTER button. The selected folder will be highlighted . • Press the MENU button again to return to the SlideShow screen. The selected background music is played. Move Open Select NOTE • If you turn Off the Background Music, even if the Background Music Settings have been set up, the background music will not be played. continued... English - 146 Return BP68-00588H-00Eng(142~159) 4/25/06 3:43 PM Page 147 List: The saved file information is displayed as folder or JPEG file. 1200x748 2006-2-6 4/14 To exit WISELINK mode, press the WISE LINK button on the remote control. Move Enter Photo menu Return Slideshow function information icon (Displayed at the top left of the screen). Icon Play Current OSD Function (Photo) SlideShow Photo SlideShow is in progress. Photo Pause When the SlideShow and music is paused by the PLAY/PAUSE button on the remote control during a SlideShow. To resume the SlideShow, press the PLAY/PAUSE button on the remote control again. Volume Up Volume Down When pressing the VOL +, buttons on the remote control to adjust the music volume. Move to Next Photo When pressing the (right) direction button on the remote control to move to the next photo. Move to Previous Photo When pressing the (left) direction button on the remote control to move to the previous photo. NOTE • When selecting a photo file, the photo file information is displayed on the left in the TV screen, such as the resolution, the date modified and the order of the file in the current directory (e.g. 10th out of 15). 709x531 2006-1-30 1/14 such as the resolution date modified order of the file in the current directory Photo 709x531 2006-1-30 1/14 Move Enter Photo menu Return English - 147 BP68-00588H-00Eng(142~159) 4/25/06 3:43 PM Page 148 WISELINK Rotating 1 Complete Steps 1 to 4 of Using the WISELINK Menu. (Refer to page 143) 2 Press the œ or √ button to move to “Photo”, then press the ENTER button. The saved file information is displayed as a folder or file. Move 3 Press the …, †, œ and √ buttons to select a file, then press the ENTER button. Pressing the button over a photo thumbnail displays the photo in full screen. Enter Photo menu Press the INFO button to display the option(Slide Show, Rotate, Zoom). Press the … or † button to select “Rotate”, then press the ENTER button. Slide Show Rotate Zoom Exit • The INFO button, the Rotate option and Enter must be pressed each time you want to rotate the picture. For example, from 90 to 180 degrees. To rotate a photo, press the INFO button to open the options window, select the “Rotate” option and press the ENTER button. Whenever you do this, the photo on the screen is rotated. (90°, 180°, 270°, 0°) To exit WISELINK mode, press the WISE LINK button on the remote control. NOTES • The rotated file is not saved. • Zoom/Slide Show option is disabled when the Rotate option is selected. English - 148 Return 709x531 2006-1-30 1/14 Move 4 Enter Return BP68-00588H-00Eng(142~159) 4/25/06 3:43 PM Page 149 Zooming-in 1 Complete Steps 1 to 4 of Using the WISELINK Menu. (Refer to page 143) 2 Press the œ or √ button to move to “Photo”, then press the ENTER button. The saved file information is displayed as a folder or file. Move 3 Press the …, †, œ and √ buttons to select a file, then press the ENTER button. Pressing the button over a photo thumbnail displays the photo in full screen. Return Photo menu Return 709x531 2006-1-30 1/14 Move 4 Enter Enter Press the INFO button to display the option(Slide Show, Rotate, Zoom). Press the … or † button to select “Zoom”, then press the ENTER button. The enlarged photo image appears on the screen. Slide Show Rotate Zoom Exit To enlarge a displayed photo, press the INFO button to open the Options window, select the “Zoom” option and press the ENTER button. Whenever you do this, the following zoom options are applied in sequence. • The INFO button, the Rotate option and Enter must be pressed each time you want to Zoom the picture. For example, from x 2 to x 4. continued... English - 149 BP68-00588H-00Eng(142~159) 4/25/06 3:43 PM Page 150 WISELINK • Zoom(x 2): Zoom-in to the photo x2. • Zoom(x 4): Zoom-in to the photo x4. • Zoom(x 1): Restore the photo to its original size. To move to pan up/down/left/right, press the …, †, œ and √ buttons. To exit WISELINK mode, press the WISE LINK button on the remote control. The Rotating function information icon (Displayed at the top left of the screen). Icon Current OSD Function Rotating (90°) To rotate a photo by 90 degrees Rotating (180°) To rotate a photo by 180 degrees Rotating (270°) To rotate a photo by 270 degrees Rotating (0°) To rotate a photo by original Zoom function information icon (Displayed at the top left of the screen). Icon Current OSD Function Zoom (x 2) Zoom-in to a photo x2. Zoom (x 4) Zoom-in to a photo x4. Zoom (x 1) Restore a photo to its original size. Pan Down Pan down to view the lower part of a zoomed-in photo. Pan Up Pan up to view the upper part of a zoomed-in photo. Pan Right Pan right to view the right side of a zoomed-in photo. Pan Left Pan left to view the left side of a zoomed-in photo. Pan Down (END) Pan to the bottom of a zoomedin photo. Pan Up (END) Pan to the top of a zoomed-in photo. Pan Right (END) Pan to the right-most part of a zoomed-in photo. Pan Left (END) Pan to the left-most part of a zoomed-in photo. NOTE • Rotate/Slide show option is disabled when the Zoom option is selected. English - 150 BP68-00588H-00Eng(142~159) 4/25/06 3:43 PM Page 151 Using the MP3 List This menu shows MP3 files from among the files saved on an MSC memory device. 1 Complete Steps 1 to 4 of Using the WISELINK Menu. (Refer to page 143) 2 Press the œ or √ button to move to “Music”, then press the ENTER button. The saved file information is displayed as a folder or file. Move 3 Press the … or † button to select a file, then press the ENTER button. To select all files or a file, press the INFO button to display the Music menus. Press the ENTER button to select “Play All Files” or “Play”. Enter Nat King Cole-Fly me to the moon Return 00:04:00 Upper Folder 2006-2-10 6/14 Folder 1 001 Swan Song feat.TBNY 00:04:01 002 Beatles-Yesterday 00:04:28 003 Fall in Love 00:04:12 004 Tom Waits-Time 00:05:39 005 Chuk Mangione-Feel So good 00:04:30 006 Nat King Cole-Fly me to the moon 00:04:30 007 Ryuichi Sakamoto-Rain 00:03:54 008 Bon jovi-This ain’t a love song Move 00:05:25 Enter Music menu Return : folder icon : musical note icon • Pressing the button over a musical note icon immediately plays the music file. • Pressing the button over a folder icon shows the music files included in the folder. To select a file on the next page, press the REW or FF button to move to the next page. continued... English - 151 BP68-00588H-00Eng(142~159) 4/25/06 3:43 PM Page 152 WISELINK 4 Press the PLAY/PAUSE button while playing an MP3 file to pause the file. Press the STOP button to exit Play mode. Nat King Cole-Fly me to the moon 00:04:00 Upper Folder Folder 1 001 Swan Song feat.TBNY 00:04:01 002 Beatles-Yesterday 00:04:28 003 Fall in Love 00:04:12 004 Tom Waits-Time 00:05:39 005 Chuk Mangione-Feel So good 00:04:30 006 Nat King Cole-Fly me to the moon 00:04:30 007 Ryuichi Sakamoto-Rain 00:03:54 008 Bon jovi-This ain’t a love song To exit WISELINK mode, press the WISE LINK button on the remote control. Move Enter 00:05:25 Music menu NOTES • This menu only shows files with the mp3 file extension. Files with other file extensions are not displayed, even if they are saved on the same memory card. • The selected file is displayed on the top with its playing time. • To adjust the music volume, press the VOL+ or VOL- button on the remote control. To mute the sound, press the MUTE button on the remote control. • (FF/Rew) Key does not function during the play. Music function information icon (Displayed at the top left of the screen). Icon English - 152 Current OSD Function (Music) All When all music files are being played. (Music) One When a music file is being played. (Music) Play/Pause When pressing the PLAY/PAUSE button on the remote control while music is playing. The music stops and the ‘Play’ text appears at the top of the screen. (Music) Stop When pressing the STOP button on the remote control when music is stopped. The music resumes and the ‘Stop’ text appears at the top of the screen. Return BP68-00588H-00Eng(142~159) 4/25/06 3:43 PM Page 153 Using the Setup Menu Setup displays the user settings of the WISELINK menu. 1 Complete Steps 1 to 4 of Using the WISELINK Menu. (Refer to page 143) 2 Press the œ or √ button to move to “Setup”, then press the ENTER button. Move 3 Press the … or † button to select an item you want, then press the ENTER button. Press the … or † button to select the option, then press the ENTER button. Return Slide Show Speed : Fast √ Slide Show Repeat : Off √ Background Music On/Off : On √ Music Repeat : On √ Screen Saver : 5 min √ Move 4 Enter Slide Show Speed Enter Return Enter Return : Fast Slow Slide Show Repeat : OffNormal Background Music On/Off : OnFast Music Repeat : On Screen Saver : 5 min Move continued... English - 153 BP68-00588H-00Eng(142~159) 4/25/06 3:43 PM Page 154 WISELINK Slide Show Speed: Select to control the slide show speed. You can select Slow, Normal or Fast. Slide Show Speed : Fast Slow Slide Show Repeat : OffNormal Background Music On/Off : OnFast Music Repeat : On Screen Saver : 5 min Move Slide Show Repeat: • On: Repeats the slide show from the beginning when all the files in the folder have been displayed. • Off: Exit a slide show. To return to the Photo menu when all the files in the folder have been displayed. Background Music: Select to determine whether to play an MP3 file during a slide show. You can select Music On or Music Off. Slide Show Speed : OffOff Background Music On/Off : OnOn Music Repeat : On Screen Saver : 5 min Move : Off Background Music On/Off : OnOff Music Repeat : OnOn Screen Saver : 5 min Screen Saver: Select to set the waiting time before the screen saver is run when no button is pressed. You can select from Off(Do Not Use), 5min(minute) or 10min(minute). Slide Show Speed : Off Background Music On/Off : On Music Repeat : OnOff : 5 min On Move Slide Show Speed Enter Return Enter Return Enter Return : Fast Slide Show Repeat : Off Background Music On/Off : On Music Repeat : On Screen Saver : 5 min Off 5 min 10 min Move English - 154 Return : Fast Slide Show Repeat Screen Saver Enter : Fast Slide Show Repeat Move Music Repeat: Select to determine whether to repeat playing the music when all MP3 files in the current folder have been played. You can select On or Off. • On: (Music) All, (Music) One • Off: (Music) All, (Music) One Return : Fast Slide Show Repeat Slide Show Speed Enter BP68-00588H-00Eng(142~159) 4/25/06 3:43 PM Page 155 Appendix BP68-00588H-00Eng(142~159) 4/25/06 3:43 PM Page 156 Appendix Troubleshooting If the TV seems to have a problem, first try this list of possible problems and solutions. If none of these troubleshooting tips apply, then call your nearest Samsung authorized service center. Problem Possible Solution Poor picture quality. Try another channel. Adjust the antenna. Check all wire connections. Poor sound quality. Try another channel. Adjust the antenna. No picture or sound. Try another channel. Press the SOURCE button. Make sure the TV is plugged in. Check the antenna connections. Check that the Mute feature is off. No color, wrong colors or tints. Make sure the program is broadcast in color. Adjust the picture settings. Picture rolls vertically. Adjust the antenna. Check all wire connections. If you are using a VCR, check the tracking. The TV operates erratically. Unplug the TV for 30 seconds, then try operating it again. Your remote control does not operate your TV. Press the “TV” button to put your remote control into TV mode. Make sure the remote has batteries. The TV won’t switch on. Make sure the wall outlet is working. Make sure the TV is plugged in. Make sure the remote has batteries. Digital broadcasting screen problem. Please check the digital signal strength and input antenna. There is a “clicking” sound repeatedly in Standby mode. There is a sound when both Air and Cable are set to “Yes” in the TV Guide On ScreenTM Setup. The sound is made by the TV trying to receive TV Guide On ScreenTM data in Standby mode, and is not a defect. Set up the Antenna (Air)/Cable according to the connection status in the TV Guide On ScreenTM Setup. continued... English - 156 BP68-00588H-00Eng(142~159) 4/25/06 3:43 PM Page 157 Problem Possible Solution I want to view the clearest picture in 1080p resolution. The best visual quality is obtained with 1080p input signal. ➔ To view TV in the best 1080p visual quality, connect to a PC whose graphic output is WUXGA (1920 x 1080). The visual qualities of digital channels vary. The visual qualities of digital channels may vary depending on the original production method (analog or digital). ➔ If the original production method is digital: High visual quality program. ➔ If the original production method is analog: The digital program displayed on the screen is originally an analog program which has been converted. The visual quality is of an SD grade. Although the TV caption shows HD, the visual quality is not satisfactory. The HD caption that appears when switching channels or when pressing the Information button on the remote control means the selected channel is simply a digital channel. If the broadcasting station converts an analog signal into digital and transmits the signal, the visual quality may not be perfect. • The display panel used for the DLP TV is composed of many tiny pixels. These pixels may occasionally appear on the screen. • If the screen is too dark, contact the Service Center to change the LED or ask for help. English - 157 BP68-00588H-00Eng(142~159) 4/25/06 3:43 PM Page 158 Appendix Cleaning and Maintaining Your TV Please follow these guidelines to get the maximum performance from your TV. Placement • Do not put the TV near extremely hot, cold, humid or dusty places. • Do not place the TV near appliances with electric motors that create magnetic fields, such as vacuum cleaners. • Keep the ventilation openings clear; do not place the TV on a soft surface, such as cloth or paper. • Place the TV in a vertical position only. Liquids • Do not handle liquids near or on the TV. Liquids that spill into it can cause serious damage. Cabinet • Never open the cabinet or touch the parts inside. • Wipe your TV with a clean, dry cloth. Never use water, cleaning fluids, wax, or chemicals. • Do not put heavy objects on top of the cabinet. • This DLP TV projects the image onto a large screen by applying an optical system. If you place the TV set face down, it might cause a problem because dirt, or some other contaminant may become attached to the inside of the TV set. Temperature • If your TV is suddenly moved from a cold to a warm place, unplug the power cord, and allow at least two hours for moisture that may have formed inside the unit to dry completely. Using Your TV in Another Country If you plan to take your TV with you to a foreign country, please be aware of the different television systems that are in use around the world. A TV designed for one system may not work properly with another system due to differences in the TV channel frequencies. English - 158 BP68-00588H-01Eng(142~159) 5/16/06 1:02 PM Page 159 Specifications Model Dimensions (W x D x H) Weight HL-S5088W HL-S5688W HL-S6188W HL-S7178W 45.43 x 15.63 x 32.30 inches 50.87 x 16.34 x 35.67 inches 60.63 x 22.44 x 43.39 inches 65.78 x 20.43 x 46.81 inches 1154 x 397 x 820.5 mm 1292 x 415 x 906 mm 1540 x 570 x 1102 mm 1671 x 519 x 1180 mm 30.3 Kg / 66.8 lbs 33.3 Kg / 73.41 lbs 36 Kg / 79.37 lbs 58.9 Kg / 129.85 lbs TV System NTSC 8VSB (terrestrial) QAM (cable) American TV Standard ATSC compliant 8VSB ANSI/SCTE 07 2000 Channel Terrestrial (analog) Cable TV (analog) Terrestrial (digital) Cable TV (digital) 2-69 1-135 2-69 1-135 Component Video IN 2 (Y/PB/PR) 480i, 480p, 720p, 1080i, 1080p HDMI IN 2 total Video : 480i,480p,720p,1080i,1080p (EIA/CEA-861-B compliant) Audio : Two channel linear PCM 32, 44.1 and 48kHz PC IN D-sub 15-pin, analog RGB VESA (Refer to page 134 for detail) Speaker Output 10W(L), 10W(R) Voltage AC110-120V Frequency of Operation 60Hz Power Consumption 230W English - 159 BP68-00588H-00Eng(cover) 4/25/06 3:27 PM Page 2 Contact SAMSUNG WORLD-WIDE If you have any questions or comments relating to Samsung products, please contact the SAMSUNG customer care center. Country Customer Care Center CANADA 1-800-SAMSUNG (7267864) www.samsung.com/ca U.S.A 1-800-SAMSUNG (7267864) www.samsung.com Web Site Address Samsung Electronics Canada Inc., Customer Service 55 Standish Court Mississauga, Ontario L5R 4B2 Canada Samsung Electronique Canada Inc., Service à la Clientèle 55 Standish Court Mississauga, Ontario L5R 4B2 Canada Samsung Electronics America, Inc. 105 Challenger Road Ridgefield Park, NJ 07660-0511 BP68-00588H-01