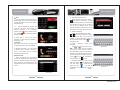
1
User Manual
Car Entertainment and Navigation System
Android series
Android series
In order to use the device in the correct way, please
read the manual carefully. We will not notice you
the specification or design update of due to the
technology improvement.
RoadNav S150
Foreword
Thank you for choosing the car audio-visual
navigation system of this company!
When you use this product, please read all the information attached with
it, this manual is introduced all the functions of audio-visual navigation system
,so that you can facilitate the process easier. Through it, you can obtain
information about products introduction, operation methods, make sure the
operation is more convenience.
The display picture example of manual referenced may be a little different
from the actual picture.
The display contents of this manual may be a little different with the actual
content.
If any parameters change when Products continue to update and
upgrade their functions, will be added to make without notice. Any
problem please check the details with the agent, thank you for your
support and cooperation!
NOTE:The information of this manual protected by copyright, any part of it without
company prior written permission is not permitted in any way to copy and photocopy.
The Company reserves the final explanation about three guarantees warrant and relative
information in this manual.
RoadNav S150
Contents
Contents
、Before the Operation
01
23. Browser
42
1.Notice for safety items
01
24. Global Time
43
2.Notice before Installation
03
25. Record
43
3. System installation
04
26.Digital TV
44
4.Other notice
06
27. Analog TV player function operation
52
28.Schedule management function operation
53
29.2- zone settings
53
、Basic Operation
12
5. Button function instruction
12
30.Operation for Maintenance- Record
54
6. Description of Buttons on Remote Control
13
31.Operation for IPod Function
55
7. Turn on/off the unit
16
32.GPS Monitor
56
8. Main Menu
16
33.Operation for File Management
56
9.Radio Function
17
34.Operation for Electron-Book
57
10.Bluetooth Hands Free communication operation
20
35.Operation for DVR
58
11 . Music function
24
36.Operation for Calculator
59
37.AUX
59
12.Video playing function
26
13.Navigation function
27
14.Virtual CD Changer Operation
28
15.Process explorer Operation
30
16.Volume setup Operation
31
17.Picture browser operation
32
18.Email Operation
33
19.DVD features operation
35
20.Play the CD disc
40
21.Phone Book function of operation
41
22.Calendar
42
38.Operation for System Setting
60
39. Recorder Function
67
、Troubleshooting
68
、Troubleshooting
70
RoadNav S150
Before the Operation
Before the Operation
Warning
In order to avoid accidents, a possible violation of applicable law, do not use
other function as purposes expect navigation when driving.
In some areas, it is illegal for the drivers or other people in car to watch the
images of the display.
Notice for safety items
In order to avoid any injury or property damage of the user or other
persons, please be sure to read in details and abide the following notice item.
1) Read the Manual
2) Take good care of the Manual for future use.
3) To comply with all the warning and notice of this manual.
4) To comply with all operating instructions.
5) Regarding the power supply, please refer what the manual stated.
6) The installation and wiring distribution of this product needs specialized skills
and experience. To ensure safety, commissioned by professional technicians for
installation and wiring.
7) There is not any parts attached with the products for user to repair and
replace, please ask the professional technician with qualification of
maintenance to repair and replace.
8) Ventilation: Do not plug any ventilation cooling vents, the local shell holes
and other openings are for ventilation of heat. In order to ensure machine works
stable and reliable, long service life, not to plug the hole cooling, ventilation
environment must be maintained to avoid overheating the machine caused by
smoking, fire or other danger.
9) Avoid heat source: heat source should be avoided and products will be not
installed on local exposure to direct sunlight, high temperature areas; to be
away from heat sources, such as heating, heaters, heat or have other things
(including magnifier).
10) Avoid Water or Moist: device should avoid water or moist, do not let this
machine being exposed to rain or moisture in the environment (as when rain
and car washing) to avoid the internal machinery of the short circuit caused the
fire, electric shock or other danger.
11) Cleaning: before cleaning machines have to shut down power, and then
wipe panel Do not use volatile chemicals (such as gasoline or thinner) to clean
panel.
12) Avoid the matter or water into the device. to prevent foreign matter or liquid
into the inside of the machine, do not insert the foreign body from the cooling
hole or other opening into the machine. If you insert foreign bodies may cause
electric shock, machine parts within a short circuit caused the fire, such as the
risk of electric shock.
13) Installation device. do not install the unit to the truck, frame, tripod, bracket
or table without the manufacturer's recommendations, should be installed on
the install fittings which come with machines. When used in the car, pay more
attention to firm the installation of this machine, avoid the machine falling down
because of the sudden brake and resulting in personal injury.
14) Don't operate the machine in the event of rain or lightning for a long time,
have to cut off the machine power.
15) Appear in the following situations, please turn off the local power supply in
time, and contact with professional technician.
A. When the power wire or connector damaged.
B. When the machines were splashed with liquid or when the entry of foreign
matter;
C.when the machine has been rained or moisture attack;
1
2
RoadNav S150
Before the Operation
Before the Operation
D. when the machine crashed from a height or as a result of abnormal
operation or unreasonable damage caused.
be very dangerous. Please ensure that the installation of the product will not
disturb driving.
16) LCD Display: do not let the machine decline to avoid LCD screen
fragmentation, if so, when the outflow of liquid crystal, do not touch the liquid
crystal, so as not to be harmed. Do not heat the liquid crystal display or
scratching LCD with sharp objects, touch panel is also susceptible to
scratching. The effective pixel of LCD screen is more than 99.99 percent, but
0.01 percent of the pixels could not be lighten normally.
Please ensure that all leading cable will not be caught by the doors or sliding
framework in the seat, so as not to cause a short circuit.
Notice before Installation
Products of the manufacturers recommend that you do not install or repair
their navigation systems by yourself. Installation and maintenance of the
product may cause you in danger of electric shock or others, for all installation
and maintenance operations of this navigation system please entrust to the
service center authorized by manufacturer.
Forbid to use the following dangerous installing ways and location:
1. When the car in a sudden stop may cause injury on the driver and passengers.
2. To avoid the possibility that impeded the operation of the vehicle drivers, such as
the driver front seat or the floor near the steering wheel, stick shift.
Before opening the hole from faceplate in the dashboard panel, make sure
that the rear space is enough. Be careful, not to damage the fuel cable, brake
cable, electrical components, power lines or cable communications.
When use the screws, please ensure that they are not contact with any
electrification down-lead. Vibration may have damaged wire or insulation skin
and lead to a short circuit or other damage to the vehicle.
In order to ensure proper installation, use the standard method of installation of
the required components. If you use any non-standard components, this product can
be internal damaged or loose components, leading to damage of the Product.
If the GPS antenna may lead to the winding column or stick shift that would
3
After finish the installation of navigation systems, please check vehicles and
other equipment is correct.
Some countries may prohibit or restrict to install or use of the system in the
vehicle. Please comply with all the rules related to the application of laws and
regulations when using, installation and operation of the navigation system.
This product will be installed in the position between the driver's seat and
passenger seat in order not to avoid any damage on the unit by driver and
passenger when the car suddenly brake.
Never install this product on the dashboard, door or columniation and girder, and
the position the air bag expanding out and nearby, Please refer to your vehicle
owner's manual to find out the area front airbags expanding
Do not install this product on the location may prevent the vehicles, including
airbags, pillows and any operating system performance.
Avoid the electromagnetic interference: In order to avoid Electromagnetic
interference, please try to stay away from the following components of this
product, cable or other wire. ( FM, AM antenna and its wire, GPS antenna and
its wire). And you should arrange every wire to stay away from each other, not
make it colligation or cross-banding together. EMI will increase the possibility of
showing wrong location.
System installation
Voltage rating (as the picture -01)
1) This product use for the vehicle with 12V battery and negative GND. Before
the installation, check the battery voltage.
2) In order to avoid short-circuit system, installed prior to the proposed removal
4
RoadNav S150
Before the Operation
Before the Operation
of the battery negative.
2) To install an external antenna (on the
car),GPS antenna will be placed in a
level position as far as possible, such as
roof or cover suitcase Department. ( By a
fixed magnetic body.)(picture-02 ):
3) Don't cross the fuse of the device,
directly connect to the battery.
NOTE: Paste the metal plates, should not
(Picture-01)
The installation of the device
1) First of all, take the original vehicle CD player out.
2) Remove the install bracket and screws and keep it.
be cut it into small pieces. Some models of
vehicles do not allow glass windows GPS
satellite signal penetration. Then, the GPS
antenna should be installed at the outside of
the vehicle.
GPS Antenna
When the lead contacts the up
of the car door to circle au-turn
in order to prevent the rain water
flows along the lead to the inhouse of vehicle.
Waterproof mat
Please make sure waterproof mat to contact the
top of rubber pad.
Curving the lead to a circle
out side the rubber pad in
order to prevent rain water
flows along thelead vehicle
in-house.
3) Fix the bracket through the screws on the navigation system device.
(Picture-03)
4) Don't connect this product power wire directly to other power-line circuits.
Other notice
5) Fix all the cables according to the hose diagram.
Operation of remote control
6) Install the navigation system in right position and then screw the bracket of
the original car to fix it well.
Note: Do not damage or dirty the Dashboard.
The installation of GPS antenna
1) To install the antenna in the inner of
the car(on the rear shell),please try to
make the metal plate stick on the
horizontal lever so that the GPS antenna
towards the window. GPS antenna will be
placed on the metal plate. ( GPS antenna
fixed by magnetic.)(picture-02 ):
metal plate please peel
the paper at back
GPS antenna
On the proper use of batteries
NOTE:the metal plate
have powerful glutinosity to
leave the impress when you
remove it.
please sweep the
place to make sure
no dust,wet,oil or dirt
before you stick.
(Picture-02)
5
Do not put remote control on the dashboard, the steering wheel or sunbaked
place, especially in the summer as the high temperature will lead to deformation
of the remote control. When the car stopped in the sun-baked place, the remote
control should be placed on storage boxes or sunproof area. Under direct
sunlight, the signal from the remote control may not be correct to receive by the
device. Therefore, please put remote control near the front panel of sensors.
If used the battery in a wrong way, due to rupture and leakage of electrolyte
and cause fever, fire, injury or failure, as well as the use of pollution around the
danger.
1) Please put the batteries in the remote after confirm the + and-of batteries.
2) Please use the batteries we suggested.
3) Please change the exhausted batteries in time for your better use.
6
RoadNav S150
Before the Operation
Before the Operation
4) Please take the batteries out, if you don't want to use the remote for a long
time.
5) Bind up depleted batteries with adhesive tape or store them in a plastic bag
for insulation in storage.
6) Never charge, short-circuit, dismantle, deform and heat the batteries or throw
them into fire or water and make them contact with any metallic object
7) Never place batteries or remote control loaded with batteries in the
surroundings at high temperature including an enclosed vehicle with doors and
windows closed, trunk or a place in the direct sunshine and adjacent to a
heater.
8) Keep batteries away from children. Send the children to the hospital
immediately if they swallow down any battery.
Notice about Batteries
1) Type of Battery: lithium battery
2) Operation Life: approx. 1 year (under indoor temperature ) in normal
operation
3) While disposing batteries, make sure to observe the local regulations on
depleted batteries.
automobile stereo system dealer for
assistance in the case of any foregoing
abnormality ,Battery Installation (Picture04):
4) Take out the battery holder. Push and
press the point A along the direction
shown by the arrow and draw out the
battery holder at the point B.
At the first time before
Lithium Battery operation,draw out the
extruding thin sheet
beneath to make the
battery contact normally.
Bac k
2 Point B
3
1
Battery Holder Point A
(Picture-04)
5) Put the battery into the battery holder.
6) Insert the battery holder back to the
original place.
The DVD Disk format
The DVD player can play DVD disk
which have marked format as Following
( picture-05) :
NOTE: DVD player can't play the disk
which the region code is not compatible.
( DVD player is full region code)
VCD
CD
MP4
MP3
(Picture-05)
Treatments for battery electrolyte leakage are presented below:
1) Wipe off the electrolyte residue inside the battery compartment and put in
new batteries.
2) When the leaked electrolyte attaches to the human body or skin, rinse it off
with water.
3) If the electrolyte enters your eyes, do not rub with hands but rinse with water
and then go through the medical treatment. Emergency Treatment:In order to
prevent life or property damages to the user or others, please immediately turn
the power off and deliver it back to the nearest maintenance center or
7
The maintenance of the DVD player
Please use the conventional circular
disk, not to insert irregular, noncircular
disk, otherwises these disks may be
stuck inside the DVD player, or the DVD
player may not correctly play. Please
check before playing on the disk if there
is cracks, scratches or curly. Such discs
may not play and lead to product failure.
Right
Wrong
(Picture-06)
8
RoadNav S150
Before the Operation
Before the Operation
Do not use this type of disc. Using disk, do not touch the recording surface
( nonprinted surface) Please put the disk in the box if it's not in use. Please
don't put the dish far away from the direct sunlight and high temperature place.
Please don't put the label, write, paint on the disk surface, or use chemicals on
the disk. Please use soft dry cloth to clean the disk from the centre to outside.
The DVD player is likely to be internal components moisture if the car using
central heating. The dew may cause DVD player can't work properly. So please
stop the unit about 1 hour to make the unit clean and dry, if you find the fault like
that. And clean the moisture on the disk with soft cloth. The DVD may be
disrupted if the car running on a bumpy road.
DVD disk
Regarding some disks, maybe can not use the some special function.
Maybe can't play some disks.
DVD digital multi-functional disk
(also known as "Digital Versatile Disc" or "Digital Video Disc") is a popular
optical disc storage media format. Its main uses are video and data storage.
Most DVDs are of the same dimensions as compact discs (CDs) but store more
than six times as much data.
DVD Menu
DVD can show couple of titles, the title menu. Besides, DVD title menu can
make some kinds of items shown, the sub-menu came out during the playing,
the Dolby Digital and PCM audio, caption, language changed according to the
software. While the unit play DVD-R/DVD-RW discs , it only play video format (
under video mode), not play the PC files. DVD-R/DVD-RW disks recorded may
not play properly due to the property of disk, scratches or dirt on disks or dew
on the lens of unit. Disk recorded on personal PC maybe not worked properly, it
depends on the setup and environment of the application format, therefore
please use a proper format of recording.
9
CD-R/CD-RW Disk
The DVD player only play completed CD-R/CD-RW Disk. CD disks recorded
on personal PC recorded may not play properly due to the property of disk,
scratches or dirt on disks or dew on the lens of unit. Disk recorded on personal
PC maybe not worked properly, it depends on the setup and environment of the
application format, therefore please use a proper format of recording.
CD-R/CD-RW maybe not worked properly under direct sunlight or being in
high temperature storage place in the car. The DVD player can not be worked
properly with Recorded CD-R/CD-RWDisk's title and information data. ( under
Audio data CD-DA ) You will wait a little long time for CD-RW Disk comparing to
traditional CD or CD-R. Please look at the notice before using CD-R/CD-RW
notice. MP3 Files (CD-ROM)
MP3 Files (CD-ROM)
MP3 is a kind of audio compact method, which should be brought into Audio
level 3 in the MPEG standard. The audio compact method has already been in
the depth of personal computers as a standard mode. MP3 can compact original
audio data to 10% of its initial size and to keep the voice in high quality. This
means that about 10 Track CDs can be recorded on a CD-R disk or CD-RW
disk. In this case, there is no need to constantly change CD disks for playing for
a long time. This player allows the playing of MP3 files on CD-ROM, CD-R and
CD-RW disks as well as the content of any disks compatible with ISO9660
Levels 1 and 2 and ROMEO and JOLOEY file system. It can play the disks
recorded compatible in multiple sections.MP3 files are incompatible with the
transmission of data written in groups. The maximum number of characters that
can be displayed as names of files is 32 characters (calculated from the first
character). The maximum number that can be displayed as the name of a folder
is 32 characters. If a file is recorded in the ROMEO and JOLIET file system, it
can display 32 characters only. When a disk with Mp3 files and audio data (CDDA), for example, CD-EXTRA and MIXED-MODE CD, they can switch between
MPEG and CD-DA to play these two types of discs. The selection sequence of
playing and other folders being operated will become the writing order used by
writing software.
10
RoadNav S150
Basic Operation
Before the Operation
Therefore, the sequence expected by the playing time can't be inconflict with
the actual playing. However, some software permits the setup of playing
sequence.
Notice:When one MP3 file is named, please add the corresponding file extension
name(MP3). This player will play the files with the extension name (.MP3) as Mp3
files. To prevent noise and failure, please do not use such an extension name for non
MP3 files.
Button function instruction
【
】button
When the unit is off, press this button to start the unit and enter into DVD interface;
when the unit is on and there is disc in it, press it to eject the disc.
【MENU】button
In any interface, press this button into the relative menu interface
The MENU button in different interface has different functions, please refer to the
system function operation instruction.
【BACK】button
In any interface, press this button to back to previous interface.
【Power】button
When the unit is on, short press this button to close the screen and long press it into off
status. When the unit is off, short press it into on status.
【HOME】button
Knobs: when the unit is off, press the button to start the unit; when the unit is on,
switch the knob to right side, the volume plus, switch it to left, the volume minus, short
press it to switch from mute or non-mute status; long press it to turn the unit off.
【RESET 】button
Stick a needle into the little hole and it will back to the factory original setting mode.
Note: In some models this knob is used for volume adjust button, some is
used for volume adjust knob, some models with full touch screen that
haven't the button and knob, it is based on the model you purchased.
11
12
RoadNav S150
Basic Operation
Basic Operation
5、【DVD button】short press this button to login the DVD player.
Description of Buttons on Remote Control
6、【direction button to left】
PWR
LCD
OPEN
17.LCD in and out Button
3.
19.Audio setup Button
4.
20.PIP Button
5.
DVD
SRC
21.SRC player Button
22.Direction Button
23.Direction Button
6.
7.
8.
NAVI
BAND
24.Radio Button
25.Direction Button
9.Receive Button
MENU
10.System setup Button
8、【navigation button】short press this button to enter GPS interface .
9、【receive button】after the player matched with your mobile phone, press
this button to answer an incoming call.
10、【system setup button】press this button to enter system setup interface.
11、【eject button】the disk come out after press this button.
26Hand up Button
11.Eject Button
27.Information Button
12.Play/pause Button
28.Stop Button
13.Last song
29.Next song
14.Fast forward Button
15.System setup Button
7、【confirm button】
18.Display angle increase Button
30.Fast forward Button
SETUP
12、【play/pause button】 when you inserted a disk, press this button to playing
, when the player is playing, press this button to pause playing; when the player
on paused and stopped status, press this button to playing.
31.Mute Button
16.Volume – Button
32.Volume+ Button
1
2
3
4
5
6
7
8
9
0
10+
F
33.Number Button
13、 【 last song】 press this button to repeat play the previous song or the
previous video.
14、【fast forward button】 press this button for fast forward playing.
15、【 system setup button】 short press this button to enter in the DVD setup
interfaces.
16、【volume – button】short press this button to decrease volume.
17、【LCD in and out button】just useful for one din universal.
1、【Power button】 When the player is off , the player will be power on by
pressing this button; when powered on, the player will be power off by
pressing this button.
18、【 display angle increase button】 the button is no effect for the fixed panel
models.
2、【 Display angle minish button】 this button is no available with the fixed
panel models.
20、【PIP button】short press this button to enter the PIP interfaces.
3、 【 day/night mode button】 short press this button to switch day mode
and the nigh mode.
22、【direction button】up.
4、【image mode button】short press this button for different images mode
setup , brightness, contrast, hue from 0-40.
13
19、【audio setup button】short press for individuated audio setup .
21、【src player button】short press this button for the main menu.
23、【direction button】 right.
14
RoadNav S150
Basic Operation
Basic Operation
24、【radio button】when power off , the system will be power on and entering
radio interface by pressing this button; when powered on, in the non-radio
interface, short press this button to enter radio interface; in the radio interface,
short press this button to switch between FM1,FM2,FM3 and AM.
25、【direction button】down.
26、 【 hand up button】 when power off , the system will be power on and
entering Bluetooth interface by pressing this button; in the Bluetooth interface, if
your mobile phone matched with the player, press this button to hang up.
27、【information button】short press this button to display the information like
the title and sequence number of segment about the playing program.
28、【stop button】press this button to stop playing.
Turn on/off the unit
Turn on the unit
If you turn off the unit by taking out the car key last time, then when you insert the car
key again, the unit will turn on automatically. If you turn off the unit by pressing the power
button last time, then please press power button to turn it on.
Power off
he system will be power off by pull out the car key. The system will be power
off by long pressing this button.
Main Menu
1)When the unit is on, system will enter into
main menu automatically. In other interface,
press HOME button to get into the main
menu, like (picture-07):
29、【next song】press this button to playing next song or next video.
30、【fast forward button】press this button for fast forward playing.
31、【mute button】short press this button for switch mute or non-mute.
32、【 volume+ button】short press this button to augment volume.
33、【number button】number from 0-10.
2)Main menu shows the current date and
time, you can adjust it in the system setting
menu.
(picture-07)
3)The icon below the interface is shortcut
icon, totally 6 pieces, you can select the 6
icons you like, see the (picture- 08):
4)All the function icons could be slipped to
turn/switch the page, see the (picture 08,09):
(picture-08)
Set the shortcut icon
1) In any interface, long press the function
icon for 2 seconds, it will tremble and
enlarge, then you can drag it into the
shortcut icon bar, or you can delete it from
the shortcut icon bar.
(picture-09)
Notice: GPS works in a complicated program which easy to be fluenced by magnet or other
external surroundings, leading to failed work(like no image and can’t enter into GPS map).
If situation like this, please restart GPS and it will back to normal.
15
16
RoadNav S150
Basic Operation
Basic Operation
Radio Function
After the announcement finished, it will automatically get back the previous
menu/function .(Needs to be supported by RDS function)
Exit/Enter
4) PTY: PTY is A type of program ID, along with the launch of a program, which
category the broadcasting programs into the specified programs among the 31
such programs. Receiver Click ID to receive, record this type of program(Needs
to be supported by RDS function)
In main menu, press
icon into
radio function, like (picture -10):
Press Home, BACK, and
icon to
exit from radio interface, but the radio is still
on.
(picture-10)
Setting operation
Press
icon into radio setting
menu, like (picture -11, 12, 13):
5) MODE: Remote/short distance earch, LOC remote search, DX short distance
search
6) AST: Automatically search stations
7)ST: Stereo
Setting function include RDS\AF\TA\
PTY\PTY SCAN\MODE\AST\ST and so
on.
1) RDS: RDS function is a special radio
system developed by BBC company,
which could only be used in Europe area.
2) AF: AF table offers the information
sent by the same or adjacent transmitter
which receives the broadcast of the same
program, the receiver stores this table in
order to reduce the time of the search of
alternative frequencies. (Needs to be
supported by RDS fucntion)
(picture-11)
Automatic Search
In the setting interface, choose AST
icon, press
icon into automatic
search, during the search , the stations
will be stored automatically, press any
icon to stop the searching, like (picture
14):
Semi-automatic search
(picture-12)
(picture-14)
Press
icon or
icon into low frequency/ high frequency semi-automatic
search status. Press it, it starts to search, press again, it ends searching. Or drag the
icon into low frequency/high frequency semi-automatic search
status. When the station searched, it will be stored automatically.
Fine-tune search
3) TA: TA is a switching signal,
specializing in traffic announcement
broadcasting status. The receiver will
automatically switch to the program
which is broadcasting the traffic
announcement according to the received
signal.
17
Press
or
icon into higher frequency/ lower frequencyfine tune search.
When stations searched, it will be stored automatically.
Notice: In the factory mode interface, you can set the region of radio(Detailed
operation please refer to Factory mode setting function).
(picture-13)
18
RoadNav S150
Basic Operation
Basic Operation
Remote automatic search/ Semi-automatic search
1) Remote automatic search: on the
setting interface, press MODE icon, then
select LOC, then press AST icon into
remote automatic search. During the
search process, the stations will be
stored automatically, like (picture -15,16):
2) Remote manual search: on the setting
menu, press MODE icon, select LOC,
then pres
icon to back to radio
interface. Press
icon or
icon into
low/high frequency remote manual
search. Press it to start searching, press
again to stop searching. When the
stations searched, they will be stored
automatically, like (picture -15,16):
(picture-15)
Bluetooth Hands Free communication operation
1) The system features with BT hands-free communication function. If your
mobile phone equips with BT function, you can set up point to point link with the
system, dialing, answering phone, as well as playing music and other functions
on the screen.
2) Since there are various brands of mobile phone, their BT module is different
from each other. So when it comes to the practical use, some of the functions
might be different, even some of them might not compatible with our unit,
please forgive for this.
Enter/Exit
On main interface, press
icon into
BT interface, see (picture -19):
Press
or
icon to exit BT
interface.
(picture-16)
List playing
2) Press
icon to turn to up page,
press
icon to turn to down page, or
slip
icon to move from up to down
page.
Band Selection
Press the “BND” icon, the band can
be switched between FM(MHZ) to
AM(KNZ) .
FM band: This unit can be saved for
100 channels.
AM band: This unit can be saved for
100 channels.
19
(picture-19)
Pairing and Link
1) During the search process, the
stations will be stored automatically into
the station list. Press
icon to select
the station you want to play.
1) Before using the BT hands-free communication function, please pair and link
it with your mobile phone first. Press
icon on the main menu, select BT
setting, like (picture -20):
(picture-17)
2)Press BT icon, then click on
icon
to turn on the BT function and meantime
turn BT function of your mobile phone on.
Press “Link” icon, then the unit will
search automatically. When the system is
linked to the phone signal, your mobile
shows on the screen. Link it and input the
PIN code. After successful match and
link, an icon like
will shown on the
bottom right of screen.
(picture-20)
(picture-18)
20
RoadNav S150
Basic Operation
Basic Operation
Dial
1) You can dial the number through your
linked mobile phone or input the number
through keyboard on the screen directly,
like (picture -21).
2)
During inputting the number, the
input bar will show the number you
already inputted, if any mistake,
please press
icon to delete one by
one. Press
icon to dial the number,
like (picture -21):
(picture-21)
3) After dial, it enters into calling
interface, you can hang up by pressing ,
like (picture -22):
Answer
1) When a call comes in, the ring of the
mobile phone will out from the speaker.
2) When a call comes in, you can choose
to answer, reject or mute, if answer it,
then it will enters into the answer
interface, like (picture -23):
(picture-22)
APPLE
Phone book
Touch “ Phone book” icon, enter phone
book menu. Hereby all the number will be
shown. It supports the Blue tooth’s phone
book, which can be transferred from by
the Blue tooth from the cell phone to the
car kit.
(picture-23)
1) Download the phone book
Inside the phone book menu, touch
icon, select “ cell phone “ or “SIM”
card, then touch “confirm” to download all
the information to the car kit. The list of
the car kit can display all the phone
number, select the number and touch the
“Dial” button to make a call,like picture 25
2) Number searching
Inside the phonebook menu, touch
to move up and down to search
、
the number you want. Or you can use
number or name searching to find the
current contacts ,Click on the
icon,
like (picture -26):
A) Letter / spelling / writing input
searching
Inside the searching menu, touch
( Pic -26 / 27/28) to
、
、
shift the key board. Input the letter of
each first name + given name to find the
number. In case of writing input by hand,
just write down the full name is enough.
Touch “
” icon, Pic -29, to select the
number, then touch
to dial.
During the searching, if there is wrong
input, just touch
to delete one by
one, then touch
to hide the key
board. Pls note,
is to shift the
capital letter or low case letter.
is
for blank.
(picture-25)
(picture-26)
(picture-27)
(picture-24)
21
22
RoadNav S150
Basic Operation
Basic Operation
Music function
B)Digital searching
Inside the phonebook menu, touch
to shift into the digital key board (
Pic-30). On the keyboard, input the
number directly, then touch “
”( Pic29) , select this number and touch “
”
to dial.
Can play the audio inside SD card/ USB/ Bluetooth, etc. which are connected
with car kit.
1) Support format: MP3/WMA/WAV/MIDI
2) Those formats are not supported, there will be warning of “ not support”
3) The music must be stocked into the specified music file, if not , cannot be
read.
(picture-28)
On the keyboard, touch
between Full / Half - width.
change the special symbol,
return to other keyboard.
to shift
is to
is to
On the main screen, touch
to enter
the audio playing menu, see as-(Pic-32):
Touch
/
or “ Home” or “ BACK”
, to exit the music menu, meanwhile, music
is playing at the background. Touch any
other function, music will be stopped, which
is completely exit.
Bluetooth music playing
1) If there is Bluetooth music function of
this phone, the audio can be transferred
from the cell phone to the car speakers.
Just open the “music playing” is enough.
Or touch the
on the main menu, then
touch
, then music starts playing.
2) Touch
next track
31.
Entry / Exit
to select previous or
pause;
play. See Pic-
Music file selection
only love
1)There are 3 selections inside the
Music File, SD / USB / Blue tooth. Select the
one you prefer.
(picture-30)
SD card music playing
1)、 Touch
SD icon, to enter the SD
playing list menu. Then it will show the
song list, album, and artist , see as-(Pic-
I Do
kissing you
DAY BY DAY
Hero
(picture-33)
33):
2)、Touch the song name, or touch
enter playing menu. See (Pic-34).
Note: Only the cell phone with
functions of “ Stereo playing” or “
Remote control” , can operate the
music playing menu. The music of cell
phone can only be played while the
car kit is in the Bluetooth music
playing menu.
to
only love
3) 、 Touch
to return to the playing
list menu. Touch
to move up
and down. Touch
to pause,
to
play,
to random playing.
Jerry
(picture-34)
(picture-31)
23
(picture-32)
(picture-29)
24
RoadNav S150
Basic Operation
Basic Operation
4) 、 Current music file selection will be memorized by car kit. When entering
the Music function next time, the car kit will turn to exact menu automatically. If
SD card or USB device is removed, it will turn to the Music file for your
selection.
Bluetooth music playing
Bluetooth music playing, please refer to the Bluetooth music playing
instruction.
Video playing function
Video of SD card / USB / hard disc , etc can be played by this car kit.
1) Support format: AV1/WMV/MP/3GP/ OGG.
2) Those are not supported, there is warning of “ Not Supported format”
3) All the videos must be stocked under the folder of “ Video”
Entry / Exit
On the mani interface, touch
to enter video playing menu. See (Pic-
37):
Album list
1) Touch icon of “Album” to enter album
list, see (Pic-35). Music list appears. The
cover of album appears in thumbnail
format; together you can see the album
and the artist name.
I Do
kissing you
Hero
2) Touch the “Album” to activate the
songs list. If you want to enter the playing
song, just touch the “song list” or “album
cover”, all the songs will be started
playing.
(picture-35)
(picture-37)
Video playing
1) When you select a video, silent
reading starts by 5 times speed at the
right side frame, see Pic-38:
(picture-36)
1)Touch “Artist” icon to enter the artist menu, see(Pic-36). Artist cover and artist
name appear.
2)Touch Artiest cover to activate the song list. Touch the list or the Artist cover to
enter the playing menu. All the songs will be started playing.
3)Remark: if the music file does not include the photo, then default picture
appear as “Artist photo”.
25
Video file selection
1) 3 options for video file,SD card, USB,
hard disc.
3) Remark: if the album does not include
the photo, then default picture appear as
“album photo”.
Artist list
Touch
or
or “Home” or “BACK”
to exit the video playing menu, meanwhile
the playing is continue at the background.
When you touch another function icon,
current playing stops.
2) Touch
to return to the playing list
menu. Touch
or
as right & left
selection, touch
to pause,
to
play,
to adjust the video brightness,
see Pic-41.
(picture-38)
3) Slide
to adjust the brightness,
contrast, color, or select “standard”,
“soft”, or “bright”.
26
RoadNav S150
Basic Operation
Basic Operation
Navigation function
Navigation map
1) Due to the city construction and fast development of traffic development,
navigation map should keep on updating on time. During driving, if you found
the navigation guidelines is different from the read condition, please following
the real condition.
Entry or Exit
1) Within the main interface, touch
to
enter the navigation main menu.See (Pic39)
2) Touch “Home” or “Back” to exit the
navigation menu. At the moment,
navigation continues and won’t stop until
you select other function.
Navigation function
1) Search the destination by any types of “searching function”. Navigation
starts after destination set up. See Pic-42.
(picture-39)
Music function within navigation
2) If the driver is familiar with this district, just driver as you know, which might
be more suitable the navigation guidelines.
Error
1) There is around 7 meters error between satellite positioning and real
condition. System can correct the error automatically, but error might remain. At
the moment, driving condition should be subject to the real condition.
Shift from the radio / music /electronic
book to navigation application, the music
can be listened at the background.
Navigation notice
1) Make sure the connecting between
head unit and navigation antenna is
correct. Head unit need few minutes to
receive the satellite signal and upgrade
the system. At the moment, the screen
status bar shows “positioning”.
2) If your current position is in the tunnel,
or under the bridge, or near the high
building, etc., then the signal might be
weak.
Notice: navigation function is working while navigation module is installed.
(picture-40)
To store the Music from the CD disc to device ROM, total 19 disc to play for
7.5 hours. Support play list management, sort the favorite songs out, one touch
to achieve, usual function clear and convenient. You can get the song easily by
the files setup, play list change, auto search. Convenient and good for safely
driving.
Enter/Quit
(picture-41)
3) Make sure you should park you
vehicle before set up the destination. Do
not operate the navigation during driving.
Press
on the main menu to enter
the VCDC interface, eg(pic-43)
Press
icon or [Home], [Back] to
quit the VCDC interface, but the music
continue at the background, press other
function to stop the music play.
(picture-42)
27
Virtual CD Changer Operation
(picture-43)
Note: The song in VCDC is stored by User. (Operation please refer to the
CD store function).
28
RoadNav S150
Basic Operation
Basic Operation
EQ setup
Keyboard definition
List play
Open function list
Stop
Seek-
Seek+
Play/Pause
delete
Fast Forward
Fast Rewind
Random
Repeat
Equalizer
1, Press“EQ” icon, enter the EQ setup
interface, eg(pic-47):
2, Adjust the High, Middle, Bass to get
your favorite Equalizer, or select the
equalizer.
Virtual Disc select
(picture-47)
1,
Press “VCDC1” icon to enter the Disc
select interface, eg (pic-44):
Process explorer Operation
2,
Press
icon to return the VCDC
playing interface.
3, Press
icon to page up or
/
down, or slide on the touch screen to select
the Disc.
Enter/Quit
(picture-44)
List Play
1, Press
icon on the VCDC interface
to enter the VCDC list, the list including
all the tracks in VCDC. eg pic-45;
(picture-45)
icon or [Home],
(picture-48)
2, Press “ Exit all” icon to exit all the
running software on the process explorer
interface.
、
3, Press
icon to page up and
down, or slide on the touch screen to
select the running software.
1, At VCDC interface, you can delete the
song you don’t like. First press
icon eg
pic-46, second press the song you don’t
like. eg pic-46;
29
,
1, Process Explorer show you all the
software running currently. Press “Close”
icon to exit this software.
Delete
2, Press“ OK ” icon, then the song will
be delete from the Disc.
Press
[Back] to quit.
Process explorer Operation
2, Press
icon or the Track to return
to the VCDC playing interface.
3, Press
icon to page up and
、
down, or slide on the touch screen to
looking for the Track.
Press
icon on the main menu to
enter the process explorer interface, eg pic48, pic-49
(picture-49)
Software explorer operation
1, Press
icon to enter the software
explorer interface, it show you all the
installed software, eg pic-50;
(picture-46)
(picture-50)
30
RoadNav S150
Basic Operation
Basic Operation
2, On the software explorer interface,
user can uninstall the 3nd part software (
System software non uninstall), Press the
“” icon to uninstall the software and all the
software data.
3, On the Software explorer interface,
Press the software to check the software
information, you can uninstall, clear
software data, clear software Cache,
clear auto run, eg pic-51.
Picture browser operation
Picture browser can browse and edit
the picture on the USB, SD card. The
pictures must store in the “photo” folder.
(picture-51)
1, Press
icon to enter the Storage
space interface, It will show you the
device ROM, GPS SD card, DVD SD
card, USB Disc storage and Remain
space. eg pic -52;
Picture folder select
(picture-52)
Volume setup Operation
Enter/Quit
Press
on the main menu to enter
the Volume setup interface, eg pic-53 pic54;
3, Press
icon to change to next page.
31
1, Press
icon, it will auto search
picture on SD card and create a picture
list.
2, Press
icon, it will auto search
picture on USB Disc and create a picture
list.
(picture-56)
Picture Browser
(picture-53)
1, Slide on the touch screen to select a
picture and press it to view the picture,
eg pic-56, pic-57;
2, On the view interface, press
1, Volume setup for Navigation, TV,
Radio, Bluetooth, Audio player, Video
player, Disc, VCDC, IPOD, AUX1, AUX2,
APP volume.
2, Slide
icon to adjust high, middle
and low, press
to reset to factory
default setting.
(picture-55)
Press
,
icon or [Home], [Back]
to quit the picture browser interface.
Storage space
Press
,
icon or [Home],
[Back] to quit the Volume setup interface.
Enter/Quit
Press
icon on the main menu to
enter Picture browser interface, eg pic56;
、
to view the prev and next picture, press
to enlarge the picture,
to reduce
the picture.
to return to 1:1, 、 to
flip the picture.
(picture-54)
3, On the view interface, press
return the picture list.
to
(picture-57)
32
RoadNav S150
Basic Operation
Basic Operation
Login Email account
Wallpaper setup
1,
On the picture browser interface,
press
icon to enter the wallpaper
setup. Eg pic-58;
2,
Select wallpaper area, press “set
wallpaper” icon, then the picture become
the wallpaper on the main menu.
1, Confirm the WIFI or INTERNET is
available when the first time enter Email,
input your account and password and
other Email setup after confirm. eg pic62, pic-63;
(picture-58)
Slide view
1, On the view interface, press
icon
to view as slide.
2, It is view as slide from this picture
one by one.
Collect and Send the Email
(
-59)
1,
Email interface including Write, In
box, Draft box, Sent box, sending box,
Trash box function, eg pic-64;
(picture-63)
2, Email will auto collect while login the
account, after that will collect by
frequency, New Email will go to the In
box.
(picture-60)
Email Operation
3, Long press on the Mail to get more
operate manu, including Delete, Mark
read label, store the sender to
phonebook.
(picture-64)
4, To store the attachment into your
memory, you can read the file by file
manager after store.
Enter/ Quit
Press
on the main menu to enter
the Email interface, eg pic-61;
Press
、
icon or [Home],
[Back] to quit the Email interface.
(picture-61)
33
(picture-62)
3, Login the Email interface successfully
after input the Email information.
Slide view setup
1, On the slide view interface, press
[MENU] to get the slide setup interface.
2, Setup the slide view turns and slide
time, eg pic-59、pic-60;
2, Input the Incoming and send Mail
Server, account, passport, com port,
security type.
5, After compose the New Email, input
the receiver mail address, press send
button, mail will start to transfer. It will
store to the Sent box after finish sending.
Press Save as button to store the mail to
Draft box when Editing Email. eg pic-65;
(picture-65)
34
RoadNav S150
Basic Operation
Basic Operation
6, Email support attachment. Press add attachment button, select file source,
file source can be picture browser, file manager, or music player.
2) When there is disc inside the DVD, press the
eject the disc.
7, The Max size attachment is 10 MB, file to add attachment if bigger than
10MB.
3) If you don’t take away the disc in 15 seconds afrom the unit after eject the
disc, the unit will suck the disc in and play it again.
Collect and Send Email setup
1, Press “MENU” button to open the
setup interface, including collect
frequency, signature, Email Notice,
Remind tone. eg pic-66;
DVD features operation
Definition of Keyboard
Numeric Keyboard
This unit support DVD/VCD/CD/MP3
/MP4/JPG/CD-R formats and so on.
Enter/ Quit
Press
icon to enter DVD Menu.
Check (Pic-67
(picture-67)
1) Press DVD opening logo to enter
DVD play menu immediately. Check (Pic68)
2) Enter Numeric Keyboard Menu, input
number to select song directly. Press
“OK” to play the selected song. Numeric
Keyboard will hide automatically after
played for 3 seconds. It will show again
when you touch the screen.
Tools Keyboard
(picture-69)
Direction Keyboard
eject/insert the disc
35
Setting Keyboard
3) When selecting the song, input the
number of song and press “OK” to play. If
want to select NO.11 song, input 11 and
press “OK” to play the selected song. If
select 58, input 58 and press “OK” to
play.
Press
(Pic-70):
1) In the DVD menu, when the screen
show the “Open” letter, please put the
disc in to the DVD entrance, when the
unit detected there is a disc there, it will
suck in and play the disc automatically.
Direction Keyboard
Numeric Keyboard
1) Press
icon on the screen. Check
(Pic-69):
(picture-66)
Press
or
icons to quit DVD
operation and keep playing in the
background.
button, then the unit will
icon on the screen. Check
(picture-70)
Definition of Direction Keyboard
(picture-68)
upward
downward
leftward
rightward
(picture-70)
OK
Tools Keyboard
Press
icon on the screen. Check
(Pic-71):
(picture-71)
36
RoadNav S150
Basic
Operation
Basic Operation
Definition of Tools Keyboard
Fast reverse
Fast-forward
Last song
--General Set up Page-Tv Display
Wide
Angle Mark
Off
Osd Lang
Eng
Captions
Off
Next song
--General Set up Page-Tv Display
Wide
Angle Mark
Off
Osd Lang
Eng
Captions
Off
On
Off
English
Portuguese
Pause
Setting Keyboard
Press
Check (Pic-72)
Set Angle Mark
Set Angle Mark
(picture-72)
icon on the screen.
Set Osd Language
(picture-74)
Set Osd Language (picture-75)
Definition of Setting Keyboard
Play list
Stop
Eject
Switch A-B disc
Play cycling
Video setting
Play list
Information
Random play
Switch subtitle
Angle
Zoom in/Zoom
--Speaker Setup Page-Downmix
--General Set up Page-Tv Display
Wide
Angle Mark
Off
Osd Lang
Eng
Captions
Off
Lt/Rt
Stereo
On
Off
Accompaniment
DVD system set up
Attention: Touch any position will show/hide operation dialogue. Or it will be
full screen after 3 seconds.
DVD System Setting
In Setting Keyboard Menu, press
icon to enter DVD System Setting.
Check (Pic-73):
In DVD Setting menu, including
General Set up Page, Speaker Set up
Page, Preference Page, Password Set
up Page and Quit.
Press “upward, downward, leftward,
rightward” icon to set the content and
then press “OK” to finish. Check(Pic-73):
--General Set up Page-Tv Display
Wide
Angle Mark
Off
Osd Lang
Eng
Captions
Off
Set Downmix Mode
Set Downmix Mode
Closed Caption
Caption (picture-76)
Back
Normal/Ps
Normal/Lb
Wide
Set Tv Display Mode
Set Tv Display Mode (picture-73)
--Preference Page-Audio
ENG
Subtitle
ENG
Dise Menu
ENG
Parental
Deault
--Preference Page-Audio
ENG
Subtitle
ENG
Dise Menu
ENG
Parental
Deault
English
French
Spanish
Italian
Preferred Audio Language
--Preference Page-Audio
ENG
Subtitle
ENG
Dise Menu
ENG
Parental
Deault
English
French
Spanish
Italian
1 Kid Saf
2G
3 Pg
4 Pg 13
5 Pgr
6R
7 Nc17
8 Adult
Preferred Parental Control
Preferred Menu Language
picture-81)
Preferred Parental Control (
picture-80)
Preferred Menu Language(
37
English
French
Spanish
Italian
Portuguese
Preferred Subtitle Language
Preferred Subtitle Language(picture-79)
Preferred Audio Language(picture-78)
--Preference Page-Audio
ENG
Subtitle
ENG
Dise Menu
ENG
Parental
Deault
(picture-77)
38
RoadNav S150
Basic Operation
--Preference Page-Audio
ENG
Subtitle
ENG
Dise Menu
ENG
Parental
Deault
Basic Operation
Note: the operation of the VCD/MP4 just the same as the DVD. but there is
little different in the playing, when playing the MP4, it will display the image.
There are many different format for the MP4 disc, such as the XVID, AVI, DIVX
RM, if some of the disc can’t play deal to the format, it is normal phenomenon,
the playing interface just the same as the DVD playing infterface.
--Password Setup Page-Change
Password
Reset
Play the CD disc
Change Password
Change Password
Load Factory Setting
Load Factory Setting (picture-82)
(picture-83)
Press
icon to quit DVD System Setting Menu.
Preference Page Set up does not take effect until setting without disc
inserted.
When there is one VCD disc inside
the unit and the disc don’t have the play
menu, the unit will play the disc
automatically; when the disc have the
play menu, click the menu icon , then will
play the disc. As the (picture -86):
play the DVD disc
Play list
When there is one DVD disc inside
the unit and the disc don’t have the play
menu, the unit will play the disc
automatically; when the disc have the
play menu, click the menu icon , then will
play the disc. As the (picture-84):
Order of play
1) In CD Play Menu, press
icon to
enter Play List. All songs will show on the
list. Check (Pic-94)
Song choice
2) Press
icon or touch the playing
song to back to CD Play Menu.
(picture -84)
If you want to select the track you
want to listen, you can touch the song
name and play this song. If the disc
support the subtitle, then the unit will
show the subtitle information on the
screen, as the (picture -85):
(picture-86)
02/10 Ch 01/01
3) Press
/
icons to turn page or
slip the list to choose the song.
(picture-87)
0:03:05
Only Love
Storage
Two.a.m.and the rain is falling
Here we are at the crossroads once again
You're telling me you're so confused
You can't make up your mind
1) Insert CD to enter CD Play Menu.
Press
icon and choose disk to store.
Is this meant to be
During the playing, you can change the
playing by controling the touch menu,
please check the function definition of the
touch menu.
39
0 2/ 10 C h 01 /0 1
/
/
0: 03 :0 5
(picture -85)
2) Press the disk and select the way of
compress( Normal Compress/ Fast
Compress) to store. Check (Pic-88)
(picture-88)
40
RoadNav S150
Basic Operation
Basic Operation
Calendar
3) Press
to stop copying and back
to Play Menu automatically. Press
Press
icon in Main Menu to enter
Calendar. Check (Pic-92)
icon again to whether to continue
copying. Check( Pic-89). Press “OK” to
continue copying. Press “Cancel” to close
the tip and back to Play Menu.
4) Press
icon to stop to copy and
back to Play Menu automatically.
Press
Menu.
(picture-89)
Phone Book function of operation
This function supports saving the
phone number, Email, address and
etc. And it is convenient for user to
search.
Browser
Must connect the network before enter Browser. Press “Setting” icon to enter
Setting Menu, and set network. ( The operations refer to “Setting-Wireless &
network”. ) After connected, the
or
icon will appear the upper right of
screen.
Press
Check( Pic-93)
Press
Menu.
,
(picture-92)
icon to select the month
Enter/Quit
Enter/Quit
Press
Menu.
icons back to Main
Usage
Press
and year.
Attention: If select Normal Compress to store, would continue play the song when
back to Play Menu. If select Fast Compress to store, would not continue play the
song when back to Play Menu.
Press
icon in the Main Menu to
enter Contacts. Check (Pic-90)
,
icon to enter Browser.
,
icons back to Main
(picture-90)
(picture-93)
Browser operation
icons back to Main
1) After input web addresses, press
“GO” to view web page.
Adding Contact
2) There are Zoom in, Zoom out and
other functions on the down of web page.
Press
icon to enter Adding
Contact. Check (Pic-91)
3) Click
icon to view “Bookmarks”,
“Most visited” and “History” records.
Check(Pic-94):
Input the information and press “Save”
icon, adds successfully.
(picture-91)
41
(picture-94)
42
RoadNav S150
Basic Operation
Basic Operation
Global Time
Operations
1) Press
icon of Main Menu to enter
Global Time. Check (Pic-95)
2) Press
Menu.
,
icons back to Main
Operations
User can check the time of different
countries. Click the City name on the screen
and then select the continent – County City.
Check(Pic-96):
(picture-95)
Press
icon to record, press again
to stop. During recording, press the icons
of left side to control the video. For
example, press
or
icon to switch
up or down record, press
icon to
pause playing. Check (Pic-99):
Press
icon back to replay list.
(picture-99)
TV
The operation of TV only works with inner TV module and external TV box.
Record
The device has VideoRecord/Camera
/TV/AV functions.
(picture-96)
Enter/Quit
Press
icon of Main Menu to enter
Record. Check( Pic-97)
Digital TV
With TV signal, press “Bluetooth”, input password(#*98723), press
icon to
choose TV module and quit. Press
icon to enter Digital TV Play Interface. Check
(Pic-100):
Press
,
icons back to Main
Menu. The voice of Record Source will keep
running in the background, but stop
recording.
Setting
Enter/Quit Setting of Digital TV Direction Keyboard
(picture-97)
1)
Press
icon to enter Record
Setting. Check( Pic-98) Press
icon
back to Record Menu.
2)R e c o r d S o u r c e : S e l e c t s o u r c e
according to user demands, such as
DVD/Camera/AV1/AV2/TV.
(picture-98)
43
Press
icon to enter TV Setting.
Press
icon to show the Setting
Details, press
icon again or this
icon to quit setting. Check (Pic-101):
Instructions of Digital TV Direction Keyboard
3)Resolution: Select LD(Standard
Definition) HD(High Definition) to record.
4)Store Path: The path to store.
This device supports searching channels of CMMB/DVB-TV/Analog TV/Digital TV,
supports playing channel of digital TV, supports switching channels, supports
Electronic Program Guide, supports subtitles. Plug the AUX input cable into
AUX/DTV audio input jack.
(picture-100)
1) Including Installation/System/Channel List/Parameter Setting. Check the
operations of Setting on the screen.
2) Installation: Including Select Area/Automatic Search/Manual Search/Reset
Default Setting.
3) System: Including System Status/Signal Detection Function Setting.
44
RoadNav S150
Basic Operation
Basic Operation
Automatic Search
4) Channel List: Including Edit
Channels/Favorite Channels Setting.
5) Parameter: Including Language/AV
Control/Other Setting. There are Time on
Screen/ Transparency/Color settings in
Other Setting.
Press
icon, click
icon to enter
Automatic Search status. Or press “ ” icon to
enter Automatic Search status in Installation
Menu. The device store automatically while
searching the channels , Check (Pic-105):
(picture-101)
Attention: Follow the instructions on screen to set above functions.
Installation
Press
icon, and then press
icon
to choose “Install” icon. Check (Pic-102).
Press “OK” to enter Installation.
There is a progress bar while
searching automatically. During the
searching, press “OK” to stop, Press
or
icon to select Save/Quit/Delete.
If channel does not exist after
searching,press “Quit”, reset parameter
and search again. If search successfully,
the channels will show on the left list.
Please save and quit the interface.
(picture-105)
Manual Search
(picture-102)
There are Select Area/Automatic
Search/Manual Search/Reset Default
Setting in Installation Menu. Check (Pic103):
In Installation Menu, press “Manual
Search” to enter Manual Search status. The
device store automatically while searching
the channels. Check ( Pic-106)
If channel does not exist after searching,
press “OK” , reset Parameter and search
again.
(picture-106)
Reset Default
(picture-103)
Select Area
The device default country is United
Kingdom.
Press
icon in Installation Menu to
choose “Select Area”.
Press
or
icon to choose the
country, and press “OK”. Check (Pic-104)
Press “Reset Default” in Installation Menu. Check
(Pic-107):
Press
or
icon to select “Yes” or “No”. Press
“Yes” will recover to Factory Default Setting. On the
other hand, means cancel “Reset Default”.
(picture-107)
(picture-104)
45
46
RoadNav S150
Basic Operation
Basic Operation
Channel list
System
You can edit channel and set favorite
channels in the channel list menu, Click
button to select "Channel List" icon, click
the "OK" button, such as (image-112):
Press
and
to choose “System”
icon. Check (Pic-108) :
Press “OK” to enter System Menu.
(picture-108)
In the System menu, you can view the
system status, signal detecting, such as
(image-109) :
(picture-112)
Edit Channel
In the channel list menu, click the
button
to select" Edit Channel "icon, click the" OK
"button , such as (image-113):
Lock
Unlock
(picture-109)
System status
Delete
Click
button to select "System status"
icon in the system menu, click the "OK" button,
such as (image-110)
(picture-113)
Edit
Favorite channel
In the channel list menu, click on the
button to select "favorite channel "icon,
click the" OK "button, such as (image 114):
(picture-110)
Add
Classification
(picture-114)
Move
Signal detecting
Click
button to select "
detecting" icon in the system menu,
click the "OK" button, such as
(image-111):
(picture-111)
47
When you have added some
channels to the favorite channel list and
exit the menu state, press the "OK"
button, use the
or
button to switch
TV or favorite channel list, in the favorite
program list and TV channels list, Use
the
or
key, press the "OK" button
switch, such as (image -115)
(picture-115)
48
RoadNav S150
Basic Operation
Basic Operation
Other settings
Parameter settings
Click “Parameter settings” icon,
parameter contains the language settings,
AV control and other settings. Other settings
can be displayed time on screen,
transparency, color settings. The system
default menu language is English.
Click the "menu" button, the icon was
enlarged highlighted ,such as (image116), with the
button to select
"parameter settings" icon, click the "OK"
button to enter the parameter setting
menu.
1 Other settings contains setting
display time, menu transparency and
color settings.
2 With "" or "" button to select the content
you need to set, click "OK" to complete
the settings, such as (image -119):
(picture-116)
Click
icon to enter the numeric
keypad program switch, such as (image 120)
Click
icon, return to the main menu
interface.
Click the numbers in numeric
keypad, click the "OK" button, you can
switch to favorite channels. You can also
click programs to change the channel.
(picture-117)
A / V control
1. A / V control contains audio output,
screen ratio, display format and other
settings.
2. With
or
button to select the
content you need to set, click "OK" to
complete the settings, such as (image -118):
(picture-118)
49
(picture-119)
Switch channels
Language settings
1. Language contains menu language,
audio language, subtitle language
settings.
2. With
or
button to select the
content you need to set, click "OK" to
complete the language settings, such as
(iamge -117):
Volume Control
In the direction key ,
key to increase
the volume,
key to decrease the volume.
In the locked channels , will come out
the black background to enter a
password, as long as input password
(default password "0000", can properly
watch the channel program, such as
(image -121):
Program report
When you check the program information,
select the
button in function keyboard,
it can display the current channel sequence,
name, sound, signal strength, signal quality,
as well as the current program report, such
as (image -122) :
(picture-120)
(picture-121)
(picture-122)
50
RoadNav S150
Basic Operation
Basic Operation
Analog TV player function operation
Click
button again, it can hide the
information interface.
Electronic program guide
Clicking the "EPG" button to display
the electronic program guide, the guide
display each program channel, date and
time, such as (image -123):
Click the
bar window;
(picture-123)
button in function keyboard to switch the channel, date, program
In the program bar, click the
program information;
In the channel bar window, click the
or
button to move to the next or previous
or
button to move to another channel.
Click
to select your favorite program, then click" OK "button to confirm will be
able to watch the selected program.
Click the
button to view the detailed information of the current program.
(picture-126)
Click
,
icon or the [Home] or
[BACK] key to exit the maintenance records
operation .
Analog TV automatic search
1) Click the
icon to enter the
automatic search, it can be automatically
stored in the automatic search process ,
such as (image -127):
(picture-127)
2) In the Channel search process, the
screen will display the TV search
information and the frequency.
Teletext
Click "TTX" button to display the
teletext, the teletext program channels,
date and time and the channel
information, such as (image -124):
Click "TTX" button again to exit
teletext.
In the signal connected state, enter
the Bluetooth interface, input the opening
password (#*98723), click
icon to
enter the TV module selection screen,
select the module then exit. In the main
menu interface, click
icon to enter
the analog TV player function interface,
such as (image-126):
3) Touch other functions in the screen to
exit the search.
Analog television broadcasting
(picture-124)
TV / radio switch
In the state of digital TV, press the
"OK" button, you can see the TV
channels list, press the "OK" button to
switch to the radio mode. Click TV / R in
this state can switch between TV or
7RADIO mode , such as (image -125):
Click the
/
Icon to view up and
down program, such as (image -128):
(picture-128)
Analog TV settings
Click
icon to enter the analog TV
setting interface, such as (image -129):
Click
icon to adjust the image
mode and sound mode. Click "Exit" to
exit the Analog TV setting.
(picture-129)
(picture-125)
51
52
RoadNav S150
Basic Operation
Basic Operation
Schedule management function operation
Click this icon to operate every functions ,click “synchronize”to exit operation.
In the main menu, click the
icon to
enter the schedule management interface,
such as (image -130):
Operation for Maintenance- Record
Enter/Exit
Click
,
icon or [Home] or
[BACK] key to exit the schedule
management interface.
Add schedule
1) Click the "Add" icon to enter the Add
interface, such as (image-131):
Click
icon on the main menu to
enter the interface of the MaintenanceRecord, see the picture of -133.
(picture-130)
Operation for Maintenance-Record
1) Click “Record Maintenance” to enter
the interface ,note the charge for every
maintenance item to record the finished
car maintenance .See the picture of -134.
(picture-131)
2- zone settings
The system provides 2-zone playback operation function. The driver can
enjoy music, radio, TV, camera, the passengers can also through the 2-zone
screen to watch AUX1, AUX2, camera, TV, DVD/VCDC operation, and
independently of each other.
2) You can increase new maintain item
in the record .
In the main menu, click
icon to enter
the 2-zone settings interface, such as
(image-132):
Click the
、
icon or[Home] or
[BACK] key to exit 2-zone settings interface.
(picture-132)
(picture-134)
3) Click “Check maintenance record” to
check the list for all record of maintain
.See the picture of -135.
4) This function need car owner make
record by himself .
Maintain remind
1) Click “Maintain Remind” to setup the
reminder ON or OFF ,and also can set up
the mileage of remind.See the picture of 136.
Enter / exit
53
Click
and
icon ,or(Home) and
(Back)to exit the operation of MaintenanceRecord.
(picture-133)
2) Input schedule content, click "Add
mentioning” ,select a reminder time, click
the
to return, will show up whether to
add the schedule management, click
"Yes" to complete the add.
3) In the schedule management
interface, click the "delete" icon, you can
delete the schedule.
operation
2) The system will remind car owner go
to maintain when the mileage reach to
the mileage of remind been set up.
(picture-135)
(picture-136)
54
RoadNav S150
Basic Operation
Basic Operation
3)Maintain remind function should be support by the original CANBUS
information on the car. Some models can not use this function .
Operation for IPod Function
love
The main unit can play the Audio and
Video file when it connect with IPod
products.
apple
Click the icon of
on the main menu
to enter the GPS Monitor interface .See the
picture of -139.
Click the icon of
,
or [Home]
button and [BACK] button to exit the
function of GPS Monitor .
(picture-137)
Click the icon of
on the main
menu to enter the IPod interface .See the
picture of -137.
When click the icon of
,
or
[Home] ,[BACK] to exit the IPod setup,
unit still playing ,to exit IPod playing
please click other functions .
my love
(picture-139)
Operation for File Management
westlise
love to be loved you
Mari
take that
(picture-138)
IPod Operation
1) Click the icon of
westlise
I lay my love on y
the flood
This function can monitor the state of GPS, show the longitude and latitude of
GPS, the speed, the movement of distance ,the time of determine and the direction
of box and needle, can be used for car against theft/determine system/determine and
track system .(Should be connect with GPS signal first).
Enter/Exit
me and you
Enter/Exit
GPS Monitor
to enter the IPod interface . See the picture of -138
Enter/Exit
Click the icon of
to enter the file
management interface . See the picture of 140.
Click the icon of
,
or [Home]
button and [BACK] button to exit the
operation of file management.
(picture-140)
2) Click the icon of
or
slip the touch screen to choose the file. Click
the file name to play . Click the icon of
again to exit to playing interface .
File Choosing
IPod Icon
Main Menu
last song
Play/Pause
The information for Playing file
Circular Playing
Next song
Stochastic Playing
55
1) Click the SD card icon of
, system
will show all the files in SD card .See the
picture of -141.
2) Click the U disk icon of
, system
will show all the files in U disk.
3) Click the hard disk icon of ,system
will show all the files in hard disk .
(picture-141)
56
RoadNav S150
Basic Operation
Basic Operation
File Searching
1)
In the interface of file list , press
[MENU] button to use the search function
,enter the word that you need to search
,press the button of confirm . See the picture
of -142
File Operation
(picture-142)
1) The system will using music player to play music automatically when click
the music file in the interface of file list .
2) The system will using video player to play video automatically when click the
video file in the interface of file list.
3) The system will using electron-book browser to read the book automatically
when click the book file in the interface of file list .
4) The system will start to install the Android application(APK file) when click
the function of Android application installation .(Only support on some models.)
Electron-Book Reading
1) Showing the current book according
the read time .
2) S h o w i n g t h e c u r r e n t r e a d i n g
automatically if the SD card or U disk still
in the unit when enter this function .And
will show the interface for main book list if
the SD card or U disk be taken out .
3) Click the button or slip the touch
screen to turn pages .
4) Click the icon of
to turn back to the
main book list .
5) Click the icon of
to lessen and
zoom in the proportion of the page.See
the picture of-145, -146.
(picture-145)
(picture-146)
Operation for Electron-Book
Electron-Book reading aloud
Enter/Exit
1)Reading aloud from the beginning of the current page.
2)The volume can be adjusted .
Click the icon of
to enter the interface
of electron-book function .See the picture of
-143.
Click the icon of
,
or [Home]
button and [BACK] button to exit the
operation of electron-book function .
Select the books library
1) Click the SD card icon of
, system
will show all the book files in SD card .
2) Click the U disk icon of
, system
will show all the book files in U disk.
3) Click the network icon of
,system
will show all the book files in network .
57
The format for the Electron-Book
1)The system can support the format of electron-book are EPUB,OEB, FB2 and
plain text.
(picture-143)
The storage route for electron-Book
1)Some models only can storage the electron-book in SD card and U disk .
Operation for DVR
DVR function used for record the accident (including the time, longitude and
latitude ),data communications ,storage video (additional camera, SD card ).
58
RoadNav S150
Basic Operation
Basic Operation
Enter/Exit
Operation for System Setting
Click the icon of
to enter the
interface of DVR function . See the
picture of -147.
The System Setting including the Video
Setting, Display Setting, Dual-zone
Setting etc.
Click the icon of
,
or
[Home] button and [BACK] button to exit
the function of DVR.
Enter/Exit
(picture-147)
Functions instruction of DVR
Menu setup
replay
confirm
Up
start to record
Down
Left
take photos
Right
the usage of the car recorder , please refer to the specification.
Operation for Calculator
(picture-151)
1) Sound Setting including the volume
balance, volume equalization, system
volume etc .
(picture-148)
2) In the volume balance setting
interface, click the volume balance point
AUX
This function can be used after connect
with additional audio or video signal .
Enter/Exit
Click the icon of
to enter the
AUX interface .See the picture of -149.
59
Operation for Sound Setting
Click the icon of
,
or [Home]
button and [BACK] button to exit the Sound
Setting.
Click the icon of
,
or [Home]
button and [BACK] button to exit the
calculator function .
Click the icon of
,
or [Home]
button and [BACK] button to exit the AUX
interface .
(picture-150)
Click the icon of
,
or [Home]
button and [BACK] button to exit the System
Setting function .
Click “Sound Setting” under the System
Setting interface .See the picture of -153.
Click the icon of
to enter the
calculator interface .See the picture of 148.
The operation way same as the
normally calculator .
Click the icon of
to enter the System
Setting interface .See the picture of -150,151,-152.
(picture-149)
(picture-152)
icon to adjust the volume, click “reset
"icon to restore the original car volume
balance. Click
icon to adjust the
、
volume down and up, click
to
、
adjust the volume balance point of the
car, click
icon to center, as(picture154):
(picture-153)
60
RoadNav S150
Basic Operation
Basic Operation
3 ) Tu r n o n t h e s p e e d v o l u m e
compensation switch, the volume of
system will automatically increase as the
speed increased, decreased as the
speed decreased.
4) The volume of the system determines
the basis of the volume in all the
programs.
Device setting functional operation
In the system setting interface, click
“device setting” interface, as (picture157,158):
Click
,
or (back) to exit.
(picture-154)
Display setting functional operation
In the system setting interface, click
“display setting” interface, as(picture-155)
Click
,
or “ back” to exit.
icon or (home) button
1. The display setting contains day
backlight, night backlight, video setting
options, you can adjust the screen
display through the brightest, also can
adjust the video interface display through
the brightness, contrast, color.
Bluetooth setting functional operation
In the system setting interface, click
“Bluetooth setting” interface, as (picture156)
1) Click
,
button or “ back” to exit.
(picture-155)
1) Device setting include the device
name, light inspection, brake inspection,
voice navigation, reverse function,
reverse mute, reversing boot, boot
automatic video, key tone type, key light
color, virtual disc format.
2) Select the function you need to set,
and click this function to complete the
setting.
(picture-157)
(picture-158)
Language setting functional operation
In the system setting interface, click
“language setting” icon enter into the
language setting interface, as(picture159):
(picture-156)
icon or (home)
Click
2) Open the system Blue tooth device, at the same time open your phone Blue
tooth device. When the system with the phone obtain the signal connection, the
phone device name will be displayed and click device name, then enter
connection password and the mobile phone pairing password, begin to connect
your phone.
3) Successful paired and connected ,if you turn on the automatic connection,
the system will initially discover paired devices and automatically connect.
61
icon or (home)button
,
(picture-159)
icon or (home) button or “ back” to exit.
1) Language setting interface contains the language selection, user dictionary
setting and input keyboard setting.
2)
The product language supports for Chinese and the English.
3)User dictionary setting: touch the panel “MENU” to select “increase”.
4) Input keyboard settings default as Google Pinyin input, you can set the key
sound and associating input.
62
RoadNav S150
Basic Operation
Basic Operation
1) Individuation setting contains the settings of product theme and restores
wallpaper.
Network setting functional operation
In the system setting interface, click
“network setting” icon enter into the network
setting interface.
Click
,
or (back) to exit
2) The theme settings preset sets of screen theme (different types of products
will be preset different screen theme), select a theme and apply to the product,
the style will be changed accordingly.
icon or (home) button
1) Click on the "mobile network" icon, enter
the network settings interface, set up the
network data switch, network data roaming
switch and access point settings, only use
the 2G network switch
2) Click the name of access point to enter
the setting switch and the system has been
preset operator access point. So please set
the operator access point according to the
location of the vehicle, otherwise it may
affect the normal use of the wireless
network
3) Click “mobile network” enter into mobile
network setting. When open only 2G
network, 3G high-speed internet access will
be closed. At that time, the system's network
speed will be reduced, so please set
according to the actual situation, as (picture162).
(picture-160)
Date and time zone setting function
In the system setting interface, click
“date and time zone setting” icon enter to
time zone interface, as (picture-164);
Click
,
or ( back) to exit.
(picture-161)
(picture-162)
In the system setting interface, click
“individuation setting” icon to enter to
individuation setting interface, as
(picture-163);
1) You can set the date display, time zone
selection, time setting in the date and time
zone setting interface. Click the "Auto” can
automatically update the time.
(picture-164)
In the system setting interface, click
“steering wheel setting” icon enter into
vehicle setting interface, as(picture-165):
Click
,
(back) to exit.
icon or (home) button or
(picture-165)
icon or (home) button
(picture-163)
63
icon or (home) button
Steering wheel setting functional operation
Individuation setting functional operation
Click
,
or ( back) to exit.
3) Wallpaper settings: you can choose the picture file as the background of the
main interface; the browsing pictures can also be saved in the specified
background image position to set the wallpaper.
Touch any icon in interface, click “start” icon, and press on the steering wheel
where you want to set the function keys. The interface will have parameter display.
Touch “storage” icon, it means set successfully when appears a successful prompt in
the interface. If failure, press “reset” icon to re-repeat the above steps.
64
RoadNav S150
Basic Operation
Basic Operation
Touch screen calibration function operation
Vehicle setting functional operation
In the system setting interface, click
“vehicle setting “icon enter into the
vehicle setting interface, as (picture-166)
Click
,
button or (back) to exit.
In the system setting interface, click
“touch screen calibration” interface, as
(picture-169,170);
icon or (home)
(picture-166)
1) You can set license number, vehicle attribution, brake warning in vehicle
setting.
2) In the illegal inquiry procedures, you can directly input the setting license
number in the illegal query website (some models do not support this feature)
3) Using the illegal inquiry procedures, you can visit the corresponding illegal
query website through setting the vehicle attribution.
4) Select “brake warning" icon, the brake automatically prompts.
Confidentiality setting function operation
In the system setting interface, click
“confidentiality setting “icon enter to the
vehicle setting interface, as (picture-167)
Click
,
button or (back) to exit.
Click the center of the cross into
calibration using the nib or tip of something,
the target will automatically move, when
finish the screen calibration will exit
(picture-169)
(picture-170)
Attention: when calibrate, the center of the cross must require accurate,
otherwise it will affect the touch calibration accuracy.
icon or (home)
System update functional operation
1) Confidentiality setting contains
borrowing car mode switch, code
protection switch and protection code
setting.
(picture-167)
Click the "OK", upgrade automatically!
(Must insert the upgrade card)
2) Click “open borrowing car mode” icon
enter into confidentiality setting interface,
as(picture-168):
(picture-171)
Restore factory setting functional operation
In the system setting interface, click “restore factory setting” icon enter into
restore factory setting interface, as (picture-172):
3) Open borrowing car mode, the user's
phone book, call records, e-mail functions
are protected and cannot be used
4) Open password-protected, closing the
borrowing car mode requires user input
the password.
65
In the system setting interface, click
“system update” enters into system update
interface, as (picture-171):
(picture-168)
1) Click “restore factory setting” icon will appear the menu of restore factory
setting, click “OK” icon to restore, at that time the system will automatically
restart.
66
RoadNav S150
Troubleshooting
Basic Operation
2) Installed third-party program and all
the user data will be lost after the system
is restored, please backup all the system
user data before restoring factory settings
Note:Please check “Troubleshooting List” carefully before sending the broken device
back to repair. If the problem is out of list or still could not solve the problem, please
feel freely to contact our professional after-sale team!
Phenomenon
Cause
Solutions
Wrong connection between
wires and connector
Make sure all connections
correct again
Broken fuse
Find out the reason of the
broken fuse; and then replace
it with the identical fuse
The build-in microprocessor is
unable to work normally due
to the noise and other factors
Press RESET to restore to the
factory settings
Low Battery
Replace with new batteries
Certain functions are forbidden
under specific modes
Enter the proper mode
(picture-172)
Device information
No power supply
In the system setting interface, click
“device information” icon enter into device
information interface, as (picture-173):
1) you can check the product model,
Android version, baseband version, kernel
version, MCU version and version number
and so on.
(picture-173)
Failure of Remote Control
Recorder Function
Enter/Quit
Press “Bluetooth” icon to enter
Bluetooth Menu. Input password
(#*98723) to enter Open Mode. Press
icon to enter Factory Set up Menu,
touch “Recorder” icon to enter Recorder
Menu. Check (Pic-57)
Press
Menu.
or
unable play the disk
(picture-174)
to quit Recorder
No sound
1) Must insert SD card before recording.
2) Press “Star” icon to record. Press
“Stop” icon to stop recording. Press
“Play” icon to replay records. System will
storage records to “mnt / inand/” file
automatically.
67
Cannot increase the volume
(picture-175)
Disk is dirty
Clean the disk
The format of the disk is not
compatible
Check the disk format
The disk video system is not
compatible
Change new disk is compatible
with the video system
Disk poor quality or damage
Replace the good quality disk
The cable is not properly
connected
Re-connect the cable properly
This machine is running in still, There is no sound output in still,
slow motion or frame by frame slow motion or frame by frame
playback
playback
Particular speaker cannot
output sound
Audio setup is not correct
The DVD cannot display if appear
the parent lockup message
Turn on the parent lockup function Close the parent lockup function
or change the setting level
Set the proper audio configuration
68
RoadNav S150
Troubleshooting
Phenomenon
Unable to Change Language
(subtitle included)
Produc specifications
Cause
Current DVD has no extra
languages for selection
Solutions
You can not switch to other
language in a None MultiLanguage disc
You can only switch it over to
Using the disk menu for switching
the options as shown in the disk
menu
No Subtitled
No subtitle in this DVD
You can only switch it over to
the options as shown in the disk
menu
Failed to play back According
to language in Audio and
Subtitle Selected in the DVD
Setup Menu Unable to switch
over to another Viewing angle
If there are no subtitles recorded
for the disk,then it is unable to
show subtitles.
power
12V DC(allowable range:9.5-17.01V)
Groundaing system
Negative pole type
Display screen
Horizontal-vertical ratio
16:9
Pixel
384,000(800*480)
Type
TFT active matrix
Color system
Full system
Range of operating temperature
-20℃+70℃
Range of storing temperature
-30℃+80℃
Angle regulation
0 ~50
Use the disk menu for switchover
If the disc is not recorded DVD
The current DVD has no audio setup menu choice language,
or subtitle language in the DVD is unable to switch to select
setup menu.
language
If the disc is not recorded with
The current DVD has no a multi m o r e p e r s p e c t i v e s h o o t i n g
scenes , can't switch to other
-viewing angle
Audio
Maximum output power
45W*4
Load impedance
4Ω(allowable range:4-8Ω)
Advance output level/impedance
4.0V/200Ω
viewing in a NO Multi-Viewing disc
Unable to view angle switch
You try to switch it over to
another viewing angle out
there are no multi-viewing
Watch with more perspective
recording scene switching angle
Because the DVD and anti copy
analog copy protection system,
so if the player has a copy
The disc has a copy protection protection signal disc ,then in
Picture is extremely unclear /
distorted or dim in the playback signal (some of the disc may some viewed on a monitor, the
have this feature)
picture may appear horizontal
stripe or other, it does not mean
that the issue of fault
Connect the brake wire and
You fail to connected the
when turn on the manual brake
No image:PIC OFF is shown
manual brake wires or fail to
turn on the manual brake
when the ignition switch is
turned to the ON pisition(or to
This is a normal function
the ACC position) the player
automatically switches on
69
DVD
System
DVD audio,DVD video,VCD,CD,DTS CD,and Mp3 system
Discs available
DVD audio disk, DVD video disk,VCD, CD,DTS CD.
Number of tracks
2(stereo),digital 6 tracks
MP3 encoding format
MPEG-1 and 2 and Audio level 3
FM modulator
Frequency range
87.5-108.0MHZ
Effective sensitivity
10dBu(S/N:30DB)
AM modulator
Frequency range
522-1620KHZ
Effective sensitivity
30dBu(S/N:20DB)
70
RoadNav S150
Produc specifications
GPS Navigation
main chipset
SAMSUNG S5PV210AH-A0
Chipset
Samsung CPU S5PV210AH-A0
Flash memory
4GB
FLASH
4GB
Flash memory
512MB
DDR2
512MB
GPS module
JN 3
GPS module
JN 3
Map carrier
4GB SD card
Map Software upgrade
SD card
GPS module communication mode
UART
GPS Module Communi cation
UART
GPS module baud rate
9600bps
GPS Module Baud rate
9600bps
External antenna type
Active, 3 V dc power supply, approximately 5 meters in length
External GPS antenna module
Active
DC supply
3V,approximately 5m in Length
71
RoadNav S150