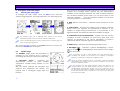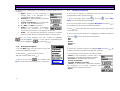
1
Advanced cartographic navigator
ALAN MAP 600
by
User´s Manual
®
ALAN MAP 600
1
Important Warnings
1.1
1.2
2
3
3
7.1.11
7.1.12
7.1.13
Symbols used................................................................3
Warnings ......................................................................3
Introduction
2.1
Bedienungsanleitung
4
Your MAP 600 .............................................................4
Description of MAP 600
5
7.2
8
Preparation
5
5.1
5.2
5.3
6
7
11
Menu Settings.............................................................11
Backlight .................................................................12
Navigation Mode ...................................................12
NMEA Output ..........................................................12
Map Direction .........................................................12
Units.........................................................................12
Language ...............................................................13
DMS Format ............................................................13
WAAS / EGNOS .......................................................13
Buzzer (acoustic Signal) ..........................................13
Changing Coordinate format ............................13
7.1.1
7.1.2
7.1.3
7.1.4
7.1.5
7.1.6
7.1.7
7.1.8
7.1.9
7.1.10
1
10
Rotating the main pages .............................................10
Display backlighting ..................................................10
Adjusting display contrast ..........................................10
Navigating the command menus
7.1
9
Turning on/off ..............................................................9
Initialisation of GPS receiver (first receiving) .............9
Establishing your position............................................9
Display settings
6.1
6.2
6.3
7
Unpacking ....................................................................7
Optional accessories .....................................................7
Installation of a CF memory card and batteries ...........8
The first time you use your MAP 600
Description of the main pages
15
Selecting the main pages ........................................... 15
Satellite page.............................................................. 15
8.2.1
Menu of the satellite page ................................ 16
8.3
Map page ................................................................... 16
8.3.1 Menu of the map page – Gerneral ...................... 17
8.3.2 Search by City ........................................................ 18
8.3.3 Nearest Search....................................................... 18
8.3.4 Map Info ................................................................. 19
8.3.5 Shortcut on/off ....................................................... 19
8.3.6 Navigating Route ................................................... 19
8.3.7 Map Scale .............................................................. 20
8.3.8 Setup Map ............................................................. 20
8.3.9
Menu: Auto-Routing-Function ................................ 21
8.4
Data Page ................................................................... 21
8.4.1 Menu of the Data Page ......................................... 21
8.4.2 Trip Reset ................................................................ 22
8.4.3 Change field .......................................................... 22
8.5
Compass Page............................................................ 22
8.5.1 Menu of the Compass Page .................................. 22
8.5.2 Change Waypoint ................................................. 23
8.6
Arrow Guide .............................................................. 23
Buttons and controls.....................................................5
3.1.1 Front Panel ................................................................5
3.1.2 Back Panel and Connections ...................................6
4.1
4.2
4.3
Main Menu................................................................. 14
8.1
8.2
3.1
4
Changing map references (Datum) .................. 13
Set AR ................................................................. 13
Time .................................................................... 14
9
Waypoint
9.1
23
Creating Waypoint..................................................... 23
9.1.1 Using the Menu ...................................................... 23
9.1.2 During the Navigation ............................................ 24
9.2
Modifying a Waypoint............................................... 24
9.3
Starting the GoTo Function to a Waypoint................ 25
9.4
Deleting one or more Waypoints............................... 25
ALAN MAP 600
9.5
9.6
10
Deleting all Waypoints...............................................25
Narrowing waypoint list.............................................26
ROUTES
10.1
user’s manual
26
Normal Routes............................................................27
10.1.1
Creating ..............................................................27
10.1.2
Activating for Navigation ...................................28
10.1.3
Adding a Waypoint to a Route ..........................28
10.1.4
Inverting the Order of Waypoints ........................28
10.1.5
Inserting a Waypoint between two existing
Waypoints ...........................................................................28
10.1.6
Removing a Waypoint from a route ...................29
10.1.7
Removing all Waypoints .....................................29
10.2
All our hardware/software/firmware updates, as well
as the newest operating instruction version may be
downloaded under www.cte.it
Auto-Routes ...............................................................30
10.2.1
Calculate Auto-Routes .......................................30
10.2.2
Navigating Route................................................31
10.2.3
Arrow Guide........................................................31
10.2.4
Route Manager ..................................................32
10.2.5
Route Settings .....................................................32
Track memorizing
32
11
11.1
11.2
12
13
Activating the Tracking..............................................32
Tracking Options........................................................33
Troubleshooting
The Global Positioning System (GPS) network
13.1
13.2
13.3
13.4
14
34
36
How the System works...............................................36
Satellite Frequency and control signals......................36
Ground control ...........................................................36
The GPS receiver .......................................................37
Technical Characteristics
37
14.1 Assistence...................................................................38
14.2 Notes about the manual ..............
. ............................
15
Appendix A – information about using batteries
15.1
39
Recharging of rechargeable batteries .........................39
15.1.1
Checking battery power ....................................39
2
16
15.1.2
Memory Effect on rechargeable batteries ........ 39
Appendix B – Tabelle der voreingestellten Kartensysteme 41
..
ALAN MAP 600
1
1.1
Important Warnings
Symbols used
user’s manual
1.2
Warnings
Warning!
Pay close attention to all of the warnings below. Failing to observe
these warnings may result in serious problems and/or damage
and/or personal injury.
For ease and convenience in reading this manual, symbols are
used to highlight urgent situations, practical advice, and general
information.
•
Exclamation marks such as this one indicate a crucial description
regarding technical repairs, dangerous conditions, safety arnings,
advice and/or important information. Failing to observe these
symbols may result in serious problems and/or damage and/or
personal injury.
•
Note pages such as this one indicate key practical advice that
we recommend following to ensure MAP 500’s optimal
performance.
•
•
•
•
•
•
•
3
This GPS is intended solely as an aid to navigation. This receiver
should not be considered a substitute either for standard
navigation procedures or for reasonable prudence and
judgment.
When using this receiver in a vehicle, do so only when you are
not the driver, when the vehicle is stopped, or in an emergency.
Using this receiver while driving is dangerous and may cause
accidents or collisions. While driving, pay attention to your
driving!
When the sockets are not in use, protect them with the rubber
cover.
Observe all precautions regarding use of the batteries.
Do not use alcohol, solvents, or abrasives to clean MAP 600. Use
a soft, clean cloth that is slightly damp with water. In more
difficult cases, use a mild detergent.
Do not expose MAP 600 to ambiental conditions which are
excessively humid or dusty, or to temperatures outside the 10°C to +70°C range. Also avoid exposure to direct sunlight. For
example, do not leave the receiver on the dashboard of a
vehicle which is exposed to summer sunlight, or to alpine
temperatures during the winter.
Avoid jarring, mechanical shock, and excessive vibration. The
receiver was designed to resist jarring and vibrations that are
within the norm of any electronic device.
Do not open the receiver for any reason. MAP 600’s precision
mechanics and electronics require experienced technicians
and specialized equipment. Unauthorized opening of MAP 600
will nullify the warranty and will damage the waterproof poured
chassy parts.
Do not replace or recharge the receiver’s batteries in
potentially explosive environments. A single spark may cause
an explosion.
ALAN MAP 600
2
2.1
Introduction
Your MAP 600
Congratulations on your purchase! The MAP 600 is a GPSreceiver with high precision map display, electronically GPSCompass, Trip PC und additional Auto – Routing – Function. It is
various usable and an excellent and precise Navigation-Help in
the Outdoor- area or on a Motorbike.
The map 600 is navigation equipment, which offers the function
apart from the conventional orientation possibilities (with 1000
waypoints, 50 routes and 8 Track Logs with altogether 20.000
points) to automatically calculate and show up to 20 road
routes. From the continuously precisely computed position, the
input of the desired way and with the help of the map data the
route details are computed automatically and indicated while
driving. The announcement (the distance up to the crossing, in
which direction and road is to be turned) can take place
alternatively with and without map display or also as detail list.
Should be deviated intentionally or inadvertently from the given
route, immediately a new way is computed. Further the user can
select the auto zoom, avoid highways and optimise a route and
set middle points.
Beside the precise and fast positioning by satellite navigation,
the integrated map representation with nine-level zoom shot
and high detail accuracy convinces. Together with the
optionally available detail maps the map 600 offers the
possibility of finding roads or interesting objects (like restaurant,
hotel, shopping possibilities, airports, stations and much more).
The Map600 is water resistant and offers the possibility to expand
the memory over Compact Flash Cards (CF-Cards) as well as
saving of several files and selecting individually over a file
manager.
4
user’s manual
Principal features and abilities of your MAP 600:
• Reception and acquisition of up to 12 satellites
• Menu selectable in 6 different languages
• GPS altitude indication is already converted to altitude over
sea-level
• The most used national coordinate systems in Central Europe
and map data (e.g. Gauss Krueger, Swiss and Austrian lattice
systems) are integrated.
• 1000 Waypoints (geographical references)with associated
named and graphic symbols programmed by the user
• 50 Manual Routes with max. 150 Waypoint per Route
• 20 Auto Routes with Start-, Middle- and Endpoint
• up to 9 track logs of your movement (altogether 20.000 points)
• Integrated cartography with 9 levels of zoom as well as
display/hide of reference symbols as desired
• Large back-lit LCD display with adjustable contrast
• Possibility of memory expansion using ordinary Compact Flash
cards (not supplied)
• Ability to select various graphic representations of your position
and direction of movement
• Compact Flash (CF) memory card, which memorizes maps
• Connectable to a PC for downloading of maps and updating
of operating system
• Uses two normal AA batteries, including rechargeable ones
(set not supplied)
• Multi-functional Joystick for practical use
• External antenna socket for use inside vehicles
Further Information you can find under www.cte.it.
The MAP 600 contains various functions, that’s why you should
come to know the functions step, by step for optimal using.
ALAN MAP 600
3
user’s manual
Description of MAP 600
3.1
Buttons and controls
3.1.1
Front Panel
[1] Integrated GPS-Antenna - for signal reception from GPS
satellites. For optimal reception, the antenna should be pointed
towards the sky at an angle of approx. 45 degrees.
1
[2] LC-Display(liquid crystal)– displays different pages (screens),
command menus and modes of operation.
Button (Menu) – accesses the command menu available
[3]
for each page (screen) of the receiver and for programming of
various functions.
[4]
Button (On/Off/ backlighting).
Serves two functions:
- holding down the button for at least 2 seconds, the receiver
turns on/off
- when the receiver is turned on, briefly pressing the button
activates and deactivates the display backlighting
2
[5] ESC Taste (pages/exit) – for selection of main pages (screens)
and going backwards through the command menus without
creating or changing settings.
direction Joystick – for using many functions, such as
[6]
scrolling through maps on the screen, moving the cursor, etc.
[7] + and - Buttons (Zoom) – for enlarging and reducing the scale
of maps.
[8]
menu.
5
Button (confirm) – confirms commands selected in the
8 7
6 3 4
5
ALAN MAP 600
3.1.2
user’s manual
Back Panel and Connections
[9] Threaded junctures – for mounting on the bracket
[10] Data socket (on the bottom of the receiver, under the
protective cap) – for connecting to a PC via the DL 500 cable
for
downloading of maps and various data, using a standard NMEA.
[11] 3V max socket (on the bottom of the receiver, under the
protective cap) - 3VdC socket for recharging Ni-MH batteries
using a suitable AC battery charger (or DC cable adaptor).
14
9
[12] Lever on battery well cover – for opening the battery
compartment.
13
[13] Battery compartment – for insertion of 2 AA batteries, either
alkaline or rechargeable Ni-MH.
[14] ] External antenna socket – for the connection of an active
external antenna, for use when there is insufficient visibility of the
sky (e.g., inside a vehicle).
Do not connect the battery charger when using normal alkaline batteries
(or other non-rechargeable batteries) as this may damage the
equipment.
12
9
Remove the protective cap from the sockets only when using them; this
will avoid exposure to humidity or other damaging agents.
Do not remove the batteries before switching off your MAP 500! All the
internal settings, the new waypoints and routes are in fact permanently
saved in your MAP 500 only in the switching off.
6
11
10
ALAN MAP 600
4
4.1
Preparation
Unpacking
When opening the box containing your receiver, ensure that the
package includes:
a. GPS Map600 Receiver
b. Quick guide
c. CD-ROM with detailed user manual
d. MapRoute installing program to collect maps
e. Certificate of warranty
f. serial RS232 data cable
Depending on the
model, some parts may already be
attached/connected to the receiver. In any case, if any parts are
missing,
contact your supplier immediately.
To use of the Map600 efficient, you also need Detail maps for Europe, 2
rechargeable batteries and one CF-Card. For a comfortable (easy and
quick) transfer of the Detail maps on the CF-Card, we recommend to use
a CF-Card Reader and Writer.
4.2
7
Optional accessories
user’s manual
1 Compact Flash Memory card (CF-Card)
For memorizing digital maps, you can use CF cards of various
capacities: 16, 32, 64, 96, 128, 256 and 512 MB too.
2 Carholder
When using your MAP 600 in a
vehicle, attach it to its mount
to the dashboard using the 3M
tape supplied. For optimal
reception and signal reading,
move the receiver as close as
possible to the windshield and
keep it at a 45° angle to the
sky. We recommend using an
external antenna.
3 Data cable
2 kinds of cable are available:
• RS232 lead (9pin SUB-D
connector for COM port) with some versions in the
scope of supply;
• an optional USB lead for the
data transmission between
PC and GPS, (Download
/Upload) and as NMEA 0183
interface for other applications of software usable.
ALAN MAP 600
4 Active external antenna
The active antenna improves satellite reception for mobile use
inside vehicles. Windshields with dark screens may negatively
influence reception. In this case, using an active antenna
resolves the problem. Insert the active antenna’s male MCX
connector into MAP 500’s external antenna connector and
attach to antenna above the roof of the vehicle, on the sun
visor, or somewhere that has a very ample view of the sky.
5 Adaptor for cigarette lighter plug
When applying a voltage between
12 and 26 VDC to this connector,
you provide a power supply to the
receiver and simultaneously
charge the batteries.
6 Detail maps
Various CDs are available (optional), such as the European set
on 2 CDs or the limited version with Germany maps only.
7 Rechargeable Batteries
Two rechargeable Ni-MH high-capacity AA batteries are
supplied.
user’s manual
4.3
Installation of a CF memory card and batteries
The MAP 600 has a slot for Compact Flash memory cards (CF
maps) with a capacity up to 512 MT for reading in detailed map
data. We recommend to use only 256 MB map files, because
more data has a bad influence of the functions e.g. the AutoRouting.
The GPS needs 2 batteries type AA, which are inserted into the
battery slot. Use only new or fresh batteries.
The following battery types can be used:
a. Alkaline batteries (not rechargeable)
b. rechargeable
Ni-MH-batteries
(nickel metal hydride).
To insert the CF-Card and Batteries switch
of the MAP 600.
1. Open the battery box on the back
by pushing the battery box cover
back at the cover.
2. Decrease to battery box cover.
3. Insert the CF card so that the
inscription side is showing to you
(can vary depending on the CFcard) into the slot. (The card must
be easily pushed in, otherwise you
have to try it carefully differently).
4. Push the memory card completely
into the slot.
5. Insert
the
2
batteries
in
accordance with the polarity
markings into the battery box.
6. Close the battery box and make
sure that the battery box cover is
totally closed.
Further information about usable Battery types,
rechargeable Batteries and Memory Effect you
can find in the Appendix A.
8
ALAN MAP 600
5
5.1
user’s manual
5.2
The first time you use your MAP 600
Turning on/off
1. Find a place outdoors which has
a wide view of the sky, with as
few obstacles (buildings, radio
towers, plants, etc.) as possible.
Adjust your GPS so it is facing
upwards and is at a 45-degree
angle from the ground.
2. To turn the receiver on/off, hold down the
for at least 2 seconds. In the
button
Display a welcome page with information
about the installed Operating system
appears. Afterwards a warning screen
appears, which has to be confirm by
pressing the ESC button. If you press two
times ESC the pages will quicker
disappear. Wird der Warnhinweis nicht
innerhalb einer Minute mit ESC bestätigt,
schaltet das Gerät automatisch aus.
Before you use your navigation help for the first time, the MAP600
must determine his own position like all other GPS receivers
automatically. Your MAP 600 must execute this process
(initialisation) always, if the device has been transported after
the last use turned off to a remote place (more than 500 km) or
the device wasn't taken into operation over a longer time period
(1 month).
This procedure must be passed through after the purchase of
your device once and can last for some minutes. In the later use
this process takes no longer so much time since , because the
MAP 600 can determine its position data faster.
If the initialisation has been successful, you only have to switch
on the device for later operation.
1. Press Two times the
button or one time the
button,
move the Cursor up or down to the field Main Menu and
confirm with
.
2. Choose with help of the cursor the
function Could start (initialisation) and
. The initialisation is
confirm with
started and in the Satellite page the
message Acquiring Sats.. appears.
3. The Satellites page will come up on the screen.
4. Press 2 seconds on the
Initialisation of GPS receiver (first receiving)
button to turn off the Map600.
If you press a short time one the
is turning on.
button the lightning
5.3
Establishing your position
As far as the MAP 600 received 3 or more Satellites, it can
calculate it´s position and the display automaticaly changes to
the Mappage. Until now the device is ready for Navigation. The
Mappage showes the position and the direction of the trip with
respect to the card view.
9
ALAN MAP 600
6
6.1
user’s manual
6.3
Display settings
Rotating the main pages
You can rotate viewing of the display in order to better use the
longer side of the display. In some situations, this is very
convenient, particularly when viewing the MAP page. To rotate
a page, hold down the ESC button until the screen rotates.
Adjusting display contrast
You can adjust the display contrast to optimize visibility in various
lighting conditions.
1. Go to the Satellites page. This page appears after turning
on or if you go into the main menu (press two times the
button) select Satellite and confirm with
2. Move the Joystick to the left or right respectively to
reduce or increase the contrast. While using this function,
the display will show the contrast level.
ESC
3. Press the
button to confirm or ESC to exit without
saving the new contrast setting.
Another way to adjust the display contrast, is given by the
Main menu:
Be careful not to confuse this function with the one described in the
previous paragraph: briefly pressing the button selects a page, while
holding down the button rotates the page.
6.2
Display backlighting
If ambient lighting is not adequate for viewing the display, press
the
button to light up the display. Pressing the
button
again will deactivate the backlighting. The backlighting,
deactivated after a determined period of time, is enabled every
time any button is pressed.
The time of the period you can select in the menu Settings. You
can choose between 30 seconds, 3 or 10 Minutes or always. If
the backlighting turns off, you can activate it again by pressing
each button.
Backlighting speeds up battery consumption; use this feature only when
necessary.
10
1. Press 2 times the
button to get the main menu.
2. Chose LCD Level with the Cursor and confirm with
3. Move the Joystick to the left or right respectively to
reduce or increase the contrast. While using this function,
the display will show the contrast level.
ALAN MAP 600
7
Navigating the command menus
Each page displays a series of options and settings, accessed
through the command menu.
The procedure for navigating the menus is as follows:
user’s manual
7.1
Menu Settings
This menu allows the user to personalize their receiver according
to their needs and for optimum function of the device. This can
be called up from any main page, as described above.
The following options are explained in further detail below:
(menu) button: the display will show the menu
1. Press the
options for the selected page.
2. Move the Joystick up/down to highlight the desired option.
(confirm) to activate the option.
3. Press
4. Select other options as desired, repeating steps 2 and 3, as will
be further described ahead in the paragraphs outlining each
function. When using this function, you can go back to a
previous level by pressing ESC .
The last two options, Setting and Main Menu, are available on every page
and allow for, respectively, personalizing your GPS (backlighting mode,
map orientation, units of measurement, etc) and for quick access to
frequently used functions (geographical reference settings, routes, etc).
Pressing twice quickly provides quick access to the Main Menu from any
page.
Occasionally, you will be asked to confirm or cancel settings you have
selected, pressing the check or cross buttons respectively. These functions
can be enabled using the Joystick and the button.
11
1. From any page, press
, then select Setting using the
Joystick.
to confirm.
2. Press
3. Move the Joystick up/down or left/right to highlight the
. A list of available settings
desired option and press
will appear.
ALAN MAP 600
4. Move the Joystick up/down to select the desired option
.
and press
5. If necessary, repeat steps 3 and 4 to change settings as
required.
to confirm.
6. Use the Joystick to highlight OK and press
Don’ t forget this step, otherwise no storage of settings
takes place! Press ESC to leave the menu without saving.
7.1.1
Backlight
Selects the automatic backlight deactivation time (is activated
each time by pressing the button). Settings available are: 30 sec,
3 min, 10 min, Always. With the last setting, you will be required
to manually deactivate the backlighting by pressing a second
time. The backlight, deactivated after a determined period of
time, is enabled at any button pressure.
7.1.2
user’s manual
NMEA 0183 compatible data interface device (e.g., transceiver,
mapping instrument, etc). The available settings are:
a. Off (interface excluded) – MAP 500 functions normally
without sending data to the interface.
b. On (interface active) – data are sent with an update
frequency of once per second at a velocity of 4,800 bps,
and in the GGA, GSA, GSV, RMC formats. In this state, the
option of downloading maps or other data to the GPS
via the cable and optional software is deactivated.
Activation of the interface is advised only when necessary, because
when it is active, the data update frequency on MAP 500’s display
is slightly slower.
When using the NMEA ON interface, you cannot enter into navigation
mode Simulate.
Navigation Mode
In order to have the serial port properly working even when the NMEA
output is deactivated, we suggest you switch ALAN
MAP500 off and then on.
Select the navigation mode for the receiver, based on the
battery consumption. The available settings are:
a. Normal – maximum settings (rapid updating of data on
the display) with normal consumption.
b. Saving – reduced settings (data is updated on the
display more slowly) with reduced battery consumption.
c. Simulate – GPS receiver deactivated with minimum
battery consumption. Navigation is not possible in this
mode; the only options available are the changing of
settings and viewing of maps.
7.1.4
In Simulate mode, this setting is not activated: the backlighting is always
enabled.
7.1.5
7.1.3
NMEA Output
Data acquired from the satellites can be taken from the NMEA
data output (Data socket) using an (optional) interface cable.
The data can be elaborated using a laptop computer or other
12
Map Direction
Orientation of the displayed map can be changed on the Map
page as follows:
a. Track Up – the map is automatically oriented towards the
direction in which you are moving. The map rotates at
45° steps to maintain this orientation. In this mode, the
in the top left corner of the display will constantly
icon
show North as the dark part.
Units
This setting determines the units of measurement used by MAP
600:
a. Mi/MPH (Miles/Miles per Hour) – for use in Anglo-Saxon
countries.
b. KM/KMH (KM/KM per Hour) – for land navigation in nonAnglo-Saxon countries
ALAN MAP 600
7.1.6
Language
With this feature, you set the language of the GPS menus. Italian,
English, Spanish, Dutch, German, French are available.
7.1.7
WAAS / EGNOS
Activates the setting for the additional indicator correction by
special geostationary satellite signals.
a. On- additional satellite signal correction is switched on (in
case of receiption appears DGPS)
b. Out - without additional correction signal this setting is
always recommended if user does not know exactly
whether a WAAS or a EGNOS signal is receiptable at
present.
7.1.9
Buzzer (acoustic Signal)
Here the acoustic Signal could be defined. The following options
are available:
a. Message (Beep to inform the user about messages)
b. Key ( beep by pressing buttons)
c. Bouth (Key and Message together)
d. Off (no acoustic Signal)
7.1.10 Changing Coordinate format
Normally, latitude and longitude are used to
define a geographical position, although other
systems exist which may be selected for special
applications. In addition, you can still choose
further internationally used systems, e.g. the
German Gauss Krueger system, the Austrian, Swiss,
the British and the UTM system, who are
automatically linked with the associated map
data. The basic adjustment is recommended only
13
if it is necessary to change the coordinate format.
Move the cursor left/ right to select the window Format. Use the
cursor up/down and the
button to select the standard
desired and confirm with OK.
DMS Format
The attitude for the view settings (traditionally) degrees, minutes,
seconds of DD MM SS.S or in the today wide-spread decimal
minute mode of DD MM.M.
7.1.8
user’s manual
7.1.11 Changing map references (Datum)
Maps are created using different standards. The
most common one is WGS-1984 (World
Geodetic System 1984), used by most GPS
devices. For this reason we suggest not
changing it as long as it suits your particular
needs, as selecting an incorrect standard may
result in measurement errors. To select other
standards move the cursor left/ right and select
the window Datum. Use the cursor up/down
button to select the standard
and the
desired and confirm with OK.
In the appendix you can find all available Map600 references (Datum).
The manual changing of the Waypoint Coordinates are only possible, if
WGS 84 is selected.
7.1.12 Set AR
On the Page Set AR (Settings for Auto-Routing)
the following setting could be selected:
a. Route optimise, to calculate the optimal
Route,
b. Avoid Highways, to drive on smaller
Streets,
c. Auto-Zoom-In, to zoom in at the corner
and
d. Road Match, to use the Auto-Routing
beside streets.
ALAN MAP 600
7.1.13 Time
The GPS constellation allows to read data and
time with extreme precision. Time is based on the
Greenwich meridian, so if you are located in
another time zone, you will be obliged to insert a
time zone difference (for Italy an hour more). To
select other time move the cursor left/ right and
select the window Time. (picture) Use the cursor
up/down and the
button to select the time
and confirm with OK.
a. Plus/Minus – defines if the time zone difference is plus or
minus Greenwich Mean Time.
b. Hour – hours of difference with respect to the Greenwich
meridian
c. Minute –minutes of difference with respect to the
Greenwich meridian (for use only in special applications)
7.2
Main Menu
The Main Menu could be chosen from every
main Page, by pressing two time on the
button or on time
and selecting Main Manu
. The Main
with the Cursor and confirm with
Menu contains the Quick Selection of the
mostly used options (like waypoints, routes,
Track Logs ...) with the Cursor an the
button. In the picture all Options are shown.
Waypoints (geographical references) – creation
and use of geographical references (waypoints).
Routes – creation and use of routes composed of various
waypoints.
Track log – for automatic tracking of the route followed
(independently of the route programmed in Routes).
14
user’s manual
Satellite – option to open the satellite page
Stop Navi/navigation – allows the changing of the Navigation
Mode
Cold Start (initialization).
Files in CF (File Manager)– allows to manage the files on the CFCard. E. g. if more than one map file is stored the wanted file
can be selected by using the cursor (up/ down) and the
button.
LCD Level – to change the display contrast by moving the cursor
.
(left/right) and confirming with
About (Viewing of system information) – viewing of map version,
map utilised, software version, and other
data from the receiver.
Loading (downloading of data) – for
transferring data (maps, waypoints, routes,
tracks, etc) from a PC to your GPS, and to
update MAP 600’s operating system using
optional software and cables. For further
information, refer to the instructions supplied
with these accessories.
To modify an option:
1. Press from any page twice
to call up the main menu or
press once , highlight Main Menu with the Joystick and
.
press
2. Use the Joystick to select the option desired.
3. Press
to confirm and ESC to leave the menu.
Follow the directions in the paragraph below regarding the
option selected.
ALAN MAP 600
8
8.1
Description of the main pages
Selecting the main pages
To change the Main Pages, press the ESC button untill the
wanted page appears. The page appears in the following order:
user’s manual
The centre of the internal circles indicates the perfectly vertical
position. The numbers which appear are the identification
numbers of the satellites received. The dark numbers represent
the acquired satellites (from which you can read data). In this
example, satellites , , , and are acquired. Satellite is at 45° from
you and number is on the horizon.
2. DOP (Dilution Of Position) – indicates errors introduced to the
system.
3. Vertical bars – represent the signals of the satellites received.
Below each one appears the identification number of the
satellite, its length being proportionate to the intensity of the
signal received. The dark bars indicated satellites acquired.
The Satellite page only is displayed after turning on the device.
Afterward this page can be opened by using the Main Menu.
If the Auto-Routing-Function is active, instead of the Compass page the
Arrow Guide page is displayed.
The Compass page is shown , if the GoTo function to a Point or a
Route with Set Navi was activated.
8.2
Satellite page
The Satellites page shows the acquisition of
satellites by the receiver and is useful for
optimising the antenna’s directional pointing.
1. Concentric circles – represent the
approximate position of each satellite
(orientation towards North) relative to your
position.
The two circles indicate the elevation (the
external one represents the horizon, the
internal one a 45-degree angle from the
horizon).
15
4. Coordinates of your position/DGPS – appear once the GPS has
acquired at least 3 satellites (at least three dark bars must
appear, as described in the above paragraph) or DGPS is
displayed if WAAS or EGNOS signal has been received.
5. Battery icon – indicates the remaining battery power.
6. Backlight icon – indicates if display backlighting is active.
When it is dark , the backlighting is deactivated; when it is light
, it is activated.
It is important to keep in mind satellites are being acquired only if
Acquiring Sats appears at the bottom of the display. If Simulation
appears, you will need to change the navigation mode.
During the satellite acquisition phase, it is possible to monitor the signal
and optimize the pointing of your antenna to lengthen the bars and
hasten the acquisition process.
If the message Poor GPS Signal! appears, check that there are no
obstacles above you that might impede MAP 600’s reception of the
satellite signals (tree branches, beams, poles, etc). In particular, do not
use this function while inside a building or vehicle (without at least using
an external antenna). Press to confirm, move to a more open area, and
try the procedure again.
ALAN MAP 600
8.2.1
14 Menu of the satellite page
Press the
button to access the following options:
a. Navigation/Stop Navigation for selecting navigation or
simulation mode.
b. Einstellung for access to the settings menu.
c. Hauptmenü for access to the main menu.
If you do not need to actually navigate, but are only using your
receiver to enter settings or consult maps, we suggest you
deactivating the receiver by entering Simulation mode. This
mode considerably reduces the battery consumption.
Navigation activates navigation, while Stop Navigation
deactivates it by selecting simulation mode. When Simulation
mode is activated, this will be displayed at the bottom of the
Satellites screen in the place of your coordinates.
From the Satellites page, you can switch from Navigation to
highlight
Simulation without entering the Settings menu: press
Navigation or Stop Navigation (Simulation mode) and press
to confirm.
user’s manual
8.3
Map page
This page shows your position and direction of movement, shown
by the symbol
inside the GPS’ memorized map. In this map,
you can create geographical references (waypoints) or routes
as desired.
The Map page includes the following details:
1. Direction and current position – The symbol
shows the current position and the angle
of direction of movement (displayed either
towards North or towards a preset
destination). This is obviously different from a
traditional compass as it indicates direction
only during movement. Furthermore, if the
symbol is dark, this means that you have
acquired the minimum three satellites
necessary for navigation, otherwise position your GPS better for
acquisition.
2. Cursor
– A useful instrument which allows you to verify
the coordinates of a point by simply moving the cursor to that
position using the Joystick. The cursor also allows you to move
the displayed area of the map: just move the cursor close to the
edge of the map and that part of the map will appear on the
screen.
3. Scale of map, position coordinates, direction and speed –
Scale and coordinates of position are shown right down in the
display, direction and speed are indicated above in the left
corner of the display.
The following functions can be implemented:
Change the scale – briefly press the zoom + and - buttons to
increase or decrease the scale. The scales available are:
16
ALAN MAP 600
user’s manual
50m – 100m - 200m (0.2miles) - 500m (0.5miles) – 1Km (1mile) –
2Km (2miles) – 5Km (5miles) – 25Km (25miles) 100Km (100miles).
railway stations, hotels, restaurants, etc. These symbols can be
made to appear/disappear individually on the map.
Fade in/out Scale, coordinates, direction and speed – hold +
pressed the key for approx. 2 seconds.
8.3.1
4. Viewing mode – The symbol on the bottom right, beside the
scale, constantly displays the active viewing mode of the map:
Press the
button (Menu) to select one of the following
function. The functions will be activated by pressing the
Button:
Navigation mode – the display indicates the area relative
to your current position. The cursor is not shown, but as soon as
you move the Joystick, it will appear close to your current
position.
View map mode – the display indicates another area
different from that of your position. The cursor is always visible to
allow you to move between different areas of the map, and to
use various functions.
.
You can switch between the two modes by briefly pressing
This provides quick movement from the area viewed in which
you are travelling to a place where you are going, and viceversa. This allows you to check the information on any place
while keeping an eye on navigation, as desired.
5. Map viewing reference – When you enlarge/reduce the map,
the black point inside the grey square changes format and
position depending on the settings, representing the size and
position of the viewed area with respect to the entire map.
6. Streets – Normally, the Map page also shows the streets
memorized in the electronic map. If you wish to hide/unhide
these streets, hold down the
- button for two seconds.
7. Reference icons – Indicates the presence of various
cartographic points pre-programmed into the map: airports,
17
Menu of the map page – Gerneral
a. Search by City is the searching
function to find points of Interrests in
the map (city, Street, Hotel, ...).
b. Nearest Search is the searching
function in the nearest surrounding
with reference to a special point
(e.g. the actual position).
c. Map Info shows the information
about the pointed region.
d. Shortcut On/Off means to show or
hide the Airline (dotted) from actual
Position to a Reference Point
e. Navigating Route allows to select Options for the AutoRouting.
f. Map Scale to change the map scale by moving the
cursor sideward.
g. Setup Map - settings to change the view of the map.
h. System Settings for access to the settings menu.
i. Menu for the main menu for access to the main menu.
ALAN MAP 600
user’s manual
Search by City is the search for reference points (e.g. town,
Street, hotel, restaurant, airport, bank, building, gas station etc.).
The chosen reference point is shown by a corresponding symbol
on the map. Proceed as follows:
3.2 The Wild Card is recommended in areas, where all names
starts similar (e.g. Plaza). Move the Cursor (left/right) to reach the
window Wild Card. Move the Cursor under the field Input Name
and press the
button, to spell the name of the object with
and select the field
help of the Cursor. Confirm the with
Find. In the choice box the names in an alphabetical order
button, select search by
. In the display select a
appears. They could be selected with the + and – button or
Step by Step with the cursor (up/down). Confirm the choice with
8.3.2
Search by City
1. Open the map page, press the
City and confirm the choice with
region appears, sorts to towns. To select the town, press the
button and spell the town with the Cursor. The moving high and
down changes the letters and lateral movement for reaching
you confirm the choice.
the next place. With
Furthermore the + and – button allows to scroll page by page or
the Moving of the cursor (up/down) allows to scroll step by step.
You reach into the next view mask with a pressure on the
button.
2. In the display appears select a type with another choice list:
Town, street, hotel, restaurant, airport etc..
Select OK button and press
to finish the search.
4. Finaly the results with information about the Name and the
Distance to the wanted Object appears in the display. Down in
the display 3 options could be chosen by the cursor and
.
confirmed with
a.
b.
c.
, to calculate an Auto-Route to the point,
, to display the object in the map and
, to leave the menu.
3. Move the Cursor up/ down to make a choice and press
to reach the display with the Fast (selecting the name) and Wild
Card (input of letters) search.
button, this point could be defined as Way-, Start-,
By pressing
Middle- and Endpoint.
3.1 Select the window fast search and highlight the window
button to spell the name of
under select a name. Press the
the object with help of the cursor. Confirm with
.
Furthermore you can select the lower choice box with the
names in an alphabetical order to choose the object with the
8.3.3
cursor (high/down) to scroll step by step or pressing the + and
button to scroll page by page. Confirm your choice with
to finish the search.
Select OK button and press
–
This function is similar to Search Object, which allows the user to
search for the same type of pre-programmed map reference,
this time selecting references around the position. To activate:
1. When you have activated the nearest serach option, select
Select A Type, followed by a list: City, Road, Hotel, Restaurant,
Airport, etc.
2. Move the Joystick down/up to highlight the reference type
.
you are searching for (e.g., Airport) and press
3. Press
18
Nearest Search
. Distance will appear on the screen.
ALAN MAP 600
4. Press the
button. This will activate a menu which will allow
you to select the search ray from your position (up to 5 Km or
5 miles).
5. Move the Joystick up/down to select the distance, then press
. All references (of the previously selected type) within the
radius defined in the last step will appear.
6. Move the Joystick down to highlight the reference desired,
then press
. The cursor will move to the desired reference in
viewing mode View Map.
8.3.4
Map Info
Map Info is useful to display Information about geographical
Reference Points (Streets, city, etc.) of the map.
1. Move the pointer in the map display on a various reference
point.
and select MapInfo and confirm with
. In the
2. Press
display the informationpage with the data of the reference
point (e.g. Direction, Distance, …) appears. Down in the display
3 options could be chosen by the cursor and confirmed with
.
, to calculate an Auto-Route to the point,
a.
b.
, to display the object in the map and
c.
, to leave the menu.
8.3.5
Shortcut on/off
These function creates a line, the shortest way from the actual
position to the chosen Point.
1. Set the pointer away from the actual position to a various
point.
, choose Shorcut on with the cursor and press
2. Press
. In the display the shortest way is shown as a line (with
finaly
dots).
This function could be deaktivated with the function Shortcut off.
19
user’s manual
8.3.6
Navigating Route
In the menu Navigating Route the settings and functions for
Auto-Routing could be chosen.
Select with the cursor in the menu Navigating Route and confirm
. After pressing
you will see the submenu with the
with
following function, which are shown in the picture:
a. Append, to add Start-, Middle- and
Endpoints:
o from GPS, actual Position
o Search Object
o Nearest Search, in a special
surrounding
o Waypoint, defined Reference
Points.
b. Insert to insert Start-, Middle- and
Endpoints:
o from GPS, actual Position
o Search Object
o Nearest Search, in a special
surrounding
o Waypoint, defined Reference Points.
c. Move, to move Points,
d. Delete, to delete selected Points (The warning „Are you
, or denied with
sure?“ must be confirmed with
ESC.)
e. Delete all, to delete all Points of a Auto-Route (The
, or
warning „Are you sure?“ must be confirmed with
denied with ESC.)
f. Reverse, to change Start- and Endpoint and so the
direction of the route
g. Calculate, to calculate the Auto-Route
h. Guide on/off to activate or deactivate the guiding of the
Auto-Route
i. Route Detail, to display the Details of the Route (street,
distance and direction)
j. Route Demo, to simulate the way,
ALAN MAP 600
Save, to save the Auto-Route. (Maximal 20 Auto-Routes
could be stored)
If a Auto-Route is created, in the Display the Name of the AutoRoute and in the window below the Start-, Middle- and Endpoint
is shown.
k.
Down in the display the following 3 options could be chosen by
.
the cursor and confirmed with
a.
b.
c.
8.3.7
, to show the Auto-Route in the map,
, to enter the chosen option and
, to leave the menu.
Map Scale
This is the second way to change the scale of
the map beside using the + and – button. Chose map scale
and press
to confirm. Down in the display the scale field
appears and you can Change the scale by moving the cursor
(left/right).
8.3.8
Setup Map
Chose setup map and press
to confirm. A submenu
appears, were you can:
a. turn the Measure Distance on or off to get the distance
(airline or short cut-----) between points. Chose a Point in
and Chose the next point
the display, confirm with
and confirm with
b. change the map Direction into Track up or North up, to
orientate the maps individually to the North or to the
direction of the movement,
c. Show Map Direction vertical or horizontal to change the
format of the display (the format also changed by
pressing 2 seconds on the ESC button) and
user’s manual
d. Select Show fly Name with Name on or off, to show or
hide all dynamical Information which appears on the
Screen when the Pointer is close the object.
If you
can:
a.
b.
c.
press again the
button a submenu appears were you
Display Items to show and hide symbols of the map,
Initial Value, to show the actual position and
Set Location to set the selected positions as the actual
position.
A choice off symbols are (e.g. Streets,
School, petrol, hotel etc.) available, which
could be shown ore hide in the to limit the
Map Information.
and
1. Select the menu Setup Map, press
.
choose Display Items and confirm with
In the display all available Items appears.
Beside every item is a square were you can
active this item.
2. Move the cursor to the field ? and press
. Many pages
with discrription for the items appears. You can scroll the pages
by moving the cursor (left/right).
3. After knowing the items, ESC to leave the Display. Press
20
to:
ALAN MAP 600
user’s manual
- Hide All/Show All items
- Hide Points/Show Points
- Hide Streets/Show Streets
To create a Auto-Route, you have to define Start- and Endpoint,
button and select
by pressing again 2 Seconds on the
Calculate. Confirm the choise wit
.
4. At this stage, if you wish to hide/show only some of the
symbols, you can move the Joystick to the symbols you wish to
to hide/show the check mark.
change and press
By using the GoTo-Function the calculation start from the actual
position to the chosen point in.
5. To memorize the settings and exit this function, use the Joystick
and press
to confirm. In case of error, you
to highlight
can also exit without memorizing the settings by
.
highlighting
8.3.9
Menu: Auto-Routing-Function
Go to the map display, press 2 Seconds and
button to come to the following
the
function:
a. GoTo- function, to go directly to a
focussed point.
b. Startpoint, Endpoint and Middlepoint
to define a Auto-Route
c. Calculate to calculate the AutoRoute,
d. Guide on/off allows the activate/deactivate the guiding.
e. Edit AR to reach the menu Navigation Route, to edit the
Auto- Route start functionalities
f. Waypoint, to define a waypoint on the actual or on
focussed Position.
To define reference points (Way-, Start-, End- and Middlepoints,
point the wanted position in the map by moving the, press 2
Seconds on the
button and choose the Typ.
21
Confirm with
8.4
and leave the menu with ESC.
Data Page
The Trip-PC shows the received and calculated GPS Data:
1. Speed of the trip (current, average and
maximal),
2. Track the direction to the goal,
3. Trip Odom Distance from the s seit Beginn
der To tart point,
4. Trip Time,
5. Altitude above see level,
6. Signal,
7. Koordinats,
8. actual Time and
9. Date.
Move the cursor (left/right) to show this information in a
difference size in the display.
8.4.1
Menu of the Data Page
Press
a.
b.
c.
d.
to get this submenu, were you can select:
Trip reset, before starting a Trip,
Change Field to select special Information in the display,
Settings,
Main Menu.
ALAN MAP 600
8.4.2
Trip Reset
user’s manual
8.5
Compass Page
MAP 600 is equipped with a special timer which records when
you begin using your receiver to navigate and uses this to derive
certain information (e.g., average trip speed, distance travelled
from the beginning of the trip, etc). Obviously, to receive
accurate information from this data, you must reset the timer
when you begin a new trip. To use this function, go to the Data
When you are navigating using a route or the GoTo function to
waypoint, the Compass page helps to hold your course with
respect to the next waypoint by indicating the direction of
movement, the distance, and other useful parameters which
help you to maintain the set route.
page and press
. Using the Joystick, select Trip Reset, then
press
. The timer will be reset and all of the new data will be
displayed correctly.
The references are as follows):
a. NEXT WP - Shows the designation of the
nearest waypoint (route) and/or
selected waypoint (GoTo, lower
picture).
b. TO NEXT – these two fields show the
distance to the next waypoint and the
estimated time of arrival.
c. TO DEST – these two fields show the
final distance and the estimated time
of arrival.
d. Compass needle – shows the direction
of the next waypoint.
e. Direction indictor – shows the direction of navigation (the
circle with the cardinal points underneath moves below
it).
8.4.3
Change field
button,
Al the data could be selected and shown. Press the
. Afterwards select the
select Change Field and confirm with
button and chose information by
wanted field, press the
.
Moving the Kursor (up/down) and confirm your choise with
8.5.1
Menu of the Compass Page
button accesses the following options, which you
Pressing the
.
can highlight with the Joystick and activate using
a. Change Next WP – For selecting a different waypoint
than the one chosen in order to monitor the various legs
of the route.
b. Setting – For access to the settings menu.
c. Main Menu – For access to the main menu.
22
ALAN MAP 600
8.5.2
Change Waypoint
When you reach a waypoint, you will want to monitor the data
for the next waypoint. Using this command, you can switch to
any waypoint on the route.
1. Press
and highlight Change Next WP with the Joystick, then
. The display will show the list of previously-selected
press
waypoints along the route.
2. Move the Joystick down/up to highlight the waypoint you wish
. The references on the Compass
to monitor, then press
page will be updated with this new information.
This command is not active if a route is not previously programmed and
selected.
The Compass page is and to reach by pressing the ESC button, if
GoTo to a waypoint with ShortCut (shorteset Distance) or a
normal Route with Set Navi was activated.
8.6
Arrow Guide
If the Auto-Routing-Function was activat, the Arrow Guide Page
appears instead of the Compass Page.
Beside following the Auto-Route you can
choose between the map display or the
Arrow Guide Display. In the Arrow Guide
display are shown
a. Distance,
b. Direction,
c. Actual Street and
d. next Street.
23
user’s manual
9
Waypoint
Waypoints are geographical references along a route which
can be created at will and used for orientation during a trip
towards a destination. The user can do many things with a
waypoint, for example give it a name and add it to a route.
MAP 600 can memorize up to 1000 waypoints for use individually
or along a route.
To a waypoint you can go:
a. directly by short cut in the map display or with help of the
Information in the Compass Page or
b. by Auto-Routes calculated along streets.
9.1
Creating Waypoint
There are two methods to create a waypoint: using the menu, or
during navigation.
9.1.1
Using the Menu
1. From any page, press the button twice , or press once ,
. The display
highlight Main Menu with the Joystick, and press
is shown in the picture:
2. Using the cursor, highlight Waypoints
. A list of previously
and press
programmed waypoints will appear .
.
3. Press , highlight New and press
The display will prompt you to enter a
waypoint.
ALAN MAP 600
A waypoint is composed of a number of fields (from top to
bottom):
a. Name (name of the waypoint) is
written with a W followed by a
progressively higher number
b. Comment to add reminder comments
(e. g., obstacle)
c. Current Coordinates (in this example,
N 52°29’11.0” and E013°32’19.7”)
d. The date and time of creation
e. Active is a box which, if checked,
displays the waypoint on a map,
otherwise the waypoint only appears on the list
f. GOTO - You can activate this field, if you like to navigate
directly to the selected waypoint without using a route.
5. Once you have finished, use the Joystick to highlight
and press
to confirm, or exit without memorizing the
and pressing
.
waypoint by highlighting
9.1.2
During the Navigation
user’s manual
9.2
Modifying a Waypoint
If you wish to modify a waypoint that has previously been
programmed, follow this procedure:
1. From any page, press twice
Menu with the joystick and press
or just once
.
, select Main
2. Move the joystick down to highlight Waypoints and press
The entire list of all waypoints will be displayed.
3. Press
: you will enter the waypoint list and can then select
a specific one
4. Move the Joystick up/down to highlight the desired waypoint
and press
- New
- Edit
- Delete
- Delete All
- GOTO
. A list of commands will appear:
1. On the Map page, use the cursor to move the
cursor to the desired position.
5. Move the Joystick up/down to highlight Edit and press
confirm. The following screen will appear (picture):
for 2 seconds choose
2. Hold down
.
Waypoint and confirm with
6. A waypoint is composed of a number of fields:
- Name (of the waypoint) is written with a W
followed by a progressively higher number
- Comment to add reminder comments
- Current Coordinates
- The date and time of creation
- Active is a box which, if checked, displays
the waypoint on a map, otherwise the
waypoint only appears on the list
- GOTO
3. Move on the field
and confirm with
to save the actual Position as a waypoint.
24
.
to
ALAN MAP 600
user’s manual
7. Move the Joystick up/down or left/right to highlight the field
to modify: the first
being modified (e.g., Name) and press
character in the field will be highlighted.
8. Move the Joystick left/right to select a character from the
field, then move the Joystick up/down to change the character.
9. As desired, repeat the previous step to change each
to confirm.
character in a field, then press
10. Change other fields by repeating steps 5 through 7.
9.4
If you want to delete a previously programmed waypoint:
1. Follow steps 1 through 4, as described in par.9.2.
2. Follow step 5, selecting the Delete command and press
.
The display will request that you confirm this, with Are you sure?
3. If you wish to delete the waypoint selected, press
,
otherwise press ESC to exit without deleting the waypoint.
This function will not allow you to delete a waypoint marked with an
asterisk. This symbol indicates that this waypoint has been inserted in a
route. If you wish to delete it, you must first remove it from the route, as
described in par.10.6.
10. Once you have finished, use the Joystick to highlight
and press
to confirm, or exit without modifying the
and pressing
.
waypoint by highlighting
The Aktiv button you can only activated or deactivated by using the
button.
Waypoints added to the list may be marked with an asterisk on their righthand side. This indicates that they have been added
to a route.
9.3
Starting the GoTo Function to a Waypoint
There are two possibilities to create the way to a waypoint.
a. Auto-Route (automatically guiding along streets)
b. Short Cut (direct and shortest Way shown by Airline and
compass)
a. Use the same steps like in point 9.2 until point 7, chose the
button. Move the
waypoint with help of the cursors and the
cursor to the
button and confirm with
the Auto-Route to the chosen point.
, to calculate
b. If ypou want to have the direct way showing by Short Cut in
the mapdisplay or on the compass oage (direction, distance
. In the display Short Cut appears. Confirm with
and time) press
, to calculate the way.
25
Deleting one or more Waypoints
9.5
Deleting all Waypoints
If you wish to delete all previously programmed waypoints:
1. Follow steps 1 through 4, as described in par. 9.2.
2. Follow step 5, selecting the Delete All command and press
. The display will request that you confirm this, with Are you
sure?
3. If you wish to delete all the waypoints, press
press ESC to exit without deleting the waypoints.
, otherwise
This function will not allow you to delete waypoints marked with an asterisk.
This symbol indicates that these waypoints have been inserted in a route. If
you wish to delete them, you must first remove them from the route, as
described in par.10.6.
ALAN MAP 600
9.6
Narrowing waypoint list
If you have a number of waypoints programmed, you can
narrow the list to reach the ones you wish to modify or delete
more easily.
For example, when at step one in par.9.2, you see a list of
waypoints:
1. Ensure the Name field is highlighted, as described above (not
.
the list of waypoints), and press
2. Use the Joystick to change the characters in the Name field to
view only the waypoints which contain the same characters in
the same position on the list. The character _ (underscore)
automatically accepts any character.
Example: you have 5 waypoints with these names:
• W001
• W002
• PORT
• HOME
• LIGHTHOUSE
If you insert _ O _ _ _ _ _ _ into the Name field, you will see only
the waypoints PORT and HOME (because the second letter is O);
if instead you insert W _ _ _ _ _ _ _ into the Name field, you will
only see the waypoints W001 and W002.
26
user’s manual
10 ROUTES
The Map600 allows to create two different types of Routes:
c. normal Routes includes two or more waypoints to show
the Way to the Endpoint. On this way you can create 50
Routes with up to 150 Waypoints per Route. So the Route
shows the way from Waypoint to Waypoint until you
reached the goal. The information for the Route you can
see during the Navigation on the map- or compass
page.
d. Auto-Routes are defined with a Start- and Endpoint
(Middle points). You can save up to 20 Auto-Routes with
automatically guiding along streets. By Moving the Route
will by continuously displayed in the map or bigger in the
arrow guide display with information about the direction
distance and next street name. If necessary the route will
be recalculated again.
Bouth Routes could be managed with help
of the Route Manager. To open the Route
Manager press on every main pagetwo
times the
button, or on time
and
select with the cursor Main Menu and
confirm with
. Choose Routes and press
.
ALAN MAP 600
10.1
user’s manual
Normal Routes
to confirm.
10.1.1 Creating
1. Ensure that you have at least two waypoints programmed.
, or press once , highlight
2. From any page, press twice
Main Menu with the Joystick, and press
. The display will
show the main menu.
. The list of
3. Using the Joystick, highlight Routes and press
previously programmed Routes in the Route Manager will
appear.
. The display will show the
4. Select Manu Routes and Press
available options on the Routes menu:
a.
b.
c.
d.
e.
f.
Neu
Bearbeiten
Löschen
Alle Löschen
Setzte Navi
Lösche Navi
5. Using the Joystick, highlight New and press
display will prompt you to create a new route:
. The
a. Name is written with an R a
progressively higher number
b. Comment to add reminder comments
(e.g., home-work)
c. Uhrzeit und Datum der Erstellung
7. If you wish to modify a field (for example
the name), use the Joystick to highlight the
, then move the Joystick
field and press
left/right to select the character you wish to
modify, and up/down to modify it. Once you have finished, press
27
8. Press
. The display will show the options
available:
a. Add
b. Insert
c. Delete (einzelne Wegpunkte löschen)
d. Alle Löschen (alle Wegpunkte löschen)
e. Umkehren
9. Use the Joystick to highlight Add WP (add waypoint – when
.
creating a route, this is the only option available) and press
The display will highlight the entire list of previously programmed
waypoints. Press again
.
10. You can now select an individual waypoint by moving the
Joystick up/down. Once you have selected the first waypoint,
, you will see a 1 to the right of the waypoint; this is the
press
first reference, and is used as a starting point.
11. Add other waypoints by repeating step 10. You will note that
waypoints will be assigned progressively higher numbers which
will determine the order in which the waypoints are used (the
highest number will be the trip destination point). To remove a
.
waypoint from the route, select it and press again
12. Once you have finished, press ESC to exit.
and press
to
13. Move the Joystick down to highlight
confirm. The display will show the route created (in the exam14. Press ESC to reach the main page.
ALAN MAP 600
user’s manual
10.1.2 Activating for Navigation
To navigate using a previously programmed
route:
1. Enter the Routes menu (steps 1 through 3 in the
previous paragraph. The display (picture) will
show a list of programmed routes.
2. Move the Joystick up/down to select the route
desired for navigation and press
will show the options available.
. The display
. To the right
3. Use the Joystick to select Set Navi and press
of the route, an asterisk will appear to signal that the route has
been activated.
4. Press to ESC exit. At this point, the Map and Compass pages
will refer to the first waypoint.
Obviously, only one navigation route can be activated at a time.
Selecting another route overrides the previous route selected.
If you wish to turn off the navigation of all routes, follow the above procedure,
selecting Cancel Navi at step 3.
10.1.3 Adding a Waypoint to a Route
To add waypoints to a route:
1. Enter the Routes menu (steps 1 through 3 of paragraph 10.1).
2. Move the Joystick up/down to select the route to modify.
. The display will show the options available on the
3. Press
Routes menu.
. The display will
4. Using the Joystick, highlight Edit and press
show the route, including the previously inserted waypoints.
. The display will show the available options.
5. Press
. The display
6. Using the Joystick, select Add WP and press
will highlight the entire list of previously programmed waypoints.
28
Press again
.
7. You can now select an individual waypoint by moving the
Joystick up/down. Once you have selected the first waypoint,
.
press
8. Press ESC to exit.
9. Move the Joystick down to highlight
and press
to
confirm.
10. Move the Joystick to highlight
and press
to confirm.
11. Press ESC to return to the main screens.
10.1.4 Inverting the Order of Waypoints
You can invert the order of waypoints so that the starting
waypoint becomes the destination waypoint, and vice-versa. This
is a useful function, particularly when you are navigation on a
route which you would like to return upon. From any page:
1. Press twice .
.
2. Select Routes and press
3. Select the route where to invert the order of waypoints and
press
.
4. Press .
5. Select Invert.
6. Highlight
and press
to confirm. The display will show
the modified route.
7. Press ESC to return to the main screens.
10.1.5 Inserting a Waypoint between two existing Waypoints
If you wish to drastically modify the waypoint sequence of a
route, it may be easier to insert a waypoint between two
previously programmed waypoints.
From any page:
1. Press twice
.
ALAN MAP 600
user’s manual
2. Select Routes and press
.
3. Select the route to modify and press
.
4. Move the Joystick up/down to highlight the list of waypoint
and press
.
5. Move the Joystick up/down to highlight the waypoint
immediately after the position where the new waypoint will be
; above and underneath the waypoint,
inserted and press
you’ll see
6. Press
and then
.
7. To confirm, press again
.
8. Press ESC and move the Joystick up/down to highlight
and press
to confirm.
9. Press ESC to return to the main screens.
6. Press . The display will show the options available.
7. To insert a new waypoint before the one selected at step 6,
highlight Insert by moving the Joystick.
8. Press
. The list of all waypoints previously stored will be
.
displayed. Press again
9. Move the Joystick up/down to select the waypoint for
insertion and press
.
10. Once you have finished, press ESC to exit (the list of all
waypoints is displayed).
11. Move the Joystick down to highlight
and press
to
confirm. The display will show the modified route. User’s Manual
12. Move the Joystick up/down to highlight
and press
to confirm.
13. Press ESC to return to the main screens.
To remove all the waypoints from a route:
1. Follow steps 1 and 2 of paragraph before
2. Select the routes where to remove all the waypoints and press
.
3. Move the joystick up/down to highlight the list of waypoints.
10.1.6 Removing a Waypoint from a route
To remove a waypoint from a route:
From any page:
Press twice .
.
2. Select Routes and press
3. Select the route where you want to remove the waypoint and
.
press
4. Move the Joystick up/down to highlight the list of the
waypoints and press
.
5. Move the Joystick up/down to highlight the waypoint to
delete.
29
10.1.7 Removing all Waypoints
4. Press
5. Press
and select Delete All; press
to confirm.
.
and select Add with the Joystick, then press
6. Press
will see the screen where to create a new waypoint.
. You
ALAN MAP 600
10.2
Auto-Routes
10.2.1 Calculate Auto-Routes
user’s manual
the Button GoTo and press
to confirm. This GoTo procedure
also works to a defined waypoint.
Start point, Middle point and Endpoint could be selected by
cursor in the map display or with help of the function search for
objects. The Route along the displayed streets will be
automatically calculated from the Start- to the Endpoint and
displayed beside moving.
a) GOTO Funktion
The GOTO Function calculates the way from the actual Position
to the goal (chosen Object).
1. Select the goal by cursor
Select the chosen Object in the mapdisplay, press two seconds
button, move the cursor (up/down) to select Goto and
the
, to calculate the way and start Navigation.
confirm with
2. Select the goal by searching for Objects
and selcet Search for city and confirm with
Chose
Press
button.
the wanted Object with help of the cursor and the
In the final display the results of the searching are shown. Select
30
b) Create a Auto-Route with Start-, Middle- and Endpoint
Select the chosen Object in the mapdisplay, press two seconds
button, to define Start-, Middle- and Endpoint with help
the
of the menu. Afterwards press again two seconds on the
button, to select Calculation of the Route and start with
.
ALAN MAP 600
user’s manual
10.2.2 Navigating Route
In the menu Navigating Route or Edit AR the
Auto-Routing Information page appears.
Here the Route could be changed or
recalculated.
Press the
button to reach the folowing
submenu (picture), which is expained under
point 8.3.6.
In the Navigation Mode some functionsare
not available. The function Guide of
finisched the Navigation Mode. The
information of the Route (Street, distance
and direction) are shown with the function
Route Details. If you select Route Demo a
Simulation of the way is shown. Select Save
to store the created Route.
10.2.3 Arrow Guide
If the presentation of the way in the way
map display is not so clear, you also can
select the Arrow Guide display (picture) by
pressing ESC with a bigger display of
information like direction, distance and
streetname)
Before turning you can hear a acoustically
signal.
31
ALAN MAP 600
10.2.4 Route Manager
) you can manage the
In the Main menu (press two times
stored Manu Routes (normal Routes with Waypoints) and AutoRoutes.
user’s manual
11 Track memorizing
When you are travelling using waypoints as reference indicators,
leave a track. Tracks consist of a series of positions relative to the
actual route travelled, and which are registered at regular
intervals (of time and space) during your trip by your MAP 600.
This track can be used again when you are traveling along the
same route, or for verifying that you have correctly followed a
previously programmed route. MAP 600 can memorize up to
2500 positions per route: 8 in its memory, and one for current use.
Data points are generated when the device is in movement. The
date on which a track is created will be saved with each track.
11.1
10.2.5 Route Settings
In the menu settings you can define
the following parameter of a route:
1. Route optimise, to calculate the
optimal way,
2. Avoid highway, to drive on shorter
streets,
3. Auto-Zoom-In, to have the optimal
zoom level at the corner and
4. Road match, to use the AutoRouting- features also in the outdoor
area.
32
Activating the Tracking
1. From any page, press the
button twice, or press once ,
. The Main
highlight Main Menu using the Joystick and press
Menu will appear.
2. Using the Joystick, highlight Track Logs
and press
. The following screen in the
picture will appear.
3. If you wish, use the Joystick and
button to change the recording mode
shown under Tracking:
a. Off - excluded
b. Fill – recording of points until the
memory space is filled (up to 2500
positions)
c. Wrap – continual recording of
points (when the memory is full, new points will substitute
the oldest ones, in order of memorization)
d. Continue - Continual recording of points on all 8 tracks
available.
4. Press and use the Joystick to highlight Recording Mode, then
.
press
5. If you wish, you can change the distance-travelled interval
between one point and the next (Dist. Interval) or the time
ALAN MAP 600
user’s manual
interval between one position and the next (Time Interval). Use
button as usual.
the Joystick and
to
6. Move the Joystick up/down to highlight OK and press
confirm. You will be returned to the page shown in step 2.
You will be returned to the main screens. If MAP 600 has
identified your position, it will begin to record the track, showing
this on the map with a dotted line.
If you choose Fill at step 3 and the memory space has reached 2500 positions,
MAP 500 will prompt you to answer the question Tracking Full, save or clear?
Press
. The display will show the screen appearing in step 2. The next
paragraph
explains the options available.
11.2
Tracking Options
When the screen from step 2 of the previous paragraph is open,
press
. You have a number of options available which can
be selected using the Joystick at the button:
a. Clear Tracking – deletes all tracking data in use
b. Save tracking – saves data from tracking in use
c. Tracking Distance – length of the tracking covered
d. Delete – deletes the previously memorized tracking
(selected from the list using the Joystick)
e. Show ON/OFF – shows/hides tracking data from the map,
selected from the list using the Joystick.
Once you have chosen the desired option, move the Joystick up/down to
highlight and press
12 Troubleshooting
33
to confirm. .
ISTR MAP_UKrev2
16-09-2004
9:45
Pagina 35
ALAN MAP 600
User’s Manual
Troubleshooting
12. Troubleshooting
If you run into difficulty with MAP 600, this table might help to resolve your problems. If not, contact your supplier or service centre and describe in as much detail as possible
the way in which the device is malfunctioning.
PROBLEM
POSSIBLE CAUSE
SOLUTION
REF.
MAP 600 doesn’t turn on
Batteries are not inserted correctly
Batteries are low
Battery contacts are dirty
Ensure you have inserted the batteries correctly, that the batteries are charged, and, if necessary, clean the contacts
4.2.b
Batteries don’t last very long
This can be expected if the GPS energy saver is not inserted
Rechargeable batteries are not the correct type, are charged
incorrectly, and/or are experiencing a “memory effect”
You are using the display backlighting too frequently
Try to insert the energy saver
Ensure the batteries are the correct type, that they are properly charged, and/or eliminate the memory effect
Backlighting increases consumption. Reduce its use to a
minimum
7.1.b
4.2.a
GPS will not function in operating mode
There is insufficient open space overhead
Move to a more open area. Try to monitor the signals using
the Satellites page
MAP 600 is connected too close to interference devices Move MAP 600 further away from interference devices
(televisions, computers, transceivers, air conditioners, etc)
Logical malfunction
Remove the batteries for a few minutes and try to insert them
again
GPS takes a long time to begin functioning You have travelled more than 500Km with the device turned Ensure you have enough open space overhead, then turn off
in operating mode
off and/or with insufficient open space overhead for recep- the device and turn it back on again. You can also try to inition
tialize it.
GPS doesn’t update its position on the dis- You are in Simulation mode
play
The displayed time is incorrect
Put the device in navigation mode
You have chosen an incorrect time difference (time zone dif- Select the correct time zone difference
ference from Greenwich) for your current position
6.3
8.1
4.2.b
5.2
7.1.b
8.3.a
Measurements displayed on the GPS are An incorrect unit of measure for your requirements has been Enter the correct unit regarding current application and/or
incorrect or incomprehensible
selected (e.g., miles data, if you wish metric data) and/or the use coordinate system and data system fitting to the curreference system on your map is different from the selected rent map.
one
7.1.e
7.2.b
GPS has acquired 3 or more satellites, but is The acquired satellites are all located in one quadrant of the When this happens, MAP 600 will not display your position
sky (the DOP value (Diluition of Position) on the Satellites because the margin of error is too high. Move to another
not displaying your position
page is too high)
area to acquire satellites from other quadrants
-
34
ISTR MAP_UKrev2
16-09-2004
9:45
Pagina 36
ALAN MAP 600
User’s Manual
Troubleshooting
PROBLEM
POSSIBLE CAUSE
On the Map page, your position is not longer You have selected the View Map
Navigation
mode
displayed
You are unable to delete waypoints
SOLUTION
mode rather than Press the
button
The waypoints you are trying to delete have been inserted in Remove the waypoints you are deleting from the route
a route
You are unable to program waypoint coordi- You have selected a map reference with a different standard You can only program waypoint coordinates using WGSfrom WGS-1984
1984. Select it
nates
You are unable to navigate along a route
Programming a route is not enough; you also have to active Activate the route for navigation
it before using the route for navigation
The Change Next WP command is disabled
To navigate using a route and select a next waypoint, you Program the waypoints and the route
must first program a route
Map details are not displayed as they should It is possible to show all details or only those which you wish Refer to the paragraphs noted to the right of this box, and
to show (using the correct commands)
follow the instructions according to your needs
be
REF.
Step 4
of 8.2
10.6
10.7
7.2.c
10.2
9
10
Step 3
of 8.2
8.2.g
The data being read do not coincide with the It is possible that the reference system or the design stan- Refer to the paragraphs to the right of this box
dard of the map is not the same as the one being used in
data on a paper map
your MAP 600
7.2.c
7.2.b
During the recording of the tracking, an You have reached the maximum capacity of the tracking
error message appears which appears each
time you turn on the device
Save or delete the tracking
11.2
A PC or other device is not able to receive For PDA’s there are existing different standards for the lead
connections and communication protocols. Use RS-232
data from your MAP 600
cable only for connections with COM port to PCs and
Notebooks. By using MapRoute, always pay attention to start
first the data communication at the GPS and thereafter the
transmission at the PC. The NMEA interface must be activated since the unit has to deliver the GPS data with NMEA
standard to another equipment.
Make sure that you selected the correct COM port and the
general NMEA protocol in the used software programs. On
newer Notebooks a COM port is missing sometimes. In that
case you need an USB lead instead of the RS-232 cable or
a seriell “9pin on USB” connection. Use only the associated
USB driver!
7.1.c
The data transmission between ALAN By using MapRoute pay absolutely attention to start first the
MAP500 and MapRoute (on PC) does not data communication at the GPS and after that the transmission at the PC. When working with MapRoute, the NMEA
occur
protocol may not be activated.
By using MapRoute, pay attention to the correct transmission direction! MapRoute 2.00. has symbols like PC->GPS and GPS->PC.
Leave the NMEA function switched off. The correct sequence is to be
observed, because with this procedure the used COM port number
is recognized automatically! A manual COM port selection is neither
necessary nor possible!
35
ISTR MAP_UKrev2
16-09-2004
9:45
Pagina 38
ALAN MAP 600
User’s Manual
The Global Positioning System (GPS) network
13. The Global Positioning System (GPS) network
GPS is a world-wide radio navigation system formed by a group of 24 satellites (21
operating and 3 spares) and their associated ground stations. GPS uses these satellites, appropriately called NAVSTAR (Navigation Satellite Timing and Ranging), to
calculate ground positions. The basis of GPS operation is the use of triangulation
from the satellites. To triangulate, a GPS receiver measures distance using the travel time of radio signals. However, to measure travel time, GPS needs very accurate timing, plus it needs to know exactly where the satellites are in space. To solve
this problem, each of the 24 satellites is inserted into an orbit high enough (12,000
miles) to preclude interference from other objects, both man-made and natural, and
to insure overlapping coverage on the ground so that a GPS receiver can always
receive from at least four of them at any given time. In addition, compensation is
inserted for any delay the signal experiences as it travels through the atmosphere to
the receiver.
The GPS network was originally conceived by the U.S. Department of Defense
(DOD) to aid navigation.
13.1 How the system works
With the satellites operating at 12,000 miles above the earth’s surface, they are
arranged in strategic positions and orbit around the earth at a speed of 17,000
miles-per-hour, thereby completing an earth orbit every 12 hours. Each is powered
by solar energy; if that fails, they are equipped with on-board backup batteries to
maintain operational GPS integrity, and with small rocket boosters to keep them
flying along the correct path.
36
13.2 Satellite Frequency and control signals
Each satellite transmits a low-power radio signal in the UHF frequency range; the
frequencies used are designated as L1, L2, etc. GPS receivers, such as the PMRGPS unit, listen on the L1 frequency of 1575.42 MHz. This signal, since it is line-ofsight, will reach the ground receiver unless it is obstructed by solid objects, such as
buildings and mountains.
The L1 signal is accompanied by a pair of pseudo-random signals (referred to as a
pseudo-random code) which is unique to each satellite. These codes are identified
by the GPS receiver and allow for the calculation of the travel time from the satellite to the ground. If this travel time is multiplied by the speed of light, the result is the
satellite range (distance from satellite to receiver). The navigation information provided by each satellite consists of orbital and clock data, plus delay information based
on an ionospheric model. Signal timing is provided by highly accurate atomic
clocks.
13.3 Ground control
There are five GPS ground control stations - Hawaii, Ascension Island, Diego Garcia,
Kwajalein and Colorado Springs - that control the satellites by checking their operational disposition and exact position in space. Four of these stations are unmanned, and the fifth -- Colorado Springs – is the Master station. The four unmanned
stations constantly receive data and send it to the Master station. The Master station then provides corrections for satellite Ephemeris constants and clock offsets
and, in conjunction with two other antenna sites, uplinks these information to the
satellites.
ISTR MAP_UKrev2
16-09-2004
9:45
Pagina 39
ALAN MAP 600
User’s Manual
Technical characteristics
13.4 The GPS receiver
The GPS receiver, (in this case, the PMR-GPS unit), uses NAVSTAR satellite signals
as a way of determining exact position on earth. Mathematically, you need four
satellite ranges to accomplish these coordinates. Although three ranges are enough,
an additional range is required for technical purposes.
So, our position is based on how long it takes for a signal sent from the satellite to
arrive at our receiver. Since timing is everything, the satellite signal is almost perfect
since it has an atomic clock on board. But, what about our GPS receiver timing? Our
receiver certainly contains no atomic clock; if it did, its cost would be prohibitive -nobody could afford it. To get around this problem, our receiver must take an additional satellite measurement. Hence, it really needs four satellite signals to insure our
correct position. Since this fourth measurement, done as a cross check, does not
intersect with the first three, our receiver’s computer says, in effect, there is a discrepancy in my measurements, and I must not be synchronized with universal time.
Since any offset from universal time will affect all of our measurements, the receiver
looks for a single correction factor that it can subtract from all its timing measurements that would cause them all to intersect at a single point. That correction brings
the receiver’s clock back into sync with universal time and, in this way, atomic timing
accuracy is in the palm of your hand!
Once our receiver has that correction, it applies to all the rest of its measurements
and now we’ve got precise positioning.
14. Technical characteristics
Map
•
•
•
Scale view: 50m – 200 Km with 9 levels of zoom (enlarge/reduce)
Memory card: Compact Flash (CF) by Scandisk or another 100% compatible brand
Map memory capacity: In combination with Mapshow CRD vector detailed
maps can be modified to .LST files and loaded on CF cards.
Navigation
•
•
•
Waypoints: up to 1000 waypoints, including their names, comments, and display
Routes: up to 50 routes, each with a maximum of 150 waypoints
Tracking: up to 9 recordings of movement – 8 in memory and 1 in use, with a
maximum of 2500 points each. Movement recording mode modifiable.
Functions
•
•
Receives and synchronizes up to 12 satellites
Acquisition time:
- First start-up: 300 seconds, on average
- Already turned on in the area: 40 seconds, on average
- Already warm: 15 seconds, on average
- Speed of satellite acquisition: every 0.1 second
- Speed of data update: every second
Precision
•
•
•
Position: 5 – 25 meters
Speed: within 0.1m/second
Time: ± 1 µS
Measurement fields
• Altitude: from -1.000 to 18.000 m
• Speed: within 515 m per second
• Acceleration: ± 4 G
37
ISTR MAP_UKrev2
16-09-2004
9:45
Pagina 40
ALAN MAP 500
User’s Manual
Technical characteristics
Interface
•
Data
•
219 geographic reference systems pre-programmed in the factor and userselected
Antenna
•
14.1. Assistance
Optional USB cable for PC
We recommend you to write the serial number of your transceiver in the space provided below. This number is found on the rear panel of the transceiver and will be
useful in the event of repair/assistance and/or loss and/or theft.
Serial number _______________________
Integrated, with the possibility of an optional antenna with MCX connector
Dimensions and power supply
14.2 Notes about this manual
•
•
Every effort has been made to ensure that the information in this document is complete, accurate, and up-to-date. The manufacturer assumes no responsibility for the
results of errors beyond its control. Standard accessories and options can be different according to each country version. The described functions are referred to the
software version available at the printing date.
Errors and Omissions Excepted
All rights reserved
•
Size: 6.2 x 13 x 3 cm
Weight: 200 gr. including 2 AA batteries and the CF card
147 gr. (batteries and CF card excluded)
Batteries: 2 AA batteries (alkaline or rechargeable)
Screen
•
•
•
•
4 shades of grey
Size: 6.0 x 3.8 cm
Backlighting: high-contrast electro-luminescent
Resolution: 100 x 160 pixels
Other
•
•
•
38
Buttons: 6 functional plus 1 4-direction Joystick
Operating environment: from -10° to +70°C
Storage: from -40° to +85°C
ALAN MAP 600
15 Appendix A – information about using batteries
The GPS functions with two AA batteries, which should be
installed in the battery compartment. The receiver operates
using:
• Alkaline batteries (non-rechargeable)
• Ni-MH rechargeable batteries (Nickel-metal hydrate).
A capacity lower than 1300 mAh is not recommended (these
devices deliver max. 8 hours operation time and higher capacity
batteries are increasing the operation time)!
Although alkaline batteries allow for superior autonomy with respect to
rechargeable ones, we suggest using the rechargeable Ni-MH batteries if
you are using your MAP 500 frequently as this will reduce operating costs.
To extend the battery life, try rotating through multiple sets of batteries.
Remove the batteries from the receiver when not in use for long periods
of time. This precaution eliminates the likelihood of battery leakage and
corrosion of the receiver. Also, certain circuits are constantly being
supplied electricity, even when the receiver is turned off. This consumption
is very low, but over time may drain the batteries.
Do not combine old batteries with new ones and/or different types
and/or for different uses. Each set of batteries used must be composed of
the same 2 elements, and cannot be used separately or for use with other
devices. Don`t mix batteries of different brand, too!
Never throw batteries into a fire or bring them close to a source of heat:
this may cause explosions and personal injury. Dispose of your batteries
according to local regulations.
15.1
Recharging of rechargeable batteries
The type of battery we recommend is a high-capacity (at least
1.300 mAh), rechargeable Ni-MH (Nickel-metal hydrate). Ni-MH
batteries have a better capacity compared to normal Ni-Cad
batteries, and are less likely to produce a “memory effect”
reaction. There are two ways to recharge batteries:
• Separate recharging of batteries (outside the receiver) – use a
suitable, external battery charger (not supplied) to charge the
batteries before putting them into the receiver. Recharge time
39
user’s manual
varies according to the type of charger and the capacity of the
batteries utilized.
• Charge the batteries while they are in the receiver – use the
optional car battery charger. This is connected to the
appropriate socket in the receiver 3V Max.
Do not attempt to charge alkaline batteries or other non-rechargeable
batteries. Ensure that only 2 rechargeable Ni- MH batteries are used in the
battery well of the receiver, with the battery charger connected.
Attempting to recharge other types of batteries (for ex. alkaline/Mangan
type) is extremely dangerous. Non-suitable batteries may leak liquid,
explode, or burn and cause serious damage!
Ensure that the original charger is used. Using an unsuitable battery
charger or batteries may damage your receiver or cause explosions or
personal injury. When in doubt, contact your supplier.
15.1.1 Checking battery power
When the device is being used, the Satellites page continually
displays the battery icon. The internal part of the icon displays
the remaining battery power: a full icon indicates high battery
power; an empty icon indicates low battery power.
Similar to gas indicators in a vehicle, the indicator is not proportional to
the actual charge (e.g., a half-full battery icon does not
indicate that exactly half of the battery power remains). Furthermore, this
indication varies according to the type of batteries
used (alkaline or rechargeable Ni-MH).
15.1.2 Memory Effect on rechargeable batteries
Rechargeable Ni-MH batteries (Nickel-metal hydrate) have
almost no “memory effect”. This memory effect results in a
drastic reduction of autonomy of use of the device, and is
triggered if the batteries are regularly recharged before
completely running out of battery power and/or when the
batteries are not completely recharged. Manual
To avoid this memory effect:
• When possible, recharge batteries only once they have
completely run out of power (until the receiver turns off during
normal use).
ALAN MAP 600
• Do not disconnect the battery charger before the batteries
are completely recharged.
• Completely discharge and recharge your batteries at least
twice a month.
In any case, the most effective solution for avoiding memory
effect is to rotate the use of two sets of batteries, keeping one
charged set on hand while the other set is in use in the GPS.
To completely eliminate the memory effect on batteries,
discharge and recharge the batteries completely at least three
or four times before using them again.
Memory effect should not be confused with the normal life of the
batteries, which is on average 300-400 charge/discharge
cycles. It is normal for the operating power of the batteries to diminish as
the batteries begin to near the end of their life. When
this happens, substitute the entire set of batteries.
40
user’s manual
ISTR MAP_UKrev2
16-09-2004
9:45
Pagina 41
ALAN MAP 600
500
User’s Manual
Appendix B – Reference table of pre-loaded maps
16. Appendix B – Reference table of pre-loaded maps
MAP 600 supports 219 references from pre-loaded maps (including the most commonly used WGS-84 factor pre-defined) as listed in the below table.
With the choice of national usual coordinate systems, the associated date changes automatically (e.g. POTSDAM with German Grid (Gauss Krueger)
1.
2.
3.
4.
5.
6.
7.
8.
9.
10.
11.
12.
13.
14.
15.
16.
17.
18.
19.
20.
21.
22.
23.
24.
25.
26.
27.
28.
29.
30.
31.
32.
33.
34.
35.
36.
36a.
37.
38.
39.
40.
Datum
dX
dY
dZ
WGS-84
0
0
0
Adindan
-118 -14 218
Adindan
-134 -2
210
Adindan
-165 -11 206
Adindan
-123 -20 220
Adindan
-166 -15 204
Adindan
-128 -18 224
Adindan
-161 -14 205
Afgooye
-43 -163 45
Ain el Abd 1970
-150 -250 -1
Ain el Abd 1970
-143 -236
7
American Samoa 1962
-115 118 426
Anna 1 Astro 1965
-491 -22 435
Antigua Island Astro 1943
-270 13
62
Arc 1950
-138 -105 -289
Arc 1950
-153 -5 -292
Arc 1950
-125 -108 -295
Arc 1950
-161 -73 -317
Arc 1950
-143 -90 -294
Arc 1950
-134 -105 -295
Arc 1950
-169 -19 -278
Arc 1950
-147 -74 -283
Arc 1950
-142 -96 -293
Arc 1960
-160 -6 -302
Arc 1960
-157 -2 -299
Arc 1960
-175 -23 -303
Ascension Island 1958
-205 107 53
Astro Beacon E 1945
145 75 -272
Astro DOS 71/4
-320 550 -494
Astro Tern Island (FRIG) 1961
114 -116 -333
Astronomical Station 1952
124 -234 -25
Australian Geodetic 1966
-133 -48 148
Australian Geodetic 1984
-134 -48 149
Ayabelle Lighthouse
-79 -129 145
Bellevue (IGN)
-127 -769 472
Bermuda 1957
-73 213 296
Berne
Berna map data for Swiss lattice (Swiss grid)
Bissau
-173 253 27
Bogota Observatory
307 304 -318
Bukit Rimpah
-384 664 -48
Camp Area Astro
-104 -129 239
Ellipsoid
WGS 84
Clarke 1880
Clarke 1880
Clarke 1880
Clarke 1880
Clarke 1880
Clarke 1880
Clarke 1880
Krassovsky 1940
International 1924
International 1924
Clarke 1866
Australian National
Clarke 1880
Clarke 1880
Clarke 1880
Clarke 1880
Clarke 1880
Clarke 1880
Clarke 1880
Clarke 1880
Clarke 1880
Clarke 1880
Clarke 1880
Clarke 1880
Clarke 1880
International 1924
International 1924
International 1924
International 1924
International 1924
Australian National
Australian National
Clarke 1880
International 1924
Clarke 1866
Region of use
Global
Burkina Faso
Cameroon
Ethiopia
Mali
Mean for Ethiopia; Sudan
Senegal
Sudan
Somalia
Bahrain
Saudi Arabia
American Samoa Islands
Cocos Islands
Antigua (Leeward Islands)
Botswana
Burundi
Lesotho
Malawi
Mean for Botswana; Lesotho; Malawi; Swaziland; Zaire; Zambia; Zimbabwe
Swaziland
Zaire
Zambia
Zimbabwe
MEAN FOR Kenya; Tanzania
Kenya
Tanzania
Ascension Island
Iwo Jima
St Helena Island
Tern Island
Marcus Island
Australia; Tasmania
Australia; Tasmania
Djibouti
Efate & Erromango Islands
Bermuda
Name in ALAN
WGS 1984
Adindan- Burkina Faso
Adindan- Cameroon
Adindan- Ethiopia
Adindan- Mali
Adindan-Regional Mean
Adindan- Senegal
Adindan- Sudan
Afgooye- Somalia
Ain el Abd’70- Bahrain
Ain el Abd’70- Saudi Arabia
American Samoa’62
Anna 1 Astro’65
Antigua Island Astro’43
Arc’50- Botswana
Arc’50- Burundi
Arc’50- Lesotho
Arc’50- Malawi
Arc’50-Regional Mean
Arc’50- Swaziland
Arc’50- Zaire
Arc’50- Zambia
Arc’50- Zimbabwe
Arc’60- Mean of Kenya, Tanzania
Arc’60- Kenya
Arc’60- Tanzania
Ascension Island’58
Astro Beacon E’45
Astro DOS 71/4
Astro Tern Island
Astronomical Station’52
Australian Geodetic’66
Australian Geodetic’84
Ayabelle Lighthouse
Bellevue
Bermuda 1957
International 1924
International 1924
Bessel 1841
International 1924
Guinea-Bissau
Colombia
Indonesia (Bangka & Belitung Ids)
Antarctica (McMurdo Camp Area)
Bissau
Bogota Observatory
Bukit Rimpah
Camp Area Astro
41
ISTR MAP_UKrev2
16-09-2004
9:45
Pagina 42
ALAN MAP 600
500
User’s Manual
Appendix B – Reference table of pre-loaded maps
dX
-148
298
-136
-2
-263
175
-134
-206
-83
260
-377
230
211
374
-104
-130
-86
-86
-87
-84
-117
-97
-97
-107
-87
dY
136
-304
-108
151
6
-38
229
172
37
12
681
-199
147
150
-101
-117
-96
-96
-95
-95
-132
-103
-88
-88
-98
dZ
90
-375
-292
181
431
113
-29
-6
124
-147
-50
-752
111
588
-140
-151
-120
-120
-120
-130
-164
-120
-135
-149
-121
Ellipsoid
International 1924
International 1924
Clarke 1880
Clarke 1866
Clarke 1880
International 1924
International 1924
International 1924
Clarke 1880
Clarke 1880
Bessel 1841
International 1924
International 1924
Bessel 1841
International 1924
International 1924
International 1924
International 1924
International 1924
International 1924
International 1924
International 1924
International 1924
International 1924
International 1924
66. European 1950
-87
-96
-120
International 1924
67.
68.
69.
70.
European 1950
European 1950
European 1950
European 1979
-103
-84
-112
-86
-106
-107
-77
-98
-141
-120
-145
-119
International 1924
International 1924
International 1924
International 1924
71.
72.
73.
74.
75.
76.
77.
78.
79.
80.
81.
82.
83.
84.
Fort Thomas 1955
Gan 1970
Geodetic Datum 1949
Graciosa Base SW 1948
Guam 1963
Gunung Segara
GUX 1 Astro
Herat North
Hermannskogel Datum
Hjorsey 1955
Hong Kong 1963
Hu-Tzu-Shan
Indian
Indian
-7
-133
84
-104
-100
-403
252
-333
653
-73
-156
-637
282
295
215 225
-321 50
-22 209
167 -38
-248 259
684 41
-209 -751
-222 114
-212 449
46
-86
-271 -189
-549 -203
726 254
736 257
41.
42.
43.
44.
45.
46.
47.
48.
49.
50.
51.
52.
53.
54.
55.
56.
57.
58.
59.
60.
61.
62.
63.
64.
65.
42
Datum
Campo Inchauspe
Canton Astro 1966
Cape
Cape Canaveral
Carthage
Chatham Island Astro 1971
Chua Astro
Corrego Alegre
Dabola
Deception Island
Djakarta (Batavia)
DOS 1968
Easter Island 1967
Estonia Coordinate System 1937
European 1950
European 1950
European 1950
European 1950
European 1950
European 1950
European 1950
European 1950
European 1950
European 1950
European 1950
Clarke 1880
International 1924
International 1924
International 1924
Clarke 1866
Bessel 1841
International 1924
International 1924
Bessel 1841 (Namibia)
International 1924
International 1924
International 1924
Everest (India 1830)
Everest (India 1956)
Region of use
Argentina
Phoenix Islands
South Africa
Bahamas; Florida
Tunisia
New Zealand (Chatham Island)
Paraguay
Brazil
Guinea
Deception Island; Antarctia
Indonesia (Sumatra)
New Georgia Islands (Gizo Island)
Easter Island
Estonia
Cyprus
Egypt
England; Channel Islands; Scotland; Shetland Islands
England; Ireland; Scotland; Shetland Islands
Finland; Norway
Greece
Iran
Italy (Sardinia)
Italy (Sicily)
Malta
Mean for Austria; Belgium; Denmark; Finland; France; W Germany; Gibraltar;
Greece; Italy; Luxembourg; Netherlands; Norway; Portugal; Spain;
Sweden; Switzerland
Mean for Austria; Denmark; France; W Germany;
Netherlands; Switzerland
Mean for Iraq; Israel; Jordan; Lebanon; Kuwait; Saudi Arabia; Syria
Portugal; Spain
Tunisia
Mean for Austria; Finland; Netherlands; Norway;
Spain; Sweden; Switzerland
Nevis; St. Kitts (Leeward Islands)
Republic of Maldives
New Zealand
Azores (Faial; Graciosa; Pico; Sao Jorge; Terceira)
Guam
Indonesia (Kalimantan)
Guadalcanal Island
Afghanistan
Croatia -Serbia, Bosnia-Herzegovina
Iceland
Hong Kong
Taiwan
Bangladesh
India; Nepal
Name in ALAN
Campo Inchauspe
Canton Astro’66
Cape- South Africa
Cape Canaveral
Carthage- Tunisia
Chatham Island Astro’71
Chua Astro- Paraguay
Corrego Alegre
Dabola- Guinea
Deception Island
Djakarta-Batavia
DOS 1968
Easter Island’67
Estonia Coord Sys’37
Euro’50- Cyprus
Euro’50- Egypt
Euro’50- England
Euro’50- North Regional Mean
Euro’50- Finland,Norway
Euro’50- Greece
Euro’50- Iran
Euro’50-Italy-Sardinia
Euro’50-Italy-Sicily
Euro’50-Malta
Euro’50-West Regional Mean
Euro’50-East Regional Mean
Euro’50-South Regional Mean
Euro’50- Portugal,Spain
Euro’50- Tunisia
European 1979
Fort Thomas 1955
Gan 1970
Geodetic Datum’49
Graciosa Base SW’48
Guam’63 Guam
Gunung Segara
GUX 1 Astro
Herat North
Hermannskogel Datum
Hjorsey 1955
Hong Kong’63
Hu-Tzu-Shan
Indian- Bangladesh
Indian- India,Nepal
ISTR MAP_UKrev2
16-09-2004
9:45
Pagina 43
ALAN MAP 600
User’s Manual
Appendix B – Reference table of pre-loaded maps
Datum
dX
dY
dZ
85. Indian
283 682 231
86. Indian 1954
217 823 299
87. Indian 1960
182 915 344
88. Indian 1960
198 881 317
89. Indian 1975
210 814 289
90. Indonesian 1974
-24 -15
5
91. Ireland 1965
506 -122 611
92. ISTS 061 Astro 1968
-794 119 -298
93. ISTS 073 Astro 1969
208 -435 -229
94. Johnston Island 1961
189 -79 -202
95. Kandawala
-97 787 86
96. Kerguelen Island 1949
145 -187 103
97. Kertau 1948
-11 851
5
98. Kusaie Astro 1951
647 1777 -1124
99. Korean Geodetic System
0
0
0
100. L. C. 5 Astro 1961
42 124 147
101. Leigon
-130 29 364
102. Liberia 1964
-90 40
88
103. Luzon
-133 -77 -51
104. Luzon
-133 -79 -72
105. M'Poraloko
-74 -130 42
106. Mahe 1971
41 -220 -134
107. Massawa
639 405 60
108. Merchich
31 146 47
108a.MGI
map data for Austrian lattice
109. Midway Astro 1961
912 -58 1227
110. Minna
-81 -84 115
111. Minna
-92 -93 122
112. Montserrat Island Astro 1958
174 359 365
113. Nahrwan
-247 -148 369
114. Nahrwan
-243 -192 477
115. Nahrwan
-249 -156 381
116. Naparima BWI
-10 375 165
117. North American 1927
-5 135 172
118. North American 1927
-2 152 149
119. North American 1927
2
204 105
120. North American 1927
-4 154 178
121. North American 1927
1
140 165
122. North American 1927
-7 162 188
123. North American 1927
-9 157 184
124. North American 1927
-22 160 190
Ellipsoid
Everest (Pakistan)
Everest (India 1830)
Everest (India 1830)
Everest (India 1830)
Everest (India 1830)
Indonesian 1974
Modified Airy
International 1924
International 1924
International 1924
Everest (India 1830)
International 1924
Everest (Malay.&Sing)
International 1924
GRS 80
Clarke 1866
Clarke 1880
Clarke 1880
Clarke 1866
Clarke 1866
Clarke 1880
Clarke 1880
Bessel 1841
Clarke 1880
Region of use
Pakistan
Thailand
Vietnam (Con Son Island)
Vietnam (Near 16øN))
Thailand
Indonesia
Ireland
South Georgia Islands
Diego Garcia
Johnston Island
Sri Lanka
Kerguelen Island
West Malaysia & Singapore
Caroline Islands
South Korea
Cayman Brac Island
Ghana
Liberia
Philippines (Excluding Mindanao)
Philippines (Mindanao)
Gabon
Mahe Island
Ethiopia (Eritrea)
Morocco
Name in ALAN
Indian- Pakistan
Indian 1954
Indian’60- Con Son Island
Indian’60-Vietnam
Indian 1975
Indonesian’74
Ireland 1965
ISTS 061 Astro’68
ISTS 073 Astro’69
Johnston Island’61
Kandawala
Kerguelen Island’49
Kertau 1948
Kusaie Astro’51
Korean Geo Sys
L. C. 5 Astro’61
Leigon
Liberia 1964
Luzon-Philip
Luzon-Philip- Mindanao
M'Poraloko
Mahe 1971
Massawa
Merchich
International 1924
Clarke 1880
Clarke 1880
Clarke 1880
Clarke 1880
Clarke 1880
Clarke 1880
International 1924
Clarke 1866
Clarke 1866
Clarke 1866
Clarke 1866
Clarke 1866
Clarke 1866
Clarke 1866
Clarke 1866
Midway Astro’61
Minna- Cameroon
Minna- Nigeria
Montserrat Island Astro’58
Nahrwan-Oman-Masirah Island
Nahrwan- Saudi Arabia
Nahrwan- United Arab Emirates
Naparima BWI
N-Amer’27-Alaska
N-Amer’27-Aleutian Ids E
N-Amer’27-Aleutian Ids W
N-Amer’27-Bahamas
N-Amer’27-San Salvador
N-Amer’27-Alberta
N-Amer’27- Manitoba, Ontario
N-Amer’27- New Brunswick
125.
126.
127.
128.
129.
130.
Clarke 1866
Clarke 1866
Clarke 1866
Clarke 1866
Clarke 1866
Clarke 1866
Midway Islands
Cameroon
Nigeria
Montserrat (Leeward Islands)
Oman (Masirah Island)
Saudi Arabia
United Arab Emirates
Trinidad & Tobago
Alaska (Excluding Aleutian Ids)
Alaska (Aleutian Ids East of 180øW)
Alaska (Aleutian Ids West of 180øW)
Bahamas (Except San Salvador Id)
Bahamas (San Salvador Island)
Canada (Alberta; British Columbia)
Canada (Manitoba; Ontario)
Canada (New Brunswick; Newfoundland;
Nova Scotia; Quebec)
Canada (Northwest Territories; Saskatchewan)
Canada (Yukon)
Canal Zone
Cuba
Greenland (Hayes Peninsula)
Mean for Antigua; Barbados; Barbuda;
Caicos Islands; Cuba; Dominican Republic;
Grand Cayman; Jamaica; Turks Islands
North American 1927
North American 1927
North American 1927
North American 1927
North American 1927
North American 1927
4
-7
0
-9
11
-3
159
139
125
152
114
142
188
181
201
178
195
183
N-Amer’27- Saskatchewan
N-Amer’27- Yukon
N-Amer’27-Canal Zone
N-Amer’27-Cuba
N-Amer’27-Greenland
N-Amer’27-Antigua, Barbados
43
ISTR MAP_UKrev2
16-09-2004
9:45
Pagina 44
ALAN MAP 600
User’s Manual
Appendix B – Reference table of pre-loaded maps
Datum
131. North American 1927
dX
0
dY
125
dZ
194
Ellipsoid
Clarke 1866
132. North American 1927
133. North American 1927
134. North American 1927
-10
-8
-9
158
160
161
187
176
179
Clarke 1866
Clarke 1866
Clarke 1866
135. North American 1927
-8
159
175
Clarke 1866
-12
0
-2
0
0
1
0
-186
-425
-130
89
45
65
61
58
-346
371
371
375
130
0
0
0
0
1
0
-93
-169
110
-279
-290
-290
-285
-283
-1
-112
-111
-111
190
0
4
0
0
-1
0
310
81
-13
-183
-172
-190
-181
-182
224
434
434
431
Clarke 1866
GRS 80
GRS 80
GRS 80
GRS 80
GRS 80
GRS 80
Clarke 1880
International 1924
Helmert 1906
Clarke 1866
Clarke 1866
Clarke 1866
Clarke 1866
Clarke 1866
Clarke 1880
Airy 1830
Airy 1830
Airy 1830
136.
137.
138.
139.
140.
141.
142.
143.
144.
145.
146.
147.
148.
149.
150.
151.
152.
153.
154.
North American 1927
North American 1983
North American 1983
North American 1983
North American 1983
North American 1983
North American 1983
North Sahara 1959
Observatorio Meteorologico 1939
Old Egyptian 1907
Old Hawaiian
Old Hawaiian
Old Hawaiian
Old Hawaiian
Old Hawaiian
Oman
Ordnance Survey Great Britain 1936
Ordnance Survey Great Britain 1936
Ordnance Survey Great Britain 1936
155. Ordnance Survey Great Britain 1936
384 -111 425
Airy 1830
156. Ordnance Survey Great Britain 1936
370 -108 434
Airy 1830
157. Pico de las Nieves
-307 -92 127
International 1924
158. Pitcairn Astro 1967
185 165 42
International 1924
159. Point 58
-106 -129 165
Clarke 1880
160. Pointe Noire 1948
-148 51 -291
Clarke 1880
161. Porto Santo 1936
-499 -249 314
International 1924
161a.Potsdam 1950 German map data with Gauss Krueger coordinate system
162. Provisional South American 1956
-270 188 -388
International 1924
163. Provisional South American 1956
-270 183 -390
International 1924
164. Provisional South American 1956
-305 243 -442
International 1924
165. Provisional South American 1956
-282 169 -371
International 1924
166. Provisional South American 1956
-278 171 -367
International 1924
167. Provisional South American 1956
-298 159 -369
International 1924
168. Provisional South American 1956
-288 175 -376
International 1924
169.
170.
171.
172.
173.
44
Provisional South American 1956
Provisional South American 1956
Provisional South Chilean 1963
Puerto Rico
Pulkovo 1942
-279
-295
16
11
28
175 -379
173 -371
196 93
72 -101
-130 -95
International 1924
International 1924
International 1924
Clarke 1866
Krassovsky 1940
Region of use
Mean for Belize; Costa Rica; El Salvador; Guatemala;
Honduras; Nicaragua
Mean for Canada
Mean for Conus
Mean for Conus (East of Mississippi;
River Including Louisiana; Missouri; Minnesota)
Mean for Conus (West of Mississippi;
River Excluding Louisiana; Minnesota; Missouri)
Mexico
Alaska (Excluding Aleutian Ids)
Aleutian Ids
Canada
Conus
Hawaii
Mexico; Central America
Algeria
Azores (Corvo & Flores Islands)
Egypt
Hawaii
Kauai
Maui
Mean For Hawaii; Kauai; Maui; Oahu
Oahu
Oman
England
England; Isle of Man; Wales
Mean For England; Isle of Man; Scotland;
Shetland Islands; Wales
Scotland; Shetland Islands
Wales
Canary Islands
Pitcairn Island
MEAN FOR Burkina Faso & Niger
Congo
Porto Santo; Madeira Islands
Name in ALAN
N-Amer’27-Costa Rica, El Salvador
Bolivia
Chile (Northern; Near 19 øS)
Chile (Southern; Near 43 øS)
Colombia
Ecuador
Guyana
Mean for Bolivia; Chile; Colombia; Ecuador;
Guyana; Peru; Venezuela
Peru
Venezuela
Chile (Near 53 øS) (Hito XVIII)
Puerto Rico; Virgin Islands
Russia
Prov S-Amer’56- Bolivia
Prov S-Amer’56-Chile-North
Prov S-Amer’56-Chile-South
Prov S-Amer’56- Colombia
Prov S-Amer’56- Ecuador
Prov S-Amer’56- Guyana
Prov S-Amer’56-Regional Mean
N-Amer’27- Mean of Canada
N-Amer’27-Mean of Conus
N-Amer’27-E-Mississippi
N-Amer’27-W-Mississippi
N-Amer’27-Mexico
N-Amer’83-Alaska
N-Amer’83-Aleutian Ids
N-Amer’83-Canada
N-Amer’83-Conus
N-Amer’83-Hawaii
N-Amer’83-Mexico, Central America
North Sahara’59
Observatorio Meteorologico’39
Old Egyptian 1907
Old Hawaiian- Hawaii
Old Hawaiian- Kauai
Old Hawaiian- Maui
Old Hawaiian-Regional Mean
Old Hawaiian- Oahu
Oman
Ord Sur GB’36- England
Ord Sur GB’36- Isle of Man
Ord Sur GB’36-Regional Mean
Ord Sur GB’36- Scotland, Shetland
Ord Sur GB’36- Wales
Pico de las Nieves
Pitcairn Astro 1967
Point 58
Pointe Noire 1948
Porto Santo 1936
Prov S-Amer’56- Peru
Prov S-Amer’56- Venezuela
Prov S-Chilean’63
Puerto Rico
Pulkovo 1942
ISTR MAP_UKrev2
16-09-2004
9:45
Pagina 45
ALAN MAP 600
User’s Manual
Appendix B – Reference table of pre-loaded maps
174.
175.
176.
177.
178.
179.
180.
181.
182.
183.
184.
185.
186.
187.
188.
189.
190.
191.
192.
193.
194.
195.
196.
197.
198.
199.
200.
Datum
Qatar National
Qornoq
Reunion
Rome 1940
S-42 (Pulkovo 1942)
S-42 (Pulkovo 1942)
S-42 (Pulkovo 1942)
S-42 (Pulkovo 1942)
S-42 (Pulkovo 1942)
S-42 (Pulkovo 1942)
S-42 (Pulkovo 1942)
S-JTSK
Santo (DOS) 1965
Sao Braz
Sapper Hill 1943
Schwarzeck
Selvagem Grande 1938
Sierra Leone 1960
South American 1969
South American 1969,
South American 1969,
South American 1969,
South American 1969,
South American 1969,
South American 1969,
South American 1969,
South American 1969,
dX
-128
164
94
-225
28
23
26
24
15
24
28
589
170
-203
-355
616
-289
-88
-62
-61
-60
-75
-44
-48
-47
-53
-57
dY
dZ
-283 22
138 -189
-948 -1262
-65
9
-121 -77
-124 -82
-121 -78
-124 -82
-130 -84
-130 -92
-121 -77
76 480
42
84
141 53
21
72
97 -251
-124 60
4
101
-1
-37
2
-48
-2
-41
-1
-44
6
-36
3
-44
26
-42
3
-47
1
-41
Ellipsoid
International 1924
International 1924
International 1924
International 1924
Krassovsky 1940
Krassovsky 1940
Krassovsky 1940
Krassovsky 1940
Krassovsky 1940
Krassovsky 1940
Krassovsky 1940
Bessel 1841
International 1924
International 1924
International 1924
Bessel 1841 (Namibia)
International 1924
Clarke 1880
South American 1969
South American 1969
South American 1969
South American 1969
South American 1969
South American 1969
South American 1969
South American 1969
South American 1969
201.
202.
203.
204.
205.
206.
207.
208.
209.
210.
211.
212.
213.
214.
215.
216.
217.
218.
219.
South American 1969,
South American 1969,
South American 1969,
South American 1969,
South Asia
Tananarive Observatory 1925
Timbalai 1948
Tokyo
Tokyo
Tokyo
Tokyo
Tristan Astro 1968
Viti Levu 1916
Voirol 1960
Wake Island Astro 1952
Wake-Eniwetok 1960
WGS 1972
Yacare
Zanderij
-61
-58
-45
-45
7
-189
-679
-148
-148
-158
-147
-632
51
-123
276
102
0
-155
-265
2
-33
0
-44
12
-33
8
-33
-10 -26
-242 -91
669 -48
507 685
507 685
507 676
506 687
438 -609
391 -36
-206 219
-57 149
52
-38
0
0
171 37
120 -358
South American 1969
South American 1969
South American 1969
South American 1969
Modified Fischer 1960
International 1924
Everest (Sabah Sarawak)
Bessel 1841
Bessel 1841
Bessel 1841
Bessel 1841
International 1924
Clarke 1880
Clarke 1880
International 1924
Hough 1960
WGS 72
International 1924
International 1924
Region of use
Qatar
Greenland (South)
Mascarene Islands
Italy (Sardinia)
Hungary
Poland
Czechoslavakia
Latvia
Kazakhstan
Albania
Romania
Czechoslavakia (Prior 1 JAN 1993)
Espirito Santo Island
Azores (Sao Miguel; Santa Maria Ids)
East Falkland Island
Namibia
Salvage Islands
Sierra Leone
Argentina
Bolivia
Brazil
Chile
Colombia
Ecuador
Ecuador (Baltra; Galapagos)
Guyana
Mean for Argentina; Bolivia; Brazil; Chile; Colombia; Ecuador; Guyana;
Paraguay; Peru; Trinidad & Tobago; Venezuela
Paraguay
Peru
Trinidad & Tobago
Venezuela
Singapore
Madagascar
Brunei; E. Malaysia (Sabah Sarawak)
Japan
Mean for Japan; South Korea; Okinawa
Okinawa
South Korea
Tristan da Cunha
Fiji (Viti Levu Island)
Algeria
Wake Atoll
Marshall Islands
Global Definition
Uruguay
Suriname
Name in ALAN
Qatar National
Qornoq
Reunion
Rome 1940
S-42 Pul’42- Hungary
S-42 Pul’42- Poland
S-42 Pul’42- Czechoslavakia
S-42 Pul’42- Latvia
S-42 Pul’42- Kazakhstan
S-42 Pul’42- Albania
S-42 Pul’42- Romania
S-JTSK
Santo DOS’65
Sao Braz
Sapper Hill’43
Schwarzeck
Selvagem Grande’38
Sierra Leone’60
S-Amer’69- Argentina
S-Amer’69- Bolivia
S-Amer’69- Brazil
S-Amer’69- Chile
S-Amer’69- Colombia
S-Amer’69- Ecuador
S-Amer’69- Baltra, Galapagos
S-Amer’69- Guyana
S-Amer’69-Regional Mean
S-Amer’69- Paraguay
S-Amer’69- Peru
S-Amer’69- Trinidad,Tobago
S-Amer’69- Venezuela
South Asia
Tananarive Observ’25
Timbalai 1948
Tokyo- Japan
Tokyo-Regional Mean
Tokyo- Okinawa
Tokyo- South Korea
Tristan Astro’68
Viti Levu 1916
Voirol 1960
Wake Island Astro’52
Wake-Eniwetok’60
WGS 1972
Yacare
Zanderij
45