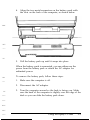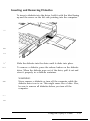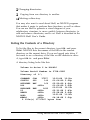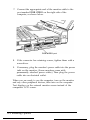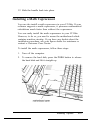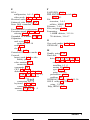
1
Epson® Equity™ LT-286e
User’s Guide Corrections
Please note that your Epson Equity LT-286e provides support for an
80287 math coprocessor. Pages 2,1-17, and C-l of your User’s Guide
incorrectly refer to a CMOS 8OC287 math coprocessor. Do not attempt
to install an 80C287 math coprocessor in the computer. You can install
an 8 MHz 80287 math coprocessor only.
Please note that your video display has two modes:
1. The default mode displays white characters on a black background.
Note that this is the default mode rather than the normal mode as
stated in your User’s Guide.
2. The reverse video mode displays black characters on a white
background.
You may want to use the reverse video mode, for most applications
because the black characters on a white background provide enhanced
readability. See page 2-15 in your User’s Guide for instructions.
The Equity LT-286e comes with an empty plastic box in the slot for
the hard disk drive. If your dealer has not already installed the hard
disk drive in your computer, you must remove the empty box before
you install the hard disk drive. See pages 1-3 through 1-5 of your User’s
Guide for instructions on installing the hard disk drive.
You must run the SETUP program after installing the following
optional devices:
External diskette drive
1MB RAM card
80287 math coprocessor
The SETUP program is described in Chapter 1.
EPSON
®
EQUlTYTMLTTM-286e
User’s Guide
IMPORTANT NOTICE
DISCLAIMER OF WARRANTY
Epson America makes no representations or warranties, either express or implied, by
or with respect to anything in this manual, and shall not be liable for any implied
warranties of merchantability and fitness for a particular purpose or for any indirect,
special, or consequential damages. Some states do not allow the exclusion of
incidental or consequential damages, so this exclusion may not apply to you.
COPYRIGHT NOTICE
All rights reserved. No part of this publication may be reproduced, stored in a
retrieval system, or transmitted, in any form or by any means, electronic, mechanical,
photocopying, recording, or otherwise, without the prior written permission of Epson
America, Inc. No patent liability is assumed with respect to the use of information
contained herein. While every precaution has been taken in the preparation of this
publication, Epson America assumes no responsibility for errors or omissions. Nor is
any liability assumed for damages resulting from the use of the information contained
herein. Further, this publication and features described herein are subject to change
without notice.
TRADEMARKS
AT and XT are trademarks and IBM is a registered trademark of International
Business Machines Corporation.
Centronics is a registered trademark of Centronics Data Corporation.
Epson is a registered trademark of Seiko Epson Corporation.
Equity and LT are trademarks of Epson America, Inc.
GW-BASIC, Microsoft, Microsoft Word, and MS-DOS are registered trademarks of
Microsoft Corporation.
Hayes is a registered trademark of Hayes Microcomputer Products, Inc.
Lotus and 1-2-3 are registered trademarks of Lotus Development Corporation.
Copyright 0 1989 by Epson America, Inc.
Torrance, California
Y19499100100
FCC COMPLIANCE STATEMENT FOR AMERICAN USERS
This equipment generates and uses radio frequency energy and if it is not installed
and used properly, that is, in strict accordance with the manufacturer’s instructions, it
may cause interference to radio and television reception. It has been type tested and
found to comply with the limits for a Class B computing device in accordance with
the specifications in Subpart J of Part 15 of FCC rul es, which are designed to provide
reasonable protection against such interference in a residential installation. However,
there is no guarantee that interference will not occur in a particular installation. If
this equipment does cause interference to radio and television reception, which can
be determined by turning the equipment off and on, you are encouraged to try to
correct the interference by one or more of the following measures:
l
l
l
l
Reorient the receiving antenna
Relocate the computer with respect to the receiver
Move the computer away from the receiver
Plug the computer into a different outlet so that the computer and receiver are
on different branch circuits.
If necessary, consult your dealer or an experienced radio/television technician for
additional suggestions, You may find the following booklet prepared by the Federal
Communications Commission helpful:
“Television Interference Handbook”
This booklet is available from the U.S. Government Printing Office, Washington DC
20402. Stock No. 004-000-00450-7
Note: If the interference stops, it was probably caused by the computer or its peripheral devices. To further isolate the problem:
Disconnect the peripheral devices and their input/output cables one at a time. If the
interference stops, it is caused by either the peripheral device or its I/O cable. These
devices usually require shielded I/O cables. For Epson peripheral devices, you can
obtain the proper shielded cable from your dealer. For non-Epson peripheral devices,
contact the manufacturer or dealer for assistance.
WARNING: This equipment has been certified to comply with the limits for a
Class B computer device, pursuant to Subpart J of Part 15 of FCC Rules. Only
peripherals (computer input/output devices, terminals, printers, etc.) certified to
comply with the Class B limits may be attached to this computer. Operation with
noncertified peripherals is likely to result in interference to radio and TV
reception.
The connection of a nonshielded equipment interface cable to this equipment will
invalidate the FCC Certification of this device and may cause interference levels
that exceed the limits established by the FCC for this equipment.
This digital apparatus does not exceed the Class B limits for radio noise emissions
from digital apparatus as set out in the radio interference regulations of the Canadian
Department of Communications.
Le present appareil numerique n’emet pas de bruits radioelectriques depassant les
limites applicables aux appareils numeriques de Classe B prescrites dans le reglement
stir le brouillage radioelectriques edict6 par le Minis&e des Communications du
Canada.
iv
Contents
Introduction
How To Use This Manual . . . . . . . . . . . . . . . . . . . . . . . . . . . . 4
Where To Get Help . . . . . . . . . . . . . . . . . . . . . . . . . . . . . . . . . 5
Chapter 1
Setting Up Your System
1 Unpacking.. . . . . . . . . . . . . . . . . . . . . . . . . . . . . . . . . . . . . .
2 Installing the Hard Disk Drive. . . . . . . . . . . . . . . . . . . . . . . .
3 Connecting a Printer . . . . . . . . . . . . . . . . . . . . . . . . . . . . . . .
Using the Parallel Interface . . . . . . . . . . . . . . . . . . . . . . .
Using the Serial Interface. . . . . . . . . . . . . . . . . . . . . . . . .
4 Connecting the AC Adapter. . . . . . . . . . . . . . . . . . . . . . . . .
5 Connecting the Power Cord . . . . . . . . . . . . . . . . . . . . . . . . .
6 Starting the System . . . . . . . . . . . . . . . . . . . . . . . . . . . . . . . .
Turning On the Computer. . . . . . . . . . . . . . . . . . . . . . . .
Adjusting Screen Contrast and Brightness . . . . . . . . . . .
Initial Screen Display. . . . . . . . . . . . . . . . . . . . . . . . . . . .
7 Running the SETUP Program . . . . . . . . . . . . . . . . . . . . . . . .
Starting the SETUP Program. . . . . . . . . . . . . . . . . . . . . .
8 Inserting the Install Diskette . . . . . . . . . . . . . . . . . . . . . . . . .
Chapter 2
1-2
1-3
1-6
1-6
1-9
1-10
1-13
1-14
1-14
1-16
1-16
1-17
1-18
1-21
Using the Equity LT-286e
Using the AC Adapter . . . . . . . . . . . . . . . . . . . . . . . . . . . . . . .
Using the Battery . . . . . . . . . . . . . . . . . . . . . . . . . . . . . . . . . . .
Connecting the Battery Pack . . . . . . . . . . . . . . . . . . . . . . . . . .
Status Indicator Bar. . . . . . . . . . . . . . . . . . . . . . . . . . . . . . . . . .
Opening and Closing the Screen . . . . . . . . . . . . . . . . . . . . . . .
Using the Handle . . . . . . . . . . . . . . . . . . . . . . . . . . . . . . . . . . .
Selecting Execution Speed . . . . . . . . . . . . . . . . . . . . . . . . . . . .
2-1
2-2
2-4
2-7
2-9
2-10
2-11
Defining LCD Options . . . . . . . . . . . . . . . . . . . . . . . . . . . . . . .
Backlight Period . . . . . . . . . . . . . . . . . . . . . . . . . . . . . . . .
LCD Adjustment Options . . . . . . . . . . . . . . . . . . . . . . . .
Gray scale modes . . . . . . . . . . . . . . . . . . . . . . . . . . .
Reverse video mode . . . . . . . . . . . . . . . . . . . . . . . . .
Special Keys on the Equity LT-286e Keyboard . . . . . . . . . . . .
Using Diskettes . . . . . . . . . . . . . . . . . . . . . . . . . . . . . . . . . . . . .
How Diskettes Work . . . . . . . . . . . . . . . . . . . . . . . . . . . .
Choosing Diskettes for the Equity LT-286e . . . . . . . . . .
Caring for Diskettes . . . . . . . . . . . . . . . . . . . . . . . . . . . . .
Inserting and Removing Diskettes . . . . . . . . . . . . . . . . . .
Making Backup Copies. . . . . . . . . . . . . . . . . . . . . . . . . . .
Write-Protecting Diskettes . . . . . . . . . . . . . . . . . . . . . . .
Using the Hard Disk Drive . . . . . . . . . . . . . . . . . . . . . . . . . . . .
Caring for the Hard Disk . . . . . . . . . . . . . . . . . . . . . . . . .
Protecting the Data on Your Hard Disk . . . . . . . . . . . . .
Improving Hard Disk Performance . . . . . . . . . . . . . . . . .
Turning Off the Hard Disk. . . . . . . . . . . . . . . . . . . . . . . .
Modifying the AUTOEXEC.BAT File . . . . . . . . . . . . . . . . . .
Resetting the Computer . . . . . . . . . . . . . . . . . . . . . . . . . . . . . .
Turning Off the Computer . . . . . . . . . . . . . . . . . . . . . . . . . . . .
Chapter 3
2-12
2-12
2-14
2-14
2-15
2-15
2-17
2-18
2-18
2-19
2-21
2-22
2-22
2-23
2-23
2-24
2-24
2-25
2-25
2-27
2-28
Using MS-DOS With Your Computer
Starting and Exiting MS-DOS . . . . . . . . . . . . . . . . . . . . . . . . . 3-2
Changing the Current Drive. . . . . . . . . . . . . . . . . . . . . . . . . . . 3-2
The MS-DOS Command Format. . . . . . . . . . . . . . . . . . . . . . . 3-4
Entering MS-DOS Commands. . . . . . . . . . . . . . . . . . . . . . . . . 3-5
3-5
Storing Data . . . . . . . . . . . . . . . . . . . . . . . . . . . . . . . . . . . . . . .
.
.
.
.
.
.
.
.
.
.
.
.
.
.
.
.
.
.
.
.
.
.
.
.
.
.
.
.
.
.
.
.
.
.
.
3-6
Using Directories.
.
.
.
.
.
.
.
.
.
.
.
.
.
.
.
.
.
.
.
.
.
.
.
.
.
.
.
3-8
The Current Directory
Listing the Contents of a Directory . . . . . . . . . . . . . . . . . 3-9
3-10
Using Pathnames . . . . . . . . . . . . . . . . . . . . . . . . . . . . . . .
Creating Directories . . . . . . . . . . . . . . . . . . . . . . . . . . . . . 3-11
Changing Directories . . . . . . . . . . . . . . . . . . . . . . . . . . . . 3-12
Copying From One Directory to Another. . . . . . . . . . . . 3-13
Deleting a Directory. . . . . . . . . . . . . . . . . . . . . . . . . . . . . 3-14
vi
Formatting Diskettes . . . . . . . . . . . . . . . . . . . . . . . . . . . . . . . . .
Formatting a 1.44MB Diskette . . . . . . . . . . . . . . . . . . . . .
Formatting a 720KB Diskette . . . . . . . . . . . . . . . . . . . . . .
Copying Data . . . . . . . . . . . . . . . . . . . . . . . . . . . . . . . . . . . . . .
Using DISKCOPY . . . . . . . . . . . . . . . . . . . . . . . . . . . . . .
Using COPY . . . . . . . . . . . . . . . . . . . . . . . . . . . . . . . . . . .
Using BACKUP . . . . . . . . . . . . . . . . . . . . . . . . . . . . . . . .
Deleting Data . . . . . . . . . . . . . . . . . . . . . . . . . . . . . . . . . . . . . .
Using the MS-DOS Shell Program . . . . . . . . . . . . . . . . . . . . . .
Using HELP . . . . . . . . . . . . . . . . . . . . . . . . . . . . . . . . . . . . . . . .
Using MENU . . . . . . . . . . . . . . . . . . . . . . . . . . . . . . . . . . . . . .
MENU Utility Options . . . . . . . . . . . . . . . . . . . . . . . . . .
Using an AUTOEXEC.BAT File . . . . . . . . . . . . . . . . . . . . . . .
Creating an AUTOEXEC.BAT File . . . . . . . . . . . . . . . .
Starting an Application Program . . . . . . . . . . . . . . . . . . . . . . .
Chapter 4
3-14
3-15
3-16
3-17
3-18
3-20
3-22
3-24
3-24
3-25
3-27
3-28
3-29
3-30
3-31
Troubleshooting
The Computer Won’t Start . . . . . . . . . . . . . . . . . . . . . . . . . . .
The LCD Screen Is Blank. . . . . . . . . . . . . . . . . . . . . . . . . . . . .
The Monitor Screen Is Blank . . . . . . . . . . . . . . . . . . . . . . . . . .
The Computer Locks Up . . . . . . . . . . . . . . . . . . . . . . . . . . . . .
Diskette Problems . . . . . . . . . . . . . . . . . . . . . . . . . . . . . . . . . . .
Hard Disk Problems. . . . . . . . . . . . . . . . . . . . . . . . . . . . . . . . . .
4-1
4-2
4-3
4-4
4-4
4-5
vii
Appendix A
DIP Switches and Slide Switches
Setting the DIP Switches . . . . . . . . . . . . . . . . . . . . . . . . . . . . .
Accessing the DIP Switches. . . . . . . . . . . . . . . . . . . . . . .
Replacing the Expansion Card Cover . . . . . . . . . . . . . . .
Setting the Slide Switches . . . . . . . . . . . . . . . . . . . . . . . . . . . .
Appendix B
Installing Options
Connecting an External Color Monitor. . . . . . . . . . . . . . . . . .
Connecting an External Diskette Drive. . . . . . . . . . . . . . . . . .
Installing the Internal Modem . . . . . . . . . . . . . . . . . . . . . . . . .
Installing the RAM Card . . . . . . . . . . . . . . . . . . . . . . . . . . . . .
Connecting an External Keyboard . . . . . . . . . . . . . . . . . . . . . .
Installing an Option Card. . . . . . . . . . . . . . . . . . . . . . . . . . . . .
Installing a Math Coprocessor . . . . . . . . . . . . . . . . . . . . . . . . .
Appendix C
Index
B-1
B-3
B-4
B-5
B-6
B-7
B-13
Specifications
Main Unit . . . . . . . . . . . . . . . . . . . . . . . . . . . . . . . . . . . . . . . . .
Interfaces . . . . . . . . . . . . . . . . . . . . . . . . . . . . . . . . . . . . . . . . . .
Keyboard . . . . . . . . . . . . . . . . . . . . . . . . . . . . . . . . . . . . . . . . . .
Mass Storage . . . . . . . . . . . . . . . . . . . . . . . . . . . . . . . . . . . . . . .
Display. . . . . . . . . . . . . . . . . . . . . . . . . . . . . . . . . . . . . . . . . . . .
Power Supply. . . . . . . . . . . . . . . . . . . . . . . . . . . . . . . . . . . . . . .
Power Requirements . . . . . . . . . . . . . . . . . . . . . . . . . . . . . . . . .
Physical Dimensions . . . . . . . . . . . . . . . . . . . . . . . . . . . . . . . . .
Environmental Requirements. . . . . . . . . . . . . . . . . . . . . . . . . .
Options.. . . . . . . . . . . . . . . . . . . . . . . . . . . . . . . . . . . . . . . . . .
Glossary
A-1
A-2
A-9
A-11
C-1
C-1
C-2
C-2
C-2
C-3
C-3
C-3
C-4
C-4
Introduction
Your Epson® Equity™ LT™-286e portable computer is a
compact, high-performance system you can use just about
anywhere: at the office, at home, or on the road. Its
rechargeable battery lets you use it in remote locations when
you don’t have access to an electrical outlet. With the AC
adapter connected, you can use the computer as long as you like
and recharge the battery in the process.
The Equity LT-286e comes with the following:
Q An 80C286 microprocessor
CI
1MB (megabyte) of internal RAM memory
CI One 20 or 40MB removable hard disk
0 One 1.44MB, 3 ‘/z-inch diskette drive
CI A high-contrast, paper-white, backlit LCD (liquid crystal
display) screen
CI An internal, proprietary modem slot
Cl A 2/3-size, IBM® PC AT™-compatible, 8/16-bit internal
expansion slot
Ci A high-capacity battery pack to power the LT-286e for up
to 2 l/2 hours of operation
Q Built-in interfaces for serial, parallel, video, external
diskette drive, and external keyboard connectors
Q An AC adapter and power cord.
Introduction 1
The 80C286 microprocessor inside your Equity LT-286e can
run at an execution speed of either 12 MHz or 8 MHz.
Ordinarily, you’ll want to use the 12 MHz speed to get faster
performance from your computer; a few application programs
may require the 8 MHz speed. A slide switch allows you to
change the speed.
The Equity LT-286e also has a built-in socket for an 80C287
math coprocessor, which you can easily install or have installed
by an authorized Epson dealer or Customer Care Center.
The built-in serial and parallel interfaces allow you to attach
almost any peripheral device, such as an Epson printer or
external modem, to your Equity LT-286e.
You can connect a color monitor to the computer to take
advantage of the color and the larger display. A slide switch lets
you change between the LCD and an external CRT display.
The LT-286e supports MDA, CGA, EGA, and extended EGA
video modes.
You can also connect an Epson external 5 ‘/+inch diskette drive
to the computer to easily exchange data with other computers
that use 5 l/4-inch diskette drives.
The following optional equipment is available from your Epson
dealer:
c3 An 80C287 math coprocessor
LI A 2400-baud, Hayes®-compatible, auto-dial internal modem
LI An internal RAM memory card to expand memory to 2MB
CI An external 1.2MB, 5 ‘/+inch diskette drive
Cl The GW-BASIC® programming language
Cl An additional 20MB or 40MB hard disk drive
2
Introduction
LI An additional battery pack
Cl An additional AC adapter
CL An adapter for an external, Epson keyboard
CI Carrying case.
Your Equity LT-286e comes with MS-DOS? version 4.01, by
Microsoft? MS-DOS 4.01 provides a new Shell feature that lets
you run programs and choose operating system commands from
menus instead of the MS-DOS command prompt. Designed for
both new and experienced users of MS-DOS, the Shell program
lets you tailor your system to your own needs and manage your
programs and data more efficiently.
You’ll find the MS-DOS manuals packed in the box with the
computer. MS-DOS includes the following manuals:
Q MS-DOS Installation Guide-Use this manual to install
MS-DOS on your hard disk.
CI MS-DOS Reference Manual-Use this manual to learn
about the features of MS-DOS and for a complete
description of each MS-DOS command.
Ll MS-DOS Shell User’s Guide-Use this manual to learn
about the new MS-DOS Shell feature.
Q MS-DOS Command Summary-Use this as a quick
reference when you need to check on the format of a
command.
In addition to MS-DOS, Epson has included two time-saving
utilities that make MS-DOS easier to use: HELP and MENU.
The HELP program lets you display information on the screen
about any MS-DOS command. MENU provides an easy way to
run some MS-DOS commands for routine operations, such as
file copying and disk management.
Introduction 3
You can use any application program designed for the IBM
Personal Computer, PC XT™ or PC AT on your Equity
LT-286e.
How To Use This Manual
This manual explains how to set up and care for your Equity
LT-286e. It also describes how to use your computer and run
diagnostic checks.
The eight steps in Chapter 1 explain how to set up your
computer and prepare it for use. On the inside back cover is a
foldout with illustrations of the LT-286e; you may want to refer
to these illustrations while you set up the computer.
Chapter 2 describes general operating procedures for your
computer and explains how to use and care for your disks and
disk drives.
Chapter 3 provides basic instructions for using MS-DOS with
your computer. You can find more detailed information about
MS-DOS in the MS-DOS manuals.
Chapter 4 provides troubleshooting guidelines you can follow if
you encounter any problems while using your Equity LT-286e.
Appendix A describes the DIP switches and slide switches you
need to change if you modify your system’s configuration.
Appendix B explains how to attach an external color monitor,
external diskette drive, or keyboard to your Equity LT-286e and
how to install the Epson internal modem, the Epson RAM card,
an option card, or a math coprocessor. To install other options,
see the instructions that come with the option. For dealerinstalled options, contact an authorized Epson dealer or
Customer Care Center. (See the next section, “Where To Get
Help,” for details.)
4 Introduction
Appendix C lists the Equity LT-286e hardware specifications.
At the back of the manual is a glossary of computer terms.
Where To Get Help
Customer support and service for Epson products is provided by
a network of authorized Epson dealers and Customer Care
Centers throughout the United States. Epson America provides
product information and support to its dealers and Customer
Care Centers.
Therefore, we ask that you contact the business where you
purchased your Epson product to request assistance. If the
people there do not have the answer to your question, they can
obtain it through our dealer support program.
Epson is confident that this policy will provide you with the
assistance you need.
Call the Epson Consumer Information Center at
1-800-922-8911 for the following:
Cl The location of the nearest Epson dealer
Ci The location of the nearest Customer Care Center
D Information on Epson User Groups.
To locate or purchase accessories or supplies, contact your
nearest Epson dealer or call 1-800-873-7766.
Introduction 5
Chapter 1
Setting Up Your System
Setting up your Epson Equity LT-286e portable computer is easy.
Just follow the steps in this chapter. They describe how to
attach the hard disk, connect a printer, and attach the AC
adapter and power cord that come with your Equity LT-286e.
After assembling these parts, you start the computer and run the
system SETUP program.
After you perform these steps, turn to Chapter 2 for information
about using the computer.
The LT-286e has two sets of switches that provide the computer
with information about its configuration each time you turn it
on. The switches are called DIP switches and slide switches.
Both sets of switches are located on the bottom of the
computer.
When the LT-286e is shipped from the factory, these switches
are set for the following type of system:
Ci The internal diskette drive is drive A
0 The LCD screen is set for EGA mode
0 The slide switch is set for the LCD screen
LI The serial port is the primary serial port
CI The parallel port is the primary parallel port
Ll The CPU clock speed is 12 MHz.
If you plan to use this standard setup, continue with the
instructions in this chapter.
Setting Up Your System
1-1
If your system does not match this configuration, you need to
change the appropriate switches as described in Appendix A
before you begin. If you plan to modify your computer by
attaching an external monitor or diskette drive, see Appendix B
for instructions.
Do not turn on the computer, printer, or any peripherals until
the instructions tell you to do so. Otherwise, you may damage
some part of your equipment.
1
1-2
Unpacking
As you unpack the components, be sure to inspect each item. If
anything is missing or damaged, consult your Epson dealer.
Setting Up Your System
In addition to this manual, you should have the following items:
Cl The main unit
5 The battery pack
Ll The AC adapter
5 The power cord
Ll The hard disk drive
Ll The three MS-DOS diskettes: Install, Operating, and Shell
Cl The MS-DOS manuals: MS-DOS Installation Guide,
MS-DOS Reference Manual, MS-DOS Shell User’s Guide,
MS-DOS Command Summary.
You’ll also find a registration card with the main unit. Fill out
this card now and mail it to Epson. With your registration card
on file, Epson can send you update information.
Please keep a copy of your sales receipt for warranty verification.
Your receipt is all that is required for warranty service.
Be sure to keep your packing materials. They provide the best
protection for your computer if you need to ship it later.
3 Installing the Hard Disk Drive
/1
Your hard disk drive, which is either 20MB or 40MB, comes in
its own package. Your dealer may have installed the hard disk; if
so, you can skip this step.
You install the hard disk drive above the keyboard panel on the
computer. To access the slot for the hard disk drive, open the
screen by pressing the latch release button in the center of the
computer. Then lift the screen up and back.
Setting Up Your System
1-3
Follow these steps to install the hard disk drive:
1. Unwrap the hard disk drive.
2. Face the front of the computer and hold the hard disk drive
with the PUSH button on the left and the retractable tabs
on the right.
3. Position the hard disk drive directly above the hard disk
drive slot on the computer.
The connectors on the hard disk drive fit into the sockets
on the computer.
1-4
Setting Up Your System
4. Keep the hard disk drive level and lower it straight down
into the hard disk drive slot. If you lower either side first,
the connectors do not fit into the sockets.
5. Press firmly (but carefully) on the hard disk drive until it
snaps into place.
The TYPE indicator on the left side identifies the type of hard
disk drive. You use this TYPE for the SETUP program. A 20MB
hard disk is TYPE 2; a 40MB hard disk is TYPE 17.
A new hard disk drive must be partitioned and formatted to run
an operating system. The MS-DOS installation program, called
SELECT, performs these functions. See your MS-DOS
Installation Guide for details after you complete the remaining
steps in this chapter.
Setting Up Your System
1-5
3
Connecting a Printer
The Equity LT-286e has both parallel and serial interfaces
(ports). You can easily connect a printer or plotter that has
either type of interface. Just follow the instructions below. Of
course, Epson offers a full range of printer products; consult your
Epson dealer for more information.
Using the Parallel Interface
The computer’s Centronics®-compatible parallel interface
provides a 25-pin, D-shaped female connector. Most Epson
printers have parallel interfaces. To connect a printer to the
computer, you need an IBM PC-compatible printer cable. If
you’re not sure which one you need, consult your Epson dealer.
Once you. have a printer cable, follow these steps to connect
your printer to the parallel interface labeled PRINTER on the
computer:
1. Place the printer next to your computer.
2.
1-6
Before you connect the printer, make sure the power
switches on the computer and printer are off. (The power
switch for your computer is located on the right side of the
machine).
Setting Up Your System
3. Press down on the release tab to open the computer’s
interface cover, as shown below.
4. One end of the printer cable has a 25-pin, D-shaped male
connector. (See your printer manual if you cannot identify
this connector.) Connect this end to the parallel connector
labeled PRINTER on the right side of the computer, as
shown below. If the plug has retaining screws, tighten them
by hand or with a screwdriver.
Setting Up Your System
1-7
5. Connect the other end of the cable to the printer as shown
in the following illustration. To secure the cable, squeeze
the clips at each side of the printer connector and push
them into place.
6.
Plug the printer’s power cable into an electrical outlet.
The standard DIP switch settings for the LT-286e define your
parallel port as the primary parallel port. If you think the DIP
switch settings have been changed or you would like a different
setting, see “Setting the DIP Switches” in Appendix A.
1-8
Setting Up Your System
Using the Serial Interface
If you have a printer or other peripheral device that uses a serial
interface, connect it to the serial interface labeled RS-232C on
the right side of the computer.
serial pot-l
The Equity LT-286e uses an IBM PC AT-compatible, 9-pin,
D-shaped male connector, so be sure you have a compatible
cable or an adapting cable that converts the 9-pin output to the
standard 25-pin output. To connect a serial device, follow the
steps above for connecting a parallel device.
Make sure the serial port is set up to function properly. If you
are using the port for a serial printer, you must also redirect
printer output from the parallel port to the serial port. Use the
MS-DOS MODE command (or the Epson MENU program) to
make these changes. See your MS-DOS Reference Manual for
instructions.
The standard DIP switch settings for the LT-286e define your
serial port as the primary serial port. If you think the DIP switch
settings have been changed or you would like a different setting,
see “Setting the DIP Switches” in Appendix A.
Setting Up Your System
1-9
4
Connecting the AC Adapter
Follow these steps to connect the AC adapter:
1. Make sure the computer’s power switch (located on the
right side of the computer) is turned off.
2. Turn the computer around so the back panel is facing you.
Position the back panel slightly over the edge of the desk or
table.
3. The end of the AC adapter cable is shaped like a box.
Notice the plastic safety cover that protects the connector
on the AC adapter. Slide the release tab in the direction
shown on the tab to release the safety cover. Lift off the
cover and store it in a safe place.
1-10
Setting Up Your System
4. Slide this box up into the slots on the connector on the
back panel of the computer. Press the connector box up
until it snaps into place.
Be sure to read “Using the AC Adapter” in Chapter 2 for more
information about the AC adapter.
Setting Up Your System
1-11
When you are not using the AC adapter, replace the safety
cover that protects the connector.
WARNING
Do not connect or disconnect the AC adapter when the
computer is turned on.
Keep the AC adapter at least six inches away from your
computer and disks.
1-12
Setting Up Your System
Connecting the Power Cord
Follow these steps to connect the power cord:
1. Connect the power cord to the adapter’s input socket.
2.
Plug the other end of the power cord into a grounded,
120-volt, AC wall outlet.
Setting Up Your System
1-13
6
Starting the System
After you complete steps 1 through 5, you’re ready to turn on
the power and start using your Equity LT-286e computer. Read
these safety rules first to avoid accidentally damaging your
computer or injuring yourself:
Cl
Do not attempt to dismantle any part of the computer. If
there is a hardware problem you cannot solve after reading
Chapter 4 on troubleshooting, consult your Epson dealer.
CI Never turn off or reset your computer while a disk drive is
in use; this can destroy data stored on the disk or make the
entire disk unusable. The disk drive indicators are located
on the status indicator bar. The right disk-in-use icon
indicates that the hard disk drive is in use. The left disk-inuse icon indicates that the built-in diskette drive is in use.
D Always wait at least five seconds after you switch off the
power before switching it back on. Turning the power off
and on rapidly can damage the computer’s circuitry.
Cl Do not leave a beverage on top of or next to your system.
Spilled liquid can damage the circuitry of your components.
Turning On the Computer
After you have connected the AC adapter and power cord, you
can turn on your computer. Leave the AC adapter connected
while you use the computer.
You can turn on your computer with or without a system
diskette in the diskette drive. For now, leave the drive empty.
1-14
Setting Up Your System
To turn on your computer, follow these steps:
1. Turn on any peripheral devices, such as a printer, an
external diskette drive, or a color monitor.
2. Turn on the computer by pressing the power switch on the
right side of the computer. Press the switch toward the back
of the computer.
power switch
The speed indicator on the status bar shows your operating
speed (12 MHz), and after a few seconds the computer begins to
perform an internal self test. This is a diagnostic program the
computer runs whenever you turn it on. The power-on self test
checks the RAM (random access memory), keyboard, system
board, and peripheral interfaces before the computer begins
normal operation.
Setting Up Your System
1-15
Adjusting Screen Contrast and Brightness
If you cannot see text on the screen clearly, use the levers on
the right side of the screen to adjust the screen’s contrast and
brightness. The levers are shown below:
The contrast lever on the right determines how bright the
characters appear against the background. To increase the
contrast, move the lever up. To decrease it, move the lever down.
The brightness lever on the left controls the intensity of the
screen’s backlighting. To make the backlighting brighter, move
the lever up. To decrease the backlighting, move the lever
down. When you’re running the computer on the battery, do
not make the screen brighter than necessary to read the text
clearly. This helps to conserve the battery’s charge.
Initial Screen Display
After the computer completes its self test, a message tells you
how much RAM is available:
01024 KB OK
Next you are prompted to run the SETUP program.
1-16
Setting Up Your System
7
Running the SETUP Program
When you turn on your computer for the first time, run the
SETUP program to define how your computer is set up. This is a
simple procedure that you must do at least once. You may need
to do it again later if you want to change a setting.
The SETUP program is stored in read-only memory (ROM).
You can access this program only when you turn on or reset the
computer.
The SETUP program lets you specify the following:
Q The current date and time
D The type of hard disk drive you have
c;1
The type of diskette drive you have
Q Whether you have installed an external 5 ‘&inch diskette
drive.
The SETUP program automatically displays these configuration
settings:
il The type of display you’re using, including screen width
LI The amount of RAM in your computer
U Whether you have installed an 80C287 math coprocessor.
The settings you specify with the SETUP program are recorded
in a special area of memory called CMOS RAM. This memory
is backed up by a battery, so it will not be erased when you turn
off or reset the computer. Whenever you turn on the computer,
it reads the settings stored in CMOS RAM. If there are any
differences between those settings and the DIP switch settings,
you see an error message. If this occurs, run the SETUP program
or correct your DIP switch settings.
Setting Up Your System
1-17
Starting the SETUP Program
After the self test completes, you see this prompt:
Press <DEL>
key to run SETUP
utility.
To start the SETUP program, follow these steps:
1. Press Del.
2. You see this message and prompt:
Want to run SETUP utility (Y/N)?
Press Y and Enter.
3. You see a screen titled CMOS SETUP. The first prompt is:
Current d a t e i s . . . . . . . m m - d d - y y y y
Enter new date (MM-DD-YYYY)?...
Enter the correct date in the format shown, or press Enter
to use the displayed date.
If you type an invalid entry, the program beeps. The cursor
returns to the beginning of the field so you can enter the
correct value.
4. Next you see this prompt:
Current t i m e i s . . . . . . . . h h . m m . s s
Enter new time (HH:MM:SS)?....
Enter the correct time in the format shown, or press Enter
to use the displayed time.
1-18
Setting Up Your System
5. The SETUP program now displays the type of display you
are using and the current screen width. You cannot change
these definitions; the computer automatically determines
the type of display you are using based on your DIP switch
settings.
The first time you run SETUP, you must define the type of
hard disk drive you have installed. You see this warning:
***WARNING***
Entering the wrong disk drive TYPE causes
improper operation of the disk.
If disk not installed, press <RETURN>.
SETUP then displays these prompts:
Enter disk drive C type (1-47)? . . .
For disk TYPE details, press <ESC>.
If you press ESC, SETUP displays a list of hard disk types.
The detail in this list is for service personnel only. If you
have a 20MB hard disk, the type is 2. A 40MB hard disk
drive is type 17.
Enter the disk type for drive C, either 2 or 17, and press
Enter.
6. SETUP displays this prompt:
Fixed disk drive D type . . .
Press Enter because an external hard disk is not installed.
7. You now identify the type of diskette drives attached to the
computer. You see this prompt:
Enter diskette drive A type (1-3)? . . . .
Setting Up Your System
1-19
The screen shows you these values to enter for diskette
drives:
( 1 ) = 1 . 2 M B , 5 1/4" diskette drive
(2) = 720 KB, 3 1/2" diskette drive
(3) = 1.44 MB, 3 1/2" diskette drive
Press 3 and Enter for drive A.
8.
SETUP displays this prompt:
Enter diskette drive B type (1-3)? . . . .
If you have an external diskette drive attached, enter type 1.
If you have not installed an external drive, press Enter.
9. After you specify the disk drive types, SETUP displays other
system parameters. The screen looks similar to the
following:
CMOS SETUP
Current date is . . . . . . . . . . . ...04-17-1989
Enter new date (MM-DD-YYYY)?..
Current time is . . . . . . . . . . . . ..10:00:00
Enter new time (HH:MM:SS)?....
Primary display is . . . . . . . . . ..Color display
Current screen width is . . . ...80 column
Fixed disk drive C type ...... 2
Fixed disk drive D type .... ..Not installed
Diskette drive A is .......... .
Diskette drive B is ........ ..Not installed
Base memory size ........... ..640 KB
Expansion memory size ...... ..384 KB
Numeric processor.............Absent
Are these options correct (Y/N)?
1-20
Setting Up Your System
If you need to make corrections to the settings, press N and
Enter. SETUP returns to the date and time prompts, and
you can make corrections to your selections.
If the settings are correct, continue with step 8, “Inserting
the Install Diskette.”
When you run the SETUP program again, you are not asked to
specify the hard disk drive types. SETUP automatically displays
the type you specified the first time you ran the program.
--
8
Inserting the Install Diskette
Follow these steps to insert the MS-DOS Install diskette:
1. Hold the diskette with the printed label facing up and the
arrow pointing into the diskette drive, as shown below.
Insert the diskette in the drive so that it clicks into place.
When the diskette is all the way in, the release button pops
out. For more information on inserting, removing, and
caring for diskettes, see Chapter 2.
Setting Up Your System
1-21
2. Now press Y and Enter in response to the SETUP program
prompt:
Are these options correct
(Y/N)?
The system reboots with the new setup information. You
see the self test and the SETUP prompt.
3. This time ignore the SETUP prompt. The computer
automatically loads the operating system and starts the
MS-DOS installation program, which is called SELECT.
The SELECT program automatically partitions and formats
your hard disk, creates an AUTOEXEC.BAT file and a
CONFIG.SYS file based on your responses to prompts, and
copies the MS-DOS files to the hard disk.
After you have copied the MS-DOS files onto the hard disk,
your original MS-DOS diskettes become your backup copies.
Store these diskettes in a safe place.
See your MS-DOS Installation Guide for a complete description
of SELECT and how to install MS-DOS on your computer.
1-22
Setting Up Your System
Chapter 2
Using the Equity LT-286e
This chapter describes some basic procedures for using your
computer.
Using the AC Adapter
The Equity LT-286e can be powered by its external battery pack
or by the AC adapter. When you connect the AC adapter to
the computer and to an electrical outlet, the outlet supplies the
power to the computer. To preserve the battery’s charge, use the
AC adapter whenever you have access to an electrical outlet.
If the battery pack is connected to the computer, and you
connect the AC adapter to the battery pack and to an electrical
outlet, the AC adapter recharges the battery. See the next
section for details.
-
If you are not using the AC adapter and the Battery in Use icon
on the status indicator bar starts flashing, save all your work and
power off the computer before connecting the AC adapter.
(When the battery is low, connecting the AC adapter may reset
the computer.)
Because the adapter can operate at voltages from 100 to 240
volts, you can use your Equity LT-286e in countries other than
the United States provided you have the appropriate adapter
plug.
-
Use the AC adapter to recharge the battery as described in the
next section.
Using the Equity LT-286e
2-1
WARNING
Keep the AC adapter at least six inches away from your
computer and any disks. Do not connect or disconnect the
AC adapter when the computer is turned on.
Using the Battery
The battery pack that comes with the Equity LT-286e contains
NiCad (nickel cadmium) batteries that power the computer
when the AC adapter is not connected. The battery pack is
rechargeable.
You need to recharge the battery pack at the following times:
Q Before using the battery pack with the computer for the first
time
U If the battery has not been used for a long time
D
If the Battery in Use icon on the status indicator bar starts
flashing and you hear a beep.
After the Battery in Use icon starts to flash, you have a
maximum of 10 to 15 minutes before the battery charge is
completely gone. If you continue using the computer without
connecting the adapter, power runs out and you will lose data.
To recharge the battery, leave the battery pack connected to
the computer and connect the AC adapter to the battery pack.
Then connect the power cord to the AC adapter and to an
electrical outlet. You can charge the battery whether the
computer is on or off. For the maximum charge, leave the AC
adapter connected for eight hours. The battery pack cannot be
overcharged, so don’t worry if you leave it connected for more
than eight hours.
2-2
Using the Equity LT-286e
Remember the following when you are charging the battery:
LI
Use only the AC adapter that comes with the Equity
LT-286e. Using a different adapter can damage the
computer and/or the battery pack.
D Charge the battery for at least eight hours. If you charge the
battery for short periods, it runs low sooner.
The length of time the battery provides power after being
charged depends on how you are using the computer. A fully
charged battery provides approximately one to four hours of use.
If you are working with a program that makes extensive use of
the hard disk or if you are using the diskette drive, you may
need to recharge the battery sooner.
To increase the amount of time you can operate the LT-286e
using the battery, follow these guidelines:
u Lower the brightness of the backlight to its lowest level.
Use the brightness lever on the right side of the screen.
cl Select a clock speed of 8 MHz. Set the CLOCK slide switch
on the bottom of the computer.
CI Using HDDPSAVE, turn off the hard disk drive when you
are not using it. Remember that powering up the hard disk
drive uses power, so set a realistic time period for the power
to be turned off.
cl Using SETLCD, turn off the backlight to the LCD when
you are not using the keyboard.
Using the Equity LT-286e
2-3
To maximize the charge time your battery supplies, completely
discharge and then recharge the battery from time to time. To
do this, follow these steps:
1. Let the battery drain all the way down.
2. When the Battery in Use icon starts to flash, save your work
in progress (if any) and exit any program you are using.
3. Leave the computer on, but do not use it. After about 10 to
20 minutes, the icons on the status indicator bar go dark,
indicating the battery is discharged.
4. Now give the battery a full, eight-hour charge.
Connecting the Battery Pack
Before you can use the LT-286e without the AC adapter, you
must install the battery pack. Follow these steps:
1. Make sure the power switch on the computer is off.
2. Turn the computer around so its back is facing you. Position
the back of the computer slightly over the edge of the desk
to make it easier to slide the battery pack into place.
3. Remove the safety cover that protects the metal connector
on the battery pack.
2-4
Using the Equity LT-286e
4. Align the two metal connectors on the battery pack with
the slots on the back of the computer, as shown below.
5. Pull the battery pack up until it snaps into place.
When the battery pack is connected, you can either use the
power from the battery pack or attach the AC adapter for
unlimited power.
To remove the battery pack, follow these steps:
1. Make sure the computer is off.
2.
Disconnect the AC adapter.
3. Turn the computer around so the back is facing you. Make
sure the back of the computer is slightly over the edge of the
desk so you can slide the battery pack down.
Using the Equity LT-286e
2-5
4. While pulling the release tabs (on each side of the battery
pack) toward you, press down on the battery pack. Slide the
battery pack down and off the computer.
Note
When you are not using the battery pack, replace the safety
cover that protects the metal connector.
2-6
Using the Equity LT-286e
Status Indicator Bar
The status indicator bar above the keyboard provides
information about the computer’s operation.
cl
Indicates when you are accessing the hard
disk drive.
Indicates when you are accessing the
internal diskette drive.
EXT.FD
12 MHZ
Indicates when the FDD EXTANT slide
switch is in the EXT position.
Displays the current CPU clock speed,
either 8 MHz or 12 MHz.
Indicates when you are using the battery
pack; blinks when the battery pack charge
is low.
Indicates when you select an external
CRT.
Using the Equity LT-286e
2-7
Indicates when you can use the LCD
display; blinks when the display is in
standby mode.
SCRL
Indicates when the internal keyboard is in
Scroll Lock mode; does not respond to the
modes of an external keyboard.
NUM
Indicates when the internal keyboard is in
Num Lock mode; does not respond to the
modes of an external keyboard.
CAPS
Indicates when the internal keyboard is in
Caps Lock mode; does not respond to the
modes of an external keyboard.
WARNING
Do not turn off your computer when either disk drive
indicator is illuminated. Also, do not remove a diskette when
the right diskette indicator is illuminated. If you do, you may
lose data.
The SCRL, NUM, and CAPS icons indicate whether the
corresponding key functions are enabled. See “Special Keys on
the Equity LT-286e Keyboard” later in this chapter.
2-8
Using the Equity LT-286e
Opening and Closing the Screen
When you are not using the computer or you want to move it,
turn it off and close the screen, as shown below. Be sure the
screen locks into the bottom part of the computer.
To open the screen, press the latch release button in the center
of the computer (shown below). Then lift the screen back. You
can position the screen at a variety of viewing angles.
Using the Equity LT-286e
2-9
Note
Always set the computer in a flat, horizontal position before
opening it.
If you close the screen while the computer is running, you hear
a warning beep. Always turn off the computer before closing the
screen.
Using the Handle
The Equity LT-286e has a convenient carrying handle. To use
the handle, pull it out from the computer, as shown below.
Be sure the screen is closed whenever you carry the computer by
its handle.
To avoid accidental damage to your Equity LT-286e, always
store the computer in a flat, horizontal position. Do not leave it
standing upright on its back panel.
2-10
Using the Equity LT-286e
Selecting Execution Speed
The Equity LT-286e can operate at two execution speeds:
8 MHz and 12 MHz. At the higher speed, the computer
performs all tasks more quickly. You can select the slower speed
to run application programs that have specific timing
requirements and to prolong the battery’s charge.
WARNING
Do not change the execution speed while you are running a
program. Always complete your current operation and exit
the program first. You must turn the computer off before
changing execution speed.
To change the speed follow these steps:
1. Turn off the computer.
2. Turn the computer upside down.
3. Move the CLOCK switch located on the bottom of the
computer.
n
m CLOCK
1812)
m CRT/LCD
Ia
FDD
EXT/INT
The CLOCK switch has two positions. The left position is
8 MHz; the right position is 12 MHz.
Using the Equity LT-286e
2-11
Defining LCD Options
The SETLCD utility defines certain options for your LCD
screen:
0 The backlight period-You can turn off backlighting on the
LCD screen if the computer is not used for a period of time;
this prolongs the battery’s charge.
CI The gray scale-You can select one of four available gray
scale modes. The gray-scale mode governs the way your
LCD screen displays color information.
Q The reverse video mode-You can display in normal mode,
white on black, or in reverse mode, black on white.
Backlight Period
Use the SETLCD program to specify a backlight period, which
is the length of time the LCD screen remains illuminated before
the computer turns it off. Initially, the screen is always on.
When the computer turns off the screen’s backlighting, the
screen is in standby mode.
To conserve the battery’s charge when you are running your
computer without the AC adapter, specify a backlight period
using the SETLCD program. The backlight period is a number
of minutes from 1 to 60.
You can change the value for the period of time the computer
waits before darkening the screen using the SETLCD program.
To specify a backlight period, type the following at the system
prompt:
SETLCD /xx
2-12
Using the Equity LT-286e
where XX can be any value from 1 to 60. Then press Enter.
For example, to turn off the screen’s backlighting after two
minutes, type:
SETLCD /2
and press Enter. If you don’t press any key for two minutes, the
system automatically turns off the screen’s backlighting. To turn
it on again, press any key. To do this without disturbing a
program running on your computer, press Shift, Ctrl, or Alt.
To make sure backlighting is always on, type one of the
following:
SETLCD /0
SETLCD /00
SETLCD /ALL
and press Enter.
Note
When you are running a memory-resident program that
intercepts keyboard entries, the computer cannot restore the
screen’s backlighting after it has been turned off. If the
screen’s backlighting does not come back on when you press
a key, you may want to set the backlight so it is always on,
If you do not use the SETLCD program, the screen is always on.
Using the Equity LT-286e
2-13
LCD Adjustment Options
After you load the SETLCD program (by typing SETLCD
/xx and pressing Enter), you see these messages:
Follow these steps to change the LCD display
performance:
Step 1: Press "Ctrl" & "left-shift"
simultaneously.
Step 2: Press "S" to change the LCD color
palette on the screen.
Step 3: Press "I" to invert the BLACK/WHITE
on the LCD.
Step 4: Press ANY OTHER KEY to resume the
keyboard function.
The backlight will turn off after xx
minute(s).
Press Ctrl and the Shift key on the left to enter LCD adjustment
mode. In this mode, you can adjust the gray scale and select
reverse video mode.
Gray scale modes
You can use the LCD adjustment mode of the SETLCD
program to select one of four available gray scale modes. The
gray scale mode governs the way the LCD displays color
information.
After you load the SETLCD program, load one of your programs
that displays a graphics screen. Now press Ctrl and the left Shift
key to enter LCD adjustment mode. In this mode, you can
adjust the gray scale; just press S to see the different gray scale
levels. Select the level that works best with the graphics being
displayed.
2-14
Using the Equity LT-286e
Reverse video mode
The reverse video function lets you display text on the LCD
screen in normal or reverse mode. In normal mode, the LCD
displays white characters on a black background. In reverse
mode, the LCD displays black characters on a white
background.
After you load the SETLCD program and enter the LCD
adjustment mode as described above, press I to reverse the
display mode. (The I stands for invert.) Press I again to switch
back to normal mode. Press Enter to exit this function.
Special Keys on the Equity LT-286e Keyboard
The illustration below shows the Equity LT-286e keyboard.
Certain keys on your keyboard serve special functions when
your computer is running application programs. For instructions
on how to use keys for specific software functions, consult the
manual that came with the program you’re running.
Using the Equity LT-286e
2-15
The Num Lock, Scroll Lock, and Caps Lock keys work as
toggles; press them once to turn on a function and again to turn
it off. When a function is on, the corresponding light on the
status indicator bar is illuminated. When a function is off, the
light is off.
The following table describes special keys on the Equity
LT-286e keyboard.
2-16
Key
Purpose
F1 - F10
Perform special functions within application
programs.
Esc
Cancels the current command line or operation
in some application programs.
Tab ‘5
Moves the cursor one tab to the right in normal
mode and one tab to the left in Shift mode.
Ctrl
Works with other keys to perform special
functions, such as editing operations in
MS-DOS.
Shift
Changes the letter keys from lowercase to
uppercase while held down and changes other
keys from their normal characters or functions
to their alternate characters or functions. When
the Caps icon is illuminated, changes letter
keys from uppercase to lowercase.
Alt
Works with other keys to enter alternate
character codes.
Shift + Prt Sc
Prints text on the screen to the printer.
Scroll Lock
Used by some application programs.
Break
Used by some application programs.
Num Lock
Changes the function of the cursor keys. For
example, when the Num Lock function is on
and you press 1, you get the number 2.
Using the Equity LT-286e
Key
Purpose
Caps Lock
Changes the letter keys from lowercase to
uppercase; changes back to lowercase when
pressed again. This key does not affect the
numeric/symbol keys on the top row of the
keyboard.
Ins
Turns the insert function on and off.
Del
Deletes the character at the cursor.
Enter J
Ends a line of keyboard input or executes a
command.
t
Moves the cursor back one space, deleting the
character to the left (Backspace).
Home, End,
PgUp, PgDn
t-+.Lt
Control cursor location within application
programs. With Num Lock on, you can use
these keys as a numeric keypad.
Sys Req
Used by some application programs.
Using Diskettes
Use diskette drives to store data on diskettes and retrieve and
use stored data. The Equity LT-286e has a 1.44MB, 3 l/z-inch
diskette drive; it also supports an optional, external 1.2MB,
5 ‘/+inch diskette drive. This section explains how diskettes
work and tells you how to do the following:
Ll Choose diskettes
Ci Care for diskettes
CI Make backup copies
CI Write-protect diskettes.
Using the Equity LT-286e
2-17
How Diskettes Work
The diskettes you use are flexible plastic, coated with a
magnetic material and enclosed in a protective plastic case.
Information is recorded in magnetic patterns on both surfaces
of the diskette. Because data is stored magnetically, you can
retrieve, record, and erase data, just as you play, record, and
erase music on cassette tapes.
When you insert a diskette in a drive, a metal shutter above the
diskette’s access area moves aside to expose the diskette surface.
When your computer reads data from or writes data to the
diskette, it causes the diskette to spin within its plastic casing.
Then the drive’s read/write head locates the appropriate
position on the diskette and performs the operation you specify.
Choosing Diskettes for the Equity LT-286e
Be sure to buy high-quality diskettes to use in your Equity
LT-286e. You can use two kinds of diskettes:
Cl 3 l/z-inch, 720KB, double-sided, double-density diskettes
Ll 3 l/z-inch, 1.44MB, double-sided, high-density diskettes.
On a 720KB diskette, you can store the equivalent of about
300 pages of text. You can store twice as much information on
1.44MB diskettes, but the 3 ‘/z-inch diskette drives on some
computers cannot use these high-capacity diskettes. If you are
planning to exchange data with a computer that has a 720KB
diskette drive, use 720KB diskettes in your Equity LT-286e.
If you have an external, 5 ‘/.+-inch, 1.2MB (high-capacity)
diskette drive, use 5 l/+-inch, double-sided, high-density
diskettes in this drive. These diskettes can hold the equivalent
of about 500 pages of text and are compatible with the highcapacity diskette drives used on some models of the IBM AT.
The 1.2MB diskette drive can read 360KB diskettes.
2-18
Using the Equity LT-286e
Because of their size difference, you cannot use a 3 ‘/z-inch
diskette in a 5 ‘/.+-inch drive or vice versa. If you have both types
of drives, however, you can copy individual files or groups of
files from one drive to the other with the COPY and XCOPY
commands. See Chapter 3 or your MS-DOS manuals for
information about the COPY and XCOPY commands.
You need to format new diskettes before you can use them.
Formatting prepares a diskette to receive data. Formatting also
erases any data previously stored on a diskette, so be sure to
format only new blank diskettes or diskettes that contain data
you want to erase. See Chapter 3 for information about
formatting diskettes.
Note
You must format double-sided, double-density, 3 l/z-mch
diskettes to store 720KB of data, if you are using double+
sided, high-density, 3 l/&nch diskettes, you must format them
to store 1.44MB of data.
Caring for Diskettes
The 3 ‘/z-inch diskettes are sturdy and reliable, but are not
indestructible. To avoid damaging your diskettes and losing
data, take these precautions:
Ci Do not remove a diskette or turn off the computer while the
diskette drive icon is on. This icon indicates that the
computer is copying data to or from a diskette. If you
interrupt this process, you may destroy data.
0 Remove all diskettes before you turn off the computer.
Cl Keep diskettes away from dust and dirt. Small particles of
dust or dirt can scratch the magnetic surface and destroy
data. Dust can also ruin the read/write heads in a diskette
drive.
Using the Equity LT-286e
2-19
Cl Keep diskettes away from magnetic fields. (Remember,
diskettes store data magnetically; strong magnetic fields can
scramble that data.) Do not set your diskettes on such
common magnetic sources as electrical appliances,
telephones, television sets, and loudspeakers. Do not place
your diskettes near your hard disk drive or the AC adapter.
Ll Keep diskettes in a moderate environment. They work best
at room temperature and in normal humidity. Never leave
diskettes sitting in the sun or in extreme cold or heat. The
temperature in a car in the middle of summer or winter can
cause severe damage.
LI Do not expose a diskette’s magnetic surface by sliding the
metal shutter. Never touch a diskette’s magnetic surface.
The oil on your fingertips can damage the diskette and also
the drive.
LI
Do not place anything on top of your diskettes, and make
sure they do not get bent.
CI Never wipe, brush, or try to clean diskettes in any way.
Ci Store diskettes properly in diskette containers.
If you use an external, 5 ‘/.+inch diskette drive, be especially
careful with your 5 ‘/+inch diskettes. Because they are more
flexible, and because they do not have a metal shutter
protecting their magnetic surfaces, they are more easily
damaged than 3 l/z-inch diskettes. Always keep 5 ‘/+inch
diskettes in their protective envelopes when you are not using
them.
2-20
Using the Equity LT-286e
Inserting and Removing Diskettes
To insert a diskette into the drive, hold it with the label facing
up and the arrow on the left side pointing into the computer:
Slide the diskette into the drive until it clicks into place.
To remove a diskette, press the release button on the diskette
drive. When the diskette pops out of the drive, pull it out and
store it properly in a diskette container.
WARNING
Never remove a diskette or turn off the computer while the
diskette drive icon is on. This might cause loss of data. Also,
be sure to remove all diskettes before you turn off the
computer.
Using the Equity LT-286e
2-21
Making Backup Copies
Copy all diskettes that contain programs. After you make your
copies, store the originals in a safe place away from your
working diskettes and use only the copies.
For general instructions on copying diskettes or hard disk files,
see Chapter 3 or your MS-DOS Reference Manual.
Write-Protecting Diskettes
You can write-protect a diskette to prevent its data from being
altered. When a diskette is write-protected, you can copy data
from it, but you cannot store new data, modify existing data,
erase files, or format the diskette.
The write-protect mechanism is a small switch on the lowerright corner on the back of the diskette. To write-protect the
diskette, slide the switch down toward the edge of the diskette
to expose a small opening.
la
2-22
Using the Equity LT-286e
-write-protect
notch
To remove the write protection, move the switch up toward the
center of the diskette to cover the opening.
Using the Hard Disk Drive
Unlike a diskette, a hard disk is rigid and fixed in place. It is
sealed in a protective environment free of dust and dirt. A hard
disk stores data the same way as a diskette, but it works much
faster and has a much larger storage capacity.
You can do almost all your work on the hard disk and copy your
files to diskettes whenever you need to make backups or transfer
data to another computer system. However, to ensure that you
always have plenty of space available, keep only files you use
regularly on the hard disk. Store your other files on diskettes.
Note
You must prepare a new hard disk before using it for the first
time. Perform all procedures in your MS-DOS Installation
Guide.
Caring for the Hard Disk
To avoid damaging your hard disk, take these precautions:
U Keep your computer away from magnetic fields, such as
electrical appliances, telephones, and loudspeakers.
LI Keep your computer in a moderate environment. Hard disks
work best at room temperature and in normal humidity.
Q Never turn off the computer’s power or remove the hard
disk when the hard disk icon is on. This icon indicates that
the computer is currently copying data to or from the hard
disk. If you interrupt this process, you may lose data.
Using he Equity LT-286e
2-23
0 Never remove the hard disk unit when the computer’s
power is on.
0 Never attempt to open the hard disk unit. The disk itself is
enclosed in an airtight container to protect it from dust.
Q Keep the AC adapter at least six inches away from your
computer and disks.
Protecting the Data on Your Hard Disk
Although the hard disk is very reliable, you must back up your
hard disk files onto diskettes in case you lose some data
accidentally.
Make backup copies of all your system and application program
diskettes before copying the program files to the hard disk. Copy
your data files frequently to keep your backup diskettes up to
date.
Use the Epson MENU utility or the MS-DOS BACKUP
command to back up your hard disk files. Use the MENU utility
or the MS-DOS DISKCOPY command to make copies of your
system and program diskettes. For instructions on using these
backup utilities, see Chapter 3 or your MS-DOS manuals.
Improving Hard Disk Performance
MS-DOS includes a program called FASTOPEN, and a device
driver called SMARTDRV.SYS, that can improve your hard
disk’s performance. For information about using these features,
see your MS-DOS Reference Manual.
2-24
Using the Equity LT-286e
Turning Off the Hard Disk
If you are running the computer on its battery and you do not
need to use the hard disk, you can use the HDDPSAVE utility
to turn off the hard disk to prolong the battery’s charge. If you
are using the AC adapter, you don’t need to turn off the hard
disk.
You specify the amount of time (between 1 and 18 minutes) you
want the computer to wait before it turns off the hard disk.
After the hard disk drive is off, the computer must turn the hard
disk back on to access it. So be sure to set a realistic time period.
To specify a power-off time, type the following at the system
prompt:
HDDPSAVE
--
/xx
where xx can be any value from 1 to 18. Then press Enter. To
keep the hard disk drive on at all times, type one of the
following and press Enter:
HDDPSAVE
HDDPSAVE
HDDPSAVE
/0
/00
/ALL
Modifying the AUTOEXEC.BAT File
The SELECT program you use to install MS-DOS creates a file
named AUTOEXEC.BAT on your hard disk. This file contains
instructions MS-DOS executes every time you boot your system
from the hard disk. These instructions do the following:
Q Tell MS-DOS where to find its essential system files
Cl Allow you to define certain system parameters
Using the Equity LT-286e
2-25
Q Install the appropriate keyboard information for the country
in which you’re using your computer
Q Allow you to start the MS-DOS Shell program.
These instructions ensure that your system starts up properly
each time you boot it from the hard disk. See your MS-DOS
Installation Guide for details.
You’ll also want to add the SETLCD and HDDPSAVE utilities
to your AUTOEXEC.BAT file. By adding these utilities, you
can set the backlight period for the LCD screen and the poweroff period for the hard disk each time you power on the
computer. Also, by adding the SETLCD utility to the
AUTOEXEC.BAT file, you can modify the gray-scale modes at
any time.
To modify the AUTOEXEC.BAT file created by SELECT,
follow these steps:
1. Type COPY AUTOEXEC.BAT + CON
AUTOEXEC.BAT and press Enter.
2. Type SETLCD /5 and press Enter. This turns off
backlighting after five minutes. Use any time period you
want (between 1 and 60).
3. Type HDDP SAVE / 5 and press Enter. This turns off
power to the hard disk if you do not access the hard disk
for five minutes. Use any time period you want (between
1 and 18).
4. Press F6 and then Enter.
2-26
Using the Equity LT-286e
-
Resetting the Computer
You can reset the computer to reload the operating system or to
restart a program. You may also need to do this if an error occurs
and the computer does not respond to anything you type.
Resetting, however, erases any data in the computer’s temporary
memory (RAM) that you have not stored; so be careful when
you reset your computer.
In MS-DOS, you can hold down Ctrl and press C or Break to
stop a program’s operation and return to the MS-DOS
command prompt. If an error occurs, try this method before you
reset the computer.
There are three ways to reset. Because each is more powerful
than the last, try them in the order listed here:
1. If you are using MS-DOS, hold down Ctrl and Alt and press
Del. The screen goes blank for a moment and then the
computer reloads MS-DOS (MS-DOS must be either on
the hard disk or on a diskette in drive A.) If this does not
correct the problem, try the second method.
2. Press the RESET button on the right side of the computer.
This method works even when the keyboard does not
respond to your commands. If this does not correct the
problem, try the third method.
3. Turn off any peripheral devices and then turn off the
LT-286e. Wait five seconds and then switch the power
back on.
Using the Equity LT-286e
2-27
Turning Off the Computer
Before you turn off your computer, save your data, exit the
program you are using, and then remove all diskettes from the
disk drives. First turn off any peripherals, such as a printer, a
monitor, or an external diskette drive. Then turn off the
computer.
2-28
Using the Equity LT-286e
Chapter 3
Using MS-DOS With Your Computer
Your Equity LT-286e comes with version 4.01 of MS-DOS.
MS-DOS manages the routine work of your computer system,
such as keeping the computer’s memory organized, controlling
the screen display, accepting keyboard input, and directing
external communications.
To communicate with the operating system, you use MS-DOS
commands. How much you need to know about MS-DOS
depends on how you plan to use your computer. If you use it
only for running application programs, the few MS-DOS
commands you need are introduced in this chapter. If you use
advanced features or create your own programs, see your
MS-DOS manuals for a complete description of the features of
the operating system.
This chapter describes the following MS-DOS functions:
0
Starting and exiting MS-DOS
CI Changing the current drive
LI The MS-DOS command format
Cl Entering MS-DOS commands
Q Storing data
LI Using directories
Ci Formatting diskettes
0 Copying data
D Deleting data
Using MS-DOS With Your Computer
3-1
LI Using the MS-DOS Shell program
CI Using the Epson HELP utility
CI Using the Epson MENU utility
0 Using an AUTOEXEC.BAT file
Ki Starting an application program
The information presented in this chapter assumes you are
running MS-DOS from the MS-DOS command prompt, not
from the MS-DOS Shell program. If you plan to use Shell, see
the MS-DOS Shell User’s Guide for a complete description of
how to execute commands using Shell.
Starting and Exiting MS-DOS
Before you can run an MS-DOS application program, MS-DOS
must be running in memory. If you have prepared your hard disk
according to the procedures in the MS-DOS Installation Guide,
MS-DOS loads automatically from your hard disk whenever you
turn on your computer (provided you do not have a diskette in
the diskette drive).
Before you turn off the computer, make sure the MS-DOS
command prompt (such as C> or C : \ > ) appears on the screen.
Then remove your diskettes, turn off any peripheral devices,
and turn off the computer.
Changing the Current Drive
MS-DOS identifies the hard disk as drive C and the 3 ‘/z-inch
diskette drive as drive A. If you have an external 5 ‘&inch
diskette drive, MS-DOS identifies that drive as drive B.
3-2
Using MS-DOS With Your Computer
The C> prompt that appears when you load MS-DOS from the
hard disk tells you that drive C, your hard disk, is the current
drive (also called the default drive). The current drive is the one
that MS-DOS uses for all commands unless you specify a
different drive. For example, if the current drive is drive C and
you type the name of a program, MS-DOS searches drive C for
the program.
If you want to run a program or find a data file on a different
drive, you must specify the name of that drive. You can do this
either by logging onto that drive (making it the current drive)
or by including the drive letter with the filename.
To log onto another drive, type the name of the drive followed
by a colon. Then press Enter. For example, if the current drive
is C and you want to log onto drive A, type A: and press Enter.
Your screen now displays the A> prompt, showing that you are
operating from drive A. Drive A continues to be the current
drive until you log onto a different drive or turn off or reset your
computer.
To access a program or file on another drive without first
logging onto that drive, specify the drive identifier (the name of
the drive followed by a colon) along with the filename. For
example, if you are logged onto drive C and you want to run a
program called WP that is stored on drive A, type A : WP and
press Enter. MS-DOS runs the program on drive A but remains
logged onto drive C.
Note
You can reverse the drive identifiers for the internal 3 ‘/a-inch
and the external 5 ‘I+inch diskette drives by setting DIP
switch SW2-2 to OFF. See “Setting the DIP Switches,” in
Appendix A.
Using MS-DOS With Your Computer
3-3
The MS-DOS Command Format
To enter an MS-DOS command, you need to type the
command in the correct format. The MS-DOS command
format consists of the command name, parameters, and delimiters.
The command name tells MS-DOS the task you want to
perform. Parameters are items that identify the data you want to
process (such as a filename) and change the way a command
works. Delimiters are characters such as spaces or commas that
separate command names and parameters.
Some commands also have optional switches you can use.
A switch is a type of parameter that alters the effect of a
command.
Pathnames may be required in a command if you are specifying
files that are not on the current drive or directory. A pathname
tells MS-DOS where to find a file, and consists of one or more
directory names separated by backslashes. See “Using
Pathnames,” later in this chapter.
There are two kinds of MS-DOS commands: internal and
external. Internal commands are commands that are built into
MS-DOS and can be used any time MS-DOS is loaded into
memory. External commands are stored on your system diskettes
as program files. To run an external command, MS-DOS must
be able to locate the file on a system diskette or on your hard
disk. If the file is not stored in the current drive and directory,
you may need to use a pathname when you enter an external
command.
See your MS-DOS manuals for more information on the
command format and for a detailed description of each
command.
3-4
Using MS-DOS With Your Computer
Entering MS-DOS Commands
You can enter an MS-DOS command when you see the
MS-DOS command prompt. Type the command name and any
necessary parameters and delimiters, and then press Enter to
execute the command. You can type command names in either
uppercase or lowercase letters.
If you make a mistake when typing a command and you notice
it before you press Enter, you can do one of two things:
Cl Use the backspace key to back up and correct the error
LI Press Esc to cancel the command line.
If you press Enter when a command line has an error in it, the
screen displays an error message. Usually, the command prompt
reappears so you can try again. Type the correct command and
press Enter.
Storing Data
You store all your work and programs in files on your hard disk
or diskettes. A data file contains information, such as words,
numbers, or pictures. A program contains instructions that the
computer can understand and execute.
The kind of file you create depends on the MS-DOS commands
or application program you use to create it. Because each
program you use stores data files in its own particular format,
you are likely to encounter problems if you try to read a file
using a different program.
Each file must have a unique filename so that MS-DOS can
find it when you need to retrieve it. The filename consists of
two parts, the name and the extension.
Using MS-DOS With Your Computer
3-5
The name can be up to eight characters in length. It is a good
idea to choose a name that describes the contents of the file.
You can use any characters except blank spaces and the
following symbols:
* \ / [ ] : | < > + = ; . ?
The extension is optional and can be up to three characters
long. You can use the extension to describe the type of data
contained in the file-for example, TXT for a text file. When
you use an extension, separate it from the filename with a
period, like this:
DATA.TXT
Many application programs automatically add extensions to the
data files you create. Lotus® 1-2-3® Release 2, for example,
automatically uses the extension .WK1 for worksheet files.
Microsoft Word@ uses .DOC for its word processing files. Such
default extensions help an application program distinguish its
own data files from files created by other programs. If you have
programs that use default extensions, avoid using those
particular extensions in other contexts.
You can type the name and the extension in either lowercase
or uppercase letters, but do not use uppercase or lowercase
letters to distinguish between files. After you type the filename,
MS-DOS converts all lowercase letters to uppercase.
Using Directories
MS-DOS organizes files by storing them in directories. This
makes it easy for you to find and manage your files. Directories
also list specific information about each file, including the
filename, the size of the file, and the date and time you last
modified the file.
3-6
Using MS-DOS With Your Computer
_
_
When you format your hard disk, MS-DOS creates a single
directory for the disk. This directory is called the root directory.
Because the hard disk has room for hundreds of files, MS-DOS
allows you to create additional directories, called subdirectories.
Subdirectories allow you to organize your hard disk to keep files
of similar type or purpose together. Without subdirectories, it
would be difficult to keep track of all the files on your hard disk.
You can also create subdirectories on your diskettes. You may
find this useful for organizing the files on your backup diskettes.
The subdirectory structure of a hard disk can be represented
with a tree-like diagram, like this:
Root
directory
I
WORDPROC
LEDGER
I l
SALES
ACCOUNTS
BUSINESS
STORIES
-
l
PERSONAL
LETTERS
In this example, the original directory (the root directory) has
two subdirectories, named LEDGER and WORDPROC. Each
of these subdirectories has subdirectories of its own. LEDGER
has two, named ACCOUNTS and SALES; WORDPROC also
has two, named BUSINESS and PERSONAL. The
PERSONAL subdirectory of WORDPROC also has two
subdirectories, named STORIES and LETTERS.
Using MS-DOS With Your Computer
3-7
On your own hard disk, you can create a subdirectory structure
that is more complex than this one. Or you may prefer to keep
things simple. Organize your disk to suit your own needs; you
can modify the structure as your needs change.
When creating subdirectories, note the following points:
CI Any directory can have any number of subdirectories
(except the root directory, which is limited in the number
of files and subdirectories).
Cl You name subdirectories in the same way as files. The name
can include as many as eight characters (letters or
numbers), and you can add an optional extension consisting
of up to three characters.
CI The root directory does not have a name; it is identified by
a backslash ( \ ).
The Current Directory
MS-DOS always recognizes one directory as the current, or
default, directory, just as it always recognizes one drive as being
the current, or default, drive. The current directory is the
directory in which MS-DOS performs your commands, unless
you tell it otherwise. If you want to run a program or access a
data file that is not stored in the current directory, you can
change directories (making a different directory the current
directory) or include a pathname in your command.
Six basic directory operations are described on the following
pages:
0 Listing the contents of a directory
Q Using pathnames
CI Creating directories
3-8
Using MS-DOS With Your Computer
Q Changing directories
Ll Copying from one directory to another
c3 Deleting a directory.
You may also want to read about Shell, an MS-DOS program
that makes it easier to perform these functions, as well as others.
You can use Shell to generate a visual diagram of your
subdirectory structure, to move quickly between directories, to
add and remove directories, and so on. Shell is described in the
MS-DOS Shell User’s Guide.
Listing the Contents of a Directory
To list the files in the current directory, type DIR and press
Enter. MS-DOS lists the names of the files in the current
directory on the current drive. If you are logged onto drive C
but want to see a directory of the files on the diskette in drive
A, type DIR A: and press Enter.
A directory listing looks like this:
Volume in drive C is DOS400
Volume Serial Number is 3728-0CF6
Directory of C:\
12-19-88
COMMAND COM
37557
01-06-89
SYS
146
CONFIG
03-29-89
166
AUTOEXEC BAT
01-06-89
<DIR>
DOS
03-15-89
1693
HDDPSAVE EXE
02-31-89
<DIR>
LT
03-29-89
<DIR>
BENCH
10-31-88
<DIR>
WORD
04-18-89
<DIR>
MEMOS
9 File(s) 17717247 bytes free
12:00a
5:58p
4:26p
5:59p
10:01a
1:43p
2:24p
11:06a
1:34p
Using MS-DOS With Your Computer
3-9
To list the files in a different directory on the current drive,
type the pathname of that directory. For example, to list the
contents of the LEDGER subdirectory while logged onto
drive C, type DIR \LEDGER and press Enter. (Pathnames
are described below.)
Using Pathnames
Whenever you want to access a file that is not in the current
directory, you must specify the file’s pathname. A full pathname
consists of one or more directory names separated by
backslashes and followed by the filename. The pathname tells
MS-DOS where your file is stored.
For instance, in the directory structure shown previously in this
chapter, if you had a file named APRIL.TXT stored in the
subdirectory named LETTERS, the full pathname of that file
would be:
This pathname tells MS-DOS to start at the root directory
and go through two subdirectories (WORDPROC and
PERSONAL) to find the LETTERS subdirectory. Once in the
LETTERS subdirectory, MS-DOS finds the file called
APRIL.TXT.
The first backslash tells MS-DOS to begin at the root directory.
If you omit the backslash at the beginning of the pathname,
MS-DOS begins the search at the current directory. For
example, if the current directory is PERSONAL and you want
MS-DOS to find the file APRIL.TXT, which is stored in the
subdirectory LETTERS, you can specify the pathname like
this:
LETTERS\APRIL.TXT
3-10
Using MS-DOS With Your Computer
-
Because this pathname does not begin with a backslash,
MS-DOS starts in the current directory (PERSONAL), moves
to the subdirectory LETTERS, then finds the file APRIL.TXT.
If you did begin with the backslash, MS-DOS would not find
the file, because it is located in a subdirectory of PERSONAL,
not of the root directory.
Creating Directories
The MKDIR command lets you create directories. To create the
directory LEDGER within your root directory, for example, type
the following and press Enter:
MKDIR
\LEDGER
You can abbreviate the name of this command to MD. For
example, to create a SALES directory under the LEDGER
directory, type the following and press Enter:
MD
\LEDGER\SALES
To check that the LEDGER directory is a subdirectory of the
root directory, type DIR \ and press Enter.
Using MS-DOS With Your Computer
3-11
The screen displays a list of files in the root directory, along
with the names of any subdirectories of the root directory:
LEDGER
<DIR>
<DIR>
WORDPROC
25307
COMMAND COM
209
CONFIG
SYS
AUTOEXEC BAT
309
9-14-89 10:17a
9-14-89 10:32a
3-17-88 12:00a
9-14-89 10:48a
9-14-88 12:11p
3 File(s) 18625536 bytes free
The list identifies the subdirectories by the letters <DIR>.
Changing Directories
You can use any directory as your current or working directory.
To change to a different directory, type CHDIR (or CD )
followed by the pathname of the directory you want to use.
For example, to change from any directory to the directory
LEDGER (which is a subdirectory of the root directory), type
the following and press Enter:
CD
\LEDGER
The backslash identifies the LEDGER directory as a
subdirectory of the root directory. Once you are working within
a directory, you can access any of the files it contains without
typing the full pathname.
To change to a subdirectory within the current directory, you
do not need to type the backslash. For example, to change to
the SALES subdirectory while you are working in LEDGER,
type the following and press Enter:
CD
3-12
SALES
Using MS-DOS With Your Computer
To change from any directory to its parent directory (the
directory of which it is a subdirectory), type the following and
press Enter:
CD . .
The two periods represent the parent directory.
To return to the root directory from any subdirectory, type the
following and press Enter:
CD \
Copying From One Directory to Another
The COPY command lets you copy files from one directory to
another. To use this command, you must specify the name of
the file you want to copy, as well as the directory to which you
want to copy the file.
For example, if you are in the LETTERS directory and want to
copy the file APRIL.TXT to the BUSINESS directory, type the
following and press Enter:
C OPY
APRIL . TXT
\WORDPROC\BUSINESS
The command has three parts: the word COPY, the name
of the file you want to copy (APRIL.TXT), and the name
of the directory to which you want to copy this file
( \ WORDPROC \BUSINESS). You must include spaces or
commas between each of the three parts as delimiters.
Note
You can also copy files using MENU or the MS-DOS
XCOPY command. See the section later in this chapter on
using MENU, and see your MS-DOS Reference Manual for
information about using XCOPY.
Using MS-DOS With Your Computer
3-13
Deleting a Directory
If you no longer need a directory, you can remove it with the
RMDIR command (which can be abbreviated RD). Before
removing a directory, you must delete any files it contains or
move them to a different directory. You can only delete a
directory that is empty. (To delete files from a directory, use the
DEL or ERASE command. See “Deleting Data,” below.)
To delete an empty directory, such as the ACCOUNTS
directory under LEDGER, type the following and press Enter:
RD
\LEDGER\ACCOUNTS
Formatting Diskettes
Before you can store data on a new diskette, you must format it.
Formatting prepares the diskette so that MS-DOS can store
data on it. You need to do this before you use the diskette for
the first time.
You can also reformat previously used diskettes. This process
erases all data on the diskette. Always be sure you no longer
need any files on a diskette before reformatting it.
You can format two kinds of 3 ‘/z-inch diskettes. Double-sided,
double-density diskettes can be formatted to hold 720KB of
data. Double-sided, high-density diskettes can be formatted to
hold 1.44MB. Ordinarily you may prefer to use high-density
diskettes, because they hold more information. But if you need
to transfer files to another computer that cannot read 1.44MB
diskettes, you can purchase double-density diskettes and use the
720KB format.
3-14
Using MS--DOS With Your Computer
Formatting a 1.44 MB Diskette
To format a 1.44MB diskette, follow these steps:
1. If necessary, log onto drive C. If you are not in the directory
containing the file FORMAT.COM, change to that
directory. For example, if FORMAT.COM is stored in a
subdirectory named DOS, type CD \DOS and press Enter.
2. Type the following and press Enter:
FORMAT A:
You see this prompt:
Insert new diskette for drive A:
and strike ENTER when ready...
3. Insert the diskette you want to format into drive A and
press Enter.
When the diskette is formatted, you see this message and
prompt:
Format complete
Volume label (11 characters,
ENTER for none)?
4. Enter up to 11 characters for the volume label to be stored
on the diskette and press Enter. FORMAT displays these
messages:
1447664 bytes total disk space
1447664 bytes available on disk
512 bytes in each allocation unit
2847 allocation units available on disk
Volume Serial Number is 3944-14CA
Format
another
(Y/N)?
Using MS-DOS With Your Computer
3-15
At this point, you can format another diskette by pressing Y
and Enter, or return to the MS-DOS command prompt by
pressing N and Enter.
Formatting a 720KB Diskette
To format a 720KB diskette in a 1.44MB drive, follow these
steps:
1. If necessary, log onto drive C. If you are not in the directory
containing the file FORMAT.COM, use the CD command
to change to that directory.
2. Type the following and press Enter:
FORMAT A: /F:720
You see this prompt:
Insert new diskette for drive A:
and strike ENTER when ready...
3. Insert the diskette you want to format into drive A and
press Enter.
When the diskette is formatted, you see this message and
prompt:
Format complete
Volume label (11 characters,
ENTER for none)?
3-16
Using MS-DOS With Your Computer
4.
Enter up to 11 characters for the volume label to be stored
on the diskette and press Enter. FORMAT displays these
messages:
730112 bytes total disk space
730112 bytes available on disk
1024 bytes in each allocation unit
713 allocation units available on disk
Volume Serial Number is 1C55-14C6
Format another (Y/N)?
At this point, you can format another diskette by pressing Y
and Enter, or return to the MS-DOS command prompt by
pressing N and Enter.
Note
The MENU utility provides an easy way to perform these
functions, See the section on MENU later in this chapter,
Copying Data
It is very important to keep backup diskettes containing copies
of the files you create. There are several ways to copy data and
program files:
CI
Use the DISKCOPY command to make an exact duplicate
of a diskette
LI Use the COPY command to copy individual files
Ll Use the BACKUP command to back up the files on a hard
disk or diskette in a special format.
The COPY command is easier to use when you have only a few
files to back up. The BACKUP command has some advantages
when you want to back up many files at once.
Using MS-DOS With Your Computer
3-17
Note
The MENU utility makes it easy to perform these functions.
See the section on MENU later in this chapter. You can also
use the MS-DOS XCOPY command to copy entire
subdirectories of files. See your MS-DOS manuals for details.
Using DISKCOPY
The DISKCOPY command lets you copy an exact image of one
diskette onto another diskette as long as the two diskettes are
the same size and type. You cannot use DISKCOPY to copy
data from a 3 ‘/z-inch diskette to a 5 ‘/+-inch diskette or to copy
data from a 1.44MB diskette to a 720KB diskette. You also
cannot use DISKCOPY to copy data between a hard disk and a
diskette.
To use DISKCOPY, follow these steps:
1. Make sure your original diskette (the one you are copying
from) is write-protected. (See Chapter 2 for instructions.)
2.
If necessary, log onto drive C. If you are not in the directory
containing the file DISKCOPY.COM, use the CD
command to change to that directory.
3. Type the following and press Enter:
DISKCOPY A: A:
MS-DOS displays this message:
Insert SOURCE diskette in drive A:
Press any key to continue . . .
3-18
Using MS-DOS With Your Computer
4. Insert the diskette you want to copy from (your source
diskette) in the diskette drive and press any key.
DISKCOPY copies the contents of the diskette to the
computer’s memory. When memory is full, the screen
displays this message:
Insert TARGET diskette in drive A:
Press any key to continue . . .
5. Remove the diskette from drive A and insert the blank
diskette (your target diskette) in the drive. Press any key.
DISKCOPY formats the diskette, if necessary. The copy
operation begins when the format is complete.
6. After DISKCOPY copies the files from memory to the
target diskette, it prompts you to reinsert the source diskette
so it can copy the remaining data to the computer’s memory
(if necessary). Insert the source diskette in drive A and press
any key.
7. DISKCOPY copies the rest of the source diskette’s files to
the computer’s memory and then prompts you to reinsert
the target diskette. Insert the target diskette in drive A and
press any key.
8. DISKCOPY copies the remaining data from memory to the
target diskette. When the copy is complete, you see this
message:
Copy another diskette (Y/N)?
Press Y and Enter to copy another diskette or N and Enter
to return to the MS-DOS command prompt.
Using MS-DOS With Your Computer
3-19
Using COPY
The COPY command lets you copy files in several ways:
CI Copy individual files from a diskette or the hard disk to
another diskette or hard disk
LI Copy a group of files using wildcard characters (wildcard
characters are explained below)
Ll Copy one or more files and give them new names
D Combine or merge files into one file.
A few simple rules apply to all uses of COPY:
CI You must tell MS-DOS where to find the source file and
where to store the target file.
D If an existing file on the target diskette or directory has
the same name as the file you are copying, the copy
automatically replaces (overwrites) the existing file.
MS-DOS does not provide a warning. Be careful you do
not accidentally replace a file that you want to keep.
tl
If you are copying to a diskette, the diskette must be
formatted.
To use the COPY command, type COPY at the command
prompt, followed by the drive identifiers and necessary
filenames. Then press Enter to execute the command.
For example, to copy a file named REPORT from the diskette in
drive A to the hard disk (drive C), using the same name for the
copy as for the original file, type the following and press Enter:
COPY A:REPORT C:
3-20
Using MS-DOS With Your Computer
If you want to copy this file from the diskette in drive A to the
hard disk but want to change the name of the copy from
REPORT to FACTS, type this command and press Enter:
COPY A:REPORT C:FACTS
To make a copy of this file on the diskette in drive A and assign
the name FACTS to the copy, type the following and press
Enter:
COPY A:REPORT A:FACTS
In this case, you must assign a new name to the copy, because
MS-DOS does not allow two files in the same directory to have
the same name.
For any of the previous examples, if you omit the drive identifier
(A: or C:), the COPY command uses the current drive. For
example, if the current drive is C and you want to copy the file
REPORT from drive A to drive C without changing the
filename, enter the command as follows:
COPY A:REPORT
MS-DOS writes the copy to drive C because drive C is the
current drive. You can save a few keystrokes by omitting the
drive identifier of the current drive, but it is equally correct to
include all the drive identifiers.
You can use wildcard characters to copy a group of files at one
time. A wildcard character stands for some other single
character or group of characters in the filenames. MS-DOS
recognizes two wildcard characters: * and ?. The asterisk
represents any group of characters and the question mark
represents any single character.
Using MS-DOS With Your Computer
3-21
To copy all files on the diskette in drive A to the current
directory on the hard disk, type the following and press Enter:
COPY A:*.* C:
To copy all files with names that begin with the four letters
MEMO and end with any single character, type the following
and press Enter:
COPY A:MEMO? C:
You can also use the COPY command to combine a number of
files into one file. For example, to create a new file called
DATA that consists of the files REPORT, FACTS, and
MEMO, type the following and press Enter:
COPY REPORT + FACTS + MEMO DATA
MS-DOS combines the three files into one file, in the order in
which you specified their names.
Using BACKUP
The BACKUP command lets you store files in a special format
for archive purposes. You normally use BACKUP to back up
hard disk files; however, you can use it to copy files from any
disk to another (hard disk to diskette, diskette to hard disk,
diskette to diskette, or hard disk to hard disk).
There are advantages to using the BACKUP command:
CI BACKUP can split large files between two or more
diskettes. That is, if the diskette to which you are copying
has only 200KB of available space, and the next file to be
backed up occupies 300KB, the BACKUP command copies
the first part of the file to the current diskette and the
remainder to the next backup diskette. This results in more
efficient diskette use.
3-22
Using MS-DOS With Your Computer
Cl The BACKUP command can perform incremental backups.
That is, you can copy only those files that changed since
the last time you used the BACKUP command. This also
results in more efficient diskette use.
Ci The BACKUP command can format new diskettes as it
copies files. You don’t have to go through a separate
formatting step when you use BACKUP.
Unlike DISKCOPY and COPY, which make readable copies of
files, BACKUP creates files that you cannot use until you
restore them to the disk by using the RESTORE command.
You can use switches with BACKUP to back up files created
after a certain date or to specify files stored in a certain
directory. You can also tell BACKUP to add only those files
that were modified since the last time you ran BACKUP. This
process speeds up the backup procedures you perform on a
regular basis.
For complete instructions on the use of BACKUP and
RESTORE, see your MS-DOS Reference Manual.
Using MS-DOS With Your Computer
3-23
Deleting Data
To delete a file, type DEL and then the full name (including the
extension, if any) of the file you wish to delete. For example, to
delete the file named APRIL.TXT from the current directory,
type the following and press Enter:
DEL APRIL.TXT
You can delete all files in the current directory at once by
typing the following and pressing Enter:
DEL *.*
For your protection, when you type DEL *.* MS-DOS asks if
you are sure that is what you want to do. If you are sure, press Y,
then Enter.
You can also use the ERASE command to delete files. ERASE
works exactly like the DEL command.
Using the MS-DOS Shell Program
MS-DOS 4.01 provides a new Shell feature that lets you run
programs and choose operating system commands from menus
instead of the MS-DOS command prompt. The Shell feature is
designed for both new and experienced users of MS-DOS. It lets
you tailor your system to your own needs and manage your
programs and data more efficiently.
See your MS-DOS Shell User’s Guide for complete details.
3-24
Using MS-DOS With Your Computer
Using HELP
The Epson HELP utility provides on-line information about the
MS-DOS commands and programs. You can use HELP in either
of two ways:
Ll To display the HELP menu, type HELP at the command
prompt and press Enter
Cl To bypass the menu, type HELP plus the name of the
command you want information about.
To use the HELP menu, follow these steps:
1. Type HELP at the MS-DOS command prompt and press
Enter.
2. The screen displays a menu of MS-DOS commands. Use
the cursor keys to highlight the command you want
information about, then press Enter.
3. If there is more than one page of information about the
command, you see the prompt PgUp at the top of the
screen. Press the PgUp key to display the rest of the text.
4. To return to the HELP menu, press ESC. Press ESC again to
exit the HELP utility. MS-DOS displays the name of the
last command you selected at the command prompt for easy
reference.
Using MS-DOS With Your Computer
3-25
To bypass the HELP menu and display information about a
specific command, follow these steps:
1. At the command prompt, type HELP and the name of the
MS-DOS command you want information about. Then
press Enter. For example, to see information about the
COPY command, type the following and press Enter:
HELP COPY
2.
If there is more than one page of information about the
command, you see the prompt PgUp at the top of the
screen. Press PgUp to display the rest of the text.
3. Press ESC to exit the HELP program.
You can also request help information for more than one
command. Follow these steps:
1. At the command prompt, type HELP and the names of the
commands you want information about. Then press Enter.
Separate each command name with a space. For example, to
see information about DISKCOPY, FORMAT, and COPY,
type the following and press Enter:
HELP DISKCOPY FORMAT COPY
2. MS-DOS displays help information for the first command.
If there is more than one page of information about the
command, you see the prompt PgUp at the top of the
screen. Press PgUp to display the rest of the text.
3.
Press ESC when you are ready to display information about
the next command.
4. Press ESC again to exit the HELP program.
3-26
Using MS-DOS With Your Computer
--
Using MENU
Your Equity LT-286e comes with an Epson utility called
MENU. This program gives you access to several utilities that
perform the functions of some of the most commonly used
MS-DOS commands. MENU lets you execute several
commands without having to remember the exact format for
each one.
To access the MENU utility, log onto the directory containing
the file MENU.EXE. Type MENU at the command prompt and
press Enter.
You see this main menu:
EXIT
File Utilities
Disk Utilities
Mode Settings
Help
Enter DOS Command
To select an option, use the arrow keys to highlight your
selection, then press Enter.
Most options contain submenus; keep highlighting your
selection and pressing Enter until you select the operation you
want.
Using MS-DOS With Your Computer
3-27
MENU Utility Options
The MENU utility offers five options:
File Utilities
Lets you back up and restore files, replace
files, compare files, change file attributes,
copy files, and copy directories. This
option does the work of these MS-DOS
commands: BACKUP, RESTORE,
REPLACE, FC, Al-I-RIB, and XCOPY.
Disk Utilities
Lets you check, copy, compare, and format
diskettes. This option gives you easy-touse alternatives to the MS-DOS
CHKDSK, DISKCOPY, DISKCOMP, and
FORMAT commands.
Mode Settings
Lets you change your configuration
settings. This option also lets you select
alternate code pages (character sets) and
redirect data from the parallel port to the
serial port. Because you can perform so
many tasks from the Mode Settings
submenus, this option is a powerful
alternative to the MS-DOS MODE
command.
Help
Lets you access the Epson HELP utility.
Enter DOS
Command
Lets you run other MS- DOS commands
without leaving the MENU program.
See your MS-DOS manual for step-by-step instructions for using
each option.
3-28
Using MS-DOS With Your Computer
Using an AUTOEXEC.BAT File
You may find that there are some commands you need to run
every time you turn on your computer.
To run a command or a series of commands automatically upon
startup, you can type the commands into a special file called
AUTOEXEC.BAT. When you load MS-DOS, it automatically
looks for this file. If there is an AUTOEXECBAT file in the
root directory, MS-DOS executes the commands in that file.
Here are some suggestions for tasks you can perform using an
AUTOEXEC.BAT file:
Ll Modify the PATH command to include the directories
containing application programs you commonly use. This
reduces the number of times you need to change directories
or specify pathnames.
Add the command that starts your most commonly used
application program (such as a word processor or
spreadsheet program) so MS-DOS loads it automatically
when you turn on or reset the computer.
rd Change the MS-DOS command prompt so it displays the
current directory--or your name, or anything else you want.
See your MS-DOS Reference Manual for instructions on using
the PATH command, the PROMPT command, and any other
commands you want to include in your AUTOEXEC.BAT file.
The SELECT program you used to install MS-DOS, created an
AUTOEXEC.BAT file in the root directory of your hard disk.
SELECT adds commands to the AUTOEXEC.BAT file based
on your responses to questions. See your MS-DOS Installation
Guide for details.
Using MS-DOS With Your Computer
3-29
Creating an AUTOEXEC.BAT File
You can create an AUTOEXEC.BAT file with any program that
lets you store a text-only file (also called an ASCII text file). If
your word processing program can save a file as a text-only file,
you can use that program to create an AUTOEXEC.BAT file.
Just be sure to name the file AUTOEXEC.BAT and store it in
the root directory of the hard disk.
You can also use the MS-DOS COPY command to create an
AUTOEXEC.BAT file. Follow these instructions to use the
COPY command:
1. At the C> prompt, type the following and press Enter:
COPY CON: C:\AUTOEXEC.BAT
2. Type the commands you want to include in the file exactly
as you want MS-DOS to execute them. Press Enter at the
end of each line. After you type the last command, press
Enter to move the cursor to the next blank line.
3. Now press F6 and then Enter. COPY creates a file named
AUTOEXEC.BAT containing all the commands you just
typed. MS-DOS stores the file in the root directory of your
hard disk. From now on, every time you start or reset your
computer, MS-DOS executes all commands in the
AUTOEXEC.BAT file.
3-30
Using MS-DOS With Your Computer
Starting an Application Program
Any time you see the MS-DOS command prompt (for example,
A> or C>), you can start using an application program. Just log
onto the drive and directory containing your application
program files (if necessary) and type the name of the program’s
executable file. (See the documentation for your application
program if you are not sure what to type.) When you press
Enter, MS-DOS runs the application program.
When you exit the program, the MS-DOS command prompt
reappears. Be sure to exit the application program properly and
return to the command prompt before turning off your
computer.
Using MS-DOS With Your Computer
3-31
Chapter 4
Troubleshooting
You should not encounter any difficulties as you set up and use
your Equity LT-286e. You can correct most problems by
adjusting a cable connection, changing a DIP switch or slide
switch setting, repeating a software procedure, or resetting the
computer. If anything out of the ordinary happens, turn to this
chapter for a solution.
If the suggestions in this chapter do not solve the problem,
contact your Epson dealer. Your dealer may be able to solve the
problem; if not, he or she can refer you to an authorized Epson
Customer Care Center. If necessary, call the Epson Consumer
Information number (1-800-922-891 1) for the location of your
nearest authorized Epson Customer Care Center.
When you contact your dealer or Epson Customer Care Center,
be ready to provide the serial number of your computer (located
on the bottom of the computer), its configuration (including
the type of disk drives and options), and the names and version
numbers of any software programs you are using.
The Computer Won’t Start
If your computer does not start up when you turn on the power
switch, follow the steps below. (Also see the section on hard
disk problems later in this chapter.)
1. Check that the status indicator bar above the keyboard is
on. If not, remove any diskettes from the diskette drives and
turn off the power. Wait five seconds, then turn the power
back on.
Troubleshooting 4-1
WARNING
When you turn off the computer, always wait at least five
seconds before turning it back on. You can damage your
computer if you turn it off and on rapidly.
2. If the status indicator bar still does not come on, turn off
the power switch. Check that the AC adapter is securely
connected to both the computer (or the battery pack) and
an electrical outlet. Make sure the green LED on the AC
adapter is illuminated. Then turn the power back on.
3. If the computer still does not start, check the electrical
outlet. Plug a lamp into the outlet and turn it on to see if
the outlet supplies power.
4. If your computer still won’t start, contact your Epson dealer.
The LCD Screen Is Blank
If the computer starts but no image appears on the LCD screen,
follow these steps to solve the problem:
1. Use the contrast and brightness levers to adjust the screen
display.
2. To save power, you may have defined a backlight period so
that the LCD screen turns off automatically after a specified
period of time. If this happens, press any key to restore the
display. To change the time limit or turn off the backlight
feature, see “Backlight Period” in Chapter 2.
3. If an image still does not appear, check that DIP switches
SW1-7 through SW1-10 are in the correct position. (See
“Setting the DIP Switches” in Appendix A for
instructions.) Check that the CRT/LCD slide switch is in
the LCD position. (See “Setting the Slide Switches” in
Appendix A for instructions.)
4-2
Troubleshooting
4. If you still do not see an image on the screen, contact your
Epson dealer.
The Monitor Screen Is Blank
If you are using an external color monitor and no image appears
on its screen, follow these steps to solve the problem:
1.
Be sure the power switches on the computer and monitor
are turned on.
2. Use the controls on the monitor to adjust the brightness
and contrast.
3. Remove any diskette from drive A, then turn off the power
switches on the monitor and the computer. Check that the
monitor’s power cable is securely connected to the monitor
and to an electrical outlet, and that the monitor cable is
properly connected to both the monitor and the computer.
Then turn both power switches back on.
4. Check that the CRT/LCD slide switch is in the CRT
position. (See “Setting the Slide Switches” in Appendix A
for instructions.)
5. Turn off the power switches on both the computer and the
monitor. Then check the electrical outlet for power. Plug a
portable lamp into the outlet and turn it on to see if the
outlet supplies power.
6.
If an image still does not appear on your color monitor,
contact your Epson dealer.
Troubleshooting 4-3
The Computer Locks Up
If the computer does not respond to your keyboard entries, try
the following:
1. Wait a few seconds. Some operations take longer than
others to perform. For example, a spreadsheet program takes
longer to recalculate an entire spreadsheet than to record
one figure. Also, programs involving many calculations can
take several minutes, or even hours, to complete. Be aware
of the task the computer is performing and judge the time
accordingly.
2.
If the computer remains locked up after you’ve waited a
reasonable amount of time, follow the steps in Chapter 2 to
reset the computer.
Note
Changing the execution speed while running an
application program could cause the computer to lock up.
Always exit the program, and turn off the computer
before changing the execution speed.
Diskette Problems
If you have trouble with a diskette, follow these steps to define
the problem:
1. Is the diskette damaged? To find out, use DISKCOPY to
make a copy of the diskette. Using the copy, repeat the
operation that caused the problem. If the operation works
using the copy diskette, the original diskette is probably
damaged. Discard the original diskette and use the copy
instead.
4-4 Troubleshooting
If you have trouble copying the entire diskette, some of the
sectors may be bad. Try using the COPY command to copy
one file at a time. Then repeat the operation to see if it
works on the copy. If it does, the original diskette is
damaged.
2.
Is the diskette write-protected? If the write-protect switch is
set, first make sure the diskette does not contain files you do
not want to change or lose. Then try moving the switch to
remove the write protection. (Ordinarily, it’s a good idea to
leave program diskettes write-protected, but some programs
don’t work properly on write-protected diskettes.)
3. Try formatting a blank diskette to determine if the diskette
drive is operating properly.
If you cannot format a diskette, contact your Epson dealer.
Hard Disk Problems
If you have problems with your hard disk when you first start to
use it, make sure it is properly set up. See the instructions for
setting up the hard disk in your MS-DOS Installation Guide.
If the hard disk still does not work, contact your Epson dealer or
have an authorized Epson Customer Care Center check your
hard disk. Never open the airtight container that encloses the
hard disk.
Troubleshooting 4-5
Appendix A
DIP Switches and Slide Switches
This appendix describes the DIP switches and slide switches you
set to define your system’s configuration. The computer uses this
information each time you turn it on.
If you are using the standard LT-286e settings, that is, you are
using the LCD screen in EGA mode, a parallel printer, and
operating at 12 MHz, you do not need to change the DIP
switches or slide switches.
If you are not using the standard settings, you need to define
your system configuration using these switches. Then return to
Chapter 1 to finish setting up your computer.
Setting the DIP Switches
The Equity LT-286e has two sets of DIP switches that you access
from the bottom of the computer. These are small, on/off
switches that provide your computer with information each
time you turn it on. A DIP switch is either on (up) or off
(down). To change a setting, use a hard, thin object, such as a
small screwdriver.
The first set has ten switches that control the type of external
monitor you are using and the display configuration. The
second set has ten switches that control the diskette drive, the
CRT/LCD display mode, and the parallel and serial interface
configuration.
Read this section to make sure the current DIP switch settings
match your system configuration.
DIP Switches and Slide Switches
A-l
Before accessing the DIP switches, make sure the power switch
is off and all cables, including the AC adapter, are
disconnected.
Accessing the DIP Switches
To locate the DIP switches, follow these steps:
1. Remove the expansion slot cover on the left side of the
computer. Press down on the release tab and lift off the
expansion slot cover.
--
2. Pull out the carrying handle.
3. Turn the computer upside down with the handle away from
you.
A-2
DIP Switches and Slide Switches
4. Remove the expansion card cover as shown below. Lift up
on the two tabs while you press on the grated squares to
release the cover. Slide the cover away from you (toward
the handle).
The DIP switches are located on the right side of the computer.
DIP Switches and Slide Switches
A-3
Because the computer is upside down, the DIP switches
numbers are upside down and the ON/OFF orientation is
reversed. Take care when changing a DIP switch setting that
you are changing the correct switch.
The following tables list the system functions these switches
control.
DIP switch settings (SW1)
Switch Setting Function
1
ON*
Not used; must be ON
2
ON*
OFF
Selects attached enhanced color display
Selects attached monochrome or color display
3
ON*
Reserved; must be ON
4
ON*
Reserved; must be ON
5
ON*
Reserved; must be ON
6
ON*
OFF
Selects expanded LCD mode
Selects standard LCD mode
7
ON
Selects EGA configuration;
see the CRT/LCD switch settings
Selects default EGA configuration
OFF*
8
A-4
ON*
OFF
Selects default EGA configuration
Selects EGA configuration;
see the CRT/LCD switch settings
DIP Switches and Slide Switches
Switch Setting Function
9
ON*
OFF
Selects default EGA configuration
Selects EGA configuration;
see the CRT/LCD switch settings
10
ON
Selects EGA configuration;
see the CRT/LCD switch settings
Selects default EGA configuration
OFF
*Default setting
DIP switch settings (SW2)
Switch Setting Function
1
ON*
Not used; must be ON
2
ON*
Selects internal diskette drive as drive A; external
diskette drive is drive B
Selects external, 5 ‘la-inch diskette drive as drive A;
internal diskette drive is drive B
OFF
3
ON*
Not used; must be ON
4
ON*
OFF
Selects color for primary display
Selects monochrome for primary display
5
ON
Reserved
6
ON*
OFF
Selects internal serial port as primary
Selects internal serial port as secondary
7
ON*
OFF
Enables internal serial port
Disables internal serial port
8
ON*
OFF
Selects internal printer port as primary
Selects internal printer port as secondary
9
ON*
OFF
Enables internal printer port
Disables internal printer port
10
ON*
Not used; must be ON
*Default setting
DIP Switches and Slide Switches
A-5
DIP switch settings for video controller (SW1)
CRT/LCD
Configuration
Switch settings
8
7
9
10
Selects MDA (monochrome
display adapter) to use
monochrome display (CRT only)
OFF
ON
OFF
OFF
Selects CGA (color graphics
adapter) to use color or
enhanced color display;
40 characters x 25 lines
ON
OFF
OFF
ON
Selects CGA to use color
or enhanced color display;
80 characters x 25 lines
ON
OFF
OFF
OFF
Selects EGA (enhanced
graphics adapter) to use
enhanced color display
in normal mode
OFF
ON
ON
ON
Selects EGA (enhanced
graphics adapter) to use
enhanced color display
in enhanced mode
OFF
ON
ON
OFF
The following switches are located on SW1. These DIP
switches define how the video controller is interpreted by the
computer.
Switch l-This switch is not used and must always be set to
ON.
Switch 2-This switch defines the type of external monitor
attached to the computer.
Set this switch to ON if you have attached an external EGA
monitor.
Set this switch to OFF if you have attached an external
monochrome or RGB monitor.
A-6
DIP Switches and Slide Switches
Switch 3--This switch is reserved and must always be set to
ON.
Switch 4-This switch is reserved and must always be set to
ON.
Switch 5-This switch is reserved and must always be set to
ON.
Switch 6-This switch selects the LCD mode of your screen.
Set this switch to ON for the expanded LCD mode; in this
mode, the LT-286e displays larger characters to fill the screen.
Set this switch to OFF for the standard LCD mode; in this
mode, the LT-286e displays characters in the standard size and
you see a one-inch margin on the top and bottom of the screen.
Switch 7, Switch 8, Switch 9, Switch 10--These switches
define the EGA configuration.
The following switches are located on SW2. These DIP
switches define how the computer identifies peripherals
attached to the computer.
Switch l-This switch is not used and must be set to ON.
Switch 2-This switch defines your diskette drive assignments.
Set this switch to ON to identify the internal diskette drive as
drive A; an external, 5 ‘/4-inch drive is drive B.
Set this switch to OFF to identify the external diskette drive as
drive A; the internal diskette drive becomes drive B.
Switch 3-This switch is not used and must always be set to
ON.
DIP Switches and Slide Switches
A-7
Switch 4-This switch defines the primary display.
Set this switch to ON if the primary display is color.
Set this switch to OFF if the primary display is monochrome.
Switch 5--This switch is reserved and must always be ON.
Switch 6-This switch tells the computer whether the serial
port on the side of the computer is configured as a primary port
or a secondary port.
Set this switch to ON if you want the serial port to be
recognized as the primary serial port ($3F8-$3FF).
Set this switch to OFF if you want the serial port to be
recognized as the secondary serial port ($2F8-$2FF).
Switch 7-This switch enables or disables the serial port on the
side of the computer. If you install an option card that offers
serial ports, you may need to disable the internal serial port if it
conflicts with the port on the option card.
Set this switch to ON to enable the serial port.
Set this switch to OFF to disable the serial port.
Switch 8--This switch tells the computer whether the parallel
port on the side of the computer is configured as a primary port
or a secondary port.
Set this switch to ON if you want the parallel port to be
recognized as the primary parallel port ($378-$37F).
Set this switch to OFF if you want the parallel port to be
recognized as the secondary parallel port ($278-$27F).
Switch 9--This switch enables or disables the parallel port on
the side of the computer.
Set this switch to ON to enable the parallel port.
Set this switch to OFF to disable the parallel port.
Switch IO-This switch is not used and must be set to ON.
A-8
DIP Switches and Slide Switches
Replacing the Expansion Card Cover
After you verify or change your DIP switch settings, you need to
replace the expansion card cover. Follow these steps:
1. Set the cover on the computer and slide it back into
position as shown below. Press firmly until the cover snaps
into position.
2.
Turn the computer right side up with the handle facing you.
3. Replace the expansion slot cover on the left side of the
computer. The cover has two tabs that fit into slots on the
computer’s cover.
DIP Switches and Slide Switches
A-9
4. Lift the cover up into place and slide the release tab up to
secure the cover.
5. Slide the handle back into place.
4-10
DIP Switches and Slide Switches
Setting the Slide Switches
The slide switches let you do the following for your LT-286e:
Cl Select a CPU clock speed of 12 MHz or 8 MHz
tl Select an external CRT
tl
Select an external diskette drive.
The slide switches are located on the bottom of the computer.
Follow these steps:
1. Turn the computer off.
2.
Disconnect all cables from the computer, including the AC
adapter.
3. Turn the computer upside down with the back panel closest
to you.
Set the slide switches only when the computer is turned off.
I
n
1
m CLOCK
-1
m CRT/LCD
m
FDD
EXT/INT
DIP Switches and Slide Switches
A-11
Clock speed-Slide the CLOCK switch to the left to select a
CPU clock speed of 8 MHz. Leave the switch in the right
position to select a CPU clock speed of 12 MHz.
Display switch-Slide the CRT/LCD switch to the left if you
plan to connect an external CRT to the computer. Leave the
switch in the right position if you plan to use the LCD.
External diskette drive-Slide the FDD EXT/INT switch to the
left if you plan to connect an external, 5 1/4-inch diskette drive
to the computer. Leave the switch in the right position if you do
not plan to use an external diskette drive.
You are now ready to set up and use your LT-286e computer.
See Chapter 1 for details on setting up your computer.
A-12
DIP Switches and Slide Switches
Appendix B
Installing Options
This appendix describes how you install optional devices on
your LT-286e. You can install an external monitor, an external
diskette drive, an internal modem, an internal 1MB memory
card, and an external keyboard. You can also install a %-size,
IBM AT-compatible expansion card and a math coprocessor.
Connecting an External Color Monitor
If you plan to use an external monitor with your Equity
LT-286e, follow the instructions below to connect it to the
computer:
1.
Be sure both the computer and monitor (as well as any
other peripheral devices) are turned off.
2. Turn the computer upside down and set the CRT/LCD slide
switch to CRT. This slide switch setting lets the computer
know you will be using a monitor instead of the LCD
screen. (See “Setting the Slide Switches” in Appendix A
for details.)
3. Turn the computer right side up with the front facing you.
4. Place your monitor near the Equity LT-286e.
5. If necessary, connect the monitor cable to the monitor.
(Some monitors come with permanently attached cables.)
6.
Lower the interface cover on the right side of the computer.
7. Connect the appropriate end of the monitor cable to the
port marked RGB VIDEO on the right side of the
computer, as shown below.
RGB VIDEO port
8. If the connector has retaining screws, tighten them with a
screwdriver.
9. If necessary, plug the monitor’s power cable into the power
inlet on the monitor. (Some monitors come with
permanently attached power cables.) Then plug the power
cable into an electrical outlet.
When you are ready to use the computer, turn on the monitor
and any other peripheral devices, then turn on the computer.
Text displays on the external monitor screen instead of the
computer’s LCD screen.
B-2 Installing Options
Connecting an External Diskette Drive
You can connect the optional, 1.2MB, 5 1/4-inch diskette drive
to your LT-286e. Follow these steps:
1. Make sure both the computer and external diskette drive
(as well as any other peripheral devices) are turned off.
2. Set DIP switch SW2-2 to identify the drive. When SW2-2
is ON, the external drive is drive B. When SW2-2 is OFF,
the external drive is drive A. See “Setting the DIP
Switches” in Appendix A for details.
3. Make sure the FDD EXT/INT slide switch is set to FDD
EXT. See “Setting the Slide Switches” in Appendix A.
4. Place the external diskette drive near the LT-286e.
5. Lower the interface cover on the front, right side of the
computer (when the front of the computer is facing you).
6. Connect the interface cable from the external diskette drive
to the EXT FDD port on the right side of the computer, as
shown below.
7.
Tighten the retaining screws on the connector with a
screwdriver.
8.
Plug the drive’s power cable into an electrical outlet.
When you are ready to use the computer, turn on the external
diskette drive and any other peripheral devices, then turn on
the computer.
Installing the Internal Modem
You can install the optional, Epson internal modem in your
LT-286e. Follow these steps:
1. Make sure the computer is turned off.
2.
Press down on the release tab to lower the modem cover on
the back, left side of the computer (when the front of the
computer is facing you).
3. Slide the modem card into this slot. Secure the connector
on the modem to the socket inside the slot.
4. Snap out the plastic moldings that cover the LINE and
PHONE openings on the modem cover.
5. Close the modem cover. Press up on the release tab to
secure the cover.
6. Connect the modem to a phone line.
Installing the RAM Card
You can install the optional, Epson 1MB RAM card in your
LT-286e. Follow these steps:
1. Make sure the computer is turned off.
2. Press down on the release tab to lower the RAM card cover
on the back, right side of the computer (when the front of
the computer is facing you).
-
3. You slide the RAM card into this slot. Secure the connector
on the RAM card to the socket inside the slot.
5. Close the RAM card cover. Press up on the release tab to
secure the cover.
Connecting an External Keyboard
You can attach an external keyboard to your LT-286e. The
socket for the external keyboard is on the front, right side of the
computer.
Follow these steps:
1. Make sure the computer is turned off.
2. Lower the interface cover on the front, right side of the
computer (when the front of the computer is facing you).
Press down on the release tab to lower the cover.
external keyboard port
B-6
Installing Options
3. Attach the keyboard adapter to the external keyboard slot.
Then attach the connector from the external keyboard to
the adapter.
You only need the keyboard adapter if your keyboard connector
interferes with the RGB VIDEO port and you are planning on
connecting an external monitor to this port.
Installing an Option Card
You can also install a %-size, IBM PC AT-compatible, internal
expansion card in your LT-286e. You can install a 2/3-size option
card provided it physically fits in the expansion slot on the
LT-286e. You cannot install a full-length option card. Also, you
cannot install an 8-bit card that interferes with the 16-bit
connector inside the LT-286e.
Installing Options B-7
An option card must meet certain power supply requirements.
The option card cannot draw more than the specified current
(Amps):
Supply voltage
Maximum current
+5 Volts
f 12 Volts
-5 Volts
-12 Volts
0.8 Amps
0.1 Amps
0.05 Amps
0.05 Amps
The option card must not interfere with options installed in the
internal ports. For example, if you install an option card with a
parallel port, you must assign that port as the secondary parallel
port ($278) if the internal parallel port is the primary parallel
port ($378). If you want the parallel port on the option card to
be the primary parallel port, you must disable the internal
parallel port by setting DIP switch SW2-9 to OFF. See “Setting
the DIP Switches” in Appendix A for details.
WARNING
You cannot install an optional video card in the expansion
slot; video cards interfere with the built-in video capabilities
of the LT-286e. You cannot install an option card that
supports a diskette drive, a hard disk drive, or an expansion
box that supports multiple cards.
B-8
Installing Options
Follow these steps to install an option card:
1. Turn off the computer and disconnect all cables, including
the AC adapter.
2. Remove the expansion slot cover on the left side of the
computer. Press down on the release tab and lift off the
expansion slot cover.
3. Pull out the carrying handle.
4. Turn the computer upside down with the handle away from
you.
Installing Options B-9
5. Remove the expansion card cover as shown below. Lift up
on the two tabs while you press on the grated squares to
release the cover. Slide the cover away from you (toward
the handle).
6. Remove the bracket on the side of the computer.
B-10
Installing Options
7.
Insert the card from the back of the computer. Line up the
connector on the card with the socket inside the expansion
slot. Insert the connector directly into the socket. Secure
the card with the screw you removed from the bracket.
8.
Set the cover on the computer and slide it back into
position as shown below. Press firmly until the cover snaps
into position.
Installing Options
B-11
9. Turn the computer right side up with the handle facing you.
10. Replace the expansion slot cover on the left side of the
computer. The cover has two tabs that fit into slots on the
computer’s cover.
tabs
11. Lift the cover up into place and slide the release tab up to
secure the cover.
B-12
Installing Options
12. Slide the handle back into place.
Installing a Math Coprocessor
You can also install a math coprocessor in your LT-286e. If your
software supports a math coprocessor, it processes mathematical
calculations much faster than without the coprocessor.
You can easily install the math coprocessor in your LT-286e.
However, to do so, you need to access the motherboard which
contains sensitive circuitry. If you have any doubts about the
installation procedure, ask your Epson dealer for assistance or
contact a Customer Care Center.
To install the math coprocessor, follow these steps:
1. Turn off the computer.
2. To remove the hard disk, press the PUSH button to release
the hard disk and lift it straight up.
Installing Options
B-13
3. Lift off the motherboard cover.
4. Notice the outline for the math coprocessor on the
motherboard.
5. Make sure the notch on the math coprocessor lines up with
the notch on the outline on the motherboard. Press the
math coprocessor firmly into place.
6. Replace the motherboard cover.
7. Reinstall the hard disk. Insert the hard disk drive straight
down; it will not go in correctly if you attempt to press it in
at an angle.
B-14
Installing Options
Appendix C
Specifications
Main Unit
CPU
8OC286 microprocessor, 8 MHz or 12 MHz
clock speed; switch selectable
Main memory
1MB (640KB standard and 384KB
extended)
Math coprocessor
80C287 coprocessor (optional), 8 MHz
Interfaces
--
Parallel
Standard 8-bit parallel, 25-pin, D-type
female connector
Serial
RS-232C, programmable, asynchronous,
9-pin, D-type male connector
Video
9-pin, female connector supports MDA,
CGA, EGA, and extended EGA
External
diskette drive
15-pin, D-type female connector
Expanded keyboard Keyboard connector
--
Speaker
Internal
Option slot
One 2/3-size, IBM PC AT-compatible slot
Memory
Internal RAM memory card slot allows
expansion to 2MB; 40-pin male connector
Specifications C-1
Modem
Internal modem slot; 34-pin male
connector
Clock/calendar
Real-time clock and calendar with battery
backup
Keyboard
84 sculpted keys; LCD indicator icons for
Num Lock, Caps Lock, Scroll Lock
Optional, external keyboard
Mass Storage
Hard disk
Interchangeable, pop-out, 20MB or 40MB
hard disk designed for low power
consumption; 28ms average access time;
built-in, 16-bit bus AT-compatible
controller
Diskette drives
One internal 1.44MB 3 ‘/z-inch diskette
drive
Optional, external 5 ‘/.+-inch (1.2MB)
diskette drive
Display
Large (640x480 dots), high contrast,
paper-white, backlit LCD display with
16-level gray scale; continuous brightness
and contrast controls; power-saving
feature
C-2 Specifications
CRT mode supports ECD (enhanced color
display), monochrome display, color
display, and multisync-compatible CRTs
External RGB monitor supported (EGAcompatible)
Power Supply
Externally attached, rechargeable NiCad
battery pack (4000 milliampere-hours); up
to 2 l/z hours
12/5-volt AC adapter (can recharge
battery pack while operating computer)
with automatic 100-240V sensing
Power Requirements
100-240 VAC, 50/60 Hz
NiCad rechargeable battery pack, 9.6
volts 4 ampere-hours
Physical Dimensions
Height
3.46 inches (88 mm)
Width
12.9 inches (318 mm)
Depth
11.7 inches (296.5 mm), with handle
retracted; 13.9 inches (354 mm) with
battery pack
Weight
16.4 lbs (7.4 kg) with battery and hard
disk drive
Specifications C-3
Environmental Requirements
Temperature
Operating: 41° to 95° F (5° to 35°C)
Non-operating: -4° to 122° (-20° to
60°C)
Humidity
Operating: 20% to 80% (non-condensing)
Non-operating: 8% to 80% (noncondensing)
When traveling by airplane, take your LT-286e into the
passenger compartment as carry-on luggage to prevent it from
being stored in an unpressurized storage compartment.
Options
Modem
Internal 2400-baud, Hayes-compatible,
auto-dial
Memory
1MB RAM expansion card
Expansion cards
One 2/3-size, IBM PC AT-compatible slot
Carrying case
Soft case for carrying computer
C-4 Specifications
Glossary
80C286
A CMOS integrated circuit, or chip; the central processing unit
(CPU) of your Equity LT-286e. The CMOS type chip provides
low power consumption.
80C287
A special-purpose CMOS integrated circuit used to assist the
80C286 and speed up certain kinds of mathematical
calculation. The computer’s motherboard has a socket to
accommodate an optional 80C287 math coprocessor.
AC adapter
The device that converts AC voltage from a wall socket into
the proper DC voltage to power your Equity LT-286e. The AC
adapter provides enough power to recharge the NiCad battery
pack while you operate the computer.
Application program
A software program that performs a specific task, such as word
processing, spreadsheet analysis, or database management.
ASCII
-
American Standard Code for Information Interchange. A
standard system for encoding text characters, such as letters,
numbers, and punctuation symbols. An ASCII character
occupies one byte of storage. Many different computers,
printers, and programs can use files stored under the ASCII
code.
Asynchronous
A method of data transmission in which one device sends data
one bit at a time to another device. This method allows for
delays of any length between characters.
AUTOEXEC.BAT file
A special kind of batch file MS-DOS executes automatically
each time you turn on or reset the computer.
Backlighting
The internal fluorescent illumination of the computer’s LCD
screen. LCD screens that are not backlit are not legible without
an external source of light.
Backlight period
The length of time your LCD screen stays illuminated in the
absence of keyboard activity. To restore backlighting to your
screen after the backlight period has elapsed, press any key. To
change the backlight period, run the SETLCD program (see
Chapter 2).
Backup
A copy of a program, data file, or disk, kept in case the original
is damaged or lost.
Batch file
A text file containing one or more MS-DOS commands, each
stored on a separate line. You use batch files to automate
MS-DOS operations. When you type the name of the batch file
(with or without its .BAT extension), each command in the file
executes in sequence.
2
Glossary
Baud rate
A measure of data transmission speed. Usually equivalent to bits
per second.
Bit
A binary digit (0 or 1). The smallest unit of information a
computer can store. Eight bits make one byte.
Boot
To load a program or an operating system into the computer’s
memory.
Byte
A sequence or group of eight bits. In the ASCII encoding
system, a byte represents one character of data.
CGA
Color Graphics Adapter. A type of color monitor that can
display graphics. You can plug a CGA monitor directly into
the built-in CRT connector on the side panel of the Equity
LT-286e.
Character
Anything you can print or display in a single space on the page
or screen, including numbers, letters, punctuation marks, and
graphic symbols.
Chip
A hardware component of your system (formally known as an
integrated circuit). Examples of chips include memory chips and
the 80C286 microprocessor.
-
Glossary 3
CMOS
Complementary Metal-Oxide Semiconductor. A method of
making low power, integrated circuits (chips).
CMOS RAM
A special type of low-power memory in your Equity LT-286e
that records information about your system’s configuration.
Unlike ordinary RAM, CMOS RAM is backed up by a small
battery and is not erased when you turn off the computer.
Code
A system of symbols for representing data or instructions. Also,
any software program or part of a program.
COM1
The name that MS-DOS uses to identify the primary serial port.
COM2
The name that MS-DOS uses to identify a secondary serial port.
Command
An instruction you enter on a keyboard to direct the computer
to perform a specific function.
COMMAND.COM
The program file that enables MS-DOS to perform commands
such as DIR, COPY, and ERASE. You must store this file in the
root directory of your hard disk if you want to boot MS-DOS
from the hard disk.
4 Glossary
Command prompt
The characters MS-DOS displays to indicate it is loaded and
ready to receive instructions. The MS-DOS command prompt
ordinarily displays the current operating drive (A> or C>, for
example). You can add other information to the command
prompt using the PROMPT command.
Configuration
The particular arrangement of the hardware components of your
computer. Your configuration, for example, might include a
printer and an internal modem, as well as your hard disk and
diskette drive.
Control code
A character (generated by holding down the Ctrl key and
pressing another key on the keyboard) that instructs the
computer to perform a specific function.
Controller
A hardware component of your computer that oversees the
operation of the hard disk or diskette drive.
Coprocessor
An optional integrated circuit (chip) that assists the CPU in
performing numeric calculations.
CPU
Central Processing Unit. The integrated circuit (chip)
responsible for interpreting program instructions, performing
calculations, and controlling input and output operations.
Glossary 5
CRT
Cathode Ray Tube. A type of video display. A color monitor or
a TV screen is an example of a CRT.
CRT connector
The socket on the side of your Equity LT-286e where you plug
in the cable of a color monitor.
CRT/LCD switch
A slide switch located on the bottom of the computer that
identifies the type of display you are using. You can use either
the built-in LCD or an external CRT display.
Current directory
The directory in which you are working. MS-DOS executes a
command in the current directory unless you include a
pathname with the command. Also called the default directory.
Current drive
The disk drive (A or C, for example) you are currently using.
MS-DOS executes a command in the current drive unless you
include a drive identifier with the command. Also called the
default drive.
Cursor
The highlighted marker that shows your position on the screen
and moves as you enter and delete data.
Cylinder
A storage area on a hard disk. A cylinder on a hard disk is similar
to a track on a diskette.
6 Glossary
--
Data
The information a computer stores or processes.
Data diskette
A formatted diskette you use to store data files.
Data file
This term usually refers to files you create using an application
program (for example, a memo created by a word processor), as
opposed to files containing program code.
Data length
The number of bits per character in serial transmissions.
Default
A value or setting that takes effect when you turn on or reset
the computer. Also, a response to a command the system uses
unless you provide a different response.
Default directory
A synonym for current directory.
Default drive
A synonym for current drive.
Delimiter
A character (usually a semicolon, comma, or a space) used to
separate different parts of an MS-DOS command.
Glossary 7
Device
A piece of equipment that is part of a computer system and
performs a specific task. Examples include your hard disk,
diskette drive, monitor, and printer.
DIP switch
A small, two-position switch you use to supply configuration
information to the computer (or to a device). DIP stands for
Dual Inline Package. The LT-286e includes two sets of DIP
switches, with 10 switches in each set.
Directory
A list of files on a hard disk or diskette.
Disk
A general term meaning either a diskette or a hard disk.
Disk drive
The physical device (either a hard disk drive or a diskette drive)
that allows the computer to read from and write to a disk. A
diskette drive has a slot into which you insert a diskette. A hard
disk is permanently sealed inside its own container.
Diskette
A flat piece of flexible plastic coated with magnetic material
and used to store data. Also called a floppy disk.
Diskette drive
The physical device that enables the computer to read from and
write to a diskette.
8 Glossary
--
DOS
Short for MS-DOS. The Disk Operating System that controls
the computer’s input and output functions. See Operating
system.
Double-density
A type of diskette. Double-density, 3 ‘/z-inch diskettes have a
capacity of 720KB.
Drive identifier
The letter name of a diskette drive or hard disk, followed by a
colon (for example, A: or C:).
ECD
Enhanced Color Display.
EGA
Enhanced Graphics Adapter. A type of video monitor that can
display graphics.
Executable file
A file containing program instructions. In MS-DOS, executable
files must have an extension of .BAT, .COM, or .EXE. To
perform the instructions in the file, type its name at the
command prompt (with or without the extension).
Execution speed
The speed at which the CPU can execute commands. The
Equity LT-286e can run at 8 MHz or 12 MHz. Also called clock
speed or operating speed.
Glossary 9
Expansion slot
A particular kind of connector that can accommodate an
option card. You can use the expansion slot in your Equity
LT-286e, for example, to connect a 2/4ze, IBM AT-compatible
option card, such as a LAN card or FAX board.
Extension
A suffix of up to three characters you can add to a filename.
External command
A command MS-DOS stores in a program file. The FORMAT
command, for example, is stored in the file FORMAT.COM.
To perform an external command, MS-DOS must be able to
find the appropriate program file. External commands are
distinguished from internal commands (such as DIR or
ERASE), which are not stored in separate program files.
File
A group of related pieces of information (sometimes called
records or entries) stored together on a disk. Text files consist of
words and sentences. Program files consist of code. Computers
use program files to perform instructions.
Filename
A name of up to eight characters MS-DOS uses to identify a
file.
FL backlighting
The LCD screen panel type. It consists of a double-layered
structure to provide a high-contrast font pattern on a white
background. Brightness originates from two fluorescent tubes.
The display is black on white or white on black.
10
Glossary
Floppy disk
See Diskette.
Format
To prepare a new disk (or erase an old one) so that it can store
information. Formatting a disk divides it into tracks and sectors
and creates addressable locations on it.
Graphics
Lines, angles, curves, and other non-alphanumeric data.
Gray scale mode
The mapping of colors to shades of gray on the LCD screen.
GW-BASIC
Microsoft’s extended version of the BASIC programming
language.
Hard disk
A sealed mass storage device you use to store data permanently.
A hard disk can process data more rapidly and can store many
more files than a diskette.
Hardware
Any physical component of a computer system, such as a
monitor, printer, keyboard, or CPU.
Hexadecimal
A base 16 numbering system commonly used by programmers.
Glossary
11
Hidden file
A file whose name is not listed by the DIR command. MS-DOS
stores two hidden files in the root directory of your hard disk.
Some application programs also create hidden files.
High-density
A type of diskette. High-density, 3 l/z-inch diskettes have a
capacity of 1.44MB.
Input/output (I/O) port
See Port.
Interface
A hardware or software connection used to transmit data
between equipment or programs.
Internal command
A command, such as DIR or ERASE, that MS-DOS does not
store in a separate program file. You can execute internal
commands from any drive or directory.
Kilobyte (KB)
A unit used to measure storage space in a computer’s memory or
on a disk. One kilobyte equals 1,024 bytes.
LCD
Liquid Crystal Display. A form of flat panel display.
Log on
To make a drive or directory the current drive or directory.
12
Glossary
--
Main unit
The part of the computer that houses the central processing
unit, random access memory, disk drives, and other supporting
circuitry.
MDA
Monochrome Display Adapter.
Megabyte (MB)
A unit used to measure storage space in a computer’s memory or
on a disk. One megabyte equals 1,048,576 bytes.
Megahertz (MHz)
A unit used to measure the oscillation frequency of a computer’s
internal timing clock. One megahertz is one million cycles per
second. The Equity LT-286e operates at 8 or 12 MHz.
Memory
The area where the computer stores data. Memory contents may
be permanent (ROM) or temporary (RAM). See also ROM and
RAM.
Memory expansion module
An optional component that adds memory to your computer.
Memory-resident program
A program you can access while another program is running.
An example might be a notepad utility that you can use while
working in a spreadsheet program.
Microprocessor
A CPU chip, such as the 80C286. See CPU.
Glossary 13
Modem
A device that allows a computer to send or receive data over a
telephone line.
Monitor
The screen of a CRT.
Motherboard
The main circuit board of your computer. Also called the system
board.
MS-DOS
An operating system from Microsoft that comes with your
computer. See Operating system.
NiCad
The type of battery used by your Equity LT-286e. NiCad stands
for nickel-cadmium.
Numeric keypad
The number keys grouped on the upper, right side of the
keyboard.
Operating speed
The speed at which the CPU can execute commands. The
Equity LT-286e has operating speeds of 8 MHz and 12 MHz.
Also called execution speed or clock speed.
14
Glossary
Operating system
A collection of programs that allows a computer to control all
of its operations. The operating system determines how
programs run on the computer and supervises all input and
output. Your computer comes with MS-DOS, an operating
system by Microsoft.
Option card
A circuit board you install in a slot in your main unit. Option
cards provide additional capabilities, such as a mouse, fax, or
network. The expansion slot on the LT-286e is accessed from
the bottom of the computer.
Parallel
A type of interface that transmits data in groups of bits.
Distinguished from serial, a type of interface in which bits are
transmitted one at a time.
Parameter
A term added to a command that tells the computer how to
perform the command (for example, what data file to use or
what particular conditions to expect).
Parity
A bit used to verify the accuracy of data.
Partition
To divide a hard disk into logical sections for use by one or
more operating systems. You must partition a hard disk before
you can use it, even if you intend to install only one operating
system on the disk.
Glossary 1 5
Pathname
The list of directories the operating system must search through
to locate a file. For example, the pathname for a file named
CONTRACT.TXT that is located in the BUSINESS
subdirectory is \ BUSINESS \CONTRACT.TXT.
Peripheral
An external device, such as a printer or modem, connected to a
computer.
Port
An input/output connection on a computer to which you can
attach a peripheral.
Power-on diagnostics
A set of self-testing routines the computer performs
automatically every time you turn it on.
Program
A disk file that contains coded instructions telling the computer
what to do and how to do it.
Prompt
A message on the screen that requests information or tells you
the action you need to perform next.
RAM
Random Access Memory. The portion of the computer’s
memory that runs programs and temporarily stores data while
you work. All data stored in RAM is erased when you turn off
the computer, so you must store any data you want to save on a
diskette or hard disk.
16
Glossary
Read
To copy data from one area to another. For example, when you
open a text file stored on disk, the computer reads the data from
the disk and displays it on the screen.
Read/write head
The physical device inside a disk drive that reads and records
data on the magnetic surface of a disk.
Real-time clock
A battery-powered clock in the computer that keeps track of
the current time and date even when the computer’s power is
turned off.
Reset
To reload a computer’s operating system so you can retry a task
or begin using a different operating system. Resetting erases the
computer’s RAM.
RGB
Red-Green-Blue. A type of color monitor.
ROM
Read Only Memory. The portion of the computer’s memory
that contains permanent instructions and cannot be modified.
The power-on diagnostic programs, for example, are stored in
ROM. Unlike RAM, ROM retains its contents even after you
turn off the computer.
Root directory
The top-level directory on a diskette or hard disk. The root
directory is designated by a backslash (\ ). All other directories
are subdirectories of the root directory or of other subdirectories.
Glossary 17
RS-232C
A standard serial interface. You can easily connect an
RS-232C-compatible device to your Equity LT-286e.
Sector
A contiguous section of a disk track that provides a location at
which the computer can access data.
Self test
A diagnostic procedure the computer performs automatically
when you turn it on.
Serial
A type of interface in which data is transmitted one bit at a
time (as distinguished from parallel, a type of interface in which
data bits are transmitted in groups).
Shell
An MS-DOS program that lets you run programs and perform
operating system commands from menus.
Slide Switch
A switch on the bottom of the LT-286e that controls certain
operational features.
Software
The programs that enable the computer to perform the tasks
and functions you indicate.
Source diskette
The diskette from which you are copying files, as opposed to the
target diskette (the diskette to which you are copying files).
18
Glossary
Status indicator bar
A built-in LCD indicator panel that shows how you are using
the computer.
Stop bit
A signal sent in serial communications to mark the end of a
character.
Subdirectory
A disk directory that branches down from another subdirectory
or from the root directory.
Switch
An option you can add to an MS-DOS command that affects
the way the command works. See Parameter.
System board
See motherboard.
System diskette
A diskette from which you can boot the operating system. An
MS-DOS system diskette must contain the file
COMMAND.COM plus two hidden MS-DOS program files.
To create a system diskette, use the /S switch with the
FORMAT command (for example, FORMAT A: /S).
Target diskette
The diskette to which you are copying files, as opposed to the
source diskette (the diskette from which you are copying files).
Glossary 19
TPI
Tracks Per Inch. A measure of the density with which data can
be stored on a diskette.
Track
A circular region on a diskette, which is divided into sectors.
Each side of a 1.44MB or 720KB diskette has 80 concentric
tracks. Each side of a 360KB 5 ‘/.+-inch diskette has 40. On a
hard disk, tracks are called cylinders.
Utility program
A type of application program designed to perform
housekeeping chores, such as copying files, creating directories,
and so on. HELP and MENU are examples of utility programs.
Volume label
A name (up to eleven characters in length) you can assign to a
diskette or hard disk. To add or change a volume label for a
diskette or hard disk that has already been formatted, use the
MS-DOS LABEL command.
Wildcard character
A character that represents an unknown character or group of
characters. MS-DOS recognizes two wildcard characters: * and
?. The asterisk represents a group of characters, and the question
mark represents a single character.
Write
To record data on a disk.
Write-protect
To prevent a diskette from being overwritten. When a diskette
is write-protected, you cannot erase, change, or record over its
contents.
20
Glossary
Index
A
-
AC adapter, 3, 1-3, 1-14, 2-24-25,
4-2
connecting, 1-10 -12
disconnecting, 1-12
using, 2-1 -2
AC wall outlet, 1-13
APPEND command, 3-11
Application programs, 2, 4, 2-11
2-15, 3-2, 3-5, 3-31
starting, 3-31
AUTOEXEC.BAT file, 1-22,
2-25 -26, 3-11, 3-29 -30
creating, 3-30
modifying, 2-25 -26
using, 3-29 -30
B
Backlight period, 2-12 -13, 2-26,
4-2
Backlighting, 1-16, 2-13
turning off, 2-3
Backlit LCD, 1
Backslash, 3-13
BACKUP command, 2-24, 3-17,
3-22 -23
using, 3-22 -23
Backup,
copies, 1-22, 2-22, 2-24
diskettes, 3-17
Batteries, NiCad, 2-2
Battery pack, 1, 3, 1-3, 2-2, 2-5,
2-7
charge, preserving, 2-1, 2-12
charging, 2-3 -4, 2-7, 2-11
connecting, 2-4-6
recharging, 2-1 -2
removing, 2-5
using, 2-2-6
Brightness, 4-3
adjusting, 1-16
lever, 1-16, 2-3
C
Caps Lock, 2-8, 2-16
Carrying,
case, 3, C-4
handle, 2-10, A-2. See also Handle
CGA video mode, 2, A-6
CLOCK slide switch, 2-3, A-12
Clock speed, 2-3, A-1, A-12
CMOS,
RAM, 1-17
SETUP, 1-18
Color monitor, 2, 1-10. See also
External monitor
Command,
format, 3-4
prompt, 3-4, 3-24 -25, 3-31
See also MS-DOS
Computer,
resetting, 2-27
starting, 4-1 -2
storing, 2-10
turning off, 2-28
turning on, 1-14 -15
using, 2-1 -28
CONFIG.SYS file, 1-22
Contrast, 4-3
adjusting, 1-16
lever, 1-16
Control key,
Ctrl Alt Del, 2-27
Ctrl Break, 2-27
Ctrl C, 2-27
COPY command, 3-13, 3-17, 3-20,
3-30, 4-5
using, 3-20-22
Copying, data, 3-17-23. See also
COPY command
CPU clock speed, 1-1, 2-7, A-11
CRT/LCD,
display mode, A-1
slide switch, 4-2-3, A-5, A-12,
B-l
switch settings, A-6
Current,
directory, 3-8 -9, 3-11
drive, 3-3
changing, 3-2-3
screen width, 1-19
Customer Care Centers, 5, 1-4, 4-1,
B-13
D
copying, 3-17 -23
deleting, 3-24
protecting, 2-24
storing, 3-4-5
Default drive. See Current drive
Delimiters, 3-4
Diagnostic program. See Self test
DIP switches, 1-1, 1-8-9, 1-17,
4-1 -2, A-1 -10
accessing, A-2
setting, A-1 -10
2
Index
Directories,
changing, 3-12 -13
copying, 3-13
creating, 3-11 -12
deleting, 3-14
listing, 3-9-10
using, 3-6-14
Disk,
drive indicators, 1-14
utilities, MENU, 3-28
DISKCOPY command, 3-17 -19,
4-4
using, 3-18-19
Diskette drive assignments, A-7
Diskette drives, 1-17, 1-19, 2-7,
2-17, A-l, C-2
3 ‘/z-inch, 1, 2-17, 3-2 -3
5 ‘I+inch, 2, 2-17,2-20,3-2-3,
B-3
Diskettes,
3 ‘/z-inch, 2-18
5 ‘/+inch, 2-18
caring, 2-19 -20
choosing, 2-18 -19
format, 2-19
formatting, 3-14 -17
inserting, 2-21
problems, 4-4 -5
removing, 2-21
using, 2-17 -23
write-protecting, 2-22
Display,
switch, A-12. See also
CRT/LCD switch
type, 1-19
See also LCD screen
Drive identifiers, 3-3
E
F
EGA,
configuration, A-4 -5, A-7
video mode, 2, 1-1, A-l, A-6
Electrical outlet, 2-1
Enhanced color display, A-4
Enter DOS command, MENU,
3-28
Environmental requirements, C-4
Execution speed, 2, 2-11, 4-4
selecting, 2-11
Expanded LCD mode, A-4, A-7
Expansion,
card cover, A-2
replacing, A-9 -10
cards, C-4
slot, 1
cover, A-2
Extended EGA video modes, 2
External,
battery pack, 2-1. See also
Battery pack
color monitor, 4-3
connecting, B-1 -2
commands, 3-4
CRT, 2-7, A-11
diskette drive, 1, 1-10, 1-17,
1-20, A-5, A-7, A-11 -12,
C-1. See also Diskette
drive, 5 ‘/+inch
connecting, B-3 -4
keyboard, 1, A-5, C-2
connecting, B-6 -7
monitor, A-1, A-6, B-1 -2
connecting, B-1 -2
FASTOPEN, 2-24
FDD EXT/INT slide switch, 2-7,
A-12, B-3
File,
extension, 3-4-5
utilities, MENU, 3-28
Filename, 3-4-5
Files, merging, 3-22
Formatting,
1.44MB diskette, 3-15-16
720 diskette, 3-16-17
G
Gray scale modes, 2-12, 2-14
GW-BASIC, 2
H
Handle, using, 2-10
Hard disk,
drive, 1-2, 1-3, 1-17, 1-22, 2-3,
2-7, 2-23, 2-26, 3-3, C-2
care, 2-23-24
installing, 1-3 -5
turning off, 2-25
types, 1-19
using, 2-23-26
performance, 2-24
problems, 4-5
HDDPSAVE utility, 2-3, 2-25 -26
HELP utility, 3,3-25-26
using, 3-25-26
Help, MENU, 3-28
Index 3
I
M
Install diskette, inserting, 1-21 -22
Installation program, 1-22
Internal
commands, 3-4
diskette drive, 1-1, A-5, A-7.
See also Diskette drive
keyboard, 2-8, A-5.
See also Keyboard
memory. See RAM
modem, 2, C-2. See also Modem
installing, B-4 -5
printer port, A-5. See also Parallel
interface
self test, 1-15-16
serial port, A-5 See also Serial
interface
Magnetic fields, 2-10, 2-23
Math coprocessor, 2, 1-17
MDA video mode, 2
Memory card, 2. See also RAM
MENU utility, 3, 1-9, 2-24, 3-18,
3-23, 3-27
using, 3-27 -28
Merging files, 3-20, 3-22
Microprocessor, 1-2, C-1
MODE command, 1-9
Mode settings, MENU, 3-28
Modem, 1, C-4
cover, B-4
installing, B-4 -5
Monitor, external, 4-3, A- 1, A-6,
B-1 -2
Motherboard, B-14
MS-DOS,
command prompt, 3-29
commands, 3-1, 3-25 -27
entering, 3-4
diskettes, 1-3, 1-22
exiting, 3-2
files, 1-22
installation program, 1-5.
See also SELECT program
manuals, 3, 1-3
operating system, 3, 3-1 -32
starting, 3-2
using, 3-1 -32
K
Keyboard, 2-16, C-2
adapter, B-7
connector, C-1
external, 1, 3, A-5, B-6 -7, C-2
L
LCD screen, 1, 1-1, 2-8, 2-12, 2-15,
2-26, 4-2, A-1, B-2
adjustment mode, 2-14-15
display, C-2
mode, A-7
options, defining, 2-12-15
Levers,
brightness, 4-2
contrast, 4-2
N
Num Lock, 2-8, 2-16
O
On-line information, 3-25
Operating system, 3, 1-22, 3-1
commands, 3-24
See also MS-DOS
Option,
card, installing, B-7 -13
slot, C-1
Optional
devices, B-1
video card, B-8
Options, C-4
installing, B-1 -14
P
Parallel,
interface, 1-2, l-l, 1-6-8, A-1
C-1
port, A-9
printer, A-1
Parameters, 3-4
Parent directory, 3-12
PATH command, 3-11, 3-29
Pathnames, 3-4, 3-8, 3-11, 3-29
using, 3-10 -11
Peripheral devices, 2, 1-9, 2-27
Physical dimensions, C-3
Power,
cord, 1-3
connecting, 1-13
off, 1-14
requirements, C-3
supply, C-3
switch, 1-15, 4-1 -3, A-2
Power-off period, 2-25-26
Primary,
display, A-5, A-8
port,
parallel, 1-8, A-8, B-8
serial, 1-9, A-8
Printer, connecting, 1-6 -10
PROMPT command, 3-29
PUSH button, 1-4
R
RAM (random access memory), 1,
1-15, 1-17, 2-27, C-1
memory card, C-l
installing, B-5 -6
Read-only memory (ROM), 1-17
Real-time clock, C-2
Registration card, 1-3
RESET button, 2-27
RESTORE command, 3-23
Reverse video mode, 2-12, 2-15
RGB VIDEO port, B-2
Root directory, 3-7 -8, 3-10 -13, 3-30
RS-232C port, 1-9
S
Safety rules, 1-14
Screen,
closing, 2-9-10
opening, 2-9-10
Scroll Lock, 2-8, 2-16
Secondary port,
parallel, A-8, B-8
serial, A-8
SELECT program, 1-5, 1-22, 2-25,
3-29
Self test, 1-15 -16
Serial interface, 1-2, l-l, 1-6,
1-9 -10, A-l, A-8, C-l
SETLCD program, 2-3, 2-12 -14,
2-26
Setting up, 1-1 -22
SETUP,
program, 1-5, 1-19
running, 1-17 -21
starting, 1-18-21
prompt, 1-22
Index
5
Shell program, 3, 2-26, 3-9
using, 3-24
Shock indicator, 1-4
Slide switches, 2, 1-1, 2-3, 2-7, A-1
setting, 4-1, A-11 -12
SMARTDRV.SYS, 2-24
Source,
diskette, 3-19
file, 3-20
Special keys, 2-15 -17
Speed indicator, 1-15
Standard LCD mode, A-7
Standby mode, 2-12
Status indicator bar, 1-14, 2-1 -2, 2-4,
2-7 -8, 4-1 -2
Storing data, 3-4-5
Subdirectories, 3-7, 3-11, 3-13
creating, 3-7
Subdirectory structure, 3-8
SUBST command, 3-11
Switch, CLOCK, 2-11
Switches, MS-DOS, 3-4
System,
configuration, A-1
starting, 1-14 -16
T
Target,
diskette, 3-19-20
file, 3-20
Troubleshooting, 4-1 -5
TYPE indicator, 1-5
U
Unpacking, 1-2 -3
Using,
directories, 3-6 -14
MS-DOS, 3-1 -32
6 Index
V
Video,
controller, A-6
interface, 1
modes, C-l
CGA, 2, A-6
EGA, 2, 1-1, A-l, A-6
extended EGA, 2
MDA, 2
Viewing angles, 2-9
W
Warranty verification, 1-3
Wildcard characters, 3-20
Word processing files, 3-5
Working directory, 3-13
Write-protect switch, 4-5
X
XCOPY command, 2-19, 3-13,
3-18, 3-23
Reader Comment Card
Equity LT-286e User’s Guide
Please use this card to evaluate this manual. Your comments and
suggestions will help us improve our publications.
Please rate the following:
Fair
Poor
n Organization of this manual
cl
cl
cl
cl
n
Technical accuracy
cl
cl
Ll
tl
Completeness of instructions
cl
cl
Ll
cl
E Clarity of concepts and wording
ci
cl
cl
cl
W Quality of examples and pictures
ci
Ll
cl
Cl
n Quantity of examples and pictures
cl
cl
cl
cl
n
Excellent Good
Comments :
Name:
Address:
City:
State:
Please tear out and mail in.
Thank you!
EPSON
Zip:
PLACE
-
EPSON America, Inc.
2780 Lomita Blvd.
Torrance, CA 90505
MS 4-1
Fold Here
Tape Here - Do Not Staple
-l+
brightness lever
contrast lever
internal diskette drive
/
handle
Port
diskette
drive port
hard disk drive
status indicator bar
expansion slot cover
handle