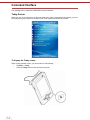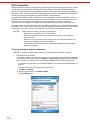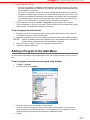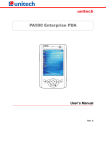
1
WPA 1000
User’s Manual
Table of Contents
Preface
About This Manual
iii
Notices ..................................................................................................................................... iii
Battery Charge Notice ............................................................................................................ iii
Storage and Safety Notice...................................................................................................... iv
RoHS Statement..................................................................................................................... iv
Chapter 1
Getting Started
1
Introducing the WPA1000................................................................................................. 1
Features ................................................................................................................................. 1
Package Contents ............................................................................................................... 2
A Tour of the WPA1000 ..................................................................................................... 3
Front View............................................................................................................................... 3
Back View ............................................................................................................................... 4
Setting up the WPA1000 ................................................................................................... 5
Installing the Battery ............................................................................................................... 5
Charging the WPA1000 .......................................................................................................... 6
Powering on the WPA1000..................................................................................................... 8
Chapter 2
Using the Hardware
9
Using the Keypad ................................................................................................................ 9
Using the Stylus ................................................................................................................. 10
Using the SDIO/MMC Slot............................................................................................... 11
Using the Laser Scanner ................................................................................................ 12
Command Interface .......................................................................................................... 14
Today Screen .......................................................................................................................
Start Menu ............................................................................................................................
Navigation Bar ......................................................................................................................
Command Bar.......................................................................................................................
Pop-up Menus ......................................................................................................................
Notifications ..........................................................................................................................
Chapter 3
Getting Connected
14
17
17
18
19
19
21
Establishing Device-PC Connection.......................................................................... 21
Installing Microsoft ActiveSync ............................................................................................. 21
Connecting the Device to Your Computer ............................................................................ 22
v
Using ActiveSync .............................................................................................................. 24
Synchronizing Information with Your Computer ................................................................... 24
Using ActiveSync to Exchange Files .................................................................................... 26
Synchronization Options....................................................................................................... 27
Chapter 4
Wireless Communications
28
Managing Wireless Connections ................................................................................ 28
Using the Wireless Manager................................................................................................. 28
Connectivity Features ...................................................................................................... 29
Beam Function......................................................................................................................
Infrared Connection ..............................................................................................................
Bluetooth Connection ...........................................................................................................
Wi-Fi Connection ..................................................................................................................
29
30
30
34
Connecting to the Internet ............................................................................................. 35
Chapter 5
Managing Programs
36
Accessing Programs ........................................................................................................ 36
Using the Barcode Scanner Programs ..................................................................... 37
Scan2Key ............................................................................................................................. 37
Scanner Settings .................................................................................................................. 38
Chapter 6
Customizing Your WPA1000
Adjusting Settings .............................................................................................................
Checking Main and Backup Battery Status ............................................................
Extending Battery Life .....................................................................................................
Adjusting the Backlight Setting ...................................................................................
Resetting the Device ........................................................................................................
41
41
42
43
44
45
Warm Boot............................................................................................................................ 45
Clean Boot ............................................................................................................................ 45
Cold Boot .............................................................................................................................. 46
Viewing Flash ROM Files ................................................................................................
Adding Programs to Your Device ...............................................................................
Adding a Program to the Start Menu .........................................................................
Removing Programs.........................................................................................................
vi
46
46
47
50
Appendix A
System Specifications
51
Appendix B
Regulatory Compliance Statements
72
Preface
About This Manual
This manual explains how to install, operate and maintain the WPA1000 mobile device.
No part of this publication may be reproduced or used in any form, or by any electrical or
mechanical means, without permission in writing from the manufacturer. This includes
electronic or mechanical means, such as photocopying, recording, or information storage and
retrieval systems. The material in this manual is subject to change without notice.
© Copyright 2010 Wasp Barcode Technology All rights reserved.
Bluetooth is a registered trademark of Bluetooth SIG.
Microsoft, Windows and ActiveSync are either registered trademarks or trademarks of
Microsoft Corporation. Other product names mentioned in this manual may be trademarks or
registered trademarks of their respective companies and are hereby acknowledged.
Notices
This unit is equipped with a battery pack and backup battery. It is possible that the WPA1000
may not power-on due to battery discharge as a result of storage.
In the above situation, plug the WPA1000 to the USB charging cable which is with DC in port
or put the unit into the WPA1000 USB Docking Station (with 5V/3A AC-DC adapter), and
recharge the unit for 16 hours in order to fully charge its backup battery.
The backup battery will charge from external power or the main battery (if the main battery still
has enough power to turn on). In the event the main battery is fully charged, refrain from using
the WPA1000 for 16 hours in order for the main battery to fully charge the backup battery.
Backing-up data by backup battery only without the main battery installed in battery
compartment may take as long as 1 hour. Therefore, in order to prevent data protection failure
due to backup battery failure, do not leave the WPA1000 without the rechargeable battery
pack installed, or without connection to AC power for an extended period of time.
Battery Charge Notice
It is important to consider the environment temperature whenever you are charging the
Lithium-Ion battery pack. The process is most efficient at normal room temperature or slightly
cooler. It is essential that you charge batteries within the stated range of 0°C to 50°C.
Charging batteries outside of the specified range could damage the batteries and shorten their
charging life cycle.
iii
Storage and Safety Notice
Although charged Lithium-Ion batteries may be left unused for several months, their capacity
may be depleted due to build up of internal resistance. If this happens they will require
recharging prior to use. Lithium-Ion batteries may be stored at temperatures between -20°C to
60°C, however they may be depleted more rapidly at the high end of this range. It is
recommended to store batteries within normal room temperature ranges.
RoHS Statement
This device conforms to RoHS (Reduction Of Hazardous Substances) European Union
regulations that set maximum concentration limits on hazardous materials used in electrical
and electronic equipment.
iv
Chapter 1
Getting Started
Introducing the WPA1000
Thank you for purchasing the WPA1000. Your WPA1000 was designed for users needing a compact
and durable portable computer for data collection and real time transactions.
Ultra-rugged Design
The WPA1000 is a compact mobile computing device designed for maximum durability.
Easy to Use
The unit is equipped with a color display with touch screen, a five-way directional key, and six
application keys. The WPA1000 supports integrated long range scanners for fast and accurate data
collection.The device also supports Infrared interface, Bluetooth, and wireless communication
capability for exchanging information between a computing or communication system.
Features
Powerful system
•
•
Microsoft Windows Mobile 5.0 operating
system
Intel PXA270 processor with speed of up
to 520 MHz
System memory
•
•
64 MB SDRAM
64 MB Flash ROM
Display
•
•
3.5-inch QVGA LCD touch-sensitive
screen
320 x 240 resolution
Barcode scanner
•
•
Symbol SE950
Hitachi HD6433657W barcode decoder
Wireless connectivity
•
•
•
Communication
•
•
•
•
SDIO/MMC slot
802.11b/g
Bluetooth
Infrared
USB Host & Client
Battery life
•
•
•
Normal usage: 4 hours
Charging time: 3.5 hours
Embedded backup battery cell: 1 hour
User-friendly interface
•
Expansion slot
•
802.11b/g with diversity antenna
Bluetooth
Infrared port
•
Special keys to launch particular
applications and display the on-screen
keyboard
Keys for barcode scanning
1
Package Contents
After opening the box, ensure the following accessories for the WPA1000 are present:
WPA1000 Terminal
Power Adapter*
Stylus
USB charging cable
Stylus with bungee lanyard
(optional)
USB docking station
(optional)
CD-ROM
Quick Reference Guide
Battery Pack
Earphone
Leather case (optional)
* The adapter’s replaceable clip plugs availability depends on region.
If anything is missing or appears damaged in any way, contact your dealer.
2
Chapter 1 Getting Started
A Tour of the WPA1000
The following sections describe the main components and features of the WPA1000.
Front View
No.
Component
Description
1.
Barcode laser scanner
(optional)
Reads and captures information on a barcode label.
2.
Status indicator
Indicates the battery charging and barcode scanning status.
• Green - Battery is fully charged, the device is running on
battery power, or barcode scanning process is completed
without error.
• Red - Battery is charging, barcode scanner is activated and
processing.
3.
SDIO/MMC slot
Accepts an SD (Secure Digital), MMC (Multimedia Card) or SDIO
(Secure Digital Input Output) cards, allowing you to add more
memory.
Install add-on applications or use audio text files stored in it for
use with internal applications. You can also use it to back up data
from your device.
4.
Power button
If the device is off, press this button to turn it on.
Alternatively, when the unit is on, this key must be pressed and
held down for about two seconds in order to turn the device off.
5.
LCD touch screen
Displays the applications and data stored on your device. It is
touch-sensitive and responds to the stylus or finger.
6.
Keypad
Includes a software keyboard button, navigation key and
application buttons to launch Microsoft Outlook Mobile programs.
7.
8.
Microphone
Inputs audio into your device when recording voice notes.
Left scanner trigger
key
Press to activate the barcode laser scanner.
9.
Cord holder
Eyelet for holding the elastic bungee lanyard.
3
Back View
No.
4
Component
Description
10.
Speaker
Listen to audio media. When speaker phone is active,
sounds are emitted here.
11.
Battery release latch
Slide toward the right side of the device and hold firmly,
then detach the battery from its bay.
12.
Reset button
Press the end of the stylus into the button to reset your
device.
13.
Main battery
Removable and rechargeable 3.7 V, 2200 mAh battery
pack.
14.
Universal connector
Connects your device to a USB charging cable, which in
turn connects to the computer’s USB port and through
the AC adapter to an electrical outlet. This allows you to
recharge your device and perform an ActiveSync
operation.
You can also use it to connect a peripheral hardware,
such as a docking station, to your device.
15.
Earphone jack
Lift the rubber cover from the earphone jack and connect
an audio line-out device (earphone or headphone).
16.
17.
Right scanner trigger key
Press to activate the barcode laser scanner.
Infrared (IR) port
Uses infrared technology to transmit and receive data
from other IR-enabled devices.
18.
Stylus
To use the stylus, remove it from its holder and hold it the
same way you hold a pen or pencil.
Chapter 1 Getting Started
Setting up the WPA1000
Perform the following easy set up tasks to begin using your device:
•
•
•
Install the battery pack
Charge your device
Power on the WPA1000
Installing the Battery
WARNING! There is a risk of fire and burns if the battery pack is handled
improperly. DO NOT disassemble, crush, puncture, short external
contacts, or dispose the battery pack in fire or water. DO NOT attempt
to open or service the battery pack. Dispose of used batteries
according to local recycling guidelines in your area.
A backup battery cell is embedded into your device to prevent data loss in instances when the
removable battery pack is removed or completely discharged. This backup battery cell retains data for
60 minutes after which you risk loosing all data on the internal memory of your device.
NOTE:
1.
2.
To enable the internal battery cell to provide backup power supply, charge your device
with the main battery pack for at least three and a half hours.
Position the battery pack, making sure the battery pack fits the shape of the battery
compartment.
Slide the battery pack into the battery bay. The battery pack locks to the chassis with an audible
click.
5
Charging the WPA1000
For initial use, you need to charge your device for about 16 hours. After that, you can charge it
everyday to recharge the battery to full capacity. You can charge your device using the USB charging
cable or the docking station.
CAUTION! Operating the WPA1000 for the first time without the AC adapter, and
without fully charging the backup battery may result in loss of data
stored in RAM memory.
NOTE:
Data you enter may not be properly stored until the internal backup battery has been
adequately charged.
To charge the device using the USB charging cable:
1.
2.
3.
4.
6
Install the clip plug to the AC adapter, if necessary. Slide the replaceable clip plug into the AC
adapter until it locks into place with an audible click.
Press and hold the connector button on the USB charging cable and connect it to the WPA1000
(1).
Plug the AC adapter cable into the power jack on the USB charging cable (2).
Connect the AC adapter into an electrical outlet (3).
Chapter 1 Getting Started
To charge the device using the docking station:
1.
2.
3.
Plug the AC adapter cable into the power jack on the docking station.
Plug the AC adapter into an electrical outlet.
Slide the device into the docking station until it clicks into place.
The connection is secure when the bottom edge of the device is aligned smoothly with the
docking station, and the LED indicator on the docking station and device lights up red.
LED status during charging:
– Solid red: Charging
– Solid green: Charging complete
If the battery level becomes low in the course of normal use, a status icon appears on the
device screen indicating low
or very low battery
status. In both cases, perform an
ActiveSync operation to back up your data, then recharge your device as soon as possible.
If the battery level reaches low status, the device will enter sleep mode; if the battery level
reaches very low status, the device will enter deep sleep mode. In this case, you have about
72 hours to recharge your device after which you risk losing all data on your device’s internal
memory.
7
Powering On the WPA1000
After you have initially charged your device for about 16 hours, the device is ready to be used. You can
now start up your device where you’ll calibrate the display, set up the system time zone, and learn some
basic stylus usage.
1.
Turn on your device by pressing the Power button on the front panel.
NOTE:
2.
3.
4.
8
The WPA1000 screen ships with a protective plastic film. You may remove this if
desired by peeling from one corner. The screen will be more susceptible to scratching
without the film, but will be more readable.
The WPA1000 welcome screen appears. The Windows Mobile screen will appear shortly
thereafter.
Calibrate the WPA1000
The calibrate screen will automatically appear when the unit is powered-on for the first time or
after the system is reset. This screen can also be accessed at any time by tapping Start →
Settings → System tab → Screen.
The WPA1000 will prompt you to calibrate the unit by tapping a sequence of screen locations.
Tap gently but firmly. When you have completed the series of taps, press the Enter button to
confirm it.
Set the Time Zone, Date, and Time
Select your current time zone from the Time zone drop-down menu, then tap Next.
Follow all onscreen instructions to complete the set up. The setup wizard provides tips for using
the pop-up menus and assign a lock password to access your device.
After the device setup, you can create an ActiveSync partnership to synchronize information
between your computer and your device. See Establishing Device-PC Connection on page 21
for detailed instructions.
Chapter 2
Using the Hardware
Using the Keypad
The WPA1000 keypad has a navigation key and six special keys to launch particular applications and
display the on-screen keyboard.
No.
Component
Icon
Description
1.
Software keyboard
button
Press to launch the Windows CE or on-screen keyboard.
2.
Notes button
Press to open Notes. Notes allows you to quickly capture
thoughts, reminders, ideas, drawings, and phone numbers.
You can create a written note or include a recording in a note.
3.
Enter button
Press the Enter button, center of the navigation key, to
access the menu options and confirm your selection.
4.
Navigation key
Use the up, down, left, and right arrow keys to navigate
through the menu options.
5.
Email button
Launch Microsoft Outlook Express.
6.
Today button
Customize the look and information that is displayed on the
Today screen.
7.
Calendar button
Press to bring up Calendar. Calendar enables you to
conveniently manage your schedules and appointments or
any other activities associated with a date and time.
8.
Tasks button
Keep track of what you have to do and prioritize them based
on their importance and urgency.
9
Using the Stylus
CAUTION! Never use anything other than the WPA1000 stylus on the screen.
Using another object as a stylus could cause permanent damage.
10
1.
Slide the stylus in the direction of the arrow, then pull out to remove the stylus from its holder.
2.
3.
4.
Hold the stylus like a pencil.
To make a choice from a menu, lightly tap the tip of the stylus on that choice.
To write data into a field on a form, use the stylus to print the letters or numbers. Use very light
pressure.
Chapter 2 Using the Hardware
Using the SDIO/MMC Slot
Your device has an expansion slot compatible with a range of SD, SDIO, and MMC storage cards,
which are primarily used to back up or transfer files and data.
To insert a storage card:
1.
Hold the device securely, then lift the rubber cover from the SDIO/MMC slot
.
2.
Push the card into the slot until you hear an audible system sound; this will signal that the card
is already properly seated within the slot.
The card is secure when it is not protruding from the slot.
To remove a storage card:
1.
2.
Hold the device securely; then push against the top of the card, as if you were pushing it further
into the slot, letting the card spring out. An audible system sound will signal that the card has
been released.
Gently remove the card from the slot.
11
Using the Laser Scanner
WPA1000 has an integrated laser scanner which reads all major barcode labels with excellent
performance.
NOTE:
The reading software must be enabled in order to operate the scanner. This can be a
user-loaded application or a pre-loaded utility such as Scanner Settings.
To scan a barcode:
1.
Launch the Scanner Settings application.
a. Tap Start → Settings.
b. On the System tab, tap Scanner Settings.
In the Scanner Control Panel screen, you can configure barcode scanner parameters such
as enabling or disabling barcode symbologies, setting data transmission options,
configuring magnetic and proximity reading options, and setting power management
options.
c. On the Settings tab, tap Barcode IDs.
12
Chapter 2 Using the Hardware
d. Tap the Test tab.
2.
3.
Press either one of the scanner trigger keys on the device.
Aim the laser scanner at the selected barcode and press both trigger keys to scan. The
scanned barcode data appears on the screen.
4.
On the Scanner Control Panel screen, tap ok to exit
13
Command Interface
The following section explains the WPA1000 command interface.
Today Screen
When you turn on your device for the first time each day or after a preset period of inactivity, you’ll see
the Today screen.It provides an at-a-glance view of the important reminders and details.
To display the Today screen:
When viewing another screen, you can do either of the following:
•
•
14
Tap Start → Today.
Press the Today button on the device’s front panel.
Chapter 2 Using the Hardware
To define a preset period of inactivity after which the Today screen is displayed:
1.
Tap Start → Settings.
2.
On the Personal tab, tap Today.
15
16
3.
On the Items tab, select the “Today timeout” check box.
4.
Tap the pick list beside the check box to set the period of inactivity.
5.
Tap ok.
Chapter 2 Using the Hardware
Start Menu
The Start menu displays a list of active programs, as well as options to view the Programs, Settings and
Help screens.
Navigation Bar
The navigation bar is located at the top of the screen. It displays the notification icons for system alarms and
reminders, status icons for the data connectivity, battery charge, and volume control.
Status Icons
The table below describes some of the status icons you may see on your device.
Status Icon
Description
Turns all sounds on and off.
Indicates Bluetooth wireless technology is on.
Indicates that the main battery is charging. The WPA1000 is either plugged-in via
the AC adapter or docking station.
Indicates the main battery is fully charged.
Indicates the main battery is low and needs to be charged.
Indicates the main battery is very low. Stop device operation and charge the
device immediately.
Indicates the backup battery is very low. Stop device operation and charge the
device immediately.
Indicates device is synchronized with a computer.
Wireless and Bluetooth connection is activated.
For more detailed description of the status icons, tap Start → Help.
17
Command Bar
Use the command bar at the bottom of the screen to perform tasks in programs.
The command bar includes menu names, buttons, and the Input Selector button.
18
•
To create a new item in the current program, tap New.
•
To view a notification or an image file received on your device, tap View.
•
To see the name of a button, tap and hold the stylus on the button. Drag the stylus off the button so that the
command is not carried out.
•
To view the soft keyboard, tap the Input Selector button
or you can press the Software keyboard button.
Chapter 2 Using the Hardware
Pop-up Menus
With pop-up menus, you can quickly choose an action for an item. The actions in the pop-up menus
vary from program to program.
To display a pop-up menu:
1.
2.
Tap and hold the stylus on the item that you want to perform the action on.
When the menu appears, lift the stylus, then do either of the following:
– Tap the action you want to perform.
– Tap anywhere outside the menu to close the menu without performing an action.
Notifications
Your device reminds you in a variety of ways when you have something to do or receive a message.
For example, if you’ve set up an appointment in Calendar, a task with a due date in Tasks, data or
message received, or an alarm in Clock; you’ll be notified in any of the following ways:
•
A message box appears on the screen.
•
A sound, which you can specify, is played.
19
To choose reminder types and sounds for your device:
1.
Tap Start → Settings.
2.
3.
4.
On the Personal tab, tap Sounds & Notifications.
On the Sounds tab, select the kind of events you want to be notified of.
On the Notifications tab, select the manner of notification you prefer. The options you choose
here are applied globally in your device.
Tap ok.
5.
20
Chapter 3
Getting Connected
Establishing Device-PC Connection
Installing Microsoft ActiveSync
In order to exchange data between your computer and the WPA1000, Microsoft ActiveSync must be
installed on your computer. Use the USB charging cable that comes with your device or cradle to
connect the device to your computer.
NOTE:
The WPA1000 requires ActiveSync version 4.2 or higher.
System installation requirements
•
•
•
•
•
•
•
Microsoft Windows 2000 SP4, Server® 2003 SP1, Server 2003 SP1 for titanium-based
systems, Server 2003 Standard x64 Edition, XP® Media Center Edition, XP Professional x64
Edition, XP SP1, XP SP2, XP Tablet Edition
Microsoft Outlook® 2000, Microsoft Outlook XP, or Microsoft Outlook® 2003 (recommended)
messaging and collaboration clients required for Microsoft Outlook Office Mobile
synchronization
Microsoft Office 2000, Microsoft Office XP or Microsoft Office 2003 for Microsoft Office Mobile®
synchronization
Microsoft Internet Explorer 6.0 or later for Internet Explorer Mobile favorites synchronization
Microsoft Systems Management Server 2.0
Hard disk drive with 7 MB of available hard disk space (actual requirements may vary based on
selected features and user’s current system configuration)
USB port, Bluetooth, or infrared connection
To install Microsoft ActiveSync on your computer:
1.
2.
3.
4.
Close any open programs, including those that run at startup, and disable any virus-scanning
software.
Download the ActiveSync software from the Microsoft ActiveSync Download page at
http://www.microsoft.com.
Browse to the location of the downloaded file, and double-click it.
The installation wizard begins.
Follow the instructions on the screen to install Microsoft ActiveSync.
After you have installed ActiveSync and restarted your computer, the ActiveSync icon will
appear on your computer’s system tray (on the lower right-hand corner of the screen) and the
ActiveSync wizard appears.
For detailed information on how to use ActiveSync on your computer, start ActiveSync; then
click Help → Microsoft ActiveSync Help.
Connecting the Device to Your Computer
1.
After ActiveSync has been installed, connect the USB charging cable to your device. If
necessary, connect an adapter.
21
2.
Plug the other end of the USB charging cable into a USB port on your computer.
3.
4.
Turn the device on.
ActiveSync should start automatically and recognize your WPA1000 and configure the USB
port. The New Partnership setup wizard will automatically start.
NOTE:
If ActiveSync doesn’t start automatically, click Start → Programs → Microsoft
ActiveSync.
If a message appears indicating that it is unable to detect a connection, click the
Cancel button and manually configure the communication settings.
5.
22
Follow the onscreen instructions.
Chapter 3 Getting Connected
6.
When the configuration process is complete, the ActiveSync window appears on your
computer, while the Data connectivity icon
7.
appears on your device’s navigation bar.
Synchronization will be initialized and will take place if you’ve chosen to synchronize
periodically or upon connection via several options — via USB charging cable, infrared, or
Bluetooth connections.
NOTE:
Your computer can create a partnership with multiple Enterprise PDA. Also, the
WPA1000 can create a partnership with up to two computers.
23
Using ActiveSync
You can use ActiveSync to synchronize information between your WPA1000 and your computer so you
always have the most up-to-date information wherever your are.
Synchronizing Information with Your Computer
ActiveSync supports the following connection options between your device and your computer:
•
•
•
USB connection - using the USB charging cable. This connection is established when you have
created an ActiveSync partnership with your computer.
Infrared connection - ideal for quickly switching between multiple devices since cables or
adapters are not required.
Bluetooth connection - applicable only if your computer is equipped with a Bluetooth adapter or
access point.
To setup a USB ActiveSync connection:
1.
2.
3.
4.
5.
6.
Open ActiveSync on your computer.
Click File → Connection Settings.
Select the “Allow USB connections” check box.
Click OK.
Open ActiveSync on your device.
Tap Menu → Connections.
7.
8.
9.
10.
Select the “Synchronize all PCs using this connection” check box.
Select USB.
Tap ok.
Connect your device to your computer using the USB charging cable. Synchronization is
automatically initiated.
To setup an Infrared ActiveSync connection:
1.
2.
3.
4.
5.
24
Configure the infrared port on your computer. Refer to the computer’s documentation for
instructions.
Once your computer’s IR port is ready, open ActiveSync on your computer.
Click File → Connection Settings.
On the “Allow connections to one of the following” list select Infrared Port (IR).
Click OK.
Chapter 3 Getting Connected
6.
7.
8.
Align the IR port of your device with that on your computer.
Open ActiveSync on your device.
Tap Menu → Connect via IR.
To setup a Bluetooth ActiveSync connection:
Your device is equipped with Bluetooth wireless technology that you can use to synchronize information
with a computer equipped with a Bluetooth adapter or access point. Bluetooth wireless technology
allows you to communicate with the computer whenever it is within range.
1.
2.
3.
4.
5.
6.
7.
Configure the Bluetooth connection on your computer. Refer to the Windows Online Help for
instructions.
Ensure Bluetooth is turned on your computer and discoverable and within close range.
Make your device discoverable to your PC by tapping Start → Settings → Connections tab →
Bluetooth.
On the Mode tab, select the check boxes for the “Turn on Bluetooth” and “Make this device
visible to other devices” check box.
Tap ok.
On your device, tap Start → Programs → ActiveSync.
Tap Menu → Connect via Bluetooth.
If authentication is required, the Enter Passcode screen appears, type an alphanumeric
passkey (PIN code), then tap Next; enter the same passkey on the computer.
If you do not want to use a passkey, tap Next.
25
Using ActiveSync to Exchange Files
You can use ActiveSync to exchange information from your device your computer and vice versa.
Changes you make to the information on one location will not affect the information on the other one. If
you want to automatically update information on both your device and computer, synchronize the
information instead.
You can copy two types of information to your device: files and Pocket Access Windows CE Store
information.
The procedure below only applies to copying files. Refer to the ActiveSync Help on your computer for
instructions on how to copy Pocket Access Windows CE Store information.
NOTE:
Files created on your computer may need to be converted by ActiveSync so that they
can be viewed and edited on your device, and vice versa.
To copy files:
1.
2.
Connect your device to your computer.
In ActiveSync on your computer, click Explore.
Windows Explorer opens the Mobile Device window for your device.
3.
4.
Locate the file that you want to copy on your device or computer.
Do either one of the following:
– To copy the file to your device, right-click the file and click Copy. Place the cursor in the
desired folder for your device, right-click, then click Paste.
– To copy the file to your computer, right-click the file and click Copy. Place the cursor in the
desired folder for your computer, right click, then click Paste.
26
Chapter 3 Getting Connected
Synchronization Options
By default, ActiveSync only synchronize information for Contacts, Calendar, Messaging (Outlook
E-Mail), Tasks, and Favorites (for Internet Explorer Mobile). You can select which information types are
synchronized. You can also control how much information is synchronized. To illustrate, when
synchronizing Calendar, you can set ActiveSync to synchronize appointments within a certain date
range and for specific categories only. For example business appointments from the past two weeks
only.
NOTE:
ActiveSync does not support synchronizing subfolders in Calendar and Contacts.
To select the type of information to synchronize:
NOTE:
1.
2.
3.
4.
5.
If you decide to synchonize files, for example Word documents, ActiveSync need to
convert these files. Converted files may not contain all information found in original file.
Connect your device to your computer.
Click Tools → Options.
Select the information type that you want to synchronize.
If available, click Settings, then select the options you want.
Repeat steps 2 and 3 for each information type.
27
Chapter 4
Wireless Communications
Managing Wireless Connections
Using the Wireless Manager
The Wireless Manager provides easy management to the wireless features on your device. This
program complements your device’s integrated wireless card enabling you to turn the wireless features
on and off and allows for centralized management of the Wi-Fi and Bluetooth settings.
To open Wireless Manager:
Do any of the following:
•
On the Today screen, tap Wireless Manager.
Tap to launch
Wireless Manager.
•
•
On the navigation bar, tap the Data connectivity icon
, then tap Wireless Manager from the
Connectivity drop-down box.
Tap Start → Settings → Connections tab → Wireless Manager.
To activate wireless features
You can use Wireless Manager to turn the Wi-Fi and Bluetooth features on and off — one at a time or
all at the same time.
•
•
•
28
To turn multiple wireless features on, open Wireless Manager, then tap All → Done.
To activate Bluetooth via the Wireless Manager, tap Bluetooth → Done.
To activate Wi-Fi via the Wireless Manager, tap Wi-Fi → Done.
Chapter 4 Wireless Communications
Connectivity Features
You can use your device to exchange information with other mobile devices and connect to your
computer, a network, or the Internet. You have the following options:
•
•
Use the infrared sensor or Bluetooth function to exchange files from another IR- or Bluetoothenabled device.
Use Wi-Fi connection to send and receive email messages by using Messaging and view Web
pages by using Internet Explorer Mobile.
Beam Function
In a Microsoft Windows Mobile program (except Messaging) and Picture & Videos, you can exchange
files using either infrared or Bluetooth.
NOTE:
You can also beam files (not folders) from the File Explorer screen. To do so, tap and
hold the item you want to send, then tap Beam File from the pop-up menu.
You need to first activate the beam function before you can begin exchanging files with another IR- or
Bluetooth-enabled device.
To activate the Beam function:
1.
2.
3.
Tap Start → Settings.
On the Connections tab, tap Beam.
Tap “Receive all incoming beams” check box.
4.
Tap ok.
29
Infrared Connection
Using infrared, you can enable short-range file exchange between your device and another IR-enabled
device.
To exchange files using IR connection:
1.
2.
3.
4.
5.
Ensure that the IR function on both your MC35 and on other device you want to exchange files
with are turned on.
Switch to the program where you created the item you want to send and locate the item in the
list.
Align the IR port of your device with that of the IR-enabled device so that they are unobstructed
and within a close range.
Tap and hold the item, then tap Beam [type of item] on the pop-up menu.
Tap the device that you want to send the file to.
To receive files via IR connection:
1.
2.
3.
Align the IR port of your device with that of the IR-enabled device so that they are unobstructed
and within a close range.
Have the owner of the other IR-enabled device send the file to you.
On the Receiving Data callout, tap Yes.
Bluetooth Connection
Your device allows you to connect to any Bluetooth-enabled device in your personal area network
(PAN). Once connected you can send and receive file to another Bluetooth-enabled device, locate and
use any of the services available on the Bluetooth-enabled device you are connected to.
To setup a Bluetooth connection:
1.
Activate the Bluetooth function.
You have two options to activate your device’s Bluetooth connection using the Wireless
Manager or the Bluetooth option under the Settings → Connections preferences. Once
activated, Bluetooth connection is indicated as On in the Wireless Manager section of the Today
screen.
– To activate Bluetooth via the Wireless Manager, see “Using the Wireless Manager” on page
28.
– To activate Bluetooth using the Settings option:
a. Tap Start → Settings.
b. On the Connections tab, tap Bluetooth.
30
Chapter 4 Wireless Communications
c. On the Mode tab, select all check boxes.
2.
Tap ok.
NOTE:
3.
Deactivate the Bluetooth function when you do not plan to use it for extended time.
Create a Bluetooth partnership.
You need to create a Bluetooth partnership with another Bluetooth-enabled device to be able to
exchange information with it.
a. On the Bluetooth settings screen, tap the Devices tab.
31
b. Tap New Partnership. Your device searches for Bluetooth-enabled devices on your PAN
and displays them in the devices list.
c. Tap the name of the device in the list, then tap Next.
If you want to use a passcode, type an alphanumeric passkey, then tap Next; enter
the same passkey on the other device.
The passkey is recommended for enhanced security. Your passkey must be between 1 to
16 alphanumeric characters.
If you do not want to use a passkey, tap Next.
32
Chapter 4 Wireless Communications
d. On the Partnership Settings screen, type in a device name and select the type of services
you want to enable for the Bluetooth partnership.
e. Tap Finish.
f. On the Bluetooth screen, tap the COM Ports tab.
g. To connect to a device, tap New Outgoing Port.
h. To allow other devices to connect to the device, tap New Incoming Port.
i. Select the device you want to add, then tap Next.
j. Select a numbered COM port from the list.
k. Select “Secure Connection” check box to designate the COM port for Bluetooth partnership.
l. Tap Finish.
m. Tap ok.
To send files via Bluetooth:
1.
2.
Switch to the program where you created the item you want to send and locate the item in the
list.
Do any one of the following:
– Tap and hold the item, and then tap Beam Task on the pop-up menu.
– Using Pictures & Videos, tap and hold a thumbnail to display a pop-up menu of available
actions, then tap Beam.
– Using File Explorer, tap and hold an item (but not folders), select Beam File on the pop-up
menu.
3.
4.
Select the Bluetooth device, then tap Tap to send.
Tap ok.
To receive files via Bluetooth:
1.
2.
3.
Turn on the Bluetooth function.
Have the owner of the other device send the information to you. Your device will automatically
receive it.
On the Bluetooth callout, tap Yes.
For detailed information on how to use Bluetooth, tap Start → Help.
33
Wi-Fi Connection
Windows Mobile can support TCP/IP protocol, so the user can easily connect to the Internet by modem
or high-frequency wireless LAN technology. Wi-Fi networks look and operate similarly to Ethernet
networks. The only difference is that a radio transmission replaces the hard-wire connection between
the various nodes. This means all of your existing applications that currently operate over Ethernet will
also function utilizing WLAN without any special wireless network software.
With WPA1000 integrated Wi-Fi, you can scan for existing wireless network access point or hot spot.
Wireless network access point or hot spot can be found in homes and offices or public areas such as
inside the airport, restaurant, coffee shops, hotels, subway stations, or campus. Using Wi-Fi
networking, you can connect to a computer, access the Internet, send and receive email and files.
A wireless network can be added either when the network is detected or by manually entering settings
information. Wi-Fi access in some areas may require a separate purchase of a service contract with a
wireless service provider. You can check with a Wi-Fi service provider for detailed information.
NOTE:
Before doing these steps, you must do the following:
• Make sure your computer have TCP/IP installed.
• Make sure the network system and remote access server in your workplace
supports TCP/IP.
• Make sure you have remote access account. Ask your network administrator for
assistance on setting up a wireless connection.
• First establish ActiveSync partnership with the WPA1000 using infrared, USB, or
Bluetooth connection.
To set up a wireless network connection:
NOTE:
1.
Before doing these steps, determine if authentication information is needed.
Activate wireless connection.
You have two options to activate your device’s wireless connection using the Wireless Manager
or the Network Cards option under the Settings → Connections preferences. Once activated,
Wi-Fi connection is indicated as On in the Wireless Manager section of the Today screen.
– To activate Wi-Fi connection via the Wireless Manager, see “Using the Wireless Manager” on
page 28.
– To activate Wi-Fi connection using the Settings option:
a. Tap Start → Settings.
b. On the Connections tab, tap Network Cards.
c. Tap the Wireless tab.
34
Chapter 4 Wireless Communications
d. If there are networks already detected, tap and hold network name, then select Connect.
If none, tap Add New and follow all onscreen instructions.
e. Under the Network to access drop-down menu, select from the following network
connection options:
— All available
— Only access points
— Only computer-to-computer
f. When finished, tap OK.
To configure the wireless network connection settings, tap Start → Settings →
Connections tab → Network Cards. For more information on how to configure the
wireless network settings, tap Start → Help.
To connect to a wireless network:
1.
2.
3.
4.
5.
6.
Tap Start → Settings.
On the Connections tab, tap Network Cards.
Tap the Wireless tab.
On the command bar, tap Connect.
If a wireless network is connected, a “New Network Detected” callout appears.
Tap Connect.
For more information on how to connect to a wireless network, tap Start → Help.
Connecting to the Internet
After configuring your device’s wireless setting you can now define the network settings you’ll be using
to access the Internet, connect to your office network and view intranet URLs.
Once you have established these network settings, use Internet Explorer Mobile to view Internet and
intranet sites.
For help information on performing the following procedures, tap Help from the screen you are having
difficulty with.
35
Chapter 5
Managing Programs
Accessing Programs
Your WPA1000 supports a variety of PDA and wireless communication programs to help you manage
both personal and work-related information.
To open a Program:
36
•
Tap a program name from the Start menu.
•
Tap Start → Programs, then tap a program icon.
You can select which programs are displayed on the Start menu. For instructions, see “Adding a
Program to the Start Menu” on page 47.
Chapter 5 Managing Programs
Using the Barcode Scanner Programs
Scan2Key
The Scan2Key application routes input from a scanner port to a keypad buffer, emulating a full
keyboard by use of a scanner emulate input from the keypad. Using Scan2Key, scanned data can be
directly input into scanner port aware application, like Word Mobile.
To open Scan2Key:
1.
Tap Start → Programs.
2.
Tap Scan2Key. Scan2Key appears as an icon on lower right corner of the Today screen.
37
To exit Scan2Key:
1.
On the Today screen, tap and hold the Scan2Key icon, then tap Exit on the pop-up menu. The
Quit Scan2Key dialog box appears.
2.
Tap Yes.
Scanner Settings
When it is necessary to change the default barcode symbology for a different application, the Scanner
Control Panel provides the ability to change default symbology. The Scanner Control Panel also lets
you place delimiter characters behind scanned data and save the settings.
To view the default barcode symbologies:
1.
2.
38
Tap Start → Settings.
On the System tab, tap Scanner Settings.
Chapter 5 Managing Programs
To view the default barcode symbologies:
1.
2.
3.
Tap Start → Settings.
On the System tab, tap Scanner Settings.
On the Settings tab, tap the plus sign in front of Barcode Symbologies to expand and display
the list of barcode symbologies.
Below table lists the standard protocol for a particular type of barcode symbology.
Symbology
Enable/ Check
Transmit Transmit
Disable Char/Digit Check
Leading
verification Char/
Char/
Digit
Digit
Bookland EAN YES
—
—
—
Codabar
YES
YES
YES
YES
Transmit Other
Leading
Digit
Code 11
YES
—
YES
—
—
Code 128
Code 32
(Pharmacy
Code)
Code 39
YES
YES
—
—
—
—
—
—
—
YES
YES
YES
YES
YES
YES
Code 93
Delta Code
EAN 128
YES
YES
YES
—
YES
—
—
YES
—
—
—
—
—
—
—
EAN 13
EAN 8
YES
YES
—
—
YES
YES
—
—
YES
YES
—
—
—
CLSI format,
3 to 48 data length
2 check digits,
1 to 48 data length
1 to 64 data length
Transmit tailing digit
Full ASCII,
Function Code,
0 to 48 data length,
Double labels
decoding,
Double labels
separator
1 to 48 data length
—
Transmit Code ID,
Field separator
—
—
39
Symbology
Enable/ Check
Transmit Transmit
Disable Char/Digit Check
Leading
verification Char/
Digit
Digit
YES
YES
YES
—
Transmit Other
Leading
Digit
Label Code
IV&V
MSI/Plessey
YES
—
YES
—
—
YES
—
YES
—
—
Standard 2
of 5/Toshiba
(China Postal
Code) Group
Telepen
YES
YES
YES
—
—
YES
—
—
—
—
UPC A
UPC E
YES
YES
—
—
YES
YES
—
—
YES
YES
UPC/EAN
Group
—
—
—
—
—
Interleaved
2 of 5
40
—
Fixed Length,
Not suppress start or
stop digit,
10 to 64 data length
—
Check digit double
module 10,
1 to 16 data length
Fixed Length,
4 to 48 data length
Standard
character set
Zero Expansion,
NSC
Supplement 2,
Supplement 5,
Insert Space before
supplement,
Must have
supplement,
Add-on code try level
Chapter 6
Customizing the WPA1000
Adjusting Settings
You can adjust the settings of your device to suit the way you work. Adjusting certain settings, such as
backlight, auto power off timer, system volume, and processor speed.
To access Settings:
Tap Start → Settings.
41
Checking Main and Backup Battery Status
View power level for both the main and backup battery. To minimize power consumption, you can define
settings for the auto-off function and the processor’s operation speed.
To check the main and backup battery status:
1.
2.
Tap Start → Settings.
On the System tab, tap Power.
3.
Do either of the following:
– If the Plug
or Battery
Power settings screen.
icon appears on your device, double-tap the icon to bring the
– Tap Start > Settings > System tab > Power.
4.
The battery tab will show the status of the main and backup batteries. There are four kinds of
status icons, Good , Low , and Very Low
or , that may appear on the top of the Today
screen to indicate main battery or backup battery status. For more information on the battery
status icons, see page 17.
NOTE:
It is necessary to charge the main battery when the Low
is displayed. To prevent
status icons are
data loss, replace or recharge the device when the Very Low
or
displayed. If both icons are still displayed after charging, pleas. contact Wasp Technical
Support.
42
Chapter 6 Customizing the WPA1000
Extending Battery Life
You can save your device’s battery life by doing either of the following:
•
•
Change the automatic power settings
Minimize use of backlight
To change the Automatic Power Settings:
The WPA1000 will enter idle mode when there is no task, or all tasks are waiting for input. In default
setting, the WPA1000 will automatically turn itself off if it remains idle for 3 minutes and when there is
no external charging power applied. Pressing the power button will return the WPA1000 to the same
point at the time of automatic shutdown.
1.
2.
3.
4.
Tap Start → Settings.
On the System tab, tap Power.
Tap the Advanced tab.
Tap the “On battery power turn off device if not used for” check box and change the amount of
time before the unit turns off the backlight while running in battery power mode.
This function can also be activated when the WPA1000 is plugged into the power adapter or
placed in its docking station. On the Advanced tab, tap the “On external power turn off device if
not used for” check box and change the amount of time before the unit turns off the backlight
while running in external power mode.
43
Adjusting the Backlight Setting
The power consumption of the LCD backlight is high, turn off the backlight function if it is not necessary.
To adjust the Backlight setting:
1.
2.
3.
Tap Start → Settings.
On the System tab, tap Backlight.
On the Battery Power tab, do either of the following:
– Tap the “Turn off the backlight if device is not used for” check box and change the amount of
time before the unit turns off the backlight while running in battery power mode.
– Tap “Turn on backlight when button is pressed or the screen is tapped” check box.
4.
On the External Power tab, do either of the following:
– Tap the “Turn off backlight if device is not used” check box and change the amount of time
before the unit turns off the backlight while running in external power mode.
– Tap the “Turn on backlight when a button is pressed or the screen is tapped” check box.
5.
44
Tap ok.
Chapter 6 Customizing the WPA1000
Resetting the Device
There are three kinds of reset that you can perform on your device when the device’s operating system
stops responding or the system becomes corrupted. Depending on the situation, a warm boot, clean
boot, or cold boot can be performed.
Warm Boot
You may have to perform a warm boot if the device freezes (i.e., device no longer responds to the
buttons on the screen).
To perform a warm boot:
A warm boot or soft reset allows your device to get a fresh start, similar to rebooting a computer. This
will restart your device and adjust memory allocation. All records and entries are retained after a warm
boot. Unsaved data in open programs may in some cases be lost.
1.
2.
Remove the stylus from its holder.
Lightly press the tip of the stylus to the Reset button located on the rear of the device.
Clean Boot
A clean boot allows your device to load the main operating system and perform diagnostic tests to
determine the boot process problems.
To perform a clean boot:
1.
2.
Hold down the right and left scanner trigger buttons.
While holding down the scanner trigger buttons, gently press the tip of the stylus to the reset
button located on the rear of the device.
45
Cold Boot
A cold boot will cut off power to your device. This will erase all records and entries, delete all programs
you have added, and restore the device default factory settings. Never perform a cold boot unless a
warm or clean boot does not correct your problem. When you perform your next ActiveSync operation,
you can restore any data that you previously synchronized to your computer or you can restore data
that you backed up to a storage card.
NOTE:
When you perform a cold boot, the date and time settings are not retained. Formats,
preferences, and other settings are restored to their default factory settings.
To perform a cold boot:
1.
2.
Hold down the power button.
While holding down the power button, gently press the tip of the stylus to the reset button
located on the rear of the device.
Viewing Flash ROM Files
Flash ROM (read-only memory) is a rewritable storage for programs and data files. The benefit of this
feature is that files and programs saved in Flash ROM are unaffected by the WPA1000 power status.
To access the Flash Memory files:
1.
2.
Connect the device to your computer. See page 21.
On your computer, click My Computer → Mobile Device → Flash Storage.
To transfer files to Device’s Flash Memory:
1.
2.
3.
4.
Connect the device to your computer. See page 21.
On your computer, click My Computer → Mobile Device → Flash Storage.
Select the file that you want to save.
Click File → Save To and select Flash Storage.
Adding Programs to Your Device
Programs bundled with your device at the factory are stored in Flash ROM. You cannot remove these
programs, and you’ll never accidentally lose Flash ROM contents. Software programs and data files
added to your WPA1000 after factory installation can be stored in RAM (random access memory).
To add programs using ActiveSync:
Before installing a program on your device, you must first install the appropriate software to your device
on your computer.
1.
Determine your device and processor type so that you know which version of the software to
install.
a. Tap Start → Settings.
b. On the System tab, tap About.
c. On the Version tab, make a note of the processor information.
2.
Download the program to your computer (or insert the CD or disk that contains the program into
your computer).
You may see a single *.xip, *.exe or *.zip file, a Setup.exe file, or several versions of files for
different device types and processors. Be sure to select the program designed for Pocket PC
and your device’s processor type.
NOTE:
3.
46
Read any installation instructions. Read Me files or documentation that come with the
program. Many programs provide special installation instructions.
Connect your device to your computer.
Chapter 6 Customizing the WPA1000
4.
Double-click the *.exe file.
– If the file is an installer, the installation wizard will begin. Follow the directions on the screen.
Once the software has been installed on your computer, the installer will automatically transfer the software to your device.
– If the file is not an installer, you will see an error message stating the program is valid but is
designed for a different type of computer. You will need to move this file to your device. If you
cannot find any installation instructions for the program in the Read Me file or documentation,
use ActiveSync Explore button to copy the program file to the Program Files folder on your
device. For more information on copying files using ActiveSync, see page 24.
5.
Once installation is complete, tap Start → Programs, then the program icon to launch it.
If you are installing a *.cab file on your device, open ActiveSync on your desktop, then click the
Explore button. The application will install on your device.
To add a program from the Internet:
1.
2.
Determine your device and processor type so that you know which version of the software to
install. Refer to previous section for instructions.
Download the program to your device straight from the Internet using Internet Explorer Mobile.
NOTE:
3.
4.
Read any installation instructions. Read Me files or documentation that come with the
program. Many programs provide special installation instructions.
Tap the file, such as *.xip or *.exe file. The installation wizard will begin.
Follow the onscreen instructions.
Adding a Program to the Start Menu
You can choose what program icons should appear on the menu based on which ones you use most
often.
To add a program to the Start menu program using Settings:
1.
2.
Tap Start → Settings.
On the Personal tab, tap Menus.
3.
Select the check box for the programs you wish to add.
If you do not see the program you want, you can either use File Explorer on your device to
move the program to the Start Menu folder, or use ActiveSync on your computer to create a
shortcut to the program and place the shortcut in the Start Menu folder.
Tap ok.
4.
47
To add a program to the Start menu program using File Explorer on your device:
48
1.
2.
Tap Start → Programs → File Explorer.
Tap the My Device icon (tap the folder list, labeled My Documents by default, and then My
Device to see a list of all folders on your device).
3.
Open the path: Windows | Start | Programs.
Chapter 6 Customizing the WPA1000
4.
Tap and hold the program you want to add to the menu, then tap Cut on the pop-up menu.
5.
6.
Open the path: Windows | Start Menu.
Tap and hold a blank area of the screen, then tap Paste on the pop-up menu.
49
7.
A Confirm File Move dialog box appears, tap Yes.
8.
The program will now appear on the Start menu.
To add a Start menu program using ActiveSync on your computer:
1.
2.
3.
4.
In the ActiveSync on your computer, click Explore to explore your device’s files and locate the
program.
Right-click the program, and then click Create Shortcut.
Open the path: Mobile Devices | Windows | Start Menu.
Move the shortcut to the Start Menu folder. The shortcut now appears on the Start menu.
For more information on using ActiveSync, see ActiveSync Help on your computer.
Removing Programs
You can only remove programs that you have installed. Programs that come with your device cannot be
removed.
To remove a program using Settings:
1.
2.
3.
4.
Tap Start → Settings.
On the System tab, tap Remove Programs.
Tap the program you wish to remove.
Tap Remove.
To remove a program using File Explorer on your device:
If the program does not appear in the list of installed programs, use File Explorer on your device to
locate the program:
1.
2.
3.
4.
50
Tap Start → Programs → File Explorer.
Tap the My Device icon (tap the folder list, labeled My Documents by default, and then My
Device to see a list of all folders on your device).
Open the path: Windows | Start | Programs.
Tap and hold the program you want to remove, then tap Delete on the pop-up menu.
Appendix A
System Specifications
Processing/Memory
Input/Output
CPU
Intel PXA270 processor with speed of up to 520 MHz
Memory
• SDRAM: 64 MB
• Flash ROM: 64 MB Built-in (Flash Memory
Manager included)
Input Devices
•
•
•
•
•
•
Touch screen
Stylus
Control buttons
Full alphanumeric software keyboard
Mag stripe reader
Barcode scanner
Control and Quick
launch hot keys
•
•
•
•
•
•
•
Navigation key
Software keyboard button
Email button
Today button
Calendar button
Tasks button
Notes button
Audio
• Built-in speaker
• 3.5 mm stereo earphone jack
• Microphone
Display
• 3.5" QVGA LCD touch-sensitive screen and
Electroluminescent backlight
• 320 x 240 resolution
LED Indicator
Dual colors (green/red) for barcode read indication
Scan Engine
• Light Source: Visible Laser Diode (VLD) 650 nm
• Min. print contrast: 25% absolute dark/light
reflectance at 650 nm
• Power Consumption: 65 mA typical@5 V
Connectivity
• USB port
• SDIO/MMC slot
Wireless connectivity
• Bluetooth
Version: 1.1 and 1.2 with class 2 specification
Peak output power: 2 ±2 dBm
Frequency band: 2400-2483.5 MHz
Operating channels: 79 Channels
Modulation Type: GFSK
51
52
Input/Output
Wireless connectivity
• WLAN (802.11b)
802.11b low power (3.96 mW deep sleep mode)
Peak output power: 18 ±2 dBm
Frequency band: 2400-2483.5 MHz
Operating channels: 11 Channels
Modulation Type:
CCK (1Mbps)
DBPSK (2Mbps)
DQPSK (5.5/11Mbps)
• WLAN (802.11g)
802.11g low power (3.96 mW deep sleep mode)
Peak output power: 15 ±2 dBm
Frequency band: 2400-2483.5 MHz
Operating channels: 11 Channels
Modulation Type: OFDM (6~54Mbps)
• Serial infrared port
Power
Main battery
Standard battery: 3.7 V, 2200 mAh
Battery life
4 hours
Battery charge
• 3.5 hours with external AC adapter
• 3.5 hours with docking station
Backup battery
One hour data retaining time when main battery is
removed
Power management
• Provide all voltage outputs required in this device
• Retain memory content more than 72 hours after
automatic low battery shutdown
• Provide 4 hours operating time with a standard
battery. The activities in operating period are:
a. Scan one barcode.
b. Send this barcode data to the host via wireless
LAN.
c. Repeat items 1 and 2 every 5 seconds.
• Provide 3-level battery status to show main
battery capacity
• Provide 3-level battery status to show back-up
battery capacity
• 3.5 hours charging time
• 16 hours backup battery charging time
Appendix A System Specifications
Barcode/Symbology
Barcode Scanner
Symbol SE950
Symbology
•
•
•
•
•
•
•
•
•
•
•
•
•
•
•
•
•
•
•
Bookland EAN
Codabar
Code 11
Code 128
Code 32 (Pharmacy Code)
Code 39
Code 93
Delta Code
EAN 128
EAN 13
EAN 8
Interleaved 2 of 5
Label Code IV & V
MSI/Plessy
Standard 2 of 5/Toshiba (China Postal Code)
group
Telpen
UPC A
UPC E
UPC/EAN group
OS and Software
Programming Tools
OS
Microsoft Windows Mobile 5.0
Language Support
•
•
•
•
Mechanical and
Environmental
Dimensions
Length: 126 mm
Width: 76 mm
Depth: 23 mm
Weight
220 g
Temperature
Operating: 0° to 50°C
Non-operating: -20° to 60°C
Humidity
Operating/Non-operating: 5% to 95% RH
Vibration
Operating/Non-operating: 2g, 10 - 500 Hz
Shock
Operating: 10 g
Non-operating: 15 g
Drop
120 cm, without major damage
International English
Japanese
Simplified Chinese
Traditional Chinese
53
Technische Daten des Systems
CPU/Speicher
Eingang/Ausgang
54
CPU
Intel PXA270-Prozessor mit Frequenzen bis zu 520
MHz
Speicher
• SDRAM: 64 MB
• Flash ROM: 64 MB integriert (inklusive FlashSpeicher-Manager)
Eingangsgerate
•
•
•
•
•
•
Touchscreen
Stift
Kontrolltasten
Vollalphanumerische Software-Tastatur
Magnetstreifenleser
Barcode-Scanner
Kontroll- und
Schnellstart-Hotkeys
•
•
•
•
•
•
•
Navigationstaste
Tasks-Taste
Software keyboard-Taste
Today-Taste
E-Mail-Taste
Calendar-Taste
Notes-Taste
Audio
• Eingebauter Lautsprecher
• Mikrofon
• 3,5 mm Stereo-Ohrhorerbuchse
Display
• Beruhrungsempfindlicher 3,5-Zoll-QVGA-LCDBildschirm und elektroluminiszierende
Beleuchtung
• 320 x 240 Auflosung
LED-Anzeige
Zwei Farben (grun/rot) fur Barcode-Leseanzeige
Scanmaschine
• Lichtquelle: Sichtbare Laser-Diode (VLD) 650 nm
• Min. Druckkontrast: 25% absolute Dunkelheit/
Lichtreflektion bei 650 nm
• Leistungsaufnahme: 65 mA typisch@5 V
Anschlussfahigkeit
• SB-Anschluss
• SDIO/MMC-Steckplatz
Drahtlosanschluss
• Bluetooth
Version: 1.1 und 1.2 mit Spezifikation Klasse 2
Ausgangsleistung (Spitze): -1 ±2 dBm
Frequenzband: 2400-2483,5 MHz
Betriebskanale: 79 Kanale
Modulationstyp: GFSK
Appendix A System Specifications
Eingang/Ausgang
Drahtlosanschluss
• WLAN (802.11b)
802.11b niedrige Leistung (3,96 mW
Tiefschlafmodus)
Ausgangsleistung (Spitze): 18 ±2 dBm
Frequenzband: 2400-2483,5 MHz
Betriebskanale: 11 Kanale
Modulationstyp:
CCK (1Mbps)
DBPSK (2Mbps)
DQPSK (5.5/11Mbps)
• WLAN (802.11g)
802.11g niedrige Leistung (3,96 mW
Tiefschlafmodus)
Ausgangsleistung (Spitze): 15 ±2 dBm
Frequenzband: 2400-2483,5 MHz
Betriebskanale: 11 Kanale
Modulationstyp: OFDM (6~54 Mbit/s)
• Serieller Infrarotanschluss
Strom
Hauptakku
Standardakku: 3.7 V, 2200 mAh
Akkunutzungszeit
4 Stunden
Akkuladung
• 3,5 Stunden mit externem Netzteil
• 3,5 Stunden mit Dockingstation
Backup-Akku
Daten werden bei Entfernung des Hauptakkus eine
Stunde lang beibehalten
Energieverwaltung
• Gibt alle Spannungen aus, die in diesem
Terminal benotigt werden
• Bewahrt den Speicherinhalt fur mindestens 72
Stunden nach automatischem Ausschalten
wegen schwachem Akku
• 4 Stunden Betriebszeit mit einem Standardakku.
Die Aktivitaten in der Betriebszeit sind:
a. Einen Barcode scannnen.
b. Diese Barcode-Daten uber drahtloses LAN an
den Host senden.
c. Punkte 1 und 2 alle 5 Sekunden wiederholen.
• Zeigt die Kapazitat des Hauptakkus anhand
eines 3-Stufen-Akkustatus
• Zeigt die Kapazitat des Backup-Akkus anhand
eines 3-Stufen-Akkustatus
• 3,5 Stunden Ladezeit
• 16 Stunden Ladezeit fur Backup-Akku
55
Barcode/
Symbologie
Barcode- Scanner
Symbol SE950
Symbologie
•
•
•
•
•
•
•
•
•
•
•
•
•
•
•
•
•
•
•
56
Bookland EAN
Codabar
Code 11
Code 128
Code 32 (Pharmazie-Code)
Code 39
Code 93
Delta Code
EAN 128
EAN 13
EAN 8
Interleaved 2 von 5
Label Code IV & V
MSI/Plessy
Standard 2 von 5/ Toshiba-Gruppe (ChinaPostcode)
Telpen
UPC A
UPC E
UPC/EAN-Gruppe
Betriebssystem und
SoftwareProgrammierwerkze
uge
Betriebssystem
Microsoft Windows Mobile 5.0
Unterstutzte
Sprachen
•
•
•
•
Mechanik und
Umgebung
Abmessungen
Lange: 126 mm
Breite: 76 mm
Tiefe: 23 mm
Gewicht
220 g
Temperatur
Eingeschaltet: 0° to 50°C
Ausgeschaltet: -20° to 60°C
Luftfeuchte
Ein-/Ausgeschaltet: 5% to 95% RH
Erschutterung
Ein-/Ausgeschaltet: 2g, 10 - 500 Hz
Stoß
Eingeschaltet: 10 g
Ausgeschaltet: 15 g
Fall
120 cm, ohne wesentliche Beschadigungen
Englisch (international)
Japanisch
Vereinfachtes Chinesisch
Traditionelles Chinesisch
Appendix A System Specifications
Especificaciones del sistema
CPU/memoria
Entrada/salida
CPU
Procesador Intel PXA270 con velocidad hasta
520 MHz
Memoria
• SDRAM: 64 MB
• Flash ROM: 64 MB integrado (Administrador
de memoria flash incluido)
Dispositivos de entrada
•
•
•
•
•
•
Pantalla sensible al toque
Stylus
Botones de control
Teclado software alfanumerico completo
Lector de cinta mag
Escaner de codigos de barras
Teclas especiales de
control y de lanzamiento
rapido
•
•
•
•
•
•
•
Tecla de navegacion
Boton de Tasks
Boton de teclado software
Bouton Today
Boton de Email
Boton de Calendar
Boton de Notes
Sonido
• Bocina integrada
• Conector de audifono estereo de 3.5 mm
• Microfono
Pantalla
• 3.5" QVGA LCD touch-sensitive screen and
Electro luminescent backlight
• Resolucion 320 x 240
Indicador LED
Dos colores (verde/rojo) para indicar la lectura de
codigos de barras
Maquina escaner
• Fuente de luz: diodo laser visible (VLD) 650
nm
• Contraste de impresion min.: 25% oscuro
absoluto/reflejo claro a 650 nm
• Consumo de energia: 65 mA typical@5 V
Conectividad
• Puerto USB
• Ranura SDIO/MMC
Conectividad
inalambrica
• Bluetooth
Version: 1.1 y 1.2 con especificacion clase 2
Maxima produccion de corriente: 2 ±2 dBm
Banda de frecuencia: 2400-2483.5 MHz
Canales operativos: 79 canales
Tipo de modulacion: GFSK
57
58
Entrada/salida
Conectividad
inalambrica
• WLAN (802.11b)
802.11b de baja corriente (3.96 mW en modo
dormir profundo)
Maxima produccion de corriente: 18 ±2 dBm
Banda de frecuencia: 2400-2483.5 MHz
Canales operativos: 11 Channels
Tipo de modulacion:
CCK (1Mbps)
DBPSK (2Mbps)
DQPSK (5.5/11Mbps)
• WLAN (802.11g)
802.11g de baja corriente (3.96 mW en modo
dormir profundo)
Maxima produccion de corriente: 15 ±2 dBm
Banda de frecuencia: 2400-2483.5 MHz
Canales operativos: 11 canales
Tipo de modulacion: OFDM (6~54Mbps)
• Puerto serial infrarrojo
Energia
Bateria principal
Bateria estandar: 3.7 V, 2200 mAh
Duracion de carga de la
bateria
4 horas
Carga de bateria
• 3.5 horas con adaptador de corriente AC
externo
• 3.5 horas con estacion de acoplamiento
Bateria de respaldo
Una hora de uso despues de retirar la bateria
principal
Administracion de
energia
• Proporciona todas las salidas de voltaje
requeridas en esta terminal
• Retiene el contenido de memoria por mas de
72 horas luego del apagado automatico por
bajo nivel de bateria
• Proporciona 4 horas de operacion usando un
paquete de bateria estandar. Las actividades
en el periodo de operacion son:
a. Escanea un codigo de barras.
b. Envia el dato del codigo de barras al
anfitrion atraves del LAN inalambrico.
c. Repite articulos 1 y 2 cada 5 segundos.
• Proporciona 3 niveles de estado de bateria
para mostrar la capacidad de la bateria
principal
• Proporciona 3 niveles de estado de bateria
para mostrar la capacidad de la bateria de
respaldo
• 3.5 horas para recargar la bateria
• 16 horas para recargar la bateria de respaldo
Appendix A System Specifications
Codigo de barras/
simbologia
Escaner de codigos de
barras
Simbolo SE950
Simbologia
•
•
•
•
•
•
•
•
•
•
•
•
•
•
•
•
•
•
•
Bookland EAN
Codabar
Codigo 11
Codigo 128
Codigo 32 (Codigo de farmacia)
Codigo 39
Codigo 93
Codigo Delta
EAN 128
EAN 13
EAN 8
Entrelazado 2 de 5
Codigo de etiqueta IV & V
MSI/Plessy
Grupo estandar 2 de 5/ Toshiba (codigo postal
chino)
Telpen
UPC A
UPC E
GroupeUPC/EAN
Sistema operativo y
herramientas de
programacion
software
Sistema operativo
Microsoft Windows Mobile 5.0
Idioma soportado
•
•
•
•
Mecanicas y del
ambiente
Dimensiones
Largo: 126 mm
Ancho: 76 mm
Grosor: 23 mm
Peso
220 g
Temperatura
Operativa: 0° to 50°C
No operativa: -20° to 60°C
Humedad
Operativa/no operativa: 5% to 95% RH
Vibracion
Operativa/no operativa: 2g, 10 - 500 Hz
Choque
Operativa: 10 g
No operativa: 15 g
Caida
120 cm, sin mayor dano
Ingles internacional
Japones
Chino simplificado
Chino tradicional
59
Specifications du systeme
Processeur/
Memoire
Entree/Sortie
60
Processeur
Processeur Intel PXA270 avec frequence jusqu'a
520 MHz
Memoire
• SDRAM: 64 MB
• ROM Flash: 64 Mo integre (gestionnaire de
memoire Flash inclus)
Peripheriques d'entree
•
•
•
•
•
•
Ecran tactile
Stylet
Boutons de controle
Clavier logiciel alphanumerique complet
Lecteur de carte magnetique
Scanner de code barres
Touches speciales de
lancement rapide et de
controle
•
•
•
•
•
•
•
Touche de Navigation
Bouton Tasks
Bouton Software keyboard
Bouton Today
Bouton Email
Bouton Calendar
Bouton Notes
Audio
• Haut-parleur integre
• Prise ecouteur stereo 3,5 mm
• Microphone
Affichage
• Ecran tactile LCD QVGA de 3,5 pouces et
retroeclairage electroluminescent
• Resolution de 320 x 240
Voyant diode
Bicolore (vert/rouge) pour l'indication de lecture
de code barres
Moteur de numerisation
• Source lumineuse : Diode a laser visible (VLD)
650 nm
• Contraste d'impression mini : Reflectivite
sombre/claire absolue 25% a 650 nm
• Consommation : 65 mA typique a 5 V
Connectivite
• Port USB
• Emplacement SDIO/MMC
Connectivite sans fil
• Bluetooth
Version : 1.1 et 1.2 avec specification
classe 2
Sortie d'alimentation de pointe : 2 ±2 dBm
Bande de frequence : 2400-2483.5 MHz
Canaux de fonctionnement : 79 Channels
Type de modulation : GFSK
Appendix A System Specifications
Entree/Sortie
Connectivite sans fil
• Reseau sans fil (802.11b)
802.11b basse puissance (3,96 mW mode de
sommeil profond)
Sortie d'alimentation de pointe : 18 ±2 dBm
Bande de frequence : 2400-2483.5 MHz
Canaux de fonctionnement : 11 canaux
Type de modulation :
CCK (1Mbps)
DBPSK (2Mbps)
DQPSK (5.5/11Mbps)
• Reseau sans fil (802.11g)
802.11g basse puissance (3,96 mW mode de
sommeil profond)
Sortie d'alimentation de pointe : 15 ±2 dBm
Bande de frequence : 2400-2483.5 MHz
Canaux de fonctionnement : 11 canaux
Type de modulation : OFDM (6~54Mbps)
• Port infrarouge serie
Alimentation
Batterie principale
Batterie standard : 3,7 V, 2200 mAh
Autonomie de la batterie
4 heures
Charge de la batterie
• 3,5 heures avec adaptateur secteur externe
• 3,5 heures avec station d'accueil
Batterie de secours
Temps de retention des donnees d'une heure lors
du retrait de la batterie principale
Gestion de l'alimentation
• Fournir toutes les tensions necessaires dans
cet appareil
• Retenir le contenu de la memoire plus de 72
heures apres l'arret automatique pour batterie
basse
• Fournir 4 heures de temps de fonctionnement
avec une batterie standard. Les activites en
periode de fonctionnement sont :
a. Numeriser un code barres.
b. Envoyer ces donnees de code barres au
hote via le reseau sans fil.
c. Repeter les etapes 1 et 2 toutes les 5 secondes.
• Fournir l'etat a 3 niveaux de la batterie pour
afficher la capacite de la batterie principale
• Fournir l'etat a 3 niveaux de la batterie pour
afficher la capacite de la batterie de secours
• Temps de charge de 3,5 heures
• Temps de charge de 16 heures de la batterie
de secourse
61
Code barres/
Symboles
Scanner de code barres
Symbol SE950
Symboles
•
•
•
•
•
•
•
•
•
•
•
•
•
•
•
•
•
•
•
62
Bookland EAN
Codabar
Code 11
Code 128
Code 32 (Code Pharmacie)
Code 39
Code 93
Delta Code
EAN 128
EAN 13
EAN 8
2 parmi 5 entrelaces
Code etiquette IV & V
MSI/Plessy
2 parmi 5 standard/ groupe Toshiba (Code
postal chinois)
Telpen
UPC A
UPC E
GroupeUPC/EAN
Systeme
d'exploitation et
outils de
programmation
logicielle
Systeme d'exploitation
Microsoft Windows Mobile 5.0
Prise en charge
linguistique
•
•
•
•
Mecanique et
environnement
Dimensions
Longueur : 126 mm
Largeur : 76 mm
Profondeur : 23 mm
Poids
220 g
Temperature
En marche : 0° to 50°C
A l'arret : -20° to 60°C
Humidite
En marche/A l'arret : 5% to 95% RH
Vibration
En marche/A l'arret : 2g, 10 - 500 Hz
Choc
En marche : 10 g
A l'arret : 15 g
Chute
120 cm, sans degat majeur
Anglais international
Japonais
Chinois simplifie
Chinois traditionnel
Appendix A System Specifications
CHSions du systeme
Processing/Memory
Input/Output
CPU
Intel PXA270 processor with speed of up to 520 MHz
Memory
• SDRAM: 64 MB
• Flash ROM: 64 MB Built-in (Flash Memory
Manager included)
Input Devices
•
•
•
•
•
•
Touch screen
Stylus
Control buttons
Full alphanumeric software keyboard
Mag stripe reader
Barcode scanner
Control and Quick
launch hot keys
•
•
•
•
•
•
•
Navigation key
Software keyboard button
Email button
Today button
Calendar button
Tasks button
Notes button
Audio
• Built-in speaker
• 3.5 mm stereo earphone jack
• Microphone
Display
• 3.5" QVGA LCD touch-sensitive screen and
Electroluminescent backlight
• 320 x 240 resolution
LED Indicator
Dual colors (green/red) for barcode read indication
Scan Engine
• Light Source: Visible Laser Diode (VLD) 650 nm
• Min. print contrast: 25% absolute dark/light
reflectance at 650 nm
• Power Consumption: 65 mA typical@5 V
Connectivity
• USB port
• SDIO/MMC slot
Wireless connectivity
• Bluetooth
Version: 1.1 and 1.2 with class 2 specification
Peak output power: 2 ±2 dBm
Frequency band: 2400-2483.5 MHz
Operating channels: 79 Channels
Modulation Type: GFSK
63
64
Input/Output
Wireless connectivity
• WLAN (802.11b)
802.11b low power (3.96 mW deep sleep mode)
Peak output power: 18 ±2 dBm
Frequency band: 2400-2483.5 MHz
Operating channels: 11 Channels
Modulation Type:
CCK (1Mbps)
DBPSK (2Mbps)
DQPSK (5.5/11Mbps)
• WLAN (802.11g)
802.11g low power (3.96 mW deep sleep mode)
Peak output power: 15 ±2 dBm
Frequency band: 2400-2483.5 MHz
Operating channels: 11 Channels
Modulation Type: OFDM (6~54Mbps)
• Serial infrared port
Power
Main battery
Standard battery: 3.7 V, 2200 mAh
Battery life
6 hours
Battery charge
• 3.5 hours with external AC adapter
• 3.5 hours with docking station
Backup battery
One hour data retaining time when main battery is
removed
Power management
• Provide all voltage outputs required in this
terminal
• Retain memory content more than 72 hours after
automatic low battery shutdown
• Provide 6 hours operating time with a standard
battery. The activities in operating period are:
a. Scan one barcode.
b. Send this barcode data to the host via wireless
LAN.
c. Repeat items 1 and 2 every 5 seconds.
• Provide 3-level battery status to show main
battery capacity
• Provide 3-level battery status to show back-up
battery capacity
• 3.5 hours charging time
• 16 hours backup battery charging time
Appendix A System Specifications
Barcode/Symbology
Barcode Scanner
Symbol SE950
Symbology
•
•
•
•
•
•
•
•
•
•
•
•
•
•
•
•
•
•
•
Bookland EAN
Codabar
Code 11
Code 128
Code 32 (Pharmacy Code)
Code 39
Code 93
Delta Code
EAN 128
EAN 13
EAN 8
Interleaved 2 of 5
Label Code IV & V
MSI/Plessy
Standard 2 of 5/Toshiba (China Postal Code)
group
Telpen
UPC A
UPC E
UPC/EAN group
OS and Software
Programming Tools
OS
Microsoft Windows Mobile 5.0
Language Support
•
•
•
•
Mechanical and
Environmental
Dimensions
Length: 126 mm
Width: 76 mm
Depth: 23 mm
Weight
220 g
Temperature
Operating: 0° to 50°C
Non-operating: -20° to 60°C
Humidity
Operating/Non-operating: 5% to 95% RH
Vibration
Operating/Non-operating: 2g, 10 - 500 Hz
Shock
Operating: 10 g
Non-operating: 15 g
Drop
120 cm, without major damage
International English
Japanese
Simplified Chinese
Traditional Chinese
65
CHTfications du systeme
Processing/Memory
Input/Output
66
CPU
Intel PXA270 processor with speed of up to 520 MHz
Memory
• SDRAM: 64 MB
• Flash ROM: 64 MB Built-in (Flash Memory
Manager included)
Input Devices
•
•
•
•
•
•
Touch screen
Stylus
Control buttons
Full alphanumeric software keyboard
Mag stripe reader
Barcode scanner
Control and Quick
launch hot keys
•
•
•
•
•
•
•
Navigation key
Software keyboard button
Email button
Today button
Calendar button
Tasks button
Notes button
Audio
• Built-in speaker
• 3.5 mm stereo earphone jack
• Microphone
Display
• 3.5" QVGA LCD touch-sensitive screen and
Electroluminescent backlight
• 320 x 240 resolution
LED Indicator
Dual colors (green/red) for barcode read indication
Scan Engine
• Light Source: Visible Laser Diode (VLD) 650 nm
• Min. print contrast: 25% absolute dark/light
reflectance at 650 nm
• Power Consumption: 65 mA typical@5 V
Connectivity
• USB port
• SDIO/MMC slot
Wireless connectivity
• Bluetooth
Version: 1.1 and 1.2 with class 2 specification
Peak output power: 2 ±2 dBm
Frequency band: 2400-2483.5 MHz
Operating channels: 79 Channels
Modulation Type: GFSK
Appendix A System Specifications
Input/Output
Wireless connectivity
• WLAN (802.11b)
802.11b low power (3.96 mW deep sleep mode)
Peak output power: 18 ±2 dBm
Frequency band: 2400-2483.5 MHz
Operating channels: 11 Channels
Modulation Type:
CCK (1Mbps)
DBPSK (2Mbps)
DQPSK (5.5/11Mbps)
• WLAN (802.11g)
802.11g low power (3.96 mW deep sleep mode)
Peak output power: 15 ±2 dBm
Frequency band: 2400-2483.5 MHz
Operating channels: 11 Channels
Modulation Type: OFDM (6~54Mbps)
• Serial infrared port
Power
Main battery
Standard battery: 3.7 V, 2200 mAh
Battery life
6 hours
Battery charge
• 3.5 hours with external AC adapter
• 3.5 hours with docking station
Backup battery
One hour data retaining time when main battery is
removed
Power management
• Provide all voltage outputs required in this
terminal
• Retain memory content more than 72 hours after
automatic low battery shutdown
• Provide 6 hours operating time with a standard
battery. The activities in operating period are:
a. Scan one barcode.
b. Send this barcode data to the host via wireless
LAN.
c. Repeat items 1 and 2 every 5 seconds.
• Provide 3-level battery status to show main
battery capacity
• Provide 3-level battery status to show back-up
battery capacity
• 3.5 hours charging time
• 16 hours backup battery charging time
67
Barcode/Symbology
Barcode Scanner
Symbol SE950
Symbology
•
•
•
•
•
•
•
•
•
•
•
•
•
•
•
•
•
•
•
68
Bookland EAN
Codabar
Code 11
Code 128
Code 32 (Pharmacy Code)
Code 39
Code 93
Delta Code
EAN 128
EAN 13
EAN 8
Interleaved 2 of 5
Label Code IV & V
MSI/Plessy
Standard 2 of 5/Toshiba (China Postal Code)
group
Telpen
UPC A
UPC E
UPC/EAN group
OS and Software
Programming Tools
OS
Microsoft Windows Mobile 5.0
Language Support
•
•
•
•
Mechanical and
Environmental
Dimensions
Length: 126 mm
Width: 76 mm
Depth: 23 mm
Weight
220 g
Temperature
Operating: 0° to 50°C
Non-operating: -20° to 60°C
Humidity
Operating/Non-operating: 5% to 95% RH
Vibration
Operating/Non-operating: 2g, 10 - 500 Hz
Shock
Operating: 10 g
Non-operating: 15 g
Drop
120 cm, without major damage
International English
Japanese
Simplified Chinese
Traditional Chinese
Appendix A System Specifications
JPecifications du systeme
Processing/Memory
Input/Output
CPU
Intel PXA270 processor with speed of up to 520 MHz
Memory
• SDRAM: 64 MB
• Flash ROM: 64 MB Built-in (Flash Memory
Manager included)
Input Devices
•
•
•
•
•
•
Touch screen
Stylus
Control buttons
Full alphanumeric software keyboard
Mag stripe reader
Barcode scanner
Control and Quick
launch hot keys
•
•
•
•
•
•
•
Navigation key
Software keyboard button
Email button
Today button
Calendar button
Tasks button
Notes button
Audio
• Built-in speaker
• 3.5 mm stereo earphone jack
• Microphone
Display
• 3.5" QVGA LCD touch-sensitive screen and
Electroluminescent backlight
• 320 x 240 resolution
LED Indicator
Dual colors (green/red) for barcode read indication
Scan Engine
• Light Source: Visible Laser Diode (VLD) 650 nm
• Min. print contrast: 25% absolute dark/light
reflectance at 650 nm
• Power Consumption: 65 mA typical@5 V
Connectivity
• USB port
• SDIO/MMC slot
Wireless connectivity
• Bluetooth
Version: 1.1 and 1.2 with class 2 specification
Peak output power: 2 ±2 dBm
Frequency band: 2400-2483.5 MHz
Operating channels: 79 Channels
Modulation Type: GFSK
69
70
Input/Output
Wireless connectivity
• WLAN (802.11b)
802.11b low power (3.96 mW deep sleep mode)
Peak output power: 18 ±2 dBm
Frequency band: 2400-2483.5 MHz
Operating channels: 11 Channels
Modulation Type:
CCK (1Mbps)
DBPSK (2Mbps)
DQPSK (5.5/11Mbps)
• WLAN (802.11g)
802.11g low power (3.96 mW deep sleep mode)
Peak output power: 15 ±2 dBm
Frequency band: 2400-2483.5 MHz
Operating channels: 11 Channels
Modulation Type: OFDM (6~54Mbps)
• Serial infrared port
Power
Main battery
Standard battery: 3.7 V, 2200 mAh
Battery life
6 hours
Battery charge
• 3.5 hours with external AC adapter
• 3.5 hours with docking station
Backup battery
One hour data retaining time when main battery is
removed
Power management
• Provide all voltage outputs required in this
terminal
• Retain memory content more than 72 hours after
automatic low battery shutdown
• Provide 6 hours operating time with a standard
battery. The activities in operating period are:
a. Scan one barcode.
b. Send this barcode data to the host via wireless
LAN.
c. Repeat items 1 and 2 every 5 seconds.
• Provide 3-level battery status to show main
battery capacity
• Provide 3-level battery status to show back-up
battery capacity
• 3.5 hours charging time
• 16 hours backup battery charging time
Appendix A System Specifications
Barcode/Symbology
Barcode Scanner
Symbol SE950
Symbology
•
•
•
•
•
•
•
•
•
•
•
•
•
•
•
•
•
•
•
Bookland EAN
Codabar
Code 11
Code 128
Code 32 (Pharmacy Code)
Code 39
Code 93
Delta Code
EAN 128
EAN 13
EAN 8
Interleaved 2 of 5
Label Code IV & V
MSI/Plessy
Standard 2 of 5/Toshiba (China Postal Code)
group
Telpen
UPC A
UPC E
UPC/EAN group
OS and Software
Programming Tools
OS
Microsoft Windows Mobile 5.0
Language Support
•
•
•
•
Mechanical and
Environmental
Dimensions
Length: 126 mm
Width: 76 mm
Depth: 23 mm
Weight
220 g
Temperature
Operating: 0° to 50°C
Non-operating: -20° to 60°C
Humidity
Operating/Non-operating: 5% to 95% RH
Vibration
Operating/Non-operating: 2g, 10 - 500 Hz
Shock
Operating: 10 g
Non-operating: 15 g
Drop
120 cm, without major damage
International English
Japanese
Simplified Chinese
Traditional Chinese
71
Appendix B
Regulatory Compliance Statements
FCC Statement
This is a FCC Part 15 Class B product. In a domestic environment this product may cause radio
interference, in which case the user may be required to take adequate measures.
Canadian Compliance Statement
This Class B Digital apparatus meets all requirements of the Canadian Interferance-Causing
Equipment Regulations.
The device is certified to the requirements of RSS-139-1 for 2.4 GHz spread spectrum devices.
European Conformity Statement
Declaration of Conformity with Regard to the R&TTE 1999/5/EC and EMC89/336/ EEC directives.
Laser Information
The WPA1000 series is certified in the U.S. to conform to the requirements of DHHS/CDRH 21CFR
Subchapter J and to the requirements of IEC 825-1. Class II and Class 2products are not considered to
be hazardous. The WPA1000 series contains internally a Visible Laser Diode (VLD) whose emissions
do not exceed the maximum limits as set forth in the above regulations. The scanner is designed so
that there is no human access to harmful laser light during normal operation, user maintenance or
during prescribed service operations.The laser safety warning label required by the DHHS/IEC for the
WPA1000 series’s optional laser scanner module is located on the memory compartment cover, on the
back of the unit.
CAUTION! Use of controls or adjustments or performance of procedures other than those specified
herein may result in hazardous laser light. Use of optical instruments with the scanner will increase eye
hazard. Optical instruments include binolulars, microscopes, and magnifying glasses. This does not
include eye glasses worn by the user.
72
Appendix B Regulatory Compliance Statements
Erklarung zur Ubereinstimmung mit
FCC-Erklärung
Die ist ein mit FCC, Teil 15, übereinstimmendes Produkt der Klasse B. In einer Wohnumgebung könnte
dieses Produkt den Funkverkehr stören, wobei der Benutzer dann entsprechende Gegenmaßnahmen
treffen muss.
Erklärung zur Übereinstimmung mit Vorschriften Kanadas
Dieses Digitalgerät der Klasse B entspricht sämtlichen Anforderungen der kanadischen Bestimmungen
für störfelder-erzeugende Geräte.
Das Gerät besitzt die Zertifizierung für RSS-139-1-Anforderungen für 2,4 GHz Spread-SpectrumGeräte.
Erklärung zur Übereinstimmung mit Vorschriften Europas
Erklärung zur Übereinstimmung mit den Richtlinien R&TTE 1999/5/EG und EMV 89/336/EWG.
Laser-Information
Die WPA1000-Serie ist in den USA für Übereinstimmung mit den Anforderungen von DHHS/CDRH
21CFR, Unterkapitel J, und den Anforderungen von IEC 825-1 zertifiziert. Produkte der Klasse II und
Klasse 2 werden nicht als gefährlich angesehen. Die WPA1000-Serie besitzt intern eine sichtbare
Laserdiode (VLD), deren Strahlung nicht die maximalen Grenzwerte, die in den obigen Bestimmungen
festgelegt sind, überschreitet. Der Scanner ist so ausgelegt, dass bei normalem Betrieb, während
Wartungsarbeiten seitens des Benutzers oder bei festgesetzten Reparaturen kein menschlicher
Zugang zum gefährlichen Laserlicht erforderlich ist. Das von der DHHS/IEC für das optionale
Laserscannermodul der WPA1000-Serie geforderte Warnschild für Lasersicherheit befindet sich auf
der Abdeckung des Speicherfachs auf der Rückseite des Geräts.
ACHTUNG – Die Bedienung von Kontrolltasten oder Einstellungen oder Ausführung von Vorgängen,
die von den hier beschriebenen abweichen, können eine gefährliche Laserbestrahlung zur Folge
haben. Die Verwendung optischer Instrumente mit dem Scanner erhöht die Gefar für Ihr Augenlicht.
Optische Instrumente beziehen sich auf Ferngläser, Mikroskope und Lupen. Vom Benutzer getragene
Brillen sind hiervon nicht betroffen.
73
Declaracion regulatoria
Declaracion de la FCC
Este es un producto de la clase B de la parte 15 de la Comision Federal de Comunicaciones (FCC).
Este producto puede causar interferencias radiales en un entorno domestico. En tal caso el usuario
debera tomar medidas correctivas adecuadas.
Declaracion de conformidad con regulaciones canadienses
Este aparato digital de la clase B satisface todos los requisitos de las regulaciones canadienses acerca
de las interferencias causadas por equipos.
Este dispositivo esta certificado de acuerdo a los requisitos RSS-139-1 para dispositivos con un rango
espectral de 2.4 GHz.
Declaracion de conformidad con regulaciones europeas
Declaracion de conformidad con respecto a las directivas R&TTE 1999/5/EC y EMC 89/336/ EEC.
Informacion laser
La computadora de la serie WPA1000 esta certificada en los Estados Unidos por los requisitos del
subcapitulo J de DHHS/CDRH 21CFR y IEC 825-1. Los productos de la Clase II y Clase 2 no son
considerados peligrosos. La serie WPA1000 contiene un diodo laser visible (VLD) con emisiones que
no exceden los limites establecidos por las regulaciones citadas. El escaner esta disenado para
impedir el acceso humano a la luz laser danina durante su operacion normal, mantenimiento o
reparacion. La etiqueta de advertencia de seguridad laser DHHS/IEC para el modulo escaner laser
opcional de la serie WPA1000 se encuentra en el compartimiento de memoria del panel trasero de la
computadora.
ADVERTENCIA: El uso de controles, ajustes o procedimientos de rendimiento que no hayan sido
especificados en este documento pueden resultar en una luz laser danina. El uso de instrumentos
opticos con el escaner incrementaran el riesgo de posibles danos oculares. Tales instrumentos opticos
pueden ser binoculares, microscopios, y lupas. No se incluyen las gafas portadas por los usuarios.
74
Appendix B Regulatory Compliance Statements
Déclaration de conformité réglementaire
Déclaration FCC
Ceci est un produit FCC article 15 classe B Dans un environnement domestique ce produit peut être à
l’origine d’interférence radio, auquel cas l’utilisateur peut avoir l’obligation de prendre des mesures
adéquates.
Déclaration de conformité du Canada
Cet appareil numerique de la classe B respecte les exigences du Reglement sur le material broilleur du
Canada.
L’appareil est certifié aux exigences de RSS-139-1 pour les appareils de l’étalement de spectre 2,4
GHz.
Déclaration de conformité pour l’Europe
Déclaration de conformité en ce qui concerne les directives R&TTE 1999/5/EC et EMC 89/336/ EEC.
Informations sur le laser
La gamme WPA1000 est certifiée aux États-unis comme étant conforme aux exigences de DHHS/
CDRH 21CFR sous-chapitre J et aux exigences de IEC 825-1. Les produits de classe II et de classe 2
ne sont pas considéré comme dangereux. La gamme WPA1000 contient en interne une diode à laser
visible (VLD) dont les émissions n’excèdent pas les limites maximales définies dans les
réglementations ci-dessous. Le scanner est conçu pour qu’il n’y ait pas d’accès humain à une lumière
laser nuisible pendant l’utilisation normale, l’entretien par l’utilisateur ou les opérations de service
prescrites. L’étiquette d’avertissement de sécurité du laser exigée par DHHS/IEC pour le module
scanner laser en option de la gamme WPA1000 est située sur le couvercle du compartiment de la
mémoire, sur l’arrière de l’unité.
ATTENTION – L’utilisation de contrôles, d’ajustements ou des procédures autres que ceux décrits dans
ce document peut résulter en une lumière laser dangereuse. L’utilisation d’instruments optiques avec le
scanner augmentera le danger pour les yeux. Les instruments optiques comprennent les jumelles, les
microscopes et les loupes. Ceci ne comprend pas les lunettes portées par l’utilisateur.
75
SC Compliance Statements
FCC Statement
This is a FCC Part 15 Class B product. In a domestic environment this product may cause radio interference, in which case the user may be
required to take adequate measures.
Canadian Compliance Statement
This Class B Digital apparatus meets all requirements of the Canadian Interferance-Causing Equipment Regulations.
The device is certified to the requirements of RSS-139-1 for 2.4 GHz spread spectrum devices.
European Conformity Statement
Declaration of Conformity with Regard to the R&TTE 1999/5/EC and EMC89/336/ EEC directives.
Laser Information
The WPA1000 series is certified in the U.S. to conform to the requirements of DHHS/CDRH 21CFR Subchapter J and to the requirements of IEC
825-1. Class II and Class 2products are not considered to be hazardous. The WPA1000 series contains internally a Visible Laser Diode (VLD)
whose emissions do not exceed the maximum limits as set forth in the above regulations. The scanner is designed so that there is no human access
to harmful laser light during normal operation, user maintenance or during prescribed service operations.The laser safety warning label required by
the DHHS/IEC for the WPA1000 series’s optional laser scanner module is located on the memory compartment cover, on the back of the unit.
CAUTION! Use of controls or adjustments or performance of procedures other than those specified herein may result in hazardous laser light. Use
of optical instruments with the scanner will increase eye hazard. Optical instruments include binolulars, microscopes, and magnifying glasses. This
does not include eye glasses worn by the user.
76
Appendix B Regulatory Compliance Statements
TC Compliance Statements
FCC Statement
This is a FCC Part 15 Class B product. In a domestic environment this product may cause radio interference, in which case the user may be
required to take adequate measures.
Canadian Compliance Statement
This Class B Digital apparatus meets all requirements of the Canadian Interferance-Causing Equipment Regulations.
The device is certified to the requirements of RSS-139-1 for 2.4 GHz spread spectrum devices.
European Conformity Statement
Declaration of Conformity with Regard to the R&TTE 1999/5/EC and EMC89/336/ EEC directives.
Laser Information
The WPA1000 series is certified in the U.S. to conform to the requirements of DHHS/CDRH 21CFR Subchapter J and to the requirements of IEC
825-1. Class II and Class 2products are not considered to be hazardous. The WPA1000 series contains internally a Visible Laser Diode (VLD)
whose emissions do not exceed the maximum limits as set forth in the above regulations. The scanner is designed so that there is no human access
to harmful laser light during normal operation, user maintenance or during prescribed service operations.The laser safety warning label required by
the DHHS/IEC for the WPA1000 series’s optional laser scanner module is located on the memory compartment cover, on the back of the unit.
CAUTION! Use of controls or adjustments or performance of procedures other than those specified herein may result in hazardous laser light. Use
of optical instruments with the scanner will increase eye hazard. Optical instruments include binolulars, microscopes, and magnifying glasses. This
does not include eye glasses worn by the user.
77
JP Compliance Statements
FCC Statement
This is a FCC Part 15 Class B product. In a domestic environment this product may cause radio interference, in which case the user may be
required to take adequate measures.
Canadian Compliance Statement
This Class B Digital apparatus meets all requirements of the Canadian Interferance-Causing Equipment Regulations.
The device is certified to the requirements of RSS-139-1 for 2.4 GHz spread spectrum devices.
European Conformity Statement
Declaration of Conformity with Regard to the R&TTE 1999/5/EC and EMC89/336/ EEC directives.
Laser Information
The WPA1000 series is certified in the U.S. to conform to the requirements of DHHS/CDRH 21CFR Subchapter J and to the requirements of IEC
825-1. Class II and Class 2products are not considered to be hazardous. The WPA1000 series contains internally a Visible Laser Diode (VLD)
whose emissions do not exceed the maximum limits as set forth in the above regulations. The scanner is designed so that there is no human access
to harmful laser light during normal operation, user maintenance or during prescribed service operations.The laser safety warning label required by
the DHHS/IEC for the WPA1000 series’s optional laser scanner module is located on the memory compartment cover, on the back of the unit.
CAUTION! Use of controls or adjustments or performance of procedures other than those specified herein may result in hazardous laser light. Use
of optical instruments with the scanner will increase eye hazard. Optical instruments include binolulars, microscopes, and magnifying glasses. This
does not include eye glasses worn by the user.
78