1
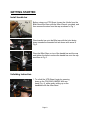
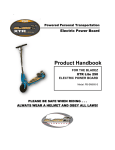
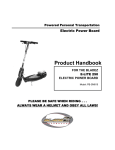
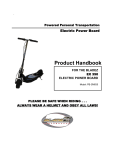
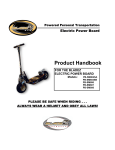
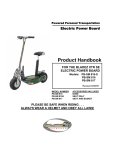
Powered Personal Transportation Electric Power Board Product Handbook FOR THE BLADEZ XTR Street ELECTRIC POWER BOARD Model: PB-SM1806 PLEASE BE SAFE WHEN RIDING . . . ALWAYS WEAR A HELMET AND OBEY ALL LAWS! Page 1 Page 2 IMPORTANT BATTERY MAINTENANCE and CHARGING INSTRUCTIONS: 1. You MUST Charge completely prior to initial use. (Follow charging instructions in your Product Handbook). 2. Charge immediately after every use. 3. Charge before storage – min. of every 30 days if not in use. 4. Charge the unit for 4-6 hours after the light on the charger turns green. 5. DO NOT allow your unit to Deep Discharge. 6. For safety purposes, DO NOT charge for over 24 hours. 7. Turn the unit OFF when not in use. Failure to follow proper CHARING INSTRUCTIONS will VOID YOUR WARRANTY! This PRODUCT IS NOT INTENDED FOR EXTREME or OFF-ROAD Use! Please take care of your POWERBOARD! DO NOT JUMP or ABUSE THIS PRODUCT! DO NOT RIDE IN WET CONDITIONS! Failure to follow these instruction and abuse will VOID YOUR WARRANTY! If you have any questions, please contact Bladez customer service (866) 325-2339 or visit us on the web at www.ebladez.com Page 3 IMPORTANT PLEASE READ THIS BEFORE USING THIS PRODUCT READ THIS FIRST! WARNING This product does not conform to Federal Motor Vehicle Standards and is not intended for operation on public streets, roads or highways. Serious injury can result from the unsafe operations of this product. Operator can minimize these risks by using certain safety equipment such as: safety helmet, goggles, gloves, elbow and kneepads and appropriate footwear. DO NOT operate this product in traffic, on wet, frozen oily or unpaved surfaces or under the influence of drugs and/or alcohol. Avoid uneven surfaces, potholes, surface cracks and obstacles. DO NOT use a water hose to clean this product. See Product Handbook for more information. This product is recommended for riders 16 YEARS OF AGE and older. SAFETY This product should not be used by persons without excellent vision, balance, coordination, reflex, muscle and bone strength and good decision-making capabilities. This product should not be used by minors without adult supervision. This product should not be used by persons unwilling or unable to take responsibility for their own actions. • The user of this product assumes ALL risks associated with its use. To minimize these RISKS, the user must wear safety helmet, goggles, gloves, elbow and knee pads and appropriate footwear. • This product is ELECTRIC! DO NOT Ride this product in wet conditions, puddles or rainy weather. Page 4 DO NOT TAKE YOUR BLADEZ POWERBOARD BACK TO THE STORE! CONTACT US FIRST IF YOU HAVE ANY QUESTIONS OR NEED ASSISTANCE, PLEASE CALL BLADEZ, TOLL FREE AT: (866) EBLADEZ (866) 325-2339 MONDAY thru FRIDAY, 8am to 5pm PST or visit us on the web at: www.ebladez.com NETWORK OF BLADEZ AND TANAKA SERVICING DEALERS FOR ALL YOUR POWERBOARD NEEDS Page 5 TABLE OF CONTENTS BATTERY MAINTENANCE AND ................................................................................... 3 CHARGING INSTRUCTIONS:........................................................................................ 3 GETTING TO KNOW YOUR BLADEZ POWER BOARD............................................... 7 GETTING STARTED ...................................................................................................... 8 Install Handle Bar & Unfolding 8 Charging 9 FOLDING AND STORAGE........................................................................................... 10 CHARGING SYSTEM ................................................................................................... 11 RECOMMENDED TOOLS ............................................................................................ 11 BRAKING SYSTEM...................................................................................................... 11 Adjusting the Brakes 11 Squeaky Brakes 12 TIRES AND WHEELS................................................................................................... 12 Tire Pressure 12 ADJUSTING THE HEAD UNIT ..................................................................................... 12 CHAIN CARE................................................................................................................ 13 Lubrication 13 Chain Adjustment 13 TROUBLESHOOTING GUIDE ..................................................................................... 14 OTHER QUESTIONS.................................................................................................... 14 Page 6 GETTING TO KNOW YOUR BLADEZ POWER BOARD 1 2 6 3 8 7 3 8 9 9 4 5 6 13 14 12 10 11 Before operating your BLADEZ Power Board, please get acquainted with all of the features: 1. 2. 3. 4. 5. 6. 7. Accelerator Lever (Variable Speed) Brake Lever Folding Handle Disc Brake Kick Stand Charging Plug 450 W Electric Motor 8. 9. 10. 11. 12 13 14. Page 7 Mud Guard 24V, 12AH Batteries AC Charger Charger Cord Power Panel with On/Off Switch 10 & 13mm Wrench 4mm Allen Wrench GETTING STARTED Install handle bar Fig. 1 Stem Cap Before using your XTR-Street, loosen the 4 bolts from the Billet Aluminum Stem with the Allen Wrench provided, and then remove the stem from the cap as shown in Fig 1. Place handle bar onto the Billet cap with the hole facing down towards the threaded bolt as shown with arrow in Fig 2. Fig. 2 Fig. 3 Place the Billet Stem on top of the handle bar and the cap and tighten the bolts to secure the handle bar onto the cap as shown in Fig 3. Unfolding Instruction Fig. 4 1. To unfold the XTR-Street, begin by pressing down on the FOLDING HANDLE with one hand (Fig. 4), while gently pulling up on the handlebar with the other hand. Page 8 2. Fully extend the handlebars to their upright position until you feel the mechanism lock into place (Fig. 5). Fig. 5 Charging Your XTR-Street should come charged out of the box. Bladez still recommends charging the unit for 6-8 hours prior to first use! Bladez also recommends charging your XTR-Street after every use and prior to storage. Warning: DO NOT allow your Powerboard to go into deep discharge! – This will damage the batteries. Charging Instructions Fig. 6 Charging 1. Carefully remove the XTR-Street from the box. 2. Make sure the unit is turned OFF. 3. Open the charging plug by rotating the safety cover clockwise as shown in arrow from Fig. 6. 4. Locate the AC CHARGER and plug it into wall. Insert the charger (the end with the prongs inside of it) into the charging plug. 5. A red light (Charging Status Light) will come on the Charger indicating that charging is in process as shown in Fig 7. 6. Remove charger and close the safety cap. 7. You are now ready to ride the XTR-Street. Fig. 7 Charging Status Light Note: If the light turns green right away, this is because the unit was charged at the factory. Please continue charging for 6-8 hours prior to initial use. Page 9 Riding Before going for a joy ride, makes sure that all of the bolts and screws are tightened. Put switch to the ON position, green light will come on indicating the unit is turned on with full charge as shown in Fig 8. NOTE: If the unit is at the ON position for over 10-15 minutes without moving, Smart Power will shut itself OFF. To reset, turn the unit OFF, wait a few seconds and then switch it back ON again. Fig.12 Fig. 8 Put one foot on the deck of the XTR-Street. While pushing off with the other foot, gently squeeze the ACCELERATOR LEVER, on the right side of the handlebars. The XTRStreet will begin to move on its own power. Control your speed by pressing and releasing the accelerator lever. You do not need to constantly hold down the accelerator, but can rather use small bursts of power to control speed and maximize battery life. To stop, release the accelerator handle and depress the BRAKE LEVER (on the left side of the handlebars). Depressing the brake will disengage power to the motor. When the unit feels like it is losing power, or not accelerating to full speed you are ready to RECHARGE. *NOTE: At this time, there is still charge in the battery but it is not advisable to fully discharge the batteries. FOLDING AND STORAGE When you are done riding the XTR-Street you can fold it down for compact storage, carrying and transportation. Make sure the POWER SWITCH is in the OFF position and the charger is unplugged from the socket. Always charge your POWERBOARD fully prior to storage! To fold down the XTR-Street, use one hand to push down on the FOLDING HANDLE, while using the other to gently push down on the handlebars. BE CAREFUL NOT TO HIT YOUR HEAD WITH THE HANDLEBAR. Push down until you feel the mechanism lock into place. You can now carry the XTR-Street by the handlebar tube. Page 10 CHARGING SYSTEM This unit comes standard with a regulated 24V charger, this means that the power can be left switched on for a long period of time without harm to the batteries. NOTE: It is not advisable to leave your Powerboard plugged in for more than 24 hours. ALWAYS CHARGE YOUR POWERBOARD PRIOR TO STORAGE To re-charge your XTR-Street, simply connect the small round plug on the CHARGER to CHARGING PLUG as described in GET STARTED Charging section. Your Power Board is now fully charged and ready for use. RECOMMENDED TOOLS To adjust and service the Bladez XTR-Street Power Board you will need the following tools: Allen Keys: 3/4/5/6mm. Wrenches: 10/13/14/17 mm Open and ring combination. Large Adjustable Crescent Wrench Philips Head Screwdriver Oil, Grease or Lubricant (such as WD-40) BRAKING SYSTEM The XTR-Street uses a front wheel disc/calliper system activated by a hand lever (on the left side of the handlebar). The brake is activated by squeezing the BRAKE LEVER with your left hand. The XTR-Street is equipped with a controller that temporarily disengages the power to the motor when the BRAKE LEVER is depressed. Practice braking on a smooth, dry surface to get used to the feel of the braking system. Braking distance is affected by wet conditions and loose and uneven riding surfaces. Adjusting the Brakes The Brakes on the XTR-Street should come fully adjusted from the factory. However, it may be necessary to adjust the brake from time to time. To adjust the brakes: Fig. 9 1. Loosen the tension screw on the Brake Lever by rotating it counter-clockwise until the wheel spins freely, with some For further adjustment: Page 11 2. With one hand, depress the brake calliper using your thumb and forefinger. (Fig. 9). 3. With the other hand, adjust the tension screw on the brake line. a. Turn the tension screw clockwise to loosen the brake. b. Turn the tension screw counter-clockwise to tighten the brake. Squeaky Brakes The brakes may squeak before they are broken in. This is normal and will not affect the function or performance of the brakes. With continued use, the squeak should go away. TIRES AND WHEELS The Bladez XTR-Street uses an identical rim and tires assembly on the front and rear wheels, which means that the tires can be rotated. The wheels are actually two wheel halves (split rim) bolted together to make it easier to remove and replace the tire. The rear wheel is fitted with a special spacer to accommodate the sprockets, while the front wheel has a bracket for the disc brake. Tire wear will differ based on rider weight, riding conditions and care. Replacement tires can be obtained at your local Bladez dealer, through motorcycle shops, or from the Bladez website at www.ebladez.com. Tire Pressure This 3.00-4 tire must be inflated to a maximum of 60 P.S.I.. Empty all air from the tire, prior to loosing the bolt to split the rim. ADJUSTING THE HEAD UNIT The head unit should come adjusted from the factory. However, riding on rough terrain and general use may cause the head unit to become loose over time. It may be necessary to adjust the head unit from time to time. Fig. 10 To adjust the head unit: 1. Rotate the handle bar as far right as it will go to expose the HEAD UNIT (Fig. 10). 2. Using a large adjustable wrench, gently turn the BEARING LOCK clockwise to tighten. * DO NOT over tighten as it will make it difficult to steer and may DAMAGE THE BEARING RACE. Page 12 CHAIN CARE Proper chain care will increase the life and improve performance of your Power Board. Always keep the chain lubricated and tightened to proper tension. Lubrication Always keep the chains lubricated with a good chain spray or grease (not chain wax). If the chains are allowed to run dry for a prolonged period they will fail, and the life of the chain is severely shortened. Chain Adjustment The chain on the XTR-Street should be adjusted from time to time. The chain should be tight enough not to skip, but have a little bit of play. If you feel your chain skipping or make a popping noise, adjust the tension immediately. For regular adjustments: 1. Using a 17mm wrench, loosen the axel bolts on each side of the rear wheel (Fig. 11). 2. While the axel bolts are loose, using a 10mm wrench loosen the tension bolts behind the rear wheel of the XTR-Street and move the rear wheel backwards to remove the slack for the chain (fig. 12). 3. Once this is achieved the wheel nuts must then be relocked into position and wheel alignment must be checked (while turning the wheel, visually check that the clearance between the wheel and the frame parts have clearance). Fig.11 Fig.12 *Note: Chains that are run excessively dry or loose can result in sprocket teeth being severely damaged. Page 13 TROUBLESHOOTING GUIDE The following guide will help assist you in identifying and correction common problems with your XTRStreet: Symptoms Potential Causes: Solutions: The charger light turns green right away No action needed. Batteries do not hold a charge. Unit does not have specified travel range. This indicates the batteries are adequately charged. Most units come charged in the box. Batteries have reached the end of their useful life or poor polarity between batteries. Unit moves intermittently, or very slow. Charger is malfunctioning. Batteries not fully charged or polarity problem. Replace charger unit. Charge or replace batteries. Throttle cable is loose. Throttle cable is loose. Tighten cable. Tighten cable. Batteries not fully charged. Replace batteries, charger or circuit board. Batteries have reached the end of their useful life. Circuit breaker has “tripped”. Replace batteries. Unit will not move when throttle lever is activated. Unit stops abruptly during use. Replace batteries. Allow electric motor to cool and re-set circuit breaker by turning power switch on and off. OTHER QUESTIONS Where can get replacement and aftermarket parts? From your local Servicing Dealer of over the web at: www.ebladez.com For additional questions, service instruction, further information and important phone numbers, please go to the Bladez website at www.ebladez.com. If you have any additional questions, please contact Bladez Customer Service Department at (866) 325-2339 x 1 Thank you for purchasing a Bladez Power Board and please tell your friends about how much fun you had on the Bladez Power Board. Page 14 www.ebladez.com Bladez, Corp. 20155 Ellipse Foothill Ranch, CA 92610 Page 15