1
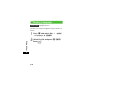
Introduction
Thank you for purchasing the SoftBank 707SC.
Note
●Read this guide thoroughly before using
707SC to ensure proper usage.
・Unauthorized copying of any part of this guide
is prohibited.
●After reading this guide, keep it for later
reference.
・Contents are subject to change without prior
notice.
●Should you lose or damage this guide,
contact Customer Service ( P.25-25).
・Not all functions and services described in this
user guide are available in Japan.
●Accessible services may be limited by
contract conditions or service area.
・Steps have been taken to ensure the accuracy
of descriptions in this guide. If you find
inaccurate or missing information, contact
Customer Service ( P.25-25).
707SC is compatible with both 3G and GSM
network technologies.
・If there are any missing/misplaced pages in this
manual, SoftBank will replace it.
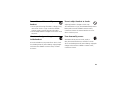
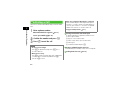
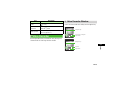
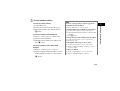
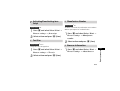
Accessories
Make sure the following accessories are included in the package with handset. These accessories are also sold separately.
For details on accessories or optional items, contact Customer Service ( P.25-25).
Battery
AC Charger
Utility Software
(CD-ROM)
Stereo Earphones USB Cable
Earphone Conversion
Cable with Microphone
i
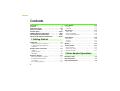
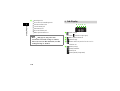
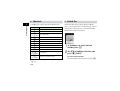
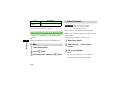
Contents
Accessories . . . . . . . . . . . . . . . . . . . . . . . . . . . . . . . i
Contents . . . . . . . . . . . . . . . . . . . . . . . . . . . . . . . . ii
About This Guide . . . . . . . . . . . . . . . . . . . . . . . . xiii
Safety Precautions . . . . . . . . . . . . . . . . . . . . . . . xv
General Notes. . . . . . . . . . . . . . . . . . . . . . . . . xxviii
SAR Certification Information . . . . . . . . . . . . .xxxv
FCC RF Exposure Information . . . . . . . . . . . . . xxxvi
European RF Exposure Information . . . . . . . .xxxvii
1 Getting Started
USIM Card. . . . . . . . . . . . . . . . . . . . . . . . . . . . . .1-2
General Information & Precautions. . . . . . . . . . . . . . . . . . .1-2
Inserting & Removing USIM Card . . . . . . . . . . . . . . . . . . . .1-3
USIM PINs . . . . . . . . . . . . . . . . . . . . . . . . . . . . . . . . . . . . .1-5
Handset Parts & Functions . . . . . . . . . . . . . . . . .1-6
Handset. . . . . . . . . . . . . . . . . . . . . . . . . . . . . . . . . . . . . . .1-6
Display Indicators. . . . . . . . . . . . . . . . . . . . . . . . . . . . . . . .1-8
Sub Display . . . . . . . . . . . . . . . . . . . . . . . . . . . . . . . . . . .1-10
Battery & Charger. . . . . . . . . . . . . . . . . . . . . . .1-11
Before Using Battery or Charger. . . . . . . . . . . . . . . . . . . .1-11
Inserting & Removing Battery. . . . . . . . . . . . . . . . . . . . . .1-13
AC Charger . . . . . . . . . . . . . . . . . . . . . . . . . . . . . . . . . . .1-15
In-Car Charger (Optional). . . . . . . . . . . . . . . . . . . . . . . . .1-16
ii
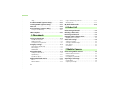
Power On/Off. . . . . . . . . . . . . . . . . . . . . . . . . . 1-17
Power On . . . . . . . . . . . . . . . . . . . . . . . . . . . . . . . . . . . . 1-17
Power Off. . . . . . . . . . . . . . . . . . . . . . . . . . . . . . . . . . . . 1-18
Time & Date. . . . . . . . . . . . . . . . . . . . . . . . . . . 1-18
Time & Date . . . . . . . . . . . . . . . . . . . . . . . . . . . . . . . . . . 1-18
Time Zone Updating . . . . . . . . . . . . . . . . . . . . . . . . . . . . 1-19
Changing Home Time Zone. . . . . . . . . . . . . . . . . . . . . . . 1-20
707SC Menus. . . . . . . . . . . . . . . . . . . . . . . . . . 1-20
Main Menu. . . . . . . . . . . . . . . . . . . . . . . . . . . . . . . . . . . 1-20
Shortcuts . . . . . . . . . . . . . . . . . . . . . . . . . . . . . . . . . . . . 1-22
Switch Bar . . . . . . . . . . . . . . . . . . . . . . . . . . . . . . . . . . . 1-22
Options . . . . . . . . . . . . . . . . . . . . . . . . . . . . . . 1-23
Security Codes. . . . . . . . . . . . . . . . . . . . . . . . . 1-23
Phone Password . . . . . . . . . . . . . . . . . . . . . . . . . . . . . . . 1-23
Center Access Code . . . . . . . . . . . . . . . . . . . . . . . . . . . . 1-23
Network Password . . . . . . . . . . . . . . . . . . . . . . . . . . . . . 1-24
2 Basic Handset Operations
Initiating a Call . . . . . . . . . . . . . . . . . . . . . . . . . 2-2
Receiving a Call . . . . . . . . . . . . . . . . . . . . . . . . . 2-3
Reject Incoming Call . . . . . . . . . . . . . . . . . . . . . 2-4
Answer Machine . . . . . . . . . . . . . . . . . . . . . . . . .2-5
Activating & Canceling. . . . . . . . . . . . . . . . . . . . . . . . . . . .2-5
Ringing Duration . . . . . . . . . . . . . . . . . . . . . . . . . . . . . . . .2-6
Sound Language . . . . . . . . . . . . . . . . . . . . . . . . . . . . . . . .2-6
Checking Recordings . . . . . . . . . . . . . . . . . . . . . . . . . . . . .2-6
Engaged Call Operations . . . . . . . . . . . . . . . . . .2-7
Earpiece Volume . . . . . . . . . . . . . . . . . . . . . . . . . . . . . . . .2-7
Hold . . . . . . . . . . . . . . . . . . . . . . . . . . . . . . . . . . . . . . . . .2-7
Speaker Phone. . . . . . . . . . . . . . . . . . . . . . . . . . . . . . . . . .2-7
Voice Recording. . . . . . . . . . . . . . . . . . . . . . . . . . . . . . . . .2-7
Engaged Call Options . . . . . . . . . . . . . . . . . . . . . . . . . . . .2-8
Call Log Records . . . . . . . . . . . . . . . . . . . . . . . . .2-9
Viewing Call Log Records. . . . . . . . . . . . . . . . . . . . . . . . . .2-9
Calling from Call Log Records . . . . . . . . . . . . . . . . . . . . . .2-9
Deleting Call Log Records . . . . . . . . . . . . . . . . . . . . . . . .2-10
Call Log Options . . . . . . . . . . . . . . . . . . . . . . . . . . . . . . .2-10
Call Manager . . . . . . . . . . . . . . . . . . . . . . . . . .2-11
Data Counter, Call Costs, & Call Times. . . . . . . . . . . . . . .2-11
Edit Cost Limit . . . . . . . . . . . . . . . . . . . . . . . . . . . . . . . . .2-12
Display Call Cost during a Call . . . . . . . . . . . . . . . . . . . . .2-13
International Roaming . . . . . . . . . . . . . . . . . . .2-13
Changing Network Mode. . . . . . . . . . . . . . . . . . . . . . . . .2-13
Network Setup. . . . . . . . . . . . . . . . . . . . . . . . . . . . . . . . .2-14
Calling from Outside Japan . . . . . . . . . . . . . . . . . . . . . . .2-15
Emergency Calls . . . . . . . . . . . . . . . . . . . . . . . .2-16
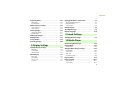
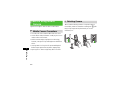
3 Manner Profile
Minding Mobile Manners . . . . . . . . . . . . . . . . . 3-2
Manner Related Functions . . . . . . . . . . . . . . . . . . . . . . . . 3-2
Manner Profile. . . . . . . . . . . . . . . . . . . . . . . . . . 3-3
Changing Profile . . . . . . . . . . . . . . . . . . . . . . . . 3-3
Offline Mode . . . . . . . . . . . . . . . . . . . . . . . . . . . 3-4
4 Entering Text
Text Entry . . . . . . . . . . . . . . . . . . . . . . . . . . . . . 4-2
Text Entry Window . . . . . . . . . . . . . . . . . . . . . . . . . . . . . . 4-2
Changing Text Entry Mode . . . . . . . . . . . . . . . . . . . . . . . . 4-2
Key Assignments . . . . . . . . . . . . . . . . . . . . . . . . . . . . . . . 4-3
Entering Characters. . . . . . . . . . . . . . . . . . . . . . 4-4
Hiragana/Kanji . . . . . . . . . . . . . . . . . . . . . . . . . . . . . . . . . 4-4
Katakana . . . . . . . . . . . . . . . . . . . . . . . . . . . . . . . . . . . . . 4-6
Alphanumerics . . . . . . . . . . . . . . . . . . . . . . . . . . . . . . . . . 4-7
Numbers . . . . . . . . . . . . . . . . . . . . . . . . . . . . . . . . . . . . . 4-8
Symbols, Pictograms & Emoticons . . . . . . . . . . . . . . . . . . . 4-9
Line Breaks. . . . . . . . . . . . . . . . . . . . . . . . . . . . . . . . . . . 4-10
Quoting Saved Text . . . . . . . . . . . . . . . . . . . . . . . . . . . . 4-10
Hangul . . . . . . . . . . . . . . . . . . . . . . . . . . . . . . . . . . . . . . 4-11
Editing Text . . . . . . . . . . . . . . . . . . . . . . . . . . . 4-11
Deleting . . . . . . . . . . . . . . . . . . . . . . . . . . . . . . . . . . . . . 4-11
Copy/Cut, Paste & Undo . . . . . . . . . . . . . . . . . . . . . . . . . 4-12
iii
Jump . . . . . . . . . . . . . . . . . . . . . . . . . . . . . . . . . . . . . . . .4-13
Prediction On/Off (Japanese Only) . . . . . . . . . .4-13
Learning On/Off (Japanese Only) . . . . . . . . . . .4-13
Font Size . . . . . . . . . . . . . . . . . . . . . . . . . . . . . .4-14
User Dictionary (Japanese Only). . . . . . . . . . . .4-14
Saving to User Dictionary . . . . . . . . . . . . . . . . . . . . . . . . .4-15
SMS Templates . . . . . . . . . . . . . . . . . . . . . . . . .4-15
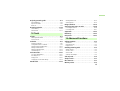
5 Phonebook
Copy to USIM & Copy to Phone . . . . . . . . . . . . . . . . . . . 5-15
Deleting Entries . . . . . . . . . . . . . . . . . . . . . . . . . . . . . . . 5-15
My Phonebook Details . . . . . . . . . . . . . . . . . . 5-16
6 Video Call
Before Using Video Call. . . . . . . . . . . . . . . . . . .
Initiating a Video Call . . . . . . . . . . . . . . . . . . . .
Receiving a Video Call. . . . . . . . . . . . . . . . . . . .
Engaged Video Call Operations . . . . . . . . . . . .
6-2
6-2
6-2
6-3
Saving to Phonebook . . . . . . . . . . . . . . . . . . . . .5-2
Engaged Video Call Options . . . . . . . . . . . . . . . . . . . . . . . 6-5
Phonebook Entry Items . . . . . . . . . . . . . . . . . . . . . . . . . . .5-2
Adding Entry Items . . . . . . . . . . . . . . . . . . . . . . . . . . . . . .5-4
Saving from Call Log Records . . . . . . . . . . . . . . . . . . . . . . .5-6
Video Call Settings . . . . . . . . . . . . . . . . . . . . . . 6-6
Category Settings . . . . . . . . . . . . . . . . . . . . . . . .5-7
New Category (USIM Card) . . . . . . . . . . . . . . . . . . . . . . . .5-7
Edit Category. . . . . . . . . . . . . . . . . . . . . . . . . . . . . . . . . . .5-7
Add Member . . . . . . . . . . . . . . . . . . . . . . . . . . . . . . . . . . .5-8
Using Phonebook . . . . . . . . . . . . . . . . . . . . . . . .5-9
Calling from Phonebook . . . . . . . . . . . . . . . . . . . . . . . . . .5-9
Speed Dialing . . . . . . . . . . . . . . . . . . . . . . . . . . . . . . . . .5-12
Phonebook Options . . . . . . . . . . . . . . . . . . . . . . . . . . . . .5-13
Editing Phonebook Entries . . . . . . . . . . . . . . . .5-14
Edit . . . . . . . . . . . . . . . . . . . . . . . . . . . . . . . . . . . . . . . . .5-14
Default Number . . . . . . . . . . . . . . . . . . . . . . . . . . . . . . . .5-14
iv
Sending Your Image . . . . . . . . . . . . . . . . . . . . . . . . . . . . . 6-6
Selecting a Substitute Image . . . . . . . . . . . . . . . . . . . . . . . 6-6
Retry Settings . . . . . . . . . . . . . . . . . . . . . . . . . . . . . . . . . . 6-7
Voice Mute. . . . . . . . . . . . . . . . . . . . . . . . . . . . . . . . . . . . 6-7
7 Mobile Camera
Before Using Mobile Camera . . . . . . . . . . . . . . 7-2
Mobile Camera Precautions . . . . . . . . . . . . . . . . . . . . . . . 7-2
Rotating Camera . . . . . . . . . . . . . . . . . . . . . . . . . . . . . . . 7-2
Using Display as Viewfinder . . . . . . . . . . . . . . . . . . . . . . . 7-3
Capturing a Still Image . . . . . . . . . . . . . . . . . . . 7-4
Camera Mode . . . . . . . . . . . . . . . . . . . . . . . . . . . . . . . . . 7-4
Capturing Still Images. . . . . . . . . . . . . . . . . . . . . . . . . . . . 7-5
Capturing Video . . . . . . . . . . . . . . . . . . . . . . . .7-10
Backlight Brightness & Duration . . . . . . . . . . . . 8-7
Video Mode. . . . . . . . . . . . . . . . . . . . . . . . . . . . . . . . . . .7-10
Recording Video . . . . . . . . . . . . . . . . . . . . . . . . . . . . . . .7-11
Adjusting Display Brightness . . . . . . . . . . . . . . . . . . . . . . . 8-7
Backlight Duration . . . . . . . . . . . . . . . . . . . . . . . . . . . . . . 8-7
Sub LCD Light. . . . . . . . . . . . . . . . . . . . . . . . . . . . . . . . . . 8-8
Mobile Camera Settings . . . . . . . . . . . . . . . . . .7-13
Camera Settings . . . . . . . . . . . . . . . . . . . . . . . . . . . . . . .7-13
Video Settings . . . . . . . . . . . . . . . . . . . . . . . . . . . . . . . . .7-14
Viewing Images . . . . . . . . . . . . . . . . . . . . . . . .7-15
Viewing Still Images. . . . . . . . . . . . . . . . . . . . . . . . . . . . .7-15
Viewing Videos . . . . . . . . . . . . . . . . . . . . . . . . . . . . . . . .7-15
Editing Still Images. . . . . . . . . . . . . . . . . . . . . .7-15
Editing Video . . . . . . . . . . . . . . . . . . . . . . . . . .7-17
Create Flash® . . . . . . . . . . . . . . . . . . . . . . . . . .7-19
Attaching Images . . . . . . . . . . . . . . . . . . . . . . .7-20
8 Display Settings
Standby Display Settings . . . . . . . . . . . . . . . . . .8-2
Wallpaper . . . . . . . . . . . . . . . . . . . . . . . . . . . . . . . . . . . . .8-2
Clock Display . . . . . . . . . . . . . . . . . . . . . . . . . . . . . . . . . . .8-4
Operator Name . . . . . . . . . . . . . . . . . . . . . . . . . . . . . . . . .8-5
Menu Display . . . . . . . . . . . . . . . . . . . . . . . . . . .8-5
Menu Style . . . . . . . . . . . . . . . . . . . . . . . . . . . . . . . . . . . .8-5
Popup Menu . . . . . . . . . . . . . . . . . . . . . . . . . . . . . . . . . . .8-6
List Font Size . . . . . . . . . . . . . . . . . . . . . . . . . . . . . . . . . . .8-6
Zoom List . . . . . . . . . . . . . . . . . . . . . . . . . . . . . . . . . . . . .8-7
Dialing Display . . . . . . . . . . . . . . . . . . . . . . . . . 8-8
Greeting Messages . . . . . . . . . . . . . . . . . . . . . . 8-9
Display Language . . . . . . . . . . . . . . . . . . . . . . 8-10
9 Sound Settings
Changing Profile Settings . . . . . . . . . . . . . . . . . 9-2
10 Media Player
Before Using Media Player . . . . . . . . . . . . . . . 10-2
Playing Music . . . . . . . . . . . . . . . . . . . . . . . . . 10-3
Create Playlist . . . . . . . . . . . . . . . . . . . . . . . . . . . . . . . . 10-6
Changing Music Player Settings . . . . . . . . . . . 10-7
Repeat Mode . . . . . . . . . . . . . . . . . . . . . . . . . . . . . . . . . 10-7
Tone Volume . . . . . . . . . . . . . . . . . . . . . . . . . . . . . . . . . 10-7
Audio Skin . . . . . . . . . . . . . . . . . . . . . . . . . . . . . . . . . . . 10-7
Visualization Mode . . . . . . . . . . . . . . . . . . . . . . . . . . . . . 10-8
Playing Video . . . . . . . . . . . . . . . . . . . . . . . . . 10-9
Player Settings . . . . . . . . . . . . . . . . . . . . . . . 10-11
Repeat Mode . . . . . . . . . . . . . . . . . . . . . . . . . . . . . . . . 10-11
Tone Volume . . . . . . . . . . . . . . . . . . . . . . . . . . . . . . . . 10-12
v
Resolution . . . . . . . . . . . . . . . . . . . . . . . . . . . . . . . . . . .10-12
11 Managing Files (Data Folder)
Data Folder . . . . . . . . . . . . . . . . . . . . . . . . . . . .11-2
Default Folders . . . . . . . . . . . . . . . . . . . . . . . . . . . . . . . .11-2
Saved Files . . . . . . . . . . . . . . . . . . . . . . . . . . . .11-3
Opening Files. . . . . . . . . . . . . . . . . . . . . . . . . . . . . . . . . .11-3
Using File Viewer . . . . . . . . . . . . . . . . . . . . . . . . . . . . . . .11-5
Viewing Graphics/Animation with
the SVG-T/Flash® Viewer . . . . . . . . . . . . . . . . . . . . . . .11-8
Sorting Files. . . . . . . . . . . . . . . . . . . . . . . . . . . . . . . . . . .11-9
Using Files. . . . . . . . . . . . . . . . . . . . . . . . . . . .11-10
Wallpaper . . . . . . . . . . . . . . . . . . . . . . . . . . . . . . . . . . .11-10
Setting Sound File as Ringtone . . . . . . . . . . . . . . . . . . . .11-11
Setting Video File as Ringtone . . . . . . . . . . . . . . . . . . . .11-11
Setting Flash® file as Wallpaper. . . . . . . . . . . . . . . . . . .11-12
Saving a vFile . . . . . . . . . . . . . . . . . . . . . . . . . . . . . . . .11-12
Data Folder Options. . . . . . . . . . . . . . . . . . . . . . . . . . . .11-13
Managing Files/Folders. . . . . . . . . . . . . . . . . .11-14
Create Folder. . . . . . . . . . . . . . . . . . . . . . . . . . . . . . . . .11-14
Changing a File Name/Folder Name . . . . . . . . . . . . . . . .11-14
Moving a File/Folder . . . . . . . . . . . . . . . . . . . . . . . . . . .11-15
Copying Files/Folders . . . . . . . . . . . . . . . . . . . . . . . . . . .11-16
Deleting a File/Folder . . . . . . . . . . . . . . . . . . . . . . . . . . .11-17
Deleting a Content Key . . . . . . . . . . . . . . . . . . . . . . . . .11-18
vi
12 External Connections
External Connections. . . . . . . . . . . . . . . . . . . . 12-2
Bluetooth® . . . . . . . . . . . . . . . . . . . . . . . . . . . 12-2
Before Using Bluetooth® . . . . . . . . . . . . . . . . . . . . . . . . 12-2
Sending & Receiving Files . . . . . . . . . . . . . . . . . . . . . . . . 12-4
Connecting Handsfree . . . . . . . . . . . . . . . . . . . . . . . . . . 12-9
Changing Bluetooth® Settings . . . . . . . . . . . . . . . . . . . 12-10
USB Connection . . . . . . . . . . . . . . . . . . . . . . . 12-11
Connecting to a PC. . . . . . . . . . . . . . . . . . . . . . . . . . . . 12-12
Connecting to a Printer. . . . . . . . . . . . . . . . . . . . . . . . . 12-12
13 Security
Change Phone Password . . . . . . . . . . . . . . . . . 13-2
PIN . . . . . . . . . . . . . . . . . . . . . . . . . . . . . . . . . . 13-2
Changing PIN/PIN2. . . . . . . . . . . . . . . . . . . . . . . . . . . . . 13-2
PIN Lock. . . . . . . . . . . . . . . . . . . . . . . . . . . . . . . . . . . . . 13-3
Resetting PIN Lock . . . . . . . . . . . . . . . . . . . . . . . . . . . . . 13-3
USIM Lock . . . . . . . . . . . . . . . . . . . . . . . . . . . . 13-4
Handset Security . . . . . . . . . . . . . . . . . . . . . . . 13-5
Phone Lock. . . . . . . . . . . . . . . . . . . . . . . . . . . . . . . . . . . 13-5
Password Lock . . . . . . . . . . . . . . . . . . . . . . . . . . . . . . . . 13-5
Privacy Lock . . . . . . . . . . . . . . . . . . . . . . . . . . . . . . . . . . 13-6
Activate Secret Mode . . . . . . . . . . . . . . . . . . . . . . . . . . . 13-6
Mobile Tracker . . . . . . . . . . . . . . . . . . . . . . . . . . . . . . . . 13-7
Rejecting Incoming Calls . . . . . . . . . . . . . . . . .13-8
Reject Withheld . . . . . . . . . . . . . . . . . . . . . . . . . . . . . . . .13-8
Reject Unavailable . . . . . . . . . . . . . . . . . . . . . . . . . . . . . .13-8
Black List. . . . . . . . . . . . . . . . . . . . . . . . . . . . . . . . . . . . .13-9
Restoring Defaults . . . . . . . . . . . . . . . . . . . . .13-10
Clear Memory . . . . . . . . . . . . . . . . . . . . . . . . . . . . . . . .13-10
Master Reset . . . . . . . . . . . . . . . . . . . . . . . . . . . . . . . . .13-11
14 Tools
Alarms. . . . . . . . . . . . . . . . . . . . . . . . . . . . . . . .14-2
Wake-up Alarm/Alarms . . . . . . . . . . . . . . . . . . . . . . . . . .14-2
Auto Power On . . . . . . . . . . . . . . . . . . . . . . . . . . . . . . . .14-4
Calendar . . . . . . . . . . . . . . . . . . . . . . . . . . . . . .14-5
Displaying Calendar . . . . . . . . . . . . . . . . . . . . . . . . . . . . .14-5
Saving New Entries to Calendar . . . . . . . . . . . . . . . . . . . .14-7
Viewing Saved Calendar Entries . . . . . . . . . . . . . . . . . . .14-12
Editing Calendar Entries. . . . . . . . . . . . . . . . . . . . . . . . .14-12
Deleting Calendar Entries. . . . . . . . . . . . . . . . . . . . . . . .14-13
Calendar Options. . . . . . . . . . . . . . . . . . . . . . . . . . . . . .14-14
Voice Recorder . . . . . . . . . . . . . . . . . . . . . . . .14-15
Voice Recorder Window. . . . . . . . . . . . . . . . . . . . . . . . .14-15
Recording Voice. . . . . . . . . . . . . . . . . . . . . . . . . . . . . . .14-16
Playing Voice . . . . . . . . . . . . . . . . . . . . . . . . . . . . . . . . .14-16
Changing Voice Recorder Settings . . . . . . . . . . . . . . . . .14-17
World Clock . . . . . . . . . . . . . . . . . . . . . . . . . .14-18
Viewing World Clock . . . . . . . . . . . . . . . . . . . . . . . . . . 14-18
Selecting Areas. . . . . . . . . . . . . . . . . . . . . . . . . . . . . . . 14-18
Using Calculator . . . . . . . . . . . . . . . . . . . . . . 14-19
Converting Currencies or Units . . . . . . . . . . . 14-20
Converting Currencies. . . . . . . . . . . . . . . . . . . . . . . . . . 14-20
Converting Units. . . . . . . . . . . . . . . . . . . . . . . . . . . . . . 14-21
Stopwatch . . . . . . . . . . . . . . . . . . . . . . . . . . . 14-22
Dictionary . . . . . . . . . . . . . . . . . . . . . . . . . . . 14-22
Interpreter. . . . . . . . . . . . . . . . . . . . . . . . . . . 14-23
15 Advanced Functions
Calling Functions . . . . . . . . . . . . . . . . . . . . . . . 15-2
Auto Redial . . . . . . . . . . . . . . . . . . . . . . . . . . . . . . . . . . 15-2
International Dial . . . . . . . . . . . . . . . . . . . . . . . . . . . . . . 15-2
Earphone call . . . . . . . . . . . . . . . . . . . . . . . . . . . . . . . . . 15-3
Handling Incoming Calls . . . . . . . . . . . . . . . . . 15-5
Anykey Answer. . . . . . . . . . . . . . . . . . . . . . . . . . . . . . . . 15-5
Acoustic Shock . . . . . . . . . . . . . . . . . . . . . . . . . . . . . . . . 15-5
Active Folder . . . . . . . . . . . . . . . . . . . . . . . . . . . . . . . . . 15-6
Side Key Silence/Reject . . . . . . . . . . . . . . . . . . . . . . . . . . 15-6
Side Key Lock . . . . . . . . . . . . . . . . . . . . . . . . .
Simple Search . . . . . . . . . . . . . . . . . . . . . . . . .
Idle Shortcuts . . . . . . . . . . . . . . . . . . . . . . . . .
Memory Status . . . . . . . . . . . . . . . . . . . . . . . .
15-6
15-7
15-7
15-8
vii
16 Optional Services
Optional Services . . . . . . . . . . . . . . . . . . . . . . .16-2
Call Forwarding . . . . . . . . . . . . . . . . . . . . . . . .16-3
Activating Call Forwarding . . . . . . . . . . . . . . . . . . . . . . . .16-3
Cancel All . . . . . . . . . . . . . . . . . . . . . . . . . . . . . . . . . . . .16-4
Check Status . . . . . . . . . . . . . . . . . . . . . . . . . . . . . . . . . .16-4
Voice Mail . . . . . . . . . . . . . . . . . . . . . . . . . . . . .16-5
Activating Voice Mail . . . . . . . . . . . . . . . . . . . . . . . . . . . .16-5
Canceling Voice Mail . . . . . . . . . . . . . . . . . . . . . . . . . . . .16-6
Checking Settings . . . . . . . . . . . . . . . . . . . . . . . . . . . . . .16-6
Listening to Messages . . . . . . . . . . . . . . . . . . . . . . . . . . .16-6
Incoming Call Notification . . . . . . . . . . . . . . . . . . . . . . . .16-7
Call Waiting* . . . . . . . . . . . . . . . . . . . . . . . . . .16-8
Activating or Canceling . . . . . . . . . . . . . . . . . . . . . . . . . .16-8
Receiving a Second Call . . . . . . . . . . . . . . . . . . . . . . . . . .16-8
Conference Call* . . . . . . . . . . . . . . . . . . . . . . .16-9
New Call . . . . . . . . . . . . . . . . . . . . . . . . . . . . . . . . . . . . .16-9
Engaged Conference Call Operations . . . . . . . . . . . . . . .16-10
Join . . . . . . . . . . . . . . . . . . . . . . . . . . . . . . . . . . . . . . . .16-10
Call Barring . . . . . . . . . . . . . . . . . . . . . . . . . . .16-11
Restrict Outgoing/Incoming Calls . . . . . . . . . . . . . . . . . .16-12
Cancel All . . . . . . . . . . . . . . . . . . . . . . . . . . . . . . . . . . .16-12
Changing Network Password . . . . . . . . . . . . . . . . . . . . .16-13
Caller ID . . . . . . . . . . . . . . . . . . . . . . . . . . . . .16-13
viii
Show My Number. . . . . . . . . . . . . . . . . . . . . . . . . . . . . 16-13
Adding 186 or 184 . . . . . . . . . . . . . . . . . . . . . . . . . . . . 16-14
17 Receiving & Sending Messages
Getting Started . . . . . . . . . . . . . . . . . . . . . . . . 17-2
Checking for New Messages . . . . . . . . . . . . . . 17-2
Retrieving Complete Messages . . . . . . . . . . . . . . . . . . . . 17-4
Using Received Messages . . . . . . . . . . . . . . . . . . . . . . . . 17-5
Creating Messages . . . . . . . . . . . . . . . . . . . . . 17-6
Procedures . . . . . . . . . . . . . . . . . . . . . . . . . . . . . . . . . . . 17-7
Address . . . . . . . . . . . . . . . . . . . . . . . . . . . . . . . . . . . . . 17-8
Subject . . . . . . . . . . . . . . . . . . . . . . . . . . . . . . . . . . . . . 17-10
Message. . . . . . . . . . . . . . . . . . . . . . . . . . . . . . . . . . . . 17-10
Sending a Message. . . . . . . . . . . . . . . . . . . . . . . . . . . . 17-11
Slide Show . . . . . . . . . . . . . . . . . . . . . . . . . . . . . . . . . . 17-12
Changing the Style of Message Field . . . . . . . . . . . . . . . 17-12
Templates. . . . . . . . . . . . . . . . . . . . . . . . . . . . . . . . . . . 17-14
Attaching/Inserting Files . . . . . . . . . . . . . . . . 17-14
Attaching/Inserting a File from Data Folder, etc. into Message
Field . . . . . . . . . . . . . . . . . . . . . . . . . . . . . . . . . . . . . 17-15
Creating & Inserting a File. . . . . . . . . . . . . . . . . . . . . . . 17-18
Saving Created Messages . . . . . . . . . . . . . . . 17-19
Save to Drafts. . . . . . . . . . . . . . . . . . . . . . . . . . . . . . . . 17-19
Save as a Template. . . . . . . . . . . . . . . . . . . . . . . . . . . . 17-20
18 Messaging Folders
Moving Messages. . . . . . . . . . . . . . . . . . . . . . . . . . . . . 18-16
Delete Folder . . . . . . . . . . . . . . . . . . . . . . . . . . . . . . . . 18-16
Viewing Messages . . . . . . . . . . . . . . . . . . . . . .18-2
From Message List. . . . . . . . . . . . . . . . . . . . . 18-16
Message Lists . . . . . . . . . . . . . . . . . . . . . . . . . . . . . . . . .18-2
Message Window Operations. . . . . . . . . . . . . . . . . . . . . .18-5
Saving to Phonebook . . . . . . . . . . . . . . . . . . . . . . . . . . 18-16
Sorting Messages . . . . . . . . . . . . . . . . . . . . . . . . . . . . . 18-17
Move to Phone/Move to USIM . . . . . . . . . . . . . . . . . . . 18-18
Saving an S! Mail Template . . . . . . . . . . . . . . . . . . . . . 18-19
Message List Options . . . . . . . . . . . . . . . . . . . . . . . . . . 18-20
Replying to a Message . . . . . . . . . . . . . . . . . . .18-7
Forwarding a Message . . . . . . . . . . . . . . . . . . .18-8
Sending from Drafts . . . . . . . . . . . . . . . . . . . . .18-8
Sending from Unsent Messages . . . . . . . . . . . .18-9
Deleting a Message . . . . . . . . . . . . . . . . . . . . .18-9
Deleting Specified Message(s) . . . . . . . . . . . . . . . . . . . . .18-9
Designating & Deleting a Mailbox . . . . . . . . . . . . . . . . .18-10
Deleting All Messages from a Mailbox . . . . . . . . . . . . . .18-11
Linked Information . . . . . . . . . . . . . . . . . . . . .18-11
Saving to Phonebook . . . . . . . . . . . . . . . . . . . . . . . . . . .18-12
Saving as a Bookmark . . . . . . . . . . . . . . . . . . . . . . . . . .18-12
Initiating a Call, Sending a Message, or Accessing the Web
. . . . . . . . . . . . . . . . . . . . . . . . . . . . . . . . . . . . . . . . .18-12
Using an Attachment . . . . . . . . . . . . . . . . . . .18-13
Viewing an Attachment . . . . . . . . . . . . . . . . . . . . . . . . .18-13
Saving Attachments to Data Folder . . . . . . . . . . . . . . . .18-14
Managing Folders . . . . . . . . . . . . . . . . . . . . . .18-15
Create Folder. . . . . . . . . . . . . . . . . . . . . . . . . . . . . . . . .18-15
Edit Folder . . . . . . . . . . . . . . . . . . . . . . . . . . . . . . . . . . .18-15
Security ON/OFF . . . . . . . . . . . . . . . . . . . . . . . . . . . . . .18-15
19 Server Mail
Message List. . . . . . . . . . . . . . . . . . . . . . . . . . 19-2
Acquire Mail List. . . . . . . . . . . . . . . . . . . . . . . . . . . . . . . 19-2
Download. . . . . . . . . . . . . . . . . . . . . . . . . . . . . . . . . . . . 19-2
Delete . . . . . . . . . . . . . . . . . . . . . . . . . . . . . . . . . . . . . . 19-3
Remote Forward . . . . . . . . . . . . . . . . . . . . . . . 19-4
20 Other Message Settings
Customizing Handset Address. . . . . . . . . . . . . 20-2
S! Mail Settings . . . . . . . . . . . . . . . . . . . . . . . . 20-2
Sending Settings. . . . . . . . . . . . . . . . . . . . . . . . . . . . . . . 20-2
Receiving Settings. . . . . . . . . . . . . . . . . . . . . . . . . . . . . . 20-3
Message Size . . . . . . . . . . . . . . . . . . . . . . . . . . . . . . . . . 20-4
Default Style . . . . . . . . . . . . . . . . . . . . . . . . . . . . . . . . . 20-4
SMS Settings . . . . . . . . . . . . . . . . . . . . . . . . . . 20-5
ix
3D Pictogram Settings . . . . . . . . . . . . . . . . . . .20-5
Reply with text . . . . . . . . . . . . . . . . . . . . . . . . .20-6
21 Mobile Internet
Getting Started. . . . . . . . . . . . . . . . . . . . . . . . .21-2
Getting Online . . . . . . . . . . . . . . . . . . . . . . . . .21-3
Yahoo! Keitai Main Menu . . . . . . . . . . . . . . . . . . . . . . . .21-3
Enter URL . . . . . . . . . . . . . . . . . . . . . . . . . . . . . . . . . . . .21-3
Page Window Operations . . . . . . . . . . . . . . . . .21-4
Using Linked Info. . . . . . . . . . . . . . . . . . . . . . . . . . . . . . .21-6
22 Mobile Internet Files
Using Image Files . . . . . . . . . . . . . . . . . . . . . . .22-2
Saving Images to Data Folder. . . . . . . . . . . . . . . . . . . . . .22-2
Wallpaper . . . . . . . . . . . . . . . . . . . . . . . . . . . . . . . . . . . .22-3
Using Sound Files . . . . . . . . . . . . . . . . . . . . . . .22-4
Playing Sound . . . . . . . . . . . . . . . . . . . . . . . . . . . . . . . . .22-4
Saving Sound Files to Data Folder . . . . . . . . . . . . . . . . . .22-4
Using Video Files . . . . . . . . . . . . . . . . . . . . . . .22-6
Playing a Video . . . . . . . . . . . . . . . . . . . . . . . . . . . . . . . .22-6
Saving Videos to Data Folder . . . . . . . . . . . . . . . . . . . . . .22-6
Streaming . . . . . . . . . . . . . . . . . . . . . . . . . . . . .22-7
Saving Pages. . . . . . . . . . . . . . . . . . . . . . . . . . .22-8
Saving a Page . . . . . . . . . . . . . . . . . . . . . . . . . . . . . . . . .22-8
x
Opening a Saved Page . . . . . . . . . . . . . . . . . . . . . . . . . . 22-8
Change Title. . . . . . . . . . . . . . . . . . . . . . . . . . . . . . . . . . 22-8
Deleting a Saved Page . . . . . . . . . . . . . . . . . . . . . . . . . . 22-9
Saving Bookmarks. . . . . . . . . . . . . . . . . . . . . . 22-9
Saving an Address as a Bookmark. . . . . . . . . . . . . . . . . . 22-9
Opening a Bookmark . . . . . . . . . . . . . . . . . . . . . . . . . . 22-10
Editing Bookmarks . . . . . . . . . . . . . . . . . . . . . . . . . . . . 22-10
Deleting a Bookmark . . . . . . . . . . . . . . . . . . . . . . . . . . 22-11
History . . . . . . . . . . . . . . . . . . . . . . . . . . . . . 22-11
Display Settings . . . . . . . . . . . . . . . . . . . . . . 22-12
Rendering. . . . . . . . . . . . . . . . . . . . . . . . . . . . . . . . . . . 22-12
Search Text. . . . . . . . . . . . . . . . . . . . . . . . . . . . . . . . . . 22-13
Copy Text . . . . . . . . . . . . . . . . . . . . . . . . . . . . . . . . . . . 22-13
Reload . . . . . . . . . . . . . . . . . . . . . . . . . . . . . . . . . . . . . 22-13
Page Details . . . . . . . . . . . . . . . . . . . . . . . . . . . . . . . . . 22-14
Send URL . . . . . . . . . . . . . . . . . . . . . . . . . . . . . . . . . . . 22-14
Server Certificate . . . . . . . . . . . . . . . . . . . . . . . . . . . . . 22-14
Returning to Default Page. . . . . . . . . . . . . . . . . . . . . . . 22-15
Encoding . . . . . . . . . . . . . . . . . . . . . . . . . . . . . . . . . . . 22-15
Information Window Options . . . . . . . . . . . . . . . . . . . . 22-15
23 Other Web Settings
Preferences . . . . . . . . . . . . . . . . . . . . . . . . . . . .23-2
Security. . . . . . . . . . . . . . . . . . . . . . . . . . . . . . .23-2
Cookie Options . . . . . . . . . . . . . . . . . . . . . . . . . . . . . . . .23-2
Activating/Deactivating Java Script . . . . . . . . . . . . . . . . . .23-3
Text Size . . . . . . . . . . . . . . . . . . . . . . . . . . . . . . . . . . . . .23-3
Manufacture Number. . . . . . . . . . . . . . . . . . . . . . . . . . . .23-3
Browser Information . . . . . . . . . . . . . . . . . . . . . . . . . . . .23-3
Certificates . . . . . . . . . . . . . . . . . . . . . . . . . . . . . . . . . . .23-4
Refresh Browser . . . . . . . . . . . . . . . . . . . . . . . .23-4
Empty Cache/Empty Cookies . . . . . . . . . . . . . . . . . . . . . .23-4
24 S! Appli
Getting Started. . . . . . . . . . . . . . . . . . . . . . . . .24-2
S! Appli . . . . . . . . . . . . . . . . . . . . . . . . . . . . . . . . . . . . . .24-2
Network S! Appli . . . . . . . . . . . . . . . . . . . . . . . . . . . . . . .24-2
Downloading S! Appli . . . . . . . . . . . . . . . . . . .24-2
Starting S! Appli . . . . . . . . . . . . . . . . . . . . . . . .24-3
Exit, Pause, & Resume . . . . . . . . . . . . . . . . . . .24-3
Exiting or Pausing S! Appli. . . . . . . . . . . . . . . . . . . . . . . .24-3
Restarting a Paused S! Appli . . . . . . . . . . . . . . . . . . . . . .24-4
Lock/Unlock . . . . . . . . . . . . . . . . . . . . . . . . . . . . . . . . . . 24-4
Delete . . . . . . . . . . . . . . . . . . . . . . . . . . . . . . . . . . . . . . 24-5
mPet . . . . . . . . . . . . . . . . . . . . . . . . . . . . . . . . 24-5
Selecting Pet . . . . . . . . . . . . . . . . . . . . . . . . . . . . . . . . . 24-5
mPet Operations. . . . . . . . . . . . . . . . . . . . . . . . . . . . . . . 24-7
Other Operations . . . . . . . . . . . . . . . . . . . . . . . . . . . . . . 24-9
Comic Surfing . . . . . . . . . . . . . . . . . . . . . . . . 24-11
Browsing Electronic Comic . . . . . . . . . . . . . . . . . . . . . . 24-11
Security . . . . . . . . . . . . . . . . . . . . . . . . . . . . . 24-12
S! Appli Settings . . . . . . . . . . . . . . . . . . . . . . 24-13
Backlight . . . . . . . . . . . . . . . . . . . . . . . . . . . . . . . . . . . 24-13
Application Volume . . . . . . . . . . . . . . . . . . . . . . . . . . . 24-13
Vibration . . . . . . . . . . . . . . . . . . . . . . . . . . . . . . . . . . . 24-14
S! Appli Sort. . . . . . . . . . . . . . . . . . . . . . . . . . . . . . . . . 24-14
Reset S! Appli Settings . . . . . . . . . . . . . . . . . . . . . . . . . 24-14
25 Appendix
Functions . . . . . . . . . . . . . . . . . . . . . . . . . . . . . 25-2
Troubleshooting . . . . . . . . . . . . . . . . . . . . . . . 25-4
Software Update . . . . . . . . . . . . . . . . . . . . . . 25-10
Symbols & Pictograms. . . . . . . . . . . . . . . . . . 25-12
Managing S! Appli . . . . . . . . . . . . . . . . . . . . . .24-4
Symbols . . . . . . . . . . . . . . . . . . . . . . . . . . . . . . . . . . . . 25-12
Pictograms . . . . . . . . . . . . . . . . . . . . . . . . . . . . . . . . . . 25-14
Details. . . . . . . . . . . . . . . . . . . . . . . . . . . . . . . . . . . . . . .24-4
Memory List. . . . . . . . . . . . . . . . . . . . . . . . . . 25-15
xi
Specifications . . . . . . . . . . . . . . . . . . . . . . . . .25-15
INDEX . . . . . . . . . . . . . . . . . . . . . . . . . . . . . . .25-17
Warranty & After Sales Service . . . . . . . . . . .25-24
Customer Service . . . . . . . . . . . . . . . . . . . . . .25-25
xii
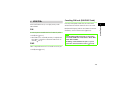
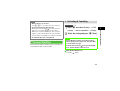
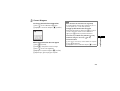
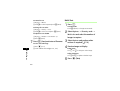
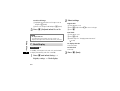
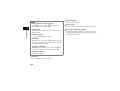
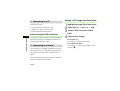
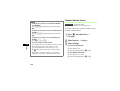
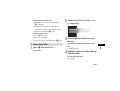
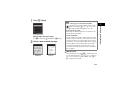
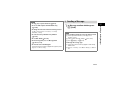
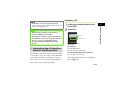
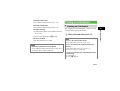
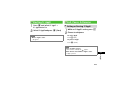
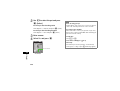
About This Guide
In this guide, 707SC refers to SoftBank 707SC. Instructions
are described using mainly default settings. When settings
Softkeys
are changed, screen shots or handset responses may differ
Operation options appear at the bottom of Display. Press
from those depicted in this guide.
the corresponding Softkey to execute assigned functions.
Screen Shots and 707SC Illustrations
Screen shots appearing in this guide are for reference only
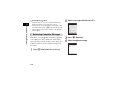
Press w
to Save
保存 選択
再生
Press c
to Select
Press o
to Play
and may differ from actual Display images. Product
illustrations may vary from actual product appearances.
Confirmations & Warning Messages
Messages not described in this guide may appear; read all
confirmations and warning messages carefully.
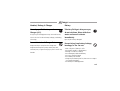
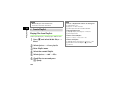
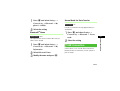
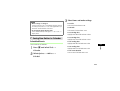
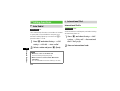
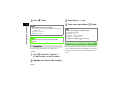
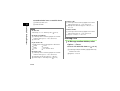
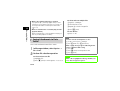
Symbols
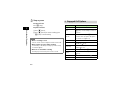
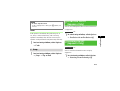
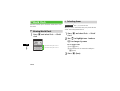
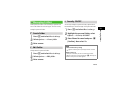
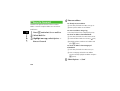
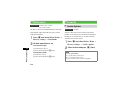
Softkey Operations
Press
(Save)
Assigned Function
In this guide, symbols represent 707SC keys; see "Handset
Parts & Functions" ( P.1-6). Softkey and Multi Selector
Softkey
operations are indicated as shown below.
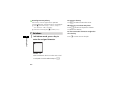
xiii
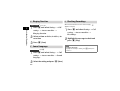
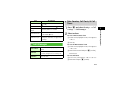
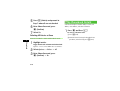
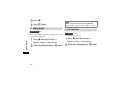
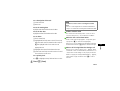
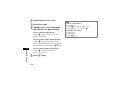
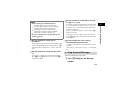
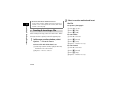
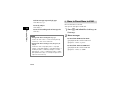
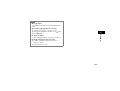
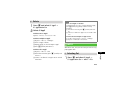
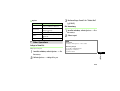
Highlighting
Multi Selector Operations
Use Multi Selector to select menu items, move cursor, and
scroll, etc. In this guide, Multi Selector operations are
In this guide, "to highlight" means to move cursor to an
item.
indicated as shown below.
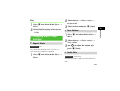
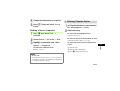
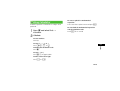
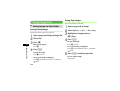
Menu Operations
Basic Multi Selector Operations
Menu/Options operations are simplified with arrows.
u
l
r
d
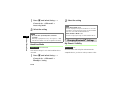
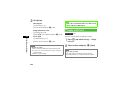
Main Menu
APress
and select Settings →
Display settings → Wallpaper
Highlight an item and press c (Select)
j : Press u or d
For details, see "707SC Menus" ( P.1-20).
s : Press l or r
Options
a : Press u, d, l, or r
ASelect Options → Send → Via
bluetooth
Press o (Options) to open Options
Highlight an item and press c (Select)
xiv
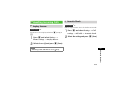
Safety Precautions
•Read these safety precautions before using handset.
•Observe all precautions to avoid injury to yourself and others, or damage to property.
•SoftBank is not liable for any damages resulting from use of this product.
xv
Before Using Handset
● Symbols
Make sure you thoroughly understand these symbols before reading on. Symbols and their meanings are described below:
Danger
Warning
Great risk of death or serious injury from improper use
Caution
Risk of injury or damage to property from improper use
Risk of death or serious injury from improper use
Prohibited Actions
Compulsory Actions
Attention Required
xvi
Danger
Handset, Battery, & Charger
Battery
Use only specified battery and
Charger ( P.i).
electric shock or fire due to battery leakage, overheating,
If battery fluid gets into your eyes,
do not rub them. Rinse with clean
water and consult a doctor
immediately.
or bursting.
Eyes may be severely damaged.
Do not short-circuit Charger Port.
Prevent injury from battery leakage,
breakage, or fire. Do not:
Using non-specified equipment may cause malfunctions,
Keep metal objects away from the Charger Port.
Keep handset away from jewelry. Battery may leak,
overheat, burst, or ignite causing injury. Use a case to carry
handset.
• Heat or dispose of battery in a fire.
• Disassemble, modify, or break battery.
• Damage or solder on to battery.
• Use a damaged or deformed battery.
• Use a non-specified charger.
• Force battery into handset.
• Charge or place battery near fire, heat sources or expose
it to extreme heat ( P.i).
• Use battery for other equipments.
xvii
Warning
Handset, Battery, & Charger
Do not insert foreign objects into
handset.
Do not place metal or flammable objects in handset or
Charger. This may cause fire or electric shock. Keep
handset out of the reach of children.
Keep handset away from liquidfilled containers.
Keep handset and Charger away from chemicals/liquids.
Fire or electric shock may result.
Avoid sources of fire.
To prevent fire or explosion, do not use handset
Keep handset out of rain or extreme
humidity.
Fire or electric shock may occur.
near gas or fine particles (Coal, dust, metal, etc.).
Keep handset and Charger away
from microwave ovens.
Battery or handset may leak, burst, overheat, or ignite.
xviii
Do not disassemble or modify
handset.
Do not subject handset to shocks.
• Do not open the housing of handset or Charger; it may
cause electric shock or injury. Contact the SoftBank
Customer Center, Customer Assistance for repairs.
• Do not modify handset or Charger. Fire or electric shock
may result.
cause malfunction or injury. Should handset break, remove
If water or foreign matter gets
inside handset:
If an abnormality occurs:
Discontinue handset use to prevent fire or electric shock.
Turn handset power off, remove battery, unplug Charger
and contact the SoftBank Customer Center, Customer
Assistance.
Subjecting handset or Charger to shocks may
battery and contact the SoftBank Customer Center,
Customer Assistance. Discontinue handset use. Fire or
electric shock may occur.
Should there be any unusual sound, smoke, or
odor, discontinue handset use to avoid fire or electric
shock. Turn handset power off, remove battery, unplug the
Charger, and contact the SoftBank Customer Center,
Customer Assistance.
xix
Handset
Ringtone & Vibration Settings
Preventing accidents
Select settings carefully if you have a heart
• For safety, never use handset while driving. Pull
over beforehand. Mobile phone use while driving is
prohibited by the revised Road Traffic Law (Effective 1
November 2004).
• Do not use headphones while driving or riding a bicycle.
Accidents may result.
• Do not turn the volume up so high that ambient sounds
cannot be heard, especially when walking in or around
traffic to avoid accidents.
condition or wear a pacemaker/defibrillator.
Do not swing handset by the strap.
707SC.
Injury or breakage may result.
Turn handset power off before
boarding aircraft.
Using wireless devices aboard aircraft may cause electronic
malfunctions or endanger aircraft operation.
xx
During thunderstorms, turn power
off; find cover.
There is a risk of a lightning strike or electric shock.
Do not use handset with wet hands.
Doing so may lead to electric shock or damage to
Charger
Use only the specified voltage.
Do not touch plug blades with wet
hands.
• Non-specified voltages may cause fire or electric
shock.
• AC Charger: AC 100V-240V Input
SoftBank is not liable for problems caused by charging
handset abroad.
• In-Car Charger: DC 100V-240V Input
Electric shock may occur.
Do not use step up/down
transformers.
Do not bend, twist, pull, or set
objects on the cord. Do not put
heavy objects on the cords or heat
or pull the cords.
Use of the AC Charger with step up/down transformers
may cause fire, electric shock or damage.
Do not use In-Car Charger inside
vehicles with a positive earth.
Fire may result. Use In-Car Charger only inside vehicles
with a negative earth.
Do not use multiple cords in one
outlet.
Excess heat or fire may occurs.
Fire or electric shock may result.
Do not short-circuit Charger Port.
Keep the metal away from Port. Overheating, fire,
or electric shock may result.
xxi
Do not use AC/In-Car Charger if the
cord is damaged.
Fire or electric shock may be caused. Contact the SoftBank
Customer Assistance to replace the cord.
Be sure to secure In-Car Charger.
Battery
If battery does not charge properly,
stop charging.
Battery may overheat, burst or ignite.
Avoid injury or accidents.
If there is leakage or abnormal
odor, avoid fire sources.
During thunderstorms:
It may catch fire or burst.
Unplug the Charger to avoid damage, fire, or
If there is abnormal odor, excessive
heat, discoloration, or distortion,
remove battery from handset.
electric shock.
Keep Charger out of the reach of
children.
Electric shock or injury may occur.
xxii
It may leak, overheat, or explode.
Handset Use & Electronic Medical
Equipment
This section is based on "Guidelines on the Use of Radio
Communications Equipment such as Cellular Telephones
and Safeguards for Electronic Medical Equipment"
Turn handset power off in crowded
places such as trains. People with
implanted pacemakers/
defibrillators may be near.
(Electromagnetic Compatibility Conference, April 1997)
Implanted pacemakers/defibrillators may malfunction due
and "Report of Investigation of the Effects of Radio Waves
to radio waves.
on Medical Equipment, etc." (Association of Radio
Industries and Businesses, March 2001).
People with implanted pacemakers/
defibrillators should keep handset
more than 22 cm away.
Implanted pacemakers/defibrillators may malfunction due
to radio waves.
Observe these rules inside medical
facilities:
• Do not take handset into operating rooms or Intensive or
Coronary Care Units.
• Keep handset off in hospitals.
• Keep handset off in hospital lobbies. Electronic
equipment may be near.
• Obey rules regarding mobile phone use in medical
facilities.
Consult the manufacturer of other
electronic medical equipment about
radio wave effects.
xxiii
Caution
Handset, Battery, & Charger
Handset Care
• Place 707SC on stable surfaces to avoid
malfunction or injury.
• Keep 707SC away from oily smoke or steam. Fire or
accidents may result.
• Cold air from air conditioners may condense, resulting in
leakage, or burnout.
• Keep 707SC away from direct sunlight (Inside vehicles,
etc.) or heat sources. Distortion, discoloration, or fire
may occur. Battery shape may be affected.
• Keep 707SC out of extremely cold places to avoid
malfunction or accidents.
• Keep 707SC away from fire sources to avoid malfunction
or accidents.
• Avoid using 707SC on the beach. Sand may cause
malfunction or accidents.
• Keep 707SC away from credit cards, phone cards, etc. to
avoid data loss.
Handset
Avoid leaving 707SC in extreme
heat (Inside vehicles, etc.).
Handset may heat up and lead to burns.
Volume settings
Keep handset volume moderate.
Excessive volume may cause damage to your hearing.
Usage Environment
Headphones
• Excessive dust may prevent heat release and
cause burnout or fire.
• Do not unplug by pulling the cord; may damage
the cord.
• Keep the plug clean to avoid noise or malfunction.
xxiv
Inside vehicles:
Handset use may cause other electronic
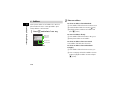
Rotate Camera
Camera Ornament
equipment to malfunction.
Should skin irritation occur,
discontinue handset use and consult
a doctor.
Skin irritation, rashes, or itchiness may result depending on
your physical condition.
Parts
Housing (Display side)
Housing (Speaker part, Battery Cover side)
Housing (Sub Display side)
Housing (Keys side)
Keypad
Charger & External Device Port Cover
Battery Cover
Side keys
Materials &
Parts
Materials &
Finishing
Mg
PC
PC+GF30%
PC+GF20%
Mixture material
Mixture material/
UV coating
PC
Mixture material/
UV coating
Hinge Cap
Finishing
PC/UV coating
PC/UV coating
Zinc Alloy/Nickel
coating
Charger
Charger & In-Car Charger
• Grasp the plug (not the cord) to disconnect
Charger. Otherwise, fire or electric shock may
result.
• Keep the cord away from heaters. Exposed wire may
cause fire or electric shock.
• Stop use if the plug is hot or improperly
connected. Fire or electric shock may result.
• Keep In-Car Charger socket clean. If might
overheat and cause injury.
Use only the specified fuse
A 1A fuse is specified for In-Car Charger. An
improper fuse may cause damage or fire.
xxv
Always charge 707SC in a wellventilated area.
Installing In-Car Charger
Avoid covering/wrapping Charger; may cause damage or
avoid injury or accidents.
fire.
Battery
Do not use In-Car Charger when
engine is off.
Start engine before use; may weaken car battery.
Disconnect AC/In-Car Charger
during long periods of disuse.
Properly position the cable for safe driving to
Keep battery out of the reach of
children.
They may sustain injuries. And when using, do not let them
remove battery from handset.
Be sure to unplug AC/In-Car Charger after use.
Do not leave battery in direct
sunlight or inside vehicles.
Handset Maintenance
Overheating or fire may occur and performance may be
When cleaning, disconnect AC/In-Car Charger to
prevent shock or injury.
reduced.
Do not expose battery to liquids.
Performance may deteriorate.
xxvi
If battery fluid makes contact with
skin or clothes:
Rinse with clean water immediately.
Do not dispose of exhausted
batteries with ordinary refuse.
Tape over battery terminals before disposal, or bring them
to a SoftBank shop. Follow local regulations regarding
If a child is using handset, explain
all these instructions and supervise
handset’s usage.
If there is any abnormal odor or
excessive heat, stop using battery
and call the SoftBank Customer Center,
Customer Assistance.
battery disposal.
Do not throw or abuse battery.
Battery may overheat, burst, or ignite.
Do not leave battery uncharged.
Charge at least once every six
months.
Charge battery within a range of
5°C - 40°C.
Battery may leak/overheat and performance may
deteriorate.
xxvii
General Notes
General Use
•SoftBank is not liable for any damages
resulting from accidental loss/alteration of any
data on handset. Please keep separate records
of Phonebook entries, etc.
•Handset transmissions may be disrupted inside
buildings, tunnels, or underground, or when
moving into/out of such places.
•Use handset without disturbing others.
•Handsets are radios as stipulated by the Radio
Law. Under the Radio Law, handsets must be
submitted for inspection upon request.
•Handset use near landlines, TVs or radios may
cause interference.
• Beware of eavesdropping.
Because this service is completely digital, the
possibility of signal interception is greatly
xxviii
reduced. However, some transmissions may be
overheard.
Eavesdropping
Deliberate/accidental interception of
communications constitutes eavesdropping.
Inside Vehicles
•Never use handset while driving.
•Do not park illegally to use handset.
•Handset use may affect a vehicle's electronic
equipment.
Aboard Aircraft
Never use handset aboard aircraft (Keep the power off).
Handset use may impair aircraft operation.
Function Usage Limits
•These functions are disabled after handset
upgrade/replacement or service cancellation:
Camera; Media Player; S! Applications.
•After a period of disuse, these functions may be
unusable; establish a Network connection to
restore usability.
Handset Care
•If handset is left with no battery or an
exhausted one, data may be altered/lost.
SoftBank is not liable for any resulting
damages.
•Use handset between 5°
C - 40°
C.
•Avoid extreme temperatures/direct sunlight.
•Exposing the lens to direct sunlight may
damage the color filter and affect image color.
•Do not drop or subject handset to shocks.
•Clean handset with a dry, soft cloth. Using
alcohol, thinner, etc. may damage it.
•Do not expose handset to rain, snow, or high
humidity.
•Never disassemble or modify handset.
•Avoid scratching Display.
•When closing handset, keep straps, etc. outside
to avoid damaging Display.
•When using headphones, moderate the volume
to avoid sound bleed.
•Handset is not water-proof. Avoid exposure to
liquids and high humidity.
・Keep handset away from precipitation.
・Cold air from air conditioning, etc. may
condense causing corrosion.
・Avoid placing handset in damp places
(Restrooms, bath/shower rooms, etc.).
・On the beach, keep handset away from
water and direct sunlight.
xxix
・Perspiration may get inside handset causing
malfunction.
•Heavy objects or excessive pressure should be
avoided. This may cause malfunction or injury.
・Do not sit down with handset in a back
pocket.
・Do not place heavy objects on handset in a
bag.
•Insert only specified devices into Headphone
Port. Malfunction or damage may result.
•Always turn power off before removing battery.
If battery is removed while saving data or
sending mail, data may be lost, changed or
destroyed.
xxx
Copyrights
Copyright laws protect sounds, images, computer
programs, databases, other materials for copyright holders.
Duplicated material is limited to private use only.
Use of materials beyond this limit or without permission of
copyright holders may constitute copyright infringement,
and be subject to criminal punishment. Comply with
copyright laws when using images captured with handset
camera.
The software contained in 707SC is copyrighted material;
copyright, moral right, and other related rights are
protected by copyright laws. Do not copy, modify, alter,
disassemble, decompile, or reverse-engineer the software,
and do not separate it from hardware in whole or part.
Trademarks
•Licensed by QUALCOMM Incorporated
under one or more of the following United
States Patents and/or their counterparts in
other nations:
4,901,307 5,490,165 5,056,109
5,504,773 5,101,501 5,506,865
5,109,390 5,511,073 5,228,054
5,535,239 5,267,261 5,544,196
5,267,262 5,568,483 5,337,338
5,600,754 5,414,796 5,657,420
5,416,797 5,659,569 5,710,784
5,778,338
•S! Appli and Mail Art are trademarks or
registered trademarks of SOFTBANK
MOBILE Corp.
•"SOFTBANK," SOFTBANK's equivalent in
Japanese, and the SOFTBANK logo are
trademarks or registered trademarks of
SOFTBANK CORP. in Japan and in other
countries.
•Yahoo! and the "Yahoo!" or "Y!" logos
are trademarks or registered trademarks of
Yahoo! Inc.
•This product contains ACCESS Co., Ltd.’s
NetFront Internet browser software.
NetFront is a trademark or registered
trademark of ACCESS Co., Ltd. in Japan and
in other countries.
•Part of the software in this product
incorporates a module developed by the
Independent JPEG Group.
•THIS PRODUCT IS LICENSED UNDER THE
MPEG-4 VISUAL PATENT PORTFOLIO
LICENSE FOR THE PERSONAL AND NONCOMMERCIAL USE OF A CONSUMER FOR
xxxi
(i) ENCODING VIDEO IN COMPLIANCE
WITH THE MPEG-4 VISUAL STANDARD
("MPEG-4 VIDEO") AND/OR (ii) DECODING
MPEG-4 VIDEO THAT WAS ENCODED BY A
CONSUMER ENGAGED IN A PERSONAL
AND NONCOMMERCIAL ACTIVITY AND/
OR WAS OBTAINED FROM A VIDEO
PROVIDER LICENSED BY MPEG LA TO
PROVIDE MPEG-4 VIDEO. NO LICENSE IS
GRANTED OR SHALL BE IMPLIED FOR ANY
OTHER USE. ADDITIONAL INFORMATION
INCLUDING THAT RELATING TO
PROMOTIONAL, INTERNAL AND
COMMERCIAL USES AND LICENSING MAY
BE OBTAINED FROM MPEG LA, LLC. SEE
HTTP://WWW.MPEGLA.COM.
•Contains Macromedia® Flash® Flash LiteTM
technology by Adobe Systems Incorporated.
xxxii
•Copyright© 1995-2005 Adobe Systems
Incorporated. All rights reserved.
•Macromedia, Flash, Macromedia Flash, and
Macromedia Flash Lite are trademarks or
registered trademarks of Adobe Systems
Incorporated in the United States and other
countries.
•JBlendTM is incorporated in this product.
JBlendTM is a JavaTM execution environment
developed by Aplix Corporation for
implementing advanced performance and
fast operation on small-memory systems.
•Powered by JBlendTM Technology.
JBlend and JBlend logos are
registered trademarks of Aplix
Corporation in Japan and other countries.
•Powered by JBlendTM, ©1997-2006 Aplix
Corporation.
All rights reserved.
•JBlend and all JBlend-based trademarks
and logos are trademarks or registered
trademarks of Aplix Corporation in Japan
and other countries.
•Chaku-Uta® and Chaku-Uta Full® are
registered trade marks of Sony Music
Entertainment Corp.
•Java and all Java-based trademarks
and logos are trademarks or
registered trademarks of Sun
Microsystems, Inc. in the United States and
other countries.
•Bluetooth is a trademark of the
Bluetooth SIG, Inc.
The Bluetooth word mark and logos are
owned by the Bluetooth SIG, Inc. and any
use of such marks by Samsung Electronics
is under license. Other trademarks and
trade names are those of their respective
owners.
xxxiii
Bluetooth®
In the frequency band of the Bluetooth®
functions of 707SC, Industrial, scientific or
medical equipments such as microwave
ovens or in-house radio stations such as the
ones used in production lines or by amateur
radio stations (Referred to as "other radio
stations" hereafter) are used. In order to
prevent radio interference with other radio
equipments, follow the points listed below in
using handset.
1.Before using Bluetooth® functions, confirm
there are no "other radio stations"
operating near you.
2.In case there is a radio interference with
"other radio stations," move to some other
place or stop the Bluetooth® functions
(Stop emitting the radio waves)
immediately.
3.If you have any questions or problems with
Bluetooth® emissions, contact SoftBank as
listed below:
Contact: SoftBank Customer Center
From a SoftBank handset, dial 157 (toll free) for General
Information. See "Customer Service" ( P.25-25) for
landline numbers by service area.
707SC transmits on the 2.4 GHz band, employing
frequency-hopping spread spectrum (FHSS) modulation,
with resistance to radio frequency interference between
1.5 - 5 meters, depending on usage environment.
xxxiv
SAR Certification Information
707SC meets the technical standards of Ministry of
The highest SAR value for 707SC is 0.361 W/kg. This value
Internal Affairs and Communications (MIC) regarding radio
is obtained in accordance with the MIC testing procedure
wave absorption by a human body.
with the mobile phone transmitting at its highest
These technical standards are established on a scientific
permitted power level. While there may be differences in
basis to prevent radio waves emitted from wireless devices
the SAR levels depending on phones, they all meet the
such as mobile phones that are used close to human head
MIC's permissible value. Because mobile phones are
from affecting human health. These standards assure that
designed to employ the minimum power level required for
the SAR (Specific Absorption Rate), an indicator of the
the communication with the base station, the SAR of the
amount of average energy absorbed in the side of a
phone during a call is usually below the maximum value.
human head, must not exceed the permissive value of 2W/
For further information about SAR, please see the
kg*. This value includes a substantial safety margin
following websites (Japanese only):
designated to assure the safety of all persons, regardless of
MIC: http://www.tele.soumu.go.jp/j/ele/index.htm
age and physical size. The value is equal to the
international guideline recommended by International
Commission on Non-Ionizing Radiation Protection
(ICNIRP) that has a cooperative relationship with the
World Health Organization (WHO).
ARIB: http://www.arib-emf.org/initiation/sar.html
*The guideline is defined by relevant laws and regulations
associated with the Radio Law (No. 2 of Article 14 of
Ordinance Regulating Radio Equipment.).
xxxv
FCC RF Exposure Information
Your handset is a radio transmitter and receiver.
It is designed and manufactured not to exceed the emission
limits for exposure to radio frequency (RF) energy set by the
Federal Communications Commission of the U.S. Government.
The guidelines are based on standards that were developed
by independent scientific organisations through periodic and
thorough evaluation of scientific studies. The standards
include a substantial safety margin designed to assure the
safety of all persons, regardless of age and health.
The exposure standard for wireless handsets employs a
unit of measurement known as the Specific Absorption
Rate, or SAR. The SAR limit set by the FCC is 1.6 W/kg.
The tests are performed in positions and locations (e.g., at the
ear and worn on the body) as required by the FCC for each
model. The highest SAR value for this model handset when
tested for use at the ear is 0.366 W/kg and when worn on the
body, as described in this user guide, is 0.392 W/kg.
Body-worn Operation; This device was tested for typical bodyworn operations with the back of the handset kept 1.5 cm from
xxxvi
the body. To maintain compliance with FCC RF exposure
requirements, use accessories that maintain a 1.5 cm separation
distance between the user's body and the back of the handset.
The use of belt clips, holsters and similar accessories should not
contain metallic components in its assembly.
The use of accessories that do not satisfy these
requirements may not comply with FCC RF exposure
requirements, and should be avoided.
The FCC has granted an Equipment Authorisation for this
model handset with all reported SAR levels evaluated as in
compliance with the FCC RF emission guidelines. SAR
information on this model handset is on file with the FCC
and can be found under the Display Grant section of
http://www.fcc.gov/oet/fccid after searching on FCC ID
A3L707SC.
Additional information on Specific Absorption Rates (SAR)
can be found on the Cellular Telecommunications &
Internet Association (CTIA) website at http://www.
phonefacts.net.
European RF Exposure Information
Your mobile device is a radio transmitter and receiver. It is
designed not to exceed the limits for exposure to radio
waves recommended by international guidelines. These
guidelines were developed by the independent scientific
organization ICNIRP and include safety margins designed
to assure the protection of all persons, regardless of age
and health.
The guidelines use a unit of measurement known as the
Specific Absorption Rate, or SAR. The SAR limit for mobile
devices is 2 W/kg and the highest SAR value for this device
when tested at the ear was 0.363 W/kg*. As mobile
devices offer a range of functions, they can be used in other
positions, such as on the body as described in this user
guide**. In this case, the highest tested SAR value is
0.239 W/kg.
to ensure it only uses the minimum level required to reach
the network.
The World Health Organization has stated that present
scientific information does not indicate the need for any
special precautions for the use of mobile devices. They
note that if you want to reduce your exposure then you can
do so by limiting the length of calls or using a hands-free
device to keep the mobile phone away from the head and
body.
* The tests are carried out in accordance with
international guidelines for testing.
**Please see General Notes (Electromagnetic Waves) on
P.25-15 for important notes regarding body worn
operation.
As SAR is measured utilizing the devices highest
transmitting power the actual SAR of this device while
operating is typically below that indicated above. This is
due to automatic changes to the power level of the device
xxxvii
xxxviii
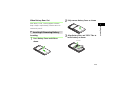
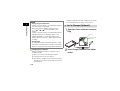
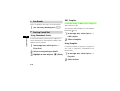
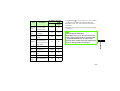
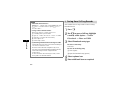
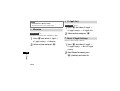
Getting Started
USIM Card
1
Getting Started
General Information &
Precautions
Universal Subscriber Identity Module (USIM) Card is an IC
card containing customer and authentication information,
including handset number and limited storage for
Phonebook entries and SMS. Install USIM Card to use
707SC; turn 707SC power off to insert/remove USIM Card.
IC
USIM Card
Insert USIM Card into another compatible handset to
access SMS and Phonebook entries saved on USIM Card.
Note the following precautions regarding USIM Card
usage and care (see USIM Card User Guide for details):
• Avoid using excessive force when Inserting/removing
USIM Card.
1-2
• SoftBank is not liable for damages resulting from
inserting USIM Card into IC card readers or other third
party devices.
• Always keep USIM Card IC chip clean.
• Clean USIM Card IC chip with a soft, dry cloth.
• Do not attach labels to USIM Card; malfunction may
result.
Notes
• USIM Card is the property of SoftBank.
• Return USIM Card to SoftBank upon termination of
subscription.
• Returned USIM Cards are recycled.
• USIM Card specifications may change without prior
notice.
• If USIM Card or 707SC with USIM Card inserted is lost
or stolen in Japan or abroad, immediately contact
Customer Service ( P.25-25) to suspend service.
• Handset/USIM Card repairs, replacement or upgrades
may deactivate Chaku-Uta®, Chaku-Uta Full®,
S! Appli, or video files on handset.
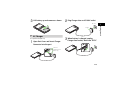
1
Always turn power off before opening 707SC to remove
battery, or insert/remove USIM Card.
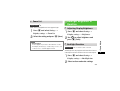
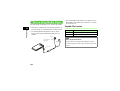
Inserting
ARemove battery ( P.1-14)
BWith IC chip down, insert USIM Card
into card slot
IC
• Inserting another USIM Card (not the included one)
into 707SC may deactivate preinstalled S! Appli or
Comic Surfing files on handset.
• Back-up USIM Card files. SoftBank is not liable for lost
files.
1-3
Getting Started
• If USIM Card is lost or damaged, you will be charged
for reissuing it.
Inserting & Removing USIM
Card
1
CPush in USIM Card until it stops and
locks
Note
• Inserting USIM Card with excessive force may
damage it or 707SC.
Getting Started
• Do not misplace a removed USIM Card.
• To prevent damaging it, avoid touching the IC chip
when Inserting or removing USIM Card. Do not
touch battery contacts.
Removing
ARemove battery ( P.1-14)
BPress down on USIM Card and gently
slide it out
1-4
USIM PINs
USIM Card features two (4- to 8-digit) security codes:
PIN
Use PIN to prevent unauthorized use of 707SC by others.
• Modify PIN ( P.13-2).
• When PIN lock is activated, PIN entry is required each
time 707SC is turned on or whenever USIM Card is reinserted ( P.13-3).
PIN2
Incorrectly entering PIN or PIN2 three consecutive times
1
activates PIN Lock and limits 707SC function access. Enter
PUK (PIN Unlocking Key) Code to cancel PIN Lock. For more
information, contact Customer Service ( P.25-25).
Note
• Entering PUK or PUK2 incorrectly ten consecutive
times locks USIM Card and deactivates 707SC. Write
down PUK and PUK2.
• Unlocking a locked USIM Card requires a special
procedure. Contact Customer Service ( P.25-25).
PIN2 is required for Reset Call Cost or Edit Cost Limit, etc.
• Modify PIN2 ( P.13-2).
1-5
Getting Started
PIN and PIN2.
Canceling PIN Lock (PUK/PUK2 Code)
1
Getting Started
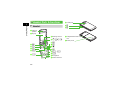
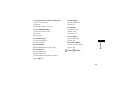
Handset Parts & Functions
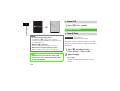
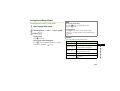
rSub Display
Handset
sn
tb
aEarpiece/
Speaker
bDisplay
hRotating Camera
iudlr
cw
de
et
fC
g*
jo
ki
lc
my
n0~9
o#
pMicrophone
qInternal Antenna
1-6
uCharger/External Device
Port
vBattery Cover
a Earpiece/Speaker
b Display
c Left Softkey/Mail Key
d Camera/Character Key
Activate Camera or select text entry mode.
e Start Key
Initiate and receive Voice Calls.
f Clear/Back Key
Delete entered text or return to the previous window.
g
Key
Enter line breaks in text entry windows.
In Standby, press for 1+ seconds to open Phone Profiles.
h Camera
Capture images or send video during a Video Call.
i Multi Selector
Select menu items, move cursor, scroll window.
j Right Softkey/Yahoo! Keitai Key
Access Yahoo! Keitai or execute Right Softkey command/
function.
Display Switch Bar ( P.1-22).
1
l Center Key
Getting Started
Open Messaging menu or execute Left Softkey command/
function.
k Switch Bar Key
Open Main Menu or execute Center Softkey command/
function.
m Power/End Key
Turn power on/off or end operations.
n Keypad
Enter numbers or characters and select menu items.
o #/Manner Key
Toggle Symbols menus in text entry windows.
In Standby, press for 1+ seconds to activate/cancel Manner
Profile.
p Microphone
q Internal Antenna
r Sub Display
s n(Side Key)
Raise volume. During a Video Call, enlarge image size.
t b(Side Key)
Lower volume. During a Video Call, reduce image size.
1-7
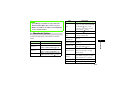
u Charger/External Device Port
1
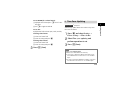
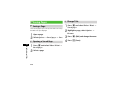
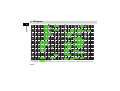
Display Indicators
Connect Charger, Stereo Earphone Microphone, USB Cable,
etc. here.
a b c de f
Getting Started
v Battery Cover
g
Opened to insert/remove battery or USIM Card.
h
i
Tip
• Internal Antenna
707SC has no external antenna. 707SC transmits and
receives signals via Internal Antenna. Do not cover or place
stickers, etc. over the area containing Internal Antenna.
Voice quality may vary by where/how 707SC is used.
a
Signal Strength (more bars
indicate stronger
signal)
Out-of-Range (outside service area or no signal
when Language is set to English or
)
Out-of-Range (When Language is set to 日本語 )
1-8
3G (UMTS) network connected/roaming
c
GSM network connected/roaming
Web SSL connected
(Blue) Bluetooth® Active
d
(Flashing in Blue & Pink) Bluetooth® Transmission
Bluetooth® Packet Data transmission
Call in Progress with Bluetooth® Active
(Blue) USB Connected
(Flashing in Orange & Yellow) USB Active
S! Appli Active
S! Appli Paused
Packet Data transmission
Voice Call in Progress
e
Video Call in Progress
New S! Mail
f
New SMS
New Voice Mail
Unheard Answer Machine Message
Software Update Required
Normal Profile
g
h
Meeting Profile
Outdoor Profile
Offline Mode
Battery Strong
1
Battery Moderate
Battery Low
(Flashing) Battery Weak (Charge Now)
Sound settings: Other than Off for Voice Call in
Ringtone volume Set; and On for Voice Call in
Vibration Set
Sound settings: Other than Off for Voice Call in
Ringtone volume Set; and Off for Voice Call in
Vibration Set
Sound settings: Off for Voice Call in Ringtone
volume Set; and On for Voice Call in Vibration Set
Sound settings: Off for Voice Call in Ringtone
volume Set and Vibration Set
Manner Profile
Car Profile
1-9
Getting Started
b
i
Roaming Active
Voice Mail/Call Forwarding Active
Answer Machine Active
S! Mail Memory Full
SMS Memory Full
Voice Mail Memory Full
Wake-up Alarm/Alarm Set
1
Sub Display
a b c d e
Getting Started
a
(more bars
Tip
• When
(Red) appears, only packet data
transmission and S! Mail sending are available;
Voice Call, received S! Mail notification, and SMS
sending/receiving are disabled.
Signal Strength
b
indicate stronger signal)
Wake-up Alarm/Alarm Set
c
New Message
d
Manner Profile Set; and On for Voice Call in
Vibration Set
e
Battery Strong
Battery Moderate
Battery Low
Battery Weak (Charge Now)
1-10
Battery & Charger
Charge battery before first use of 707SC or after periods of
disuse.
Charging Battery
• Long periods of disuse may affect battery's ability to
hold a full charge.
• 707SC uses a lithium-ion battery; charge battery in any
state without damaging its ability to hold a charge.
• Do not charge battery under the following conditions:
• Charge battery at least once every six months while not
in use. Otherwise, battery may become unusable.
• Battery is a consumable; replace it if operating time
shortens noticeably.
Note
• Use specified Charger only.
• Battery must be inside 707SC to charge it.
• When not in use, unplug Charger from outlet or
cigarette lighter socket.
- Where the ambient temperature is below 5°C or
above 40°C
- Where there are high levels of humidity, vibrations or
dust
- Near a radio receiver (May cause feedback)
1-11
1
Getting Started
Before Using Battery or Charger
• 707SC or Charger may warm while charging. This is
normal, however, should they become very hot to the
touch, stop charging and contact Customer Service
( P.25-25).
Battery Life
1
Battery time/life may be reduced by any of the following:
Getting Started
• Environmental Factors
- Storing/using 707SC in places with ambient
temperature or above 5°C below 40°C
- Using 707SC in when signal is poor/leaving it on outof-range
- Allowing debris to collect on 707SC, battery or
Charger Port
• Operational Factors
- Active S! Appli
- Camera use
- Media Player use
- Excessive Keypad use (e.g. for gaming or messaging)
- Bluetooth® transmissions
- Frequently opening and closing 707SC
1-12
• Settings
- Using Slide Show
- Setting Brightness higher or Backlight Time longer
- Using Media Player with Backlight set to Always on
Battery Disposal
Do not dispose of exhausted batteries with ordinary refuse.
Tape over battery terminals before disposal or take to a
SoftBank shop. Follow any and all local regulations
regarding battery disposal.
Lithium-ion batteries are recyclable.
When Battery Runs Out
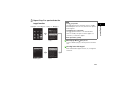
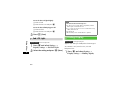
BFully remove Battery Cover as shown
When battery is weak, a warning appears and 707SC
1
automatically turn off.
Inserting & Removing Battery
Inserting
APress Battery Cover and slide as
shown
CAlign Battery Slots and 707SC Tabs to
insert battery as shown
707SC Tabs
a
b
1-13
Getting Started
beeps. Charge or replace battery; otherwise 707SC will
1
Getting Started
DInsert Battery Cover Tabs into 707SC
Slots to attach Battery Cover as
shown
Battery Cover Tabs
Removing
Always turn 707SC off before removing battery. Never
remove battery while AC Charger or In-Car Charger is
connected.
APress Battery Cover and slide as
shown
a
Note
• Remove battery cover with care; stress on tabs may
damage them.
• Gently insert battery to avoid damaging 707SC tabs.
1-14
b
BFully remove Battery Cover as shown
CLift battery up and remove as shown
BPlug Charger into an AC 100V outlet
AC 100V
Getting Started
Charger
AC Charger
Use specified Charger only.
AOpen Port Cover and insert Charger
Connector into the port
1
CWhen battery is charged, unplug
Charger from outlet, then from 707SC
Port Cover
Charger Connector
(with △ up)
1-15
Tip
1
Getting Started
• Battery Charged Confirmation
If 707SC is on while Charger is connected, battery indicators
flash when battery is fully charged.
While charging, battery indicators change as follows:
.
flashes when battery is fully
→
→
charged.
If 707SC is off while Charger is connected, battery indicator
and graphic appear full on Sub Display & Battery full
appears above graphic on Display when battery is fully
charged. Otherwise, Charging... appears above animation
on Display.
Charging via USB takes more time; charging time will vary by
PC. A weak battery may not charge via a PC USB port.
In-Car Charger (Optional)
AOpen Port Cover and insert Connector
Plug
Port Cover
Charger Connector
(with △ up)
• Charging Time
An empty battery requires 120 minutes (approx.) to charge
when power on and Display off (no operation). Longer when
Display on. Charging time may vary by ambient temperature.
Charging via PC USB Port
Battery will charge when 707SC is connected to a PC via
included USB cable.
a Open Port Cover and insert USB Cable Connector
b Insert USB Connector into a PC USB port
c When battery is charged, remove Connector from 707SC
and replace Port Cover, then remove USB Connector from
the PC USB port
1-16
BInsert Charger Connector into lighter
socket
Lighter Socket
Charger Connector
In-Car Charger
Tip
• Battery Charged Confirmation ( P.1-16)
1
• When using In-Car Charger
See In-Car Charger manual. For safety, use In-Car Holder
together with In-Car Charger.
CStart the car's engine
DWhen battery is charged, remove InCar Charger Connector, replace Port
Cover, then remove Charger
Connector from lighter socket
Note
• Do not charge battery in ambient temperatures over
40°C (e.g. inside a closed automobile in direct
sunlight, etc.).
• Use In-Car Charger in cars with minus-earth only (DC
12/24V).
Power On/Off
Power On
AOpen 707SC
BPress y for 1+ seconds
1-17
Getting Started
• Charging Time ( P.1-16)
Power Off
1
Getting Started
APress y for 2+ seconds
Time & Date
Standby
Time & Date
Tip
• To confirm handset phone number
In Standby, press c → 0; save or edit your
information in My Phonebook Details including name and
mail address ( P.5-16).
Default Setting
■
■
Time format: 24H
Date format: YYYY/MM/DD
Some 707SC functions cannot be used unless time and
• When PIN lock is activated
PIN entry is required each time 707SC is turned on.
date are set. Open Time & Date to change Time Format or
• When 707SC is left open without operations
Display automatically shuts down to conserve power.
APress c and select Settings →
Phone settings → Time & date
Note
BAdjust settings
• Use both hands to open and close 707SC; avoid
using excessive force which could damage handset
or lead to malfunctions.
Date Format.
To set time
Highlight Time field and enter the time (24-hour
format)
1-18
To set AM/PM (for 12-hour format)
aHighlight Time field and press r twice for AM/
PM option
Default Setting
■
Automatically update 707SC Date & Time using server
To set date
time zone information.
Highlight Date field and enter year, month, and day
APress c and select Settings →
Phone settings → Time & date
To change time format
aSelect Time format field
bSelect the setting and press c
To change date format
aSelect Date format field
bSelect the setting and press c
CPress w (Save)
1
Prompt first
BSelect Time zone updating and
perform operations to set
CPress w (Save)
Tip
• Time zone updating Items
Manual only: Enter date & time manually.
Prompt first: Confirmation appears when 707SC moves
into a different time zone. This function is not available
Japan.
Automatic: Time & Date updated according to server time
zone information. This function is not available Japan.
1-19
Getting Started
bUse r to toggle AM and PM
Time Zone Updating
Changing Home Time Zone
1
Default Setting
■
Getting Started
■
Home zone: GMT+9h
Daylight saving: Unchecked
Select the zone closest to your locality. Set Daylight saving
707SC Menus
Main Menu
AIn Standby, press c
time as required.
APress c and select Settings →
Phone settings → Time & date
BSelect Home zone field
CSet time zone
To set home time zone
aUse s to specify a target area
bPress c
To set daylight saving time
aCheck Daylight saving
bPress w (OK)
DPress w (Save)
1-20
Main Menu
BHighlight an item and press c (Select)
CRepeat Step 2 to open/activate the
target function
• To end an operation
Press y. Operation ends and 707SC returns to Standby.
When multiple functions are active, the next active operation
window appears.
• To cancel/escape an operation
Press y. Operation/function is canceled and 707SC
returns to Standby or the previous window appears. For
some menus, a confirmation appears.
• Menu operations ( P.xiv)
Select Settings
Select Display
settings
When Popup Menu ( P.8-6) is On
Content is different (Step 2), however operations remain the
same.
Selecting items with Keypad
When numbered items appear in menus, etc., use keypad to
select them.
Wallpaper Setup
Window appears
Select Wallpaper
Pictures
1-21
1
Getting Started
<Example> Select Display settings → Wallpaper
Tip
Shortcuts
1
Switch Bar
In Standby, press a key to open the assigned shortcut.
Getting Started
Key
Corresponding Menu/Function
w
Messaging
o
Yahoo! Keitai Main Menu
o
(1+ seconds)
Player; use multiple functions concurrently (e.g., create a
message while listening to music, or browse the Mobile
Internet while talking on the phone).
Yahoo! Keitai Menu
e
Mobile Camera (last used function)
i
Switch Bar
u
Idle shortcut*
d
Phonebook list
l
Call Log (Received)
r
Call Log (Dialled)
t
Call Log (Current Contacts)
*
(1+ seconds)
Phone Profiles
#
(1+ seconds)
Activate/Cancel Manner Profile
* Create shortcuts for frequently used functions in Idle shortcut
( P.15-7).
1-22
Initiate Call, Messaging, Yahoo! Keitai, or Media
AIn Standby or an active function
window, press i
BUse s to highlight a function and
press c (Select)
To exit an active function
From the window of the function to exit, press y
To exit all active functions
aPress i
bUse s to highlight End all? and press c (Yes)
Security Codes
1
Phone Password, Center Access Code and Network
• When exiting all active functions
Exiting all active functions during message creation or voice/
video recording deletes created/recorded data.
Phone Password
The 4-digit number (9999 by default) required to use/
change some handset functions.
Options
When Options appears at bottom-right of Display, press
o to open Options. To execute an option, highlight the
item and press c (Select).
Tip
• See "Options" ( P.xiv)
• Entered digits are represented with*
• If incorrect, an error message appears; try again.
• Change Phone Password as required
Center Access Code
4-digit number specified at subscription; required to access
Voice Mail via landlines/to subscribe to fee-based
information.
Center Access Code cannot be changed on 707SC; a
special procedure is required. For details, contact Customer
Service ( P.25-25).
1-23
Getting Started
Password are required to use 707SC.
Tip
Network Password
1
4-digit number specified at subscription, required to
Getting Started
restrict handset services. Entering Network Password
incorrectly three consecutive times locks Call Barring
settings. To resolve, Network Password and Center Access
Code must be changed. For details, contact Customer
Service ( P.25-25).
• Network Password can be changed on 707SC
( P.16-13).
Note
• Write down Phone Password, Center Access Code, or
Network Password. If you forget any of these codes
contact Customer Service ( P.25-25).
• Do not reveal Phone Password, Center Access Code,
or Network Password to others. SoftBank is not
liable for damages caused by misuse of these codes
by others.
1-24
Basic Handset Operations
Calls.
• When Stereo Earphone Microphone is connected
Enter a number and press Stereo Earphone Microphone
switch for 1+ seconds to initiate a call. When Earphone
call is On, press switch for 1+ seconds to call specified
number. Press switch for 1+ seconds to end a call.
AEnter a phone number
• Engaged Call Operations ( P.2-7)
Initiating a Call
See P.5-9 to call from a Phonebook entry or P.6-2 for Video
2
Basic Handset Operations
When Phonebook list appears ( P.5-11)
Placing international calls from Japan
To use Speed Dialing ( P.5-12)
A separate subscription is required for international calls.
a Enter a phone number
b Options → International dial
c Select country or Enter Code for direct entry
d Select Japan
e Confirm the number and press t
BConfirm the number and press t
CPress y to end the call
Tip
• To correct entered digits
Press C to delete the last digit. Press C for 1+
seconds to delete all.
• When the line is busy
Press y to end the call and try again later. If Auto Redial
is active, number is automatically redialed. Press o
(Cancel) or y to cancel.
2-2
Using a SoftBank handset overseas
Enter handset phone number; country code is not required.
Calling from overseas ( P.2-15)
Options
Item
Description
Initiate a Video Call.
Add to Phonebook
Save a number to Phonebook or
USIM Card Phonebook ( P.5-6).
Create msg
Open a new message addressed to
the number ( P.17-6).
Phonebook
Open Phonebook Search window.
Call log
Open Call Log.
International dial
Add international code and country
code to a number ( P.2-2).
Hide/Show my ID
Hide or show your phone number
when placing calls; select None to
apply Caller ID settings.
AWhen 707SC rings/vibrates, press t
or c (Accept)
BPress y to end the call
Tip
• When Anykey Answer is On
Press any key except w, o, y, or Side Key n b to
answer Voice Calls.
• To mute ringer for an incoming call
While 707SC rings/vibrates, press w (Mute); caller
continues to hear ringback tone. To answer the call, press
c (Accept).
• To adjust ringer volume
While 707SC rings/vibrates, press Side Key n or b.
• When Stereo Earphone Microphone is connected
When 707SC rings/vibrates, press Stereo Earphone
Microphone switch for 1+ seconds to accept a call. Press
again for 1+ seconds to end the call.
• Engaged Call Operations ( P.2-7)
2-3
2
Basic Handset Operations
Video call
Receiving a Call
2
Basic Handset Operations
Ringtones
When you cannot answer a call
Specify ringtones for saved numbers by Phonebook entry or
Category ( P.5-4, 5-7). When no ringtone is set, 707SC rings
according to Profile Settings ( P.9-2).
Under following conditions, 707SC rings according to each
Mode; Secret Mode is set to Hide and Phonebook(contains
caller's number as an entry)'s Secret Mode is set to On.
Use Call Forwarding/Voice Mail to forward incoming calls to a
specified number automatically/to save messages at Voice
Mail Center. When Call Forwarding or Voice Mail is set to No
reply, press o (Busy) to forward an incoming call
immediately ( P.16-3, 16-5).
Use Answer Machine to record caller messages. Up to 3
messages (15 seconds per message) can be recorded in
707SC ( P.2-5).
Incoming call window
If caller sends Caller ID, phone number appears; if saved in
Phonebook, name appears. When an image is set in
Phonebook or Category, image also appears ( P.5-4, 5-7). If
caller hides Caller ID, Withheld appears.
Under following conditions, no name/image appears; Secret
Mode is set to Hide and Phonebook(contains caller's number
as an entry)'s Secret Mode is set to On.
Missed call window
After an unanswered incoming call, Missed call window
appears. Press w (View), to open Missed Call Log ( P.2-9).
2-4
Reject Incoming Call
Proactively disconnect an incoming call without answering
it. The rejected call is recorded in Missed.
AWhile 707SC rings/vibrates, press y
Tip
• When Side Key is set to Reject
Press n or b for 1+ seconds to reject an incoming call.
• To automatically reject a call ( P.13-8)
Answer Machine
Record caller messages on handset. Up to 3 messages (15
seconds per message) can be recorded.
Default Setting
■
Off
APress c and select Settings → Call
settings → Answer machine → Setting
BSelect the setting and press c (Save)
Note
• Answer Machine cannot be used when handset is
off, out-of-range or in Offline mode. Use Voice Mail
to record caller messages.
• If 707SC shared memory ( P.25-15) is below 600K
bytes, Answer Machine cannot be used.
With Answer Machine set
In Standby,
appears.
2-5
2
Basic Handset Operations
• To reject call and send a busy message
When neither Call Forwarding ( P.16-2) nor Voice Mail
( P.16-2) is active, press o (Busy) to proactively
disconnect a call without answering it; "busy" message
appears on caller's handset before call is disconnected. If
caller's handset is incompatible, call is simply disconnected.
Activating & Canceling
Ringing Duration
Default Setting
2
■
10 seconds
Basic Handset Operations
APress c and select Settings → Call
settings → Answer machine →
Ringing duration
BSelect an item or Other (0-60Secs) to
set a time
CPress c (Save)
Sound Language
Default Setting
■
日本語
APress c and select Settings → Call
settings → Answer machine → Sound
language
BSelect the setting and press c (Save)
2-6
Checking Recordings
When Answer Machine records caller messages,
appears in Display.
APress c and select Settings → Call
settings → Answer machine →
Recordings
BHighlight the message to check and
press c (Play)
Tip
• To delete messages
Highlight the message to delete, press w (Delete) and
select Yes.
Engaged Call Operations
Earpiece Volume
Adjust Earpiece or Earphone volume. Setting remains even
ADuring a call, press Side Key n or b
Hold
When a call is put on hold, the party on hold hears a hold
tone and neither party can hear the other's voice.
A subscription to Call Waiting ( P.16-8) or Conference
Call ( P.16-9) is required to use this function.
ADuring a call, press w (Hold)
ADuring a call, press c (
select Yes
) and
2
To cancel Speaker Phone
Press c (
Basic Handset Operations
after power off.
Speaker Phone
)
Voice Recording
Record voice of a maximum of 2 minutes during a call.
ADuring a call, select Options →
Record
BPress c (Record)
BPress w (Retrieve) to reconnect the
call
2-7
CStop or pause
Engaged Call Options
To stop and save
Press w (Stop)
To pause and save
2
Basic Handset Operations
aPress c (Pause)
bPress c (Record) to restart recording; press
Item
Whisper on/off
With On, raise the volume of sent sounds.
Mute
Check Voice or Key tone and press
w (OK) to cancel sending no sounds or
key tones.
New call
Enter a number and press c (Call) to
initiate another call; requires subscription
to Conference Call ( P.16-9).
Phonebook
Open Phonebook Search window.
Add to Phonebook
Save number to Phonebook or USIM Card
Phonebook ( P.5-6).
Create msg
Open a new message addressed to the
number ( P.17-6).
Send DTMF
Enter digits then press c (Send).
Record
Record caller's voice during a call
( P.2-7).
Memo
Create and save text memos ( P.14-10).
End call
Disconnect call.
w (Save) to end recording
Tip
• When a recording is made
Files are saved to Sounds & Ringtones folder in Data Folder.
• When another call arrives while recording
If Call Waiting is subscribed, recording stops and incoming
call window appears.
• When call is ended while recording
Recording stops automatically and voice file is saved.
2-8
Description
Item
Description
Call Log Record Indicators
Appears when Bluetooth®-compatible
Switch to headset/
headset is in use. Select headset or phone
Switch to phone
(handset).
:
:
:
Viewing Call Log Records
:
:
Current contacts All incoming and outgoing calls
Missed
All missed incoming calls
Received
All received incoming calls
Dialled
All outgoing calls
APress r
BUse s to select a Call Log
To confirm phone number and call duration
Highlight an item and press c (View)
Tip
• While Secret Mode is set to Hide
Call Log records of numbers saved in Secret Phonebook
entries do not appear.
Calling from Call Log Records
APress r
BUse s to select a Call Log
2-9
2
Basic Handset Operations
Call Log Records
: Voice Call to/from a number
saved in Phonebook
Call to/from a number saved in USIM Card Phonebook
Voice Call to/from an unsaved number
Video Call to/from a number saved in Phonebook
Current Contacts (all incoming/outgoing calls)
Indicators
Received call
: Rejected incoming call
Missed call
: Dialled call
CHighlight a record and press t
2
Deleting All Records
To initiate a Video Call
Delete all Call Log records at once.
Options → Video call
APress r
Basic Handset Operations
Deleting Call Log Records
Deleting One Record
Delete one Call Log record.
APress r
BUse s to select a Call Log
CHighlight a record, select Options →
Delete → Selected → Yes
Use s to select Current contacts
BSelect Options → Delete → All → Yes
CEnter Phone Password and press
c (Confirm)
Call Log Options
Item
Initiate a Voice Call to the current number.
Video call
Initiate a Video Call to the current number
( P.2-9).
Add to Phonebook
Save number to Phonebook or USIM Card
Phonebook ( P.5-6).
Create msg
Open a new message addressed to the
current number ( P.17-6).
Tip
• To delete individual calls from records
a Perform Steps 1 and 2
b Highlight a record and press c (View)
c Highlight a call, select Options → Delete → Selected
→ Yes
2-10
Description
Voice call
Item
Description
Add to black list
Add the number to Black List ( P.13-9).
View phonebook
details
Open Entry details for a number.
International dial
Add international code and country code
to the number ( P.2-2).
Hide/Show my ID
Hide or show your phone number when
placing calls; select None to apply Caller
ID settings.
Data Counter, Call Costs, & Call
Times
APress c and select Settings → Call
settings → Call manager
BSelect an item
To reset a Data Counter item
aIn Data counter, highlight an item, select Options
→ Reset
bSelect Yes
Call Manager
Data counter
Confirm/reset incoming/outgoing data
volume.
Call costs
Confirm/reset Total Costs, Last Call Cost or
Cost Limit; change Call Costs currency unit.
Call times
Confirm/reset incoming/outgoing Voice/
Video Call Times.
To reset all Data Counter items
aIn Data counter, highlight an item, select Options
→ Reset all
bEnter Phone Password and press c (Confirm),
and select Yes
To reset Call Costs
aIn Call Costs, select Options → Reset call cost
bEnter PIN2 and press c (Confirm)
2-11
2
Basic Handset Operations
Delete
Delete the current Call Log record
( P.2-10).
To reset Call Times
aIn Call Times, highlight an item, select Options
→ Reset → Yes
2
After reaching the call cost limit, only emergency calls
To reset all Call Times
( P.2-16) can be initiated; messaging, web connections
aIn Call Times, highlight an item, select Options
(fee-based operations) are disabled.
Basic Handset Operations
→ Reset all
bEnter Phone Password and press c (Confirm)
→ Yes
APress c and select Settings → Call
settings → Call manager
To change Call Costs currency unit
BSelect Call costs
aIn Call Costs, select Options → Setup currency
CSelect Options → Edit cost limit
bEnter PIN2 and press c (Confirm)
cHighlight Price field to enter a price in Yen
dHighlight Currency field and enter currency unit
ePress w (Save)
2-12
Edit Cost Limit
DEnter PIN2 and press c (Confirm)
EEnter limit
Display Call Cost during a Call
Default Setting
■
Off
BSelect setting and press c (Save)
A separate subscription is required for international calls.
Contact Customer Service for more information about
international roaming.
Changing Network Mode
Default Setting
■
2
Basic Handset Operations
APress c and select Settings → Call
settings → Call manager → Display
call cost
International Roaming
3G
APress c and select Settings →
Connectivity → Network mode
BSelect a Network mode
Tip
• Network mode Items
Automatic: Network is set automatically by location.
GSM 900/1800: Available overseas.
GSM 1900: Available overseas.
3G: Available domestically and overseas.
2-13
Network Setup
Selecting a Network
2
Default Setting
■
Automatic
Basic Handset Operations
Select a network (operator) by location or use Automatic.
APress c and select Settings →
Connectivity → Network selection
BSelect a Network
To select automatically
Select Automatic
To select a specific network
aSelect Manual
bSelect a network
Preferred Networks
Insert networks into Preferred Networks list or add them to
the end. Select networks from Network List or create new
network entries.
APress c and select Settings →
Connectivity → Preferred networks
BEdit Preferred Networks
To insert/add a network from Network List
aWhen inserting, highlight insert position
bOptions → Insert or Add → Network list
cSelect a network and press c (Insert/Add)
To insert/add a new network
aWhen inserting, highlight insert position
bOptions → Insert or Add → New network
cEnter network settings and press w (Insert/Add)
To delete a network from Preferred Networks
Highlight network to delete, select Options →
Delete → Yes
2-14
BSelect Options → International dial
Tip
• New Network Settings
Country code
Up to 3 digits
Network code
Up to 3 digits
CSelect country or Enter Code for
direct entry
DSelect Abroad
Network type
EConfirm number and press t
GSM or 3G
Calling from Outside Japan
AEnter phone number with area code
2
Tip
• To change/add International code or country code
( P.15-2)
To call an in-country landline or mobile phone
Proceed to Step 5
To enter country code, etc. directly
Press 0 for 1+ seconds to enter +, enter country
code and phone number omitting the first 0 (except
when calling landlines in Italy) and proceed to Step 5
2-15
Basic Handset Operations
Network name Up to 20 single-byte alphanumerics
Emergency Calls
Some emergency numbers (110 (Police), 119 (Fire), etc.)
2
are available even when certain Call Barring settings are
active. See details below.
Basic Handset Operations
707SC Status
Available Numbers
Offline mode ( P.3-4) is active.
None
Call Cost limit exceeded ( P.2-12).
110, 119, 118
707SC is locked ( P.13-5).
None
Required PIN not entered ( P.13-3).
None
USIM Card cannot be authenticated
( P.13-4).
None
Outgoing Call Barring ( P.16-11) is
active.
110, 119, 118
Note
• SoftBank can not guarantee connections in all
countries and regions. Handset operations may vary
by network, signal, or function settings.
2-16
Manner Profile
Minding Mobile Manners
3
Manner Related Functions
Please take care not to disturb others when using 707SC.
707SC offers two manner-related profiles.
• Turn 707SC off in theaters, museums, and other places
where silence is the norm.
Manner Profile
• Keep 707SC off aboard airplanes, inside hospitals, or in
other places where handset use is prohibited.
tones, and alarms. Use Manner Key to activate or cancel
Manner Profile
• Refrain from using 707SC in places such as restaurants,
hotel lobbies, or elevators.
• Observe announcements or posted instructions
regarding handset use aboard trains, etc.
• Refrain from handset use that interrupts the flow of
pedestrian or vehicle traffic.
Silence 707SC sounds and activate Vibration for all alerts,
Manner Profile.
Offline Mode
Temporarily suspend 707SC transmissions; other 707SC
functions may still be used while Offline Mode is active.
Muting/vibrating 707SC can be selected respectively for
alert tone, ringtone, or alarm in Sound settings other than
Manner Profile/Offline Mode.
3-2
Manner Profile
AIn Standby, press # for 1+
seconds
Tip
• Even when Manner Profile is active, shutter click
sounds for Camera.
Changing Profile
• To change 707SC Profile ( P.9-2)
Profiles
Select a Profile by usage and edit settings as required
( P.9-2).
Profile
Normal
Normal sounds produced by 707SC
Manner
No sounds produced by 707SC
Car
Set Automatic reception of Voice Calls
and activation of Speaker Phone for use
while driving
Meeting
Ringtone or Key tone preset to
Vibration or Mute
Outdoor
Ringtone or Key tone preset to
maximum sound volume
707SC features five Profiles, including Manner Profile.
AIn Standby, press * for 1+
seconds
3
Description
BSelect a Profile
CPress c (Save)
3-3
Manner Profile
• When Manner Profile is active
appears.
Tip
Offline Mode
Default Setting
3
■
Off
APress c and select Settings→ Call
settings → Offline mode
Manner Profile
BSelect the setting and press c (Save)
Tip
• When 707SC is turned off while Offline mode is
active
Offline mode activation confirmation appears the next time
707SC is turned on. Press o (No) to select Normal Profile.
3-4
Entering Text
Number Only Text Entry Fields
Text Entry
Enter kanji/hiragana/hangul, single- or double-byte katakana,
alphanumerics, or symbols/pictograms/emoticons.
Text entry windows do not appear for Phonebook Phone
fields or Alarm Time fields; enter numbers directly.
Changing Text Entry Mode
Text Entry modes may be limited in some text entry fields
Text Entry Window
or windows.
Current Entry Mode
: Kanji/Hiragana
: Double-byte Katakana
: Double-byte
Alphanumerics
: Double-byte Numbers
: Double-byte Symbols
: Pictograms
: Hangul
4
Entering Text
: Single-byte Katakana
: Single-byte
Alphanumerics
: Single-byte Numbers
: Single-byte Symbols
: Emoticons
Number of characters that still can be entered
Text entry field
Text entry field
Suggestions*
Japanese kana conversion alternatives
*Suggestions appear only in Kanji/Hiragana mode, when
Prediction setting is On.
4-2
AIn a text entry window, press e
BHighlight entry mode and press c
Tip
• To toggle symbols
In text entry windows, press # to toggle Symbols,
Pictograms, and Emoticons.
Key Assignments
Multiple characters are assigned to each key. Press a key repeatedly until the target character appears.
Key
Kanji/Hiragana
Katakana
#
Alphanumerics
1
2
3
4
5
6
7
8
9
,.-_!?〈Space〉0
0
• Toggle upper/lower-case
• Enter Line Break
Enter Line Break
• Reverse toggle characters assigned to the same key before finalizing character selection
• Toggle Pictograms, Double-byte Symbols, Single-byte Symbols, Emoticons
1 When double-byte, "~" cannot be used ("∼"appears on Display).
Numbers
.@-_/:~11
abcABC2
defDEF3
ghiGHI4
jklJKL5
mnoMNO6
pqrsPQRS7
tuvTUV8
wxyzWXYZ9
4
Entering Text
1 あいうえおぁぃぅぇぉ 1 アイウエオァィゥェォ 1
2 かきくけこ2
カキクケコ2
3 さしすせそ3
サシスセソ3
4 たちつてとっ 4
タチツテトッ 4
5 なにぬねの5
ナニヌネノ5
6 はひふへほ6
ハヒフヘホ6
7 まみむめも7
マミムメモ7
8 やゆよゃゅょ 8
ヤユヨャュョ 8
9 らりるれろ9
ラリルレロ9
わをんゎ、。−・∼!? ワヲンヮ 2、。−・∼!?
0
〈Space〉0
〈Space〉0
• Toggle upper/lower-case; add ゛/ ゜to unfixed, convertible
kana
*
• Enter Line Break
Toggle Pictograms, Doublebyte Symbols, Single-byte
Symbols, Emoticons
2 Single-byte "ヮ " (lower case) cannot be entered.
4-3
When calls/alarms interrupt text entry
To add ゛or ゜
Answer incoming calls without saving text first; disconnect
call to return to text entry window. Similarly, close Alarm
window to return to text entry window.
Enter a valid character and press *
Entering Characters
To correct a misentry
Use C to delete the character then enter the
correction
When key is pressed too many times
Hiragana/Kanji
Press # to return to the previous character
4
Enter hiragana/kanji with or without conversion
assigned to the same key
Entering Text
predictions. When Prediction setting is On, Suggestions
To enter consecutive characters assigned to
appear below text entry window.
the same key
AActivate Kanji/Kana entry mode to
enter hiragana
4-4
Press r to move cursor to the right
To enter unconverted hiragana
Press c (Confirm)
BConvert hiragana
To select a conversion from Suggestions
aPress d to move between Suggestions
bHighlight a conversion and press c (Confirm)
Tip
• When characters do not convert to target Kanji
Try entering different readings. When multiple Kanji do not
convert together, try to convert them separately.
• To toggle predicted/conversion alternatives
While predicted alternatives appear, press w (Convert) for
conversion alternatives. While conversion alternatives
appear, press w (Predict) for predicted alternatives.
• To set/release prediction entry function ( P.4-13)
4
When target conversion does not appear
aPress w (Convert)
bUse s to change the conversion range
• To enter date/time
a Press a key to enter a key to which numbers are assigned
b Press o (EngNumカナ)
c Highlight a conversion alternative and press c (Confirm)
cPress d to move to Suggestions
dHighlight a conversion and press c (Confirm)
eRepeat steps b through d as required
4-5
Entering Text
• To convert using User dictionary ( P.4-14)
Resetting Text Entry History
To correct a misentry
Previous kanji conversions appear first for predicted/
conversion alternatives. Follow these steps to restore defaults.
a Press c and select Settings → Phone settings →
User dictionary → Reset learning
b Enter Phone Password, press c (Confirm) → Yes
Use C to delete character then correct
Katakana
4
Entering Text
AIn Katakana mode, press a key to
enter the assigned character
To add ゛or ゜
Enter a Katakana to which a voiced or semi-voiced
sound symbol should be added and press *
4-6
When key is pressed too many times
Press # to return to the previous character
assigned to the same key
To enter consecutive characters assigned to
the same key
Press r to move cursor to the right
Tip
• To enter Katakana in Kanji/Kana entry mode
For example, to convert "くも" to "クモ" or "クモ".
Alphanumerics
AIn Alphanumerics entry mode, press a
key to enter the assigned character
4
Entering Text
a In Kanji/Kana entry mode, enter hiragana
b Press o (EngNumカナ)
c Highlight katakana conversion alternative and press
c (Confirm)
To toggle upper and lower case
Enter a character and press *
To correct a misentry
Use C to delete the character and press the
correct key
When key is pressed too many times
Press # to return to a previous character
assigned to the same key
4-7
To enter consecutive characters assigned to
the same key
Press r to move cursor to the right
Tip
4
Entering Text
• To enter alphanumerics in Kanji/Kana entry mode
Press key(s) assigned to alphanumerics as many times as it
would take to enter same character(s) in Alphanumerics
mode. For example, press 2 three times and press
3 once to enter "cd."
a In Kanji/Kana entry mode, press key to which
alphanumeric is assigned
b Press o (EngNumカナ)
c Highlight alphanumeric conversion alternative and press
c (Confirm)
Numbers
AIn Number entry mode, press number
keys
To correct a misentry
Use C to delete the entry, then enter correction
Tip
• To enter numbers in Kanji/Kana entry mode
a In Kanji/Kana entry mode, press key to which number is
assigned
b Press o (EngNumカナ)
c Highlight number conversion alternative and press
c (Confirm)
4-8
Symbols, Pictograms &
Emoticons
AIn a text entry window, press # to
toggle symbols
BHighlight target character and press
c
To enter symbols, pictograms, or emoticons
successively
Press w (Continue)
To toggle double-byte symbols and singlebyte symbols
4
Press * while Suggestions for double-byte
Entering Text
symbols and single-byte symbols appear
Tip
• To enter symbols, pictograms, or emoticons in Kanji/
Kana entry mode
Enter hiragana like てん and press w (Convert), symbols
・and … appear among conversion alternatives. Similarly,
convert はーと or でんわ to pictograms and わーい or
えーん to emoticons.
4-9
Line Breaks
Enter a line break the same way in all text entry modes.
AIn a text entry window, press *
Quoting Saved Text
4
Using Phonebook Entries
Entering Text
In a text entry window, use Phonebook via Options to
SMS Template
In a text entry window, use SMS template via Options to
quote saved text in SMS.
Save frequently used words/phrases as SMS templates
beforehand ( P.4-15).
AIn message text, select Options →
SMS template
search saved entries for inserting phone numbers or mail
BSelect a template
addresses into message text.
Using Template
AIn message text, select Options →
Phonebook
BSelect an entry and open details
CHighlight an item and press c (Select)
In a text entry window, use Templates via Options to
save ".ne.jp" or "http://www" in Phonebook for one
keystroke entry.
AIn message text, select Options →
Templates
BSelect an item
4-10
Editing Text
Hangul
Select Hangul entry mode to enter Hangul characters.
AIn a text entry window, press e and
select Hangul
Consonant Example (Key Assignment)
4
(once)
4
(twice)
(
02
( ), 1 (
02
( ), 3 (
02 (
(
), 2 ( )
), 3 (
4
The character before cursor is deleted.
To delete all text on/after cursor
Press C for 1+ seconds
To delete all text
(three times)
Place cursor at the end of text and press C for
0122
)
0221
)
0223
), 1 (
When a space is highlighted
4
Vowel Example (Key Assignment)
01
AHighlight character to delete and
press C
1+ seconds
), 2 ( ), 1
)
4-11
Entering Text
BPress number keys to enter assigned
character units that appear; combine
several consonants and vowels
Deleting
Copy/Cut, Paste & Undo
Copy/Cut
Select a range of characters to copy/cut. Paste copied/cut
characters repeatedly to other locations.
4
AIn a text entry window, select Options
→ Copy or Cut
Entering Text
BUse a to highlight the first
character in the range and press
c (Start)
To copy/cut all
Press o (All)
CUse a to specify range and press
c (End)
4-12
Tip
• To copy text from Phonebook entries or My
Phonebook Details
Options → Copy item ( P.5-13, 5-17)
• Copied/cut items
Up to 10 copied/cut items can be saved. Content remains
even power is turned off. With 10 items are already saved,
oldest item is automatically deleted.
Paste
AUse a to move cursor to paste
location
BSelect Options → Paste
CSelect an item to paste and press
c (Select)
Tip
• To delete copied/cut items
In Step 3, highlight item to delete, press w (Delete) and
select Yes.
Undo
Prediction On/Off
(Japanese Only)
Select to show/hide Japanese kana conversion alternatives
in Suggestions.
Default Setting
Undo operations immediately after performing such as
Cut, Paste, or Delete. Alternatively, undo converting
operation can be performed in Kanji/Kana entry mode only.
AIn a text entry window, select Options
→ Undo
AIn a text entry window, select Options
→ Prediction On or Prediction Off
Learning On/Off
(Japanese Only)
Default Setting
Jump
AIn a text entry window, select Options
→ Jump → Top or End
On
■
4
Entering Text
operations immediately after character conversion; this
■
On
Select to save/discard entered character strings by
Suggestions.
AIn a text entry window, select Options
→ Learning On or Learning Off
4-13
Font Size
Default Setting
■
Large
Change font size for SMS, S! Mail, or template text;
available sizes vary.
4
AIn message text, select Options →
Font Size
Entering Text
User Dictionary
(Japanese Only)
Save frequently used words/phrases of up to 20 characters;
entries appear in Suggestions when key characters are
entered.
APress c and select Settings →
Phone settings → User dictionary →
New entry
BSelect Word field and enter text
4-14
CSelect Reading field and enter key
characters
DPress w (Save)
Tip
• To edit User Dictionary entries
a Press c and select Settings → Phone settings →
User dictionary → Edit entry
b Select contents to edit
c Edit a word or readings and press w (Save)
• To delete one item
a Press c and select Settings → Phone settings →
User dictionary → Edit entry
b Highlight item to delete, select Options → Delete
• To delete all items
a Press c and select Settings → Phone settings →
User dictionary → Delete all
b Enter Phone Password, press c (Confirm) → Yes
Saving to User Dictionary
AIn a text entry window, select Options
→ Word registration
BUse a to move cursor to the first
character, press c (Start)
To open User Dictionary window to check
Press o (UserDic)
• When the range contains a line break
Character string before line break is saved to dictionary.
• To edit User dictionary
Press o (UserDic) to select start point for Word registration;
perform operations in "User Dictionary (Japanese Only)"
( P.4-14). Select Edit entry and registered entries appear.
4
SMS Templates
Save frequently used words/phrases of up to 70 characters.
CUse a to set the range, press
c (End)
APress w ( ) and select Templates
→ SMS templates
DSelect Reading field and enter reading
BSelect Options → Add new
EPress w (Save)
When no SMS templates have been saved
Press w (Add new)
CPress c (Select) and enter text
DPress w (Save)
4-15
Entering Text
saved content, etc.
Tip
Tip
• To use an SMS template ( P.4-10)
• To edit an SMS template
a Press w (
) and select Templates → SMS
templates
b Highlight an item to edit and press c (Edit)
c Press c (Select) and edit the text
d Press w (Save)
4
Entering Text
• To delete an SMS template
a Press w (
) and select Templates → SMS
templates
b Highlight an item to delete, select Options → Delete →
Selected → Yes
To delete all SMS templates, in Step b, select Delete →
All, enter Phone Password, press c (Confirm) and select
Yes. To delete multiple items, select Delete → Multiple in
Step b, check items to delete, press w (Delete) → Yes.
4-16
Phonebook
Availability (Quantity)
Saving to Phonebook
Item
Description
707SC
USIM
Card
Saved with area code
Yes
(5 of up to
40 digits
each)
Yes2 3
Email
Single-byte
alphanumerics
Yes
(4 of up to
256
characters
each)
Yes3
(1 address)
Email
Icon
Select one of three
icons
Yes
No
Phonebook Entry Items
Save phone numbers, mail addresses, and more for up to
1,000 entries in Phonebook; USIM Card Phonebook
Phone
Number
capacity varies by card. Insert USIM Card into compatible
SoftBank handsets to use USIM Card Phonebook entries.
Each 707SC Phonebook entry contains items listed below.
5
Availability (Quantity)
Phonebook
Item
Description
707SC
USIM
Card
Entry
Number
a 3-digit number
Yes
Yes
(000-999)1 (000-0XX)2
Category
Select one of twenty
categories
Yes
Yes2
Name
Single-/double-byte
characters
Yes (Up to
50
characters)
Yes3
Caller ID
Select incoming call
image from Data
Folder
Yes
No
Reading
Single-byte characters
Yes
Yes3
Select one of six icons
Yes
(Six Icons)
No
Call
Notice
Select incoming call
ringtone from Data
Folder
Yes
No
Phone
Icon
5-2
Availability (Quantity)
Item
Description
707SC
USIM
Card
Select incoming S!
Mail/SMS ringtone
from Data Folder
Yes
No
Blood
Type
Select one of four
blood types
Yes
No
Birthday
Enter the party's date
of birth
Yes
No
Address
Enter up to 20 singlebyte characters for
postal code and up to
50 for address
Yes
No
Hobby
Up to 100 characters
Yes
No
URL
Up to 100 single-byte
alphanumerics
Yes
(2 URLs)
No
URL Icon
Select one of three
icons
Yes
No
Notes
Up to 100 characters
Yes
No
Secret
Mode
Select secret setting
Yes
No
Note
• Protect important information
Phonebook entries may be lost/altered if battery is
removed or left uncharged for an extended period;
accidents/malfunctions may also affect entries.
Back-up entries and store separately. SoftBank is not
liable for damages from lost information.
5-3
5
Phonebook
Message
Notice
1 Use speed dialing ( P.5-12) to initiate a voice calls to primary
number saved in Phonebook Entry Numbers 000 - 099.
2 The number of items that can be saved varies by the type of
USIM Card.
3 The number of characters that can be saved varies by the type
of USIM Card.
Adding Entry Items
707SC assigns lowest available Entry Number; edit as
required.
To modify Reading Name
aSelect Reading Name field
bEnter a reading name (use katakana to organize
entries in Phonebook list)
To save Phone number
Highlight Phone number field and enter a number
To set Phone icon
aSelect Phone number field
bSelect an icon
5
Phonebook Details
To save Mail address
Phonebook
ASelect Options → Add to → Phone or
USIM
aSelect Mail address field
BEnter additional items as required
To set Category
5-4
bEnter an address
cSelect an icon
*Not available in USIM Card Phonebook.
aSelect Category field
To change Entry number
bSelect a Category
Highlight Entry number field and enter a number
To set Caller ID for a Voice Call or Video Call*
To save Name
aSelect Caller ID field
aSelect Name field
bSelect On
bEnter a name
cOpen Data Folder to select an image file, etc.
To save Hobby*
aSelect Call notice field
aSelect Hobby field
bSelect On
bEnter text
cOpen Data Folder to select a file
To save URL*
To set S! Mail/SMS Notice*
aSelect URL field
aSelect Message notice field
bEnter a URL
bSelect On
cSelect an icon
cSelect sound
To save Memo*
To save Blood type*
aSelect Notes field
aSelect Blood type field
bEnter text
bSelect blood Type
To set Secret Mode*
To save Birthday*
aSelect Secret Mode field
Highlight Birthday field and enter a date
bSelect On
To save Address*
aSelect Address field
5
Phonebook
To set Call notice for a Voice or Video Call*
CPress w (Save)
bEnter a postal code
cSelect Address field and enter an address
dPress w (OK)
5-5
Tip
• Valid Phone Field Characters
Enter 0-9, #, *, P (Pause), and + (International Code). Press
* for 1+ seconds to enter P or press 0 for 1+
seconds to enter +.
5
• Saving an Entered Phone Number
During a call, Options → Add to Phonebook
a In Standby, enter a phone number
b Options → Add to Phonebook → Phone or USIM
c Select New or Update and select memory
d Select a phone icon
e Perform Steps 2 and 3
Phonebook
• Synchronizing Phonebook with Samsung PC Studio
Secret Mode entries cannot be synchronized or backed-up to
a PC even if Secret Mode is active.
The entries with Secret Mode changed from Off to On,
cannot be synchronized and deleted immediately after the
Secret Mode settings has been changed and tried
synchronization.
For more information about Samsung PC Studio, see the
User's guide in the attached CD-ROM.
Saving from Call Log Records
Save numbers from Call Log records to new or existing
Phonebook entries.
APress r
BUse s to open a Call Log, highlight
a record, select Options → Add to
Phonebook → Phone or USIM
CSelect Phonebook entry type
To create a new entry
Select New
To save to an existing entry
aSelect Update
bOpen the Phonebook entry ( P.5-9)
DSelect a phone icon
EEnter additional items as required
5-6
FPress w (Save)
Category Settings
Organize Phonebook entries among twenty Categories.
New Category (USIM Card)
APress c and select Phonebook
BSelect Options → View from USIM
DSelect Options → New category
EEnter a name
Customize Category names; add images/ringtones to
appear/sound for incoming calls/messages from members.
APress c and select Phonebook
To select a USIM Card Category
After Step 1, select Options → View from USIM
BPress w (Search) and select Category
search
CHighlight category to change, select
Options → Category settings
DEdit Category items
To change Category name
Select Category name field and enter a name
5-7
5
Phonebook
CPress w (Search) and select Category
search
Edit Category
To set Category image
Select Category image field then select a file from
Data Folder
To select Category on USIM Card
Select Call notice field then select a file from Data
After Step 1, select Options → View from USIM
To set incoming S! Mail/SMS notice
Select Message notice field then select a ringtone
To restore Category defaults
Highlight item to restore and press o (Reset)
Phonebook
EPress w (Save)
Tip
• Incoming Image & Ringtone Priority
Images and ringtones set for individual Phonebook entries
take priority over those set for a Category.
5-8
APress c and select Phonebook
To set incoming call ringtone
Folder
5
Add Member
BPress w Search and select Category
search
CSelect Category to which to add
member
DSelect Options → Add member
ECheck the member to add and press
w (Add)
Tip
• To delete a member from a Category
Deleting a member from a Category does not affect
member's Phonebook entry.
a Perform Steps 1 and 2 in "Add Member"
b Select Category from which to delete member
c Highlight member to delete, select Options → Remove
→ Yes
BPress w (Search)
To search Phonebook list
aSelect Phonebook list
bUse s to navigate Phonebook list
To search by Category
aSelect Category search
bSelect Category
Using Phonebook
To search by name
Calling from Phonebook
bEnter any part of Name
aSelect Name search
5
Phonebook
To search by Reading
Phonebook Search
aSelect Reading search
APress d
bEnter any part of Reading
If the correct search method appears first
Proceed to Step 2, Part b
To change method from an active search
window
Press c and proceed to Step 2
To search by Entry Number
aSelect Entry No. search
bEnter Entry Number
To search by Phone Number
aSelect Phone No. search
bEnter any part of a phone number
5-9
To search by Mail Address
Initiating a Call
aSelect Email search
ASelect an entry, press c (Details) to
view Details window
bEnter any part of an mail address
CSelect an entry
To open Entry details
Press c (Details/Select)
Tip
5
Phonebook
• To set Phonebook preference (Phonebook or USIM
Card Phonebook)
a Press c and select Settings → Phonebook settings
→ View phonebook from
b Select Phone memory or USIM memory and press
c (Save)
• When Secret Mode is set to Hide
Secret Phonebook entries do not appear. Activate Secret
Mode to search Secret entries.
5-10
Entry Details
BSelect a number and initiate a call
To initiate a Voice Call
Press c or select Options → Voice call
To initiate a Video Call
Select Options → Video call
Tip
• To place a call from Phonebook list
Highlight an entry, select Options → Voice call or Video
call. When entry contains multiple numbers, Default Number
is dialled if set; otherwise, first number listed is dialled. If
Default Number is Not assigned, Call window appears;
select a number.
Calling USIM Card Phonebook Entries
Use Entry Numbers as shortcuts to call numbers saved in
the first 100 USIM Card Phonebook entries.
AEnter last two Entry Number digits
BPress #
Calling from Simple Search or search result
If the correct entry is not highlighted
Reading name corresponding to the Entry Number appears.
Highlight a phone number, press t or c (Select) → c
(Call) to initiate a Voice Call; Options → Video call for
Video Call.
Use j to highlight it
Enter 4-digit number to search and open entry name/phone
number; this search for entries contains the entered number
at the first/last part of the entry. When Simple search is On
and an entry searched, press s to switch search result
between phone No. search and Simple search. Highlight a
phone number, press t or c (Select ) → c (Call) to
initiate a Voice Call; select Options → Video call to call a
Video Call.
5
To initiate a Video Call
Phonebook
Calling from Phone No. search or search result
CPress w (Call)
Press o (V-Call)
5-11
Change Search Method
Default Setting
■
Phonebook list
Speed Dialing
Enter the last two Entry Number digits to call Voice Call
Specify search window to appear first when d is
Default Number in Phonebook entries 000 - 099.
pressed in Standby.
AEnter last two Entry Number digits
APress c and select Settings →
Phonebook settings → Search type
BSelect the setting and press c (Save)
5
Phonebook
Tip
• Search Method Items
Phonebook list: Press d in Standby, list appears.
Other settings: Search window appears.
5-12
BPress c (
)
Tip
• When Simple search is On
Enter Entry No. for names and phone numbers. After 5
seconds, search result disappears. When
appears, press
c to dial.
Item
Note
Send
Delete
Delete an entry ( P.5-15).
Save to Data
Folder
Create a vFile and save it to Other
documents in Data Folder.
Copy to USIM/
Copy to phone
( P.5-15)
• Speed Dialing is invalid for an entry if Voice Call
Default Number ( P.5-14) is set to Not assigned.
• While Secret Mode is set to Hide, Secret Phonebook
entries cannot be dialled.
Phonebook Options
Use the following options in Phonebook List or Entry
details.
Description
Add to1
Start the process of saving a new entry.
Voice call
Initiate a Voice Call to the highlighted
number or Default Number ( P.5-10).
Video call
Initiate a Video Call to the highlighted
number or Default Number ( P.5-10).
Create message
Open a new message addressed to the
number saved as an entry ( P.17-6).
5
View from USIM/ Toggle Phonebook and USIM
View from Phone1 Phonebook.
International dial
Add international code and country
code to the number ( P.2-2).
Hide/Show my ID
Show or hide your number when
making calls; Select None to apply
Caller ID setting.
Print via
bluetooth
Print highlighted Entry details (name,
phone number information) using the
printer via Bluetooth® connection.
Memory status1
Check memory usage.
Copy item2
Copy highlighted entry item.
Phonebook
Item
Description
Send entry as a vFile; select Via
message, to open a new message with
entry attached ( P.17-6), or Via
bluetooth, to send entry to another
device wirelessly ( P.12-6).
5-13
Item
Mark default
number2
Description
Default Number
( P.5-14)
Default Setting
1 This item does not appear in Entry details.
2 This item does not appear in Phonebook list.
Editing Phonebook Entries
5
Voice call: First phone number
Video call: First phone number
■ Message: Not assigned
■
■
When an entry contains multiple phone numbers/mail
addresses, set calling/messaging priorities by assigning to
To search, list or Entry details, see "Phonebook Search"
Default Number.
( P.5-9).
Resetting an item changes it to Not assigned.
Activate Secret Mode to edit Secret Phonebook entries.
AOpen Entry details
Phonebook
Edit
AOpen Entry details
BPress w (Edit)
CEdit entry items and press w (Save)
BSelect Options → Mark default
number
CSet or reset options
To set
aSelect Voice call, Video call, or Message
bSelect a phone number or mail address
5-14
To reset
Highlight Voice call, Video call, or Message and
press o (Reset)
DPress w (Save)
Copy to USIM & Copy to Phone
AHighlight entry or open Entry details
BCopy the entry
From Phonebook to USIM Card Phonebook
Deleting Entries
Deleting a Single Entry
AHighlight entry or open Entry details
BSelect Options → Delete → Selected
→ Yes
Deleting Multiple Entries at Once
5
AHighlight entries
To select Phonebook or USIM Card Phonebook
Yes
Options → View from Phone or View from USIM
From USIM Card Phonebook to Phonebook
Options → Copy to phone → Selected or All
BSelect Options → Delete → Multiple
CCheck an entry to delete
DRepeat Step 3 to check all target
entries
5-15
Phonebook
Options → Copy to USIM → Selected or All →
EPress w (Delete) and proceed to
Step 7 when all are not checked
FEnter Phone Password, press
c (Confirm)
GSelect Yes
Deleting All Entries at Once
5
Delete all Phonebook or USIM Card Phonebook entries.
Phonebook
AHighlight entries
Toggle Phonebook and USIM Card Phonebook
Options → View from USIM or View from Phone
BSelect Options → Delete → All
CEnter Phone Password, press
c (Confirm) → Yes
5-16
My Phonebook Details
Confirm handset phone number. Add your name, mail
address, street address, and other information.
APress c and Press 0
To enter or edit other items
aPress w (Edit)
bEnter/edit items following the Phonebook item
procedures; when finished, press w (Save)
Options
Item
Description
Send my
phonebook
details
Send as a vFile; select Via message to
create a message with vFile attached
( P.17-6), or Via Bluetooth to send
vFile wirelessly ( P.12-6).
Delete
Delete owner info except USIM Card
number.
Save to Data
Folder
Create a vFile and save it to Other
documents in Data Folder.
Copy highlighted entry item.
Print via
Bluetooth
Print My phonebook details (name,
phone number information) using
printer via Bluetooth® connection.
5
Phonebook
Copy item
5-17
5-18
Video Call
Before Using Video Call
Exchange voice/video with compatible 3G handsets.
You may choose not to send your own image ( P.6-6).
6
CPress y to end the call
Tip
• Engaged Video Call Operations ( P.6-3)
Video Call
Video Call Precautions
When Video Call cannot be connected
• Calls to incompatible handsets may be disconnected;
charges apply.
• It may be difficult to use Speaker Phone with earpiece
volume raised; lower volume or use Stereo Earphone
Microphone.
• Ambient noise may hamper voice quality; use Stereo
Earphone Microphone.
• Using Speaker Phone in public may disturb others; please
mind your mobile manners.
Unavailable for a video call... appears; select Options →
Voice call or Create message to contact the recipient, or
View contact details to open Phonebook. Select Add to
Phonebook to save the receiver's number to Phonebook or
USIM Card Phonebook.
Initiating a Video Call
Call via Phonebook entries/Call Log records or dial directly.
Initiating a Call ( P.2-3)
Receiving a Video Call
AWhen 707SC rings/vibrates, press
c (Accept)
Loudspeaker on? appears;
AEnter a phone number
Select Yes or No
BSelect Options → Video call
Allow own picture to be shown? appears;
6-2
Select Yes or No
BPress y to end the call
Engaged Video Call
Operations
Tip
• To adjust ringtone volume
While 707SC is ringing, press n or b.
• When a Stereo Earphone Microphone is connected
Press Stereo Earphone Microphone switch for 1+ seconds to
answer Video Calls. Press for 1+ seconds to end a Video
Call.
• To disconnect a Video Call without answering it
Press o (Busy)
Perform operations from Video Call Menu or Options.
相田名都
c
a
¥ 144
00:00:00
終了
オフ゜ション
d
b
f
e
• To change or cancel outgoing image
Set 707SC to send Substitute Image beforehand ( P.6-6).
Alternatively, change to Substitute Image during a call
( P.6-6).
aLarge Display (Normally, the other party's image)
• Send Your Image or Substitute Image
After Step 1, Your Image appears. When confirmation
appears, select Yes or No to send Your Image or Substitute
Image. When Video Call connects Your Image or Substitute
Image appears.
dCall duration
6
cThe other party's name or phone number
Video Call
• Engaged Video Call Operations ( P.6-5)
bSmall Display (Normally, your image)
eMeaning of the icon at cursor position
fVideo Call Menu Icons
/
: Toggle Speaker Phone Off/On
: Toggle Incoming Image Size
/
: Freeze or unfreeze outgoing image
6-3
(Blue)/
(Gray): Toggle Your Image and Substitute
To flip outgoing image
and press c
Image
Highlight
/
To cancel Your Image/mic/key tones
: Freeze or unfreeze incoming image
aOptions → Mute
: Flip image
ADuring Video Calls, select Video Call
Menu or Options to adjust settings
To toggle Speaker Phone off/on
Highlight
/
and press c
To select incoming image size
Highlight
6
and press c to select an item
To freeze or unfreeze outgoing image
Video Call
Highlight
/
and press c
To toggle Your Image and Substitute Image
Highlight
(Blue/Gray) and press c
To freeze or unfreeze incoming image
Highlight
6-4
/
and press c
bCheck item(s) to cancel and press w (Save)
When Camera (Your Image) is canceled, Substitute
Image is sent.
To adjust outgoing image appearance/quality
aOptions → Display options → Effects or
Quality
bHighlight an item and press c
To adjust outgoing image brightness
aOptions → Display options → Brightness
bUse s to adjust brightness
Tip
Engaged Video Call Options
• To adjust earpiece volume
Press j during a Video Call.
Item
Description
• To enlarge or reduce outgoing image
Press n or b during a Video Call.
Normal/Speaker on
Toggle Speaker Phone off/on
( P.6-4).
• When outgoing image is canceled
707SC send caller Substitute Image.
Mute
Cancel sending outgoing image/mic/
key tones ( P.6-4).
Display options
Adjust outgoing image appearance/
quality ( P.6-4).
Settings
Select Video Call settings ( P.6-6).
Open Phonebook Search window.
Add to Phonebook
Save number to Phonebook or USIM
Card Phonebook ( P.5-6).
Send DTMF
Send push tones.
Memo
Create and save text memos
( P.14-10).
Details
Open Phonebook Entry details.
Switch to headset/
Switch to phone
Appears when Bluetooth®compatible headset is in use. Select
headset or phone (handset).
6
Video Call
Phonebook
6-5
Video Call Settings
Sending Your Image
Selecting a Substitute Image
Default Setting
■
Camera Off
Select an image to use as the outgoing image.
Default Setting
■
Always ask
When Always ask is set, Choose between Your Image or
Substitute Image as outgoing image each time a Video
Call is received.
6
APress c and select Settings → Call
settings → Video call → Show my
picture
Video Call
BSelect the setting and press c (Save)
APress c and select Settings → Call
settings → Video call → Select still
picture
BPress c (Change)
COpen Data Folder, select a file and
press c (Save)
Tip
• To restore Substitute Image to its default
a Perform Steps 1 and 2
b Select any image file in Data Folder → Options →
Reset
6-6
Retry Settings
Default Setting
■
Always ask
APress c and select Settings → Call
settings→ Video call → Retry with
BSelect the setting and press c (Save)
Tip
Default Setting
■
Off
Set Voice mute to On to answer Video Calls with no
sound sending to caller.
APress c and select Settings → Call
settings → Video call → Voice mute
BSelect On and press c (Save)
Tip
6
• To send sound
a During a Video Call, select Options → Mute
b Uncheck Voice
c Press w (Save)
Video Call
• Retry with Items
Always ask: Select an action from Options.
Voice call: Redial number as a Voice Call.
Messages: Create a message.
None: Return to Standby after a failed Video Call.
Automatic retry option changes by setting.
Voice Mute
6-7
6-8
Mobile Camera
Before Using Mobile
Camera
Capture still images in JPEG or video in 3GP format.
Rotating Camera
707SC features Rotating Camera. To capture images or
record video, rotate lens inward or outward; press n (Side
Keys) to flip image vertically/horizontally to suit lens
Mobile Camera Precautions
orientation, etc.
• Use a dry soft cloth to remove debris from lens cover.
• Avoid camera shake; hold 707SC steady or place it on a
stable surface and use Timer.
• Mobile Camera employs high precision technology,
however, some pixels may seem brighter or darker than
others.
7
• Leaving 707SC in a hot place for an extended period
before image capture/save may affect image quality.
• Exposing lens to direct sunlight may affect color filter.
Mobile Camera
7-2
Lens outwards
Lens inwards
c White Balance
Using Display as Viewfinder
a
a
bc
: Auto
: Incandescent
bchi
: Fine
: Fluorescent
: Cloudy
d Mode
No display : Single shot
: Multi-shot (6 shots)
: Multi-shot (15 shots)
: Mosaic shot (2 x 2)
d
e
: Multi-shot (9 shots)
: Mosaic shot (3 x 3)
e Timer (When set)
f
g
j
00:00:03 22K
k
l
f Image Orientation (Vertical)
Video Viewfinder
Camera Viewfinder
: Upright Image (Lens Outward)
: Upright Image (Lens Inward)
a Size
,
,
b Quality
: Superfine
: Normal
: Economy
: Fine
: Low
,
,
,
g Image Orientation (Horizontal)
7
: Normal image
: Mirror image
Mobile Camera
,
,
: 3 seconds
: 5 seconds
: 10 seconds
h Audio Recording
: On
: Off
i Recording Time
: Limit for S! Mail
: 30 seconds
: 10 seconds
: Normal recording
7-3
j Elapsed Recording Time
Mode
Description
Image size
Mosaic shot
Capture multiple images, one at
a time; 707SC automatically
combines single images (4 for
2 x 2 or 9 for 3 x 3) into one
composite image.
240 x 192
k Total Data Size/Recording Time
l Progress Bar
Capturing a Still Image
Camera Mode
Tip
Select Single shot to capture single images, Multishot or
Mosaic shot to capture multiple images. Save images in
Pictures.
Mode
7
Mobile Camera
Description
Image size
Single shot
Capture single images, select
size for purpose; attach images
to S! Mail, save as Wallpaper,
etc.
1600 x 1200
1280 x 960
640 x 480
320 x 240
240 x 320
240 x 192
Multi-shot
Press shutter once to capture 6,
9 or 15 sequential images.
320 x 240
7-4
• When using Single shot mode with a frame
Image size is automatically adjusted to 240 x 192.
Capturing Still Images
Single Shot
APress e
In Video mode
Press w (Photos) to change to Camera mode
BSelect Options → Shooting mode →
Single shot → Take & save
To save captured images without review
Select Automatic save
CSelect Options and perform other
actions as required ( P.7-6)
Use r or l to lighten or darken image
EPress c (Take)
To cancel the image and capture another
Press w (Back)
Tip
• To activate/adjust Timer in image preview
Press 5 to toggle 3 seconds, 5 seconds, 10 seconds,
and Off.
• To adjust viewfinder in image preview
Press # to toggle Full screen, Actual ratio, Full
screen without indicator, and Full screen with grid.
• To send an image via S! Mail or Bluetooth®
a After Step 5, press c (Send) and select send medium
b Send image ( P.12-6, 17-6)
Zoom image in/out (invalid for 1600 x 1200)
Use u or d to zoom out or in
7-5
7
Mobile Camera
DPreview image on Display
Adjust brightness
Preview Options
Review Options
Available options may vary by mode and other settings.
Item
Shooting mode
7
Mobile Camera
7-6
Description
Select Shooting mode and save setting
for Single shot, or image count for
Multi-shot or Mosaic shot ( P.7-5,
7-9).
Effects
Select Black & White, Sepia or
Negative effects filters. When an effect
is active, select None to cancel.
Frames
Add a frame to image in Single shot
mode.
Timer
Activate self-timer ( P.7-5).
Go to photos
Open Pictures folder.
Camera settings
Select image size, image quality, etc.
( P.7-13).
Camera shortcuts
Open a function shortcuts graphic
( P.7-10).
Item
Description
Delete
Delete the last image captured.
Set as
Set image for Wallpaper, Phonebook
entries, or Substitute Image.
Edit photo
Edit an image in Pictures folder
( P.7-15).
Dynamic Effect
Create Flash® images using Still images
( P.7-19).
Rename
Change file name.
mPostcard
Create a mobile postcard ( P.7-7).
Go to photos
Open Pictures folder.
Lock/Unlock
Set/release file protection.
Details
Confirm file size or format.
Mobile Postcard
Use Single shot, Multi-shot, or Mosaic shot images.
EPress c (Merge) and check result
To change image
This function renders one of two images as line art,
aPress C
merging it with the other to create a stamped photograph.
bHighlight image to change, select Options →
ACapture an image ( P.7-5, 7-8)
cRepeat Steps 4 and 5
BSelect Options → mPostcard
To swap image positions
CPress c (Add)
bOptions → Swap image
DAdd a second image
To select a still image from Data Folder
Change image
aPress C
cPerform Step 5
FTo edit line art, press o (Edit)
aSelect Open
To change line art position
bOpen Data Folder and select an image file
aOptions → Move
To capture an image
bUse a to move image and press w (Done)
aSelect Take photo
To change line art size
cPress c (Add)
aOptions → Size
bUse j to adjust image and press w (Done)
7-7
Mobile Camera
bPress c (Take)
7
To rotate line art
Multi Shot
aOptions → Rotate
APress e
bUse s to rotate image and press w (Done)
To change line art color
aOptions → Change colour
bUse s to select color and press w (Done)
To adjust line art shadow
aOptions → Shadow on or Shadow off
bPress w (Done)
GPress w (Save) and enter a file name
To save and send image
aPress c (S & S)
bSelect medium and send ( P.12-6, 17-6)
7
In Video mode
Press w (Photos) to change Camera mode
BSelect Options → Shooting mode →
Multi-shot and select the number of
images to capture
CSelect Options and perform other
actions as required ( P.7-6)
DPreview image on Display
Zoom in/out
Mobile Camera
Use u or d to enlarge or reduce image
Adjust brightness
Use r or l to lighten or darken image
EPress c (Take)
7-8
FView captured still image(s)
DPreview image on Display
To view still images individually
Zoom in/out
aHighlight the image and press c (View)
Use u or d to zoom in or out
bPress C
Adjust brightness
To retake a still image
Use r or l to brighten or darken image
Press w (Back)
Mosaic Shot
APress e
EPress c (Take) for each image
FView captured still images
In Video mode
Press w (Photos) to change Camera mode
CSelect Options and perform other
actions as required ( P.7-6)
7
Mosaic Mode (2 x 2)
Mobile Camera
BSelect Options → Shooting mode →
Mosaic shot to select the number of
images to capture
To retake an image
Press w (Back)
7-9
Shortcut Key Operations
Press the assigned key to change item settings.
Available shortcuts vary by mode or setting status.
Key
7
Item
Description
1 Size
1600 x 1200, 1280 x 960,
640 x 480, 320 x 240,
240 x 320, 240 x 192
2 Quality
Superfine, Fine, Normal, Low,
Economy
3 Shooting mode
Single shot, Multi-shot (6, 9, 15
shots), Mosaic shot (2 x 2, 3 x 3)
4 White balance
Auto, Fine, Cloudy,
Incandescent, Fluorescent
5 Timer
3 seconds, 5 seconds, 10
seconds
Mobile Camera
6 Frames
7 Effects
Select from 9 types
Black & White, Sepia, Negative
0 Photo album
-
# Screen mode
Toggle Full screen, Actual ratio,
Full screen without indicator,
Full screen with grid
w
n
7-10
Mode switch
-
Vertical inverse
-
Key
Item
b
Horizontal
inverse
Description
-
j
Zoom
-
s
Brightness
-
Capturing Video
Video Mode
Capture clips to attach to mail or save as mementos.
Alternatively, capture clips without sound. Files are saved
in 3GP format to Videos folder in Data Folder.
Recording Video
APress e
FPress c (Play) to view clip
To continue recording
Press w (Back)
In Camera mode
Press w (Videos) to open Video mode
BSelect Options and perform other
actions as required ( P.7-11)
CPreview image on Display
Tip
• To activate/adjust Timer
In image preview, press 5 to toggle 3 seconds, 5
seconds, 10 seconds, Off.
Preview Options
Item
Zoom in/out
Use u or d to enlarge or reduce image
Effects
Adjust brightness
Use r or l to lighten or darken image
Description
Select Black & White, Sepia, or
Negative effects filters. When an effect
is active, select None to cancel.
7
Activate self-timer ( P.7-11).
DPress c (Record)
Go to videos
Open Videos folder.
EPress c (Save) and end
Video settings
Select image size, image quality, etc.
( P.7-14).
Camcorder
shortcuts
Open a function shortcuts graphic
( P.7-12).
After recording time elapses
Recording ends and clip is saved automatically.
7-11
Mobile Camera
Timer
Review Options
Key
Description
Edit
Edit Video files in Data Folder (P.7-17).
3
Shooting time
Resolution
Select video display size while playing
or paused.
Limit for S! Mail, 10 seconds,
30 seconds, Normal
recording
4
White balance
Send file via S! Mail ( P.17-6) or
Bluetooth® ( P.12-6).
Auto, Fine, Cloudy,
Incandescent, Fluorescent
5
Timer
Set as
Set captured videos as Voice ringtone
or Video ringtone.
3 seconds, 5 seconds, 10
seconds
6
Audio recording
On, Off
Delete
Delete the last video captured.
7
Effects
Rename
Change file name.
Black & White, Sepia,
Negative
Go to videos
Open Videos folder.
0
Record album
-
w
Mode switch
-
n
Vertical inverse
-
b
Horizontal
inverse
-
j
Zoom
-
s
Brightness
-
Item
Description
Send
7
Item
Lock/Unlock
Set/release file protection.
Details
Confirm file size or format.
Shortcut Key Operations
Mobile Camera
Change settings by pressing key assigned to each item.
Key
7-12
Item
Description
1
Size
320 x 240, 176 x 144,
128 x 96
2
Quality
Fine, Normal, Low, Economy
Mobile Camera Settings
To set image size
aSelect Size
Make settings related to image capturing including the
bSelect the setting and press c (Save)
size, image quality, save location, etc. of images.
To set image quality
Camera Settings
Default Setting
Size: 240 x 320 ■ Quality: Normal
Viewfinder: Full screen
■ Shutter sound: Shutter 1
■ Multi-shot speed: High
■ Single shot mode: Take & save
■ White balance: Auto
■ Default name: Photo
■
■
APress e
aSelect Quality
bSelect the setting and press c (Save)
To set Viewfinder
aSelect Viewfinder
bSelect the setting and press c (Save)
To set the shutter sound
aSelect Shutter sound
bSelect the setting and press c (Save)
To set sequential shot speed
aSelect Multi-shot speed
Press w (Photos) to change to Camera mode
bSelect the setting and press c (Save)
BSelect Options → Camera settings
To set the Single shot mode
CSelect an item
bSelect the setting and press c (Save)
7
Mobile Camera
In Video mode
aSelect Single shot mode
7-13
To set white balance
aSelect White balance
bSelect the setting and press c (Save)
To set file name
aSelect Default name
bEnter file name
Video Settings
Default Setting
aSelect Recording time
bSelect the setting and press c (Save)
To set size
aSelect Size
bSelect the setting and press c (Save)
To set image quality
aSelect Quality
■
bSelect the setting and press c (Save)
Recording time: Limit for S! Mail
Size: 176 x 144
■ Quality: Economy ■ Audio recording: On
■ Default name: Video
In Camera mode
Mobile Camera
Press w (Videos) to change to Video mode
BSelect Options → Video settings
7-14
To set duration
■
APress e
7
CSelect an item and adjust settings
To set voice recording
aSelect Audio recording
bSelect the setting and press c (Save)
To set file name
aSelect Default name
bEnter file name
Tip
• Video recording time
When the recording time is set to Normal recording, video
with maximum of approximately one hour can be recorded in
ordinary mode.
• When Recording time is set to Limit for S! Mail
Unable to set Size with 320 x 240; Quality is automatically
set to Economy, and cannot be changed.
Viewing Images
View images/video clips saved in Data Folder.
Viewing Still Images
APress e
Press w (Photos) to change Camera mode
BSelect Options → Go to photos
CHighlight a file and press c (View)
APress e
In Camera mode
Press w (Videos) to change to Video mode
BSelect Options → Go to videos
CHighlight and select a file and press
c (Play)
Editing Still Images
Edit image files saved in Data Folder.
7
APress c, select Data folder and
select an image to edit
BHighlight a file and press c (View)
CPress c (Edit)
7-15
Mobile Camera
In Video mode
Viewing Videos
DEdit using Options
To change the size of an image
aSelect Resize
bUse s to select a frame
cPress w (Done)
cEnter Width or Height (If Customise is selected)
To add clip art to an image
dPress w (Done)
aSelect Cliparts
aSelect Effects
bSelect the setting
cPress w (Done)
To add blur or correct red-eye
aSelect Partial effects → Partial blur or Redeye
repair
Mobile Camera
bOptions and select the suitable operation
bSelect a piece of clip art to add to an image
cOptions → Size and use j to adjust clip art
size
dOptions → Rotate and use s to turn clip art
eOptions → Move and use a to move clip art
fPress w (Done)
To add text to image (320 x 240 or above)
aSelect Insert text
cPress w (Done)
bEnter text
To adjust an image
dOptions → Rotate and use s to turn text
aSelect Adjust → Brightness/Contrast/Colour
bAdjust the image
cPress w (Done)
7-16
aSelect Frames
bSelect the setting
To add effects to an image
7
To add a frame
cOptions → Size and use j to adjust text size
eOptions → Font size → Large/Normal/Small
fOptions → Colour and use a to adjust text
color
gPress w (Done)
EPress c (Save)
To rotate image
FEnter a name for the image
aSelect Rotate
bSelect 90° R or 90° L
cPress w (Done)
Editing Video
To flip image
Edit Video files in Data Folder.
aSelect Flip
APress c, and select Data Folder →
Videos
bSelect Vertically or Horizontally
cPress w (Done)
To crop image
aSelect Crop
bOptions → Size and use j to adjust trimming
size
cOptions → Shape and use s to select
dOptions → Move and use a to adjust
trimming position
eOptions → Crop
fPress w (Done)
CEdit using Options
To cut video
7
aSelect Cut
bPress c (Play)
cPress w (Start) at the start point
dPress w (End) at the End point
eTo cancel and retry, press o (Reset) and repeat
b to d
fPress w (Done)
7-17
Mobile Camera
trimming shape
BHighlight a file, select Options → Edit
To merge multiple videos
aSelect Merge
bCheck files to merge (Up to ten files)
cRepeat b to check all target files
dPress w (Done)
ePress c (Merge)
To replace sound from other video/sound
aSelect Replace sound → From other video or
From other sound
bPress c (Open)
cSelect a file and press w (Done)
DPress c (Save)
7
EEnter a file name
Mobile Camera
7-18
Tip
• To confirm video before editing
Press w (Preview)
• To add files to merge videos
a After e in Step 3 in "To merge multiple videos," select
Options → Add
b Perform b to e in Step 3 in "To merge multiple
videos"
• To delete the file order for merging
a After e in Step 3 in "To merge multiple videos," use
s to highlight the file to delete
b Options → Delete → Yes
• To change the file order for merging
a After e in Step 3 in "To merge multiple videos," use
s to highlight the file to move
b Options → Change order
c Use s to highlight a personal folder or a file, highlight
the file and press c
cOptions → Size, use j to adjust size and
Create Flash®
Create
Flash®
press w (Done)
images using still images saved in Pictures
folder, already created
Flash®
images saved in Other
documents folder, or still images previewed immediately
after shooting; newly created
Flash® images
are saved to
dOptions → Rotate and use s to adjust angle
eUse a to adjust position and w (Done)
fRepeat a to e to add more icons
To add text to image
Other documents folder in Data Folder.
aSelect
APress c and Camera → Dynamic
effect list
bEnter text
BSelect files
dOptions → Font color and use s to adjust
CPerform creation operations
eUse a to adjust the position and w (Done)
To add frame to image
(Frame)
bSelect frame
To add icon to image
aSelect
cOptions → Font size and adjust size and press
w (Done)
color and press w (Done)
fUse s to change scroll direction and press
w (Done)
gTo add more text, select
7
Mobile Camera
aSelect
(Text)
(Text), press
c (Insert) and repeat b to g
(Icon)
bSelect icon
7-19
To add watch on image
aSelect
• To create Flash® images using Data Folder images
a Highlight image saved in Data Folder and select Options
→ Dynamic Effect
b Perform Steps 1 to 3 ( P.7-19) in "Create Flash®"
(Watch)
bSelect the watch
cPress w (Done)
To reset image during editing
aSelect
Note
(Reset)
• Created Flash® images cannot be sent as message.
bSelect Yes
DPress w (Save)
Attaching Images
EEnter an image name
Attach captured image or recorded video and send via S!
Mail.
Tip
7
• To delete added frame/watch
a After Step 2, select
(Frame) or
b Press w (Delete)
(Watch)
Mobile Camera
• To delete added icon(s)/text
a After Step 2, select
(Icon) or
(Text)
b Use s to highlight more icons/text to delete
c Press w (Delete)
d Press c (Done)
• Available icon/text to add
Up to 5 icons/texts can be added.
7-20
AAfter capturing, press c (Send) →
As message
To send video
In image review, select Options → Send → As
message
BEnter an address, subject, text, etc.,
and send
Tip
• To send a still image or video via Bluetooth®
Select Via bluetooth in Step 1 ( P.12-6).
7
Mobile Camera
7-21
7-22
Display Settings
Standby Display Settings
Wallpaper
Default Setting
■
To set/edit the image of Photo slide
aSelect Photo slide and press w (Edit)
bPerform Steps 2 to 4 in "Setting Photo Slide"
( P.8-2) or perform Steps 2 and 3 in "Editing
Photo Slide" ( P.8-3)
Pictures
Set an image, animation or Photo Slide to appear in
CPress c (Save)
Standby.
Display Settings
APress c and select Settings →
Display settings → Wallpaper
BPerform operations to set
Note
Select Pictures, Photo slide, mPet world image,
• With no pet selected in mPet, mPet world image
cannot be set as Wallpaper.
To change the image of Pictures
aHighlight Pictures and press w (Edit)
bSelect the save location of files and select a file
cPress c (Set)
8-2
• After setting mPet
mPet operations are enabled ( P.24-5). Press y to show
Standby as usual; various operations can be performed.
To change settings
or None
8
Tip
Photo Slide
APress c and select Tools → Photo
slide
BPress c (Add)
CSelect save location for the file, check
the image to set and press w (Done)
To see preview
aPress w (Preview) and select Yes (Crop left and
right) or No (Original horizontal and vertical ratio)
bPress C to close the preview
To set effect
• To adjust slide size
To display large in the window, select Yes in Step 4. To
display in the original horizontal and vertical ratio, select No.
Editing Photo Slide
APress c and select Tools → Photo
slide
BPerform editing operations
bUse s to toggle setting
To edit still images
To change the switching duration per still
aOptions → Replace
image
bCheck a still image to set and press w (Done)
aUse j to highlight Duration field
To change order of still images
bUse s to highlight Effect field
aHighlight the still images to change order, select
DPress c (Set) and select Yes (crop
sides) or No (show full image)
Options → Change Order
bUse a to change order and press c (Save)
To delete a still image
Highlight the still image to delete, select Options →
Delete → Yes
8-3
Display Settings
aUse j to highlight Effect field
Tip
8
To add a still image
aHighlight any part where a still image is not set
and press o (Add)
bCheck a still image to add and press w (Done)
CPress c (Set) and select Yes or No
BSelect settings
Digital clock
aSelect Digital clock
bPress w (Edit) and use s to select clock type
cPress c
Dual clock
Tip
aSelect Dual clock
• To adjust slide size
To display large in the window, select Yes in Step 3. To
display in the original horizontal and vertical ratio, select No.
Display Settings
8
Clock Display
Default Setting
■
Off
In Standby, select Digital clock, Dual clock, and Calendar
to display. Alternatively, hide clock in Standby.
APress c and select Settings →
Display settings → Clock display
8-4
bPress w (Edit)
cPerform Step 3 in "Changing Home Time Zone"
( P.1-20)
To display calendar
Select Calendar
To hide clock
Select Off
CPress c (Save)
Tip
• When Dual clock is set
Two clocks appear in Standby. Top time is that of the zone
selected in "Changing Home Time Zone" ( P.1-20) and
bottom time is that of zone in which Dual clock was set.
Operator Name
Default Setting
■
Off
In Standby, show or hide operator name.
BSelect the setting and press c (Save)
Menu Style
Default Setting
■
Black
Change menu appearance.
APress c and select Settings →
Display settings → Main menu style
BPerform operations to set
Display Settings
APress c and select Settings →
Display settings → Operator name
Menu Display
To set Bicycle
aSelect Bicycle
bUse s to change the type
cPress d and Use s to change seasons
8
To set Amoeba or Slider
aSelect Amoeba or Slider
bUse s to change the type
To set Black
Proceed to Step 4
8-5
CPress c
DPress w (Save)
Popup Menu
Default Setting
■
Tip
• When an item with no sub menu is highlighted
Nothing appears. Popup menus do not appear in Alarms.
List Font Size
Off
When active, sub menus appear in a popup window when
a menu item is highlighted.
Default Setting
■
Large
Set main menu item font size.
Display Settings
APress c and select Settings →
Display settings → Popup menu
APress c and select Settings →
Display settings → List font size
BSelect the setting and press c (Save)
BSelect the setting and press c (Save)
8
8-6
Zoom List
Default Setting
■
Off
When active, highlighted menu items appear larger.
Backlight Brightness &
Duration
Adjusting Display Brightness
APress c and select Settings →
Display settings → Brightness
BSelect the setting and press c (Save)
BUse a to adjust brightness and
press c (Save)
Tip
• Effective Range
Zoom list applies only to items in sub-sub menus or lower.
For example, select Settings → Call settings → Voice call
→ Diverts. Voice call items appear zoomed.
Backlight Duration
Default Setting
■
On: 15 seconds
■
Dim: 5 seconds
Set backlight time. Display becomes dimmer when time set
in On elapses and turns off when time set in Dim elapses.
APress c and select Settings →
Display settings → Backlight time
BSelect an item and make settings
8-7
Display Settings
APress c and select Settings →
Display settings → Zoom list
8
To set the time to light brightly
aSelect On field
bSelect the time to set and press c
To set the time till Display goes off
aSelect Dim field
bSelect the time to set and press c
CPress w (Save)
Sub LCD Light
Display Settings
8
Default Setting
■
Power saving mode
Tip
• The contents of Sub LCD light are:
On: Turn on for 3 seconds after closing 707SC, then the
bottom part of Sub LCD turns off.
Power saving mode: Turn on for 3 seconds after closing
707SC, then turns off.
Off: Always off.
Sub LCD always turns off while 707SC is opened.
Dialing Display
Default Setting
■
Font type: Quill pen
APress c and select Settings →
Display settings → Sub LCD light
Appears when dialing in Standby. When character type is
BSelect the setting and press c (Save)
APress c and select Settings →
Display settings → Dialling display
8-8
set to Normal or Serif, select font size, color and
background color.
BSelect an item and make settings
To set font type
aSelect Font type
bUse s to switch font type
Greeting Messages
Default Setting
■
■
Main LCD: No entry
Sub LCD: No entry
To set the font size
Change power on message for Display.
aSelect Font size
aSelect Font colour
APress c and select Settings →
Display settings → Greeting message
→ Main LCD or Sub LCD
bUse s to select the setting
BEdit power on message text
bUse s to select the size
To set font color
To set background color
Display Settings
aSelect Background colour
8
cUse u to move cursor to Color selection field
and use s to select a color (For Monochrome
only)
bUse s to select the color
CPress c (Save)
8-9
Display Language
Default Setting
■
日本語 (Japanese)
Set 707SC user interface to appear in English, Japanese, or
Korean.
APress c and select 設定 → 一般設定
→ Language or 言語選択
Display Settings
BSelect English and press c (保存/
Save/
)
8
8-10
Sound Settings
Changing Profile Settings
9
cHighlight a melody, select Options → Play
dPress o (Select)
Sound Settings
Change 707SC incoming transmission response by profile.
ePress w (Save)
In Car Profile, select Call answer mode.
To set S! Mail/SMS ringtone
AIn Standby, press * for 1+
seconds
aSelect Ringtone and Messages
BHighlight a profile and press w
(Edit)
To set Ringtone volume
aSelect Ringtone volume and select item to set
bUse s to adjust volume
cPress w (Play) to confirm volume and press
c
dPress w (Save)
To set Voice/Video Call ringtone
aSelect Ringtone and Voice call or Video call
bSelect the save location for files
9-2
bSelect setting
cPress w (Play) to confirm ringtone and press
c
dPress w (Save)
To set vibration
aSelect Vibration and select items
bSelect setting and press c (Save)
To set S! Mail/SMS ring duration
aSelect Message ringtone duration
bEnter duration and press c
To set sound effect or key tone volume
aSelect Key tone volume
bUse s to adjust volume and press c (Save)
To set Phone sounds
aSelect Phone sounds
bCheck items to set and press w (Save)
aSelect Key tones
bSelect setting and press c (Save)
To set Car Profile answering method
aSelect Call answer mode
bSelect setting and press c (Save)
• Ringtone volume
Select
for step-up ringer.
9
• Acoustic shock
Reduces ringer volume to Level 1 for the first two seconds.
• Car Profile Call answer mode
If Any key is set, press any key except w , o , y , or
Side Key n or b.
• To set Car Profile auto answer time
After b in "To set" in Step 2, select Automatic and press
w (Edit); edit answer time and press c.
• To Voice recorder recording as ringtone
After b in "To set ringtone" in Step 2, select amr file.
• To adjust the volume while 707SC rings
Press Side Key n or b while 707SC rings.
• To turn ringer and vibration off
Mute Ringtone volume and set Vibration Off; mute
indicator ( ) appears.
9-3
Sound Settings
To set key tone
Tip
9
Sound Settings
• To change ringtone title for S! Mail/SMS
a After b in "To set ringtone for S! Mail/SMS" in Step 2,
highlight Data Folder and press o (Change)
b Select location to save the file
c Highlight the file, select Options → Play
d Press o (Select)
e Press w (Save)
• To adjust key tone volume
In Standby, press Side Key n or b.
Sound settings
Change Normal Profile sound settings here.
9-4
Profile settings
Available items vary by Profile. Defaults are as listed below.
Profile
Normal
Manner
Car
9
Outdoor
Sound Settings
Item
−: Setting deactivated
Meeting
Ringtone volume
Voice call
Level 4
−
Level 4
Off
Level 5
Video call
Level 4
−
Level 4
Off
Level 5
Messages
Level 4
−
Level 4
Off
Level 5
Voice call
03 acapella.mmf
−
03 acapella.mmf
03 acapella.mmf
03 acapella.mmf
Video call
Techno Dance.mp4
−
Techno Dance.mp4 Techno Dance.mp4 Techno Dance.mp4
Messages
Pure
−
Pure
Ringtone
Pure
Pure
Vibration
Voice call
On
On
On
On
On
Video call
On
On
On
On
On
Messages
On
On
On
On
On
9-5
Item
9
Profile
Normal
Manner
Car
Meeting
Outdoor
Ringtone duration
Sound Settings
Messages
Key tone volume
Level 2
Phone sounds
Several tones On
Key tones
Xylophone
Call answer mode
Answer machine
9-6
5 Seconds
5 Seconds
5 Seconds
Level 4
Off
Level 5
Several tones On
Alerts on call
Several tones On
−
Xylophone
Xylophone
Xylophone
−
Normal
−
−
−
−
−
Alerts on call
−
−
5 Seconds
−
On
−
Phone Sounds
Available items vary by Profile. Volume Level set in Key Tone
Volume applies to all Phone Sounds.
Description
All
Check/uncheck all items.
Popup box alerts
Sounds for confirmations/warnings.
Minute minder
Sounds about once a minute during
calls.
Call connect tone
Sounds when calls connect before
called phone rings.
Call end tone
Sounds when a call ends.
Power on
Sounds when power turns on.
Sound Settings
Item
9
Open/close folder Sounds when 707SC is opened/closed.
Alerts on call
Sounds for alarms/incoming
transmissions.
9-7
9-8
Media Player
Before Using Media Player
Play Data Folder sound/video files or stream online media.
10
• From Music or Video menu, select Download music or
Download videos, to download files via Yahoo! Keitai.
Media Player
• Use Stereo Earphone Microphone. Insert as shown
below. Unplug Stereo Earphone Microphone to use
Speaker.
Left (L)
Stereo Earphone
Microphone
Connector
10-2
• Use Stereo Earphone Microphone to accept Voice Calls.
When 707SC rings/vibrates, press switch for 1+ seconds
to answer the call.
Playable File Formats
Player
File (Extension)
Music
MPEG4 Audio (mp4, aac, 3gp (Sound only))
Video
MPEG4 (mp4, 3gp)
Tip
Right (R)
• Other Playback Conditions
Media Player will only play files described above saved in
Sounds & Ringtones in Data Folder; select directly from Data
Folder.
Playing Music
APress c and select Media Player →
Music
CPress c (Play)
Natsu Aida−Evening Waltz
b
c
d
e
f
g
h
i
To select from All music
To select from Recent music
Select Recent music and highlight the file
10
Media Player
BSelect files
Select All music and highlight the file
a
Melody Player Window
a Artist's name and title (File name when title is
unknown)
To select from Most played music
b Skin
Select Most played music and highlight the file
c Status : PLAY, PAUSE, STOP
To playback using Playlist ( P.10-7)
d Repeat mode
(Off),
(One),
(Shuffle),
e File number/Total number of files
(All)
f Playing volume
g Total playing time
h Elapsed playing time
i Progress bar
10-3
Tip
• To end playback and return to Options
Press C. In Options, press C to return to the
previous menu or close Options menu.
10
Media Player
• Incoming calls
Playback pauses and 707SC rings; after call ends playback
remains paused.
• Incoming messages
or
appears and 707SC vibrates.
• Alarm times
Playback pauses, Alarm sounds and details appear. Press any
key to cancel alarm and resume playback; press another key
to reopen Media Player window.
• Saving files as Ringtone
Highlight a file in list or from pause or stop, press w (Set
as) and select a function. Only valid files can be saved.
• Using other functions
Use Switch Bar ( P.1-22).
All music
Lists all playable files (up to 9999 files).
10-4
Download music
Shortcut to download site.
Music search
Shortcut to Music search. site; search by genre or keyword.
Recent music/Most played music
Most recently played file appears first in Recent music. Most
frequently played file appears first in Most played music. Each
list holds up to 100 records.
Player Window & List Options
Available items vary by file type, etc.
Item
Description
Item
Details
Description
Confirm file size, etc.
End playback.
Send
Play via
Add
Add files to Playlist. Select Playlist to
add all files contained in another
Playlist. Select Files to add selected
files to Playlist.
In Player window, select Headphone
or Speaker ( P.12-7) for sound
output.
Transfer to A/V
Select Headphone or Speaker
headset/Transfer to
( P.12-7) as sound output source.
Phone
Move track in
playlist
Change order of files in Playlist.
View bookmark
Access a page containing a streaming
play link saved as a bookmark.
Create playlist
Create new Playlist ( P.10-6).
Rename
Change Playlist name.
Access a page containing a streaming
play link already accessed.
Open playlist
Open Playlist.
Player settings
Add to playlist
Files in All music are added to Play
List. Choose Selected file to add
highlighted file, or Multiple file to
add multiple files to Playlist.
Adjust Media Player settings
( P.10-7).
Play by
Play tracks by album, artist or genre.
Delete
Delete a highlighted file or all files.
Rename
Change file name.
Lock/Unlock
Set/release file protection.
View history
Download content
key
Purchase or acquire Content Key.
10-5
10
Media Player
Stop
Send file via S! Mail ( P.17-6) or
Bluetooth® ( P.12-6).
Tip
• When Transfer to A/V headset is set
Raise/lower volume from A/V headset.
10
Media Player
Create Playlist
Playing Files from Playlists
Create up to 20 Playlists, containing up to 100 files each.
APress c and select Media Player →
Music
BSelect Options → Create playlist
CEnter Playlist name
DSelect the created Playlist
ESelect Options → Add → Files
FCheck files to save and press
w (Save)
10-6
Tip
• To create a Playlist from tracks in an existing one:
a Perform Steps 1 to 3
b Options → Add → Playlist
c Select Playlist from which to add all melodies
• To change Playlist name
a Highlight Playlist, select Options → Rename
b Enter Playlist name
• To delete selected Playlist
Options → Delete → Selected → Yes
• To delete all Playlists
a Highlight Playlist, select Options → Delete → All
b Enter Phone Password and press c (Confirm)
c Select Yes
Play
APress c and select Media Player →
Music
Changing Music Player
Settings
Repeat Mode
Default Setting
■
OFF
Play a single track repeatedly, all files in All music, or
tracks from Playlist, randomly or repeatedly.
APress c and select Media Player →
Music
CSelect an item and press c (Save)
Tone Volume
APress c and select Media Player →
Music
BSelect Options → Player settings →
Tone volume
CUse a to adjust the volume and
press c (Save)
Audio Skin
Default Setting
■
Rainbow wave
Set one of two images to appear on Display while music
plays.
10-7
10
Media Player
BSelect Playlist to play, select Options
→ Play
BSelect Options → Player settings →
Repeat mode
10
APress c and select Media Player →
Music
BSelect Options → Player settings →
Visualization → Visualization mode
BSelect Options → Player settings →
Audio Skin
CSelect the setting and press c (Save)
Media Player
CSelect the setting and press c (Save)
Skin, Show Controller, & Backlight
Default Setting
Skin: Flowers
Show controller: Show
■ Backlight: Normal
■
■
Visualization Mode
Visualization On/Off
Select one of ten skins to appear while music plays. Set
Show controller to Hide for full screen view. Set Backlight
Default Setting
■
On
Activate or cancel this setting to apply or cancel Skin,
Controller and Backlight settings while playing MPEG4
AAC or AAC+ files.
APress c and select Media Player →
Music
to Always on to see skin with handset open.
APress c and select Media Player →
Music
BSelect Options → Player settings →
Visualization → Skin, Show controller,
or Backlight
CSelect the setting and press c (Save)
10-8
Playing Video
APress c and select Media Player →
Video
CPress c (Play)
Natsu Movie−1
From All Video
Select All Video and highlight the file
From Recent video
Select Recent video and highlight the file
From Most Played video
Select Most Played video and highlight the file
From Playlist ( P.10-7)
10
f
g
Video Player Window
a Artist's name and title (File name when the video title
information is unknown)
b Playing status : PLAY/PAUSE/STOP
c Progress bar
d File no./Total number of files
e Playing volume level
f Total playing time
g Elapsed playing time
10-9
Media Player
BSelect files
a
b
c
d
e
Tip
10
• To set video file as Ringtone
Highlight paused file or one from list and press w (Set as).
Set file as Ringtone ( P.11-11). Valid only for compatible
files.
Player Window & List Options
Select Options in Player window or list and perform
operations listed below. Available items vary by file type, etc.
Item
Description
Media Player
Full screen view
Play video in full screen view.
Add
Add files to Playlist. Select Playlist to
add all files contained in another
Playlist. Select individual files to add to
Playlist.
All (up to 9999) playable files appear.
Move track in
playlist
Change order of files in Playlist.
Download videos
Stop
End video playback.
Shortcut to download site.
Edit
Edit video files ( P.7-17).
• Playlist
a After Step 1, select Options → Create playlist
b Perform Steps 2 to 5 in "Create Playlist" ( P.10-6)
All Video
Recent video/Most Played video
Most recently played file appears first in Recent video. Most
frequently played file appears first in Most Played Video. Each
list holds up to 100 records.
10-10
Resolution
Set video display size.
Send
Send file via S! Mail ( P.17-6) or
Bluetooth® ( P.12-6).
View bookmark
Access a page containing a streaming
link saved as a bookmark.
View history
Access a page containing a streaming
link already accessed.
Item
Description
Player Settings
Add a file to Playlist in All Video.
Select Selected file to add highlighted
file to Playlist.
Select Multiple file to add multiple
files.
Default Setting
Delete
Delete a highlighted file or all files.
Play a file repeatedly or files in a folder randomly/
Rename
Change file name.
repeatedly.
Lock/Unlock
Set/release file protection.
Details
Confirm file size, etc.
Play via
In Player window, select Headphone or
Speaker ( P.12-7) for sound output.
APress c and select Media Player →
Video
Transfer to A/V
headset/Transfer
to Phone
Select Headphone or Speaker ( P.12-7)
as sound output source.
Create Playlist
Create new Playlist ( P.10-6).
Rename
Change Playlist name.
Player settings
Adjust Media Player settings
( P.10-11).
Add to playlist
Repeat Mode
■
10
BHighlight a file and press c (Play)
CSelect Options → Player settings →
Repeat mode
DSelect the setting and press c (Save)
10-11
Media Player
Off
Tone Volume
10
APress c and select Media player →
Video
Media Player
BHighlight a file and press c (Play)
CSelect Options → Player settings →
Tone volume
DUse a to adjust the volume and
press c (Save)
10-12
Resolution
Adjust video size during playback or while paused.
APress c and select Media Player →
Video
BHighlight a file and press c (Play)
CSelect Options → Resolution and
select a size
Managing Files
(Data Folder)
Data Folder
Folder
707SC files are organized in folders by file format.
Default Folders
11
Data Folder contains six default folders; new files are
Managing Files (Data Folder)
saved to the appropriate folder (see right). Create
additional sub-folders in Default folders as required.
Default Folders
Data Folder
Pictures※
Videos
Sounds & Ringtones※
S! Appli
Book
Other documents※
Memory status
※Sub-folder Pre-installed
(For files which come preinstalled with handset).
Description
Pictures
All still images
Videos
All videos
All sounds recorded
Sounds & with Voice Recorder,
downloaded music,
Ringtones
and other sound files
File Formats1
JPEG, BMP, GIF, WBMP,
PNG, Animation GIF
MPEG4 (3GP, MP4)
SMAF/MIDI/SP-MIDI,
MPEG4 Audio,
AMR
S! Appli
S! Appli
JAVA
Book
Save downloaded
electronic comic/
photo book files
CCF
Other
documents
Documents, graphics/
SWF, SVG,
vCard,
animation requiring
vCalendar,
PDF,
File Viewer for
XLS,
DOC,
display; Flash® files,
PPT,
TXT,
vFiles, etc. are saved
Unsupported files
here
1 Copy or move sorted files to other folders as required.
11-2
Tip
• Savable number of files/folders
Up to 999 files/folders can be saved each Default Folder.
Memory status
Download links
appears in Data Folder for download site shortcut. Select
shortcut to connect to the download site.
Download Book feature
In Data Folder, Use Download Book in Book Folder as a
download site shortcut. Select it to open the site.
Opening Files
APress c and select Data Folder
BSelect the folder where a file is saved
11
CHighlight a file and press c (View/
Play/Select)
Managing Files (Data Folder)
Select to view memory usage of each Data Folder.
Alternatively, use setup menu to view memory status
( P15-8).
Saved Files
Tip
• To use Slide Show
a Perform Steps 1 to 3 to display images
b Options → Slide show
• To enlarge or reduce image
a Perform Steps 1 to 3 to display an image
b Options → Zoom
c Press w ( ), o ( ), or a to enlarge, reduce, or
scroll the image
d Press C to return to the previous window
11-3
• After enlarging/reducing image
After b in "To enlarge or reduce image," press o ( ) to
open list window.
Press o ( ) to change window view; select another file.
11
Managing Files (Data Folder)
• File List Indicators
: Nontransferable
: Nontransferable & unusable
: Encrypted
: Copy Protected file (Transferable, Content Key valid)
: Copy Protected file (Transferable, Content Key expired)
: Copy Protected file (Nontransferable, Content Key valid)
: Copy Protected file (Nontransferable, Content Key
expired)
: Set as Wallpaper ( P.11-10)
: Set as Ringtone ( P.11-11)
• When another USIM Card is inserted into 707SC
Only preinstalled nontransferable/copy protected files are
usable.
• To show image in Full screen view
After Step 3, select Options → Full screen view. For
partial image, use a to change display area. Press o
(Rotate) to rotate the image. Press C to return to
previous view.
• To view File Details
Options → Details
11-4
Note
• Files over 3 MB cannot be opened. Files larger than
1600 x 1200 pixels cannot be edited or zoomed.
Files over 1.3 MB cannot be set as Incoming image
or Substitute Image.
Activating Camera or Voice Recorder from Data
Folder
Select Options → Take photo; activate Camera in Camera
mode by highlighting the Pictures folder or an image file
captured by 707SC.
Select Options → Record video; activate Camera in Video
mode by highlighting the Videos folder or a video captured by
707SC.
Select Options → Record sound; activate Voice Recorder by
highlighting the Sounds & Ringtones folder or sound file
captured by 707SC.
Using File Viewer
Open PDF, XLS, DOC, PPT, or TXT files saved in Data Folder;
File Viewer activates automatically. Select Normal View or
Full Screen View; navigate files via Options or shortcuts.
CSelect Options/navigation shortcuts to
navigate
To scroll
Press a
To change Display appearance
Options → Full screen view or Normal view
11
To enlarge or reduce the image
Managing Files (Data Folder)
Navigation
Shortcuts
aOptions → Zoom
bPress In or Out to enlarge/reduce
Normal View
Full Screen View
To fit document size to Display
APress c and select Data Folder
Options → Fit to screen
BSelect file location then file
Options → Go to and select an item
To move a page
To move to specified page
aOptions → Go to → Page
bEnter page number
To capture current screen image
Select Screen capture
11-5
To rotate image 90 degrees clockwise
File Viewer Settings
aOptions → Rotate
bOptions → Rotate to return to the previous
window
To search words in the page
11
aOptions → Search
Managing Files (Data Folder)
cPress 3 to continue searching forward or
bEnter words
press 1 to continue searching backward, for
the same word
Default Setting
Panning: 10 pixel ■ Reflow: Off
Map on: On ■ Controller: On
■ Name: Capture
■
■
APress c and select Data Folder
BSelect save location and select the file
CSelect Options → Settings
DPerform operations to set
To view assigned shortcut keys
To assign scroll range per press of a
Options → FileViewer shortcuts
aSelect Panning
bSelect the setting and press c (Save)
Tip
• After capturing
Captured files are saved in Other documents in 707SC
Data Folder (Phone) as JPEG format.
11-6
To fit text width to Display
aSelect Reflow
bSelect On and press c (Save)
To set Map (shows display position) on/off
Navigation Shortcuts
aSelect Map on
Key
Description
bSelect a setting and press c (Save)
Side Key n
Zoom in
To set guide for shortcuts in Full screen view
Side Key b
Zoom out
aOptions → Settings → Controller
bSelect a setting and press c (Save)
aSelect Name
bEnter a name
Tip
• When Reflow is On
Fit text width (such as doc. or txt.) to 707SC window width.
No need to scroll right/left to show the contents.
• When Map on is On
In bottom right of the window, map showing the current
position/area in the whole page appears. The current
position/area is indicated in red frame.
Move to the first page
4
5
Move to the previous page
6
8
Move to the next page
*
Select Normal View or Full Screen View
Rotate 90 degrees clockwise or cancel
Move to the final page
Confirmation Window & List Options
For items other than window operation options, see "Data
Folder Options" ( P.11-13).
Note
• If a document includes many pages or complicated
designs, all pages of the document may not appear
properly.
• If a file includes any language other than Japanese
or English, that file may not appear properly.
11-7
11
Managing Files (Data Folder)
To change default file mane
2
Viewing Graphics/Animation with
the SVG-T/Flash® Viewer
View SVG, SVGZ, and SWF formatted files in Data Folder.
When one of these files is selected from Data Folder list,
11
CSelect Options/navigation shortcuts to
navigate
To change Display appearance
Options → Full screen view or Normal view
Managing Files (Data Folder)
the SVG-T/Flash® Viewer is automatically launched.
To enlarge or reduce the image
View the graphics/animation on Normal View or Full
bPress w (
Screen View. In either mode, Options and shortcut (Key
operations) are available to control Display.
aOptions → Zoom
) to enlarge an image or o (
to reduce
cUse a to scroll the window
dPress c to return to the previous window
To pause or restart an flash® image
Options → Pause or Resume
To select image quality
Normal View
Options → Quality and select an item
Full Screen View
APress c and select Data Folder
BSelect file location then file
11-8
To rotate the screen 90 degrees clockwise or
counterclockwise
Options → Rotate and select an item
)
Tip
• To set an image for Wallpaper
Press w (Set as) on Normal View, or in Options of Full
Screen View, select Set as and select Wallpaper.
Confirmation Window & List Options
Sorting Files
Sort files in various ways.
ASelect Options → Sort by
BSelect an item
To sort files in descending order of dates
Select Date
To sort files by file types
Select Size
To sort files by status of Content Key
Select Activation Status
Tip
11
• When folders are listed
Folders appear at the top of list.
• When sorted by Type
Files appear in alphabetical order by file extension (e.g., doc,
jpg, swf, and such).
• When sorted by Name
Files appear by file name: numbers → alphanumerics →
Japanese syllabary
• When sorted by Activation status
Files appear as follows:
Unrestricted → Nontransferable → Copy Protected (Content
Key valid) → Copy Protected (Content Key expired) →
Invalid Nontransferable
Select Type
To sort files by file names
Select Name
11-9
Managing Files (Data Folder)
For items other than window operation options, see "Data
Folder Options" ( P.11-13).
To sort files in ascending order of size
Using Files
Wallpaper
To set as Phonebook image for use with an
incoming call
aSelect Caller ID
bSearch and select an entry in which to place the
image and press c (Set)
Set an image file as Wallpaper of Display, an image in
11
Managing Files (Data Folder)
Phonebook, or a Substitute Image for Video Calls to
To set as Substitute Image for use with an
display with incoming calls.
incoming Video Call
AHighlight a file and press w (Set as)
aSelect Still picture
To set while viewing an image
Highlight a file, press c (View) and press
w (Set as)
BSet the Use of the File
To set as Wallpaper on Display
Select Wallpaper, confirm the preview and press
c (Set)
11-10
bPress c (Save)
Tip
• To edit a still image ( P.7-15)
• To create a mobile postcard ( P.7-7)
• To print a still image ( P.12-12)
Setting Sound File as Ringtone
Change ringtone settings in Normal profile ( P.3-3).
APress c, select Data Folder and
select location to save the file
CSet ringtone
To set ringtone for Voice Calls
Select Voice ringtone
• Player Restrictions
Only copy protected MPEG4 AAC, AAC+, or Enhanced AAC+
files are playable.
Setting Video File as Ringtone
Change ringtone settings in Normal profile ( P.3-3).
APress c, select Data Folder and
select location to save the file
To set ringtone for Video Calls
BHighlight the file and press w (Set as)
Select Video ringtone
CSet ringtone
To set ringtone for Phonebook entries
To set video file as ringtone for Voice Call
aSelect Caller ringtone
Select Voice ringtone
bSearch Phonebook and select an entry
To set ringtone for S! Mail/SMS
Select Message alert tone
To set video file as ringtone for Video Call
Select Video ringtone
To set ringtone for Phonebook entries
Select Caller ringtone
11-11
11
Managing Files (Data Folder)
BHighlight the file and press w (Set as)
Tip
Tip
Saving a vFile
• Restrictions
Only copy protected MPEG4 (mp4, 3gp) AAC, AAC+, or
Enhanced AAC+ files can be set.
vFile is the standard format to exchange Phonebook data,
etc. via the Internet. 707SC uses vCard (extension: vcf)
format for Phonebook data; also uses vCalendar
11
Setting
Flash®
file as Wallpaper
Managing Files (Data Folder)
APress c and select Data Folder →
Other documents
To set while viewing a Flash® image
Highlight the file, press c (View) and press
w (Set as)
BHighlight the file, press w (Set as)
CSelect Wallpaper
DCheck preview window and press
c (Set)
11-12
(extension: vcs) format for Schedule/To Do data.
Save a vFile stored in Data Folder to Phonebook, calendar,
or as a scheduled event.
APress c, select Data Folder and
select save location for the vFile
BSelect a file and press c (Register)
Item
Data Folder Options
Description
Options vary by file or folder.
Register to
Calendar
Export a vCalendar file to Calendar
( P.11-12).
For File Viewer or SVG-T/Flash® Viewer Options, see
Send
Send file via S! Mail ( P.17-6) or
Bluetooth® ( P.12-6).
mPostcard
Create a mobile postcard ( P.7-7).
Zoom
Enlarge or reduce still image being
confirmed ( P.11-3).
Browser access
Access linked site included in electronic
comic/photo book files.
"Using File Viewer" ( P.11-5) or "Viewing a Graphics/
Animation with the SVG-T/Flash® Viewer" ( P.11-8).
Edit
Description
Edit a still image or Videos ( P.7-15).
Create Flash® images
Dynamic Effect/
Dynamic effect list ( P.7-19).
using Still images
Full screen view
Display Still image in full screen ( P.11-5).
Playback
Playback video files.
When playback display, select Phone to
sound from speaker.
Select A/V headset to sound from
Bluetooth®-compatible devices (stereo
headphone, etc.) ( P.12-7).
11
Sort by
Sort files ( P.11-9).
Move
Move files from/to 707SC another folder.
Copy
Copy files and paste from/to 707SC
another folder.
Add to playlist
Add files to Playlist.
Highlight Selected and select to add a file.
Highlight Multiple and select to add
multiple files at once.
Transfer to A/V
headset
Switch sound output to Bluetooth®compatible devices (stereo headphone, etc.)
( P.12-7).
Delete
Delete a file/files ( P.11-17).
Delete folder
Delete a folder ( P.11-17).
Register to
phonebook
Export a vCard file to Phonebook
( P.11-12).
Take photo
Activate Camera in Camera mode
( P.11-4).
11-13
Managing Files (Data Folder)
Item
Item
11
Description
Managing Files/Folders
Managing Files (Data Folder)
Record video
Activate Camera in Video mode ( P.11-4).
Record sound
Activate Voice Recorder ( P.11-4).
Rename
Change file name ( P.11-14).
Rename folder
Change folder name ( P.11-14).
Create sub-folders in Default folders.
Show/Hide file
info
In List window for Picture Folder with
thumbnail view, set to display folder/file
name when highlighted.
APress c and select Data Folder
View By
Select List window type for Picture Folder.
Select List to show folder/file in list view.
Select Thumbnail view to show folder/file
in thumbnail view.
Create Folder
BSelect Default folder to create a
sub-folder
CSelect Options → Create folder
Create folder
Create a new folder ( P.11-14).
Print via
Print Still images using the printer via USB/
Bluetooth® connection.
Lock/Unlock
Set/release file protection.
Download
content key
Purchase or acquire Content Key.
Details
Confirm file/folder properties.
Change the name of a file or a created sub-folder.
APress c and select Data Folder
Content key info
Show the list of Content Keys for the files in
Data Folder; manage them by selecting
Delete to delete ( P.11-18) or Details to
check the details.
11-14
DEnter a name
Changing a File Name/Folder
Name
BSelect Default folder and highlight a
sub-folder or a file
CSelect Options → Rename folder or
Rename
DEnter a name
• When a file is locked
You cannot change the file name.
Moving a File/Folder
Move a file/folder to another folder or a location outside
DMove file or folder
To move one file or all files in the same folder
or all created sub-folders
Select Selected or All
To select and move multiple files or created
sub-folders
aSelect Multiple
bCheck files or created sub-folders to move and
press w (Move)
ESelect the destination folder → Move
here
folders.
APress c and select Data Folder
BSelect Default folder and highlight a
sub-folder or a file
Tip
• To check/uncheck all files or folders at once
Press o (Mark all) or o (Unmark all)
• When a file is locked
File cannot to be moved.
11-15
11
Managing Files (Data Folder)
Tip
CSelect Options → Move
• When target file/folder with the same name exists
Change file/folder name; enter new name in message text.
CCopy file or folder
To copy one file or all files in the same folder
or all folders
Note
11
• Downloaded files may not appear/play properly if
moved to another device or when a different USIM
Card is inserted in 707SC.
Select Selected or All
To select and copy multiple files or folders
aSelect Multiple
Managing Files (Data Folder)
bCheck files or folders to copy and press
w (Copy)
Copying Files/Folders
Make a copy of a file or folder in another folder or a
location outside folders.
APress c and select Data Folder
BHighlight a folder or a file, select
Options → Copy
DSelect destination folder and select
Paste here
Tip
• To check/uncheck all files or folders at once
( P.11-15)
• When a copy of a file or folder is pasted to the same
location as the original
The pasted file or folder is saved under another name, i.e.,
_001 is automatically added to the name.
• When target file/folder with the same name exists
Change file/folder name; enter new name in message text.
11-16
To select and delete multiple files
Note
• Nontransferable/copy protected files cannot be
copied.
Deleting a File/Folder
aSelect Multiple
bCheck files, press w (Delete)
cEnter Phone Password and press c (Confirm) (If
all files are checked)
dSelect Yes
11
Delete
BHighlight a file, select Options →
Delete
CDelete the file
To delete one file
Select Selected → Yes
Tip
• To check/uncheck files or folders at once ( P.11-15)
• If a file is set as Wallpaper or ringtone, or locked
Confirmation appears; select Yes to delete file. When
deleting multiple files, select No to delete unset/unprotected
files only.
• When file has Content Key
Confirmation appears; select Yes to delete file and Content
Key.
To delete all files from the same folder
aSelect All
bEnter Phone Password press c (Confirm) and
select Yes
11-17
Managing Files (Data Folder)
APress c and select Data Folder
Delete Folder
APress c and select Data Folder
BSelect Default folder and highlight a
11
created sub-folder to delete, select
Options → Delete folder
Managing Files (Data Folder)
CEnter Phone Password, press
c (Confirm) and select Yes
If no file saved in a sub-folder
Phone Password is not required.
Tip
• If a folder contains files set as Wallpaper, ringtones,
or locked/copy protected files
A confirmation message appears. Select Yes to execute
folder deletion. Select No to delete only files without
designated uses or protection, leaving the folder undeleted.
• When file in a folder has Content Key
A confirmation message appears. Select Yes to delete both
the file and Content Key.
11-18
Deleting a Content Key
APress c and select Data Folder
BSelect Options → Contents key info
CPerform operations to delete
To delete a Content Key
Select Selected
To delete all Content Keys
Select Delete all
External Connections
Before Using Bluetooth®
External Connections
Exchange files wirelessly with Bluetooth®-compatible
Bluetooth® transmissions require Bluetooth®-compatible
devices, or connect to PCs or printers via USB cable.
devices with the same profiles.
707SC Bluetooth® specifications:
Bluetooth®
Item
®
Exchange files wirelessly with Bluetooth devices or use a
®
12
Bluetooth handsfree device for calls. Use Bluetooth to
External Connections
®
connect PCs and other devices for Internet access, etc.
12-2
Specification
Communication
Standard
Bluetooth® Standard Version 1.2
Applicable
profiles
Headset
Handsfree
Serial Port
Dialup Networking
File Transfer
Object Push
Advanced Audio Distribute
Audio/Video Remote Control
Basic Imaging
Basic Printing1
Output
Bluetooth® Power Class2
Line-of-signal
distance2
Approximately 10 meters or less
Item
Frequency band
used
Specification
2.4 GHz
1 For Printing function only.
2 Varies by radio interference and other conditions.
Bluetooth® Precautions
• 707SC may not work with all Bluetooth® devices.
Tip
• To check Bluetooth® functions available
a Press c and select Settings → Connectivity →
Bluetooth → Bluetooth service
b Select an item and view the contents
• To confirm the device address of 707SC
Press c and select Settings → Connectivity →
Bluetooth → My Information
12
External Connections
• File transfers may not possible with some Bluetooth®
devices. Operations, displays or actions vary by device.
• The 2.4GHz band used by Bluetooth® devices is used by
other devices that may reduce transmission rates/
distance.
• Use of handsfree devices may create noise depending on
connected devices/the environment.
• 707SC does not support multiple Bluetooth®
connections.
• USB and Bluetooth® cannot be used at the same time.
• Cancel Bluetooth® before connecting USB cable.
12-3
Sending & Receiving Files
Send and receive Phonebook entries, My Phonebook
details, Schedule information, Task information, still
images, video, sound files, vFiles, and others.
Activation
12
Default Setting
■
Off
External Connections
Activating Bluetooth® makes 707SC visible to other
devices;
appears at the top of Display.
APress c and select Settings →
Connectivity → Bluetooth →
Activation
BSelect the setting
Search New Device
Save up to 10 devices to My devices list. Enter the same
Passkey on both 707SC and the device.
Activate Bluetooth® on device beforehand.
APress c and select Settings →
Connectivity → Bluetooth → My
devices
BSelect Search new device
CWhen devices appear, select device to
save
DEnter 4-16 digit passkey and
press c
EWithin 30 seconds, enter the same
passkey on the other device
12-4
Tip
• Passkey
The Passkey is a password used to connect Bluetooth®compatible devices. When connecting to a handsfree device,
enter the Passkey specified for it. You are not required to
enter the Passkey again for a registered device.
• If authentication with the other device has failed
A confirmation appears; select Yes to retry.
• To delete a device from My devices
a Press c and select Settings → Connectivity →
Bluetooth → My devices
b Highlight a device, select Options → Delete →
Selected or All
c Enter Phone Password, press c (Confirm) (In the case
of All only) and select Yes
• To search for or register a device from other
Bluetooth®-compatible devices ( P.12-10)
12
External Connections
• If ten devices have already been registered
A message indicating the device memory is full appears.
• To check Bluetooth® functions available for each
device
a Press c and select Settings → Connectivity →
Bluetooth → My devices
b Highlight a device, select Options → Service list
c Highlight an item, select Options → Help and view the
contents
• To change the name of a registered device
a Press c and select Settings → Connectivity →
Bluetooth → My devices
b Highlight a device, select Options → Rename
c Enter a new name
12-5
My devices list Indicators
To send files from other functions (except
Device name is preceded by one of these indicators:
: Personal Computer
: Mobile phone
: Handsfree device/Headset
: PDA
: Printer
: Other
Data Folder)
When a connection request appears
12
If connection request appears, select Yes and enter valid
Passkey within 30 seconds.
Connection requests from saved devices are connected
automatically.
External Connections
Sending Files
Send via function Options menu. Transfer begins as soon
as receiving device accepts it and 707SC goes offline.
ASelect file to send
To send files from Data Folder
aHighlight the data to send
bIn list window, select Options → Send → Via
bluetooth
12-6
aIn list window, highlight the data to send
bOptions → Send → Via bluetooth
BSelect receiving device
If receiving device has not been set
Select Service new device, search for that device
and set it ( P.12-4)
Tip
• Sending from Details or Playback windows
Some functions allow sending option from Details/Playback
window.
Receiving a File
CSelect receiver's device
When connection from the sender is approved, file
To save device
reception starts and the received file is saved in Data
Select Search new device and save device
Folder.
( P.12-4)
AWhen confirmation window appears,
select Yes
A/V Headset
APlay files via Media Player ( P.10-3,
10-9)
BSelect Options → Transfer to A/V
headset
Print Data Folder Image Files
Connect Bluetooth®-compatible printer to 707SC; print
Still images/vFiles in Data Folder directly. Set paper size/
number on 707SC.
See printer User Guide for printer operations/settings.
12-7
12
External Connections
Connect Bluetooth®-compatible headphones.
Tip
• While Melody is stopped
a In Melody Playback window, select Options → Play via
→ A/V headset
b Select the destination device or Search new device and
search the device to register ( P.12-4)
AIn Data Folder list window, highlight
still image/vFile
BSelect Options → Print via →
Bluetooth
CSelect receiver's device
To register receiver's device
12
Select Search new device to search and register
External Connections
( P.12-4)
DPerform operations to set
To set a paper size
Select Date print and the setting
To set whether or not to print a frame
Select Frame and the setting
To set a print quality
Select Print quality and the setting
EPress o (Preview)
FCheck the preview window and press
c (Print)
Accessing Connected Device Files
Select Paper size and the setting
Access the shared folders and files of the other party's
To set the number of copies
device. Alternatively, receive or delete data residing on the
Select Number of copies, enter the number of
other device.
copies (1 to 99) and press c
APress c and select Settings →
Connectivity → Bluetooth → My
devices
To set the number of pages to print on a sheet
Select Paper per sheet and the setting (1 to 16)
12-8
To set whether or not to print the date
BSelect a device
Waiting Connection Request
CApprove access on source device
In the steps given below, 707SC is placed in mode waiting
for a handsfree-device connection request.
Tip
• To receive an accessed file
After Step 3, select a file to receive.
Locations of received files
Connecting Handsfree
Save a handsfree device following the steps for "Search
New Device" ( P.12-4) beforehand.
BSelect a handsfree-compatible device
When Passkey entry window appears
Enter the same Passkey as is set for the handsfree
device
Answering Mode
Default Setting
■
Normal
If the setting is changed to Automatic a call to 707SC will
be answered without the operation of any keys.
12-9
12
External Connections
Received files are automatically saved to Data Folder. The type
of the folder that a file is saved to vary by file format; for
example, JPEG and BMP files are saved to the Pictures folder
and vFiles to the Other documents folder.
APress c and select Settings →
Connectivity → Bluetooth → My
devices
APress c and select Settings →
Connectivity → Bluetooth →
Answering mode
BSelect the setting
Tip
12
External Connections
• To set the time (Seconds) before automatic
reception
After Step 1, highlight Automatic, select Options → Edit
and select the number of seconds to ring before answering.
BSelect the setting
Tip
• While Private Mode is set
Answer outgoing/incoming calls with 707SC for calls made
with 707SC; answer outgoing/incoming calls with handsfree
devices for calls made with handsfree devices.
• While Handsfree Mode is set
Answer all outgoing/incoming calls with handsfree devices.
Changing Bluetooth® Settings
Handsfree Mode
My Phone's Visibility
Default Setting
Default Setting
■
Handsfree Mode
■
On
Select answer settings for calls when handsfree devices
To activate search and saving from other Bluetooth®-
connected.
compatible devices, you have to make your 707SC visible.
APress c and select Settings →
Connectivity → Bluetooth →
Handsfree setting
12-10
APress c and select Settings →
Connectivity → Bluetooth → My
phone's visibility
Secure Mode for Data Transfer
BSelect the setting
sending data.
Bluetooth® Name
APress c and select Settings →
Connectivity → Bluetooth → Secure
mode
Default Setting
■
707SC
707SC can be changed.
APress c and select Settings →
Connectivity → Bluetooth → My
Information
BSelect Bluetooth Name
■
On
If set On, a confirmation message appears before you
BSelect the setting
USB Connection
Connect 707SC to a PC via USB cable to transfer files
between the devices. Alternatively, connect a printer to
print still images.
CModify the name and press c
12-11
12
External Connections
The displayed name shown on another device for your
Default Setting
Connecting to a PC
Perform the following:
AHighlight an image file in Data Folder
• Transfer 707SC Data Folder files to a PC
BSelect Options → Print via → USB
• Import PC files and save to Data Folder
• Perform packet data communications
Before Using the USB Connection
12
Printing a Still Image from Data Folder
Install USB driver and Samsung PC Studio beforehand. For
CConnect 707SC to printer via USB
cable
DSelect printer settings
External Connections
more about installation, PC operating environment, etc.,
To set paper size
see attached CD-ROM User Guide.
Select Paper size and select the setting
To set number of prints
Connecting to a Printer
Connect 707SC to a PictBridge-compatible printer with a
USB cable and print still images directly from Data Folder.
Set a paper size, number of prints, and other items on
707SC.
For more information about printer operations and paper
setting, see the printer's User Manual.
12-12
Select Number of copies, enter number (1 to 99)
and press c
To set the number of pages to print on a sheet
Select Paper per sheet and select the setting (1 to
16)
To set whether or not to print the date
Select Date print and select the setting
To set whether or not to print a frame
Select Border and select the setting
12
To set a print quality
External Connections
Select Print quality and select the setting
EPress c
FCheck the preview window and press
c (Print)
Note
• Never disconnect the USB cable during printing.
12-13
12-14
Security
Change Phone Password
APress c and select Settings →
Security →Change phone password
APress c and select Settings →
Security → Change PIN code or
Change PIN2 code
BEnter current Phone Password and
press c (Confirm)
BEnter current PIN or PIN2 and press
c (Confirm)
CEnter new 4-digit Phone Password
CEnter new PIN or PIN2 (4 to 8 digits)
and press c (Confirm)
DEnter new Phone Password again and
press c (Confirm)
DEnter new PIN or PIN2 again and press
c (Confirm)
Default Setting
13
Changing PIN/PIN2
■
9999
Security
and press c (Confirm)
PIN
PINs are security codes for USIM Card. For more
information, see "USIM Card" ( P.1-2).
13-2
Note
• When PIN lock ( P.13-3) is set to Disable, PIN
cannot be changed.
PIN Lock
Default Setting
■
Enable
To require PIN authentication each time the power is
turned on, set this function to Enable.
Resetting PIN Lock
If PIN or PIN2 is been incorrectly entered three consecutive
times, PIN or PIN2 lock is set, restricting operations of
707SC. Unlock PIN or PIN2 lock.
APress c and select Settings →
Security → PIN lock
AIn PUK Code entry window, enter PUK
Code and press c (Confirm)
BSelect the setting and press c (Save)
BEnter new PIN or PIN2 (4 to 8 digits)
and press c
CEnter new PIN or PIN2 again and press
c
13-3
13
Security
CEnter PIN and press c (Confirm)
Note
• For more information about PUK and PUK2, contact
Customer Service ( P.25-25).
• If incorrect PUK Code is entered ten consecutive
times, USIM Card is locked (turning 707SC off does
not reset count).
• A locked USIM Card cannot be unlocked. Contact
Customer Service ( P.25-25).
APress c and select Settings →
Security → USIM lock
BSelect the setting and press c (Save)
CEnter a USIM password (4 to 8 digits)
and press c (Confirm)
To set Disable
Setting is saved and operation complete.
13
USIM Lock
To set Enable
Security
Proceed to Step 4
Default Setting
■
Disable
Activate to disable 707SC unless USIM password is
entered whenever a different USIM Card is installed.
13-4
DEnter the USIM password again and
press c (Confirm)
BSelect the setting and press c (Save)
Tip
• USIM password
This is a password dedicated to USIM Card authentication. If
the USIM password matches, the other USIM Card can also
be used for 707SC.
Change USIM password each time the USIM check setting is
set to Enable.
• When you forget your USIM password
Insert a USIM Card (with USIM lock set to Enable) to 707SC
and execute All reset ( P.13-11).
Handset Security
CEnter Phone Password and press
c (Confirm)
Password Lock
Default Setting
■
Disable
Set Password lock to Enable; Press any key in Standby;
Phone Password entry window appears. Enter Phone
Password to cancel Password lock; 707SC operations are
Security
enabled.
Phone Lock
Default Setting
■
Disable
Set Phone lock to Enable; then Phone Password entry is
required each time the power is turned on.
APress c and select Settings →
Security → Phone lock
13
APress c and select Settings →
Security → Password lock
BSelect the setting and press c (Save)
CEnter Phone Password and press
c (Confirm)
13-5
Tip
Activate Secret Mode
• When Password lock is canceled
Password lock is automatically set to Disable.
Privacy Lock
Default Setting
■
Unlock all
Activate to require Phone Password entry to open All,
Messages, Data Folder, Phonebook, Call log or
13
Calendar).
Security
APress c and select Settings →
Security → Privacy lock
BCheck the functions to lock and press
w (Save)
CEnter Phone Password and press
c (Confirm)
13-6
Default Setting
■
Hide
Activate Secret Mode to hide Secret Phonebook entries.
APress c and select Settings →
Security → Activate Secret mode
BEnter Phone Password and press
c (Confirm)
CSelect the setting and press c (Save)
Tip
• Under following conditions, 707SC turns the setting
to Hide; Activate Secret mode is set to Show then
707SC is powered on again.
Mobile Tracker
Default Setting
■
Off
Activate to receive notification whenever a different USIM
Card is inserted. Enter up to two SMS addresses via which
to receive notification.
APress c and select Settings →
Security → Mobile tracker
aHighlight To field and select Options →
Phonebook
bSearch Phonebook and select an entry ( P.5-9)
cHighlight phone number and press c (Select)
To enter a phone number directly
aHighlight To field and select Options → Direct
input
bEnter phone number
FPress w (Done)
13
Security
BEnter Phone Password and press
c (Confirm)
To select an address from Phonebook
CSelect Activation field
GSelect Sender field and enter a
sender's name
DSelect On and press c (Select)
HPress w (Save)
ESelect Recipients field and enter an
address
IPress w (Accept) after checking the
items
13-7
Tip
• To delete an address
After Step 5, highlight the address, select Options → Delete
With a different USIM Card is inserted
If Mobile Tracker is on, SMS notification is sent to specified
address when 707SC is turned on; nothing appears on
707SC.
Even if Mobile Tracker is off, notification is sent if Phone
Password is incorrectly entered three consecutive times.
13
Rejecting Incoming Calls
Security
Automatically reject calls with no Caller ID. Reject nuisance
calls by saving phone numbers to Black List.
Reject Withheld
Default Setting
■
Off
APress c and select Settings → Call
settings → All calls → Reject incoming
calls
BSelect Reject withheld field
CSelect the setting and press c
DPress w (Save)
Reject Unavailable
Default Setting
■
Off
Reject/accept calls by callers who are unable to send caller
ID, like International calls from overseas/transferred calls
from landlines.
13-8
APress c and select Settings → Call
settings → All calls → Reject incoming
calls
To select a phone number from Phonebook
aOptions → Add → Phonebook
bSearch Phonebook and select an entry ( P.5-9)
cSelect phone number
BSelect Reject unavailable field
To enter a phone number using Call Log
CSelect the setting and press c
aOptions → Add → Call log
DPress w (Save)
Black List
DPress C and press w (Save)
Tip
13
• To delete phone numbers from Black list
a Perform Steps 1 and 2
b Highlight the phone number to delete, select Options →
Delete → Selected or All → Yes
BSelect Black list field
CSet the phone number
To enter a phone number directly
aOptions → Add → Direct input
bEnter phone number
13-9
Security
APress c and select Settings → Call
settings → All calls → Reject incoming
calls
bSelect the log record
Reject Black List
APress c and select Settings → Call
settings → All calls → Reject incoming
calls
BSelect Reject black list field
CSelect the setting and press c
13
DPress w (Save)
Security
Calls from phone numbers in Black list
Calls are not connected. Caller hears a busy tone. Missed
call appears in Standby. Press w (View) to see Missed
Calls.
13-10
Restoring Defaults
Clear Memory
Clear Data Folder, Messaging folders, Phonebook (Phone)
entries, and Calendar entries each or all at once.
APress c and select Settings →
Memory settings → Phone memory →
Clear memory
BCheck items to reset and press
w (OK)
CEnter Phone Password, press
c (Confirm) and select Yes
APress c and select Settings →
Memory settings → Phone memory →
Master reset → Reset settings
Master Reset
Reset Settings
Clear Saved contents/settings and restore defaults.
However, the following contents are not restored.
Setting menu
Content not to be reset
BEnter Phone Password, press
c (Confirm) and select Yes
Phone settings
Contents set in Time and Date fields for
Time & date
Reset All
Display settings
Contents set in Brightness
Restore 707SC defaults and delete Phonebook (Phone),
Messaging, and Data Folder contents/settings. Original
13
files and S! Appli are restored.
Call settings
All calls→Reject incoming calls→
contents saved in Black list
Voice call/Video call→contents saved/
set in Diverts
Voice call→contents set in Call waiting
Contents set in Call barring
Contents set in Voice mail
Security
Phonebook
settings
Contents saved/set in My phonebook
details, Category settings
Connectivity
Preferred networks
Security
USIM lock, PIN lock, Change PIN
code, Change PIN2 code
APress c, select Settings → Memory
settings → Phone memory → Master
reset → Reset all
BEnter Phone Password, press
c (Confirm) and select Yes
13-11
13-12
Tools
Alarms
Wake-up Alarm/Alarms
Register a Wake-up alarm and 4 other alarms. Each alarm
can be named and the name given to Alarm appears when
Alarm sounds. Once an alarm time is saved, it can only be
14
ESelect and set other items as required
Set a name (Wake-up alarm cannot be edited)
aSelect Alarm name field
bEnter the name to set
Set Alarm time
Highlight Alarm time field and enter the time
set/reset by switching Alarm activation to On or Off. In
Set an Alarm sound
addition to setting one time only alarm, set alarms to
aSelect Alert tone field
repeat on specific days of the week or everyday.
bSelect the location of sound file, select an alarm
APress c and select Tools → Alarms
Set Vibrator
Tools
BSelect an alarm from Wake-up alarm
to Alarm4
CSelect Alarm activation field
DSelect On and press c
sound and press c
aSelect Vibration field
bSelect the setting and press c
Set Alarm volume
aSelect Alarm volume field
bUse s to adjust the volume
cPress w (Play) to check the volume and press
c (Save)
14-2
Set whether to sound repeatedly or once
aSelect Repeat field
bSelect Everyday or Once alarm and press c
Set days of the week for a repeated alarm to
sound
aSelect Repeat field
bSelect Specify days and press c (Edit)
cCheck the days to set and press w (OK)
Set a snooze procedure
Tip
• When wake-up alarm/alarms are set
appears.
• When wake-up alarm and/or multiple alarms have
been set for the same activation time
Wake-up alarm takes priority over Alarm1 to Alarm4.
Among alarms, the last set one takes priority.
• Alarm volume settings
Select
to adjust volume step by step. Alarm volume
become louder gradually.
aSelect Snooze field
bSelect the setting and press c
14
If you do not want to activate Alarm yet
Tools
aSelect Alarm activation field
bSelect Off and press c
FPress w (Save)
14-3
When alarm time arrives
Alarm sounds and a message appears if an alarm sound is set
to mute ( P.9-3), you are notified by the vibrator even when
Alarm sound is not set to On in Step 5. Alternatively, notify
using vibrator with vibration setting On. Press any key to stop
Alarm sound and press any key again to clear the message.
When the time set comes while capturing video
or recording sound
Alarm sound is generated as soon as capturing of recording
finishes.
Auto Power On
When Snooze is on
Alarm sounds for one minute, up to six times at the specified
interval, or until Snooze is canceled. If no handset operations
take place, and y, o (End) are not pressed while alarm
sounds, alarm is automatically reset to sound again at the
specified interval. To cancel Snooze, press y or o (End).
14
When a call is being initiated or during a call
Tools
During a call or connection (Connecting…appears), 707SC
notifies with a short sound and indicator; uncheck Alerts on
call (in Phone sounds setting) to notify only by an indicator.
When an outgoing call is being Initiated (Dialing…appears),
707SC notifies with a short sound and indicator as connection
established. Press any key twice to clear an indicator; with
Snooze On, press o (End).
14-4
Default Setting
■
Off
If you set this setting to On, even when the power is
turned off, the power is automatically turned on at the
time set for a wake-up alarm or alarm.
APress c and select Tools → Alarms
→ Auto power
BSelect On or Off and press c (Save)
Note
• Cancel Auto Power On near electronic devices
employing high precision or low frequency signals,
in places where mobile phone use is prohibited, like
airplanes or hospitals.
Viewing Calendar
View Calendar in Monthly, Weekly or Daily view.
When the Time for Wake-up alarm/Alarm comes
707SC automatically turned the power on. Deactivating alarm
sound, display indicator, snooze function is performed by the
same operation as usual ( P.14-4). Stop alarm sound and go
off display indicator; 707SC shows Standby display and
continues to power on.
Monthly View Window
: Highlighted position
(Date in light blue) : Current
day
Date in red: Holiday/Sunday
Calendar
(In Yellow) : Anniversary registered
(In Blue) : Schedule registered
(In Green) : Memo registered
(In Red) : Task registered
14
Tools
: Schedule
: Anniversary
: Holiday
: Memo
: Task
: Priority
: Alarm set
: Repetition set
Displaying Calendar
APress c and select Tools →
Calendar
Weekly View Window
Daily View Window
14-5
Tip
• To display the previous or next month on Monthly
view window
Press */#, highlight Year/Month field and press
s
• To display the previous or next week on Weekly view
window
Press */#, highlight Year/Month field and press
s
• To display the previous or next day on Daily view
window
Press s, *, or #
14
Tools
• To view a particular month or week
From Monthly view window or Weekly view window, change
Display by specifying year, month, and day as follows.
a In the calendar window, select Options → Go to
b Select Date, enter the year, month, and day and press
c
When Today is selected in Step b, the current date is
highlighted on the window of the current month or week.
Calendar Window Format
Default Setting
■
■
Starting day: Sunday
Default view mode: Monthly view
Set first day of the week to Sunday or Monday as well as
the default Calendar window.
APress c and select Tools →
Calendar
BSelect Options → Settings
CSelect settings
Set the first day of week
aSelect Starting day
bSelect the setting and press c (Save)
Set the default view mode
aSelect Default view mode
bSelect the setting and press c (Save)
14-6
Tip
CSelect items and make settings
• When settings are changed
A change in Starting day is immediately reflected. Selecting
the settings of Default view mode can be applied when you
deactivate calendar and then reactivate it.
Set a title
• To temporarily change display mode
In the calendar window, select Options → View mode →
Display mode
Select Details field and enter a text
Saving New Entries to Calendar
Scheduled Events
Save a maximum of 100 items.
Select Title field and enter a text
Set details
Set a starting date
Highlight Start date field and enter a date
Set a starting time
Highlight Start time field and enter a time
Set an ending date
Highlight End date field and enter a date
BSelect Options → Add new →
Schedule
Select Location field and enter a text
14
Tools
APress c and select Tools →
Calendar
Set an ending time
Highlight End time field and enter a time
Set an event location
14-7
Set an alarm
aCheck Alarm field to select
bHighlight Before field, enter an interval before
Alarm time, use s to highlight Unit field and
switch to an appropriate unit
cSelect Alert tone field, select a location of sound
files and select an alert tone
Set Repeat
aCheck Repeat field to select
bUse s to highlight Time cycle field and specify
the time cycle unit
14
cHighlight Value field and enter a value
Tools
dHighlight Until date field and enter a year, month,
and day to stop repetition
Set Expiry time for a Calendar Event
Use s to highlight Expiry field and switch the
expiry limit
DPress w (Save)
14-8
Tip
• To make it easier to enter a Start/End date
Put cursor on the target date on Calendar window before
Step 2 to show that date in Start date or End date field.
• When an event has expired
Event is automatically deleted from Calendar. For example, if
expiry is After 1 year, and repetition is not set, it is deleted
after one year from the event end date. With repetition set, it
is deleted one year after the end date of the last repetition.
To cancel automatic deletion, set Disable for expiry date.
Anniversary/Holiday
Register a maximum of 50 anniversaries and 50 holidays.
APress c and select Tools →
Calendar
BSelect Options → Add new →
Anniversary or Holiday
CSelect items and make settings
Set a text
aSelect Text entry field
cHighlight Alarm time field, and enter a time
dSelect Alert tone field, select the location of sound
of files and select an alert tone
Set to repeat every year
Check Repeat every year field
DPress w (Save)
Tip
• To make it easier to enter a date
Put cursor on the target date on Calendar window before
Step 2 to show that date in Date field.
14
bEnter text
Tools
Set a date
Highlight Date field and enter the date
Set an alarm (Anniversary only)
aCheck Alarm field to select
bHighlight Before field, enter an interval before the
anniversary Alarm time, use s to highlight Unit
field and switch to an appropriate unit
14-9
Memo
Up to 20 memos can be registered. Memos can be
registered even while talking ( P.2-8, 6-5).
APress c and select Tools →
Calendar
BSelect Options → Add new → Memo
CSelect the memo text box and enter
text
14
To set the date
Select Date and enter the date
Tools
DPress w (Save)
Tip
• To make it easier to enter a date ( P.14-9)
Tasks
Register a maximum of 100 time-limited items and
manage them in a list.
APress c and select Tools →
Calendar
BSelect Options → Add new → Task
CSelect items and make settings
Set a title
aSelect Title field
bEnter title
14-10
Set a description of the task
aSelect Task field
bEnter text
To set the starting date
Highlight Start date field and enter the date
Tip
• To make it easier to enter a Starting date or Due
date
Put cursor on the target date on Calendar window before
Step 2 to show that date in Starting date and Due date field.
To set the due date
Volume of Alarm sound
Highlight Due date field and enter the date
The volume follows the setting of Tone volume for Voice
Calls; the setting of Voice call in Vibration for Vibrator.
Set an alarm
aCheck Alarm field
When the time set for Alarm comes
appropriate unit
When a call is being initiated or during a call
before the task starts the alarm should sound, use
cHighlight Alarm time field and enter the time
dSelect Alert tone field, select the location of sound
files and select an alert tone
Set a priority level
Use s to highlight Priority field and select a value
During a call or connection (Connecting…appears), 707SC
notifies with a short sound and indicator; uncheck Alerts on
call (in Phone sounds setting) to notify only by an indicator.
When an outgoing call is being Initiated (Dialing…appears),
707SC notifies only by an indicator. Press c to clear an
indicator.
DPress w (Save)
14-11
14
Tools
s to highlight field of units and select an
Alarm sounds and a message appears. To stop Alarm, press
any key. Press c to cancel the message display.
With no action to stop Alarm, a message appears indicating
Missed alarm event. Press w (View) to view the message.
bHighlight Before field, enter a value for how long
Viewing Saved Calendar Entries
Editing Calendar Entries
APress c and select Tools →
Calendar
Editing and Saving as New Entries
BOpen a window listing items
and save them as new entries.
To check items of one day
Select a date on Monthly view window or Weekly
view window, or use s to change the date on
Daily view window
In addition to edit and update the entries, edit the entries
APress c and select Tools →
Calendar
BOpen a window listing entries
To check registered contents by type
To open a window listing entries for a single
14
Options → Event list and select a type
day
Tools
To check the message of a missed alarm
Options → Missed alarm event
CSelect and view details
Tip
• To check calendar item status
Select Options in Calendar or registered contents list and
Memory status; check the number of savings by type.
14-12
Select a date on Monthly view window or Weekly
view window, or use s to change the date on
Daily view window
To view events by type
Options → Event list and select a type
CSelect an item to edit
DPress c (Edit)
EChange the information as required
FPress w (Save) and select New or
Update
Marking a Task as Completed
APress c and select Tools →
Calendar
BSelect Options → Event list → Task
CHighlight a completed task, select
Options → Completed
Deleting Calendar Entries
AIn Calendar window or saved contents
list, select Options → Delete
BDelete the entry
To delete only the highlighted entry
Select Selected → Yes
To delete all entries of current month or week
Select This month or This week → Yes
To delete only entries from a specific period
14
of time
aSelect Periods
Options → To do
bEnter the start and end dates
Tools
To remove the completion mark
cPress c (Delete) and select Yes
Tip
• To sort tasks
In the Task window, select Options → Sort by and select a
sorting type. Classify tasks into completed/uncompleted ones
or sort them by due date or priority.
14-13
To delete all entries or all before the
highlighted date
Calendar Options
aSelect All or All past data
Perform the following operations from Options on a
bEnter Phone Password, press c (Confirm) and
window listing Calendar entries:
select Yes
Tip
14
Tools
• To collectively delete multiple registered items
Select registered unnecessary items from a list by type and
delete them collectively.
a Press c and select Tools → Calendar
b Options → Event list and select the type
c Options → Delete → Multiple
d Check the items to delete, press w (Delete) and select
Yes
14-14
Item
Description
Add new
Save a new Calendar entry ( P.14-7).
Send schedule/
Send task
Send Calendar entry via S! Mail ( P.17-6)
or Bluetooth® ( P.12-6).
View mode
Select a display mode ( P.14-7).
Go to
Display a particular month or week by
changing Monthly/Weekly view window
( P.14-6).
Event list
View events listed by type ( P.14-12).
Delete
Delete a Calendar entry ( P.14-13).
Completed/To do
Set or cancel the task completion mark
( P.14-12).
Sort by
Sort tasks ( P.14-13).
Save to Data
Folder
Create a vFile and save it to Other
documents in Data Folder.
Settings
Select Calendar Display settings
( P.14-6).
Item
Description
Missed alarm
event
View the message of a missed alarm
( P.14-12).
Print via
bluetooth
Print highlighted schedule event or task via
Bluetooth® printer.
Memory status
Check memory usage for Calendar
functions ( P.14-12).
Voice Recorder Window
Control Voice Recorder with Softkeys and navigation key.
Navigation key
Remaining recording time
Voice Recorder
Record up to 60 minutes; activate from Tools, during a call,
Elapsed time
Recording Window
via Data Folder or a Message creation window.
Navigation key
14
Tools
Play time
Elapsed time
Playback Window
14-15
Recording Voice
Recorded voice is saved to Sounds & Ringtones Data
Replay a voice file saved in Data Folder.
Folder.
APress c and select Tools → Voice
recorder
APress c and select Tools → Voice
recorder
To change the fixed recording time ( P.14-17)
BPress c (Record)
14
Playing Voice
CPress w (Stop) or continue
recording until the set time runs out
Tools
DAs required, press c (Play) to replay
BSelect Options → My sounds
CHighlight the file and press c (Play)
Voice Recorder Options
Operate listed below from Options before and after
recording. Options's selectable items vary by the conditions.
For more information about available options after selecting
My sounds, see "Data Folder Options" ( P.11-13).
Item
To pause
Description
Press c (Pause)
Record
Start recording.
To resume
My sounds
Call up list of sound files saved in the
My sounds folder.
Send
Send a file via S! Mail ( P.17-6) or
Bluetooth® ( P.12-6).
Set as
Set voice for ringtone, etc.
Select Options → Record
To record voice from Options ( P.14-16)
14-16
Item
Description
Delete
Delete a recorded voice file.
Rename
Change file name.
Lock/Unlock
Set/release file protection.
Details
Confirm recorded sound file size, etc.
Record settings
Select the file name assigned
automatically or the fixed recording
time ( P.14-17).
Changing Voice Recorder
Settings
Default Name
■
Voice
The voice recorded with Voice recorder is saved under a
name such as "Voice 001." "Voice" can be changed to
another word.
APress c and select Tools → Voice
recorder
CEnter a name
Tip
• If the default name is changed
The naming rule is applied from the next recording.
Recording Time
Default Setting
■
5 minutes
APress c and select Tools → Voice
recorder
BSelect Options → Record settings →
Recording time
CSelect a duration and press c (Save)
14-17
14
Tools
Default Setting
BSelect Options → Record settings →
Default name
World Clock
World clock allows you to check the current time all over
the world.
Default Setting
■
Tokyo, Seoul for both areas
When you save a second time zone, easily check the time
Viewing World Clock
APress c and select Tools → World
clock
14
Selecting Areas
Current time and city name of area 1
Tools
Current time and city name of area 2
at that area looking at World clock.
APress c and select Tools → World
clock
BUse j to highlight area 1 and use
s to change city name
To set summer time
aPress o (DST )
bCheck the area to set summer time and press
w (Done)
CPress c (Save)
14-18
Using Calculator
To erase a symbol in a mathematical
expression
Arithmetic operations to a maximum of 13 digits can be
Place cursor after a symbol to erase and press C
performed.
To erase both the mathematical expression
APress c and select Tools →
Calculator
and the calculation result
Press C for 1+ seconds
BCalculate
To enter numbers
Press keys
To enter +, −, ×, or ÷
14
Press r, l, u, or d
Tools
To display the calculation result
Press c
To enter ., (, or )
Press w (.( )) to toggle symbols
To move cursor left or right
Press * or #
14-19
Converting Currencies or
Units
To replace the original currency with the
Convert the currencies for various countries. Alternatively,
CSelect Original currency amount field
and enter the amount
convert the units of length, weight, etc.
Converting Currencies
APress c and select Tools →
Converter → Currency
Original currency
Enter the amount in original currency
Target currency
Converted amount appears
14
target currency
Press o (Reverse)
To enter a decimal point
Press *
DSelect Target currency field and
currency
EView result in the target currency
Tools
To check the exchange rate
aHighlight either of Currency fields and press
w (View Rate)
BSelect Original currency field and
currency
14-20
bPress C to return to the Original window
To change the exchange rate
aHighlight either of Currency fields and press
w (View Rate)
BSelect Length, Weight, Volume, Area,
or Temperature
bSelect the base currency to change the rate,
Original unit
Enter a value in original unit
Target unit
The converted value appears
highlight the currency, select Options → Edit
cEnter the rate and press c (Save)
To add a currency unit
aPress w (View Rate)
bOptions → Add Rate
cEnter the currency unit/rate and press c (Save)
Converting Units
To replace the original unit with the target
unit
14
Tools
APress c and select Tools →
Converter
CSelect Original unit field and select
the unit
Press o (Reverse)
DHighlight Original unit value field and
enter the value
To enter a decimal point
Press *
14-21
To enter/delete "-" when converting
temperature
Press #
ESelect target Unit field and select the
unit
FView result in Converted value field
Dictionary
Look up English/Japanese dictionaries.
Press w (Clear)
APress c and select Tools →
Dictionary
Stopwatch
BSelect a dictionary
To clear the values
14
CPress c (Lap) to measure a lap time
or w (Stop) to stop time
measurement
Tools
707SC can be used as a stopwatch for measuring a
maximum of ten lap times plus the total time.
APress c and select Tools →
Stopwatch
BPress c (Start)
14-22
To use English dictionary
Select English dictionary
To use Japanese dictionary
Select Japanese dictionary
CEnter a word to search
DSelect a target word
Interpreter
Use 707SC Interpreter as a translator to find frequently
used phrases in particular places (such as an airport),
through voice prompts in each language. Available
languages are English, Korean, and Chinese. Select place
name or the phrases using keys or your voice.
DSelect the phrase
To set by your voice
Speak the phrase for inquiry to 707SC after the beep
To set by keys
Press w (メニュー ) to select the item
EHighlight the phrase and press c
APress c and select Tools →
Interpreter
To listen the phrase
BSelect the language
Press w (リピート)
To set by your voice
Speak the item in menu to 707SC after the beep
To set by keys
Use a to highlight the item and press c
To listen the phrase again
14
Tip
Tools
CSelect an item
Press w (音を聴く)
• To play voice prompts
After Step 3, press o (ボイスオン)
• When もう一回言って下さい appears
707SC could not recognize your voice. Speak clearly again or
say another phrases.
14-23
14-24
Advanced Functions
Calling Functions
Auto Redial
Default Setting
■
Off
International Prefix
Default Setting
■
010
Set to automatically disconnect a Voice/Video Call initiated
Set the international code frequently used when initiating
to a party that is busy and redial the same party soon.
an international phone call.
Automatic redialing repeats up to 10 times until y is
APress c and select Settings→ Call
settings → Voice call → International
dial→ Int'l prefix
pressed or 707SC is closed.
APress c and select Settings → Call
settings→ All calls → Auto redial
15
International Dial
BSelect a value and press c (Save)
Advanced Functions
Tip
• When Retry with is set for Video Call
Automatic redialing settings take priority.
• When receiver has activated Voice Mail or Call
Forwarding
The call is forwarded and automatic redialing is canceled.
15-2
BEnter an international code
Editing Country Codes
To add or change
aHighlight the item to add or change and press
Default Setting
■
1: Japan 2: KOR 3: GBR 4: ITA 5: CHE
6: ESP 7: DEU 8: PRT 9: NLD 10: FRA
11: MCO 12: USA 13: SWE 14: AUS
15: CHN 16: HKG 17: TWN
18 to 20: Unused
Add a country code or delete an unnecessary one.
c (Change)
bSelect Country name field and enter the country
name
cHighlight Country code, enter code and press
w (Save)
APress c and select Settings → Call
settings → Voice call → International
dial → Country codes
To delete
BPerform operations to add, change, or
delete
Earphone call
Highlight item to delete, press w (Delete) and
select Yes
Default Setting
■
■
Earphone call activate: Off
Call number: No list
15
to call specified number.
APress c and select Settings → Call
settings → Voice call → Earphone call
15-3
Advanced Functions
When Earphone call is On, press switch for 1+ seconds
BSelect Earphone call activate
CSelect the setting
DHighlight Call number and perform
operations to save phone number
To enter a phone number directly
aPress c (Select) and select Direct input
bEnter phone number
To select a phone number from Phonebook
aPress c (Select) and select Phonebook
bSearch Phonebook and select an entry ( P.5-9)
cHighlight phone number and press c (Select)
To enter a phone number using Call Log
15
Advanced Functions
aPress c (Select) and select Call log
bSelect the log record
EPress w (Save)
15-4
Tip
• To delete a phone number
a Perform Step 1
b Press c (Select) and select Direct input
c Press C for 1+ seconds press c
• To change a phone number
a Perform Step 1
b Perform Step 4
c Press c (Save)
Handling Incoming Calls
Anykey Answer
Acoustic Shock
Default Setting
■
On
Reduces ringer volume to Level 1 for the first two seconds.
Default Setting
■
Off
Answer Voice Calls using keys other than c (Accept) or
t.
APress c and select Settings →
Phone settings → Anykey answer
APress c and select Settings → Call
settings → All calls → Acoustic shock
BSelect the setting and press c (Save)
BSelect On or Off and press c (Save)
Tip
15
• Answering a Voice Call when On is set ( P.2-3)
Advanced Functions
15-5
Active Folder
Default Setting
■
Off
When On, open 707SC to answer an incoming call.
APress c and select Settings →
Phone settings → Active folder
BSelect On or Off and press c (Save)
Side Key Silence/Reject
Default Setting
15
■
Silence
Use n or b to mute ringer or reject an incoming call.
Select from Reject (disconnect the call) or Silence (silence
Advanced Functions
the incoming tone).
APress c and select Settings →
Phone settings → Side key
BSelect a value and press c (Save)
15-6
Side Key Lock
When On, Side Keys are locked. Avoid accidental key press
when 707SC is inside a bag, etc.
APress c and select Settings →
Phone settings → Side key lock
BSelect On or Off and press c (Save)
Simple Search
Default Setting
■
Off
When Simple search is On, enter numbers in Standby to
search Phonebook entries starting with Reading name
corresponding each number. Then search result (entry
names and phone numbers) list appears.
APress c and select Settings →
Phone settings → Simple search
BSelect the setting and press c (Save)
Tip
Idle Shortcuts
Up to nine frequently used functions can be saved; create
your own Shortcut Menu. In Standby, press u to access
functions saved to shortcuts.
APress u
BHighlight unsaved function entry box
and press c (Assign)
CSelect the function
DRepeat Steps 2 and 3 to save the
function
15
Advanced Functions
• To initiate calls using Simple search ( P.5-11)
15-7
Tip
• To change functions
a In Step 2, Highlight the function, select Options →
Assign
b Select Yes and select the function
• To sort functions
a In Step 2, Highlight the function, select Options →
Change Order
b Use a to highlight the target function box and press
c (Select)
• To delete functions
In Step 2, Highlight the function, select Options → Delete
→ Yes
15
• To restore defaults
In Step 2, Highlight the function, select Options → Reset
→ Yes
Advanced Functions
15-8
Memory Status
Check the following information:
• Available shared memory
• Status of SMS and S! Mail mailboxes
• Status of memory in Data Folder
• Status of Calendar items registered
• Status of Phonebooks (Handset and USIM Card)
Alternatively, delete saved entries and/or files.
APress c and select Settings →
Memory settings → Memory status
BSelect an item to check
Tip
• To delete contents
When the contents in Data Folder, Calendar or Phonebook
are to be deleted
a Perform Steps 1 and 2
b Highlight an item, press c (Select), select Yes and
view an entry
c Check the fields to delete, press w (Delete) and select
Yes
• To delete all contents
After Step c in "To delete the contents," enter Phone
Password, press c (Confirm) and select Yes
• To check/uncheck all contents at once
After Step c in "To delete the contents," select Options →
Mark all or Unmark all
• When the checked contents contain the contents
that functions or locks are set in
After Step c in "To delete the contents" or the "To delete
all contents" operations, the confirmation window appears.
If you select Yes, the deletion is performed. If you select No,
only files without functions or locks set are deleted.
15
Advanced Functions
15-9
15-10
Optional Services
Optional Services
The following optional services are available with 707SC:
Service
Description
Call
Forwarding
When you know you will be unable to answer
calls to 707SC, automatically divert calls to a
specified number.
Voice Mail
Optional Services
Divert all or all unanswered calls to Voice Mail
Center; access caller messages via 707SC
from within the service area or via a
touchtone phone anywhere.
Call Waiting*
A tone sounds for incoming calls when the
line is engaged.
Put the line on hold to answer or alternate
between lines.
16
Conference
Call*
Open another line while one is engaged;
toggle lines or talk on all simultaneously. Add
new parties to an existing conference; talk on
up to five lines simultaneously.
Call Barring
Restrict incoming or outgoing calls by
condition.
16-2
Service
Caller
Identification
Description
Show or hide your own number when placing
calls.
* This service requires a separate subscription.
Note
• When Out appears, access services from a touchtone
landline. For details, contact Customer Service
( P.25-25).
Call Forwarding
Activating Call Forwarding
Set forwarding condition and number, by call type (Voice
Specify a forwarding number beforehand.
Call or Video Call), beforehand, to divert incoming calls to
APress c and select Settings → Call
settings → Voice call or Video call →
Diverts
a specified number.
Forwarding
Condition
Description
Unanswered calls are diverted after the
specified ring time, or when the line is busy or
707SC is out-of-range.
Always
707SC does not ring/vibrate for incoming
calls; calls are diverted automatically and
Missed Call does not appear.
BSelect No reply or Always; view the
current settings
When the settings are acceptable
After viewing, press l to return to the previous
window
Note
• Call Forwarding and Voice Mail cannot be used at
the same time.
Optional Services
No reply
16
• Activating Call Forwarding cancels Voice Mail.
• Call Forwarding is not available when All outgoing
calls or All incoming calls in Call Barring is active
(Call Barring takes priority over Call Forwarding).
16-3
CHighlight Forwarding address field
and enter a number
To select a phone number from Phonebook
aHighlight forwarding Address field and select
Options → Phonebook
bSelect Phonebook, highlight a phone number and
press c (Select)
Optional Services
16
DFor No reply, highlight Waiting time
field and set a time
EPress c (ON)
Tip
• When Call Forwarding (No reply) is active
While 707SC rings/vibrates, answer a call or press o
(Busy) to forward it.
Cancel All
Cancel all Diverts services at once.
APress c and select Settings → Call
settings → Voice call or Video call →
Diverts → Cancel all
Tip
• To stop Call Transfer service for each forwarding
condition
a Press c and select Settings → Call Settings →
Voice call or Video call → Diverts
b Select No reply or Always
c Press w (OFF)
Check Status
APress c and select Settings → Call
settings → Voice call or Video call →
Diverts → Check status
16-4
Voice Mail
Forward an incoming Voice Call to Voice Mail Center or a
specified number based on preset forwarding conditions
( P.16-3).
Note
• Voice Mail and Call Forwarding cannot be active at
the same time.
• Voice Mail is not available when All outgoing calls or
All incoming calls in Call Barring is active (Call
Barring takes priority over Voice Mail).
APress c and select Settings → Call
settings → Voice mail
BSelect No reply or Always
CFor No reply, highlight Waiting time
field and set a time
DPress c (ON)
Optional Services
• Activating Voice Mail cancels Call Forwarding.
Activating Voice Mail
Tip
• When Voice Mail (No reply) is active
While 707SC rings/vibrates, answer a call or press o
(Busy) to forward it.
16
16-5
Canceling Voice Mail
Listening to Messages
Cancel all Voice mail services at once.
When a caller saves a message at Voice Mail Center, in
APress c and select Settings → Call
settings → Voice mail → Cancel all
standby, a message appears. Also,
appears at the top
of Display.
Tip
Optional Services
16
• To cancel Voice Mail by forwarding condition
a Press c and select Settings → Call settings →
Voice mail
b Select No reply or Always
c Press w (OFF)
Checking Settings
APress c and select Settings → Call
settings → Voice mail → Check status
Notification
12
15
15 30
While Message Appears
Connect to Voice Mail Center as described below and
follow voice prompts.
APress w (Dial)
To check message details
Press c while message appears
16-6
Tip
• To access caller message from overseas
a Press 0 for 1+ seconds and enter +
b Enter 819066514170 and press t
Incoming Call Notification
AEnter 1414 and press t (Free of
charge)
• To delete a message without listening to it
Press o (End).
When setting from a general subscriber phone
• To clear
Voice Mail indicator disappears when messages are accessed
via 707SC.
Dial 090-665-1414 and press t
AEnter 1416 and press t
Incoming Call Notification
When setting in overseas (Charged)
Press 0 for 1+ seconds, enter +, enter 81-90665-14191 and press t
Optional Services
While No Message Appears
in Japan (Free of charge)
BPerform operations following the
audio prompts
SMS is delivered for calls unanswered because 707SC is
outside service area or off, or if a caller saves a message at
16
Voice Mail Center while the line is engaged.
16-7
Call Waiting*
Receiving a Second Call
* A separate subscription is required to use this service.
When there is an incoming call during a call, you are
This service is only available for Voice Calls.
notified with a specific interrupt sound and display. Place
the current call on hold and answer the second call.
Activating or Canceling
APress c and select Settings → Call
settings → Voice call → Call waiting
Optional Services
BActivate or cancel the service
BSelect Hold active call
To end the current call and answer the second
To activate
call
Press c (ON)
Select End active call
To cancel
Press w (OFF)
16
AWhen you hear the interrupt sound,
press c (Accept)
CPress w (Swap) to toggle the calls
DTo end the current call, press y
To end the call on hold
Options → End → Held call
16-8
To end both calls at once
Options → End → All calls, or close 707SC
New Call
When the called party is connected, the party that has
Tip
• When the other party ends the call and you have
another call waiting
Press w (Retrieve) to talk to the waiting party.
ADuring a call, select Options → New
call and enter number
To use Phonebook
aPress c (Search) and select Phonebook
bHighlight the phone number and press
Optional Services
• When the Call Transfer service or Voice Mail service
is active
When the second call is not answered, it is forwarded to a
forwarding destination or Voice Mail Center. When the
forwarding condition is set to Always, the Call Waiting
service is not available.
been connected is placed on hold.
c (Select)
To use a log
Conference Call*
* A separate subscription is required to use this service.
Talk with a maximum of six parties simultaneously.
Press t, open logs and highlight the entry
BPress c (Call) and talk with the
connected party
16
16-9
Engaged Conference Call
Operations
ACall another party during a call
( P.16-9)
BPress w (Swap) to switch connected
calls
Optional Services
16
Tip
• To end the call on hold
During a call, select Options → End → Held call
• To end all calls
During a call, select Options → End → All calls, or close
707SC
• When the current caller ends the call while using
Conference Call service
A party on hold remains on-hold state. Switch to the on-hold
party to talk.
16-10
Join
ADuring a call, initiate a call to another
party ( P.16-9)
BSelect Options → Join
Tip
• To call with only one person
During a call, select Options → Split and select a caller to
talk to
• To end the call for a specific caller
During a call, select Options → End → Select
participant, check callers to end and press w (End)
• To end the all calls
During a call, press y
• When one party ends the call during Conference Call
Continue talking with remaining parties.
Setting restrictions requires Network Password (The 4-digit
Call Barring
number dedicated to Outgoing/incoming service specified
Bar outgoing/incoming Voice/Video Calls or SMS by the
at the subscription).
conditions listed below.
Item
Restrict
incoming
calls
Note
• If incorrect Network Password is entered three
consecutive times, Call Barring service is disabled. In
this case, change Network Password and Center
Access code. For more information, contact
Customer Service ( P.25-25).
All outgoing
calls
Deactivates initiating calls and
SMS sending, except
emergency calls.
Outgoing Intl
calls
Deactivates initiating
international calls and SMS
sending within your current
location.
Intl except
home
Deactivates initiating
international calls and SMS
sending within your current
location or except Japan.
Optional Services
Restrict
outgoing
calls
Description
All incoming
calls
Deactivates reception of all
calls and SMS receiving.
16
• If Call Forwarding or Voice Mail is active, All
outgoing calls or All incoming calls cannot be set.
Deactivates reception of all
Incoming
calls and SMS receiving while
when roaming
outside of Japan.
16-11
Tip
• If a call is attempted while restrictions are on
A message appears indicating that outgoing call restriction is
active. The message may appear after a while depending on
service area.
Restrict Outgoing/Incoming
Calls
Restrict outgoing calls and/or Restrict incoming calls for
Optional Services
16
each type of call (Voice/Video Calls, SMS)/transmission.
APress c and select Settings → Call
settings → Call barring
BSelect Voice call, Video call, or SMS
and select a restriction type
CEnter Network Password
DSet or cancel call barring
To set
Press c (ON)
To cancel
Press w (OFF)
Tip
• To check settings
Perform Steps 1 and 2. After checking the settings, press
C to return to the previous window.
Cancel All
Canceling outgoing and incoming call is available for each
of call types (Voice and Video Calls, SMS)/transmission.
APress c and select Settings → Call
settings → Call barring
BSelect Voice call, Video call, or SMS
→ Cancel all
16-12
CEnter Network Password and press c
Changing Network Password
Caller ID
Show or hide your own phone number when calling from
APress c and select Settings → Call
settings → Call barring → Change
password
707SC.
BEnter current Network Password in Old
field and new Network Password
(4 digits) in New and Cnf (Confirm)
field, then press c (Confirm)
APress c and select Settings → Call
settings → All calls → Show my
number
Show My Number
Default Setting
■
By network
Tip
• When set to By network
Automatically set to Show/Hide your number by current
network status.
16-13
Optional Services
BSelect setting and press c (Save)
16
Adding 186 or 184
Use 186 (Show ID) or 184 (Hide ID) prefixes to show or
hide your number when calling from 707SC, regardless of
the Show my number setting.
AEnter Show ID or Hide ID Prefix
To show Caller ID
Press 186
Optional Services
To hide Caller ID
BEnter phone number
16
Options → Video call
Press 184
CPress t
To initiate a Video Call
16-14
Receiving & Sending Messages
Getting Started
17
S! Mail
Receiving & Sending Messages
Use this service to send/receive long text messages,
images, videos, other files, and sounds between S! Mail
Tip
• Retry function
If the other party's handset cannot receive a message
because the power turned off or out-of-range, 707SC keeps
the message saved on Mail Server; then send to the other
party after signal reception recovers stable.
compatible SoftBank handsets and PCs via e-mail.
Checking for New
Messages
A separate subscription is required to use S! Mail and
receive e-mail.
SMS
When a message is received in Standby mode, reception
Use this service to send/receive short text messages
notification appears. The number of received messages,
between SMS-compatible SoftBank handsets using phone
senders and reception dates/times appear.
numbers.
Number of received messages
Sender
相田名都
12
15
15 30
Reception date and time
Reception Notification Window
17-2
APress w (View)
Tip
• Received message count
When there are unread messages, the total number of new
and unread messages appears.
Received Message List
When multiple messages appear
Use s to select the
tab and press w (View)
BSelect a new received message
• Sender information
A phone number or mail address appears. When the sender
has been saved in Phonebook, you will see the name saved
in Phonebook. When an incoming image has been saved in
Phonebook or an incoming image has been set for the group,
the image appears at the same time. While Secret Mode is
set to Hide and Phonebook Secret Mode is set to On for
message receiver/sender information; sender's name/image
does not appear.
SMS Operations
SMS Window
S! Mail Text
In SMS window, press Side Keys nb to enlarge/reduce text
font size. Alternatively, press u or d for 1+ seconds to
auto scroll. To stop auto scroll, press any key. Press r or
l to adjust the scroll speed.
17-3
17
Receiving & Sending Messages
• When a message is received (out of Standby)
or
appears at top of Display. When 707SC is closed,
appears on Sub Display ( P.1-8, 1-10). The icon does
not appear with Sub LCD light ( P.8-8) set to Off.
3D Pictogram ( P.20-5)
17
BSelect a message with the rest of it
Receiving & Sending Messages
By default, when you check an incoming/unread message
(Except S! Mail that is set for Slide Show or with an
attachment), the message text appears in 3D Pictogram. After
3D Pictogram display ends or w (Stop) is pressed, Message
window appears. Perform various operations after Message
window appears.
Retrieving Complete Messages
When Home network ( P.20-3) or Roaming ( P.20-3)
is set to Manual, S! Mail is temporarily stored on Mail
Server; part of the received message is sent to 707SC as a
Notification Details
CPress c (Retrieve)
DSelect complete message
reception notification. Retrieve complete messages from
Mail Server.
APress w and select Received msgs
Message Window
17-4
Tip
• To retrieve complete messages from Message list
window ( P.19-2)
If an image is inserted, the image appears with the message.
If sound is inserted, select Options → Play to play sound.
If Slide Show is set, sound is played when the page with an
inserted sound appears.
If video is inserted, select Options → Play and press o
(Video) to play video.
If Slide Show is set, Video appears at the lower right and
pressing o (Video) plays sound when the page with video
inserted appears.
Message window for S! Mail with an
attachment
Message window with a file requiring
purchasing/obtaining Content Key
The first page shows the file name for the attachment and the
second and subsequent pages show the message. Use r to
read the message or select Options → Play to start Slide
Show.
appears on a page with an inserted file that you cannot
view/play.
Select Options → Download content key to view/play the
file.
Message window for S! Mail with Slide Show
set
Select Options → Play to play the slide. During playing,
press c (Pause)/w (Stop) to pause/stop it. Use s to
manually select pages.
Using Received Messages
Send a message directly to the sender.
APress w (Reply) on the Message
window
17-5
17
Receiving & Sending Messages
• Received Message list window indicators
: Unread reception notification (Priority: High)
: Unread reception notification (Priority: Standard)
: Unread reception notification (Priority: Low)
: Read reception notification (Priority: High)
: Read reception notification (Priority: Standard)
: Read reception notification (Priority: Low)
Message window for S! Mail with an inserted
file ( P.17-16, 17-18)
BCreate a message and press w (Send)
17
Tip
Receiving & Sending Messages
• Subject display of S! Mail for replies
The subject of a replied S! Mail is prefixed with "RE:"
automatically.
Number of
characters that
can be sent
Creating Messages
Two types of messages are available on 707SC: S! Mail
and SMS. The number of characters that can be sent and
entry items are different between these types (Shown
below).
S! Mail
SMS
Approximately
10,000 single-byte/
double-byte
characters1
Approximately
10,000 characters
in one slide2
(Up to 300KB3)
Maximum of 70
single- byte/doublebyte, Katakana
characters
Maximum of 160
single-byte
alphanumerics (Up
to 140 bytes)
Yes
Yes
Yes
No
Address
Entry Subject
items Attachment
Message
Yes
No
Yes
Yes
Yes: Available
No: Not available
1 The number of characters that can be sent varies by the
attachment size, etc.
2 Set a maximum of 20 slides in one message.
3 Total size of all kinds of messages (Including address, subject,
text, and attachments).
Using Mail Art
In S! Mail window, view text/images consecutively like slides
or with a background color ( P.17-12, 17-14, 17-18).
17-6
Tip
Procedures
Create messages in the flow shown below. Enter items
Creating S! Mail
Creating SMS
Enter an address (
Enter a subject (
P.17-8)
P.17-10)
Enter message text (
(
Automatic Change of Message Type
P.17-10)
Attach/Insert files
P.17-14, 17-18)
Set any sending options (
Send the message (
P.17-11)
When message creation is started, the message type is set to
SMS; it automatically changes to S! Mail when one of the
following occurs:
• Entering mail address as a destination
• Entering a subject
• Entering characters exceeding the number of characters
that can be sent by SMS
• Inserting files on Slide Show page
• Attaching or inserting a file
• Changing the address type to Cc or Bcc
When the message is modified to allow it to be sent as SMS,
for example, by deleting an attached or inserted file or a
subject, the message type automatically changes to SMS.
Depending on message creation conditions, it may not
automatically change type. If the mail type is not changed
automatically, change it manually ( P.17-11).
P.17-11)
17-7
17
Receiving & Sending Messages
other than Destination required.
• To set sending options beforehand ( P.20-2, 20-5)
BEnter an address
Address
17
Enter a phone number or mail address for S! Mail or a
Receiving & Sending Messages
phone number for SMS as a message address. Up to
twenty addresses can be entered.
APress w and select Create msg
To select an address from Phonebook
aSelect Address field and select From Phonebook
bSearch Phonebook and select an entry ( P.5-9)
cHighlight a phone number or mail address and
press c (Select)
To enter an address directly
Address field
Subject field
Attach field
Message field
Text entry field
Message Creation Window
aSelect Address field and select Enter Recipient
bEnter phone number or mail address
To select an address from sent records
Select Address field and select the record
To select an address from a Phonebook
Category
aSelect Address field and select From Category
bSelect a Category, with/without Address selection
window, highlight an address to enter and press
c (Select)
17-8
CTo enter another address
Tip
• To create a message using a template ( P.17-14)
aSelect Address field
• To confirm the entered address
In Step 3, select Options → Recipient list
bSelect Entry field and select Enter Recipient
cEnter phone number or mail address and press
w (Done)
To select an address from Phonebook
aOptions → Add recipients → Phonebook
bSearch and select Phonebook
cHighlight a phone number or mail address and
press c (Select)
To select an address from a Phonebook
Category
aOptions → Add recipients → Category
bSelect a Category; with/without Address selection
window, highlight an Address to enter and press
• To add an address after confirming entered address
a In Step 3, select Options → View recipient list
b Select Entry field and perform operation in the same way
as Step 2
c Press w (Done)
• To send a message after confirming entered address
a In Step 3, select Options → View recipient list
b Options → Send
• To change the address type to To, Cc, or Bcc
a In Step 3, select Options → View recipient list
b Options, highlight an address → Change recipients
→ To, Cc, or Bcc
• To delete an address
a In Step 3, select Options → view recipient list
b Options, highlight an address → Remove
c (Select)
17-9
17
Receiving & Sending Messages
To enter an address directly
• To copy, cut, or paste characters ( P.4-12)
17
Receiving & Sending Messages
• Viewing Address field
When multiple addresses have been saved,
and the
number of addresses appear in Address field on Message
creation window.
Note
• If shared memory ( P.25-15) is less than 464KB, you
cannot create a message. To create a message,
delete messages.
• If shared memory ( P.25-15) becomes low while in
a message creation, you may not be able to save the
message in Drafts.
• A message created on 707SC may not appear the
same way on the other party's phone.
• Message sent with Subject/Text in Hangul, may
appear as spaces or be deleted on the other party's
phone.
Subject
AIn Message creation window, select
Subject field
BEnter a subject
Tip
• To copy, cut, or paste characters ( P.4-12)
• To set/release the prediction entry function
( P.4-13)
Message
AIn Message creation window, select
Message field
When Slide Show is set ( P.17-12)
Select Text entry field
BEnter the message
17-10
Tip
• To copy, cut, or paste characters ( P.4-12)
• To change the font size of characters being entered
In Step 2, select Options → Font Size → Small,
Standard, or Large
• To set/release the prediction entry function
( P.4-13)
• To set Slide Show ( P.17-12)
• To insert image files, etc. in a Message field
( P.17-15, 17-18)
• To view the text in 3D Pictogram
In Message creation window, highlight Message field, select
Options → 3D Pict. Disp.
AIn Message creation window, press
w (Send)
Tip
• To set sending settings for a message being created
a In Message creation window, select Options →
Sending options
b Select an item and make settings ( P.20-2, 20-5)
c Press w (Apply) or w (Save)
• To change the message type
a In Message creation window, highlight all fields except
Address field
b Options → Change to S! Mail or Change to SMS →
Yes
17-11
17
Receiving & Sending Messages
• To use an SMS template or Phonebook entry
( P.4-10)
Sending a Message
Tip
Slide Show
17
Open S! Mail window in Slide Show. Text messages,
Receiving & Sending Messages
images, movies, and sounds can be inserted on each page
of Slide Show. Set a maximum of 20 slide pages in one
message.
AIn Message creation window, select
Options → Insert → Text
Slide page No. and display time
• To insert Image, Sound, or Video
Perform operations in "Inserting a File" ( P.17-16).
Alternatively, other files can be inserted in the same page.
But image/video or sound/video cannot be displayed in the
same page.
• To delete a Text entry field
a In Message creation window, highlight Text entry field
b Options → Remove → Yes
• To preview Slide Show before sending
a In Message creation window, highlight a field other than
Address field
b Options → Preview
c Options → Play
Added Text entry field
Message Creation Window
BSelect added Text entry field and
enter a message
CTo add a Text entry field for Slide
Show, perform Steps 1 and 2
17-12
Changing the Style of Message
Field
Set the font color, font style, interval time for displaying
Slide Show, background color, etc.
AIn Message creation window,
highlight Message field
BSet options as required
To set background color
bHighlight Select page and use s to display All
pages
cHighlight Background colour and use a to
highlight a color
cHighlight Font colour and use a to highlight a
color
Set font size for all pages
aOptions → Edit style
bHighlight Select page and use s to display All
pages
Set the page display
cHighlight Font Size and use s to display a size
aHighlight a Character entry field to set
To set font size for a single slide page
bOptions → Edit style
aHighlight a Character entry field to set
cHighlight Slide interval and enter a time
bOptions → Edit style
Set the font color
cHighlight Font Size and use s to display a size
aOptions → Edit style
To change the display order for text and
bHighlight Select page and use s to display All
images (Videos)
pages
cHighlight Font colour and use a to highlight a
color
Set a font color for a single slide page
aHighlight a Character entry field to set
aOptions → Edit style
bHighlight Select page and use s to display All
pages
cHighlight Order item and use s to display
Text-Top or Image (Video)
17-13
17
Receiving & Sending Messages
aOptions → Edit style
bOptions → Edit style
CPress c (Save)
17
Tip
Receiving & Sending Messages
• To preview the style before sending
a In Message creation window, highlight a field other than
Address field
b Options → Preview
c Options → Play
Note
• Edit style or Preview does not appear in SMS
Options.
CSelect Options → Send
DCreate a message and press w (Send)
Tip
• To use after viewing an S! Mail template
a Perform Steps 1 and 2
b Options → View
c Options → Play as required
d Options → Edit and send
• To register a template ( P.4-15, 18-19)
Attaching/Inserting Files
Templates
A file that can be attached/inserted to an S! Mail is limited
Create and send a message using S! Mail or SMS
in size to 294KB (except the message address, subject and
template.
message text size). Up to 20 files can be attached to one
APress w and select Templates →
S! Mail templates or SMS templates
S! Mail.
BHighlight an S! Mail or SMS template
17-14
Tip
Attaching a File
AIn Message creation window, Select
Attach field
Note
BAttach file
• Note that some recipients may not be able to
receive attachment or inserted files.
• Video files that cannot be sent by S! Mail (File size:
over 294KB, Size: over 176 x 144, Quality: other than
Economy, or etc.) are attached/inserted, the
message indicating attaching/inserting failed
appears.
Attach field
Attachment name
Message Creation Window
(File Attached)
To attach file
Attaching/Inserting a File from Data
Folder, etc. into Message Field
aSelect Data Folder
bSelect a file from Data Folder
Attach images, video, and/or sounds saved in Data Folder
To attach Phonebook data as vCard file
to a message, as well as any contents saved in Phonebook
aSelect Phonebook details
and Calendar (converted as vCard format or vCalendar
bSearch Phonebook and select an entry ( P.5-9)
format). If you insert a file in Message field, display/play
cPress w (Add)
the file when you view the Message window.
17-15
17
Receiving & Sending Messages
• To check the size of a message being created
Select S! Mail as the Type of the message, the message size
appears in the upper-right corner.
To attach Calendar items as vCard file format
17
aSelect Calendar item
bSelect the items
Receiving & Sending Messages
Tip
• To add a file
Perform Step 1 to 2 in "Attaching a file" ( P.17-15)
• To check an attachment
a In Message creation window, highlight a file in Attach
field and select Options → View attachment
b Select a file
• If you attach a file
File type indicator and file name appears in Attach field.
: Image
: Sound
: Video
: vCalendar
: vCard
: File other than above
• To replace a file
a In Message creation window, highlight a file in Attach
field and select Options → View attachment
b Highlight a file and select Options → Replace
c Perform Step 2 in "Attaching a file" ( P.17-15)
17-16
• To delete a file
a In Message creation window, highlight a file in Attach
field and select Options → View attachment
b Highlight a file and select Options → Remove →
Selected
• To delete all files
a In Message creation window, highlight a file in Attach
field and select Options → View attachment
b Options → Remove → All → Yes
Inserting a File
AIn Message creation window, select
Options → Insert
To insert a file with Slide Show set ( P.17-12)
aIn Message creation window, highlight Text entry
field to insert a file
bOptions → Insert
BSelect file to insert
Tip
• To preview an inserted file
a Options → Preview
b Options → Play
Message Creation Window
(File Inserted)
To insert an image
aSelect Image
bSelect an image from Data Folder
To insert sound
aSelect Sound
bSelect sound from Data Folder
To insert a video
aSelect Video
bSelect movie from Data Folder
• If you insert a file
In Message creation window, the icon indicating the file
type, file name, and file size is displayed in Text entry field. If
you inserted an image with no restrictions on its being
displayed, the image will be shown in reduced size instead of
the icon.
: Images that cannot be displayed because of Content Key
has not been purchased or otherwise obtained
: Sound
: Video
• To replace a file
a In Message creation window, highlight a file in Text entry
field
b Options → Replace
c Select a file, an entry, or a calendar item
• To delete a file
a In Message creation window, highlight a file in Text entry
field
b Options → Remove → Yes
17-17
Receiving & Sending Messages
Inserted file name
17
17
Receiving & Sending Messages
• To insert a file where another is inserted
A new Slide Show page is added automatically and the file is
inserted. In case of an image file and sound file, both can be
inserted on the same page.
BSelect a creation method and insert
the file
To capture a photograph
aSelect Take picture
Creating & Inserting a File
While creating a message, create a file and insert it. When
Message window is opened, inserted file appears/plays.
AIn Message creation window, select
Options → Create & Insert
To insert a file with Slide Show is set
aIn Message creation window, highlight Text entry
field where a file to be inserted
bOptions → Create & Insert
bPress c (Take)
cPress c (Add)
To record video
aSelect Record video
bPress c (Record)
cPress c (Save)
dOptions → Add to message
To record sound
aSelect Record sound
bPress c (Record)
cPress w (Stop)
dOptions → Add to message
17-18
Tip
Saving Created Messages
17
Save to Drafts
• To insert a file where another is inserted
707SC works the same way as the file inserted from Data
Folder to Text entry field ( P.17-17).
When message creation is interrupted before completion,
• To replace or delete a file
Perform operations the same way as the file inserted from
Data Folder to Text entry field ( P.17-17).
AIn Message creation window, select
Options → Save to Drafts
• Operations activated before and after capturing a
still image ( P.7-6)
• Operations activated before and after recording
video ( P.7-11)
• Operations activated before and after recording
sound ( P.14-16)
etc., save the message being created to Drafts.
Tip
• When C / y / l is pressed on Message
creation window
When C, y, or l is pressed after entering
something or attaching or inserting a file, a message appears
asking whether to finish creating the message. Select Yes to
save the created message to Drafts.
17-19
Receiving & Sending Messages
• If you insert a file
707SC works the same way as the file inserted from Data
Folder to Text entry field ( P.17-17).
Note
17
Receiving & Sending Messages
• Save to Drafts appears in Options after address,
subject or text has been entered or a file is attached/
inserted.
Save as a Template
By saving a message with fixed contents, etc. as an S! Mail
templates, new S! Mail can be easily created and sent.
AIn Message creation window,
highlight Attach or Text entry field
BSelect Options → Save as template
Note
• Saved as template appears in Options only when a
subject is entered or the message is longer than
SMS, or when a file is inserted.
17-20
Messaging Folders
Viewing Messages
Five mailboxes are created on 707SC.
18
Mailbox
Messaging Folders
Received msgs
Message type
Received messages.
Drafts
Message drafts saved before completion.
Unsent msgs
Messages unsent because of failure or
cancellation, or waiting to be sent.
Sent msgs
Messages already sent.
Templates
S! Mail or SMS saved as templates.
Tip
• To check message memory status
a Press w
b Select Memory status
c Select SMS, S! Mail (By count), or S! Mail (By size)
Note
• When adding a new SMS to Drafts, Unsent msgs, or
Sent msgs cause the maximum number of allowed
message to be exceeded, the oldest SMS is deleted
automatically.
Message Lists
From list of Received msgs or Unsent msgs, view the
messages.
APress w
BSelect Received msgs or Unsent msgs
• To create a personal folder in Received msgs
( P.18-15)
Received Message List
18-2
From a personal folder in Received msgs
Select a folder; then Phone Password entry window
appears, enter Phone Password and press c (Confirm)
Message List Window
The following information appears in lists for each
Messaging folder.
CSelect a message
Messaging Folders
Tip
Subject or the top of the message
• In Message window, press * or #
Switch between previous and next window.
• When pressing Side Keys nb in SMS window
Press Side Key n to enlarge font size by two levels; press
Side Key b to reduce font size by two levels
18
Message type icon
Sender or recipient
Reception date
Message size
Copy protected file indicator
Received Message List
• To view a sent message
a In Step 2, select Sent msgs
b Highlight a message, select Options → View
• To view S! Mail details
In Step 3, highlight a message, select Options → Details
18-3
Tip
18
Messaging Folders
• Received Message Indicators
: Unread S! Mail (Priority: High)
: Unread S! Mail (Priority: Standard)
: Unread S! Mail (Priority: Low)
: Unread S! Mail (Priority: High; Video and/or sound
inserted)
: Unread S! Mail (Priority: Standard; Video and/or sound
inserted)
: Unread S! Mail (Priority: Low; Video and/or sound
inserted)
: Read S! Mail (Priority: High)
: Read S! Mail (Priority: Standard)
: Read S! Mail (Priority: Low)
: Read S! Mail (Priority: High; Video and/or sound
inserted)
: Read S! Mail (Priority: Standard; Video and/or sound
inserted)
: Read S! Mail (Priority: Low; Video and/or sound
inserted)
18-4
: Unread reception notification (Priority: High)
: Unread reception notification (Priority: Standard)
: Unread reception notification (Priority: Low)
: Read reception notification (Priority: High)
: Read reception notification (Priority: Standard)
: Read reception notification (Priority: Low)
: Unread SMS
: Read SMS
: Unread SMS (saved in USIM Card)
: Read SMS (saved in USIM Card)
: Unread S! Mail Delivery Report
: Read S! Mail Delivery Report
: Unread SMS Delivery Report
: Read SMS Delivery Report
: Receiving S! Mail
• Draft Message Indicators
: S! Mail (Priority: High)
: S! Mail (Priority: Standard)
: S! Mail (Priority: Low)
: S! Mail (Priority: High; Video and/or sound inserted)
: S! Mail (Priority: Standard; Video and/or sound inserted)
: S! Mail (Priority: Low; Video and/or sound inserted)
: SMS
• Sent Message Indicators
: S! Mail
: S! Mail (Video and/or sound inserted)
: SMS
: SMS (saved in USIM Card)
• Copy Protected file Indicators
Attached/inserted Copy protected file indicators
: Transferable, Content Key has already been purchased
: Transferable, Content Key has not been purchased or
otherwise obtained
: Nontransferable, Content Key has already been
purchased
: Nontransferable, Content Key has not been purchased or
otherwise obtained
• While Secret Mode is set to Hide
Phonebook Secret Mode is set to On for message receiver/
sender information; only the number or email addresses
appear (instead of the name).
Message Window Operations
Saving to Phonebook
Save phone number/mail address of the sender/recipient to
18
Phonebook while viewing Message window (Received)/
Messaging Folders
• Unsent Message Indicators
: S! Mail
: S! Mail (Video and/or sound inserted)
: SMS
: Sending S! Mail
Reception notification window.
AIn Message window, select Options →
Add to Phonebook → Phone or USIM
BSelect New or Update
To save as a new entry
Select New
To save to an existing entry
aSelect Update
bSearch Phonebook and select an entry ( P.5-9)
CSelect an icon
DSave other items ( P.5-4)
18-5
EPress w (Save)
Note
18
Messaging Folders
• When an underlined phone number, mail address or
URL is highlighted in a message window, Add to
Phonebook does not appear in Options.
Note
• While viewing S! Mail sent via PC, etc., Save as S!
Mail template does not appear in Options.
Message Window Options
Item
Saving as an S! Mail Template
Play
Play Slide Show, inserted video, or sound
( P.17-5).
Retrieved
Receive subsequent part of the notified
message.
Reply
Reply to the sender of the reception
notification.
Reply to all
Send reply to all entered S! Mail recipients.
Forward
Forward received message.
Download
content key
Purchase or acquire Content Key.
Save received or sent S! Mail as an S! Mail template.
AIn Message window, select Options →
Save as S! Mail template
Tip
• If a message appears indicating name duplication
a Press c
b Press c (Select) and enter the name
c Press w (Save)
• When a name entry window has opened
a Press c (Select) and enter the name
b Press w (Save)
18-6
Description
Delete
Delete displayed messages.
Save as S! Mail
template
Add displayed S! Mail as an S! Mail
template ( P.18-6).
Item copy
Save files attached or inserted in an S! Mail
to Data Folder ( P.18-14).
Item
Description
Tip
• The subject of message replies
The subject of an S! Mail reply is prefixed with "RE:"
automatically.
Details
Confirm S! Mail size, etc.
3D Pict. Disp.
Display a message in 3D Pictogram
( P.20-5).
• While Reply with text is On
Under two line breaks, received message text is
automatically entered in Text entry field.
Move to Phone/
USIM
Move an SMS received or being sent to
handset or USIM Card ( P.18-18).
Note
Add to
Phonebook
Replying to a Message
APress w and select Received msgs
18
• If shared memory ( P.25-15) is less than 464KB, you
cannot reply to a message. To reply to the message,
delete messages.
BHighlight message, select Options →
Reply
To reply to all recipients entered in the S! Mail
Highlight message, select Options → Reply to all
CCreate a message and press
w (Send)
18-7
Messaging Folders
Save number or mail address to
Phonebook or USIM Card Phonebook
( P.18-5).
Forwarding a Message
Forward a received or sent message to another recipient.
18
Messaging Folders
APress w and select Received msgs or
Sent msgs
BHighlight message, select Options →
Forward
CCreate a message and press
w (Send)
Tip
• The subject of forwarded messages
The subject of a forwarded S! Mail is prefixed with "FW:"
automatically.
18-8
Note
• If shared memory ( P.25-15) is less than 464KB, you
cannot forward a message. To forward the message,
delete messages.
Sending from Drafts
APress w and select Drafts
BHighlight the message and press
w (Send)
When Send does not appear
aPress c (Edit)
bEnter address and press w (Send)
Sending from Unsent
Messages
Send messages directly from Unsent Messages.
BHighlight the message and press
w (Send)
To send after modifying
aHighlight the message, select Options → Edit
To delete a saved S! Mail or SMS templates
Select Templates → S! Mail templates or SMS
templates
18
CDelete a Message or Template
To delete one message or template
aHighlight the message or template
bOptions → Delete → Selected → Yes
To delete multiple messages or templates
bEdit the message and press w (Send)
aOptions → Delete → Multiple
Deleting a Message
cRepeat b to check all of the target messages or
Deleting Specified Message(s)
dPress w (Delete) and proceed to f when all
Delete multiple specified messages. Alternatively, specify
and delete saved templates.
APress w
bCheck a message or template to delete
templates
are not checked
eEnter Phone Password and press c (Confirm)
fSelect Yes
18-9
Messaging Folders
APress w and select Unsent msgs
BSelect a mailbox
Tip
18
Designating & Deleting a
Mailbox
Messaging Folders
• To view the contents of multiple messages or S! Mail
templates while selecting them
a Repeat Steps 1 and 2
b Options → Delete → Multiple
c Highlight message or S! Mail template, select Options
→ View
APress w to select Settings → Delete
all
• To collectively select/deselect multiple messages or
S! Mail templates
a Repeat Steps 1 and 2
b Options → Delete → Multiple
c Options → Mark all or Unmark all
CRepeat Step 2 to check all target
mailboxes
• To collectively select/deselect multiple SMS
templates
a Perform Steps 1 and 2
b Options → Delete → Multiple
c Press o (Mark all) or o (Unmark all)
Note
• While highlighting an S! Mail template designated
as default, Delete does not appear in Options.
18-10
BCheck a mailbox to delete
DPress w (Delete)
EEnter Phone Password, and press
c (Confirm) to select Yes
Deleting All Messages from a
Mailbox
Delete saved templates all at once.
BSelect a mailbox
To delete an S! Mail or SMS template
Select Templates → S! Mail templates or SMS
templates
• Personal folders cannot be deleted by this
operation. To delete Personal folders, perform the
following operations: Messaging → Settings →
Delete all
• You cannot delete the S! Mail template designated
as the default.
Linked Information
If Message window or Notification details window
CSelect Options → Delete → All
contains an underlined number, mail address, or URL; save
DEnter Phone Password, press
c (Confirm) and select Yes
save bookmark, or access the site.
it to Phonebook or use it to place a call, send messages,
As linked information, following number of characters can
be recognized for each S! Mail Font size setting:
Maximum of 45 lines (1,035 characters) for Standard,
54 lines (1,026 characters) for Large, and 41 lines (1,025
characters) for Small.
18-11
18
Messaging Folders
APress w
Note
Saving to Phonebook
18
Messaging Folders
AIn Message window, select a phone
number, mail address, or URL and
select Add to phonebook → Phone or
USIM
BSelect saving method to create a new
entry or update an existing entry
To save as a new entry
Select New
To save to an existing entry
aSelect Update
bSearch Phonebook and select an entry ( P.5-9)
CSelect an icon
DSave other items ( P.5-4)
EPress w (Save)
18-12
Note
• If URL is selected, USIM is unselectable in Step 1.
Saving as a Bookmark
AIn Message window, select a URL and
select Bookmark
BPress c (Select) to enter a subject
and press w (Save)
Initiating a Call, Sending a
Message, or Accessing the Web
Use phone number/mail address/URL information in
Message window or Notification details window.
AIn Message window, take procedures
down below
To initiate a Voice Call
Select a phone number and select Voice call
To initiate a Video Call
Select a phone number and select Video call
aSelect a phone number or mail address and select
Create msg
bCreate a message and press w (Send)
To access the Web
Select URL and select Go to URL
Tip
• Operations in Notification details window
Phone number/mail address/URL information except in From
(other party's phone number) can be used.
Viewing an Attachment
Open images/play sounds attached to S! Mail. For vCard/
18
Messaging Folders
To send a message
Using an Attachment
vCalendar, open Details to see contents.
ASelect a file and select Open file
Tip
• To save a file in Data Folder directly
In Message window, select a file → Save items
• To save vCard/vCalendar to Phonebook/Calendar
directly
In Message window, select a file → Register to
Phonebook or Register to Calendar
• To register vCard/vCalendar to Phonebook/Calendar
after viewing
a Perform Step 1
b Press c (Register)
18-13
18
• When a file requiring Content Key is attached
If you perform Step 1, a message appears and you cannot
open the file. To view the file, select Save items in Step 1 to
save and purchase/obtain Content Key from Data Folder
( P.11-13).
Messaging Folders
• When an attachment has a restriction (only one time
playback allowed)
When you perform Step 1, a message appears notifying you
that only one time playback is allowed).
To select and save multiple files
aOptions → Multiple
bCheck the files to save
cRepeat b to check all target files
dPress w (Save)
To save all files
Options → All
Tip
Saving Attachments to Data
Folder
Save S! Mail attachment/inserted files to 707SC.
AIn Message window, select Options →
Save items
BPerform file selection operation
• To select or deselect multiple files at once
a In Step 2, select Options → Multiple
b Press o (Mark all) or o (Unmark all)
• When a popup message appears indicating the file
name is a duplicate while saving
a Press c
b Press c (Select) and change the file name
c Press w (Save)
To select and save one file
Note
aHighlight a file
• When a file is highlighted in Message window, Save
items does not appear in Options.
bPress c (Select) or select Options → Selected
18-14
Managing Folders
Security ON/OFF
Set Security setting for a personal folder; require Phone
save in the folders for each mail types. Set own security
Password entry to check messages in the personal folder.
setting for personal folders.
APress w and select Received msgs
Create Folder
APress w and select Received msgs
BSelect Options → Create folder
CEnter a name
Edit Folder
Change name for personal folders.
APress w and select Received msgs
BSelect Options → Edit folder
BHighlight the personal folder, select
Options → Security ON/OFF
CEnter Phone Password and press c
(Confirm), then select Yes
Tip
• Folder with Security setting
appears indicating Security setting has been selected.
• With Security On
Select personal folders; Phone Password entry window
appears. Enter Phone Password and press c; Message list
window in the personal folder appears.
CEnter a name
18-15
18
Messaging Folders
Create personal folders in Received msgs; organize and
Moving Messages
APress w and select Received msgs
18
To move messages in personal folder to
Messaging Folders
another personal folder
Select a personal folder
BHighlight message, select Options →
Move this
CSelect the destination folder
To return messages to Received msgs
Select Received msgs
Delete Folder
APress w and select Received msgs
BHighlight the personal folder, select
Options → Delete folder → Yes
To select personal folder with Security setting
On
Enter Phone Password and press c (Confirm)
CSelect Yes
From Message List
Saving to Phonebook
APress w and select Received msgs,
Unsent msgs or Sent msgs
BHighlight message, select Options →
Add to Phonebook
18-16
CSelect a phone number or mail
address and select Phone or USIM
DSelect saving method to create a new
entry or update an existing entry
Select New
To save to an existing entry
Available sorting types to display vary by Message list
window of the mailbox.
BSelect an item
aSelect Update
To sort in descending order of date
bSearch Phonebook and select an entry ( P.5-9)
Select Date
ESelect an icon
To sort by sender
FEnter additional items as required
( P.5-4)
To sort by recipient
GPress w (Save)
18
AIn Message list window, select
Options → Sort by
Messaging Folders
To save as a new entry
Sorting Messages
Select Sender
Select Recipient
To view read and unread messages separately
Select Unread to read or Read to unread
18-17
To view messages separately by type
Select Message type
18
Move to Phone/Move to USIM
To sort by subject
Move received SMS or sent SMS.
Select Subject
Save up to ten messages to USIM Card.
Messaging Folders
To sort in descending order of message size
Select Size
Tip
• Listing order when selecting Message type
Listed in the order of SMS → S! Mail (Including message
notification) → SMS saved in USIM Card.
• Listing order when selecting Sender, Recipient, or
Subject
Listed in the order of single-byte symbol → single-byte
number → single-byte alphabet → single-byte Katakana →
double-byte symbol → double-byte Hiragana → doublebyte Katakana → Kanji → double-byte number → doublebyte alphabet. But if Subject is selected, messages with no
subject are listed at the top.
18-18
APress w and select Received msgs or
Sent msgs
BMove messages
To move from USIM Card to 707SC
aHighlight an SMS saved on USIM Card
bOptions → Move to phone
To move from 707SC to USIM Card
aHighlight an SMS saved in USIM Card
bOptions → Move to USIM
Tip
• To move received SMS in personal folder to USIM
Card
A confirmation message appears. Select Yes to complete the
move.
Saving an S! Mail Template
For more information about saving an SMS template, see
"SMS Templates" ( P.4-15).
APress w and select Templates →
S! Mail templates
BSelect Options → Add new
DPress w (Save)
18
Tip
• To view an S! Mail template being created
In Step 3, select Options → Preview
• To display and view an S! Mail template
In Step 2, highlight S! Mail template, select Options →
View
• To modify an S! Mail template
a In Step 2, select a registered S! Mail template and
perform modification operation
b Press w (Save)
• To delete an S! Mail template
Perform the same operation as for a message ( P.18-9).
• To copy, cut, or paste characters ( P.4-12)
• To use contents of an SMS template or Phonebook
( P.4-10)
18-19
Messaging Folders
• Message List SMS Indicators
: Unread SMS
: Read SMS
: Unread SMS (USIM Card)
: Read SMS (USIM Card)
: Sent SMS
: Sent SMS (USIM Card)
CSelect Subject field or Text entry field
and enter a subject or message
18
Item
Description
Messaging Folders
• To change font size
a In Step 3, select Text entry field, select Options → Font
Size
b Select any of Small, Standard, or Large
Move this
Move received mails to a personal folder
( P.18-16).
Create folder
Create a personal folder ( P.18-15).
• To set/release the prediction entry function
( P.4-13)
Edit folder
Change personal folder name ( P.18-15).
• Setting Slide Show/inserting a file
a In Step 3, select Options → Insert or Create & Insert
b Perform setting, attaching, or inserting operation
( P.17-12, 17-16, 17-18)
Security On/Off
With Security setting On, enter Phone
Password to check mails in a personal
folder ( P.18-15).
Delete folder
Delete a personal folder ( P.18-16).
View
Open sent messages or S! Mail templates
( P.18-3, 18-19).
Edit
Edit unsent message ( P.18-8).
Delete
Delete messages or templates ( P.18-9,
18-11).
Move to phone/
Move to USIM
Move SMS between 707SC and USIM
Card ( P.18-18).
Sort by
Sort messages ( P.18-17).
• To view the text in 3D Pictogram
In Step 3, highlight Text entry field, select Options → 3D
Pict. Disp.
Message List Options
Item
Retrieve
Description
Retrieve complete S! Mail from the Server.
Reply
Reply to the sender ( P.18-7).
Reply to all
Send reply to all entered S! Mail recipients
( P.18-7).
Forward
18-20
Forward received message ( P.18-8).
Save number or mail address to
Add to Phonebook Phonebook or USIM Card Phonebook
( P.18-16).
Details
Check memory status in a personal folder
or confirm S! Mail size, etc.
Item
Description
Stop message retrieval from Mail Server.
Send
Send message using S! Mail template or
SMS template ( P.17-14).
Add new
Save a new S! Mail template or SMS
template ( P.4-15, 18-19).
18
Messaging Folders
Cancel retrieving
18-21
18-22
Server Mail
Message List
View Mail Server message list. Retrieve, forward, or delete
messages.
19
Acquire Mail List
Server Mail
APress w and select Server mail box
BSelect Acquire Mail List
Tip
• To check Mail Server usage state
a Select Server mail volume in Step 2
b Press c (Update) and select Yes to update to the
latest information
19-2
Download
APress w and select Server mail box
BSelect Mail List
CHighlight the message, select Options
→ Download
Tip
• To receive all messages from Message list window
In Step 2, select Retrieve All Mail
Delete
APress w and select Server mail box
BSelect Mail List
CDelete unwanted messages
aHighlight a message
bOptions → Delete → Selected → Yes
aOptions → Delete → Multiple
bCheck a message to delete
cRepeat b to check all target messages to delete
dPress w (Delete) and go to f if unmarking all
eEnter Phone Password and press c (Confirm)
fSelect Yes
To delete all messages
aOptions → Delete → All
bEnter Phone Password, press c (Confirm) and
select Yes
Tip
• To select/deselect multiple messages at once
a Perform Steps 1 and 2
b Options → Delete → Multiple
c Options → Mark all or Unmark all
19-3
19
Server Mail
To delete one message
To delete multiple messages
Remote Forward
DEnter an address
To directly enter an address
Forward a message from the Mail Server to another
aSelect Entry field and select Enter Recipient
address. Contents except the address are sent without
bEnter a phone number or mail address
modification.
19
APress w and select Server mail box
Server Mail
To enter an address using a log
BSelect Mail List
To select an address from Phonebook
CHighlight message, select Options →
Remote Forward
bSearch Phonebook and select an entry ( P.5-9)
Select Entry field and select a displayed log entry
aSelect Entry field and select From Phonebook
cHighlight a phone number or mail address and
press w (Select)
To select an address from Category of
Phonebook
aSelect Entry field and select From Category
bSelect a Category, with/without an Address
selection window, highlight an address and press
w (Select)
ESelect Options → Send
19-4
Tip
• Message subject
Forwarded message Subject is automatically prefixed with
"FW:".
• To set other sending options for a message
a In Step 5, select Options → Sending options
b Select an item and perform operations to set ( P.20-2)
c Press w (Apply)
19
Server Mail
• To delete an address
In Step 5, highlight a recipient, select Options → Remove
• To change address type to To, Cc, or Bcc
a In Step 5, highlight a recipient, select Options →
Change recipients
b Select any of To, Cc, or Bcc
19-5
19-6
Other Message Settings
Customizing Handset
Address
Change your mail address (alphanumerics before @) used
20
APress w and select Settings →
S! Mail → Sending options
BSelect an item and set
Other Message Settings
for sending and receiving S! Mail to/from PC, etc. The
Message priority
default account name consists of random alphanumerics.
aSelect Priority
APress w and select Settings →
S! Mail → Mail Address setting
bSelect a level and press c
BFollow onscreen instructions
bSelect an item and enter a time if you selected
Mail Server Retention Period (before expiry)
aSelect Expiration
Custom time (Hour)
S! Mail Settings
cPress c
Mail Server Retention Period (before delivery)
Sending Settings
Default Setting
Priority: Normal ■ Expiration: Maximum
■ Delivery: Immediately
■ Request delivery report: Unchecked
bSelect an item and press c
■
Set Sending options. Alternatively, set options for each
S! Mail message ( P.17-11).
20-2
aSelect Delivery
Delivery report request
Check Request delivery report
CPress w (Save)
BSelect an item and set
Tip
• When retention set in Expiration expires
The S! Mail is deleted automatically from the Mail Server.
To set the receiving method to use in Japan
• When retention is set in Delivery
When the specified time has elapsed, the S! Mail is sent from
the Mail Server.
bSelect an item and press c
• When Request delivery report is checked
When an S! Mail is sent from the Mail Server, a distribution
report is sent to your handset.
aSelect Roaming network
Default Setting
■
■
Home network: Manual
Roaming network: Manual
Set receiving options.
To set the receiving method while overseas
bSelect an item and press c
20
CPress w (Save)
Other Message Settings
Receiving Settings
aSelect Home network
Tip
• Home network and Roaming network Items
Auto download: Receive automatically.
Manual: Receive only reception notification.
APress w and select Settings →
S! Mail → Receiving options
20-3
Message Size
BSet Options
Font color
Default Setting
■
300KB
Cancel outgoing messages exceeding specified size.
APress w and select Settings →
S! Mail → Message size
20
BSelect an item and press c (Save)
aSelect Font color
bUse a to highlight a color and press c
To set a font size
aSelect Font Size
bSelect an item and press c
Background color
Other Message Settings
aSelect Background color
Default Style
Default Setting
Font color: Black ■ Font size: Large
■ Background color: White
■ Slide interval: Custom time (3 seconds)
■
Set font color, font style, background color, and Slide Show
time intervals. Alternatively, change display settings for
each S! Mail sent ( P.17-12).
APress w and select Settings →
S! Mail →Default style
20-4
bUse a to highlight a color and press c
Slide Show time intervals
aSelect Slide interval
bSelect an item, with Custom time, enter a time
cPress c
CPress w (Save)
SMS Settings
Default Setting
■
■
Delivery report: Unchecked
Character support: Automatic
Set Sending options. Alternatively, set options for each
SMS message ( P.17-11).
APress w and select Settings → SMS
Tip
• When Delivery report is checked
When an SMS is sent from the Mail Server, a delivery report
is sent to your handset.
3D Pictogram Settings
Default Setting
Display type: New mails only
Background: Pattern 1
■ Running Speed: Normal
■
20
■
Request a delivery report
Animate text, pictograms or emoticons in message text.
Check Delivery report
Activate/cancel 3D Pictogram; set background color/speed.
Change character encoding
APress w and select Settings →
3D pictogram
aSelect Character support
bSelect an item and press c
CPress w (Save)
20-5
Other Message Settings
BSet Options
BSet Options
3D Pictogram
aSelect Display type
Note
• Such as file-attached/Slide Show set S! Mail may not
appear properly in 3D Pictogram.
bSelect an item and press c (Save)
Background & Font color
aSelect Background
bPress s, select a pattern and press c (Save)
Reply with text
Default Setting
■
Off
20
To set speed
Activate to include original message text in Reply.
Other Message Settings
aSelect Running speed
APress w and select Settings → Reply
with text
bSelect an item and press c (Save)
Tip
• Display type Items
Always: Use 3D Pictogram when viewing every message.
New mails only: Use 3D Pictogram only when viewing an
unread message.
OFF: Not use 3D Pictogram.
20-6
BSelect an item and press c (Save)
Tip
• Reply with text Items
On: Reply with text including received message text.
Off: Reply with text not including received message text.
Mobile Internet
Getting Started
Web
Access Mobile Internet or Internet sites from 707SC.
Browse sites or download image or sound files, etc. A
separate subscription is required for Web service.
Accessing via Yahoo! Keitai Main Menu
Select Yahoo! Keitai menu items to access various content.
21
SSL/TLS Precautions
When a security notice appears, subscribers must decide for
themselves whether or not to open the page. Opening secure
pages constitutes agreement to the terms of usage.
SOFTBANK MOBILE Corp., VeriSign Japan K.K., Betrusted
Japan Co., Ltd., and Entrust Japan Co., Ltd. are not liable for
damages associated with SSL/TLS use.
Cache
Retrieved Mobile Internet pages are temporarily saved
here. Cache remains even after a session ends or 707SC is
Mobile Internet
Internet Accessing
turned off. When full, oldest pages are automatically
Enter a URL and access pages.
deleted to make room for new ones. When a saved page is
SSL/TLS
opened again, it may open from Cache. For the latest
version, reload the page ( P.22-13).
Secure Sockets Layer (SSL) and Transport Layer Security
(TLS) are encryption protocols for secure Internet
Tip
transmissions of important/sensitive information (credit
• To manually delete Cache contents ( P.23-4)
card numbers, etc.) and authentication. Confirm electronic
• When another USIM Card is inserted into 707SC
Cache contents are automatically deleted.
certificates saved on 707SC ( P.22-14, 23-4).
21-2
• When a page with an expiry date is saved
Page is automatically deleted upon expiry.
Getting Online
Yahoo! Keitai Main Menu
Access Mobile Internet sites via Yahoo! Keitai main menu.
APress o
Alternatively, press o for 1+ seconds
Enter URL
APress c and select Yahoo! Keitai →
Enter URL
BSelect URL field and enter a URL
CPress w (Go to)
Yahoo! Keitai menu appears. Select Yahoo! Keitai
to open Yahoo! Keitai main menu.
Tip
• When accessing Mobile Internet for the first time
After Step 1, Time & date settings window appears; set time
& date to display Information window.
21
• To access a page from the access history ( P.22-11)
21-3
Mobile Internet
BSelect an item
Tip
• To save the entered URL as a bookmark
a In Step 2, check Add bookmark
b Select Title field and enter title
c Press w (Go to)
Page Window Operations
Operations on pages are as follows.
Scrolling
current view.
21
d/r/b
くじらの化石を発掘
×× 県○○市のビル工事現場
で、約300万年前のくじらの化
石を発見。
化石の特徴から、
△△くじらの
一種ではないかとみられてい
る。
Mobile Internet
化石の特徴から、
△△くじらの
一種ではないかとみられてい
る。
戻る
Moving Cursor
item.
ニュース
×× 県○○市のビル工事現場
で、約300万年前のくじらの化
石を発見。
○○市ではこれまでにくじら
の化石が10体発掘されている
Side Key n: Scroll page up by multiple lines
When selecting an item such as link, move cursor to that
Scroll bar appears when page content extends beyond
ニュース(速報)
くじらの化石を発掘
Side Key b: Scroll page down by multiple lines
u/l/n
○○市ではこれまでにくじら
の化石が10体発掘されている
が、今回発見されたのは他の
ものよりも50万年ほど古いと
戻る
Scroll bar
d/r: Scroll down by one line
When a horizontal scroll bar appears, use r to
scroll right
u/l: Scroll up by one line
1.国内のニュース
Cursor
d/r
ニュース
1.国内のニュース
2.海外のニュース
2.海外のニュース
3.政治
3.政治
4.経済
4.経済
5.スホ゜ーツ
5.スホ゜ーツ
6.その他
戻る
選択
u/l
6.その他
戻る
選択
d/ r: When items are listed vertically, move cursor
down
When the page is already scrolled to the bottom,
alternatively, press Side Key b to move cursor down
u/ l: When items are listed vertically, move cursor
up
When a horizontal scroll bar appears, use l to
When the page is already scrolled to the top,
scroll left
alternatively, press Side Key n to move cursor up
21-4
Tip
Tip
• When items are listed in the same row
Press s to move cursor right or left.
• When you move cursor
The selected item is highlighted or enclosed in a frame of
dotted lines if it is link to another page.
• If w (Back)/C is pressed with no previous page
A message appears asking whether to terminate the Web
connection; select Yes to terminate the Web connection.
Text Entry/Item Selection
An information window may show fields and items below.
Previous or Next Page
お名前
ニュース
1.国内のニュース
c
ニュース(スポーツ)
1.野球
aText entry field
bRadio button
cMenu field
性別 男 女
住所
2.サッカー
3.政治
3.ゴルフ
初めて購入した
4.その他
もう一度購入したい
友達にも薦めたい
4.経済
アンケート(複数選択可)
5.スホ゜ーツ
送信
6.その他
戻る
選択
w (Back)/C
戻る
戻る
選択
Highlight link, etc. and press c: Display the next page
Alternatively, select Options → Forward to change
the window
キャンセル
21
dCheck box
eCommand button
選択
a Text entry field
Enter data, certification passwords, etc.; highlight Text
entry field, press c and enter text
w (Back) or C: Display the previous page
21-5
Mobile Internet
2.海外のニュース
b Radio button
Note
Select only one of the selection items. Highlight an item
with
and press c to select it (Appearing as
).
• The appearance of text entry or item selection varies
by page opened.
c Menu field
Display a menu and select an item. Highlight a menu,
press c to display the menu. Use j to highlight the
item and press c to select the item. When multiple
items can be selected for Menu field, press C to
d Check box
Mobile Internet
Select any number of selection items. Highlight an item
underlined.
and press c to select it (Appearing as
). To
and press c.
e Command button
Perform operations assigned to a button such as send or
reset. Highlight a command button and press c to
execute the operation.
21-6
on an page to initiate calls, create and send messages, and
Available phone numbers, mail addresses, and URLs are
21
deselect a selected item, highlight
Use phone numbers, mail addresses, and URLs contained
access other pages.
cancel multiple selections.
with
Using Linked Info
Using Page Links
AOpen a page containing linked info
BUse the available links
To initiate a Voice Call
Select a phone number and select Voice Call
BSelect a number or address and select
Save Number or Save Address →
Phone or USIM
CCreate a new entry or update an
existing entry
To create and send messages
To save as a new entry
aSelect a phone number or mail address and select
Select New
Create message
To add to an existing entry
21
aSelect Update
To access another page
bSearch for an existing entry to modify ( P.5-9)
Select a URL
DSelect an icon
Saving to Phonebook
ESave the item ( P.5-4)
AOpen a page with linked number or
address
FPress w (Save)
21-7
Mobile Internet
bCreate messages and press w (Send)
21-8
Mobile Internet Files
Using Image Files
Saving Page Images
Save a page image to Data Folder.
Saving Images to Data Folder
AOpen a page with an image
Saving Linked Images
BSelect Options → Save → Save image
Download and save images from page links.
AOpen a page containing an image link
CHighlight the image and press
c (Save)
BSelect link
DPress C
To open the image
22
When details appear
Press c (Launch)
Mobile Internet Files
CPress c
Press c
To set saved image as Wallpaper
DPress C
To open the image
Press c (Launch)
( P.22-3)
EPress C to end the operation
To set saved image as Wallpaper
To save another image
Press w (Set) and perform Step 3 in "Wallpaper"
Repeat Step 3
( P.22-3)
22-2
Press w (Set) and perform Step 3 in "Wallpaper"
Tip
• If the same file name exists
a Press c (Edit) and change the file name
b Press w (Save)
• Viewing images
Press w (Set as) to set Wallpaper. ( P.22-3).
Press c (Zoom) to enlarge or reduce the image. Press
o (Details) to view image details.
• When SVG-T/SWF format file is saved
Options appears on the save image confirmation window,
then select Options and execute various operations
( P.11-8).
Wallpaper
Set a saved image as Wallpaper.
AOpen image to set as Wallpaper
( P.22-2)
BPress w (Set as)
CSelect an item
To set as Wallpaper
aSelect Wallpaper
bPress c (Set)
22
entries
aSelect Caller ID
bSearch Phonebook and select an entry ( P.5-9)
cPress c (Set)
To set as outgoing image
aSelect Still picture
bPress c (Save)
22-3
Mobile Internet Files
To set as incoming image for Phonebook
Note
• For SVG-T/SWF format file, Settings does not appear.
For Wallpaper, open Data Folder and open an image
( P.11-8).
Saving Sound Files to Data
Folder
Download sound files from page links and save them to
Data Folder.
Using Sound Files
AOpen a page containing a sound link
Playing Sound
BSelect link
Play sounds from page links.
AOpen a page containing link
22
BSelect link to sound
CPress c
When details appear
Press c
Mobile Internet Files
DSelect Exit
To play sound
Select Launch
22-4
Saving Sound Being Played
Save background sound while viewing a page.
AOpen a page with sound
BSelect Options → Save → Save sound
CPress C
To play sound
Press c (Launch)
Tip
• If same file name exists
a Press c (Edit) and change the file name
b Press w (Save)
• To play sounds
Press w (Set as) and set saved sound as Ringtone
( P.11-11). For other operations, refer to Media Player
( P.10-3).
Options
The items listed vary by the window status.
To set saved sound as Ringtone
Press w (Set as) and perform Step 3 in "Setting
Item
Description
Stop playing.
View bookmark
Access a page containing a streaming
play link saved as a bookmark.
View history
Access a page containing a streaming
play link already accessed.
Details
Confirm sound size, etc.
Player settings
Select settings related to Media Player
( P.10-7).
22-5
22
Mobile Internet Files
Stop
Sound File as Ringtone" ( P.11-11)
Using Video Files
Playing a Video
Play video from a page link.
AOpen a page containing a video link
BSelect link
Saving Videos to Data Folder
Download and save videos from page links.
22
Mobile Internet Files
AOpen a page containing a video link
BSelect link
CPress c
To play video
Press c (Launch)
To set saved video as Ringtone
Press w (Set as) and perform Step 3 in "Setting
Video File as Ringtone" ( P.11-11)
Tip
• If same file name exists
a Press c (Edit) and change the file name
b Press w (Save)
• To play video
Press w (Set as) and set saved video as Ringtone
( P.11-11). For other operations, refer to Media Player
( P.10-9).
Options
The items listed vary by the window status.
Item
When details appear
Press c
DPress C
22-6
Description
Resolution
Set video display size while playing or
paused.
View bookmark
Access a page containing a streaming
play link saved as a bookmark.
Item
View history
Description
Access a page containing a streaming
play link already accessed.
Details
Set video size while playing or paused.
Player settings
Select settings related to Media Player
( P.10-11).
Note
• Even when use of streaming is temporarily stopped,
communications continue, so packet communication
fees continue.
Options
The items listed vary by the window status.
Streaming
Item
Description
Set video size while playing or paused.
compatible files via page links, etc. Downloaded content
Add bookmark
Save current page containing a
streaming play link as a bookmark.
View bookmark
Access a page containing a streaming
play link saved as a bookmark.
View history
Access a page containing a streaming
play link already accessed.
cannot be saved.
AOpen a page containing a streaming
video link
BSelect link
Tip
• To stream files
Operate the same as Media Player ( P.10-3, 10-9).
22-7
22
Mobile Internet Files
Enjoy audio visual media while it downloads. Access
Resolution
Saving Pages
Saving a Page
Save current page to open it at any time without accessing
APress c and select Yahoo! Keitai →
Saved pages
AOpen a page
BHighlight a page, select Options →
Rename
BSelect Options → Saved pages → Save
CPress c (Edit) and change the name
the Web. Save up to 50 pages.
Opening a Saved Page
22
Change Title
Mobile Internet Files
APress c and select Yahoo! Keitai →
Saved pages
BSelect a page
22-8
DPress w (Save)
Deleting a Saved Page
APress c and select Yahoo! Keitai →
Saved pages
BDelete as required
Tip
• To select/deselect multiple pages at once
a In Step 2, select Options → Delete → Multiple
b Options → Selected/All
Saving Bookmarks
To delete one page
aHighlight a page
bOptions → Delete → Selected → Yes
To delete multiple pages
aOptions → Delete → Multiple
bCheck a page to delete
By saving the Web addresses (URLs) of frequently used
pages as bookmarks, access those pages. Up to 50 URLs
can be saved as bookmarks.
dPress w (Delete) and select Yes
AOpen a page
To delete all pages
BSelect Options → Bookmarks → Add
to Bookmarks
aOptions → Delete → All
bEnter Phone Password, press w (OK) and select
Yes
22-9
22
Mobile Internet Files
cRepeat Step b to check all target pages
Saving an Address as a
Bookmark
CConfirm Title and URL
To change the title/URL
aSelect Title or URL field
bChange Title or URL
Tip
• To send a bookmark URL in a message
a In Step 2, highlight a bookmark, select Options → Send
URL
b Create a message and press w (Send)
DPress w (Save)
Editing Bookmarks
Tip
22
• To manually enter and save a bookmark
a Press c and select Yahoo! Keitai → Bookmarks
b Options → Add bookmark
c Select Subject field and enter a subject
d Select URL field and enter a URL
e Press w (Save)
Mobile Internet Files
Opening a Bookmark
APress c and select Yahoo! Keitai →
Bookmarks
BSelect a bookmark
22-10
Modify the title or URL of bookmark.
APress c and select Yahoo! Keitai →
Bookmarks
BHighlight a bookmark, select Options
→ Edit bookmark
CSelect Title field or URL field, and
modify the title or URL
DPress w (Save)
Deleting a Bookmark
APress c and select Yahoo! Keitai →
Bookmarks
BDelete as required
To delete one bookmark
aHighlight a bookmark
bOptions → Delete → Selected → Yes
To delete multiple bookmarks
aOptions → Delete → Multiple
bCheck a bookmark to delete
Tip
• To select/deselect multiple bookmarks at once
a In Step 2, select Options → Delete → Multiple
b Options → Selected/All
History
Holds up to 50 page URLs; open previously viewed pages.
APress c and select Yahoo! Keitai →
History
BUse History records
dPress w (Delete) and select Yes
Select URL
To delete all bookmarks
To delete a History record
aOptions → Delete → All
bEnter Phone Password, press w (OK) and select
22
Mobile Internet Files
cRepeat b to check all target bookmarks
To open a History record
aHighlight the URL
bOptions → Delete → Selected → Yes
Yes
22-11
To delete multiple records
aOptions → Delete → Multiple
bCheck a record to delete
cRepeat b to check all target records
Rendering
dPress w (Delete) and select Yes
Default Setting
To delete all records
Set pages to match Display size or show only text.
aOptions → Delete → All
bEnter Phone Password, press w (OK) → Yes
Tip
22
Display Settings
• To select/deselect multiple histories collectively
a In Step 2, select Options → Delete → Multiple
b Options → Selected/All
■
Standard
AOpen a page
BSelect Options → Rendering
CSelect an item
To open a page without changing its layout
Mobile Internet Files
Select Wide
To fit page to Display
Select Standard
To show page text only
Select Simple
22-12
Search Text
AOpen Information window
BSelect Options → Search text
CSelect Text entry field and enter text
DSelect search direction and press
w (Search)
Copy Text
AOpen Information window
DUse a to move cursor on the first
character and press c (Start)
To copy all texts in text entry window
Press o (All) to copy
EUse a to specify the range and
press c (End)
Reload
AOpen a page
BSelect Options → Reload
22
Mobile Internet Files
BSelect Options → Copy Text
CIn a text entry window, select Options
→ Copy
22-13
Page Details
View current page information including URL and Title.
View SSL/TLS server certificates.
AOpen a page
AOpen a secure page
BSelect Options → Browser setting →
BSelect Options → Browser setting →
Page details
Send URL
Attach current page URL to a message and send it.
22
Server Certificate
AOpen a page
Mobile Internet Files
BSelect Options → Send URL
CCreate a message and press w (Send)
22-14
Certificates
CSelect Server certification and select a
certificate
Tip
• When you open a page that uses SSL/TLS
appears on the top of Display.
Returning to Default Page
Information Window Options
Return to the Yahoo! Keitai main menu.
Item
Description
AOpen a page
Forward
Move to the next information window
( P.21-5).
BFrom any page, select Options →
Bookmark
Add or open bookmarks ( P.22-9).
Saved pages
Save information windows to Saved pages.
Display information window from Saved
pages ( P.22-8, 22-8).
Text search
Search text in information window
( P.22-13).
Reload
Reload the information for a page
( P.22-13).
AOpen a page
Enter URL
Enter a URL to open another site/page
( P.21-3).
BSelect Options → Browser setting →
Encoding
Rendering
Change the displaying method for pages
( P.22-15).
Copy text
Copy text in information window ( P.22-13).
Save
Save images and sounds to Data Folder
( P.22-2, 22-4).
Send URL
Send URLs of a page in a message
( P.22-14).
Yahoo! Keitai
Encoding
Default Setting
■
Auto
If page text appears garbled, change character encoding.
22-15
Mobile Internet Files
CSelect an option and press c (Save)
22
Description
Item
History
Item
Access previously viewed pages ( P.22-11).
Yahoo! Keitai
Return to Yahoo! Keitai main menu
( P.22-15).
About
browser
Browser setting Adjust Web Browser settings.
22
Mobile Internet Files
Text size
Adjust information window text size
( P.23-3).
Downloads
Set image/sound download settings
( P.23-2).
Empty
cache
Delete all information in cache.
Empty
cookies
Delete all cookies.
Cookie
options
Activate or cancel cookies.
Certificates
View certificates ( P.22-14, 23-4).
Page details View page details ( P.22-14).
Manufacture
Show or hide handset serial number.
No.
Encoding
Change current page character encoding
( P.22-15).
Java Script
Turn Java Script on/off ( P.23-3).
22-16
Description
View browser details.
Other Web Settings
Preferences
Default Setting
■
■
Display images: Checked
Play sound: Checked
Security
Cookie Options
Set 707SC to deactivate embedded images/sounds when
Default Setting
opening pages. Pages download more quickly without
Activate or deactivate Cookies that allow information
image and sound data.
providers to automatically record information identifying
APress c and select Yahoo! Keitai →
Browser settings → Downloads
handset user. User information, access date, and other
BPerform operations to set
To deactivate images
aSelect Display images
23
■
Accept all
information are saved in Cookies.
APress c and select Yahoo! Keitai →
Browser settings → Cookie options
BSelect an item and press c (Save)
Other Web Settings
bSelect an item and press w (Save)
To deactivate sounds
aSelect Play sound
bSelect an item and press w (Save)
23-2
Tip
• Cookie options Items
Accept all: Always accept Cookies.
Reject all: Always reject Cookies.
Prompt: Confirm Cookies each time they appear.
Activating/Deactivating Java
Script
Default Setting
■
Off
APress c and select Yahoo! Keitai →
Browser settings → Java script
BSelect an item and press c (Save)
Text Size
Default Setting
■
Manufacture Number
Default Setting
■
Off
Set 707SC to automatically send handset serial number to
Websites upon request for user identification.
APress c and select Yahoo! Keitai →
Browser settings → Manufacture
number
BSelect an item and press c (Save)
Normal
Change the size of the page fonts.
APress c and select Yahoo! Keitai →
Browser settings → About browser
BSelect an item and press c (Save)
23-3
23
Other Web Settings
APress c and select Yahoo! Keitai →
Browser settings → Text size
Browser Information
Certificates
View electronic certificate saved on 707SC.
AOpen a page using SSL/TLS
BSelect Options → Browser setting →
Certificates
CSelect Root certificate to view the
certificate
Refresh Browser
Empty Cache/Empty Cookies
Delete information saved in Cache and Cookies.
APress c and select Yahoo! Keitai →
Browser settings
BDelete as required
To delete Cache contents
Select Empty cache → c (Yes)
To delete Cookies
Select Empty cookies → c (Yes)
23
Other Web Settings
23-4
S! Appli
Getting Started
S! Appli
Download 707SC-compatible S! Appli, including games,
APress c and select S! Appli →
S! Application list
3D images, and information via Mobile Internet sites.
BSelect Download S! Appli
• Use only compatible S! Appli.
CSelect S! Appli to download
• To download S! Appli, separate subscription is required
and communication fees apply.
Network S! Appli
Some S! Appli require network connection. Enjoy network
gaming or access real-time information like stock prices.
• A separate subscription is required to download S! Appli
or use those which require network connection.
24
Downloading S! Appli
• Connection fees apply.
S! Appli
24-2
DSelect Yes
When details appear
Press c
ESelect Exit
To activate S! Appli
Select Launch
Starting S! Appli
APress c and select S! Appli →
S! Application list
BSelect S! Appli and press c (Start)
Tip
• When S! Appli is active
appears.
Exit, Pause, & Resume
Exiting or Pausing S! Appli
AWhile an S! Appli is active, press y
BChoose to exit/pause
To exit S! Appli
Press w (Exit)
To pause S! Appli
Press c (Pause)
Tip
• When S! Appli is paused
707SC returns to Standby and
appears.
• When 707SC is closed while S! Appli is active
S! Appli is paused.
24
S! Appli
24-3
Restarting a Paused S! Appli
AIn Standby with S! Appli paused,
press c and select S! Appli
BPress w (Resume)
• S! Appli properties
Open Details to see following properties:
Name, Description, Profiles, Certification, Size, Record Size,
Version, and Vendor.
Lock/Unlock
Managing S! Appli
Lock S! Appli to prevent accidental deletion.
Details
APress c and select S! Appli →
S! Application list
Open Details to confirm S! Appli properties.
APress c and select S! Appli →
S! Application list
24
Tip
S! Appli
BHighlight a S! Appli, select Options →
Details
BHighlight S! Appli, select Options →
Lock
Tip
• Locked S! Appli Indicator
In S! Appli list,
appears.
• To cancel lock
In Step 2, highlight locked S! Appli, select Options →
Unlock
24-4
Delete
APress c and select S! Appli →
S! Application list
BDelete S! Appli
To delete one S! Appli
Options → Delete → Selected → Yes
To delete multiple S! Appli
aOptions → Delete → Multiple
Tip
• When all S! Appli are checked
In Step 2, perform a to c in "To delete multiple S! Appli,"
press w (Delete) in d and proceed the following
procedures
a Enter Phone Password, press c (Confirm) and select
Yes
b Select Yes to delete all S! Appli or No to exclude locked
ones
• To select/deselect multiple S! Appli at once
a In Step 2, select Options → Delete → Multiple
b Options → Mark all or Unmark all
bCheck S! Appli to delete
cRepeat Step b to check all target S! Appli
mPet
dPress w (Delete) and select Yes
With 707SC mPet, raise your own virtual pet. Train or enjoy
To delete all S! Appli
playing games with.
aOptions → Delete → All
bEnter Phone Password, press c (Confirm) and
cSelect Yes to delete all S! Appli or No to exclude
locked ones
S! Appli
select Yes
24
Selecting Pet
APress c and select S! Appli →
S! Application list → mPet → Yes
24-5
BUse s to select the pet and press
c (Select)
To select pet after checking action
Select Options → animate and press c (Select)
To select pet after checking direction
Select Options → turn and press c (Select)
CEnter a name
DSelect Yes and press c
Tip
• After selecting your pet
Garden appears. Train or tame in this location. Play game in
other rooms. Activating mPet shows location last used.
• Pet action in mPet window
After a while with no action to pet; pet starts to play alone,
bark, shows it's emotional text bubble. With low battery, pet
gets down and starts sniffing.
• To end mPet
Press C or y
• To set mPet as Wallpaper ( P.8-2)
• mPet Help
Use mPet Help to see other operations. In mPet window,
select Options → Help or press o while Help appears
Emotion Indicator
24
mPet Window
S! Appli
24-6
Operation
mPet Operations
Location
Navigation Modes & Operations
Open Options, then select Options to set Navigation.
When set to Shortcut mode, use number keys to move
Living
Room
your pet. When set to Walking mode, use a to move
your pet. Available operations vary by location.
Operation
Location
Shortcut
mode
Walking
mode
Description
Play Ding Dong
game
2
Front Door
(Top Center)
Go to Living Room
3
Flower Bed
(Top Right)
Go for a walk
4
Ball
Play Stanza game
(Bottom Right)
Garden
Kitchen
Bed
Room
Walking
mode
Description
1
Door
(Top Left)
Go to Garden
2
Back Door
(Top Right)
Go to Kitchen
1
Back Door
(Top Left)
Go to Living Room
2
Door
(Top Right)
Go to Bedroom
3
Bowl
Feed Meal
(Bottom Right)
4
Today's Saying Show Today's
(Bottom Left) Saying
5
Snacks
(Top Center)
Feed Snack
1
Door
(Top Left)
Go to Kitchen
2
Laundry
Basket
(Top Center)
Bathe pet
24
S! Appli
1
Notes
(Top Left)
Shortcut
mode
24-7
Operation
Location
Bed
Room
Shortcut
mode
Item
Description
Walking
mode
Discipline
3
Dog House
(Top Right)
4
Book
English Quiz
(Bottom Right)
5
Injector
(Bottom Left)
Put Pet to Bed
Medicate pet
Action Operations
In mPet window, press w (Action) to perform the
operations listed below (Train/Commend/Discipline).
Pet growth varies by operations.
Item
Description
Sit
24
S! Appli
Train
Commend
24-8
Teach pet to sit down.
Roll
Teach pet to roll over.
Turn
Teach pet to turn around.
Bark
Teach pet to bark.
Paw
Teach pet to give you a paw.
Praise
Praise pet for good behavior
Pet
Comfort pet for good behavier, etc.
Description
Warn
Command pet to behave
Punish
Punish pet for bad behavior
Tip
• When pet refuses to behave
Pet sometimes refuse to act as operated, due to such as the
first time operation, pet status. Teach pet repeatedly or check
the status and take care.
• When each operation ends
Pet barks and responds to operation with emotional state
text bubble; pet status window appears. Check the pet
status by following category: Health/Fatigue/Fullness/
Clean/Stress/Obedient/Intimacy.
Options
Item
Description
CPerform Steps 2 and 3 in "Select Pet"
( P.24-5)
Location
Select a location from among Garden/
Living room/Kitchen/Bedroom.
Pet Inventory
Show Pet list to select various
settings ( P.24-9).
Pet Status
Check Pet status while pet is playing.
AIn mPet window, select Options → Pet
Inventory
Options
Select mPet sound/display settings
( P.24-10).
BSelect a pet
Help
Check mPet operations description.
Pet Inventory
Tip
Other Operations
Adopt a New Pet
Adopt up to five pets.
• Rename your pet
a In Step 2, highlight the pet
b Options → Rename
c Enter a name
24
S! Appli
AIn mPet window, select Options → Pet
Inventory
• Pet status
In Step 2, select Options → View status
BSelect Options → Adopt New pet
24-9
Say Goodbye
AIn mPet window, select Options → Pet
Inventory
mPet Sound & Settings
Default Setting
Sound: Sound only
Navigation: Shortcut mode
■ Sound type: Voice
■
■
BHighlight the pet and select Options
→ Say Goodbye
AIn mPet window, select Options →
Options
CPress o (Yes)
BPerform operations to set
DPress c
To set pet sound
aSelect Sound
Note
bSelect an item and Press c
• Once given up, pet cannot be restored.
To set operation mode
aSelect Navigation
bSelect an item and Press c
24
To set action menu sound
S! Appli
aSelect Sound type
bSelect an item and Press c
24-10
Tip
• Sound Items
Sound & Vibrate: Pet barks and 707SC vibrates
simultaneously.
Sound only: Pet barks.
Vibrate: 707SC vibrates with no pet barking.
No sound: No vibration and with no pet barking.
• Navigation Items
Shortcut mode: Show available shortcuts indicators in mPet
window to use assigned shortcuts keys.
Walking mode: Use a to move locations with the pet.
• Sound type Items
Voice: Indicate the selected action operation by voice.
Melody: Indicate the selected action operation by melody.
Browsing Electronic Comic
APress c and select S! Appli →
S! application list
→ コミックサーフィン
Tip
• After starting
Refer to ヘルプ in コミックサーフィン .
Comic Surfing
コミックサーフィン is the file viewer for browsing
24
electronic comic/photo book files (CCF files) saved in Book
S! Appli
folder in Data Folder. Enlarge/reduce images, scroll page,
browse images with sound/vibration effects.
To browse CCF files, acquire Content Key. No Content Key
is required to browse the default sample files in 707SC.
24-11
Security
Default Setting
Net Access: Per session
Application Autoinvocation: Per session
■ Local connectivity: Per session
■ Read user data access: Per access
■ Write use data access: Per access
■
■
For Mobile Internet access
Select Net Access
For automatic activation
Select Application Autoinvocation
For external device connection
Select Local connectivity
Set access/confirmation condition for S! Appli.
For read user data access
APress c and select S! Appli →
S! Application list
Select Read user data access
BHighlight S! Appli, select Options →
Permissions
CSelect items to set
24
S! Appli
24-12
For write user data access
Select Write user data access
DSelect items and press c (Save)
BSelect the setting and press c
Tip
• Permissions Items
Select one item for each application; available options vary.
Always: Confirmation does not appear.
Per session: Confirmation appears once per session.
Per access: Confirmation appears each time application is
accessed.
Never: Confirmation does not appear.
• To restore defaults
In Step 3, select Reset → Yes
S! Appli Settings
Make S! Appli settings and restore defaults.
Backlight
Default Setting
■
Normal settings
APress c and select S! Appli →
S! Appli settings → Backlight
• Backlight Items
Always On: Set the backlight always on.
Always Off: Set the backlight always off.
Normal settings: Settings of Backlight time ( P.8-7) for
Display settings take priority.
Application Volume
Default Setting
■
Level 3
Adjust the volume of sounds.
APress c and select S! Appli →
S! Appli settings → Application
Volume
24
BUse a to adjust volume and press
c
24-13
S! Appli
Set Display settings for the backlight.
Tip
Tip
S! Appli Sort
• Sound volume in Manner Profile
Manner Profile Phone sounds settings apply.
Vibration
Default Setting
■
ON
Default Setting
■
By Date
APress c and select S! Appli →
S! Appli settings → S! Appli Sort
BSelect an item and press c
Activate to use vibration with compatible S! Appli.
APress c and select S! Appli →
S! Appli settings → Vibration
BSelect an item and press c
Reset S! Appli Settings
Restore S! Appli settings to defaults.
APress c and select S! Appli →
S! Appli settings → Reset S! Appli
settings
BEnter Phone Password, press
c (Confirm) and select Yes
24
S! Appli
24-14
Appendix
Main Menu
Item
Functions
25
Appendix
Main Menu
Item
S! Appli
Yahoo! Keitai
Media Player
Camera
25-2
Item
S! Application list
Page
P.24-2
Data Folder
Item
Page
Pictures
P.11-2
Videos
P.11-2
Sounds & Ringtones
P.11-2
S! Appli
P.11-2
S! Appli Settings
P.24-13
Yahoo! Keitai
P.21-3
Book
P.11-2
Bookmarks
P.22-9
Other documents
P.11-2
Saved pages
P.22-8
Memory status
P.11-3
Enter URL
P.21-3
Received msgs
P.17-4, 18-2
History
P.22-11
Create msg
P.17-8
Browser settings
P.23-2
Drafts
P.18-8
Music
P.10-3
Unsent msgs
P.18-9
Sent msgs
P.18-8
Messaging
Video
P.10-9
Take photo
P.7-5
Templates
P.17-14
Record video
P.7-11
Server mail box
P.19-2
Go to photos
P.7-6
Settings
P.20-2, 20-5
P.7-12
Memory status
P.18-2
Go to videos
Dynamic effect list
P.7-19
Video editor
P.7-17
Main Menu
Item
Phonebook
Page
Main Menu
Item
Item
Page
Alarms
P.14-2
Phone settings
Calendar
P.14-5
Sound settings
P.9-4
Voice recorder
P.14-15
Display settings
P.8-1
World clock
P.14-18
Call settings
Calculator
P.14-19
Phonebook settings
P.5-1
Converter
P.14-20
Connectivity
P.12-1
Stopwatch
P.14-22
Security
P.13-1
Dictionary
P.14-22
Software Update
P.25-10
Photo slide
P.8-2
Memory settings
P.13-10, 15-8
Interpreter
P.14-23
Memory status
P.14-12
Phonebook List
P.5-9
Settings
25
-
Appendix
Tools
Item
-
25-3
Troubleshooting
25
Appendix
■ 707SC does not turn on
" Is battery empty?
# Replace or charge battery.
" Is battery installed in 707SC?
# Install battery correctly.
■ When power is turned on, PIN entry
window appears
" Is PIN lock set to Enable?
# If PIN lock is Enable, enter PIN.
■ When power is turned on, USIM password
entry window appears
" Is USIM lock set to Enable?
# If USIM lock is Enable, enter USIM
password.
25-4
■ Please insert USIM card or This card
cannot be recognized appears when 707SC
is turned on or executing a function
" Is USIM Card correctly installed?
# Check to see if USIM Card is correctly
installed. If the message appears even though
USIM Card is correctly installed, it may be
damaged.
" Is an incorrect USIM Card used?
# Check to see if correct USIM Card is used. Use
USIM Card specified by SoftBank.
" Is there debris on USIM Card IC chip?
# Remove debris with a clean, dry cloth, and
then install USIM Card correctly.
■ Reading USIM Cannot operate or Reading
USIM Card Cannot start appears
# USIM Card data is being read. Try again later.
with zero such as an area code?
# Enter a phone number beginning with zero
appears)
# Change 707SC to another mode such as
Normal.
# Move to a place where the signal is stronger
and try again.
■ Calls are interrupted or disconnected
" Does
or
appear?
# Move to a place where the signal is stronger
such as an area code.
" Is 707SC set to Offline mode? (
or
appears and no calls can be
initiated
" 707SC is out-of-range.
and try again.
" Is battery empty?
# Replace or charge battery.
■ Unable to initiate a call
" Is Call Barring set?
# Deactivate Call Barring.
25-5
25
Appendix
■ A Busy tone continues after dialing
" Have you entered a phone number beginning
■
25
■ Unable to open Phonebook entry, Data
Folder, Call Log, Calendar, or Messaging
" Is Privacy lock set?
Appendix
# Cancel Privacy lock.
■ Clicking noise is heard during a call
" Noise may be generated when signal is weak
or while moving between coverage areas.
■ Unable to charge battery
" Is AC Charger Connector securely inserted?
# Insert AC Charger Connector securely.
" Is AC Charger plug securely inserted?
# Insert AC Charger plug securely.
" Is battery installed in 707SC?
# Install battery correctly.
25-6
" Are 707SC terminals, battery terminals and
AC Charger clean?
# Clean contacts with a dry cotton swab.
" Was battery charged in ambient temperature
below 5 ºC or above 40 ºC.
# Charge battery in ambient temperature
between 5 ºC and 40 ºC.
" Battery may need to be replaced.
# Install a new battery.
" Does battery always lose its charge quickly
after being charged?
# Battery life has expired. Replace with a new
battery.
" Does 707SC or battery become very warm
during charging?
operating environment (Ambient temperature,
may stop. After 707SC and battery are cool,
charging conditions, or Signal Strength),
retry charging.
operations, and settings.
■ Devices become hot
" During charging, AC Charger may heat up.
" 707SC may heat up during charging/long
calls.
# If 707SC can be touched with your hand, it is
normal. If it is too hot to touch, immediately
stop charging and contact Customer Service
( P.25-25).
# Use 707SC in an appropriate environment and
reduce operations requiring high power
( P.1-12).
■ Display flickers
" Is 707SC used near a fluorescent light?
# Use 707SC as far away from a fluorescent
light as possible.
■ Display is dim or unlit
" This may be due to the characteristics of
Display and not a problem. The time (seconds)
until Display is dimmed or unlit can be
changed by adjusting the Backlight time.
25-7
25
Appendix
# If the temperature rises too much, charging
■ Battery drains quickly
" Battery may drain quickly depending on the
25
■ Unable to play music through speaker
" Is Manner Profile set?
Appendix
# Cancel Manner Profile.
" Is the stereo earphone microphone
connected?
■ Unable to establish Bluetooth® or USB
connections using Samsung PC Studio
" Is the USB driver installed? (for USB
connection)
# If communications are executed connecting to
# Disconnect the connector for the stereo
a personal computer with the supplied USB
earphone microphone from 707SC.
cable, installing the driver is required. Install
the driver from the supplied CD-ROM.
■ Too many applications are already running,
thus unable to launch anymore appears
" Memory is low or full.
# Delete unnecessary S! Mail messages. If
multiple functions are active, close some.
" Is the connection method set correctly on the
personal computer?
# Set the connection method to USB or
Bluetooth on the Connection Manager of
Samsung PC Studio or the Connection Wizard
for the communication in use.
25-8
" Are Bluetooth® or PC USB connection port
and Samsung PC Studio the same?
Samsung PC Studio Connection Manager or
Connection Wizard.
■ Some Phonebook entries do not appear
" Is 707SC set to Hide in Secret Mode?
# Set to Show in Secret Mode.
■ Message cannot be created
" Shared Memory may be full.
# Delete messages. If less than 464 KB,
messages cannot be created.
■ Try again appears
" Signal conditions are poor.
# Try again later.
■ All available connections are busy appears
" New S! Mail arrives while 707SC is being used
for packet data communications.
# End the data communication and try again.
■ Service unavailable appears
" 707SC is outside the service area.
# Send from within the service area.
■ No response appears
" Network/Server is busy.
# Try again later.
# Move for a stronger signal and try again.
25-9
25
Appendix
# Make sure port settings match those set for
■ Sending message failed or Unknown error
appears
" Network connection failed.
25
Appendix
■ Change from flight profile to other profile
for network service, created message will be
saved in outbox appears
" Offline mode is active.
# Cancel Offline mode and try again.
■ Cannot download because of too large data
appears
" S! Appli memory is full.
# Delete unnecessary S! Appli and try again.
■ Received invalid data. Quit download or
Cannot download because of too large data
appears
# File cannot be downloaded; cancel download.
Software Update
Check for 707SC software updates and download as
required. Choose to begin Update or Schedule update.
APress c and select Settings →
Software update
BPress w (Yes)
707SC connects to network.
CRead Terms of Use and select Agree
Read through Terms of Use before selecting Agree.
DEnter Center Access Code ( P.1-23)
and press c
Update Result appears.
25-10
EPress c
To update immediately
completed, 707SC turns the power off and on again;
then Notification window appears.
Notification Window
To schedule later update
• Procedures
Procedures can be found in the SoftBank Website (http://
www.softbank.jp).
• Connection fees
Connection fees do not apply to updates (including checking
for updates, downloading, and rewriting).
• Scheduled update time
Confirmation window appears at scheduled update time.
Press c or wait approximately ten seconds to start.
Update will not start while 707SC is in use. When the current
operation ends, confirmation window appears. But other
functions active, and ten minutes after scheduled update
time, scheduled update is automatically canceled.
aSelect Schedule update
bPress c (Yes)
cPress w (Yes)
dSelect schedule date and press c
eSelect schedule time and press c
fConfirm schedule date & time and press c
Notification Window
• To cancel Schedule update
a Perform Steps 1 to 5, select Cancel schedule
b Press w (Yes)
25-11
25
Appendix
Select Update now to start the update. When
Tip
Note
25
• Charge battery beforehand; a low battery may cause
update to fail.
Appendix
• When Scheduled update time comes and 707SC is
out-of-range, Software Update does not start.
Symbols & Pictograms
Symbols
Double-byte Symbols
• Keep 707SC in a place where signal is strong and
stable.
• 707SC Phonebook entries, media files, and other
contents are not affected by software updates, but
always back-up important information (note that
some files cannot be copied). SoftBank is not liable
for damages from lost information, etc.
• During update, calling or receiving messages, etc.
cannot be used.
• Update may take for a while.
• Update failure may disable 707SC. Contact SoftBank
Customer Center, Customer Assistance.
25-12
䄟
Single-byte Symbols
25
Appendix
Symbol Conversions
Symbol
Label
Symbol
Symbol
Label
Symbol
あっと
@@
こめ
※
いこーる
==
ころん
:;
えん
¥
さんかく
△▲▽▼
おんぷ
♪
しかく
□■◇◆
かける
×
どう
ゝ〃々
かっこ
から
()「」『』【】〈〉 ぱーせんと
[]‘ ’
“ ”
( )
〔 〕 ほし
[ ]{ }〈 〉《 》
まる
∼
やじるし
%%
☆★
○●◎
→←↑↓
25-13
Pictograms
25
Appendix
• Pictograms with
are animated.
• Some pictograms and animated pictograms may not appear properly on some models of SoftBank handsets or other devices.
25-14
Memory List
Specifications
707SC specifications may change without prior notice.
S! Mail
SMS
Received msgs
Up to 500 messages
Drafts
Up to 10 messages
Unsent msgs
Up to 10 messages
Sent msgs
Up to 250 messages
Received msgs
Up to 500 messages
Drafts
Up to 10 messages
Unsent msgs
Up to 10 messages
Sent msgs
Up to 250 messages
Specification
Weight
Approximately 93 g
Continuous Talk Time
Voice Call:
Approximately 165 minutes (3G)
Approximately 310 minutes (GSM)
Video Call:
Approximately 100 minutes (3G)
Continuous Standby
Time (707SC closed
and sub Display OFF)
Approximately 255 hours (3G)
Approximately 300 hours (GSM)
Book
Dimensions
(W x H x D)
Approximately 51.4 x 102.5 x 11.9 ㎜
(707SC closed)
Other documents
Maximum Output
0.25 W
Pictures
Videos
Data Folder
SoftBank 707SC
Item
Sounds & Ringtones
S! Appli
Up to 999 items (files
and subfolders) per
folder
25
Appendix
Shared Memory
• 707SC with battery installed.
25-15
25
Appendix
• Battery Time is calculated by SoftBank under stable
signal conditions. Calling in poor signal conditions or
leaving 707SC on out-of-range will consume more
power and may reduce Battery Time by more than half.
• Frequent 707SC operations requiring Backlight (e.g.,
Yahoo! Keitai) may reduce Continuous Talk Time and
Continuous Standby Time.
• Using video for Wallpaper may significantly reduce
Continuous Talking and Continuous Standby Times.
• Using S! Appli may reduce Continuous Talking and
Continuous Standby Times.
• Continuous Talk Time is an average measured with a
new, fully charged battery in stable signal conditions.
Continuous Standby Time is an average measured with a
new, fully charged battery with 707SC closed without
calls or operations, in Standby, in stable signal
conditions. Alternating between usage and Standby
shortens Continuous Talk Time and Continuous Standby
Time. Talk Time/Standby Time may vary by environment
(battery status, ambient temperature, etc.).
25-16
Battery
Item
Specification
Voltage
3.7 V
Type
Lithium-ion
Capacity
880 mAh
Dimensions
(W x H x D)
Approximately 46.3 x 36.9 x 5.2 mm
(without protruding parts)
AC Charger
Item
Specification
Power Source
AC 100 V-240 V, 50/60 Hz
(with power cable)
Output Voltage/
Current
DC 5 V/720 mA
Charging Temperature
5 to 40 ºC
Dimensions
(W x H x D)
Approximately 53 x 49 x 20 mm
(without cables)
Cord Length
Approximately 180 cm
Applicable Profiles for Bluetooth®
INDEX
...................................................................... 12-2
AC Charger ................................................1-15
Acoustic shock .........................................15-5
Activate Secret mode ..........................13-6
Activating Bluetooth® ........................12-4
Activating S! Appli ...............................24-3
Active Folder ............................................15-6
Add to playlist .........................................10-5
Adding Reject Black List ....................13-9
Adjusting earpiece volume ................2-7
Adjusting ringtone volume ........ 2-3, 6-3
Adjusting volume level to play
.......................................................... 10-7, 10-12
Alarms ..........................................................14-2
All music .....................................................10-3
Anniversary ...............................................14-9
Answer Machine .......................................2-5
Answering mode ....................................12-9
Anykey answer ........................................15-5
Attaching files ...................................... 18-13
Attaching to a message for sending
still images ........................................... 7-20
Attaching to a message for sending
videos ...........................................7-20, 11-13
Attaching/Inserting a file ............... 17-14
Audio Skin ................................................. 10-7
Auto power ON ...................................... 14-4
Auto redial ................................................ 15-2
B
Backlight ................................. 8-7, 10-8, 24-13
Battery ................................................1-11, 1-13
Bluetooth® ................................................ 12-2
Bluetooth® Address ............................ 12-3
Bluetooth® service .............................. 12-3
Browser Information ........................... 23-3
C
Cache ............................................................ 21-2
Calculator ................................................ 14-19
25-17
25
Appendix
A
Calendar ......................................................14-5
Calendar window format ..................14-6
Call answer mode ....................................9-3
Call cost limit ...........................................2-12
Call Log Records ......................................2-9
Call Transfer service ............................16-3
Call Waiting ..............................................16-8
Caller ID ....................................................16-13
Camera ..........................................................7-2
Camera mode ............................................7-4
Camera setting .......................................7-13
Capturing continuous images ..........7-8
Capturing in Mosaic shot ....................7-9
Capturing mode .......................................7-4
Capturing still images ..........................7-5
Capturing videos ...................................7-10
Category .......................................................5-7
Centre access code ...............................1-23
Certificates .................................... 22-16, 23-4
Changing a file name ........................11-14
Changing a folder name ...... 11-14, 18-15
Changing mail address .......................20-2
Changing phone password ..............13-2
25
Appendix
Changing PIN ...........................................13-2
Changing PIN2 .........................................13-2
Changing profile ......................................3-3
Changing settings of each profile
........................................................................9-2
Changing to SMS .................................17-11
Changing to S! mail ...........................17-11
Changing voice recorder settings
....................................................................14-17
Charger Port ...............................................1-8
Charging ........................................... 1-15, 1-16
Checking memory usage ......... 15-8, 18-2
Clear memory ........................................13-10
Clock Display ..............................................8-4
Conference Call ......................................16-9
Connecting a Bluetooth®-compatible
device ............................................. 12-6, 12-9
Connection to another Bluetooth
devices .....................................................12-6
Content key info ..................................11-14
Converting currency or unit ..........14-20
Cookie setting .........................................23-2
Copy text ..................................................22-13
25-18
Copying characters .............................. 4-12
Copying files .......................................... 11-16
Copying folders .................................... 11-16
Copying items ......................................... 5-13
Copying Phonebook ............................ 5-15
Copyrighted file icons ........................ 18-5
Country code ........................................... 15-3
Creating a folder ......................11-14, 18-15
Creating a play list ............................... 10-6
Creating messages ............................... 17-6
Current contacts ...................................... 2-9
Cutting characters ................................ 4-12
D
Data folder .......................................7-15, 11-2
Date and time setting ........................ 1-18
Default name ......................................... 14-17
Default style ............................................. 20-4
Deleting a bookmark ........................ 22-11
Deleting a file ....................................... 11-17
Deleting a folder ......................11-17, 18-16
Deleting a Saved page ....................... 22-9
Deleting a S! Appli ............................... 24-5
Deleting access logs ..........................22-11
Deleting Cache ........................................23-4
Deleting Calendar items .................14-13
Deleting Call Log Records ................2-10
Deleting characters ..............................4-11
Deleting Cookies ...................................23-4
Deleting messages ...............................18-9
Deleting messages in server ...........19-3
Deleting My devices ............................12-5
Deleting Phonebook ............................5-15
Deleting still images .............................7-6
Deleting templates ..........4-16, 18-9, 18-11
Dialed Call Log Records .......................2-9
Dialing display ..........................................8-8
Dictionary .................................................14-22
Display ...........................................................1-8
Display brightness ..................................8-7
Display mode ...........................................14-7
Display Operator name ........................8-5
Display rendering ................................22-12
Display size of videos .......................10-12
Displaying Slide show ......................17-12
Download Content Key ....................11-14
E
Earphone call ...........................................15-3
Editing bookmarks .............................22-10
Editing Calendar details ..................14-12
Editing Phonebook ...............................5-14
Editing still images ...............................7-15
Editing Style ...........................................17-12
Editing the title for a Saved page
......................................................................22-8
Editing Videos .........................................7-17
Effect sound and keypad tone
volume .......................................................9-2
Effect sound setting ....................... 9-3, 9-7
Effects ..........................................................7-12
Encode ........................................................22-15
Entering a number to select an item
......................................................................1-21
Entering by quoting text ...................4-10
Entering characters .........................4-2, 4-4
Entering emoticons ................................ 4-9
Entering pictograms .............................. 4-9
Entering symbols ..................................... 4-9
Entering URL ............................................ 21-3
Entry mode for characters ................. 4-2
Event list .................................................. 14-12
External Device Port ............................. 1-8
F
File details ............................................... 11-14
File Viewer ................................................ 11-5
Font size .............................4-14, 8-6, 8-9, 23-3
Forwarding ............................................... 18-8
Forwarding Messages ........................ 19-4
Forwarding messages in server .... 19-4
Frames ..................................................7-6, 7-16
G
Greeting Messages
................................ 8-9
H
Holiday .........................................................14-9
Home zone .................................................1-20
I
Icons for attached files ....................17-16
Icons for files ................................. 11-2, 11-4
Icons on Drafts list ...............................18-4
Icons on My devices list ....................12-6
Icons on Received messages list
......................................................................18-4
Icons on Sent messages ....................18-5
Icons on Unsent messages list .......18-5
Image display ..........................................23-2
In-car charger ..........................................1-16
Initiating a call ................................ 2-2, 2-15
Initiating a call overseas ...................2-15
Initiating a Video Call ...........................6-2
Initiating an international call
.............................................................. 2-2, 2-15
Inserting/Removing USIM Card .......1-3
Installing and removing battery ...1-13
25-19
25
Appendix
Downloading a S! Appli ....................24-2
Drafts ............................................................18-2
DTMF ....................................................... 2-8, 6-5
Dynamic effect list ................................7-19
25
Appendix
International code ................................15-2
International roaming ........................2-13
Interpreter ...............................................14-23
Invoking a function with Switch Bar
Locking/Unlocking sound files .... 14-17
Locking/Unlocking S! Appli ............. 24-4
......................................................................1-22
Mail art function ................................... 17-6
Mail Server ............................................... 19-2
Mailbox ....................................................... 18-2
Main menu style ...................................... 8-5
Manner profile .......................................... 3-2
Mark default number ......................... 5-14
Maximum of message size .............. 20-4
Media Player ............................................ 10-2
Memo ......................................................... 14-10
Message ..................................................... 17-2
Message details ..................................... 18-3
Message List ............................................ 19-2
Message type icon ............................... 18-3
Missed Call ...........................................2-4, 2-9
Mobile Postcard ....................................... 7-7
Mobile tracker ........................................ 13-7
Modifying characters .......................... 4-11
Move to USIM ....................................... 18-20
mPet .............................................................. 24-5
Invoking functions from Main menu
......................................................................1-20
Items to save to Phonebook .............5-2
J
Java Script .................................................23-3
Jump ..............................................................4-13
K
Key assignments ......................................4-3
Keypad tone ...............................................9-3
L
Language ....................................................8-10
List Font Size ..............................................8-6
Locking/unlocking ...............................11-14
Locking/unlocking files ....................11-14
25-20
M
mPostcard ....................................................7-6
Multi Selector ............................................ xiv
Mute .................................................2-3, 2-8, 9-3
My devices ..............................12-4, 12-8, 12-9
My phone’s name ................................12-11
My phone’s visibility .........................12-10
My phone’s visibility for Bluetooth®
....................................................................12-10
N
Network mode ........................................2-13
Network password ................... 1-24, 16-13
Network Profile ......................................2-13
Network selection .................................2-14
Network S! Appli ...................................24-2
O
Offline Profile ............................................3-2
Opening Saved page ...........................22-8
Operating messages in server .......19-2
Operations available during a Video
Call ...............................................................6-3
Operations during a call ......................2-8
P
Page Details ............................................22-14
Page Window ...........................................21-4
Password Lock .........................................13-5
Pasting characters ................................4-12
Phone lock .................................................13-5
Phonebook search ...................................5-9
Photo slide ...................................................8-2
PIN ....................................................................1-5
PIN authentication at power on
.............................................................. 1-5, 13-3
PIN lock .......................................................13-3
PIN2 .................................................................1-5
PIN2 lock unlocking code .................13-3
Player settings ............................. 10-7, 10-11
Playing melody .......................................10-3
Playing video .................................. 7-15, 10-9
Playing voice ..........................................14-16
Popup menu ............................................... 8-6
Power ON/OFF ................................1-17, 1-18
Predictive entry function ON/OFF
...................................................................... 4-13
Preferences ............................................... 23-2
Preferred network ................................ 2-14
Pre-installed ............................................. 11-2
Print via Bluetooth® ........................... 12-7
Privacy Lock ............................................. 13-6
Providing Manufacturer Number
...................................................................... 23-3
PUK Code ............................................1-5, 13-3
Putting a call on hold ........................... 2-7
Q
Quoting for entries
.............................. 4-10
R
Received call log ..................................... 2-9
Received messages .............................. 18-2
Receiving a call ........................................ 2-3
Receiving a Video Call ......................... 6-2
Receiving all messages ...................... 19-2
Receiving data via Bluetooth® .....12-7
Receiving message in server ..........19-2
Receiving settings .................................20-3
Record settings .....................................14-17
Recording voice ....................................14-16
Registering an S! Mail Template
....................................................................18-19
Registering as S! Mail Template
......................................................................18-6
Registering SMS templates .............4-15
Registering to bookmark ..................22-9
Registering to Phonebook .................5-4
Rejecting call reception .....................15-6
Rejecting incoming calls ...................13-8
Renaming a still image file ................7-6
Renaming My devices .........................12-5
Renaming sound files .......................14-17
Repeat mode ................................ 10-7, 10-11
Reply ................................................... 17-5, 18-7
Reply with text .......................................20-6
Reset ...........................................................13-11
Reset all ....................................................13-11
Reset settings ........................................13-11
25-21
25
Appendix
Option menu .............................................1-23
Outgoing/incoming call barring
service ....................................................16-11
Owner information ...............................5-16
25
Appendix
Resetting a call cost .............................2-11
Resetting Call times .............................2-11
Resetting PIN lock .................................13-3
Resetting S! Appli settings ............24-14
Restarting paused S! Appli ..............24-4
Retry function ..........................................17-2
Retry with ....................................................6-7
Ringtone for a Voice Call ....................5-8
S
Saving a page ..........................................22-8
Saving as a template .........................17-20
Saving attached files .........................18-14
Saving images .........................................22-2
Saving sounds ..........................................22-5
Saving to Drafts ...................................17-19
Schedule ......................................................14-7
Search text ..............................................22-13
Search type ...............................................5-12
Secure mode for data transfer ....12-11
Security ......................................................24-12
Security Codes .........................................1-23
Selecting 3G or GSM ...........................2-13
25-22
Sending a bookmark URL ............... 22-10
Sending a message from Drafts ... 18-8
Sending data via Bluetooth® ......... 12-6
Sending from Unsent Messages ... 18-9
Sending settings ............... 17-11, 20-2, 20-5
Sending sound files ........................... 14-16
Sending still images via Bluetooth®
...................................................................... 12-6
Sending URL ........................................... 22-14
Sending videos via Bluetooth®
.............................................................7-12, 12-6
Sending your image .............................. 6-6
Sent messages ........................................ 18-2
Server Certification ........................... 22-14
Server Mail Size ..................................... 19-2
Shortcut operations ............................. 7-10
Shortcuts ...........................................1-22, 15-7
Side Key ...................................................... 15-6
Side Key Lock .......................................... 15-6
Simple Search Setting ........................ 15-7
Skin ................................................................ 10-8
Slide show ................................................. 11-3
SMS ......................................................17-2, 20-5
SMS templates ........................................4-10
Softkey .......................................................... xiii
Software Update .................................25-10
Sort .........................................11-9, 14-13, 18-17
Sorting files ..............................................11-9
Sound file details ................................14-17
Sound file setting ................................14-16
Sound playback ......................................23-2
Sound Settings ..........................................9-4
Speaker Phone call .................................2-7
Speed dialing ...........................................5-12
SSL/TLS .........................................................21-2
SSL/TLS certificate ................................23-4
Still image details ...................................7-6
Stopping or Pausing S! Appli .........24-3
Stopwatch ................................................14-22
Streaming ...................................................22-7
Sub LCD Light ............................................8-8
Substitute images ...................................6-6
SVG-T/Flash® Viewer ..........................11-8
Switching callers ..................................16-10
S! Appli ........................................................24-2
S! Appli detailed information ........24-4
S! Mail ..........................................................17-2
S! Mail templates ................................17-14
Task ..............................................................14-10
Templates ......................................... 4-10, 18-2
Timer .............................................................7-11
U
Unsent messages ...................................18-2
Updating information .......................22-13
Updating mail list ..................................19-2
USB connection .....................................12-11
User dictionary ........................................4-14
USIM Card ....................................................1-2
USIM lock ...................................................13-4
USIM password .......................................13-5
Using a file ..............................................11-10
Using a template .................................17-14
Using SMS templates ..........................4-15
W
Various settings for Video Call ....... 6-6
vFile ............................................................. 11-12
Vibration .........................................14-2, 24-14
Vibrator/Sound settings ...................... 9-2
Video Mode .............................................. 7-10
Video settings ......................................... 7-14
Viewfinder ................................................... 7-3
Viewing a file .......................................... 11-3
Viewing attached files ..................... 18-13
Viewing Call cost .................................. 2-11
Viewing Call Log Records .................. 2-9
Viewing Call times ............................... 2-11
Viewing Saved Calendar Entries
Wake-up Alarm .......................................14-2
Wallpaper .....................................................8-2
Web ................................................................21-2
Web access from a bookmark ......22-10
Web connection from access logs
.................................................................... 14-12
Viewing your phone number
(My Phonebook details) ................ 5-16
Visualization ............................................ 10-8
Voice Mail Service ................................ 16-5
Voice Recorder ..................................... 14-15
Volume ....................................... 2-7, 9-2, 24-13
....................................................................22-11
World clock
.............................................14-18
Y
Yahoo! Keitai .........................................22-16
Z
Zoom list .......................................................8-7
Numerics
3D Pictogram
...........................................20-5
25-23
25
Appendix
T
V
25
Warranty & After Sales
Service
Appendix
Warranty
The purchased 707SC comes with a Warranty.
• Check the shop and date of purchase.
• Read through the contents of the Warranty and keep it
in a safe place.
• The warranty period can be found in the Warranty.
SoftBank is not liable for damages to you or a third party
from missed calls, etc. due to handset failure or
malfunction, etc.
Repair Requests
Before submitting 707SC for repair, consult the
"Troubleshooting" section.
for a solution. If a problem persists, contact Customer
Service ( P.25-25) or the nearest SoftBank shop; be
prepared to describe problem in detail.
25-24
• During the warranty period, repairs will be made under
the terms and conditions described in the warranty.
• After the warranty period, repairs will be upon request;
if said repairs can be made, you will be charged for
them.
Note
• 707SC files and settings may be lost or altered due
to accidents or repairs. Keep a copy of important
files, etc. like Phonebook entries. SoftBank is not
liable for damages resulting from accidental loss or
alteration of 707SC files (Phonebook, Data Folder,
etc.) or settings.
• Disassembling or modifying this product may be a
violation of the Radio Law. Note that SoftBank will
not accept repair requests for disassembled or
modified products.
Customer Service
25
If you have questions about SoftBank handsets or services, please call General Information.
Appendix
For repairs, please call Customer Assistance.
SoftBank Customer Center
SoftBank International Call Center
From a SoftBank handset, dial toll free at
157 for General Information or
113 for Customer Assistance
From outside Japan, dial +81-3-5351-3491
(Please take care to dial correctly; international charges will
apply.)
Call these numbers toll free from landlines.
Subscription Areas
Contact
General Information
0088-240-157 (Toll-free)
Customer Assistance
0088-240-113 (Toll-free)
General Information
0088-241-157 (Toll-free)
Customer Assistance
0088-241-113 (Toll-free)
General Information
0088-242-157 (Toll-free)
Customer Assistance
0088-242-113 (Toll-free)
Hiroshima, Okayama, Yamaguchi, Tottori, Shimane, Tokushima, Kagawa, General Information
Ehime, Kochi, Fukuoka, Saga, Nagasaki, Oita, Kumamoto, Miyazaki,
Customer Assistance
Kagoshima, Okinawa
0088-250-157 (Toll-free)
Hokkaido, Aomori, Akita, Iwate, Yamagata, Miyagi, Fukushima, Niigata,
Tokyo, Kanagawa, Chiba, Saitama, Ibaraki, Tochigi, Gunma, Yamanashi,
Nagano, Toyama, Ishikawa, Fukui
Aichi, Gifu, Mie, Shizuoka
Osaka, Hyogo, Kyoto, Nara, Shiga, Wakayama
0088-250-113 (Toll-free)
25-25
25-26
SoftBank 707SC
User Guide
October 2006 Version 1
SOFTBANK MOBILE Corp.
To help protect the environment and
recycle valuable resources, mobile
phone, and PHS shops displaying the
above mark accept mobile phones,
batteries, and chargers of all
manufacturers.
*For more information, please visit
your nearest SoftBank Shop.
*Mobile phones, batteries, and chargers
collected for recycling cannot be returned.
*To protect your privacy, delete any personal
information (telephone numbers, call log
records, messages, etc.) beforehand.
Model name : SoftBank 707SC
Manufacturer : Samsung Electronics
Co., Ltd.