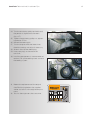
1
Technical Infos
Power Transmission Group
Find rather than search.
Product Information Center
All information on every ContiTech aftermarket product at a glance.
Product Information Center
w w w. c o n t i t e c h . d e / p i c
ContiTech Technical Info / Contents
3
Contents / Vehicle Type
Vehicle type
Engine
Alfa Romeo
Audi
1.9 JTD
1.4 / 1.6 16V
1.6 / 2.0 8V
1.8 20V
1.8 T / 2.0
1.9 TDI
1.9 / 2.0 TDI (PD)
1.6 TDI and 2.0 TDI (Common Rail)
2.4 / 2.5 TDI 5-cyl.
2.5 TDI 5-cyl.
2.5 TDI V6
1.6 Diesel; 9H engines
2.5 / 2.8 D
1.4 / 1.5 / 1.6 16V
1.4 / 1.5 / 1.6 16V
Cuore
Punto 188 A4 engine
1.6 Diesel; 9H engines
1.9 JTD engines
2.5 / 2.8 D
1.25 / 1.4 / 1.6 16V, various from 4/97
1.25 / 1.4 / 1.6 16V
1.6 Diesel; 9H engines
1.8 Diesel
2.5 Diesel
1.7 DTI up to engine number 328703, various
1.7 D, various
1.4 – 1.6 16V, various
Citroën
Chevrolet
Daewoo
Daihatsu
Fiat
Ford
GM
Hyundai
Page
38
24
37
10
42
17 + 27
36
34
22
25
15
41
26
30
30
19
9
41
38
26
20
43
41
12
11
28
32
39
ContiTech Technical Info / Contents
4
Vehicle type
Engine
Page
Iveco
Jeep
Mazda
Mini
Mitsubishi
2.5 / 2.8 D
Cherokee
1.6 Diesel; 9H engines
1.6 Diesel; 9H engines
1.3 / 1.5 engine type 4 G, various
1.8 GDI
1.5 dCi
1.4 / 1.6 / 1.8 / 2.0 16V
1.6 / 1.8 16V
1.7 DTI up to engine number 328703, various
1.7 D, various
1.9 JTD
2.5 / 2.6 / 3.0 / 3.2 V6, various
2.5 / 2.8 D
3.0 DTI V6
1.6 Diesel; 9H engines
2.5 / 2.8 D
Renault, various
Master, Trafic
1.2 16V
1.4 / 1.6 16V
1.5 dCi
2.5 / 2.8 D
3.0 DTI V6
2.0 / 2.5 V6
1.9 JTD
2.5 / 2.6 / 3.0 / 3.2 V6, various
3.0 DTI V6
26
13
41
41
40
18
21
29
16
28
32
38
44
26
35
41
26
31
13
8 + 33
14
21
26
35
23
38
44
35
Nissan
Opel
Peugeot
Renault
Rover / MG
Saab
ContiTech Technical Info / Contents
5
Vehicle type
Engine
Seat
1.4 / 1.6 16V
1.6 / 2.0 8V
1.8 T/2.0
1.9 TDI
1.9 / 2.0 TDI (PD)
1.6 TDI and 2.0 TDI (Common Rail)
1.4 / 1.6 16V
1.6 / 2.0 8V
1.8 T / 2.0
1.9 TDI
1.9 / 2.0 TDI (PD)
1.6 TDI and 2.0 TDI (Common Rail)
1.5 DDIS
V40 / S40 1.8
1.6 Diesel; 9H engines
1.4 / 1.6 16V
1.6 / 2.0 8V
1.8 T / 2.0
1.9 TDI
1.9 / 2.0 TDI (PD)
1.6 TDI and 2.0 TDI (Common Rail)
2.4 / 2.5 TDI 5-cyl.
2.5 TDI 5-cyl.
2.5 TDI V6
Škoda
Suzuki
Volvo
VW
Page
24
37
42
17 + 27
36
34
24
37
42
17 + 27
36
34
21
18
41
24
37
42
17 + 27
36
34
22
25
15
ContiTech Technical Info / Contents
6
Contents / Product
Product
Page
CT 522 K4 in CT 522 K1
CT 604 K1, CT 684 K1, CT 711 K1,CT 840 K1/K2, CT 935 K1/K2, CT 940 K1/K2 , CT 949 K1
CT 738 K1
CT 817
CT 870 K1, CT 873 K1, CT 975 K3
CT 881 K2 / K4
CT 881 K3
CT 884 K1, CT 990 K1 / K2
CT 887 K1
CT 908 K1
CT 909 K5 in CT 909 K10
CT 919 K4 / K5
CT 939 K1-5
CT 939 K2 / K3
CT 941 K1
CT 942 K1
CT 946 K2 in CT 1044 K1
CT 957 K1 / K2
CT 975 K1 in CT 975 K3
CT 983 K1 / K2
CT 984 K2 and CT 1015 K2
CT 1014 K3
CT 1014 K2 / K3 / K5
CT 1028 K2 / K3 / K4, CT 1051 K1 / K2
CT 1035 K1 / K2
CT 1038 K1, CT 1034 K1, CT 989 K1 and CT 731 K1
CT 1044 K1
CT 1045 K1
CT 1055 / CT 1054
CT 1079 K1
CT 1092 K1
CT 1096 K1
CT 1105 K1
13
31
40
19
29
20
43
44
30
37
42
10
22
25
18
39
17
24
16
12
15
28
32
36
21
26
27
8 + 33
11
35
41
23
38
ContiTech Technical Info / Contents
Product
7
Page
6PK1140 Elast in 6PK1070
6PK1748 in 5PK1750
BTT Hz (frequency measurement)
34
14
9
Installation tips – changing the timing belt
VW Scirocco, Golf V, VI, Plus, Jetta III, from model year 2008, engine code CBDB
Renault Clio II 1.6 16V, engine code K4M 748
Opel 1.8i 16V C 18 XE
Audi A4, A6, A8, VW Passat 2.8 30V
46
54
62
70
ContiTech Technical Info
8
CT 1045 K1
Renault 1.2 16V
Installation tip – tensioning pulley
Problem:
The tensioning pulley fails after a short period of operation, with
the running surface possibly having separated from the bearing
core. The running surface usually shows severe rubbing marks.
The back of the timing belt is often substantially damaged or
even completely worn through as a result of heat action.
Excerpt from the manual
Cause:
Because the eccentric has been rotated in the wrong direction,
the tensioning pulley has moved to a position it was not
intended to reach and made contact with a protruding edge
in the drive.
As a result the tensioning pulley has mechanically seized, either
completely or partially, and the belt has overheated on the running surface. The level of damage depends on the running time.
Damaged running surface
Solution:
Always install the timing belt exactly according to the
manufacturer’s instructions. In particular, comply with
the rotational direction of the eccentric for tensioning
(counterclockwise here). Otherwise the tensioning pulley
can come into contact with a protruding edge which can
result in premature failure.
Observe rotational direction
ContiTech Technical Info
9
BTT Hz
Fiat Punto Motor 188 A4
Setting the timing belt tension by means of frequency measurement
Problem:
The manual specifies 150 - 160 Hz as the tension setting
for the final tension (T2) with the BTT Hz.
Subjective measurement results in the timing belt being
tensioned too high.
Excerpt from the manual
Cause:
Fiat’s nominal setting with a frequency gauge, applicable since
the 2003 model year, is determined by adding two measurements. The first reading (between the camshaft pulley and the
water pump) and the second reading (between the crankshaft
and the tensioning pulley) have to be added. Older models can
also be set using the BTT Hz.
Measuring points
Solution:
Pretension the timing belt to 7 Nm at the tensioning pulley
using a torque wrench. Then secure the tensioning pulley
and perform two engine revolutions. Now measure the readings
at the two measuring points. The total value should be 150 160 Hz. Alternatively, you can also perform just one measurement above the water pump. The reading here should be
125 Hz.
BTT Hz
ContiTech Technical Info
10
CT 919 K4/K5
Audi A4 1.8 20V
Converting vehicles built before 1998 to hydraulic tensioner
Problem:
The belt drive makes noises after operating for a short time.
Cause:
The newly installed tensioning pulley is not the correct distance
from the engine and allows the belt to rub at the side on the
inner flange (misalignment).
(1)
Solution:
When refitting vehicles built before and during 1998, the old
version stud bolt (1) must be removed. The new version is then
screwed into the same hole with a pre-mounted spacer (2).
The problem here is that the manufacturer has two different
thicknesses of spacer (3.1) + (3.2) which define the distance from
the pulley to the engine. Despite the Vehicle Identification No.
delimitation (production month: 01/96) it is not always clear
which kit must be used since the stated Vehicle Identification
No. can deviate from this. You should always check whether the
new tensioning pulley is correctly aligned when mounted in the
belt drive. Otherwise, noise will definitely occur or even serious
damage to the engine.
Version to be replaced
(3.1)
(3.2)(2)
From VIN
Up to VIN
New tensioning pulley design
ContiTech Technical Info
11
CT 1055/CT 1054
Ford 2.5 Diesel
Converting the tensioning system
Problem:
The tensioning pulley included in the kit for the type delivered is
different to the one installed in the vehicle.
Type to be replaced
Cause:
According to Ford, the new tensioning pulley must be fitted in
all 2.5 diesel engines when the timing belt is due to be changed.
Given the fact that the structure has been changed completely,
clarification is required on how to install or position this correctly.
(1)
Solution:
The new type is a semi-automatic tensioning pulley which is
installed centrally in place of the manual tensioner. Following
installation of the timing belt, adjust the tension on the pulley
on the front by turning it in the direction of the arrow using a
hex key. Please note, the semi-circular dot marking must be
correctly aligned with the bottom edge (1) of the recess.
New tensioning pulley design
Target tension (1)
ContiTech Technical Info
12
CT 983 K1/K2
Ford 1.8 Diesel
Converting the tensioning pulley system
Problem:
The tensioning pulley in the kit has a different
technical design than the factory-fitted component.
Type to be replaced
Cause:
According to Ford, the new type of tensioning pulley has to be
installed in all 1.8 diesel engines when the timing belt is due to
be changed. Given the fact that the structure has been changed
completely, clarification is required on how to install or position
this correctly.
New tensioning pulley design
Solution:
The new type is a semi-automatic tensioning pulley which is
installed centrally in place of the manual tensioner (50 Nm). Following installation of the timing belt, adjust the tension on the
pulley on the front by turning it in the direction indicated by the
embossed arrow using a hex key. Make sure that the recess is
opposite the stop lug in approx. the 3 o’clock position. In some
older types a few 1/10 mm must be filed off the cover
in the area of the tensioning pulley.
Nominal tension
ContiTech Technical Info
13
Replacing CT 522 K4 with CT 522 K1
Renault Master, Trafic & Jeep Cherokee
Changing the tensioning pulley
Problem:
The tensioning pulley included in the kit for the type delivered is
different to the one installed in the vehicle.
Type to be replaced
Cause:
According to the manufacturer, the new type of tensioning pulley has to be installed in all 2.1 diesel engines when the timing
belt is due to be changed in accordance with kits referenced
above. Given the fact that the structure has been changed, clarification is required on how to install or position this correctly.
New tensioning pulley design
Solution:
The new type is also a manual tensioning pulley which is
installed in place of the previous tensioner. After the timing belt
has been installed, the accompanying pulley is placed on the
retaining plate and screwed on together. The spring with
sleeve is no longer used (not depicted). The tension is then
adjusted as per instructions in the past.
(e.g.: BTT Hz: 104 Hz +/- 5)
New tensioning pulley design
ContiTech Technical Info
Replacing 6PK1748 with 5PK1750
Renault 1.4/1.6 16V with K4J/K4M AC system
Converting the V-ribbed belts
Problem:
The belt is very noisy, wears quickly and exhibits signs of abrasion. The tensile member and ribs can be torn out of the belt by
edge contacts. This can lead to serious engine damage if the
timing belt jumps off a pulley.
Cause:
The V-ribbed belt on older vehicles has six ribs (6PK1748).
The new belt has only five ribs (5PK1750) to increase the
distance from the ancillary units. According to Renault,
this new belt should generally be installed.
Solution:
Position the 5-rib belt only on the outer grooves of all belt
pulleys; the inside groove must remain free on all pulleys. In
this connection, the generator’s overrunning alternator pulley
should also be checked to make sure that it is functioning perfectly and the hydraulic steering pump checked for axial play
(misalignment). Before mounting the belt, remove any abrasion
fines from the grooved pulley using a soft wire brush.
14
ContiTech Technical Info
15
CT 984 K2 and CT 1015 K2
Audi, VW 2.5 TDI V6
Installation tip – tensioning system
Problem:
The tensioning lever chafes against the tensioning pulley.
This can result in serious damage to the engine.
Chafing lever
Cause:
Due to improper positioning during installation, the tensioning
lever comes into contact with the running surface after the
parts have been in operation only briefly. By way of illustration,
the side facing the engine is shown here (normally hidden).
Lever wrongly positioned
Solution:
Carefully check the position of the tensioning lever on the
check stud. Only the lever contact surface shown here must
be allowed to make contact with the catch. This ensures the
running surface’s freedom of movement.
Lever correctly positioned
ContiTech Technical Info
16
Replacing CT 975 K1 with CT 975 K3
Opel 1.6/1.8 16V
Changing the idler
Problem:
The idler pulley included in the kit for the type delivered is
different to the one installed in the vehicle.
Pulley to be replaced
Cause:
According to the manufacturer, the new pulley with a plastic
running surface (55373) must be installed when the belt is
changed instead of the previous metal version (55333).
Solution:
The new pulley is now equipped with a pre-mounted
bolt and can be fitted directly.
New idler roller
ContiTech Technical Info
17
Replacing CT 946 K2 with CT 1044 K1
Audi, VW, Seat, Škoda 1.9 TDI
(Common rail injection pump)
Problem:
The belt supplied with CT 1044 K1 is different in terms of
appearance and number identification from the CT 946 belt
installed so far.
CT 946
Cause:
The CT 1044 is reinforced with an additional fabric backing and
can also be used for older TDI engines which were factory-fitted
with the CT 946.
CT 1044 with fabric backing
Solution:
Kit CT 946 K2 is no longer available and has been replaced by
CT 1044 K1. The engine number delimitation is therefore no
longer applicable.
ContiTech Technical Info
18
CT 941 K1
Mitsubishi 1.8 GDI, Volvo V40/S40 1.8
Overheating of idler
Problem:
Shortly after the kit has been installed, the idler pulley fails
due to degradation/overheating.
Failed idler
Cause:
Seizure of the tensioning pulley. This causes the belt to overheat
and in turn to transmit this heat to the idler. As a result, the
plastic cage of the bearing melts, causing the pulley to fail.
The seizure of the tensioning pulley occurs when the roller rubs
against the mounting support.
Tensioning pulley seized
internally
Solution:
It is essential to clamp the tensioning pulley counterclockwise
when an eccentric is used for tensioning. The pulley must be
able to move freely on the mounting support. The tightening
torque of 48 Nm on the fixing screw must be observed.
ContiTech Technical Info
19
CT 817
Daihatsu Cuore, all years
Problem:
The belt is frayed on the sides and has the look
of sloppy work.
Edges of the CT 817 (Fig. 1)
Cause:
The CT817‘s tensile member is Kevlar. For technical reasons,
the edges appear as in Fig. 1 after being cut.
Conventional timing belt
Solution:
There is no cause for concern in using the belts.
No material flaw is involved here.
ContiTech Technical Info
CT 881 K2 / K4
Ford 1.25/1.4/1.6 16V, various
20
(from 04/1997)
Change in the tensioning pulley
Problem:
The tensioning pulley delivered in the kit is designed differently
from the pulley previously installed in the vehicle (eccentric
adjustment to pointer alignment using a hex key).
Previous pulley design
Cause:
According to the manufacturer, the new version must be
installed instead of the previous one when belts are changed.
New design
Solution:
The new pulley is now equipped with a pre-mounted cotter
pin and can be installed directly. After all components have
been installed, simply remove the cotter pin and the tension
is set automatically.
ContiTech Technical Info
21
CT 1035 K1 / K2
Renault 1.5 dCi, Nissan 1.5 dCi, Suzuki 1.5 DDIS
Change in the tensioning pulley
Problem:
The tensioning pulley supplied in the kit is designed differently
from the pulley previously installed in the vehicle.
Previous design
Cause:
There is an alternative design. This is supplied with the
same screw and can be installed according to the vehicle
manufacturer‘s specifications.
Alternative design
Solution:
Despite its different designs, the tensioning pulley can be used
for all the vehicles specified in the catalog.
Comparison of base plates
ContiTech Technical Info
CT 939 K1-5
Audi, VW 2.4/2.5 TDI 5-cyl
Oil-fouled tensioning pulley
Problem:
A cast part has broken off the tensioning pulley or the spring
is broken. The tensioning pulley does not work, and the belt
has jumped.
Cause:
The tensioning pulley is visibly
contaminated by oil. The Tefloncoated friction pulley is designed
to damp vibrations but ceases
to work after coming into contact
with oil.
Solution:
The oil contamination caused the failure of the pulley (excessive oscillation of the spring). Always check to ensure that the
shaft sealing rings on the crankshaft/camshaft are functioning
properly. If necessary, they must be replaced.
22
ContiTech Technical Info
23
CT 1096 K1
Rover, MG, all 2.0/2.5 V6
Installation tip – tensioning pulley
Problem:
The tensioning pulley twists on the base frame during operation. During further operation, the running surface starts to
contact the base frame and seizes. This can damage the
engine.
Tensioning pulley
Cause:
You must ensure that the pulley is only pre-mounted on the
base frame to 10 Nm.
Seized tensioning pulley
Solution:
After the belt has been installed and adjusted, the pulley
must be definitively fixed by tightening the mounting bolt
to 40–50 Nm.
ContiTech Technical Info
CT 957 K1/K2
Audi, Seat, Škoda, VW 1.4/1.6 16V
Installation tip – tensioning pulley
Problem:
The timing belt has lost a great deal of its width,
and has torn as a result.
Cause:
The timing belt has worn away at the side because the
tensioning pulley was misaligned.
Solution:
When the tensioning pulley is installed, make sure that the
arrester is latched properly in the core hole cover. Turn the
adjustment eccentric counterclockwise to tighten the pulley
When the belt drive is rotated twice, be certain to check that
the belt is aligned.
24
ContiTech Technical Info
25
CT 939 K2/K3
Audi, VW 2.5 TDI 5 Zyl.
Washer (diamond-coated)
Problem:
The timing belt kit contains a thin washer (diamond-coated)
that was not previously installed in the vehicle.
Washer
Solution:
This special washer (4) must be fitted between the crankshaft
drive pulley (3) and the torsional vibration damper (5). This
increases the coefficient of friction.
Fitting position
ContiTech Technical Info
26
CT 1038 K1, CT 1034 K1, CT 989 K1 & CT 731 K1
Citroën, Peugeot, Iveco, Fiat, Renault, Opel 2.5/2.8 D
Correct fitting of the tensioning pulley
Problem:
The tensioning pulley supplied with the kit breaks apart after
a short period of operation, normally resulting in damage to
the engine.
Disassembled bearing
Cause:
This is due to faulty alignment of the belt drive. The tensioning
pulley is subjected to off-center loading and fails after a short
running time.
Intact pulley
Solution:
To ensure correct belt alignment, it is vital that the tension pulley bracket is cleaned thoroughly, and that you subsequently
check that the entire surface of the pulley is properly seated on
the journal.
Journal of the tensioning pulley
retaining plate
ContiTech Technical Info
27
CT 1044 K1
Audi, VW, Seat, Škoda 1.9 TDI
Snapped-off idler
Problem:
The large idler snaps off following a short period of operation
as a result of bearing seizure. This can lead to engine damage.
Large idler
Cause:
Because of insufficient tension, the back of the timing belt
has become heated up on the two stabilizing rollers and
transmitted heat to the large idler. Eventually it overheats
and snaps off.
Stabilizing roller
Solution:
When adjusting timing belt tension, it is vital that the correct
position of the marking on the tensioner pulley is checked
again, even once the drive has been rotated several times. Care
must be taken to make sure there is sufficient friction force at
the small stabilizing rollers so that they are also driven without
any slippage occurring.
Tensioning pulley
ContiTech Technical Info
CT 1014 K3
Opel, GM 1.7 DTI, various
28
(up to engine no. 328703)
Converting the tensioning system
Problem:
The new pulley does not fit into the slot for the old idler pulley.
The engine support bracket is now positioned at a slant to the
engine and can no longer be screwed onto it.
Old pulley from
CT 1014 k1
Cause:
According to “Opel TIS”, the old, mechanical tensioning pulley
from CT 1014 K1 can no longer be used. You must convert to the
new type (as factory-fitted as of engine number 328704).
New tensioning pulley from
CT 1014 K3
Solution:
To mount the new pulley, an enclosed stay bolt has to be
screwed in to the right of the injection pump pulley. This now
serves as the catch for the modified pulley spring. The old
engine support bracket must also be replaced with the likewise
enclosed new type. This is necessary because with the new
pulley there is no longer any base plate, which also previously
served as a spacer plate for the engine support bracket.
Tightening torque: 49 Nm.
Engine support bracket
ContiTech Technical Info
29
CT 870 K1, CT 873 K1, CT 975 K3
Opel 1.4/1.6/1.8/2.0 16V
Installation tip – tensioning pulley
Problem:
The tensioning pulley makes noises after operating for a certain amount
of time. In subsequent operation, the arrester can break and the belt
loses its tension. As a rule, this results in damage to the engine!
Cause:
When cold, the pointer on the tensioning pulley no longer
points to the mark and strikes the cold stop after each combustion cycle (hence the noise).
Pointer position too low
Solution:
Opel/GM specifies a special process for setting the tension
when a timing belt is changed: When tensioning, turn the adjusting cam counterclockwise (to the left). Rotate the timing
belt 2x by hand with fully tensioned tensioning pulley. Only after
this has been done is the tension to be set by turning the cam
to the right to the “new” mark. This must be done to ensure
that the timing belt is properly seated in the pulley.
Full stop setting
Final setting
ContiTech Technical Info
30
CT 887 K1
Daewoo, Chevrolet 1.4/1.5/1.6 16V
Installation tip – tensioning pulley
Problem:
The pointer on the tensioning pulley breaks off during
installation and could severely damage the belt.
Snapped-off pointer
Cause:
There are two possible reasons for this:
1. Failure to loosen the water pump and to use it for adjusting
the tension as described in the instructions.
2. During the specified two-fold rotation of the engine at
increased tension (hole marking on the baseplate) the limit
stop is subjected to excessive load and the movable pointer
breaks off.
Damaged timing belt
Solution:
1. Make sure that the water pump is loosened, then turned using
the corresponding tool (OE J-4249 2) and finally tightened again
to 8 Nm.
2. The tongue of the pointer must be adjusted to ensure that it
bears no load at any time. After turning the engine twice, both
pointers must be perfectly aligned with one another.
Hole mark
ContiTech Technical Info
31
CT 604 K1, CT 684 K1, CT 711 K1, CT 840
K1/K2, CT 935 K1/K2, CT 940 K1/K2, CT 949 K1
Renault, various Installation tip – tensioning pulley
Problem:
The tensioner blocked after a short period of operation.
The timing belt becomes hot and overheats the idler.
Overheated idler
Cause:
During tensioning pulley installation, the rotating axis was not
fitted properly and/or the nut was not tightened sufficiently.
This caused the pulley to twist under load and the running
surface seized as a result of a bent retaining plate.
Seized tensioning pulley
Solution:
Ensure that the tensioning pulley is correctly installed on the
mounting surface. The lug must be located in the recess of the
retaining plate.
In addition, the specified tightening torque of 50 Nm must
be observed during installation.
ContiTech Technical Info
32
CT 1014 K2/K3/K5
Opel, GM 1.7 D, various
Change in the idler
Problem:
The idler in the kit is different from the one previously
installed in vehicles.
Old idler pulley V 55317
Cause:
According to “Opel TIS” the old idler is no longer used. This is
being changed to the new type with a large ball bearing without
a flange.
New idler pulley V 55368
Solution:
Despite the changed design, the new type can be installed
directly instead of the old steel idler.
ContiTech Technical Info
33
CT 1045 K1
Renault 1.2 16V
Change in the tensioning pulley
Problem:
The running surface material of the tensioning pulley in
the kit is different from that of the removed pulley.
Previous tensioning pulley
Cause:
The running surface of the tensioning pulley was changed by
the manufacturer from sintered metal to plastic.
New tensioning pulley
Solution:
The new pulley can be used without limitations.
ContiTech Technical Info
34
Replacing 6PK1140 ELAST with 6PK1070
Audi, VW, Seat, Škoda 1.6 TDI & 2.0 TDI (Common Rail)
Converting the V-ribbed belt
Problem:
The 6PK1140 ELAST V-ribbed belt (OE no. 03L903137G)
is being discontinued. The 6PK1070 replacement belt
(OE no. 03L903137) cannot, however, be installed directly.
Belt drive
Cause:
During plant trials the modified design apparently contributed
to improved running properties, and because of that the new
design should now be used when the belt has to be replaced.
Solution:
The idler pulley (OE no. 03L145276) should be replaced with
a tensioning element with roller (OE no. 038903315AH).
Together with the new belt, the new tensioner is installed using
a new M8x50 hexagon head screw (OE no. N10640801).
Tensioning element
ContiTech Technical Info
35
CT 1079 K1
Opel, Renault, Saab 3.0 DTI V6
Idler failure as a result of overheating
Problem:
The belt fails due to overheating shortly after the
kit is installed.
Overheated parts
Cause:
The idler pulley seizes due to improper installation! This results
in overheating of the belt, which transmits heat to the other
parts, in turn causing the belt drive to fail. The idler seizes if
it is mounted with the wrong side of the pulley towards the
mounting support.
Idler pulley mechanically
seized (engine side up)
Solution:
The idler pulley between the camshafts must be installed with
the raised inner flange towards the engine! If this is not done,
the pulley is positioned incorrectly and will seize (see off-center
signs of rubbing on the belt).
ContiTech Technical Info
36
CT 1028 K2/K3/K4, CT 1051 K1/K2
VW, Audi, Seat, Škoda 1.9/2.0 TDI PD
Tensioning pulley breaks off after bolt snaps
Problem:
Belt drive failure soon after installation of the kit due to the
tensioning pulley breaking off.
Broken-off tensioning pulley
Cause:
The tensioning pulley was unable to gain full supporting purchase on the engine. This resulted in the action of lateral forces
on the stud bolt, which subsequently broke.
Stud bolt at transition (M10)
Solution:
The stud bolt must always be inserted as far as it will go into the
engine so that the screwed-on contact surface of the tensioning
pulley can be fully supported on the cylinder block without any
additional loads being generated.
ContiTech Technical Info
CT 908 K1
VW, Audi, Seat, Škoda 1.6/2.0 8V
Noise in belt drive
Problem:
Shortly after installation of the kit, noise comes from the
cold engine (belt not aligning).
Cause:
The timing belt rubs up against the inside flange of the
tensioner pulley, producing a squeaking sound.
Solution:
Before finally making the setting to the arrow marking, tension
and relax the tensioner pulley five times. In addition, ensure that
the tensioning pulley is fully and properly seated.
37
ContiTech Technical Info
38
CT 1105 K1
Opel, Alfa Romeo, Fiat & Saab, 1.9 JTD
Idler failure as a result of overheating
Problem:
The belt drive fails as a result of the defective idler. The plastic
running surface shows signs of overheating over its entire
circumference (melting).
Defective idler
Cause:
The water pump is worn and seized. The back of the belt
becomes overheated because of the resulting sliding friction.
It then transfers this heat to the idler, and the running surface
starts to melt and deform. This results in a loss of tension in the
drive, causing the timing belt eventually to jump.
Overheated back
of the timing belt
Solution:
The water pump should be inspected regularly to ensure that it
is in perfect condition. The pump should always be replaced at
the same time as the belt is replaced.
Seized water pump
ContiTech Technical Info
39
CT 942 K1
Hyundai 1.4 – 1.6 16V, various
Belt failure as a result of incorrectly fitted tension spring
Problem:
The belt drive fails due to a torn timing belt.
Torn belt
Cause:
The back of the timing belt became overheated because the
tensioning pulley was prevented from turning freely.
Tensioning pulley
Solution:
The correct installation position of the tension spring must
always be checked. Otherwise it may come into contact with
the tensioning pulley running surface.
Contact between spring
and running surface
ContiTech Technical Info
40
CT 738 K1
Mitsubishi, 1.3/1.5 Motortyp 4 G, various
Pulley failure as a result of incorrectly fitted tension spring
Problem:
The belt drive fails because of a broken tensioning pulley.
Broken tensioning pulley
Cause:
The pulley has been split in the middle as a result of an
unacceptable external action (spring contact).
Tension spring
Solution:
Always check that the tensioning spring has been positioned
correctly. Otherwise, dangerous contact can occur with the
tensioning pulley’s running surface which is irretrievably
damaged as a result.
ContiTech Technical Info
41
CT 1092 K1 Peugeot, Citroën, Ford, Fiat,
Mazda, Mini and Volvo 1.6 Diesel, 9H engines
Idler failure as a result of running surface seizure
Problem:
The belt drive fails due to the defective idler pulley. Part of the
plastic running surface has been worn through.
Worn-through idler
Cause:
The idler seizes due to inadmissible contact with the cover.
The timing belt destroys the idler after a short period because
of the belt sliding over it.
Solution:
Always make sure that the cover of the timing belt drive is
positioned correctly and check for any potential distortion due
to heat input. Long-term operation can be ensured only when
the pulleys can rotate freely.
Timing belt cover
ContiTech Technical Info
42
Replacing CT 909 K5 with CT 909 K10
VW, Audi, Seat, Škoda 1.8 T/2.0
Converting the tensioning pulley system
Problem:
The components supplied in the timing belt kit do not match
the components previously installed on the vehicle.
Version to be replaced
Cause:
A new tensioning system with a mechanical tensioning
pulley is available for these vehicles. In this, the hydraulic
tensioning damper with the small idler is replaced by a
bracket for the idler.
New tensioning system
Solution:
After fitting the timing belt and the bracket (with the small
idler), set the tensioning pulley to the mark by turning the
eccentric clockwise. Check the setting after cranking the
engine twice. Tighten the nut of the tensioning pulley to
a torque of 23 +/- 3 Nm.
Tensioning pulley mark
ContiTech Technical Info
43
CT 881 K3
Ford 1.25/1.4/1.6 16V
Crankshaft screws
Problem:
Crankshaft screws of two different lengths (29 and 44.5 mm)
are supplied in the kit.
Crankshaft screw
M12 x 1.75 x 29
Cause:
A 44.5 mm long screw has been used with effect from
production date 15.08.2005.
Crankshaft screw
M12 x 1.75 x 44.5
Solution:
To make doubly sure that the appropriate screw is used,
you must determine the depth of the bore.
42 mm: 29 mm screw
52 mm: 44.5 mm screw
Both screws are tightened to a torque of 40 Nm + 90°.
ContiTech Technical Info
44
CT 884 K1, CT 990 K1/K2
Opel, Saab 2.5/2.6/3.0/3.2 V6, various
Installation tip – idlers
Problem:
After a short period of operation the timing belt jumps
because of a lack of tension.
Jumped timing belt
Cause:
The screw attaching the idler pulley to the plate has snapped
and caused a sudden loss of tension.
Snapped-off idler
Solution:
The factory default setting of the idler with a prefitted screw
may not be used. The screws of both idlers must be tightened
to 40 Nm in accordance with the setup process specified by
the manufacturer.
... comprehensive
information
... always absolutely
up-to-date
... directly to
the product
... no mountains
of paper and
no out-of-date
information
... simple and
easy access
... everything
at a glance
Product Information Center
w w w. c o n t i t e c h . d e / p i c
... free
... product-specific
special features
... satisfied
customers
“Find an explanation of PIC on YouTube too”
www.contitech.de/yt07en
... no registration required
... saves time
... article-specific
... attractive and clear
ContiTech Technical Info / Installation Tips
46
Installation Tips – Changing timing belts
For models: VW Scirocco, Golf V, VI, Plus,
Jetta III, engine code: CBDB (From model year 2008)
Large numbers of the engine are installed in
various VW models. When the timing belt is
changed, serious mistakes are often made. To
ensure that changing the belts goes smoothly,
ContiTech Power Transmission Group is providing mechanics with detailed installation tips.
Step by step, the ContiTech expert explains how
to replace belts correctly.
VW recommends that the timing belt and
tensioning pulley be replaced as follows:
> Scirocco: 2009 and older: every 180,000 km
2010 and newer: every 210,000 km
Tensioning pulley:
2010 and newer every 210,000 km
> Golf Plus: Timing belt every 180,000 km
> Golf V:
Timing belt every 180,000 km
> Golf VI: Timing belt and tensioning pulley
every 210,000 km
> Jetta III: 2009 and older: every 180,000 km,
tensioning pulley every 360,000 km
2010 and newer: timing belt and
tensioning pulley every 210,000 km
Labor time:
2.20 hours for all engines
TIP:
When the timing belt is changed, the tensioning
pulley, the idler pulley and the water pump
should be replaced, too.
Special tools required:
1. Locking pin for camshaft (OE 3359)
2. Locking pin for high-pressure pump
sprocket (OE 3359)
3. Arrester (OE T 10172, OE T 10172/4)
4. Lock ring tool for crankshaft (OE T 10050)
5. Socket wrench (OE T 10264)
6. Locking pin (OE T 10265)
ContiTech Technical Info / Installation Tips
Safety notes:
Turn the engine in the direction of engine
rotation ONLY on the crankshaft sprocket.
The crankshaft and camshaft sprockets must
never be rotated after the timing belt has
been removed.
> Do not use camshaft locking tool(s) as an
arrester when loosening or tightening the
camshaft sprocket.
> When turning the camshaft, the crankshaft
must not be positioned at top dead center
(TDC).
> The timing belt must not come in contact
with oil or cooling water.
> Only adjust the timing belt when the engine
is cold.
> Make a note of the radio code. Disconnect
the battery’s negative terminal.
> We recommend that, once the timing belt has
been removed, it should always be renewed
and not re-used.
47
Tightening torques:
New self-locking nuts and bolts should always
be fitted.
> Bolt(s) on camshaft sprocket (7)
(see fig. 1)
Use new bolts.
Central bolt: 100 Nm
Sprocket bolts 20 Nm + 90°
> Bolt(s) on high-pressure pump sprocket (8)
(see fig. 1)
Use new bolts.
29 Nm + 90°
> Nut(s) on tensioning pulley (4)
(see fig. 2)
Use new bolts.
20 Nm + 45°
> Center timing belt guard
Use new nut(s)
10 Nm
> Lower timing belt guard
Use new bolt(s)
10 Nm
> Bolt(s) on vibration damper
Use new bolt(s).
10 Nm + 90°
> Idler
Bolt
Use new bolt(s)
50 Nm + 90°
ContiTech Technical Info / Installation Tips
48
Removal:
> Remove engine cover
> Dismantle fuel filter
> Disconnect the plug on the coolant
temperature sensor
> Open clip(s). Remove the upper timing
belt guard
> Remove front right wheel-house liner
> Remove drive unit belt
> Remove vibration damper
> Remove the lower timing belt guard
> Remove the center timing belt guard
> Remove coolant pipe(s)
> Position the engine at TDC cylinder 1.
Note the marking(s) (1) (2.2) (2.3)
(see figs. 1+2).
> The geared segment on the camshaft
timing belt sprocket must be at the top (1).
1
Fig. 1
ContiTech Technical Info / Installation Tips
49
> Use lock ring tool for crankshaft
OE (T 10050) (2.1).
> Markings of crankshaft and lock ring
tool for crankshaft must align (2.2 + 2.3)
(fig. 2).
2.1
2.2
2.3
Fig. 2
> Lock ring tool for crankshaft: Pins must
be positioned flush in the bore holes.
> Fit the locking pins (3.1 + 4.1), highpressure pump sprocket and camshaft
(figs 3 + 4).
> Loosen the bolts on the high-pressure
pump sprocket (3.2) (fig. 3).
> Loosen the bolts on the camshaft
sprocket (4.2) (fig. 4).
> Use arrester.
3.1
3.2
Fig. 3
4.2
4.1
Fig. 4
ContiTech Technical Info / Installation Tips
50
> Loosen the nut of the tensioning
pulley (5.1/6.1).
> Using the hex key, turn the eccentric
(5.3/6.3) of the tensioning pulley counterclockwise, until the tensioning pulley can be
disconnected with the special tool (5.2).
> Socket wrench OE (T 10264)
> Locking pin OE (T 10265)
5.2
5.1
5.3
Fig. 5
> Using the hex key, turn the tensioning pulley
clockwise (maximum load stop) (6.3).
> Tighten the nut of the tensioning pulley
slightly (5.1/6.1).
> Remove the timing belt from the idler first
and then from the sprockets.
6.3
6.1
Fig. 6
ContiTech Technical Info / Installation Tips
51
Installation:
> Adjustment work on the timing belt may be
carried out only when the engine is cold.
> Tensioning pulley: the lug of the base plate
must be located in the recess (7.1)
> Check the TDC markings and readjust as
required.
7.1
Fig. 7
> The tensioning pulley must be locked using
the locking pin and fixed to the stop on the
right (6.3).
> Turn the camshaft sprocket clockwise to
the stop.
> Turn the injection pump sprocket clockwise
to the stop.
> Place the timing belt around the crankshaft,
tensioning pulley, camshaft sprocket, coolant
pump, and high-pressure pump, in that order.
> Loosen the nut of the tensioning pulley.
> Remove the special tool (locking pin).
> Ensure that the tensioning pulley is
positioned correctly.
ContiTech Technical Info / Installation Tips
52
> Using the hex key, turn the tensioning pulley
clockwise (in the direction of the arrow).
> The pointer of the tensioning pulley must be
flush with the recess in the base plate (8.1).
8.2
8.1
Fig. 8
> The nut of the tensioning pulley must not
turn while this is being done (8.2).
> Tighten the nut of the tensioning pulley (8.2).
> Brace the camshaft sprocket
counterclockwise to maintain pretension (use
the arrester).
> Tighten the screw(s) on the camshaft
sprocket (4.2) (fig. 4).
> Tighten the screw(s) on the high-pressure
pump sprocket (3.2) (fig. 3).
> Remove locking pins on the high-pressure
pump sprocket and on the camshaft sprocket
(3.1 + 4.1) (figs. 3 + 4).
> Remove crankshaft lock ring tool (fig. 2).
> Rotate the crankshaft twice in the direction
of engine rotation.
> Position the crankshaft right before the
TDC of the first cylinder.
ContiTech Technical Info / Installation Tips
> Insert crankshaft lock ring tool (6.1)
OE (T 10050).
> Turn the crankshaft until the lock ring tool
can be inserted.
> The pin on the crankshaft lock ring tool
must be directly in front of the bore hole
of the sealing flange (6.1) (arrows). Turn the
crankshaft until the lock ring tool can be
inserted (fig. 6).
> Check whether the camshaft can be locked
with the lock ring tool. The pointer of the
tensioning pulley must be flush with the
recess in the base plate.
> Tighten screw(s) on the camshaft sprocket.
> Tighten screw(s) on the injection pump
sprocket.
53
The rest of the installation procedure takes
place as for the disassembly procedure but
in the reverse order.
> Mount the drive unit belt.
> Decode the radio, program the volatile
memory.
> Start the engine and check for proper
function.
> Read error memory.
> Carry out a test drive.
> Document timing belt change.
> 1 crankshaft lock ring tool.
ContiTech Technical Info / Installation Tips
54
Installation Tips – changing timing belts
As an example Renault Clio II 1.6 16V,
Engine code K4M 748
This engine, and its equivalents in different engine sizes, is installed in other Renault vehicles
in large numbers and initially does not seem
to raise any questions with regard to changing
the timing belt under normal circumstances,
even for mechanics unfamiliar with it. However,
critical mistakes are made again and again here
and have a negative effect on the belt drive. To
ensure that changing the belt goes smoothly,
we have provided mechanics with installation
tips which are clear in our view.
Change interval recommended
by vehicle manufacturer:
> For vehicles manufactured up to
March 3, 1999: replace every 100,000 km
or every 5 years
> For vehicles manufactured from
March 12, 1999:
replace every 120,000 km or every 5 years
(the tensioning pulley, guide pulleys and
water pump should be replaced at the same
time).
Labor time:
> Clio: 2.70 hours
> Mégane: 3.60 hours
> Mégane Scénic: 3.90 hours
> Laguna: 2.50 hours
Special tool:
> Crankshaft locking pin,
Renault tool code MOT1489
> Camshaft alignment ruler,
Renault tool code MOT1496
Motorcode K4M 748
ContiTech Technical Info / Installation Tips
1.
55
First identify the vehicle exactly using the
engine code on the engine block. (fig. 1)
Fig. 1
2.
Disconnect the vehicle battery.
3.
Remove:
a. Drain cooling water
b. Support engine
c. Right engine mount
d. Ancillary unit drive belt (V-ribbed belt)
e. Plugs from rear end of camshafts. (fig. 2)
Fig 2
f. Plug from cylinder block (fig. 3)
Fig 3
ContiTech Technical Info / Installation Tips
4.
56
Turn the crankshaft to the right to the setting position. The grooves in the camshafts
must be aligned.
Note:
The grooves are located below the
top edge of the cylinder head. (fig. 4)
Fig. 4
5.
Insert the locking pin into the cylinder
block (tool code MOT1489).
Note:
The crank web must be up against the
locking pin. (figs. 5/6)
Fig. 5
Fig. 6
ContiTech Technical Info / Installation Tips
6.
7.
8.
9.
Then apply the alignment ruler at the rear
end of the camshafts (tool code MOT1496).
(fig. 7)
Lock the flywheel using a large screwdriver
or suitable tool and loosen the screw of the
crankshaft pulley.
Note:
The flywheel must be securely locked so
that the locking pin does not break or
become bent, or that the camshaft ruler
or the camshaft itself is not damaged
when loosening the crankshaft screw.
57
Fig. 7
Remove:
g. Crankshaft pulley screw
h. Crankshaft pulley
i. Top and bottom timing belt covers
Loosen the nut of the tensioning pulley.
10. Have the belt push the tensioning
pulley off. (fig. 8)
11. Remove and fit new:
> Tensioning pulley nut
> Tensioning pulley
> Guide pulley
> Timing belt
> Water pump
Note:
The crankshaft pulley must not slip
off the crankshaft.
Fig. 8
ContiTech Technical Info / Installation Tips
Installation:
1. Check whether the locking pin is inserted.
The crankshaft must be up against the
locking pin.
2. The grooves in the camshafts must be
aligned.
3. Also check whether the alignment ruler is
correctly applied.
4. Then install the new water pump.
Note: Carefully clean the sealing surface
between engine block and water pump
and remove any remaining seal.
5. Install the new guide pulley and tighten
to 45 Nm. (fig. 2)
Note: Pay attention to the tightness of the
bolt that holds the tensioning pulley in the
water pump housing.
58
Fig. 1
Fig. 2
6.
Install the new tensioning pulley and
tighten the nut to 7 Nm for the time being.
(fig. 3)
Fig 3
ContiTech Technical Info / Installation Tips
59
Note:
Pay attention to the tightness of the bolt that
holds the tensioning pulley in the water pump
housing.
7.
8.
9.
10.
11.
12.
13.
14.
Remove the crankshaft sprocket and gear.
Degrease the end of the crankshaft.
Reinstall the crankshaft sprocket.
Fit the timing belt going around towards
the left starting from the crankshaft sprocket. Make sure that the timing belt is tight on
the load side.
Degrease the crankshaft belt pulley.
Install the crankshaft belt pulley.
Measure the length of the screw of the
crankshaft belt pulley. Maximum length:
49.1 mm. If longer: fit new screw.
Screw in the crankshaft belt pulley screw.
New screw: do NOT oil.
Tighten the crankshaft belt pulley screw
for the time being. Leave a gap of 2-3 mm
between the contact surface of the screw
and the crankshaft belt pulley.
Loosen the nut of the tensioning pulley.
Turn tensioning pulley to the right until the
movable pointer is at the right stop. Use a
6 mm hex key.
Fig 4
ContiTech Technical Info / Installation Tips
60
Note:
The movable pointer must be 7-8 mm behind
the fixed pointer.
15. Tighten the tensioning pulley nut for the
time being, tightening torque: 7 Nm.
16. Lock the flywheel with a large screwdriver
and tighten the screw of the crankshaft belt
pulley for the time being, tightening torque:
20 Nm.
17. Remove:
> Locking pin
> Alignment ruler
18. Lock the flywheel with a large screwdriver
and tighten the screw of the crankshaft belt
pulley by a further 120-150 degrees.
19. Turn the crankshaft two rotations to the
right into the setting position. This is an
extremely important step. If this is not
done, the belt drive will start making noise
in a short time due to insufficient tension.
20. Insert the locking pin into the cylinder
block.
21. The crank web must be against the
locking pin.
22. Check whether you can easily apply the
camshaft alignment ruler.
23. Brace the tensioning pulley using a 6 mm
hex key. Loosen the nut of the tensioning
pulley.
Fig. 5
ContiTech Technical Info / Installation Tips
24. Turn the tensioning pulley to the left until
the pointer is aligned with the notch.
(figs. 6/7)
25. Tighten the tensioning pulley nut, tightening torque: 27 Nm.
26. Remove the locking pin.
27. Turn the engine drive two more times,
check the setting and adjust if necessary.
28. Screw in the cylinder block plug.
29. Insert new plugs at the end of the
camshaft.
30. Install the components in reverse order of
removal. Fill up the cooling water and vent
the cooling system.
61
Fig 6
Fig. 7
31. Record the replacement of the original
ContiTech timing belt on the supplied
sticker and affix it in the engine compartment.
32. Test run the engine or take a test drive.
ContiTech Technical Info / Installation Tips
62
Installation Tips – changing timing belts
As an example
Opel 1.8i 16V C 18 XE
This engine, and its equivalents in different
engine sizes, is installed in other Opel vehicles
in large numbers and initially does not seem
to raise any questions with regard to changing
the timing belt under normal circumstances,
even for mechanics unfamiliar with it. However,
critical mistakes are often made with regard
to adjusting the tensioning pulley. To ensure
that changing the belt goes smoothly, we have
provided mechanics with installation tips which
are clear in our view.
Change interval recommended
by vehicle manufacturer:
> Replace every 60,000 km or every 4 years
(the tensioning pulley, guide pulleys and
water pump should be replaced at the same
time).
Labor time:
> Astra F – 1.8: 0.90 hours
Special tool:
> Camshaft locking tool, e.g. Multi-Lock from
the Tool Box.
ContiTech Technical Info / Installation Tips
63
Fig. 1
1.
2.
3.
First identify the vehicle exactly using the
engine code, which can be found on the
outer edge of the transmission mounting
flange on the engine block (fig. 2).
Disconnect the vehicle battery.
Remove:
a. Complete air filter
b. Air intake hose
c. C 18 XE/XEL: air mass sensor
d. Support engine
e. Right engine mount
f. Ancillary unit drive belt (V-ribbed belt)
g. Power-steering / air-conditioning
compressor pump
h. Timing belt cover
Fig. 2
Fig 3
ContiTech Technical Info / Installation Tips
64
Removing timing belt
4. Turn the crankshaft to the right until the
timing mark on the crankshaft pulley aligns
with the tip on the engine block.
(fig. 4)
Fig. 4
5.
On camshaft sprockets with a single timing
mark, make sure that the mark of the
respective camshaft sprocket is aligned
with the marks of the valve cover. On
camshaft sprockets with two timing marks,
check that the “INTAKE” and “EXHAUST”
timing marks are aligned with the marks of
the valve cover. (fig. 5)
Fig. 5
ContiTech Technical Info / Installation Tips
6.
65
Lock the camshaft with the locking tool.
Note:
If the timing belt is removed without
locking the camshafts, the camshafts
rotate and the engine timing is off. The
timing belt can no longer be mounted
properly.. In such cases, the camshafts
can only be positioned for fitting by using
unprofessional methods. (fig. 6)
Fig. 6
ContiTech Technical Info / Installation Tips
Remove the crankshaft pulley.
Loosen the tensioning pulley screw.
Turn the tensioning pulley to the right
until the pointer is at the left stop. Here,
the tab attached with a hexagon socket
screw must move clockwise downwards.
Use a hex key here.
10. Remove the timing belt.
11. Drain cooling water and remove the
tensioning pulley, idlers and the water
pump.
12. Change the idlers and the water pump.
66
7.
8.
9.
Fig. 7
Fig. 8
Note:
When installing the water pump, make sure
that it is positioned correctly. The lug of the
water pump must be located in the recess
of the rear timing belt housing. (fig. 9)
Fig. 9
ContiTech Technical Info / Installation Tips
67
Installation of the timing belt:
13. Install the tensioning pulley. Make
certain that the arrester on the back of
the tensioning pulley (base plate of the
tensioning pulley) is positioned between
the contact surfaces on the engine block ...
(fig. 10)
Fig. 10
… and not next to them.
(fig. 11)
14. Fit the new timing belt in the opposite
direction to the direction of rotation,
starting at the crankshaft sprocket.
Fig. 11
ContiTech Technical Info / Installation Tips
68
15. Turn the tensioning pulley with the
adjusting cam to the left until the pointer is
at the right stop. Here, the hexagon socket
screw moves counterclockwise upwards.
Use a hex key. Then tighten the new
tensioning pulley slightly. (fig. 12)
Note:
This is an especially important step. If this
is not done, the belt drive will start making
noise in a short time due to insufficient
tension. Now rotate the engine by hand in
the running direction at least twice after
removing the locking tool.
Fig. 12
16. Loosen the screw of the tensioning pulley
and turn the tensioning pulley to the right
(clockwise) until the pointer is aligned with
the notch in the bracket. (fig. 13)
Fig. 13
ContiTech Technical Info / Installation Tips
69
17. Tighten the tensioning pulley screw
to 20 Nm. (fig. 14)
18 Turn the engine drive two more times,
check the setting and adjust if necessary.
19. Install the components in reverse order of
removal. Fill up the cooling water and vent
the cooling system.
Fig. 14
Fig. 15
20. Record the replacement of the original
ContiTech timing belt on the supplied
sticker and affix it in the engine
compartment.
21. Test run the engine or take a test drive.
ContiTech Technical Info / Installation Tips
70
Installation Tips – changing timing belts
As an example
Audi A4, A6, A8, VW Passat 2.8 30V
This engine is installed in large numbers in various Audi and VW models. Critical mistakes are
often made when changing the timing belt.
To ensure that changing the belt goes smoothly, the ContiTech Power Transmission Group is
providing fitters with detailed installation tips.
ContiTech experts explain step-by-step how
to change belts correctly. Audi recommends
changing the timing belt every 120,000 km and
fitting a new tensioning pulley at the same time.
Note:
The tensioning pulley, tensioner, idler, water
pump and thermostat should also be changed
at the same time.
Special tools required (fig. 1):
1. Crankshaft locking tool no. 3242
(also in the TOOL BOX)
2. Camshaft locking tool no. 3391
3. Camshaft sprocket remover no. 3032
4. Supporting sleeves no. 3369
Labor time:
> A4: 2.90 hours
> A6 (up to 1997): 2.50 hours
> A6 (from 1997): 3.50 hours
> A8: 1.90 hours
> Passat: 3.30 hours
3
2
1
Fig. 1
Preparatory work:
> Identify the vehicle using the engine code.
> Disconnect the vehicle battery.
> Do not turn the crankshaft and camshaft
once the timing belt has been removed.
> Remove spark plugs so that the engine can
turn more easily.
> Turn the engine in its normal direction
(clockwise).
> ONLY turn the engine at the crankshaft
sprocket and not at other sprockets!
> Observe all tightening torques.
ContiTech Technical Info / Installation Tips
Removal:
1. Jack up the vehicle at the front and
support it.
2. A6 1997 and later/A4: move the radiator
support panel to the service position:
> Remove the front bumper
> Remove the air intake hose between the
front panel and the air filter
> Remove the screws in the front panel
> Attach the support sleeves no. 3369 in
the front panel
> Push the front panel forward
> Insert the top back screws into the front
holes to hold the panel
71
Fig. 2
ContiTech Technical Info / Installation Tips
3.
Remove:
> Viscous fan (left-handed thread)
> Ancillary unit timing belt
> Left and right timing belt covers
4.
Turn the crankshaft clockwise to TDC in
the third cylinder. The timing marks have
to match up. (fig. 3)
72
Fig. 3
5.
6.
The large holes on the mounting plates for
the camshaft sprockets must be opposite
each other. (fig. 4)
If this is not the case, turn the crankshaft
to the right a further complete turn.
Fig. 4
ContiTech Technical Info / Installation Tips
7.
73
Remove the plug from the crankcase
(fig. 5) and screw in the crankshaft locking
tool (no. 3242).
Fig. 5
Note:
The TDC bore in the crank web must be in
line with the hole for the plug. (figs. 6/7)
Fig. 6
Fig. 7
ContiTech Technical Info / Installation Tips
8.
74
Turn the tensioning pulley to the right
until the holes in the push rod line up with
those in the tensioner casing. Use an 8 mm
hex key. Hold the push rod by inserting
a locking pin with a diameter of 2 mm
through the hole in the tensioner casing.
(fig. 8)
Fig 8
Note:
Always insert the hex key completely into
the hex socket of the tensioning pulley to
ensure that the power is transmitted over
a large area when turning the tensioning
pulley against the piston of the damper.
If this is not the case, then the tension
pulley eccentric may break or crack.
Fig 9
We recommend being patient when
pushing the piston rod into the damper
casing by turning the tensioning pulley.
The piston takes some time to push out
the oil in the damper.
Fig 10
ContiTech Technical Info / Installation Tips
9.
75
Remove:
> The screws of the crankshaft belt pulley
(not the crankshaft pulley screw!!)
> The crankshaft belt pulley
> The viscous fan mount
Note:
The two screws on the mount can be
reached through the hole in the belt pulley
(Audi).
> Remove the lower timing belt cover
> Remove the timing belt
When removing the tensioning pulley,
remember to put the spacer back between
the engine and the tensioning pulley.
(fig. 11)
Installation:
1. Remove the screw of the camshaft
sprockets.
2. Screw an M10 screw into the camshaft
as a counter bearing for the camshaft
sprocket remover.
3. Loosen and remove both camshaft
sprockets from their tapered end. Use the
remover no. 3032.
4. Install:
> Mounting plates
> Screws
5. Slightly tighten the screws for the camshaft
sprockets.
6. The camshaft sprockets must turn easily
without tilting.
Fig. 11
ContiTech Technical Info / Installation Tips
7.
8.
9.
76
Place the timing belt around the camshaft
sprockets and the water pump belt pulley.
Fit the locking tool (no. 3391) on the
camshafts.
The crankshaft locking tool must be fitted.
(fig. 12)
Fig. 12
10. Place the timing belt around the guide
roller, crankshaft sprocket and tensioning
pulley. (fig. 13)
11. Slightly turn the tensioning pulley to
the right. Use an 8 mm hex key for this.
Remove the locking pin from the tensioner
casing to release the push rod.
12. Apply the torque wrench to the hex socket
of the tensioning pulley.
13. Tension the timing belt to 15 Nm by turning
to the left.
Fig. 13
ContiTech Technical Info / Installation Tips
14. Then remove the torque wrench.
15. Tighten the camshaft sprocket screw
to 55 Nm.
16. Remove:
> Camshaft locking tool
> Crankshaft locking tool
17. Screw the plug in.
18. Fit the crankshaft belt pulley. The notches
must be aligned to the nipple on the
crankshaft sprocket (Audi).
19. Tighten the screws on the crankshaft belt
pulley to 25 Nm (Audi 20 Nm).
20. Install the components in reverse order
of removal.
21. Record the replacement of the original
ContiTech timing belt on the sticker
provided and affix it in the engine
compartment.
22. Test run the engine or take a test drive.
77
Fig. 14
ContiTech Technical Info
Notes
78
ContiTech Technical Info
79
ContiTech. Engineering Next Level
Market segment
Automotive Aftermarket
As a division of the Continental Group,
ContiTech is a recognised innovation and
technology leader in natural rubber and
plastics. As an industry partner with a firm
future ahead of us, we engineer solutions
both with and for our customers around the
world. Our bespoke solutions are specially
tailored to meet the needs of the market.
With extensive expertise in materials and
processes, we are able to develop cuttingedge technologies while ensuring we make
responsible use of resources. We are quick
to respond to important technological trends,
such as function integration, lightweight
engineering and the reduction of complexity,
and offer a range of relevant products and
services. That way, when you need us, you’ll
find we’re already there.
Contact
ContiTech Antriebssysteme GmbH
Hanover, Germany
Tech. Hotline +49 (0)511 938-5178
[email protected]
Your local contact
www.contitech.de/contactlocator
Data, instructions and other technical
information available from the PIC
at www.contitech.de/pic or simply
scan the QR code.
Certified in accordance with
The content of this publication is not legally
binding and is provided as information only. The
trademarks displayed in this publication are the
property of Continental AG and/or its affiliates.
Copyright © 2014 ContiTech AG.
All rights reserved. For complete information
go to: www.contitech.de/discl_en
PTG 8309 EN 11.14 (Böl/Bru) Climate-neutrally printed with ContiTech offset-printing blankets.
Power Transmission Group