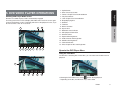
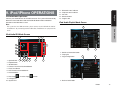
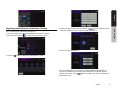
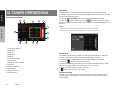
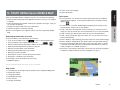
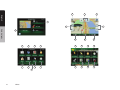
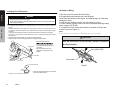
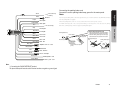
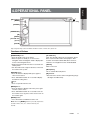
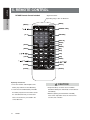
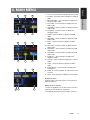
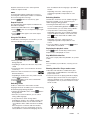
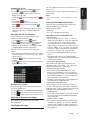
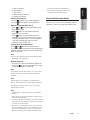
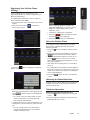
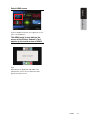
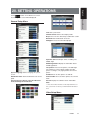
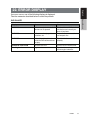
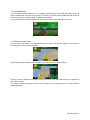
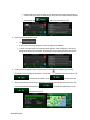
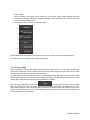
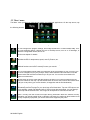
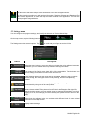
1
Quick Start Guide & Installation manual Guide de d’emarrage et Guide d’installation Guía de inicio rápido y Manual de instalación NX404 DVD MULTIMEDIA STATION WITH BUILT-IN NAVIGATION & 6.2” TOUCH PANEL CONTROL Station multimédia DVD avec navigation intégrée et commande par écran tactile de 6.2 pouces Estación multimedia DVD con navegación integrada y control de panel táctil de 6.2 pulgadas Conformément à la réglementation d’Industrie Canada, le présent émetteur radio peut fonctionner avec une antenne d’un type et d’un gain maximal (ou inférieur) approuvé pour l’émetteur par Industrie Canada. Dans le but de réduire les risques de brouillage radioélectrique à l’intention des autres utilisateurs, il faut choisir le type d’antenne et son gain de sorte que la puissance isotrope rayonnée équivalente (p.i.r.e.) ne dépasse pas l’intensité nécessaire à l’établissement d’une communication satisfaisante. Quick start guide Dear Customer: Congratulations on your purchase of a Clarion mobile electronic product. We are confident that you’ll enjoy your Clarion experience. There are many benefits to registering your product. We invite you to visit our website at www.clarion.com to register your Clarion product. We have made product registration simple with our easy to use website. The registration form is short and easy to complete. Once you’re registered, we can keep you informed of important product information. Register at www.clarion.com - it’s easy to keep your Clarion product up to date. English For USA and Canada only www.clarion.com Under Industry Canada regulations, this radio transmitter may only operate using an antenna of a type and maximum (or lesser) gain approved for the transmitter by Industry Canada. To reduce potential radio interference to other users, the antenna type and its gain should be so chosen that the equivalent isotropically radiated power (e.i.r.p.) is not more than that necessary for successful communication. English CLARION PRODUCT REGISTRATION INFORMATION INFORMATIONS DE L’ENREGISTREMENT DE PRODUITS CLARION Pour les Étas Unis et le Canada seulement www.clarion.com Cher client: Nous vous remercions d’avoir acheté ce produit électronique mobile Clarion. Nous sommes confiants que vous apprécierez votre expérience Clarion. Il y a beaucoup d’avantage à enregistrer votre produits. Nous vous invitons à visiter notre site Web www.clarion.com pour enregistrer votre produit Clarion. Nous avons facilité la tache d’enregistrement de produit simple et facile grâce à notre site Web.Le formulaire d’enregistrement est court et facile à compléter. Lorsque vous êtes enregistrer, nous pouvons vous tenir informé des informations important de produits. Enregistrer à www.clarion.com - c’est facile de mettre à jour votre produit Clarion. INFORMACIÓN DEL REGISTRO DE PRODUCT O DE CLARION Para USA y Canada nomas www.clarion.com Querido Cliente: Felicitaciones por su compra de producto electrónico móvil de Clarion. Estamos seguros que usted gozará de su experiencia con el producto de Clarion. Hay muchas ventajas al registrar su producto. Le invitamos a que visite nuestro sitio en internet www.clarion.com para registrar su producto de Clarion. Hemos hecho el registro de producto fácil en nuestro sitio. La forma de registro es corta y fácil de completar. Una vez que lo registre, podremos proporcionarle la información de su producto. Registrese en www.clarion.com - es fácil mantener su producto de Clarion actualizado. NX404 1 Contents English 1. PRECAUTIONS ............................................................................3 INFORMATION FOR USERS: .........................................................4 2.OPERATIONAL PANEL ................................................................6 Functions of Buttons.....................................................................6 3. TURNING THE POWER ON ........................................................7 4. MAIN MENU.................................................................................7 5. DVD VIDEO PLAYER OPERATIONS .........................................8 Operate the DVD Player Menu ......................................................9 6. CD PLAYER OPERATIONS......................................................10 Listening to a Disc/Ejecting a Disc .............................................10 Showing CD Player Mode Screen ..............................................10 7. USB AUDIO OPERATIONS ......................................................11 8. USB VIDEO OPERATIONS........................................................12 9. iPod/iPhone OPERATIONS ......................................................13 iPod Audio ID3 Information .........................................................13 iPod Audio Playlist Mode Screen ...............................................13 iPod Video ID3 Mode Screen......................................................14 iPod Video Play Mode Screen ....................................................14 ® 10. Pandora OPERATIONS .........................................................15 Selecting the Pandora Mode ......................................................15 Selecting the Bluetooth Audio Mode ..........................................16 Bluetooth Audio Player Settings .................................................16 ® 11. Bluetooth AUDIO PLAYER OPERATIONS ...........................16 Pandora Bluetooth Mode............................................................16 Registering your Bluetooth Audio Player (Pairing) ......................17 Selecting the Bluetooth Audio Player .........................................18 Controlling the Bluetooth Audio Player.......................................18 Select the BT Phone Mode .........................................................19 Bluetooth Telephone Settings ....................................................19 ® 12. Bluetooth TELEPHONE OPERATIONS ................................. 19 Registering Your Cellular Phone (Pairing) ...................................20 Select the Cellular Phone............................................................21 Obtaining the Phone Book Data .................................................21 Telephone Operations ................................................................21 13. TUNER OPERATIONS .............................................................22 Quick start guide 2 NX404 14. START USING Clarion MOBILE MAP...................................... 23 INSTALLATION .............................................................................27 1. Before Starting ........................................................................27 2. Package Contents ..................................................................27 3. General Cautions ....................................................................27 4. Cautions on Installation ..........................................................27 5. Installing the Main Unit ...........................................................28 Wire Connections .........................................................................29 Installing The GPS Antenna ....................................................... 30 t 'PSZPVSTBGFUZUIFESJWFSTIPVMEOPUXBUDIBOZWJEFPTPVSDFTBOEPSPQFSBUF the controls while driving. Please note that watching and operating any video sources while driving are prohibited by law in some countries. Also, while driving, keep the volume to a level at which external sounds can be heard. t "TUIFESJWFSZPVBMPOFBSFSFTQPOTJCMFGPSZPVSESJWJOHTBGFUZ t*OPSEFSUPBWPJEBUSBGmDBDDJEFOUEPOPUPQFSBUFUIFTZTUFNXIJMF driving. t*OPSEFSUPBWPJEBUSBGmDBDDJEFOUPQFSBUFUIFTZTUFNPOMZXIFOUIF vehicle is stopped at a safe place and the parking brake is on. t %POPUVTFUIJTVOJUXIFOBUSPVCMFFYJTUTTVDIBTOPTDSFFODPOUFOU appears or no sound is audible. It may cause an accident, fire, or electric shock. For that case, consult your authorized dealer or a nearest Clarion service center. t*OPSEFSUPBWPJEBUSBGmDBDDJEFOUPSUSBGmDPGGFOTFSFNFNCFSUIBU actual road conditions and traffic regulations take precedence over the information contained on the navigation system. t 6TFBGVTFXJUIUIFTBNFTQFDJmDBUJPOPOMZXIFOSFQMBDJOHUIFGVTF Using a fuse with a different specification may causes a fire. t 'PSUIFJOTUBMMBUJPOPGUIJTVOJUPSBDIBOHFJOUIFJOTUBMMBUJPOBTL your authorized dealer or a nearest Clarion service center for safety. Professional skills and experiences are required to do so. t 5IJTOBWJHBUJPOTZTUFNTIPVMEOPUCFVTFEUPSFQMBDFZPVSPXO judgment. No itinerary suggested by this navigation system should ever override any highway regulations, your own judgment, or a knowledge of safe driving practices. Do not follow the navigation system’s suggested itinerary if it would cause you to perform a dangerous or illegal act, place you in a dangerous situation, or take you into an area you consider unsafe. t 5IFBEWJDFQSPWJEFECZUIFOBWJHBUJPOTZTUFNJTUPCFSFHBSEFEBT a suggestion only. There may be times when the navigation system displays the vehicle’s location incorrectly, fails to suggest the shortest route, or fails to direct you to your desired destination. In such t5IFTPGUXBSFNBZDPOUBJOJOBDDVSBUFPSJODPNQMFUFJOGPSNBUJPOEVF to the passage of time, changing circumstances, and the sources of information used. Please respect current traffic conditions and regulations at all times while driving. t8IFSFBDUVBMSPBEDPOEJUJPOTBOEIJHIXBZSFHVMBUJPOTEJGGFSGSPNUIF information contained on the navigation system, abide by the highway regulations. t,FFQUIFBNPVOUPGUJNFTQFOUWJFXJOHUIFTDSFFOXIJMFESJWJOHUPB strict minimum. t5IFOBWJHBUJPOTZTUFNEPFTOPUQSPWJEFOPSSFQSFTFOUJOBOZXBZ information on: traffic and highway regulations; technical aspects of the vehicle including weight, height, width, load and speed limits; road conditions including grade, percentage of incline and surface conditions; obstacles such as the height and width of bridges and tunnels; and other current driving or road conditions. Always rely on your own judgment when driving a car, taking into account current driving conditions. t5IJTFRVJQNFOUIBTCFFOUFTUFEBOEGPVOEUPDPNQMZXJUIUIFMJNJUT for a Class B digital device, pursuant to Part 15 of the FCC Rules. These limits are designed to provide reasonable protection against harmful interference in a residential installation. This equipment NX404 3 Quick start guide t %POPUEJTBTTFNCMFPSNPEJGZUIJTVOJU*UNBZDBVTFBOBDDJEFOUmSF or electric shock. t *ODBTFPGBQSPCMFNTVDIBTBOZNBUFSJBMIBTCFFOFOUFSFEJOUIF unit, the unit gets wet, or smoke or strange smells come out of the unit, etc., stop using this unit immediately, and consult your authorized dealer or a nearest Clarion service center. Using it in that condition may cause an accident, fire, or electric shock. English WARNING t %POPUVTFUIFOBWJHBUJPOTZTUFNUPMPDBUFFNFSHFODZTFSWJDFT5IF database does not contain a complete listing of emergency services such as police stations, fire halls, hospitals and walk-in clinics. Please show discretion and ask for directions in such instances. English 1. PRECAUTIONS instances, rely on your own driving judgment, taking into account the driving conditions at the time. English generates, uses, and can radiate radio frequency energy and, if not installed and used in accordance with the instructions, may cause harmful interference to radio communications. However, there is no guarantee that interference will not occur in a particular installation. If this equipment does cause harmful interference to radio reception, which can be determined by turning the equipment off and on, the user is encourage to consult the dealer or an experienced radio technician for help. V8VCNE8239DCL 8614A-CNE8239DCL 5 B Quick start guide 1.When the inside of the car is very cold and the player is used soon after switching on the heater, moisture may form on the disc (DVD/ CD) or the optical parts of the player and proper playback may not be possible. If moisture forms on the disc (DVD/CD), wipe ÁÌÇŰÏÁÌÀ¹ËǾ̻ÄÇÌÀƖ¾ÅÇÁËÌÍʽ¾ÇÊÅËÇÆÌÀ½ÇÈÌÁ»¹ÄȹÊÌËǾÌÀ½ player, do not use the player for about one hour. The condensation will disappear naturally allowing normal operation. 2.Driving on extremely bumpy roads which cause severe vibration may cause the sound to skip. 3.This unit uses a precision mechanism. Even in the event that trouble arises, never open the case, disassemble the unit, or lubricate the rotating parts. INFORMATION FOR USERS: À¹Æ¿½ËÇÊÅǼÁŲ»¹ÌÁÇÆËÌÇÌÀÁËÈÊǼͻÌÍƹÈÈÊÇν¼ºÑÌÀ½ manufacturer will void the warranty and will violate FCC approval. 4 NX404 NX404 ƹ “Made for iPod,” and “Made for iPhone” mean that an electronic accessory has been designed to connect specifically to iPod, or iPhone, respectively, and has been certified by the developer to meet Apple performance standards. Apple is not responsible for the operation of this device or its compliance with safety and regulatory standards. Please note that the use of this accessory with iPod or iPhone may affect wireless performance. iPhone and iPod are trademarks of Apple Inc., registered in the U.S. and other countries. ƹ The Bluetooth® word mark and logos are registered trademarks owned by the Bluetooth® SIG, Inc. And any use of such marks by Clarion Co.,Ltd. is under license. Other trademarks and trade names are those of their respective owners. ƹ Pandora. the Pandora logo. and the Pandora trade dress are trademarks or registered trademarks of Pandora Media. Inc. used with permission. NX404 5 Quick start guide ƹ Manufactured under license from Dolby Laboratories. “Dolby” and the double-D symbol are trademarks of Dolby Laboratories. English ƹ This product incorporates copyright protection technology that is protected by U.S. patents and other intellectual property rights. Use of this copyright protection technology must be authorized by Rovi Corporation, and is intended for home and other limited viewing uses only unless otherwise authorized by Rovi Corporation. Reverse engineering or disassembly is prohibited. ƹ DivX®, DivX Certified® and associated logos are trademarks of Rovi Corporation or its subsidiaries and are used under license. DivX Certified® to play DivX® video, including premium content. Covered by one or more of the following U.S. patents: 7,295,673; 7,460,668; 7,515,710; 7,519,274 ABOUT DivX VIDEO: DivX® is a digital video format created by DivX, LLC, a subsidiary of Rovi Corporation. This is an official DivX Certified® device that has passed rigorous testing to verify that it plays DivX video. Visit divx.com for more information and software tools to convert your files into DivX videos. ABOUT DivX VIDEO-ON-DEMAND: This DivX Certified® device must be registered in order to play purchased DivX Video-on-Demand (VOD) movies To obtain your registration code, locate the DivX VOD section in your device setup menu. Go to vod.divx.com for more information on how to complete your registration. English About the registered marks, etc. 2.OPERATIONAL PANEL English [Microphone] [MENU] [NAVI/AV] ] [ [Disc slot] Quick start guide [POWER/VOL] [IR] [RESET] [microSD slot] [Cover] [AUX IN] Only navigation map card is available and don’t remove it when unit is power on Functions of Buttons [POWER/VOL] Knob s0RESSTHISKNOBTOTURNONTHEPOWER s7HENTHEPOWERISALREADYONITMOVESTOTHE.AVIGATIONMODE)F.AVIGATION MODEISDISPLAYEDITMOVESTOTHE.AVIGATIONMENU s+EEPPRESSINGTHISKNOBMORETHANSECONDTOTURNOFFTHEPOWER s4URNTHISKNOBTOLEFTORRIGHTTODECREASEORINCREASETHEVOLUMEOFTHESYSTEM [NAVI/AV]"UTTON s0RESSTHISBUTTONTODISPLAY.!6)PRESSAGAINTORETURNCURRENTSOURCE s0RESSANDHOLDTHISBUTTONFORSECONDSTODISPLAYTHE$IMMERSETTINGMENU [ ]%JECT s0RESSTOEJECTDISCFROMUNIT [MENU]"UTTON s0RESSTHISBUTTONTODISPLAYMAINMENUPRESSAGAINTORETURNCURRENTSOURCE s0RESSANDHOLDTHISBUTTONFORSECONDSTOTURNOFFTHEMONITOR0RESSANYPLACE OFTHESCREENTOTURNONTHEMONITORAGAIN 6 NX404 3. TURNING THE POWER ON English Note: When the [RESET] button is pressed, frequencies of radio stations, titles, etc. stored in memory are cleared. English [RESET]"UTTON s 0RESSTHISBUTTONTOHARDWARERESETTHEUNIT 3TARTTHEENGINE4HEPOWERIS SUPPLIEDTOTHISUNIT [microSD slot ] )NSERTAMICRO3$#ARDFOR-!0HERE4HEMICRO3$CARDFOR-!0ISSOLDSEPARATELY .OTE4HEMICRO3$CARDISONLYFORNAVIGATION0LEASEDONTINSERTMICRO3$CARDFOR OTHERPURPOSE!FTERINSERTIONOFMICRO3$CARDFOR-!0DONTREMOVEITOTHERWISE THENAVIGATIONFUNCTIONWILLBEDISABLED VOL/PWR [AUX IN] !58#ONNECTOR Quick start guide 0RESS[POWER]BUTTONONTHE PANELTOTURNONTHEUNIT [Microphone] 4HISISUSEDFOR"LUETOOTHPHONE [IR]3%.3/2 s2ECEIVERFORTHEREMOTECONTROLUNITOPERATINGRANGEDEGREEINALLDIRECTIONS Selecting a Source s0RESS[MENU]BUTTONONTHE0!.%,TOSHOWMAINSOURCEMENU s#HANGEPAGEBYDRAGGINGLEFTORRIGHTORTOUCHINGOTHERBUTTONS s4OUCHTHEICONSONTHESCREENTOENTERCORRESPONDINGWORKMODESUCHAS$ISC MODE4UNERMODE4ELEPHONEMODEETC NX404 7 4. MAIN MENU English 1 3 4 5 6 7 8 9 Quick start guide 2 4UNER4OUCHTHEBUTTONTODISPLAYTHE4UNERMODE 0ANDORA4OUCHTHEBUTTONTODISPLAYTHE0ANDORAMODE "LUETOOTH!UDIO4OUCHTHEBUTTONTODISPLAYTHE"LUETOOTH!UDIOMODE $ISC!UDIO4OUCHTHEBUTTONTODISPLAYTHE$ISC!UDIOMODE I0OD!UDIO4OUCHTHEBUTTONTODISPLAYTHEI0OD!UDIOMODE .AVIGATION4OUCHTHEBUTTONTODISPLAYTHE.AVIGATIONMODE 7 - .*3/4OUCHTHEBUTTONTODISPLAYTHE($-)MODE 53"!UDIO4OUCHTHEBUTTONTODISPLAYTHE53"!UDIOMODE !584OUCHTHEBUTTONTODISPLAYTHE!58MODE $ISC6IDEO4OUCHTHEBUTTONTODISPLAYTHE$ISC6IDEOMODE 53"6IDEO4OUCHTHEBUTTONTODISPLAYTHE53"6IDEOMODE I0OD6IDEO4OUCHTHEBUTTONTODISPLAYTHEI0OD6IDEOMODE 4ELEPHONE4OUCHTHEBUTTONTODISPLAYTHE4ELEPHONEMODE #AMERA4OUCHTHEBUTTONTODISPLAYTHE#AMERAMODE !584OUCHTHEBUTTONTODISPLAYTHE!58MODE 3ETTING"UTTON4OUCHTHEBUTTONTODISPLAYTHE3ETTINGMENU !UDIOOFF4OUCHTHEBUTTONTOMAKEAUDIOSOURCEVOICEOFF 18 - 8KGX4OUCHTHEBUTTONTODISPLAYTHE8KGXMODE Scrolling the menu Flicking to right or left it will switch to next or previous page of main menu. 11 12 13 14 15 16 8 NX404 17 18 Moving the menu position 1. 4OUCH any quadrate icon on main menu more than 2 seconds, the icon will float on main menu. 2. Scrolling the floating icon to any position you want. !FTERDISCISLOADEDTHEPLAYMODEISAUTOMATICALLYENGAGED 4OUCHANYPLACEOFTHESCREENTODISPLAY$6$6IDEOMENUTOUCHTHESCREENAGAIN TORETURNTHEPLAYBACKSCREEN4HEDISPLAYWILLRETURNTOTHEPLAYBACKSCREENIFYOU DONOTTOUCHTHESCREENFORSECONDS 3 2 4 5 6 7 8 9 Quick start guide 1 11 12 English Showing DVD Player Mode Screen English 5. DVD VIDEO PLAYER OPERATIONS /PTIONBUTTON 3HOW#URSORKEYSBUTTON 0REVIOUS#HAPTER&AST"ACKWARDBUTTON 0LAY0AUSEBUTTON .EXT#HAPTER&AST&ORWARDBUTTON %LAPSEDPLAYINGTIME 3EEKBAR 4OTALTIME -ENU,ISTBUTTON 3YSTEMTIME "LUETOOTHSTATUSINDICATOR $6$PLAYBACKINFORMATION 3HORTCUTBUTTON 2EPEAT3WITCHINGBUTTON !UDIO#HANNELSWITCHINGBUTTON 3UBTITLESWITCHINGBUTTON )NFORMATIONBUTTON $IRECTCHAPTERORTITLESEARCHINGBUTTON Operate the DVD Player Menu Using the Title Menu /N$6$DISCSCONTAININGTWOORMORETITLESYOUCANSELECTFROMTHETITLEMENUFOR PLAYBACK 13 14 15 16 17 18 3HOWINGTHE$6$6IDEOMENUTOUCH[ ]BUTTONDURINGPLAYBACK $EPENDINGONTHEDISCTHETITLEMENUMAYNOTBECALLED NX404 9 English 4OUCHTHETITLEMENUSCREEN!NDTOUCHTHE3HOW#URSORBUTTON DIRECTIONALBUTTONS 3ELECTTHEITEMSINTHETITLEMENUSCREENBY $EPENDINGONTHEDISCITEMSMAYNOTBESELECTEDWITHTHEDIRECTIONALBUTTONS ]BUTTONTOlXONTHESELECTEDITEM 4OUCH[ ]BUTTON 4OUCH[ Showing Video Files Player Mode Screen 8 9 Quick start guide 2 3 4 5 Showing CD Player Mode Screen !FTERDISCISLOADEDTHEPLAYMODEISAUTOMATICALLYENGAGED )FDISCHAVEBEENLOADEDYOUCANTOUCH[Disc Audio]BUTTONONMAINMENUTO DISPLAY#$PLAYERMODESCREEN 7 /PTIONBUTTON 0REVIOUS4RACK&AST"ACKWARD BUTTON 0LAY0AUSEBUTTON .EXT4RACK&AST&ORWARDBUTTON %LAPSEDPLAYINGTIME3EEKBAR ,IST-ODEBUTTON 3YSTEMTIME "LUETOOTHSTATUSINDICATOR 0LAYBACKINFORMATION 1 6. CD PLAYER OPERATIONS 6 8 5 7 4 9 12 1 6 11 2 3 16 3HORTCUTBUTTON 2EPEATBUTTON !UDIOBUTTON 3UBTITLEBUTTON 13 14 15 11 12 13 18 /PTIONBUTTON %LAPSEDPLAYINGTIMEINDICATOR 2OTATIONEFFECT 0AGETURNINGBUTTON 3YSTEMTIME NX404 17 "LUETOOTHSTATUSINDICATOR 2EPEATBUTTON 0REVIOUS4RACK&AST"ACKWARDBUTTON 3HORTCUTBUTTON 0LAY0AUSEBUTTON .EXT4RACK&AST&ORWARDBUTTON 3HUFmEBUTTON $IRECT3EARCHINGBUTTON 3CAN3TART3TOPBUTTON 2OTATION%FFECT/N/FFBUTTON 3ONGTITLE !RTISTALBUMINFORMATION #LOSEOPTIONMENUBUTTON English 4HISSYSTEMCANPLAYAUDIOlLES-07-!!!#&,!#STOREDINAN53"MEMORY WHICHISRECOGNIZEDASh53"-ASS3TORAGE#LASSDEVICEv9OUCANUSEYOUR53" MEMORYASANAUDIODEVICEBYSIMPLYCOPYINGDESIREDAUDIOlLESINTOIT English 7. USB AUDIO OPERATIONS Note: s4HISSYSTEMWILLNOTOPERATEORMAYOPERATEIMPROPERLYWITHSOME53"MEMORY s&ILESPROTECTEDWITHANY$2-CANNOTBEPLAYED 11 Quick start guide 12 13 Playback MP3/WMA/AAC Menu 1 14 15 16 17 9 1 3 2 2EPEAT0LAYBACK 7HILEPLAYING-07-!!!#TOUCH BUTTONCANSWITCHBETWEEN2EPEAT&OLDER 2EPEAT!LLAND2EPEAT4RACK2EPEAT&OLDERAND2EPEAT!LL #URRENT&OLDER s3HOWINGTITLEOFCURRENTFOLDER s4HENUMBERONTHEFOLDERSYMBOLISTHENUMBEROFlLESANDFOLDERSNUMBERIN CURRENTFOLDER s4OUCHTHETITLEOFCURRENTFOLDERPLAYLISTWILLSHOWlLESANDFOLDERSINUPPERFOLDER 2 5 6 4 7 8 18 19 /PTIONBUTTON 0LAY0AUSEBUTTON 0REVIOUS4RACK&AST"ACKWARDBUTTON .EXT4RACK&AST&ORWARDBUTTON NX404 11 English Quick start guide 2EPEATBUTTON 3HUFmEBUTTON -0lLES7-!lLESINLIST &OLDERSINLIST 0AGETURNINGBUTTON 3YSTEMTIME "LUETOOTHSTATUSINDICATOR -UTESTATUSINDICATOR 0LAYBACKSTATUSINFORMATION !LBUMART 3HORTCUTBUTTON #URRENT)$INFOAREA %LAPSEDPLAYINGTIMEINDICATOR3EEKBAR $IRECTBUTTON 3CANBUTTON 8. USB VIDEO OPERATIONS 4HISSYSTEMCANPLAY53"VIDEOlLES-0'0ETCSTOREDINAN53"MEMORY WHICHISRECOGNIZEDASh53"-ASS3TORAGE#LASSDEVICEv9OUCANUSEYOUR53" MEMORYASANAUDIODEVICEBYSIMPLYCOPYINGDESIREDAUDIOlLESINTOIT Note: s 4HISSYSTEMWILLNOTOPERATEORMAYOPERATEIMPROPERLYWITHSOME53"MEMORY s &ILESPROTECTEDWITHANY$2-CANNOTBEPLAYED 8 9 7 1 2 3 4 0REVIOUS4RACK&AST"ACKWARDBUTTON 0LAY0AUSEBUTTON .EXT4RACK&AST&ORWARDBUTTON %LAPSEDPLAYINGTIMEINDICATOR3EEKBAR -ENULIST 2EPEATBUTTON 3YSTEMTIME "LUETOOTHSTATUSINDICATOR 0LAYBACKINFORMATION 3HORTCUTBUTTON 12 NX404 5 6 ® ® #ONNECTYOURI0OD I0HONE TOTHE53"CONNECTOR4HESYSTEMWILLAUTOMATICALLY DETECTTHECONNECTEDDEVICEANDTHEI0OD!UDIOBUTTONWILLBEENABLEDFOR OPERATIONONTHE-AIN-ENUSCREEN English iPod Audio Menu Operations English 9. iPod/iPhone OPERATIONS "LUETOOTHSTATUSINDICATOR 0LAYBACKSTATUSINDICATOR !RTWORK 3HORTCUTBUTTON 0ROGRESSBAR iPod Audio Playlist Mode Screen Note: 4HISSYSTEMHASTWO53"CONNECTORSPLEASECONNECTTOTHE53"WITHTHELABELOF hI0ODI0HONEv"YCONNECTINGANOTHER53"CABLEI0ODI0HONECANTPLAYBACKTHE music. 1 Quick start guide iPod Audio ID3 Mode Screen 12 11 13 9 14 2 3 15 3WITCHTOINFORMATIONBUTTON 0LAYINGLIST 0AGETURNINGBUTTON 4 2 5 3 6 /PTIONBUTTON 1 2EPEATBUTTON 3HUFmEBUTTON 0REVIOUS4RACK&AST"ACKWARDBUTTON 0LAY0AUSEBUTTON .EXT4RACK&AST&ORWARDBUTTON )$INFORMATION .EXT0AGE; #ATEGORYLIST 3YSTEMTIME =0REVIOUS0AGE; 7 4 5 8 =BUTTON 6 "ACKTOFATHERFOLDER NX404 13 #LOSETHELISTMODE 3EARCHWITHTHElRSTALPHABETINCURRENTLIST iPod Video Play Mode Screen 9 8 7 English iPod Video ID3 Mode Screen 11 9 12 7 Quick start guide 13 14 3 1 1 2 4 6 5 /PTIONBUTTON 2EPEATBUTTON 0REVIOUSTRACKBUTTON 0LAY0AUSEBUTTON .EXTTRACKBUTTON 0LAYINGlLETITLE #ATEGORYLIST =0REVIOUS0AGE; .EXT0AGE; 3YSTEMTIME "LUETOOTHSTATUSINDICATOR 0LAYBACKSTATUSINDICATOR !RTWORK 3HORTCUTBUTTON 0ROGRESSBAR 14 NX404 =BUTTON 8 2 3 4 0REVIOUS4RACK&AST"ACKWARDBUTTON 0LAY0AUSEBUTTON .EXT4RACK&AST&ORWARDBUTTON 0ROGRESSBAR -ENULISTBUTTON 2EPEATBUTTON 3YSTEMTIME "LUETOOTHSTATUSINDICATOR 0LAYBACKINFORMATION 5 6 Selecting the Pandora Mode 2 Quick start guide 4URNON0ANDORAFUNCTIONOFYOURI0OD #ONNECTYOURI0ODTOTHEUNIT 7HENI0ODI0HONEISALREADYCONNECTEDTOUCHTHE ;0ANDORA=ICONONTHE-AIN-ENUSCREEN s0ANDORAMODE)$)NFORMATION3CREEN English If you have any issues with the Pandora application on your mobile phone, please direct them to [email protected]. ,ISTBUTTON 4OUCHTHISBUTTONTOSHOWLISTSCREEN #URRENTSTATIONNAME #URRENTTITLE 4OUCHICONTOSTORECURRENTTITLETOTRACKFAVORITESLIST #URRENTARTIST 4OUCHICONTOSTORECURRENTARTISTTOARTISTFAVORITESLIST #URRENTALBUMNAME 1 English 10. Pandora OPERATIONS ® 8 3 9 1 11 12 2 13 3 4 5 6 7 !RTWORK 0ROGRESSBAR 3ETTINGSBUTTON 4HUMBSDOWN 4OUCHTHISBUTTON4HUMBSDOWNCURRENTTRACKANDPLAYNEXTTRACK 0LAY0AUSEBUTTON 5SETOCONTROLPLAYBACKANDPAUSE 4OUCHTHEBUTTONDURINGPLAYBACK0LAYBACKPAUSES 4ORESUMEPLAYBACKTOUCHTHEKEYAGAIN .EXTTRACKBUTTON 4HUMBSUP 3YSTEMTIME ; =BUTTON 4OUCHTHISBUTTONTODISPLAY)$)NFORMATION3CREEN ; =BUTTON 4OUCHTHISBUTTONTOSORTTHELISTBYlRSTLETTERTOUCHAGAINTOSORTTHELISTBYDATE 3TATIONLISTTOUCHTOSELECTSTATIONPLAY 7HENTHEDESIREDSTATIONISNOTDISPLAYEDTOUCHAND mICKTHESTATIONLISTUPORDOWN s0ANDORAMODE3ETTINGSCREEN 1 2 3 NX404 15 English !DDANEW3TATION 3ELECTADEVICE #LOSETHESETTINGSCREEN Pandora Bluetooth Mode When your mobile phone have connected to the unit via bluetooth. You can also enter the Pandora mode. The OPERATIONISSAMEASTHENORMALPandora MODE ® 11. Bluetooth AUDIO PLAYER OPERATIONS 3OME"LUETOOTHCELLULARPHONESHAVEAUDIOFEATURESANDSOMEPORTABLEAUDIO PLAYERSSUPPORTTHE"LUETOOTHFEATURE4HESEDEVICESWILLBECALLEDASh"LUETOOTH AUDIOPLAYERSvINTHISMANUAL4HISSYSTEMCANPLAYAUDIODATASTOREDINA "LUETOOTHAUDIOPLAYER Note: s4HISSYSTEMWILLNOTOPERATEORMAYOPERATEIMPROPERLYWITHSOME"LUETOOTHAUDIO players. Quick start guide s&ORDETAILEDINFORMATIONONTHEPLAYABLE"LUETOOTHAUDIOPLAYERSSEEOURHOME page: www.clarion.com Selecting the Bluetooth Audio Mode 1 4OUCHTHE;"LUETOOTH!UDIO=KEYTOSELECTTHE"LUETOOTH!UDIOMODE 4HESYSTEMCHANGESTOTHE"LUETOOTHMODE)FTHECONNECTIONWITHA"LUETOOTH AUDIOPLAYERHASBEENALREADYESTABLISHEDYOUMAYSELECTTHE-USICFUNCTION 0RESS-%.5BUTTONON/PERATIONAL0ANELTORETURNTOTHE-AIN-ENU s 7HENTHECONNECTIONWITHBLUEICONA"LUETOOTHAUDIOPLAYERHASBEEN ESTABLISHEDTHE[ ]ICONISDISPLAYEDATTHETOPOFTHESCREEN "4MODE 7HENCONNECTEDVIABLUETOOTH4HISICONWILLCHANGEFROM53"TO"4 Bluetooth Audio Player Settings 9OUCANCONlRMVARIOUSINFORMATIONCONCERNINGABOUTTHE"LUETOOTH)NTERFACE FEATURES 4OUCHTHE[ ]BUTTONTODISPLAYTHEINFORMATIONONTHESCREEN 7HENYOUlNISHCONlRMINGTHE"LUETOOTHINFORMATIONTOUCHTHE[ ]BUTTONTO RETURNTOTHEPREVIOUSSCREEN 16 NX404 English English You can register up to 5 Bluetooth audio players. 1. Turn on the power of the Bluetooth audio player you wish to register. 2. Touch the Device button [ ] to display the Device Select screen. 4. Touch your desired device button and touch [ ] button to register for the Bluetooth audio player. Then select an image of this device. And select a type of this device. 3. Touch the [ ] button to display the Inquiring Device screen. When the pairing operation completes, the registered Bluetooth audio player is set as the current device, after selecting the favorite icon, the display return to the device list screen. Touch [ ] button, the display will return to the Bluetooth audio mode screen. NX404 17 Quick start guide Registering your Bluetooth Audio Player (Pairing) or switch noises may be generated. Playing Music English !FTERTHECONNECTIONWITHA"LUETOOTHAUDIOPLAYERISESTABLISHEDTHEPLAYMODEIS AUTOMATICALLYENGAGED s 7HENPLAYBACKISNOTSTARTEDFORSOMEDEVICESTOUCHTHE[ ]BUTTON MANUALLY Pausing Playback 4OUCHTHE[ ]BUTTONDURINGPLAYBACK Playback Pauses. Quick start guide s4ODELETETHE"LUETOOTHAUDIOPLAYERREGISTRATION =BUTTONTODELETETHEDEVICE 4OUCHTHE; !CONlRMATIONSCREENISDISPLAYED =BUTTONTOCONlRMDELETE 4OUCHTHE; Selecting the Bluetooth Audio Player 4OCHANGETHECURRENT"LUETOOTHAUDIOPLAYERTOTHEOTHERDEVICEWHICHISALREADY REGISTEREDPERFORMTHEFOLLOWINGOPERATION 4OUCHTHEDEVICEBUTTONTO[ ]DISPLAYTHE$EVICE3ELECTSCREEN ]BUTTONTO 4OUCHTHECURRENTLYCONNECTEDDEVICEBUTTONTHENTOUCHTHE[ DISCONNECTTHEACTIVEDEVICE 4OUCHTHEDESIRED$EVICEBUTTONYOUWISHTOUSE4OUCH[ ]BUTTONTOSELECT ITASYOURACTIVEDEVICE4HECORRESPONDINGCELLULARPHONEISSETASCURRENT TELEPHONE 4OUCHTHE[ ]BUTTONTORETURNTOTHEPREVIOUSSCREEN Controlling the Bluetooth Audio Player Note: s/CCASIONALLYDEPENDINGONTHEENVIRONMENTPLAYBACKSOUNDSMAYBEFRAGMENTED 18 NX404 4ORESUMEPLAYBACKTOUCHTHE[ ]BUTTON0LAYBACKRESUMES Skipping a Track (searching) 4OUCHTHE[ ]OR[ ]BUTTONDURINGPLAYBACK Stopping Playback 4OUCHTHE[ ]BUTTONDURINGPLAYBACK 4RACKSARESTOPPEDTOUCHTHE[ ]BUTTONTOPLAYBACKTHElRST4RACK Show Track List 4OUCHTHE[ ]BUTTONTOSHOWTHECURRENTTRACKLIST 4OUCHTHE[ ]BUTTONTOSHOWALLOFTHELISTS!NDYOUCANPLAYBACKANYTRACKS BYTOUCHTHEITEMSINTHELIST ® s4HE0HONE"OOKDATATRANSMISSIONMAYTAKEALONGTIME4HEOPERATIONSOFSENDING calls are disabled during the data transmission. Select the BT Phone Mode Bluetooth Telephone Settings 9OUCANCONlRMVARIOUSINFORMATIONCONCERNINGABOUTTHE"LUETOOTH)NTERFACE FEATURES 4OUCHTHE[ ]BUTTONTODISPLAYTHEINFORMATIONONTHESCREEN 0ERFORMSETTINGFORTHEDESIREDITEM3EETHEFOLLOWINGSECTIONSFORDETAIL ]BUTTONTO 7HENYOUlNISHCONlRMINGTHE"LUETOOTHINFORMATIONTOUCHTHE[ RETURNTOTHEPREVIOUSSCREEN 4OUCHTHE;"LUETOOTH4ELEPHONE=BUTTONTOSELECTTHE"LUETOOTH4ELEPHONEMODE 4HE4ELEPHONESCREENISDISPLAYED 0RESS-%.5BUTTONON/PERATIONAL0ANELTORETURNTOTHEMAINMENU s 7HENNO"LUETOOTH4ELEPHONECONNECTEDTHEICON [ ]ISDISPLAYEDATTHETOPOFTHESCREEN s 7HENTHECONNECTIONWITHA"LUETOOTH4ELEPHONEHASBEENESTABLISHEDTHEICON [ ]ANDSIGNALLEVELINDICATORAREDISPLAYEDATTHETOPOFTHESCREEN 3ETTING!UTOMATIC#ONNECTION 4HESYSTEMAUTOMATICALLYRECONNECTSTHECELLULARPHONEAFTERTHECONNECTIONISLOST ORTHESYSTEMISRESTARTED s 4HEFACTORYDEFAULTSETTINGISh/.v4OUCHTHE [ ]OR[ ]BUTTONOFTHE!UTOMATIC#ONNECTIONITEMTOSETTHEFUNCTION/. OR/&& .OTE4HEhAUTOCONNECTvISEFFECTIVETOTHECELLULARPHONEOFLASTCONNECTING 3ETTING!UTOMATIC!NSWER )FACALLCOMESINANSWERAUTOMATICALLYAFTERSECONDS NX404 19 Quick start guide Note: s3OMECELLULARPHONESMAYNOTBEABLETOTRANSFERTHE0HONE"OOKDATATOHEADUNIT English 7HENTHECONNECTIONWITHYOUR"LUETOOTHCELLULARPHONEISESTABLISHEDTHE FOLLOWINGFUNCTIONSAREAVAILABLEONTHISUNIT s ,ISTENINGTOYOURTELEPHONECALLSONTHECARSPEAKERS s !NSWERINGTOANINCOMINGCALL s -AKINGACALLUSINGTHE4EN+EYPADSCREEN s -AKINGACALLUSINGTHE0HONE"OOKDATAINTHESELECTEDCELLULARPHONE s -AKINGACALLUSINGTHE(ISTORYDATAOFTHEDIALEDRECEIVEDCALLS English 12. Bluetooth TELEPHONE OPERATIONS s 4HEFACTORYDEFAULTSETTINGISh/&&v4OUCHTHE [ ]OR[ ]BUTTONOFTHE!UTOMATIC!NSWERITEMTOSETTHEFUNCTION/.OR /&& English 3ETTING-ICROPHONE'AIN 9OUCANADJUSTTHEINPUTLEVELOFTHEMICROPHONEINLEVELS s 4OUCHTHELEVELINDICATORBUTTONOFTHE-ICROPHONE'AINITEMTOADJUSTTHEINPUT LEVEL Registering Your Cellular Phone (Pairing) 9OUCANREGISTERUPTOCELLULARPHONES4HEREGISTERINGMETHODISASSAMEAS h2EGISTERINGYOUR"LUETOOTHAUDIOPLAYERv 4URNONTHEPOWEROFTHECELLULARPHONEYOUWISHTOREGISTER ]TODISPLAYTHE$EVICE3ELECTSCREEN 4OUCHTHE$EVICEBUTTON[ Quick start guide Note: s4HEINPUTLEVELOFTHEMICROPHONECANBEAFFECTEDBYITSSURROUNDINGS!DJUSTTHE level if the person on the other end of the telephone has a reception problem. 4OUCHTHE[ NX404 ]BUTTONTODISPLAYTHE)NQUIRING$EVICESCREEN Obtaining the Phone Book Data English s 4HECELLULARPHONEMAYPROMPTTOACKNOWLEDGETHE"LUETOOTHCONNECTIONORTO ENTERTHE0ASS+EYCODEOFTHISUNIT0ERFORMTHESEOPERATIONSACCORDINGTOTHE MESSAGEDISPLAYED 4OUCHTHE[ ]BUTTONTORETURNTOTHEPREVIOUSSCREEN English 4OUCHYOURDESIRED#ELLULARBUTTONTOSELECTTHEBUTTONFORTHECELLULARPHONETO BEREGISTEREDANDTOUCH[ ]BUTTONTOREGISTERFORTHE"LUETOOTHCELLULAR PHONE s 9OUCANNOTSELECTTHE#ELLULARBUTTONOFWHICHANOTHERCELLULARPHONEISALREADY REGISTERED3ELECTABLANK#ELLULARBUTTON )FENTERINGTHE0ASS+EYCODEISPROMPTEDONYOURCELLULARPHONEENTERTHE0ASS +EYCODESETINTHISUNIT s 9OUCANCHANGETHE0ASSKEYSETTINGOFTHISUNITFROMTHE"LUETOOTH)NFOSCREEN UNDERTHE4ELEPHONE3ETTINGSSCREEN 3ENDINGTHE0HONE"OOKDATAFROMTHECELLULARPHONEENABLESYOUTOMAKEACALL USINGTHE0HONE"OOKFUNCTIONFROMTHISUNIT Telephone Operations 4OUCHTHE[ ]BUTTONTODISPLAYTHE4EN+EYPADSCREEN %NTERTHETELEPHONENUMBERBYUSINGTHE4EN+EYPADDISPLAYEDONTHESCREEN 7HENTHEPAIRINGOPERATIONCOMPLETESTHEREGISTEREDCELLULARPHONEISSETAS THECURRENTTELEPHONEANDTHEDISPLAYRETURNSTOTHE4ELEPHONESCREEN s 4ODELETETHECELLULARPHONEREGISTRATION =BUTTONTODELETETHEDEVICE!CONlRMATIONSCREENIS 4OUCHTHE; DISPLAYED 4OUCHTHE; =BUTTONTOCONlRMDELETE Select the Cellular Phone 4OCHANGETHECURRENTCELLULARPHONETOTHEOTHERDEVICEWHICHISALREADY REGISTEREDPERFORMTHEFOLLOWINGOPERATION 4OUCHTHE[ ]BUTTONTODISPLAYTHE$EVICE3ELECTSCREEN 4OUCHTHECURRENTLYCONNECTEDDEVICETHENTOUCH [ ]BUTTONTODISCONNECTTHEACTIVEDEVICE ]BUTTONTOSELECT 4OUCHTHEDESIRED$EVICEBUTTONYOUWISHTOUSE4OUCH[ ITASYOURACTIVEDEVICE4HECORRESPONDINGCELLULARPHONEISSETASTHECURRENT TELEPHONE s )FTHEPOWEROFTHECELLULARPHONEISNOTTURNEDONTURNITON NX404 21 Quick start guide Making a call using the Ten-Key pad 13. TUNER OPERATIONS English Listening to the Tuner 11 8 9 7 5 Auto Store 4HE!UTO3TOREISAFUNCTIONFORSTORINGUPTOSTATIONSTHATAREAUTOMATICALLY SEARCHEDINSEQUENTIALLY)FTHENUMBEROFRECEIVABLESTATIONSCANNOTREACHTOTHE PREVIOUSSTOREDSTATIONREMAINS 4OUCHTHE[FM1/2/3/AM]BUTTONTOSELECTTHEDESIREDBAND&-OR!- 4OUCHTHE[ ]BUTTONANDTHENPRESSTHE[ ]BUTTONTOSTARTTHE!UTO3TORE !BEEPSOUNDSANDTHESTATIONSWITHGOODRECEPTIONARESTOREDAUTOMATICALLYTOTHE PRESETLIST Quick start guide Notes: !FTERAUTOSTORETHEPREVIOUSSTOREDSTATIONSWILLBEOVERWRITTEN 4HEUNITHASBANDSBUT&-AND!-CANSTOREBY!3FUNCTION 12 6 4 13 0RESET3CANBUTTON 3EEKDOWN 3EEKUP 3TEPDOWN 3TEPUP &REQUENCIESDISPLAY 3YSTEMTIME "LUETOOTHSTATUSINDICATOR 0RESETLIST $8,OCALINDICATOR "ANDBUTTON 3HORTCUTBUTTON /PTIONBUTTON 1 2 3 Preset Scan 4HE0RESET3CANRECEIVESTHESTATIONSSTOREDINTHEPRESETMEMORYINORDER4HIS FUNCTIONISUSEFULWHENSEARCHINGFORTHEDESIREDSTATIONINMEMORY 4OUCHTHE;&-!-="UTTONTOSELECTTHEDESIREDBAND&-OR!- ]BUTTONTOSTARTTHE0RESET3CAN 4OUCHTHE[ 4HEUNITSTARTSSCANNINGEACHSTATIONFORSECONDSSEQUENTIALLY"UTTHESTATION STOREDISNOTAVALIDSTATIONTHESCANNINGTIMEISONLYSECONDS 7HENTHEDESIREDSTATIONISTUNEDINTOUCHTHE [ ]BUTTONAGAINTOSTAYINTHATSTATION DX/Local Setting 4HE$8,OCALSETTINGCHANGESTHETUNERSENSITIVITYINORDERTOSEPARATECLOSELY SPACEDSTATIONS4HISFEATUREISUSEFULINAREASTHATHAVEMANYRADIOSTATIONSIN CLOSEPROXIMITY 22 NX404 4OENTERANADDRESSASTHEDESTINATIONDOASFOLLOWS 1. If you are on the Map screen, tap to return to the Navigation menu. 2. In the Navigation menu, tap the following buttons: 3. Selecting a destination by entering the address or the postal code. 4. Selecting the destination from the Places of Interest. 5. Selecting a map location as the destination. 6. Selecting the destination from your Favorite. 7. Selecting your Home location. 8. Searching for a Place of Interest by its phone number. 9. Entering the coordinate of the destination. 10. Selecting a recent destination from the History. 11. Additional options. Quick menu 20. The Quick menu is a selection of controls and functions that are frequently needed during navigation. It can be opened directly from the Map screen by tapping 21. If more drivers use Clarion Mobile Mapfor navigating, their settings can be remembered by using one of the user profiles. 22. Find / Find Places /Quick Search (This function lets you search for a Place along your route or around your current location if there is no route calculated). 23. Find / Favorite (This button opens the list of your Favorite destinations). 24. Find / History (This button opens the History list. You can select one of your previous destinations). 25. More / Settings / Route Settings (This button opens the route related settings). 26. More / Settings / Map Settings (This button opens the map related settings). 27. Tap the Current Street field on the Map screen (This button opens a special screen with information about the current position and a button to search for nearby emergency or roadside assistance. 28. My Route / Cancel Route (This button cancels the route and stops navigation. The button is replaced with the next one if waypoints are given). t'PSUIFJOGPSNBUJPOBCPVUPUIFSXBZTTFFUIFVTFSNBOVBM Map screen 12. To enlarge this small map and open the Map screen, tap [Show Map] button. 13. Zooming in and out. 14. Tilting up and down. 15. Rotating left and right. 16. 2D or 3D view. 17. Location information. 1 5.$JDPOJTOPUBWBJMBCMFPO/9 NX404 23 Quick start guide Selecting the destination of a route English 7HEN#LARION-OBILE-APISSTARTEDTHElRSTTIMEYOUNEEDTODOTHEFOLLOWING 1. Select the written language of the application interface. Later you can change it in Settings. 2. Select the language and speaker used for voice guidance messages. Later you can change it in Settings. 3. Read and accept the End User License Agreement. 4. Read and accept the road safety warning. After this, the Navigation menu appears and you can start using Clarion Mobile Map. English 14. START USING Clarion MOBILE MAP 18. Return to normal navigation. 19. Select destination. 16 17 15 English 2 13 14 Quick start guide 12 18 NX404 19 3 4 5 6 21 22 23 24 7 8 9 25 26 27 28 11 24 11 WARNING Installation Precautions English WARNING English Symbol Identification This manual uses symbols and icons to indicate safety precautions and concerns during the installation procedure. Be sure to carefully read and understand each precaution prior to beginning the installation. s7HENINSTALLINGTHEUNITTOAVEHICLEWITHANAIRBAGSYSTEMNEVERINSTALL it in a place where it may affect the operation of the airbag. s$ONOTINSTALLTHISUNITINTHEFOLLOWINGLOCATIONS A location interfering with the driver’s visual range or operation. A location where the gear shift or brake pedal are hindered. A location where passengers are at risk. An unstable location, or where the system may fall. Quick start guide This symbol is intended to alert the user to the presence of important operating instructions. Failure to heed the instructions may result in severe injury or death. CAUTION CAUTION This symbol is intended to alert the user to the presence of important operating instructions. Failure to heed the instructions can result in injury or material damage. s$ONOTINSTALLTHESYSTEMINTHELOCATIONSDESCRIBEDBELOW4HISMAY CAUSEAlREACCIDENTORELECTRICALSHOCK A location exposed to rain or dust. An unstable location, or where the system may fall. s$ONOTINSTALLTHISUNITINAPLACEEXPOSEDTODIRECTSUNLIGHTHEATORA place where the vent holes or heat radiation holes are covered. s7HENYOUINSTALLTHEANTENNAMOUNTITINAPLACEWHERETHEELEMENTSOF the antenna do not protrude beyond the edge of the front, back, left and right of the vehicle. If it comes in contact with pedestrians, it may cause an accident. WARNING s#ONlRMTHEBATTERYVOLTAGEOFTHEVEHICLETOBEINSTALLED4HISUNITIS designed only for vehicles with DC 12V power supply. s$ISCONNECTTHENEGATIVETERMINALOFTHEBATTERYBEFORECONNECTING wires, otherwise an electric shock, injury by short circuit may occur. NX404 25 Installation Notes English WARNING s0LEASENOTETHEPOSITIONOFPIPESTANKSANDELECTRICALWIRINGSBEFORE installing the unit into the vehicle; failure in avoiding these may cause a lREORMALFUNCTION Quick start guide CAUTION s5SEONLYTHESUPPLIEDPARTS )FUNSPECIlEDPARTSAREUSEDTHEYMAYCAUSEDAMAGE s!NYHOLESMADEINTHEBODYOFTHEVEHICLESHOULDBESEALEDWITHA silicon adhesive. If exhaust fumes or water penetrates into the vehicle, this may cause an accident. s&ASTENTHEBOLTSSECURELYWHENINSTALLINGTHEUNIT)FTHEBOLTSARELOOSE an accident or malfunction could occur. Connection Notes WARNING s,OOMALLCABLESACCORDINGTOTHEINSTRUCTIONMANUALSOASNOTTOHINDER operation. s7IRETHECONNECTINGCORDSCABLESAWAYFROMHIGHTEMPERATUREAREAS )FTHECOATINGSOFTHECABLESMELTITCOULDCAUSEANACCIDENTlREBYA short circuit. Take care when wiring in the engine compartment. s7HENWIRINGTHECONNECTINGCABLESINAVEHICLEWITHANAIRBAGSYSTEM never feed the cables through a place where it may affect the operation of the airbag. An airbag not operating correctly in an emergency may cause increased injury. 26 NX404 CAUTION s6ERIFYWIRESWITHADIGITALMULTIMETERPRIORTOMAKINGANYCONNECTIONS Many new vehicles use multiplexed and/or low voltage circuits that can be damaged if a test light or logic probe is used. s#ONNECTCABLESAPPROPRIATELY)FAWRONGCONNECTIONISMADETHISMAY CAUSEAlREORACCIDENT s7HENPASSINGCABLESTHROUGHTHEBODYOFTHEVEHICLEUSENON conductive grommets. If the coatings of the cables are worn out by RUBBINGTHISMAYCAUSEANACCIDENTlREORASHORTCIRCUIT s!FTERWIRINGCABLESlXTHEMWITHINSULATIONTAPE s"ESURETOSWITCHOFFTHEVEHICLEWHENCONNECTINGORDISCONNECTING cords to/from the unit, otherwise an electric shock, injury or accident may occur. Quick Start Guide and INSTALLATION English English Installation manual............................................................................................................1 Warranty card............................................................ ......................................................1 CONTENTS Remote controller ........................................................... ................................................1 Before Starting ..........................................................................................................27 2. Package Contents ....................................................................................................27 3. General Cautions ......................................................................................................27 4. Cautions On Installation .............................................................................................27 5. Installing The Main Unit ..............................................................................................28 HDMI cable holder................................................................ ...........................................1 Machine screw(M2 x 4)....................................................................................................2 RCA output cable....................................................................................... .....................1 Quick start guide 1. Electro tap.......................................................................................................................2 Flush mount bolts ...........................................................................................................8 Hexagon Head Screw......................................................................................................8 AV cable .........................................................................................................................1 1. Before Starting SWI cable .......................................................................................................................1 1. This set is exclusively for use in cars with a negative ground 12 V power supply. 2. Read these instructions carefully. 3. General Cautions 1. Do not open the case. There are no user- serviceable parts inside. If you drop anything into the unit during installation, consult your dealer or an authorized Clarion service center. 3. Be sure to disconnect the battery “-” terminal before starting. This is to prevent short circuits during installation. (Figure 1) 2. Use a soft, dry cloth to clean the case. Never use a rough cloth, thinner, benzine, or alcohol etc. For tough dirt, apply a little cold or warm water to a soft cloth and wipe off the dirt gently. 4. Cautions on Installation Car battery 1. Prepare all articles necessary for installing the source unit before starting. Figure 1 2. Package Contents 2. Install the unit within 30° of the horizontal plane. (Figure 2) 3. If you have to do any work on the car body, such as drilling holes, consult your car dealer beforehand. 4. Use the enclosed screws for installation. Using other screws can cause damage. (Figure 3) Main unit .........................................................................................................................1 Chassis Wiring harness ................................................................................................................1 Chassis GPS antenna ..................................................................................................................1 Damage Clamp for GPS antenna's cable .......................................................................................3 Double face tape for GPS Antenna...................................................................................1 NX404 Owner’s manual (CD-R) ...................................................................................................1 Figure 2 Max. 8 mm (M5 screw) Figure 3 NX404 27 Installing the Main Unit in NISSAN Vehicle English 5. This unit has a fan motor in the back of the main unit so as not to raise the temperature in the source unit. When the fan motor vent is covered with cords or mounting bracket, it may cause a malfunction. Be sure not to cover it when wiring cords. Main Unit Spacer (thickness: 1mm) Quick start guide (Not attached to the main unit) 5. Installing the Main Unit This unit is designed for fixed installation in the dashboard. 1. When installing the main unit in NISSAN vehicles, use the parts attached to the unit and follow the instructions in Figure 5. When installing the main unit in TOYOTA vehicles, use the parts attached to the vehicle and follow the instructions in Figure 6. 2. Wire as shown in Section 7. 3. Reassemble and secure the unit in the dashboard and set the face panel and center panel Mounting bracket 6- Flat head screws (1 pair for the left and right sides) (M5x8) (Attached to the main unit) Figure 5 Mounting Screw Holes (Side View of the Main Unit) 6EHICLESOTHERTHAN.)33!.AND4/9/4! For TOYOTA vehicle For NISSAN vehicle Figure 4 28 NX404 In some cases the center panel may require modification. (Trimming, filing, etc.) t3FNPWJOHUIF.BJO6OJU When the main unit is to be removed, disassemble it in the reverse of the order in “INSTALLING THE MAIN UNIT”. are attached to the WIRE CONNECTIONS Note: ƹ ½¾ÇʽÁÆË̹ÄÄÁÆ¿Ɠº½ËÍʽÌǼÁË»ÇÆƽ»ÌÌÀ½Æ½¿¹ÌÁν»¹ºÄ½Ç¾ÌÀ½ car battery. ƹ ÆÌÀ½ÇÈÌÁÇƹļ½ÎÁ»½ËƓÌÀ½»¹ºÄ½Ë¹Æ¼ÌÀ½ÇÆƽ»ÌÇÊ cables are separately-sold items. ƹ À½Æ»ÇÆƽ»ÌÌÀ½»¹ºÄ½Ɠº½ËÍʽÌÇŲÐÏÁÌÀÌÀ½»¹ºÄ½ÀÇļ½Ê Quick start guide and Machine screw(M2 x 4). Main Unit NX404 8- Hexagonal screws (M5x8) Center Panel Mounting bracket (*1) (1 pair for the left and right sides) (*2) *1. Some panel openings are too small for the unit depending on the vehicle type and model. In such a case, trim the upper and lower sides of the panel frame by about 0.5 to 1.5 mm so the unit can be inserted smoothly. HDMI cable holder 2EFERTO PAGE *2. If a hook on the installation bracket interferes with the unit, bend and flatten it with a nipper or similar tool. CCA-750(sold separately) HDMI CABLE Typical Mounting Brackets MIC SUBWOOFER2 Black SUBWOOFER1 Gray Black Gray SWI AUX2 AUDIO IN RCH AUX2 AUDIO IN LCH AUX2 VIDEO IN Example 1 Example 3 Example 2 Affix the screws to the marks. English Install by using parts attached to the vehicle. (Screws marked vehicle.) English Installing the Main Unit in TOYOTA Vehicle Red Red White White White Red Front Right Rear Right Front Left Rear Left REAR LCH REAR RCH Red White Yellow White Red For Rear zone VIDEO OUT CAMERA Yellow Yellow NX404 29 Cautions on Wiring Installing The GPS Antenna English English WARNING s s Do not install the GPS antenna in a place where it may interfere with the operation of the airbag or hinder the driver’s visual range. Do not use the navigation system with the GPS antenna cord cut off. The power cables in the cord may be short-circuited. Quick start guide Note: s ThesuppliedGPSantennaisforinstallinginsidethevehicle.Donotinstallitoutsidethe vehicle. s InstalltheGPSantennamorethan50cmawayfromthemainunit,otheraudiodevicessuch asCDplayer,andaradardetector.Ifitisinstallednearthesedevices,GPSreceptionmaybe impaired. s ToimprovetheGPSsignalreception,installtheGPSantennahorizontallyonaflatplane. s DonotwaxorpaintthecoveroftheGPSantenna.Thismayreducetheperformanceofthe GPSantenna. s Install the GPSantennaatleast10cmawayfromthewindshield. s Wipe off thedirtofthemountingsurfacebeforeinstallingtheGPSantenna. GPS antenna ʾƖ½ËÍʽÌÇÌÍÊÆÌÀ½ÈÇϽÊÇŰº½¾ÇʽÏÁÊÁÆ¿Ɩ ʿƖ½È¹ÊÌÁ»ÍĹÊÄÑ»¹Ê½¾ÍÄÏÀ½Ê½ÑÇÍÊÇÍ̽ÌÀ½ÏÁʽËƖ Keep them well away from the engine, and exhaust pipe, etc. Heat may damage the wires. 3. If the fuse should blow, check to see if the wiring is correct. If a fuse is blown, replace it with a new one of the same amperage rating ¹ËÌÀ½ÇÊÁ¿ÁƹÄƼʾ˂ ƽƖ 4. To replace the fuse, remove the old fuse on the back of the unit and insert the new one. (Figure 7) NOTE: There are various types of fuse holder. Do not let the battery side touch other metal parts. CAUTION s Mount the GPS antenna. After the connection, fix the cord by a clamp or insulation the passenger side dashboard where GPS signal interruption is minimized. s Wire the GPS antenna cord. Fasten the cord using the cord holders. tape for protection. Í˽Ƽʾ˂ ƽ Cord holder Fuse holder Double-sided tape Bottom face of the GPS antenna NX404 s Stick the double-sided tape to the bottom face of the GPS antenna. Figure 7 Connect directly Note: Ground s#ONNECTINGTHEPARKINGBRAKECORDTOLAMPGROUNDALLOWSYOUTOWATCHI0ODI0HONEVIDEO$6$VIDEO!6INPUT Black Purple PurpleBlack Red Gray White WhiteBlack Rear right V accessory BRAKEWHILECONlRMINGSAFETYANDTHENENGAGETHEPARKINGBRAKEAGAIN How to attach the electro-tap Front right Parking brake lamp Front left cord to battery Front left Rear left GreenBlack Rear left OrangeWhite s)Fh!5$)//.,9vAPPEARSONTHESCREENJUSTAFTERTURNINGONTHE!##POWEROFTHECARRELEASETHEPARKING Front right Green BlueWhite s7HENTHEPARKINGBRAKECORDISNOTCONNECTEDTHEMONITORWILLNOTSHOWANYVIDEOSOURCES Amplifier turnon cord Quick start guide GrayBlack when the parking brake is engaged. Rear right Parking brake 1. Place the Parking brake cord at the stopper, and fold it back in the direction of the arrow 2. Pass the Parking brake signal cord through, and fold it back in the direction of the arrow. Parking brake signal cord Electro-tap Parking brake signal cord Parking brake signal cord Parking brake cord (Grassgreen) ÌÇÈÈ½Ê Parking brake cord (Grass-green) Illumination Blue Auto antenna Brown Phone interrupt Grassgreen PurpleWhite English V to battery English Yellow Connecting the parking brake cord Connect the cord to parking brake lamp ground in the meter panel. Parking brake cord Reverse gear cord Note: *1: Connecting the PHONE INTERRUPT terminal The phone interrupt will mute the audio if the lead receives a negative or ground signal. NX404 31 Clarion Co., Ltd. All Rights Reserved. Copyright © 2013: Clarion Co., Ltd. Printed in China / Imprimé en Chine / Impreso en China 2013/12 Owner’s manual NX404 DVD MULTIMEDIA STATION WITH BUILT-IN NAVIGATION & 6.2’’ TOUCH PANEL CONTROL English English CLARION PRODUCT REGISTRATION INFORMATION For USA and Canada only www.clarion.com Owner’s Manual Dear Customer: Congratulations on your purchase of a Clarion mobile electronic product. We are confident that you’ll enjoy your Clarion experience. There are many benefits to registering your product. We invite you to visit our website at www.clarion.com to register your Clarion product. We have made product registration simple with our easy to use website. The registration form is short and easy to complete. Once you’re registered, we can keep you informed of important product information. Register at www.clarion.com - it’s easy to keep your Clarion product up to date. INFORMATIONS DE L’ENREGISTREMENT DE PRODUITS CLARION Pour les Étas Unis et le Canada seulement www.clarion.com Cher client: Nous vous remercions d’avoir acheté ce produit électronique mobile Clarion. Nous sommes confiants que vous apprécierez votre expérience Clarion. Il y a beaucoup d’avantage à enregistrer votre produits. Nous vous invitons à visiter notre site Web www.clarion.com pour enregistrer votre produit Clarion. Nous avons facilité la tache d’enregistrement de produit simple et facile grâce à notre site Web.Le formulaire d’enregistrement est court et facile à compléter. Lorsque vous êtes enregistrer, nous pouvons vous tenir informé des informations important de produits. Enregistrer à www.clarion.com - c’est facile de mettre à jour votre produit Clarion. INFORMACIÓN DEL REGISTRO DE PRODUCT O DE CLARION Para USA y Canada nomas www.clarion.com Querido Cliente: Felicitaciones por su compra de producto electrónico móvil de Clarion. Estamos seguros que usted gozará de su experiencia con el producto de Clarion. Hay muchas ventajas al registrar su producto. Le invitamos a que visite nuestro sitio en internet www.clarion.com para registrar su producto de Clarion. Hemos hecho el registro de producto fácil en nuestro sitio. La forma de registro es corta y fácil de completar. Una vez que lo registre, podremos proporcionarle la información de su producto. Registrese en www.clarion.com - es fácil mantener su producto de Clarion actualizado. Under Industry Canada regulations, this radio transmitter may only operate using an antenna of a type and maximum (or lesser) gain approved for the transmitter by Industry Canada. To reduce potential radio interference to other users, the antenna type and its gain should be so chosen that the equivalent isotropically radiated power (e.i.r.p.) is not more than that necessary for successful communication. Conformément à la réglementation d’Industrie Canada, le présent émetteur radio peut fonctionner avec une antenne d’un type et d’un gain maximal (ou inférieur) approuvé pour l’émetteur par Industrie Canada. Dans le but de réduire les risques de brouillage radioélectrique à l’intention des autres utilisateurs, il faut choisir le type d’antenne et son gain de sorte que la puissance isotrope rayonnée équivalente (p.i.r.e.) ne dépasse pas l’intensité nécessaire à l’établissement d’une communication satisfaisante. NX404 1 Contents English Thank you for purchasing this Clarion product. tPlease fully read this owner’s manual before operating this equipment. t$IFDLUIFDPOUFOUTPGUIFFODMPTFEXBSSBOUZDBSEBOETUPSFJUJOBTBGFQMBDFXJUIUIJTNBOVBM Owner’s Manual 1. FEATURES ...........................................................................................................4 Expanding Systems ..............................................................................................4 2. PRECAUTIONS ....................................................................................................5 3. CAUTIONS ON HANDLING.................................................................................8 Operation Panel ....................................................................................................8 USB Port ...............................................................................................................8 Cleaning ................................................................................................................8 Handling Discs ......................................................................................................9 4.OPERATIONAL PANEL ......................................................................................11 Functions of Buttons...........................................................................................11 5. REMOTE CONTROL..........................................................................................12 Remote Control Function....................................................................................13 6. MAIN MENU.......................................................................................................15 7. DVD VIDEO PLAYER OPERATIONS ...............................................................16 Discs ...................................................................................................................16 Change DVD System Settings ............................................................................17 Watching to a disc ..............................................................................................17 Operate the DVD Player menu ............................................................................18 Operate the Video files Player menu...................................................................20 Switching Subtitles .............................................................................................20 Video files list ......................................................................................................20 Play DivX Video-On-Demand file ........................................................................20 Playable disc video files......................................................................................21 8. CD PLAYER OPERATIONS...............................................................................22 Listening to a disc/Ejecting a disc ......................................................................22 Showing CD Player mode screen .......................................................................22 Operate the CD Player menu ..............................................................................22 Listening to compressed audio ..........................................................................23 Tag display function............................................................................................23 9. USB AUDIO OPERATIONS ...............................................................................25 Notes on using USB memories...........................................................................25 Select USB Audio mode .....................................................................................25 Playing Audio files in USB memory ....................................................................26 10. USB VIDEO OPERATIONS..............................................................................27 Notes on using USB memories...........................................................................27 Select USB Video mode .....................................................................................27 Playing video files in USB memory .....................................................................27 Playable Video file ...............................................................................................27 11. iPod OPERATIONS..........................................................................................29 Notes on using Apple iPod/iPhone .....................................................................29 iPod Audio ID3 Info .............................................................................................29 iPod audio playlist mode screen.........................................................................30 iPod Video Menu Operations ..............................................................................31 iPod Video ID3 mode screen ..............................................................................31 iPod Video List mode screen ..............................................................................32 iPod Video Simple Control Mode Screen ...........................................................32 iPod Video play mode screen .............................................................................32 iPod Audio Bluetooth mode................................................................................33 12. Pandora® OPERATIONS.................................................................................34 2 NX404 English Owner’s Manual NX404 English Selecting the Pandora mode ..............................................................................34 Pandora Bluetooth mode ....................................................................................35 13. Bluetooth® AUDIO PLAYER OPERATIONS ..................................................36 Selecting the Bluetooth Audio mode ..................................................................36 Bluetooth audio player settings ..........................................................................36 Registering your Bluetooth audio player (Pairing)...............................................36 Selecting the Bluetooth audio player ..................................................................37 Controlling the Bluetooth audio player ...............................................................37 14. Bluetooth® TELEPHONE OPERATIONS ..........................................................38 Select the BT Phone mode .................................................................................38 Bluetooth Telephone settings .............................................................................38 Registering your cellular phone (Pairing) ............................................................39 Select the cellular phone ....................................................................................39 Obtaining the Phone Book data .........................................................................39 Telephone operations .........................................................................................39 15. TUNER OPERATIONS .....................................................................................41 16. HDMI MODE ....................................................................................................42 Wire connection of HDMI mode .........................................................................42 Select HDMI source ...........................................................................................43 HDMI Mode.........................................................................................................43 17. AUX .................................................................................................................44 18. CAMERA INPUT OPERATIONS .....................................................................44 19. REAR SOURCE OPERATIONS .......................................................................45 DVD Video in Rear ..............................................................................................45 DVD Video Rear Source Control Info mode. ......................................................45 DVD Video Rear Source Control Direct mode. ..................................................45 iPod Video in Rear ..............................................................................................46 iPod Video Rear Source Control Play Mode .......................................................46 iPod Video Rear Source ID3 Mode .....................................................................46 20. SETTING OPERATIONS ..................................................................................47 General Setup Menu ...........................................................................................47 Video Setup Menu ..............................................................................................47 Audio Setup Menu ..............................................................................................48 Navigation Setup Menu ......................................................................................48 Others Setup Menu .............................................................................................48 Set the Anti-Theft code .......................................................................................49 21. TROUBLESHOOTING .....................................................................................50 GENERAL............................................................................................................50 DVD PLAYER ......................................................................................................50 USB DEVICE .......................................................................................................51 Bluetooth ............................................................................................................51 TFT screen ..........................................................................................................52 22. ERROR DISPLAY.............................................................................................53 DVD PLAYER ......................................................................................................53 23. SPECIFICATIONS ............................................................................................54 24. WIRE CONNECTION GUIDE...........................................................................56 3 English 1. FEATURES FLAC(Free Lossless Audio Codec) Compatible with ID3-TAG Display Built-in Bluetooth® Handsfree (HFP) and Audio Streaming (A2DP & Owner’s Manual AVRCP) Front-Panel Auxiliary Input and 6ch RCA Output with Subwoofer Control Expanding Systems Expanding audio features External Power ÅÈÄÁŲ½Ê Expanding visual features Rear monitor Rear Vision Camera iPod® USB Memory (Connect via CCA-750) iPhone® iPhone®/ Smartphone via HDMI Bluetooth (Connect via CCA-750) Telephone (Connect via CCA-770,CCA-771) NOTE: tThe items listed outside of the frames are the commercial products generally sold. tCCA-750,CCA-770,CCA-771:Sold separately. 4 NX404 English English 2. PRECAUTIONS WARNING Owner’s Manual t 'PSZPVSTBGFUZUIFESJWFSTIPVMEOPUXBUDIBOZWJEFPTPVSDFTBOEPSPQFSBUFUIFDPOUSPMTXIJMFESJWJOH Please note that watching and operating any video sources while driving are prohibited by law in some countries. Also, while driving, keep the volume to a level at which external sounds can be heard. t %POPUEJTBTTFNCMFPSNPEJGZUIJTVOJU*UNBZDBVTFBOBDDJEFOUmSFPSFMFDUSJDTIPDL t %POPUVTFUIJTVOJUXIFOBUSPVCMFFYJTUTTVDIBTOPTDSFFODPOUFOUBQQFBSTPSOPTPVOEJT audible. It may cause an accident, fire, or electric shock. For that case, consult your authorized dealer or a nearest Clarion service center. t *ODBTFPGBQSPCMFNTVDIBTBOZNBUFSJBMIBTCFFOFOUFSFEJOUIFVOJUUIFVOJUHFUTXFUPS smoke or strange smells come out of the unit, etc., stop using this unit immediately, and consult your authorized dealer or a nearest Clarion service center. Using it in that condition may cause an accident, fire, or electric shock. t 6TFBGVTFXJUIUIFTBNFTQFDJmDBUJPOPOMZXIFOSFQMBDJOHUIFGVTF Using a fuse with a different specification may causes a fire. t 'PSUIFJOTUBMMBUJPOPGUIJTVOJUPSBDIBOHFJOUIFJOTUBMMBUJPOBTLZPVSBVUIPSJ[FEEFBMFSPSB nearest Clarion service center for safety. Professional skills and experiences are required to do so. t 5IJTOBWJHBUJPOTZTUFNTIPVMEOPUCFVTFEUPSFQMBDFZPVSPXOKVEHNFOU/PJUJOFSBSZTVHHFTUFE by this navigation system should ever override any highway regulations, your own judgment, or a knowledge of safe driving practices. Do not follow the navigation system’s suggested itinerary if it would cause you to perform a dangerous or illegal act, place you in a dangerous situation, or take you into an area you consider unsafe. t 5IFBEWJDFQSPWJEFECZUIFOBWJHBUJPOTZTUFNJTUPCFSFHBSEFEBTBTVHHFTUJPOPOMZ5IFSFNBZ be times when the navigation system displays the vehicle’s location incorrectly, fails to suggest the shortest route, or fails to direct you to your desired destination. In such instances, rely on your own driving judgment, taking into account the driving conditions at the time. t %POPUVTFUIFOBWJHBUJPOTZTUFNUPMPDBUFFNFSHFODZTFSWJDFT5IFEBUBCBTFEPFTOPUDPOUBJO a complete listing of emergency services such as police stations, fire halls, hospitals and walk-in clinics. Please show discretion and ask for directions in such instances. t "TUIFESJWFSZPVBMPOFBSFSFTQPOTJCMFGPSZPVSESJWJOHTBGFUZ t*OPSEFSUPBWPJEBUSBGmDBDDJEFOUEPOPUPQFSBUFUIFTZTUFNXIJMFESJWJOH t*OPSEFSUPBWPJEBUSBGmDBDDJEFOUPQFSBUFUIFTZTUFNPOMZXIFOUIFWFIJDMFJTTUPQQFEBUBTBGF place and the parking brake is on. t*OPSEFSUPBWPJEBUSBGmDBDDJEFOUPSUSBGmDPGGFOTFSFNFNCFSUIBUBDUVBMSPBEDPOEJUJPOTBOE traffic regulations take precedence over the information contained on the navigation system. t5IFTPGUXBSFNBZDPOUBJOJOBDDVSBUFPSJODPNQMFUFJOGPSNBUJPOEVFUPUIFQBTTBHFPGUJNF changing circumstances, and the sources of information used. Please respect current traffic conditions and regulations at all times while driving. t8IFSFBDUVBMSPBEDPOEJUJPOTBOEIJHIXBZSFHVMBUJPOTEJGGFSGSPNUIFJOGPSNBUJPODPOUBJOFEPO the navigation system, abide by the highway regulations. t,FFQUIFBNPVOUPGUJNFTQFOUWJFXJOHUIFTDSFFOXIJMFESJWJOHUPBTUSJDUNJOJNVN t5IFOBWJHBUJPOTZTUFNEPFTOPUQSPWJEFOPSSFQSFTFOUJOBOZXBZJOGPSNBUJPOPOUSBGmDBOE highway regulations; technical aspects of the vehicle including weight, height, width, load and NX404 5 English speed limits; road conditions including grade, percentage of incline and surface conditions; obstacles such as the height and width of bridges and tunnels; and other current driving or road conditions. Always rely on your own judgment when driving a car, taking into account current driving conditions. t5IJTFRVJQNFOUIBTCFFOUFTUFEBOEGPVOEUPDPNQMZXJUIUIFMJNJUTGPSB$MBTT#EJHJUBMEFWJDF pursuant to Part 15 of the FCC Rules. Owner’s Manual These limits are designed to provide reasonable protection against harmful interference in a residential installation.This equipment generates, uses, and can radiate radio frequency energy and, if not installed and used in accordance with the instructions, may cause harmful interference to radio communications.However, there is no guarantee that interference will not occur in a particular installation. If this equipment does cause harmful interfrence to radio reception, which can be determined by turning the equipment off and on, the user is encourage to consult the dealer or an experienced radio technician for help. 6 NX404 English English Owner’s Manual 1.When the inside of the car is very cold and the player is used soon after switching on the heater, moisture may form on the disc (DVD/ CD) or the optical parts of the player and proper playback may not be possible. If moisture forms on the disc (DVD/CD), wipe it ÇŰÏÁÌÀ¹ËǾ̻ÄÇÌÀƖ¾ÅÇÁËÌÍʽ¾ÇÊÅËÇÆÌÀ½ optical parts of the player, do not use the player for about one hour. The condensation will disappear naturally allowing normal operation. V8VCNE8239DCL 8614A-CNE8239DCL 5 B 2.Driving on extremely bumpy roads which cause severe vibration may cause the sound to skip. 3.This unit uses a precision mechanism. Even in the event that trouble arises, never open the case, disassemble the unit, or lubricate the rotating parts. NX404 INFORMATION FOR USERS: À¹Æ¿½ËÇÊÅǼÁŲ»¹ÌÁÇÆËÌÇÌÀÁËÈÊÇ¼Í»Ì unapproved by the manufacturer will void the warranty and will violate FCC approval. NX404 7 English 3. CAUTIONS ON HANDLING Operation Panel For a longer service life, be sure to read the following cautions. Owner’s Manual t 5IFPQFSBUJPOQBOFMXJMMPQFSBUFQSPQFSMZJOB temperature range of 0˚ to 60˚ C. t %POPUBMMPXBOZMJRVJETPOUIFTFUGSPN drinks, umbrellas etc. Doing so may damage the internal circuitry. t %POPUEJTBTTFNCMFPSNPEJGZUIFTFUJOBOZ way. Doing so may result in damage. t 4VCKFDUJOHUIFPQFSBUJPOQBOFMUPTIPDLT may result in breakage, deformation or other damage. t 5IFSFNPUFDPOUSPMVOJUNBZOPUXPSLJGUIF remote control sensor is exposed to direct sunlight. t *OFYUSFNFMZDPMEXFBUIFSUIFEJTQMBZ movement may slow down and the display may darken, but this is not a malfunction. The display will work normally when the temperature increases. t 4NBMMCMBDLBOETIJOZTQPUTJOTJEFUIFMJRVJE crystal panel are normal for LCD products. t %POPUMFUDJHBSFUUFTCVSOUIFEJTQMBZ t *GBQSPCMFNTIPVMEPDDVSIBWFUIFTFU inspected at your store of purchase. USB Port t 5IF64#NFNPSZTUJDLTNVTUCFSFDPHOJ[FE as “USB mass storage class” to work properly. Some models may not operate correctly. When the memorized data is lost or damaged by any chance, Clarion shall not be liable for any damage. When using an USB memory stick, we recommend that you backup your data stored on it before by using a personal computer etc. t %BUBmMFTNBZCFCSPLFOXIFOVTJOH64# memory sticks in the following situation: When disconnecting the USB memory stick or turning the power off during writing or reading data. When affected by static electricity or electric noise. Connect/disconnect the USB memory stick when it is not accessed. t $POOFDUJOHXJUIUIFDPNQVUFSJTOPUDPWFSFE Cleaning ƹ Ľ¹ÆÁÆ¿ÌÀ½»¹ºÁÆ½Ì Use a soft, dry cloth and gently wipe off the dirt. For tough dirt, apply some neutral detergent diluted in water to a soft cloth, wipe off the dirt gently, then wipe again with a dry cloth. Do not use benzene, thinner, car cleaner, etc., as these substances may damage the cabinet or cause the paint to peel. Also, leaving rubber or plastic products in contact with the cabinet 8 NX404 for long periods of time may cause stains. ƹ Ľ¹ÆÁÆ¿ÌÀ½ÄÁÉÍÁ¼»ÊÑË̹ÄÈ¹Æ½Ä The liquid crystal panel tends to collect dust, so wipe it off occasionally with a soft cloth. The surface is easily scratched, so do not rub it with hard objects. Ball-point pen Roughness Never stick labels on the surface of the disc or mark the surface with a pencil or pen. t/FWFSQMBZBEJTDXJUIBOZDFMMPQIBOF tape or other glue on it or with peeling off marks. If you try to play such a disc, you may not be able to get it back out of the DVD player or it may damage the DVD player. t%POPUVTFEJTDTUIBUIBWFMBSHF scratches, are misshapen, cracked, etc. Use of such discs may cause missoperation or damage. t5PSFNPWFBEJTDGSPNJUTTUPSBHFDBTF press down on the center of the case and lift the disc out, holding it carefully by the edges. t%POPUVTFDPNNFSDJBMMZBWBJMBCMFEJTD protection sheets or discs equipped with stabilizers, etc. These may damage the disc or cause breakdown of the internal mechanism. Cleaning t5PSFNPWFmOHFSNBSLTBOEEVTUVTF a soft cloth and wipe in a straight line from the center of the disc to the circumference. t%POPUVTFBOZTPMWFOUTTVDIBT commercially available cleaners, antistatic spray, or thinner to clean discs. t"GUFSVTJOHTQFDJBMEJTDDMFBOFSMFUUIF disc dry off well before playing it. On Discs t/FWFSUVSOPGGUIFQPXFSBOESFNPWFUIF unit from the car with a disc loaded. CAUTION For your safety, the driver should not insert or eject a disc, opening the operation panel while driving. NX404 9 Owner’s Manual Storage t%POPUFYQPTFEJTDTUPEJSFDUTVOMJHIUPS any heat source. t%POPUFYQPTFEJTDTUPFYDFTTIVNJEJUZ or dust. t%POPUFYQPTFEJTDTUPEJSFDUIFBUGSPN heaters. English Handling t/FXEJTDTNBZIBWFTPNFSPVHIOFTT around the edges. If such discs are used, the player may not work or the sound may skip. Use a ball-point pen or the like to remove any roughness from the edge of the disc. English Handling Discs English About the registered marks, etc. Owner’s Manual ƹ This product incorporates copyright protection technology that is protected by U.S. patents and other intellectual property rights. Use of this copyright protection technology must be authorized by Rovi Corporation, and is intended for home and other limited viewing uses only unless otherwise authorized by Rovi Corporation. Reverse engineering or disassembly is prohibited. ƹ Manufactured under license from Dolby Laboratories. “Dolby” and the double-D symbol are trademarks of Dolby Laboratories. ƹ "Made for iPod," and "Made for iPhone" mean that an electronic accessory has been designed to connect specifically to iPod, or iPhone, respectively, and has been certified by the developer to meet Apple performance standards. Apple is not responsible for the operation of this device or its compliance with safety and regulatory standards. Please note that the use of this accessory with iPod or iPhone may affect wireless performance. iPhone, iPod, iPod nano and iPod touch are trademarks of Apple Inc., registered in the U.S. and other countries. Lightning is a trademark of Apple Inc. ƹ The Bluetooth® word mark and logos are registered trademarks owned by the Bluetooth® SIG, Inc. And any use of such marks by Clarion Co.,Ltd. is under license. Other trademarks and trade names are those of their respective owners. ƹ Pandora. the Pandora logo. and the Pandora trade dress are trademarks or registered trademarks of Pandora Media. Inc. used with permission. 10 NX404 ƹ DivX®, DivX Certified® and associated logos are trademarks of Rovi Corporation or its subsidiaries and are used under license. DivX Certified® to play DivX® video, including premium content. Covered by one or more of the following U.S. patents: 7,295,673; 7,460,668; 7,515,710; 7,519,274 ABOUT DivX VIDEO: DivX® is a digital video format created by DivX, LLC, a subsidiary of Rovi Corporation. This is an official DivX Certified® device that has passed rigorous testing to verify that it plays DivX video. Visit divx.com for more information and software tools to convert your files into DivX videos. ABOUT DivX VIDEO-ON-DEMAND: This DivX Certified® device must be registered in order to play purchased DivX Video-on-Demand (VOD) movies. To obtain your registration code, locate the DivX VOD section in your device setup menu. Go to vod.divx.com for more information on how to complete your registration. English English 4.OPERATIONAL PANEL ] [Disc slot] [NAVI/AV] [POWER/VOL] [IR] [RESET] [microSD slot] [Cover] [AUX IN] Only navigation map card is available and don’t remove it when unit is power on Functions of Buttons [POWER/VOL] Knob s0RESSTHISKNOBTOTURNONTHEPOWER s7HENTHEPOWERISALREADYONITMOVESTOTHE .AVIGATIONMODE)F.AVIGATIONMODEISDISPLAYEDIT MOVESTOTHE.AVIGATIONMENU s+EEPPRESSINGTHISKNOBMORETHANSECONDTOTURN OFFTHEPOWER s4URNTHISKNOBTOLEFTORRIGHTTODECREASEORINCREASE THEVOLUMEOFTHESYSTEM [NAVI/AV]"UTTON s0RESSTHISBUTTONTODISPLAY.!6)PRESSAGAINTO RETURNCURRENTSOURCE s0RESSANDHOLDTHISBUTTONFORSECONDSTODISPLAY THE$IMMERSETTINGMENU [microSD slot ] .OTE4HEMICRO3$CARDISONLYFORNAVIGATION0LEASE DONTINSERTMICRO3$CARDFOROTHERPURPOSE!FTER INSERTIONOFMICRO3$CARDFOR-!0DONTREMOVEIT OTHERWISETHENAVIGATIONFUNCTIONWILLBEDISABLED [AUX IN] !58#ONNECTOR [Microphone] 4HISISUSEDFOR"LUETOOTHPHONE [IR]3%.3/2 s2ECEIVERFORTHEREMOTECONTROLUNITOPERATINGRANGE DEGREEINALLDIRECTIONS [ ]%JECT s0RESSTOEJECTDISCFROMTHEUNIT [MENU]"UTTON s0RESSTHISBUTTONTODISPLAYMAINMENUPRESSAGAIN TORETURNCURRENTSOURCE s0RESSANDHOLDTHISBUTTONFORSECONDSTOTURNOFF THEMONITOR0RESSANYPLACEOFTHESCREENTOTURNON THEMONITORAGAIN [RESET]"UTTON s 0RESSTHISBUTTONTOHARDWARERESETTHEUNIT Note: When the [RESET] button is pressed, frequencies of radio stations, titles, etc. stored in memory are cleared. NX404 11 Owner’s Manual [ [Microphone] [MENU] English 5. REMOTE CONTROL RCX005 Remote Control Included 3IGNALTRANSMITTER /PERATINGRANGEªINALLDIRECTIONS Owner’s Manual [MUTE] [ / ] [ 0-9 ] [OPEN] [POWER / SRC] [VOLUME] [NAV/ AV] [SRCH] [BACK] [BAND] [SET] [MENU] [PIC] [ENT] [ , , , ] [TAG] [TITLE] [RPT] [ROOT] [ ], [ ] [ ], [ [ZOOM] [SUB.T] [AUDIO] [ANGLE] Replacing the batteries 0RESSTHERETENTIONTABANDPULLOUTTHE ] CAUTION BATTERYTRAYANDREMOVETHEOLDBATTERY s+EEPTHEBATTERYOUTOFTHEREACHOFCHILDREN )NSERTTHENEW#2BATTERYANDSLIDE 3HOULDTHEBATTERYBESWALLOWEDCONSULTADOCTOR IMMEDIATELY THEBATTERYTRAYBACKINTHEREMOTECONTROL THESAMEDIRECTIONTHATYOUREMOVEDIT 0LEASEENSURETHETRAYISINSERTEDINTHE CORRECTDIRECTION 12 NX404 s"ATTERIESBATTERYPACKORBATTERIESINSTALLED MUSTNOTBEEXPOSEDTOEXCESSIVEHEATSUCHAS SUNSHINElREORTHELIKE s2EMOVETHEBATTERYIFTHEREMOTECONTROLISNOT USEDFORAMONTHORLONGER Important s$ONOTSTORETHEREMOTECONTROLINHIGH TEMPERATURESORDIRECTSUNLIGHT s4HEREMOTECONTROLMAYNOTFUNCTIONPROPERLYIN DIRECTSUNLIGHT s$ONOTHANDLETHEBATTERYWITHMETALLICTOOLS s$ONOTLETTHEREMOTECONTROLFAILONTOTHEmOOR WHEREITMAYBECOMEJAMMEDUNDERTHEBRAKEOR ACCELERATORPEDAL s$ONOTSTORETHEBATTERYWITHMETALLICOBJECTS s)FTHEBATTERYLEAKSWIPETHEREMOTECONTROL COMPLETELYCLEANANDINSTALLANEWBATTERY Remote Control Functions 9OUCANUSETHEREMOTECONTROLUNITTOCONTROLTHE.8 Note: s4HEWIRELESSREMOTECONTROLOPERATIONMAYNOTBEOPTIMALINDIRECTSUNLIGHT / ]"UTTON [BAND] "UTTON s0RESSTHISBUTTONTOPLAYORPAUSEVIDEOANDAUDIO MEDIA s3WITCHTONEXTBANDALTERNATELY s0RESSTHISBUTTONMORETHANSECONDTOSTOPVIDEO ANDAUDIOMEDIA s0RESSTHISBUTTONTOOPENTHE!UDIOSETTINGMENUIN ANYMODE [MUTE]"UTTON [BACK] "UTTON s-UTEOR5NMUTETHESPEAKER s0RESSTHISBUTTONTOQUITMAINMENUIFCURRENTSCREEN ISMAINMENU s4HESYMBOL ONUPPERRIGHTAREAOFTHESCREEN INDICATESTHATSPEAKERISMUTED [POWER/SRC] "UTTON s0RESSTHISBUTTONTOMOVETHEFOCUSTONEXTAVAILABLE SOURCEITEMONMAINMENU s0RESSTHISBUTTONTOPOWERONWHENTHEUNITISPOWER OFF [SET] "UTTON [ ], [ ], [ ], [ ]"UTTONS s0RESSTHISBUTTONFORCURSORMOVEMENTINMAINMENU OR3ETTINGMODE s&ROMTHEMAINMENUYOUCANSELECTYOURDESIRED SOURCEORCHANGEYOURSETTINGS [MENU]"UTTON s0RESSTHISBUTTONMORETHANSECONDTOPOWEROFF WHENTHEUNITISPOWERON s0RESSTHISBUTTONTOENTERTHE-!).-%.5ORRETURN CURRENTRESOURCE [0 - 9] "UTTONS [PIC]"UTTON s5SEINTHE+EY0ADSCREENTOSELECTTHERADIO s5SETOSELECTTHETRACKINTHETRACKLISTSCREEN s0RESSTOENTER$6$VIDEOCHAPTERSTITLESINTHE+EY 0ADSCREEN s0RESSANDHOLDTHISBUTTONTOCHANGEYOURMONITOR $IMMER [ENT] "UTTON [VOLUME] "UTTONS s0RESSTOlXTHEENTEREDDATAINTHE+EY0ADSCREEN ORENTERTHEITEMTHECURSORISON s)NCREASEANDDECREASEVOLUME [TAG]"UTTON [NAVI/AV]"UTTON s.OFUNCTION s0RESSTHISBUTTONTOSWITCHBETWEENCURRENTSOURCE ANDCURRENTPOSITIONONNAVIGATIONMAP [TITLE] "UTTON s0RESSTOGOTOTHETITLEMENUONTHE$6$ [SRCH]"UTTON [ROOT] "UTTON s0RESSTHISBUTTONTOOPENCHAPTERORTITLESEARCH WINDOWWHILEPLAYING$6$ s0RESSTOGOTOTHEROOTMENUONTHE$6$ [RPT]"UTTON NX404 13 Owner’s Manual s4HEREISADANGEROFEXPLOSIONIFBATTERYIN INCORRECTLYREPLACED2EPLACEDONLYWITHTHESAME OREQUIVALENTTYPE [ English s5SEONE#26LITHIUMBATTERY English s7HENDISPOSINGOFUSEDBATTERIESCOMPLYWITH GOVERNMENTALREGULATIONSORENVIRONMENTALPUBLIC INSTITUTIONSRULESTHATAPPLYINYOURCOUNTRYAREA CAUTION English s0RESSTOPERFORMCHAPTERREPEATTITLEREPEATREPEAT OFFWHILEPLAYING$6$MODE [AUDIO] "UTTON s0RESSTOPERFORM2EPEAT4RACK2EPEAT!LLWHILE PLAYING#$ s0RESSTOSWITCHTHE!5$)/CHANNELOFTHEDISCWHILE PLAYING$6$ Owner’s Manual s0RESSTOPERFORM2EPEAT4RACK2EPEAT&OLDER 2EPEAT!LLWHILEPLAYING-07-!ORVIDEOlLESON DISC s0RESSTOPERFORM2EPEAT4RACK2EPEAT&OLDER 2EPEAT!LLWHILEPLAYING-07-!ORVIDEOlLESIN 53"MEMORY [ ] "UTTONS ], [ s0RESSTOSEEKTHENEXTAVAILABLELOWERORHIGHER STATIONIN4UNERMODE s0RESSTOSELECTTHENEXTLOWERORHIGHERCHAPTER NUMBERIN$6$VIDEOMODE s0RESSTOSELECTTHENEXTLOWERORHIGHERTRACKIN#$ 53"6IDEO53"!UDIOMODE s0RESSFORMOVEMENTOFBACKGROUNDSOURCEIN .AVIGATIONMODE [ ], [ ]"UTTONS s0RESSTOMANUALLYSELECTTHENEXTLOWERORHIGHER STATIONIN4UNERMODES s0RESSTOPERFORMFASTBACKWARDORFASTFORWARD SEARCHING0RESSAGAINTOCHANGETHESPEEDTOX XXORX s0RESSFORMOVEMENTOFBACKGROUNDSOURCEIN .AVIGATIONMODE [ZOOM]"UTTON s0RESSTOTURNONANDZOOMINWHILEPLAYING$6$9OU CANZOOMINUPTOX.OALL$6$DISCSUPPORTSTHIS 14 NX404 FUNCTION. [SUB-T]"UTTON s0RESSTOSWITCHNEXTAVAILABLESUBTITLEWHILEPLAYING $6$ s0RESSTODISPLAY6IDEOMENUINI0ODMODE [ANGLE]"UTTON s0RESSTOSWITCHTHEDIFFERENT!.',%WHILEPLAYING $6$.OALL$6$DISCSUPPORTSTHISFUNCTION s0RESSTODISPLAY!UDIOMENUINI0ODMODE [OPEN]"UTTON s0RESSTOEJECTDISCFROMTHEUNIT 3 4 5 6 7 8 9 10 11 12 13 14 15 4UNER4OUCHTHEBUTTONTODISPLAYTHE4UNERMODE 0ANDORA4OUCHTHEBUTTONTODISPLAYTHE0ANDORA MODE "LUETOOTH!UDIO4OUCHTHEBUTTONTODISPLAYTHE "LUETOOTH!UDIOMODE $ISC!UDIO4OUCHTHEBUTTONTODISPLAYTHE$ISC !UDIOMODE I0OD!UDIO4OUCHTHEBUTTONTODISPLAYTHEI0OD !UDIOMODE .AVIGATION4OUCHTHEBUTTONTODISPLAYTHE .AVIGATIONMODE .*3/4OUCHTHEBUTTONTODISPLAYTHE($-) MODE 53"!UDIO4OUCHTHEBUTTONTODISPLAYTHE53" !UDIOMODE !584OUCHTHEBUTTONTODISPLAYTHE!58 MODE $ISC6IDEO4OUCHTHEBUTTONTODISPLAYTHE$ISC 6IDEOMODE 53"6IDEO4OUCHTHEBUTTONTODISPLAYTHE53" 6IDEOMODE I0OD6IDEO4OUCHTHEBUTTONTODISPLAYTHEI0OD 6IDEOMODE 4ELEPHONE4OUCHTHEBUTTONTODISPLAYTHE 4ELEPHONEMODE #AMERA4OUCHTHEBUTTONTODISPLAYTHE#AMERA MODE !584OUCHTHEBUTTONTODISPLAYTHE!58 MODE 3ETTINGBUTTON4OUCHTHEBUTTONTODISPLAYTHE 3ETTINGMENU !UDIOOFF4OUCHTHEBUTTONTOMAKEAUDIOSOURCE VOICEOFF 8KGX4OUCHTHEBUTTONTODISPLAYTHE8KGXMODE Scrolling the menu Flicking to right or left it will switch to next or previous page of main menu. 16 17 18 Moving the menu position 1. Touch any quadrate icon on main menu more than 2 seconds, the icon will float on main menu. 2. Scrolling the floating icon to any position you want. NX404 15 English 2 Owner’s Manual 1 English 6. MAIN MENU English 7. DVD VIDEO PLAYER OPERATIONS Discs Owner’s Manual Playable discs This DVD video player can play the following discs. Playable discs DVD video discs Audio CD CD TEXT ĹѹºÄ½Å½¼Á¹ŲÄ½Ë MP3/WMA/AAC DivX -0 About CD Extra disc A CD Extra disc is a disc in which a total of two ˽ËËÁÇÆËÀ¹Î½º½½Æʽ»Çʼ½¼ƖÀ½ŲÊËÌ˽ËËÁÇÆ is Audio session and the second session is Data session. Your personally-created CDs with more than second data sessions recorded cannot be played on this DVD video player. Note: t When you play a CD Extra disc, only the first session will be recognized. About playing a CD-R/CD-RW disc (MP3, WMA) This player can play CD-R/CD-RW discs previously recorded in music CD format (MP3, WMA). About playing a DVD-R/RW or DVD+R/RW disc ˀƯŲĽËʽ»Çʼ½¼ÇÆƘƯ¹Æ¼ DVD+R/RW discs can be played. Discs that cannot be played back This DVD video player cannot play back DVDAudio, DVD-RAM, Photo CDs, etc. Note: t It may also not be possible to play back CDs recorded on a CD-R unit and CD-RW unit. (Cause: disc characteristics, cracks, dust/dirt, dust/dirt on player’s lens, etc.) t If a CD-R or CD-RW disc that has not been finalized is played, it will take a long time to start playing. Also, it may not be possible to play depending on its recording conditions. 16 NX404 t You cannot play SuperAudio CD. The CD player is not supported even if it is a hybrid disc. About MP3/WMA playback This unit can play back CD-R/CD-RW, DVD-R/ RW and DVD+R/RW discs on which MP3/WMA music data have been recorded. For a detailed information, see the section entitled “Listening to compressed audio”. Note on region numbers The DVD video system assigns a region number to DVD video players and DVD discs by sales area. DVD video players sold in Asia can play back DVD discs with the region number “ALL”, “1” or any combination of numbers that also incorporate a “1”. The DVD video region number is marked on the disc jacket as shown below. ALL 1 1 3 4 4OUCHTHE[Settings]BUTTONONTHE-AIN-ENUTO ACCESSTHE6IDEOSETUPMENU 4OUCH[Video] BUTTON4HEVIDEOMENUISDISPLAYED +ID3AFE ' 0' 0' 0'2 2 .# +ID3AFE 'ENERAL!UDIENCES 0ARENTAL'UIDANCE3UGGESTED 0ARENTS3TRONGLY#AUTIONED 0ARENTAL'UIDANCE2ESTRICTED 2ESTRICTED .O/NE!ND5NDER!DMITTED !DULT /NLY!DULT Owner’s Manual Selecting DVD Setup Menu 3ELECTOthersSCREENWHILEINSettingMODE4OUCH ;0ARENTAL#ONTROL=BUTTON4OUCHTHEDESIREDRATINGFOR LEVELCONTROL5SETHISTABLETOSETTHEPARENTALLEVEL s 4HECONTENTSTHATTHEPARENTALLEVELRESTRICTSVARY WITHTHECOUNTRYCODE Note:4HERATINGCANBESELECTEDONLYUNDERTHE password unlocked status, and the limits can be set only under the password locked status. Watching to a Disc Setting up the Screen Size 4OUCHTHE[DVD Wide Screen Mode]BUTTONTOTURNON ORTURNOFFTHE$6$WIDESCREENMODE 4HEFACTORYDEFAULTSETTINGIShOFFv .OTE.OTALL$6$DISCSUPPORTTHISFUNCTION Setting up the password for parental level control 4HEFACTORYDEFAULTPASSCODEIShv In Main Menu4OUCH[Settings]BUTTON4OUCH [Others]BUTTONONTHEDISPLAY4OUCHTHE[Set Password] ----ANDANUMERICALKEYPADWILLAPPEAR 4OLOADADISC )NSERTTHEDISCINTOTHECENTEROFTHEINSERTIONSLOTTHE LABELSIDEFACINGUP CAUTION For your safety, the driver should not insert or eject a disc, opening the operation panel while driving. Note: s.EVERINSERTFOREIGNOBJECTSINTOTHEDISCINSERTIONSLOT s)FTHEDISCISNOTINSERTEDEASILYTHEREMAYBEANOTHER disc in the mechanism or the unit may require service. sCMSINGLEPLAYDISCSCANNOTBEUSED $ISCSTARTSPLAYINGAUTOMATICALLY WARNING Some videos may be recorded at higher than desired volume levels. Increase the volume gradually from the minimal setting after the video has started. Ejecting a disc )NPUTANEWPASSWORDANDCOMEAGAIN4HEPASSWORD ISSET Note: When a disc with view restrictions is inserted, you will BEPROMPTEDTOINPUTTHISPASSWORD4HEDISCWILLNOTBE viewable until the correct password is entered. 4OEJECTADISCPRESSEJECT[ ]BUTTON4HEPLAY MODETHENSWITCHESTOTHE4UNERMODE )FTHEDISCISLEFTINTHEEJECTEDPOSITIONFOR SECONDSTHEDISCISAUTOMATICALLYRELOADED)NTHIS CASETHEPLAYMODEWILLREMAININTHE4UNERMODE Note: If you force a disc into before auto reloading, it may damage a disc. Change DVD System Settings NX404 English Note: If the setup operation is performed in the middle of DVD video play, the disc will restart from the beginning. Set rating for parental level control English Change DVD System Settings 17 Showing DVD Player mode screen Operate the DVD Player Menu English Owner’s Manual !FTERDISCISLOADEDTHEPLAYMODEISAUTOMATICALLY ENGAGED 4OUCHANYPLACEOFTHESCREENTODISPLAY$6$6IDEO MENUTOUCHTHESCREENAGAINTORETURNTHEPLAYBACK SCREEN4HEDISPLAYWILLRETURNTOTHEPLAYBACKSCREEN IFYOUDONOTTOUCHTHESCREENFORSECONDS 12 11 10 9OUCANSELECTTHEBUTTONITEMSDISPLAYEDINTHE$6$ MENUBYDIRECTLYTOUCHINGIT Play/Pause Playback 4OUCH[ 4OUCH[ ]BUTTONTOPAUSEDURINGPLAYBACK ]BUTTONAGAINTORESUMEPLAYBACK Skip (Search) a Chapter 4OUCH[ ]OR[ ]BUTTONDURINGPLAYBACK #HAPTERSARESKIPPEDDOWNORUPFROMCURRENT LOCATIONSASMANYTIMESASTHEBUTTONISTOUCHEDAND PLAYBACKSTARTS Skip use seek bar 4OUCHTHETRIANGLE[ ]ONSEEKBARANDDRAGITTOANY POSITIONWHEREYOUWANTTOSTARTPLAYBACK Fast Forward/Fast Backward 1 2 3 4 5 6 7 8 9 4OUCH[ ]OR[ ]BUTTONANDHOLDSECONDSTO STARTFASTBACKWARDORFASTFORWARDDURINGPLAYBACK 4HEPLAYBACKSPEEDSTARTSATXTHENWILLINCREASE TOXXANDX2ELEASETHEBUTTONWILLCONTINUE PLAYINGWITHNORMALSPEED Note: s.OAUDIOISREPRODUCEDDURINGFASTFORWARDANDFAST backward operation. s4HEFASTFORWARDANDFASTBACKWARDSPEEDMAYDIFFER depending on the disc. 13 Search function 14 15 16 17 18 /PTIONBUTTON 3HOW#URSORKEYSBUTTON 0REVIOUS#HAPTER&AST"ACKWARDBUTTON 0LAY0AUSEBUTTON .EXT#HAPTER&AST&ORWARDBUTTON %LAPSEDPLAYINGTIME 3EEKBAR 4OTALTIME -ENU,ISTBUTTON 3YSTEMTIME "LUETOOTHSTATUSINDICATOR $6$PLAYBACKINFORMATION 3HORTCUTBUTTON 2EPEAT3WITCHINGBUTTON !UDIO#HANNELSWITCHINGBUTTON 3UBTITLESWITCHINGBUTTON )NFORMATIONBUTTON $IRECTCHAPTERORTITLESEARCHINGBUTTON 18 NX404 9OUCANLOCATETHEBEGINNINGOFASCENEUSINGTHE CHAPTERNUMBERSORTITLENUMBERSRECORDEDONTHE $6$6IDEODISC 3HOWINGTHE$6$6IDEOMENUTOUCH[ ]BUTTON 4HE+EY0ADSCREENAPPEARSWITHTHECHAPTER4ITLE NUMBERINPUTMODE 4OUCHING[ ]BUTTONTURNSTHE+EY0ADTOTHE CHAPTERNUMBERINPUTMODE 4OUCHING[ ]BUTTONTURNSTHE+EY0ADTOTHETITLE NUMBERINPUTMODE s4ITLE !LARGESEGMENTTODIVIDETHEDATAAREAOFTHEDISC s#HAPTER !SMALLSEGMENTTODIVIDETHEDATAAREAOFTHEDISC )NPUTTHENUMBEROFTHETITLECHAPTERTHATYOUWANT TOPLAYWITHTHE[0]TO[9]KEY ]BUTTON#HANGE$6$3YSTEM 4OUCHTHE[ 3ETTINGS Repeat Playback 4HISOPERATIONPLAYSBACKCHAPTERSRECORDEDONTHE $6$6IDEOREPEATEDLY ]BUTTON 3HOWINGTHE$6$6IDEOMENUTOUCH[ ]BUTTONONCEFOR2EPEAT#HAPTERAGAIN 4OUCH[ FOR2EPEAT4ITLE 4OUCH[ ]BUTTONAGAINTOTURNOFFTHEREPEAT PLAYBACK Using the Title Menu /N$6$DISCSCONTAININGTWOORMORETITLESYOUCAN SELECTFROMTHETITLEMENUFORPLAYBACK /N$6$DISCSINWITHTWOORMORESUBTITLELANGUAGES HAVEBEENRECORDEDYOUCANSWITCHAMONGTHE SUBTITLELANGUAGESDURINGPLAYBACK 3HOWINGTHE$6$6IDEOMENUTOUCH[ ]BUTTON TOSELECTASUBTITLEDURINGPLAYBACK%ACHTIMEYOU TOUCHTHEBUTTONYOUCANSWITCHAMONGSUBTITLES s )TMAYTAKETIMETOSWITCHAMONGSUBTITLES $EPENDINGONTHEDISCUPTOKINDSOFSUBTITLES MAYBERECORDED&ORDETAILSSEETHEMARKOFTHE DISC )NDICATESTHATKINDSOFSUBTITLESHAVE BEENRECORDED $EPENDINGONTHEDISCSWITCHINGMAYBE COMPLETELYIMPOSSIBLEORIMPOSSIBLEONSOME SCENES 4OTURNOFFSUBTITLESREPEATTOUCHING[ ]BUTTON UNTILSUBTITLESARETURNEDOFF Displaying the playback status 4OUCH[ ]BUTTONON$6$0LAYERMODESCREEN 0LAYBACKSTATUSISDISPLAYEDONSCREEN Play MP4/DivX video files 4HISSYSTEMCANPLAYVIDEOlLES!6)-0ETCSTORED ONDISC 3HOWINGTHE$6$6IDEOMENUTOUCH[ ]BUTTON DURINGPLAYBACK $EPENDINGONTHEDISCTHETITLEMENUMAYNOTBE CALLED 4OUCHTHETITLEMENUSCREEN!NDTOUCHTHE3HOW #URSORKEYS 3ELECTTHEITEMSINTHETITLEMENUSCREENBY DIRECTIONALBUTTONS $EPENDINGONTHEDISCITEMSMAYNOTBESELECTED WITHTHEDIRECTIONALBUTTONS 4OUCH[ ]BUTTONTOlXONTHESELECTEDITEM ]BUTTON 4OUCH[ Switching Audio /NDISCSINWHICHTWOORMOREAUDIOSORAUDIO LANGUAGESHAVEBEENRECORDEDYOUCANSWITCHAMONG THEAUDIOLANGUAGESDURINGPLAYBACK 3HOWINGTHE$6$6IDEOMENUTOUCH[ ]BUTTON DURINGPLAYBACK s %ACHTIMEYOUTOUCHTHEBUTTONYOUCANSWITCH AMONGAUDIOLANGUAGES s )TMAYTAKETIMETOSWITCHAMONGAUDIOS $EPENDINGONTHEDISCUPTOKINDSOFAUDIOSMAY BERECORDED&ORDETAILSSEETHEMARKOFTHEDISC )NDICATESTHATAUDIOSHAVEBEENRECORDED 7HENTHEPOWERISTURNEDONANDWHENTHEDISC ISCHANGEDTOANEWONETHELANGUAGESETASTHE FACTORYDEFAULTISSELECTED)FTHATLANGUAGEHASNOT English Switching Subtitles Note: DivX Certified® to play DivX® video, including premium content. Showing video files Player mode screen !FTERDISCWITHVIDEOlLESISLOADEDTOUCH;$ISC 6IDEO=BUTTONON-!).-%.5TOSHOWVIDEOlLES PLAYERMODESCREEN 4OUCHTHESCREENOFTHEPLAYINGVIDEOlLETODISPLAY 6IDEOlLESPLAYERMENUTOUCHTHESCREENAGAINTO RETURNTHEPLAYBACKSCREEN4HEDISPLAYWILLRETURNTO THEPLAYBACKSCREENIFYOUDONOTTOUCHTHESCREEN FORSECONDS 8 9 1 2 3 4 5 7 6 NX404 19 Owner’s Manual NOTE: )FTHEINPUTTITLECHAPTERNUMBERDOESNOTEXISTOR SEARCHINGWITHATITLECHAPTERNUMBERISNOTALLOWED THESCREENIMAGEWILLNOTCHANGE 4OUCH[ ]BUTTONTOCLOSETHEKEYPAD BEENRECORDEDONDISCTHELANGUAGEISSPECIlEDON THEDISC $EPENDINGONTHEDISCSWITCHINGMAYBE COMPLETELYIMPOSSIBLEORIMPOSSIBLEONSOME SCENES English 0LAYBACKSTARTSFROMTHESCENEOFTHEINPUTTITLE NUMBERORCHAPTERNUMBER Repeat Playback English 4HISOPERATIONPLAYSBACKVIDEOlLESRECORDEDONTHE DISCREPEATEDLY 4HEREPEATSETASTHEFACTORYDEFAULTIS2EPEATALL ] 3HOWINGTHEVIDEOlLESPLAYERMENUTOUCH[ BUTTON 4OUCH[ ]BUTTONONCEFOR2EPEAT4RACKAGAIN FOR2EPEAT&OLDER ]BUTTONAGAINFOR2EPEAT!LL 4OUCH[ Owner’s Manual 10 Switching Audio 11 12 13 /PTIONBUTTON 0REVIOUS4RACK&AST"ACKWARDBUTTON 0LAY0AUSEBUTTON .EXT4RACK&AST&ORWARDBUTTON %LAPSEDPLAYINGTIME3EEKBAR ,IST-ODEBUTTON 3YSTEMTIME "LUETOOTHSTATUSINDICATOR 0LAYBACKINFORMATION 3HORTCUTBUTTON 2EPEATBUTTON !UDIOBUTTON 3UBTITLEBUTTON 3OMEVIDEOlLESWILLHAVETWOORMOREAUDIOCHANNELS YOUCANSWITCHAMONGTHEAUDIOCHANNELSDURING PLAYBACK 4OUCH[ ]BUTTONDURINGPLAYBACK s %ACHTIMEYOUTOUCHTHEBUTTONYOUCANSWITCH AMONGAUDIOLANGUAGES s )TMAYTAKETIMETOSWITCHAMONGAUDIOS $EPENDINGONTHEDISCSWITCHINGMAYBEIMPOSSIBLE Switching Subtitles 3OMEVIDEOlLESWILLHAVETWOORMORESUBTITLESHAVE BEENRECORDEDYOUCANSWITCHAMONGTHESESUBTITLES DURINGPLAYBACK 4OUCHTHE[ ]BUTTONTOSELECTASUBTITLEDURING PLAYBACK s %ACHTIMEYOUTOUCHTHEBUTTONYOUCANSWITCH AMONGSUBTITLES s )TMAYTAKETIMETOSWITCHAMONGSUBTITLES $EPENDINGONTHEDISCSWITCHINGMAYBEIMPOSSIBLE Operating Video Files Player Menu Video Files List 9OUCANSELECTTHEBUTTONITEMSDISPLAYEDINTHE6IDEO lLESPLAYERMENUBYDIRECTLYTOUCHINGIT 3HOWINGTHE6IDEOlLESPLAYERMENUTOUCHTHE [ ]BUTTONTODISPLAYVIDEOlLESLISTSCREEN 6IDEOlLESLISTOPERATIONSISALMOSTSAMEAS$ISC!UDIO PLAYERMODE0LEASEREFERTO#$0LAYER/PERATIONS Play/Pause Playback 4OUCH; 4OUCH; =BUTTONTOPAUSEDURINGPLAYBACK =BUTTONAGAINTORESUMEPLAYBACK Switch to Previous/Next File 4OUCH[ ]OR[ ]BUTTONDURINGPLAYBACKTOPLAY PREVIOUSNEXTlLE Skip using seek bar 4OUCHTHETRIANGLEONSEEKBARANDDRAGITTOANY POSITIONWHEREYOUWANTTOSTARTPLAYBACK Fast Forward /Fast Backward 4OUCH[ ]OR[ ]BUTTONANDHOLDSECONDSTO STARTFASTBACKWARDORFASTFORWARDDURINGPLAYBACK 4HEPLAYBACKSPEEDSTARTSATXTHENWILLINCREASE TOXXANDX2ELEASETHEBUTTONWILLCONTINUE PLAYBACKWITHNORMALSPEED Note: .OAUDIOISREPRODUCEDDURINGFASTFORWARDANDFAST backward operation. 4HEFASTFORWARDANDFASTBACKWARDSPEEDMAYDIFFER depending on the disc. 20 NX404 Play DivX Video-On-Demand Files 9OUMUSTCOMPLETEAONETIMEREGISTRATIONPROCESS INORDERTOPLAYAPURCHASED$IV8MOVIEONYOUR$IV8 DEVICE 2EGISTRATIONISNOTNEEDEDTOPLAYFREE$IV8MOVIES YOUCREATEORDOWNLOAD Getting DivX Registration Code and Registering Your Device 4OUCHTHE;3ETTINGS=BUTTONONTHE-AIN-ENUTO ACCESS;'ENERAL=SETUPMENU 4OUCH;'ENERAL=SETUPBUTTONANDTOUCH;$)30,!9= BUTTONONTHERIGHTSIDEOFh$IV8®2EGISTRATIONv 9OUWILLlNDhDIGIT$IV8REGISTRATIONCODEONTHE SCREEN English Owner’s Manual 4OUCH;/+=TOCLOSETHEPOPUPWINDOW English %NTERTHISCODEIN$IV80LAYERTOCREATEA h2EGISTRATIONVIDEOvDISCONYOUR0#/NCETHIS h2EGISTRATIONVIDEOvDISCHASPLAYEDONTHISDEVICE REGISTRATIONISDONEANDYOUCANENJOYSOME PURCHASED$IV8MOVIESONYOURDEVICE For detail please visit “http://www.divx.com/vod” MPlLES s FORMAT-0%'6ISUAL3IMPLE , s 0ICTURESIZEX s !UDIOFORMAT!!# s !UDIOSAMPLINGFREQUENCY+(Z MPGlLES sFORMAT-0%' s 0ICTURESIZEX s !UDIOFORMAT-0 s !UDIOSAMPLINGFREQUENCY+(Z DIVXlLES s FORMAT$IVX s 0ICTURESIZEX s !UDIOFORMAT-0 s !UDIOSAMPLINGFREQUENCY+(Z Note: After you register your device, this setting menu is changed to “DivX® Deregistration” Deregister your device %VENAFTERYOUHAVElNISHEDREGISTRATIONYOU CANDEREGISTERYOURDEVICEIFYOUWILLNOTWATCH PURCHASEDMOVIESONTHISDEVICEANYMORE 4OUCHTHE;3ETTINGS=BUTTONONTHE-AIN-ENUTO ACCESS;'ENERAL=SETUPMENU 4OUCH;'ENERAL=SETUPBUTTONANDTOUCH;3%4= BUTTONONTHERIGHTSIDEOFh$IV8®$EREGISTRATIONv 9OUWILLBEASKEDIFYOUWANTTODEREGISTERTHIS DEVICETHENTOUCH;9%3=INTHEPOPUPSCREEN .OTEDIGITh$EREGISTRATIONCODEvINTHEPOPUP SCREEN+EEPTHISCODEUNTILYOUDEREGISTERTHIS DEVICEONYOUR0# $EREGISTERTHISDEVICEBYUSINGTHEh$EREGISTRATION CODEvONYOUR0# For detail please visit “http://www/divx.com/vod” Playable Video Disc Formats 4HISSYSTEMCANPLAYVIDEOlLESSTOREDONDISC AVIlLES s FORMAT$IVX s 0ICTURESIZEX s!UDIOFORMAT-0 s!UDIOSAMPLINGFREQUENCY+(Z NX404 21 English 8. CD PLAYER OPERATIONS Listening to a Disc/Ejecting a Disc Owner’s Manual 0LEASEREFERTO$ISC6IDEO0LAYER/PERATIONSWATCHING TOADISCAND%JECTINGADISC 3ONG4ITLE !RTISTALBUM)NFORMATION #LOSEOPTIONMENU"UTTON Showing CD Player Mode Screen Operate the CD Player Menu !FTERDISCISLOADEDTHEPLAYMODEISAUTOMATICALLY ENGAGED )FDISCHAVEBEENLOADEDYOUCANTOUCH[Disc Audio] BUTTONONMAINMENUTODISPLAY#$PLAYERMODE SCREEN 9OUCANSELECTTHEBUTTONITEMSDISPLAYEDINTHE#$ PLAYERMENUBYDIRECTLYTOUCHINGITINLIST 8 6 5 4 9 12 1 4OUCH[ 4OUCH[ ]BUTTONTOPAUSEDURINGPLAYBACK ]BUTTONAGAINTORESUMEPLAYBACK Switch to Previous/Next file or track 7 10 Play/Pause Playback 4OUCH[ ]OR[ ]BUTTONDURINGPLAYBACKTOPLAY PREVIOUSNEXTlLE s 4OUCHING[ ]BUTTONSTARTSPLAYBACKFROMTHE BEGINNINGOFTHENEXTTRACK s 4OUCHING[ ]BUTTONSTARTSPLAYBACKFROMTHE BEGINNINGOFTHECURRENTTRACK7HENTHISBUTTONIS TOUCHEDAGAINWITHINSECONDSPLAYBACKSTARTS FROMTHEBEGINNINGOFPREVIOUSTRACK Fast Forward /Fast Backward 11 2 3 16 13 4OUCH[ ]OR[ ]BUTTONANDHOLDMORETHAN SECONDSTOSTARTFASTBACKWARDORFASTFORWARD DURINGPLAYBACK4HEPLAYBACKSPEEDSTARTSATX THENWILLINCREASETOXXANDX2ELEASETHE BUTTONWILLCONTINUEPLAYBACKWITHNORMALSPEED Note: 4HEFASTFORWARDANDFASTBACKWARDSPEEDMAYDIFFER depending on the disc. 14 15 Repeat Playback 4HEREPEATSETASTHEFACTORYDEFAULTIS2EPEAT!LL 4OUCH[ ]BUTTONSWITCHBETWEEN2EPEAT&OLDER 2EPEAT!LLAND2EPEAT4RACK 18 17 /PTIONBUTTON %LAPSEDPLAYINGTIMEINDICATOR 2OTATIONEFFECT 0AGE4URNINGBUTTON 3YSTEMTIME "LUETOOTHSTATUSINDICATOR 2EPEATBUTTON 0REVIOUS4RACK&AST"ACKWARDBUTTON 3HORTCUTBUTTON 0LAY0AUSEBUTTON .EXT4RACK&AST&ORWARDBUTTON 3HUFmEBUTTON $IRECT3EARCHINGBUTTON 3CAN3TART3TOPBUTTON 2OTATION%FFECT/N/FFBUTTON 22 NX404 Shuffle Playback 4OUCH;; =BUTTONTOSHUFmETHETRACKSDURING PLAYBACK 4OUCHTHISBUTTONAGAINTOTURNOFFTHEFEATURE Selecting a track on the Track List Screen 4HISFUNCTIONALLOWSYOUTOSELECTTRACKSFROMA DISPLAYEDLIST 4OUCHTHETRACKTITLEONTHEDISPLAYLIST4HESELECTED TRACKWILLSTARTPLAYING 7HENTHEDESIREDTRACKISNOTDISPLAYEDTOUCHAND mICKTHETRACKLISTUPORDOWN 4OUCHTHEDESIREDTRACKTITLEBUTTON4HE CORRESPONDINGTRACKISSTARTEDPLAYBACK Note: Displaying MP3/WMA/AAC TAG titles 4AGINFORMATIONCANBEDISPLAYEDFORCOMPRESSED AUDIOlLECONTAINING4AGINFORMATION -0TITLEARTISTALBUM 7-!ARTIST !!#CANNOTDISPLAYTAGINFORMATION Searching with the Track Number Precautions when creating MP3 disc 4HISOPERATIONALLOWSSEARCHINGUSINGTHETRACK NUMBERSRECORDEDONTHE#$S ]BUTTON 4OUCH[ ]BUTTONTOSHOW[ ]BUTTON4HENUMERICALKEYPADWILL 4OUCH[ APPEARONTHESCREENANDTOUCH;; =BUTTON )NPUTTHETRACKNUMBERTHATYOUWANTTOPLAYBACK WITH[0]TO[9]KEYANDTOUCH;/+=BUTTON 0LAYBACKSTARTSFROMTHETRACKOFTHEINPUTTRACK NUMBER s )FTHEINPUTTRACKNUMBERDOESNOTEXISTORSEARCHING WITHTRACKNUMBERISNOTALLOWEDTHESCREENIMAGE WILLNOTCHANGE ]BUTTONWILLCLOSETHENUMERICAL s 4OUCHTHE[ KEYPAD s 4OUCH[ ]BUTTONWILLCLOSETHEOPTIONWINDOWAND DISPLAYPLAYBACKSCREEN s &ILEEXTENSIONS !LWAYSADDAlLEEXTENSIONh-0vORhMPvTO AN-0lLEANDh7-!vORhWMAvTOA7-!AND hMAvTOA!!#lLEBYUSINGSINGLEBYTELETTERS )FYOUADDAlLEEXTENSIONOTHERTHANSPECIlEDOR FORGETTOADDTHESElLEEXTENSIONTHElLECANNOTBE PLAYED)NADDITIONIFYOUUSEUPPERCASEANDLOWER CASELETTERSCAPITALANDSMALLLETTERSMIXEDFORlLE EXTENSIONSNORMALPLAYMAYNOTBEPOSSIBLE &ILESOTHERTHAN-07-!!!#DATACANNOTBE PLAYED 0LAYINGlLESWITHAFORMATNOTSUPPORTEDWILLBE SKIPPEDANDTHESCANRANDOMANDREPEATPLAYBACK MODEMAYBECANCELED s &ILEAND$ISC.OT3UPPORTED &ILESANDDISCSWITHFOLLOWINGEXTENSIONSARENOT SUPPORTED !!# $,& -5 0,3 -002/ lLESlLESWITH$2-OPENSESSIONDISCS s ,OGICALFORMAT&ILESYSTEM 7HENWRITINGAN-07-!!!#lLEONADISC PLEASESELECTh)3/LEVELORLEVELWITHOUT INCLUDINGEXPANSIONFORMATvASTHEWRITINGSOFTWARE FORMAT.ORMALPLAYBACKMAYNOTBEPOSSIBLEIFTHE DISCISRECORDEDONANOTHERFORMAT 4HEFOLDERNAMEANDlLENAMECANBEDISPLAYEDAS THETITLEDURING-07-!!!#PLAY s %NTERING&ILEAND&OLDER.AMES .AMESUSINGTHECODELISTCHARACTERSARETHEONLY lLENAMESANDFOLDERNAMESTHATCANBEENTEREDAND DISPLAYED5SINGANYOTHERCHARACTERWILLCAUSETHElLE ANDFOLDERNAMESTOBEDISPLAYEDINCORRECTLY s &OLDERSTRUCTURE !DISCWITHAFOLDERHAVINGMORETHANHIERARCHICAL LEVELSWILLCONmICTWITHTHE)3/ANDPLAYBACK WILLBEIMPOSSIBLE s .UMBEROFlLESORFOLDERS 4HEMAXIMUMALLOWABLENUMBEROFFOLDERSIS INCLUDINGROOTDIRECTORYTHEMAXIMUMALLOWABLE NUMBEROFlLESISMAXPERFOLDER4HIS REPRESENTSTHEMAXIMUMNUMBEROFTRACKSTHATCAN BEPLAYEDBACK Rotation Effect On/Off 4HISOPERATIONALLOWSTURNONTURNOFFROTATIONEFFECT 4HEFACTORYDEFAULTIS/N 4OUCH[ ]BUTTONTOSHOW[Rotation effect]BUTTON ]BUTTONWILLTURNONTHE2OTATIONEFFECT 4OUCH[ ]BUTTONWILLTURNOFFTHE2OTATIONEFFECT 4OUCH[ Listening to Compressed Audio 4HISSYSTEMCANPLAYAUDIOlLESSTOREDONDISC -07-!!!# Tag Display Function 4HISUNITISAN)$4AGCOMPATIBLEMODEL NX404 23 Owner’s Manual s3OME#$SRECORDEDON#$227MODEMAYNOTBE usable. English 4OUCH[ ]BUTTONTOSHOW[Scan ]BUTTON ]BUTTONDURINGPLAYBACK 4OUCH[Scan s )TWILLPLAYFROMNEXTTRACKANDEACHTRACKWILL DISPLAYFORSECONDS ]BUTTONWILLSWITCHTO[Scan ] s 4HE[Scan BUTTON ]BUTTON 4OUCH[Scan s )TWILLCONTINUEPLAYBACKFROMCURRENTTRACK ]BUTTONWILLSWITCHTO[Scan ] s [Scan BUTTON 4HEFUNCTIONWILLSCANALLTRACKSORDERLYINCURRENT FOLDERONCE!FTER3CANSTOPPEDPLAYBACKWILL CONTINUE 4HISUNITSUPPORTSTHE)$4!'SOFTHE6ERSION AND )NDISPLAYINGTHISUNITGIVESPRIORITYTOTHE6ERSION AND4!'S English Scanning the Tracks English Owner’s Manual 4RACKSAREPLAYEDINTHEORDERTHATTHEYWERE RECORDEDONTOADISC4RACKSMIGHTNOTALWAYSBE PLAYEDINTHEORDERDISPLAYEDONTHE0# s 3OMENOISEMAYOCCURDEPENDINGONTHETYPEOF ENCODERSOFTWAREUSEDWHILERECORDING s )NCASEOFATRACKRECORDEDAT6"2VARIABLEBITRATE THEDISPLAYFORTHEPLAYTIMEOFTHETRACKMAYBE SLIGHTLYDIFFERENTFROMTHEACTUALPLAYTIME!LSOTHE RECOMMENDEDVALUEOF6"2RANGESFROMKBPSTO KBPS s !FTERDISCSELECTIONTHEPLAYMODEISAUTOMATICALLY ENGAGED Playback MP3/WMA/AAC menu 1 2 2EPEAT0LAYBACK 7HILEPLAYING-07-!!!#TOUCH BUTTONCAN SWITCHBETWEEN2EPEAT&OLDER2EPEAT!LLAND2EPEAT 4RACK2EPEAT&OLDERAND2EPEAT!LL #URRENT&OLDER s3HOWINGTITLEOFCURRENTFOLDER s4HENUMBERONTHEFOLDERSYMBOLISTHENUMBEROF lLESANDFOLDERSNUMBERINCURRENTFOLDER s4OUCHTHETITLEOFCURRENTFOLDERPLAYLISTWILLSHOW lLESANDFOLDERSINUPPERFOLDER *Other operations about playing MP3/WMA/AAC are almost same as CD Player mode. 3TOP0LAYBACK ]BUTTONTOSTOPPLAYBACK 4OUCH[ ]BUTTONAGAINTORESUMEPLAYBACK 4OUCH[ 0LAYBACKRESUMESFROMSTARTOFTHEFOLDERWHICH PLAYINGTRACKISIN s/THEROPERATIONSABOUTPLAYING-07-!!!#ARE ALMOSTSAMEAS#$0LAYERMODE 24 NX404 English English 9. USB AUDIO OPERATIONS Notes on the Tag titles 4HELIMITATIONSONTHE4AGTITLESARESAMEASTHOSEIN #$0LAYERMODE Note: s4HISSYSTEMWILLNOTOPERATEORMAYOPERATEIMPROPERLY with some USB memory. #ONNECTYOUR53"MEMORYWITH-0lLES7-!!!# &,!#lLESTOTHE53"CONNECTOR4HESYSTEMWILL AUTOMATICALLYDETECTTHECONNECTEDDEVICEANDTHE [USB Audio]BUTTONONMAINMENUWILLBEENABLED s 7HENAN53"MEMORYISALREADYCONNECTED 4OUCH[USB Audio]BUTTONTOSELECTTHE53"!UDIO MODE 4HESYSTEMCHANGESTOTHE53"!UDIOMODEAND STARTSPLAYBACKFROMTHEPREVIOUSPOSITIONORFROMTHE BEGINNING s&ILESPROTECTEDWITHANY$2-CANNOTBEPLAYED Notes on Using USB Memories General notes s 7HENNOSUPPORTlLESTHElLELISTDISPLAYNOTHING .OTESONTHE!UDIOlLES s4HISSYSTEMCANPLAYTHE-07-!!!#&,!#lLES STOREDINTHE53"MEMORY -0lLES s FORMAT-0%'!UDIOLAYER s BITRATEK^KBPS sSAMPLINGFREQUENCY+(Z slLEEXTENSIONMP 7-!lLES s FORMAT7INDOWSMEDIA!UDIOSTANDARD, PROlLE s BITRATE^+(Z s SAMPLINGFREQUENCY+(Z s lLEEXTENSIONWMA !!#lLES sFORMAT!DVANCED!UDIO#ODING,#!!#(% !!# s SAMPLINGFREQUENCY+(Z s lLEEXTENSIONMA &,!#lLES s FORMAT&REE,OSSLESS!UDIO#ODEC s QUANTIZATIONBITRATEORBITS s SAMPLINGFREQUENCY^+(Z s lLEEXTENSIONmAC .OTESONTHEFOLDERSTRUCTURE s 4HEFOLDERHIERARCHYMUSTBEWITHINHIERARCHICAL LEVELS/THERWISEPLAYBACKMAYBEIMPOSSIBLE s 4HEMAXIMUMALLOWABLENUMBEROFFOLDERSIS INCLUDINGROOTDIRECTORYANDFOLDERSWITHNO-0 lLES7-!!!#&,!#lLE s 4HEMAXIMUMALLOWABLENUMBEROFlLESINAFOLDER IS s 9OUCANSTORETHE-0lLES7-!!!#&,!# TOGETHERINAFOLDER s 4HESYSTEMMAYBECOMESLOWIFTHElLESORFOLDERS EXCEEDTHELIMITATIONABOVE Select USB Audio Mode Note: 4HISSYSTEMHASTWO53"CONNECTORSANDCANCONNECT two USB. You can select the desired USB by touching the list of USB root menu. 4HISSYSTEMINDICATETHE53"ASh-Y53"vh-Y53"v on the list. 12 13 11 10 14 15 16 17 9 1 3 2 5 6 4 7 8 18 19 /PTIONBUTTON 0LAY0AUSEBUTTON 0REVIOUS4RACK&AST"ACKWARDBUTTON .EXT4RACK&AST&ORWARDBUTTON NX404 25 Owner’s Manual 4HISSYSTEMCANPLAYAUDIOlLES-07-!!!# &,!#STOREDINAN53"MEMORYWHICHISRECOGNIZED ASh53"-ASS3TORAGE#LASSDEVICEv9OUCANUSE YOUR53"MEMORYASANAUDIODEVICEBYSIMPLY COPYINGDESIREDAUDIOlLESINTOIT English Owner’s Manual 2EPEATBUTTON 3HUFmEBUTTON -0lLES7-!lLESINLIST &OLDERSINLIST 0AGETURNINGBUTTON 3YSTEMTIME "LUETOOTHSTATUSINDICATOR -UTESTATUSINDICATOR 0LAYBACKSTATUSINFORMATION !LBUM!RT 3HORTCUTBUTTON #URRENT)$INFOAREA %LAPSEDPLAYINGTIMEINDICATOR3EEKBAR $IRECTBUTTON 3CANBUTTON Playing Audio Files in USB Memory Play/Pause Playback 4OUCH[ 4OUCH[ ]BUTTONTOPAUSEDURINGPLAYBACK ]BUTTONAGAINTORESUMEPLAYBACK Switch to Previous/next file 4OUCH[ ]OR[ ]BUTTONDURINGPLAYBACKTOPLAY PREVIOUSNEXTlLE s 4OUCH[ ]BUTTONTOSTARTPLAYBACKFROMTHE BEGINNINGOFTHENEXTTRACK s 4OUCH[ ]BUTTONTOSTARTPLAYBACKFROMTHE BEGINNINGOFTHECURRENTTRACKWHENTHISBUTTONIS TOUCHEDAGAINWITHINABOUTSECONDSPLAYBACK STARTSFROMTHEBEGINNINGOFPREVIOUSTRACK Fast Forward /Fast Backward 4OUCH [ ]OR[ ]BUTTONANDHOLDMORETHAN SECONDSTOSTARTFASTBACKWARDORFASTFORWARD DURINGPLAYBACK4HEPLAYBACKSPEEDSTARTSATX THENWILLINCREASETOXXANDX2ELEASETHE BUTTONWILLCONTINUEPLAYBACKWITHNORMALSPEED Note: 4HEFASTFORWARDANDFASTBACKWARDSPEEDMAYDIFFER depending on the audio files. Repeat Playback 4HEREPEATSETASTHEFACTORYDEFAULTIS2EPEAT!LL 4OUCHTHE[ ]BUTTONONCEFOR2EPEAT4RACKAGAINFOR 2EPEAT&OLDER2EPEAT!LL Shuffle Playback 4OUCH[ ]BUTTONTOSHUFmETHETRACKSINPLAYING FOLDERDURINGPLAYBACK 4OUCHTHISBUTTONAGAINTOTURNOFFTHEFEATURE Album Art work )FCURRENTAUDIOlLECONTAINSALBUMARTIMAGEIN)$ THEPICTUREWILLBEDISPLAYEDINTHISAREA ID3 Information Area 4HISAREADISPLAY)$INFORMATIONOFPLAYINGlLESONG TITLEARTISTINFORMATIONALBUMINFORMATIONNUMBER OFCURRENTlLETOTALNUMBERINCURRENTFOLDERELAPSED PLAYINGTIMETOTALTIMEOFCURRENTlLE Skip Using Seek Bar 4OUCH ONSEEKBARANDDRAGITTOANYPOSITIONWHERE YOUWANTTOSTARTPLAYBACK 26 NX404 Select a Folder on Display List 4OUCHTHEFOLDERTITLEONTHEDISPLAYLISTTHEDISPLAYLIST WILLDISPLAYlLESANDFOLDERSINSELECTEDFOLDER Selecting a Track on the Display List 4HISFUNCTIONALLOWSYOUTOSELECTTRACKSFROMA DISPLAYEDLIST 4OUCHTHETRACKTITLEONTHEDISPLAYLIST4HESELECTED TRACKWILLSTARTPLAYING 7HENTHEDESIREDTRACKISNOTDISPLAYEDTOUCHAND mICKTHETRACKLISTUPORDOWN 4OUCHTHEDESIREDTRACKTITLEBUTTON4HE CORRESPONDINGTRACKISSTARTEDPLAYBACK Scanning the Tracks 4OUCH[ ]BUTTONTOSHOW[Scan ]BUTTON 4OUCH[Scan ]BUTTONDURINGPLAYBACK s )TWILLPLAYFROMNEXTTRACKANDEACHTRACKWILL DISPLAYFORSECONDS s 4HE[Scan ]BUTTONWILLSWITCHTO[Scan ] BUTTON 4OUCH[Scan ]BUTTON s )TWILLCONTINUEPLAYBACKFROMCURRENTTRACK ]BUTTONWILLSWITCHTO[Scan ] s [Scan BUTTON 4HEFUNCTIONWILLSCANALLTRACKSORDERLYINCURRENT FOLDERONCE!FTER3CANSTOPPEDPLAYBACKWILL CONTINUE Searching With the Track Number 4HISOPERATIONALLOWSSEARCHINGTOUSETHETRACK NUMBERSINPLAYINGFOLDER 4OUCH[ ]BUTTONTOSHOW[ ]BUTTON 4OUCH[ ]BUTTON4HENUMERICALKEYPADWILL APPEARONTHESCREEN )NPUTTHETRACKNUMBERTHATYOUWANTTOPLAYBACK WITH[0]TO[9]KEYANDTOUCH;/+=BUTTON 0LAYBACKSTARTSFROMTHETRACKOFTHEINPUTTRACK NUMBER s )FTHEINPUTTRACKNUMBERDOESNOTEXISTORSEARCHING WITHATRACKNUMBERISNOTALLOWEDTHESCREENIMAGE WILLNOTCHANGE s 4OUCH[ ]BUTTONWILLCLOSETHENUMERICALKEYPAD s 4OUCH[ ]BUTTONWILLCLOSETHEOPTIONWINDOWAND DISPLAYPLAYBACKSCREEN s 4HISSYSTEMWILLNOTOPERATEORMAYOPERATEIMPROPERLY with some USB memory. s &ILESPROTECTEDWITHANY$2-CANNOTBEPLAYED Notes on Using USB Memories General notes 7HENNOSUPPORTlLESTHElLELISTDISPLAYNOTHING .OTESONTHEFOLDERSTRUCTURE 4HELIMITATIONSONTHEFOLDERSTRUCTUREARESAMEAS THOSEIN53"!UDIO0LAYERMODE Notes on the Tag titles 4HELIMITATIONSONTHE4AGTITLESARESAMEASTHOSEIN #$0LAYERMODE Select USB Video Mode #ONNECTYOUR53"MEMORYWITHVIDEOlLESTOTHE53" CONNECTOR4HESYSTEMWILLAUTOMATICALLYDETECTTHE CONNECTEDDEVICEANDTHE[USB Video]BUTTONON MAINMENUWILLBEENABLED s 7HENAN53"MEMORYISALREADYCONNECTED 4OUCH[USB Video]BUTTONONMAINMENUTOSELECTTHE 53"6IDEOMODE 4HESYSTEMCHANGESTOTHE53"6IDEOMODEAND STARTSPLAYBACKFROMTHEPREVIOUSPOSITIONORFROMTHE BEGINNING Playable Video Format MPlLES sFORMAT-0%'6ISUAL -0%'!6#( s0ICTURESIZE8-0%'6ISUAL X-0%'!6# s!UDIOFORMAT!!# s!UDIOSAMPLINGFREQUENCY+(Z MVlLES sFORMAT-0%'6ISUAL -0%'!6#( s0ICTURESIZEX s!UDIOFORMAT!!# s!UDIOSAMPLINGFREQUENCY+(Z MPGlLES sFORMAT-0%' s0ICTURESIZEX s!UDIOFORMAT-0 s!UDIOSAMPLINGFREQUENCY+(Z GPlLES sFORMAT-0%'6ISUAL ( s!UDIOFORMAT!!#!-2 s!UDIOSAMPLINGFREQUENCY+(Z 9 8 7 10 Note:4HISSYSTEMHASTWO53"CONNECTORSANDCAN connect two USB. You can select the desired USB by touching the list of USB root menu. 4HISSYSTEMINDICATETHE53"ASh-Y53"vh-Y53"v on the list. Playing Video Files in USB Memory )FTHEVIDEOISPLAYINGTOUCHTHESCREENOFTHEPLAYING VIDEOTODISPLAY/PERATIONBUTTONS 4HEDISPLAYWILLRETURNTOTHEPLAYBACKSCREENIFYOU DONOTTOUCHTHESCREENFORSECONDS 1 2 3 4 5 6 0REVIOUS4RACK&AST"ACKWARDBUTTON 0LAY0AUSEBUTTON .EXT4RACK&AST&ORWARDBUTTON %LAPSEDPLAYINGTIMEINDICATOR3EEKBAR -ENU,IST 2EPEATBUTTON 3YSTEMTIME "LUETOOTHSTATUSINDICATOR 0LAYBACKINFORMATION 3HORTCUTBUTTON Play/Pause Playback 4OUCH[ 4OUCH[ ]BUTTONTO0AUSEPLAYBACK ]BUTTONTORESUMEPLAYBACK NX404 27 Owner’s Manual Note: English 4HISSYSTEMCANPLAY53"VIDEOlLES-0'0ETC STOREDINAN53"MEMORYWHICHISRECOGNIZEDAS h53"-ASS3TORAGE#LASSDEVICEv9OUCANUSEYOUR 53"MEMORYASANVIDEODEVICEBYSIMPLYCOPYING DESIREDVIDEOlLESINTOIT English 10. USB VIDEO OPERATIONS Switch to Previous/next file English Owner’s Manual 4OUCH[ ]OR[ ]BUTTONDURINGPLAYBACKTOPLAY PREVIOUSNEXTlLE s 4OUCH[ ]BUTTONTOSTARTSPLAYBACKFROMTHE BEGINNINGOFTHENEXTTRACK s 4OUCH[ ]BUTTONTOSTARTSPLAYBACKFROMTHE BEGINNINGOFTHECURRENTTRACKWHENTHISBUTTONIS TOUCHEDAGAINWITHINABOUTSECONDSPLAYBACK STARTSFROMTHEBEGINNINGOFPREVIOUSTRACK Repeat Playback 4HEREPEATSETASTHEFACTORYDEFAULTIS2EPEAT!LL ]BUTTONONCEFOR2EPEAT4RACKAGAIN 4OUCHTHE[ FOR2EPEAT&OLDERAGAINFOR2EPEAT!LL Skip Using Seek Bar 4OUCHTHE ONSEEKBARANDDRAGITTOANYPOSITION WHEREYOUWANTTOSTARTPLAYBACK Switching USB Video Menu 4OUCH [ ]BUTTONPLAYBACKWILLBEPAUSEDANDTHE SCREENWILLSWITCHTO53"6IDEO,IST 11 10 9 8 !LBUM!RT 3HORTCUTBUTTON #URRENTlLEINFORMATIONAREA %LAPSEDPLAYINGTIMEINDICATOR3EEKBAR $IRECTBUTTON 3CANBUTTON Play/Pause Playback /N53"6IDEOMENUSCREENPLAYBACKSTATUSIS PAUSE 4OUCH[ ]BUTTONTORESUMEPLAYBACK4HESCREEN WILLGOTOVIDEOSCREENAUTOMATICALLY Switch to Previous/next file 4OUCH [ ]OR[ ]BUTTONDURINGPLAYBACKTOPLAY PREVIOUSNEXTlLE s 4OUCH [ ]BUTTONTOSTARTSPLAYBACKFROMTHE BEGINNINGOFTHENEXTTRACK s 4OUCH [ ]BUTTONTOSTARTSPLAYBACKFROMTHE BEGINNINGOFTHECURRENTTRACKWHENTHISBUTTONIS TOUCHEDAGAINWITHINABOUTSECONDSPLAYBACK STARTSFROMTHEBEGINNINGOFPREVIOUSTRACK Repeat Playback 12 4HEREPEATSETASTHEFACTORYDEFAULTIS2EPEAT!LL 4OUCHTHE[ ]BUTTONONCEFOR2EPEAT4RACKAGAINFOR 2EPEAT&OLDERAGAINFOR2EPEAT!LL 13 Shuffle Playback 4OUCH[ ]BUTTONTOSHUFmETHETRACKSINPLAYING FOLDERDURINGPLAYBACK 4OUCHTHISBUTTONAGAINTOTURNOFFTHEFEATURE 14 15 3 Current File Information Area 1 2 5 6 4 7 4HISAREADISPLAYSINFORMATIONOFCURRENTVIDEOlLElLE NAMENUMBEROFCURRENTlLETOTALNUMBERINCURRENT FOLDER%LAPSEDPLAYINGTIMETOTALTIMEOFCURRENTlLE Skip Using Seek Bar 4OUCH ONSEEKBARANDDRAGITTOANYPOSITION WHEREYOUWANTTOSTARTPLAYBACK 16 17 Select a Folder on Display List 4HISOPERATIONISSAMEASTHISIN53"!UDIOMODE Selecting a Track on the Display List 4HISOPERATIONISSAMEASTHISIN53"!UDIOMODE /PTIONBUTTON 0LAY0AUSEBUTTON 0REVIOUS4RACK&AST"ACKWARDBUTTON .EXT4RACK&AST&ORWARDBUTTON 2EPEATBUTTON 3HUFmEBUTTON 6IDEOlLESINLIST 3YSTEMTIME "LUETOOTHSTATUSINDICATOR -UTESTATUSINDICATOR 0LAYBACKSTATUSINFORMATION 28 NX404 Scanning the Tracks 4HISOPERATIONISSAMEASTHISIN53"!UDIOMODE Searching with the Track Number 4HISOPERATIONISSAMEASTHISIN53"!UDIOMODE 4. During iOS device is connected by Bluetooth, and SELECTTHEI0ODMODETHEVOLUMELEVELISCONTROLLEDBY only iOS device. 5. During iOS device is connected by Bluetooth, Album JACKETIMAGEISNOTDISPLAYED Note: s4HISSYSTEMWILLNOTOPERATEORMAYOPERATEIMPROPERLY with unsupported versions. s&ORDETAILEDINFORMATIONONTHEPLAYABLEI0ODI0HONE models, see our home page: www.clarion.com Notes on using iPod/iPhone s $ONOTCONNECTANI0ODI0HONETOTHISUNITWITHA HEADPHONECONNECTEDTOTHEI0ODI0HONE s !FTERTHEI0ODI0HONEHASBEENCONNECTEDTOTHIS UNITTHEBUTTONSOFI0ODAREDISABLEDFOROPERATION INTHE-USICMODE)NTHE6IDEOMODEDONOT OPERATETHEBUTTONSOFI0OD s 7HENINTHEI0ODMODETHESCREENIMAGEINPUT FROMTHE!58TERMINALISOUTPUTTOTHEREARMONITOR s 7HENNODATAISPRESENTTHETITLEDISPLAYWILLREMAIN BLANK s 3ETTHELANGUAGESETTINGOFI0ODI0HONETO%NGLISH BEFORECONNECTINGYOURI0ODI0HONE3OME CHARACTERSOFTHEOTHERLANGUAGESMAYNOTBE DISPLAYEDCORRECTLYINTHISSYSTEM 4HEPLAYBACKSTARTSAFTERAWHILEFROMWHERETHEI0OD I0HONEHASBEENPAUSED s 7HENI0ODI0HONEISALREADYCONNECTED ]BUTTONONTHE-AIN-ENU 4OUCHTHE[ SCREEN4HESYSTEMCHANGESTOTHEI0ODMODEAND STARTSPLAYBACKFROMTHEPREVIOUSPOSITION iPod Audio ID3 Information 12 11 10 s0RECAUTIONSONBATTERYCONSUMPTION )FTHEI0ODI0HONEISCONNECTEDTOTHISUNITWHENTHE INTERNALBATTERYOFI0ODI0HONEHASRUNDOWNTHIS FUNCTIONMAYNOTOPERATECORRECTLY9OUMUSTCONNECT THEI0ODI0HONEAFTERCHARGINGTHEBATTERYIFITHASRUN DOWN iPod Audio Menu Operations #ONNECTYOURI0ODI0HONETOTHE53"CONNECTOR 4HESYSTEMWILLAUTOMATICALLYDETECTTHECONNECTED DEVICEANDTHEI0OD!UDIOBUTTONWILLBEENABLEDFOR OPERATIONONTHE-AIN-ENUSCREEN Note: 4HISSYSTEMHASTWO53"CONNECTORSPLEASE CONNECTTOTHE53"WITHTHELABELOFhI0ODI0HONEv"Y CONNECTINGANOTHER53"CABLEI0ODI0HONECANTPLAY back the music. 7HENI/3DEVICEISCONNECTEDVIABOTH53"AND "LUETOOTHATTHESAMETIMEANDSELECTI0ODMODEI/3 device is controlled by USB connecton. 7HENTHEI0ODMODEANDOPERATETHEAUDIOPLAYER 9 13 14 15 4 1 2 5 3 6 7 8 /PTIONBUTTON 2EPEATBUTTON 3HUFmEBUTTON 0REVIOUS4RACK&AST"ACKWARDBUTTON 0LAY0AUSEBUTTON .EXT4RACK&AST&ORWARDBUTTON )$)NFORMATION NX404 29 English ORINTERNETRADIOOTHERTHANI0ODTHEREISACASETHAT I0ODDOESNTPLAYBACKCORRECTLY0LEASEDONTOPERATE THEAUDIOPAYERORINTERNETRADIOOTHERTHAN0ANDORA WHENTHE0ANDORAMODE Owner’s Manual I0ODI0HONECANBECONNECTEDBYUSINGTHE CONNECTORCABLESUPPLIEDWITHTHEI0ODI0HONEBUTIN THISCASEYOUCANENJOYITSAUDIOSOUNDONLY4OENJOY VIDEOMOVIESSTOREDINTHEI0ODI0HONEWITHVIDEO DISPLAYINGTHEMONTHISUNITITISREQUIREDTOUSETHE SPECIALCONNECTORCABLE##!SEPARATELYSOLD (OWEVERTHENEWPRODUCTSSUCHASI0HONEI0HONE SANDI0HONECI0ODTOUCH®THGENERATIONAND I0ODNANO®THGENERATIONONLYCANCONNECTPIN CABLENOVIDEOSIGNALOUTPUTSOTHESENEWPRODUCTS CANNOTDISPLAYVIDEOINVIDEOMODE English 11. iPod OPERATIONS iPod Audio Playlist Mode Screen English Owner’s Manual .EXT0AGE; =0REVIOUS0AGE; #ATEGORYLIST 3YSTEMTIME "LUETOOTHSTATUSINDICATOR 0LAYBACKSTATUSINDICATOR !RTWORK 3HORTCUTBUTTON 0ROGRESSBAR =BUTTON 1 Play/Pause Playback 4OUCH[ 4OUCH[ ]BUTTONTOPAUSEDURINGPLAYBACK ]BUTTONAGAINTORESUMEPLAYBACK Switch to Previous/next file s4OUCH [ ]OR[ ]BUTTONDURINGPLAYBACKTOPLAY PREVIOUSNEXTlLE s4OUCH [ ]BUTTONTOSTARTSPLAYBACKFROMTHE 4OUCHOFTHENEXTTRACK s4OUCH [ ]BUTTONTOSTARTSPLAYBACKFROMTHE BEGINNINGOFTHECURRENTTRACKWHENTHISBUTTONIS TOUCHEDAGAINWITHINABOUTSECONDSPLAYBACK STARTSFROMTHEBEGINNINGOFPREVIOUSTRACK 2 3 3WITCHTOINFORMATIONBUTTON 0LAYINGLIST 0AGETURNINGBUTTON 4 5 Fast Forward /Fast Backward 4OUCH [ ]OR[ ]BUTTONANDHOLDMORETHAN SECONDSTOSTARTFASTBACKWARDORFASTFORWARDDURING PLAYBACK Note: 4HEFASTFORWARDANDFASTBACKWARDSPEEDMAYDIFFER depending on the audio files. Repeat Playback DEPENDONI0OD ]BUTTONONCEFOR2EPEAT4RACKAGAIN 4OUCHTHE[ FOR2EPEAT!LLAGAINFOR2EPEAT/FF Shuffle Playback 4OUCH[ ]BUTTONTOSHUFmETHETRACKSINPLAYING FOLDERDURINGPLAYBACK 4OUCHTHISBUTTONAGAINTOTURNOFFTHEFEATURE Album Art work )FCURRENTAUDIOlLECONTAINSALBUMARTIMAGEIN)$ THEPICTUREWILLBEDISPLAYEDINTHISAREA ID3 Information Area 4HISAREADISPLAY)$INFORMATIONOFPLAYINGlLE SONGTITLEARTISTINFORMATIONALBUMINFORMATION 'ENREPLAYLISTANDRELEASETIME Category List 3ELECTDIFFERENTCATEGORYSONGSTOPLAY4HE CATEGORYISSAMEASTHEI0ODI0HONE 30 NX404 6 "ACKTOFATHERFOLDER #LOSETHELISTMODE 3EARCHWITHTHElRSTALPHABETINCURRENTLIST iPod Audio List Mode Screen s)NTHE)$INFORMATIONMODESCREENTOUCHTHE)$ INFOAREATOSWITCHTHEPLAYINGLISTANDINTHEPLAYING LISTMODESCREENTOUCHTHEBUTTON[ ]TOBACKTO THEFATHERFOLDER)FTHELISTISINROOTTOUCHITTO CLOSETHELIST s4OUCHTHEBUTTON;; =TOBACKTOTHEFATHERFOLDER)F THELISTISINROOTTOUCHITTOCLOSETHELIST s4OUCHTHEBUTTON; =TOCLOSETHE,ISTANDBACKTO THE)$INFORMATIONMODE Selecting a list item from a list screen 1 4OUCHTHEDESIREDTRACKNAMEONTHELISTto play it. iPod Video Menu Operations #ONNECTYOURI0ODI0HONETOTHE53"CONNECTOR 4HESYSTEMWILLAUTOMATICALLYDETECTTHECONNECTED DEVICEANDTHEI0OD6IDEOBUTTONWILLBEENABLEDFOR OPERATIONONTHE-AIN-ENUSCREEN 2 3IMPLE#ONTROLBUTTON 6IDEO-ODEBUTTON ]INOPTIONMENU s)FTHE3IMPLE#ONTROLISSETTO[ THESCREENWILLBECOME3IMPLE#ONTROL-ODE)TCAN ALSODISPLAYTHEVIDEOOFI0ODI0HONEREGARDLESSIT ISI0OD!UDIOORI0OD6IDEOMODE"UTONLY h0REVIOUS4RACKv᱃h0LAY0AUSEvANDh.EXT4RACKv CANBEOPERATED ]THEVIDEOWILLPLAYFROMI0OD s4OUCH[ s 7HENANI0ODI0HONEISALREADYCONNECTED ]BUTTONONTHE-AIN-ENU 4OUCHTHE[ SCREEN4HESYSTEMCHANGESTOTHEI0OD6IDEOMODE ANDSTARTSPLAYBACKFROMTHEPREVIOUSPOSITION 4OUCH-%.5BUTTONON/PERATIONAL0ANELTORETURNTO THE-AIN-ENU s 6IEWINGVIDEODATAINTHEI0ODI0HONEONLYFORTHE I0ODI0HONEWITHVIDEOFEATURES 7HENYOUCONNECTANI0ODI0HONEWITHVIDEOFEATURES BYUSINGTHEOPTIONALCONNECTORCABLEFORI0ODI0HONE WITHVIDEOYOUCANENJOYTHEVIDEODATAANDSLIDE SHOWDATASTOREDINTHEI0ODI0HONEANDSHOWTHEM ONTHEDISPLAYOFTHISUNITANDTHEREARMONITORIF CONNECTED iPod Video ID3 Mode Screen 11 10 9 Skipping a Track (Simple Control Mode) 4OUCHTHE[ ]OR[ ]BUTTONDURINGPLAYBACK4RACKS ARESKIPPEDASMANYTIMESASTHEBUTTONISTOUCHED ANDPLAYBACKSTARTS s4OUCHTHE[ ]BUTTONTOSTARTSPLAYBACKFROMTHE BEGINNINGOFTHENEXTTRACK s4OUCHTHE[ ]BUTTONTOSTARTSPLAYBACKFROMTHE BEGINNINGOFTHECURRENTTRACK 7HENTHISBUTTONISTOUCHEDAGAINWITHINABOUT SECONDSPLAYBACKSTARTSFROMTHEBEGINNINGOFTHE PREVIOUSTRACK 12 13 7 14 3 1 2 4 5 6 8 NX404 31 Owner’s Manual 4OUCHTHELISTSCREENANDmICKUPORDOWNTOSCROLL THELIST 4OUCHADESIREDLISTITEMONTHESCREENTODISPLAY THECORRESPONDINGLISTOFTRACKS English Note: )N3IMPLE#ONTROL-ODETHEBESTWAYISTOCONTROL THEI0ODJUSTONI0OD English Simple Control Mode English Owner’s Manual /PTIONBUTTON 2EPEATBUTTON 0REVIOUS4RACKBUTTON 0LAY0AUSEBUTTON .EXT4RACKBUTTON 0LAYING&ILETITLE #ATEGORYLIST =0REVIOUS0AGE; .EXT0AGE; 3YSTEMTIME "LUETOOTH3TATUSINDICATOR 0LAYBACK3TATUSINDICATOR !RTWORK 3HORTCUTBUTTON 0ROGRESSBAR =BUTTON 4HISOPERATIONISSAMEASTHISINI0OD!UDIOMODE iPod Video Simple Control Mode Screen Note: 4HISICONSHOWSONLYWHEN:ONEON4HISICONISIN some screen pictures and none in other some pictures. )TISBETTERTOBESAMESETTINGINAMANUAL!LSO.AVI ICONSHOWSOWNEDBYSETTING4HEREISNO.AVIICON SCREENINTHISMANUAL Play/Pause Playback 4OUCH[ 4OUCH[ ]BUTTONTOPAUSEDURINGPLAYBACK ]BUTTONAGAINTORESUMEPLAYBACK Switch to Previous/Next file s4OUCH[ ]OR[ ]BUTTONDURINGPLAYBACKTOPLAY PREVIOUSNEXTlLE s4OUCH[ ]BUTTONTOSTARTSPLAYBACKFROMTHE BEGINNINGOFTHENEXTTRACK s4OUCH[ ]BUTTONTOSTARTSPLAYBACKFROMTHE BEGINNINGOFTHECURRENTTRACK 4HISOPERATIONISSAMEASTHISINI0OD!UDIOMODE Repeat Playback 4HEREPEATSETASTHEFACTORYDEFAULTISDEPENDON I0ODI0HONE ]BUTTONONCEFOR2EPEAT/NEAGAIN 4OUCHTHE[ FOR2EPEAT!LLAGAINFOR2EPEAT/FF iPod Video Play Mode Screen 9 8 7 Album Art work )FCURRENTVIDEOlLECONTAINSALBUMARTIMAGEIN)$ THEPICTUREWILLBEDISPLAYEDINTHISAREA ID3 Information Area 4HEAREAISDISPLAYTHETITLEOFTHEPLAYINGlLE Category List 3ELECTDIFFERENTCATEGORYMOVIESTOPLAY4HE CATEGORYISSAMEASTHEI0ODI0HONE iPod Video List Mode Screen 1 2 3 4 5 0REVIOUS4RACK&AST"ACKWARDBUTTON 0LAY0AUSEBUTTON .EXT4RACK&AST&ORWARDBUTTON 0ROGRESSBAR 32 NX404 6 4OUCH[ 4OUCH[ ]BUTTONTOPAUSEDURINGPLAYBACK ]BUTTONAGAINTORESUMEPLAYBACK Switch to Previous/Next Track English s!UDIOMAYBEPLAYEDBACKSLIGHTLYOUTOF synchronization with video images. iPod Audio Bluetooth Mode 7HENYOURI0ODI0HONEHAVECONNECTEDVIABLUETOOTH TOTHISUNITYOUCANALSOENTERI0OD!UDIOMODE4HE OPERATIONISSAMEASTHENORMALI0OD!UDIOMODE s4OUCH[ ]OR[ ]BUTTONDURINGPLAYBACKTOPLAY PREVIOUSNEXTTRACK s4OUCH[ ]BUTTONTOSTARTSPLAYBACKFROMTHE BEGINNINGOFTHENEXTTRACK s4OUCH[ ]BUTTONTOSTARTSPLAYBACKFROMTHE BEGINNINGOFTHECURRENTTRACKWHENTHISBUTTONIS TOUCHEDAGAINWITHINABOUTSECONDSPLAYBACK STARTSFROMTHEBEGINNINGOFPREVIOUSTRACK BEGINNINGOFTHECURRENTTRACK Fast Forward /Fast Backward 4OUCH[ ]OR[ ]BUTTONANDHOLDMORETHAN SECONDSTOSTARTFASTBACKWARDORFASTFORWARDDURING PLAYBACK2ELEASETHEBUTTONWILLCONTINUEPLAYBACK WITHNORMALSPEED Note: 4HEFASTFORWARDANDFASTBACKWARDSPEEDMAYDIFFER depending on the video files. Repeat Playback 4HEREPEATSETASTHEFACTORYDEFAULTIS2EPEAT/FF ]BUTTONONCEFOR2EPEAT/NEAGAIN 4OUCHTHE[ FOR2EPEAT!LLAGAINFOR2EPEAT/FF Note: 4HEOPERATIONINI0ODVIDEOMODEISASSAMEASI0OD !UDIOMODE0LEASEREFERTOTHEI0OD!UDIO-ODE operation. Note: 6IDEOPLAYBACKISNOTAVAILABLEONALLI0ODI0HONE DEVICES0LEASECONTACTYOUR#LARIONDEALERFORDETAILS An optional connection cable or accessory may be required for this feature. Note: sh!5$)//.,9vISDISPLAYEDWHENTHEAUTOMOBILEIS moving. s)MAGEDATAMAYNOTBEPLAYEDBACKACCORDINGTOTHE STATUSOFTHEI0ODI0HONE s4HEVOLUMESETTINGOFVIDEODATAISRELATIVELYLOWERTHAN audio data. Be sure to lower the volume setting before switching to the other mode. s$ONOTSELECTTHECATEGORIESWITHNOTRACKREGISTERED FROMTHEI0ODMENUSCREEN4HEI0ODI0HONEMAYBE FROZEN)FTHEI0ODI0HONEISFROZENRESETTHEI0OD I0HONEBYFOLLOWINGTHEPROCEDUREDESCRIBEDINTHE NX404 33 Owner’s Manual Play/Pause Playback INSTRUCTIONMANUALOFTHEI0ODI0HONE English -ENU,ISTBUTTON 2EPEATBUTTON 3YSTEMTIME "LUETOOTHSTATUSINDICATOR 0LAYBACKINFORMATION English 12. Pandora OPERATIONS ® If you have any issues with the Pandora application on your mobile phone, please direct them to [email protected]. Owner’s Manual Selecting the Pandora Mode 4URNON0ANDORAFUNCTIONOFYOURI0OD #ONNECTYOURI0ODI0HONE!NDROIDTOTHEUNIT 7HENI0ODI0HONE!NDROIDISALREADYCONNECTED TOUCHTHE ;0ANDORA=ICONONTHE-AIN-ENUSCREEN s0ANDORAMODENOWPLAYINGSCREEN0ANDORAMODE INFORMATIONSCREEN 8 9 10 1 11 12 2 13 3 4 5 6 7 s)FSKIPLIMITHASBEENREACHED3KIPTRACKSIN (THISFUNCTIONWILLNOTAVAILABLE s4RACKRATING 4OUCH; =OR; =BUTTONTO4HUMBSDOWNOR4HUMBS UPCURRENTTRACKANDTHEBUTTONWILLLIGHT .OTE s4OUCH; =BUTTONWILLSKIPTONEXTTRACKSKIPLIMITHAS NOTBEENREACHED s3OMETRACKISNOTABLETOBERATEDIEAUDIOADS ANDSHAREDSTATIONCONTENT4HETHUMBSBUTTONSWILL DISABLE s"OOKMARKING 4OUCH; =BUTTONTOSTORECURRENTTITLEORARTISTTO TRACKFAVORITESLIST Note: s3OMETRACKARENOTABLETOBEBOOKMARKEDIEAUDIO ADS)NTHISCASETHEBOOKMARKBUTTONSWILLDISABLE s0ANDORA-ODE3TATION,IST 1 !RT7ORK 0ROGRESSBAR 3ETTINGSBUTTON 4HUMBSDOWN 4OUCHTHISBUTTON4HUMBSDOWNCURRENTTRACKAND PLAYNEXTTRACK 0LAY0AUSEBUTTON 5SETOCONTROLPLAYBACKANDPAUSE 4OUCHTHEBUTTONDURINGPLAYBACK0LAYBACK PAUSES 4ORESUMEPLAYBACKTOUCHTHEBUTTONAGAIN .EXTTRACKBUTTON 4HUMBSUP 3YSTEMTIME ,ISTBUTTON 4OUCHTHISBUTTONTOSHOW,IST3CREEN #URRENTSTATIONNAME #URRENTTITLE 4OUCHICONTOSTORECURRENTTITLETOTRACKFAVORITESLIST #URRENTARTIST 4OUCHICONTOSTORECURRENTARTISTTOARTISTFAVORITESLIST #URRENTALBUMNAME ING ING NG s3KIPPINGATRACK0ANDORAMODE 4OUCH;=BUTTONDURINGPLAYBACKTRACKSARE SKIPPEDANDSTARTSPLAYBACKFROMTHEBEGINNINGOFTHE NEXTTRACK Note: s3OMETRACKARENOTABLETOBESKIPPED 34 NX404 2 3 ; =BUTTON 4OUCHTHISBUTTONTODISPLAY)NFORMATION3CREEN ; =BUTTON 4OUCHTHISBUTTONTOSORTTHELISTBYlRSTLETTERTOUCH AGAINTOSORTTHELISTBYDATE 3TATIONLISTTOUCHTOSELECTSTATIONPLAY 7HENTHEDESIREDSTATIONISNOTDISPLAYEDTOUCHAND mICKTHESTATIONLISTUPORDOWN s0ANDORA-ODE3ETTINGSCREEN 1 2 3 English English !DDANEW3TATION 3ELECTADEVICE s4HISh3ELECT$EVICEvKEYISUSEWHENCONNECT I0HONEBYTHE53"ANDCONNECTTHE!NDROIDBY "LUETOOTH4HEDEFAULTSETTINGTHE53"CONNECTION HASPRIORITY #LOSETHESETTINGSCREEN Owner’s Manual Pandora Bluetooth Mode When your mobile phone have connected to the unit via bluetooth.You can also enter the Pandora mode. The OPERATIONISSAMEASTHENORMALPandora MODE 1 "4MODE 7HENCONNECTEDVIABLUETOOTH4HISICONWILLCHANGE FROM53"TO"4 Note: 0ANDORAINTERNETRADIOMAYNOTBEAVAILABLEINALL AREASDUETOGOVERNMENTRESTRICTIONS 7HENTHE0ANDORAMODESTARTTHISSYSTEMCHOOSES THEPREVIOUSLYCONNECTEDDEVICE!NDROIDORI/3 7HENITISCONNECTED!NDROID"4I0HONE"4OR53" TOGETHERANDh$ONOTSHOWAGAINvISNOTCHECKED DISPLAYTHEPOPUPOFCHOOSEDEVICE 3. When connect the mobile phone by Bluetooth or USB when the Pandora mode, there is a case the change device button works correctly. We recommend that after finished the Pandora mode, then connect other mobile phone. 4. When the Pandora mode and operate the audio player or internet radio other than Pandora, there is a case that Pandora doesn’t playback correctly. Please don’t operate the audio payer or internet radio other than Pandora when the Pandora mode. 5. During Pandora playback in the Pandora mode with the Bluetooth connection, the volume level is controlled only by the mobile phone side. (Both iOS devise and Android) NX404 35 English 13. Bluetooth AUDIO PLAYER OPERATIONS ® Owner’s Manual 3OME"LUETOOTHCELLULARPHONESHAVEAUDIOFEATURES ANDSOMEPORTABLEAUDIOPLAYERSSUPPORTTHE "LUETOOTHFEATURE4HESEDEVICESWILLBECALLEDAS h"LUETOOTHAUDIOPLAYERSvINTHISMANUAL4HISSYSTEM CANPLAYAUDIODATASTOREDINA"LUETOOTHAUDIOPLAYER Note: s4HISSYSTEMWILLNOTOPERATEORMAYOPERATEIMPROPERLY with some Bluetooth audio players. s&ORDETAILEDINFORMATIONONTHEPLAYABLE"LUETOOTH audio players, see our home page: WWWCLARIONCOM Selecting the Bluetooth Audio Mode 4OUCHTHE;"LUETOOTH!UDIO=BUTTONTOSELECTTHE "LUETOOTH!UDIOMODE 4HESYSTEMCHANGESTOTHE"LUETOOTHMODE)FTHE CONNECTIONWITHA"LUETOOTHAUDIOPLAYERHASBEEN ALREADYESTABLISHEDYOUMAYSELECTTHE-USIC FUNCTION 0RESS-%.5BUTTONON/PERATIONAL0ANELTORETURN TOTHE-AIN-ENU s 7HENTHECONNECTIONWITHBLUEICONA"LUETOOTH AUDIOPLAYERHASBEENESTABLISHEDTHE[ ]ICONIS DISPLAYEDATTHETOPOFTHESCREEN )FYOUWANTTOCHANGETHE0IN#ODESETTINGOFTHISUNIT PERFORMTHEFOLLOWINGSTEPS s 4HEFACTORYDEFAULTSETTINGIShv 4OUCHTHETEXTBOXOFTHE0IN#ODEITEMTODISPLAY THE4EN+EY0ADSCREEN %NTERYOURDESIREDDIGIT0).NUMBERANDTHEN ]BUTTON TOUCHTHE[ Registering your Bluetooth Audio Player (Pairing) 9OUCANREGISTERUPTO"LUETOOTHAUDIOPLAYERS 9OURMOBILEPHONE"LUETOOTHVERSIONISUNDER 0LEASEINPUT0).CODEhv 4URNONTHEPOWEROFTHE"LUETOOTHAUDIOPLAYERYOU WISHTOREGISTER 4OUCHTHE$EVICEBUTTON[ ]TODISPLAYTHE$EVICE 3ELECTSCREEN 4OUCHTHE[ SCREEN Bluetooth Audio Player Settings 9OUCANCONlRMVARIOUSINFORMATIONCONCERNINGABOUT THE"LUETOOTH)NTERFACEFEATURES 4OUCHTHE[ ]BUTTONTODISPLAYTHEINFORMATIONON THESCREEN G 7HENYOUlNISHCONlRMINGTHE"LUETOOTH INFORMATIONTOUCHTHE[ ]BUTTONTORETURNTOTHE PREVIOUSSCREEN 36 NX404 ]BUTTONTODISPLAYTHE)NQUIRING$EVICE English Note: s/CCASIONALLYDEPENDINGONTHEENVIRONMENTPLAYBACK sounds may be fragmented, or switch noises may be generated. Playing Music !FTERTHECONNECTIONWITHA"LUETOOTHAUDIOPLAYERIS ESTABLISHEDTHEPLAYMODEISAUTOMATICALLYENGAGED s 7HENPLAYBACKISNOTSTARTEDFORSOMEDEVICES TOUCHTHE[ ]BUTTONMANUALLY Pausing Playback 4OUCHTHE[ ]BUTTONDURINGPLAYBACK Playback Pauses. 7HENTHEPAIRINGOPERATIONCOMPLETESTHEREGISTERED "LUETOOTHAUDIOPLAYERISSETASTHECURRENTDEVICE AFTERSELECTINGTHEFAVORITEICONTHEDISPLAYRETURNTO THEDEVICELISTSCREEN4OUCH[ ]BUTTONTHEDISPLAY WILLRETURNTOTHE"LUETOOTHAUDIOMODESCREEN 4ORESUMEPLAYBACKTOUCHTHE[ 0LAYBACKRESUMES ]BUTTON Skipping a Track (searching) 4OUCHTHE[ ]OR[ ]BUTTONDURINGPLAYBACK Stopping Playback 4OUCHTHE[ ]BUTTONDURINGPLAYBACK ]BUTTONTO 4RACKSARESTOPPEDTOUCHTHE[ PLAYBACKTHElRST4RACK Show Track List s4ODELETETHE"LUETOOTHAUDIOPLAYERREGISTRATION =BUTTONTODELETETHEDEVICE 4OUCHTHE; !CONlRMATIONSCREENISDISPLAYED =BUTTONTOCONlRMDELETE 4OUCHTHE; 4OUCHTHE[ ]BUTTONTOSHOWTHECURRENTTRACK LIST ]BUTTONTOSHOWALLOFTHELISTS!ND 4OUCHTHE[ YOUCANPLAYBACKANYTRACKSBYTOUCHTHEITEMSIN THELIST Selecting the Bluetooth Audio Player 4OCHANGETHECURRENT"LUETOOTHAUDIOPLAYERTOTHE OTHERDEVICEWHICHISALREADYREGISTEREDPERFORMTHE FOLLOWINGOPERATION 4OUCHTHEDEVICEBUTTONTO[ ]DISPLAYTHE$EVICE 3ELECTSCREEN 4OUCHTHECURRENTLYCONNECTEDDEVICEBUTTONTHEN TOUCHTHE[ ]BUTTONTODISCONNECTTHEACTIVE DEVICE 4OUCHTHEDESIRED$EVICEBUTTONYOUWISHTOUSE 4OUCH[ ]BUTTONTOSELECTITASYOURACTIVE DEVICE4HECORRESPONDINGCELLULARPHONEISSETAS CURRENTTELEPHONE 4OUCHTHE[ ]BUTTONTORETURNTOTHEPREVIOUS SCREEN NX404 37 Owner’s Manual !NDSELECTATYPEOFTHISDEVICE Controlling the Bluetooth Audio Player English 4OUCHYOURDESIREDDEVICEBUTTONANDTOUCH[ ]BUTTONTOREGISTERFORTHE"LUETOOTHAUDIO PLAYER4HENSELECTANIMAGEOFTHISDEVICE English 14. Bluetooth TELEPHONE OPERATIONS ® Owner’s Manual 7HENTHECONNECTIONWITHYOUR"LUETOOTHCELLULAR PHONEISESTABLISHEDTHEFOLLOWINGFUNCTIONSARE AVAILABLEONTHISUNIT s ,ISTENINGTOYOURTELEPHONECALLSONTHECAR SPEAKERS s !NSWERINGTOANINCOMINGCALL s -AKINGACALLUSINGTHE4EN+EYPADSCREEN s -AKINGACALLUSINGTHE0HONE"OOKDATAINTHE SELECTEDCELLULARPHONE s -AKINGACALLUSINGTHE(ISTORYDATAOFTHEDIALED RECEIVEDCALLS 4OUCHTHE[ ]BUTTONTODISPLAYTHEINFORMATIONON THESCREEN 0ERFORMSETTINGFORTHEDESIREDITEM3EETHE FOLLOWINGSECTIONSFORDETAIL 7HENYOUlNISHCONlRMINGTHE"LUETOOTH INFORMATIONTOUCHTHE[ ]BUTTONTORETURNTOTHE PREVIOUSSCREEN Note: s3OMECELLULARPHONESMAYNOTBEABLETOTRANSFERTHE 0HONE"OOKDATATOHEADUNIT s4HE0HONE"OOKDATATRANSMISSIONMAYTAKEALONG TIME4HEOPERATIONSOFSENDINGCALLSAREDISABLED during the data transmission. Select the BT Phone Mode 4OUCHTHE;"LUETOOTH4ELEPHONE=BUTTONTOSELECTTHE "LUETOOTH4ELEPHONEMODE 4HE4ELEPHONESCREENISDISPLAYED 0RESS-%.5BUTTONON/PERATIONAL0ANELTORETURN TOTHE-AIN-ENU s 7HENNO"LUETOOTH4ELEPHONECONNECTEDTHEICON [ ]ISDISPLAYEDATTHETOPOFTHESCREEN 3ETTING!UTOMATIC#ONNECTION 4HESYSTEMAUTOMATICALLYRECONNECTSTHECELLULAR PHONEAFTERTHECONNECTIONISLOSTORTHESYSTEMIS RESTARTED s 4HEFACTORYDEFAULTSETTINGISh/.v4OUCHTHE [ ]OR[ ]BUTTONOFTHE!UTOMATIC#ONNECTION ITEMTOSETTHEFUNCTION/.OR/&& 3ETTING!UTOMATIC!NSWER )FACALLCOMESINANSWERAUTOMATICALLYAFTER SECONDS s 4HEFACTORYDEFAULTSETTINGISh/&&v4OUCHTHE ]OR[ ]BUTTONOFTHE!UTOMATIC!NSWERITEM [ TOSETTHEFUNCTION/.OR/&& 3ETTING-ICROPHONE'AIN 9OUCANADJUSTTHEINPUTLEVELOFTHEMICROPHONEIN LEVELS s 4OUCHTHELEVELINDICATORBUTTONOFTHE-ICROPHONE 'AINITEMTOADJUSTTHEINPUTLEVEL s 7HENTHECONNECTIONWITHA"LUETOOTH4ELEPHONE HASBEENESTABLISHEDTHEICON[ ]ANDSIGNALLEVEL INDICATORAREDISPLAYEDATTHETOPOFTHESCREEN Bluetooth Telephone Settings 9OUCANCONlRMVARIOUSINFORMATIONCONCERNINGABOUT THE"LUETOOTH)NTERFACEFEATURES 38 NX404 Note: s4HEINPUTLEVELOFTHEMICROPHONECANBEAFFECTEDBY ITSSURROUNDINGS!DJUSTTHELEVELIFTHEPERSONONTHE other end of the telephone has a reception problem. English 7HENTHEPAIRINGOPERATIONCOMPLETESTHE REGISTEREDCELLULARPHONEISSETASTHECURRENT TELEPHONEANDTHEDISPLAYRETURNSTOTHE 4ELEPHONESCREEN s 4ODELETETHECELLULARPHONEREGISTRATION 4OUCHTHE; =BUTTONTODELETETHEDEVICE !CONlRMATIONSCREENISDISPLAYED 4OUCHTHE; =BUTTONTOCONlRMDELETE Select the Cellular Phone 4OUCHTHE[ $EVICESCREEN ]BUTTONTODISPLAYTHE)NQUIRING 4OCHANGETHECURRENTCELLULARPHONETOTHEOTHER DEVICEWHICHISALREADYREGISTEREDPERFORMTHE FOLLOWINGOPERATION 4OUCHTHE[ ]BUTTONTODISPLAYTHE$EVICE3ELECT SCREEN 4OUCHTHECURRENTLYCONNECTEDDEVICETHENTOUCH [ ]BUTTONTODISCONNECTTHEACTIVEDEVICE 4OUCHTHEDESIRED$EVICEBUTTONYOUWISHTOUSE ]BUTTONTOSELECTITASYOURACTIVE 4OUCH[ DEVICE4HECORRESPONDINGCELLULARPHONEISSETAS THECURRENTTELEPHONE s )FTHEPOWEROFTHECELLULARPHONEISNOTTURNEDON TURNITON s 4HECELLULARPHONEMAYPROMPTTOACKNOWLEDGETHE "LUETOOTHCONNECTIONORTOENTERTHE0ASS+EYCODE OFTHISUNIT0ERFORMTHESEOPERATIONSACCORDINGTO THEMESSAGEDISPLAYED 4OUCHTHE[ ]BUTTONTORETURNTOTHEPREVIOUS SCREEN Obtaining the Phone Book Data 3ENDINGTHE0HONE"OOKDATAFROMTHECELLULARPHONE ENABLESYOUTOMAKEACALLUSINGTHE0HONE"OOK FUNCTIONFROMTHISUNIT 4OUCHYOURDESIRED#ELLULARBUTTONTOSELECTTHE BUTTONFORTHECELLULARPHONETOBEREGISTEREDAND TOUCH[ ]BUTTONTOREGISTERFORTHE"LUETOOTH CELLULARPHONE s 9OUCANNOTSELECTTHE#ELLULARBUTTONOFWHICH ANOTHERCELLULARPHONEISALREADYREGISTERED 3ELECTABLANK#ELLULARBUTTON )FENTERINGTHE0ASS+EYCODEISPROMPTEDONYOUR CELLULARPHONEENTERTHE0ASS+EYCODESETINTHIS UNIT s 9OUCANCHANGETHE0ASSKEYSETTINGOFTHIS UNITFROMTHE"LUETOOTH)NFOSCREENUNDERTHE 4ELEPHONE3ETTINGSSCREEN Telephone Operations Making a call using the Ten-Key pad 4OUCHTHE[ ]BUTTONTODISPLAYTHE4EN+EYPAD SCREEN %NTERTHETELEPHONENUMBERBYUSINGTHE4EN+EY PADDISPLAYEDONTHESCREEN NX404 39 Owner’s Manual 9OUCANREGISTERUPTOCELLULARPHONES4HE REGISTERINGMETHODISASSAMEASh2EGISTERINGYOUR "LUETOOTHAUDIOPLAYERv 9OURMOBILEPHONE"LUETOOTHVERSIONISUNDER 0LEASEINPUT0).CODEhv 4URNONTHEPOWEROFTHECELLULARPHONEYOUWISHTO REGISTER ]TODISPLAYTHE 4OUCHTHE$EVICEBUTTON[ $EVICE3ELECTSCREEN English Registering Your Cellular Phone (Pairing) Making a Call Using the Phone Book English 9OUCANUSETHE0HONE"OOKDATAOBTAINEDFROMTHE CELLULARPHONETOMAKEACALLFROMTHISUNIT Owner’s Manual s/NLYTHE0HONE"OOKITEMSWITHATLEASTONETELEPHONE NUMBERREGISTEREDINTHECAPTURED0HONE"OOKDATA AREDISPLAYEDONTHE0HONE"OOKSCREEN Note: s"EFOREUSINGTHISFUNCTIONTHE0HONE"OOKDATAMUST be sent from the cellular phone. 4OUCHTHE[ ]3ENDBUTTONTOCALLTHEENTERED NUMBER s 4HEFOLLOWING4ELEPHONE)NTERRUPTSCREENIS DISPLAYEDDURINGPHONECALL 4OUCHTHE[ ]BUTTONTODISPLAYTHE0HONE"OOK SCREEN 4OUCHTHEDESIREDNAMEBUTTONYOUWISHTODIAL s &LICKTHELISTUPANDDOWNTOSCROLLTHELIST ]BUTTONTOCALLTHESPECIlED 4OUCHTHE[ NUMBER4HE4ELEPHONE)NTERRUPTSCREENIS DISPLAYEDANDCALLINGSTARTS s 7HENTHECALLISlNISHEDTOUCHTHE[ ]BUTTON TOHANGUP Making a Call Using the History s 4OUCHTHE[ ]BUTTONTOTALKBYUSINGTHECELLULAR PHONEANDCANCELINGTHEHANDSFREEFUNCTION 0RIVATE-ODE4ORETURNTOTHEHANDSFREEMODE TOUCHTHE[ ]BUTTONAGAIN s 4OUCHTHE[ ]BUTTONTOMUTETHEMICROPHONE .OWYOUCANHEARTHEOTHERSIDEBUTTHEOTHERSIDE CANNOTHEARYOURSIDE s 4OUCHTHE[ ]BUTTONTOHOLDTHECURRENTPHONECALL NOWYOUCANANSWERTOTHEOTHERINCOMINGCALL 4OUCHAGAINTOTALKWITHPREVIOUSCALL )FDURINGACALLWITHATHIRDPARTYCALLYOUCANKEEP THECURRENTCALLTOANSWERATHIRDPARTYORHANGUP THECURRENTCALLTOANSWERATHIRDPARTY9OUCANALSO IGNORETHETHIRDPARTYCALLS 7HENTHECALLISlNISHEDTOUCH[ HANGUP ]BUTTONTO Note: s$EPENDINGONSOMESPECIALCELLULARPHONETHE 4ELEPHONE)NTERRUPTSCREENMAYBECLOSEDANDTHE connection with this system may be disconnected WHENENTERINGTHE0RIVATEMODE 40 NX404 4HESYSTEMWILLMEMORIZETHE$IALED2ECEIVEDCALLS RECORDDATAINTHEMEMORY9OUCANCONlRMITANDUSE ITTOMAKEACALLFROMTHISUNIT 4OUCHTHE[ ]BUTTON4HE(ISTORY,ISTSCREENIS DISPLAYED s 4HEITEMSARESORTEDBY$IALED-ISSEDAND 2ECEIVEDCALLS s &LICKTHELISTUPANDDOWNTOSCROLLTHELIST 4OUCHTHEDESIRED(ISTORYITEMKEYYOUWISHTODIAL ]BUTTONTOCALLTHESPECIlED 4OUCHTHE[ NUMBER4HE4ELEPHONE)NTERRUPTSCREENIS DISPLAYEDANDCALLINGSTARTS s 7HENTHECALLISlNISHEDTOUCHTHE[ ]BUTTON TOHANGUP Answering to an incoming call 7HENACALLCOMESINTHEFOLLOWING4ELEPHONE )NTERRUPTSCREENAPPEARS 9OUCANANSWERTOTHEINCOMINGCALLONTHISSYSTEMBY THEFOLLOWINGOPERATION 4OUCHTHE[ ]BUTTONTOANSWERTHECALL ]BUTTON 7HENTHECALLISlNISHEDTOUCHTHE[ TOHANGUP English 0RESSTHEPRESETSTATIONTOON0RESETLIST Listening to the Tuner 10 9 8 7 Manual memory 4OUCHTHEDESIREDBANDBUTTONTOSELECTTHEBAND YOUWISHTOSTORE 4UNETOASTATIONYOUWANTTOSTOREUSINGTHESEEK TUNINGSTEPTUNINGORPRESETTUNING 4OUCHANDHOLDTHEDESIRED0RESETBUTTONYOUWANT TOSTOREFORABOUTSECONDS Auto Store 5 12 6 4 13 1 2 3 0RESET3CANBUTTON 3EEKDOWNBUTTON 3EEKUPBUTTON 3TEPDOWNBUTTON 3TEPUPBUTTON &REQUENCIESDISPLAY 3YSTEMTIME "LUETOOTHSTATUSINDICATOR 0RESETCHANNELLIST $8,OCALINDICATOR "ANDBUTTON 3HORTCUTBUTTON /PTIONBUTTON 4HE!UTO3TOREISAFUNCTIONFORSTORINGUPTOSTATIONS THATAREAUTOMATICALLYSEARCHEDINSEQUENTIALLY)FTHE NUMBEROFRECEIVABLESTATIONSCANNOTREACHTOTHE PREVIOUSSTOREDSTATIONREMAINS 4OUCHTHE[FM1/2/3/AM]BUTTONTOSELECTTHE DESIREDBAND&-OR!- 4OUCHTHE[ ]BUTTONANDTHENTOUCHTHE[ ] BUTTONTOSTARTTHE!UTO3TORE !BEEPSOUNDSANDTHESTATIONSWITHGOODRECEPTION ARESTOREDAUTOMATICALLYTOTHEPRESETLIST Notes: !FTERAUTOSTORETHEPREVIOUSSTOREDSTATIONSWILLBE overwritten. 4HEUNITHASBANDSBUT&-AND!-CANSTOREBY Auto Store function. Seek Tuning Preset Scan 4OUCHTHE;&-!-=BUTTONTOSELECTTHERADIO BAND&-OR!- 4OUCHTHE[ ]OR[ ]BUTTON s7HENTOUCHTHE[ ]BUTTONTHESTATIONISSEARCHED INTHEDIRECTIONOFHIGHERFREQUENCY s7HENTOUCHTHE[ ]BUTTONTHESTATIONISSEARCHED INTHEDIRECTIONOFLOWERFREQUENCY 4HE0RESET3CANRECEIVESTHESTATIONSSTOREDINTHE PRESETMEMORYINORDER4HISFUNCTIONISUSEFULWHEN SEARCHINGFORTHEDESIREDSTATIONINMEMORY 4OUCHTHE;&-!-=BUTTONTOSELECTTHEDESIRED BAND&-OR!- 4OUCHTHE[ ]BUTTONTOSTARTTHE0RESET3CAN 4HEUNITSTARTSSCANNINGEACHSTATIONFORSECONDS SEQUENTIALLY"UTTHESTATIONSTOREDISNOTAVALID STATIONTHESCANNINGTIMEISONLYSECONDS 7HENTHEDESIREDSTATIONISTUNEDINTOUCHTHE [ ]BUTTONAGAINTOSTAYINTHATSTATION Step Tuning 4OUCHTHE;&-!-=BUTTONTOSELECTTHERADIO BAND&-OR!- 4OUCHTHE[ ]OR[ ]BUTTONINFREQUENCYMENUTO TUNEUPORDOWNBYONESTEP Recalling a preset station 4OUCHTHE[FM1/2/3/AM]BUTTONTOSELECTTHEDESIRE BAND&-OR!-ONTHETUNER DX/Local Setting 4HE$8,OCALSETTINGCHANGESTHETUNERSENSITIVITYIN ORDERTOSEPARATECLOSELYSPACEDSTATIONS4HISFEATURE ISUSEFULINAREASTHATHAVEMANYRADIOSTATIONSIN CLOSEPROXIMITY NX404 41 Owner’s Manual 4OUCHTHE4UNERBUTTONONTHEMAINMENUDISPLAY 4HETUNERMODESCREENISDISPLAYED 4OUCHTHE;&-&-&-!-=BUTTONTOSELECTTHE RADIOBAND%ACHTIMETHEBUTTONISTOUCHEDTHE RADIORECEPTIONBANDCHANGESINTHEFOLLOWINGORDER &-&-&-!-&- 11 English 15. TUNER OPERATIONS English 16. HDMI MODE Wire Connection of HDMI Mode Owner’s Manual iPhone 4, iPhone 4S, iPhone 5, iPhone 5s and iPhone 5c can be connected by using the connector cable supplied with the iPhone 4, iPhone 4S, iPhone 5, iPhone 5s and iPhone 5c and HDMI cable (sold in the market) or CCA-770 and digital Av adapter. .OTE 4HEFOLLOWINGISPARTOFTHEWIRINGEXAMPLE Depending on the device, there is a case to connect to the device directly with the CCA-771. Depending on the adapter or device, there is a case that the audio noise and video noise is generated. (1) Connection with the iPhone 4 and iPhone 4S HDMI cable sold in the market or 䧴CCA-770 NX404 Apple Genuine 30pin cable iPhone 4 and iPhone 4S Apple Genuine 30pin-Digital AV adapter (2) Connection with the iPhone 5, iPhone 5s and iPhone 5c HDMI cable sold in the market or 䧴CCA-770 NX404 Apple Genuine Lightning TM cable iPhone 5, iPhone 5s and iPhone 5c Apple Genuine Lightning-Digital AV adapter (3) Connection with the Android Phone 䎰䏌䏆䏕䏒䎃䎸䎶䎥䎃䏆䏄䏅䏏䏈䎃䏖䏒䏏䏇䎃䏌䏑䎃䏗䏋䏈䎃䏐䏄䏕䏎䏈䏗 NX404 HDMI cable sold in the market or 䧴CCA-770 (4) ConnecƟon with the equipment with HDMI output HDMI cable sold in the market NX404 42 NX404 MHL adaptor sold in the market Electronic devices with HDMI output English English Select HDMI source Owner’s Manual 4OUCHTHE($-)MENUBUTTONTHENAPPEARTHESCREEN OFTHECONNECTEDDEVICE This HDMI mode is only indicate the screen of the iPhone, Android. Can‘t operate by the touch screen of NX404 .OTE $EPENDINGONTHEAPPLICATIONANDMODELOFTHE MOBILEPHONETHEREISTHECASETHATBLACKFRAME APPEARSAROUNDTHESCREEN NX404 43 English 17. AUX %XTERNALPERIPHERALDEVICESINCLUDINGAGAMECONSOLECAMCORDERNAVIGATIONUNITI0ODI0HONEETCCANBE CONNECTEDTOTHE!58CONNECTORONTHEFRONTORBACKOFTHISUNITUSINGTHE!6MEDIACABLES Owner’s Manual Switching to AUX IN 4OUCH;!58=;!58=BUTTONON-AIN-ENUTOSELECTDESIREDMODEWHENUNITISREADING)FTHEEXTERNALDEVICE CONNECTEDTO!58INPUTHAVEAUDIOSIGNALTHEUNITWILLBROADCASTAUDIOOFEXTERNALDEVICE0RESS-ENUBUTTONON /PERATIONAL0ANELTORETURNTOTHE-AIN-ENU 9OUCANNOTDIRECTLYCONTROLEXTERNALDEVICESCONNECTEDTO!58INPUT 18. CAMERA INPUT OPERATIONS Switching to Camera mode 4OUCH;#AMERA=BUTTONON-AIN-ENU 4HE,#$WILLDISPLAYTHEEXTERNALCAMERAVIDEO4HESCREENWILLDISPLAYh.O6IDEO3IGNALvMESSAGEIFAVALID CAMERAISNOTCONNECTTOTHISHEADUNIT 0RESS-%.5BUTTONON/PERATIONAL0ANELTORETURNTOTHE-AIN-ENU Setting Camera audio 3ELECTh/.vBUTTONINTHE#AMERA!UDIOSETTINGOFTHE'ENERALSETTING 4HEAUDIOFROMCAMERAWILLHEARDWHENBACKGEARISON4HEVOLUMECONTROLISAVAILABLEBUTNOTINDICATEDONTHE SCREENDUETOTHESAFETY 3ELECTh-54%vBUTTONTHENMUTETHEAUDIOOFTHECURRENTMODEWHENBACKGEARISON Note: If the reverse cable is connected correctly to the car, the unit goes to camera mode automatically when the car is in reverses. As an additional safety feature, the audio from camera with built-in microphones can be heard through the NX404. 44 NX404 2 1 4OUCHTHEBUTTONTOACCESSTHEFRONTSOURCE 4OUCHTHEBUTTONTOCLOSETHEREARSOURCE Multi-Zone Operation )NDEPENDENTSOURCESCANBEPLAYEDSIMULTANEOUSLY ONTHEUNIT&OREXAMPLEA&-!-CONSOLECANBE PLAYBACKONTHEFRONTSCREENWHILE$6$VIDEOIS AVAILABLETOREARPASSENGERS"UTNOWCANTSELECT $6$VIDEOINFRONT Access Rear-Zone DVD Video Rear Source Control Info Mode. 4OUCHTHE2EARBUTTONON-AIN-ENUTOACCESSTHE 2EAR3OURCE 3ELECTASOURCETOPLAY Exit Rear-Zone Touch the 2-Zone off button to close the Rear Source. Note: )FTHESOURCEISSELECTEDASTHEFRONTTHESOURCEIN REARCANTBESELECTED )FTHESOURCEISSELECTEDASTHEREARTHESOURCEIN FRONTCANTBESELECTED 4OUCHTHE&RONTBUTTONTOACCESSTHEMAINMENUBUT NOTCLOSETHE2EAR3OURCE 5PVDI#"$,CVUUPOUPSFUVSO DVD Video Rear Source Control Direct Mode. DVD Video in Rear 8 ./4%-OREDETAILPLEASEREFERTO$6$6IDEO&RONT SOURCE 1 2 3 4 5 6 7 NX404 45 English /PTIONBUTTON 3HOW#URSORKEYS 0REVIOUS#HAPTER&AST"ACKWARDBUTTON 0LAY0AUSEBUTTON .EXT#HAPTER&AST&ORWARDBUTTON %LAPSEDPLAYINGTIME -ENU,ISTBUTTON &RONT2EARBUTTON )FTHESCREENDISPLAYS2EAR3OURCETOUCH&RONT2EAR BUTTONTOSWITCHTO&RONT3OURCE )FTHESCREENDISPLAYS&RONT3OURCETOUCH&RONT2EAR BUTTONTOSWITCHTO2EAR3OURCE Owner’s Manual )FAMONITORISINSTALLEDINTHEREARZONEANDCONNECTED TOTHEREARZONE!6OUTPUTPASSENGERSINTHEBACK SEATCANWATCHTHE$6$I0OD6IDEO!58!58 VIDEOSEPARATELYFROMFRONTSOURCE English 19. REAR SOURCE OPERATIONS !58 iPod Video Rear Source ID3 Mode English Owner’s Manual !58 iPod Video in Rear iPod Video Rear Source Control Play Mode 7 1 2 3 4 5 6 0REVIOUS4RACK&AST"ACKWARDBUTTON 0LAY0AUSEBUTTON .EXT4RACK&AST&ORWARDBUTTON 0ROGRESSBAR -ENU,ISTBUTTON 0RESSTHE-ENUBUTTONTODISPLAYTHEI0OD6IDEO 2EAR3OURCEMODESCREEN 2EPEATBUTTON 3AMEASI0ODFUNCTIONOFFRONTSOURCE &RONT2EARBUTTON )FTHESCREENDISPLAYS2EAR3OURCETOUCHTOSWITCHTO &RONT3OURCE )FTHESCREENDISPLAYS&RONT3OURCETOUCHTOSWITCHTO 2EAR3OURCE 46 NX404 ./4% )FTHESOURCEISSELECTEDASTHEFRONTTHESOURCEINREAR CANTBESELECTED )FTHESOURCEISSELECTEDASTHEREARTHESOURCEINFRONT CANTBESELECTED 4OUCHTHE&RONTBUTTONTOACCESSTHEFRONTMAINMENU BUTTHEREARSOURCEWILLKEEPRUNNING English English 20. SETTING OPERATIONS 4OUCH[ ]BUTTONONTHE-AINMENUSCREEN 4HE3ETTINGMENUSCREENWILLBEDISPLAYED Owner’s Manual General Setup Menu Time:3ETSYSTEMCLOCK 24-Hour Format: Set the time display mode. Beep:4URNONORTURNOFFTHEBEEPCONlRMATIONSOUND Bluetooth: 3ETTHE"LUETOOTH/NOR/FF Wallpaper: #HOOSETHEDESIREDWALLPAPER Input Aux Sense:!58INPUTSWITCHINCLUDING,OW -IDDLE(IGH System Language: 3ETTHE,ANGUAGEFORSYSTEM SCREEN Illumination Color: Set the illumination color on the panel. Select menu to be able to select from Shortcut menu and drag it to left side area. DivX® Registration: Display the information about DivX® registration. Tel Speaker: There are two options, Left and Right. For example, if current setting is Right, when BT phone is coming in, only right speaker can hear the phone. Pandora:There are two options, On and Off. Camera Audio: There are three options, Off, On and Mute. Version: Display the software version information. Note: s4IMEAND(OUR&ORMATCANBEADJUSTEDWHENSET THESYSTEMTIMENOTTOBESYNCHRONIZEDWITH'03LOCAL time. Video Setup Menu NX404 47 English Owner’s Manual This menu includes:$6$7IDE3CREEN-ODE $IMMER$IMMER-ODE DVD Wide Screen Mode: Set the DVD wide screen mode On or Off. Dimmer: 3ET$IMMERVALUEFROMTO Dimmer Mode: 4HEREARETHREEOPTIONS$AY.IGHT AND!UTO Navigation Setup Menu Audio Setup Menu 4HISMENUINCLUDES'034IME.AVI)NTERRUPT6OICE 'UIDANCE GPS Time:3ETTHESYSTEMTIMETOBESYNCHRONIZED WITH'03LOCALTIMEORNOT Navi Interrupt:4HEREARETHREECHOICES/N0OPUP /FFh/Nv4HENAVIGATIONSCREENWILLCOVERTO!6 SCREENWHENREACHINGSOMEKEYPOINTh0OPUPv7HEN SMALLTURNINFOWINDOWWILLPOPUPINTHETOPOFTHE !6SCREENTOINDICATETHEKEYPOINTh/FFv4URNOFFTHIS FUNCTION Voice Guidance:4HEREARETHREECHOOSE/N-UTE /FF /N)NTERRUPTFUNCTIONOFVOICEGUIDANCEISON7HILE INTERRUPTINGNOATTENUATEFUNCTIONOF!6SOUND -UTE)NTERRUPTFUNCTIONOFVOICEGUIDANCEISON7HILE INTERRUPTINGATTENUATEFUNCTIONSOUNDISON /FF$ISABLETHENAVIGATIONVOICEGUIDANCE 4HISMENUINCLUDES"ALANCE&ADER"EAT%13UB 7OOFER#TRL3UB7OOFER0HASE(IGH0ASS&ILTER,OW 0ASS&ILTER,INE/UTAND-AGNA"ASS%8 Balance:#HOOSETHEDESIREDVOLUMEFORLEFTANDRIGHT SPEAKER Fader: #HOOSETHEDESIREDVOLUMEFORFRONTANDREAR SPEAKER Beat EQ:#HOOSETHEDESIREDMODE"ASS"OOST )MPACT%XCITE#USTOMAND/&& Subwoofer Ctrl:#HOOSETHEDESIREDSUBWOOFERGAIN FROMTO Subwoofer Phase: #HOOSETHE3UBWOOFER0HASE NORMALORREVERSE High Pass Filter: #HOOSETHEFREQUENCYABOUTTHE HIGHPASSlLTERORENABLE4HEFREQUENCIESINCLUDE (Z(ZAND(Z Low Pass Filter:#HOOSETHEFREQUENCYABOUTTHELOW PASSlLTERORENABLE4HEFREQUENCIESINCLUDE(Z (ZAND(Z Magna Bass EX:#HOOSETHELOUDNESS/NOR/FF Others Setup Menu Note: /PTIONALCABLESOLDSEPARATELYISNECESSARYWHENYOU use Audio line out. 48 NX404 This menu include: Set Password; Parental Control; Audio Language; Subtitle Language; Screen Calibration and Factory Default. Set Password:3ETTHEPASSWORDFOR$6$PARENTAL CONTROL Parental Control:3ETTHERATINGOFTHEAGE)TCONTAINS +ID3AFE'0'0'0'22.#!DULT English English Audio Language:3ETTHE,ANGUAGEFOR$6$!UDIO Subtitle Language:3ETTHE,ANGUAGEFOR$6$SUBTITLE Blinking LED:3ETBLINKING,%$/NOR/FF Screen Calibrate:4HEFUNCTIONOFITISTOSELECTTHE43 #ALIBRATE9%3OR./ Factory Default: 4HEFUNCTIONISTOSELECTTOLOAD FACTORYDEFAULTORNOT Owner’s Manual Set the Anti-Theft code )FYOURUNITISUNLOCKEDHOLDTHE[ ]BUTTON MORETHANSECONDSTHENTHE!NTI4HEFTSETTING MODEWILLDISPLAY5SERSCANCHANGEANTITHEFT CODE 4OUCH;9%3=BUTTONTHENUMERICALKEYPADIS DISPLAYED%NTERTHENEWPASSWORDTWICETHENANTI THEFTCODEISSETANDYOURUNITISSECURED 7HENTHE!NTITHEFTISh/NvYOUNEEDENTERCORRECT !NTITHEFTCODETOTURNTHEUNITON)FYOUENTER WRONGCODETHREETIMESTHEUNITISLOCKEDANDMUST BEUNLOCKEDBYTHEPROFESSIONALS )FYOURUNITISSECUREDHOLDTHE;; =BUTTONMORE THANSECONDSTHENTHE!NTI4HEFTSETTINGMODE WILLDISPLAY4HENUMERICALKEYPADISDISPLAYED ENTERTHERIGHTCODETOUNLOCK Note: )FTHEANTITHEFTCODEISLOSTORFORGOTTENACHARGEWILL be incurred at the owner’s expense by a Clarion service STATIONTOUNLOCKTHE.8 NX404 49 English 21. TROUBLESHOOTING GENERAL Owner’s Manual Problem Cause Measure Power does not turn on. (No sound is produced.) Fuse is blown. Replace with a fuse of the same amperage. If the fuse blows again, consult your store of purchase. Incorrect wiring. Consult your installation center. The microprocessor has malfunctioned due to noise, etc. Press the reset button with a thin rod. Note: When the Reset button is ÈʽË˽¼ƓÌÍÊÆÇŰÌÀ½ power. * When the Reset button is pressed, frequencies of radio stations, titles, etc. stored in memory are cleared. Direct rays of the sun fall on the light-receptive part of the remote control unit. When direct rays of the sun fall on the light-receptive part of the remote control unit, it may not work. The battery of the remote control unit is dead or there is no battery in the remote control unit. Check the battery of the remote control unit. Problem Cause Measure Disc cannot be loaded. A disc is already loaded. Eject the disc before loading the new one. There is foreign matter already in the disc slot. Remove the foreign matter, or consult a service station. Disc is dirty. Clean the disc with a soft cloth. Disc is heavily scratched or warped. Replace with a disc in good condition. Sound is bad directly after power is turned on. Condensation may form on the internal lens when the car is parked in a humid place. Let dry for about 1 hour with the power on. Video images are not displayed. The parking brake is not engaged. Check that the parking brake is engaged. Disc cannot play with the display “PARENTAL VIOLATION” shown. Feature exceeds set parental level. Release the view limitation or change the parental level. See the subsection “Setting up the parental level” Nothing happens when buttons are pressed. Display is not accurate. The remote control unit does not work. DVD PLAYER Sound skips or is noisy. 50 NX404 Cause USB device cannot be inserted. The USB device has been inserted with wrong direction. Measure Reversing the connection direction of the USB device, try it again. Owner’s Manual The USB connector is broken. Replace with a new USB device. The USB device is damaged. Connectors are loose. Disconnect the USB device and reconnect. If the device is still not recognized, try ʽÈĹ»ÁÆ¿ÏÁÌÀ¹¼ÁŰ½Ê½ÆÌ device. No sound heard with the display “NO FILE” shown. ÇˀƯŲĽÁËËÌÇʽ¼ÁÆ the USB device. ÌÇʽÌÀ½Ë½ŲĽËÈÊÇȽÊÄÑÁÆÌÀ½ USB device. Sound skips or is noisy. ˀƯŲĽ˹ʽÆÇÌ encoded properly. ˽ˀƯŲĽ˽ƻǼ½¼ properly. The video image of iPod/ iPhone is disturbed. The TV Signal setting of the iPod/iPhone is not set correctly. Set the TV Signal setting (NTSC/PAL) of the iPod/iPhone correctly. Problem Cause Measure Cannot pair the Bluetooth enable device with the car audio system. The device does not support ÌÀ½ÈÊÇŲĽËʽÉÍÁʽ¼¾ÇÊÌÀ½ system. Use another device to connect. The Bluetooth function of the device is not enabled. Refer to the user manual of the device for how to enable the function. The Bluetooth reception is poor. Move the device closer to the car audio system or remove any obstacle between the device and the system. USB device is not recognized. Bluetooth The audio quality is poor after connection with a Bluetooth enabled device. NX404 English Problem English USB DEVICE 51 TFT screen English Owner’s Manual Problem Cause Measure The image is not displayed. The parking brake is not engaged. Check that the parking brake is engaged. The display is dark. The Dimmer control is too low. Adjust the Dimmer properly. The operating condition is not good. The temperature inside the vehicle may be 0°C or lower. Set to an appropriate temperature (25°C or so) and check it again. The headlight of the vehicle is lit The display is made dark at night to prevent the glare (When the headlight of the vehicle is lit in the daytime, the display gets dark). There are red, green, and blue points in display. 52 NX404 -------------------- This is not a failure, but a phenomenon peculiar to a liquid crystal panel (The liquid crystal panel is produced according to technology with very high precision. Note that, ÌÀÇÍ¿ÀÌÀ½Ê½¹Ê½½Ű½»ÌÁν pixels of 99.99% or more, pixel missing or normally lit pixels account for 0.01%). English English 22. ERROR DISPLAY If an error occurs, one of the following displays is displayed. Take the measures described below to solve the problem. Owner’s Manual DVD PLAYER Display Cause Measure BAD DISC A disc is caught inside the DVD deck and is not ejected. This is a failure of DVD deck’s mechanism and consult your store of purchase. BAD DISC A disc cannot be played due to scratches, etc. Replace with a non-scratched, non-warped disc. BAD DISC A disc is loaded upside- down inside the DVD deck and does not play. Eject the disc then reload it properly. PARENTAL VIOLATION Parental level error Set the correct Parental level. Disc Region incorrect Region code error Eject the disc, and replace correct region code disc. NX404 53 English 23. SPECIFICATIONS Owner’s Manual FM Tuner !$0!DVANCED!UDIO$ISTRIBUTION0ROlLE &REQUENCY2ANGE -(ZTO-(Z !62#0!62EMOTE#ONTROL0ROlLE 5SABLE3ENSITIVITYD"«6 0"!00HONE"OOK!CCESS0ROlLE 3TEREO3EPARATION D"K(Z 3003ERIAL0ORT0ROlLE &REQUENCY2ESPONSE(ZTOK(Z 0OWER#LASS 2 AM Tuner USB &REQUENCY2ANGEK(ZTOK(Z 3PECIlCATION53"&3 5SABLE3ENSITIVITYD"«6 0LAYABLE!UDIOFORMAT -07-!!!#&,!# DVD Player System 0LAYABLE6IDEOFORMAT $IGITAL6ERSATILE$ISC3YSTEMWITH#$$!CAPABLE !6)-0-0'-0%'GP 5SABLEDISCS $6$VIDEODISC#OMPACTDISC General &REQUENCY2ESPONSE(ZTOK(Z 0OWERSOURCEVOLTAGE 3IGNAL.OISE2ATIODB!72EF 6$#TO6ALLOWABLE $ISTORTION 'ROUND.EGATIVE 6IDEOSYSTEM.43#0!, #URRENTCONSUMPTION! 7 !UTO!NTENNA2ATED#URRENTM!LESS Audio/Video Input !UDIOINPUTVOLTAGE d6RMS 6IDEOINPUTVOLTAGE6PP !UDIOINPUTSENSITIVITYAT6OUTPUT (IGH M6RMS -ID M6RMS ,OW 6RMS Audio/Video output 6IDEOOUTPUTVOLTAGE6PP 3CREEN3IZEvWIDETYPE 0IXELS 2ESOLUTIONXX2'" Bluetooth 3PECIlCATION"LUETOOTH6ER%$2 0ROlLE (&0(ANDS&REE0ROlLE 54 (30(EADSET0ROlLE NX404 Note: ƹ Ƚ»ÁŲ»¹ÌÁÇÆ˹Ƽ¼½ËÁ¿Æ¹Ê½Ëͺ½»Ì to change without notice for further improvement. Power Output: =839^)NGTTKRYGZœ GTJʇ:.*4 Signal to Noise Ratio: J('XKLKXKTIK=OTZUœ English English 4’’ 1 0 0 m m 6.8’’ 172mm Owner’s Manual 6.4’’ 165mm 7’’ 1 7 8 m m .8DIMENSIONS .8WEIGHTKG NX404 55 English 24. WIRE CONNECTION GUIDE Owner’s Manual Note: ƹ ½¾ÇʽÁÆË̹ÄÄÁÆ¿Ɠº½ËÍʽÌǼÁË»ÇÆƽ»ÌÌÀ½Æ½¿¹ÌÁν»¹ºÄ½Ç¾ÌÀ½»¹Êº¹Ì̽ÊÑƖ ƹ ÆÌÀ½ÇÈÌÁÇƹļ½ÎÁ»½ËƓÌÀ½»¹ºÄ½Ë¹Æ¼ÌÀ½ÇÆƽ»ÌÇÊ»¹ºÄ½Ë¹Ê½Ë½È¹Ê¹Ì½ÄÑƘËÇļ items. ƹ À½Æ»ÇÆƽ»ÌÌÀ½»¹ºÄ½Ɠº½ËÍʽÌÇŲÐÏÁÌÀÌÀ½»¹ºÄ½ÀÇļ½Ê¹Æ¼¹»ÀÁƽ˻ʽÏƼʿÐ 4). NX404 HDMI cable holder 2EFERTO PAGE CCA-750(sold separately) HDMI CABLE MIC SUBWOOFER2 Black Gray Black Gray SUBWOOFER1 SWI Red Red White White White Red Front Right Rear Right Front Left Rear Left AUX2 AUDIO IN RCH Red AUX2 AUDIO IN LCH White AUX2 VIDEO IN Yellow REAR LCH White REAR RCH Red For Rear zone VIDEO OUT CAMERA 4-Channel Amplifier 56 NX404 Yellow Yellow English English Owner’s Manual Yellow Connect directly V to battery Black Ground Purple PurpleBlack Red Gray GrayBlack White WhiteBlack Green GreenBlack BlueWhite OrangeWhite Rear right Rear right V accessory Front right Front right Front left Front left Rear left Rear left Amplifier turnon cord Illumination Blue Auto antenna Brown Phone interrupt Grassgreen PurpleWhite Parking brake cord Reverse gear cord 1RWH *1: Connecting the PHONE INTERRUPT terminal The phone interrupt will mute the audio if the lead receives a negative or ground signal. NX404 57 Clarion Co., Ltd. All Rights Reserved. Copyright © 2014: Clarion Co., Ltd. Owner’s manual NX404 US English Thank you for choosing the Clarion NX404 as your navigator. Start using Clarion NX404 right away. This document is the detailed description of the navigation software. You can easily discover Clarion Mobile Map while you are using it; however, we still recommend that you read this manual to fully understand the features and functions. Easy navigation map updates It is easy to keep the navigation system up to date. Simply download new map data from Clarion’s portal site, store them on a microSD card and insert it into the Clarion NX404 via the front card slot. Latest Map Guarantee When you start using the product, you have 30 days to download the latest available map free of charge. 2 NX404 English Table of contents 1 Warnings and Safety information ........................................................................................... 6 2 Getting started ........................................................................................................................... 7 2.1 Navigation menu ................................................................................................................................. 8 2.2 Buttons and other controls on the screen ........................................................................................... 9 2.2.1 Using keyboards........................................................................................................................................ 10 2.2.2 Beyond single screen tap........................................................................................................................... 11 2.3 Map screen ....................................................................................................................................... 12 2.3.1 Navigating on the map .............................................................................................................................. 12 2.3.2 Position markers........................................................................................................................................ 14 2.3.2.1 Vehimarker and Lock-on-Road ........................................................................................................................... 14 2.3.2.2 Selected map location (Cursor) and selected map object ................................................................................... 14 2.3.3 Objects on the map.................................................................................................................................... 15 2.3.3.1 Streets and roads ................................................................................................................................................ 15 2.3.3.2 Turn preview and Next street .............................................................................................................................. 15 2.3.3.3 Lane information and Signposts ......................................................................................................................... 16 2.3.3.4 Junction view ...................................................................................................................................................... 17 2.3.3.5 Freeway exit services .......................................................................................................................................... 17 2.3.3.6 3D object types ................................................................................................................................................... 18 2.3.3.7 Elements of the active route ................................................................................................................................ 18 2.3.4 Manipulating the map ............................................................................................................................... 19 2.3.5 Quick menu ............................................................................................................................................... 20 2.3.6 Checking the details of the current position (Where Am I?)..................................................................... 23 3 On-road navigation ................................................................................................................. 25 3.1 Selecting the destination of a route .................................................................................................. 25 3.1.1 Combined Search ...................................................................................................................................... 25 3.1.1.1 Combined Search - Navigating to a recent destination (History) ....................................................................... 28 3.1.1.2 Combined Search - Navigating to a Favorite destination ................................................................................... 29 3.1.1.3 Combined Search - Navigating to an address ..................................................................................................... 30 3.1.1.4 Combined Search - Navigating to an intersection .............................................................................................. 31 3.1.1.5 Combined Search - Navigating to a Place of Interest ......................................................................................... 32 3.1.1.6 Combined Search - Navigating to a Place of Interest by its category................................................................. 33 3.1.2 Entering an address or a part of the address .............................................................................................. 34 3.1.2.1 Entering an address (United States) ................................................................................................................... 35 3.1.2.2 Entering an address (Canada) ............................................................................................................................ 37 3.1.2.3 Entering an address starting with the street name (in the United States only) ................................................... 39 3.1.2.5 Entering the midpoint of a street as the destination ............................................................................................ 42 3.1.2.6 Selecting an intersection as the destination ........................................................................................................ 43 NX404 English 3 3.1.2.7 Selecting a city/town center as the destination ................................................................................................... 45 3.1.2.8 Entering an address with a ZIP code .................................................................................................................. 46 3.1.2.9 Tips on entering addresses quickly ..................................................................................................................... 48 3.1.3 Selecting the destination from the Places of Interest ................................................................................ 49 3.1.3.1 Quick search for a Place of Interest ................................................................................................................... 49 3.1.3.2 Searching for a Place of Interest using preset categories ................................................................................... 51 3.1.3.3 Searching for a Place of Interest by category ..................................................................................................... 53 3.1.3.4 Searching for a Place of Interest by name .......................................................................................................... 56 3.1.3.5 Searching for a Place of Interest by its phone number ....................................................................................... 59 3.1.3.6 Selecting nearby assistance from 'Where Am I?' ................................................................................................ 60 3.1.4 Selecting a map location as the destination ............................................................................................... 62 3.1.5 Selecting the destination from your Favorites........................................................................................... 62 3.1.6 Selecting your Home location ................................................................................................................... 64 3.1.7 Selecting a recent destination from the History ........................................................................................ 65 3.1.8 Entering the coordinate of the destination ................................................................................................ 66 3.1.9 Building a route from the list of destinations (Create Route) ................................................................... 67 3.2 Viewing the entire route on the map ................................................................................................. 68 3.3 Checking route parameters and accessing route related functions.................................................. 69 3.4 Modifying the route .......................................................................................................................... 70 3.4.1 Selecting a new destination when already having a route: New Route, Waypoint or Final Destination .. 70 3.4.2 Setting a new starting position for the route ............................................................................................. 70 3.4.3 Editing the list of destinations (Edit Route) .............................................................................................. 72 3.4.4 Pausing the active route ............................................................................................................................ 73 3.4.5 Canceling the active route ......................................................................................................................... 73 3.4.6 Checking route alternatives when planning the route ............................................................................... 73 3.4.7 Checking route alternatives for an existing route ...................................................................................... 74 3.4.8 Changing the road types used in route planning ....................................................................................... 76 3.5 Saving a location as a Favorite destination ..................................................................................... 77 3.5.1 Editing the details of a Favorite destination .............................................................................................. 77 3.6 Saving a map location as an alert point ........................................................................................... 78 3.7 Editing an alert point........................................................................................................................ 79 3.8 Watching the simulation of the route ................................................................................................ 80 4 Off-road navigation................................................................................................................. 82 4.1 Selecting the destination of the route ............................................................................................... 82 4.2 Navigating in off-road mode............................................................................................................. 82 5 Reference Guide ...................................................................................................................... 83 5.1 Concepts ........................................................................................................................................... 83 5.1.1 Smart Zoom .............................................................................................................................................. 83 4 NX404 English 5.1.2 Daytime and night color themes ............................................................................................................... 83 5.1.3 Tunnel view .............................................................................................................................................. 84 5.1.4 Route calculation and recalculation .......................................................................................................... 84 5.1.5 Green routing ............................................................................................................................................ 85 5.1.6 Road safety cameras and other proximity alert points .............................................................................. 86 5.1.7 Speed limit warning .................................................................................................................................. 87 5.2 'More' menu ...................................................................................................................................... 88 5.3 Settings menu .................................................................................................................................... 89 5.3.1 Sound and Warnings ................................................................................................................................. 91 5.3.2 Customize Quick menu ............................................................................................................................. 93 5.3.3 Route settings ............................................................................................................................................ 93 5.3.4 User profiles .............................................................................................................................................. 96 5.3.5 Map settings .............................................................................................................................................. 97 5.3.6 Visual guidance settings............................................................................................................................ 98 5.3.7 Display settings ....................................................................................................................................... 100 5.3.8 Regional settings ..................................................................................................................................... 100 5.3.9 Trip monitor settings ............................................................................................................................... 100 5.3.10 Log collection settings .......................................................................................................................... 101 6 Glossary .................................................................................................................................. 102 7 End User License Agreement ............................................................................................... 104 8 Copyright note ....................................................................................................................... 110 NX404 English 5 1 Warnings and Safety information The navigation system helps you find your way to your destination with the built-in GPS receiver. Clarion Mobile Map does not transmit your GPS position; others cannot track you. If you accept it when first using the application, Clarion Mobile Map collects usage information and GPS logs that may be used for improving the application and the quality and coverage of maps. The data is processed anonymously; no one will be able to track any personal information. If you change your mind later, you can enable or disable the log collection in Settings (page 101). It is important that you look at the display only when it is safe to do so. If you are the driver of the vehicle, we recommend that you operate Clarion Mobile Map before you start your journey. Plan the route before your departure and stop if you need to change the route. You must obey the traffic signs and follow the road geometry. If you deviate from the recommended route, Clarion Mobile Map changes the instructions accordingly. Never place Clarion NX404 where it obstructs the driver's view, where it is in the deployment zone of an airbag or where it might cause injuries in an accident. For more information, consult the End User License Agreement (page 104). 6 NX404 English 2 Getting started Clarion Mobile Map is optimized for in-car use. You can use it easily by tapping the screen buttons and the map with your fingertips. When using the navigation software for the first time, an initial setup process starts automatically. Do as follows: 1. Select the written language of the application interface. Later you can change it in Regional settings (page 100). 2. Read the End User License Agreement. Tap 3. You are now asked whether you allow the software to collect usage information and GPS logs that may be used for improving the application and the quality and coverage of maps. Tap to continue. to allow the anonymous statistics or disable this function. Later you can turn them on or off individually in Log collection settings (page 101). to continue. 4. The Configuration wizard starts. Tap 5. Select the language and speaker used for voice guidance messages. Later you can change it in Sound and Warnings settings (page 100). NX404 English 7 6. If needed, modify the time format and unit settings. Later you can change them in Regional settings (page 100). 7. If needed, modify the default route planning options. Later you can change them in Route settings (page 93). 8. The initial setup is now complete. The Configuration wizard can be restarted later from the Settings menu (page 89). After the initial setup, the Navigation menu appears and you can start using Clarion Mobile Map. 2.1 Navigation menu You can reach all parts of Clarion Mobile Map from the Navigation menu. You have the following options: • Tap to select your destination by entering an address or selecting a place of interest, a location on the map or one of your Favorite destinations. You can also look up your recent destinations from the Smart History or enter a coordinate. • to display the route parameters and the route in its full length on the map. Tap You can also perform route-related actions such as editing or canceling your route, setting a start point for the route, picking route alternatives, avoiding parts of the route, simulating navigation or adding the destination to your Favorites. 8 NX404 English • Tap • to start navigating on the map. The button itself is a miniature live map Tap that shows your current position, the recommended route and the surrounding map area. Tap the button to enlarge the map to the full screen. to simulate demo routes or to run some additional applications. 2.2 Buttons and other controls on the screen When you are using Clarion Mobile Map, you usually tap buttons on the touch screen. You only need to confirm selections or changes if the application needs to restart, it needs to perform a major reconfiguration, or you are about to lose some of your data or settings. Otherwise, Clarion Mobile Map saves your selections and applies the new settings without confirmation as soon as you use the controls. Type Example Description How to use it Button Tap it to initiate a function, to Tap it once. open a new screen, or to set a parameter. Button with value Some buttons display the current value of a field or setting. Tap the button to change the value. After the change, the new value is shown on the button. Icon List Shows status information. Tap it once. Some icons also function as a button. Tap them once. When you need to select from Grab the list anywhere and slide several options, they appear in your finger up or down. a list. Depending on the speed of the sliding, the list will scroll fast or slow, only a bit or till the end. Alternatively, move between pages with the and buttons and tap the value that you want. Radio button When there are only a few choices, radio buttons may be used instead of lists. Only one value can be selected. Tap one of the buttons to select a new value. NX404 English 9 Switch When there are only two Tap it to turn the switch on or off. choices, a checkmark shows whether the feature is enabled. Slider When a feature can be set to different values in a range, Clarion Mobile Map shows an indicator on a gauge that displays and sets the value. Virtual keyboard Alphabetic and alphanumeric keyboards to enter text and numbers. • Drag the handle to move the slider to its new position. • Tap the slider where you want the handle to appear; the thumb jumps there. Each key is a touch screen button. 2.2.1 Using keyboards You only need to enter letters or numbers when you cannot avoid it. You can type with your fingertips on the full-screen keyboards and you can switch between various keyboard layouts, for example English, Greek or numerical. Task Switching to another keyboard layout, for example from an English keyboard to a Greek keyboard Instruction Tap the layout from the list. button and select the new keyboard Correcting your entry on the keyboard Tap to remove the unneeded character(s). Tap and hold the button to delete several characters or the entire input string. Entering a space, for example between a first name and a family name or in multi-word street names Entering upper and lower case letters Tap the button at the bottom center of the screen. When entering a text, the first character appears in upper case while the rest of the text is in lower case. Tap to enter an upper case letter or tap twice to turn on Caps Lock. Tap again and lower case letters return. 10 NX404 English Entering numbers and symbols Tap to switch to a keyboard offering numeric and symbol characters. Finalizing the keyboard entry (accepting the suggested search Tap result) Finalizing the keyboard entry (opening the list of search results) . Tap . Tap . Tap . Finalizing the keyboard entry (saving your input) Canceling the keyboard entry (returning to the previous screen) 2.2.2 Beyond single screen tap You usually need to tap the screen only once. However, some useful features can be accessed with combined touch screen tapping. Those are the following: Action Tapping and holding the screen Details Tap and keep pressing the following buttons to reach extra functions: • Tap and hold appears. • Tap and hold any of the , , , , , and buttons on the Map screen: you can rotate, tilt or scale the map continuously. • Tap and hold quickly. on keyboard screens: you can delete several characters • Tap and hold or on list and menu screens: the Map screen in long lists: you can scroll pages continuously. NX404 English 11 Gestures (drag&drop) You need to drag and drop the screen only in cases like: • Moving the handle on a slider. • Scrolling the list: grab the list anywhere and slide your finger up or down. Depending on the speed of the sliding, the list will scroll fast or slow, only a bit or till the end. • Moving the map in map browsing mode: grab the map, and move it in the desired direction. 2.3 Map screen 2.3.1 Navigating on the map The Map screen is the most frequently used screen of Clarion Mobile Map. button. A small live map is displayed on the Navigation menu, as a part of the To enlarge this small map and open the Map screen, tap . This map shows the current position (the Vehimarker, a blue arrow by default), the recommended route (an orange line), and the surrounding map area. When there is no GPS position, the Vehimarker is transparent. It shows your last known position. You see colored dots circling around a satellite symbol in the top left corner. The more green dots you see, the closer you are to get the valid GPS position. 12 NX404 English When GPS position is available, the Vehimarker is displayed in full color, now showing your current position. There are screen buttons and data fields on the screen to help you navigate. During navigation, the screen shows route information. button gives quick access to frequently used functions. You can change the available The functions in Settings. By default, only one data field is displayed in the bottom right corner. Tap this field to see all route data fields. Tap any of the data fields to suppress others and display only the selected one. The data fields are different when you are navigating an active route and when you have no specified destination (the orange line is not displayed). Default data fields when cruising without a destination (tap and hold any of the fields to change its value): Field Description Shows your current speed given by the GPS receiver. Shows the speed limit of the current road if the map contains it. Shows the current time corrected with time zone offset. The accurate time comes from the GPS satellites, and the time zone information comes from the map or it can be set manually in Regional settings. (The current time is always displayed in the top left corner of menu screens.) NX404 English 13 Default data fields when navigating a route (tap and hold any of the fields to change its value): Field Description Shows the distance you need to travel on the route before reaching your final destination. Shows the time needed to reach the final destination of the route based on information available for the remaining segments of the route. The calculation cannot take into account traffic jams and other possible delays. Shows the estimated arrival time at the final destination of the route based on information available for the remaining segments of the route. The calculation cannot take into account traffic jams and other possible delays. 2.3.2 Position markers 2.3.2.1 Vehimarker and Lock-on-Road When your GPS position is available, Clarion Mobile Map marks your current position with the Vehimarker. By default, this marker is a blue arrow, but you can change this icon in Settings. When on-road navigation is selected, the Vehimarker may not show your exact GPS position and heading. If roads are near, it is aligned to the nearest road to suppress GPS position errors, and the direction of the icon is aligned to the direction of the road. If you select off-road navigation: The Vehimarker is at your exact GPS position. The direction of the icon shows your current heading. 2.3.2.2 Selected map location (Cursor) and selected map object You can mark a map location in the following ways: • Tap the map when navigating, • Tap the map when you are asked to confirm the destination at the end of a search, or • Tap the map in Find on Map (page 62) When a map location is selected, the Cursor appears at the selected point on the map. The Cursor is displayed with a radiating red dot ( ) to make it visible at all zoom levels. The location of the Cursor can be used as the destination of the route, a new alert point, you can search for Places around it, or you can save this location as one of your Favorite destinations. You can also select some of the objects on the map. If you tap the map at the icon of a Place of Interest or an alert point, the object will be selected (you see a red circling border around the object), and you can get information about this object or use it as a route point. 14 NX404 English 2.3.3 Objects on the map 2.3.3.1 Streets and roads Clarion Mobile Map shows the streets in a way that is similar to how the paper road maps show them. Their width and colors correspond to their importance: you can easily tell a freeway from a small street. 2.3.3.2 Turn preview and Next street When navigating a route, the top section of the Map screen shows information about the next route event (maneuver) and the next street or the next city/town. There is a field in the top left corner that displays the next maneuver. Both the type of the event (turn, traffic circle, exiting freeway, etc.) and its distance from the current position are displayed. A smaller icon shows the type of the second next maneuver if it is near the first one. Otherwise, only the next maneuver is displayed. Most of these icons are very intuitive. The following table lists some of the frequently shown route events. The same symbols are used in both fields: Icon Description Turn left. Turn right. Turn back. Bear right. Turn sharp left. NX404 English 15 Keep left. Continue straight in the intersection. Go left on the traffic circle, 3rd exit (next maneuver). Enter traffic circle (second next maneuver). Enter freeway. Exit freeway. Board ferry. Leave ferry. Approaching a waypoint. Approaching the destination. 2.3.3.3 Lane information and Signposts When navigating on multilane roads, it is important to take the appropriate lane in order to follow the recommended route. If lane information is available in the map data, Clarion Mobile Map displays the lanes and their directions using small arrows at the bottom of the map. Highlighted arrows represent the lanes and direction you need to take. Where additional information is available, signposts substitute arrows. Signposts are displayed at the top of the map. The color and style of the signposts are similar to the real ones you can see above road or by the roadside. They show the available destinations and the number of the road the lane leads to. All signposts look similar when cruising (when there is no recommended route). When navigating a route, only the signpost that points to the lane(s) to be taken is displayed in vivid colors; all others are darker. If you want to hide the currently displayed signposts, tap any of them and the normal Map screen returns until new signpost information is received. 16 NX404 English 2.3.3.4 Junction view If you are approaching a freeway exit or a complex intersection and the needed information exists, the map is replaced with a 3D view of the junction. The lanes you need to take are displayed with arrows. At the top of the screen road signs show you additional information. If you want to hide the currently displayed junction, tap the picture and the Map screen returns. 2.3.3.5 Freeway exit services You may need a gas station or a restaurant during your journey. This feature displays a new button on the map when you are driving on freeways. Tap this button to open a panel with the details of the next few exits or service stations. Tap any of them to display the exit area on the map. You can now easily add this exit as a waypoint to your route if needed. If you want to display other types of Places for the exits, you can change the icons in Visual Guidance settings (page 98). NX404 English 17 2.3.3.6 3D object types Clarion Mobile Map supports the following 3D object types: Type 3D terrain Description 3D terrain map data shows changes in terrain, elevations or depressions in the land when you view the map in 2D, and use it to plot the route map in 3D when you navigate. Hills and mountains are shown in the background of the 3D map, and illustrated by color and shading on the 2D map. Elevated roads 3D landmarks 3D buildings Complex intersections and vertically isolated roads (such as overpasses or bridges) are displayed in 3D. Landmarks are 3D artistic or block representations of prominent or well-known objects. 3D block representation of full city building data containing actual building size and position on the map. 2.3.3.7 Elements of the active route Clarion Mobile Map shows the route in the following way: Symbol Name Current GPS position and Start point Description Your current position displayed on the map. If roads are near, it is aligned to the nearest road. Normally if GPS position is available, the route starts from the current position. If there is no valid GPS position, Clarion Mobile Map uses the last known position as the start point. Waypoint (intermediate An intermediate destination of the route before reaching the final destination) destination. Destination (end point) Route color Streets and roads that are excluded from the navigation 18 NX404 English The final destination of the route. The route always stands out with its color on the map, both in daytime and in night color mode. You can choose whether you want to use or avoid certain road types (page 93). However, when Clarion Mobile Map cannot avoid such roads, the route will include them and it will show them in a color that is different from the route color. 2.3.4 Manipulating the map Tap the map anywhere to browse it during navigation. The map stops following the current position (the Vehimarker, a blue arrow by default, is not locked in a fix position on the screen any more) and control buttons appear to help you modify the map view. Action Moving the map with drag&drop Button(s) No buttons Zooming in and out Description You can move the map in any direction: tap and hold the map, and move your finger towards the direction you want to move the map. Changes how much of the map is displayed on the screen. , Clarion Mobile Map uses high-quality vector maps that let you examine the map at various zoom levels, always with optimized content. It always displays street names and other text with the same font size, never upside-down, and you only see the streets and objects that you need. Map scaling has a limit in 3D map view mode. If you zoom out further, the map switches to 2D view mode. Tap the button once to modify the view in large steps, or tap and hold the button to modify it continuously and smoothly. Tilting up and down Changes the vertical view angle of the map in 3D mode. , Rotating left and right Changes the horizontal view angle of the map. , 2D or 3D view , Compass in 2D map view mode Compass in 3D map view mode Tap the button once to modify the view in large steps, or tap and hold the button to modify it continuously and smoothly. , , Tap the button once to modify the view in large steps, or tap and hold the button to modify it continuously and smoothly. Tap this button to switch between the 3D perspective and 2D topdown map view modes. The direction of the compass shows North. Tap the button to switch to North-up view, and then tap again to rotate the map in the previous direction. The direction of the compass shows North. Tap the button to switch to North-up view, and then tap again to rotate the map in the previous direction. NX404 English 19 Location information Return to normal navigation Tap this button to open a new screen with information about the selected map point, the Cursor. Tap this button to move the map back to follow the current GPS position. Automatic map rotation is also re-enabled. The map manipulation buttons disappear and navigation continues. Additional options Select destination Tap this button to open a list of additional features like saving the Cursor as a Favorite destination, or searching for Places around the Cursor. Tap this button to select the Cursor as a new destination. The route is automatically calculated. 2.3.5 Quick menu The Quick menu is a selection of controls and functions that are frequently needed during navigation. It can be opened directly from the Map screen by tapping . The menu will close after a few seconds of inactivity or if you tap . Most of these functions are shortcuts. They are accessible from the menu system. There are more functions available than the number of buttons in the menu. In Settings, you can choose the function of each button (page 93). The following options are available: Button Description This button opens the Combined Search function that allows you to search addresses, Places, Favorite and recent destinations by name in one unified environment. Shortcut for Destination (page 25) Destination / Find Places / This function lets you search for a Place by its name. The search Quick Search (page 49) is carried out either along your route or around your current location if there is no route calculated. 20 NX404 English This button opens the list of your Favorite destinations. This button opens the History list. You can select one of your previous destinations. This button opens the route editing function. Find / Favorite (page 62) Find / History (page 65) My Route / Edit Route This button opens the route related settings. More / Settings / Route Settings (page 93) This button opens the map related settings. More / Settings / Map Settings (page 97) Tap the Current Street field This button opens a special screen with information about the on the Map screen current position and a button to search for nearby emergency or roadside assistance. For details, see the next chapter. My Route / Cancel Route This button cancels the route and stops navigation. The button is (page 73) replaced with the next one if waypoints are given. This button skips the next waypoint from the route. n/a My Route / Overview (page This button opens a 2D map scaled and positioned to show the 68) entire route. This button opens the Visual Guidance settings screen. This button lets you bypass parts of the recommended route. More / Settings / Visual Guidance (page 98) My Route / Avoidances More / Trip Monitor (page This button opens the Trip Monitor screen where you can manage 88) your previously saved trip logs and track logs. NX404 English 21 This button opens the list of maneuvers (the itinerary). Tap the top of the Map screen during navigation. With this function you can save the active route for later use. My Route / More / Save Route My Route / More / Load With this function you can replace the active route with a Route previously saved route. Find / Find Places (page With this function you can search for Places of Interest in various 49) different ways. My Route / More / Simulate This button opens the Map screen and starts simulating the active Navigation (page 80) route. Tap the top of the Map This button opens the GPS Information screen with satellite screen when there is no position and signal strength information. GPS reception This button offers your Home location as a destination. This button opens the parameters of the selected Vehicle profile. 22 NX404 English More / Settings / Route (page 93) 2.3.6 Checking the details of the current position (Where Am I?) This screen contains information about the current position (or about the last known position if GPS reception is not available) and a button to search for useful Places nearby. You can access this screen from the map in one of the following ways: • If the current street is displayed below the Vehimarker (the current position on the map), tap it to open the Where Am I? screen. • Open the Quick menu and tap the button. Information on this screen: • , • : Altitude (elevation information coming from the GPS receiver - often inaccurate). • : House number on the left. • : House number on the right. : Latitude and Longitude (coordinate of the current position in WGS84 format). • In the middle of the screen you can see whether the position is current, or the time left since it was last updated. • Address details (when available) of the current position are displayed at the bottom. You can also perform some actions on this screen: Tap to save the current position as a Favorite destination. NX404 English 23 You can also search for assistance near your current position. Tap screen for the Quick search: to open a new The following services can be searched around the current position or the last known position: • : Car repair and roadside assistance services • : Police stations • : Medical and emergency services • : Gas stations Tap any of the buttons, select a Place from the list, and navigate to it. 24 NX404 English 3 On-road navigation When first started, Clarion Mobile Map calculates routes using the road network of the high quality vector maps provided with the product. You can set up your route in different ways: • If you need a route for immediate navigation, you can select the destination and start navigating to it right away (normal navigation). • You can also plan a route independently of your current GPS position or even without GPS reception. To achieve this you need to set a new starting point in My Route / Edit Route by tapping the flag icon at the current position. This will also turn off the GPS receiver so that the route is not recalculated when a new position is received. You can plan routes with multiple destinations. Select the first destination. Then select a second destination and add it to your route to create a multi-point route. You can add as many destinations to your route as you like. You can also use Clarion Mobile Map for off-road navigation. For details, see page 82. 3.1 Selecting the destination of a route Clarion Mobile Map offers you several ways of choosing your destination: • Enter a full address or a part of an address, for example a street name without a house number or the names of two intersecting streets (page 34). • Enter an address with ZIP code (page Error! Bookmark not defined.). This way you do not need to select the name of the city/town and the search for street names might be faster as well. • Use a built-in Place of Interest as your destination (page 49). • Select a location on the map with the Find on Map feature (page 62). • Use a previously saved Favorite destination (page 62). • Select a location from the History of previously used destinations (page 65). • Enter the coordinate of the destination (page 66). 3.1.1 Combined Search There are several ways to select the destination of the route. You can find buttons in the Destination menu that initiate a separate search for addresses, Places, Favorite or recent destinations. The fastest way to search for any of these is to use the Combined Search. In this section you can find the full description of how this feature works. The below process shows how to carry out the search and the following subsections will help you find specific kinds of results. 1. In the Navigation menu, tap 2. Tap . and the Combined Search screen appears. NX404 English 25 3. First you see hints on the screen showing how you can use the function. These hints are only displayed the first time you use this screen. 4. Tap anywhere and the hints disappear. Once you get through this screen to the search results, the hint will not appear again when you open this window later but you can see them again if you tap the information button on the right side of the input field. 5. You can see the input field at the top of the screen. Right below that you see the search area, the city/town around which the search is carried out. The default search area is the area where you are located. For a local search, skip the next step. 6. (optional) To search in a different area, do as follows: 1. . A new screen opens with a new input field. A hint bubble explains Tap how you can specify the new search center. 2. Tap anywhere and the hint disappears. If you successfully select a new search area, the hint will not appear again when you open this window later but you can see it again if you tap the information button on the right side of the input field. 3. Start entering the center of the new search area using the screen keyboard. You only need to enter a few letters to get a result. If the new search area is in a different country or state, you can narrow the search results if you enter one space and then a few letters of the country or state of the search area. 4. The most likely result appears below the input field as you enter new letters. Tap to select this as your new search area. If you cannot see your preferred area after a few letters, tap and select one from the list. 26 NX404 English 7. With the proper search area displayed, you can start entering the name, address or category of the button shows how destination you are looking for. The number shown in the many results match the entered text. The background search is carried out while you enter letters so this number may keep on increasing if you wait a few seconds. Keep on entering new letters while this number is high. 8. Once the number of results is acceptable after a few seconds of searching, you can tap to switch to the result screen. 9. The result screen also opens with hints. Tap anywhere to suppress them. Once you select a destination, they will not appear again. 10. You see all results in the list, regardless of their type. Addresses, Places, Place categories, Favorite and recent destinations are mixed within one list. 11. You have the following options: 12. • Tap the result you want to use as your destination. Scroll the list if necessary. • To narrow the search for only one type of result (for example for Places only) you can tap the related button at the top of the screen. See the next sections for details. Once the destination is selected, a full screen map appears with the selected point in the middle. If necessary, tap the map somewhere else to modify the destination. The Cursor ( the new location. Tap select a different destination. to confirm the destination, or tap ) appears at to NX404 English 27 13. After a short summary of the route parameters, the map appears showing the entire route. The to modify route parameters, or tap route is automatically calculated. Tap and start your journey. If you know that you will use this destination frequently, before tapping Tip! confirm the destination, put it on the list of your Favorites first: tap to then , give a name for the new Favorite, and tap to save the location. The map with the destination returns automatically. Now you can start your journey. 3.1.1.1 Combined Search - Navigating to a recent destination (History) To find one of your recent destinations in Combined Search, carry out the search as described earlier. For the input text you can use either a part of the name or a part of the address of the recent destination. When you get to the result screen, do as follows: at the top of the screen. 1. Tap 2. The list is now filtered. What you see is the list of recent destinations with a matching name or address. 3. Scroll down the list if necessary and then select one of the destinations from the list. 4. Once the destination is selected, a full screen map appears with the selected point in the middle. If necessary, tap the map somewhere else to modify the destination. The Cursor ( the new location. Tap select a different destination. 28 NX404 English to confirm the destination, or tap ) appears at to 5. After a short summary of the route parameters, the map appears showing the entire route. The to modify route parameters, or tap route is automatically calculated. Tap and start your journey. Note! The alternative way to search for a recent destination is to tap the button in the Quick menu or in the Destination menu. The rest of the procedure is similar to the above. 3.1.1.2 Combined Search - Navigating to a Favorite destination To find one of your Favorite destinations in Combined Search, carry out the search as described earlier. When you get to the result screen, do as follows: at the top of the screen. 1. Tap 2. The list is now filtered. What you see is the list of your Favorite destinations with a matching name. 3. Scroll down the list if necessary and then select one of the destinations from the list. 4. Once the destination is selected, a full screen map appears with the selected point in the middle. If necessary, tap the map somewhere else to modify the destination. The Cursor ( the new location. Tap select a different destination. to confirm the destination, or tap ) appears at to NX404 English 29 5. After a short summary of the route parameters, the map appears showing the entire route. The to modify route parameters, or tap route is automatically calculated. Tap and start your journey. Note! The alternative way to search for a Favorite destination is to tap the button in the Quick menu or in the Destination menu. The rest of the procedure is similar to the above. 3.1.1.3 Combined Search - Navigating to an address To find an address in Combined Search, carry out the search as described earlier. Use the name of the street alone or combined with the house number as your input text. When you get to the result screen, do as follows: at the top of the screen. 1. Tap 2. The list is now filtered. What you see is the list of matching addresses. 3. Scroll down the list if necessary and then select one of the addresses from the list. 4. Once the destination is selected, a full screen map appears with the selected point in the middle. If necessary, tap the map somewhere else to modify the destination. The Cursor ( the new location. Tap select a different destination. 30 NX404 English to confirm the destination, or tap ) appears at to 5. After a short summary of the route parameters, the map appears showing the entire route. The route is automatically calculated. Tap to modify route parameters, or tap and start your journey. button in the Destination menu. Note! The alternative way to search for an address is to tap the Unlike the Combined Search, this alternative search method is a structured one where you can define the parts of the address separately. 3.1.1.4 Combined Search - Navigating to an intersection To find an intersection in Combined Search, carry out the search as described earlier but use the '&' sign to separate the two intersecting streets. You do not need to use spaces before and after the separator character. For example you can use any of the following input texts to find the intersections of Collins Street and Douglas Avenue (the more precise the input string the fewer false results are expected): • Collins St & Douglas Ave • Collins & Douglas • Coll St & Dou Av • Col&Doug • C&D • Collins St& (this one will give you all the intersections of Collins Street so that you can select the appropriate one from the result list) When you get to the result screen, do as follows: 1. Tap 2. The list is now filtered. What you see is the list of matching intersections. 3. Scroll down the list if necessary and then select one intersection from the list. 4. Once the destination is selected, a full screen map appears with the selected point in the middle. If at the top of the screen. necessary, tap the map somewhere else to modify the destination. The Cursor ( ) appears at NX404 English 31 the new location. Tap select a different destination. 5. to confirm the destination, or tap to After a short summary of the route parameters, the map appears showing the entire route. The to modify route parameters, or tap route is automatically calculated. Tap and start your journey. Note! The alternative way to search for an address is to tap the button in the Destination menu. Unlike the Combined Search, this alternative search method is a structured one where you can define the parts of the address separately. 3.1.1.5 Combined Search - Navigating to a Place of Interest To find a Place of Interest in Combined Search, carry out the search as described earlier. Search for a part of its name. When you get to the result screen, do as follows: at the top of the screen. 1. Tap 2. The list is now filtered. What you see is the list of matching Places ordered by their distance from your current location. 3. Scroll down the list if necessary and then select one of the Places from the list. 4. Once the destination is selected, a full screen map appears with the selected point in the middle. If necessary, tap the map somewhere else to modify the destination. The Cursor ( the new location. Tap select a different destination. 32 NX404 English to confirm the destination, or tap ) appears at to 5. After a short summary of the route parameters, the map appears showing the entire route. The to modify route parameters, or tap route is automatically calculated. Tap and start your journey. The alternative way to search for a Place is to tap the Note! button in the Quick menu or the button in the Destination menu. These alternatives are different from the Combined Search. The first one is also a name search but if there is a route planned, it will not be carried out around your current location but along the route. The Place search in the Destination menu is a complex Place search with several options including category search or search around the destination of the current route. 3.1.1.6 Combined Search - Navigating to a Place of Interest by its category To find a Place of Interest in Combined Search by giving its category only, carry out the search as described earlier. Search for a part of the category name. When you get to the result screen, do as follows: 1. The list is ordered with Place categories at the beginning but if you want, you can filter the list to contain Place categories only. Tap at the top of the screen to filter the list. 2. Scroll the list and select one of the categories. You get the list of Places in that category ordered by their distance from your current position. If the selected category contains subcategories, you will see all Places in that category mixed into one list. 3. Scroll down the list if necessary and then select one of the Places from the list. 4. Once the destination is selected, a full screen map appears with the selected point in the middle. If necessary, tap the map somewhere else to modify the destination. The Cursor ( the new location. Tap select a different destination. to confirm the destination, or tap ) appears at to NX404 English 33 5. After a short summary of the route parameters, the map appears showing the entire route. The route is automatically calculated. Tap to modify route parameters, or tap and start your journey. The alternative way to search for a Place category is to tap the button in the Destination Note! menu and then tap . This alternative is different from the Combined Search. When you search for a Place category here, you will go through the whole Place category tree. When you select a category, the list of its subcategories opens. 3.1.2 Entering an address or a part of the address If you know at least a part of the address, it is the quickest way to select the destination of the route. Using the same screen, you can find an address by entering: • the exact address, including house number • the center of a city/town • an intersection • the midpoint of a street • any of the above, starting the search with the ZIP code (page Error! Bookmark not defined.) 34 NX404 English 3.1.2.1 Entering an address (United States) To enter an address as the destination, do as follows: 1. If you are on the Map screen, tap 2. In the Navigation menu, tap the following buttons: 3. By default, Clarion Mobile Map proposes the country and state where you are. If needed, tap to return to the Navigation menu. , . , enter the first few letters of the destination country or state on the keyboard, and select one from the list. If you select a country without a state, you can search for a city/town in all its states. 4. Select a new city/town: a. Tap . The city/town of your current location is offered by default. For a local search, tap city/town name. to accept it, otherwise continue with entering the destination b. Start entering the name of the city/town on the keyboard. c. Find the city/town you need: • The most likely city/town name is always shown in the input field. To accept it, tap . • If the desired name does not show up, the names that match the string appear in a list after entering a couple of characters (to open the list of results before it appears automatically, tap ). Select the city/town from the list. NX404 English 35 5. Enter the street name: . a. Tap b. Start entering the street name on the keyboard. c. Find the street you need: • The most likely street name is always shown in the input field. To accept it, tap . • If the desired name does not show up, the names that match the string appear in a list after entering a couple of characters (to open the list of results before it appears ). Select the street from the list. automatically, tap 6. 7. Enter the house number: a. Tap b. Enter the house number on the keyboard. (To enter letters, tap c. to finish entering the address. (If the entered house number Tap cannot be found, the midpoint of the street is selected as the destination.) . ). A full screen map appears with the selected point in the middle. If necessary, tap the map somewhere else to modify the destination. The Cursor ( to confirm the destination, or tap destination. 36 NX404 English ) appears at the new location. Tap to select a different 8. After a short summary of the route parameters, the map appears showing the entire route. The route is automatically calculated. Tap to modify route parameters, or tap and start your journey. 3.1.2.2 Entering an address (Canada) To enter an address as the destination, do as follows: 1. If you are on the Map screen, tap 2. In the Navigation menu, tap the following buttons: 3. By default, Clarion Mobile Map proposes the country, state and city/town where you are. If needed, to return to the Navigation menu. , . , enter the first few letters of the destination country or state on the tap keyboard, and select one from the list. If you select a country without a state, you can search for a city/town in all its states. 4. If needed, select a new city/town: a. Tap b. Start entering the name of the city/town on the keyboard. c. Find the city/town you need: • . The most likely city/town name is always shown in the input field. To accept it, tap . NX404 English 37 • If the desired name does not show up, the names that match the string appear in a list after entering a couple of characters (to open the list of results before it appears ). Select the city/town from the list. automatically, tap 5. Enter the street name: a. Tap b. Start entering the street name on the keyboard. c. Find the street you need: . • The most likely street name is always shown in the input field. To accept it, tap . • If the desired name does not show up, the names that match the string appear in a list after entering a couple of characters (to open the list of results before it appears ). Select the street from the list. automatically, tap 6. Enter the house number: a. Tap b. Enter the house number on the keyboard. (To enter letters, tap 38 NX404 English . ). c. 7. to finish entering the address. (If the entered house number Tap cannot be found, the midpoint of the street is selected as the destination.) A full screen map appears with the selected point in the middle. If necessary, tap the map somewhere else to modify the destination. The Cursor ( ) appears at the new location. Tap to confirm the destination, or tap to select a different destination. 8. After a short summary of the route parameters, the map appears showing the entire route. The route is automatically calculated. Tap to modify route parameters, or tap and start your journey. 3.1.2.3 Entering an address starting with the street name (in the United States only) You can leave the city/town name empty and start the search with the street name. This way you can search in all streets of a state. Do as follows: 1. If you are on the Map screen, tap 2. In the Navigation menu, tap the following buttons: to return to the Navigation menu. , . NX404 English 39 3. By default, Clarion Mobile Map proposes the country and state where you are. If needed, tap the button with the name of the country, enter the first few letters of the destination country or state on the keyboard, and select a country and state from the list. If you select the country without a state, this function cannot work. 4. Enter the street name: a. Tap b. Start entering the street name on the keyboard. c. Find the street you need: . • The most likely street name is always shown in the input field. To accept it, tap . • If the desired name does not show up, the names that match the string appear in a list after entering a couple of characters (to open the list of results before it appears automatically, tap 40 NX404 English ). Select the street from the list. 5. 6. Enter the house number: a. Tap b. Enter the house number on the keyboard. (To enter letters, tap c. to finish entering the address. (If the entered house number Tap cannot be found, the midpoint of the street is selected as the destination.) . ). A full screen map appears with the selected point in the middle. If necessary, tap the map somewhere else to modify the destination. The Cursor ( to confirm the destination, or tap ) appears at the new location. Tap to select a different destination. 7. After a short summary of the route parameters, the map appears showing the entire route. The route is automatically calculated. Tap to modify route parameters, or tap and start your journey. NX404 English 41 3.1.2.5 Entering the midpoint of a street as the destination You can navigate to the midpoint of a street if the house number is not available: 1. If you are on the Map screen, tap 2. In the Navigation menu, tap the following buttons: 3. Select the country, state and city/town as described earlier (page 35). 4. Enter the street name: , . . a. Tap b. Start entering the street name on the keyboard. c. Find the street you need: • The most likely street name is always shown in the input field. To accept it, tap . • If the desired name does not show up, the names that match the string appear in a list after entering a couple of characters (to open the list of results before it appears automatically, tap 5. to return to the Navigation menu. Instead of entering the house number, tap selected as the destination. 42 NX404 English ). Select the street from the list. . The midpoint of the street is 6. A full screen map appears with the selected point in the middle. If necessary, tap the map somewhere else to modify the destination. The Cursor ( ) appears at the new location. Tap to confirm the destination, or tap to select a different destination. 7. After a short summary of the route parameters, the map appears showing the entire route. The route is automatically calculated. Tap to modify route parameters, or tap and start your journey. 3.1.2.6 Selecting an intersection as the destination To enter an address as the destination, do as follows: 1. If you are on the Map screen, tap 2. In the Navigation menu, tap the following buttons: 3. Select the country, state and city/town as described earlier (page 35). 4. Enter the street name: a. Tap b. Start entering the street name on the keyboard. c. Find the street you need: • to return to the Navigation menu. , . . The most likely street name is always shown in the input field. To accept it, tap . NX404 English 43 • If the desired name does not show up, the names that match the string appear in a list after entering a couple of characters (to open the list of results before it appears ). Select the street from the list. automatically, tap 5. Enter the intersecting street name: 1. 6. Tap . • If only a few intersecting streets exist, their list appears immediately. • In case of a longer street, the keyboard screen appears. Start entering the name of the intersecting street on the keyboard. As soon as the street names that match the entered string can be shown on one screen, their list appears automatically. Select from the list. A full screen map appears with the selected point in the middle. If necessary, tap the map somewhere else to modify the destination. The Cursor ( to confirm the destination, or tap ) appears at the new location. Tap to select a different destination. 7. After a short summary of the route parameters, the map appears showing the entire route. The route is automatically calculated. Tap and start your journey. 44 NX404 English to modify route parameters, or tap 3.1.2.7 Selecting a city/town center as the destination The city/town center is not the geometric center of the city/town but an arbitrary point the map creators have chosen. In towns and villages, it is usually the most important intersection; in larger cities, it is one of the important intersections. to return to the Navigation menu. 1. If you are on the Map screen, tap 2. In the Navigation menu, tap the following buttons: 3. Select the country and state as described earlier (page 35). 4. Select the destination city/town: , a. Tap b. Start entering the name of the city/town on the keyboard. c. Find the city/town you need: • . . The most likely city/town name is always shown in the input field. To accept it, tap . • If the desired name does not show up, the names that match the string appear in a list after entering a couple of characters (to open the list of results before it appears automatically, tap 5. Instead of entering the street name, tap city/town becomes the destination of the route. ). Select the city/town from the list. . This way the center of the displayed NX404 English 45 6. A full screen map appears with the selected point in the middle. If necessary, tap the map ) appears at the new location. Tap somewhere else to modify the destination. The Cursor ( to confirm the destination, or tap to select a different destination. 7. After a short summary of the route parameters, the map appears showing the entire route. The route is automatically calculated. Tap to modify route parameters, or tap and start your journey. 3.1.2.8 Entering an address with a ZIP code All of the above address searching possibilities can be performed with entering the ZIP code instead of the city/town name. Find below an example with a full address: to return to the Navigation menu. 1. If you are on the Map screen, tap 2. In the Navigation menu, tap the following buttons: 3. Select the country and state as described earlier (page 35). 4. Enter a new city/town using its ZIP code: a. Tap . b. Tap to open the numeric keypad. c. Start entering the ZIP code. d. Find the city/town you need: • 46 NX404 English , . The most likely ZIP code is always shown in the input field. To accept it, tap . • If the desired number does not show up, open the list of results by tapping . Select the ZIP code from the list. 5. Enter the street name: a. Tap b. Start entering the street name on the keyboard. c. Find the street you need: . • The most likely street name is always shown in the input field. To accept it, tap . • If the desired name does not show up, the names that match the string appear in a list after entering a couple of characters (to open the list of results before it appears ). Select the street from the list. automatically, tap 6. Enter the house number: a. Tap b. Enter the house number on the keyboard. (To enter letters, tap . ). NX404 English 47 c. 7. to finish entering the address. (If the entered house number Tap cannot be found, the midpoint of the street is selected as the destination.) A full screen map appears with the selected point in the middle. If necessary, tap the map somewhere else to modify the destination. The Cursor ( to confirm the destination, or tap ) appears at the new location. Tap to select a different destination. 8. After a short summary of the route parameters, the map appears showing the entire route. The route is automatically calculated. Tap to modify route parameters, or tap and start your journey. 3.1.2.9 Tips on entering addresses quickly • When you are entering the name of a city/town or a street: • Only those letters are offered on the keyboard that appear in possible search results. All other characters are grayed out. • As you are typing, the most likely result is always displayed in the input field. If the guess is correct, tap • to select it. After entering a couple of letters, tap specified letters. 48 NX404 English to list the items that contain the • You can speed up finding an intersection: • Search first for the street with a less common or less usual name; fewer letters are enough to find it. • If one of the streets is shorter, search for that one first. You can then find the second one faster. • You can search for both the type and the name of a road. If the same word appears in several names, for example in the name of streets, roads and avenues, you can obtain the result faster if you enter the first letter of the street type: For example, enter 'PI A' to obtain Pine Avenue and skip all Pine Streets and Pickwick Roads. • You can also search in ZIP codes. As ZIP codes consist of only a few characters, this is usually faster than entering the name of the city/town. 3.1.3 Selecting the destination from the Places of Interest You can select your destination from the Places of Interest included with Clarion Mobile Map. Using the same screen, you can find a Place in different ways: • with the Quick search feature, you can quickly find a nearby Place by its name • with the Preset search feature, you can find frequently searched types of Places with only a few screen taps • you can search for a Place by its category • you can search for a Place by its name In addition, you can search for special services from the 'Where Am I?' screen. 3.1.3.1 Quick search for a Place of Interest The Quick search feature lets you quickly find a Place by its name. The search is always carried out • along the recommended route if it exists or • around your current location if there is no destination given. 1. Start the Quick search function: • If you are on the Map screen, tap • If you are in the Navigation menu, tap and then tap . , and then tap . NX404 English 49 2. Using the keyboard, start entering the name of the Place. 3. After entering a few letters, tap containing the entered character sequence. 4. (optional) The Places in the list are ordered by the length of the necessary detour (when navigating a route) or by their distance from the current position (when no destination is given). If you need to to open the list of Places with names . reorder the list, tap 5. Browse the list if necessary and tap one of the list items. A full screen map appears with the selected point in the middle. The name and address of the Place is displayed at the top of the screen. 6. (optional) Tap the map. 7. If necessary, tap the map somewhere else to modify the destination. The Cursor ( to see the details of the selected Place. Tap at the new location. Tap to select a different destination. 50 NX404 English to confirm the destination, or tap to return to ) appears 8. After a short summary of the route parameters, the map appears showing the entire route. The route is automatically calculated. Tap to modify route parameters, or tap and start your journey. 3.1.3.2 Searching for a Place of Interest using preset categories The Preset search feature lets you quickly find the most frequently selected types of Places. 1. If you are on the Map screen, tap 2. In the Navigation menu, tap the following buttons: 3. The preset search categories appear: • to return to the Navigation menu. , . : • If an active route exists, gas stations are searched along the route. • If there is no active route (destination is not selected), they are searched around the current position. • If the current position is not available either (no GPS signal), they are searched around the last known position. • : • If an active route exists, parking lots are searched around the destination of the route. NX404 English 51 • If there is no active route (destination is not selected), they are searched around the current position. • If the current position is not available either (no GPS signal), they are searched around the last known position. • : • If an active route exists, restaurants are searched along the route. • If there is no active route (destination is not selected), they are searched around the current position. • If the current position is not available either (no GPS signal), they are searched around the last known position. • : • If an active route exists, accommodation is searched around the destination of the route. • If there is no active route (destination is not selected), they are searched around the current position. • If the current position is not available either (no GPS signal), they are searched around the last known position. 4. Tap any of the quick search buttons to get an instant list of Places. 5. (optional) The Places in the list are ordered by their distance from the current or last known position, from the destination or by the length of the necessary detour. If you need to reorder the list, tap . 6. Browse the list if necessary and tap one of the list items. A full screen map appears with the selected point in the middle. The name and address of the Place is displayed at the top of the screen. 7. (optional) Tap the map. 8. If necessary, tap the map somewhere else to modify the destination. The Cursor ( to see the details of the selected Place. Tap at the new location. Tap to select a different destination. 52 NX404 English to confirm the destination, or tap to return to ) appears 9. After a short summary of the route parameters, the map appears showing the entire route. The route is automatically calculated. Tap to modify route parameters, or tap and start your journey. 3.1.3.3 Searching for a Place of Interest by category You can search for Places of Interest by their categories and subcategories. 1. If you are on the Map screen, tap 2. In the Navigation menu, tap the following buttons: 3. Tap 4. Select the area around which the Place should be searched for: to return to the Navigation menu. , . . • Tap to search around the current position or if it is not available, around the last know position. (The result list will be ordered by the distance from this position.) • to search for a place within a selected city/town. (The result list will Tap be ordered by the distance from the center of the selected city/town.) • to search for a place around the destination of the active route. Tap (The result list will be ordered by the distance from the destination.) NX404 English 53 • to search along the active route, and not around a given point. Tap This is useful when you search for a later stopover that results in a minimal detour only, such as searching for upcoming gas stations or restaurants. (The result list will be ordered by the length of the necessary detour.) 5. (optional) If you have selected 6. Select one of the main Place categories (e.g. Accommodation) or tap Places around the selected location or along the route. 7. to list all Select one of the Place subcategories (e.g. Hotel or Motel) or tap Places in the selected main category around the selected location or along the route. 54 NX404 English , select the city/town to search in. to list all 8. Sometimes the list of brands in the selected Place subcategory appears. Select one brand or tap to list all Places in the selected subcategory around the selected location or along the route. 9. 10. Finally, the results appear in a list. (optional) The Places in the list are ordered by their distance from the current or last known position, from the selected city/town, from the destination or by the length of the necessary detour. If you need to reorder the list, tap . 11. Browse the list if necessary and tap one of the list items. A full screen map appears with the selected point in the middle. The name and address of the Place is displayed at the top of the screen. 12. (optional) Tap the map. 13. If necessary, tap the map somewhere else to modify the destination. The Cursor ( to see the details of the selected Place. Tap at the new location. Tap to select a different destination. to return to ) appears to confirm the destination, or tap NX404 English 55 14. After a short summary of the route parameters, the map appears showing the entire route. The route is automatically calculated. Tap to modify route parameters, or tap and start your journey. 3.1.3.4 Searching for a Place of Interest by name You can search for Places of Interest by their names. You can search around different locations or along your route in the whole Place database or in one Place category or subcategory only. to return to the Navigation menu. 1. If you are on the Map screen, tap 2. In the Navigation menu, tap the following buttons: 3. Tap 4. Select the area around which the Place should be searched for: , . . • to search around the current position or if it is not available, Tap around the last know position. (The result list will be ordered by the distance from this position.) • to search for a place within a selected city/town. (The result list will Tap be ordered by the distance from the center of the selected city/town.) • to search for a place around the destination of the active route. Tap (The result list will be ordered by the distance from the destination.) 56 NX404 English • to search along the active route, and not around a given point. Tap This is useful when you search for a later stopover that results in a minimal detour only, such as searching for upcoming gas stations or restaurants. (The result list will be ordered by the length of the necessary detour.) 5. (optional) If you have selected 6. Select one of the main Place categories (e.g. Accommodation) to search in or tap , select the city/town to search in. to search among all Places. 7. Select one of the Place subcategories (e.g. Hotel or Motel) to search in or tap to search in the selected Place category. NX404 English 57 if you have not done it before. 8. Tap 9. Using the keyboard, start entering the name of the Place. to open the list of Places with names 10. After entering a few letters, tap containing the entered character sequence. 11. (optional) The Places in the list are ordered by their distance from the current or last known position, from the selected city/town, from the destination or by the length of the necessary detour. If you need to reorder the list, tap . 12. Browse the list if necessary and tap one of the list items. A full screen map appears with the selected point in the middle. The name and address of the Place is displayed at the top of the screen. 13. (optional) Tap the map. 14. If necessary, tap the map somewhere else to modify the destination. The Cursor ( to see the details of the selected Place. Tap at the new location. Tap to select a different destination. 58 NX404 English to confirm the destination, or tap to return to ) appears 15. After a short summary of the route parameters, the map appears showing the entire route. The to modify route parameters, or tap route is automatically calculated. Tap and start your journey. 3.1.3.5 Searching for a Place of Interest by its phone number You can search for Places of Interest by their phone number: 1. If you are on the Map screen, tap 2. In the Navigation menu, tap the following buttons: 3. The numeric keyboard appears. Enter the phone number you are looking for or a part of it. 4. Tap 5. The list of Places with the entered sequence in their phone number appears. 6. (optional) The Places in the list are ordered by their distance from the current or last known position, from the selected city/town, from the destination or by the length of the necessary detour. to return to the Navigation menu. , . . If you need to reorder the list, tap . 7. Browse the list if necessary and tap one of the list items. A full screen map appears with the selected point in the middle. The name and address of the Place is displayed at the top of the screen. 8. (optional) Tap the map. to see the details of the selected Place. Tap to return to NX404 English 59 9. If necessary, tap the map somewhere else to modify the destination. The Cursor ( to confirm the destination, or tap at the new location. Tap to select a different destination. 10. ) appears After a short summary of the route parameters, the map appears showing the entire route. The to modify route parameters, or tap route is automatically calculated. Tap and start your journey. 3.1.3.6 Selecting nearby assistance from 'Where Am I?' You can quickly search for nearby assistance from the 'Where Am I?' screen. 1. On the Map screen, tap 2. Tap 3. Preset search categories appear, all for searching around the current position (or around the last known position if the current position is not available): • 60 NX404 English , and then to open the Quick menu. . : Car repair and roadside assistance services • : Medical and emergency services • : Police stations • : Gas stations 4. Tap any of the quick search buttons to get an instant list of that type of Places. 5. (optional) The Places in the list are ordered by their distance from the current or last known position, from the selected city/town, from the destination or by the length of the necessary detour. If you need to reorder the list, tap . 6. Browse the list if necessary and tap one of the list items. A full screen map appears with the selected point in the middle. The name and address of the Place is displayed at the top of the screen. 7. (optional) Tap the map. 8. If necessary, tap the map somewhere else to modify the destination. The Cursor ( to see the details of the selected Place. Tap at the new location. Tap to select a different destination. 9. to return to ) appears to confirm the destination, or tap After a short summary of the route parameters, the map appears showing the entire route. The route is automatically calculated. Tap to modify route parameters, or tap and start your journey. NX404 English 61 3.1.4 Selecting a map location as the destination 1. If you are on the Map screen, tap to return to the Navigation menu. 2. In the Navigation menu, tap the following buttons: 3. Locate your destination on the map: move and scale the map as needed. 4. Tap the location that you want to select as your destination. The Cursor ( 5. Tap 6. After a short summary of the route parameters, the map appears showing the entire route. The , . ) appears there. to select the Cursor as the destination. to modify route parameters, or tap route is automatically calculated. Tap and start your journey. 3.1.5 Selecting the destination from your Favorites You can select a location that you have already saved as a Favorite to be your destination. Adding a location to the list of Favorite destinations is described on page 77. 1. Access the list of Favorites: • If you are on the Map screen, tap • If you are in the Navigation menu, tap 62 NX404 English to open the Quick menu. . 2. Tap . The list of Favorite destinations is displayed. 3. Tap the Favorite that you want to set as your destination. If necessary, browse down to see more of the list or tap destination. 4. and enter a few letters from the name of the Favorite A full screen map appears with the selected point in the middle. If necessary, tap the map somewhere else to modify the destination. The Cursor ( to confirm the destination, or tap ) appears at the new location. Tap to select a different destination. 5. After a short summary of the route parameters, the map appears showing the entire route. The route is automatically calculated. Tap to modify route parameters, or tap and start your journey. NX404 English 63 3.1.6 Selecting your Home location To navigate to your Home location, first you need to save it. Seach for your address or browse the map and select and when the Cursor is at the desired location, tap . Now that the Home location is set, you can quickly navigate to it: 1. 2. To select the Home location, do one of the following: • If you are on the Map screen, tap and then tap the Quick menu in Settings - page 93). • If you are in the Navigation menu, tap (this button can be added to and then tap . A full screen map appears with the selected point in the middle. If necessary, tap the map somewhere else to modify the destination. The Cursor ( to confirm the destination, or tap ) appears at the new location. Tap to select a different destination. 3. After a short summary of the route parameters, the map appears showing the entire route. The route is automatically calculated. Tap and start your journey. 64 NX404 English to modify route parameters, or tap 3.1.7 Selecting a recent destination from the History The destinations that you have set earlier appear in the History. 1. Access the History: • If you are on the Map screen, tap • If you are in the Navigation menu, tap and then tap . and then tap . 2. The list of recent destinations appears. Smart History promotes three destinations to the first page based on your previous routes (most likely destinations). The rest of the destinations are ordered by time they were last selected. If necessary, scroll the list to see earlier destinations. 3. Select a destination from the list. 4. A full screen map appears with the selected point in the middle. If necessary, tap the map somewhere else to modify the destination. The Cursor ( to confirm the destination, or tap ) appears at the new location. Tap to select a different destination. 5. After a short summary of the route parameters, the map appears showing the entire route. The route is automatically calculated. Tap to modify route parameters, or tap and start your journey. NX404 English 65 3.1.8 Entering the coordinate of the destination You can also select a destination by entering its coordinate. Do as follows: 1. If you are on the Map screen, tap 2. In the Navigation menu, tap 3. Open the 4. You can enter the latitude and longitude values in any of the following formats: decimal degrees; degrees and decimal minutes; or degrees, minutes and decimal seconds. 5. (optional) If necessary, tap in UTM format. 6. When finished, tap 7. A full screen map appears with the selected point in the middle. If necessary, tap the map to return to the Navigation menu. . menu and tap . then . somewhere else to modify the destination. The Cursor ( to confirm the destination, or tap destination. 66 NX404 English and enter the coordinate ) appears at the new location. Tap to select a different 8. After a short summary of the route parameters, the map appears showing the entire route. The to modify route parameters, or tap route is automatically calculated. Tap and start your journey. 3.1.9 Building a route from the list of destinations (Create Route) You can also build your route destination by destination from the My Route menu. 1. If you are on the Map screen, tap 2. In the Navigation menu, tap 3. Tap 4. There is only one line in the list of route points, the start point of the route, normally the current GPS position. 5. Tap to return to the Navigation menu. . . to select the destination. NX404 English 67 6. The Destination menu appears and you can select the destination of the route the same way as described in the previous sections. 7. When the new destination is selected, the list returns. 8. To add more destinations, tap repeat the above procedure. where you want to insert the new route point in the list, and 3.2 Viewing the entire route on the map It is easy to get a map overview of the active route. Do as follows: 1. If you are on the Map screen, tap 2. In the Navigation menu, tap 3. . The active route is displayed in its full length on the map together with Tap additional information and controls. 68 NX404 English to return to the Navigation menu. . 3.3 Checking route parameters and accessing route related functions You can check different parameters of the route recommended by Clarion Mobile Map. 1. If you are on the Map screen, tap 2. In the Navigation menu, tap 3. The following pieces of information are displayed: 4. to return to the Navigation menu. . • The name and/or address of the destination. • Warning icons (if any). They provide extra information about your route (e.g. unpaved roads or toll roads to be taken). • The total time of the route. • The total length of the route. • Estimated delay calculated from traffic events on your route. • The symbol of the vehicle type used in route calculation. • The route planning method (e.g. Fast). You have the following options on this screen (for detailed instructions on how to use them, see the next chapter): • to edit the route: to add or remove destinations or change their Tap sequence. You can also set a route start point other than your current location. This can be useful to plan and save a future trip. • Tap to display the entire route on the map. • Tap to bypass a part of the route. • Tap to delete the active route. • to open a list with more options like selecting from route Tap alternatives, changing route parameters, simulating the route, saving the active route or loading a previously saved route. • Tap to return to the Navigation menu. NX404 English 69 3.4 Modifying the route When navigation is already started, there are several ways to modify the active route. The following sections show some of those options. 3.4.1 Selecting a new destination when already having a route: New Route, Waypoint or Final Destination If you already have a recommended route and you select a new destination as described in the above sections, the application will ask you whether to start a new route, add a new waypoint (intermediate destination) to the route or append the newly selected destination at the end of the current route. • to plan a new route to the newly selected location. The previous destination and Tap waypoint(s) are deleted. • to add the newly selected location as an intermediate destination to your route. The Tap other destinations of the route remain intact. Note: the new waypoint is placed among destinations to keep the route optimal. To decide where a waypoint to appear, use the Edit Route feature. • to append the newly selected destination at the end of the route. The other Tap destinations of the route remain intact. The previous final destination is now the last waypoint. 3.4.2 Setting a new starting position for the route For normal navigation, all routes are planned from the current position. In order to check future routes, simulate them or see their length in time and distance, you can turn off the GPS receiver. Then you can set the starting point of the route to a different location than the current GPS position. 1. If you are on the Map screen, tap 2. In the Navigation menu, tap 70 NX404 English to return to the Navigation menu. . 3. If you already have a route, tap . If you are starting a new route, tap . 4. The first line is the start of the route, normally the current GPS position. Tap your action at the warning message. 5. The Destination menu appears and you can select the start point of the route the same way you select a destination. 6. When the new start point is set, tap and confirm . NX404 English 71 7. The map returns with a transparent Vehimarker (showing that there is no GPS reception). If an active route already existed, it is now recalculated starting from the selected location. 8. To return to normal navigation, tap . 3.4.3 Editing the list of destinations (Edit Route) You can edit the route by modifying the list of destinations. You can add or remove destinations, modify the start position or reorder the list. 1. If you are on the Map screen, tap 2. In the Navigation menu, tap 3. Tap 4. You have the following options: to return to the Navigation menu. . . • Tap to add a new destination. • Tap to delete a destination. • Tap to modify the start point of the route. • to reorder the list. You can do it manually or you can let the Tap application optimize the route for you. 72 NX404 English 3.4.4 Pausing the active route You do not need to pause the active route: when you start driving again, Clarion Mobile Map restarts the voice instructions from your position. 3.4.5 Canceling the active route To cancel the navigated route, do one of the following: • If you are on the Map screen, tap you need to tap • and then tap . (If you have a route with waypoints, until all waypoints are deleted.) In the Navigation menu, tap route is deleted with all its waypoints. and then tap . The active 3.4.6 Checking route alternatives when planning the route You can select from different route alternatives or change the route planning method after you have selected a new destination. Do as follows: 1. Select a destination as explained earlier, and get to the route confirmation screen. 2. Tap . 3. Tap . NX404 English 73 4. You see the basic details of three route alternatives with the selected route planning method. Tap any of them to see it on the map. 5. Or if you cannot find a good alternative, tap different routing methods. 6. Select one of the route alternatives and tap to return to the previous screen. Clarion Mobile Map recalculates the route. The orange line now shows the new recommended route. and scroll down for routes with 3.4.7 Checking route alternatives for an existing route To recalculate the active route with a different route planning method, you can modify the Route settings (page 93). There is another way to do this and to compare different route alternatives with the same route planning method. Do as follows: 1. If you are on the Map screen, tap 2. In the Navigation menu, tap 74 NX404 English to return to the Navigation menu. . 3. Tap . 4. Tap . 5. You see the basic details of three route alternatives with the selected route planning method. Tap any of them to see it on the map. 6. Or if you cannot find a good alternative, tap different routing methods. 7. Select one of the route alternatives then tap and hold for a few seconds to return to the Map screen. Clarion Mobile Map recalculates the route. The orange line now shows the new recommended route. and scroll down for routes with NX404 English 75 3.4.8 Changing the road types used in route planning To recalculate the active route with different road type preferences, do as follows. These changes can also be made in Settings (page 93). 1. On the Map screen, tap 2. Tap any of the listed road types to modify the route. If needed, scroll the list for all road types. You have the following options (their order depends on the selected vehicle type): 3. and then tap . • - You might need to avoid freeways when you are driving a slow car or you are towing another vehicle. • - Charge roads are pay roads where you can purchase a pass or vignette to use the road for a longer period of time. They can be enabled or disabled separately from toll roads. • - Clarion Mobile Map includes toll roads (pay roads where there is a per-use charge) in the routes by default. If you disable toll roads, Clarion Mobile Map plans the best toll-free route. • - Clarion Mobile Map includes ferries in a planned route by default. However, a map does not necessarily contain information about the accessibility of temporary ferries. You might also need to pay a fare on ferries. • - Clarion Mobile Map excludes unpaved roads by default: unpaved roads can be in a bad condition and usually you cannot reach the speed limit on them. • - Carpool or HOV lanes can be used if a given number of passengers are traveling in the vehicle. You should check whether you are allowed to use carpool lanes before enabling this road type. The route has already been recalculated. Tap The orange line now shows the new recommended route. 76 NX404 English to return to the Map screen. 3.5 Saving a location as a Favorite destination You can add any location to Favorites, the list of frequently used destinations. Planning a route to one of the Favorite destinations is described on page 62. 1. Select a destination as described before. It can be an address, a Place, any location on the map, a previously used destination from History, etc. 2. When the full screen map appears with the selected location in the middle, tap . 3. Tap 4. (optional) Using the keyboard, you can change the name offered for the Favorite. Tap enter numbers or symbols. 5. Tap . to to save the location as a new Favorite destination. 3.5.1 Editing the details of a Favorite destination You can select a location that you have already saved as a Favorite and edit its details. Adding a location to the list of Favorite destinations is described on page 77. 1. Access the list of Favorites: • If you are on the Map screen, tap • If you are in the Navigation menu, tap and then tap . and then tap . NX404 English 77 2. The list of Favorite destinations is displayed. 3. Tap the Favorite that you want to edit. If necessary, browse down to see more of the list or tap and enter a few letters from the name of the Favorite destination. 4. A full screen map appears with the selected point in the middle. 5. Tap 6. Tap any of the data fields and modify its content. 7. Tap and hold to see the details of the selected Place. to return to the map. 3.6 Saving a map location as an alert point You can save any map location as an alert point (for example a speed camera or a railroad crossing). 1. Browse the map and select a location. The red Cursor appears there. 2. Tap 3. Scroll down the list and tap 78 NX404 English . . 4. On the newly opened screen, select the type of the alert point, the direction from which you expect the alert, and (if applicable) the speed limit for this alert point. 5. Tap to save the location as a new alert point. 3.7 Editing an alert point You can edit a previously saved or uploaded alert point (for example a speed camera or a railroad crossing). 1. Browse the map and select the alert point to edit. The red circle appears around the alert point. 2. Tap 3. Scroll down the list and tap 4. On the newly opened screen, modify the type of the alert point, the direction from which you expect the alert, or (if applicable) the speed limit for this alert point. 5. Tap . . to save the changes to the alert point. NX404 English 79 3.8 Watching the simulation of the route You can run a simulated navigation that demonstrates the active route. Do as follows: to return to the Navigation menu. 1. If you are on the Map screen, tap 2. In the Navigation menu, tap 3. Tap 4. Scroll down the list and tap . The simulation starts from the starting point of the route, and using a realistic speed, it leads you through the whole recommended route. 1. . . (optional) You have the following controls during the simulation (the control buttons disappear after a few seconds but you can open them again if you tap the map): • : Jump to the next route event (maneuver). • : Pause the simulation. • : Jump to the previous route event (maneuver). 80 NX404 English • 2. : Tap to increase the speed of the simulation to 4, 8 or 16 times faster. Now tap again to return to the normal speed. Tap to stop the simulation. NX404 English 81 4 Off-road navigation When first started, Clarion Mobile Map calculates routes using the road network of the high quality vector maps provided with the product. You can switch the application to off-road mode in Route settings in one of the following ways: • , From the Main menu, tap , and then . • From the Map screen, tap , and then . Most of the procedures described for on-road navigation also apply to off-road navigation. However, there are some that are not available in this navigation mode (for example you cannot open the itinerary as you have no maneuvers just route points and straight lines between them). 4.1 Selecting the destination of the route Selecting the start point or a destination (waypoint or final destination) is the same as described at onroad navigation. The only difference is that route points are linked to form a route with straight lines regardless of the road network and traffic regulations. 4.2 Navigating in off-road mode The real difference between the on-road and off-road modes is the navigation itself. When you are on the Map screen with an off-road route: • your position and heading is not aligned with the nearest road and • there is no turn by turn navigation just a recommended direction. You see a orange line drawn between your current position and the next destination to reach. The Turn Preview field in the top left corner shows a compass with your bearing and the distance of the next destination. When you reach a waypoint, the orange line will show the direction to the next destination. (Future legs of the route are shown with orange lines.) When you reach the final destination, navigation ends. 82 NX404 English 5 Reference Guide On the following pages you will find the description of the different concepts and menu screens of Clarion Mobile Map. 5.1 Concepts 5.1.1 Smart Zoom Smart Zoom provides much more than just a usual automatic zoom feature: • While following a route: when approaching a turn, it will zoom in and raise the view angle to let you easily recognize your maneuver at the next junction. If the next turn is at a distance, it will zoom out and lower the view angle to be flat so you can see the road in front of you. • While driving without an active route: Smart Zoom will zoom in if you drive slowly and zoom out when you drive at high speed. 5.1.2 Daytime and night color themes Clarion Mobile Map uses different color themes during the day and during the night for both the map and the menu screens. • Daytime colors are similar to paper road maps, and the menus are bright. • The night color themes use dark colors for large objects to keep the average brightness of the screen low. Clarion Mobile Map offers different daytime and night color profiles. It can also switch automatically between the daytime and the night schemes based on the current time and GPS position a few minutes before sunrise, when the sky has already turned bright, and a few minutes after sunset, before it becomes dark. NX404 English 83 5.1.3 Tunnel view When entering a tunnel, the map is replaced with a generic tunnel image so that surface roads and buildings cannot distract you. The top-down overview of the tunnel helps you orient yourself. The remaining distance in the tunnel is also displayed. After leaving the tunnel, the original map view returns. This feature can be turned off in Settings (page 98). 5.1.4 Route calculation and recalculation Clarion Mobile Map calculates the route based on your preferences: • Route planning methods: • : Gives a quick route if you can travel at or near the speed limit on all roads. Usually the best selection for fast and normal cars. • : Gives a route that has the smallest total distance of all possible routes. It can be practical for slow vehicles. • : Gives a quick but fuel efficient route based on the fuel consumption data given in Route settings (page 93). Travel cost and CO2 emission calculations are estimations only. They cannot take elevations, curves and traffic conditions into account. • : For vehicle types where Green routing is not available, this method combines the benefits of Fast and Short: Clarion Mobile Map calculates as if it were calculating the Fast route, but it takes other roads as well to save fuel. • : Results in a route with fewer turns and no difficult maneuvers. With this option, you can make Clarion Mobile Map to take, for example, the freeway instead of a series of smaller roads or streets. 84 NX404 English • Vehicle types: When creating a new vehicle profile, select one of the below vehicle types. Besides the below mentioned conditions, dimension, weight and freight hazard restrictions can also be taken into account when planning a route. • Road types used or avoided in route calculation: • • • • • • Clarion Mobile Map automatically recalculates the route if you deviate from the proposed itinerary. For further information about Route settings, see page 93. 5.1.5 Green routing Route calculation is not only about finding the quickest or shortest route. For some of the vehicle types, you can also check the fuel consumption and CO2 emission when planning a route, and you can create cost effective routes with less effect on the environment. In Route settings, you can edit the parameters of the selected vehicle. Enter the fuel consumption values and the price of the fuel. You can also select whether you want to see the difference between your route and the green route even if the selected routing method is not Green. as route planning method to get a fast but After the above parameters are set, select also fuel efficient route. Note that travel cost and CO2 emission calculations are estimations only. They cannot take elevations, turns, curves and traffic conditions into account. Also, this routing is not meant to give you the "greenest" route of all. It is still important to travel quickly so the result is a fast route with low fuel consumption and CO2 emission. NX404 English 85 With a vehicle type where green routing is selectable, whichever route planning method is selected, the Green details are also shown when you confirm the route: If the selected route planning method is not Green, and you have allowed the application to show the green alternative, the price, fuel consumption and CO2 emission differences between your selected route and the Green route are also shown on this screen: Tap the field with these details to switch the route to Green immediately. 5.1.6 Road safety cameras and other proximity alert points There is a special proximity warning for road safety cameras (like speed or red light cameras) and other proximity alert points (like schools or railroad crossings). These alert points are not part of Clarion Mobile Map. You can download them from www.naviextras.com or you can upload points in a specific text file if needed. You can also add your own alert points or edit the previously uploaded points. See page 78 for details. The application can warn you when you approach road safety cameras like speed cameras or dangerous areas like school zones or railroad crossings. You can set up the different alert types individually in Sound and Warning settings (page 91). The following alert types are available: • Audio warning: beeps can be played (natural voice) or the type of the alert can be announced (TTS) while you are approaching one of these points, and an extra alert can warn you if you exceed the given speed limit while approaching. • Visual warning: the type of the alert point, its distance and the related speed limit appear on the Map screen while you are approaching one of these cameras. For some of the alert points, the enforced or expected speed limit is available. For these points, the audio alert can be different if you are below or above the given speed limit. • Only when speeding: The audio alert is only played when you exceed the given speed limit. • When approaching: The audio alert is always played when approaching one of these alert points. In order to draw your attention, the alert can is different when you exceed the speed limit. 86 NX404 English The warning for road safety cameras is disabled when you are in a country where road safety Note! camera warning is prohibited. However, you must ensure on your own liability that using this feature is legal in the country where you intend to use it. 5.1.7 Speed limit warning Maps may contain information about the speed limits of the road segments. Clarion Mobile Map is able to warn you if you exceed the current limit. This information may not be available for your region (ask your local dealer), or may not be fully correct for all roads in the map. The maximum speed set in the vehicle profile is also used for this warning. Clarion Mobile Map alerts you if you exceed the preset value even if the legal speed limit is higher. Speed warning can be fine-tuned in Sound and Warning settings (page 91). You can set the relative speed above which the application initiates the warning. The following alert types are available: • Audio warning: you receive a verbal warning when you exceed the speed limit with the given percentage. • Visual warning: the current speed limit is shown on the map when you exceed it (for example: ). You can also choose to see the speed limit sign on the map all the time. NX404 English 87 5.2 'More' menu The 'More' menu provides you with various options and additional applications. On the map screen, tap the following buttons: Button , . Description You can configure the program settings, and modify the behavior of Clarion Mobile Map. Finetune route planning options, change the look of the Map screen, turn on or off warnings, or restart the Configuration wizard, and so on. See the next chapter for details. Access travel applications: the unit converter helps you convert between various different international units for temperature, speed, area or pressure, etc. The scientific calculator helps you in all your calculation needs. Tap the Mode button for additional functions and use the memory to save your results. The Fuel consumption monitor helps you keep track of the consumption of your car even if you do not use navigation for all your journeys. Set the initial odometer value and then record the distance taken and fuel filled in whenever you fill your car. You can also set reminders for regular car maintenance. Tap this button to see the sunlit and dark areas of the world. Your current location and route points are marked on the map. Tap the Details button to see the exact sunrise and sunset times for all your route points (your current location, all waypoints and the final destination). If you save your trip logs when you arrive at some of your destinations or let the application automatically save the trip logs for you, those logs are all listed here. Tap one of the trips to see the trip statistics, speed and altitude profile. If track log has also been saved, you can display it on the map with the selected color. Track logs can be exported to GPX files for later use. Select a country from the list and see useful driving information about the selected country. Information may include speed limits on different road types, the maximum blood alcohol level and any compulsory equipment you need to show when stopped by the police. 88 NX404 English Run the Demo and watch sample route simulations to see how navigation works. The About section provides you with product information. Read the Software and Database End User License Agreement, or check the map and other contents of the application. You can also access program usage statistics. 5.3 Settings menu You can configure the program settings, and modify the behavior of Clarion Mobile Map. On the map screen, tap the following buttons: The Settings menu has several options. Tap Button , , . or scroll with your finger to see the full list. Description Adjust the sound volume, mute your device or change the voice guidance language. In addition, you can enable and set up different warnings and alerts. The content of the Quick menu (page 20) is fully customizable. Tap the button you want to change, and select its new function from the list. These settings determine how routes will be calculated. Select the type of vehicle you are driving, the road types used in route planning, and the route planning method. If more drivers use Clarion Mobile Mapfor navigating, their settings can be remembered by using one of the user profiles. You can fine-tune the appearance of the Map screen. Adjust the map view to your needs, choose suitable color themes from the list for both daytime and night use, change the blue arrow to a 3D car model, show or suppress 3D buildings, turn track logging on or off, and manage you Place visibility sets (which Places to show on the map). Adjust how the software helps you navigate with different kinds of route related information on the Map screen. Display related settings. NX404 English 89 These settings allow you to customize the application for your local language, measurement units, time and date settings and formats, as well as to choose the time zone. Trip logs and track logs contain useful information about your trips. Trip logs can be saved manually when you reach your destination or you can turn on the automatic saving here. The application collects usage information and GPS logs that may be used for improving the application and the quality and coverage of maps. Here you can enable or disable collecting these logs. Modify the basic software parameters set during the initial setup process. For details, see page 7. These settings determine how user data is managed. There are three options: • Backup User Data: All user data and the current settings are saved on the inserted USB Memory and each backup is stored in a new file. • Restore User Data: All user data and the settings are overwritten with the information stored in the latest backup file. • Delete User Data: All the user backup files are deleted. Delete all saved data and reset all settings to their factory defaults. 90 NX404 English 5.3.1 Sound and Warnings Adjust the sound volume, mute your device or change the voice guidance language. In addition, you can enable and set up different warnings and alerts. Button Description Tap this button to adjust the volume of the different sounds in the application. A new screen shows the different sound types and their controls. See below for details. This button shows the current voice guidance profile. By tapping the button, you can select a new profile from the list of available languages and speakers. Tap any of these to hear a sample voice prompt. Just tap selected the new spoken language. when you have Different voice profiles are capable of different levels of service: • Natural Voice: These prerecorded sounds can only tell you basic information about turns and distances. • TTS Voice: These computed voices can tell you complex instructions, they can tell you the street names or read out the system messages for you. Tap this button to adjust the enhanced TTS features. The following settings are available: • You can set the feature to read out traffic messages. • Whenever a route is calculated, the software can read out the quick summary of the route. • When you cross country borders, the application can read out the information about the country you have just entered. • All system messages can also be announced. Street names sound correctly only if you use a native voice profile for the country. You can decide whether the application • tries to read the street names in a foreign country, • use road numbers in your language or • announces the maneuver only. You can also decide whether you want an announcement for distance maneuvers or it is enough to receive the information when the turn is near. Tap this button to set the verbosity of the voice instructions: how much they tell and how often they speak. NX404 English 91 Maps may contain information about the speed limits of the road segments. Clarion Mobile Map is able to warn you if you exceed the current limit. This information may not be available for your region (ask your local dealer), or may not be fully correct for all roads in the map. The maximum speed set in the vehicle profile is also used for this warning. Clarion Mobile Map alerts you if you exceed the preset value even if the legal speed limit is higher. This setting lets you decide whether you wish to receive visible and/or audible warnings. Adjust the slider to set the relative speed above which the application initiates the warning. The following alert types are available: • Audio warning: you receive a verbal warning when you exceed the speed limit with the given percentage. • Visual warning: the current speed limit is shown on the map when you exceed it. If you prefer to see the speed limit sign on the map all the time (normally it is shown only if your speed exceeds it), you can set it here. This feature allows you to receive a warning when approaching a Road Safety Camera or other alert points like school zones or railroad crossings. You must ensure on your own liability that using this feature is legal in the country where you intend to use it. You can set the alert for the different alert point categories individually. The following alert types are available: • Audio warning: beeps can be played (natural voice) or the type of the alert can be announced (TTS) while you are approaching one of these points, and an extra alert can warn you if you exceed the given speed limit while approaching. • Visual warning: the type of the alert point, its distance and the related speed limit appear on the Map screen while you are approaching one of these cameras. For some of the alert points, the enforced or expected speed limit is available. For these points, the audio alert can be different if you are below or above the given speed limit. • Only when speeding: The audio alert is only played when you exceed the given speed limit. • When approaching: The audio alert is always played when approaching one of these alert points. In order to draw your attention, the alert is different when you exceed the speed limit. Maps may contain driver alert information. Tap this button to turn on or off these warnings and to set the distance from the hazard to receive the warning at. These can be set individually for the different warning types. 92 NX404 English You can control the volume of the following sound types: Button Description This is the main volume control. Use the hardware knob to adjust the main volume. These controls affect the volume of the guidance sounds (verbal instructions). Turn off the attention tone preceding verbal instructions or adjust its volume. These controls affect the volume of the non verbal alert sounds (beeps). Controls for each sound type: Button Volume slider Description Adjusts the volume of the related sound. Use the switch to mute the related sound. The slider becomes inactive. Tap again to re-enable. 5.3.2 Customize Quick menu The content of the Quick menu (page 20) is fully customizable. Tap the button you want to change, and select its new function from the list. The list of available functions and their descriptions are on page 20. 5.3.3 Route settings These settings determine how routes will be calculated. Button Description On-road navigation creates a turn by turn itinerary using the road network on the map. Switch to off-road navigation to navigate between destinations in a straight line. The route calculation can be optimized for different situations and vehicle types by changing the planning method. See below for details. If the selected routing method is not Green, you can have your route compared to the best green alternative on the screen when confirming the route. If this alternative is much better than the selected method, you can quickly switch to Green mode. NX404 English 93 To let the route fit your needs, you can also set which road types are to be considered for or to be excluded from the route if possible. Excluding a road type is a preference. It does not necessarily mean total prohibition. If your destination can only be accessed using some of the excluded road types, they will be used but only as much as necessary. In this case a warning icon will be shown on the My Route screen, and the part of the route not matching your preference will be displayed in a different color on the map. In the list of road types you can see in how many segments and what total length of the road type is used in the current route. Button Description You might need to avoid freeways when you are driving a slow car or you are towing another vehicle. Charge roads are pay roads where you can purchase a pass or vignette to use the road for a longer period of time. They can be enabled or disabled separately from toll roads. Clarion Mobile Map includes toll roads (pay roads where there is a per-use charge) in the routes by default. If you disable toll roads, Clarion Mobile Map plans the best toll-free route. Clarion Mobile Map includes ferries in a planned route by default. However, a map does not necessarily contain information about the accessibility of temporary ferries. You might also need to pay a fare on ferries. Clarion Mobile Map excludes unpaved roads by default: unpaved roads can be in a bad condition and usually you cannot reach the speed limit on them. Carpool or HOV lanes can be used if a given number of passengers are traveling in the vehicle. You should check whether you are allowed to use carpool lanes before enabling this road type. 94 NX404 English Vehicle profiles: When you tap , you can set the following parameters: Button Description Tap this button to rename the profile for something meaningful. Enter the average consumption of your vehicle when used in built-up areas. The unit for consumption can be set in Regional Settings. Enter the average consumption of your vehicle when used on highways. The unit for consumption can be set in Regional Settings. Select the engine and fuel type of your vehicle. This helps in estimating the CO2 emission. Enter the average fuel price for travel cost calculation. The currency can be set in Regional Settings. Set the maximum speed you travel with the vehicle. Check this box to enable more settings for the below parameters. Set the total length of the vehicle. Set the width of the vehicle. Set the height of the vehicle. Set if there is a trailer attached to the vehicle. Set the maximum allowed weight of the vehicle. Set the actual weight of the vehicle. Select one or more hazard types if the vehicle carries dangerous material. NX404 English 95 Route Planning Method types: Button Description Gives a quick route if you can travel at or near the speed limit on all roads. Usually the best selection for fast and normal cars. Gives a short route to minimize the distance to travel. It can be practical for slow vehicles. Searching for a short route regardless of the speed, this route type is rarely practical for normal vehicles. Gives a quick but fuel efficient route based on the fuel consumption data given in Route settings (page 93). Travel cost and CO2 emission calculations are estimations only. They cannot take elevations, curves and traffic conditions into account. Results in a route with fewer turns and no difficult maneuvers. With this option, you can make Clarion Mobile Map to take, for example, the freeway instead of a series of smaller roads or streets. 5.3.4 User profiles If more drivers use Clarion Mobile Mapfor navigating, their settings can be remembered by using one of the user profiles. Rename the profiles after tapping the edit button on the right so that all users know which profile to use and switch between profiles by tapping its name. If you select a new profile, the application restarts so that the new settings can take effect. 96 NX404 English 5.3.5 Map settings You can fine-tune the appearance of the Map screen. Adjust the map view to your needs, choose suitable color themes from the list for both daytime and night use, change the blue arrow to a 3D car model, show or hide 3D buildings, turn track logging on or off, and manage you Place visibility sets (which Places to show on the map). The map is always shown on the screen so that you can see the effect when you change a setting. Button Description Switch the map view between a 3D perspective view and a 2D top-down view. Adjust the basic zoom and tilt levels to your needs. Three levels are available. When selected, the map zooms out to show an overview of the surrounding area if the next route event (maneuver) is far. When you get close to the event, the normal map view returns. Switch between daytime and night color modes or let the software switch between the two modes automatically a few minutes before sunrise and a few minutes after sunset. Select the color scheme used in daytime mode. Select the color scheme used in night mode. Replace the default position marker to one of the 3D vehicle models. You can select separate icons for different vehicle types selected for route planning. Separate icons can be used for car, pedestrian and the other vehicles. Show or suppress 3D landmarks, 3D artistic or block representations of prominent or well-known objects. Show or suppress 3D city models, 3D artistic or block representation of full city building data containing actual building size and position on the map. NX404 English 97 Show or suppress the 3D elevation of the surrounding terrain. Turn on or off track log saving, that is, saving the sequence of the locations your journeys go through. Select which Places to show on the map while navigating. Too many Places make the map crowded so it is a good idea too keep as few of them on the map as possible. For this, you have the possibility to save different Place visibility sets. You have the following possibilities: • Tap the checkbox to show or hide the Place category. • Tap the name of the Place category to open the list of its subcategories. • Tap to save the current Place visibility set or to load a previously saved one. Here you can also revert to the default visibility settings. 5.3.6 Visual guidance settings Adjust how the software helps you navigate with different kinds of route related information on the Map screen. The data fields in the corner of the Map screen can be customized. Tap this button and select the values you want to see. The values can be different when you navigate a route from when you are just cruising without a given destination. You can select general trip data like your current speed or the altitude, or route data related to your final destination or the next waypoint on your route. You may need a gas station or a restaurant during your journey. This feature displays a new button on the map when you are driving on freeways. Tap this button to open a panel with the details of the next few exits or service stations. Tap any of them to display it on the map and add it as a waypoint to your route if needed. Select the service types displayed for the freeway exists. Choose from the POI categories. Whenever adequate information is available, lane information similar to the real ones on road signs above the road is displayed at the top of the map. You can turn this feature on or off. If you are approaching a freeway exit or a complex intersection and the needed information exists, the map is replaced with a 3D view of the junction. You can turn this feature on or let the map be displayed for the whole route. 98 NX404 English When entering tunnels, the surface roads and buildings can be disturbing. This feature shows a generic picture of a tunnel instead of the map. A top-down overview of the tunnel and remaining distance are also displayed. Turn on the route progress bar to see your route as a straight line on the left side of the map. The blue arrow represents your current position and moves up as you travel. Waypoints and Traffic events are also displayed on the line. When you slow down while driving on a freeway, there is a chance that you are in a traffic jam so Clarion Mobile Map offers you a detour using the next exit. The message shows you distance of the exit and the difference in distance and estimated time compared to the original route. You can choose from one of the following options: • Tap Dismiss or just ignore the message if you want to keep the original route. • Tap Preview to see the overview of the original route and the detour to make the decision. You can accept the detour as offered or increase the bypassed freeway segment before accepting. • Turn to the suggested new direction and the route will be automatically recalculated. Similar to the above possibility, alternative routes can be suggested when driving on normal roads. Clarion Mobile Mapwill select a different turn in the upcoming intersection and offers you a different route for the next section of the route. Your options are the similar as above but you cannot modify the offered detour. Parking at the destination may not be easy in city areas. As you approach the destination, Clarion Mobile Map can offer parking category Places near your destination. Tap the "P" button to open a top-down map with the destination and the offered parking Places. Select one and modify the route accordingly. If you leave the recommended route and suddenly exit the freeway, the application offers different alternatives near the exit like gas stations or restaurants. Also, if there are avoidable parts of the original route ahead (like a tunnel, a toll road or a ferry), you will find them in the list in case you want to bypass them with the help of Clarion Mobile Map. NX404 English 99 5.3.7 Display settings Display related settings include menu animations, separate skins for daytime and night use and the brightness of the display. When animation is turned on, buttons on menus and keyboard screens appear in an animated way. Screen transitions are also animated. 5.3.8 Regional settings These settings allow you to customize the application for your local language, measurement units, time and date settings and formats, as well as to choose the time zone. Button Description This button displays the current written language of the user interface. By tapping the button, you can select a new language from the list of available languages. The application will restart if you change this setting; you are asked to confirm this. You can set the distance units to be used by the program. Clarion Mobile Map may not support all the listed units in some voice guidance languages. Select between 12 and 24 hours time display and the various international date display formats. You can also set other country specific units used to display different values in the application. By default, time zone is taken from the map information and adjusted by your current location. Here you can set time zone and daylight saving manually. 5.3.9 Trip monitor settings Trip logs contain useful information about your trips. Trip logs can be saved manually when you reach your destination or you can turn on the automatic saving here. You can access these logs in the Trip monitor. Trip monitor is available from the More menu. Trip monitor can record statistical data of your trips. If you need these logs later, you can let the application save them automatically for you. This is not a button. This line shows the current size of the trip database, the sum of all trip and track logs saved. 100 NX404 English Track logs, the sequence of the positions given by the GPS receiver, can be saved together with trip logs. They can later be displayed on the map. You can let the application save the track log whenever it saves a trip. 5.3.10 Log collection settings If you accept this when first using the application, it collects usage information and GPS logs that may be used for improving the application and the quality and coverage of maps. The data is processed anonymously; no one will be able to track any personal information. Here you can enable or disable collecting these logs. Anonymous statistical information on using the navigation software is collected for later development purposes. Understanding how different people use the application can help us improve the user interface and the program workflow. Anonymous track logs are collected for later development purposes. Your trips can help us improve the quality and coverage of maps. NX404 English 101 6 Glossary 2D/3D GPS reception The GPS receiver uses satellite signals to calculate its (your) position and needs at least four signals to give a three-dimensional position, including elevation. Because the satellites are moving and because objects can block the signals, your GPS device might not receive four signals. If three satellites are available, the receiver can calculate the horizontal GPS position but the accuracy is lower and the GPS device does not give you elevation data: only 2D reception is possible. Active route The currently navigated route. Whenever the destination is set, the route is active until you delete it, reach your destination or you quit Clarion Mobile Map. See also: Route. City Center The city/town center is not the geometric center of the city/town but an arbitrary point the map creators have chosen. In towns and villages, it is usually the most important intersection; in larger cities, it is one of the important intersections. Color theme Clarion Mobile Map comes with different color themes for daytime or night use of the map and menu screens. Themes are custom graphic settings and they can have different colors for streets, blocks or surface waters in 2D and 3D modes, and they display shades or shadows in different ways in 3D mode. One daytime scheme and one night scheme is always selected for the map and for the menus. Clarion Mobile Map uses them when it switches from day to night and back. GPS accuracy Several factors have impact on the deviation between your real position and the one given by the GPS device. For example, signal delay in the ionosphere or reflecting objects near the GPS device have a different and varying impact on how accurately the GPS device can calculate your position. Map Clarion Mobile Map works with digital maps which are not simply the computerized versions of traditional paper maps. Similarly to the paper road maps, the 2D mode of digital maps show you streets, roads, and elevation is also shown by colors. In 3D mode, you can see the altitude differences, for example valleys and mountains, elevated roads, and in selected cities 3D landmarks and 3D buildings are also displayed. 102 NX404 English You can use digital maps interactively: you can zoom in and out (increase or decrease the scale), you can tilt them up and down, and rotate them left and right. In GPS-supported navigation, digital maps facilitate route planning. North-up map orientation In North-up mode the map is rotated so its top always faces North. This is the orientation for example in Find on Map. Road Safety Camera Special alert points for speed, red light or bus lane cameras. Different data sources are available. You can configure Clarion Mobile Map to warn you when you approach one of these cameras. Detecting the location of Road Safety Cameras is prohibited in certain countries. It is the sole responsibility of the driver to check whether this feature can be used during the trip. The software is capable of showing and warning for more than just cameras. Various other types of proximity alert points like school zones and railroad crossings are also available. Route A sequence of route events, i.e. maneuvers (for example, turns and traffic circles) to reach the destination. The route contains one start point and one or more destinations. The start point is the current (or last known) position by default. If you need to see a future route, the start point can be replaced with any other given point. Track-up map orientation In Track-up mode the map is rotated so its top always points in the current driving direction. This is the default orientation in 3D map view mode. Vehimarker The current position is shown with a blue arrow on the map by default. The direction of the blue arrow shows the current heading. This position marker can be replaced with different 3D vehicle symbols. You can even specify different Vehimarkers for different route types (depending on which vehicle type is selected for route calculation). NX404 English 103 7 End User License Agreement 1 The contracting parties 1.1 This Agreement has been entered into by and between NNG Software Developing and Commercial Ltd. (registered seat: 23 Bérc utca, H-1016 Budapest, Hungary; company reg.no.: 01-09-891838) as Licensor (hereinafter: Licensor) and You as the end user (hereinafter: User; the User and the Licensor jointly referred to as: Parties) in subject of the use of the products specified in this Agreement, including software products, databases and content . 2 Conclusion of the Agreement 2.1 The Parties hereby acknowledge that this Agreement shall be concluded by implicit conduct of the Parties without signing the Agreement. 2.2 The User hereby acknowledges that following the lawful acquisition (online purchase from authorized vendor or preinstalled on purchased Device) of the software product constituting the object of this Agreement (Section 4), any degree of use, installation into a computer or other hardware equipment (mobile phone, multi-function device, personal navigation device, in-car navigation or multi function head unit, etc.) (hereinafter referred to as: “Device”), installation of such Device into a vehicle, pressing of the “Accept” button displayed by the software during installation or use (hereinafter referred to as: “Use”) shall mean that the User has accepted the terms and conditions of this Agreement as legally binding. The time of conclusion of the present Agreement is the time of executing the first action of use (commencement of use). 2.3 This Agreement shall by no means authorize Use of the software product by those persons having unlawfully acquired the software product or having unlawfully installed it on a Device or in a vehicle. 2.4 U.S. Government Users. If you acquire the Software Product by or on behalf of the United States Government or any other entity seeking or applying rights similar to those customarily claimed by the United States Government, you are on notice that the Software Product and the Databases, content and services are commercial items as that term is defined at 48 C.F.R (“FAR”) 2.101 and that all use of the Software Product is subject to this Agreement. 3 Applicable laws and regulations 3.1 Any action related to this Agreement will be governed by the laws of the Republic of Hungary, with specific reference to Act IV of 1959 on the Civil Code and to Act LXXVI of 1999 on Copyrights (the “Copyright Act”) shall apply. The United Nations Convention on Contracts for the International Sales of Goods is hereby excluded from application to this EULA. 3.2 The parties hereby agree that the courts of the Republic of Hungary will have exclusive jurisdiction to rule on any disputes arising in connection with this Agreement. 3.3 The original language version of this Agreement is the Hungarian version. This Agreement has versions in other languages as well. In case of dispute the Hungarian version shall prevail. 4 Object of the Agreement and Termination 4.1 The object of this Agreement shall be the navigation guidance software product of Licensor (hereinafter referred to as: the “Software Product”). 4.2 The Software Product shall include the operating computer program, its complete documentation, the map database pertaining thereto and any third-party contents and services accessible through the Software Product (hereinafter together referred to as: the “Database”). 4.3 Any form of display, storage, coding, including printed, electronic or graphic display, storage, source or object code, or any other as yet undefined form of display, storage, or coding, or any medium thereof shall be deemed parts of the Software Product. 4.4 Error corrections, additions, updates or upgrades to the Software Product or the Databases used by the User following the conclusion of this Agreement shall also be deemed parts of the Software Product and Used in accordance with this Agreement. 104 NX404 English 4.5. Your rights under this Agreement will terminate immediately without notice from Licensor if you materially breach it or take any action in derogation of Licensor's and/or its licensors' rights to the Software Product. Licensor may terminate this Agreement if any Software Product becomes, or in Licensor's reasonable opinion likely to become, the subject of a claim of intellectual property infringement or trade secret misappropriation. Upon termination, you will cease use of, and destroy Software Product and all parts of it and confirm compliance in writing to Licensor, if requested. 5 Rights under copyright 5.1 Unless otherwise provided by law or contractual provisions, the Licensor is the sole and exclusive owner of all material copyrights vested in the Software Product. 5.2 Copyrights extend to the whole Software Product and to its parts separately as well. 5.3 The owner(s) of the copyrights of the Database or certain works protected by intellectual property rights, that are forming part of the Software Product is (are) the Licensor, or natural person(s) or corporate entity(ies) owners of certain Databases (hereinafter referred to as: “Database Owner”). Some Database Owners are listed in the “About” or similar menu item of the Software Product. The Licensor hereby states that it has obtained sufficient usage and representation rights from the Database Owners in order to utilize the Database, to offer it for utilization and to transfer it for utilization as set forth in this Agreement. 5.4 Pursuant to this Agreement, all rights vested in the Software Product shall remain in the ownership of the Licensor, except for those to which the User is entitled under law or by virtue of this Agreement. 6 Rights of the User 6.1 By default the User is entitled to install the Software Product on one Device having a single GPS sensor built in, and to run and use one copy of the Software Product or a preinstalled copy of the Software Product thereon. The Software Product and Database is for the User’s personal or internal business use only. 6.2 The User is entitled to make one backup copy of the Software Product. However, if the Software Product operates after installation without the use of the original media copy, then the original media copy shall be deemed to be a backup copy. In all other cases, the User is only entitled to use the backup copy if the original media copy of the Software Product has been ascertainably and unequivocally rendered unsuitable for its lawful and intended use. 6.3 In the event that the Software Product comes preinstalled on- or otherwise licensed together with the Device or purchased online for and installed by the User for a specific Device, the Software Product shall be tied to the Device and may not be separated-, transferred to-, or used with another Device or sold to another User without selling the Device itself. 6.4 The Database, content or services provided to User may only be used together with User’s copy of the Software Product and may not be used separately or with another copy of the Software Product. 7 Limitations of use 7.1 The User is not entitled 7.1.1 to duplicate the Software Product (to make a copy thereof) except to the extent allowed by this Agreement or Applicable law; 7.1.2 to resell, sublicense or use it for commercial purposes, use to lease, rent or lend it, or to transfer it to a third person for any reason without transferring the Device on which it was first legally installed on (see section 6.3); 7.1.3 to translate the Software Product (including translation (compilation) to other programming languages); 7.1.4 to decompile, disassemble, or reverse engineer the Software Product; 7.1.5 to evade the protection of the Software Product or to modify, circumvent or obviate such protection through technological or by any other means; NX404 English 105 7.1.6 to modify, extend, transform the Software Product (in whole or in part), to separate it into parts, combine it with other products, install it in other products, utilize it in other products, not even for the purpose of achieving interoperability with other devices; 7.1.7 apart from using the computer program, to obtain information from the Database as a part of the Software Product, to decompile the Database, to use, copy, modify, extend, transform the Database in whole or in part or the group of data stored therein, or to install it in other products or otherwise, utilize it in other products or to transfer it, not even with the aim of achieving interoperability with other products. 7.2 The User may only use the Databases, content and services available through the Software Product and provided by third parties and the data received through the services provided by third parties (including but not limited to the traffic data received from the RDS TMC or on-line TMC traffic information service) for his/her own personal benefit and at his/her own risk. It is strictly prohibited to store, to transfer or to distribute these data or contents or to disclose them in full or in part to the public in any format or to download them from the product. 7.3 The User is not entitled to remove, modify or obscure of any copyright, trademark notice, or restrictive legend included in the Software Product, the Database, content or services. 8 No warranty, limitation of liability 8.1 The Licensor hereby informs the User that although the greatest care was taken in producing the Software Product, given the nature of the Software Product and its technical limitations, the Licensor does not provide a warranty for the Software Product being completely error-free, and the Licensor is not bound by any contractual obligation whereby the Software Product obtained by the User should be completely error-free. 8.2 THE LICENSED SOFTWARE PRODUCTS, DATABASES, CONTENT AND SERVICES ARE PROVIDED ON AN “AS IS” AND “WITH ALL FAULTS BASIS” (INCLUDING NO WARRANTY FOR THE CORRECTION OF FAULTS) AND LICENSOR, THE DATABASE OWNERS AND THIRD PARTY SUPPLIERS EXPRESSLY DISCLAIM ALL WARRANTIES, EXPRESS OR IMPLIED, INCLUDING BUT NOT LIMITED TO, THE IMPLIED WARRANTIES OF NON-INFRINGEMENT, MERCHANTABILITY, SATISFACTORY QUALITY, ACCURACY, TITLE AND FITNESS FOR A PARTICULAR PURPOSE. NO ORAL OR WRITTEN ADVICE OR INFORMATION PROVIDED BY LICENSOR OR ANY OF ITS AGENTS, DATABASE OWNERS, EMPLOYEES OR THIRD PARTY PROVIDERS SHALL CREATE A WARRANTY, AND USER IS NOT ENTITLED TO RELY ON ANY SUCH ADVICE OR INFORMATION. THIS DISCLAIMER OF WARRANTIES IS AN ESSENTIAL CONDITION OF THE AGREEMENT. Licensor does not warrant that the Software Product, Database, content or service are capable of interoperating with any other system, Device or product (e.g. software or hardware). 8.3 The Licensor does not assume any responsibility for damages incurred due to an error in the Software Product (including errors of the computer program, the documentation and the Database). 8.4 The Licensor does not assume any responsibility for damages incurred due to the Software Product not being applicable for any defined purpose, or due to the error or incompatibility of the Software Product with any other system, device or product (e.g. software or hardware). 8.5 NEITHER LICENSOR NOR ITS SUPPLIERS SHALL BE LIABLE TO USER FOR ANY INCIDENTAL, CONSEQUENTIAL, SPECIAL, INDIRECT OR EXEMPLARY DAMAGES ARISING OUT OF THIS AGREEMENT, INCLUDING LOST PROFITS OR COSTS OF COVER, LOSS OF USE OR BUSINESS INTERRUPTION OR THE LIKE, REGARDLESS OF WHETHER THE PARTY WAS ADVISED OF THE POSSIBILITY OF SUCH DAMAGES. NOTWITHSTANDING ANYTHING TO THE CONTRARY CONTAINED HEREIN, THIRD PARTY SUPPLIERS (E.G. DATABASE OWNERS, MAP PROVIDERS) OR AGENTS OF LICENSOR SHALL HAVE NO MONETARY LIABILITY TO THE USER FOR ANY CAUSE (REGARDLESS OF THE FORM OF ACTION) UNDER OR RELATING TO THIS AGREEMENT. 8.6 The Licensor also draws the attention of the User to the fact that, when using the Software Product in any form of vehicle, observing the traffic regulations and rules (e.g. use of obligatory and/or reasonable and suitable security measures, proper and generally expected care and attention in the given situation, and special care and attention required due to the use of the Software Product) is the exclusive 106 NX404 English responsibility of the User. The Licensor shall not assume any responsibility for any damages occurred in relation to use of the Software Product in a motor vehicle. 8.7 By concluding the Agreement, the User shall, in particular, acknowledge the information stated in Section 8 above. 9 Sanctions 9.1 The Licensor hereby informs the User that, if the Licensor finds its rights under the Copyright Act to be breached, the Licensor may 9.1.1 seek judicial recognition of this breach; 9.1.2 demand that the breach cease and order the person in breach to refrain from continuing such actions; 9.1.3 demand that the person under breach give proper compensation (even by way of publicity at the expense of the person in breach); 9.1.4 claim the return of the increase of assets due to the breach; 9.1.5 demand the cease of the wrongful action and, demand restitution to its state before the breach was committed at the expense of the person in breach, and may demand the destruction of instruments and materials used to commit the breach as well as of the products created by the breach; 9.1.6 claim for damages. 9.2 The Licensor hereby also informs the User that the breach of copyrights and related rights is a crime under Act IV of 1978 on the Hungarian Criminal Code, which may be sentenced of two years in prison in basic cases and up to eight years in prison in aggravated cases. 9.3 Content and services provided by third parties. The Licensor hereby excludes any liability of its own for the Database in the Software Product and for any content or service provided by a third party by using the Database. The Licensor does not warrant the quality, suitability, accuracy, fitness for a specific purpose or territorial coverage of the Database, content, product or service or the availability of the Database, content, product or service, and it specifically excludes any liability for the suspension or cancellation of the service, and any damage arising in relation to the service or for complete cancellation of the service. User acknowledges that the mapping data in Databases contains geographical data and other data. The User hereby acknowledges that (i) inaccurate or incomplete information due to the passage of time, changing circumstances, sources used and the nature of collecting comprehensive geographic data, may each lead to incorrect results; and (ii) that the Database, contents and services provided by third parties may only be used at the risk of the User and for the personal or internal business benefit of the User. User acknowledges that the Databases, content and services are the confidential information of Database Owners and disclosure of the Databases to third parties is prohibited. USE OF THE SOFTWARE PRODUCT’S REAL TIME ROUTE GUIDANCE FUNCTION IS AT USER’S SOLE RISK AS LOCATION DATA MAY NOT BE ACCURATE. 9.4 Content and services provided by the Licensor or an agent of the Licensor. For certain Software Products the Licensor or a contractual partner may offer various products and services to the User through www.naviextras.com. The User may only use these services when the User has read and understood the relevant end user license agreement(s) at www.naviextras.com and the User is obliged to use the services in line with the terms and conditions thereof. 9.5 Purchase and acquisition of activation license for the use of certain functions, Databases, content or services may require Internet connection with no alternative way of acquisition offered by Licensor. 10 Anonymous data collection 10.1 The User hereby acknowledges that the Software Product may collect, transmit to Licensor or third parties, and in some cases store data connected to the usage of the Software Product by the User (e.g. movement/route data, user interaction data). Such data collection functions may be disabled or enabled NX404 English 107 by User any time from within the corresponding menu. The collected data is always anonymous, not associated in any way with any personal information of the User or with the User itself. 10.2 The collected data may be uploaded to Licensor’s database or transmitted periodically or in real time to a third party partner and used exclusively for the purpose of enhancing and improving the precision and reliability of features and services of the Software Product and the Databases. Uploading is executed through Licensor’s special software or by the User navigation device, and the upload may be enabled or disabled by User. After successful data upload, the collected data is deleted from the Software Product storage media. 10.3 Collected data is transmitted, stored and handled anonymously and no connection of the data with the User shall be established by Licensor or any third party. 10.4 Licensor hereby informs the User, that if it accesses the Internet through mobile data service while abroad or otherwise roaming another mobile network the transmission of such data may result in special roaming charges. To avoid such charges it is the responsibility of the User to disable mobile data services while roaming or to turn off the data collection functions of the Software Product. 11 Online Content Service Auxiliary Terms 11.1 For online content services the following auxiliary terms shall also apply. Database content (e.g. weather-, traffic info, location based info) may be supplied by Licensor to the User’s Device through an Internet connection (hereinafter: "Online Content Services"). Such Content may be granted for a fee or free of charge subject to Licensor’s decision. Ensuring access to the Internet is the responsibility of the User. 11.2 Online Content Services in general are not available in all countries, furthermore different conditions and Service characteristics may apply in different countries. Use of certain Online Services may be prohibited in various countries. It is the User's responsibility to comply with country specific regulation. Licensor excludes its liability for the consequences of illegal use of such functions and User shall indemnify and hold Licensor harmless from all claims against Licensor from authorities or third parties due to the illegal use. 11.3 Online Content is downloaded by the Software Product from Service Provider's Online content servers. The Licensor hereby excludes any liability of its own for the Online content. The Licensor does not warrant the quality, suitability, accuracy, fitness for a specific purpose or territorial coverage of the Online content, furthermore no warranty is offered regarding the availability (e.g. uptime) of Online content servers. User acknowledges that in any territory or time, slow- or non-connectivity may be experienced due to capacity limitations of Licensor's servers. The Software Product may allow the User to access and communicate third party servers directly. In such cases use of such servers is for User's own risk entirely. Licensor shall not undertake any liability whatsoever for such servers and services accessed and received directly form third parties. 11.4 User acknowledges that the data or information provided through Online Content Services is not updated in real-time and may not accurately reflect the real life situation or events. 11.5 The User hereby acknowledges that the Online Content Services may only be used at the risk of the User and for the personal benefit of the User. It is the sole responsibility of the User to provide and maintain a connection to the public Internet network. User accepts that the usage of the Online Content Services generates data traffic (up- and downstream) and may result in increased data service fees payable by User. 11.6 Online Content Services may provide data, information or materials supplied and/or licensed by third parties to Licensor. For such materials different terms and conditions imposed by such third parties may apply. Applicable third party terms shall be referred in the "About" section of the Software Product or as part of this Agreement. When first using / enabling Online Content, User accepts compliance with those third party terms and conditions. 11.7 Discontinuation. Licensor reserves the right to discontinue provision or access to any Online Content Service with or without prior notice to the User. Such discontinuation shall not entail any consequences other than here stated. In case of discontinued Online Content Services that were (i) provided for a prepaid fee, AND (ii) such fee covers the use of the Online Content Service for a definite term (i.e. pre-paid 108 NX404 English subscription service), User shall be entitled to a refund proportionate to the term remaining from such definite term from the time of the discontinuation. 11.8. Community Services. Some Online Content Services may be based on data and information uploaded by participating individuals (Users or other persons) or a Database created and maintained by a group of such individuals. Such data may not come from a trusted source and may also be intentionally false or misleading, as Licensor does not have any means to control or verify the credibility or accuracy of such data or the individuals providing the data. Therefore User accepts that community type Online Content Services must be used with extreme care. By participating in the community by providing data or any information via the Software Product or other means offered by Licensor (e.g. through a website or other software), User shall accept the following: (a) Licensor is granted a royalty free right to use the data uploaded, in particular, to modify, display, make available to the public, distribute, copy the data for any purpose; (b) User warrants that not third party has any rights that would hinder or render impossible the use of the data as set out in (a) above, and that no third party rights are infringed by uploading the data on those conditions; (c) User indemnifies and holds harmless Licensor from any claim from a third party against Licensor due to violation of its rights regarding the uploaded data. 12 Third Party Terms 12.1 Google Local Search. User acknowledges that Google Local Search (GLS) functionality is provided by the usage of Google, Inc.'s service to the User. User hereby accepts all conditions of Google's Terms of Service provided at http://www.google.com/accounts/TOS . User accepts that the Google Local Search is declared "deprecated" and is not commercially supported by Google, Inc. and also it may be made unavailable without notice by Google in accordance with the relevant terms of service at http://code.google.com/intl/hu-HU/apis/websearch/terms.html . NX404 English 109 8 Copyright note The product and the information contained herein are subject to change without prior notification. This manual may not, in whole or in part, be reproduced or transmitted in any form either electronically or mechanically, including photocopying and recording, without the express written consent of Clarion. © 2013 - Clarion © 2006 – 2013 TomTom. All rights reserved. This material is proprietary and the subject of copyright protection, database right protection and other intellectual property rights owned by TomTom or its suppliers. The use of this material is subject to the terms of a license agreement. Any unauthorized copying or disclosure of this material will lead to criminal and civil liabilities. All rights reserved. 110 NX404 English •ib!·'M'h clarion GARANTIE LIMITEE DE 1 AN CLARION Pour ie Canada et les Etats-Unis seulement Ce produit Clarion vendu par un marchand autorise Clarion est garanti contre tous defauts de materiel et de fabrication pour une duree d'un (1) an compter de Ia date de vente initiale lorsque l'achat est effectue chez un marchand autorise Clarion; les items tels les piles sont couverts par une garantie de 6 mois suivants Ia date d'achat. Tous cablages, fils et autres accessoires Clarion achetes chez un marchand autorise Clarion, sont garantis contre tous defauts de materiel ET de fabrication pour une duree de quatre-vingt-dix (90) jours suivant Ia date d'achat initiale. a TOUT ACHAT DE PRODUITS CLARION EFFECTUE CHEZ UN MARCHAND NON-AUTORISE CLARION SERA SOUMIS ADES RESTRICTIONS DE GRANANTIES DECRITES CI-DESSOUS. Les conditions de cette garantie limitee et !'implication de Ia responsabilite de Clarion Corporation of America ou Clarion Canada lnc ... Ciarion .. sous cette garantie limitee sont les suivantes: 1. UNE PREUVE DE DATE D 1ACHAT D'UN MARCHAND AUTORISE CLARION EST REQUISE POUR SERVICE SOUS GARANTIE DE CE PRODUIT. DES INFORMATIONS SUPPLEMENTAIRES CONCERNANT LES CENTRES DE SERVICES AUTORISES PAR CLARION PEUVENT ETRE OBTENUES EN CONTACTANT CLARION A UNE DES ADRESSES ENUMEREES CI-BAS. 2. Cette Garantie Limitee sera an{lulee si un dommage est survenu au bien lors d'un service effectue par une personne ou entreprise qui n'est pas accredite comme un Centre de Service et Garantie Clarion. a a 3. Cette Garantie Limitee n'est aucunement applicable un produit sujet l'abus, negligence, accidentes, mal install' ou utilisation incorrects ou que les numeros de serie ont ete modifies, obstrues ou effaces, ou qui a ete raccordes, installes, ajustes ou repares autrement qu'indique par Clarion. 4. Cette Garantie Limitee ne couvre pas les interferences electrostatiques, electriques ni les frais relies manutention pour le retrait ou Ia reinstallation. , a Ia I 5. La responsabilite de Clarion sous cette Garantie Limitee est limitee uniquement a Ia reparation ou au remplacement du produit, qui est sujet uniquement a Ia discretion de Clarion. 6. Ce produit doit est retourne dans son emballage d'origine ou equivalent. Le colis doit etre entierement assure et tous frais de transport doivent etre prepayes. Clarion n'assumera aucune responsabilite en cas de perte ou dommages survenue lors du transport. 7. TOUS PRODUITS CLARION ACQUIS PAR L'ENTREMISE AUTRE QUE PAR UN MARCHAND AUTORISE PAR CLARION, INCLUANT TOUS ACHATS VIA UN MARCHAND VIRTUEL (ACHAT INTERNET) QUI N 1EST PAS AUTORISE PAR CLARION, NE SONT PAS COUVERTS PAR LES GARANTIES LIMITEES DE CLARION, ET CE, EN ACCORD AVEC LES LIMITATIONS DEFINIES PAR LA LOI. DANS LE CAS OU LES LOIS APPLICABLES NE PERMETTENT PAS L 1ELIMINATION DES GARANTIES SOUS CES CONDITIONS, LAPERIODE DE GARANTIE LIMITEE QUI s•APPLIQUE AU PRODUIT SERA DE QUINZE(15) JOURS A PARTIR DE LA DATE D•ACHAT INITIALE. 8. AUCUNE GARANTIE IMPLICITE NE POURRA s•ETENDRE AU-DELA DE LA PERIODE DE GARANTIE DECRITE CI-DESSUS, ET CE, EN ACCORD AVEC LES LIMITES DEFINIES PAR LA LOI. CLARION NE POURRA EN AUCUN CAS ETRE TENUE RESPONSABLE DES PERTES OU DOMMAGES DIRECTS OU INDIRECTS DUS AL•UTILISATION OU L 11MPOSSIBILITE D'UTILISATION DU PRODUIT. PUISQUE CERTAINS ETATS OU PROVINCES NE PERMETTENT PAS DE LIMITER LA DUREE DES GARANTIES IMPLICITES, OU DE LIMITER LA RESPONSABILITE EN CAS DE DOMMAGES DIRECTS OU INDIRECTS, CES LIMITATIONS OU EXCLUSIONS PEUVENT NE PAS s·APPLIQUER A vous. 9. CETTE GARANTIE LIMITEE VOUS DONNE DES DROITS LEGAUX PRECIS. VOUS POUVEZ POSSEDER DES DROITS SUPPLEMENTAIRES SELON VOTRE LIEU DE RESIDENCE. 10. Les lois de l'etat de Ia California regissent totalement cette garantie limitee, son interpretation et sa mise en execution. 11. Si vous eprouvez des problemas de performance du produit pendant Ia periode de garantie, veuillez communiquer avec Clarion ou visitez notre site Web a l'adresse ci-dessous afin d'obtenir une resolution de tout problema relie aux produits Clarion. Aux Etats-Unis: Clarion Corporation of America Attn:Customer Service Manager 6200 Gateway Drive Cypress, CA 90630 1-800-GO-CLARION www.clarion.com Au Canada: Clarion Canada Inc. Centre de Service et Garantie 2239 Winston Park Drive Oakville, Ontario L6H 5R1 (905)829-4600 www.clarion.com •:nmmnt 281-0639-01 2008/9 clarion CLARION 1 YEAR LIMITED WARRANTY For USA and Canada only This Clarion product purchased from an authorized Clarion dealer are warranted against all defects in materials and workmanship for a period of one (1) year from the date of original purchase other than consumable parts, such as the battery pack, which are covered for 6 months from the date of purchase, when purchased from AND installed by an authorized Clarion dealer. All Clarion cables, wires and other accessories if purchased from an authorized Clarion dealer are warranted against all defects in materials and workmanship for ninety (90) days unless otherwise specified from the date of original purchase. ALL PURCHASES OF CLARION PRODUCTS FROM NON-AUTHORIZED CLARION DEALERS ARE SUBJECT TO FURTHER WARRANTY RESTRICTIONS AS DESCRIBED BELOW. The conditions of this Limited Warranty and the extent of responsibility of Clarion Corporation of America ( .. Clarion .. ) under this Limited Warranty are as follows : 1. PROOF OF DATE OF PURCHASE FROM AN AUTHORIZED CLARION DEALER WILL BE REQUIRED FOR WARRANTY SERVICE OF THIS PRODUCT. CENTERS MAY BE OBTAINED BY CONTACTING CLARION AT THE ADDRESS LISTED BELOW. 2. This Limited Warranty will become void if service performed by anyone other than an approved Clarion Warranty Service Center results in damage to the product. 3. This Limited Warranty does not apply to any product which has been subject to misuse, neglect or accident, or which has had the serial number altered, defaced or removed, or which has been connected, installed, adjusted or repaired, other than in accordance with the instructions furnished by Clarion. 4. This Limited Warranty does not cover car static or other electrical interferences, tape head or laser pick-up cleaning or adjustments, or labor costs for the removal or reinstallation of the unit for repair. 5. The sole responsibility of Clarion under this Limited Warranty shall be limited to the repair of the product or replacement of the product, at the sole discretion of Clarion. 6. Product must be shipped in its original carton or equivalent carton, fully insured, with shipping charges prepaid. Clarion will not assume any responsibility for any loss or damage incurred in shipping. 7. CLARION PRODUCTS PURCHASED FROM A SOURCE OTHER THAN AN AUTHORIZED CLARION DEALER, INCLUDING ANY AND ALL PURCHASES VIA THE INTERNET FROM A NON INTERNET AUTHORIZED CLARION DEALER, SHALL NOT BE COVERED BY ANY CLARION LIMITED WARRANTY TO THE EXTENT ALLOWED BY APPLICABLE LAW. IN THE EVENT AND TO THE EXTENT APPLICABLE LAW PROHIBITS ELIMINATION OF WARRANTIES UNDER THESE CIRCUMSTANCES, THE APPLICABLE LIMITED WARRANTY PERIOD SHALL BE DEEMED TO BE FIFTEEN (15) DAYS FROM THE DATE OF ORIGINAL PURCHASE. 8. ALL IMPLIED WARRANTIES EXCEPT TO THE EXTENT PROHIBITED BY APPLICABLE LAW SHALL HAVE NO GREATER DURATION THAN THE WARRANTY PERIOD SET FORTH ABOVE. UNDER NO CIRCUMSTANCES SHALL CLARION BE LIABLE FOR ANY LOSS OR DAMAGE, DIRECT OR CONSEQUENTIAL, ARISING OUT OF THE USE OR INABILITY TO USE THE PRODUCT. BECAUSE SOME STATES DO NOT ALLOW LIMITATIONS ON HOW LONG AN IMPLIED WARRANTY LASTS OR EXCLUSIONS OR LIMITATIONS OF INCIDENTAL OR CONSEQUENTIAL DAMAGES, THE ABOVE LIMITATIONS OR EXCLUSIONS MAY NOT APPLY TO YOU. 9. THIS LIMITED WARRANTY GIVES YOU SPECIFIC LEGAL RIGHTS, AND YOU MAY ALSO HAVE OTHER RIGHTS WHICH VARY FROM STATE TO STATE. 1 0. The laws of the State of California shall govern and control this Limited Warranty, its interpretation and enforcement. 11. Should you have any difficulties with the performance of this product during the warranty period, please call Clarion or visit our web site for a listing of Authorized Warranty Service Centers in your area. You may also contact Clarion Customer Service at the address listed below for any service help you may need with Clarion products. In USA: Clarion Corporation of America Attn:Customer Service Manager 6200 Gateway Drive Cypress, CA 90630 1-800-GO-CLARION www.clarion.com In Canada: Clarion Canada Inc. Warranty Service Center 2239 Winston Park Drive Oakville, Ontario L6H 5R1 (905) 829-4600 www.clarion.com