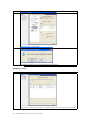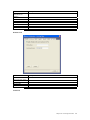
1
StorTrends®
NAS Software
(Version 2.2)
User’s Guide
MAN-STOR-N22
01/30/04
© Copyright 1998-2004 American Megatrends, Inc.
All rights reserved.
American Megatrends, Inc.
6145-F Northbelt Parkway
Norcross, GA 30071
This publication contains proprietary information which is protected by copyright. No
part of this publication can be reproduced, transcribed, stored in a retrieval system,
translated into any language or computer language, or transmitted in any form
whatsoever without the prior written consent of the publisher, American Megatrends, Inc.
American Megatrends, Inc. acknowledges the following trademarks:
Intel and Pentium are registered trademarks of the Intel Corporation.
AMD, Athlon, and Athlon XP are trademarks of the Advanced Micro Devices
Corporation.
Sun and NFS are trademarks of the Sun Microsystems Corporation.
Microsoft, Windows, Internet Explorer and MS-DOS are registered trademarks of the
Microsoft Corporation and Active Directory is a trademark of the Microsoft Corporation.
IBM, AT, VGA, PS/2, and OS/2 are registered trademarks and XT and CGA are
trademarks of the International Business Machines Corporation.
Digital, DEC, and OpenVMS are trademarks of Digital Equipment Corporation.
Compaq is a registered trademark of the Compaq Corporation.
Hewlett-Packard, HP, and HP-UX are registered trademarks of Hewlett-Packard
Company.
Novell, NetWare, IPX, NCP, and NetWare Core Protocol are registered trademarks of the
Novell Corporation.
UNIX is a registered trademark in the United States and other countries, licensed
exclusively through X/Open Company Ltd.
Linux is a registered trademark of Linus Torvalds.
Red Hat is a registered trademark of the Red Hat Corporation.
Apple and AppleTalk are registered trademarks of Apple Computer Corporation.
Yellow Pages is a registered trademark in the United Kingdom of British Telecom.
Ethernet is a registered trademark of the Xerox Corporation.
802 is a registered trademark of the Institute of Electrical and Electronic Engineers, Inc.
(IEEE).
Other trademarks and trade names may be used in this document to refer to either the
entities claiming the marks and names or their products. American Megatrends, Inc.
disclaims any proprietary interest in trademarks and trade names other than its own.
Revision History
05/15/03
06/30/03
01/30/04
ii
Initial release. (Version 2.0)
Added Mirrored OS information (Version 2.1)
GUI Redesign (Version 2.2)
StorTrends® NAS Software (Version 2.2) User’s Guide
Table of Contents
Revision History ............................................................................................................................ii
Table of Contents......................................................................................................................... iii
Limited Warranty ......................................................................................................................... vii
Limitations of Liability.................................................................................................................. vii
Web Site .................................................................................................................................. vii
Disclaimer .................................................................................................................................. viii
Chapter 1
Introduction.......................................................................................................... 1
Overview ...................................................................................................................................... 1
Features ....................................................................................................................................... 1
Features, Continued...................................................................................................................... 2
Features, Continued...................................................................................................................... 3
Features, Continued...................................................................................................................... 4
Chapter 2
Quick Installation................................................................................................. 5
Before You Start .......................................................................................................................... 5
Prerequisites............................................................................................................................. 5
Before You Start, Continued ......................................................................................................... 6
Prerequisites, Continued .......................................................................................................... 6
Installation .................................................................................................................................... 7
Text Mode................................................................................................................................. 7
Installation, Continued................................................................................................................... 8
Text Mode, Continued .............................................................................................................. 8
Installation, Continued................................................................................................................... 9
Text Mode, Continued .............................................................................................................. 9
Installation, Continued................................................................................................................. 11
Graphics Mode ....................................................................................................................... 11
Installation, Continued................................................................................................................. 12
Graphics Mode, Continued..................................................................................................... 12
Installation, Continued................................................................................................................. 13
Graphics Mode, Continued..................................................................................................... 13
Installation, Continued................................................................................................................. 14
Graphics Mode, Continued..................................................................................................... 14
Connecting ................................................................................................................................. 15
Connecting, Continued................................................................................................................ 16
Chapter 3
Using Your NAS Server..................................................................................... 19
Overview .................................................................................................................................... 19
Default User Name and Password............................................................................................. 19
NAS Management Section......................................................................................................... 20
Users and Groups...................................................................................................................... 20
Creating a User ...................................................................................................................... 21
Editing a User ......................................................................................................................... 22
Deleting a User....................................................................................................................... 23
Creating a Group.................................................................................................................... 24
Editing a Group ...................................................................................................................... 25
Deleting a Group .................................................................................................................... 27
ADS (Active Directory™ Services) Domain ........................................................................... 29
NIS (Network Information System) Domain ........................................................................... 29
Storage Explorer ........................................................................................................................ 30
Viewing System Details.......................................................................................................... 30
Viewing Backup Information................................................................................................... 31
Creating a Volume.................................................................................................................. 32
Deleting a Volume .................................................................................................................. 34
Preface
iii
Rebuilding a Volume .............................................................................................................. 36
Viewing Volume List Details ................................................................................................... 37
Viewing Volume Properties .................................................................................................... 37
Creating Subdirectories in Volumes....................................................................................... 39
Deleting Subdirectories in Volumes ....................................................................................... 40
Managing Quotas ................................................................................................................... 41
Creating and Restoring Volume Level Snapshots ................................................................. 42
Setting Sharing Protocols....................................................................................................... 46
HTTP and FTP Considerations .............................................................................................. 48
Setting Full Volume Access Rights ........................................................................................ 48
Setting Read Only Volume Access to Everyone .................................................................... 49
Denying Volume Access Rights ............................................................................................. 49
Setting Individual User and Group Volume Access Rights .................................................... 50
NAS Configuration Section ........................................................................................................ 57
Network ...................................................................................................................................... 57
TCP/IP Tab............................................................................................................................. 58
Windows Tab.......................................................................................................................... 59
UNIX Tab................................................................................................................................ 59
Apple Tab ............................................................................................................................... 60
Novell Tab .............................................................................................................................. 61
SNMP Tab .............................................................................................................................. 62
HTTP/FTP Tab ....................................................................................................................... 62
Events and Alerts....................................................................................................................... 63
Viewing and Clearing Events ................................................................................................. 63
Enabling SNMP Alerts............................................................................................................ 65
Configuring SNMP Targets .................................................................................................... 66
Setting SNMP Alert Types...................................................................................................... 67
Enabling Email Alerts ............................................................................................................. 68
Configuring Email Addresses and Mail Servers..................................................................... 69
Setting Email Alert Types ....................................................................................................... 70
Configuration and Control .......................................................................................................... 71
Shutting Down Your NAS Server ........................................................................................... 72
Restarting Your NAS Server .................................................................................................. 72
Editing Your NAS Server’s System Name ............................................................................. 73
Changing the Administrative/Root Password......................................................................... 74
Upgrading Your NAS Software............................................................................................... 75
Adjusting the Date and Time on Your NAS Server ................................................................ 76
Language ................................................................................................................................... 77
Changing the Language ......................................................................................................... 78
NAS Health and Status Information Section.............................................................................. 80
StorTrends 2104 Server ......................................................................................................... 80
CPU Temperature .................................................................................................................. 81
Ambient Temperature............................................................... Error! Bookmark not defined.
System Voltages and Fan Status ........................................................................................... 81
Appendix A
Expansion Card Compatibility List.................................................................. 85
Compatibility List........................................................................................................................ 85
Appendix B
Console User Interface ..................................................................................... 87
Overview .................................................................................................................................... 87
Navigation............................................................................................................................... 87
Main Menu ................................................................................................................................. 88
System Information .................................................................................................................... 89
Disk Information ......................................................................................................................... 90
Disk Information, Continued ........................................................................................................ 91
Volume Information.................................................................................................................... 92
iv
StorTrends® NAS Software (Version 2.2) User’s Guide
Volume Information, Continued................................................................................................... 93
Event Log List ............................................................................................................................ 94
Set Host Name........................................................................................................................... 95
Changing the Host Name ....................................................................................................... 95
Set IP Address ........................................................................................................................... 96
Configuring TCP/IP ................................................................................................................ 96
Set IP Address, Continued .......................................................................................................... 97
Configuring TCP/IP, Continued .............................................................................................. 97
Set IP Address, Continued .......................................................................................................... 98
Configuring TCP/IP, Continued .............................................................................................. 98
Set IP Address, Continued .......................................................................................................... 99
Configuring TCP/IP, Continued .............................................................................................. 99
Set IP Address, Continued ........................................................................................................ 100
Configuring TCP/IP, Continued ............................................................................................ 100
System Related Operations ..................................................................................................... 101
Log Out From Console UI ........................................................................................................ 102
Appendix C
RAID .................................................................................................................. 103
Introduction to RAID................................................................................................................. 103
RAID Benefits........................................................................................................................... 103
Improved I/O......................................................................................................................... 103
Increased Reliability ............................................................................................................. 103
RAID Overview......................................................................................................................... 104
Disk Striping ............................................................................................................................. 104
Disk Mirroring ........................................................................................................................... 105
Selecting a RAID Level ............................................................................................................ 106
RAID 0...................................................................................................................................... 107
RAID 1...................................................................................................................................... 108
RAID 5...................................................................................................................................... 109
Glossary ..................................................................................................................................... 111
ACL....................................................................................................................................... 111
Active Directory™................................................................................................................. 111
Alert ...................................................................................................................................... 111
AppleTalk®........................................................................................................................... 111
Appliance.............................................................................................................................. 111
Archive.................................................................................................................................. 112
Authentication....................................................................................................................... 112
Base DN ............................................................................................................................... 112
Capacity................................................................................................................................ 112
Data ...................................................................................................................................... 112
DHCP ................................................................................................................................... 112
Domain ................................................................................................................................. 112
Domain Controller ................................................................................................................ 112
Domain Name....................................................................................................................... 112
Ethernet ................................................................................................................................ 113
Ethernet 802.2 ...................................................................................................................... 113
Ethernet 802.3 ...................................................................................................................... 113
Ethernet II ............................................................................................................................. 113
Ethernet snap ....................................................................................................................... 113
Firewall ................................................................................................................................. 114
Frame ................................................................................................................................... 114
FTP....................................................................................................................................... 114
Gateway ............................................................................................................................... 114
Gigabyte ............................................................................................................................... 114
Group.................................................................................................................................... 114
Preface
v
Host ...................................................................................................................................... 114
HTTP .................................................................................................................................... 114
Internet ................................................................................................................................. 115
IP Address ............................................................................................................................ 115
IPv6 ...................................................................................................................................... 115
IPX........................................................................................................................................ 115
ISP........................................................................................................................................ 115
Journaling ............................................................................................................................. 115
Mail Server ........................................................................................................................... 115
MIB ....................................................................................................................................... 115
NAS ...................................................................................................................................... 115
NDMP ................................................................................................................................... 116
Network ................................................................................................................................ 116
NIC ....................................................................................................................................... 116
NIS........................................................................................................................................ 116
Node ..................................................................................................................................... 116
Notification............................................................................................................................ 116
NTP ...................................................................................................................................... 116
Open..................................................................................................................................... 117
OSI ....................................................................................................................................... 117
OSI Layer 3 .......................................................................................................................... 117
Packet................................................................................................................................... 117
Parameters ........................................................................................................................... 117
Protocol ................................................................................................................................ 117
Proxy Server......................................................................................................................... 117
Quota.................................................................................................................................... 117
RAID 0 .................................................................................................................................. 118
RAID 1 .................................................................................................................................. 118
RAID 5 .................................................................................................................................. 118
RAID Level ........................................................................................................................... 118
Mirrored OS .......................................................................................................................... 118
Router................................................................................................................................... 118
SAN ...................................................................................................................................... 119
Schedule............................................................................................................................... 119
Server ................................................................................................................................... 119
Share .................................................................................................................................... 119
SMB...................................................................................................................................... 119
Snapshot .............................................................................................................................. 119
SNMP ................................................................................................................................... 119
State ..................................................................................................................................... 120
Stripe Size ............................................................................................................................ 120
Subnet Mask......................................................................................................................... 120
Switch ................................................................................................................................... 120
TCP ...................................................................................................................................... 120
TCP/IP .................................................................................................................................. 120
Upgrade................................................................................................................................ 120
User DN................................................................................................................................ 121
Volume ................................................................................................................................. 121
WINS .................................................................................................................................... 121
XFS....................................................................................................................................... 121
Index ........................................................................................................................................... 123
vi
StorTrends® NAS Software (Version 2.2) User’s Guide
Limited Warranty
The buyer agrees that if this product proves to be defective, American Megatrends is only
obligated to repair or replace this product at American Megatrends’ discretion according
to the terms and conditions of the warranty registration software that accompanies this
product. American Megatrends shall not be liable in tort or contract for any loss or
damage, direct, incidental or consequential resulting from the use of this product. Please
see the Warranty Registration Software shipped with this product for full warranty details.
Limitations of Liability
American Megatrends, Inc. shall in no event be held liable for any loss, expenses, or
damages of any kind whatsoever, whether direct, indirect, incidental, or consequential
(whether arising from the design or use of this product or the support materials provided
with the product). No action or proceeding against American Megatrends may be
commenced more than two years after the delivery of product to Licensee of Licensed
Software.
Licensee agrees to defend and indemnify American Megatrends from any and all claims,
suits, and liabilities (including attorney’s fees) arising out of or resulting from any actual
or alleged act or omission on the part of Licensee, its authorized third parties, employees,
or agents, in connection with the distribution of Licensed Software to end-users,
including, without limitation, claims, suits, and liability for bodily or other injuries to
end-users resulting from use of Licensee’s product not caused solely by faults in
Licensed Software as provided by American Megatrends to Licensee.
Technical Support
American Megatrends provides technical support for American Megatrends products
purchased directly from American Megatrends or from an American Megatrendsauthorized reseller only.
If…
You purchased this product from American Megatrends
or from a certified American Megatrends reseller,
This American Megatrends product was installed as part
of a system manufactured by a company other than
American Megatrends or you purchased an American
Megatrends product from an unauthorized reseller,
Then…
call American Megatrends’ technical support at 770-2468645. Please be prepared to specify the serial number or
CD Key of the product (if applicable).
call the technical support department of the computer
manufacturer or the unauthorized reseller. American
Megatrends does not provide direct technical support in
this case.
If the American Megatrends StorTrends® NAS software fails to operate as described or
you are in doubt about a configuration option, please call technical support at 770-2468645.
Web Site
We invite you to access the American Megatrends’ World Wide Web site at:
http://www.ami.com/
Preface
vii
Disclaimer
This manual describes the operation of the American Megatrends StorTrends® NAS
software. Although efforts have been made to assure the accuracy of the information
contained here, American Megatrends expressly disclaims liability for any error in this
information, and for damages, whether direct, indirect, special, exemplary, consequential
or otherwise, that may result from such error, including but not limited to the loss of
profits resulting from the use or misuse of the manual or information contained therein
(even if American Megatrends has been advised of the possibility of such damages). Any
questions or comments regarding this document or its contents should be addressed to
American Megatrends at the address shown on the inside of the front cover.
American Megatrends provides this publication “as is” without warranty of any kind,
either expressed or implied, including, but not limited to, the implied warranties of
merchantability or fitness for a specific purpose.
Some states do not allow disclaimer of express or implied warranties or the limitation or
exclusion of liability for indirect, special, exemplary, incidental or consequential
damages in certain transactions; therefore, this statement may not apply to you. Also, you
may have other rights which vary from jurisdiction to jurisdiction.
This publication could include technical inaccuracies or typographical errors. Changes
are periodically made to the information herein; these changes will be incorporated in
new editions of the publication. American Megatrends may make improvements and/or
revisions in the product(s) and/or the program(s) described in this publication at any time.
Requests for technical information about American Megatrends products should be made
to your American Megatrends authorized reseller or marketing representative.
Packing List
You should have received the following:
z
StorTrends NAS Software (Version 2.2) on CD
z
StorTrends NAS Software (Version 2.2) User’s Guide on CD
z
StorTrends NAS Software (Version 2.2) Quick Installation Guide
z
Warranty and Registration Card
viii StorTrends® NAS Software (Version 2.2) User’s Guide
Preface
ix
Chapter 1
Introduction
Overview
American Megatrends StorTrends NAS software is a Linux®-based, high-performance
NAS server operating system.
Features
Feature
Microsoft®
Windows® 2000
Active Directory™
support
ACL (Access Control
List) support
Description
Active Directory™ presents organizations with a directory service designed for distributed
computing environments. Active Directory™ allows organizations to centrally manage and
share information on network resources and users while acting as the central authority for
network security. In addition to providing comprehensive directory services to a
Microsoft® Windows® environment, Active Directory™ is designed to be a consolidation
point for isolating, migrating, centrally managing, and reducing the number of directories
that companies require.
Active Directory™ is the integral directory service within the Microsoft® Windows® 2000
operating system. This service improves manageability, enables security and extends
interoperability between Microsoft® Windows® 2000 and other operating systems.
An ACL is a table that tells the system’s operating system the access rights each user has to
a directory or file. The directory or file has a security attribute that identifies its access
control list. The list has an entry for each system user with access privileges, such as read
and write.
Note:
snapshot support
Execute permission cannot be set from the Web-based UI (WebUI).
Microsoft® Windows® NT/2000, Novell® NetWare®, Hewlett-Packard® OpenVMS™
and UNIX® system-based systems are among the operating systems that use access control
lists. The list is implemented differently by each operating system.
A snapshot service gives you a nearly instantaneous virtual copy of your storage volume
with no interruption of service. The underlying backup technology creates an instantaneous
copy of the data being backed up. This is typically accomplished by splitting a mirrored set
of disks or creating a copy of a disk block when it is written, preserving the original. At
restore time, the original is made available immediately, resulting in almost instantaneous
restores.
Note:
Snapshots can be scheduled.
Cont’d
Chapter One : Introduction
1
Features, Continued
Feature
Network Information
System (NIS) support
journaling support
Apple® systems
support
NetWare® system
support
Linux®/UNIX®
system support
Microsoft®
Windows® support
industry standard
protocol support for
configuration,
management and
storage
Mirrored Operating
System (OS) support
Description
Developed by Sun™ Microsystems, NIS is a distributed naming and directory service
originally called Yellow Pages™ or YP. It is a mechanism for identifying and locating
network objects and resources. It provides a uniform storage and retrieval method for
network-wide information in a transport-protocol and media-independent fashion.
NIS is a network naming and administration system typically used for smaller networks.
Using NIS, each host, client or server in the system has knowledge about the entire system.
A user at any host can get access to files or applications on any host in the network with a
single user identification and password. It is intended for use on local area networks. NIS
uses the client/server model and the Remote Procedure Call (RPC) interface for
communication between hosts. NIS consists of a server, a library of client programs, and
some administrative tools. NIS is often used with the Network File System (NFS). NIS is a
UNIX® system-based application.
A Journaling File System (JFS) enables easy file system recovery and ensures no loss of
data in the event of an unscheduled downtime. It provides efficient formatting when new
drives are added and it allows quick recovery after abnormal shutdowns.
z
Enables the connection of Apple® systems to the NAS server
z
Apple® systems can connect and share a file using two methods - TCP/IP and
AppleTalk®
z
to share files, Apple® systems needs a network file protocol called AppleTalk® File
Protocol (AFP), similar to NFS or CIFS.
z
AppleTalk® allows the StorTrends NAS software to be used in a pure Apple®
systems environment
z
enables the connection of NetWare® systems to the NAS server
z
NetWare® systems connect using IPX
z
to share files, NetWare® uses NCP® (NetWare Core Protocol®)
z
IPX allows the StorTrends NAS software to be used in a pure NetWare®
environment
z
Enables the connection of UNIX® systems to the NAS server
z
UNIX® systems can connect using TCP/IP
z
to share files, UNIX® systems uses NFS (Network File System)
z
enables the connection of Microsoft® Windows® systems to the NAS server
z
Microsoft® Windows® systems can connect using TCP/IP
z
to share files, Microsoft® Windows® uses CIFS (Common Internet File System)
z
NTP: (Network Time Protocol) synchronizes the time of the NAS server
automatically
z
SNMP: (Simple Network Management Protocol) supports enterprise management
software solutions
z
SMTP: (Simple Mail Transport Protocol) sends mail alerts
z
Mirrored OS support
Cont’d
2
StorTrends® NAS Software (Version 2.2) User’s Guide
Features, Continued
Feature
file system protocol
support
share management
Domain integration
disk functionality
backup and recovery
hardware health
monitoring
Description
z
CIFS (Common Internet File System): is the file sharing protocol used in Microsoft®
Windows® based networks. With this support, the shared storage in the NAS box is
seamlessly accessible from Microsoft® Windows® based client systems.
z
NFS™ (Network File System): the most common file sharing protocol used in
various UNIX® systems, supports the sharing of storage as NFS™ shares so other
UNIX® system-based clients can access the storage.
z
HTTP
z
FTP
z
Mixed Protocol Security: StorTrends NAS software makes it possible to share the
storage across operating system platforms like Microsoft® Windows® and UNIX®.
When more than one user is trying to modify the shared data, it prevents the data
from being corrupted by locking the shared file, preventing multiple writes from
different users.
z
Quota: StorTrends NAS software provides quota support on a per volume basis. This
quota can be set for every individual user. If the quota is set to zero, it means the user
has unlimited storage access. If the quota is set to a particular size it means the user
has only that much amount of storage at his/her access in that volume.
Microsoft® Windows® Domain Integration: StorTrends NAS software supports user
authentication from a Microsoft® Windows® domain controller. The software can be
configured to interact with the domain controller in the Microsoft® Windows® network, so
the password authentication can be completed by the domain controller instead of the NAS
server.
z
RAID level 0 (striping, for performance)
z
RAID level 1 (mirroring, for reliability)
z
RAID level 5 (parity, for performance and reliability)
NDMP (Network Data Management Protocol): is the industry standard network based tape
backup protocol. The data can be backed up and restored using any NDMP compatible
backup software.
Note: Incremental backup is supported.
StorTrends NAS software monitors the hardware health in American Megatrends
backplanes and alerts the administrator of their status. Health monitoring includes the
following:
z
z
z
ambient temperature
system voltages
fan speed
General Events includes the following:
z
z
z
z
z
unexpected shutdown
insertion and removal of add-on devices
volume related event (created/deleted)
disk related event (inserted/removed)
backup event (backup successful/end of tape reached)
Cont’d
Chapter One : Introduction
3
Features, Continued
Feature
alert notification
Description
StorTrends NAS software has an alert manager that sends out alerts using the following
methods:
z
z
z
z
remote management
SNMP traps
E-mail alerts
LCD
Local event log
All the events are stored in a local event log. Based on the configuration, the alert manager
sends the alerts to SNMP trap and e-mail destinations.
z
Web-based UI (WebUI): allows the NAS server to be configured via an Internet
Explorer® web browser. This web-based user interface (UI) has a detailed
configuration and information page that allows you to configure the system and get
more information about the system. It has a detailed, context-sensitive online help
application on each of the following pages:
z
z
z
LCD-based
configuration and
information (custom
OEM feature)
z
upgrades and updates
z
z
z
security
z
configuration
information
SNMP: (Simple Network Management Protocol): to enable the management of the
configuration of the NAS server via an enterprise management solution, the
StorTrends NAS software implements an SNMP agent that provides most
configuration and functionality from a web-based UI.
Configuration: The LCD can be used to configure the StorTrends NAS software. It
can be used to configure network parameters and set the DHCP or static IP address
for the servers, and to shut down and power cycle the system.
Information: StorTrends NAS software uses the LCD to display important
information about:
z
processor and memory usage
z
Disk status for each disk in the system
z
Volume status for each volume in the system
Field upgrade: StorTrends NAS software can be upgraded via the network. It will
upgrade itself to the latest version, if an upgrade is available on an FTP server and
the FTP directory details are inputted to the system via the web-based UI by the
administrator.
Fail-safe upgrade: if, for any reason, the newer system image is corrupted, or if
network problems prevent the software from downloading the newer image fully
before upgrading, the software will cancel the upgrade by itself.
SSL encryption is supported. Use the following format to access it using SSL
encryption:
https://nasxxxxxxxxxxx
4
StorTrends® NAS Software (Version 2.2) User’s Guide
Chapter 2
Quick Installation
Before You Start
Prerequisites
Before you can install the StorTrends NAS software into your StorTrends 2104 NAS
server, you must meet the minimum system requirements. See the table below:
Item
processor/speed
system memory
hard disk drive
space
host bus
controller card
network card
CD-ROM drive
Description
Any Intel® Pentium® 4 processor or Intel® Celeron 478-pin FCPGA processor can be installed
into your StorTrends 2104 server.
You need to install at least 512 MB of system memory. Install 1 GB of system memory for
optimal performance.
You need at least 1 GB of space on the Primary Master IDE hard disk drive dedicated to the
StorTrends NAS software. The StorTrends NAS software uses 512 MB for itself and 512 MB
for swap files. The remaining hard disk drive space is used for storage.
The StorTrends 2104 server has two onboard IDE controllers that are fully supported by the
StorTrends NAS software.
See Appendix A, Expansion Card Compatibility List for a list of supported expansion cards.
The StorTrends 2104 server has two onboard network adapters that are fully supported by the
StorTrends NAS software.
Note:
The StorTrends 2104 server does not support an additional network card.
You must have a USB or ATAPI CD-ROM drive attached to the StorTrends 2104 server during
the installation of the StorTrends NAS software. Your StorTrends 2104 server’s BIOS must be
set to boot up off the CD-ROM drive.
Note:
keyboard
Once the StorTrends NAS software is fully installed and operational on your
StorTrends 2104 server, you can physically remove the CD-ROM drive.
You must have a USB or PS/2 keyboard attached to the StorTrends 2104 server during the
installation of the StorTrends NAS software.
Note:
Once the StorTrends NAS software is fully installed and operational on your
StorTrends 2104 server, you can physically remove the keyboard.
Cont’d
Chapter Two : Quick Installation
5
Before You Start, Continued
Prerequisites, Continued
Item
mouse
Description
You can use a USB or PS/2 mouse to install the StorTrends NAS software in Graphical Mode
onto your StorTrends 2104 server. If you do not have a mouse attached, then you can only install
the StorTrends NAS software in Text Mode.
Note:
monitor
Once the StorTrends NAS software is fully installed and operational on your
StorTrends 2104 server, you can physically remove the mouse.
You must have a monitor attached to the StorTrends 2104 server during the installation of the
StorTrends NAS software. The VGA monitor must support a screen resolution of 640 x 480 or
greater.
Note:
Note:
The following items are not required during the installation and use of the StorTrends
NAS software:
z
z
z
z
6
Once the StorTrends NAS software is fully installed and operational on your
StorTrends 2104 server, you can physically remove the monitor.
modem
sound card
parallel port
floppy drive
StorTrends® NAS Software (Version 2.2) User’s Guide
Installation
Text Mode
Use the following steps to install the StorTrends NAS software into the StorTrends 2104
server in Text Mode.
Step
1
Action
Power down your StorTrends 2104 server. Verify that your StorTrends 2104 server meets the minimum
system requirements to install the StorTrends NAS Software.
z
z
z
z
z
z
any Intel® Pentium® 4 processor or Intel® Celeron 478-pin FCPGA processor can be installed into
your StorTrends 2104 server
a 101/104 keyboard (PS/2 or USB)
a VGA monitor that supports a screen resolution of 640 x 480 or greater
a USB CD-ROM drive
at least 512 MB of system memory
at least 1 GB of hard disk drive space
Note:
2
3
You can also opt to use an IDE CD-ROM drive. Attach the CD-ROM drive to the IDE
connector on the hard disk drive tray in the third bay from the left. If you try to load from any
other bay, the installation can fail.
Power on your StorTrends 2104 server and insert the StorTrends NAS Software (Version 2.2) CD. Allow
your StorTrends 2104 server to boot up off the StorTrends NAS Software CD.
Note:
The system BIOS must be set to boot from the CD-ROM first.
After your StorTrends 2104 server boots up, you are prompted to install the StorTrends NAS Software.
Press the <ENTER> key to begin the installation.
To install StorTrends NAS Software,
press the <ENTER> key.
boot: _
Cont’d
Chapter Two : Quick Installation
7
Installation, Continued
Text Mode, Continued
Step
4
Action
When prompted, enter the StorTrends NAS Software Product Key. The Product Key can be found on your
StorTrends NAS Software CD envelope.
Welcome to AMI NAS Software
AMI NAS Installation
Enter Product Key
OK
<Tab>/<Alt-Tab> between elements | <Space> selects | <F12> next screen
5
The StorTrends NAS Software installation shows its progression.
AMI NAS Software (C) 2002-2003 American Megatrends, Inc.
Package Installation Name
: samba-x.x.xa-6
Size
: 7200k
Summary : The Samba SMB server.
Total
: Completed : Remaining : 255
203
52
465M
397M
68M
0:02:10
0:01:51
0:00:19
<Tab>/<Atl-Tab> between elements | <Space> selects | <F12> next screen
Cont’d
8
StorTrends® NAS Software (Version 2.2) User’s Guide
Installation, Continued
Text Mode, Continued
Step
6
Action
Once the installation is complete, press the <ENTER> key.
AMI NAS Software (C) 2002-2003 American Megatrends, Inc.
Complete
Congratulations, your AMI NAS Software installation is complete.
OK
<Enter> to reboot
7
8
Power down the StorTrends 2104 NAS server. At this point, you can physically remove the CD-ROM
drive.
Once the StorTrends NAS software has fully booted, you can note the system’s IP address and power off
the monitor.
AMI NAS
System Info :
Host Name
- NASXXXXXXXXXXXX
Ip Address
- XXX.XXX.XXX.XXX XXX.XXX.XXX.XXX
System Date - MM/DD/YYYY
System Time - HH:MM:SS TZ
Build Info :
Software Version - 2.2.XXXX
Build Date
- MM/DD/YYYY
Please Authenticate
< OK >
< Cancel >
From this point on, you do not need a monitor or keyboard to be physically attached to your NAS server.
Note:
9
You can gracefully power down the system from the WebUI. See the Maintenance subsection
in the System section located in Chapter Three, Configuring Your NAS Server for more
information on how to do this.
Congratulations! You have successfully installed the StorTrends NAS software on your StorTrends 2104
server.
Chapter Two : Quick Installation
9
Cont’d
10
StorTrends® NAS Software (Version 2.2) User’s Guide
Installation, Continued
Graphics Mode
Use the following steps to install the StorTrends NAS software into the StorTrends 2104
server in Graphics Mode.
Step
1
Action
Power down your StorTrends 2104 server. Verify that your StorTrends 2104 server meets the minimum
system requirements to install the StorTrends NAS Software.
z
z
z
z
z
z
z
any Intel® Pentium® 4 processor or Intel® Celeron 478-pin FCPGA processor can be installed into
your StorTrends 2104 server
a 101/104 keyboard (PS/2 or USB)
a mouse (PS/2 or USB)
a VGA monitor that supports a screen resolution of 640 x 480 or greater
a USB CD-ROM drive
at least 512 MB of system memory
at least 1 GB of hard disk drive space
Note:
2
3
You can also opt to use an IDE CD-ROM drive. Attach the CD-ROM drive to the IDE
connector on the hard disk drive tray in the third bay from the left. If you try to load from any
other bay, the installation can fail.
Power on your StorTrends 2104 server and insert the StorTrends NAS Software (Version 2.2) CD. Allow
your StorTrends 2104 server to boot up off the StorTrends NAS Software CD.
Note:
The system BIOS must be set to boot from the CD-ROM first.
After your StorTrends 2104 server boots up, you are prompted to install the StorTrends NAS Software.
Press the <ENTER> key to begin the installation.
To install StorTrends NAS Software,
press the <ENTER> key.
boot: _
Cont’d
Chapter Two : Quick Installation
11
Installation, Continued
Graphics Mode, Continued
Step
4
Action
When prompted, enter the StorTrends NAS Software Product Key. The Product Key can be found on your
StorTrends NAS Software CD envelope.
Welcome to AMI NAS Software
AMI NAS Installation
Enter Product Key
OK
<Tab>/<Alt-Tab> between elements | <Space> selects | <F12> next screen
5
The StorTrends NAS Software installation begins.
AMI POWERED
NETWORK ATTACHED STORAGE
Copyright (c)2003 American Megatrends Inc.
Cont’d
12
StorTrends® NAS Software (Version 2.2) User’s Guide
Installation, Continued
Graphics Mode, Continued
Step
6
Action
The StorTrends NAS Software installation shows its progression.
Online Help
Install Packages
Installing Packages
We have gathered all the
information needed to install AMI
StorTrends NAS on your system.
It may take a while to install
everything depending on how
many packages need to be
installed.
Package sed-x.0x-11
Size
92 KBytes
Summary A GNU stream text editor
Package Progress
Total Progress
Status
Total
Completed
Remaining
Packages
Size
Time
254
81
173
492 M
246 M
246 M
0:02:02
0:01:01
0:01:01
Discover more on www.ami.com
Hide Help
Release Notes
Back
Next
7
Once the installation is complete, left click the Exit button.
8
Power down the StorTrends 2104 NAS server. At this point, you can physically remove the CD-ROM
drive.
Cont’d
Chapter Two : Quick Installation
13
Installation, Continued
Graphics Mode, Continued
Step
9
Action
Once the StorTrends NAS software has fully booted, you can note the system’s IP address and power off
the monitor.
AMI NAS
System Info :
Host Name
- NASXXXXXXXXXXXX
Ip Address
- XXX.XXX.XXX.XXX XXX.XXX.XXX.XXX
System Date - MM/DD/YYYY
System Time - HH:MM:SS TZ
Build Info :
Software Version - 2.2.XXXX
Build Date
- MM/DD/YYYY
Please Authenticate
< OK >
< Cancel >
From this point on, you do not need a monitor or keyboard to be physically attached to your NAS server.
Note:
10
14
You can gracefully power down the system from the WebUI. See the Maintenance subsection
in the System section located in Chapter Three, Configuring Your NAS Server for more
information on how to do this.
Congratulations! You have successfully installed the StorTrends NAS software on your StorTrends 2104
server.
StorTrends® NAS Software (Version 2.2) User’s Guide
Connecting
Use the following steps to connect to your StorTrends 2104 server.
Step
1
Action
From a client system on the same network, launch Microsoft® Internet Explorer 6.0 or later. Type the IP
address of the StorTrends 2104 server that you just set up into the Web address field and press <ENTER>
or left click the Go button.
Note:
If you know the MAC address of the network adapter, type the default system name (host
name) in the Web address field, and press the <Enter> key.
The default system name is nasxxxxxxxxxxxx, where xxxxxxxxxxxx is the MAC
address. For example, if your MAC address is 00112233445566, type the following:
http://nas00112233445566
2
Once you press the <ENTER> key or left click the Go button, you are immediately prompted for a user
name and password.
The default user name and password is as follows:
Default user name: root
Default password: password
Cont’d
Chapter Two : Quick Installation
15
Connecting, Continued
Step
3
16
Action
The AMI NAS 2.2 web client appears. You are now connected to the NAS server.
StorTrends® NAS Software (Version 2.2) User’s Guide
Chapter Two : Quick Installation
17
Chapter 3
Using Your NAS Server
Overview
Once the StorTrends NAS Software is installed on your StorTrends 2104 server, it can be
operated without a keyboard, monitor, or pointing device physically attached to it. You
can configure your NAS server using the web-based user interface (WebUI), which can
be accessed from a client system on the same or a connecting network.
Note:
For certain configuration tasks and for troubleshooting, you can physically connect a
keyboard, monitor, and pointing device.
This chapter provides information necessary to perform the initial configuration of your
NAS server.
Default User Name and Password
When you first try to access your StorTrends 2104 server, you will be prompted to enter a
user name and password. Login as root. The default root password is as follows:
Field
User Name
Password
Note:
Default
root
password
When you login using the root password, you have full administrative powers. It is
advised that once you login, you change the root password.
Chapter Four : Gathering Information
19
NAS Management Section
Name
Users and Groups
Icon
Storage Explorer
Description
This section allows you to do the following:
z
view the user list.
z
add and delete users.
z
edit and view user information.
z
edit group information.
z
add and delete groups.
z
you can also add and remove specific users from any group on the
NAS server.
This section allows you to do the following:
z
view the properties of the NAS server.
z
view backup devices that are attached to the NAS server.
z
view and manage Volumes.
z
view and manage shares.
Users and Groups
This section allows you to do the following:
z
z
z
z
z
z
20
view the user list.
add and delete users.
edit and view user information.
edit group information.
add and delete groups.
you can also add and remove specific users from any group on the NAS server.
StorTrends® NAS Software (Version 2.2) User’s Guide
Creating a User
Step
1
Description
2
Chapter Four : Gathering Information
21
Editing a User
Step
1
Description
2
3
22
StorTrends® NAS Software (Version 2.2) User’s Guide
Step
4
Description
5
Deleting a User
Step
1
Description
Note:
You can select multiple Users by left clicking on each individual User.
Chapter Four : Gathering Information
23
Step
2
Description
3
4
Creating a Group
Step
24
Description
StorTrends® NAS Software (Version 2.2) User’s Guide
Step
1
Description
2
3
Editing a Group
Step
Description
Chapter Four : Gathering Information
25
Step
1
Description
2
3
26
StorTrends® NAS Software (Version 2.2) User’s Guide
Step
4
Description
5
6
Deleting a Group
Step
Description
Chapter Four : Gathering Information
27
Step
1
Description
Note:
You can select multiple Groups by left clicking on each individual Group.
2
3
4
28
StorTrends® NAS Software (Version 2.2) User’s Guide
ADS (Active Directory™ Services) Domain
Active Directory™ presents organizations with a directory service designed for
distributed computing environments. Active Directory™ allows organizations to centrally
manage and share information on network resources and users while acting as the central
authority for network security. In addition to providing comprehensive directory services
to a Microsoft® Windows® environment, Active Directory™ is designed to be a
consolidation point for isolating, migrating, centrally managing, and reducing the number
of directories that companies require.
Active Directory™ is the integral directory service within the Microsoft® Windows®
2000 operating system. This service improves manageability, enables security and
extends interoperability between Microsoft® Windows® 2000 and other operating
systems.
Item
Server Name/IP
Workgroup/Domain
Name
Organizational Unit
Admin Name
Admin Password
Confirm Password
Apply Button
Description
NIS (Network Information System) Domain
Network Information System. Developed by Sun™ Microsystems, NIS is a distributed
naming and directory service originally called Yellow Pages™ or YP. It is a mechanism
for identifying and locating network objects and resources. It provides a uniform storage
and retrieval method for network-wide information in a transport-protocol and mediaindependent fashion.
NIS is a network naming and administration system typically used for smaller networks.
Using NIS, each host, client or server in the system has knowledge about the entire
system. A user at any host can get access to files or applications on any host in the
network with a single user identification and password. It is intended for use on local
Chapter Four : Gathering Information
29
area networks. NIS uses the client/server model and the Remote Procedure Call (RPC)
interface for communication between hosts. NIS consists of a server, a library of client
programs, and some administrative tools. NIS is often used with the Network File System
(NFS). NIS is a UNIX® system-based application.
Item
Domain Name
Selective IP
Broadcast
IP Address
IP Address List
Add Button
Remove Button
Apply Button
Description
Storage Explorer
This section allows you to do the following:
z
z
z
z
view the properties of the NAS server.
view backup devices that are attached to the NAS server.
view and manage Volumes.
view and manage shares.
Viewing System Details
30
StorTrends® NAS Software (Version 2.2) User’s Guide
Item
System Name
Version
Build Date
Manufacturer
IP Address #0 and #1
MAC Address #0 and
#1
System Uptime
System Date
System Time
Description
This field displays the host name of the NAS server. The host name defaults to the letters
NAS plus the MAC address of NIC-0. See the System section in Chapter Three,
Configuring Your NAS Server for more information.
This field displays the version of the NAS software.
This field displays the build date of the NAS software.
This field lets you know which company supplied the NAS software.
This field displays the IP address of the network interface card.
This field displays the MAC address of the network interface card.
This field displays the amount of time that the NAS server has been consecutively
running. Any warm boots or cold boots can cause the Server Uptime to be reset.
This field displays the date time on the NAS server.
This field displays the current time on the NAS server.
Viewing Backup Information
Chapter Four : Gathering Information
31
Item
NDMP Port Number
Overwrite During
Restore
Device List
Description
NDMP (Network Data Management Protocol): is the industry standard network based
tape backup protocol. The data can be backed up and restored using any NDMP
compatible backup software. This field displays the NDMP server port used for backup.
Note: Incremental backup is supported.
This field displays information regarding whether or not existing files are overwritten. At
the time of the StorTrends NAS software release, this field cannot be changed. Instead,
during a restore procedure, files are not overwritten.
Device:
Device Name:
Model:
Host:
Bus:
Target:
LUN:
Creating a Volume
Step
1
Description
A Volume is a fixed amount of storage. One Volume can span over more than one physical hard disk
drive. It all depends on how you set up your Volumes.
Make sure that you are in Storage Explorer. Left click the Storage icon and then left click the Create
Volume tab.
32
StorTrends® NAS Software (Version 2.2) User’s Guide
Step
2
Description
Select the physical location of the hard disk drives that you want to include in your Volume.
3
Select the RAID level you want to use on your new Volume. See Appendix C, RAID for more
information on the benefits of each of the supported RAID configurations.
Note:
Depending on the number of hard disk drives that you select, certain RAID levels will be
grayed out while other RAID levels are made available.
Chapter Four : Gathering Information
33
Step
4
Description
If you want to enable Snapshots on your Volume, left click the box next to Enable Snapshot. Left click
the Apply button to continue and build the Volume.
Note:
Depending on the RAID levels that you are going to use in for your Volume, the time it takes
to build the Volume can vary. RAID level 5 Volumes typically take longer to build than a
RAID level 0 Volume.
5
Congratulations! You have successfully created a Volume. The new Volume is now listed under the
Storage icon in the Storage Explorer menu. If you did not use all the available hard disk drives for your
Volume, the remaining hard disk drives are listed and made available for new Volumes. If no hard disk
drives are available, no hard disk drives are listed.
Deleting a Volume
Step
34
Description
StorTrends® NAS Software (Version 2.2) User’s Guide
Step
1
Description
Make sure that you are in Storage Explorer. Left click the Storage icon to view the Volume List Details.
2
Left click on the Volume that you want to delete.
Chapter Four : Gathering Information
35
Step
3
Description
Left click the Delete Volume button.
4
A confirmation dialog box opens. Left click the OK button to confirm.
Rebuilding a Volume
Step
1
Description
Make sure that you are in Storage Explorer. Left click the Storage icon to view the Volume List Details.
36
StorTrends® NAS Software (Version 2.2) User’s Guide
Step
2
3
4
Description
Left click on the Volume that you want to rebuild.
Left click the Rebuild button.
A confirmation dialog box opens. Left click the OK button to confirm.
Viewing Volume List Details
Step
1
Description
Make sure that you are in Storage Explorer. Left click the Storage icon to view the Volume List Details.
Note:
If you have just finished creating a Volume, you may have to left click the Close button and
reopen Storage Explorer.
2
Volume:
Status:
RAID:
Storage:
Snapshot:
Creation Date:
You can left click the Close button to exit the Volume Status and Properties window.
Viewing Volume Properties
Step
Description
Chapter Four : Gathering Information
37
Step
1
Description
Make sure that you are in Storage Explorer. Left click the Storage icon and then left click on the
Volume that you want to view.
2
The General Volume Management window appears. It contains the following information:
Volume:
Status:
RAID:
Storage:
Snapshot:
Creation Date:
Disk Used:
Delete Volume Button:
Rebuild Volume Button:
38
StorTrends® NAS Software (Version 2.2) User’s Guide
Creating Subdirectories in Volumes
Step
1
Description
Right click on the Volume that you want to create a subdirectory in. A dropdown menu appears. Left
click on the Create Subdirectory menu item.
2
The Create Directory dialog box opens. Type the name that you want to use for the new directory in the
Enter New Directory field. Left click the Create Dir button to create the directory in the selected
Volume.
Chapter Four : Gathering Information
39
Step
3
Description
The new subdirectory will appear under the Volume that it is in. You can left click on the new
subdirectory to view its Sharing properties and Security settings.
Note:
You can create new subdirectories inside subdirectories by simply right clicking on the
subdirectory that you want to create a new subdirectory in.
Deleting Subdirectories in Volumes
Step
1
Description
To delete a subdirectory, right click it and left click the Delete Current Directory.
40
StorTrends® NAS Software (Version 2.2) User’s Guide
Step
2
Description
A confirmation dialog box opens. Left click the OK button to confirm.
3
A confirmation dialog box opens. Left click the OK button.
Managing Quotas
Step
1
Description
A Quota is how much hard disk space a user can use. This is a useful tool that can help you plan your
future storage growth. It can also force users to manage their usage and not waste NAS server space.
Make sure that you are in Storage Explorer. Left click the Storage icon and then left click on the
Volume that you want to view. Left click on the Quota tab to start managing user Quotas.
Chapter Four : Gathering Information
41
Step
2
Description
You can set the Default Quota for New Users that you create by simply placing a check in the box
under Default Quota for New Users and setting the amount of space you want to allow for each new
user (in MB).
Step 1 – Select Quota Type: This step allows you to either setup quotas based on all the users or by
individual users. Select how you want to manage quotas. If you select Set the same quota size for all
current and new users, all the user names in Step 2 – Select User for New Quota will be highlighted.
Step 2 – Select User for New Quota: This step allows you to select individual users and set how much
hard disk space they can use.
Step 3 – Enter New Quota Size and Press Update: This step allows you to enter the size of the space in
MB. After you enter the desired amount, left click the Update button.
Step 4 – Repeat steps 2 and 3 as needed and press Save When Done: Left click the Save button to
implement the modifications that you have made.
3
4
5
6
You can also cancel the changes that you have made by left clicking the Restore button.
A confirmation dialog box opens. Left click the OK button to discard changes.
Creating and Restoring Volume Level Snapshots
Step
42
Description
StorTrends® NAS Software (Version 2.2) User’s Guide
Step
1
Description
This section allows you to record a Volume level Snapshot and restore from a Snapshot image. Snapshot
of any Volume can be enabled at any time to restore back to that particular state in the future.
Make sure that you are in Storage Explorer. Left click the Storage icon and then left click on the
Volume that you want to view. Left click on the Snapshot tab to start managing Volume level Snapshots.
Note:
For Snapshots to work, you must have enabled Snapshots at the time the Volume was
created. A recording of the changes made since the last Snapshot is saved at the intervals
specified in this section.
Chapter Four : Gathering Information
43
Step
2
Description
Current Status: This field displays the status of the Snapshot on your NAS server.
Space Remaining: This field displays the remaining percentage of space available for the Snapshot
image on your Volume.
Last Snapshot Taken: This field displays the time the last Snapshot was taken. It is displayed as
MM/DD/YEAR HR:MN:S.
Set Snapshot Schedule: This section allows you to set the time intervals that you want the Snapshots to
be taken.
44
StorTrends® NAS Software (Version 2.2) User’s Guide
Step
3
Description
To set the Snapshot schedule, left click the time interval desired. Each option is described under its
corresponding time interval. By default Snapshot Schedule is set to Never.
A dialog box opens. Left click the OK button to confirm the Snapshot schedule change.
Chapter Four : Gathering Information
45
Step
4
Description
Left click the Restore button to immediately restore the Volume from the Snapshot. This rolls back the
Volume image to a point when the last Snapshot was taken.
A dialog box opens. Left click the OK button to confirm that you want to restore from you last
Snapshot.
A dialog box opens. Left click the OK button to confirm the restoration.
Setting Sharing Protocols
Step
46
Description
StorTrends® NAS Software (Version 2.2) User’s Guide
Step
1
Description
This section allows you to enable CIFS Shares for Microsoft® Windows® Clients, NFS Shares for
UNIX® or Linux® Clients, AFP Shares for Apple® Clients, and NCP Shares for Novell® NetWare®
Clients.
Make sure that you are in Storage Explorer. Left click the Storage icon and then left click on the
Volume that you want to view. Left click on the Sharing tab to start setting Sharing protocols.
2
Left click the box next to Enable Sharing of this Folder/Volume to allow the Volume to be shared.
Chapter Four : Gathering Information
47
Step
3
Description
Select the various protocols that you want to enable or disable. Left click the Apply button to make the
changes active.
HTTP and FTP Considerations
Name
HTTP
Description
If you have enabled Web sharing via HTTP, then Users can access the permitted share
using a standard Internet browser. You can do this from the address field of your Internet
browser. Use the following format:
Port
8080
http://<IP_address>:8080
For example, if your IP address is 192.168.0.55, type the following:
FTP
http://192.168.0.55:8080
If you have enabled Web sharing via FTP, then Users can access the permitted share
using a standard Internet browser or FTP client program. You can do this from the
address field of your Internet browser. Use the following format:
ftp://<IP_address>
For example, if your IP address is 192.168.0.55, type the following:
ftp://192.168.0.55
You can also use an FTP client program.
Setting Full Volume Access Rights
Step
48
Description
StorTrends® NAS Software (Version 2.2) User’s Guide
21
Step
1
2
Description
Make sure that you are in Storage Explorer. Left click the Storage icon and then left click on the
Volume that you want to view. Left click on the Security tab to start managing the Security settings.
By default the Allow everyone full access is selected. If it is not, select the Allow everyone full access.
Left click the Apply button to implement the change.
Setting Read Only Volume Access to Everyone
Step
1
2
Description
Make sure that you are in Storage Explorer. Left click the Storage icon and then left click on the
Volume that you want to view. Left click on the Security tab to start managing the Security settings.
Select the Allow everyone Read-Only access. Left click the Apply button to implement the change.
Denying Volume Access Rights
Step
Description
Chapter Four : Gathering Information
49
Step
1
Description
Make sure that you are in Storage Explorer. Left click the Storage icon and then left click on the
Volume that you want to view. Left click on the Security tab to start managing the Security settings.
Select the Deny access to everyone. Left click the Apply button to implement the change.
2
Setting Individual User and Group Volume Access Rights
Step
1
Description
Make sure that you are in Storage Explorer. Left click the Storage icon and then left click on the
Volume that you want to view. Left click on the Security tab to start managing the Security settings.
50
StorTrends® NAS Software (Version 2.2) User’s Guide
Step
2
Description
Left click the box next to Set permissions for individual users or groups to set individual user or group
access rights.
Chapter Four : Gathering Information
51
Step
3
Description
Highlight the users or groups that you want to set permissions for individually by left clicking on the
user name or group name. Left click the >> button to move the users or groups to the Permission List
For this Share field so that you can view and edit their access rights.
Note:
52
You can use the Select All button to highlight the entire list. Likewise, you can use the Select
None button to deselect the entire list. This is a very useful tool when you have a long list of
users and groups.
StorTrends® NAS Software (Version 2.2) User’s Guide
Step
4
Description
Highlight the users or groups that you want to Deny access rights for and left click the Deny button.
This is the default setting.
Note:
You can use the Select All button to highlight the entire list. Likewise, you can use the Select
None button to deselect the entire list. This is a very useful tool when you have a long list of
users and groups.
Denied is now listed in the Permission field next to the user or group.
Chapter Four : Gathering Information
53
Step
5
Description
Highlight the users or groups that you want to set Full Access rights for and left click the Full Access
button.
Note:
You can use the Select All button to highlight the entire list. Likewise, you can use the Select
None button to deselect the entire list. This is a very useful tool when you have a long list of
users and groups.
Full Access is now listed in the Permission field next to the user or group.
54
StorTrends® NAS Software (Version 2.2) User’s Guide
Step
6
Description
Highlight the users or groups that you want to set Read Only access rights for and left click the Read
Only button.
Note:
You can use the Select All button to highlight the entire list. Likewise, you can use the Select
None button to deselect the entire list. This is a very useful tool when you have a long list of
users and groups.
Read Only is now listed in the Permission field next to the user or group.
Chapter Four : Gathering Information
55
Step
7
Description
Left click the Apply button to implement the change.
56
StorTrends® NAS Software (Version 2.2) User’s Guide
NAS Configuration Section
Name
Network
Events and Alerts
Configuration and
Control
Language
Icon
Description
This section contains a subsection for each supported networking protocol.
The following protocols are supported: TCP/IP, AppleTalk®, SNMP, NIS,
and IPX.
This section allows you to do the following:
z
view all event log messages stored on your NAS server. There is no
specified limit for the amount of log entries that your NAS server can
store.
z
set a remote mail server (SMTP) and up to four administrative email
addresses to be notified of alert conditions.
z
enable SNMP traps. This is used to send alert notifications, known as
SNMP traps, to remote management servers.
This section allows you to do the following:
z
shutdown or restart the NAS server.
z
change the system name of your NAS server.
z
change the root password.
z
upgrade the firmware.
z
adjust the date and time.
This section allows you to change the language of your NAS software. The
default language is English.
Network
This section contains a subsection for each supported networking protocol. The following
protocols are supported: TCP/IP, AppleTalk®, SNMP, NIS, and IPX.
Chapter Four : Gathering Information
57
TCP/IP Tab
Item
Select Network
Interface dropdown
menu
Obtain IP Address and
DNS Server Address
Automatically
58
Description
StorTrends® NAS Software (Version 2.2) User’s Guide
Item
Specify an IP Address
and DNS Server
Address
IP Address
Subnet Mask
Default Gateway
Primary DNS Server
Secondary DNS Server
Apply button
Restore button
Description
Windows Tab
Item
Enable Windows File
Server Protocol (CIFS)
WINS Address
Workgroup/Domain
Apply button
Restore button
Description
UNIX Tab
Chapter Four : Gathering Information
59
Item
Enable UNIX File
Protocol (NFS)
Allow All IP Addresses
Allow Following IP
Addresses Only
Allow Following IP
Addresses Only field
IP Address
Add New button
IP Address
Modify button
Remove button
Apply button
Restore button
Description
Apple Tab
60
StorTrends® NAS Software (Version 2.2) User’s Guide
Item
Enable Apple File
Protocol (AFP)
Apply button
Description
Novell Tab
Item
Enable Novell File
Protocol
Description
Chapter Four : Gathering Information
61
Item
Set IPX Protocol
dropdown menu
Internal Network
Number
Ethernet II
Ethernet 802.2
Ethernet 802.3
Ethernet SNAP
Apply button
Restore button
Description
SNMP Tab
Item
Enable SNMP
SNMP Community
Name
Apply button
Restore button
Description
HTTP/FTP Tab
62
StorTrends® NAS Software (Version 2.2) User’s Guide
Item
Enable HTTP Sharing
Enable Secure HTTP
Sharing
Enable FTP Sharing
Apply button
Description
Events and Alerts
This section allows you to do the following:
z
z
z
view all event log messages stored on your NAS server. There is no specified limit
for the amount of log entries that your NAS server can store.
set a remote mail server (SMTP) and up to four administrative email addresses to
be notified of alert conditions.
enable SNMP traps. This is used to send alert notifications, known as SNMP traps,
to remote management servers.
Viewing and Clearing Events
Chapter Four : Gathering Information
63
Step
1
Description
2
3
64
StorTrends® NAS Software (Version 2.2) User’s Guide
Step
4
Description
5
Enabling SNMP Alerts
Step
Description
Chapter Four : Gathering Information
65
Step
1
Description
2
Configuring SNMP Targets
66
StorTrends® NAS Software (Version 2.2) User’s Guide
Field
Community Name
Column
Target IP Column
Target 1 through 4
Description
Setting SNMP Alert Types
Chapter Four : Gathering Information
67
Item
Information
Warning
Critical/Fatal
Apply button
Restore button
Description
Enabling Email Alerts
Step
68
Description
StorTrends® NAS Software (Version 2.2) User’s Guide
Step
1
Description
2
Configuring Email Addresses and Mail Servers
Chapter Four : Gathering Information
69
Item
Email Address Column
Email Address 1
through 4
Email Server
Description
Setting Email Alert Types
70
StorTrends® NAS Software (Version 2.2) User’s Guide
Item
Information
Warning
Critical/Fatal
Apply button
Restore button
Description
Configuration and Control
This section allows you to do the following:
z
z
z
shutdown or restart the NAS server.
change the system name of your NAS server.
change the root password.
Chapter Four : Gathering Information
71
z
z
upgrade the firmware.
adjust the date and time.
Shutting Down Your NAS Server
Step
1
Description
2
Restarting Your NAS Server
Step
72
Description
StorTrends® NAS Software (Version 2.2) User’s Guide
Step
1
Description
2
Editing Your NAS Server’s System Name
Step
1
Description
Chapter Four : Gathering Information
73
Step
2
Description
3
Changing the Administrative/Root Password
Step
74
Description
StorTrends® NAS Software (Version 2.2) User’s Guide
Step
1
Description
2
Upgrading Your NAS Software
Chapter Four : Gathering Information
75
Item
FTP Address
Path
User Name
Password
Confirm Password
Apply button
Restore button
Description
Adjusting the Date and Time on Your NAS Server
76
StorTrends® NAS Software (Version 2.2) User’s Guide
Item
Month dropdown menu
Year dropdown menu
Date calendar
Synchronize with Local
button
Set Time Fields
Time Zone dropdown
menu
Enable NTP box
NTP Server
Apply button
Description
Language
This section allows you to change the language of your NAS software. The default
language is English.
Chapter Four : Gathering Information
77
Changing the Language
Step
1
Description
2
78
StorTrends® NAS Software (Version 2.2) User’s Guide
Step
3
Description
Chapter Four : Gathering Information
79
NAS Health and Status Information Section
Name
StorTrends 2104 Server
Location
A
CPU Temperature
B
Ambient Temperature
C
System Voltages
D
Fan Status
E
Description
This section allows you to mouse over a hard disk drive bay to view the hard
disk drive information. You can also mouse over the power supply to view
its information.
This section allows you to quickly view the core temperature of the
processor.
This section allows you to quickly view the temperature inside the
StorTrends 2104 chassis.
You can click on the icon to the right of System Voltages to view the
voltages and fan RPMs of the StorTrends 2104 server.
You can click on the icon to the right of Fan Status to view the voltages and
fan RPMs of the StorTrends 2104 server.
StorTrends 2104 Server
This section allows you to mouse over a hard disk drive bay to view the hard disk drive
information.
80
StorTrends® NAS Software (Version 2.2) User’s Guide
You can also mouse over the power supply to view its information.
Note:
You can stop the fan animation by left clicking the box next to Stop Fan Animation.
CPU and Ambient Temperature
This section allows you to quickly view the core temperature of the processor and the
temperature inside the StorTrends 2104 chassis.
System Voltages and Fan Status
Chapter Four : Gathering Information
81
You can click on the icon to the right of System Voltages or Fan Status to view the
voltages and fan RPMs of the StorTrends 2104 server.
82
StorTrends® NAS Software (Version 2.2) User’s Guide
Chapter Four : Gathering Information
83
Appendix A
Expansion Card Compatibility
List
Compatibility List
Type
Plug In PCI IDE Controller
Manufacture and Model
To be decided
Plug In PCI SCSI Controller
To be decided
Other
American Megatrends MegaRAC G2 (series 827)
American Megatrends MegaRAC G3 (series 840)
Note:
Expansion cards that are not on the compatibility list may not perform as expected and
could result in loss of data or data corruption. Only the expansion cards on the
compatibility list are fully supported by the StorTrends RTG NAS Software. At the time
that this software was released, these were the only supported expansion cards. For the
most up to date compatibility list, please visit www.stortrends.com.
Appendix A : Expansion Card Compatibility List
85
86
StorTrends® NAS Software (Version 2.2) User’s Guide
Appendix B
Console User Interface
Overview
AMI NAS
System Info :
Host Name
Ip Address
System Date
System Time
Build Info :
Software Version
Build Date
- NASXXXXXXXXXXXX
- XXX.XXX.XXX.XXX XXX.XXX.XXX.XXX
- MM/DD/YYYY
- HH:MM:SS TZ
- 2.0.XXXX
- MM/DD/YYYY
Please Authenticate
< OK >
< Cancel >
You can set up your NAS server using the Console User Interface (UI). When you first
boot up your NAS server, you are presented with the AMI NAS authentication screen.
The AMI NAS authentication screen displays the following fields:
Name
Host Name
IP Address
System Date
System Time
Software Version
Build Date
Please Authenticate
Description
This field displays the host name of the NAS server. The default system name is
nasxxxxxxxxxxxx, where xxxxxxxxxxxx is the MAC address. For example, if
your MAC address is 00112233445566, then your NAS server’s network name (host
name) is nas00112233445566.
This field displays the IP address of the network interface card(s).
This field displays the month, day, and year that is set on the NAS server.
This field displays the hour, minute, and seconds that is set on the NAS server.
This field displays the version of the NAS software.
This field displays the build date of the NAS software.
This field allows you to type the root password of the NAS server so that you can log
into the Console UI.
Navigation
Keyboard Key
<ARROW UP>
<ARROW DOWN>
<ARROW LEFT>
<ARROW RIGHT>
<TAB>
<SPACE>
<ENTER>
Function
Moves the cursor up.
Moves the cursor down.
Moves the cursor to the left.
Moves the cursor to the right
Switches between separate fields.
Used to select and set an option. It can also be used to deselect an
option.
Executes selected function.
Appendix B : Console User Interface
87
Main Menu
AMI NAS
Make Selection
SysInfo
DisksInfo
VolumeInfo
EventLog
HostName
IpConf
SystemControl
Logout
System Information
Disks Information
Volume Information Even Log List
Set Host Name
Set Ip Address
System Related Operations
Logout From Console UI
< OK >
The main menu is the first screen that you see when you log into the Console UI of your
NAS server. Navigate to the section you want to view or configure.
Name
SysInfo
DiskInfo
VolumeInfo
EventLog
HostName
IpConf
SystemControl
LogOut
88
Description
This option allows you to view the System Information screen.
This option allows you to view the hard disk drive information.
This option allows you to view the Volume information.
This option allows you to view the event log of your NAS server.
This option allows you to set the host name.
This option allows you to configure all the IP settings of each network interface card in
you NAS server.
This option allows you to warm boot or power down your NAS server.
This option allows you to logout and exit from the AMI NAS Console UI.
StorTrends® NAS Software (Version 2.2) User’s Guide
System Information
System Information
Server Name
Network Interface (NIC - 0)
IP Address
MAC Address Network Interface (NIC - 1)
IP Address
MAC Address
Usable Memory
Server Uptime Manufacturer
: NASxxxxxxxxxxxx
= xxx.xxx.xx.xxx
= xx:xx:xx:xx:xx:xx
= xxx.xxx.xx.x
= xx:xx:xx:xx:xx:xx
: xxx MB
: x Days x Hour x Min xx Sec
: American Megatrends Inc
(xx%) < EXIT >
This System Information screen displays the following information:
Name
Server Name
Network Interface IP
Address
Network Interface
MAC Address
Usable Memory
Server Uptime
Manufacturer
Description
This field displays the host name of the NAS server. The host name defaults to the letters
NAS plus the MAC address of NIC-0. See the System section in Chapter Three,
Configuring Your NAS Server for more information.
This field displays the IP address of the network interface card.
This field displays the MAC address of the network interface card.
This field displays the available system memory that can be used.
This field displays the amount of time that the NAS server has been consecutively
running. Any warm boots or cold boots can cause the Server Uptime to be reset.
This field lets you know which company supplied the NAS software.
To go back to main menu, press the <ENTER> key.
Appendix B : Console User Interface
89
Disk Information
IDE Id : 0
State
Status
Size
Speed
Manufacturer
Model
IDE Id : 2
State Status
Size
Speed
Manufacturer
Model
IDE Id : 4
State
Status
Size
Disks Information
: Empty
: Offline
: xxx GB
: x RPM
: : Maxtor xxxxxxx
: Empty
: Offline
: xxx GB
: x RPM
:
Maxtor xxxxxxxx
: Empty
: Offline
: xxx GB
< EXIT >
This Disk Information screen displays each hard disk drive in your NAS server with the
following corresponding information:
Name
IDE/SCSI ID
State
Description
This field displays the physical location of the hard disk drive as it resides on the IDE/SCSI
channel. For example, IDE ID zero (0) means that the hard disk drive is physically located on the
primary master channel. IDE ID two (2) means that the hard disk drive is physically located on the
secondary master channel.
This field displays the state of the hard disk drive. The state of the hard disk drive can be one of the
following:
Empty
Status
This state means that the hard disk drive is available but not participating in a
Volume.
Good
This state means that the hard disk drive is participating in a Volume and is
functioning properly.
Bad
This state means that the hard disk drive is participating in a Volume but is in a
failed state.
This field displays the status of the hard disk drive. The status of the hard disk drive can be one of
the following:
Online
Offline
Rebuilding
Initializing
This status means that the hard disk drive is physically present and participating
in a Volume.
This status means that the hard disk drive is physically present but not
participating in a Volume.
This status means that the hard disk drive is physically present and is in the
process of regenerating the Volume.
This status means that the hard disk drive was just inserted on the bus and is in
the process of being recognized by the NAS server.
Note:
Not Present
The Initializing Status is available on SCSI backplanes and ATA
backplanes that support hot plugging.
This status means that the hard disk drive is not physically present.
Cont’d
90
StorTrends® NAS Software (Version 2.2) User’s Guide
Disk Information, Continued
Name
Size
Description
This field displays the actual on disk size of the hard disk drive. This information is calculated by
the StorTrends NAS software.
Most hard disk manufacturers follow the metric conventions of Kilobyte, Megabyte, and Gigabytes
for specifying the drive capacity on their label and specifications (for example, 1000 B =1 KB,
1000 KB=1 MB and 1000 MB=1 GB) instead of the 1024 convention.
Speed
Manufacturer
Model
For example, given a manufacturer-specified 18.4 GB hard disk, the actual capacity reported by the
disk is 17930455KB = 17930455 *1024 = 18360785920 Bytes. This, if converted to metric
convention, results in the specified 18.36 GB capacity rounded up. Thus, the actual capacity of the
18.4 GB drive is displayed on this page as 17.1 GB.
This field displays the stated speed of the hard disk drive. This information is provided by the hard
disk drive. If this information is not given by the hard disk drive, then the value for this field is
zero (0). Speed is rated in Revolutions Per Minute (RPM).
This field displays the stated manufacturer of the hard disk drive. This information is provided by
the hard disk drive. If this information is not given by the hard disk drive, then the value for this
field is zero (0).
This field displays the stated model of the hard disk drive. This information is provided by the hard
disk drive. If this information is not given by the hard disk drive, then the value for this field is
zero (0).
To go back to main menu, press the <ENTER> key.
Appendix B : Console User Interface
91
Volume Information
Volume Information
Number Of Volumes : x
(xxx%)
< EXIT >
This Volume Information screen displays each Volume configured in your NAS server
with the following corresponding information:
Name
Status
Description
This field displays the status of the Volume. The status of the Volume can be one of the
following:
Optimal
Failed
This status means that the Volume is fully functional and is working at
peak efficiency.
This status means that the Volume has fatally A Degraded status can
indicate multiple hard disk drive failures.
Cont’d
92
StorTrends® NAS Software (Version 2.2) User’s Guide
Volume Information, Continued
Name
Status, Continued
Description
Degraded
Initializing
This status means that the Volume has been compromised and needs to
be rebuilt. A Degraded status can indicate a hard disk drive failure or
that the data on the Volume is corrupt.
This status means that the hard disk drive was just inserted on the bus
and is in the process of being recognized by the NAS server.
Note:
Name
Capacity
Available
RAID Level
Stripe Size
Creation Date
Disk(s) Involved
The Initializing Status is available on SCSI backplanes and
ATA backplanes that support hot plugging.
Formatting
This status means that the Volume is being formatted by the StorTrends
NAS software.
Rebuilding
This status means that the Volume is being regenerated.
This field displays the name of the Volume. The name of the Volume is represented as the
word Volume followed by a numeric designation such as, 0,1,2,3,4, and so on.
This field displays the total size of the Volume.
This field displays the remaining disk space on the Volume.
This field displays the level of RAID used on the Volume. See the Volume section in
Chapter Three, Configuring Your NAS Server for more information on how to assign a
RAID Level during the creation of your Volume. See Appendix C, RAID for more
information about the supported RAID Levels.
This field displays the type of striping used on the Volume. See the Volume section in
Chapter Three, Configuring Your NAS Server for more information on how to assign a
Stripe Size during the creation of your Volume.
This field displays the date the Volume was made.
This field displays the physical hard disk drives used in the Volume. All hard disk drives
involved in the same Volume will drop down in capacity to match the lowest capacity
hard disk drive. For example, if you are mirroring a 40 GB hard disk drive with a 60 GB
hard disk drive, the 60 GB hard disk drive will loose 20 GB. In conclusion, You will
only have a 40 GB Volume.
To go back to main menu, press the <ENTER> key.
Note:
Most hard disk manufacturers follow the metric conventions of Kilobyte, Megabyte, and
Gigabytes for specifying the drive capacity on their label and specifications (for example,
1000 B =1 KB, 1000 KB=1 MB and 1000 MB=1 GB) instead of the 1024 convention.
For example, given a manufacturer-specified 18.4 GB hard disk, the actual capacity
reported by the disk is 17930455KB = 17930455 *1024 = 18360785920 Bytes. This, if
converted to metric convention, results in the specified 18.36 GB capacity rounded up.
Thus, the actual capacity of the 18.4 GB drive is displayed on this page as 17.1 GB.
Using the RAID level five with six hard disk drives yields a raw capacity of 17930455 K
times five = 89652275 K. But each hard disk drive uses some space for the RAID
configuration resulting in 89651520 K. This is an overhead of approximately 150 K per
hard disk drive.
During file system formatting, the superblock and the inodes tree use a big chunk
of space. The bigger the hard disk drive size, the more inodes are created. One inode
is created for every 4096 Bytes. Thus resulting in a usable size of 79942087 K.
Quotas are stored in two files called quota.user and quota.group. They use some
of the useable space.
Thus resulting in a final available space of 79942039 K = 76.24 G and the overall
overhead (wastage) is approximately ten percent.
Appendix B : Console User Interface
93
Event Log List
Event Log List
Number Of Events : x
<MM/DD/YYYY> <HH:MM:SS> : NASxxxxxxxxxxxxx : Previous System Shutdown Unexpe
< EXIT >
This section allows you to view the all event logs stored on your NAS server. The NAS
server can store up to 1000 log entries.
To go back to main menu, press the <ENTER> key.
94
StorTrends® NAS Software (Version 2.2) User’s Guide
Set Host Name
Host Name Configuration
Host Name : NASxxxxxxxxxxxx
< Cancel >
< OK >
This subsection allows you to change the network name (host name) of your NAS server.
Changing the Host Name
Name
Host Name
Empty field
Note:
Description
The default system name is nasxxxxxxxxxxxx, where xxxxxxxxxxxx is the MAC
address. For example, if your MAC address is 00112233445566, then your NAS server’s
network name (host name) is nas00112233445566.
This field allows you to enter a unique host name to identify your NAS server on your
network. After you type in your NAS servers new host name, press the <ENTER> key.
The host name must be a minimum of eight characters and a maximum of sixteen
characters. The host name is not case-sensitive. Parenthesis, slashes, asterisks, spaces, the
at sign (@), and the hash sign (#) are not allowed. The at sign (@) and the hash sign (#)
characters have special meanings on some UNIX based servers.
Host Name Configuration
Setting Host Name Done. . . Successfully
Host Name : NEW_HOST_NAME
< OK >
You are prompted with a confirmation screen stating that the host name was renamed
successfully. To go back to main menu, press the <ENTER> key.
Appendix B : Console User Interface
95
Set IP Address
AMI NAS
Select one
(X) NIC0 NetworkInterface-0
( ) NIC1 NetworkInterface-1
< Cancel >
< OK >
This screen allows you to configure TCP/IP automatically via DHCP server or by
specifying the addresses statically for the following:
•
•
•
•
•
IP address (Server)
Subnet Mask
Default Gateway
Primary DNS Server
Secondary DNS Server
Configuring TCP/IP
To configure your NAS server with static settings, follow the steps in the following table.
Note:
Step
1
DHCP is not explained in this document due to the fact that DHCP is the default setting.
Action
Navigate to the network interface card you want to configure. Press the <ENTER> key to continue.
AMI NAS
Select one
(X) NIC0 NetworkInterface-0
( ) NIC1 NetworkInterface-1
< OK >
< Cancel >
Cont’d
96
StorTrends® NAS Software (Version 2.2) User’s Guide
Set IP Address, Continued
Configuring TCP/IP, Continued
Step
2
Action
Highlight the STATIC option by navigating to it. Press the <ENTER> key to continue.
TcpIp Configuration
Port : NIC0
Configuration Mode
( ) DHCP
(X) STATIC
I (+)
< OK >
3
< Cancel >
Type the static IP address you want the network interface card to use. Press the <ENTER> key to
continue.
TcpIp Configuration
Port : NIC0
Configuration Mode : STATIC
Enter Ip Address
xxx.xxx.xx.xxx
< OK >
< Cancel >
Cont’d
Appendix B : Console User Interface
97
Set IP Address, Continued
Configuring TCP/IP, Continued
Step
4
Action
Type the subnet mask you want the network interface card to use. Press the <ENTER> key to continue.
TcpIp Configuration
Port : NIC0
Configuration Mode : STATIC
Ip Address : xxx.xxx.xx.xxx
Enter Subnet Mask
xxx.xxx.xxx.x
< OK >
5
< Cancel >
Type the IP address of the gateway you want the network interface card to use. Press the <ENTER> key to
continue. This field must have an entry and cannot be left blank. If you do have a gateway installed on
your network, enter 0.0.0.0 for the value of this field.
TcpIp Configuration
Port : NIC0
Configuration Mode : STATIC
Ip Address : xxx.xxx.xx.xxx
Subnet Mask
: xxx.xxx.xxx.x
Enter Gateway
xxx.xxx.xx.x
< OK >
< Cancel >
Cont’d
98
StorTrends® NAS Software (Version 2.2) User’s Guide
Set IP Address, Continued
Configuring TCP/IP, Continued
Step
6
Action
Type the IP address of your network’s primary DNS you want the network interface card to use. Press the
<ENTER> key to continue. This field must have an entry and cannot be left blank. If you do have a
primary or secondary DNS installed on your network, enter 0.0.0.0 for the value of this field.
TcpIp Configuration
Port : NIC0
Configuration Mode : STATIC
Ip Address : xxx.xxx.xx.xxx
Subnet Mask
: xxx.xxx.xxx.x
Gateway
: xxx.xxx.xx.x
Enter Primary DNS
xxx.xxx.xx.x
< OK >
7
< Cancel >
Type the IP address of your network’s secondary DNS you want the network interface card to use. Press
the <ENTER> key to continue. This field must have an entry and cannot be left blank. If you do have a
secondary DNS installed on your network, enter 0.0.0.0 for the value of this field.
TcpIp Configuration
Port : NIC0
Configuration Mode : STATIC
Ip Address : xxx.xxx.xx.xxx
: xxx.xxx.xxx.x
Subnet Mask
Gateway
: xxx.xxx.xx.x
Primary DNS Server
: xxx.xxx.xx.x
Enter Secondary DNS
xxx.xxx.xx.x
< OK >
< Cancel >
Cont’d
Appendix B : Console User Interface
99
Set IP Address, Continued
Configuring TCP/IP, Continued
Step
8
Action
You are prompted with a confirmation screen stating that the TCP/IP was configured successfully. To go
back to main menu, press the <ENTER> key.
TcpIp Configuration
Setting TcpIp Done . . . Successfully
Port : NIC0
Configuration Mode : STATIC
Ip Address : xxx.xxx.xx.xxx
Subnet Mask
: xxx.xxx.xxx.x
Gateway
: xxx.xxx.xx.x
Primary DNS Server
: xxx.xxx.xx.x
Secondary DNS Server
: xxx.xxx.xx.x
< OK >
100 StorTrends® NAS Software (Version 2.2) User’s Guide
System Related Operations
System Related Operations
Make Selection
Reboot
Shutdown
Exit
Rebooting The System
Shutdown The System
Exiting From System Control Menu
< OK >
This option allows you to warm boot or power down your NAS server.
Name
Reboot
Description
This option allows you to gracefully warm boot your NAS server.
Rebooting The NAS Server . . .
Do You Want To Continue ! . . .
< Yes >
Shutdown
Exit
< No >
This option allows you to gracefully power down your NAS server.
This option allows you to return to the main menu.
Appendix B : Console User Interface 101
Log Out From Console UI
NASRTG Console Interface
Make Selection
SysInfo
DisksInfo
VolumeInfo
EventLog
HostName
IpConf
SystemControl
LogOut
System Information
Disks Info
Volume Info
Event Log list
Set Host Name
Set Ip Address
System Related Operations
LogOut From Console UI
< OK >
This option allows you to logout and exit from the AMI NAS Console UI. You are
returned to the following screen:
AMI NAS
System Info :
Host Name
- NASXXXXXXXXXXXX
Ip Address
- XXX.XXX.XXX.XXX XXX.XXX.XXX.XXX
System Date - MM/DD/YYYY
System Time - HH:MM:SS TZ
Build Info :
Software Version - 2.0.XXXX
Build Date
- MM/DD/YYYY
Please Authenticate
< OK >
102 StorTrends® NAS Software (Version 2.2) User’s Guide
< Cancel >
Appendix C
RAID
Introduction to RAID
RAID (Redundant Array of Independent Disks) is an array of multiple independent hard
disk drives that provide high performance and fault tolerance. A RAID disk subsystem
improves I/O (input/output) performance over a system using only a single hard disk
drive. The RAID volume appears to the StorTrends 2104 server as a single storage unit or
as multiple logical units. I/O is expedited because several hard disk drives can be
accessed simultaneously. RAID systems improve data storage reliability and fault
tolerance compared to single hard disk drive systems. Data loss due to a hard disk drive
failure can be prevented by regenerating missing data from the remaining data and parity
information stored on other hard disk drives in the volume.
RAID Benefits
RAID has gained popularity because it improves I/O performance, and increases storage
subsystem reliability. RAID provides data security through fault tolerance and redundant
data storage.
Improved I/O
Although hard disk drive capabilities have improved drastically, actual performance has
improved only three to four times in the last decade. Computing performance has
improved over 50 times during the same time period. RAID allows you to access several
hard disk drives simultaneously.
Increased Reliability
The electromechanical components of a hard disk drive operate more slowly, require
more power, and generate more noise and vibration than electronic devices. These factors
reduce the reliability of data stored on a hard disk drive. RAID systems improve data
storage reliability and fault tolerance compared to single hard disk drive systems. The
additional hard disk drives make it possible to prevent data loss from a hard disk drive
failure. You can regenerate missing data from the remaining data and parity stored on
other hard disk drives in the volume.
Appendix C : RAID 103
RAID Overview
RAID is a collection of specifications that describe a system for ensuring the reliability
and stability of data stored on large hard disk drive subsystems. A RAID system can be
implemented in a number of different versions (or RAID Levels). The standard RAID
levels are 0, 1, 3, and 5.
Disk Striping
Disk striping writes data across multiple hard disk drives instead of just one hard disk
drive. Disk striping involves partitioning each hard disk drive storage space into stripes
that can vary in size. These stripes are interleaved in a repeated sequential manner. The
combined storage space is composed of stripes from each drive. StorTrends NAS
Software supports stripe sizes of 8 KB to 512 KB.
For example, in a four hard disk drive system using only disk striping (as in RAID level
0), segment one is written to hard disk drive one, segment two is written to hard disk
drive two, and so on. Disk striping enhances performance because multiple hard disk
drives are accessed simultaneously; but disk striping does not provide data redundancy.
Hard Disk Drive
One
Hard Disk Drive
Two
Hard Disk Drive
Three
Hard Disk Drive
Four
Segment One
Segment Five
Segment Nine
Segment Two
Segment Six
Segment Ten
Segment Three
Segment Seven
Segment Eleven
Segment Four
Segment Eight
Segment Twelve
Terminology
Stripe Width
Stripe Size
Description
Stripe width is the number of hard disk drives involved in a volume
where striping is implemented. For example, a four hard disk drive
volume with disk striping has a stripe width of four.
The stripe size is the length of the interleaved data segments that are
written across multiple hard disk drives.
104 StorTrends® NAS Software (Version 2.2) User’s Guide
Disk Mirroring
With mirroring (used in RAID 1), data written to one hard disk drive is simultaneously
written to another hard disk drive. If one hard disk drive fails, the contents of the other
hard disk drive can be used to run the system and regenerate the failed hard disk drive.
The primary advantage of disk mirroring is that it provides 100% data redundancy. Since
the contents of the hard disk drive are completely written to a second hard disk drive, it
does not matter if one of the hard disk drives fails. Both hard disk drives contain the same
data at all times. Either hard disk drive can act as the operational hard disk drive.
Disk mirroring provides 100% redundancy, but is expensive because each hard disk drive
in the system must be duplicated.
Hard Disk Drive
One
Segment
Segment
Segment
Segment
One
Two
Three
Four
Hard Disk Drive
Two
Segment
Segment
Segment
Segment
One Duplicated
Two Duplicated
Three Duplicated
Four Duplicated
Appendix C : RAID 105
Selecting a RAID Level
There are six official RAID levels (RAID 0 through RAID 5). The StorTrends NAS
Software supports RAID levels 0, 1, and 5.
RAID Level
0
1
5
Type
Standard
Standard
Standard
To ensure the best performance, you should select the optimal RAID level when you
create a system volume. The optimal RAID level for your volume depends on a number
of factors:
•
•
•
•
the number of hard disk drives in the NAS server
the capacity of the hard disk drives in the NAS server
the need for data redundancy
the hard disk drive performance requirements
The factors you need to consider when selecting a RAID level are listed below:
Level
Description and Use
Pros
Cons
0
Data divided in blocks and
distributed sequentially (pure
striping). Use for non-critical data
that requires high performance.
High data
throughput for
large files
1
Data duplicated on another hard disk
drive (mirroring). Use for readintensive fault-tolerant systems
100% data
redundancy
5
Disk striping and parity data across
all hard disk drives. Use for high
read volume but low write volume,
such as transaction processing.
Achieves data
redundancy at
low cost
No fault
tolerance. All
data lost if any
hard disk drive
fails.
Reduces total
hard disk drive
space by half.
Reduced
performance
during rebuilds.
Performance not
as good as RAID
1
106 StorTrends® NAS Software (Version 2.2) User’s Guide
Max.
Hard
Disk
Drives
one to 32
Fault
Tolerant
two
yes
three to 32
yes
no
RAID 0
RAID 0 provides disk striping across all hard disk drives in the volume. RAID 0 does not
provide any data redundancy, but does offer the best performance of any RAID level.
RAID 0 breaks up data into smaller blocks and then writes a block to each hard disk drive
in the volume. The size of each block is determined by the stripe size parameter, set
during the creation of the RAID set. RAID 0 offers high bandwidth.
By breaking up a large file into smaller blocks, StorTrends NAS Software can use
multiple IDE/SCSI channels and hard disk drives to read or write to the file faster. RAID
0 involves no parity calculations to complicate the write operation. This makes RAID 0
ideal for applications that require high bandwidth but do not require fault tolerance.
Point
uses
strong points
weak points
hard disk drives
Description
RAID 0 provides high data throughput, especially for large files. Any environment that does not
require fault tolerance.
Provides increased data throughput for large files. No capacity loss penalty for parity.
Does not provide fault tolerance. All data lost if any hard disk drive fails.
One to 32 hard disk drives
Hard Disk Drive
One
Hard Disk Drive
Two
Hard Disk Drive
Three
Hard Disk Drive
Four
Segment One
Segment Five
Segment Nine
Segment Two
Segment Six
Segment Ten
Segment Three
Segment Seven
Segment Eleven
Segment Four
Segment Eight
Segment Twelve
Appendix C : RAID 107
RAID 1
RAID 1 duplicates all data from one hard disk drive to a second hard disk drive. RAID 1
provides complete data redundancy, but at the cost of doubling the required data storage
capacity.
Point
uses
strong points
weak points
hard disk drives
Description
Use RAID 1 for small databases or any other environment that requires fault tolerance but small
capacity.
RAID 1 provides complete data redundancy. RAID 1 is ideal for any application that requires
fault tolerance and minimal capacity.
RAID 1 requires twice as many hard disk drives. Performance is impaired during hard disk drive
rebuilds.
Two hard disk drives
Hard Disk Drive
One
Segment
Segment
Segment
Segment
One
Two
Three
Four
Hard Disk Drive
Two
Segment
Segment
Segment
Segment
108 StorTrends® NAS Software (Version 2.2) User’s Guide
One Duplicated
Two Duplicated
Three Duplicated
Four Duplicated
RAID 5
RAID 5 includes disk striping at the byte level and parity. In RAID 5, the parity
information is written to several hard disk drives. RAID 5 is best suited for networks that
perform a lot of small I/O transactions simultaneously.
RAID 5 addresses the bottleneck issue for random I/O operations. Since each hard disk
drive contains both data and parity numerous writes can take place concurrently. In
addition, robust caching algorithms and hardware based exclusive-or assist make RAID 5
performance exceptional in many different environments.
Point
uses
strong points
weak points
hard disk drives
Description
RAID 5 provides high data throughput, especially for large files. Use RAID 5 for transaction
processing applications because each hard disk drive can read and write independently. If a hard
disk drive fails, the StorTrends NAS Software uses the parity stored on each of the other hard
disk drives to recreate all missing information. Use also for office automation and online
customer service that requires fault tolerance. Use for any application that has high read request
rates but low write request rates.
Provides data redundancy and good performance in most environments
Hard disk drive performance will be reduced if a hard disk drive is being rebuilt. Environments
with few processes do not perform as well because the RAID overhead is not offset by the
performance gains in handling simultaneous processes.
Three to 32 hard disk drives
Hard Disk Drive
One
Segment One
Segment Five
Parity (Seg 4,6)
Hard Disk Drive
Two
Segment Two
Segment Six
Parity (Seg 1,7)
Hard Disk Drive
Three
Hard Disk Drive
Four
Segment Three
Segment Seven
Parity (Seg 2,8)
Segment Four
Segment Eight
Parity (Seg 3,5)
Parity is distributed across all hard disk drives.
Appendix C : RAID 109
110 StorTrends® NAS Software (Version 2.2) User’s Guide
Glossary
ACL
Access Control List. An ACL is a table that tells the system’s operating system the access
rights each user has to a directory or file. The directory or file has a security attribute that
identifies its access control list. The list has an entry for each system user with access
privileges, such as read and write.
Microsoft® Windows® NT/2000, Novell® NetWare®, Hewlett-Packard® OpenVMS™
and UNIX® system-based systems are among the operating systems that use access
control lists. The list is implemented differently by each operating system.
Active Directory™
Active Directory™ presents organizations with a directory service designed for
distributed computing environments. Active Directory™ allows organizations to centrally
manage and share information on network resources and users while acting as the central
authority for network security. In addition to providing comprehensive directory services
to a Microsoft® Windows® environment, Active Directory™ is designed to be a
consolidation point for isolating, migrating, centrally managing, and reducing the number
of directories that companies require.
Active Directory™ is the integral directory service within the Microsoft® Windows®
2000 operating system. This service improves manageability, enables security and
extends interoperability between Microsoft® Windows® 2000 and other operating
systems.
Alert
An alert gives you information or to warn you about a potentially damaging operation.
StorTrends NAS software has an alert manager that sends out alerts using the following
methods:
•
•
•
•
SNMP traps
E-mail alerts
LCD
Local event log
All the events are stored in a local event log. Based on the configuration, the alert
manager sends the alerts to SNMP trap and e-mail destinations.
AppleTalk®
To share files, Apple® systems needs a network file protocol called AppleTalk® File
Protocol (AFP), similar to NFS or CIFS.
Appliance
An appliance is a device that is purpose built, requires little or no time to setup, and most
of all, simple to use. A good example of an appliance is a refrigerator.
Glossary 111
Archive
The StorTrends NAS software uses this word to describe the process of backing up data
stored on it to a safe place.
Authentication
Authentication is the process of determining whether someone or something is, in fact,
who or what it declares itself to be. In private and public computer networks (including
the Internet), authentication is commonly done through the use of logon passwords.
Base DN
Base Distinguished Name. For example, ami.com would be as follows:
CN=USERS,DC=AMI,DC=COM
Capacity
The size of a hard disk drive, storage device, or Volume.
Data
Distinct pieces of information usually formatted in a special way.
DHCP
Dynamic Host Configuration Protocol. Enables individual computers on an IP network to
extract their configurations from a DHCP server.
Domain
A group of computers and devices on a network that are administered as a unit with
common rules and procedures All devices sharing a common part of the IP address are
said to be in the same domain.
Domain Controller
A server with a Microsoft® Windows® 2000/NT operating system and Active
Directory™ enabled.
Domain Name
That part of the Uniform Resource Locator (URL) that tells a domain name server using
the domain name system (DNS) whether and where to forward a request for a Web page.
The domain name is mapped to an IP address.
112 StorTrends® NAS Software (Version 2.2) User’s Guide
Ethernet
Ethernet is a registered trademark of the Xerox Corporation. It describes the way data
packets are transferred between computers on a local area network (LAN).
Ethernet 802.2
Packet format that defines the standard for the data link layer. It is made up of two
smaller layers called the logical link control (LLC) layer and the media access control
(MAC) layer.
+-----------+--------+---------+-------+-------+-------+---------|destination| source | length | DSAP | SSAP |control| data >
+-----------+--------+---------+-------+-------+-------+---------< 1 > < 1
> < 1 > < 43-1497 >
Ethernet 802.3
Packet format that defines the data link layer of a packet for bus type networks that use
Carrier Sense Multiple Access / Collision Detection (CSMA/CD). The most common bus
type networks are 10Base-T, 100Base-T (Fast Ethernet), and 1000Base-T (Gigabit
Ethernet) networks. The letter T at the end designates RJ-45 Category 5 cable.
Ethernet 802.3 the standard that is used in most Ethernet cards and cables.
+-----------+--------+---------+---------|destination| source | length | data >
+-----------+--------+---------+---------<
6
> <
6 > <
2
> < 46-1500 >
Ethernet II
Packet format that defines the data link layer of a packet. This is the original Ethernet
standard.
+-----------+--------+---------+---------|destination| source | type
| data >
+-----------+--------+---------+---------<
6
> <
6 > <
2
> < 46-1500 >
Ethernet snap
Packet format that has its own definition.
+-----------+--------+---------+-------+-------+-------+-----------+--------+----------|destination| source | length | AA
| AA
| 03
| org code | type | data >
+-----------+--------+---------+-------+-------+-------+-----------+--------+----------<
3
> < 2
> < 38-1492 >
Glossary 113
Firewall
A set of related programs, located at a network gateway server that protects the resources
of a private network from users from other networks.
Frame
A frame is a single data packet that is transmitted across a network.
FTP
An application protocol commonly used to transfer Web page files from their creator to
the computer that acts as their server for everyone on the Internet. Also commonly used
to download programs and other files to your computer from other servers.
Gateway
A combination of hardware and software that links two different types of networks.
Gigabyte
A Gigabyte is one trillion Bytes of data. Most hard disk drive manufacturers follow the
metric conventions of Kilobyte, Megabyte, and Gigabytes for specifying the drive
capacity on their label and specifications (for example, 1000 B =1 KB, 1000 KB=1 MB
and 1000 MB=1 GB) instead of the 1024 convention.
For example, given a manufacturer-specified 18.4 GB hard disk, the actual capacity
reported by the disk is 17930455 KB = 17930455 *1024 = 18360785920 Bytes. This, if
converted to metric convention, results in the specified 18.36 GB capacity rounded up.
Thus, the actual capacity of the 18.4GB drive is displayed as 17.1 GB.
Group
A group is a number of users that are bunched together. Having a group makes it easier to
assign a set of rules that are common to a set of users. Common groups can be
Accounting, Sales, Marketing, and so on.
Host
A computer that is connected to a TCP/IP network, including the Internet. Each host has
a unique IP address.
HTTP
An application protocol that is the set of rules for exchanging files (text, graphic images,
sound, video, and other multimedia files) on the World Wide Web.
114 StorTrends® NAS Software (Version 2.2) User’s Guide
Internet
A global wide area network connecting millions of computers.
IP Address
A 32-bit numeric address written as four numbers separated by periods. Each number can
be zero to 255.
IPv6
Internet Protocol next generation, A new version of the Internet Protocol (IP). The
official name of IPng is IPv6, where the v6 stands for version 6.
IPX
Internetwork Packet Exchange. IPX is a networking protocol used by the Novell®
NetWare® operating systems. IPX allows the StorTrends NAS software to be used in a
pure NetWare® systems environment.
ISP
Internet Service Provider. This is a company that provide Internet access.
Journaling
A Journaling File System (JFS) enables easy file system recovery and ensures no loss of
data in the event of an unscheduled downtime. It provides efficient formatting when new
drives are added and it allows quick recovery after abnormal shutdowns.
Mail Server
A Mail Server is a system that accepts incoming electronic messages (email) and stores
them until requested by the recipient of that message.
MIB
Management Information Base - A formal description of a set of network object that can
be managed using the Simple Network Management Protocol. The format of the MIB is
defined as part of the SNMP.
NAS
Network Attached Storage. Basically, an appliance that is purposely built as a networked
storage device and meant to be easy to set up, configure, and use.
Glossary 115
NDMP
Network Data Management Protocol. It is the industry standard network based tape
backup protocol. The data can be backed up and restored using any NDMP compatible
backup software.
Network
A group of two or more computer systems linked together.
NIC
Network Interface Card. Commonly as a network adapter or network card.
NIS
Network Information System. Developed by Sun™ Microsystems, NIS is a distributed
naming and directory service originally called Yellow Pages™ or YP. It is a mechanism
for identifying and locating network objects and resources. It provides a uniform storage
and retrieval method for network-wide information in a transport-protocol and mediaindependent fashion.
NIS is a network naming and administration system typically used for smaller networks.
Using NIS, each host, client or server in the system has knowledge about the entire
system. A user at any host can get access to files or applications on any host in the
network with a single user identification and password. It is intended for use on local
area networks. NIS uses the client/server model and the Remote Procedure Call (RPC)
interface for communication between hosts. NIS consists of a server, a library of client
programs, and some administrative tools. NIS is often used with the Network File System
(NFS). NIS is a UNIX® system-based application.
Node
A processing location. Can be a computer or some other device, such as a printer. Every
node has a unique network address.
Notification
A notification is a message sent via email stating something is wrong or that something
happened on the NAS server.
NTP
Network Time Protocol. Used to synchronizes the time of the NAS server automatically.
116 StorTrends® NAS Software (Version 2.2) User’s Guide
Open
An open system (as opposed to a proprietary system) is one that adheres to a publicly
known and sometimes standard set of interfaces so that anyone using it can also use any
other system that adheres to the standard.
OSI
Open System Interconnection, an ISO standard for worldwide communications that
defines a networking framework for implementing protocols in seven layers.
OSI Layer 3
Network Layer that routes data from one node to another.
Packet
A piece of a message transmitted over a packet-switching network. Contains the
destination address in addition to the data. In IP networks, packets are often called
datagrams.
Parameters
A value used to define a characteristic.
Protocol
A special set of rules that end points in a telecommunication connection uses when they
communicate.
Proxy Server
A server that acts as an intermediary between a workstation user and the Internet so that
the enterprise can ensure security, administrative control, and caching service.
Quota
A quota is the maximum amount of space a user is allowed to use on the NAS server.
StorTrends NAS software provides quota support on a per volume basis. This quota can
be set for every individual user. If the quota is set to zero, it means the user has unlimited
storage access. If the quota is set to a particular size it means the user has only that much
amount of storage at his/her access in that volume.
Glossary 117
RAID 0
RAID 0 provides disk striping across all hard disk drives in the volume. RAID 0 does not
provide any data redundancy, but does offer the best performance of any RAID level.
RAID 0 breaks up data into smaller blocks and then writes a block to each hard disk drive
in the volume. The size of each block is determined by the stripe size parameter, set
during the creation of the RAID set. RAID 0 offers high bandwidth.
By breaking up a large file into smaller blocks, StorTrends NAS Software can use
multiple IDE/SCSI channels and hard disk drives to read or write to the file faster. RAID
0 involves no parity calculations to complicate the write operation. This makes RAID 0
ideal for applications that require high bandwidth but do not require fault tolerance.
RAID 1
RAID 1 duplicates all data from one hard disk drive to a second hard disk drive. RAID 1
provides complete data redundancy, but at the cost of doubling the required data storage
capacity.
RAID 5
RAID 5 includes disk striping at the byte level and parity. In RAID 5, the parity
information is written to several hard disk drives. RAID 5 is best suited for networks that
perform a lot of small I/O transactions simultaneously.
RAID 5 addresses the bottleneck issue for random I/O operations. Since each hard disk
drive contains both data and parity numerous writes can take place concurrently. In
addition, robust caching algorithms and hardware based exclusive-or assist make RAID 5
performance exceptional in many different environments.
RAID Level
A RAID level in the StorTrends NAS Software can be either RAID 0, RAID 1, or RAID
5.
Mirrored OS
AMI has added Mirrored operating system (OS) capabilities to the StorTrends NAS
software in the 2.1 version release. Mirroring the NAS OS is the ability to install the NAS
software on two hard disk drives. Basically, if one of the two boot hard disk drives fail,
you still maintain the ability to boot to the NAS OS from the alternate hard disk drive.
Router
A device or, in some cases, software in a computer, that is connected to at least two
networks and decides which way to send each information packet based on its current
understanding of the state of the networks it is connected to.
118 StorTrends® NAS Software (Version 2.2) User’s Guide
SAN
Storage Area Network. It is a network of shared storage devices. Its architecture works in
a way that makes all storage devices available to all servers on a LAN or WAN. As more
storage devices are added to a SAN, they too will be accessible from any server in the
larger network. In this case, the server merely acts as a pathway between the end user and
the stored data.
Schedule
Scheduling allows you set the frequency that the NAS server takes a snapshot image. The
options are Never, Hourly, Daily, and Weekly.
Server
A program that awaits and fulfills requests from client programs in the same or other
computers. A given application in a computer may function as a client with requests for
services from other programs and also as a server of requests from other programs.
Share
A share is a folder that has specific read/write attributes. You can specify that only
certain users and groups can access the folder.
SMB
Server Message Block. Provides a method for client applications in a computer to read
and write to files on and to request services from server programs in a computer network.
SMB can be used over the Internet on top of its TCP/IP protocol or on top of other
network protocols such as Internet Packet Exchange (IPX) and NetBEUI.
Snapshot
A snapshot service gives you a nearly instantaneous virtual copy of your storage volume
with no interruption of service. The underlying backup technology creates an
instantaneous copy of the data being backed up. This is typically accomplished by
splitting a mirrored set of disks or creating a copy of a disk block when it is written,
preserving the original. At restore time, the original is made available immediately,
resulting in almost instantaneous restores.
SNMP
Short for Simple Network Management Protocol, a set of protocols for managing
complex networks. The first versions of SNMP were developed in the early 80s. SNMP
works by sending messages, called protocol data units (PDUs), to different parts of a
network. SNMP-compliant devices, called agents, store data about themselves in
Management Information Bases (MIBs) and return this data to the SNMP requesters.
Glossary 119
State
A state is a text description or status used to describe whether or not the hardware feature
is within reasonable temperature, voltage, or revolutions per minute thresholds.
Stripe Size
Disk striping writes data across multiple hard disk drives instead of just one hard disk
drive. Disk striping involves partitioning each hard disk drive storage space into stripes
that can vary in size. These stripes are interleaved in a repeated sequential manner. The
combined storage space is composed of stripes from each drive. StorTrends NAS
Software supports stripe sizes of 8 KB to 512 KB.
For example, in a four hard disk drive system using only disk striping (as in RAID level
0), segment one is written to hard disk drive one, segment two is written to hard disk
drive two, and so on. Disk striping enhances performance because multiple hard disk
drives are accessed simultaneously; but disk striping does not provide data redundancy.
Subnet Mask
A mask used to determine what subnet an IP address belongs to. An IP address has two
components, the network address and the host address. Subnetting enables the network
administrator to further divide the host part of the address into two or more subnets. A
part of the host address is reserved to identify the particular subnet.
Switch
A network device that selects a path or circuit for sending a unit of data to its next
destination.
TCP
Transmission Control Protocol. One of the main protocols in TCP/IP networks. Enables
two hosts to establish a connection and exchange streams of data.
TCP/IP
Transmission Control Protocol/Internet Protocol, the suite of communications protocols
used to connect hosts on the Internet. TCP/IP uses several protocols, the two main ones
being TCP and IP.
Upgrade
To upgrade means that you are replacing an old version of a software product with a
newer version of the same product.
120 StorTrends® NAS Software (Version 2.2) User’s Guide
User DN
User Distinguished Name. For example, marketing users on the ami.com domain would
be entered as follows:
CN=ADMINNAME,CN=USERS,DC=AMI,DC=COM
Volume
A Volume is a fixed amount of storage. One Volume can span over more than one
physical hard disk drive. It all depends on how you set up your Volumes.
WINS
WINS is a system that determines the IP address associated with a particular network
computer. This is called name resolution. WINS supports network client and server
computers running Microsoft® Windows® operating system and can provide name
resolution for other computers with special arrangements. You must enter the IP Address
for that server if one is used in your network.
XFS
XFS combines advanced Journaling technology with full 64-bit addressing and scalable
structures and algorithms. This combination delivers the most scalable and highperformance file system in the world and is fully supported by the StorTrends NAS
Software.
Glossary 121
122 StorTrends® NAS Software (Version 2.2) User’s Guide
Index
Error! No index entries found.
Index 123