1
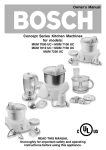
Owner’s Manual
Concept Series Kitchen Machines
for models:
MUM 7000 UC • MUM 7100 UC
MUM 7010 UC • MUM 7150 UC
MUM 7220 UC
READ THIS MANUAL
thoroughly for important safety and operating
instructions before using this appliance.
1
IMPORTANT SAFEGUARDS
WARNING: A risk of fire and electrical shock exists in all electrical appliances and may
cause personal injury or death.
When using electrical appliances, basic safety precautions should always be followed,
including the following:
1. Read all instructions before using the kitchen machine.
2. To protect against risk of electric shock, do not put the drive unit in or under water or
other liquid.
3. This appliance is not for use by children.
4. Close supervision is necessary when any appliance is used near children.
5. Do not leave appliances unattended during operation.
6. Unplug from outlet when not in use, before putting on or taking off parts, and
before cleaning.
7. To disconnect: Switch appliance off then remove plug from power supply.
8. Avoid contacting moving parts. Keep hands, hair, clothing, as well as spatulas
and other utensils away from whisks, beaters, blades, disc, dough hook and/or other
moving parts during operation to reduce the risk of injury to persons, and/or
damage to the appliance or its attachments.
9. Do not operate any appliance with a damaged cord or plug, or after the appliance
malfunctions or is dropped or damaged in any manner. Return appliance to the
nearest authorized service facility for examination, repair or electrical or mechanical
adjustment.
10. The use of attachments not recommended or sold by the appliance manufacturer
may cause fire, electric shock or injury and is therefore prohibited.
11. Do not use outdoors or when standing in a damp area.
12. Do not let cord hang over edge of table or counter, or touch hot surfaces.
13. Always operate appliance with covers in place.
14. Blades are sharp. Handle carefully due to risk of injury.
15. Remove beaters from mixing bowl before washing.
NOTE: ALSO BE SURE TO READ THE WARNINGS AND CAUTIONS THAT ARE
PROVIDED BEFORE EACH ATTACHMENT’S OPERATING INSTRUCTION.
SAVE THESE INSTRUCTIONS
2
TABLE OF CONTENTS
IMPORTANT SAFEGUARDS .................................................................. 2
Table of contents ..................................................................................... 3
ABOUT YOUR KITCHEN MACHINE ....................................................... 4
Bosch Concept Series Kitchen Machine ................................................. 4
Unpacking ............................................................................................... 4
Electrical specifications ............................................................................ 4
Before using for the first time .................................................................. 4
Getting to know your Bosch Kitchen Machine ......................................... 6
Special accessories ..................................................................... 6
Power unit features ................................................................................. 6
Getting started ..................................................................................... 7-9
STANDARD ATTACHMENTS .................................................................. 9
Mixing bowl w/twin beating whisks and dough hook ............................. 9
How to use dough hook ......................................................... 10-11
Placing into operation with dough hook ....................................... 11
How to use twin beating whisks .................................................. 11
Operation with dough hook and whisk assembly .......................... 12
Use of mixing bowl with twin beating whisks ............................... 13
Placing into operation with twin beating whisks .......................... 14
Care and cleaning of bowl and its accessories ........................... 14
Blender with unbreakable plastic jar ..................................................... 15
How to use blender ...................................................................... 15
Placing blender into operation ...................................................... 16
Example of use of blender ........................................................... 16
Care and cleaning of blender ........................................................ 17
Slicer/shredder with unbreakable bowl ................................................ 17
Slicer/shredder, intended use ...................................................... 18
Placing slicer/shredder into operation .......................................... 19
Care and cleaning of slicer/shredder ............................................ 20
Food processor with unbreakable bowl ................................................. 20
How to use food processor blade ................................................. 20
Placing into operation with food processor blade .......................... 22
Examples of use of food processor .............................................. 22
Care and cleaning of food processor blade and bowl .................... 23
How to use discs w/5-cup capacity bowl ..................................... 23
Placing into operation with discs and disc holder ......................... 24
Care and cleaning of discs, disc holder and bowl ......................... 24
SERVICE and REPAIR .......................................................................... 24
TROUBLESHOOTING ................................................................. 25
SAMPLE RECIPES .......................................................................... 26-27
SPECIAL ACCESSORIES ..................................................................... 30
BOSCH small appliance warranty ........................................................... 31
HOUSEHOLD USE ONLY
3
• The MUM 7150 UC
comprised of the electronic power unit
with integral cord storage, six-cup
capacity blender (MUZ7MX1), six-quart
capacity mixing bowl, bowl lid with
integral filling funnel and cover
(MUZ7KR1), twin beating whisks, dough
hook, five-cup capacity food processor
with safety locking lid (MUZ7MM2) and
motor drive cover.
ABOUT YOUR KITCHEN MACHINE
Congratulations on having selected one of
the Bosch Concept Series Kitchen
Machines. A series of kitchen machines that
we, and—thankfully—cooking professionals
the world over, feel are the best householdtype kitchen machines available.
As you read through these instructions,
please pay particular attention to the
IMPORTANT SAFEGUARDS. Specific
safeguards for the attachments as well as
warnings and cautions are provided in each
section describing the operation of that
particular attachment.
• The MUM 7220 UC
comprised of the electronic power unit
with integral cord storage, 12-cup
capacity slicer/shredder with three
stainless steel blades (MUZ7TS1), sixcup capacity blender (MUZ7MX1), sixquart capacity stainless steel mixing
bowl, bowl lid with integral filling tube
and cover (MUZ7ER1), twin beating
whisks, dough hook, safety cover and
bowl scraper.
Bosch Concept Series Kitchen Machine
The Bosch Concept Series Kitchen
Machine is available in 5 models:
• The MUM 7000 UC
comprised of the electronic power unit
with integral cord storage, six-quart
capacity mixing bowl, bowl lid with
integral filling tube and cover
(MUZ7KR1), twin beating whisks, dough
hook, motor drive cover and bowl
scraper.
Unpacking
Carefully remove the power unit from its
packaging and place it on the counter so it
is ready to use. As you remove the
accessories from the carton, check them
against Figure 1 to assure that all the
standard parts are present.
• The MUM 7010 UC
comprised of the electronic power unit
with integral cord storage, six-quart
capacity mixing bowl, bowl lid with
integral filling tube and cover
(MUZ7KR1), twin beating whisks,
professional-style dough hook, motor
drive cover and bowl scraper.
Electrical Specifications
Check to make sure that the voltage on
which your kitchen machine is to operate
is the same as specified on the rating plate.
Standard North American models have an
electrical power rating of 700-watt maximum
power rating with the accessory attachment
that draws the most power (some accessory
attachments may draw less power).
• The MUM 7100 UC
comprised of the electronic power unit
with integral cord storage, six-cup
capacity blender (MUZ7MX1), six-quart
capacity mixing bowl, bowl lid with
integral filling funnel and cover
(MUZ7KR1), twin beating whisks, dough
hook and motor drive cover.
Before Using for the First Time
Before using any of the attachments for the
first time it is recommended they be washed,
rinsed well and dried. Of the attachments
supplied, with the systems in this manual,
all parts, except the whisk holder for the
twin beating whisks and the blender’s
blade/base assembly, are dishwasher safe:
4
MUM 7220 UC
MUM 7010 UC
MUM 7100 UC
MUM 7150 UC
MUM 7000 UC
Figure 1
5
•
> The whisk holder should be hand
washed in warm soapy water, rinsed
and dried.
> The blender’s blade/base assembly
should be washed under running water
and dried.
Bosch Small Appliances
Customer Support
BSH Home Appliances
5551 McFadden Avenue
Huntington Beach, CA 92649
Note: It is recommended that the blender’s
blade/base assembly never be left to
stand in water or soap solution to prevent
the bearing lubricant from being washed out.
or call us at:
Getting to Know Your Bosch Kitchen
Machine
The Bosch Concept Series Kitchen
Machines are comprised of various
attachments, depending on the system
purchased (see above). In addition to the
attachments listed on the previous pages
that are available with the standard systems,
Bosch offers many special accessories.
Power Unit Features
All MUM 7000 power units have the following
features, refer to figure 2:
•
1 (866) 44BOSCH
[1 (866) 442-6724]
700-watt motor
The most powerful motor offered with any
household kitchen machine.
Electronic speed control
Six-position rotary switch is located at front
of power unit: 4 speeds plus a momentary
pulse function and a stop position “O/Off,”
see figure 2a.
Special Accessories
To allow you to get the most service from
your Bosch Concept Series Kitchen
Machine, Bosch engineers have designed
a line of special accessories to expand the
usefulness of your machine. In addition to
the attachments that come with the various
Concept Series Kitchen Machines, there
are optional accessories that can be ordered
separately. These accessories include a
food and meat grinder, grain mills, citrus
juicer and ice cream maker, plus additional
attachments that can be used with the meat
grinder: fancy cookie attachment, fruit
pulper, pasta-making disks and grater
attachment.
See
SPECIAL
ACCESSORIES, at the back of this
booklet, page 30. Or, to view all currently
available accessories, visit our Web site at
Control status indicator
Indicates when power unit is functioning
normally, or if there is a problem that has
caused the electronic safety control to be
activated, see figure 2b:
• The indicator will glow steadily when
the power unit is functioning normally.
or,
• The indicator will flash if the electronic
safety control of the power unit has
been activated.
Mono drive
Four electronically controlled shaft speeds
are all available from a single location; each
attachment automatically connects to the
appropriate drive speed.
www.boschsmallappliances.com
Work on expanding the usefulness of the
Bosch Kitchen Machine is a continuing
process. If there is some type of accessory
in which you are interested in that is not
included at the back of the book, please
either write us at:
Motor drive cover
Used to cover mono drive when not in use,
see figure 2c.
6
Gentle start
Getting Started
The operation of your Bosch Concept Series
Kitchen Machine is summarized below.
a special feature that brings the motor up
to speed over a two-second period; limiting
splashing.
Specific instructions for using each of the
attachments, provided with the kitchen
machine systems covered by this manual,
follow the summarized instructions. Please
read the specific instructions thoroughly
before using that attachment, paying
particular attention to the IMPORTANT
SAFEGUARDS and WARNINGS provided.
Convenient cord storage
Convenient cord storage is located on the
back of the power unit, see 2d.
Integrated hand grips
Side recesses provide for easy lifting and
carrying of power unit when not in use, see
2e.
1.
Four rubber feet
Four rubber feet with formed suction cups
provide the ultimate in stability, while also
serving to isolate the power unit from the
hard surface to minimize noise and
vibration. Need clean smooth surface, see
figure 2f.
Figure 2.
7
Place power unit on suitable work
surface.
Before using the machine with any of
the attachments the power unit should
be placed on suitable work surface.
The surface should be sturdy, smooth
and clean; make sure that there is
All models of the Bosch Concept
Series Kitchen Machines incorporate
an electronic safety control to protect
the motor. If the safety becomes
activated, the indicator will flash. See
TROUBLESHOOTING at the back of
this manual if status indicator is
flashing.
no flour or oil on the surface. A clean
smooth surface will provide the best
footing for the suction cup feet on
the power unit and will limit slipping
and/or “walking.”
2.
Plug power unit into power supply.
Unwind the power unit’s cord to
appropriate length and plug it into
a convenient nearby receptacle.
3.
Remove motor drive cover.
Remove motor drive cover from monodrive, see figure 2c.
4.
Select attachment to be used.
Select attachment you wish to use
and place on power unit. See specific
instructions for attachment selected.
Specific instructions are located on
pages listed below:
Attachment
Figure 3.
6.
Turn power unit off.
When your work with the attachment
is completed or the capacity of the
batch feed attachment has been
reached, turn the power unit to off
position, “O/Off” and unplug.
7.
Remove the attachment.
Remove the attachment from the
power unit, per instructions for the
specific attachment being used.
8.
Continue use.
If the attachment was of the batch feed
type and you wish to continue using
the attachment, empty the bowl or jar
of the attachment per its specific
instructions and reinstall the
attachment as before. Repeat the
steps 5 through 7 as often as
necessary to complete necessary
work.
9.
Work completed,
remove attachment.
If the attachment is of the continuous
feed type or is the batch type and you
have completed the work you wished
Pages
Mixing bowl w/dough hook ........ 9-11
Mixing bowl w/twin whisks ....... 11-14
Blender ..................................... 15-17
Slicer/shredder ......................... 17-20
Food processor ........................ 20-24
Table 1.
5.
Operate unit with rotary switch.
Once the attachment is in place, the
speed of its moving components can
be controlled through the use of the
rotary switch at the front of the power
unit. See figure 2a. The rotary switch
has six positions:
a. “M,” a momentary “pulse” position
that provides full speed and power
for the time it is held in position.
b. “O/Off,” the off position.
and
c. Four speeds labeled 1, 2, 3 and 4.
Speed 1 is the lowest speed. The
speed increases with each
succeeding step up to the highest
speed, speed 4.
8
to perform with the attachment,
remove the attachment from the power
unit per the instructions for the specific
attachment being used.
STANDARD ATTACHMENTS
Following are the specific instructions for
the standard attachments provided with the
Bosch Concept Series Kitchen Machines
covered by this manual.
10. Place contents (batch feed type)
If the attachment is the batch feed
type, disassemble per the specific
attachment’s instructions and place
the contents in a suitable container.
Mixing Bowl with Twin Beating Whisks
and Dough Hook
(MUZ 7 KR1 or MUZ 7 ER1)
WARNING
11. Care and Cleaning
Once you have completed working
with the Bosch Kitchen Machine, the
next step is to disassemble and clean
the attachments. If you wish to use
another attachment please return to
step 4, above.
1. There is a risk of injury from rotating
tools when using the mixing bowl with
the dough hook or the twin beating
whisks.
2. Avoid contact with moving parts. Keep
hands, hair, clothing, as well as
spatulas, bowl scrapers and other
utensils away from dough hook and
whisks during operation to prevent
injury, and/or damage to the power unit
or accessories.
3. Always work with the bowl lid fitted in
place.
4. Do not change tools until the power unit
has come to a complete stop; when
switched off, the power unit will continue
to turn for a brief period.
Power unit
With the power unit turned off and
unplugged, it should be cleaned only with
a clean, damp cloth. Never use coarse or
caustic cleaning products to clean the
power unit. Never immerse the power unit
in water. Then wipe off the motor drive cover
and reinstall on the power unit.
The power unit may be left on the counter
or stored for future use. In either case,
always be sure to replace the motor drive
cover on the mono drive. This will prevent
dust and/or flour build-up in the drive.
All models of the Bosch Concept Series
Kitchen Machines are provided with a sixquart mixing bowl with twin beating whisks
and dough hook. You may have either the
stainless steel bowl or the plastic mixing
bowl with the twin beating whisks and dough
hook, see figure 1. Or you may have the
standard dough hook or the professional
dough hook. Additional mixing bowls are
available as accessory items under the part
numbers: MUZ 7 ER1 and/or MUZ 7 KR1,
refer to SPECIAL ACCESSORIES section
at the back of this manual. The mixing bowl
with dough hook and twin beating whisks
consists of the following components,
dependent upon the system you have, see
figure 4:
The Bosch Concept Series Kitchen
Machines have been specially designed to
enable them to be stored in a drawer. Wind
the cord around the cord holder and, using
the carry grips, lift the power unit and place
in your chosen storage area.
Attachments
The attachment(s) that have been used
should be disassembled and washed, per
their specific instructions, dried and stored
for future use.
9
a.
b.
and that you have removed the motor drive
cover.
c.
1. Before using the mixing bowl and
dough hook for the first time, it
is recommended that the bowl,
anti-splash cover, filling funnel cap
and dough hook be washed. All
components of the mixing bowl and the
dough hook are dishwasher safe. Or
they may be washed in warm soapy
water. After washing, rinse well and dry
before using.
d.
The driveshaft can be removed for
cleaning by pushing down on the shaft,
as shown in figure 5a. After washing,
rinse and dry the driveshaft and replace
in the bowl by pressing it in, from the
bottom, as shown in figure 5b, until it
snaps into place.
e.
Figure 4.
4a. Bowl (either stainless steel or
plastic) with anti-splash cover and
filling funnel cap
a.
b.
4b. Standard dough hook (all systems
except MUM 7010 UC)
4c. Twin beating whisks
4d. Professional dough hook (MUM
7010 UC model only)
Figure 5.
4e. Bowl scraper
2. If you have not already done so, remove
the motor drive cover from the power
unit’s mono drive and place the mixing
bowl, whether the stainless bowl or the
plastic bowl, on the mono drive of the
power unit and turn the bowl counterclockwise with a slight downward
pressure until bowl is firmly seated on
the mono drive coupling, see figure 6.
How to Use Dough Hook
The dough hook and mixing bowl are
intended to be used to knead yeast doughs
and to mix cookie and pastry doughs and
also when adding nuts, chocolate chips,
dried fruit, hard butter or shortening,
hardened brown sugar, etc. to batters.
Use of mixing bowl with dough hook
CAUTION
Before beginning to attach this or any other
attachment, make sure that the power unit
is on a smooth, clean, suitable work
surface and switched to off position “O/Off,”
Failure to make sure that the bowl is
properly seated on the mono drive coupling
before the power unit is turned on can result
in damage to the bowl and/or coupling.
10
Plastic Bowl
8b), but the cover and cap should be in
place whenever the power unit is in
operation. The anti-splash cover and
cap serve to prevent the escape of flour
dust at the beginning of the stirring and
kneading process and also serves to
prevent accidental contact with the
moving dough hook.
Stainless Steel Bowl
Figure 6.
3. There are two styles of dough hook
used with the Bosch Machine, the
standard and the professional, but no
matter which one you have they are
mounted in the mixing bowl in the same
way: engage the dough hook on the
driveshaft of the mixing bowl by placing
it over the center column, as shown in
figure 7. Once in place, check to make
sure dough hook has engaged the
driveshaft by turning the dough hook
clockwise while pushing down until it
stops.
Standard
Dough Hook
a.
b.
Figure 8.
Placing into Operation w/Dough Hook
Make sure that the power unit is on a
smooth, clean, suitable work surface and
switched to off position, “O/Off.” Unwind the
electrical cord to the necessary length and
plug into a convenient outlet. The mixing
bowl with dough hook is now ready for
operation. See table 1 for examples
demonstrating the use of dough hook
attachment. Sample recipes may also be
found in recipes section, at the back of this
manual.
Professional
Dough Hook
Figure 7.
How to Use Twin Beating Whisks
All Bosch Concept Series Kitchen
Machines come with a twin beating whisk
assembly, see figure 4c.
4. Place the anti-splash cover on the bowl
so that the tabs on the bowl fit into the
recesses in the bowl cover and turn the
cover counterclockwise to fasten the
bowl cover to the bowl. See figure 8a.
The twin beating whisks and mixing bowl
are intended to be used for very light
substances, such as cream, egg whites,
sauces, batters and light pastry doughs
that are thin enough to pour.
The cover has an integral filling funnel
with a cap. The funnel cap may be
removed to add ingredients (see figure
11
OPERATION WITH DOUGH HOOK AND WHISK ASSEMBLY
Below you will find a table listing examples of how the dough hook and the whisk
assembly are to be used for various typical applications.
Attachment Ingredients
Twin Beating
Whisks
Speed
4
2 min.
(approx.)
20 eggs
(approx.)
Whipping Cream
3
2 min.
6 cups
(approx.)
Sponge Cake (any recipe)
Combine all ingredients
Whip
1
4
1/2 min.
Mix
Basic Cake Batter
Combine all ingredients
Mix
Dough Hook
Max.
Amount
Egg Whites (2)
Fold in flour mixture
Twin Beating
Whisks/Dough
Hook
Time
Cookie Dough
Cream, soft butter or shortening
and sugar using twin
beating whisks
Combine flour alternately with
liquid using dough hook
Stir in nuts, chocolate chips,
etc. using dough hook.
Yeast Dough
Combine all wet ingredients
Add flour in portions
M
(pulse)
4
4-6 min.
1
1/2 min.
4
3 min.
1
1/2 min.
4
3 min.
(approx.)
3x basic
recipe
(6 layers)
3 min
(approx.)
3x basic
recipe
(6 layers)
3x basic
recipe
(9 dozen
cookies)
2 or 3
1
1 or 2
1/2 min.
5 min.
(approx.)
3x basic
recipe
(10, 1 lb.
loaves)
Table 1. Examples of operation using whisk assembly and dough hook. Speed 1 should
be used for initial stirring and combining. Place all ingredients into the mixing bowl, liquids
first. Shortening must be soft (room temperature).
12
The driveshaft should also be removed
from the mixing bowl for cleaning, if it
has not already been done. See
previous section, covering mixing bowl
and dough hook, for instructions on how
to remove driveshaft.
The dough hook should be used for all
heavier substances such as cookie doughs,
yeast doughs, pastry doughs and other
heavy doughs.The dough hook should
always be used when adding nuts,
chocolate chips, dried fruits, hard butter or
other fats, hardened brown sugar, etc. to a
mixture.
2. If you have not already done so, remove
the motor drive cover and place the
mixing bowl on the mono drive of the
power unit and turn the bowl counterclockwise with a slight downward
pressure until bowl is firmly seated on
the mono drive coupling, see figure 4.
Use of mixing bowl with twin beating whisks
Before beginning to attach this or any other
attachment, make sure that the power unit
is on a smooth, clean, suitable surface and
switched to off position, “O/Off,” and that
you have removed the motor drive cover.
CAUTION
1. Before using the mixing bowl and twin
beating whisk assembly for the first
time, it is recommended that the bowl,
anti-splash cover, filling funnel cap and
twin beating whisk assembly be
washed. All components of the mixing
bowl and the twin beating whisk
assembly are dishwasher safe, except
the whisk holder.
Failure to make sure that the bowl is
properly seated on the mono drive coupling
before the power unit is turned on can result
in damage to the bowl and/or coupling.
3. Place and engage the twin beating
whisk assembly on the driveshaft of the
mixing bowl as shown in figure 10a.
a.
b.
The whisks may be removed from the
whisk holder as shown in figure 9a, and
washed in the dishwasher along with
the mixing bowl and other components.
The whisk holder should be washed in
warm soapy water. After washing, rinse
well and dry the whisk holder before
reattaching the whisks as shown in
figure 9b.
a.
Figure 10.
b.
4. Place the anti-splash cover on the bowl
so that the tabs on the bowl fit into the
recesses in the cover, and turn the antisplash cover counterclockwise to
fasten the bowl cover to the bowl.
See figure 10b.
The anti-splash cover has an integral filling
funnel with a cap. The cap may be removed
Figure 9.
13
Removing Contents
Before beginning to remove the contents
from the mixing bowl, make sure that the
power unit has been turned to off position,
“O/Off.” Remove the anti-splash cover by
turning the cover clockwise and lifting off.
Once the cover has been removed, the
dough hook or the twin beating whisks may
be removed by turning the hook or whisk
assembly clockwise while lifting.
to add ingredients, but the cover and cap
should be in place whenever the power unit
is in operation. The anti-splash cover and
cap serve to prevent the escape of flour dust
at the beginning of the stirring process as
well as prevent splatter, and also serves to
prevent accidental contact with the moving
whisks.
Placing into Operation w/Twin Beating
Whisks
Make sure that the switch is in the off
position, “O/Off.” Unwind the electrical cord
to the necessary length and plug into the
wall outlet. The bowl with whisk assembly
is now ready for operation. See table 1 for
examples demonstrating the use of the twin
beating whisks.
The mixing bowl can be removed from the
power unit by turning the bowl clockwise
while lifting.
The contents may now be used as desired.
Care and Cleaning
of Bowl and Its Accessories
The mixing bowl, twin beating whisks
(except for the whisk holder), dough hook
anti-splash cover, filling funnel cap, and bowl,
either the stainless steel bowl or plastic
bowl, are dishwasher safe.
Mixing bowl tips:
1. When using the mixing bowl to knead
or mix a recipe designed to be
prepared by hand, you will find that with
the Bosch Kitchen Machine you can
usually place all the ingredients in the
mixing bowl at once. When doing this,
always place the liquids in first. This
will assure more thorough mixing.
To facilitate cleaning:
> The driveshaft should be removed
from the mixing bowl, see figure 5;
and
> The whisks should be removed from
the whisk holder, see figure 9a.
2. When adding ingredients to a mixture:
a. Turn the rotary switch to a lower
speed;
b. Remove the cap from the filling
funnel;
c. Add the ingredients through the
funnel opening and replace the cap.
It is recommended that the whisk holder
be washed by hand in warm soapy water,
rinsed well and dried after each use.
The power unit of the kitchen machine
should be cleaned using a clean, damp
cloth only. Never use coarse or caustic
cleaning products to clean this appliance.
Never immerse the power unit in water.
3. If a large batch of dough is to be left in
the mixing bowl and allowed to rise, the
cover should be removed and placed
only loosely on the bowl so that it is
free to move if the dough should begin
to press on it.
14
Blender with Unbreakable Plastic Jar
(MUZ 7 MX1)
How to Use Blender
Either this plastic blender or the stainless
steel blender are available as accessory
items under the part numbers:
• MUZ 7 MX1
for blender with polycarbonate jar;
or
• MUZ 7 MX3
for blender with stainless steel jar.
WARNING
1. There is a risk of injury from sharp
blades when using the blender
attachment.
2. Keep hands and utensils out of the
blender jar while it is attached to the
power unit.
3. Blades are sharp. Handle carefully.
4. To avoid injury, never place blade
assembly on power unit without
blender jar properly attached.
5. Always operate the blender with the
cover in place.
6. The use of attachments, including
canning jars, not recommended by
the manufacturer, may cause a risk
of personal injury.
7. When blending hot and/or frothing
liquids, process a maximum of 18 fluid
ounces (0.5 litres) at a time.
The blender has been designed for crushing
ice; mixing liquids; pureeing vegetables;
preparing special diet and infant foods;
pulverizing fruit, vegetables, nuts and dried
bread (for bread crumbs); and preparing
mayonnaise and sauces.
Before beginning to use this or any other
attachment, make sure that the power unit
is on a clean, smooth, suitable work
surface and switched to off position, “O/Off,”
and that you have removed the motor drive
cover.
The MUM 7100 UC, MUM 7150 UC and the
MUM 7220 UC Bosch Concept Series
Kitchen Machines include the MUZ 7 MX1
blender accessory. The blender accessory
consists of, figure 11:
1. Before using the blender for the first
time, it is recommended that the
blender jar cover, closure/funnel and
blade/base assembly be washed. All
components, except the blade/base
assembly, are dishwasher safe.
Remove the blade/base assembly from
the blender, see figure 12.
CAUTION
Blade/base assembly is very sharp.
Handle with care.
The blade/base assembly may be
easily removed, as shown in figure 12a,
by inverting the blender and pressing
down on the quick release handle and
turning it counterclockwise until it
stops and then lifting up.
Figure 11.
11a.
11b.
11c.
11d.
Cover closure/funnel
Cover
Blender jar
Blade/base assembly.
15
a.
Normally when blending, the blender jar
should be filled with the entire amount of
material to be blended, if possible, before
switching the appliance on. The cover and
cover closure should always be in place after
filling the blender jar and before switching
the power unit to On. Any subsequent
additions to the blended material should be
made through the cover opening, see figure
14. For solids and/or granular material,
remove the cover closure/funnel to add the
material, as shown in figure 14a. For liquids,
the closure/funnel may be left in place and
the liquids added by pouring it into the
closure/funnel, see figure 14b.
b.
Figure 12.
Wash the blade/base assembly under
running water. Do not place the blade/
base assembly in the dishwasher or
allow it to stand in water. This will tend
to wash out the lubricant. After
cleaning, rinse thoroughly and dry
before using.
2. To assemble or reassemble blade/base
assembly into the blender, insert the
blade/base assembly into the blender
jar as shown in figure 12b, press
down on the quick release handle of
the blade/base assembly and turn
clockwise to the stop. The blade/base
assembly is then back in place.
Figure 14.
Example of Use of Blender
To familiarize you with the operation of the
blender, a sample recipe for mayonnaise is
provided below:
3. If you have not already done so, remove
the motor drive cover and place the
blender on the mono drive and turn
counterclockwise to lock the blender
in place.
a.
1
1/3
2
b.
1
1/2
1/2
2/3
Mayonnaise Recipe
whole egg
cup of vegetable oil
tablespoons lemon juice or light
vinegar
teaspoon sugar
teaspoon dry mustard
teaspoon of salt
cup of vegetable oil
Mix all ingredients, except final 2/3’s cup
of oil, for a few seconds at speed 1, then
quickly pour the oil in through the opening
in the cover in a uniformly thick stream, as
shown in figure 14b. Operate the blender at
speeds 1 or 4 until mixture is thick and
smooth (approximately 10-20 seconds).
Makes 1 1/4 cups.
Figure 13.
Placing Blender into Operation
Make sure that the switch is in the off
position, “O/Off.” Unwind the electrical cord
to the necessary length and plug into wall
outlet. The blender is now ready for
operation.
16