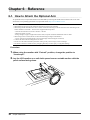
1
Important
Please read PRECAUTIONS, this User’s Manual, and Setup Manual
(separate volume) carefully to familiarize yourself with safe and
effective usage.
•Please refer to the Setup Manual for basic information ranging from
connection of the monitor to a PC to using the monitor.
•The latest User’s Manual is available for download from our web site:
http://www.radiforce.com
Location of Caution Statement
Product specification may vary with sales areas. Confirm the specification in the manual written in language of the
region of purchase.
Copyright© 2010 EIZO NANAO CORPORATION All rights reserved.
No part of this manual may be reproduced, stored in a retrieval system, or transmitted, in any form or by any means,
electronic, mechanical, or otherwise, without the prior written permission of EIZO NANAO CORPORATION.
EIZO NANAO CORPORATION is under no obligation to hold any submitted material or information confidential
unless prior arrangements are made pursuant to EIZO NANAO CORPORATION’s receipt of said information.
Although every effort has been made to ensure that this manual provides up-to-date information, please note that
EIZO monitor specifications are subject to change without notice.
2

Notice for this monitor
This product is suited to clinical review. It does not support the display of mammography images for diagnosis.
This product has been adjusted specifically for use in the region to which it was originally shipped. If the product is
used outside the region, it may not operate as specified in the specifications.
This product may not be covered by warranty for uses other than those described in this manual.
The specifications noted in this manual are only applicable for power cords and signal cables specified by us.
Use optional products manufactured or specified by us with this product.
As it takes about 30 minutes for the performance of electrical parts to stabilize, adjust the monitor 30 minutes or more
after the monitor power has been turned on.
In order to suppress the luminosity change by long-term use and to maintain the stable luminosity, use of a monitor in
lower brightness is recommended.
When the screen image is changed after displaying the same image for extended periods of time, an afterimage may
appear. Use the screen saver or power save function to avoid displaying the same image for extended periods of time.
Periodic cleaning is recommended to keep the monitor looking new and to prolong its operation lifetime (refer to
“Cleaning” (page 4)).
The screen may have defective pixels or a small number of light dots on the screen. This is due to the characteristics of
the panel itself, and not the product.
The backlight of the LCD panel has a fixed life span. When the screen becomes dark or begins to flicker, please contact
your dealer.
Do not press on the panel or edge of the frame strongly, as this may result in the display malfunction, such as the
interference patterns, etc. If pressure is continually applied to the panel, it may deteriorate or damage your panel. (If
the pressure marks remain on the panel, leave the monitor with a white or black screen. The symptom may disappear.)
Do not scratch or press on the panel with any sharp objects, as this may result in damage to the panel. Do not attempt
to brush with tissues as this may scratch the panel.
When the monitor is cold and brought into a room or the room temperature goes up quickly, dew condensation
may occur inside and outside the monitor. In that case, do not turn the monitor on and wait until dew condensation
disappears, otherwise it may cause some damages to the monitor.

3
Cleaning
Attention
• Never use any solvents or chemicals, such as thinner, benzene, wax, alcohol, and abrasive cleaner, which may
damage the cabinet or panel.
Note
• Optional ScreenCleaner is recommended for cleaning the panel surface.
●●Panel
• Clean the panel with a soft cloth such as cotton cloth or lens cleaning paper.
• If necessary, stubborn stains can be removed by moistening part of a cloth with water to enhance its
cleaning power. After that, clean the panel again with a dry cloth for better finishing.
●●Cabinet
• Clean the cabinet with a soft cloth dampened with a little mild detergent.
To use the monitor comfortably
• An excessively dark or bright screen may affect your eyes. Adjust the brightness of the monitor according
to the environmental conditions.
• Staring at the monitor for a long time tires your eyes. Take a 10-minute rest every hour.
4

CONTENTS
Cover....................................................................... 1
Notice for this monitor............................................. 3
CONTENTS.............................................................. 5
Chapter 1 Introduction........................................ 7
1-1.
Features.......................................................... 7
1-2.
Basic Operations and Functions................. 8
●●Basic Adjustment menu operations................. 8
●●Functions.......................................................... 9
Chapter 2 Adjusting Screens........................... 10
2-1.
Setting Screen Resolution...........................10
●●Compatible Resolutions/Frequencies.............10
●●Setting the Resolution.....................................10
Windows 7...................................................10
Windows Vista.............................................10
Windows XP................................................10
Mac OS X.....................................................10
2-2.
Displaying Screen Correctly.......................11
2-3.
Adjusting Color.............................................15
●●Digital Signal Input..........................................11
●●Analog Signal Input.........................................11
●●To select the display mode (CAL Switch
mode)..............................................................15
To perform advanced adjustments.................15
Adjustable settings in each mode...................16
To adjust brightness <Brightness>.................16
To adjust contrast <Contrast>.........................17
To adjust color temperature <Temperature>...17
To adjust gamma <Gamma>...........................18
To adjust the color saturation <Saturation>....18
To adjust hue <Hue>.......................................18
To adjust gain <Gain>.....................................19
To set overdrive intensity <Overdrive>...........19
●●
●●
●●
●●
●●
●●
●●
●●
●●
●●
2-4.
Changing the Screen Size........................... 20
●●To change screen size <Screen Size>.......... 20
●●To change the brightness of the nondisplay area <Border Intensity>..................... 20
Chapter 3 Setting Monitor................................ 21
3-1.
Adjusting Volume <Volume>.......................21
3-2.
Switching sound source for DisplayPort
signal input <Source>..................................21
3-3.
●●Changing Transparency of Adjustment
Menu Display <Translucent>.......................... 23
3-4.
Locking Buttons........................................... 23
3-5.
Setting the EIZO Logo Display <Logo>..... 23
3-6.
Setting Orientation <Orientation>............. 24
3-7.
Setting Language <Language>.................. 24
3-8.
Enabling/Disabling DDC/CI
communication............................................ 25
3-9.
Resetting the Monitor to the Default
Settings <Reset>.......................................... 25
●●To reset the color adjustments....................... 25
●●To reset all adjustments to the default
settings........................................................... 25
Chapter 4 Power Saving Functions................. 26
4-1.
Setting Power Saving <Power Save>......... 26
4-2.
Setting Power Indicator <Power
Indicator>...................................................... 27
4-3.
Enabling/Disabling Automatic
Brightness Adjustment “Auto EcoView”.. 27
4-4.
Setting Indicator “EcoView Index”............ 28
4-5.
Shifting to the power saving mode when
a person leaves the monitor “EcoView
Sense”........................................................... 29
4-6.
Enabling/Disabling Auto Power-OFF
<Off Timer>................................................... 30
●●Monitor........................................................... 26
●●Audio Output.................................................. 27
Chapter 5 Troubleshooting............................... 31
Chapter 6 Reference......................................... 34
6-1.
How to Attach the Optional Arm................ 34
6-2.
Attaching the FlexStand.............................. 36
6-3.
Connecting Multiple PCs.............................37
●●
●●
To switch among input signals........................37
To set input signal selection <Input Signal>.. 38
6-4.
Displaying Monitor Information
<Information>............................................... 38
6-5.
Specifications.............................................. 39
6-6.
Glossary........................................................ 42
6-7.
Preset Timing............................................... 44
Setting Adjustment Menu Display............. 22
●●
Changing Adjustment Menu Display
Size <Menu Size>.......................................... 22
Changing Adjustment Menu Display
Position <Menu Position>.............................. 22
Changing Adjustment Menu Display
Time <Menu Off Timer>................................. 22
●●
●●
CONTENTS
5
Appendix............................................................... 45
Trademark................................................................ 45
ENERGY STAR......................................................... 45
FCC Declaration of Conformity............................. 46
Hinweise zur Auswahl des richtigen
Schwenkarms für Ihren Monitor.......................47
Hinweis zur Ergonomie :.........................................47
LIMITED WARRANTY.............................................. 48
China Measures for RoHS Compliance in
ChinaRoHS......................................................... 57
6
CONTENTS
Chapter 1 Introduction
Thank you very much for choosing an EIZO color LCD monitor.
1-1. Features
• 23″ wide format LCD
• Applicable to the resolution of 1920 × 1080.
• Uses high-contrast panel (3000:1).
Enables the display of sharp images.
• VA panel with 89° horizontal and vertical viewing angles
• Applicable to DisplayPort (applicable to 8 bit)*
The image signal and audio signal can both be transmitted via a single DisplayPort cable.
* When transmitting an audio signal using the DisplayPort cable, the graphics board must be compatible
with audio output (See “6-5. Specifications” (page 39)).
• CAL Switch function for selecting an optimal calibration mode
See “To select the display mode (CAL Switch mode)” (page 15).
• Selectable DICOM (page 42) Part 14 complied screen.
• Frame Synchronous mode supported (59 - 61 Hz).
• Power saving function.
This product is equipped with various power saving functions.
-- EcoView Sense function
The sensor on the front side of the monitor detects the movement of a person. When a person moves away from the
monitor, it shifts to the power saving mode automatically and does not display the images on the screen. Therefore,
the function reduces the power consumption.
See “4-5. Shifting to the power saving mode when a person leaves the monitor “EcoView Sense”” (page 29).
-- EcoView Index function
The green indicator shows the power consumption ratio responding to the brightness of the monitor. You can
realize the power consumption reduction by taking consideration in the ratio of power saving.
See “4-4. Setting Indicator “EcoView Index”” (page 28).
• Portrait/Landscape display available.
• HDCP (High-bandwidth Digital Content Interface)
• Built-in speakers and headphone jack
Note
• This monitor supports the Portrait/Landscape display. This function allows you to change the orientation of
the Adjustment menu when using the monitor screen in vertical display position (See “3-6. Setting Orientation
<Orientation>” (page 24)).
• For using the monitor with “Portrait” position, the graphics board supporting portrait display is required. When
placing the monitor in a “Portrait” position, settings of your graphics board need to be changed. Refer to the manual
of the graphics board for details.
• The stand of the unit can be replaced with an arm or another stand (See “6-1. How to Attach the Optional Arm” (page
34))..
Chapter 1 Introduction
7
1-2. Basic Operations and Functions
●●Basic Adjustment menu operations
1.Displaying Adjustment Menu
1. Press
. The adjustment menu appears.
2.Adjusting/Setting
1. Choose a menu to adjust/set with
,
,
,
, and then press
. The Sub menu appears.
2. Choose an item to adjust/set with
,
,
,
, and then press
. The adjustment/ setting menu appears.
3. Adjust/set the selected item with
,
,
,
, and then press
3.Exiting
.
1. Choose <Return> from the Sub menu and press
. The Main menu appears.
2. Choose <Exit> from the Main menu and press
. The Adjustment menu exits.
Note
• The Adjustment menu can also be exited by pressing
• <Exit> or <Return> can also be selected by pressing
8
Chapter 1 Introduction
twice quickly.
twice or three times in the Main menu or Sub menu.
●●Functions
The following table shows all the Adjustment menu’s adjustment and setting menus.
Main menu
Auto Adjustment*1
Setting
Range
Screen
Reference
“2-2. Displaying Screen Correctly”
(page 11)
Screen
Clock*1
Phase*1
Position*1
Smoothing
Return
Color
*2
“2-3. Adjusting Color” (page 15)
Brightness
Contrast
Temperature
Gamma
Saturation
Hue
Gain
Overdrive
Reset
Sound
“3-1. Adjusting Volume <Volume>”
(page 21)
“3-2. Switching sound source for
DisplayPort signal input <Source>”
(page 21)
“4-1. Setting Power Saving <Power
Save>” (page 26)
Volume
Source*3
Power Save
PowerManager
Power Save
“4-6. Enabling/Disabling Auto
Power-OFF <Off Timer>” (page 30)
“2-4. Changing the Screen Size”
(page 20)
Off Timer
Others
Screen Size
Border Intensity
Input Signal
Menu
Settings
Menu Size
Menu Position
“To set input signal selection <Input
Signal>” (page 38)
“3-3. Setting Adjustment Menu
Display” (page 22)
Menu Off Timer
Translucent
Orientation
Power indicator
Reset
Information
Language
“3-6. Setting Orientation
<Orientation>” (page 24)
“4-2. Setting Power Indicator
<Power Indicator>” (page 27)
“3-9. Resetting the Monitor to the
Default Settings <Reset>” (page 25)
“6-4. Displaying Monitor Information
<Information>” (page 38)
“3-7. Setting Language
<Language>” (page 24)
*1
Analog signal input only
The adjustment/settings available on the <Color> menu depend on the selected Color mode. The above
table shows the sub menus when the “Custom” mode is selected.
*3
This function is available with DisplayPort input.
*2
Chapter 1 Introduction
9
Chapter 2 Adjusting Screens
2-1. Setting Screen Resolution
●●Compatible Resolutions/Frequencies
For details on compatible resolutions, refer to “Compatible Resolutions/Frequencies” in the Setup Manual.
●●Setting the Resolution
When you connect the monitor to the PC and find that the resolution is improper, or when you want to change
the resolution, follow the procedure below.
Windows 7
1. Right-click the mouse anywhere on the desktop except for icons.
2. From the displayed menu, click “Screen resolution”.
3. On the “Screen Resolution” dialog box, select the monitor.
4. Click “Resolution” to select the desired resolution.
5. Click the [OK] button.
6. When a confirmation dialog box is displayed, click [Keep changes].
Windows Vista
1. Right-click the mouse anywhere on the desktop except for icons.
2. From the displayed menu, click “Personalize”.
3. On the “Personalization” window, click “Display Settings”.
4. On the “Display Settings” dialog box, select the “Monitor” tab and select desired resolution in the
“Resolution” field.
5. Click the [OK] button.
6. When a confirmation dialog box is displayed, click [Yes].
Windows XP
1. Right-click the mouse anywhere on the desktop except for icons.
2. From the displayed menu, click “Properties”.
3. When the “Display Properties” dialog box is displayed, click the “Settings” tab and select desired
resolution for “Screen resolution” under “Display”.
4. Click the [OK] button to close the dialog box.
Mac OS X
1. Select “System Preferences” from the Apple menu.
2. When the “System Preferences” dialog box is displayed, click “Displays” for “Hardware”.
3. On the displayed dialog box, select the “Display” tab and select desired resolution in the “Resolutions”
field.
4. Your selection will be reflected immediately. When you are satisfied with the selected resolution, close
the window.
10
Chapter 2 Adjusting Screens
2-2. Displaying Screen Correctly
●●Digital Signal Input
When digital signals are input, images are displayed correctly based on the preset data of the monitor, but if
characters and/or lines appear blurred, go to “6. Modify blurred characters or lines.” (page 14).
When performing more advanced adjustment, see “2-3. Adjusting Color” (page 15) and subsequent pages.
●●Analog Signal Input
Attention
• The monitor will take about 30 minutes before its internal electric components stabilize. Wait 30 minutes or more
after turning the monitor power on before starting adjustment.
• The Self Adjust (automatic screen adjustment) function does not work for the images under the resolution of 800 ×
600 (SVGA).
The monitor screen adjustment is used to suppress flickering of the screen or adjust screen position and
screen size correctly according to the PC to be used.
Note
• The Self Adjust function works when all of the following conditions are satisfied:
- When a signal is input into the monitor for the first time or when a resolution or vertical/horizontal scan frequency
not used before is set
If the screen is not displayed correctly even after performing the Self Adjust operation, adjust the screen
according to the procedures on the following pages to use the monitor comfortably.
Setting Procedures
1.Perform the auto adjustment.
●●To adjust flickering, screen position, and screen size automatically <Screen>
Procedure
.
1. Choose <Auto Adjustment> from the Adjustment menu, and press
2. Choose <Screen> from the <Auto Adjustment> menu, and press
.
The <Auto Adjustment> menu appears.
3. Select <Execute> with
or
, and press
.
Flickering, screen position, and screen size are corrected by the auto-adjustment function.
Attention
• This function works correctly when an image is fully displayed over the Windows or Macintosh display area. It does
not work properly when an image is displayed only on a part of the screen (command prompt window, for example)
or when a black background (wallpaper, etc.) is in use.
• This function does not work correctly with some graphics boards.
If the screen is not displayed correctly even after performing “1. Perform the auto adjustment.” (page 11),
perform the adjustments according to the procedures on the following pages. If the screen is displayed
correctly, go to “5. Adjusting color gradation.” (page 14).
Chapter 2 Adjusting Screens
11
2.Prepare to use analog screen adjustment patterns.
Download the “Screen adjustment pattern files” from our site: http://www.radiforce.com.
Note
• For details and instructions on opening the “Screen adjustment pattern files”, refer to the Readme.txt file.
3.Perform the auto adjustment again with the analog screen adjustment pattern
displayed.
●●To adjust flickering, screen position, and screen size automatically
<Screen>
Procedure
1. Display Pattern 1 in full screen on the monitor using the “Screen adjustment pattern files”.
2. Choose <Auto Adjustment> from the Adjustment menu, and press
3. Choose <Screen> from the <Auto Adjustment> menu, and press
.
.
The <Auto Adjustment> menu appears.
4. Select <Execute> with
or
, and press
.
Flickering, screen position, and screen size are corrected by the auto-adjustment function.
If the screen is not displayed correctly even after performing “3. Perform the auto adjustment again
with the analog screen adjustment pattern displayed.” (page 12), perform the adjustments according to
the procedures on the following pages. If the screen is displayed correctly, go to “5. Adjusting color
gradation.” (page 14).
4.Choose
<Screen> from the Adjustment menu to perform advanced
adjustments.
Adjust the clock, phase and position, in this order.
●●To eliminate vertical bars <Clock>
Procedure
1. Choose <Clock> from the <Screen> menu, and press
.
The <Clock> menu appears.
2. Adjust the clock with
Press
3. Press
or
or
to eliminate vertical bars.
slowly so as not to miss the adjustment point.
to exit the adjustment.
When blurring, flickering or bars appear on the screen after adjustment, proceed to “Phase” to remove flickering or
blurring.
12
Chapter 2 Adjusting Screens
●●To remove flickering or blurring <Phase>
Procedure
1. Choose <Phase> from the <Screen> menu, and press
.
The <Phase> menu appears.
2. Adjust the phase with
3. Press
or
to minimize flickering or blurring.
to exit the adjustment.
When vertical bars appear on the screen after adjustment, go back to “To eliminate vertical bars <Clock>”.
(Clock → Phase → Position)
Attention
• Flickering or blurring may not be eliminated depending on your PC or graphics board.
●●To correct the screen position <Position>
Note
• Since the number of pixels and the pixel positions are fixed on the LCD monitor, only one position is provided to
display images correctly. The position adjustment is made to shift an image to the correct position.
Procedure
1. Choose <Position> from the <Screen> menu, and press
.
The <Position> menu appears.
2. Adjust the position with
3. Press
/
/
/
.
to exit the adjustment.
4. Close Pattern 1.
Chapter 2 Adjusting Screens
13
5.Adjusting color gradation.
●●To adjust color gradation automatically <Range>
Every color gradation (0 to 255) can be displayed by adjusting the signal output level.
Procedure
1. Display Pattern 2 in full screen on the monitor using the “Screen adjustment pattern files”.
2. Choose <Auto Adjustment> from the Adjustment menu, and press
3. Choose <Range> from the <Auto Adjustment> menu, and press
.
.
The <Range> menu appears.
4. Select <Execute> with
or
, and press
.
The output range is set automatically.
5. Close Pattern 2.
6.Modify blurred characters or lines.
●●To modify blurred characters/lines <Smoothing>
When an image is displayed with a resolution other than recommended, the characters or lines of the
displayed image may blur.
Attention
• Smoothing setting may not be required depending on the display resolution. (You cannot choose the smoothing icon.)
Adjustable range
1 to 5
Procedure
1. Choose <Screen> from the Adjustment menu, and press
2. Choose <Smoothing> from the <Screen> menu, and press
The <Smoothing> menu appears.
3. Use
4. Press
14
or
for adjustment.
to exit the adjustment.
Chapter 2 Adjusting Screens
.
.
2-3. Adjusting Color
●●To select the display mode (CAL Switch mode)
This function allows easy selection of a desired mode according to monitor application.
Display Modes
Mode
Purpose
Custom
Available for making desired setting.
sRGB
Suitable for color matching with sRGB compatible peripherals.
Text
Suitable for displaying texts for word processing or spreadsheets.
DICOM
Available to display in DICOM mode.
Movie
Suitable for playing back animated images.
Displays the current mode.
Procedure
1. Press
or
.
A mode name appears at the lower left of the screen.
2. Change the mode by pressing
or
while the mode name is displayed.
→Custom←→sRGB←→Text←→DICOM←→Movie←
Note
• The Adjustment menu cannot be displayed when a mode name appears.
●●To perform advanced adjustments
The <Color> menu of the Adjustment menu allows you to configure and save a separate set of color settings
for each mode.
Attention
• The monitor will take about 30 minutes before its internal electric components stabilize. Wait 30 minutes or more
after turning the monitor power on before starting adjustment.
• Perform the range adjustment first when adjusting color for analog signals (see “To adjust color gradation
automatically <Range>” (page 14)).
• The same image may be seen in different colors on multiple monitors due to their monitor-specific characteristics.
Make fine color adjustment visually when matching colors on multiple monitors.
Note
• The values shown in “%” or “K” are available only as reference.
Chapter 2 Adjusting Screens
15
●●Adjustable settings in each mode
The adjustable settings depend on the mode. (You cannot select any non-adjustable or non-settable function.)
√: Adjustable -: Not adjustable
Icon
Function
CAL Switch mode
Custom
sRGB
Text
DICOM
Movie
Brightness
√
√
√
-
√
Contrast
√
-
√
-
√
Temperature
√
-
√
-
√
Gamma
√
-
√
-
-
Saturation
√
-
√
-
√
Hue
√
-
√
-
√
Gain
√
-
-
-
-
Overdrive
√
-
-
-
-
Reset
√
√
√
-
√
●●To adjust brightness <Brightness>
The screen brightness is adjusted by changing the brightness of the backlight (light source from the LCD
back panel).
Adjustable range
0 to 100%
Procedure
1. Choose <Color> from the Adjustment menu, and press
2. Choose <Brightness> from the <Color> menu, and press
.
.
The <Brightness> menu appears.
3. Use
4. Press
or
for adjustment.
to exit the adjustment.
Note
• You can use
or
to display the Brightness adjustment menu to adjust it.
• If you feel that the image is too bright even if the brightness is set to 0% or that the image is too dark even if the
brightness is set to 100%, adjust the contrast.
16
Chapter 2 Adjusting Screens
●●To adjust contrast <Contrast>
The brightness of the screen is adjusted by varying the video signal level.
Adjustable range
0 to 100%
Procedure
1. Choose <Color> from the Adjustment menu, and press
.
2. Choose <Contrast> from the <Color> menu, and press
.
The <Contrast> menu appears.
3. Use
4. Press
or
for adjustment.
to exit the adjustment.
Note
• In the contrast of 50%, every color gradation is displayed.
• When adjusting the monitor, it is recommended to perform the brightness adjustment which may not lose the
gradation characteristics, prior to the contrast adjustment.
• Perform the contrast adjustment in the following cases.
- When you feel the image is too dark even if the brightness is set to 100% (Set the contrast to higher than 50%.)
- When you feel the image is too bright even if the brightness is set to 0% (Set the contrast to lower than 50%.)
●●To adjust color temperature <Temperature>
Color temperature can be adjusted.
The color temperature is normally used to express the hue of “White” and/or “Black” by a numerical value.
The value is expressed in degrees “K” (Kelvin).
The screen becomes reddish at a low color temperature, and bluish at a high color temperature, like the flame
temperature. A gain preset value is set for each color temperature setting value.
Adjustable range
Off, 4000K-10000K (specified by every 500K unit, including 9300K)
Procedure
1. Choose <Color> from the Adjustment menu, and press
.
2. Choose <Temperature> from the <Color> menu, and press
.
The <Temperature> menu appears.
3. Use
4. Press
or
for adjustment.
to exit the adjustment.
Note
• <Gain> allows you to perform more advanced adjustment (see “To adjust gain <Gain>” (page 19)).
• If you set to “Off”, the image is displayed in the preset color of the monitor (Gain: 100% for each RGB).
• When gain is changed, the color temperature is changed to “Off”.
Chapter 2 Adjusting Screens
17
●●To adjust gamma <Gamma>
Gamma can be adjusted. The brightness of the monitor varies depending on the input signal, however, the
variation rate is not proportional to the input signal. To keep the balance between the input signal and the
brightness of the monitor is called as “Gamma correction”.
Adjustable range
1.8, 2.0, 2.2
Procedure
.
1. Choose <Color> from the Adjustment menu, and press
2. Choose <Gamma> from the <Color> menu, and press
.
The <Gamma> menu appears.
3. Use
or
for adjustment.
to exit the adjustment.
4. Press
●●To adjust the color saturation <Saturation>
This function allows you to adjust color saturation.
Adjustable range
-128 to 127
Procedure
1. Choose <Color> from the Adjustment menu, and press
.
.
2. Choose <Saturation> from the <Color> menu, and press
The <Saturation> menu appears.
3. Use
4. Press
or
for adjustment.
to exit the adjustment.
Attention
• Using this function may make some color gradations unavailable for display.
Note
• The minimum value (-128) changes the screen to monochrome.
●●To adjust hue <Hue>
This function allows you to adjust hue.
Adjustable range
-32 to 32
Procedure
1. Choose <Color> from the Adjustment menu, and press
2. Choose <Hue> from the <Color> menu, and press
.
.
The <Hue> menu appears.
3. Use
4. Press
or
for adjustment.
to exit the adjustment.
Attention
• Using this function may make some color gradations unavailable for display.
18
Chapter 2 Adjusting Screens
●●To adjust gain <Gain>
The brightness of each color component red, green, and blue is called “Gain”. You can change the hue of
“white” by adjusting gain.
Adjustable range
0 to 100%
Procedure
1. Choose <Color> from the Adjustment menu, and press
2. Choose <Gain> from the <Color> menu, and press
.
.
The <Gain> menu appears.
3. Adjust gain with
4. Press
or
for each of red, green, and blue.
to exit the adjustment.
Attention
• Using this function may make some color gradations unavailable for display.
Note
• The value of gain changes with that of color temperature.
• When gain is changed, the color temperature is changed to “Off”.
●●To set overdrive intensity <Overdrive>
This function allows you to set overdrive intensity based on the use of the monitor. You can reduce Image
lags by setting it to “Enhanced” when displaying animated images.
Adjustable range
Enhanced, Standard, Off
Procedure
1. Choose <Color> from the Adjustment menu, and press
2. Choose <Overdrive> from the <Color> menu, and press
.
.
The <Overdrive> menu appears.
3. Use
4. Press
or
for adjustment.
to exit the adjustment.
Attention
• The overdrive function is disabled in the following cases:
- The vertical scan frequency of input signals is more than 60 Hz.
- Select “Normal” during <Screen Size> (excluding the case that display resolution is 1920 × 1080).
Chapter 2 Adjusting Screens
19
2-4. Changing the Screen Size
●●To change screen size <Screen Size>
If a resolution other than recommended is used, the image displayed in full screen automatically. You can
change the screen size by using <Screen Size> from <Others> menu.
Setting
Function
Full Screen
Displays an image in full screen. Images are distorted in some cases because the
vertical rate is not equal to the horizontal rate.
Enlarged
Displays an image in full screen. In some cases, a blank horizontal or vertical border
appears to equalize the vertical rate and the horizontal rate.
Normal
Displays images with the specified resolution.
Example: Image size 1024 × 768
Full Screen
Enlarged
Normal
(1920 × 1080)
(1440 × 1080)
(1024 × 768)
Procedure
1. Choose <Others> from the Adjustment menu, and press
.
.
2. Choose <Screen Size> from the <Others> menu, and press
The Screen Size menu appears.
3. Select “Full Screen,” “Enlarged,” or “Normal” with
4. Press
or
.
to exit the adjustment.
Attention
• Selecting “Normal” may make some color gradations unavailable for display.
●●To change the brightness of the non-display area <Border Intensity>
A border (black area with no image) around the image appears in the “Normal” or “Enlarged” mode.
Border
Procedure
1. Choose <Others> from the Adjustment menu, and press
.
2. Choose <Border Intensity> from the <Others> menu, and press
The <Border Intensity> menu appears.
3. Use
4. Press
20
or
for adjustment.
to exit the adjustment.
Chapter 2 Adjusting Screens
.
Chapter 3 Setting Monitor
3-1. Adjusting Volume <Volume>
This function allows you to adjust the volume.
Adjustable range
0 to 30
Procedure
.
1. Choose <Sound> from the Adjustment menu, and press
.
2. Choose <Volume> from the <Sound> menu, and press
The volume adjustment menu appears.
3. Use
4. Press
or
for adjustment.
to exit the adjustment.
Note
• Alternatively, you can use
or
for adjustment.
• The volume for the DisplayPort and stereo mini jacks can be set individually.
3-2. Switching sound source for DisplayPort signal
input <Source>
This function allows you to switch sound source for DisplayPort signal input. You can select the DisplayPort or
stereo mini jack.
Procedure
.
1. Choose <Sound> from the Adjustment menu, and press
2. Choose <Source> from the <Sound> menu, and press
.
The Source adjustment menu appears.
3. Select “DisplayPort” or “Stereo Mini Jack” with
4. Press
or
.
to exit the adjustment.
Note
• This function is available with DisplayPort signal input.
Chapter 3 Setting Monitor
21
3-3. Setting Adjustment Menu Display
●●Changing Adjustment Menu Display Size <Menu Size>
Change the Adjustment menu size using the following procedure.
Procedure
1. Choose <Others> from the Adjustment menu, and press
.
2. Choose <Menu Settings> from the <Others> menu, and press
.
.
3. Choose <Menu Size> from the <Menu Settings> menu, and press
The <Menu Size> menu appears.
4. Select “Normal” or “Enlarged” with
5. Press
or
.
to exit the adjustment.
●●Changing Adjustment Menu Display Position <Menu Position>
You can change the display position of the Adjustment menu.
Procedure
1. Choose <Others> from the Adjustment menu, and press
.
2. Choose <Menu Settings> from the <Others> menu, and press
.
3. Choose <Menu Position> from the <Menu Settings> menu, and press
.
The <Menu Position> menu appears.
4. Adjust the position with
5. Press
or
.
to exit the adjustment.
●●Changing Adjustment Menu Display Time <Menu Off Timer>
You can set the Adjustment menu display time.
Adjustable range
Disable, Enable (15, 30, 45, 60s)
Procedure
1. Choose <Others> from the Adjustment menu, and press
.
2. Choose <Menu Settings> from the <Others> menu, and press
.
3. Choose <Menu Off Timer> from the <Menu Settings> menu, and press
.
The <Menu Off Timer> menu appears.
4. Select “Enable” or “Disable” with
or
.
When selecting “Enable”, choose a time for displaying menu with
5. Press
or
.
to exit the adjustment.
Note
• The display time of the mode name, EcoView menu, and EcoView Index remains unchanged.
22
Chapter 3 Setting Monitor
●●Changing Transparency of Adjustment Menu Display <Translucent>
You can set the transparency of the Adjustment menu.
Procedure
1. Choose <Others> from the Adjustment menu, and press
.
2. Choose <Menu Settings> from the <Others> menu, and press
.
3. Choose <Translucent> from the <Menu Settings> menu, and press
.
The <Translucent> menu appears.
4. Use
or
5. Press
for adjustment.
to exit the adjustment.
3-4. Locking Buttons
This function allows you to lock to prevent changing the current adjustments/settings.
Buttons that can be locked
•
•
•
•
•
Buttons that cannot be locked
/
/
/
(Control buttons)
(Enter button) / Adjustments/settings using
(EcoView button)
(Input Signal Selection button)
(Power button)
Procedure
1. Press
to turn off the monitor.
down, press
2. Holding
for at least two seconds to turn on the monitor.
You can toggle between Lock and Unlock by performing steps 1 and 2.
3-5. Setting the EIZO Logo Display <Logo>
When the monitor is turned on, the EIZO logo appears on the screen. You can choose to display or not to
display the EIZO logo.
Procedure
1. Press
to turn off the monitor.
2. Press
holding
down to turn on the monitor.
The EIZO logo display setting is toggled by performing the operation in steps 1 and 2.
Chapter 3 Setting Monitor
23
3-6. Setting Orientation <Orientation>
This function allows you to change the orientation of the Adjustment menu when using the monitor screen in
vertical display position.
Procedure
1. Choose <Others> from the Adjustment menu, and press
.
2. Choose <Orientation> from the <Others> menu, and press
.
The <Orientation> menu appears.
3. Select “Landscape” or “Portrait” with
4. Press
or
.
to exit the adjustment.
5. When selecting “Portrait”, turn the monitor screen 90° in clockwise direction.
Attention
• Be sure that the cables are correctly connected.
Note
• For using the monitor with “Portrait” position, the graphics board supporting portrait display is required. When
placing the monitor in a “Portrait” position, settings of your graphics board need to be changed. Refer to the manual
of the graphics board for details.
3-7. Setting Language <Language>
This function allows you to select a language for the Adjustment menu and messages.
Selectable languages
English/German/French/Spanish/Italian/Swedish/Simplified Chinese/Traditional Chinese/Japanese
Procedure
1. Choose <Language> from the Adjustment menu, and press
.
2. Choose <Language> from the <Menu Settings> menu, and press
The <Language> menu appears.
3. Choose a language with
4. Press
24
/
to exit the adjustment.
Chapter 3 Setting Monitor
/
/
.
.
3-8. Enabling/Disabling DDC/CI communication
This function allows you to enable/disable the DDC/CI communication (see “6-6. Glossary” (page 42)).
Procedure
1. Press
to turn off the monitor.
2. Press
holding
down to turn on the monitor.
You can toggle between Enable and Disable by performing steps 1 and 2.
Note
• You can check the DDC/CI setting in the <Information> menu.
3-9. Resetting the Monitor to the Default Settings
<Reset>
There are two different Resets: Color Reset for only resetting the color adjustments to the default settings and
Full Reset for resetting all settings to the defaults.
Attention
• After resetting, you cannot undo the operation.
Note
• Regarding the default setting, see “Main Default Settings” (page 40).
●●To reset the color adjustments
This function only resets the color adjustments for the currently selected mode to the default settings.
Procedure
.
1. Choose <Color> from the Adjustment menu, and press
2. Choose <Reset> from the <Color> menu, and press
3. Select “Reset” with
4. Press
or
.
.
.
The color adjustments revert to the default settings.
●●To reset all adjustments to the default settings
This function resets all adjustments to the default settings.
Procedure
1. Choose <Others> from the Adjustment menu, and press
2. Choose <Reset> from the <Others> menu, and press
3. Select “Reset” with
4. Press
or
.
.
.
.
All adjustments revert to the default settings.
Chapter 3 Setting Monitor
25
Chapter 4 Power Saving Functions
4-1. Setting Power Saving <Power Save>
●●Monitor
This function allows you to set the monitor into the power saving mode according to the PC status. When the
monitor has shifted to the power saving mode, the images on the screen are not displayed.
Attention
• Turning off the main power switch or unplugging the power cord completely shuts off power supply to the monitor.
• Power consumption varies even when the stereo mini jack cable is connected.
• Five seconds before the monitor enters the power saving mode, it displays a preliminary message.
Procedure
1. Choose <PowerManager> from the Adjustment menu, and press
.
2. Choose <Power Save> from the <PowerManager> menu, and press
.
The <Power Save> menu appears.
3. Select “On” or “Off” with
4. Press
or
.
to exit the adjustment.
Power Saving System
Analog Signal Input
This monitor complies with the VESA DPM standard.
PC
On
Power saving
mode
STAND-BY
SUSPENDED
OFF
Power Off
Monitor
Power
Indicator
Operating
Blue
Power saving mode
Orange
Power saving mode
Orange
Digital Signal Input
DVI
This monitor complies with the DVI DMPM standard.
DisplayPort
This monitor complies with the DisplayPort Standard V1.1a.
The monitor enters the power saving mode in five seconds in connection with the PC setting.
PC
26
Monitor
Power
Indicator
On
Operating
Blue
Power saving mode
Power saving mode
Orange
Chapter 4 Power Saving Functions
●●Audio Output
This monitor allows you to turn off the audio output from the speakers/headphone at the power saving mode.
Procedure
1. Choose <Sound> from the Adjustment menu, and press
.
.
2. Choose <Power Save> from the <Sound> menu, and press
The <Power Save> menu appears.
3. Select “On” or “Off” with
or
.
to exit the adjustment.
4. Press
Attention
• No audio is output while the monitor is in the Power Saving mode, if input signal and sound source are of
DisplayPort.
4-2. Setting Power Indicator <Power Indicator>
This function allows you to set the power indicator (blue) ON/OFF in the monitor ON condition.
Procedure
1. Choose <Others> from the Adjustment menu, and press
.
2. Choose <Power Indicator> from the <Others> menu, and press
.
The <Power Indicator> menu appears.
3. Select “Enable” or “Disable” with
or
.
to exit the adjustment.
4. Press
4-3. Enabling/Disabling Automatic Brightness
Adjustment “Auto EcoView”
The sensor on the front side of the monitor detects the environmental brightness to adjust the screen brightness
automatically and comfortably by using the Auto EcoView function.
Attention
• The Auto EcoView function cannot be used in the DICOM mode.
• Be careful not to block the sensor on the lower side of the monitor when using the Auto EcoView function.
Procedure
1. Press
.
The “EcoView” menu appears.
2. Choose “Auto EcoView” with
3. Select “On” or “Off” with
4. Press
or
or
. (Alternatively, you can use
to select it.)
.
to exit the adjustment.
Note
• For this reason, as <Brightness> in the Adjustment menu is changed, the auto adjustment range is also changed.
Chapter 4 Power Saving Functions
27
4-4. Setting Indicator “EcoView Index”
By using the EcoView Index function, the indicator that shows the level of power saving appears at the time of
turning on the monitor, adjusting the brightness or switching the mode. The power saving ratio comes to high
as the indicator level meter lights towards right.
Procedure
1. Press
.
The “EcoView” menu appears.
2. Choose “EcoView Index” with
3. Select “On” or “Off” with
4. Press
28
or
to exit the adjustment.
Chapter 4 Power Saving Functions
or
.
. (Alternatively, you can use
to select it.)
4-5. Shifting to the power saving mode when a person
leaves the monitor “EcoView Sense”
The sensor on the front side of the monitor detects the movement of a person by using the EcoView Sense
function. When a person moves away from the monitor, it shifts to the power saving mode automatically and
does not display the images on the screen to reduce the power consumption. When a person comes near the
monitor again, it comes back from the power saving mode and displays the images. The detection level of the
EcoView Sense sensor can be changed according to the environment of usage.
Note
• At the time of shifting to Power Saving mode, the icon that indicates shifting is displayed.
To set EcoView Sense On/Off
.
1. Press
The “EcoView” menu appears.
2. Choose “EcoView Sense” with
3. Select “On” or “Off” with
or
or
. (Alternatively, you can use
to select it.)
.
to exit the adjustment.
4. Press
Note
• When the orientation of the Adjustment menu is set to “Portrait”, the EcoView Sense is turned off (See “3-6. Setting
Orientation <Orientation>” (page 24)). Change the setting to on.
To change the detection level
Level
Detectable Range
Auto
(default setting)
Automatic setting
(120 cm or less)
Manual1
Automatic setting (90
cm or less)
Manual2
120 cm or less
Manual3
90 cm or less
Details
The detectable range is defined by the person’s movement.
When you get out of the range, the monitor shifts to the
power saving mode. Since the function determines whether
the object is moving or not, the monitor can shift to the
power saving mode even if there is a chair or wall in the
detectable range.
When you get out of the detectable range, the monitor shifts
to the power saving mode. This setting is recommended
if the monitor frequently shifts to the power saving mode
when the level is “Auto” or “Manual1” even though you are
in front of the monitor.
1. Choose <PowerManager> from the Adjustment menu, and press
.
2. Choose <EcoView Sense> from the <PowerManager> menu, and press
.
The <EcoView Sense> menu appears.
3. Select “Auto” or “Manual” with
or
.
When selecting “Manual”, select 1, 2 or 3 for the detection level of the sensor with
4. Press
or
.
to exit the adjustment.
Chapter 4 Power Saving Functions
29
4-6. Enabling/Disabling Auto Power-OFF <Off Timer>
This function allows you to specify whether to turn on/off the monitor automatically after a specified time has
elapsed in the power saving mode.
Adjustable range
Disable, Enable (0, 1, 2, 3, 5, 10, 15, 20, 25, 30, 45 min, 1-5 h)
Procedure
1. Choose <PowerManager> from the Adjustment menu, and press
2. Choose <Off Timer> from the <PowerManager> menu, and press
The <Off Timer> menu appears.
3. Select “Enable” or “Disable” with
or
.
If “Enable” is selected, set a monitor Off time with
4. Press
30
to exit the adjustment.
Chapter 4 Power Saving Functions
or
.
.
.
Chapter 5 Troubleshooting
If a problem still remains after applying the suggested remedies, contact your local dealer.
No picture
Problem
1. No picture
• Power indicator does not light.
Possible cause and remedy
• Check whether the power cord is connected properly.
• Turn off the main power, and then turn it on again a
few minutes later.
• Turn the main power switch on.
• Press .
• Power indicator is lighting blue.
• Increase <Brightness>, <Contrast>, and/or <Gain>
in the Adjustment menu (see “To perform advanced
adjustments” (page 15)).
• Power indicator is lighting orange.
• Switch the input signal with .
• Operate the mouse or keyboard.
• When the EcoView Sense is on, the monitor may have
shifted to the power saving mode. Come near to the
monitor.
• Power indicator flashes orange.
• There is a problem in the device that uses DisplayPort
connection. Solve the problem, turn off the monitor,
and then turn it on again. Refer to the user’s manual
of the device that uses DisplayPort connection for
details.
2. The message below appears.
This message appears when the signal is not input
correctly even when the monitor functions properly.
• This message appears when no signal is
input.
Example:
• The message shown left may appear, because some
PCs do not output the signal soon after power-on.
• Check whether the PC is turned on.
• Check whether the signal cable is connected properly.
• Switch the input signal with .
• The message shows that the input signal is out
of the specified frequency range. (Such signal
frequency is displayed in red.)
Example:
• Check whether the PC is configured to meet the
resolution and vertical scan frequency requirements
of the monitor (refer to “Compatible Resolutions/
Frequencies” in the Setup Manual.).
• Reboot the PC.
• Select an appropriate display mode using the graphics
board’s utility. Refer to the manual of the graphics
board for details.
fD: Dot Clock
(Displayed only during digital signal input)
fH: Horizontal Scan Frequency
fV: Vertical Scan Frequency
Chapter 5 Troubleshooting
31
Imaging problems (for both digital and analog)
Problem
Possible cause and remedy
3. The screen is too bright or too dark.
• Use <Brightness> or <Contrast> in the Adjustment
menu to adjust it. (The LCD monitor backlight has a
limited life span. When the screen becomes dark or
begins to flicker, contact your local dealer.)
• Turn on the Auto EcoView function. The monitor
detects the environmental brightness to adjust the
screen brightness automatically.
4. Characters are blurred.
• Check whether the PC is configured to meet the
resolution and vertical scan frequency requirements
of the monitor (refer to “Compatible Resolutions/
Frequencies” in the Setup Manual.).
• Use <Smoothing> in the Adjustment menu to adjust it
(see “To modify blurred characters/lines <Smoothing>”
(page 14)).
5. Afterimages appear.
• Afterimages are particular to LCD monitors. Avoid
displaying the same image for a long time.
• Use the screen saver or power save function to avoid
displaying the same image for extended periods of
time.
6. Green/red/blue/white dots or defective
dots remain on the screen.
• This is due to LCD panel characteristics and is not a
failure.
7. Interference patterns or pressure marks
remain on the screen.
• Leave the monitor with a white or black screen. The
symptom may disappear.
8. Noise appears on the screen.
• In the Adjustment menu, set <Overdrive> to “Off” (see
“To set overdrive intensity <Overdrive>” (page 19)).
• When entering the signals of HDCP system, the
normal images may not be displayed immediately.
Imaging problems (for analog only)
Problem
9. Display position is incorrect.
32
Possible cause and remedy
• Use <Position> in the Adjustment menu to correct the
image position (see “To correct the screen position
<Position>” (page 13)).
• If the problem persists, use the graphics board’s utility
if available to change the display position.
10. Vertical bars appear on the screen or a
part of the image is flickering.
• Use <Clock> in the Adjustment menu to adjust it (see
“To eliminate vertical bars <Clock>” (page 12)).
11. Whole screen is flickering or blurring.
• Use <Phase > in the Adjustment menu to adjust it (see
“To remove flickering or blurring <Phase>” (page 13)).
Chapter 5 Troubleshooting
Other problems
Problem
Possible cause and remedy
12. The <Smoothing> icon on the Adjustment
menu <Screen> cannot be selected.
• You cannot choose the smoothing icon when the
screen is displayed in the following resolutions or
settings.
--The resolution is 1920 × 1080
--“Normal” is selected from <Screen Size> in the
Adjustment menu.
13. The adjustment menu does not appear.
• Check whether the operation lock function works (see
“3-4. Locking Buttons” (page 23)).
14. No mode name is displayed.
• Check that the Adjustment menu is not active.
15. The auto adjustment function does not
work.
• This function does not work during digital signal input.
• This function is intended for use on the Macintosh
and on AT-compatible PC running Windows. It does
not work properly when an image is displayed only
on a part of the screen (command prompt window, for
example) or when a black background (wallpaper, etc.)
is in use.
• This function does not work correctly with some
graphics boards.
16. No audio output.
• Check whether the stereo mini jack cable is connected
properly.
• Check whether volume is set to 0.
• Check the PC and audio playback software to see
whether they are configured correctly.
• If DisplayPort input is used, check the <Source>
setting in the Adjustment menu (see “3-2. Switching
sound source for DisplayPort signal input <Source>”
(page 21)).
17. (When using EcoView Sense)
The images remains to be displayed when
you move away from the monitor. The
images does not reappear when you come
near it.
• Check the setting environment of the monitor.
EcoView Sense may not work correctly in the
following environments.
--There is something that reflects the light such as
mirror or glass in front of the sensor.
--The monitor is located in a place that receive direct
sunlight.
--There is some infrared device near the monitor.
--There is some obstacle in front of the sensor.
• Check whether any dirt on the sensor. Clean the
sensor with a soft cloth.
• Check whether you are in front of the monitor. The
infrared ray is emitted vertically from the sensor to
detect a person.
• Check whether the off timer function is on. If it is on,
the monitor turns off automatically after a specified
time has passed. Therefore, the images does not
reappear on the screen even though you come near
to it. Press
to turn on the monitor (see “4-5. Shifting
to the power saving mode when a person leaves the
monitor “EcoView Sense”” (page 29)).
Chapter 5 Troubleshooting
33
Chapter 6 Reference
6-1. How to Attach the Optional Arm
An optional arm (or an optional stand) can be attached by removing the stand section. Please refer to our web
site for the corresponding optional arm (or optional stand). http://www.radiforce.com
Attention
• When attaching an arm or stand, follow the instructions of their user’s manual.
• When using another manufacturer’s arm or stand, confirm the following in advance and select one conforming to the
VESA standard. Use the M4 × 12 mm screws supplied with this product.
- Clearance between the screw holes: 100 mm × 100 mm
- Thickness of plate: 2.6 mm
- Strong enough to support weight of the monitor unit (except the stand) and attachments such as cables.
• When using an arm or stand, attach it to meet the following tilt angles of the monitor.
- Up 45°, down 45° (horizontal display, and vertical display rotated 90 degrees clockwise)
• Connect the cables after attaching an arm or stand.
• Do not move the removed stand up and down. Doing so may result in injury or device damage.
• The monitor and arm or stand are heavy. Dropping them may result in injury or equipment damage.
Procedure
1.When using the monitor with “Portrait” position, change the position to
“Landscape”.
2.Lay the LCD monitor on a soft cloth spread over on a stable surface with the
panel surface facing down.
34
Chapter 6 Reference
3.Remove the stand.
Remove the stand from the monitor while releasing the lock.
4.Attach the arm or stand to the monitor.
Secure the monitor to the arm or stand using the screws specified in the user’s manual of the arm or stand.
Chapter 6 Reference
35
6-2. Attaching the FlexStand
The once removed the FlexStand can be attached to the monitor again with the following procedures.
1.Put the insertion part of the stand in the slot of the monitor.
At the time, use as a guide that the marks (1) on the stand match to the screw holes (2) of the monitor.
Screw hole
Marks
2.Attach the stand moving the monitor toward the stand.
Make sure that the lock is latched with clicking sound shown in the figure below.
Incorrect
36
Chapter 6 Reference
Correct
6-3. Connecting Multiple PCs
The product has multiple connections to PCs and allows you to switch to one of the connections for display.
Connection examples
DisplayPort connector
DVI-D connector
D-Sub
connector
Digital
(DisplayPort)
Digital
(DVI)
Analog
Signal cable
(supplied PP200)
Signal cable
(supplied FD-C39)
Signal cable
(option MD-C87)
DisplayPort connector
To PC 1
DVI connector
To PC 2
D-Sub mini
15-pin connector
To PC 3
●●To switch among input signals
The input signal switches each time is pressed.
When the signal is switched, the active input port name appears at the top right corner of the screen.
Chapter 6 Reference
37
●●To set input signal selection <Input Signal>
Setting
Function
Auto
The monitor recognizes the connector through which PC signals are
input.
When a PC is turned off or enters the power-saving mode, the monitor
automatically displays another signal.
Manual
The monitor detects only the PC’s signals currently displaying
automatically. Select an active input signal with .
Procedure
1. Choose <Others> from the Adjustment menu, and press
.
2. Choose <Input Signal> from the <Others> menu, and press
.
The <Input Signal> menu appears.
3. Select “Auto” or “Manual” with
4. Press
or
.
to exit the adjustment.
Note
• When “Auto” is selected for <InputSignal>, the monitor’s power-saving function works only when all PCs are in the
power-saving mode.
6-4. Displaying Monitor Information <Information>
This function allows you to display the input signal status, current resolution and model name.
Information 1/3: Input signal status, resolution, and horizontal/vertical scan frequencies
Information 2/3: DDC/CI Enable/Disable status
Information 3/3: Model name, serial number, and usage time
Procedure
1. Choose <Information> from the Adjustment menu, and press
.
The <Information> menu appears.
2. Then, press
to check settings, etc.
Attention
• The usage time is not always “0” when you purchase the monitor due to factory inspection.
38
Chapter 6 Reference
6-5. Specifications
LCD panel
Size
23.0-inch (580 mm) TFT color LCD
Surface treatment
Anti-Glare Hard Coating
Surface hardness
3H
Viewing angles
Viewing angles: Horizontal 178°, vertical 178° (CR≥10)
Dot pitch
0.2655 mm
Response time
Black-white-black: Approx. 25 ms
Gray-to-gray: Approx. 7 ms (Overdrive setting: Enhanced)
Horizontal scan Analog
frequency
Digital
31-81 kHz
Vertical scan
frequency
Analog
55-76 Hz (non-interlace)
Digital
59-61Hz (non-interlace)
(VGA TEXT: 69-71Hz)
31-68 kHz
Resolution
1920 dots × 1080 lines
Max. dot clock
148.5 MHz
Max. display color
Approx. 16.77 million colors (1064.33 million colors/10 bit LUT)
Display area (H × V)
509.76 mm × 286.74 mm (20.1 inch × 11.3 inch)
Power supply
100-120 VAC ±10%, 50/60 Hz 0.75A
200-240 VAC ±10%, 50/60 Hz 0.45A
Power
consumption
Screen display On
45 W or less (Speaker working)
42 W or less (Speaker not working)
Power saving mode
1.0 W or less
(for D-Sub single signal input, when stereo mini
jack cable is not connected, [EcoView Sense] :
“Off”)
Power Off
0.1 W or less
(when stereo mini jack cable is not connected)
Main power Off
0W
Input signal connector
D-Sub mini 15-pin
DVI-D connector (Applicable to HDCP)
DisplayPort (Standard V1.1a, applicable to HDCP and 8-bit)
Applicable Format (Audio signal)
--2ch linear PCM
(32kHz / 44.1kHz / 48kHz /88.2kHz / 96kHz / 176.4kHz/ 192kHz)
Analog input signal (Sync)
Separate, TTL, positive/negative
Analog input signal (Video)
Analog, positive (0.7Vp-p/75Ω)
Digital signal transmission
TMDS (single link)
Video signal memory (Max.)
D-Sub input: 45 types, DVI-D input: 10 types, DisplayPort input: 10
types
Audio output
Speaker output: 0.35 W (8Ω, THD: 10% or less)
Headphone output: 2 mW + 2 mW
Line input
Input impedance: 48 kΩ (Typ.)
Input level: 1.0 Vrms (Max.)
Plug & play
Analog / Digital (DVI-D) : VESA DDC 2B / EDID structure 1.3
Digital (DisplayPort) : VESA DisplayPort / EDID structure 1.4
Main unit
547 mm (21.5 inch) × 517.8 - 346.5 mm (20.4 - 13.6 inch) ×
Dimensions
236 - 221 mm (9.3 - 8.7 inch)
(width) × (height)
× (depth)
Main unit (without stand) 547 mm (21.5 inch) × 332 mm (13.1 inch) × 47.5 mm (1.87 inch)
Mass
Main unit
Approx. 7.1 kg (15.7 lbs.)
Main unit (without stand) Approx. 4.3 kg (9.5 lbs.)
Chapter 6 Reference
39
Movable range
FlexStand
Tilt:
30° Up, 0° Down
Swivel:
172° Right, 172° Left
Adjustable height: 225 mm (8.9 inch) (171.3 mm (6.7 inch) when Tilt
is 0°)
Environmental
conditions
Temperature
Humidity
Air pressure
Rotation:
90° (clockwise)
Operating:
5°C to 35°C (41°F to 95°F)
Storage:
-20°C to 60°C (-4°F to 140°F)
Operating:
20% to 80% R.H. (no condensation)
Storage:
10% to 90% R.H. (no condensation)
Operating:
700 to 1,060 hPa
Storage:
200 to 1,060 hPa
Main Default Settings
Auto EcoView
DICOM: Off*, Other modes: On
EcoView Sense
Off
EcoView Index
On
Smoothing
3
CAL Switch mode
DICOM
PowerManager - Power save
On
Input Signal
Manual
Screen size
Full screen
Off timer
Disable
Menu position
Language
Menu size
Normal
Menu Off timer
45 seconds
English
* The Auto EcoView function cannot be used in the DICOM mode.
40
Chapter 6 Reference
Outside Dimensions
Unit: mm (inch)
266(10.5)
183.4(7.2)
17.6(0.69)
542.8(21.4)
199(7.8)
200(7.9)
12.4(0.49)
14.5(0.57)
243.5(9.6)
185.8(7.3)
81.5
(3.21)
24.8(0.98)
288.8(11.4)
332(13.1)
517.8(20.4)
628.5(24.7)
°
90
PIVOT
30°
TILT
107 157.5(6.2) 67.5
(2.66)
(4.2)
547(21.5)
511.8(20.1)
18.4(0.72)
17.6(0.69)
52.6(2.07)
216(8.5)
236(9.3)
183.7(7.2)
325.4(12.8)
SWIVEL
346.5(13.6)
17
2°
2°
9.5(0.37)
355(14)
411.1(16.2)
17
25(0.98)
47.5(1.87)
465(18.3)
221(8.7)
Accessories
Signalcable (D-Submini15-pin)
Cleaning Kit
MD-C87
EIZO ScreenCleaner
For the latest information about the accessories, refer to our web site.
http://www.radiforce.com
Chapter 6 Reference
41
6-6. Glossary
Clock
The analog signal input monitor needs to reproduce a clock of the same frequency as the dot clock of the
graphics system in use, when the analog signal is converted to a digital signal for image display. This is
called clock adjustment. If the clock pulse is not set correctly, some vertical bars appear on the screen.
DDC/CI (Display Data Channel/Command Interface)
VESA provides the standardization for the interactive communication of the setting information, etc.
between a PC and the monitor.
DICOM (Digital Imaging and Communication in Medicine)
The DICOM standard was developed by the American College of Radiology and the National Electrical
Manufacturer’s Association of the USA.
The DICOM compatible device connection enables to transfer the medical image and information. The
DICOM, Part 14 document defines the digital, grayscale medical image display.
DisplayPort
VESA provides the digital interface standard for the digital display device. DisplayPort can transfer the
video signal up to 16 bits for each channel of RGB, and the audio signal too. (This monitor supports the 8-bit
video signal only.)
DVI (Digital Visual Interface)
DVI is a digital interface standard. DVI allows direct transmission of the PC’s digital data without loss.
This adopts the TMDS transmission system and DVI connectors. There are two types of DVI connectors.
One is a DVI-D connector for digital signal input only. The other is a DVI-I connector for both digital and
analog signal inputs.
DVI DMPM (DVI Digital Monitor Power Management)
DVI DMPM is a digital interface power-saving function. The “Monitor ON (operating mode)” and “Active
Off (power-saving mode)” are indispensable for DVI DMPM as the monitor’s power mode.
Gain
This is used to adjust each color parameter for red, green and blue. An LCD monitor displays the color by
the light passing through the panel color filter. Red, green and blue are the three primary colors. All the
colors on the screen are displayed by combining these three colors. The color tone can be changed by
adjusting the light intensity (volume) passing through each color’s filter.
Gamma
Generally, the monitor brightness varies nonlinearly with the input signal level, which is called “Gamma
Characteristic”. A small gamma value produces a low-contrast image, while a large gamma value produces a
high-contrast image.
42
Chapter 6 Reference
HDCP (High-bandwidth Digital Content Protection)
Digital signal coding system developed to copy-protect the digital contents, such as video, music, etc.
This helps to transmit the digital contents safely by coding the digital contents sent via DVI terminal on the
output side and decoding them on the input side.
Any digital contents cannot be reproduced if both of the equipments on the output and input sides are not
applicable to HDCP system.
Overdrive
This technology enhances response speed by increasing the potential difference at the time of motion of
liquid-crystal pixels, and it is used for liquid-crystal TV sets and others in general. It provides clear-cut
three-dimensional display with little image lag, by improving response speed of the intermediate graduation
range that frequently appears in moving images.
Phase
Phase means the sampling timing to convert the analog input signal to a digital signal. Phase adjustment is
made to adjust the timing. It is recommended that phase adjustment be made after the clock is adjusted
correctly.
Range Adjustment
Range adjustment controls the signal output levels to display every color gradation. It is recommended that
range adjustment be made before color adjustment.
Resolution
The LCD panel consists of numerous pixels of specified size, which are illuminated to form images. This
monitor consists of 1920 horizontal pixels and 1080 vertical pixels. At a resolution of 1920 × 1080, all pixels
are illuminated as a full screen (1:1).
sRGB (Standard RGB)
International standard for color reproduction and color space among peripheral devices (such as monitors,
printers, digital cameras, scanners). As a form of simple color matching for the Internet, colors can be
displayed using tones close to those of the transmission and reception devices.
Temperature
Color temperature is a method to measure the white color tone, generally indicated in degrees Kelvin. The
screen becomes reddish at a low temperature, and bluish at a high temperature, like the flame temperature.
5000K: Slightly reddish white
6500K: White referred to as daylight-balanced color
9300K: Slightly bluish white
TMDS (Transition Minimized Differential Signaling)
TMDS is one of the signal transmission methods for the digital interface.
Chapter 6 Reference
43
VESA DPM (Video Electronics Standards Association - Display Power
Management)
VESA specifications achieve increased energy efficiency for computer monitors. This involves
standardization of signals sent from the computer (graphics board).
DPM defines the status of signals transmitted between the computer and monitor.
6-7. Preset Timing
The following table shows factory preset analog signal timing:
Attention
• Display position may be deviated depending on the PC connected, which may require screen adjustment using
Adjustment menu.
• If a signal other than those listed in the table is input, adjust the screen using the Adjustment menu. However, screen
display may still be incorrect even after the adjustment.
• When interlace signals are used, the screen cannot be displayed correctly even after screen adjustment using the
Adjustment menu.
44
Resolution
Applicable
Signals
640 × 480
720 × 400
640 × 480
640 × 480
800 × 600
800 × 600
800 × 600
800 × 600
1024 × 768
1024 × 768
1024 × 768
1152 × 864
1280 × 720
1280 × 960
1280 × 1024
1280 × 1024
1680 × 1050
1680 × 1050
1920 × 1080
VGA
VGA TEXT
VESA
VESA
VESA
VESA
VESA
VESA
VESA
VESA
VESA
VESA
CEA-861
VESA
VESA
VESA
VESA CVT
VESA CVT RB
CEA-861
Chapter 6 Reference
Frequency
Polarity
Dot Clock:
MHz
Horizontal:
kHz
Vertical: Hz
Horizontal
Vertical
25.18
28.32
31.50
31.50
36.00
40.00
50.00
49.50
65.00
75.00
78.75
108.00
74.25
108.00
108.00
135.00
146.25
119.00
148.50
31.47
31.47
37.86
37.50
35.16
37.88
48.08
46.88
48.36
56.48
60.02
67.50
45.00
60.00
63.98
79.98
65.29
64.67
67.50
59.94
70.09
72.81
75.00
56.25
60.32
72.19
75.00
60.00
70.07
75.03
75.00
60.00
60.00
60.02
75.03
59.95
59.88
60.00
Negative
Negative
Negative
Negative
Positive
Positive
Positive
Positive
Negative
Negative
Positive
Positive
Positive
Positive
Positive
Positive
Negative
Positive
Positive
Negative
Positive
Negative
Negative
Positive
Positive
Positive
Positive
Negative
Negative
Positive
Positive
Positive
Positive
Positive
Positive
Positive
Negative
Positive
Appendix
Trademark
The DisplayPort icon and VESA are trademarks and registered trademarks of the Video
Electronics Standards Association in the United States and other countries.
Windows, Windows Vista, Windows Media, and Xbox 360 are registered trademarks of Microsoft Corporation
in the United States and other countries.
Apple, Mac, Macintosh, iMac, eMac, Mac OS, MacBook, PowerBook, ColorSync, QuickTime, and iBook are
registered trademarks of Apple Inc.
Acrobat, Adobe, Adobe AIR, and Photoshop are registered trademarks of Adobe Systems Incorporated in the
United States and other countries.
PowerPC is a registered trademark of International Business Machines Corporation.
Pentium is a registered trademark of Intel Corporation in the United States and other countries.
AMD Athlon and AMD Opteron are trademarks of Advanced Micro Devices, Inc.
GRACoL and IDEAlliance are registered trademarks of International Digital Enterprise Alliance.
ColorVision, ColorVision Spyder2 are registered trademarks of DataColor Holding AG.
Spyder3 is a trademark of DataColor Holding AG.
Eye-One, ColorMunki, and X-Rite are registered trademarks or trademarks of X-Rite Incorporated.
TouchWare is a trademark of 3M Touch Systems, Inc.
NextWindow is a registered trademark of NextWindow Ltd.
RealPlayer is a registered trademark of RealNetworks, Inc.
NEC is a registered trademark of NEC Corporation. PC-9801 and PC-9821 are trademarks of NEC
Corporation.
PlayStation is a registered trademark of Sony Computer Entertainment Inc.
PSP and PS3 are trademarks of Sony Computer Entertainment Inc.
ENERGY STAR is a registered trademark of the United States Environmental Protection Agency in the United
States and other countries.
EIZO, the EIZO Logo, FlexScan, FORIS, RadiForce, RadiCS, RadiNET, and ScreenManager are registered
trademarks of EIZO NANAO CORPORATION in Japan and other countries.
ColorNavigator, EIZO EasyPIX, EcoView NET, EIZO ScreenSlicer, i・Sound, Screen Administrator, UniColor
Pro, and Raptor are trademarks of EIZO NANAO CORPORATION.
All other company and product names are trademarks or registered trademarks of their respective owners.
ENERGY STAR
As an ENERGY STAR Partner, EIZO NANAO CORPORATION has determined that this
product meets the ENERGY STAR guidelines for energy efficiency.
Appendix
45
FCC Declaration of Conformity
For U.S.A. , Canada, etc. (rated 100-120 Vac) Only
FCC Declaration of Conformity
We, the Responsible Party
EIZONANAOTECHNOLOGIESINC.
5710WarlandDrive,Cypress,CA90630
Phone:(562)431-5011
declare that the product
Tradename:EIZO
Model:RadiForceMS230W
is in conformity with Part 15 of the FCC Rules. Operation of this product is subject to the following
two conditions: (1) this device may not cause harmful interference, and (2) this device must accept any
interference received, including interference that may cause undesired operation.
ThisequipmenthasbeentestedandfoundtocomplywiththelimitsforaClassBdigitaldevice,pursuant
toPart15oftheFCCRules.Theselimitsaredesignedtoprovidereasonableprotectionagainst
harmfulinterferenceinaresidentialinstallation.Thisequipmentgenerates,uses,andcanradiateradio
frequencyenergyand,ifnotinstalledandusedinaccordancewiththeinstructions,maycauseharmful
interferencetoradiocommunications.However,thereisnoguaranteethatinterferencewillnotoccurin
aparticularinstallation.Ifthisequipmentdoescauseharmfulinterferencetoradioortelevisionreception,
whichcanbedeterminedbyturningtheequipmentoffandon,theuserisencouragedtotrytocorrectthe
interferencebyoneormoreofthefollowingmeasures.
* Reorientorrelocatethereceivingantenna.
* Increasetheseparationbetweentheequipmentandreceiver.
* Connecttheequipmentintoanoutletonacircuitdifferentfromthattowhichthereceiverisconnected.
* Consultthedealeroranexperiencedradio/TVtechnicianforhelp.
Changesormodificationsnotexpresslyapprovedbythepartyresponsibleforcompliancecouldvoidthe
user’sauthoritytooperatetheequipment.
Note
UsetheattachedspecifiedcablebeloworEIZOsignalcablewiththismonitorsoastokeepinterference
withinthelimitsofaClassBdigitaldevice.
- ACCord
- ShieldedSignalCable(Enclosed)
Canadian Notice
ThisClassBdigitalapparatuscomplieswithCanadianICES-003.
CetappareilnumériquedeleclasseBestcomformeàlanormeNMB-003duCanada.
46
Appendix
Hinweise zur Auswahl des richtigen Schwenkarms für Ihren Monitor
Dieser Monitor ist für Bildschirmarbeitsplätze vorgesehen. Wenn nicht der zum Standardzubehör gehörige
Schwenkarm verwendet wird, muss statt dessen ein geeigneter anderer Schwenkarm installiert werden. Bei der
Auswahl des Schwenkarms sind die nachstehenden Hinweise zu berücksichtigen:
Der Standfuß muß den nachfolgenden Anforderungen entsprechen:
a) Der Standfuß muß eine ausreichende mechanische Stabilität zur Aufnahme des Gewichtes vom Bildschirmgerät
und des spezifizierten Zubehörs besitzen. Das Gewicht des Bildschirmgerätes und des Zubehörs sind in der
zugehörenden Bedienungsanleitung angegeben.
b)Die Befestigung des Standfusses muß derart erfolgen, daß die oberste Zeile der Bildschirmanzeige nicht höher
als die Augenhöhe eines Benutzers in sitzender Position ist.
c) Im Fall eines stehenden Benutzers muß die Befestigung des Bildschirmgerätes derart erfolgen, daß die Höhe der
Bildschirmmitte über dem Boden zwischen 135 – 150 cm beträgt.
d)Der Standfuß muß die Möglichkeit zur Neigung des Bildschirmgerätes besitzen (max. vorwärts: 5°, min. nach
hinten ≥ 5°).
e) Der Standfuß muß die Möglichkeit zur Drehung des Bildschirmgerätes besitzen (max. ±180°). Der maximale
Kraftaufwand dafür muß weniger als 100 N betragen.
f) Der Standfuß muß in der Stellung verharren, in die er manuell bewegt wurde.
g)Der Glanzgrad des Standfusses muß weniger als 20 Glanzeinheiten betragen (seidenmatt).
h)Der Standfuß mit Bildschirmgerät muß bei einer Neigung von bis zu 10° aus der normalen aufrechten Position
kippsicher sein.
Hinweis zur Ergonomie :
Dieser Monitor erfüllt die Anforderungen an die Ergonomie nach EK1-ITB2000 mit dem Videosignal, 1920 ×
1080, Digital Eingang und mindestens 60,0 Hz Bildwiederholfrequenz, non interlaced. Weiterhin wird aus
ergonomischen Gründen empfohlen, die Grundfarbe Blau nicht auf dunklem Untergrund zu verwenden (schlechte
Erkennbarkeit, Augenbelastung bei zu geringem Zeichenkontrast.)
Übermäßiger Schalldruck von Ohrhörern bzw. Kopfhörern kann einen Hörverlust bewirken.
Eine Einstellung des Equalizers auf Maximalwerte erhöht die Ausgangsspannung am Ohrhörer- bzw.
Kopfhörerausgang und damit auch den Schalldruckpegel.
„Maschinenlärminformations-Verordnung 3. GPSGV:
Der höchste Schalldruckpegel beträgt 70 dB(A) oder weniger gemäss EN ISO 7779“
[Begrenzung des maximalen Schalldruckpegels am Ohr]
Bildschirmgeräte: Größte Ausgangsspannung 150 mV
Appendix
47
LIMITED WARRANTY
LIMITED WARRANTY
EIZO NANAO CORPORATION (hereinafter referred to as “EIZO”) and distributors authorized by EIZO (hereinafter
referredtoasthe“Distributors”)warrant,subjecttoandinaccordancewiththetermsofthislimitedwarranty(hereinafter
referred to as the “Warranty”), to the original purchaser (hereinafter referred to as the “Original Purchaser”) who
purchasedtheproductspecifiedinthisdocument(hereinafterreferredtoasthe“Product”)fromEIZOorDistributors,
thatEIZOandDistributorsshall,attheirsolediscretion,eitherrepairorreplacetheProductatnochargeiftheOriginal
PurchaserbecomesawarewithintheWarrantyPeriod(definedbelow)thattheProductmalfunctionsorisdamagedinthe
courseofnormaluseoftheProductinaccordancewiththedescriptionintheinstructionmanualattachedtotheProduct
(hereinafterreferredtoasthe“User’s Manual”).
TheperiodofthisWarrantyislimitedto(i)five(5)yearsfromthedateofpurchaseoftheProduct;or,limitedtothe
expiration of (ii) 30,000 hours of its use of the Product (hereinafter referred to as the “Warranty Period”); provided,
however,thattheWarrantyPeriodfortheLCDpaneloftheProductislimitedtothree(3)yearsfromthedateofpurchase
of the Product. EIZO and Distributors shall bear no liability or obligation with regard to the Product in relation to the
OriginalPurchaseroranythirdpartiesotherthanasprovidedunderthisWarranty.
EIZOandDistributorswillceasetoholdorstoreanypartsoftheProductuponexpirationofseven(7)yearsafterthe
productionofsuchpartsisdiscontinued.Inrepairingthemonitor,EIZOandDistributorswilluserenewalpartswhich
complywithourQCstandards.
TheWarrantyisvalidonlyinthecountriesorterritorieswheretheDistributorsarelocated.TheWarrantydoesnotrestrict
anylegalrightsoftheOriginalPurchaser.
NotwithstandinganyotherprovisionofthisWarranty,EIZOandDistributorsshallhavenoobligationunderthisWarranty
whatsoeverinanyofthecasesassetforthbelow:
(a) AnydefectoftheProductcausedbyfreightdamage,modification,alteration,abuse,misuse,accident,incorrect
installation,disaster,faultymaintenanceand/orimproperrepairbythirdpartyotherthanEIZOandDistributors;
(b) AnyincompatibilityoftheProductduetopossibletechnicalinnovationsand/orregulations;
(c) AnydeteriorationofdisplayperformancecausedbythedeteriorationofexpendablepartssuchastheLCDpanel
and/orbacklight,etc.(e.g.changesinbrightness,changesinbrightnessuniformity,changesincolor,changesin
coloruniformity,defectsinpixelsincludingburntpixels,etc.);
(d) AnydefectoftheProductcausedbyexternalequipment;
(e) AnydefectoftheProductonwhichtheoriginalserialnumberhasbeenalteredorremoved;
(f) Anynormaldeteriorationoftheproduct,particularlythatofconsumables,accessories,and/orattachments(e.g.
buttons,rotatingparts,cables,User’sManual,etc.);and
(g) Anydeformation,discoloration,and/orwarpoftheexterioroftheproductincludingthatofthesurfaceoftheLCD
panel.
To obtain service under the Warranty, the Original Purchaser must deliver the Product, freight prepaid, in its original
packageorotheradequatepackageaffordinganequaldegreeofprotection,assumingtheriskofdamageand/orloss
intransit,tothelocalDistributor.TheOriginalPurchasermustpresentproofofpurchaseoftheProductandthedateof
suchpurchasewhenrequestingservicesundertheWarranty.
TheWarrantyPeriodforanyreplacedand/orrepairedproductunderthisWarrantyshallexpireattheendoftheoriginal
WarrantyPeriod.
EIZO OR DISTRIBUTORSARE NOT RESPONSIBLE FORANY DAMAGE TO, OR LOSS OF, DATA OR OTHER
INFORMATIONSTOREDINANYMEDIAORANYPARTOFANYPRODUCTRETURNEDTOEIZOORDISTRIBUTORS
FORREPAIR.
EIZOAND DISTRIBUTORS MAKE NO FURTHER WARRANTIES, EXPRESSED OR IMPLIED, WITH RESPECTTO
THE PRODUCTAND ITS QUALITY, PERFORMANCE, MERCHANTABILITY OR FITNESS FORANY PARTICULAR
USE. IN NO EVENT SHALL EIZO OR DISTRIBUTORS BE LIABLE FORANY INCIDENTAL, INDIRECT, SPECIAL,
CONSEQUENTIAL OR OTHER DAMAGE WHATSOEVER (INCLUDING, WITHOUT LIMITATION, DAMAGES FOR
LOSSOFPROFIT,BUSINESSINTERRUPTION,LOSSOFBUSINESSINFORMATION,ORANYOTHERPECUNIARY
LOSS)ARISINGOUTOFTHEUSEORINABILITYTOUSETHEPRODUCTORINANYCONNECTIONWITHTHE
PRODUCT,WHETHERBASEDONCONTRACT,TORT,NEGLIGENCE,STRICTLIABILITYOROTHERWISE,EVEN
IFEIZOORDISTRIBUTORSHAVEBEENADVISEDOFTHEPOSSIBILITYOFSUCHDAMAGES.THISEXCLUSION
ALSO INCLUDESANY LIABILITY WHICH MAYARISE OUT OFTHIRD PARTY CLAIMSAGAINSTTHE ORIGINAL
PURCHASER.  THE ESSENCE OF THIS PROVISION IS TO LIMIT THE POTENTIAL LIABILITY OF EIZOAND
DISTRIBUTORSARISINGOUTOFTHISLIMITEDWARRANTYAND/ORSALES.
48
Appendix
BEGRENZTE GARANTIE
EIZONANAOCORPORATION(imWeiterenals„EIZO“bezeichnet)unddieVertragsimporteurevonEIZO(imWeiteren
als „Vertrieb(e)“ bezeichnet) garantieren dem ursprünglichen Käufer (im Weiteren als „Erstkäufer“ bezeichnet), der
dasindiesemDokumentvorgegebeneProdukt(imWeiterenals„Produkt“bezeichnet)vonEIZOodereinemVertrieb
erworbenhat,gemäßdenBedingungendieserbeschränktenGarantie(imWeiterenals„Garantie“bezeichnet),dass
EIZO und der Vertrieb nach eigenem Ermessen das Produkt entweder kostenlos reparieren oder austauschen, falls
derErstkäuferinnerhalbderGarantiefrist(weiteruntenfestgelegt)eineFehlfunktionbzw.BeschädigungdesProdukts
feststellt, die während des normalen Gebrauchs des Produkts gemäß denAnweisungen des zum Lieferumfang des
ProduktsgehörendenBenutzerhandbuchs(imWeiterenals„Benutzerhandbuch“bezeichnet)aufgetretenist.
Die Dauer der Garantieleistung beträgt (i) fünf (5) Jahre ab dem Erstverkaufsdatum des Produkts oder (ii) 30.000
Betriebsstunden des Produkts (im Weiteren als „Garantiefrist“ bezeichnet); die Garantiefrist für das LCD-Panel des
Produkts ist jedoch auf drei (3) Jahre ab dem Erstverkaufsdatum des Produkts beschränkt. EIZO und die Vertriebe
übernehmenüberdenRahmendieserGarantiehinaushinsichtlichdesProduktskeinerleiHaftungoderVerpflichtung
demErstkäuferoderDrittengegenüber.
EIZOunddieVertriebeverpflichtensich,ErsatzteilefürdasProduktübereinenZeitraumvonsieben(7)Jahrennach
EinstellungderProduktionderErsatzteilezulagernbzw.anzubieten.EIZOundseineVertriebspartnerverpflichtensich,
beieineretwaigenReparaturdesMonitorsausschließlichProduktegemäßdenEIZO-Qualitätssicherungsstandardszu
verwenden.
Diese Garantie gilt nur in Ländern oder Gebieten, in denen sich Vertriebe befinden. Die gesetzlichen
GewährleistungsrechtedesErstkäufersgegenüberdemVerkäuferwerdendurchdieseGarantienichtberührt.
EIZOunddieVertriebebesitzenimRahmendieserGarantiekeinerleiVerpflichtungindenfolgendenFällen:
(a) Produktdefekte, die auf Frachtschäden, Modifikation, Nachgestaltung, Missbrauch, Fehlbedienung, Unfälle,
unsachgemäßeInstallation,Naturkatastrophen,fehlerhafteWartungund/oderunsachgemäßeReparaturdurcheine
andereParteialsEIZOunddieVertriebezurückzuführensind.
(b) Eine Inkompatibilität des Produkts aufgrund von technischen Neuerungen und/oder neuen Bestimmungen, die
nachdemKaufinKrafttreten.
(c) Jegliche Verschlechterung der Bildschirmleistung, die durch Verschleißteile wie das LCD-Panel und/oder die
Hintergrundbeleuchtungusw.hervorgerufenwerden(z.B.VeränderungenvonHelligkeitoderHelligkeitsverteilung,
VeränderungenvonFarbeoderFarbverteilung,PixeldefekteeinschließlichvondurchgebranntenPixelnusw.).
(d) Produktdefekte,diedurchexterneGeräteverursachtwerden.
(e) JeglicherDefekteinesProdukts,dessenursprünglicheSeriennummergeändertoderentferntwurde.
(f) NormaleAbnutzung des Produkts, insbesondere von Verbrauchsteilen, Zubehörteilen und/oder Beilagen (z.B.
Tasten,drehbareTeile,Kabel,Benutzerhandbuchusw.);sowie
(g) Verformungen,Verfärbungenund/oderVerziehungenamProduktäußeren,einschließlichderOberflächedesLCDPanels.
Bei Inanspruchnahme der Garantieleistung ist der Erstkäufer verpflichtet, das Produkt auf eigene Kosten und
in der Originalverpackung bzw. einer anderen geeigneten Verpackung, die einen gleichwertigen Schutz gegen
Transportschädenbietet,andenörtlichenVertriebzuübersenden,wobeiderErstkäuferdasTransportrisikogegenüber
Schädenund/oderVerlustträgt.ZumZeitpunktderInanspruchnahmederGarantieleistungmussderErstkäufereinen
Verkaufsbelegvorweisen,aufdemdasKaufdatumangegebenist.
DieGarantiefristfüreinimRahmendieserGarantieausgetauschtesund/oderrepariertesProdukterlischtnachAblauf
derursprünglichenGarantiefrist.
EIZOODERDIEEIZO-VERTRAGSIMPORTEUREHAFTENNICHTFÜRZERSTÖRTEDATENBESTÄNDEODERDIE
KOSTEN DER WIEDERBESCHAFFUNG DIESER DATENBESTÄNDEAUF JEGLICHEN DATENTRÄGERN ODER
TEILENDESPRODUKTS,DIEIMRAHMENDERGARANTIEBEIEIZOODERDENEIZO-VERTRAGSIMPORTEUREN
ZURREPARATUREINGEREICHTWURDEN.
EIZO UND DIE EIZO-VERTRAGSIMPORTEURE GEBEN WEDER EXPLIZITE NOCH IMPLIZITE GARANTIEN
IN BEZUGAUF DIESES PRODUKT UND SEINE QUALITÄT, LEISTUNG, VERKÄUFLICHKEIT ODER EIGNUNG
FÜR EINEN BESTIMMTEN ZWECK.AUF KEINEN FALL SIND EIZO ODER DIE EIZO-VERTRAGSIMPORTEURE
VERANTWORTLICH FÜR JEGLICHE ZUFÄLLIGE, INDIREKTE, SPEZIELLE, FOLGE- ODERANDERE SCHÄDEN
JEGLICHERART (EINSCHLIESSLICH OHNE JEDE BEGRENZUNG SCHÄDEN BEZÜGLICH PROFITVERLUST,
GESCHÄFTSUNTERBRECHUNG, VERLUST VON GESCHÄFTSINFORMATION ODER JEGLICHEANDEREN
FINANZIELLEN EINBUSSEN), DIE DURCH DIE VERWENDUNG DES PRODUKTES ODER DIE UNFÄHIGKEIT
ZUR VERWENDUNG DES PRODUKTES ODER IN JEGLICHER BEZIEHUNG MIT DEM PRODUKT, SEI ES
BASIERENDAUFVERTRAG,SCHADENSERSATZ,NACHLAESSIGKEIT,STRIKTEHAFTPFLICHTODERANDEREN
FORDERUNGEN ENTSTEHEN,AUCH WENN EIZO UND DIE EIZO-VERTRAGSIMPORTEURE IM VORAUS ÜBER
DIEMÖGLICHKEITSOLCHERSCHÄDENINFORMIERTWURDEN.DIESERAUSSCHLUSSENTHÄLTAUCHJEDE
HAFTPFLICHT, DIEAUS FORDERUNGEN DRITTER GEGEN DEN ERSTKÄUFER ENTSTEHEN KANN. ZWECK
DIESERKLAUSELISTES,DIEHAFTUNGVONEIZOUNDDENVERTRIEBENGEGENÜBERFORDERUNGENZU
BEGRENZEN,DIEAUSDIESERBESCHRÄNKTENGARANTIEUND/ODERDEMVERKAUFENTSTEHENKÖNNEN.
Appendix
49
GARANTIE LIMITÉE
EIZONANAOCORPORATION(ci-aprèsdénommé«EIZO »)etlesdistributeursautorisésparEIZO(ci-aprèsdénommés
«Distributeurs »),sousréserveetconformémentauxtermesdecettegarantielimitée(ci-aprèsdénommée«Garantie
»),garantissentàl’acheteurinitial(ci-aprèsdénommé«Acheteur initial »)duproduitspécifiédanslaprésente(ci-après
dénommé«Produit »)achetéauprèsd’EIZOoudeDistributeursagréésEIZO,queEIZOetsesDistributeursauront
pouroptionderéparerouremplacergratuitementleProduitsil’Acheteurinitialconstate,pendantlaPériodedegarantie
(définieci-dessous),qu’ilyaundysfonctionnementouqueleProduitasubiundommagedanslecadred’uneutilisation
normaleduProduitconformémentàladescriptiondumoded’emploiquiaccompagneleProduit(ci-aprèsdénommé«
Manuel d’utilisation »).
LapériodedecetteGarantieestlimitéeà(i)cinq(5)ansàpartirdeladated’achatduProduitouà(ii)30000heures
d’utilisation du Produit (ci-après dénommée « Période de Garantie »), sous réserve, toutefois, que la Période de
Garantie du panneau LCD du Produit est limitée à trois (3) ans à partir de la date d’achat du Produit. EIZO et ses
DistributeursdéclinenttouteresponsabilitéouobligationconcernantceProduitfaceàl’Acheteurinitialouàtouteautre
personneàl’exceptiondecellesstipuléesdanslaprésenteGarantie.
EIZO et ses Distributeurs cesseront de tenir ou conserver en stock toute pièce de ce Produit après l’expiration de
la période de sept (7) ans suivant l’arrêt de la production de telles pièces. Pour réparer le moniteur, EIZO et ses
distributeursutiliserontdespiècesderechangeconformesànosnormesdecontrôlequalité.
LaGarantieestvalableuniquementdanslespaysoulesterritoiresoùsetrouventlesDistributeurs.LaGarantienelimite
aucundesdroitsreconnusparlaloiàl’Acheteurinitial.
NonobstanttouteautreclausedecetteGarantie,EIZOetsesDistributeursn’aurontd’obligationdanslecadredecette
Garantiepouraucundescasénumérésci-dessous:
(a) ToutdéfautduProduitrésultantdedommagesoccasionnéslorsdutransport,d’unemodification,d’unealtération,
d’unabus,d’unemauvaiseutilisation,d’unaccident,d’uneinstallationincorrecte,d’undésastre,d’unentretienet/
oud’uneréparationincorrectseffectuésparunepersonneautrequeEIZOousesDistributeurs;
(b) TouteincompatibilitéduProduitrésultantd’améliorationstechniqueset/ouréglementationspossibles;
(c) Toute détérioration des performances d’affichage causée par la détérioration des éléments consommables tels
quelepanneauLCDet/oulerétroéclairage,etc.(parexempledeschangementsdeluminosité,deschangements
del’uniformitédelaluminosité,desmodificationsdecouleur,deschangementsdel’uniformitédescouleurs,des
défectuositésdepixelsycomprisdespixelsbrûlés,etc.);
(d) ToutdéfautduProduitcauséparunappareilexterne;
(e) Toutdéfautd’unProduitsurlequellenumérodesérieoriginalaétéaltéréousupprimé;
(f) Toute détérioration normale du Produit, particulièrement celle des consommables, des accessoires et/ou des
piècesreliéesauProduit(touches,élémentspivotants,câbles,Manueld’utilisationetc.),et
(g) Toute déformation, décoloration, et/ou gondolage de l’extérieur du Produit, y compris celle de la surface du
panneauLCD.
Pourbénéficierd’unservicedanslecadredecetteGarantie,l’AcheteurinitialdoitrenvoyerleProduitportpayé,dans
sonemballaged’origineoutoutautreemballageappropriéoffrantundegrédeprotectionéquivalent,auDistributeurlocal,
etassumeralaresponsabilitédesdommageset/oupertepossibleslorsdutransport.L’Acheteurinitialdoitprésenterune
preuved’achatduProduitcomprenantsadated’achatpourbénéficierdeceservicedanslecadredelaGarantie.
LaPériodedegarantiepourtoutProduitremplacéet/ouréparédanslecadredecetteGarantieexpireraàlafindela
Périodedegarantieinitiale.
EIZOOUSESDISTRIBUTEURSNESAURAIENTÊTRETENUSRESPONSABLESDESDOMMAGESOUPERTESDE
DONNÉESOUD’AUTRESINFORMATIONSSTOCKÉESDANSUNMÉDIAQUELCONQUEOUUNEAUTREPARTIE
DUPRODUITRENVOYÉÀEIZOOUAUXDISTRIBUTEURSPOURRÉPARATION.
AUCUNEAUTRE GARANTIE, EXPLICITE OU TACITE, N’EST OFFERTE PAR EIZO ET SES DISTRIBUTEURS
CONCERNANT LE PRODUIT ET SES QUALITÉS, PERFORMANCES, QUALITÉ MARCHANDE OUADAPTATION
À UN USAGE PARTICULIER. ENAUCUN CAS, EIZO OU SES DISTRIBUTEURS NE SERONT RESPONSABLES
DES DOMMAGES FORTUITS, INDIRECTS, SPÉCIAUX, INDUITS, OU DE TOUTAUTRE DOMMAGE QUEL
QU’IL SOIT (Y COMPRIS, SANS LIMITATION, LES DOMMAGES RÉSULTANT D’UNE PERTE DE PROFIT, D’UNE
INTERRUPTION D’ACTIVITÉS, D’UNE PERTE DE DONNÉES COMMERCIALES, OU DETOUTAUTRE MANQUE
À GAGNER) RÉSULTANT DE L’UTILISATION OU DE L’INCAPACITÉ D’UTILISER LE PRODUIT OUAYANT UN
RAPPORTQUELCONQUEAVECLEPRODUIT,QUECESOITSURLABASED’UNCONTRAT,D’UNTORT,D’UNE
NÉGLIGENCE,D’UNERESPONSABILITÉSTRICTEOUAUTRE,MÊMESIEIZOOUSESDISTRIBUTEURSONTÉTÉ
AVERTISDELAPOSSIBILITÉDETELSDOMMAGES.CETTELIMITATIONINCLUTAUSSITOUTERESPONSABILITÉ
QUI POURRAIT ÊTRE SOULEVÉE LORS DES RÉCLAMATIONS D’UN TIERS CONTRE L’ACHETEUR INITIAL.
L’ESSENCE DE CETTE CLAUSE EST DE LIMITER LA RESPONSABILITÉ POTENTIELLE DE EIZO ET DE SES
DISTRIBUTEURSRÉSULTANTDECETTEGARANTIELIMITÉEET/OUDESVENTES.
50
Appendix
GARANTÍA LIMITADA
EIZO NANAO CORPORATION (en lo sucesivo “EIZO”) y sus distribuidores autorizados (en lo sucesivo los
“Distribuidores”),conarregloydeconformidadconlostérminosdeestagarantíalimitada(enlosucesivola“Garantía”),
garantizanalcompradororiginal(enlosucesivoel“Comprador original”)quecompróelproductoespecificadoeneste
documento(enlosucesivoel“Producto”)aEIZOoasusDistribuidores,queEIZOysusDistribuidores,asupropio
criterio,repararánosustituiránelProductodeformagratuitasielCompradororiginaldetectadentrodelperiododela
Garantía (indicado posteriormente) que el Productonofuncionacorrectamenteoquesehaaveriadoduranteeluso
normal del mismo de acuerdo con las indicacionesdelmanualdeinstruccionessuministradoconelProducto(enlo
sucesivoel“Manual del usuario”).
ElperíododevalidezdeestaGarantíaestálimitadoa(i)cinco(5)añosapartirdelafechadecompradelProductoo
(ii)a30.000horasdeusodelProducto(enadelantedesignadocomoel“Periodo de Garantía”);conlaexclusión,no
obstante,dequeelperíododegarantíadelpanelLCDdelProductoestálimitadoatres(3)añosapartirdelafecha
decompradelProducto.EIZOysusDistribuidoresnotendránningunaresponsabilidadniobligaciónconrespectoal
ProductoparaconelCompradororiginalniparacontercerosquenoseanlasestipuladasenlapresenteGarantía.
EIZOysusDistribuidoresnoestaránobligadosasuministrarcualquierrecambiodelProductounavezpasadossiete
(7)añosdesdequesedejedefabricarelmismo.Paralareparacióndelmonitor,EIZOylosdistribuidoresutilizarán
repuestosquecumplanconnuestrosestándaresdecontroldecalidad.
LaGarantíaesválidasóloenlospaísesyterritoriosdondeestánubicadoslosDistribuidores.LaGarantíanorestringe
ningúnderecholegaldelCompradororiginal.
A pesar de las estipulaciones de esta Garantía, EIZO y sus Distribuidores no tendrán obligación alguna bajo esta
Garantíaenningunodeloscasosexpuestosacontinuación:
(a) CualquierdefectodelProductocausadopordañoseneltransporte,modificación,alteración,abuso,usoincorrecto,
accidente, instalación incorrecta, desastre, mantenimiento incorrecto y/o reparación indebida realizada por un
terceroquenoseaEIZOosusDistribuidores.
(b) CualquierincompatibilidaddelProductodebidaaposiblesinnovacionestécnicasy/oreglamentaciones.
(c) Cualquierdeterioroenelrendimientodelavisualizacióncausadoporfallosenlaspiezasconsumiblescomoel
panelLCDy/ola"Backlight",etc.(p.ej.cambiosdebrillo,cambiosdeuniformidaddelbrillo,cambiosdecolor,
cambiosdeuniformidaddelcolor,defectosdepíxeles,incluyendopíxelesmuertos,etc.).
(d) CualquierdefectodelProductocausadoporunequipoexterno.
(e) CualquierdefectodelProductoenelquehayasidoalteradooborradoelnúmerodeserieoriginal.
(f) CualquierdeterioronormaldelProducto,yenparticulardelaspiezasconsumibles,accesoriosydemás(p.ej.
botones,piezasgiratorias,cables,Manualdelusuario,etc.).
(g) Cualquierdeformación,decoloracióny/oalabeodelexteriordelProductoincluidalasuperficiedelpanelLCD.
Para obtener servicio en los términos de esta Garantía, el Producto deberá ser enviado por el Comprador original,
asuDistribuidorlocal,coneltransportepreviamentepagado,enelembalajeoriginaluotroembalajeadecuadoque
ofrezcaelmismogradodeprotección,asumiendoelriesgodedañosy/opérdidadelProductoduranteeltransporte.El
CompradororiginaldeberápresentaruncomprobantedecompradelProductoenelquesereflejelafechadecompra
delmismocuandolosoliciteelserviciodeGarantía.
ElPeriododegarantíaparacualquierProductoreemplazadoy/oreparadoenlostérminosdeestaGarantíaexpiraráal
vencerelPeriododegarantíaoriginal.
EIZO O LOS DISTRIBUIDORESAUTORIZADOS DE EIZO NO SE RESPONSABILIZAN DE NINGÚN DAÑO O
PÉRDIDAQUEPUEDANSUFRIRLOSDATOSUOTRAINFORMACIÓNALMACENADAENCUALQUIERMEDIOO
CUALQUIERPARTEDECUALQUIERPRODUCTODEVUELTOAEIZOOALOSDISTRIBUIDORESDEEIZOPARA
SUREPARACIÓN.
EIZOY LOS DISTRIBUIDORESAUTORIZADOS DE EIZO NO OFRECEN NINGUNA OTRA GARANTÍA, IMPLÍCITA
NI EXPLÍCITA, CON RESPECTOAL PRODUCTO YA SU CALIDAD, RENDIMIENTO, COMERCIABILIDAD E
IDONEIDADPARACUALQUIERUSOENPARTICULAR.ENNINGÚNCASOSERÁNEIZOOLOSDISTRIBUIDORES
AUTORIZADOSDEEIZORESPONSABLESDENINGÚNDAÑOEMERGENTE,INDIRECTO,ESPECIAL,INHERENTE
O CUALQUIERA QUE SEA (INCLUYENDO, SIN LIMITACIÓN, DAÑOS POR LUCRO CESANTE, INTERRUPCIÓN
DE LAACTIVIDAD COMERCIAL, PÉRDIDA DE INFORMACIÓN COMERCIAL O CUALQUIER OTRA PÉRDIDA
PECUNIARIA)QUESEDERIVEDELUSOOIMPOSIBILIDADDEUSODELPRODUCTOOENRELACIÓNCONEL
PRODUCTO,YA SEA BASADO EN CONTRATO, PORAGRAVIO, NEGLIGENCIA, ESTRICTA RESPONSABILIDAD
O CUALQUIERA QUE SEA,AUN CUANDO SE HAYAADVERTIDOA EIZO OA LOS DISTRIBUIDORES DE EIZO
DELAPOSIBILIDADDETALESDAÑOS.ESTAEXCLUSIÓNTAMBIÉNABARCACUALQUIERRESPONSABILIDAD
QUE PUEDA DERIVARSE DE RECLAMACIONES HECHAS POR UN TERCERO CONTRA EL COMPRADOR
ORIGINAL.LAESENCIADEESTAESTIPULACIÓNESLIMITARLARESPONSABILIDADPOTENCIALDEEIZOYLOS
DISTRIBUIDORESQUEPUDIERADERIVARSEDEESTAGARANTÍALIMITADAY/OVENTAS.
Appendix
51
GARANZIA LIMITATA
EIZONANAOCORPORATION(acuisifaràriferimentodaquiinpoicon“EIZO”)ediDistributoriautorizzatidaEIZO(a
cuisifaràriferimentodaquiinpoicon“Distributori”)garantiscono,secondoiterminidiquestagaranzialimitata(acuisi
faràriferimentodaquiinpoicon“Garanzia”)all’acquirenteoriginale(acuisifaràriferimentodaquiinpoicon“Acquirente
originale”) che ha acquistato il prodotto specificato in questo documento (a cui si farà riferimento da qui in poi con
“Prodotto”)daEIZOodaisuoiDistributori,cheEIZOeidistributori,alorodiscrezione,riparerannoosostituirannoil
Prodottosenzaaddebitosel’Acquirenteoriginaletrova,entroilperiododellaGaranzia(definitosotto),cheilProdotto
malfunzionaesièdanneggiatonelcorsodelsuonormaleutilizzoosservandoleindicazionidelmanualediistruzioni
allegatoalProdotto(acuisifaràriferimentodaquiinpoicon“Manuale utente”).
La presente Garanzia è limitato a (i) cinque (5) anni a partire dalla data d'acquisto del Prodotto; o, limitato (ii) allo
scaderedi30.000ored'utilizzodelProdotto(acuisifaràriferimentodaquiinpoicon“Periodo di Garanzia”);tenendo
peròpresentecheilPeriododigaranziadelpannelloLCDdelProdottoèlimitatoatre(3)annidalladatad'acquisto
delProdotto.EIZOeisuoiDistributorinonsiassumonoalcunaresponsabilitàenonhannoalcunobbligoriguardoal
Prodottoversol'AcquirenteoriginaleoterzidiversidaquellirelativiaquestaGaranzia.
EIZO e i suoi Distributori cesseranno di tenere o di conservare qualsiasi ricambio del Prodotto allo scadere di sette
(7) anni dopo che la produzione di tali ricambi èstataterminata.Perlariparazionedelmonitor,EIZOeiDistributori
utilizzerannopartidiricambioconformiainostristandarddicontrollodellaqualità.
La Garanzia è valida soltanto nei paesi dove ci sono i Distributori EIZO. La Garanzia non limita alcun diritto legale
dell’Acquirenteoriginale.
IndipendentementedaqualsiasialtracondizionediquestaGaranzia,EIZOeisuoiDistributorinonavrannoalcunobbligo
derivantedaquestaGaranziainognunodeicasielencatidiseguito:
(a) QualsiasidifettodelProdottocausatodadanniditrasporto,modifiche,alterazioni,abusi,usiimpropri,incidenti,
installazioneerrata,calamità,manutenzioneerratae/oriparazioniimproprieeseguitedaterzepartichenonsiano
EIZOoisuoiDistributori.
(b) QualsiasiincompatibilitàdelProdottodovutaapossibiliinnovazionitecnichee/onormative.
(c) Qualsiasideterioramentodelleprestazionidelloschermocausatodaldeterioramentodelleparticonsumabili,come
ilpannelloLCDe/olaretroilluminazione,ecc.(peresempio:icambiamentidiluminosità,cambiamentidiuniformità
della luminosità, i cambiamenti di colore, i cambiamenti di uniformità del colore, i difetti dei pixel, inclusi i pixel
bruciati,ecc.).
(d) QualsiasidifettodelProdottocausatodaapparecchiatureesterne.
(e) QualsiasidifettodelProdottoincuiilnumerodiserieoriginalesiastatoalteratoorimosso.
(f) Qualsiasi normale deterioramento del Prodotto, in particolar modo nelle sue parti di consumo, accessori, e/o
attacchi(peresempio:tasti,partirotanti,cavi,Manualedell’utente,ecc.).
(g) Qualsiasitipodideformazione,scolorimento,e/odiinvolucroesternodelProdottoinclusalasuperficiedelpannello
LCD.
Per ricevere assistenza tecnica con questa Garanzia, l’Acquirente originale deve inviare il Prodotto, con trasporto
pre-pagato, nella sua confezione originale o altraconfezioneadeguatachefornisceunlivelloanalogodiprotezione,
assumendosiilrischiodidannie/operditaintransito,alDistributorelocale.L’Acquirenteoriginaledevepresentarela
provadiacquistochestabilisceladatadiacquistodelProdottoquandorichiedeserviziosottoGaranzia.
IlPeriododigaranziaperqualsiasiProdottosostituitoe/oriparatosottoquestaGaranziascadeallafinedelPeriododi
garanziaoriginale.
EIZOOISUOIDISTRIBUTORINONSONORESPONSABILIPERQUALSIASIDANNOOPERDITADIDATIOALTRE
INFORMAZIONI MEMORIZZATI SU QUALSIASI SUPPORTO O QUALSIASI PARTE DI QUALSIASI PRODOTTO
INVIATOAEIZOOISUOIDISTRIBUTORIPERRIPARAZIONI.
EIZO E I SUOI DISTRIBUTORI NON OFFRONOALCUNA GARANZIAADDIZIONALE, IMPLICITA O ESPLICITA,
RIGUARDO IL PRODOTTO E LA SUA QUALITÀ, PRESTAZIONI, VENDIBILITÀ OAPPROPRIATEZZA PER
QUALSIASI USO PARTICOLARE. IN NESSUN CASO EIZO O I DISTRIBUTORI EIZOAUTORIZZATI SARANNO
RESPONSABILI PER QUALSIASI DANNOACCIDENTALE, INDIRETTO, SPECIALE, CONSEGUENTE O DI
QUALSIASIALTRANATURA(INCLUSI,SENZALIMITI,DANNIPERPERDITADIPROFITTI,INTERRUZIONEDELLE
ATTIVITÀ, PERDITA DI INFORMAZIONI D’AFFARI O QUALSIASIALTRA PERDITA PECUNIARIA) DERIVANTI
DALL’USO O DALL’IMPOSSIBILITÀ DI USARE IL PRODOTTO O IN QUALSIASI RELAZIONEAL PRODOTTO,
SIA SU BASE DI CONTRATTO, TORTO, NEGLIGENZA, STRETTA RESPONSABILITÀ OALTRIMENTI,ANCHE
SE EIZO O I DISTRIBUTORI EIZOAUTORIZZATI SONO STATIAVVERTITI DELLA POSSIBILITÀ DITALI DANNI.
QUESTAESCLUSIONEINCLUDEANCHEQUALSIASIRESPONSABILITÀCHEPOSSAINSORGEREDARECLAMI
DI TERZI CONTRO L’ACQUIRENTE ORIGINALE. L’ESSENZA DI QUESTO PROVVEDIMENTO È LIMITARE LA
RESPONSABILITÀPOTENZIALEDIEIZOEDEIDISTRIBUTORIDERIVANTEDAQUESTAGARANZIALIMITATAE/O
DALLEVENDITE.
52
Appendix
BEGRÄNSAD GARANTI
EIZO NANAO CORPORATION (nedan kallat “EIZO”) och EIZOs auktoriserade distributörer (nedan kallade
“Distributörer”) garanterar i enlighet med villkoren i denna begränsade garanti (nedan kallad “Garantin”) den
ursprungligeköparen(nedankalladden“Ursprunglige köparen”)somköptedenidokumentetspecificeradeprodukten
(nedankallad“Produkten”)frånEIZOellerDistributörer,attEIZOellerDistributörerenligtegetgottfinnandekostnadsfritt
antingenrepareraellerbytautdendefektaProduktenomdenUrsprungligeköpareninomGarantiperioden(definieras
nedan)upptäckerattProduktenfungerarfelaktigtellerskadasundernormalanvändningavProduktenienlighetmed
beskrivningenibruksanvisningen(nedankallad“Bruksanvisning”).
Giltighetsperiodenfördennagarantiärbegränsadtill(i)fem(5)årfråndatumetförProduktensinköpeller,omdetta
inträffartidigare,begränsattillutlöpandetav(ii)30000timmarsanvändningavProdukten(härikallad“Garantiperioden”).
GarantiperiodenförProduktensLCD-panelärdockbegränsadtilltre(3)årfråndatumetförProduktensinköp.EIZOoch
DistributörerskainteundernågravillkorhanågotannatansvaränvadsomangesidennagarantigällandeProdukteni
relationtilldenUrsprungligeköparenellertredjepart.
EIZOochDistributörerkommerattupphöramedlagerhållningavProduktensdelareftersju(7)årefterattproduktionen
av dessa delar upphört. Nät skärmen repareras använder EIZO och distributörer reservdelar som uppfyller våra
kvalitetsstandarder.
Garantin är endast giltig i de länder där det finns Distributörer. Garantin begränsar inte några av den Ursprunglige
köparenslagstadgaderättigheter.
OavsettandravillkoridennagarantiskainteEIZODistributörerundernågravillkorhanågotansvarinågotavdefall
sombeskrivsnedan:
(a) När någon bristfällighet hos Produkten kan härledas till att ha uppstått vid frakt, modifiering, ändring, felaktigt
handhavande,olycka,felaktiginstallation,katastrof,felaktigtunderhålloch/ellerfelaktigreparationutfördavtredje
partannanänEIZOochDistributörer.
(b) AllaformeravinkompatibilitethosProduktenpågrundavmöjligatekniskainnovationeroch/ellerbestämmelser.
(c) Alla försämringar av bildens prestanda beroende på förbrukningsdelar så som LCD-panel och/eller
bakgrundsbelysningetc.(t.ex.ändringariljusstyrka,jämnhetiljusstyrka,färg,färgjämnhet,defektapixlaroch/eller
fastlysandepixlaretc.).
(d) AlladefekterhosProduktensomorsakatsavexternutrustning.
(e) AlladefekterhosProduktenpåvilkendetursprungligaserienumretharändratselleravlägsnats.
(f) All normal försämring av Produkten, speciellt förbrukningsartiklar, tillbehör och/eller yttre delar (t.ex. knappar,
roterandedelar,kablar,Bruksanvisningenetc.).
(g) Varjedeformation,missfärgningoch/ellerskevhetavProduktensyttreinklusiveytanpåLCD-panelen.
För att erhålla service under denna garanti måste den Ursprunglige köparen (med hänseende till risken för skada
och/ellerförlustundertransport)levereraProduktentillnärmasteDistributörmedförebetaldfrakt,idessursprungliga
förpackning eller annan fullgod förpackning som ger likvärdigt skydd. Den Ursprunglige köparen måste kunna visa
inköpsbevisförProduktensomklargörProduktensinköpsdatumvidbegäranavgarantiservice.
Garantiperiodenförallautbyttaoch/ellerrepareradeprodukterunderdennagarantiskallupphöravidutgångenavden
ursprungligaGarantiperioden.
EIZOELLERDISTRIBUTÖRERÄRINTEANSVARIGAFÖRNÅGONFORMAVSKADAELLERFÖRLUSTAVDATA
ELLERANNAN INFORMATION SOM HAR LAGRATS I NÅGON FORMAV MEDIA ELLERANNAN DELAV NÅGON
PRODUKTSOMHARRETURNERATSTILLEIZOELLERDISTRIBUTÖRERFÖRREPARATION.
EIZO OCH DISTRIBUTÖRERNA GARANTERAR INGET, UTTRYCKLIGEN ELLER UNDERFÖRSTÅTT, VAD
BETRÄFFARPRODUKTENOCHDESSKVALITET,PRESTANDA,SÄLJBARHETELLERLÄMPLIGHETFÖRNÅGON
FORMAVSPECIELLANVÄNDNING.UNDERINGAOMSTÄNDIGHETERSKALLEIZOELLERDISTRIBUTÖRERNA
HÅLLASANSVARIGAFÖRNÅGRASOMHELSTUNDERORDNADE,INDIREKTA,SPECIELLA,DÄRAVFÖLJANDE
ELLER ÖVRIGA SKADOR (INKLUSIVE, UTAN BEGRÄNSNING TILL, SKADOR FÖR FÖRLUSTAV INKOMST,
AVBRUTENAFFÄRSRÖRELSE,FÖRLUSTAVAFFÄRSINFORMATIONELLERANNANSÄRSKILDFÖRLUST)SOM
UPPSTÅTT SOM ETT RESULTATAVANVÄNDNING ELLER OFÖRMÅGAATTANVÄNDA PRODUKTEN ELLER I
NÅGON FORMAVANSLUTNINGTILL PRODUKTERNA, VARE SIG DETTA GRUNDAS PÅ KONTRAKT, ÅTALBAR
HANDLING,FÖRSUMLIGHET,ANSVARSSKYLDIGHETELLERANNAT,ÄVENOMEIZOELLERDISTRIBUTÖRERNA
HAR INFORMERATS BETRÄFFANDE MÖJLIGHETATT SÅDANA SKADOR FÖRELIGGER. DETTA UNDANTAG
OMFATTARÄVENALLFORMAVANSVARSSKYLDIGHETSOMKANUPPSTÅGENOMENTREDJEPARTSANSPRÅK
GENTEMOTDENURSPRUNGLIGEKÖPAREN.GRUNDBESTÅNDSDELENIBESTÄMMELSENÄRATTBEGRÄNSA
DETEVENTUELLAANSVARSTAGANDETFÖREIZOOCHDISTRIBUTÖRERNASOMKANUPPSTÅGENOMDENNA
BEGRÄNSADEGARANTIOCH/ELLERFÖRSÄLJNING.
Appendix
53
ΠΕΡΙΟΡΙΣΜΕΝΗ ΕΓΓΥΗΣΗ
ΗEIZONANAOCORPORATION(στοεξής«EIZO»)καιοιδιανομείςπουεξουσιοδοτείηEIZO(στοεξής«Διανομείς»)
παρέχουν εγγύηση, υποκείμενη και σύμφωνα με τους όρους της παρούσας περιορισμένης εγγύησης (στο εξής
«Εγγύηση»),στοναρχικόαγοραστή(στοεξής«Αρχικός Αγοραστής»)οοποίοςαγόρασετοπροϊόνπουκαθορίζεταιστο
παρόνέγγραφο(στοεξής«Προϊόν»)απότηνEIZOήτουςΔιανομείς,ηοποίαεξασφαλίζειότιηEIZOκαιοιΔιανομείς,
σύμφωναμετηδιακριτήευχέρειάτους,είτεθαεπισκευάσουνείτεθααντικαταστήσουντοΠροϊόνχωρίςχρέωσηεάνο
ΑρχικόςΑγοραστής αντιληφθεί εντός της ΠεριόδουΕγγύησης(ορίζεταικατωτέρω)ότιτοΠροϊόνδυσλειτουργείήέχει
υποστείβλάβηκατάτηδιάρκειακανονικήςχρήσηςτουΠροϊόντοςσύμφωναμετηνπεριγραφήστοεγχειρίδιοχρήσηςπου
συνοδεύειτοΠροϊόν(στοεξής«Εγχειρίδιο Χρήστη»).
ΗπερίοδοςτηςπαρούσαςΕγγύησηςείναι(i)πέντε(5)έτηαπότηνημερομηνίααγοράςτουΠροϊόντος,ή,στηλήξητων
(ii)30.000ωρώνχρήσηςτουΠροϊόντος(στοεξής«Περίοδος Εγγύησης»),μετηνπροϋπόθεση,ωστόσο,ότιηΠερίοδος
ΕγγύησηςγιατηνοθόνηLCDτουΠροϊόντοςπεριορίζεταισετρία(3)έτηαπότηνημερομηνίααγοράςτουΠροϊόντος.Η
EIZOκαιοιΔιανομείςδενφέρουνκαμίαευθύνηήυποχρέωσηόσοναφοράτοΠροϊόνσεσχέσημετονΑρχικόΑγοραστή
ήοποιοδήποτετρίτομέρος,ούτεάλληευθύνηδιαφορετικήαπόαυτήνπουπαρέχεταιστηνπαρούσαΕγγύηση.
ΗEIZOκαιοιΔιανομείςθαπαύσουνναδιατηρούνήνααποθηκεύουντυχόνεξαρτήματατουΠροϊόντοςκατόπιντηςλήξης
τωνεπτά(7)ετώνμετάτηδιακοπήτηςπαραγωγήςτέτοιωνεξαρτημάτων.Κατάτηνεπισκευήτηςοθόνης,ηEIZOκαιοι
ΔιανομείςθαχρησιμοποιήσουνανταλλακτικάεπισκευήςπουσυμμορφώνονταιμεταπρότυπάμαςγιατηΔιασφάλιση
Ποιότητας.
Η Εγγύηση ισχύει μόνο σε χώρες ή περιοχές όπου βρίσκονται οιΔιανομείς. Η Εγγύηση δεν περιορίζει οποιαδήποτε
νόμιμαδικαιώματατουΑρχικούΑγοραστή.
ΛαμβανομένηςυπόψηκάθεδιάταξηςτηςπαρούσαςΕγγύησης,ηEIZOκαιοιΔιανομείςδενθαέχουνκαμίααπολύτως
υποχρέωσησύμφωναμετηνπαρούσαΕγγύησησεοποιαδήποτεαπότιςπεριπτώσειςπουδιατυπώνονταικατωτέρω:
(α) ΤυχόνελάττωματουΠροϊόντοςπουπροκαλείταιαπόζημιάκατάτημεταφορά,τροποποίηση,αλλαγή,κατάχρηση,
λανθασμένη χρήση, ατύχημα, λανθασμένη εγκατάσταση,καταστροφή,εσφαλμένησυντήρησηή/καιλανθασμένη
επισκευήαπότρίτομέροςεκτόςτηςEIZOκαιτωνΔιανομέων,
(β) ΤυχόνασυμβατότητατουΠροϊόντοςλόγωπιθανώντεχνικώνκαινοτομιώνή/καικανονισμών,
(γ) Τυχόν επιδείνωση της απόδοσης οθόνης που προκαλείται από τη φθορά αναλώσιμων εξαρτημάτων όπως
της οθόνης LCD ή/και του φωτός υποβάθρου, κτλ. (π.χ. αλλαγές στη φωτεινότητα, αλλαγές στην ομοιομορφία
φωτεινότητας,αλλαγέςστοχρώμα,αλλαγέςστηνομοιομορφίαχρώματος,ελαττώματασεpixelπεριλαμβανομένων
τωνκαμένωνpixel,κτλ.),
(δ) ΤυχόνελάττωματουΠροϊόντοςπουπροκαλείταιαπόεξωτερικόεξοπλισμό,
(ε) ΤυχόνελάττωματουΠροϊόντοςστοοποίοέχειτροποποιηθείήαφαιρεθείογνήσιοςαριθμόςσειράς,
(στ)Τυχόν φυσιολογική φθορά του προϊόντος, ιδιαίτερα αυτής των αναλώσιµων, των αξεσουάρ ή/και των
προσαρτηµάτων(π.χ.κουµπιά,περιστρεφόµεναµέρη,καλώδια,ΕγχειρίδιοΧρήστη,κτλ.),και
(ζ) Τυχόν παραμόρφωση, αποχρωματισμό ή/και διαστρέβλωση του εξωτερικού μέρους του προϊόντος,
περιλαμβανομένηςτηςεπιφάνειαςτηςοθόνηςLCD.
ΟΑρχικόςΑγοραστήςγιαναδικαιούταιυπηρεσίεςεπισκευήςσύμφωναμετηνΕγγύηση,θαπρέπειναπαραδώσειτο
Προϊόν, με πληρωμένα τα μεταφορικά έξοδα, στηναρχικήτουσυσκευασίαήσεάλληεπαρκήσυσκευασίαμεισότιμο
βαθμόπροστασίας,αναλαμβάνονταςτονκίνδυνοβλάβηςή/καιαπώλειαςκατάτημεταφορά,στοντοπικόΔιανομέα.Ο
ΑρχικόςΑγοραστήςότανζητάυπηρεσίεςεπισκευήςσύμφωναμετηνΕγγύηση,θαπρέπειναπροσκομίζειτηναπόδειξη
αγοράςτουΠροϊόντοςκαιτηνημερομηνίατηςαγοράς.
Η Περίοδος Εγγύησης για οποιοδήποτε αντικατεστημένο ή/και επισκευασμένο προϊόν σύμφωνα με την παρούσα
ΕγγύησηλήγειστοτέλοςτηςαρχικήςΠεριόδουΕγγύησης.
Η EIZO Ή ΟΙΔΙΑΝΟΜΕΙΣΔΕΝ ΕΥΘΥΝΟΝΤΑΙ ΓΙΑ ΟΠΟΙΑΔΗΠΟΤΕ ΒΛΑΒΗ ΉΑΠΩΛΕΙΑΔΕΔΟΜΕΝΩΝ ΉΑΛΛΩΝ
ΠΛΗΡΟΦΟΡΙΩΝ ΠΟΥΑΠΟΘΗΚΕΥΟΝΤΑΙ ΣΕ ΟΠΟΙΟΔΗΠΟΤΕ ΜΕΣΟ Ή ΟΠΟΙΟΔΗΠΟΤΕΑΛΛΟ ΜΕΡΟΣ ΣΕ
ΟΠΟΙΟΔΗΠΟΤΕΠΡΟΪΟΝΠΟΥΕΠΙΣΤΡΕΦΕΤΑΙΣΤΗΝEIZOΉΣΕΔΙΑΝΟΜΕΑΓΙΑΕΠΙΣΚΕΥΗ.
Η EIZO ΚΑΙ ΟΙΔΙΑΝΟΜΕΙΣΔΕΝ ΠΑΡΕΧΟΥΝ ΚΑΜΙΑ ΠΕΡΑΙΤΕΡΩ ΕΓΓΥΗΣΗ, ΡΗΤΗ Ή ΣΥΝΕΠΑΓΟΜΕΝΗ, ΟΣΟΝ
ΑΦΟΡΑΤΟ ΠΡΟΪΟΝ ΚΑΙΤΗΝ ΠΟΙΟΤΗΤΑ,ΤΗΝΑΠΟΔΟΣΗ,ΤΗΝ ΕΜΠΟΡΕΥΣΙΜΟΤΗΤΑ ΉΤΗΝ ΚΑΤΑΛΛΗΛΟΤΗΤΑ
ΤΟΥ ΓΙΑ ΟΠΟΙΑΔΗΠΟΤΕ ΣΥΓΚΕΚΡΙΜΕΝΗ ΧΡΗΣΗ. ΣΕ ΚΑΜΙΑ ΠΕΡΙΠΤΩΣΗ Η EIZO Ή ΟΙΔΙΑΝΟΜΕΙΣΔΕΝ
ΘΑ ΕΥΘΥΝΟΝΤΑΙ ΓΙΑ ΚΑΜΙΑΑΠΟΛΥΤΩΣ ΤΥΧΑΙΑ, ΕΜΜΕΣΗ, ΕΙΔΙΚΗ, ΣΥΝΕΠΑΓΟΜΕΝΗ ΉΑΛΛΗ ΒΛΑΒΗ
(ΠΕΡΙΛΑΜΒΑΝΟΜΕΝΩΝ, ΜΕΤΑΞΥΑΛΛΩΝ, ΒΛΑΒΩΝ ΉΑΠΩΛΕΙΑΣ ΚΕΡΔΩΝ,ΔΙΑΚΟΠΗΣ ΕΠΙΧΕΙΡΗΜΑΤΙΚΩΝ
ΔΡΑΣΤΗΡΙΟΤΗΤΩΝ,ΑΠΩΛΕΙΑΣΕΠΙΧΕΙΡΗΜΑΤΙΚΩΝΠΛΗΡΟΦΟΡΙΩΝΉΤΥΧΟΝΑΛΛΗΣΧΡΗΜΑΤΙΚΗΣΑΠΩΛΕΙΑΣ)
ΠΟΥΠΡΟΚΥΠΤΕΙΑΠΟΤΗΧΡΗΣΗΉΤΗΝΑΝΙΚΑΝΟΤΗΤΑΧΡΗΣΗΣΤΟΥΠΡΟΪΟΝΤΟΣΉΤΥΧΟΝΑΛΛΗΣΣΥΝΔΕΣΗΣ
ΜΕΤΟΠΡΟΪΟΝ,ΕΙΤΕΒΑΣΙΖΕΤΑΙΣΕΣΥΜΒΟΛΑΙΟ,ΒΛΑΒΗ,ΑΜΕΛΕΙΑ,ΑΥΣΤΗΡΗΕΥΘΥΝΗΉΕΙΔΑΛΛΩΣ,ΑΚΟΜΗ
ΚΙΕΑΝΗEIZOΉΟΙΔΙΑΝΟΜΕΙΣΕΝΗΜΕΡΩΘΟΥΝΓΙΑΤΗΝΠΙΘΑΝΟΤΗΤΑΤΕΤΟΙΩΝΖΗΜΙΩΝ.ΗΕΞΑΙΡΕΣΗΑΥΤΗ
ΠΕΡΙΛΑΜΒΑΝΕΙ ΕΠΙΣΗΣ ΟΠΟΙΑΔΗΠΟΤΕ ΕΥΘΥΝΗΕΝΔΕΧΕΤΑΙΝΑΠΡΟΚΥΨΕΙΑΠΟΑΞΙΩΣΕΙΣΤΡΙΤΟΥΜΕΡΟΥΣ
ΚΑΤΑΤΟΥΑΡΧΙΚΟΥΑΓΟΡΑΣΤΗ. Η ΟΥΣΙΑΤΟΥΟΡΟΥΑΥΤΟΥΕΙΝΑΙΝΑΠΕΡΙΟΡΙΣΕΙΤΗΝΠΙΘΑΝΗΕΥΘΥΝΗΤΗΣ
EIZOΚΑΙΤΩΝΔΙΑΝΟΜΕΩΝΠΟΥΠΡΟΚΥΠΤΕΙΑΠΟΤΗΝΠΑΡΟΥΣΑΕΓΓΥΗΣΗΉ/ΚΑΙΤΙΣΠΩΛΗΣΕΙΣ.
54
Appendix
ОГРАНИЧЕННАЯ ГАРАНТИЯ
EIZO NANAO CORPORATION (называемая в дальнейшем “EIZO”) и авторизированные EIZO дистрибуторы
(называемые в дальнейшем “Дистрибуторы”) гарантируют, в соответствии с условиями и пунктами этой
ограниченной гарантии (называемой в дальнейшем “Гарантия”), первичному покупателю (называемому в
дальнейшем“Первоначальный покупатель”),которыйприобрелуEIZOилиДистрибуторовпродукт,указанный
в этом документе (называемый в дальнейшем “Продукт”), что EIZO или Дистрибуторы на свое усмотрение
либо бесплатно отремонтируют, либо бесплатно заменят Продукт, если Первоначальный покупатель признает
в пределах Гарантийного срока (определенного ниже), что Продукт неисправен или он поврежден процессе
нормальногоиспользованияпродуктавсоответствиисописаниемвинструкциипоэксплуатации,прилагаемойк
Продукту(называемойвдальнейшем“Руководство пользователя”).
Гарантийныйпериодограниченсроком(i)пять(5)летотдатыприобретенияПродукта,илиограниченсроком(ii)
30 000 часов использования Продукта (называемыйвдальнейшем“Гарантийный период”),приусловии,что
Гарантийный период для панели ЖКД ограничен сроком три (3) года от даты приобретения Продукта. EIZO и
ДистрибуторыненесутникакойответственностиинеберутобязательствотносительноПродуктапоотношениюк
Первоначальномупокупателюилипоотношениюклюбымтретьимсторонам,кромеобязательств,оговоренныхв
этойГарантии.
EIZOиДистрибуторыпрекратятхранениеилискладированиелюбыхдеталейПродуктапоистечениисеми(7)
летпослепрекращенияпроизводстватакихдеталей.ВслучаеремонтамонитораEIZOиДистрибьюторыбудут
использоватьзапчасти,которыесоответствуютнашимстандартамQC(контролькачества).
Гарантия действительна только в странах или регионах, где расположены Дистрибуторы. Гарантия не
ограничиваетникакиезаконныеправаПервоначальногопокупателя.
НесмотрянадругиеусловияэтойГарантииEIZOиДистрибуторыненесутникакихобязательствсогласноэтой
Гарантиивлюбомизперечисленныхнижеслучаев:
(а) Любые дефекты Продукта, вызванные повреждениями при перевозке, модификацией, изменением,
неправильным обращением, неправильным использованием, авариями, неправильной установкой,
стихийнымибедствиями,неправильнымуходоми/илинеправильнымремонтомтретьейстороной,отличной
отEIZOилиДистрибуторов;
(б) Любые несовместимости Продукта из-за технических усовершенствований и/или изменения технических
норм;
(в) Любые ухудшения работы дисплея, вызванные изнашиванием невосстановимых частей, таких как
панельЖКДи/илиподсветкаит.д.(например,изменениевяркости,изменениевравномерностияркости,
изменениевцветности,изменениевравномерностицветности,изменениевпикселах,включаявыгоревшие
пикселыит.д.);
(г) ЛюбыедефектыПродукта,вызванныевнешнимоборудованием;
(д) ЛюбыедефектыПродукта,прикоторыхоригинальныйсерийныйномербылизмененилиудален;
(е) Любые естественные ухудшения продукта, в частности, вызванные износом расходных частей,
принадлежностей и/или приспособлений (например, кнопок, вращающихся частей, кабелей, Руководства
пользователяит.д.);и
(ж) Любые деформации, изменения цвета и/или коробления внешней поверхности продукта, включая
поверхностьпанелиЖКД.
ЧтобыполучитьтехническоеобслуживаниеврамкахГарантии,Первоначальныйпокупательдолжендоставить
ПродуктместномуДистрибутору,оплативперевозку,вегооригинальнойупаковкеиливдругойсоответствующей
упаковке,обеспечивающейравноценнуюстепеньзащиты,принимаявовниманиерискповрежденияи/илиутерю
притранспортировке.ПризапросетехническогообслуживанияврамкахГарантииПервоначальныйпокупатель
долженпредоставитьсвидетельствопокупкипродуктаидатыпокупки.
Гарантийныйпериоддлялюбогозамененногои/илиотремонтированногопродуктаврамкахГарантииистекаетв
концезавершениясрокадействияоригинальногоГарантийногопериода.
EIZO ИЛИ ДИСТРИБУТОРЫ НЕ НЕСУТ ОТВЕТСТВЕННОСТИ ЗА ЛЮБЫЕ ПОВРЕЖДЕНИЯ ИЛИ УТЕРЮ
ДАННЫХИЛИДРУГОЙИНФОРМАЦИИ,ХРАНЯЩИХСЯНАКАКИХ-ЛИБОНОСИТЕЛЯХИНФОРМАЦИИИЛИНА
ЛЮБЫХДРУГИХЧАСТЯХПРОДУКТА,КОТОРЫЙВОЗВРАЩЕНEIZOИЛИДИСТРИБУТОРАМДЛЯРЕМОНТА.
E I Z O  И  Д И СТ Р И БУ ТО Р Ы  Н Е  Д А ЮТ  Н И К А К О Й  Д А Л Ь Н Е Й Ш Е Й  ГА РА Н Т И И ,  В Ы РА Ж Е Н Н О Й  И Л И
ПОДРАЗУМЕВАЕМОЙ, ОТНОСИТЕЛЬНО ПРОДУКТА И ЕГО КАЧЕСТВА, ТЕХНИЧЕСКИХ ХАРАКТЕРИСТИК,
ТОВАРНОСТИ ИЛИ СООТВЕТСТВИЯ ДЛЯ КАКОГО-ЛИБО ОПРЕДЕЛЕННОГО ИСПОЛЬЗОВАНИЯ.    НИ ПРИ
КАКИХ УСЛОВИЯХ EIZO ИЛИ ДИСТРИБУТОРЫ НЕ НЕСУТ ОТВЕТСТВЕННОСТИ ЗА ЛЮБОЙ СЛУЧАЙНЫЙ,
КОСВЕННЫЙ,СПЕЦИАЛЬНЫЙ,ПОБОЧНЫЙИЛИИНОЙУЩЕРБ(ВКЛЮЧАЯ,БЕЗОГРАНИЧЕНИЙ,УЩЕРБИЗЗА НЕПОЛУЧЕННОЙ ПРИБЫЛИ, ПРЕРЫВАНИЯ БИЗНЕСА, ПОТЕРИ КОММЕРЧЕСКОЙ ИНФОРМАЦИИ ИЛИ
ЛЮБЫЕ ДРУГИЕ ФИНАНСОВЫЕ ПОТЕРИ), ВОЗНИКШИЙ ИЗ-ЗА ИСПОЛЬЗОВАНИЯ ИЛИ НЕВОЗМОЖНОСТИ
ИСПОЛЬЗОВАТЬ ПРОДУКТ ИЛИ В ЛЮБОЙ ДРУГОЙ СВЯЗИ С ПРОДУКТОМ, ЛИБО ОСНОВАННЫЙ НА
КОНТРАКТНЫХ ОТНОШЕНИЯХ, ГРАЖДАНСКИХ ПРАВОНАРУШЕНИЯХ, НЕБРЕЖНОСТИ, ПРИЧИНЕНИЯ
УЩЕРБА ТРЕТЬЕЙ СТОРОНЕ ИЛИ ЧЕМ-ЛИБО ЕЩЕ, ДАЖЕ ЕСЛИ EIZO ИЛИ ДИСТРИБУТОРЫ БЫЛИ
УВЕДОМЛЕНЫ О ВОЗМОЖНОСТИ ТАКОГО УЩЕРБА. ЭТО ИСКЛЮЧЕНИЕ ТАКЖЕ ВКЛЮЧАЕТ ЛЮБЫЕ
ОБЯЗАТЕЛЬСТВА, КОТОРЫЕ МОГУТ ВОЗНИКНУТЬ В РЕЗУЛЬТАТЕ ТРЕБОВАНИЙ ТРЕТЬЕЙ СТОРОНЫ
В ОТНОШЕНИИ ПЕРВОНАЧАЛЬНОГО ПОКУПАТЕЛЯ. СУЩЕСТВОМ ЭТОГО ПОЛОЖЕНИЯ ЯВЛЯЕТСЯ
ОГРАНИЧЕНИЕ ПОТЕНЦИАЛЬНОЙ ОТВЕТСТВЕННОСТИ EIZO И ДИСТРИБУТОРОВ, ВОЗНИКАЮЩЕЙ ИЗ-ЗА
ЭТОЙОГРАНИЧЕННОЙГАРАНТИИИ/ИЛИПРОДАЖ.
Appendix
55
有限责任保证书
EIZONANAO 有限公司(以下简称 EIZO )和 EIZO 授权的经销商(以下简称 经销商 ),接受并依照本有限责任保证书
(以下简称 保证书 )之条款,向从 EIZO 和经销商购买本文中所规定产品(以下简称 产品 )的原买方(以下称 原买方 )
提供保证 :在保证期内(规定如下),如果原买方发现按本产品所附使用说明书(以下简称 用户手册 )所述方式正常使
用本产品过程中,本产品出现故障或损坏,EIZO 和经销商根据其独自的判断免费修理或更换该产品。
本保证期限定为 (i) 自本产品购买之日起的五 (5) 年期间或限定为到达(ii)使用本产品 3万小时的期限
,
(以下简称 保证期限 )
但本产品的液晶显示屏(LCD)的保证期限定为自本产品购买之日起的三 (3) 年期间。EIZO和经销商将不向原买方或任何
第三方承担本保证书所规定之外的与本产品有关的任何责任或义务。
本产品的任何部件停产七 (7) 年后,EIZO 和经销商将不再保留或保管任何这类部件。维修显示器时,EIZO 与经销商将使
用符合我方质量控制标准的替换零件。
本保证书仅对于设有经销商的国家或地区有效。本保证书并不限定原买方的任何法律权利。
无论本保证书的任何其他条款如何规定,对于任何下列情况之一,EIZO 和经销商将不承担本保证书规定责任 :
(a) 由于运输损害、改装、改动、滥用、误用、意外事故、错误安装、灾害、维护不善和 / 或由除 EIZO 和经销商以外的
第三方进行不适当的修理造成本产品的任何故障。
(b) 由于可能发生的技术变更和 / 或调整造成本产品的任何不兼容性。
(c) 由于诸如液晶显示屏(LCD)和 / 或背灯等消耗品部件的老化造成的任何显示性能低劣(如亮度变化、亮度均一性变化、
色彩变化、色彩均一性变化、如烧伤像素等像素缺陷)。
(d) 因外部设备造成本产品的任何故障。
(e) 因本产品的原序号被改变或消除造成本产品的任何故障。
(f) 本产品的任何正常老化,尤其是消耗品、附件和 / 或附加装置(如按钮、旋转部件、电缆、用户手册等)、以及
(g) 本产品表面包括液晶显示屏(LCD)表面的任何变形、变色和 / 翘曲。
为了获得本保证书规定的服务,原买方必须使用原包装或其他具有同等保护程度的适当包装将本产品运送到当地的经销商,
并且预付运费,承担运输中的损坏和 / 或损失的风险。要求提供本保证书规定的服务时,原买方必须提交购买本产品和标
明此购买日期的证明。
按本保证书规定进行了更换和 / 或修理的任何产品的保证期限,将在原保证期限结束时终止。
在返回给 EIZO 和经销商进行修理后,任何产品的任何媒体或任何部件中储存的数据或其他信息发生任何损坏或损失,对
此 EIZO 和经销商将不承担责任。
对于本产品及其质量、性能、可销售性以及对于特殊用途的适合性,EIZO 和经销商不提供其他任何明示或暗示的保证。因
使用本产品或无法使用本产品或因与本产品有任何关系(无论是否根据合同)而造成 : 任何附带的、间接的、特殊的、随
之发生的或其他的损害(包括但不仅限于:利润损失、业务中断、业务信息丢失或其他任何金钱损失)以及侵权行为、过失、
严格赔偿责任或其他责任,即使已经向 EIZO 和经销商提出了发生这些损害的可能性,对此 EIZO 和经销商概不承担责任。
本免责条款还包括因第三方向原买方提出索赔而可能发生的任何责任。本条款的本质是限定由于本有限责任保证书和 / 或
销售本产品所发生的 EIZO 和经销商的潜在责任。
56
Appendix
China Measures for RoHS Compliance in ChinaRoHS
关于电子信息产品污染控制标识
本标识根据「电子信息产品污染控制管理办法」,适用于在中华人民共和国销售的电子信息产品。标识中央的
数字为环保使用期限的年数。只要您遵守该产品相关的安全及使用注意事项,在自制造日起算的年限内,不会
产生对环境污染或人体及财产的影响。上述标识粘贴在机器背面。
• 有毒有害物质或元素的名称及含量
部件名称
有毒有害物质或元素
铅
汞
镉
六价铬
多溴联苯
多溴二苯醚
(Pb)
(Hg)
(Cd)
(Cr(VI))
(PBB)
(PBDE)
印刷电路板
×
○
○
○
○
○
机箱
○
○
○
○
○
○
液晶显示器
×
×
○
○
○
○
其他
×
○
○
○
○
○
○ :表示该有毒有害物质在该部件所有均质材料中的含量均在 SJ/T 11363-2006 规定的限量要求以下。
× :表示该有毒有害物质至少在该部件的某一均质材料中的含量超出 SJ/T 11363-2006 规定的限量要求。
( 企业可在此处 , 根据实际情況对上表中打“×” 的技术原因进行进一步说明 )
Appendix
57