1
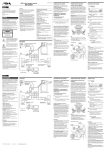
OPERATING INSTRUCTIONS
INSTRUCCIONES DE MANEJO
MODE D’EMPLOI
CSD-NS1
DIGITAL AUDIO SYSTEM
SISTEMA DE AUDIO DIGITAL
SYSTÈME AUDIO-NUMÉRIQUE
English : See page 2.
8B-CH1-903-01
010325ACK-I-IN
En
Español : Ver la página 14.
E
Français : Voir page 26.
F
U
WARNING
TO REDUCE THE RISK OF FIRE OR ELECTRIC
SHOCK, DO NOT EXPOSE THIS APPLIANCE TO
RAIN OR MOISTURE.
3
CAUTION
4
RISK OF ELECTRIC SHOCK
DO NOT OPEN
“CAUTION:TO REDUCE THE RISK OF
ELECTRIC SHOCK,
DO NOT REMOVE COVER (OR BACK).
NO USER-SERVICEABLE PARTS INSIDE.
REFER SERVICING TO QUALIFIED
SERVICE PERSONNEL.”
Explanation of Graphical Symbols:
The lightning flash with arrowhead symbol,
within an equilateral triangle, is intended
to alert the user to the presence of
uninsulated “dangerous voltage” within the
product’s enclosure that may be of
sufficient magnitude to constitute a risk of
electric shock to persons.
5
6
7
The exclamation point within an
equilateral triangle is intended to alert the
user to the presence of important
operating and maintenance (servicing)
instructions in the literature accompanying
the appliance.
OWNER’S RECORD
For your convenience, record the model number (you
will find it at the bottom of the unit) and serial number
(you will find it on the rear of the unit) in the space
provided below. Please refer to them when you contact
your AIWA dealer in case of difficulty.
Model No.
Serial No.
Precautions
Read the Operating Instructions carefully and
completely before operating the unit. Be sure to keep
the Operating Instructions for future reference. All
warnings and cautions in the Operating Instructions and
on the unit should be strictly followed, as well as the
safety suggestions below.
Installation
1 Water and moisture - Do not use this unit near
water, such as near a bathtub, washbowl, kitchen
sink, laundry tub, in a wet basement, swimming pool,
or the like.
2 Heat - Do not use this unit near sources of heat,
including heating vents, stoves, or other appliances
that generate heat.
2
ENGLISH
8
It also should not be placed in temperatures less
than 5°C (41°F) or greater than 35°C (95°F).
Mounting surface - Place the unit on a flat, even
surface.
Ventilation - The unit should be situated with
adequate space around it so that proper heat
ventilation is assured.
Allow 10 cm (4 in.) clearance from the rear and the
top of the unit and 5 cm (2 in.) from each side.
- Do not place the unit on a bed, rug, or similar
surface that may block the ventilation openings.
- Do not install the unit in a bookcase, cabinet, or
airtight rack where ventilation may be impeded.
Objects and liquid entry - Take care that objects or
liquids do not get inside the unit through the
ventilation openings.
Carts and stands - When placed or
mounted on a stand or cart, the unit
should be moved with care.
Quick stops, excessive force, and
uneven surfaces may cause the unit
or cart to overturn or fall.
Condensation - Moisture may form on the CD
pickup lens when:
- The unit is moved from a cold spot to a warm spot
- The heating system has just been turned on
- The unit is used in a very humid room
- The unit is cooled by an air conditioner
When this unit has condensation inside, it may not
function normally. Should this occur, leave the unit
for a few hours, then try to operate again.
Wall or ceiling mounting - The unit should not be
mounted on a wall or ceiling, unless specified in the
Operating Instructions.
Electric Power
1 Power sources - Use on AC house current, as
specified in the Operating Instructions and marked
on the unit.
2 Polarization - As a safety feature, some units are
equipped with polarized AC power plugs which can
only be inserted one way into a power outlet. If it is
difficult or impossible to insert the AC power plug
into an outlet, turn the plug over and try again. If it
still does not easily insert into the outlet, please call
a qualified service technician to service or replace
the outlet. To avoid defeating the safety feature of
the polarized plug, do not force it into a power outlet.
3 AC power cord
- When disconnecting the AC power cord, pull it out
by the AC power plug. Do not pull the cord itself.
- Never handle the AC power plug with wet hands,
as this could result in fire or shock.
- Power cords should be firmly secured to avoid
being bent, pinched, or walked upon. Pay
particular attention to the cord from the unit to the
power socket.
- Avoid overloading AC outlets and extension cords
beyond their capacity, as this could result in fire or
shock.
Specifications
4 Extension cord - To help prevent electric shock, do
not use a polarized AC power plug with an extension
cord, receptacle, or other outlet unless the polarized
plug can be completely inserted to prevent exposure
of the blades of the plug.
5 When not in use - Unplug the AC power cord from
the AC outlet or remove all the batteries if the unit
will not be used for several months or more. When
the cord is plugged in, a small amount of current
continues to flow to the unit, even when the power is
turned off.
Tuner section
Outdoor Antenna
Disc – Compact disc / Scanning method – Non-contact
optical scanner (semiconductor laser)
1 Power lines - When connecting an outdoor antenna,
make sure it is located away from power lines.
2 Outdoor antenna grounding - Be sure the antenna
system is properly grounded to provide protection
against unexpected voltage surges or static
electricity build-up. Article 810 of the National
Electrical Code, ANSI/NFPA 70, provides
information on proper grounding of the mast,
supporting structure, and the lead-in wire to the
antenna discharge unit, as well as the size of the
grounding unit, connection to grounding terminals,
and requirements for grounding terminals
themselves.
Antenna Grounding According to the National Electrical Code
ANTENNA LEAD IN WIRE
GROUND CLAMP
ELECTRIC
SERVICE
EQUIPMENT
ANTENNA DISCHARGE
UNIT
(NEC SECTION 810-20)
Frequency range, antenna – FM: 87.5 - 108.0 MHz,
Rod antenna, FM antenna terminal: 75 ohms
(unbalanced). AM: 530/531 - 1,710/1,602 kHz (10/9 kHz
step), AM loop antenna.
Deck section
Track format – 4 tracks, 2 channels / Frequency range
– Normal tape: 50 - 12,500 Hz (EIAJ) / Recording
system – AC bias / Erasing system – AC erase / Heads
– Recording/playback head (1), Erasure head (1)
CD player section
General
Speaker – 100 mm cone type (2) / Output –
Headphones jack (stereo mini-jack) / Power output –
10 W + 10 W (EIAJ, 4 ohms, T.H.D. 10%) / Power
requirements – AC 120 V, 60 Hz / Power consumption –
40 W / Power consumption in standby mode – With
ECO mode on: 1.2 W, With ECO mode off: 9.4 W /
Dimensions (W × H × D) – 482 × 168 × 231 mm (19 ×
6 5/8 × 9 1/8 in.) / Weight – 6.7 kg (14 lbs. 12 oz.) /
Accessories – Remote control (1), AC cord (1), AM loop
antenna (1)
Specifications and external appearance are subject to
change without notice.
En
COPYRIGHT
Please check the copyright laws relating to
recordings from disc, radio or external tape for the
country in which the machine is being used.
GROUNDING
CONDUCTORS
(NEC SECTION 810-21)
GROUND CLAMPS
POWER SERVICE GROUNDING
ELECTRODE SYSTEM
(NEC ART 250 PART H)
NEC-NATIONAL ELECTRICAL CODE
Maintenance
Clean the unit only as recommended in the Operating
Instructions.
Damage Requiring Service
Have the units serviced by a qualified service
technician if:
- The AC power cord or plug has been damaged
- Foreign objects or liquid have got inside the unit
- The unit has been exposed to rain or water
- The unit does not seem to operate normally
- The unit exhibits a marked change in performance
- The unit has been dropped, or the cabinet has been
damaged
DO NOT ATTEMPT TO SERVICE THE UNIT
YOURSELF.
If an erroneous display or malfunction occurs
Turn off the unit and press POWER 6STANDBY/ON
while pressing s.
If the unit cannot be reset in the way above, disconnect
the AC cord to turn off the display.
Leave the unit for a while and turn the power back on.
ENGLISH
3
Power supply
Using on AC house current
Connecting antennas
Connect the AM loop antenna to the AM LOOP
terminals on the rear of the unit. Keep the antenna
away from metallic objects, electrical equipment and
cords.
Connect the AC cord as illustrated below.
supplied AC cord
1 to the AC inlet of
the unit
2 to an AC outlet
(AC 120 V, 60 Hz)
The rated voltage of the unit is 120 V AC.
CAUTION
Use only the supplied AC cord. Use with other cords
may result in the risk of fire.
Power economizing (ECO) mode
ECO
Setting the unit to the ECO mode reduces the power
consumption while the unit is turned off (standby).
• When the clock is set for the first time, the ECO mode
is automatically activated.
• In the ECO mode, everything on the display goes out
and only the POWER 6STANDBY indicator lights up.
To cancel the ECO mode
Press ECO while the power is off.
The clock is always displayed while the power is off.
To restore the ECO mode, repeat the above.
Power consumption in standby mode
with ECO mode on: 1.2 W
with ECO mode off: 9.4 W
4
ENGLISH
For better FM reception, connect an outdoor antenna to
the FM 75 Ω terminals.
Remote control
Setting the clock
Insert two R6 (size AA) batteries.
POWER
6STANDBY
indicator
3
1
2
s
3
r, t
R6 (AA)
• When the reach of the remote control signal is less
than 5 meters (16 feet), replace the batteries.
• Remove the batteries if the remote control is not
going to be used for a long time.
a
r, t
The remote control may not operate correctly
when:
- The unit is exposed to intense light, such as direct
sunlight
- Objects block the remote control signal to the unit
s
When the AC cord is connected for the first time, the
clock display flashes. Set the time.
To use the buttons on the remote control
Buttons on the remote control and the main unit with
identical or similar indications have the same functions.
1
To turn the power on
2
“5” flashes in the display.
To turn the power off
3
Press POWER to turn off the display.
En
Press ENTER or a to complete the
setting.
The clock starts from 00 seconds.
To use the FUNCTION button
Each time FUNCTION is pressed while the power is on,
the function is selected cyclically.
TAPE
Turn VOLUME/TIMER to adjust the clock.
r or t is also available. Holding it down
changes the time in 20-minute units.
Press POWER to turn on the display.
CD
Press TIMER.
TUNER
NOTE
When the clock is set for the first time, everything on
the display goes out and the POWER 6STANDBY
indicator lights up. This is because the power
economizing mode is automatically activated. The
power economizing mode can be cancelled (see page
4).
To display the current time
FUNCTION
POWER
Press TIMER.
To cancel the clock display while the power is on, press
it three times or one of the function buttons. While the
power is off in the power economizing mode, press
TIMER again.
To switch to the 12/24-hour standard
Press TIMER to display the clock and press s.
In the 12-hour standard, “AM 12:00” indicates midnight
and “PM 12:00” indicates noon.
If the clock display flashes while the power is off
This is caused by a power interruption. Reset the clock.
A long power interruption will clear all the memories
such as preset stations and timer settings.
ENGLISH
5
POWER
6STANDBY/ ON
d PLAY / DIR / PRESET
s
VOLUME/ TIMER
T-BASS,
QSURROUND,
3-MODE EQ
a PAUSE / SET
r, t
TUNER / BAND
PHONES
A
1
TUNER OPERATION
Press * TUNER/BAND repeatedly to
select the desired band.
FM
AM
The power is turned on and the previously tuned
station is received.
* or BAND on the remote control
Press MODE on the remote control so that “MONO” is
displayed.
Noise is reduced, although reception is monaural.
To change the AM tuning interval
After listening, press POWER 6STANDBY/ON to
turn the power off.
The default setting of the AM tuning interval is 10 kHz/
step. If you use the unit in an area where the frequency
allocation system is 9 kHz/step, change the interval as
follows.
1 Press TUNER/BAND.
2 Press POWER 6STANDBY/ON while pressing
TUNER/BAND.
When the AM tuning interval is changed, the preset
stations are cleared.
For better reception
NOTE
2
Press r, t (TUNING f -, + g)
to select a station.
During FM stereo reception, “STEREO” is
displayed.
FM
AM
Extend the rod antenna
and orient it for the best
reception.
Rotate the AM loop
antenna to find the best
reception.
• When connecting an FM outdoor antenna, see
“Connecting antennas” on page 4.
For quick tuning (Auto Search)
Keep r, t pressed until the tuner starts
searching for a station. When a station is tuned to, the
search stops.
If the broadcast signal is weak, it does not stop. To
stop the search manually, press r or t.
To listen with the headphones
Connect headphones with a stereo mini plug to the
PHONES jack.
6
When an FM stereo broadcast contains noise
ENGLISH
If the unit picks up noise from other electrical
appliances nearby, like a TV or fluorescent lights, move
the unit.
DISPLAY
0-9, +10
SOUND ADJUSTMENT
MODE
Volume or tone adjustment does not affect
recording.
EQ
VOLUME k, i
BAND
c PLAY
a PAUSE
r, t
s
VOLUME/TIMER (VOLUME)
Turn VOLUME/TIMER, or press VOLUME k or i
on the remote control. The volume level is
displayed as a number 0 to 25 (MAX).
• The volume level is automatically set to 14 if the
power is turned off when the volume level is set
to 15 or more.
• Pressing DISPLAY on the remote control
displays the adjusted volume level.
* 3-MODE EQ (equalizer)
PRESETTING STATIONS
You can preset up to 15 stations in each band.
1
2
Select a station.
Press * a PAUSE/SET once so that
“MEMO” flashes to store the station.
A station is assigned a preset number, beginning
from 1 in consecutive order for each band.
Frequency
Press 3-MODE EQ repeatedly until the desired
mode is displayed.
The equalizer mode changes to ROCK, POP, JAZZ
or no equalization, cyclically.
ROCK - Emphasizes the high and low range of
music.
POP - Emphasizes voice and midrange of music.
JAZZ - Emphasizes the low range of music.
* or EQ on the remote control
T-BASS system
The T-BASS system enhances the realism of lowfrequency sound.
Press T-BASS to turn it on or off.
En
QSURROUND system
Preset number
* or a PAUSE on the remote control
3
Repeat steps 1 and 2.
The next station will not be stored if a total of 15
preset stations have already been stored for a
band.
To listen to preset stations
The QSURROUND system built into this unit uses
only two speakers at the left and right to create an
atmosphere that sounds as if you are surrounded
by two front speakers and two rear speakers.
Press QSURROUND to turn it on or off.
• The QSURROUND system does not work for
monaural sources.
• At higher volumes, turning QSURROUND on
may cause sound distortion. In this case, make
the volume down.
Select a band then press d PLAY/DIR/PRESET
repeatedly.
c PLAY on the remote control is also available.
To select a preset number directly with the
remote control
Press the numbered buttons 0-9 and +10.
Example:
To select number 15, press +10 and 5.
To select number 10, press +10 and 0.
To clear a preset station
Select the preset number first. Press s, and press a
within 4 seconds.
The higher numbers in the band are decreased by one.
ENGLISH
7
POWER
6STANDBY/ ON
d PLAY / DIR / PRESET
CD
s STOP/ CLEAR
a PAUSE / SET
CD OPEN/
CLOSE
r, t
B
1
CD OPERATION
Press CD.
The power is turned on.
2
Press CD OPEN/CLOSE to open the disc
compartment. Set a disc with the printed
side up, then press CD OPEN/CLOSE to
close the disc compartment.
Total number of tracks and total playing time are
displayed. It will take about 15 seconds when
loading a CD-RW disc.
3
Press d PLAY/DIR/PRESET to start
play.
The number of the track being played and elapsed
playing time are displayed.
To remove the disc
Open the disc compartment. Pick up the disc, holding
its edge, while pressing the center pivot gently.
s STOP/CLEAR – Stops play.
a PAUSE/SET – Pauses play. To resume play, press
again.
r,t – Searches for a particular point during
playback. Hold down r or t and then release
it.
– Skips to the beginning of a track. Press r or
t repeatedly.
8
ENGLISH
To start play when the power is off, press CD. The
power is turned on and play of the loaded disc begins
(Direct Play Function).
To select a track directly with the remote control,
press the numbered buttons 0-9 and +10. CD play
starts from the selected track and continues to the last
track.
Example:
To select number 25, press +10, +10 and 5.
To select number 10, press +10 and 0.
After listening, press POWER 6STANDBY/ON to turn
the power off.
NOTE
• Do not use irregular shape CDs (example: heartshaped, octagonal ones).
It may result in malfunctions.
• Do not place more than one disc in the disc
compartment.
• Do not touch the lens. Doing so may cause
malfunctions.
• The unit may not play a CD-R/RW disc that is
recorded on personal computers or some kinds of
CD-R/RW recorders because of differences in
recording platforms.
• Do not attach any seal or label to either side (the
recordable side or the labeled side) of a CD-R/RW
disc. It may cause malfunction.
• When loading an unrecorded CD-R/RW disc, you
may not open the disc compartment immediately after
pressing CD OPEN/CLOSE. Wait for a while.
0-9, +10
REPEAT
c PLAY
MODE
a PAUSE
r, t
s STOP
REPEAT, RANDOM PLAY
PROGRAMMED PLAY
A single track or all tracks can be played repeatedly,
and all the tracks randomly. Random play can be
repeated as well.
Operate with the remote control.
Up to 30 tracks can be programmed from the disc.
Operate with the remote control.
1
In stop mode, press MODE repeatedly
until “MEMO” flashes in the display.
Repeat play
2
Press the numbered buttons 0-9 and +10
to program a track.
Press REPEAT repeatedly to select
or
.
: Repeats all the tracks.
: Repeats a single track. Select a track with r or
t.
To cancel, press the button repeatedly so that
disappears.
Example:
To select the 12th track, press +10 and 2.
To select the 20th track, press +10, +10 and 0.
Program number
En
Total playing time of
the selected tracks
Random play
In stop mode, press MODE once so that “RANDOM” is
displayed.
To cancel, press MODE twice in stop mode.
Selected track number
NOTE
• During random play, you cannot skip back to the
previous track with r.
• When selecting a track with the numbered buttons,
random play is canceled.
3
4
Total number of the
selected tracks
Repeat step 2 to program other tracks.
Press c PLAY to start play.
To check the program, press r or t in stop
mode.
To clear the program, press s or MODE once in stop
mode so that “MEMO” disappears in the display.
To add tracks to the program, repeat step 2 in stop
mode. The track will be programmed after the last track.
To change the programmed tracks, clear the
program and repeat all the steps again.
NOTE
The total playing time of the selected tracks will be
displayed as “--:--” .
- When it exceeds “99:59”.
- When a track number 31 or higher is selected.
ENGLISH
9
d PLAY / DIR / PRESET
s STOP/ CLEAR
TAPE / REV MODE
a PAUSE / SET
w REC / REC MUTE
TAPE
OPEN / CLOSE
r, t
C
TAPE OPERATION
To change the playback side, press d during play.
x : Plays the side facing up.
c : Plays the opposite side.
Use Type I (normal) tapes only.
PLAYBACK
1
Press TAPE/REV MODE.
The power is turned on.
If the tape has been inserted, play begins.
2
Press TAPE OPEN/CLOSE to open the
cassette compartment and load a tape
with the exposed side facing forward.
To select a reverse mode, press TAPE/REV MODE
repeatedly.
: Plays one side only.
: Plays both sides once. Play stops at the end of
the reverse side.
: Plays both sides repeatedly.
To set the tape counter to “0000”
Press s in stop mode. The counter is also set to
“0000” when opening the cassette compartment.
Press TAPE OPEN/CLOSE to close the
compartment.
3
Press d PLAY/DIR/PRESET to start
playback.
Reverse mode
Tape counter
Playback side of
the tape
s STOP/CLEAR – Stops play.
a PAUSE/SET – Pauses play. To resume play,
press again.
r/t – Rewinds/ fast forwards. To stop the
winding, press s.
After listening, press POWER 6STANDBY/ON to
turn the power off.
10
ENGLISH
c PLAY
a PAUSE
r, t
s STOP
RECORDING
1
Load a tape with the side to be recorded
on facing up and the exposed side facing
forward.
2
Press TAPE/REV MODE to select the
reverse mode.
: Records on one side only.
or
: Records on both sides. Check that
x is displayed, so as to start recording from the
side facing up.
3
Get ready to record from the source.
To record from a CD, press CD and load the disc.
To record from a radio broadcast, press TUNER/
BAND and tune to a station.
4
To insert blank spaces
When recording from the radio, 4-second blank spaces
can be inserted. These spaces are useful to locate the
desired portion on the tape when playing back on other
units with the “Music Sensor” function.
1 Press w REC/REC MUTE in recording or recording
pause mode.
“REC” indicator flashes quickly and the tape runs
without recording for 4 seconds, then pauses.
2 Press a to resume recording.
To make blank spaces less than 4 seconds, press a
while “REC” flashes quickly.
To make blank spaces more than 4 seconds, press
w again after the tape pauses.
Press w REC/REC MUTE to start
recording.
“REC” flashes on the display.
When the selected function is CD, CD play and
recording starts simultaneously.
To record only the selected tracks of a CD
1 Follow steps 1 to 3 of PROGRAMMED PLAY on
page 9 to program tracks.
2 Press w.
To stop recording, press s. To stop CD play, press it
again.
To pause recording (only when the source is TUNER),
press a. To resume, press it again.
To erase recording, press TAPE/REV MODE and
press w.
After recording, press POWER 6STANDBY/ON to
turn the power off.
To prevent accidental erasure
Break off the plastic tabs on the cassette tape with a
screwdriver or other pointed tool after recording.
To record on the tape again
Cover the tab openings with adhesive tape, etc.
Side A
Tab for side A
ENGLISH
11
En
VOLUME/ TIMER
TAPE / REV MODE,
TUNER/ BAND,
CD
ENTER
a
SLEEP
TIMER
r, t
D
TIMER OPERATION
TIMER PLAYBACK/RECORDING
NOTE
The unit can be turned on at a specified time every
day with the built-in timer.
Make sure the clock is set correctly.
• If you use the unit after setting the timer, repeat steps
6 and 7.
• Timer recording is available only when the source is
TUNER.
1
To check the timer setting
2
Press TIMER twice for timer play or three
times for timer recording so that “5” or
“5 REC” flashes in the display.
Turn VOLUME/TIMER to specify the
timer-on time.
1 Press TIMER twice or three time.
The timer-on time is displayed.
2 Press ENTER.
The timer-activated period is displayed.
3 Press ENTER to restore the display.
r or t is also available. Holding it down
changes the time in 20-minute units.
To cancel the timer standby mode
Press TIMER repeatedly so that “5” or “5 REC”
disappears.
To reset the timer
Repeat all the steps above.
Timer-on time
3
4
Press ENTER or a.
Turn VOLUME/TIMER to specify the
timer-activated period.
The time changes between 5 and 180 minutes in
5-minute units. r or t is also available.
5
6
Press ENTER or a.
Prepare the source.
To listen to a CD, press CD and load the disc.
To listen to a tape, press TAPE/REV MODE and
load the tape.
To listen to a radio broadcast, press TUNER/
BAND and tune to the desired station.
To record from a radio broadcast, press
TUNER/BAND and tune to the desired station, and
load the tape to be recorded on.
7
Adjust the volume and tone, then turn off
the unit.
The unit turns on with the selected source at the
specified timer-on time, and turns off after the
specified timer-activated period.
12
ENGLISH
Maintenance
To clean the cabinet
a
Use a soft cloth lightly moistened with mild
detergent solution. Do not use strong solvents
such as alcohol, benzine or thinner.
To clean the heads
r, t
SETTING THE SLEEP TIMER
The unit can be turned off automatically at a specified
time.
1
2
Press SLEEP.
Within 4 seconds, turn VOLUME/TIMER to
specify the timer-activated period.
The time changes between 5 and 180 minutes in
5-minute units. r or t is also available.
When the tape heads are dirty;
- high frequency sound is not emitted
- the sound is not adequately high
- the sound is off-balance
- the tape cannot be erased
- the tape cannot be recorded on
After every 10 hours of use, clean the tape heads
with a head cleaning cassette.
Use separately sold dry-type or wet-type cleaning
cassette.
Refer to the instructions of the cleaning cassette
for details.
To clean the lens
Lens
Use a cotton swab
slightly moistened with
cleaning fluid. Wipe
gently from the center
to the edge.
En
To check the remaining timer-activated period
Press SLEEP once. The remaining time until the power
is turned off is displayed for 4 seconds.
To cancel the sleep timer
Press SLEEP twice so that “OFF” is displayed.
Simple sleep timer setting
Press SLEEP while the power is off. The unit is turned
on with the last function, and the sleep timer is
automatically turned on with the 30-minute setting.
Select the function, if needed, and start playback.
ENGLISH
13
NOTE
This equipment has been tested and found to comply
with the limits for a Class B digital device, pursuant to
Part 15 of the FCC Rules. These limits are designed to
provide reasonable protection against harmful
interference in a residential installation.
This equipment generates, uses, and can radiate radio
frequency energy and, if not installed and used in
accordance with the instructions, may cause harmful
interference to radio communications. However, there is
no guarantee that interference will not occur in a
particular installation. If this equipment does cause
harmful interference to radio or television reception,
which can be determined by turning the equipment off
and on, the user is encouraged to try to correct the
interference by one or more of the following measures:
... Reorient or relocate the receiving antenna.
... Increase the separation between the equipment and
receiver.
... Connect the equipment into an outlet on a circuit
different from that to which the receiver is connected.
... Consult the dealer or an experienced radio/TV
technician for help.
CAUTION
Modifications or adjustments to this product, which are
not expressly approved by the manufacturer, may void
the user’s right or authority to operate this product.
Printed in Indonesia