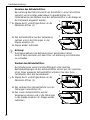
1
SANTO Z 9 18 42-4 i
Benutzerinformation
User Manual
Kühlschrank
Refrigerator
Verehrter Kunde!
Vielen Dank, dass Sie sich für eines unserer Qualitätsprodukte entschieden haben.
Dieses Gerät bietet Ihnen eine perfekte Synthese aus funktionellem Design und wegweisender Spitzentechnologie.
Überzeugen Sie sich selbst von dem Entwicklungsvorsprung unserer Produkte, die
bei Leistungsfähigkeit und Bedienung eine absolute Spitzenposition einnehmen.
Besonderer Wert wurde zudem auf so wichtige Aspekte wie Umweltfreundlichkeit
und Energieersparnis gelegt, die integraler Bestandteil aller unserer Produkte sind.
Lesen Sie dieses Bedienhandbuch aufmerksam durch, um Ihr Gerät optimal und über
lange Zeit zuverlässig nutzen und alle Bedienvorgänge korrekt und Zeit sparend ausführen zu können.
Bewahren Sie das Handbuch zur späteren Bezugnahme an einem sicheren Ort auf
und händigen Sie es im Verkaufsfall dem zukünftigen Besitzer aus.
Wir wünschen Ihnen viel Freude mit Ihrem neuen Gerät.
Folgende Symbolen werden im Text verwendet:
wichtige Hinweise für Ihre Sicherheit oder für die Funktionsfähigkeit des Gerätes
Hinweise und praktische Tipps
Umweltinformationen
2
Inhaltsverzeichnis
Sicherheit . . . . . . . . . . . . . . . . . . . . . . . . . . . . . . . . . . . . . . . . . . . . . . . . . . . . 4
Entsorgung . . . . . . . . . . . . . . . . . . . . . . . . . . . . . . . . . . . . . . . . . . . . . . . . . . . 6
Information zur Geräteverpackung / Entsorgung von Altgeräten. . . . . . . . . 6
Transportschutz entfernen. . . . . . . . . . . . . . . . . . . . . . . . . . . . . . . . . . . . . . . 7
Aufstellen . . . . . . . . . . . . . . . . . . . . . . . . . . . . . . . . . . . . . . . . . . . . . . . . . . . . 7
Aufstellort. . . . . . . . . . . . . . . . . . . . . . . . . . . . . . . . . . . . . . . . . . . . . . . . . . . . . . . 7
Ihr Kältegerät braucht Luft . . . . . . . . . . . . . . . . . . . . . . . . . . . . . . . . . . . . . . . . 8
Türanschlag wechseln . . . . . . . . . . . . . . . . . . . . . . . . . . . . . . . . . . . . . . . . . . . . . 8
Elektrischer Anschluss . . . . . . . . . . . . . . . . . . . . . . . . . . . . . . . . . . . . . . . . . . . . . 9
Bedienblende / Tasten zur Temperatureinstellung . . . . . . . . . . . . . . . . . . . . 10
Temperaturanzeige . . . . . . . . . . . . . . . . . . . . . . . . . . . . . . . . . . . . . . . . . . . . . . 11
Luftfilter . . . . . . . . . . . . . . . . . . . . . . . . . . . . . . . . . . . . . . . . . . . . . . . . . . . . . . . 11
Vor Inbetriebnahme . . . . . . . . . . . . . . . . . . . . . . . . . . . . . . . . . . . . . . . . . . . 13
Inbetriebnahme - Temperatur einstellen . . . . . . . . . . . . . . . . . . . . . . . . . 13
TURBO COOLMATIC/FROSTMATIC . . . . . . . . . . . . . . . . . . . . . . . . . . . . . . . . 14
TURBO COOLMATIC-Taste . . . . . . . . . . . . . . . . . . . . . . . . . . . . . . . . . . . . . . . . . 14
FROSTMATIC-Taste . . . . . . . . . . . . . . . . . . . . . . . . . . . . . . . . . . . . . . . . . . . . . . 15
Gerät abschalten . . . . . . . . . . . . . . . . . . . . . . . . . . . . . . . . . . . . . . . . . . . . . 15
Innenausstattung. . . . . . . . . . . . . . . . . . . . . . . . . . . . . . . . . . . . . . . . . . . . . 16
Abstellflächen / Variable Innentür / Flaschenhalter . . . . . . . . . . . . . . . . . . . 16
LONGFRESH 0°C Kaltraum . . . . . . . . . . . . . . . . . . . . . . . . . . . . . . . . . . . . . .17
Feuchte einstellen . . . . . . . . . . . . . . . . . . . . . . . . . . . . . . . . . . . . . . . . . . . . . . 17
Schubladen. . . . . . . . . . . . . . . . . . . . . . . . . . . . . . . . . . . . . . . . . . . . . . . . . . . . . 18
Richtig lagern. . . . . . . . . . . . . . . . . . . . . . . . . . . . . . . . . . . . . . . . . . . . . . . . 18
Einfrieren und Tiefkühllagern . . . . . . . . . . . . . . . . . . . . . . . . . . . . . . . . . . . 21
Eiswürfel bereiten . . . . . . . . . . . . . . . . . . . . . . . . . . . . . . . . . . . . . . . . . . . . 23
Abtauen . . . . . . . . . . . . . . . . . . . . . . . . . . . . . . . . . . . . . . . . . . . . . . . . . . . . 23
Der Kühlraum taut automatisch ab. . . . . . . . . . . . . . . . . . . . . . . . . . . . . . . . . 23
Gefrierfach abtauen . . . . . . . . . . . . . . . . . . . . . . . . . . . . . . . . . . . . . . . . . . . . . 23
Reinigung und Pflege . . . . . . . . . . . . . . . . . . . . . . . . . . . . . . . . . . . . . . . . . 25
Tipps für Energie-Einsparung . . . . . . . . . . . . . . . . . . . . . . . . . . . . . . . . . . . 26
Was tun, wenn ... . . . . . . . . . . . . . . . . . . . . . . . . . . . . . . . . . . . . . . . . . . . . . 26
Abhilfe bei Störungen. . . . . . . . . . . . . . . . . . . . . . . . . . . . . . . . . . . . . . . . . . . . 26
Lampe auswechseln . . . . . . . . . . . . . . . . . . . . . . . . . . . . . . . . . . . . . . . . . . . . . . 27
Betriebsgeräusche . . . . . . . . . . . . . . . . . . . . . . . . . . . . . . . . . . . . . . . . . . . . 28
Bestimmungen, Normen, Richtlinien . . . . . . . . . . . . . . . . . . . . . . . . . . . . . 28
Fachbegriffe . . . . . . . . . . . . . . . . . . . . . . . . . . . . . . . . . . . . . . . . . . . . . . . . . 29
3
Sicherheit
4
Die Sicherheit unserer Kältegeräte entspricht den anerkannten Regeln
der Technik und dem Gerätesicherheitsgesetz. Dennoch sehen wir uns
veranlasst, Sie mit folgenden Sicherheitshinweisen vertraut zu machen:
Bestimmungsgemäße Verwendung
• Das Kältegerät ist für die Verwendung im Haushalt bestimmt. Es eignet sich zum Kühlen, Einfrieren und Tiefkühllagern von
Lebensmitteln sowie zur Eisbereitung. Wird das Gerät zweckentfremdet oder falsch bedient, kann vom Hersteller keine Haftung für eventuelle Schäden übernommen werden.
• Umbauten oder Veränderungen am Kältegerät sind aus Sicherheitsgründen nicht zulässig.
• Sollten Sie das Kältegerät gewerblich oder für andere Zwecke als
zum Kühlen, Tiefkühllagern und Einfrieren von Lebensmitteln benutzen, beachten Sie bitte die für Ihren Bereich gültigen gesetzlichen
Bestimmungen.
Vor der ersten Inbetriebnahme
• Überprüfen Sie das Kältegerät auf Transportschäden. Ein beschädigtes Gerät auf keinen Fall anschließen! Wenden Sie sich im Schadensfall bitte an den Lieferanten.
• Prüfen, dass das Gerät nach der Installation nicht auf dem Netzkabel
steht. Wichtig: wenn die Netzanschlussleitung dieses Gerätes
beschädigt wird, muss sie durch den Hersteller oder seinen
Kundendienst oder eine ähnlich qualifizierte Person ersetzt werden,
um Gefährdungen zu vermeiden.
• Kältemittel
Das Gerät enthält im Kältemittelkreislauf das Kältemittel Isobutan
(R600a), ein Naturgas mit hoher Umweltverträglichkeit, das jedoch
brennbar ist.
• Warnung - Achten Sie beim Transportieren und Aufstellen des Gerätes
darauf, dass keine Teile des Kältemittelkreislaufs beschädigt werden.
• Bei Beschädigung des Kältemittelkreislaufs:
– offenes Feuer und Zündquellen unbedingt vermeiden;
– den Raum, in dem das Gerät steht, gut durchlüften.
Sicherheit von Kindern
• Verpackungsteile (z. B. Folien, Styropor) können für Kinder gefährlich
sein. Erstickungsgefahr! Verpackungsmaterial von Kindern fernhalten!
• Ausgediente Altgeräte bitte vor der Entsorgung unbrauchbar
machen. Netzstecker ziehen, Netzkabel durchtrennen, eventuell vorhandene Schnapp- oder Riegelschlösser entfernen oder zerstören.
Dadurch verhindern Sie, dass sich spielende Kinder im Gerät einsperren (Erstickungsgefahr!) oder in andere lebensgefährliche Situationen
geraten.
Sicherheit
• Das Gerät darf von Kindern und Personen, deren physische, sensorische
oder geistige Fähigkeiten sowie Mangel an Erfahrung und Kenntnissen
einen sicheren Gebrauch des Gerätes ausschließen, nur unter Aufsicht oder
nach entsprechender Einweisung durch eine Person benutzt werden, die
sicherstellt, dass sie sich den Gefahren des Gebrauchs bewusst sind. Kinder
sind zu beaufsichtigen, sodass sie nicht am Gerät spielen können!
Im Alltagsbetrieb
• Behälter mit brennbaren Gasen oder Flüssigkeiten können durch Kälteeinwirkung undicht werden. Explosionsgefahr! Lagern Sie keine
Behälter mit brennbaren Stoffen, wie z.B. Spraydosen, FeuerzeugNachfüllkartuschen etc. im Kältegerät.
• Flaschen und Dosen dürfen nicht in das Gefrierfach. Sie können
springen, wenn der Inhalt gefriert - bei kohlensäurehaltigem Inhalt
sogar explodieren! Legen Sie nie Limonaden, Säfte, Bier, Wein, Sekt
usw. in das Gefrierfach. Ausnahme: Hochprozentige Spirituosen können im Gefrierfach gelagert werden.
• Speiseeis und Eiswürfel nicht unmittelbar aus dem Gefrierfach in den
Mund nehmen. Sehr kaltes Eis kann an Lippen oder Zunge festfrieren
und Verletzungen verursachen.
• Tiefkühlgut nicht mit nassen Händen berühren. Die Hände könnten
daran festfrieren.
• Warnung - Keine Elektrogeräte (z. B. elektrische Eismaschinen,
Rührgeräte etc.) im Kältegerät betreiben.
• Warnung - Um die Funktion des Gerätes nicht zu beeinträchtigen,
dürfen die Lüftungsöffnungen der Geräteverkleidungen oder des
Aufbaus von Einbaumöbeln nicht abgedeckt oder zugestellt werden.
• Warnung - Um den Abtauvorgang zu beschleunigen, keine mechanischen oder künstlichen Hilfsmittel verwenden, als die vom Hersteller
empfohlenen.
• Vor Reinigungsarbeiten das Gerät grundsätzlich abschalten und den
Netzstecker ziehen oder Sicherung in der Wohnung abschalten bzw.
herausdrehen.
• Netzstecker immer am Stecker aus der Steckdose ziehen, nie am Kabel.
Im Störungsfall
• Sollte einmal eine Störung am Gerät auftreten, sehen Sie bitte zuerst
in dieser Gebrauchsanweisung unter "Was tun, wenn ..." nach. Falls
die dort aufgeführten Hinweise nicht weiterhelfen, führen Sie bitte
keine weiteren Arbeiten selbst aus.
• Kältegeräte dürfen nur von Fachkräften repariert werden. Durch
unsachgemäße Reparaturen können erhebliche Gefahren entstehen.
Wenden Sie sich im Reparaturfall bitte an Ihren Fachhändler oder an
unseren Kundendienst.
5
Entsorgung
Information zur Geräteverpackung
Entsorgen Sie das Verpackungsmaterial Ihres Gerätes sachgerecht. Alle
verwendeten Verpackungsmaterialien sind umweltverträglich und wiederverwertbar.
Zu den Werkstoffen: Die Kunststoffe können auch wiederverwertet
werden und sind folgendermaßen gekennzeichnet:
>PE< für Polyäthylen, z. B. bei der äußeren Hülle und den Beuteln im
Innern.
>PS< für geschäumtes Polystyrol, z. B. bei den Polsterteilen, grundsätzlich FCKW-frei.
Die Kartonteile werden aus Altpapier hergestellt und sollten auch wieder zur Altpapiersammlung gegeben werden.
Entsorgung von Altgeräten
Aus Umweltschutzgründen müssen Kältegeräte fachgerecht entsorgt
werden. Dies gilt für Ihr bisheriges Gerät und - nachdem es eines Tages
ausgedient hat - auch für Ihr neues Gerät.
Warnung! Ausgediente Altgeräte bitte vor der Entsorgung unbrauchbar machen. Netzstecker ziehen, Netzkabel durchtrennen, eventuell
vorhandene Schnapp- oder Riegelschlösser entfernen oder zerstören.
Dadurch verhindern Sie, dass sich spielende Kinder im Gerät einsperren
(Erstickungsgefahr!) oder in andere lebensgefährliche Situationen geraten.
Entsorgungshinweise:
• Das Gerät darf nicht mit dem Haus- oder Sperrmüll entsorgt werden.
• Der Kältemittelkreislauf, insbesondere der Wärmetauscher an der
Geräterückseite, darf nicht beschädigt werden.
• Das Symbol
auf dem Produkt oder seiner Verpackung weist darauf hin, dass dieses Produkt nicht als normaler Haushaltsabfall zu
behandeln ist, sondern an einem Sammelpunkt für das Recycling von
elektrischen und elektronischen Geräten abgegeben werden muss.
Durch Ihren Beitrag zum korrekten Entsorgen dieses Produkts schützen Sie die Umwelt und die Gesundheit Ihrer Mitmenschen. Umwelt
und Gesundheit werden durch falsches Entsorgen gefährdet. Weitere
Informationen über das Recycling dieses Produkts erhalten Sie von
Ihrem Rathaus, Ihrer Müllabfuhr oder dem Geschäft, in dem Sie das
Produkt gekauft haben.
6
Transportschutz entfernen
Das Gerät sowie Teile der Innenausstattung sind für den Transport
geschützt.
1. Klebebänder links und rechts an den Türaußenseiten abziehen.
2. Alle Klebebänder sowie Polsterteile aus dem Geräteinnenraum entfernen.
☞
Aufstellen
Aufstellort
Das Gerät soll in einem gut belüfteten und trockenen Raum stehen.
Die Umgebungstemperatur wirkt sich auf den Stromverbrauch und die
einwandfreie Funktion des Gerätes aus.
Daher sollte das Gerät
– nicht direkter Sonneneinstrahlung ausgesetzt sein;
– nicht an Heizkörpern, neben einem Herd oder sonstigen
Wärmequellen stehen;
– nur an einem Ort stehen, dessen Umgebungstemperatur der Klimaklasse entspricht, für die das Gerät ausgelegt ist.
Die Klimaklasse finden Sie auf dem Typschild, das sich links im Innenraum des Gerätes befindet.
Nachstehende Tabelle zeigt, welche Umgebungstemperatur welcher
Klimaklasse zugeordnet ist:
Klimaklasse
für Umgebungstemperatur von
SN
+10 bis +32 °C
N
+16 bis +32 °C
ST
+18 bis +38 °C
T
+18 bis +43 °C
7
Aufstellen
Direkter Einbau unter einem Kochfeld ist nicht zulässig. Die teilweise
hohen Abstrahlungstemperaturen des Kochfeldes können das Gerät
beschädigen.
Wird in der Nähe ein Kochfeld eingebaut, sind die zugehörigen Einbauund Schutzvorschriften zu beachten. Durch die Vielzahl der möglichen
Einbausituationen können hier keine detailierten Angaben erfolgen.
Eine Erwärmung des Kältegerätes ist durch ausreichenden Abstand und
Einbringung einer geeigneten Wärmeschutzplatte zu verhindern. Die
ordnungsgemäße Be- und Entlüftung des Kältegerätes muss gewährleistet sein.
Ihr Kühlgerät braucht Luft
Aus Gründen der Betriebssicherheit
muß eine Mindestbelüftung gewährleistet sein, wie aus der Abb. hervorgeht:
Achtung:
Die Lüftungs-Öffnungen müssen
immer saubergehalten werden. Damit
die Luft zirkulieren kann, die
Lüftungsöffnungen niemals abdecken
oder verstellen.
50 mm
min.
200 cm
2
min.
200 cm2
D567
Türanschlag wechseln
Zur Transportsicherung wurde die Gerätetür an beiden Anschlagseiten mit
Scharnierstiften befestigt. Je nach Türanschlag, Scharnierstift auf einer Seite
oben und unten entfernen.
Warnung! Während des Türanschlagwechsels darf das Gerät nicht am
Stromnetz angeschlossen sein. Vorher Netzstecker ziehen.
Nischenmaße
Höhe
Tiefe
Breite
8
1780 mm
550 mm
560 mm
Aufstellen
Elektrischer Anschluss
☞
Für den elektrischen Anschluss ist eine vorschriftsmäßig installierte
Schutzkontakt-Steckdose erforderlich. Sie sollte so gesetzt sein, dass
ein Ziehen des Netzsteckers möglich ist.
Die zum Anschluss des Gerätes nötige Schutzkontakt-Steckdose muss
oberhalb des Einbau-Schrankes sitzen.
Die elektrische Absicherung muss mindestens 10/16 Ampere betragen.
Ist die Steckdose bei eingebautem Gerät nicht mehr zugänglich, muss
eine geeignete Maßnahme in der Elektroinstallation sicherstellen, dass
das Gerät vom Netz getrennt werden kann (z. B. Sicherung, LSSchalter, Fehlerstrom-Schutzschalter oder dergleichen mit einer
Kontaktöffnungsweite von min. 3 mm).
Vor Inbetriebnahme am Typschild des Gerätes überprüfen, ob
Anschlußspannung und Stromart mit den Werten des Stromnetzes am
Aufstellort übereinstimmen.
Z. B.: AC 230 ... 240 V
50 Hz oder
230 ... 240 V
~ 50 Hz
(d. h. 230 bis 240 Volt Wechselstrom, 50 Hertz)
Das Typschild befindet sich links im Innenraum des Gerätes.
9
Gerätebeschreibung
Bedienblende
1
2
3
4
5
6
Betriebskontrollanzeige (grün)
Taste KÜHLEN EIN/AUS
Taste zur Temperatureinstellung (für wärmere Temperaturen)
Temperaturanzeige
Taste zur Temperatureinstellung (für kältere Temperaturen)
Anzeige für eingeschaltete FROSTMATIC-Funktion (gelb)
• FROSTMATIC für schnelles Einfrieren im Gefrierfach
7 Taste FROSTMATIC
8 Anzeige für eingeschaltete TURBO COOLMATIC-Funktion (gelb)
• TURBO COOLMATIC für Intensivkühlen im Kühlraum
9 Taste TURBO COOLMATIC
Tasten zur Temperatureinstellung
Die Temperatureinstellung erfolgt durch die
Tasten “+” (WÄRMER) und “-” (KÄLTER).
Die Tasten stehen in Verbindung mit der Temperaturanzeige.
• Durch Druck auf eine der beiden Tasten WÄRMER oder KÄLTER wird
die Temperaturanzeige von der IST-Temperatur (Temperaturanzeige
leuchtet) auf die SOLL-Temperatur (Temperaturanzeige blinkt) umgeschaltet.
• Mit jedem weiteren Druck auf eine der beiden Tasten wird die SOLLTemperatur um 1°C weiter gestellt.
• Wird keine Taste gedrückt, schaltet die Temperaturanzeige nach kurzer Zeit (ca. 5 sec.) automatisch wieder auf die IST-Temperatur
zurück.
SOLL-Temperatur bedeutet:
Die Temperatur, die im Kühlraum vorhanden sein soll. Die SOLLTemperatur wird durch blinkende Zahlen angezeigt.
10
Gerätebeschreibung
IST-Temperatur bedeutet:
Die Temperaturanzeige zeigt die Temperatur an, die momentan
tatsächlich im Kühlraum vorhanden ist. Die IST-Temperatur wird durch
leuchtende Zahlen angezeigt.
Temperaturanzeige
Die Temperaturanzeige kann mehrere Informationen
anzeigen.
• Bei normalem Betrieb wird die Temperatur angezeigt, die momentan
im Kühlraum vorhanden ist (IST-Temperatur).
• Während der Temperatureinstellung wird blinkend die im Moment
eingestellte Kühlraumtemperatur angezeigt (SOLL-Temperatur).
• Erkennt die Elektronik des Gerätes einen technischen Defekt wird
statt der Temperatur ein Quadrat angezeigt.
Das Gerät arbeitet in einem Notprogramm bis der Kundendienst die
Reparatur durchgeführt hat.
Achtung: Es ist normal, dass die Temperaturanzeige die tatsächliche
Temperatur etwas zeitverzögert anzeigt.
Luftfilter
In der Rückwand des Kühlraumes
befindet sich ein Aktivkohlefilter
(„CLEAN AIR CONTROL“).
Durch den Filter wird im Kühl- und
im LONGFRESH 0°C Kaltraum durch
Bindung unangenehmer Gerüche die
Luft gereinigt und damit die Lagerqualität zusätzlich verbessert.
Hinweis: Der Aktivkohlefilter ist ein Verschleißteil und fällt nicht unter
die Garantieleistungen.
11
Gerätebeschreibung
Einsetzen des Aktivkohlefilters
Bei Lieferung des Kühlschranks ist der Kohlefilter in einer Schutzfolie
verpackt, um eine lange Lebensdauer zu gewährleisten. Vor
Inbetriebnahme des Gerätes muss der Aktivkohlefilter in die Klappe an
der Rückwand eingesetzt werden.
1
1. Klappe durch vorsichtiges Ziehen an der
Oberkante öffnen (1).
☞
2. Den Aktivkohlefilter aus der Verpackung
nehmen und in die Führungen in der
Klappe einsetzen (2).
3. Klappe wieder zudrücken.
2
Achtung!
Die Klappe während des Betriebes immer geschlossen halten!
Vorsicht beim Hantieren mit dem Filter, um Ablösung von Kohleteilen
zu vermeiden.
Wechsel des Aktivkohlefilters
Zur Erhaltung der vollen Funktionsfähigkeit unter üblichen
Betriebsbedingungen ist der Aktivkohlefilter einmal pro Jahr auszutauschen. Einen passender Aktivkohlefilter erhaltern Sie über Ihren
Fachhändler oder den Kundendienst.
1
1. Klappe durch vorsichtiges Ziehen an der
Oberkante öffnen (1).
☞
2. Den verbrauchten Aktivkohlefilter aus den
Führungen herausziehen (2).
3. Den neuen Aktivkohlefilter aus der
Verpackung nehmen und in die Führungen
in der Klappe einsetzen (2). Klappe wieder
zudrücken.
12
2
Vor Inbetriebnahme
Geräteinnere und alle Ausstattungsteile bitte vor
☞ Das
Erstinbetriebnahme reinigen (siehe Abschnitt "Reinigung und Pflege").
Wartezeit
Zur wartungsfreien Dauerschmierung befindet sich in der Kapsel des
Motorkompressors Öl. Durch Schräglage beim Transport kann dieses Öl
in das geschlossene Rohrsystem gelangen. Es läuft selbst wieder in die
Kapsel zurück, wenn mit dem Einschalten des Gerätes ca.1 Stunde
gewartet wird.
Inbetriebnahme - Temperatur einstellen
☞1. Netzstecker in die Steckdose stecken.
2. Taste KÜHLEN EIN/AUS drücken.
Die grüne Betriebskontrollanzeige leuchtet.
3. Auf eine der Tasten “+” (WÄRMER) oder “-” (KÄLTER) drücken.
Die Temperaturanzeige schaltet um und zeigt blinkend die momentan
eingestellte SOLL-Temperatur an.
4. Gewünschte Temperatur durch Drücken der Tasten WÄRMER und
KÄLTER einstellen (siehe Abschnitt "Tasten zur Temperatureinstellung").
Die Temperaturanzeige zeigt sofort die geänderte Einstellung an.
Mit jedem Tastendruck wird die Temperatur um 1°C weitergestellt.
Einstellbarer Temperaturbereich: +3°C bis +8°C.
Aus ernährungswissenschaftlicher Sicht ist +5 °C für den Kühlraum
und -18°C für das Gefrierfach als ausreichend kalte Lagertemperatur
anzusehen.
5. Wenn nach erfolgter Temperatureinstellung die Tasten nicht mehr
gedrückt werden, schaltet die Temperaturanzeige nach kurzer Zeit (ca.
5 sec.) um und zeigt wieder die momentan im Kühlraum vorhandene
IST-Temperatur an. Die Anzeige wechselt von blinkenden zu leuchtenden Ziffern.
Der Kompressor startet und läuft dann automatisch.
Hinweis: Bei Änderung der Einstellung läuft der Kompressor nicht
sofort an, wenn gerade automatisch abgetaut wird.
Da die Lagertemperatur im Kühlraum schnell erreicht wird, können Sie
gleich nach dem Einschalten Kühlgut einlagern.
13
Im LONGFRESH 0°C Kaltraum wird die Temperatur automatisch geregelt. Sie bleibt konstant nahe 0°C, eine Einstellung ist nicht erforderlich.
Hinweis: Ihr Gerät ist mit einer dynamischen Umluftkühlung ausgestattet. Für eine optimale Anpassung an die erforderliche Kühlleistung
im Kühlabteil und im LONGFRESH 0°C Kaltraum wird der Ventilator in
verschiedenen Leistungsstufen betrieben. Daraus ergeben sich unterschiedlich wahrnehmbare Ventilatorgeräusche in Bezug auf
Einschaltdauer und Drehzahl. Dies ist normal und stellt keine
Unregelmäßigkeit oder Defekt dar.
TURBO COOLMATIC/FROSTMATIC
Achtung: Die Funktionen TURBO COOLMATIC und FROSTMATIC können
nicht gleichzeitig eingeschaltet werden.
TURBO COOLMATIC-Taste
Die TURBO COOLMATIC-Funktion eignet sich zum
schnellen Abkühlen größerer Kühlgutmengen im
Kühlraum, z. B. Getränke, Salate anläßlich einer Party.
Drücken der Taste TURBO COOLMATIC wird die TURBO COOLMA☞1. Durch
TIC-Funktion eingeschaltet. Die gelbe Anzeige leuchtet.
Die TURBO COOLMATIC-Funktion sorgt jetzt für intensives Kühlen.
Dabei wird automatisch eine SOLL-Temperatur von +3°C vorgegeben.
Nach Ablauf von 6 Stunden wird die TURBO COOLMATIC-Funktion
selbsttätig beendet. Die ursprünglich eingestellte SOLL-Temperatur ist
dann wieder maßgebend und die Temperaturanzeige zeigt die momentane Kühlraumtemperatur.
2. Durch erneutes Drücken der Taste TURBO COOLMATIC kann die TURBO
COOLMATIC-Funktion jederzeit manuell beendet werden. Die gelbe
Anzeige erlischt.
14
FROSTMATIC-Taste
Die FROSTMATIC-Funktion beschleunigt das Einfrieren
frischer Lebensmittel und schützt gleichzeitig die bereits
eingelagerte Ware vor unerwünschter Erwärmung.
Drücken der Taste FROSTMATIC wird die FROSTMATIC-Funktion
☞1. Durch
eingeschaltet. Die gelbe Anzeige leuchtet.
Wird die FROSTMATIC-Funktion nicht manuell beendet, schaltet die
Elektronik des Gerätes die FROSTMATIC-Funktion nach 52 Stunden ab.
Die gelbe Anzeige erlischt.
2. Durch erneutes Drücken der Taste FROSTMATIC kann die FROSTMATICFunktion jederzeit manuell beendet werden. Die gelbe Anzeige erlischt.
Gerät abschalten
Zum Schutz des Kühl- und Gefriergutes ist das Gerät gegen versehentliches Abschalten gesichert.
Zum Abschalten die Taste EIN/AUS ca. 5 Sekunden gedrückt halten. In
der Temperaturanzeige erfolgt ein sogenannter "Count down", dabei
wird rückwärts von "3" nach "1" gezählt. Nach Erreichen der "1" schaltet das Gerät ab. Die Anzeigen erlöschen.
Hinweis: Die Einstellung des Geräts kann bei gezogenem Netzstecker
oder fehlender Stromversorgung nicht geändert werden. Nach
Anschluss an das Stromnetz nimmt das Gerät wieder den Zustand an,
den es bei Netzunterbrechung hatte.
Soll das Gerät für längere Zeit außer Betrieb genommen werden:
1. Gerät abschalten, dazu die Taste KÜHLEN EIN/AUS drücken, bis die
Anzeigen erlöschen (siehe oben).
2. Netzstecker ziehen oder Sicherung abschalten bzw. herausdrehen.
3. Gefrierfach abtauen und Gerät gründlich reinigen (siehe Abschnitt
"Reinigung und Pflege").
4. Tür anschließend geöffnet lassen, um Geruchsbildung zu vermeiden.
☞
☞
15
Innenausstattung
Abstellflächen
Auf der Abstellfläche über dem LONGFRESH 0°C Kaltraum können Sie
Dosen und Flaschen bequem liegend lagern. Die Struktur der Fläche
verhindert hierbei ein seitliches Wegrollen der Flaschen.
Die übrigen Abstellflächen sind höhenverstellbar:
1. Dazu die Abstellfläche soweit nach
vorne ziehen, bis sie sich nach oben
oder unten abschwenken und herausnehmen läßt.
2. Das Einsetzen in eine andere Höhe
bitte in umgekehrter Reihenfolge
vornehmen.
☞
☞
Hohes Kühlgut einstellen:
Die vordere Hälfte der zweiteiligen
Glasabstellfläche herausnehmen und in
eine andere Ebene einschieben.
Dadurch gewinnen Sie Raum, um auf
der darunterliegenden Abstellfläche
hohes Kühlgut abzustellen.
Variable Innentür
Je nach Erfordernis kann das Türabstellfach nach oben herausgenommen und in andere Aufnahmen umgesetzt werden.
Flaschenhalter
Im Flaschenfach ist ein Flaschenhalter eingesetzt. Er dient als Kippschutz für einzelne Flaschen und ist seitlich verschiebbar.
16
LONGFRESH 0°C Kaltraum
Im LONGFRESH 0°C Kaltraum wird die Temperatur automatisch geregelt. Sie bleibt konstant nahe 0°C, eine Einstellung ist nicht erforderlich.
Die Lagertemperatur konstant nahe 0°C und die relative
Luftfeuchtigkeit zwischen 45 und 90 % ermöglichen für die verschiedenen Lebensmittel optimale Bedingungen.
Im LONGFRESH 0°C Kaltraum können deshalb verschiedene frische
Lebensmittel bis zu 3 mal länger bei besserer Qualität im Vergleich zur
Lagerung im normalen Kühlfach gelagert werden.
Dadurch erweitert sich Ihre Vorratshaltung für frische Lebensmittel.
Geschmack, Frischegrad, Genuss- und Nährwerte (Vitamine und
Mineralstoffe) bleiben in hohem Maße erhalten. Ein Gewichtsverlust
von Gemüse und Obst verringert sich. Die Ernährung kann ernährungsphysiologisch hochwertiger erfolgen.
Das LONGFRESH 0°C Kaltraum ist auch für das langsame Auftauen von
Lebensmitteln geeignet. In diesem Fall sind die aufgetauten
Lebensmittel bis zu zwei Tage im LONGFRESH 0°C Kaltraum haltbar.
Feuchte einstellen
Die beiden unteren Schubladen
können entsprechend den
gewünschten Lagerbedingungen
jede unabhängig von einander mit
niedrigerer oder höherer
Luftfeuchtigkeit genutzt werden.
Die Einstellung erfolgt für jede
Schublade getrennt durch Betätigung der Schieber in der
Schubladenfront.
• „Trocken“: niedrige relative Luftfeuchtigkeit von weinger als 50%
Eine niedrige relative Luftfeuchtigkeit wird erreicht wenn beide
Schieber in die Position
geschoben werden und die Luftschlitze
vollständig geöffnet sind.
• „Feucht“: hohe relative Luftfeuchtigkeit von bis zu 90%
Eine relative Luftfeuchtigkeit von bis zu 90% wird abhängig von der
Beladung erreicht wenn beide Schieber in die Position
geschoben werden und die Luftschlitze vollständig geschlossen sind.
17
Schubladen
In dieser Scublade ist die
Luftfeuchtigkeit nicht regelbar.
Die Gitterfächer im Inneren
der Schublade sorgen für
eine einwandfreie Lüftung.
Diese werden für eine optimale Erhaltung der
Lebensmittel sorgen.
Richtig lagern
Der Kühlraum ist mit einem Ventilator ausgestattet, der ein schnelles
Abkühlen der Nahrungsmittel und eine gleichmäßige
Temperaturverteilung sowohl im Kühlraum als auch im 0° LONGFRESH
Kaltraum ermöglicht.
Im Kühlraum lagern Sie:
- Getränke, Konserven, Dosen, Flaschen;
- Backwaren, fertige Speisen;
- für den kurzfristigen Verbrauch bestimmten Waren;
- die für den LONGFRESH 0°C Kaltraum nicht geeigneten
kälteempfindlichen Lebensmittel.
Tipps:
• Keine warmen Speisen oder offenen Flüssigkeiten in den Kühlschrank
stellen.
18
Richtig lagern
• Lebensmittel so einlagern, dass die Luft frei zirkulieren kann.
• Butter und für den Verzehr bestimmten Käse im Butter-/Käsefach
aufbewahren, dies bewahrt die Streichfähigkeit und das Aroma.
• Lebensmittel, insbesondere grünen Salat immer abgedeckt oder verpackt lagern um Austrocknung und Geruchs- oder
Geschmacksübertragung auf anderes Kühlgut zu vermeiden.
Zum Verpacken eignen sich:
– Frischhaltebeutel und -folien aus Polyäthylen;
– Kunststoffbehälter mit Deckel;
– Spezielle Hauben aus Kunststoff mit Gummizug;
– Aluminiumfolie.
• Hochprozentigen Alkohol nur dicht verschlossen und stehend lagern.
• Lagern Sie keine Behälter mit brennbaren oder explosiven Stoffen im
Kühlschrank.
Im LONGFRESH 0°C Kaltraum lagern Sie alle hierfür geeigneten
Lebensmittel.
Richtwerte für die Lagerdauer für frische Lebensmittel
Lebensmittel
Zwiebeln
Butter
Schweinefleisch in größeren Portionen
Rindfleisch, Wild,
Schweinefleisch kleingeschnitten, Geflügel
Tomatensauce
Fisch, Schalentiere,
Krustentiere,
Gekochte Fleischprodukte
Gekochte Fischprodukte
Bei Lagerung
“trocken”
“trocken”
“trocken”
“trocken”
“trocken”
“trocken”
“trocken”
Lagerdauer
bis 5 Monate
bis 1 Monat
bis 10 Tage
bis 7 Tage
bis 4 Tage
bis 3 Tage
bis 2 Tage
19
Richtig Lagern
Lebensmittel
Salate, Gemüse
Karotten, Küchenkräuter,
Rosenkohl, Sellerie
Artischocken, Blumenkohl,
Chicoree, Eisbergsalat,
Endiviensalat, Feldsalat,
Kopfsalat, Lauch,
Radicchiosalat
Brokkoli, Chinakohl,
Grünkohl, Kohlkopf,
Radieschen, Wirsing
Erbsen, Kohlrabi
Bei Lagerung
“feucht”
“feucht”
“feucht”
“feucht”
Lauchzwiebeln, Rettich,
Spargel, Spinat
“feucht”
Obst (*)
Birnen, Datteln (frisch),
Erdbeeren, Pfirsiche (*)
“feucht”
Äpfel (kälteunempfindlich),
Quitten
“feucht”
Pflaumen (*), Rhabarber,
Stachelbeeren
“feucht”
Aprikosen, Kirschen
Zwetschgen, Trauben
Brombeeren,
Johannisbeeren
Feigen (frisch)
Heidelbeeren, Himbeeren
“feucht”
“feucht”
“feucht”
“feucht”
“feucht”
Lagerdauer
bis 1 Monat
bis 21 Tage
bis 14 Tage
bis 10 Tage
bis 7 Tage
bis 1 Monat
bis 20 Tage
bis 21 Tage
bis 14 Tage
bis 10 Tage
bis 8 Tage
bis 7 Tage
bis 5 Tage
(*) Je reifer die Früchten sind, desto kürzer ist ihre Haltbarkeit.
Torten mit Sahne und andere Konditoreiprodukte lassen sich im
LONGFRESH 0°C Kaltraum optimal 2 oder 3 Tage aufbewahren.
20
Nicht in das LONGFRESH 0°C Kaltraum gehören:
• kälteempfindliche Südfrüchte und Obst, die bei Keller- oder
Raumtemperatur gelagert werden, wie Ananas, Bananen, Grapefruit,
Melonen, Mango, Papaya, Orangen, Zitronen, Kiwi.
• Die nicht oben genannten Lebensmittel sind im normalen Kühlfach
aufzubewahren (z.B. alle Sorten Käse, Aufschnitte, usw.).
Eine hohe Luftfeuchtigkeit in den Schubladen ist abhängig von dem
Feuchtegehalt der eingelegten Lebensmittel wie Salat, Gemüse oder
Obst und von der Häufigkeit des Türöffnens.
Das LONGFRESH 0°C Kaltraum ist auch für das langsame Auftauen von
Lebensmitteln geeignet. In diesem Fall sind die aufgetauten
Lebensmittel bis zu zwei Tage im LONGFRESH 0°C Kaltraum haltbar.
Tipps:
• Achten Sie beim Einkaufen auf die Frische der Lebensmittel. Qualität
und Frischegrad sind entscheidend für die Lagerdauer.
• Tierische Lebensmittel immer verpackt und trocken lagern.
• Beachten Sie, dass eiweißreichere Lebensmittel schneller verderben.
So verderben z.B. Schalen- und Krustentiere schneller als Fisch und
Fisch wiederum schneller als Fleisch. Durch Lagerung im 0°C Fach
kann auch bei diesen Lebensmitteln die Lagerdauer ohne qualitative
Einbußen bis zum 3-fachen verlängert werden.
• Alle Lebensmittel, die in den 0 °C-Fächern gelagert werden, sollten
ca. 15-30 Minuten vor dem Verzehr aus den Schubladen genommen
werden, vor allem Obst und Gemüse, das ohne weiteren Garprozess
verzehrt wird. Bei Raumtemperatur entfalten sich Aroma und
Geschmack, und der Genusswert erhöht sich.
Einfrieren und Tiefkühllagern
Zum Einfrieren und Tiefkühllagern von Lebensmitteln dient das
Gefrierfach.
Achtung!
• Vor dem Einfrieren von Lebensmitteln muss die IST-Temperatur im
Gefrierfach -18°C oder kälter sein.
• Bitte das auf dem Typschild angegebene Gefriervermögen beachten.
Das Gefriervermögen ist die maximale Menge an frischer Ware, die
innerhalb von 24 Stunden eingefroren werden kann. Wenn Sie an
mehreren Tagen hintereinander einfrieren, nehmen Sie bitte nur 2/3
bis 3/4 der auf dem Typschild angegebenen Menge.
21
Einfrieren und Tiefkühllagern
• Warme Lebensmittel vor dem Einbringen in das Gefrierfach abkühlen
lassen. Die Wärme führt zu verstärkter Eisbildung und zu höherem
Energieverbrauch.
• Auf die Lagerzeit bzw. auf das Haltbarkeitsdatum von gekauften Tiefkühlprodukten achten.
• Einmal aufgetaute Lebensmittel ohne weitere Verarbeitung (garen zu
Fertiggerichten) auf keinen Fall ein zweites Mal einfrieren.
• Nicht zu große Mengen, bis maximal 2 kg in 24 Stunden einfrieren.
Sie erreichen eine bessere Qualität, wenn die Lebensmittel rasch bis
zum Kern durchgefroren werden.
1. Bei Ausnutzung des max. Gefriervermögens, 24 Stunden - bei kleineren
Mengen genügen 4 bis 6 Stunden - vor dem Einfrieren die Taste
FROSTMATIC drücken. Die gelbe Anzeige leuchtet.
Drücken der Taste FROSTMATIC ist nicht erforderlich bei kleinen
Einfriermengen.
2. Alle Lebensmittel vor dem Einfrieren oder Tiefkühllagern luftdicht verpacken, damit sie nicht austrocknen, nicht den Geschmack verlieren
und keine Geschmacksübertragung auf anderes Tiefkühlgut erfolgen
kann.
Vorsicht! Tiefkühlgut nicht mit nassen Händen berühren. Die Hände
könnten daran festfrieren.
3. Die verpackten Lebensmittel auf den Boden des Gefrierfachs legen.
Nicht gefrorene Ware darf bereits gefrorene Ware nicht berühren, die
gefrorene Ware kann sonst antauen.
4. Gefrierfachtür dicht schließen.
Die Elektronik des Gerätes schaltet die FROSTMATIC-Funktion nach 52
Stunden automatisch ab. Die gelbe Anzeige erlischt. Sie können die
FROSTMATIC-Funktion auch manuell beenden, indem Sie die Taste
FROSTMATIC nochmals drücken.
Bei eingeschalteter FROSTMATIC-Funktion kann die IST-Temperatur im
Kühlraum etwas absinken. Nach dem Abschalten der FROSTMATICFunktion stellt sich die gewählte SOLL-Temperatur wieder ein.
Tipps:
• Geeignet zum Verpacken von Gefriergut sind:
– Gefrierbeutel und -folie aus Polyäthylen;
– spezielle Gefriergutdosen;
– Aluminiumfolie, extra stark.
• Zum Verschließen von Beuteln und Folien eignen sich:
Plastikklemmen, Gummiringe oder Klebebänder.
☞
22
• Vor dem Verschließen die Luft aus Beuteln und Folien streichen, denn
Luft begünstigt das Austrocknen des Gefrierguts.
• Flache Päckchen formen, diese frieren schneller durch.
• Gefriergutdosen nicht bis zum oberen Rand mit flüssigem oder breiigem Gefriergut füllen, da sich Flüssiges beim Gefrieren noch ausdehnt.
Eiswürfel bereiten
Eiswürfelschale zu 3/4 mit kaltem Wasser füllen, in das Gefrierfach
☞1. stellen
und gefrieren lassen.
2. Zum Herauslösen der fertigen Eiswürfel die Eiswürfelschale verwinden
oder kurz unter fließendes Wasser halten.
Achtung! Eine eventuell angefrorene Eiswürfelschale keinesfalls mit
spitzen oder scharfkantigen Gegenständen ablösen. Einen Löffelstiel
oder dergleichen verwenden.
Abtauen
Der Kühlraum taut automatisch ab
Das Abtauen des Kühlraums erfolgt automatisch durch eine elektrische
Abtauheizung am nicht sichtbaren Verdampfer.
Während der Abtauphase ist der Umluftventilator ausgeschaltet.
Das entstehende Tauwasser fließt in eine Schale am Kompressor und
verdunstet. Die Schale darf nicht entfernt werden.
Gefrierfach abtauen
Während des Betriebs und beim Öffnen der Tür schlägt sich
Feuchtigkeit im Gefrierfach als Reif nieder. Entfernen Sie diesen Reif
von Zeit zu Zeit mit einem weichen Kunststoffschaber, z. B. Teigkratzer.
Keinesfalls harte oder spitze Gegenstände dazu benutzen.
Abgetaut werden soll immer dann, wenn die Reifschicht eine Dicke von
ca. 4 Millimeter erreicht hat; mindestens jedoch einmal im Jahr. Ein
geeigneter Zeitpunkt zum Abtauen ist dann, wenn das Gerät leer oder
nur wenig beladen ist.
Warnung!
• Keine elektrischen Heiz- oder Wärmegeräte und keine anderen
23
Abtauen
mechanischen oder künstlichen Hilfsmittel verwenden, um den
Abtauvorgang zu beschleunigen, mit Ausnahme der in dieser
Gebrauchsanweisung empfohlenen.
• Keine Abtausprays verwenden, sie können gesundheitsschädlich sein
und/oder kunststoffschädigende Stoffe enthalten.
Vorsicht! Berühren Sie Tiefkühlgut nicht mit nassen Händen. Die
Hände könnten daran festfrieren.
1. Einige Stunden vor dem Abtauen die FROSTMATIC-Funktion einschalten, um eine Kältereserve im Tiefkühlgut zu schaffen.
2. Tiefkühlgut herausnehmen, in mehrere Lagen Zeitungspapier einpacken
und abgedeckt an einem kühlen Ort lagern.
3. Gerät abschalten und den Netzstecker ziehen oder Sicherung abschalten bzw. herausdrehen.
4 Nach dem Abtauen, Gerät einschließlich Innenausstattung gründlich
reinigen (siehe Abschnitt "Reinigung und Pflege").
5. Lebensmittel einlagern und Gerät wieder in Betrieb nehmen.
☞
24
Reinigung und Pflege
Aus hygienischen Gründen sollte das Geräteinnere, einschließlich
Innenausstattung, regelmäßig gereinigt werden.
Warnung!
• Das Gerät darf während der Reinigung nicht am Stromnetz angeschlossen sein. Stromschlaggefahr! Vor Reinigungsarbeiten Gerät
abschalten und Netzstecker ziehen oder Sicherung abschalten bzw.
herausdrehen.
• Das Gerät nie mit Dampfreinigungsgeräten reinigen. Feuchtigkeit
könnte in elektrische Bauteile gelangen, Stromschlaggefahr! Heißer
Dampf kann zu Schäden an Kunststoffteilen führen.
• Das Gerät muss trocken sein, bevor Sie es wieder in Betrieb nehmen.
Achtung!
• Ätherische Öle und organische Lösungsmittel können Kunststoffteile
angreifen, z. B.
– Saft von Zitronen- oder Apfelsinenschalen;
– Reinigungsmittel, die Essigsäure enthalten.
Solche Substanzen nicht mit den Geräteteilen in Kontakt bringen.
• Keine scheuernden Reinigungsmittel verwenden.
1. Kühl- und Tiefkühlgut herausnehmen. Tiefkühlgut in mehrere Lagen
Zeitungspapier einpacken. Alles abgedeckt an einem kühlen Ort lagen.
2. Gefrierfach vor dem Reinigen abtauen (siehe Abschnitt "Abtauen").
3. Gerät abschalten und den Netzstecker ziehen oder Sicherung abschalten bzw. herausdrehen.
4. Gerät einschließlich Innenausstattung mit einem Lappen und lauwarmem Wasser reinigen. Eventuell etwas handelsübliches
Geschirrspülmittel beigeben.
5. Anschließend mit klarem Wasser nachwischen und trockenreiben.
6. Nachdem alles trocken ist, Lebensmittel wieder einlagern und Gerät
wieder in Betrieb nehmen.
☞
Die untere Abstellfläche, die das Kühlabteil vom 0°C-Fach trennt, kann
zur Reinigung entnommen werden. Hierzu die Platte gerade herausziehen.
Die Abdeckungen über den Schubladen können zum Reinigen entnommen werden. Zur Sicherstellung der Funktion im 0°C-Kaltraum müssen
diese nach der Reinigung unbedingt wieder an ihrem Platz eingelegt
werden.
25
Tipps zur Energie-Einsparung
• Das Gerät nicht in der Nähe von Herden, Heizkörpern oder anderen
Wärmequellen aufstellen. Bei hoher Umgebungstemperatur läuft der
Kompressor häufiger und länger.
• Ausreichende Be- und Entlüftung des Gerätes gewährleisten. Lüftungsöffnungen niemals abdecken.
• Keine warmen Speisen in das Gerät stellen. Warme Speisen erst
abkühlen lassen.
• Tür nur so lange wie nötig geöffnet lassen.
• Die Temperatur nicht kälter als nötig einstellen.
• Tiefkühlgut zum Auftauen in den Kühlraum legen. Die Kälte im Tiefkühlgut wird so zur Kühlung im Kühlraum genutzt.
Was tun, wenn ...
Abhilfe bei Störungen
Möglicherweise handelt es sich bei einer Störung nur um einen kleinen
Fehler, den Sie anhand nachfolgender Hinweise selbst beheben können.
Führen Sie keine weiteren Arbeiten selbst aus, wenn nachstehende
Informationen im konkreten Fall nicht weiterhelfen.
Warnung! Reparaturen am Kältegerät dürfen nur von Fachkräften
durchgeführt werden. Durch unsachgemäße Reparaturen können
erhebliche Gefahren für den Benutzer entstehen. Wenden Sie sich im
Reparaturfall an Ihren Fachhändler oder an unseren Kundendienst.
Störung
Gerät arbeitet nicht.
Gerät kühlt zu stark.
26
Mögliche Ursache
Gerät ist nicht eingeschaltet.
Netzstecker ist nicht eingesteckt oder lose.
Sicherung hat ausgelöst
oder ist defekt.
Abhilfe
Gerät einschalten.
Netzstecker einstecken.
Sicherung überprüfen,
gegebenenfalls erneuern.
Störungen am Stromnetz
behebt Ihr
Steckdose ist defekt.
Elektrofachmann.
Wärmere
Temperatur ist zu kalt einTemperatureinstellung
gestellt.
wählen.
Was tun, wenn ...
Störung
Mögliche Ursache
Abhilfe
Die Kühlraum- bzw.
Gefrierfachtemperatur ist
nicht ausreichend.
Temperatur ist nicht richtig eingestellt.
Tür war längere Zeit geöffnet.
Innerhalb der letzen 24
Std. wurden größere
Mengen warmer
Lebensmittel eingelagert.
Das Gerät steht neben
einer Wärmequelle.
Bitte im Abschnitt “Inbetriebnahme” nachsehen.
Tür nur so lange wie nötig
geöffnet lassen.
Kältere
Temperatureinstellung
wählen.
Bitte im Abschnitt
“Aufstellort” nachsehen.
Innenbeleuchtung funktioLampe ist defekt.
niert nicht.
Bitte im Abschnitt “Lampe
auswechseln” nachsehen.
Nach Drücken der Tasten
TURBO COOL-/FROSTMATIC
oder nach Änderung der
Dies ist normal, es liegt
Temperatureinstellung
keine Störung vor.
läuft der Kompressor nicht
sofort an.
Der Kompressor läuft nach
einiger Zeit selbsttätig an.
Lampe auswechseln
Warnung! Stromschlaggefahr! Vor dem Lampenwechsel Gerät abschalten und den Netzstecker ziehen oder Sicherung abschalten bzw. herausdrehen.
Lampendaten: 220-240 V, max. 25 W, Fassung: E 14
1. Zum Abschalten des Gerätes die Taste EIN/AUS drücken, bis die
Betriebskontrollanzeige erlischt.
2. Netzstecker ziehen.
3. Zum Auswechseln der Lampe
Verschluss drücken und gleichzeitig die
Lampenabdeckung in Pfeilrichtung herausnehmen.
4. Defekte Lampe auswechseln.
5. Lampenabdeckung wieder einsetzen.
6. Gerät wieder in Betrieb nehmen.
☞
27
Betriebsgeräusche
Folgende Geräusche sind charakterstisch für Kältegeräte:
• Klicken
Immer wenn der Kompressor ein- oder ausschaltet, ist ein Klicken zu
hören.
• Summen
Sobald der Kompressor arbeitet, können Sie ihn summen hören.
• Blubbern/Plätschern
Wenn Kältemittel in dünne Rohre einströmt, können Sie ein blubberndes oder plätscherndes Geräusch hören. Auch nach dem
Abschalten des Kompressors ist dieses Geräusch noch kurze Zeit hörbar.
• Rauschen
Ihr Gerät ist mit einer dynamischen Umluftkühlung ausgestattet. Für
eine optimale Anpassung an die erforderliche Kühlleistung im
Kühlraum und im LONGFRESH 0° C Kaltraum wird der Ventilator in
verschiedenen Leistungsstufen betrieben. Daraus ergibt sich ein
unterschiedlich wahrnehmbares Ventilatorgeräusch in Bezug auf
Einschaltdauer und Drehzahl. Dies ist normal und stellt keine
Unregelmäßigkeit oder Defekt dar.
Bestimmungen, Normen, Richtlinien
Das Kältegerät ist für den Haushalt bestimmt und wurde unter
Beachtung der für diese Geräte geltenden Normen hergestellt.
Bei der Fertigung wurden insbesondere die nach dem Gerätesicherheitsgesetz (GSG), der Unfallverhütungsvorschrift für Kälteanlagen
(VBG 20) und den Bestimmungen des Verbandes Deutscher
Elektrotechniker (VDE) notwendigen Maßnahmen getroffen.
Der Kältekreislauf wurde auf Dichtheit geprüft.
Dieses Gerät entspricht den folgenden EG-Richtlinien:
– 73/23/EWG vom 19.2.1973 - Niederspannungsrichtlinie
– 89/336/EWG vom 3.5.1989
(einschließlich Änderungsrichtlinie 92/31/EWG) - EMV-Richtlinie
– 94/2/EG vom 21. 01. 1994 - Richtlinie zur Energieettikettierung
– 96/57 EG vom 3. 9. 1996 - Anforderung im Hinblick auf die Energieeffizienz von elektrischen Haushaltskühl- und Gefriergeräten und
entsprechenden Kombinationen.
28
Fachbegriffe
• Kältemittel
Flüssigkeiten, die zur Kälteerzeugung verwendet werden können,
nennt man Kältemittel. Sie haben einen verhältnismäßig niedrigen
Siedepunkt, so niedrig, dass die Wärme der im Kältegerät lagernden
Lebensmittel das Kältemittel zum Sieden bzw. Verdampfen bringen
kann.
• Kältemittelkreislauf
Geschlossenes Kreislaufsystem, in dem sich das Kältemittel befindet.
Der Kältemittelkreislauf besteht im wesentlichen aus Verdampfer,
Kompressor, Verflüssiger sowie aus Rohrleitungen.
• Verdampfer
Im Verdampfer verdampft das Kältemittel. Wie alle Flüssigkeiten
benötigt Kältemittel zum Verdampfen Wärme. Diese Wärme wird
dem Geräteinnenraum entzogen, der dadurch abkühlt. Deshalb ist
der Verdampfer im Geräteinnenraum angeordnet oder unmittelbar
hinter der Innenwand eingeschäumt und dadurch nicht sichtbar.
• Kompressor
Der Kompressor sieht aus wie eine kleine Tonne. Er wird von einem
eingebauten Elektromotor angetrieben und ist hinten im
Sockelbereich des Gerätes untergebracht. Aufgabe des Kompressors
ist es, dampfförmiges Kältemittel aus dem Verdampfer abzuziehen,
zu verdichten und zum Verflüssiger weiterzuleiten.
• Verflüssiger
Der Verflüssiger hat meist die Form eines Gitters. Im Verflüssiger wird
das vom Kompressor verdichtete Kältemittel verflüssigt. Dabei wird
Wärme frei, die über die Oberfläche des Verflüssigers an die
Umgebungsluft abgegeben wird. Der Verflüssiger ist deshalb außen,
meist an der Geräterückseite angebracht.
Für Deutschland: Sie können Ersatzteile, Zubehör und Pflegemittel online bestellen unter http://www.aeg-hausgeraete.de
Für Österreich: Sie können Ersatzteile, Zubehör und Pflegemittel für
Ihr AEG Gerät über das Internet bestellen.
Ersatzteile Online finden Sie auf unsere Homepage:
http://www.aeg-hausgeraete.at unter der Rubrik “Service”.
29
Dear Customer
Thank you for choosing one of our high-quality products.
With this appliance you will experience the perfect combination of functional design and cutting edge technology.
Convince yourself that our appliances are engineered to deliver the best performance and control - indeed we are setting the highest standards of excellence.
In addition to this you find environmental and energy saving aspects as an integral
part of our products.
To ensure optimal and regular performance of your appliance please read this
instruction manual carefully. It will enable you to navigate all processes perfectly and
most efficiently.
To refer to this manual any time you need to, we recommend you to keep it in a safe
place. And please pass it to any future owner of the appliance.
We wish you much joy with your new appliance.
The following symbols are used in this manual
Important information concerning your personal safety and information on
how to avoid damaging the appliance
General information and tips
Environmental information
30
Contents
Safety . . . . . . . . . . . . . . . . . . . . . . . . . . . . . . . . . . . . . . . . . . . . . . . . . . . . .32
Disposal . . . . . . . . . . . . . . . . . . . . . . . . . . . . . . . . . . . . . . . . . . . . . . . . . . . .34
Appliance Packaging Information . . . . . . . . . . . . . . . . . . . . . . . . . . . . . . . . .34
Disposal of old Appliances . . . . . . . . . . . . . . . . . . . . . . . . . . . . . . . . . . . . . . .34
Remove transport packaging . . . . . . . . . . . . . . . . . . . . . . . . . . . . . . . . . . .35
Installation . . . . . . . . . . . . . . . . . . . . . . . . . . . . . . . . . . . . . . . . . . . . . . . . .35
Installation Location . . . . . . . . . . . . . . . . . . . . . . . . . . . . . . . . . . . . . . . . . . . .35
Your appliance needs air . . . . . . . . . . . . . . . . . . . . . . . . . . . . . . . . . . . . . . . . .36
Housing dimensions . . . . . . . . . . . . . . . . . . . . . . . . . . . . . . . . . . . . . . . . . . . . .36
Electrical connection . . . . . . . . . . . . . . . . . . . . . . . . . . . . . . . . . . . . . . . . . . . .36
Control panel / Temperature setting buttons . . . . . . . . . . . . . . . . . . . . . . . . .37
Temperature display / Air Filter . . . . . . . . . . . . . . . . . . . . . . . . . . . . . . . . . . . .38
Prior to Initial Start–Up . . . . . . . . . . . . . . . . . . . . . . . . . . . . . . . . . . . . . . .40
Starting up and temperature regulation . . . . . . . . . . . . . . . . . . . . . . . . . .40
FROSTMATIC / TURBO COOLMATIC . . . . . . . . . . . . . . . . . . . . . . . . . . . . . .41
Switching off the appliance . . . . . . . . . . . . . . . . . . . . . . . . . . . . . . . . . . . .42
Interior Accessories . . . . . . . . . . . . . . . . . . . . . . . . . . . . . . . . . . . . . . . . . .43
Storage shelves / Variable Inner Door / Bottle Holder . . . . . . . . . . . . . . . . .43
LONGFRESH 0°C compartment . . . . . . . . . . . . . . . . . . . . . . . . . . . . . . . . . .44
Humidity control . . . . . . . . . . . . . . . . . . . . . . . . . . . . . . . . . . . . . . . . . . . . . . . .44
Drawers . . . . . . . . . . . . . . . . . . . . . . . . . . . . . . . . . . . . . . . . . . . . . . . . . . . . . . . .45
Correct Storage . . . . . . . . . . . . . . . . . . . . . . . . . . . . . . . . . . . . . . . . . . . . . .45
Freezing and storing frozen food . . . . . . . . . . . . . . . . . . . . . . . . . . . . . . . .48
Preparation of Ice Cubes . . . . . . . . . . . . . . . . . . . . . . . . . . . . . . . . . . . . . .50
Defrosting . . . . . . . . . . . . . . . . . . . . . . . . . . . . . . . . . . . . . . . . . . . . . . . . . .50
The fridge defrosts automatically . . . . . . . . . . . . . . . . . . . . . . . . . . . . . . . . . .50
Defrosting the freezer compartment . . . . . . . . . . . . . . . . . . . . . . . . . . . . . . .50
Cleaning and Care . . . . . . . . . . . . . . . . . . . . . . . . . . . . . . . . . . . . . . . . . . . . 51
Energy Saving Tips . . . . . . . . . . . . . . . . . . . . . . . . . . . . . . . . . . . . . . . . . . .52
What to do if ... . . . . . . . . . . . . . . . . . . . . . . . . . . . . . . . . . . . . . . . . . . . . .53
Correcting Malfunctions . . . . . . . . . . . . . . . . . . . . . . . . . . . . . . . . . . . . . . . . .53
Changing the light bulb . . . . . . . . . . . . . . . . . . . . . . . . . . . . . . . . . . . . . . . . .54
Customer Service . . . . . . . . . . . . . . . . . . . . . . . . . . . . . . . . . . . . . . . . . . . .55
Noises during Operation . . . . . . . . . . . . . . . . . . . . . . . . . . . . . . . . . . . . . .55
Regulations, Standards, Guidelines . . . . . . . . . . . . . . . . . . . . . . . . . . . . . .56
Technical terminology . . . . . . . . . . . . . . . . . . . . . . . . . . . . . . . . . . . . . . . .57
31
Safety
The safety aspects of our refrigerators comply with accepted technical
standards and the German Appliance Safety Law. Nevertheless, we consider it our obligation to make you aware of the following safety
information:
Intended use
• The refrigerator is intended for use in the home. It is suitable for the
cooling, freezing and storing of frozen food, as well as for making
ice. If the appliance is used for purposes other than those intended
or used incorrectly, no liability can be accepted by the manufacturer
for any damage that may be caused.
• Alterations or changes to the refrigerator are not permitted for reasons of safety.
• If you use the refrigerator in a commercial application or for purposes other than the cooling, freezing or frozen storage of foods, the
manufacturer accepts no liability for any damages which may occur.
Prior to initial start–up
• Check the appliance for transport damage. Under no circumstance
should a damaged appliance be plugged in. In the event of damage,
please contact your supplier.
• Ensure that the appliance does not stand on the electrical supply
cable. Important: if the supply cord is damaged, it must be replaced
by the manufacturer, its service agent or similarly qualified persons
in order to avoid a hazard.
• Refrigerant
The refrigerant isobutane (R600a) is contained within the refrigerant
circuit of the appliance, a natural gas with a high level of environmental compatibility, which is nevertheless flammable.
• Warning - During transportation and installation of the appliance,
be certain that none of the components of the refrigerant circuit
become damaged.
• If the refrigerant circuit should become damaged:
– avoid open flames and sources of ignition;
– thoroughly ventilate the room in which the appliance is situated.
Safety of children
• Packaging (e.g. wraps, polystyrene) can be dangerous for children.
There is a risk of suffocation! Keep packaging material away from
children!
32
Safety
• Please make old appliances unusable prior to disposal. Pull out the
mains plug, cut off the mains cable, break or remove spring or bolt
catches, if fitted. By doing this you ensure that children cannot lock
themselves in the appliance when playing (there is risk of suffocation!) or get themselves into other dangerous situations.
• This appliance is not intended for use by persons (including children) with
reduced physical, sensory or mental capabilities, or lack of experience and
knowledge, unless they have been given supervision or instruction concerning use of the appliance by a person responsible for their safety.
Children should be supervised to ensure that they do not play with the
appliance. !
Daily Operation
• Containers with flammable gases or liquids can leak at low temperatures. There is a risk of an explosion! Do not store any containers
with flammable materials such as spray cans, fire extinguisher refill
cartridges etc in the refrigerator/freezer.
• Bottles and cans must not be placed in the freezer compartment.
They can burst when the contents freeze, high carbonate content
drinks can even explode! Never store lemonade, juices, beer, wine,
sparkling wine etc. in the freezer compartment.
• Do not place ice cream or ice cubes in the mouth immediately after
removal from the freezer compartment. Very cold ice can freeze to
the lips or tongue and cause injury.
• Do not touch frozen food with wet hands. Your hands could freeze
to the food.
• Do not operate any electrical appliances in the refrigerator/freezer
(e.g. electric ice cream makers, mixers etc.).
• Before cleaning the appliance, always switch off the appliance and
unplug it, or disconnect from the electricity supply.
• When unplugging always pull the plug from the mains socket, do not
pull on the cable.
In case of malfunction
• If a malfunction occurs on the appliance, please look first in the
"What to do if ..." section of these instructions. If the information
given there does not help, please do not perform any further repairs
yourself.
• Refrigerators/freezers may only be repaired by qualified service engineers. Improper repairs can give rise to significant hazards. If your
appliance needs repairing, please contact your specialist dealer or
our Customer Service.
33
Disposal
Appliance Packaging Information
All materials are environmentally sound! They can be disposed of or
burned at an incinerating plant without danger.
About the materials: The plastics can be recycled and are identified as
follows:
>PE< for polyethylene, e.g. the outer covering and the bags in the
interior.
>PS< for polystyrene foam, e.g. the pads, which are all free of chlorofluorocarbon.
The carton parts are made from recycled paper and should be disposed
of at a waste-paper recycling collection location.
Disposal of old Appliances
For environmental reasons, refrigeration appliances must be disposed
of properly. This applies to your old appliance, and - at the end of its
service life - for your new appliance as well.
Warning! Before disposing of old appliances make them inoperable.
Remove plug from mains, sever the power cable, remove or destroy any
snap or latch closures. This ensures that playing children do not lock
themselves inside the appliance (danger of suffocation!) or place
themselves into other life-endangering situations.
Disposal:
• The appliance may not be disposed of with domestic waste or bulky
refuse.
• The refrigerant circuit, especially the heat exchanger at the back of
the appliance, must not be damaged.
• The symbol
on the product or on its packaging indicates that
this product may not be treated as household waste. Instead it shall
be handed over to the applicable collection point for the recycling of
electrical and electronic equipment. By ensuring this product is disposed of correctly, you will help prevent potential negative consequences for the environment and human health, which could otherwise be caused by inappropriate waste handling of this product. For
more detailed information about recycling of this product, please
contact your local city office, your household waste disposal service
or the shop where you purchased the product.
34
Remove transport packaging
The appliance and the interior fittings are protected for transport.
☞1. Pull off the adhesive tape on the left and right side of the door.
2. Remove all adhesive tape and packing pieces from the interior of the
appliance.
Installation
Installation Location
The appliance should be set up in a well ventilated, dry room.
Energy use and efficient performance of the appliance is affected by
the ambient temperature.
The appliance should therefore
– not be exposed to direct sunlight;
– not be installed next to radiators, cookers or other sources of heat;
– only be installed at a location whose ambient temperature
corresponds to the climate classification, for which the appliance is
designed.
The climate classification can be found on the rating plate, which is
located at the left on the inside of the appliance.
The following table shows which ambient temperature is correct for
each climate classification:
Climate classification
for an ambient temperature of
SN
+10 to +32 °C
N
+16 to +32 °C
ST
+18 to +38 °C
T
+18 to +43 °C
Installation directly under a hob is not allowed. The temperatures of
the hob, which in part are quite high, may damage the appliance.
If a hob is installed near the appliance, the corresponding installation
and safety instructions must be adhered to. Considering the numerous
installation conditions which are possible, there is no way of providing
detailed information here.
It is necessary to avoid overheating of the appliance by maintaining
adequate distances from heat sources and by the use of a suitable
thermal insulation plate. Proper ventilation of the appliance must also
be ensured.
35
Installation
Your appliance needs air
50 mm
min. 2
200 cm
For safety reasons, minimum ventilation must be as shown Fig.
Attention: keep ventilation openings clear of obstruction;
min.
200 cm
2
D567
Rehingeing the door
The appliance’s door has been locked in position for transport by means of
pins on both sides. According to the door opening direction, remove relevant
pins at the top and at the bottom.
Warning! When changing the side at which the door opens, the
appliance may not be connected to the mains. Remove plug from the
mains beforehand.
Housing dimensions
Height
Depth
Width
1780mm
550 mm
560 mm
Electrical connection
☞
36
A correctly installed, earthed socket is required for the electrical supply. The supply must have a fuse rating of at least 10 Amps. If the
socket is not accessible once the appliance is built in, the electrical
installation must include suitable means of isolating the appliance
from the mains (e.g. a fused spur).
Before initial start-up, refer to the appliance rating plate to ascertain
if supply voltage and current values correspond with those of the
mains at the installation location.
e.g.: AC 230 ... 240 V 50 Hz or
230 ... 240 V ~50 Hz
(i.e. 230 to 240 volts alternating current, 50 Hertz)
The rating plate is inside the appliance on the left.
Description of the appliance
Control panel
1
2
3
4
5
6
Pilot light (green)
ON/OFF switch
Temperature setting buttons (for warmer temperatures)
Temperature display
Temperature setting buttons (for colder temperatures)
FROSTMATIC indicator light (yellow)
• FROSTMATIC for rapid freezing in the freezer compartment
7 Push button for FROSTMATIC
8 TURBO COOLMATIC indicator light (yellow)
• TURBO COOLMATIC for intensive fridge cooling
9 Push button for TURBO COOLMATIC
Temperature setting buttons
The temperature is adjusted using the „+“
(WARMER) and „-“ (COLDER) buttons.
These buttons are connected to the temperature display.
• The temperature display is switched over from the display of the
ACTUAL temperature (temperature display is illuminated) to the display of the DESIRED temperature (temperature display flashes) by
pressing one of the two buttons, „+“ or „-“.
• With each further press of one of the two buttons, the DESIRED
temperature is adjusted by 1°C.
• If neither button is pressed, the temperature display automatically
switches back after a short period (approx. 5 sec.) to the display of
the ACTUAL temperature.
DESIRED temperature means:
The temperature that is required in the refrigerator, this can be adjusted to the temperatures shown in the display. The DESIRED temperature
is indicated by flashing numbers.
37
Description of the appliance
ACTUAL temperature means:
The temperature display indicates the temperature that is currently
present in the refrigerator. The ACTUAL temperature is indicated by
continuously illuminated numbers.
Temperature Display
The temperature display can indicate several pieces of
information.
• During normal operation, the temperature currently present in the
refrigerator (ACTUAL temperature) is displayed.
• When the temperature is being adjusted, the temperature currently
set flashes (DESIRED temperature).
• If the electronics in the appliance have detected a fault that prevents the ACTUAL temperature being measured, the temperature display shows a square. The appliance will continue to function using a
backup programme until your local Customer Service engineer has
repaired the appliance.
Air Filter
Your appliance is equipped with a
charcoal filter “CLEAN AIR CONTROL”
in the rear wall of the fridge compartment.
The filter purifies the air from
unwanted odours in the fridge and
LONGFRESH compartment meaning
that the storage quality will be further improved.
Note: Always keep the air ventilation flap closed.
The charcoal filter is a consumable accessory and as such is not covered by the guarantee.
38
Description of the appliance
Installation of the charcoal filter
On delivery the charcoal filter is placed in a plastic bag to secure the
length of life of the charcoal filter. The filter should be placed behind
the flap before the appliance is turned on.
1. Pull the cover outward (1).
1
☞
2. The charcoal filter is then mounted in the
slot found in the back of the cover (2).
3. Close the flap.
2
Important!
During operation, always keep the air
ventilation flap closed.
The filter should be handled carefully so fragments do not loosen from
the surface.
Changing the charcoal filter
To maintain the best performance the carbon filter should be changed
every year.
New charcoal filters can be purchased
1
from your local dealer.
1. The filter is placed behind the cover and
can be reached by pulling the cover outward (1).
☞
2. The charcoal filter is then pulled out of its
slot.
3. The new charcoal filter is placed in the
existing slot (2). Close the flap.
2
39
Prior to Initial Start–Up
☞
Please clean the appliance interior and all accessories prior to initial
start-up (see section: “Cleaning and Care”).
Standby time
The oil for automatic lubrication contained in the compressor may
flow into the refrigeration circuit if the appliance is transported in an
inclined position. To allow the oil to flow back into the compressor,
wait approximately 1 hour before placing the appliance in operation.
Starting up and temperature regulation
the plug into the plug socket. When the refrigerator compart☞1. Insert
ment door is opened, the internal lighting is switched on.
2. Press ON/OFF button.
The green mains pilot indicator and the temperature display illuminate.
3. Press either the „+“ (WARMER) or „-“ (COLDER) button.
The temperature display switches over and the DESIRED temperature
currently set flashes on the temperature display.
4. Set the required temperature by pressing the „+“ (WARMER) or „-“
(COLDER) buttons (see section "Temperature setting buttons"). The
temperature display will immediately show the changed setting. With
each further press of one of the two buttons, the DESIRED temperature is adjusted by 1°C.
Adjustable temperature range: +3°C to +8°C.
Note: From a food safety point of view, +5°C for the refrigerator compartment and -18°C for the freezer compartment should be considered cold enough as a storage temperature.
5. Once the required temperature has been set, after a short period
(approx. 5 sec.) the temperature display will change and again indicate
the current ACTUAL temperature inside the fridge. The display will
change from flashing to continuous illumination.
The compressor will start and then run automatically.
Information! When the setting is changed, the compressor does not
start immediately if automatic defrosting is currently taking place.
In order for the appliance to run properly in certain conditions a slight
heating of the back surface of the inner container can take place.
40
Goods to be refrigerated can be loaded immediately after switching
on, because the storage temperature in the refrigerator is quickly
reached.
In the LONGFRESH 0°C compartment the temperature is controlled
automatically. It stays constantly at about 0°C, no adjustment is necessary.
Note: The refrigerator compartment is fitted with a fan. This quickly
cools food stuffs and ensures optimal distribution of the temperature
between the fridge and the LONGFRESH 0°C compartment.
This results in the fan operating at different speeds for different
lengths of time. This is quite normal and not a fault with the appliance.
Important! Wait until the freezer compartment has reached a temperature of –18°C, before storing frozen food.
TURBO COOLMATIC/FROSTMATIC
Warning: The COOLMATIC and FROSTMATIC functions cannot be
switched on simultaneously.
TURBO COOLMATIC Button
The TURBO COOLMATIC function is suited for quick
cooling of large quantities of goods in the refrigerator,
e.g. drinks and salads for a party.
TURBO COOLMATIC function is switched on by pressing the TURBO
☞1. The
COOLMATIC button. The yellow light illuminates.
2. The TURBO COOLMATIC function now ensures intensive cooling. A
DESIRED temperature of +3°C is automatically selected. The TURBO
COOLMATIC function is ended automatically after a period of 6 hours.
The originally selected DESIRED temperature is again valid and the
compartment will return to. The temperature display shows the ACTUAL refrigerator temperature.
3. The TURBO COOLMATIC function can be ended manually at any time
by pressing the TURBO COOLMATIC button again. The yellow light goes
out.
41
FROSTMATIC Button
The FROSTMATIC function accelerates the freezing of
fresh food and, at the same time, protects foodstuffs
already stored from undesirable warming.
FROSTMATIC function is switched on by pressing the FROSTMATIC
☞1. The
button. The yellow light illuminates.
If the FROSTMATIC function is not ended manually, the appliance electronics switch off the FROSTMATIC function after 52 hours. The yellow
light goes out.
2. The FROSTMATIC function can be ended manually at any time by pressing the FROSTMATIC button again. The yellow light goes out.
When the FROSTMATIC function is switched on the ACTUAL temperature in the fridge can fall slightly. Once the FROSTMATIC function has
been switched off the selected DESIRED temperature will be resumed.
Switching off the appliance
switch off, press the ON/OFF button for approx. 5 seconds. This will
☞ To
result in a countdown from "3" to "1" taking place in the temperature
display. On reaching "1" the fridge will switch off. The temperature display will go off.
Note: The appliance cannot be switched on or off if unplugged, or if
there is no power being supplied to it. Following connection to the
mains power supply, the appliance returns to the same operating state
as before the interruption of main power.
If the appliance is not going to be used for an extended period:
1. Remove all frozen and refrigerated packages.
2. Switch off the appliance by holding down the ON/OFF button until the
display goes off (see above).
3. Remove the mains plug or switch off or disconnect from the electricity
supply.
4. Defrost the freezer compartment and clean thoroughly (see section:
“Cleaning and Care”).
5. Leave the doors open to avoid the build up of odours.
☞
42
Interior Accessories
Storage shelves
On the bottom of the refrigerator compartment, just above the
LONGFRESH 0°C compartment, you can easy place can and bottles in
horizontal position. The structure of this area will prevent the bottles
and cans from moving around.
The height of the storage shelves
can be adjusted:
1. To do this pull the storage shelf forward until it can be swivelled
upwards or downwards and
removed.
2. Please do the same in reverse to
insert the shelf at a different height.
☞
☞
Your appliance is equipped with two
half-size glass storage shelves.
Storing tall items:
Slide the front half of the Vario storage shelf in another level to the rear.
By this means you will gain space to
place tall items on the storage shelf
below.
Variable Inner Door
The door compartments can be pulled up and removed, and inserted at
other positions as needed.
Bottle Holder
Your model is equipped with a bottle holder in the bottle compartment. This is used
to prevent individual bottles from falling
over and can be slid sideways.
43
LONGFRESH 0°C compartment
In the LONGFRESH 0°C compartment the temperature is controlled
automatically. It stays constantly at about 0°C, no adjustment is necessary.
The constant storage temperature of about 0°C and the relative
humidity of between 45 and 90 % provide optimal conditions for the
various kinds of food.
You can therefore store a variety of fresh food in the LONGFRESH 0°C
compartment, where it will last up to 3 times longer with better quality compared to normal refrigerator compartments.
This allows you to stock more fresh food. Taste, degree of freshness,
quality and nutritional values (vitamins and minerals) are well preserved. Loss of weight in vegetables and fruit diminishes. Food yields a
higher degree of nutritional value.
The LONGFRESH 0°C compartment is also suitable for defrosting food.
In this case the thawed food can be stored up to two days in the
LONGFRESH 0°C compartment.
Humidity control
Both bottom drawers can be used
according to the desired storage
conditions independently of each
other with lower or higher
humidity.
Regulation for each drawer is
separate and is controlled using the slide valve at the front of the
drawer.
• „Dry“: low air humidity - up to 50 % relative humidity
This humidity level is reached when both sliders are set into this
position
and the ventilation openings are wide open.
• „Humid“: high relative humidity - up to 90%
This humidity level is reached when both sliders are set in this position
and the ventilation openings are closed. Humidity is kept
and can not escape.
44
Drawers
In this drawer the humidity is
not adjustable
The wire shelves inside the
drawers permit that air can
circulate freely and consequently a better conservation of foods.
Correct storage
The refrigerator compartment is fitted with a fan. This quickly cools
food stuffs and ensures optimal distribution of the temperature
between the fridge and the LONGFRESH 0°C compartment.
The following can be conserved in the refrigerator compartment:
- beverages, preserves, jars, bottles;
- baked goods, prepared foods;
- products with short-term expiration;
- foods which are not suitable for conservation at the temperature of
the LONGFRESH 0°C compartment.
Tips:
• Do not place warm foods or uncovered liquids in the refrigerator.
• Place foods in such a way that air can circulate freely.
• Keep butter and cheese in the special compartment to guarantee
their consistency and aroma.
45
Correct Storage
• Foods, and especially salad, must be kept well covered or packaged in
such a way that they do not dry out and that their flavours and fragrances remain unchanged.
The following are suited for packaging:
– Polyethylene airtight bags and wraps;
– Plastic containers with lids;
– Special plastic covers with elastic;
– aluminium foil.
• High-proof spirits should only be conserved tightly closed and in a
vertical position.
• Do not keep explosive or flammable materials in the refrigerator.
Conserve in the LONGFRESH 0°C compartment all foods which are
suited to it.
Storage time in the LONGFRESH 0°C compartment for fresh food
Type of food
Onion
Butter
Large pork cuts
Beef, venison, small pork
cuts, poultry
Tomato sauce
Fish, shellfish, cooked meat
products
Cooked seafood
Salad, vegetables
Carrots, herbs, Brussels
sprouts, celery
Artichokes, cauliflower,
chicory, iceberg lettuce,
endive, lamb’s lettuce, lettuce, leeks, radicchio
46
Air humidity adjustment
“dry”
“dry”
“dry”
“dry”
“dry”
“dry”
“dry”
“humid”
“humid”
Storage time
up to 5 months
up to 1 month
up to 10 days
up to 7 days
up to 4 days
up to 3 days
up to 2 days
up to 1 month
up to 21 days
Correct Storage
Type of food
Broccoli, Chinese leaves,
kale, cabbage, radishes,
Savoy cabbage
Peas, kohlrabi
Spring onions, asparagus,
spinach
Fruit (*)
Pears, dates (fresh), strawberries, peaches (*)
Air humidity adjustment
“humid”
“humid”
“humid”
“humid”
Plums (*), rhubarb, gooseberries
“humid”
Apples (not sensitive to
cold), quinces
“humid”
Apricots, cherries
Damsons, grapes
Blackberries, currants
Figs (fresh)
Blueberries, raspberries
“humid”
“humid”
“humid”
“humid”
“humid”
Storage time
up to 14 days
up to 10 days
up to 7 days
up to 1 month
up to 21 days
up to 20 days
up to 14 days
up to 10 days
up to 8 days
up to 7 days
up to 5 days
(*) The riper the fruit, the shorter the storage time
Cakes containing cream and other kinds of pastry products can be stored in the LONGFRESH 0°C compartment for 2 or 3 days.
Important!
Not to be placed in the LONGFRESH 0°C compartment:
• cold sensitive fruit which have to be stored at cellar or room temperature like pineapple, bananas, grapefruit, melons, mango, papaya,
oranges, lemons, kiwi fruit.
47
• The types of food not mentioned above should be stored in the
refrigerator compartment (e.g. all sorts of cheese, cold cuts, etc.).
The level of air humidity in the drawers depends on the content of
humidity in the stored food, vegetable and fruit and on the frequency
of door opening
The LONGFRESH 0°C compartment is also suitable for slow thawing of
food. In this case the thawed food can be stored in the LONGFRESH
0°C compartment for up to two days.
Tips:
• Pay attention to the freshness of the food, especially on the expiry
date. Quality and freshness influence the storage time.
• The whole storage cycle time will depend on the preservation conditions made prior to the final storage in the fridge.
• Food, fruit or vegetables should always be packed or wrapped up
before storage.
• Animal food always store packed and dry.
• Food rich in proteins will go bad quicker. This means seafood will
spoil before fish which in turn will spoil before meat. While storing
food in a 0°C compartment storage time for that kind of food can be
increased by up to three times as well without loss on quality.
• All food stored in a 0°C compartment should be taken out of the
drawers roughly 15-30 min before consumption, particularly fruit
and vegetables to be consumed without any additional cooking
process. Allowing fruit and vegetables to return to room temperature
will improve the texture and flavour.
Freezing and storing frozen food
The freezer compartment is for freezing and storing food.
Important!
• The temperature in the freezer compartment must be –18°C or colder before freezing fresh food or storing food already frozen.
• Do not freeze too large a quantity at any one time (max. 2 kg per 24
hrs). The quality of the food is best preserved when it is frozen right
through to the core as quickly as possible.
• Allow warm food to cool down before freezing. The warmth will
cause increased ice formation and increase the power consumption.
• Please note the maximum storage times specified by the manufacturer.
48
Freezing and storing frozen food
• Thawed foods which have not been processed further (cooked into
meals) may not under any circumstances be frozen a second time.
1. To freeze the maximum quantity shown on the rating plate press the
FROSTMATIC button 24 hours prior to freezing, or 4 to 6 hours for
smaller quantities. Yellow display lights up.
The FROSTMATIC button need not be pressed for freezing of small
quantities.
2. All foods must be packed into airtight packages or containers prior to
freezing, so that they do not dry out or lose their flavour, and so that
no flavour contamination of other frozen goods occurs.
Caution! Do not touch frozen food with wet hands. Your hands could
stick to the food causing skin abrasions.
3. Lay the packaged food on the base of the freezer compartment.
Unfrozen food must not touch items already frozen, otherwise the
frozen food could begin to defrost.
The appliance’s electronics switch off the FROSTMATIC function automatically after 52 hours. The yellow light goes out. You can also end
the FROSTMATIC function manually by pressing the FROSTMATIC button again.
When the FROSTMATIC function is switched on the ACTUAL temperature in the fridge can fall slightly. Once the FROSTMATIC function has
been switched off the selected DESIRED temperature will be resumed.
Tips:
• The following are suited for the packaging of frozen goods:
– freezer bags and polyethylene wraps;
– special cans for frozen goods;
– extra–thick aluminium foil.
• The following are suitable for sealing bags and wrappings:
plastic clips, rubber bands or tape.
• Smooth the air out of the bag before sealing; air makes it easier for
the frozen food to dry out.
• Make flat packages, because these freeze more quickly.
• Do not fill cans for frozen goods to the brim with liquid or
paste–like goods, because liquids expand during freezing.
☞
Note for inspection authorities:
Batch plans for the determination of freezing performance or warmup time can be requested directly from the manufacturer.
49
Preparation of Ice Cubes
the ice cube tray 3/4 full with cold water, place it in the freezer
☞1. Fill
compartment and leave to freeze.
2. To loosen the frozen cubes, either bend the ice cube tray or hold it
under running water for a few seconds.
Important! Never try to free an ice tray that is frozen to the freezer
compartment using pointed or sharp edged objects. Use a spoon handle or similar.
Defrosting
The fridge defrosts automatically
Defrosting of the fridge compartment is automatic thanks to an electrical heater assigned to this purpose on the concealed evaporator.
During defrosting, the air re-circulation fan is off.
The water that forms flows into a recipient on the compressor and
evaporates. This recipient cannot be removed.
Defrosting the freezer compartment
During use and when the freezer compartment door is opened, moisture is deposited in the freezer compartment as frost. Remove this
frost from time to time with a plastic scraper. Under no circumstances
use hard or pointed objects to remove frost.
The freezer compartment should always be defrosted when the layer of
frost has reached a thickness of approx. 4 millimetres; however at least
once a year. A good time for defrosting is when the appliance is empty
or contains only a small amount of food.
Warning!
• Do not use electrical heating appliances or any other mechanical or
artificial devices to speed up the defrosting process, with the exception of those recommended in these operating instructions.
• Do not use defrosting sprays, they can be hazardous to your health
and/or contain substances that damage plastics.
Caution! Do not touch frozen food with wet hands. Your hands could
stick to the food causing skin abrasions.
50
on the FROSTMATIC function a few hours before defrosting to
☞1. Switch
make sure frozen food remains sufficiently frozen.
2. Remove frozen food, wrap it in several layers of newspaper and store
it, covered, in a cool place.
3. Switch off the appliance and unplug it, or disconnect from the electricity supply.
4. After defrosting, thoroughly clean the freezer compartment ( see
"Cleaning and Care" section) and reconnect the appliance to the electricity supply.
5. Do not forget to switch the FROSTMATIC function off again.
Cleaning and Care
For hygienic reasons the appliance interior, including interior accessories, should be cleaned regularly.
Warning!
• The appliance must not be connected to the mains during cleaning.
Danger of electrical shock! Before cleaning switch the appliance off
and remove the plug from the mains, or switch off or turn out the
circuit breaker or fuse.
• Never clean the appliance with a steam cleaner. Moisture could
accumulate in electrical components, danger of electrical shock! Hot
vapours can lead to the damage of plastic parts.
• The appliance must be dry before it is placed back into service.
Important!
• Ethereal oils and organic solvents can attack plastic parts, e.g.
– lemon juice or the juice from orange peel;
– butyric acid;
– cleansers which contain acetic acid.
51
Do not allow such substances to come into contact with appliance
parts.
• Do not use any abrasive cleansers.
frozen food and the food from the refrigerator. Wrap frozen
☞1. Remove
food in several layers of newspaper. Store it in a cool place, well covered.
2. Defrost the freezer compartment prior to cleaning (see “Defrosting”
section).
3. Switch the appliance off and remove the plug from the mains, or disconnect from the electricity supply.
4. Clean the appliance and the interior accessories with a cloth and lukewarm water with a little bicarbonate of soda added (5ml to 0,5 litres
of water).
5. After cleaning wipe with clean water and rub dry.
6. After everything is dry reconnect the appliance to the electricity supply.
The lowest shelf, dividing the cooler compartment from the
LONGFRESH 0°C compartment can be removed for cleaning. To remove
pull out the shelf straight.
The cover plates above the drawers in the 0°C compartment can be
taken out for cleaning. To make sure fully functionality of the
LONGFRESH 0°C compartment the cover must be put back in their
original position after cleaning.
Energy Saving Tips
• Do not install the appliance near cookers, radiators or other sources
of warmth. High ambient temperatures cause longer, more frequent
operation of the compressor.
• Ensure sufficient air circulation and exhaust at the appliance base
and at the back wall of the appliance. Never cover air vent openings.
• Do not place warm foods into the appliance. Allow warm foods to
cool first.
• Only leave door open as long as necessary.
• Do not set temperature any colder than necessary.
• Put frozen food in the fridge to defrost. The cold in the frozen food
will then be used to cool the fridge.
52
What to do if ...
Correcting Malfunctions
A malfunction may be caused by only a minor fault that you can rectify yourself using the following instructions. Do not perform any other
work on the appliance if the following information does not provide
assistance in your specific case.
Important! Repairs to refrigerators/freezers may only be performed by
competent service engineers. Improper repairs can give rise to significant hazards for the user. If your appliance needs repairing, please
contact your specialist dealer or our local Customer Service.
Symptom
Appliance does not work.
Possible Cause
Appliance is not switched
on.
Mains plug is not plugged
in or is loose.
Fuse has blown or is
defective
Socket is defective.
Appliance cools too much.
Temperature is set too
cold.
Remedy
Switch on the appliance.
Insert mains plug.
Check fuse, replace if
necessary.
Mains malfunctions are to
be corrected by an electrician.
Press „+“ (WARMER) button.
Please look in the “Starting
Temperature is not properup and Temperatur regulaly adjusted.
tion” section.
Door was open for an
Open the door only as long
The refrigerator and/or
extended period.
as necessary.
freezer compartment tem- A large quantity of warm
Press TURBO COOLMATIC
perature is insufficient.
food was placed in the
and/or FROSTMATIC butappliance within the last
ton.
24 hours.
The appliance is near a
Please look in the
heat source.
“Installation location” section.
Interior lighting does not
work.
Light bulb is defective.
Please look in the “Changing
the light bulb” section.
53
What to do if...
Symptom
Possible Cause
Remedy
The compressor does not
start immediately after
pressing the TURBO COOL- This is normal, no error has The compressor starts after
MATIC or FROSTMATIC
occurred.
a period of time.
button, or after changing
the temperature setting.
Changing the light bulb
Warning! There is a risk of electric shocks! Before changing the light
bulb, switch off the appliance and unplug it, or disconnect from the
mains supply.
Light bulb data: 220-240 V, max. 25 W
1. To switch off, press the ON/OFF button until the mains power light
extinguishes.
2. Unplug the mains plug.
3. To change the light bulb, press on the
rear hook and at the same time slide
the light bulb cover in the direction
indicated by the arrow.
4. Change the faulty light bulb.
5. Refit the light bulb cover.
6. Put the refrigerator back into operation.
☞
54
Customer Service
If you cannot find the remedy for a malfunction in these operating
instructions, please contact your dealer or our customer service
department. Addresses and telephone numbers are listed in the accompanying booklet "Guarantee Conditions/Customer Service Locations".
Selective ordering of replacement parts can save unnecessary travel
and costs. For this reason always provide the following appliance
information:
• Model Name
• Model Number (PNC)
• Serial Number (S-No.)
This information can be found on the serial plate in the interior at the
left of the appliance. We recommend that you enter this information
here, so that it is handy if needed.
Note: The customer bears the costs of unjustified customer service
calls even during the guarantee period.
Noises during Operation
The following noises are characteristic of refrigeration appliances:
• Clicks
Whenever the compressor switches on or off, a click can be heard.
• Humming
As soon as the compressor is in operation, you can hear it humming.
• Bubbling/Splashing
When refrigerant flows into thin tubes, you can hear bubbling or
splashing noises. Even after the compressor has been switched off,
this noise can be heard for a short time.
• Rustling
Your appliance is equipped with a dynamic air ventilation system. To
ensure optimal cooling performance in the refrigerator and
LONGFRESH 0°C compartment the fan is operates with various power
levels. This results in the fan operating at different speeds for different lengths of time. This is quite normal and not a fault with the
appliance.
55
Regulations, Standards, Guidelines
This appliance was designed for household use and was manufactured
in accordance with the appropriate standards. The necessary measures
in accordance with appliance safety legislation regulations (GSG), accident prevention regulations for refrigeration appliances (VBG 20) and
the regulations of the German Society of Electrical Engineers (VDE)
were observed in the manufacture of this appliance.
The refrigerant circuit has been checked for leaks.
This appliance is in accordance with the following EU guidelines:
– 73/23/EWG dated 19 February 1973 - low voltage guidelines.
– 89/336/EWG dated 3 May 1989
(including guideline change notice 92/31/EWG) - EMV guideline
– 94/2/EG dated 21.01.1994 - Directive on Energy Labelling
– 96/57 EG dated 3.9.1996 - Energy Efficiency Requirements of
Household Electric Refrigerators, Freezers and Combinations Thereof.
56
Technical terminology
• Refrigerant
Liquids that can be used to a generate a cooling effect are known as
refrigerants. They have a relatively low boiling-point, indeed so low,
that the warmth from the food stored in the fridge or freezer can
cause the refrigerant to boil and vaporise.
• Refrigerant Circuit
Closed circulation system that contains the refrigerant. The refrigerant circuit comprises primarily of an evaporator, a compressor, a condenser and pipe work.
• Evaporator
The refrigerant is evaporated in the evaporator. Similar to all other
liquids, refrigerant requires heat to evaporate. This heat is removed
from the interior of the appliance, as a result the interior is cooled.
The evaporator is therefore located inside the appliance or placed in
foam immediately behind the inner wall and thus not visible.
• Compressor
The compressor looks like a small drum. It is driven by a built-in
electric motor and is mounted on the base of the appliance at the
rear. The task of the compressor is to draw in vaporised refrigerant
from the evaporator, to compress it, and to pass it on to the condenser.
• Condenser
The condenser normally has the form of a grid. The refrigerant compressed in the compressor is liquefied in the condenser. During this
process, heat is released to the surrounding air at the surface of the
condenser. The condenser is mounted on the base of the appliance.
57
Subject to change without notice
www.electrolux.com
Änderungen vorbehalten
www.aeg-electrolux.de
2223 465-02-00-07052009