Download Schaub Lorenz IPH-2609 User manual
Transcript
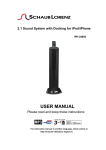
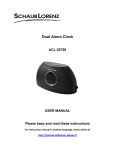
iPhone / iPad / iPod
Docking Station
IPH-2609
USER MANUAL
Please read and keep these instructions
For instruction manual in another language, check online at
http://manuel-utilisateur.logisav.fr
IMPORTANT SAFETY INSTRUCTIONS
Please read carefully and keep for future reference
To reduce the risk of fire or electric shock, do not expose this
product to water, rain or moisture. To prevent the risk of
electric shock, do not remove the cover or back of this
product. In case of product failure, only qualified personnel
can repair. There are no user-serviceable parts inside.
CAUTION !
Dangerous tension inside the product ! Do not open. Risk of
electric shock ! No parts can be repaired by the end-user. Only
qualified personnel can repair and maintain this product.
If the electric cord is damaged, it must be replaced by the manufacturer
or qualified after-sales personnel in order to avoid any danger.
The product must be installed in accordance with local laws.
Damaged batteries must be properly disposed. In order to protect the
environment, please dispose the batteries properly, in accordance with
local laws (information is available at your reseller).
Where to install the product
- Place the product on a straight, rigid and stable place. Do not
place the product on a carpet.
- Do not place the product on top of another that may cause
overheating (for example, a receiver or amplifier).
- Do not place anything underneath the product (for example, CDs
or magazines).
-1-
Proper ventilation
- Place the product in a sufficiently–aerated place to avoid
overheating. Allow at least 10cm spacing at the back and top of
the product, and 5cm spacing on both sides to prevent
overheating.
- Do not place items such as newspapers, tablecloth, curtains, in
front of the ventilating openings.
Do not expose the product to high temperatures, moisture, water
and dust.
- The apparatus shall not be exposed to dripping or splashing. No
object filled with liquids, such as vases, shall be placed on the
apparatus.
- Do not place other items close to this product that may damage it
(for example, objects containing water or lightened candles).
- No naked flame sources, such as lighted candles, should be
placed on the apparatus.
Electric supply
- Please unplug the product in case of prolonged non-use.
- If the supply cable is damaged, it must be replaced by the
manufacturer or qualified after-sales personnel to avoid any
danger.
- This product must be connected to an electrical supply 230V ~
50Hz.
- The plug must be accessible after installation.
-2-
This product is compliant with directives 2006/95/CE
(abrogating the directive 73/23/CEE modified by the
directive 93/68/CEE) and 2004/108/CE (abrogating
the directive 89/336CEE).
- This logo set on the product means that the
recycling of this apparatus comes within the
framework of the directive 2002/96/EC of
January 27, 2003 concerning the waste on
electrical and electronic equipment (WEEE).
- The presence of dangerous substances in the electrical and
electronic equipments can have potential consequences on the
environment and human health in the cycle of reprocessing this
product.
- Therefore, at the end of its lifetime, this product shall not be
disposed with other non-recycled waste.
- As the end user, your role is of prime importance in the cycles of
re-using, recycling, and other forms of valorization of this electrical
and electronic equipment. Local authorities and resellers have set
special procedures for the purpose of collecting and recycling this
product.
- You have the obligation to use the selective waste collection
systems put in place by your local authorities.
-3-
CONTENT
IMPORTANT SAFETY INSTRUCTIONS .................................................. 1
CONTENT ................................................................................................. 4
PANELS .................................................................................................... 5
REMOTE CONTROL ................................................................................ 7
CONNECTION .......................................................................................... 9
BASIC OPERATION ............................................................................... 10
TROUBLE SHOOTING ........................................................................... 17
SPECIFICATION ..................................................................................... 19
-4-
PANELS
1.
2.
3.
4.
Control button
iPod socket
SD card socket
USB connector
-5-
1. The SET key triggers the following actions in the following order.
TIME (time setting)→SL00(sleeping time setting)→ALM (alarm
clock setting)→VOUT(Video out mode)→RST(Reset)
2. Key for “Pause” or “Play” and Power Standby (Press and hold
button for 2 seconds)
3. Selection of input channels. Sequence:
iPod → SD → USB → AUX/FM
4. Volume down
5. Volume up
6. Previous track/ tuner station
7. Next track/ tuner station
-6-
REMOTE CONTROL
1.
2.
3.
4.
5.
6.
7.
8.
9.
10.
11.
12.
Standby
Mute/VOL decrease
FM/Aux input selection
iPod input selection
SD/USB input selection
iPod menu up
iPod menu down
iPod MENU
Previous track/Fast backward
Next track/Fast forward
Enter
iPod play/pause
-7-
13.
14.
15.
16.
17.
18.
19.
20.
21.
22.
23.
Master Vol- adjust
Master Vol+ adjust
MEM (tuner memory)
Tuner Channel Down
Tuner Channel Up
Repeat
Shuffle
EQ
Sleep
Alarm Set
Time Set
Battery Installation
1. Release the side latch
and pull out the battery
holder;
2. Install only a 3 volts
Cr2025 battery cell and
place battery polarity +
respectively to the + sign of the holder.
3.Replace the battery holder.
Notes:
1. Use only the size and type of battery specified.
2. Be sure to follow the correct polarity when installing the battery as
indicated in the battery compartment. A reversed battery may cause
damage to the device.
3. Do not drop or step on the remote control, this may cause inner damage
to the device.
4. If not using the remote control for a long period of time, remove the
battery to avoid possible damage due to battery leakage.
Remote control effective range:
Aim the remote control at the unit IR receiver.
The distance to the unit should be less than 5 meters and within 30。.
The remote control may be less effective if:
1. Unit is placed under intense ambient
lighting.
2. There are obstacles between the remote
control and IR receiver.
3. Other remote controls are operated at
the same time.
4. Low battery power.
-8-
CONNECTION
1. Connect the unit to the A/C outlet.
2. Audio and Video connections:
a. You can connect a MP3 player or a smartphone to the device’s
AUX-IN input. The smartphone’s music is then output through
the unit.
b. Alternatively, if you have an iPhone, you can connect the unit to
your TV screen with the VIDEO OUTPUT. Videos stored on
your iPhone can then be displayed directly on your TV screen
(please note the sound will be output through the unit – and not
from the TV).
3. Once all connections have been made, you can press the power
button located on the rear panel to the ON position.
IMPORTANT- While the AUX-IN cable is connected onto the unit, the
FM mode will be unavailable. Therefore please disconnect the AUX-IN
cable before starting FM mode.
-9-
BASIC OPERATION
PREPARATIVE
1) Before the unit is turned ON, please check if all the connections are right
and safe. Then connect the main power.
2) Press the POWER ON/OFF button on the back panel to turn on the
main power.
STATE INDICATION OF DISPLAY SCREEN
1. In radio mode, the display screen will show the currently tuned
frequency.
2. In iPod/iPhone/iPad,USB,SD, and AUX status, show the playing time.
STANDBY MODE
Press the STANDBY button on the remote control (or press and hold
STANDBY button on top panel for about 2 seconds) to switch to active or
standby mode.
ATT/MUTE BUTTON
If current volume level is above 8(the volume level range is 0~32), press
ATT/MUTE button once, then the volume will decrease to 8. Press twice, it
will enter to mute, press third time or the VOL+/-, it will resume to previous
volume level.
If current volume level is below 8, then press ATT/MUTE button once, it will
enter to mute, press twice or press VOL+/-, it will resume to previous volume
level.
VOLUME SETTING
Press the VOL.+/- button to increase or decrease the volume.
- 10 -
PREVIOUS & NEXT
In play status, press the
button to go to the previous audio file; press
the
button to go to the next audio file.
Note: These buttons are unavailable in AUX input.
FAST FORWARD & FAST REWIND
Press and hold the
or
button to fast rewind or fast forward.
Release the button to resume playing mode.
Note: These buttons are unavailable in AUX input.
MENU BUTTON
While playing the iPod/iPhone, press the MENU button to return to the
previous menu of iPod/iPhone.
iPod,FM/AUX BUTTONS
1) Connect the iPod/iPhone/iPad with this unit, then press iPod button on
the remote control.
2) Correctly connect audio facility with this unit, then press FM/AUX button
on the remote control to enter AUX mode to enjoy the external audio
input sources function.
3) Press FM/AUX button on the remote control to enter the FM radio mode.
IMPORTANT- While the AUX-IN cable is connected onto the unit, the FM
mode will be unavailable. Therefore please disconnect the AUX-IN cable
before starting FM mode.
MEM BUTTON
In Radio mode, press and hold the MEM button for about 3 seconds to
search the frequency from 87.5MHz to 108.0MHz automatically. For more
information, see FM RADIO OPERATION.
- 11 -
PLAY/PAUSE BUTTON
During playback, press the PLAY/PAUSE button on remote or on the top
panel to pause, press the button again to continue playing.
iPod/iPhone/iPad OPERATION
1. Insert the iPod/iPhone/iPad to the dock.
2. Press the iPod button on the remote control or repeatedly press the
SOURCE button on the top panel to enter to iPod/iPhone/iPad
mode.
3. When activating the iPod/iPhone/iPad mode, the screen will display”
iPod”, press MENU button to enter the iPod menu, please press
/
button to select the previous or next item. Then press the
ENTER button to play the selected audio file. Please note that the
PLAY/PAUSE button is only used for pausing and resuming the
playback.
4. Connect the unit to your TV (with the VIDEO Output on rear panel)
so as to enjoy the movies stored on your iPhone or iPod directly on
your TV screen. Please note that this video function is only available
in iPod, iPhone or iPad video mode and that it will not decode videos
stored on USB or SD devices. For video playing, user can choose
image either on iPod/iPad/iPhone or TV: Press SET button on the
top panel, when LED screen displays ”VOUT”, then press
or
to select TV as the video output mode.
5. Press Shuffle or Repeat button to choose the play mode. Shuffle for
random playing, Repeat for repeat playing. This 2 buttons only have
function under iPod/iPhone/iPad mode.
NOTES:
- Please note the unit can decode videos from your iPod, iPad and
iPhone device only. It cannot decode photos from the iPod, iPad or
iPhone device.
- Videos or photos cannot be decoded from a USB or Memory Card
- 12 -
device. USB and memory slot can solely playback MP3-format music.
- If you experience some noise or interference when playing content from
your iPhone or iPad, please put your device into airplane mode.
USB/DIGITAL CARD
It is possible to listen to audio files through the USB and Card reader.
1. Connect the USB device or a SD card to the speaker system.
2. Press the SD/USB button on the remote control to play the USB or CARD.
Press SD/USB button again to switch between USB and CARD modes.
3. Long time pressing the
or
button to fast rewind or fast forward;
Press the
or
button to go to the previous or next audio files.
4. To exit the USB/CARD mode: Press the iPod, FM/AUX button, and switch
to other modes.
The unit cannot read my USB device.
- Once you have plugged your USB device to the unit, you need to
switch to the USB mode before it can operate.
- This unit supports USB capacity up to 8G.
- This unit does not support a direct USB connection with a computer.
You need to use a USB device only.
- Check that the files system of your USB device is formatted into the
FAT or FAT 32 format. USB device formatted into NTFS are not
compatible with this unit. Caution: if you attempt to modify your file
system, formatting your device will erase all data. Please refer to
your USB device’s instruction manual first.
- Warning: Connect your USB device directly to the USB port of the
device. Using an extension cable is not recommended and may
cause interference and failure of data transfer.
The unit cannot read my memory card.
Check firstly that your memory card is compatible with the unit.
Supported memory cards are SD, SDHC formats, and support the SD card
- 13 -
capacity up to 8G. We have tested this unit with most of the market’s
memory cards(capacity is 8GB or lower) ; we cannot however guarantee a
full compatibility with all the cards in the market because of the multiple
technology standards in use. Should you have a compatibility problem,
please connect the unit through a USB device.
AUX Mode
1. Connect the audio cable between this unit and the device that has
audio output (such as CD player, DVD player, TV, PC, etc.).
2. Press FM/AUX button on the remote control, or SOURCE button on
the top panel to enter AUX mode and you’ll see the LED screen
displays ”AUX”.
Notes: Please unplug AUX-IN Audio Cable after usage, otherwise
it can’t enter FM mode.
FM RADIO OPERATION
IMPORTANT- While the AUX-IN cable is connected onto the unit, the FM
mode will be unavailable. Therefore please disconnect the AUX-IN cable
before starting FM mode.
1. Enter FM Function
While in the operating mode, press the FM/AUX button on the remote
control or press SOURCE button on the top panel to enter FM mode. The
LED screen will display ”FM”.
2. Select Bands
1) Select the band by pressing
/ : press these buttons to adjust the
frequency up or down a step. The step of FM is 100kHz.
2) Keep pressing button
/
on the remote control or top panel for
about 3 seconds, it will search 1 channel automatically.
- 14 -
3) Automatically search bands: Keep pressing the MEM button for about 3
seconds, it will search the frequency from 87.5M to 108.0MHz and
store the radio stations automatically.
4) You can change the stored radio station by using button CH- or CH+ on
remote control or
/
on top panel.
3. Save Bands
Pressing the MEM button on the remote control when under FM mode,
the LED screen will display ”Pxx”(where xx= preset radio station number,
such as 01,02……). Press CH- or CH+ button to select the preset radio
station number. And press MEM button to store the current radio
frequency.
Note: Please ensure the wire antenna is well placed to get the best radio
reception.
TIME SETTING
Press the TIME button on the remote control, and then the LED screen
shows” TIME”, Press ENTER to enter time setup mode. Press
or
to adjust the hour and minute. And press ENTER to confirm the setting.
User can also set time by top panel:
Press the SET button on the top panel. When the LED screen shows ”TIME”,
pressing SET button to enter time setup mode.
or
to adjust hour
and minute. Press SET button to confirm the setting.
ALARM FUNCTION
1. Alarm Setting
Press the “ALARM” button, and then the LED screen shows ”ALM”.
Press
or
to select the alarm mode ”ON” or “OFF”, and the LED
screen will shows ”ON” or “OFF” accordingly.
When the alarm mode is “ON”, pressing ENTER button to set alarm time,
- 15 -
pressing
or
button to adjust the hour and minute, and pressing
ENTER button to confirm the alarm time setting.
Alarm mode is “OFF” means cancel the alarm.
User can also set alarm on top panel:
Press SET button and when the LED screen shows ”ALM”, Press
or
to select alarm mode ”ON or “OFF”, and the LED screen will shows
“ON” or “OFF” accordingly.
When the alarm mode is “ON”, pressing SET button to set alarm time,
pressing
or
button to adjust the hour and minute, and pressing
SET button to confirm the alarm time setting.
Alarm mode is “OFF” means cancel the alarm
2. Alarm Wake up
The alarm will wake up with the input source (IPod, SD/USB and FM)
that was last selected before going to standby.
3. Turn off the alarm
When the alarm rings, it will go to snooze mode if pressing any button on
the remote control or on the top panel.
And it will ring per 10 minutes under snooze mode. The alarm can be
turned off completely at any time by pressing the STANDBY button.
4. The ring will stop automatic 1 hour later if no pressing any button.
SLEEP FUNCTION
Pressing SLEEP button on the remote control or press SET button on the
top panel. When the LED screen displays” SL00”, Select the sleeping time
by pressing
or
.You can choose the countdown time from
00,05,10,15,20,25,30,40,50,60,70,80,90 (unit :minute)
00 means to turn off sleeping mode. Press ENTER to confirm the setting.
When time up, the unit will go to standby mode instantly.
RESET TO FACTORY SETTING
Press the SET button on top panel, and when the LED screen
displays ”RST”, then press
or
to select YES or NO to confirm if
resume to factory default setting. YES means confirm to resume to factory
default setting.
- 16 -
TROUBLE SHOOTING
Power supply cannot be turned on
* Make sure that the power plug is fully inserted in the mains outlet.
* Switch the POWER button located on the rear panel to ON position.
The remote control does not work
* Low power or even No power in battery. Replace the battery.
* Try Remote control again, within 5 meters and effective infrared sensor
angle (+ /- 30 degree vertical to the unit)
No sound
* Make sure that the audio cable is connected correctly and securely to the
back of your unit and to the sound system.
* Make sure that the sound system is set to the correct audio input.
* Turn your unit off, then back on.
* Check the Volume level to ensure not set to minimum. Increase volume
to a higher level.
* Unit is mute mode. Press MUTE key to restore sound.
Remarks for playing videos in iphone and ipod modes:
If you cannot watch on your TV a video stored on your ipod or iphone,please
check out the following points:
* Connect the unit to your TV (with the VIDEO Output on rear panel) so as
to enjoy the movies stored on your iPhone or iPod directly on your TV
screen. Please note that this video function is only available in iPod,
iPhone or iPad video mode and that it will not decode videos stored on
USB or SD devices. For video playing, user can choose image either on
iPod/iPad/iPhone or TV: Press SET button on the top panel, when LED
screen displays ”VOUT”, then press
or
to select TV as the
video output mode.
* Please note the unit can decode videos from your iPod, iPad and iPhone
- 17 -
device only. It cannot decode photos from the iPod, iPad or iPhone
device.
* Videos or photos cannot be decoded from a USB or Memory Card device.
USB and memory slot can solely playback MP3-format music.
* If you experience some noise or interference when playing content from
your iPhone or iPad, please put your device into airplane mode.
FM mode not available
* Make sure the AUX cable is unplugged
* Make sure you have selected FM mode already
The unit does not work at all
* Switch the POWER button located on the rear panel to OFF position, and
then back to ON position 30 seconds later.
- 18 -
SPECIFICATION
VOLTAGE RATING:
AC100-240V 50/60Hz;
POWER CONSUMPTION:
15W
POWER CONSUMPTION STANDBY:
≤1W
FREQUENCY RESPONSE
L/R CH (150Hz-20KHz at -2 / -2dB)
SENSITIVITY
L/R:300mV
OVERLOAD SOURCE e.m.f.
≥2V
SEPARATION
≥55dB
S/N
≥70dB
REMOTE CONTROL
≥5m/30°
DIMENSION(with base plate)
302 (W)×123(D)×150(H)mm
Note: Specifications subject to change without prior notice.
* “Made for iPod,” “Made for iPhone,” and “Made for iPad” mean that an
electronic accessory has been designed to connect specifically to iPod, iPhone,
or iPad, respectively, and has been certified by the developer to meet Apple
performance standards. Apple is not responsible for the operation of this device
or its compliance with safety and regulatory standards.
* Apple is not responsible for the operation of this device or its compliance with
safety and regulatory standards.
* iPhone , iPod and iPad are trademark of Apple Inc., registered in the U. S. and
other countries.
* Please note that the use of this accessory with iPod, iPhone or iPad may affect
wireless performance.
- 19 -
SAV
ADMEA / LOGISAV
ZI du clos des charmes
26 rue du clos des charmes
77090 COLLEGIEN - France
For instruction manual in another language, check online at
http://manuel-utilisateur.logisav.fr
- 20 -


