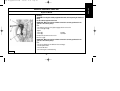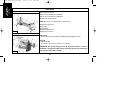
1
COUV-C6-2005
6/01/06
16:30
Page 1
VERY IMPORTANT
As the booklet is constantly re-edited, this one only covers vehicles for this
particular model year.
It is therefore necessary to order a new booklet each year and RETAIN THE
OLD ONES.
6/01/06
16:30
Page 2
PRIVATE CARS
COUV-C6-2005
AC/DTAV/MMCB/MMEC
Méthodes Mécaniques
쏘 «The intellectual property rights relating to the technical information contained in this document belong
exclusively to the manufacturer. Reproduction, translation or distribution in whole or in part without prior
written authorisation from the manufacturer is forbidden».
2005
CITROËN C6
«The technical information contained in this document is intended for the exclusive use of the trained personnel
of the motor vehicle repair trade. In some instances, this information could concern the security and safety of
the vehicle. The information is to be used by the professional vehicle repairers for whom it is intended and they
alone would assume full responsibility to the exclusion of that of the manufacturer».
«The technical information appearing in this brochure is subject to updating as the characteristics of each
model in the range evolve. Motor vehicle repairers are invited to contact the CITROËN network periodically for
further information and to obtain any possible updates».
CAR 000 023
2005
Angl-C6-Index-2005
4/02/05
17:10
Page I
PRESENTATION
THIS HANDBOOK summarises the specifications, adjustments, checks and special features of CITROËN private vehicles, not including UTILITY vehicles for which there exists a
separate handbook.
The handbook is divided into groups representing the main functions:
GENERAL - ENGINE - INJECTION - IGNITION - CLUTCH, GEARBOX, DRIVESHAFTS - AXLES, SUSPENSION, STEERING - BRAKES - HYDRAULICS - AIR CONDITIONING.
Angl-C6-Index-2005
4/02/05
17:10
Page II
IMPORTANT
If you find that this handbook does not always meet your requirements, we invite you to send us your suggestions which we will take into account
when preparing future publications. For example:
- INSUFFICIENT INFORMATION.
- SUPERFLUOUS INFORMATION.
- NEED FOR MORE DETAILS.
Please send your comments and suggestions to:
CITROEN U.K. Ltd.
221, Bath Road,
SLOUGH,
SL1 4BA.
U.K.
Angl-C6-Index-2005
4/02/05
17:10
Page III
CONTENTS
GENERAL
Auxiliary equipment drive belt
45
IGNITION
Vehicle identification
1-4
Checking and setting the valve timing
50
Sparking plugs
General specifications: dimensions
5-6
Exhaust line specifications
68 - 72
Cooling system specifications
73 - 75
General specifications: weights
7
Operations to be performed before and
after a disconnection of the battery
8
Towing specifications
Lifting and supporting the vehicle
Checking the oil pressure
9 - 10
11 - 15
Capacities
18
Lubricants
18 - 20
ENGINE
Valve clearances
Drain-fill-bleed the engine cooling circuit
Prohibited operations: SIEMENS HDi
direct injection
Speedometer
101
77
AM6 automatic gearbox specifications
102
Procedure before operations
103
Precautions: AM6 gearbox
104
78 - 82
83 - 89
90 - 91
Engine specifications
22
Safety requirements: HDi direct injection
Engine suspension tightening torques: ES9A
23
Checking the low pressure fuel
supply circuit
93 - 94
Turbo pressure checks
95 - 97
Tightening torques: ES9A engine
24 - 28
Suspension tightening torques: DT17
29 - 31
Adjustment of torque reaction rod
32
Tightening torques: DT17 engines
33 - 41
Cylinder head tightening
42 - 43
CLUTCH - GEARBOX - TRANSMISSION
76
INJECTION
BOSCH 7.4.7 injection system
100
92
AM6 gearbox specifications
105
Tightening torques: AM6 gearbox
106 - 107
AM6 gearbox control specifications
108 - 110
Shift lock function
111
Initialisation of the AM6 gearbox
112 - 113
Draining-filling-topping up
the AM6 gearbox
114 - 116
117 - 119
Air supply circuit specifications
98
Oil pressure checks: AM6 gearbox
Checking the air supply circuit
99
Transmission
120
Angl-C6-Index-2005
4/02/05
17:10
Page IV
CONTENTS
AXLES - SUSPENSION - STEERING
Wheels and tyres
Checking and adjusting the vehicle height
Values for checking and adjusting
the axle geometries
Front axle
Front axle tightening torques
Rear axle
Rear axle tightening torques
Active suspension with variable damping
Suspension tightening torques
Draining-filling-bleeding
the hydraulic steering/suspension circuit
Power steering specifications
Power steering tightening torques
Checking the steering assistance
pressure (ES9A engine)
Bleeding the hydraulic steering
assistance circuit
AIR CONDITIONING
BRAKES
121 - 124
125 - 128
Brake specifications
Braking system: general specifications
171 - 173
Special features: air conditioning circuit
129 - 133
Braking system: tightening torques
174 - 177
Pollen filter
134 - 135
136 - 139
140 - 141
142 - 143
144 - 149
150 - 154
Values for checking and adjusting
the braking system
General feataures of
the electric parking brake
Brake fluid checks
Drain-fill-bleed the braking system
170
178
179 - 189
190
191 - 194
HYDRAULICS
155 - 158
159 - 162
163 - 164
165 - 168
169
Safety requirements:
active suspension with variable damping
Suspension spheres: general specifications
195 - 197
198
Suspension spheres:
specification - identification
199 - 200
Depressurising the hydraulic
suspension circuit
201 - 202
Quantities: aircon system R134.a
203
204 - 205
206
Checking the compressor oil level
207 - 208
Checking the efficiency of
the air conditioning circuit
209 - 215
Air conditioning circuit: ES9A
216
Air conditioning circuit: DT17
217
Angl-C6-page001-21-2005
4/02/05
17:12
Page 1
IDENTIFICATION OF VEHICLES
A - Chassis stamp
(cold stamp on suspension leg).
B - Chassis stamp
(cold stamp on bodywork below rear screen).
D - AS/RP No. and RP paint code
(label on front pillar close to driver's door).
E - Inflation pressures and tyre references
(label on front pillar close to driver's door).
F - Serial no. on bodywork.
G - Gearbox reference - Factory serial no.
H - Engine legislation type - Factory serial no.
E1AP13LD
GENERAL
C - Manufacturer's data plate
(on the LH centre pillar).
Angl-C6-page001-21-2005
4/02/05
17:12
Page 2
IDENTIFICATION OF VEHICLES
Petrol
Diesel
ES
9
A
3.0i 24 S
DT
17
BTED4
2.7 24V HDi
Emission standard
GENERAL
Type code
E4
TD XFVJ
TD UHZJ
Engine type
XFV
UHZ
Cubic capacity (cc)
2946
2720
15
13
Fiscal rating (hp)
Gearbox type
Gearbox ident. plate
AM6
AM6
20 GH 07
20 GG 07
2
Angl-C6-page001-21-2005
4/02/05
17:12
Page 3
IDENTIFICATION OF VEHICLES
Manufacturer's plate
The manufacturer's plate carries the following information:
(a) Type approval number (*)
(c) Gross vehicle weight (*)
(d) Gross vehicle weight (*)
(e) Maximum weight on front axle (*)
(f) Maximum weight on rear axle (*)
(g) Manufacturer identification
(*) = according to marketing country.
E1AP09JC
3
GENERAL
(b) Type serial number (VIN)
Angl-C6-page001-21-2005
4/02/05
17:12
Page 4
IDENTIFICATION OF VEHICLES
Type approval
Structure
TD XFVJ
Version (4)
T
Family (1)
D
Bodywork (2)
L3
Depollution levels
XFV
Engine (3)
W3
J
Version (4)
A
GENERAL
Family (1)
T
C6
Bodywork (2)
D
Saloon 4-door 3-box
US
Other
XFV
3.0i 24 S
2.7 24V HDi
ES9A
DT17BTED4
4
K'
L3/L4 Euro IV
B
C
P
V
5
8
E
F
R
W
6
9
G
H
S
X
D
J
N
K
L
T
83/87
1
2
3
U
Y
Z
UHZ
Alcohol
Euro IV
M
Engine (3)
K
L4
7
0
4
Angl-C6-page001-21-2005
4/02/05
17:12
Page 5
GENERAL SPECIFICATION: DIMENSIONS
GENERAL
Exterior dimensions
E1AP13KD
5
Angl-C6-page001-21-2005
4/02/05
17:12
Page 6
GENERAL SPECIFICATION: DIMENSIONS
Exterior dimensions (mm)
GENERAL
Vehicles
Wheelbase
Front overhang
Rear overhang
Length overall
Front track at ground level
Width overall
Rear track at ground level
Track width
Height overall ODM
ODM = Vehicle in running order (vehicle empty,
All types
2900
1124
884
4908
1586
2081
1558
1860
1464
A
B
C
D
E
F
G
H
J
levels topped up).
Interior dimensions and volumes (mm)
Elbow width, front
Elbow width, rear
Height under boot
Minimum floor width
Volume of boot below parcel shelf
1503
1510
490
1115
407 dm3
(*) = Boot floor can be moved and configured.
6
Angl-C6-page001-21-2005
4/02/05
17:12
Page 7
GENERAL SPECIFICATION: WEIGHTS
Versions
Engine type
Gearbox type
Payload
Weight empty in running order
Gross Vehicle weight
Gross Train weight
Max. trailer weight with brakes
Incline 12 %
Incline 10 %
Incline 8 %
Max. trailer weight without brakes
Maximum nose weight
Maximum weight on roof bars
ES9A
DT17BTED4
3.0i 24S
XFV
2.7HDi 24V
UHZ
464
1871
2335
3671
1400
1500
1700
1400
750
70
80
NOTE: Maximum nose weight = Vertical load at the tow hook (CVA).
7
GENERAL
AM6
455
1816
2271
Angl-C6-page001-21-2005
4/02/05
17:12
Page 8
OPERATIONS TO BE CARRIED OUT BEFORE AND AFTER A DISCONNECTION OF THE BATTERY
GENERAL
Before reconnecting the battery.
Doors and tailgate.
WARNING: Before disconnecting the battery, partially open the door
windows.
Automatic gearbox.
If the vehicle has to remain stationary: Pplace the gear lever in the parking
position "P".
If the vehicle has to be moved: Place the gear lever in the neutral position
"N".
Electric parking brake.
If the vehicle has to remain stationary: Activate the electric parking brake.
If the vehicle has to be moved: Deactivate the electric parking brake.
Features of the vehicle's electrical supply.
When the boot is closed and the battery is disconnected, it is possible to
supply the vehicle by connecting another battery or a 12V exterior supply.
Operations to be performed:
- Link the earth of the exterior supply to the vehicle earth.
- Link the 12V of the exterior supply to the positive terminal of the battery +
unit, in the front left hand side of the engine compartment.
NOTE: If the window is open at the time the battery is reconnected, action
the window switch several times to close it, then re-initialise.
Open the window fully.
Action and release the window switch until the window is completely closed.
NOTE: This operation has to be carried out on each electric window.
Sun roof.
The anti-pinch function has to be re-initialised.
Place the sun roof switch in the maximum tilt position.
Keep the sun roof switch pressed until the sun roof ceases its movement.
Release the sun roof switch.
Press the sun roof switch within 5 seconds.
Keep the sun roof switch pressed until the end of the sun roof opening
sequence.
Multifunction screen.
It is necessary to adjust the date, time and outside temperature.
Adjust the display language of the multifunction screen if necessary.
NOTE: The default display language of the multifunction screen is French.
Reconfigure the personalisation menu of the multifunction screen.
Radio.
Reprogramme the radio stations.
Telematic control unit (RT3 radiotelephone).
Reprogramme the radio stations.
Navigation.
Warning: the vehicle has to be out in the open (when you switch on
the ignition, the navigation ECU searches for satellites).
Reprogramme the customer parameters.
After reconnecting the battery.
Antiscanning function.
It is necessary to wait 1 minute after reconnecting the battery in order to be
able to restart the vehicle.
Electric windows.
It may be necessary to re-initialise the sequential and anti-pinch functions.
8
Angl-C6-page001-21-2005
4/02/05
17:12
Page 9
GENERAL SPECIFICATION: TOWING THE VEHICLE
Front towing
WARNING: When the engine is not running,
steering and braking are no longer power-assisted.
Towing eye.
The towing eye (1) is to be found in the vehicle
toolkit (2) stowed in the spare wheel.
E2AP02SD
Front of the vehicle.
Rear towing
Open the flap (3).
Screw in the towing eye (1).
Rear of the vehicle.
Open the flap (4).
Screw in the towing eye (1).
E2AP02RD
E2AP02TD
9
GENERAL
Open the boot.
Lift the boot floor plate.
Angl-C6-page001-21-2005
4/02/05
17:12
Page 10
GENERAL SPECIFICATION: TOWING THE VEHICLE
Vehicle with automatic gearbox.
IMPERATIVE: Never tow the vehicle with the wheels hanging (towing by the wheels).
Towing:
GENERAL
-
It is necessary to raise the front of the vehicle, in order to tow it.
If it is not possible to raise the front of the vehicle.
It is essential to place the selection lever in position "N".
Do not add any oil.
Do not exceed a speed of 70 km/h (45 mph) on a journey of 100 Km (60 miles).
Never tow the vehicle backwards.
Check that the parking brake is released.
Driving:
- Never drive with the ignition switched off.
NOTE: The automatic gearbox is only lubricated when the engine is running.
Never push the vehicle to attempt to start it (impossible with an automatic gearbox).
10
Angl-C6-page001-21-2005
4/02/05
17:12
Page 11
LIFTING AND SUPPORTING THE VEHICLE
IMPERATIVE: Respect the safety and cleanliness requirements.
Lifting.
ATTENTION: Lifting the vehicle by the front can only be done one side at a time.
E2AP016C
IMPERATIVE: Do not lift the vehicle by taking weight under the front subframe. Do not place blocks under
the front subframe.
IMPERATIVE: Never take weight on the front panel support and the front part of the engine subframe.
IMPERATIVE: Place the jack under the centre pillar, inserting an elastomer shim at «a».
E2AP02LD
11
GENERAL
Front of the vehicle.
Angl-C6-page001-21-2005
4/02/05
17:12
Page 12
LIFTING AND SUPPORTING THE VEHICLE
Rear of the vehicle.
IMPERATIVE: Do not lift under the spare wheel (risk of deformation of the floor). Do not lift under the rear
axle crossmember.
Use lateral lifting as for the front of the vehicle, or rear lifting (see diagrams).
GENERAL
IMPERATIVE: Do not place a block between the jack and the strengthener «b».
E2AP02MD
Place the jack under the strengthener «b».
Lateral lifting.
IMPERATIVE: Do not place the jack outside the lifting points.
E2AP017C
12
Angl-C6-page001-21-2005
4/02/05
17:12
Page 13
LIFTING AND SUPPORTING THE VEHICLE
Lifting by vehicle jack.
NOTE: the vehicle jack, with the extension and handle, is to be found in the toolkit stowed in the spare wheel.
Correct position for the vehicle jack (1).
E2AP02ND
Rear of the vehicle.
Correct position for the vehicle jack (1).
E2AP02QD
13
GENERAL
Front of the vehicle.
Angl-C6-page001-21-2005
4/02/05
17:12
Page 14
LIFTING AND SUPPORTING THE VEHICLE
Supporting the vehicle.
Incorrect positioning of the axle stand.
GENERAL
E2AP018C
IMPERATIVE: Do not place the axle stands under the lugs of the jacking points.
Correct positioning of the axle stand.
E2AP02PD
14
Angl-C6-page001-21-2005
4/02/05
17:12
Page 15
LIFTING AND SUPPORTING THE VEHICLE
Raising the vehicle on a lift, supported from the jacking points.
Equipment involved:
- Two-column lift.
- Auxiliary lift with blocks.
Tooling required.
[1] Safety straps
E5AP2DNC
Using the safety straps.
WARNING: Check the condition of the safety straps before using them, do not use worn safety straps.
WARNING: Do not use straps that show any signs of oil or grease (risk of soiling the carpets and/or
seats).
Place protections on the front seats and on the fragile parts of the vehicle.
Example:
- Two-column lift.
- Place the safety straps [1] under the arm of the lift and criss-crossing the vehicle.
E2AP02FC
15
GENERAL
IMPERATIVE: Position the safety straps, if placing the vehicle on a lift supported from the jacking points
(risk of the vehicle overbalancing when a heavy component is removed).
Angl-C6-page001-21-2005
4/02/05
17:12
Page 16
CAPACITIES (in litres)
Draining methods
Oil capacities are defined according to the following methods
Draining of the engine lubrication system by GRAVITY
Draining of the engine lubrication system by SUCTION
Place the vehicle on horizontal ground (in the high position if
hydropneumatic suspension).
Place the vehicle on horizontal ground (in the high position if
hydropneumatic suspension).
The engine should be hot (oil temperature 80°C).
The engine should be hot (oil temperature 80°C).
GENERAL
Remove the oil by suction through the dipstick tube.
Drain the sump by gravity.
Remove the oil filter cartridge.
Remove the oil filter cartridge (time for draining and drip-drip = 15
minutes approx.).
Maintain the suction of oil in the sump (15 minutes approx.).
Refit a new oil filter cartridge.
Refit the cap with a new seal.
Refill the engine with oil (see table for oil capacity).
Refit a new oil filter cartridge.
Start the engine to fill the oil filter cartridge.
Refill the engine with oil (see table for oil capacity).
Stop the engine (allow to stabilise for 5 minutes).
Start the engine to fill the oil filter cartridge.
WARNING: Remove the suction container before starting the engine.
Stop the engine (allow to stabilise for 5 minutes).
ESSENTIAL: Systematically check the oil level using the oil dipstick.
16
Angl-C6-page001-21-2005
4/02/05
17:12
Page 17
CAPACITIES (in litres)
Diesel
3.0i 24S
2.7 24V
BVA
BVA
XFV
UHZ
Engine type
Engine with filter cartridge
5,25
Max. after draining and change of filter (by suction)
5,75
Max. after draining and change of filter (by gravity)
5,55
Dry sump
5,95
Between min. and max.
2
Dry automatic gearbox
7
Volume of oil remaining after draining
4
GENERAL
Petrol
3
Quantity of oil to be put back in after draining
6,3
Hydraulic circuit
11,3
Cooling circuit
13,2
65
Fuel tank
17
Angl-C6-page001-21-2005
4/02/05
17:12
Page 18
LUBRICANTS - TOTAL recommended oils
Engine oil specifications
TOTAL ACTIVA or TOTAL ACTIVA QUARTZ
Commercial description
S.A.E. norms
Climate
GENERAL
Petrol engines
Diesel engines (*) (**)
Synthetic 9000
0W40
Climate
ACE: A3
Semi-synthetic 7000
5W30
5W40
10W40
Cold
Temperate
Temperate
Hot
ACE: A5
15W40
Hot
ACE : A3
API: SJ
API: SL
ACEA: B5
ACEA: B3 or B4
Prohibited
ACEA: B3
API: CF
Prohibited FAP
(*) In the winter season, on HDi engines, it is recommended to use 5W40 oil instead of 10W40 oil, this to enhance starting from cold.
(**) Do not use 5W30 oil on HDi engines with particle filter (FAP).
18
Angl-C6-page001-21-2005
4/02/05
17:12
Page 19
LUBRICANTS - TOTAL recommended oils
Gearbox oil
AM6 automatic gearbox
All countries
JWS 3309 (ESSO)
Power steering oil
Power-assisted steering
All countries
LDS TOTAL H50126
Engine coolant
All countries
CITROËN fluid
Protection: -35C°
GLYSANTIN G33
REVKOGEL 2000
2 Litres
9979 70
9979 72
5 Litres
9979 71
9979 73
20 Litres
9979 76
9979 74
210 Litres
9979 77
9979 75
Synthetic brake fluid
Packs
All countries
CITROËN fluid
All countries
Colour
1/2 Litre
Hydraulic circuit
Packs
1 Litre
Norm
Orange
19
CITROËN references
DOT 4
CITROËN references
TOTAL FLUIDE LDS
GENERAL
CITROËN references
Packs
Angl-C6-page001-21-2005
4/02/05
17:12
Page 20
LUBRICANTS - TOTAL recommended oils
Screen wash fluid
CITROËN references
Packs
All countries
Concentrate: 250 ml
9980 33
ZC 9875 953U
Fluid
ready to
use
1 Litre
9980 06
ZC 9875 784U
5 Litres
9980 05
ZC 9885 077U
GENERAL
Greasing
General use
All countries
TOTAL MULTIS 2
TOTAL PETITES MECANISMES
Nota : NLGI = National Lubrificating Grease Institude.
20
9980 56
ZC 9875 279U
NLGI norms
2
Angl-C6-page001-21-2005
4/02/05
17:12
Page 21
ENGINE OIL CONSUMPTION
- Oil consumption depends on:
- The engine type.
- How run-in or worn it is.
- The type of oil used.
- The driving conditions.
II - An engine can be considered RUN-IN after:
- 3 000 miles (5 000 km) for a PETROL engine.
- 6 000 miles (10 000 km) for a DIESEL engine.
III - MAXIMUM PERMISSIBLE oil consumption for a RUN-IN engine.
- 0.5 litres per 600 miles (1 000 km) for a PETROL engine.
- 1 litre per 600 miles (1 000 km) for a DIESEL engine.
DO NOT INTERVENE BELOW THESE VALUES.
IV - OIL LEVEL: The level should NEVER be above the MAX. mark on the dipstick after changing or topping up the oil.
- This excess oil will be used up rapidly.
- It will reduce the engine output and adversely affect the operation of the air circuits and gas recycling.
21
GENERAL
I
Angl-C6-page022-82-2005
4/02/05
17:19
Page 22
ENGINE
ENGINE SPECIFICATIONS
Engines: ES9A - DT17TED4
Petrol
Diesel
3.0i 24S
2,7 24V
Engine type
XFV
UHZ
Cubic capacity (cc)
2946
2720
Bore/stroke
87/82,6
81x88
Compression ratio
10,9/1
17,3/1
Power ISO or EEC (KW - rpm)
155-6000
150-4000
Torque ISO or EEC (m.daN - rpm)
29-3750
44-1900
22
4/02/05
17:19
Page 23
ENGINE
Angl-C6-page022-82-2005
TIGHTENING TORQUES: POWER UNIT SUSPENSION
Engine: ES9A
Torque reaction rod - lower RH engine support
1
6 ± 0,5
2
1 ± 0,1
3
6,5 ± 0,5
LH engine support
4
3 ± 0,3
5
6,5 ± 0,6
6
5 ± 0,5
7
5,5 ± 0,5
Upper RH engine support
8-9
6 ± 0,6
10
4,5 ± 0,5
11
6 ± 0,5
12
6 ± 0,5
B1BP32YP
23
Angl-C6-page022-82-2005
4/02/05
17:19
Page 24
ENGINE
ENGINE TIGHTENING TORQUES
Engine: ES9A
1
2
3
4
Pencil-type ignition coil
Sparking plugs
Pre-tightening
Angular tightening
Valve cover
Pre-tightening
Tightening
Camshaft bearing cap cover
Pre-tightening
Tightening
Cylinder head
Pre-tightening
Slackening
Tightening
Angular tightening
B1BP27DP
24
0,8 ± 0,3
1 ± 0,1
90° ± 5°
0,5 ± 0,1
1 ± 0,1
0,2 ± 0,1
1 ± 0,1
2 ± 0,2
yes
1,5 ± 0,1
225° ± 5°
4/02/05
17:19
Page 25
ENGINE
Angl-C6-page022-82-2005
ENGINE TIGHTENING TORQUES
Engine: ES9A
5
6
7
Exhaust manifold (equipped with a new gasket)
Pre-tightening
(order from 1 to 10)
Tightening
(order from 1 to 10)
Con rod caps
Pre-tightening
Angular tightening
Engine flywheel
Pre-tightening
Angular tightening
B1JP02LD
25
1 ± 0,1
3 ± 0,3
2 ± 0,2
74° ± 5°
2 ± 0,2
60° ± 5°
Angl-C6-page022-82-2005
4/02/05
17:19
Page 26
ENGINE
ENGINE TIGHTENING TORQUES
Engine: ES9A
8
Crankshaft bearing
NOTE: Maximum length under heads for M11 = 131,5 mm.
NOTE: Maximum length under heads for M8 = 119 mm.
Perform the following operations:
- Brush the screw threads.
- Refit the screws having first pre-coated them with «MOLYKOTE G RAPID PLUS» grease
on the threads and under heads.
Check the presence of the eight centring pins
Pre-tighten the screws M11 (sequence from 1 to 8)
3 ± 0,3
Pre-tighten the screws M8 (sequence from A to H)
1 ± 0,1
Tighten the screws M6 (sequence from a to 1)
1 ± 0,1
Slacken the screws screws M11 and M8
Yes
Proceeding screw by screw
Tighten the screws M11 (sequence from 1 to 8)
3 ± 0,3
Angular tightening
180°
Tighten the screws M8 (sequence from A to H)
1 ± 0,1
Angular tightening
180°
B1BP2D3D
26
4/02/05
17:19
Page 27
ENGINE
Angl-C6-page022-82-2005
ENGINE TIGHTENING TORQUES
Engine: ES9A
9
10
11
12
Sump
Pre-tightening (sequence from 1 to 20)
Tightening (sequence from 1 to 20)
Crankshaft pinion
Pre-tightening
Angular tightening
Crankshaft pulley
Inlet distributor (with new seals)
Pre-tightening
Tightening
Air inlet manifold
Pre-tightening
Tightening
B1BP1GZD
27
0,5 ± 0,1
0,8 ± 0,1
4 ± 0,4
80°
2,5 ± 0,2
0,4 ± 0,1
0,8 ± 0,1
13
0,4 ± 0,1
0,8 ± 0,1
Angl-C6-page022-82-2005
4/02/05
17:19
Page 28
ENGINE
ENGINE TIGHTENING TORQUES
Engine: ES9A
14
15
16
17
B1BP2D3D
18
20
21
22
19
Camshaft hubs
Pre-tightening
Angular tightening
Cap
Guide roller
Camshaft pulley
Pre-tightening
Angular tightening
Camshaft pulleys
Timing belt tensioner roller
Plate for the dynamic tensioner roller
Coolant pump
Pre-tightening
Tightening
Oil pump
Pre-tightening
Tightening
B1FP04KC
28
2 ± 0,2
57°
1,5 ± 0,1
8 ± 0,8
2 ± 0,2
115°
1 ± 0,1
2,5 ± 0,2
2,5 ± 0,2
0,5 ± 0,1
0,8 ± 0,1
0,5 ± 0,1
0,8 ± 0,1
4/02/05
17:19
Page 29
ENGINE
Angl-C6-page022-82-2005
TIGHTENING TORQUES: POWER UNIT SUSPENSION
Engine: DT17BTED4
RH engine support
1
2
3
4
5
Screws
Screws
Screws
Nut
Screws
6
7
8
9
Screws
Screws
Screws
Screws
8,2 ± 1,25
6 ± 0,6
2,8 ± 0,4
6,5 ± 0,6
6 ± 0,6
Front piloted torque reaction rods
B1BP3EPD
6 ± 0,6
4,3 ± 0,4
6 ± 0,6
B1BP3EQD
29
Angl-C6-page022-82-2005
4/02/05
17:19
Page 30
ENGINE
TIGHTENING TORQUES: POWER UNIT SUSPENSION
Engine: DT17BTED4
Rear piloted torque reaction rods
10
11
12
13
Screws
Screws
Screws
Screws
14
15
16
17
Screws
Screws
Screws
Screws
6 ± 0,6
LH gearbox support
B1BP3ERD
6 ± 0,6
5,5 ± 0,8
6 ± 0,6
5,5 ± 0,8
B2CP45CD
30
4/02/05
17:19
Page 31
ENGINE
Angl-C6-page022-82-2005
TIGHTENING TORQUES: POWER UNIT SUSPENSION
Engine: DT17BTED4
Gearbox impact absorber
18
Screws
19
Screws
4 ± 0,6
B2CP45DC
Driveshaft bearing
6 ± 0,6
B2CP45EC
31
Angl-C6-page022-82-2005
4/02/05
17:19
Page 32
ENGINE
ADJUSTMENT OF PILOTED TORQUE REACTION ROD
Engine: DT17BTED4
IMPERATIVE: Respect the safety and cleanliness requirements.
IMPERATIVE: Respect the safety and cleanliness requirements specific to High pressure
Diesel injection (HDi) engines.
Additional operations.
NOTE: The piloted torque reaction rods have to be adjusted in the event of removing the fixing
yoke of the front piloted torque reaction rod (1).
B1BP3E9D
WARNING: Tighten the supports of the engine/gearbox assembly prior to adjusting the rods.
Fit the supports (2) and (3), tighten the fixings
:
Fit the tie-rod (5), tighten the fixings
: 6,5 ± 0,6.
Fit the rear piloted torque reaction rod (4).
Fit the front piloted torque reaction rod (1).
Tighten the fixings of the rear piloted torque reaction rod (4)
: 6,5 ± 0,6.
Adjustment.
Position the lower edge "a" of the yoke (7) to 5 mm from the lower edge "b" of the crossmember (6).
Tighten the fixings (8)
: 6 ± 0,6.
Tighten the fixings of the front piloted torque reaction rod
: 6 ± 0,6.
B1BP3EBD
32
4/02/05
17:19
Page 33
ENGINE
Angl-C6-page022-82-2005
ENGINE TIGHTENING TORQUES
Engine: DT17BTED4
1
2
3
4
5
6
7
8
9
B1DP1LZD
Cylinder head
Butterfly housing
Inlet valve cover screws (*)
Inlet valve cover studs (*)
Coolant outlet housing
Cylinder heads
Pre-tightening
Tightening
Tightening
Angular tightening
EGR (exhaust gas recycling) electrovalve
Exhaust manifold nuts
Exhaust manifold studs
Turbocharger nuts
Turbocharger studs
Pre-catalysers
Vacuum pump
(*) Respect the sequence of tightening.
33
0,9 ± 0,2
2 ± 0,2
4 ± 0,5
8 ± 0,5
180 ± 5°
0,9 ± 0,2
2,3 ± 0,3
1,3 ± 0,2
2,3 ± 0,3
1,3 ± 0,2
2 ± 0,1
2,3 ± 0,3
Angl-C6-page022-82-2005
4/02/05
17:19
Page 34
ENGINE
ENGINE TIGHTENING TORQUES
Engine: DT17BTED4
Order of tightening of screws (2)
(2) Camshaft bearing cover screws (from 1 to 13)
(2) Camshaft bearing cover studs (from 1 to 13)
B1DP1M1C
Order of tightening of bolts (4) (from 1 to 8)
(4) Cylinder head bolts
B1DP1M2C
34
4/02/05
17:19
Page 35
ENGINE
Angl-C6-page022-82-2005
ENGINE TIGHTENING TORQUES
Engine: DT17BTED4
11
12
13
14
15
16
17
18
B1DP1M3P
Cylinder block
Coolant pump
Con rod screws
Pre-tightening
Angular pre-tightening
Angular tightening
Starter gearwheel carrier
Pre-tightening
Angular pre-tightening
Angular tightening
Lower engine block screw (*)
Lower engine block screw (*)
Bearing cap fixing screws (*)
Pre-tightening
Tightening
Angular tightening
Crankshaft bearing cap cover
Pre-tightening
Tightening
Angular tightening
Accessories drive pulley
(*) Respect the sequence of tightening.
35
0,9 ± 0,2
2 ± 0,1
45 ± 5°
45 ± 5°
5 ± 0,5
45 ± 5°
45 ± 5°
0,9 ± 0,2
2,3 ± 0,3
6 ± 0,6
14,5 ± 1,4
90 ± 20°
1,5 ± 0,1
3,3 ± 0,9
47 ± 20°
2,5 ± 0,2
Angl-C6-page022-82-2005
4/02/05
17:19
Page 36
ENGINE
ENGINE TIGHTENING TORQUES
Engine: DT17BTED4
Order of tightening for screws (14) and (15)
(14) Lower engine block screw (screw M6)
(15) Lower engine block screw (screw M8)
Method of tightening:
- Tighten the 10 screws (15) (from 1 to 10) to
- Tighten the 8 screws (14) (from 1 to 18) to
: 2,3 ± 0,3
: 0,9 ± 0,1
B1DP1M4D
Order of tightening for screws (16) and (17)
(16) Bearing cap fixing screw (screw M9)
(17) Crankshaft bearing cap cover screw (screw M6)
Method of tightening:
- Pre-tighten the 16 screws (16) (from 1 to 16) to
- Pre-tighten the 8 screws (17) (from 17 to 24) to
- Pre-tighten the 16 screws (16) (from 1 to 16) to
- Tighten the screws (16) (from 1 to 16)
- Tighten the 8 screws (17) (from 17 to 24) to
- Tighten the screws (17) (from 17 to 24)
B1DP1M5D
36
:
:
:
:
:
:
6 ± 0,6
1,5 ± 0,1
14,5 ± 2
90° ± 20°
3,3 ± 0,3
47° ± 20°
4/02/05
17:19
Page 37
ENGINE
Angl-C6-page022-82-2005
ENGINE TIGHTENING TORQUES
Engine: DT17BTED4
Lubrication
19
20
21
22
23
24
25
26
27
28
29
30
31
Oil filter cover
Oil filter support
Oil/coolant heat exchanger
Oil pressure switch
Oil pump assembly
Oil gauge
Oil level sensor
Oil sump
Drain plug
Oil suction strainer
Piston skirt spray jets
Turbocharger lubrication pipe
Turbocharger lubrication pipe
B1DP1M6P
37
2,3 ± 0,3
0,9 ± 0,2
1,3 ± 0,2
0,9 ± 0,2
2,3 ± 0,3
2,7 ± 0,5
0,9 ± 0,2
2,3 ± 0,3
0,9 ± 0,1
1 ± 0,1
0,9 ± 0,2
1,3 ± 0,3
Angl-C6-page022-82-2005
4/02/05
17:19
Page 38
ENGINE
ENGINE TIGHTENING TORQUES
Engine: DT17BTED4
32
33
34
35
36
37
38
39
40
Valve timing
Camshaft pulley hub screw
Tightening
Angular tightening
Camshaft pulley screw
Camshaft bearing caps (*)
Tightening
Pre-tightening
Tensioner roller for the fuel high pressure pump drive belt
Fuel high pressure pump drive pulley
Tightening
Angular tightening
Camshaft timing chain tensioner
Timing belt guide roller
Timing pinion on crankshaft
Tightening
Angular tightening
Timing belt tensioner roller
(*) Respect the sequence of tightening.
B1EP1JCD
38
8 ± 0,8
90° ± 5°
2,3 ± 0,3
0,5 ± 0,1
0,9 ± 0,1
2,5 ± 0,2
8 ± 0,8
90° ± 5°
0,9 ± 0,1
4,5 ± 0,3
10 ± 1
90° ± 5°
2,6 ± 0,2
4/02/05
17:19
Page 39
ENGINE TIGHTENING TORQUES
Engine: DT17BTED4
IMPERATIVE: The camshaft bearing caps are marked at "a" with a letter on the front cylinder
head and with a number on the rear cylinder head.
Refit the camshaft bearing caps according to the plan below:
Refit: The camshaft bearing caps (34) 9, 8, 7, 6, 4, 3, 2, D, C, B, A, J, G and F ; the screws (41)
Tightening of the screws (41):
Pre-tighten the screws (41) of the camshaft bearing caps (34) by hand in the following sequence
9, 8, 7, 6, 4, 3, 2, D, C, B, A, J, G and F.
Pre-tighten the screws (41) of the camshaft bearing caps (34) to 0,5 ± 0,1 m.daN in the following
sequence 9, 8, 7, 6, 4, 3, 2, D, C, B, A, J, G and F.
Tighten the screws (41) of the camshaft bearing caps (34) to 1 ± 0,1 m.daN in the following
sequence 9, 8, 7, 6, 4, 3, 2, D, C, B, A, J, G and F.
Apply sealing product LOCTITE 518 on the camshaft bearing caps (15) K, 5, E and J (see procedure:
remove/refit camshaft).
Refit: the camshaft bearing caps K, 5, E and J.
Tightening of the screws (41):
- Pre-tighten the screws (41) of the camshaft bearing caps (34) by hand in the following sequence
K, 5, E and J.
- Pre-tighten the screws (41) of the camshaft bearing caps (34) to 0,5 ± 0,1 m.daN in the following
sequence K, 5, E and J.
- Tighten the screws (41) of the camshaft bearing caps (34) to 1 ± 0,1 m.daN in the following sequence
K, 5, E and J.
B1DP1MQD
39
ENGINE
Angl-C6-page022-82-2005
Angl-C6-page022-82-2005
4/02/05
17:19
Page 40
ENGINE
ENGINE TIGHTENING TORQUES
Engine: DT17BTED4
42
43
44
45
46
47
48
49
50
51
Injection circuit
Diesel fuel/cooolant exchanger
Diesel injection pump on support
Diesel injection pump pinion
Diesel injector fixing flange screw
Union on diesel injector
Pre-tightening
Tightening
Fuel high pressure common injection rail on engine block
Pre-tightening
Tightening
Unions on fuel high pressure common injection rail
Pre-tightening
Tightening
Fuel filter support
Union on diesel fuel high pressure pump
Pre-tightening
Tightening
Fuel high pressure common injection intermediate rail
Pre-tightening
Tightening
B1HP246D
40
2,2 ± 0,3
2,3 ± 0,3
5 ± 0,2
0,9 ± 0,1
1,5 ± 0,3
2,3 ± 0,3
1,5 ± 0,3
3 ± 0,3
1,5 ± 0,3
3 ± 0,3
2,3 ± 0,3
1,5 ± 0,3
3 ± 0,3
1,5 ± 0,3
3 ± 0,3
4/02/05
17:19
Page 41
ENGINE
Angl-C6-page022-82-2005
ENGINE TIGHTENING TORQUES
Engine: DT17BTED4
52
53
54
55
56
57
58
59
60
Accessories
Screw M8 for automatic tensioner roller (accessories drive belt)
Screw M10 for dynamic tensioner roller (accessories drive belt)
Guide roller
Accessories support
Multifunction support
Power steering pump pulley
Power steering pump
Alternator screw
Alternator power circuit
Aircon compressor screw
B1BP3C0D
41
2,2 ± 0,3
4,7 ± 0,7
4,7 ± 0,7
2,3 ± 0,3
2,3 ± 0,3
2,3 ± 0,3
2,3 ± 0,3
5 ± 0,3
1,4 ± 0,2
2,3 ± 0,3
Angl-C6-page022-82-2005
4/02/05
17:19
Page 42
ENGINE
SPECIAL FEATURES: CYLINDER HEAD TIGHTENING
Engine: ES9A
Cleaning to be carried out just prior to refitting the cylinder head
WARNING: Clean the contact faces with the approved CITROËN cleaning product.
Do not use abrasives or cutting tools on the contact faces.
The contact faces must not bear any traces of impact or scratching.
Insert a tap in the threads of the holes in the cylinder block receiving the cylinder head bolts.
Brush the threads of the cylinder head bolts.
Oil the threads and under the heads of the bolts, using MOLYKOTE G RAPID PLUS.
Front cylinder head
Engine
ES9A
Tightening (from 1 to 8)
Pre-tightening
Slackening
Tightening
Angular tightening
X = MAX. re-usable length
2 ± 0,2
yes
1,5 ± 0,1
225° ± 5°
B1DP1KEC
Rear cylinder head
IMPERATIVE: Take new screws if their length is greater than X mm.
NOTE: Tightening of the cylinder head after a repair is prohibited.
B1DP1KHC
42
149,5 mm
4/02/05
17:19
Page 43
ENGINE
Angl-C6-page022-82-2005
SPECIAL FEATURES: CYLINDER HEAD TIGHTENING
Engine: DT17BTED4
Cleaning to be carried out just prior to refitting the cylinder head
WARNING: Clean the contact faces with the approved CITROËN cleaning product.
Do not use abrasives or cutting tools on the contact faces.
The contact faces must not bear any traces of impact or scratching.
Insert a tap in the threads of the holes in the cylinder block receiving the cylinder head bolts.
Brush the threads of the cylinder head bolts.
Oil the threads and under the heads of the bolts, using MOLYKOTE G RAPID PLUS.
Front cylinder head
Engine
DT17BTED4
Tightening (from 1 to 8)
Pre-tightening
Tightening
Tightening
Angular tightening
NOT re-usable
2 ± 0,2
4 ± 0,4
8 ± 0,8
180° ± 5°
B1DP1MDD
Rear cylinder head
NOTA : Tightening of the cylinder head after a repair is prohibited.
B1DP1MLC
43
New screws
Angl-C6-page022-82-2005
4/02/05
17:19
Page 44
4099-T (C.TRONIC.105)
Tools
44
!
!
!
ENGINE
BELT TENSION/SEEM UNITS CORRESPONDENCE TABLE
4122-T (C.TRONIC.105.5)
!
4/02/05
17:19
Page 45
AUXILIARY EQUIPMENT DRIVE BELT
Petrol
Diesel
3.0i 24S
2,7 24V
Engine type
XFV
UHZ
C6
X
X
See pages:
47 to 48
49
45
ENGINE
Angl-C6-page022-82-2005
Angl-C6-page022-82-2005
4/02/05
17:19
Page 46
ENGINE
AUXILIARY EQUIPMENT DRIVE BELT
Engines : all types Petrol and Diesel
Tools.
Belt tension measuring instrument
: 4122-T.(C.TRONIC 105.5).
WARNING: If using tool 4099-T (C.TRONIC 105).
Essential.
Before refitting the auxiliary equipment drive belt, check that:
- 1 / The roller(s) rotate freely (no play or stiffness).
- 2 / The belt is correctly engaged in the grooves of the various pulleys.
46
4/02/05
17:19
Page 47
ENGINE
Angl-C6-page022-82-2005
AUXILIARY EQUIPMENT DRIVE BELT
Engine: ES9A
Tools.
[1] Ratchet spanner S.171 FACOM (1/2 square)
[2] Reduction box S.230 FACOM (1/2 - 3/8)
: S 171
: S 230
Removing.
Remove the engine cover.
Pivot the tensioner roller bracket (1) clockwise, until it locks,
using tools [1] and [2] at «a».
Remove the auxiliary equipment drive belt.
ESSENTIAL: Check that the guide rollers are turning freely
(no play and no tightness).
Refitting.
Refit the auxiliary equipment drive belt.
Respect the following order of assembly:
- The crankshaft pulley (2).
- The tensioner roller (3).
Release the tensioner roller bracket (1), by turning it anti-clockwise,
using tools [1] and [2].
ESSENTIAL: Make sure that the belt is correctly positioned in
the grooves of the various pulleys.
B1BP27FC
B1BP27EC
47
Angl-C6-page022-82-2005
4/02/05
17:19
Page 48
ENGINE
AUXILIARY EQUIPMENT DRIVE BELT
Engine: ES9A
B1BP3BSD
Tool.
[1] 2 mm diameter peg
: (-).0188-Q1
Removing.
Remove:
- The under-engine sound-deadening.
- The front RH wheel.
- The RH splash-shield.
- The air duct (linking the air distributor heat exchanger).
Compress the dynamic tensioner roller (1) to free the pegging hole at "a".
Peg the dynamic tensioner roller at "a", using tool [1].
WARNING: Do not compress the dynamic tensioner roller completely (risk
of damage).
WARNING: Mark the direction of fitting of the auxiliary equipment drive belt
if for re-use.
Disengage the auxiliary equipment drive belt from the various pulleys, commencing
at "b" (coolant pump pulley).
Remove:
- The screws (2) and (4).
- The dynamic tensioner roller (1).
- The auxiliary equipment drive belt (3).
ESSENTIAL: Check that the tensioner and guide rollers as well as the
coolant pump can turn freely (without play, without tight spots and without
projections of grease).
48
4/02/05
17:19
Page 49
AUXILIARY EQUIPMENT DRIVE BELT
Engine: DT17BTED4
Refitting.
WARNING: If re-using the auxiliary equipment drive belt, refit it respecting its direction of
fitting.
Fit the auxiliary equipment drive belt.
ESSENTIAL: Make sure that the auxiliaries drive belt is correctly positioned in the
grooves of the various pulleys.
Refit:
- The dynamic tensioner roller (1) by engaging the belt on the roller.
- The screws (2) and (4).
Tighten:
- Screw (2)
: 5 ± 0,5.
- Screw (4)
: 2,3 ± 0,2.
Compress the dynamic tensioner roller.
Remove tool [1].
ESSENTIAL: Make sure that the auxiliaries drive belt is correctly positioned in the
grooves of the various pulleys.
Refit:
- The air duct (linking the air distributor heat exchanger).
- The RH splash-shield.
- The front RH wheel.
- The under-engine sound-deadening.
B1BP3BVC
49
ENGINE
Angl-C6-page022-82-2005
Angl-C6-page022-82-2005
4/02/05
17:19
Page 50
ENGINE
CHECKING AND SETTING THE VALVE TIMING
Petrol
Diesel
3.0i 24BS
2,7 24V
Engine type
XFV
UHZ
C6
X
X
See pages:
51 to 57
58 to 67
50
4/02/05
17:19
Page 51
ENGINE
Angl-C6-page022-82-2005
CHECKING THE VALVE TIMING
Engine: ES9A
Tools.
[1]
[2]
[3]
[4]
[5]
[6]
[7]
Camshaft setting pegs
Crankshaft setting peg
Fuel pressure take-off union
Belt retaining pin
Exhaust camshaft hubs immobilising tool
Inlet camshaft hubs immobilising tool
SEEM belt tension measuring equipment
Remove components as necessary for this operation.
Remove the auxiliaries drive belt (see corresponding operation).
Checking the valve timing.
Remove:
- The power steering pulley.
- The roller/dynamic tensioner assembly (11).
- The crankshaft pulley (12).
- The upper timing covers (9) and (10).
- The lower timing cover (13).
B1BP2BKC
51
:
:
:
:
:
:
:
(-).0187.B
(-).0187.A
4192-T
(-).0187.J
(-).0187.F
FACOM D12
4122-T
Angl-C6-page022-82-2005
4/02/05
17:19
Page 52
ENGINE
CHECKING THE VALVE TIMING
Engine: ES9A
Checking the valve timing (continued).
Peg the crankshaft, using tool [1].
Check that the tool [2] engages without effort in the cylinder heads at the camshaft pulleys.
Remove the tools [1] and [2].
B1EP08TC
Refit:
- The lower timing cover (13).
- The upper timing covers (9) and (10).
- The crankshaft pulley (12).
- The roller/dynamic tensioner assembly (11).
- The power steering pulley.
Complete the refitting of components.
Initialise the ignition injection ECU.
B1EP15UD
52
4/02/05
17:19
Page 53
CHECKING AND SETTING THE VALVE TIMING
Engine: ES9A
Setting the valve timing.
Remove the components as necessary for the operation.
Remove the screws (19) and the plate (20).
Peg the crankshaft, using tool [2].
NOTE: Damp the rotation of the camshafts (15) and (17), using tool [6].
Untighten the camshaft pulley screws (15) and (17).
NOTE: Damp the rotation of the camshafts (14) and (18), using tool [5].
Untighten the camshaft pulley screws (14) and (18).
NOTE: Lubricate the tools [1], with grease G6 (TOTAL MULTIS).
Peg the camshafts, using tools [1], [5] and [6].
Remove the screw (21) of the panel (25).
Untighten the nut (23) of the tensioner roller (24).
Untighten the screws (22) of the panel (25).
Remove the guide roller (16).
WARNING: Mark the direction of fitting of the timing belt, in case the belt is to be reused.
Remove the timing belt.
B1EP15VD
53
ENGINE
Angl-C6-page022-82-2005
Angl-C6-page022-82-2005
4/02/05
17:19
Page 54
ENGINE
CHECKING AND SETTING THE VALVE TIMING
Engine: ES9A
B1EP15VD
Setting the valve timing (continued).
Refitting.
Check that the camshafts and the crankshaft are correctly pegged.
Check that the rollers and the coolant pump pulley are turning freely (no tightness).
Loosen the camshaft pulley screws by a 1/4 turn.
Make sure that the pulleys are turning freely on the camshaft hub.
Turn the camshaft pulleys in a clockwise direction, to end of slots.
WARNING: Respect the direction of fitting of the belt: Facing the timing, the inscriptions on
the belt should be readable the correct way up.
Fit the timing belt on the crankshaft pinion.
Position the tool [6].
Position the timing belt in the following sequence (belt well tensioned):
- The roller (26), the pulley (18), the pulley (17).
WARNING: Keep the timing belt well tensioned.
- Refit the guide roller (16), tighten to 8 ± 0,8 m.daN.
Position the timing in the following sequence:
- The camshaft pulleys (15) and (14), the tensioner roller (24), the coolant pump pulley and the
guide roller (27).
NOTE: When positioning the belt on the camshaft pulleys, turn these clockwise so as to engage the
next tooth. The angular displacement of the pulleys should not be more than the equivalent of one
tooth.
B1BP2BLC
54
4/02/05
17:19
Page 55
ENGINE
Angl-C6-page022-82-2005
CHECKING AND SETTING THE VALVE TIMING
Engine: ES9A
Setting the valve timing (continued).
Adjusting the timing belt tension.
Preliminary operations.
Pivot the plate (25) of the tensioner roller (24), using a spanner (type FACOM S.161).
Engage the screw (21) on the plate (25).
Tighten the screws (21) and (22), tighten to 2,5 ± 0,1 m.daN.
Act on the tensioner roller (24) so as to tension the belt, using a spanner (type FACOM R 161).
Adjust the belt tension, using tool [7]:
- Measuring equipment SEEM CTI 901.1
- Measuring equipment SEEM CTG 105.5
- Measuring equipment SEEM CTG 105.6
: 440 ± 15 SEEM units.
: 83 ± 2 SEEM units.
: 88 ± 2 SEEM units.
WARNING: Never go beyond the tensioner limit.
NOTE: The check of the belt tension is done on the longest belt section between the crankshaft
pinion and the guide roller.
B1EP15WC
55
Angl-C6-page022-82-2005
4/02/05
17:19
Page 56
ENGINE
CHECKING AND SETTING THE VALVE TIMING
Engine: ES9A
Tighten the nut (23) of the tensioner roller (24), tighten to 1 ± 0,1 m.daN.
Check that the exhaust camshaft pulley screws are not at the end of slots (by loosening one screw).
WARNING: Otherwise, restart the operation for positioning the timing belt.
Tighten at least 2 screws per exhaust camshaft pulley to 1 ± 0,1 m.daN.
Remove the tools [1], [2] and [4].
B1EP15WC
Rotate the crankshaft 2 turns in a clockwise direction.
IMPERATIVE: Never turn it back.
Peg the crankshaft, using tool [2].
Peg the camshaft pulleys, using tool [1].
Slacken the nut (23) of the tensioner roller (24).
B1EP15XC
56
4/02/05
17:19
Page 57
CHECKING AND SETTING THE VALVE TIMING
Engine: ES9A
Tensioning the timing belt.
Act on the tensioner roller (24) so as to align the marks «c» and «d», without detensioning the timing belt
(failing this, restart the operation of adjusting the belt tension).
Hold the tensioner roller (24).
Tighten the nut (23), tighten to 1 ± 0,1 m.daN.
Check the position of the tensioner roller (the alignment of the marks «c» and «d» should be correct).
Remove the tools [1], [2] and [4].
Turn the crankshaft 2 rotations clockwise.
IMPERATIVE: Never turn it back.
Peg the crankshaft, using tool [2].
Check the position of the tensioner roller (the alignment of the marks «c» and «d» should be correct).
Peg the camshaft pulleys, using tool [1].
If the peg [1] goes in: Loosen the exhaust camshaft pulley screws by 45°.
If the peg [1] does not go in: Slacken the exhaust camshaft pulley screws by 45°.
Bring the exhaust camshaft hub to the pegging position (5), using tool [5].
WARNING: Check that the exhaust camshaft pulleys are not at the end of slots. Otherwise, restart
the operation to position the timing belt.
Tighten the exhaust camshaft pulley screws to 1 ± 0,1 m.daN.
Remove tools [1] and [2].
Complete the refitting.
Initialise the injection ECU (see corresponding operation).
B1EP15XC
57
ENGINE
Angl-C6-page022-82-2005
Angl-C6-page022-82-2005
4/02/05
17:19
Page 58
ENGINE
CHECKING THE VALVE TIMING
Engine: DT17BTED4
Tools.
[1] Set of plugs
[2] Flywheel setting peg (double flywheel)
[3] Camshaft setting pegs
: (-).0188-T
: (-).0195.K
: (-).0195.H
Toolkit 0188-T
Toolkit 0188-T
Checks.
IMPERATIVE: Respect the safety and cleanliness requirements specific to High pressure
Diesel injection (HDi) engines.
Remove the engine cover.
Disconnect the battery negative terminal.
Raise and support the front of the vehicle.
Remove:
- The under-engine sound-deadening.
- The front RH wheel.
- The front RH splash-shield (see corresponding operation).
Remove:
- The air duct between the air/air exchanger and the air inlet housing (4).
- The air inlet housing (4).
Uncouple, plug and move aside the pipes (2) and (3), using tools [1].
Unclip and move aside the electrical harness.
Remove the venting chamber fixing (1).
Move aside the venting chamber (1).
B1BP3BXD
58
4/02/05
17:19
Page 59
CHECKING THE VALVE TIMING
Engine: DT17BTED4
Remove:
- The auxiliary drive belt (5) (see corresponding operation).
- The upper timing covers (6).
B1EP1J9D
Position the camshaft pegging holes "a" and "b" at "c" and "d", 30° ± 5° forward of their pegging
holes "e" and "f".
NOTE: Turn the crankshaft in the normal direction of rotation, by means of the crankshaft pinion
screw.
B1EP1JAD
59
ENGINE
Angl-C6-page022-82-2005
Angl-C6-page022-82-2005
4/02/05
17:19
Page 60
ENGINE
CHECKING THE VALVE TIMING
Engine: DT17BTED4
Remove the plug from the pegging hole on the cylinder block.
NOTE: Removing the particle filter and catalytic converter flexible pipe assembly facilitates removal
of the plug from the pegging hole and the positioning of the tool [2].
NOTE: Turn the crankshaft in the normal direction of rotation, by means of the crankshaft pinion
screw.
Peg the crankshaft, using tool [2].
Peg the camshafts, using tools [3].
B1DP1MOC
IMPERATIVE: If it is not possible to peg the camshafts, restart the setting of the valve timing
(see corresponding operation).
Remove the tools [2] and [3].
Refit the plug on the pegging hole on the cylinder block.
Refit:
- The upper timing covers (6).
- The auxiliary drive belt (5) (see corresponding operation).
Reclip the electrical harness.
Fit the venting chamber (1).
Remove the tools [1].
Reposition and connect the pipes (2) and (3).
Complete the refitting.
B1EP1JBD
60
4/02/05
17:19
Page 61
CHECKING AND SETTING THE VALVE TIMING
Engine: DT17BTED4
Tools.
[1]
[2]
[3]
[4]
[5]
[6]
Kit of plugs
Flywheel setting peg (double damping flywheel)
Camshaft setting pegs
Belt compressure spring
Coolant pump pulley peg
Lifting bracket
:
:
:
:
:
:
(-).0188-T
(-).0195.K
(-).0195.H
(-).0188.K
(-).0195.C
(-).0195.N
Toolkit 0188-T
Toolkit 0188-T
IMPERATIVE: Respect the safety and cleanliness requirements.
WARNING: Before disconnectng the battery, partially open the door windows.
Removing.
IMPERATIVE: Respect the safety and cleanliness requirements specific to High pressure Diesel injection (HDi) engines.
Remove the engine cover.
Disconnect the negative terminal of the battery.
Raise and support the front of the vehicle.
Remove:
- The under-engine sound-deadening.
- The front RH wheel.
- The front RH splash-shield (see corresponding operation).
61
ENGINE
Angl-C6-page022-82-2005
Angl-C6-page022-82-2005
4/02/05
17:19
Page 62
ENGINE
CHECKING AND SETTING THE VALVE TIMING
Engine: DT17BTED4
B1BP3C2D
Remove:
- The air duct between the air/air exchanger and the air inlet housing (6).
- The air inlet housing (6).
Uncouple, plug and move aside the pipes (2) and (3) using tool [1].
Detach and move aside the electrical harness.
Remove:
- The header tank fixing (1).
- The "Swirl" electrovalve fixings (7).
Move aside:
- The "Swirl" electrovalve (7) with its support.
- The header tank (1).
Position the lifting bracket [6] at "a".
Support the engine by means of a workshop hoist.
Remove:
- The upper RH engine support tie bar, and the upper RH engine support (5).
- The engine support (4) on the chassis member.
- The accessories drive belt (8) (see corresponding operation).
- The engine support (12), the crankshaft pulley (9), the upper timing covers (11).
- The lower timing cover (10).
Line up one of the three holes "b" on the pulley with the hole on the body of the coolant pump.
Immobilise the coolant pump pulley, using tool [6].
Remove the coolant pump pulley (13).
B1EP1JDD
62
4/02/05
17:19
Page 63
CHECKING AND SETTING THE VALVE TIMING
Engine: DT17BTED4
Position the camshaft pegging holes "c" and "e" at "d" and "f", 30° ± 5° in front of the pegging
holes "h" and "g".
NOTE: Turn the crankshaft in the normal direction of rotation, by means of the crankshaft pinion
screw.
Remove the plug from the pegging hole on the cylinder block.
B1EP1JED
NOTE: Turn the engine by means of the crankshaft pinion screw to bring it to the pegging position
(following the arrow).
Peg the crankshaft using the tool [2].
NOTE: Removing the particle filter and catalytic converter flexible pipe assembly facilitates the
removal of the plug from the pegging hole and the positioning of tool [2].
B1DP1MOC
63
ENGINE
Angl-C6-page022-82-2005
Angl-C6-page022-82-2005
4/02/05
17:19
Page 64
ENGINE
CHECKING AND SETTING THE VALVE TIMING
Engine: DT17BTED4
Peg the camshafts, using tools [3] at "h" and "g".
Slacken:
- The 3 screws (15) of the camshaft pulley (23).
- The 3 screws (17) of the camshaft pulley (18).
- The screw (21) of the tensioner roller (20).
Remove the timing belt (22).
Checks.
B1EP1JFD
IMPERATIVE: Just before refitting, carry out the checks below.
Check that the rollers (16), (20) and (19) and the coolant pump (14) can turn freely (without play
and without any tight spot).
Check that there are no signs of oil leaks (from the crankshaft and camshaft seals).
Check that there are no signs of coolant leaks (from the coolant pump).
Replace components that are faulty (if necessary).
Refitting.
Reposition the timimg belt on the crankshaft pinion (24).
Hold the timing belt (22) in position, using tool [4].
Tighten the screws (15) and (17) by hand.
Turn the camshaft pulleys (23) and (18) clockwise, to place them at the end of slots.
B1EP1JGC
64
4/02/05
17:19
Page 65
CHECKING AND SETTING THE VALVE TIMING
Engine: DT17BTED4
Reposition the timimg belt, strip «j» well tensioned, in the following order:
- Guide roller (19).
- Camshaft pulley (18).
- Guide roller (16).
- Camshaft pulley (23).
- Tensioner roller (20).
B1EP1JHD
NOTE: If necessary, turn the pulleys (23) and (18) slightly anti-clockwise (the offset must not be
more than one tooth).
Remove the tool [4].
Using a hexagonal spanner, rotate the tensioner roller (20) anti-clockwise.
Position the index "l" facing the notch "k".
Tighten the screw (21)
: 2,5 ± 0,2.
Remove the screws (15) and (17) from the pulleys (23) and (18) in order to check that the screws
(15) and (17) are not at the end of slots.
IMPERATIVE: If the screws (15) and (17) are at the end of slots, restart the operations to refit
the timing belt.
B1EP1JJC
65
ENGINE
Angl-C6-page022-82-2005
Angl-C6-page022-82-2005
4/02/05
17:19
Page 66
ENGINE
CHECKING AND SETTING THE VALVE TIMING
Engine: DT17BTED4
Tighten the screws (15) and (17)
: 2,2 ± 0,2.
Remove tools [2] and [3].
Rotate the crankshaft 8 times in the normal direction of rotation.
Fit the tool [2].
Peg the camshafts using tools [3], at "h" and "g".
B1EP1JHD
NOTE: If it is not possible to refit the tools [3], slacken the screws (15) and/or (17) of the camshafts
and drive the camshafts by means of their central screws (25) and/or (26).
Peg the camshafts using tools [3], at "h" and "g".
Tighten the screws (15) and (17)
: 2,2 ± 0,2.
Remove tools [2] and [3].
Rotate the crankshaft 8 times in the normal direction of rotation.
Fit the tool [2].
Fit the tools [3], at "h" and "g".
Check that the index "l" of the tensioner roller (20) is facing the notch "k".
B1EP1JJC
66
4/02/05
17:19
Page 67
CHECKING AND SETTING THE VALVE TIMING
Engine: DT17BTED4
Remove tools [2] and [3].
Refit: The lower timing cover (10), the upper timing covers (11), the crankshaft pulley (9), the engine
support (12), the coolant pump pulley (13), the accessories drive belt (8) (see corresponding operation),
the engine support (4) on the chassis member, the upper RH engine support (5) and the upper RH
engine support tie bar.
Take away the workshop hoist.
B1EP1JHD
Remove the tool [6].
Refit the "Swirl" electrovalve (7) with its support, the header tank (1), the electrical harness.
Remove the tool [1].
Reposition and couple the pipes (3) and (2).
Complete the refitting.
B1EP1JJC
67
ENGINE
Angl-C6-page022-82-2005
Angl-C6-page022-82-2005
4/02/05
17:19
Page 68
ENGINE
EXHAUST SPECIFICATIONS
Engine: ES9A
1
2
3
4
5
6
7
8
9
10
Upstream oxygen sensor (rear)
Downstream oxygen sensor (rear)
Downstream oxygen (front)
Upstream oxygen sensor (front)
Precatalyser (rear)
Precatalyser (front)
Resonator
Catalytic converter
Rear silencer
Clips
B1JP08AD
68
4,7 ± 0,5
3,5 ± 0,5
2,6 ± 0,3
4/02/05
17:19
Page 69
EXHAUST SPECIFICATIONS
Engine: ES9A
Repair.
Respect the precautions to be taken prior to any operation:
- The front flexible pipe must be protected against any external mechanical damage.
- The front flexible pipe must not come into contact with corrosive products.
- Do not deform the front flexible pipe more than 20° angular (X), 20 mm axial, 25 mm shearing
(Y) (front flexible pipe removed).
- Do not deform the front flexible pipe more than 3° angular (X), 0 mm axial, 3 mm shearing (Y)
(front flexible pipe in place).
WARNING: Non-respect of these precautions will shorten the life of the flexible pipe.
It is therefore imperative to disconnect or remove the exhaust line for any operations
necessitating lifting of the engine-gearbox.
B1JP02JC
69
ENGINE
Angl-C6-page022-82-2005
Angl-C6-page022-82-2005
4/02/05
17:19
Page 70
ENGINE
EXHAUST SPECIFICATIONS
Engine: DT17BTED4
B1JP07QD
Engine versions
UHZ
(1)
Clip
(2)
Particle filter
(3)
Intermediate pipe
(4)
Exhaust
silencer
(5)
Rear
precatalyser
(6)
Front
precatalyser
TR PSA F016
TR PSA K330
PSA 4234
TR PSA K311
TR PSA K310
70
4/02/05
17:19
Page 71
EXHAUST SPECIFICATIONS
Engine: DT17BTED4
Repair.
Respect the precautions to be taken prior to any operation:
- The front flexible pipe must be protected against any external mechanical damage.
- The front flexible pipe must not come into contact with corrosive products.
- Do not deform the front flexible pipe more than 20° angular (X), 20 mm axial, 25 mm shearing
(Y) (front flexible pipe removed).
- Do not deform the front flexible pipe more than 3° angular (X), 0 mm axial, 3 mm shearing (Y)
(front flexible pipe in place).
WARNING: Non-respect of these precautions will shorten the life of the flexible pipe.
It is therefore imperative to disconnect or remove the exhaust line for any operations
necessitating lifting of the engine-gearbox.
B1JP02JC
71
ENGINE
Angl-C6-page022-82-2005
Angl-C6-page022-82-2005
4/02/05
17:19
Page 72
ENGINE
TIGHTENING TORQUES - EXHAUST LINE
Engine: DT17BTED4
1
2
3
4
5
6
Clip
Particle filter hangers
Intermediate pipe hangers
Silencer hangers
Rear precatalyser screw
Front precatalyser screw
B1JP07ZD
72
2,6 ± 0,4
0,8 ± 0,1
2 ± 0,3
2 ± 0,3
4/02/05
17:19
Page 73
COOLING SYSTEM SPECIFICATIONS
Engines: ES9A - DTE17BTED4
Engine type
Capacity
Radiator surface
Pressurisation
Opening of thermostatic regulator
Cooling fan
1st speed
2nd speed
3rd speed
Air con cut-off
Alert
Post cooling
Marking
Information
Sensor
Colour of connector
Tightening (m.daN)
3.0i 24S
XFV
11,3
2,7 24V
UHZ
13,2
27 dm2
1,4 bar
78°C
1 x 600 W
FRIC function
105°C
83°C
2 x 150W
97°C or aircon in operation
101°C or 17 bars in the aircon circuit
105° or 30 bars in the aircon circuit
115°C or 30 bars in the aircon circuit
118°C
6 minutes
11
Level of coolant
Resistance
Black
6
Temperature of coolant
Temperature, diesel injection, alert, aircon
Thermostat
Thermostat
Blue
Grey
1,7 ± 0,4
73
ENGINE
Angl-C6-page022-82-2005
Angl-C6-page022-82-2005
4/02/05
17:19
Page 74
ENGINE
COOLING SYSTEM SPECIFICATIONS
Engine: ES9A
(1) Heater matrix
(2) Bleed screw
(3) Coolant outlet housing
(4) Coolant inlet housing
(5) Thermostat
(6) Coolant temperature sensor
(7) Coolant/oil heat exchanger (engine)
(8) Cooling radiator drain plug
(9) Coolant/oil heat exchanger (automatic gearbox)
(10) Engine cooling radiator
(11) Coolant level sensor
(12) Header tank
(13) Venting chamber
B1GP0CXP
74
4/02/05
17:19
Page 75
COOLING SYSTEM SPECIFICATIONS
Engine: DT17BTED4
(1) Header tank
(2) Coolant outlet housing
(3) Coolant/oil heat exchanger
(4) Coolant/EGR heat exchanger (rear cylinder bank)
(5) Bleed screw
(6) Heater matrix
(7) Additional heating unit
(8) Engine cooling radiator
(9) Engine cooling radiator drain tap
(10) Coolant/EGR heat exchanger (front cylinder bank)
B1GP0D4P
75
ENGINE
Angl-C6-page022-82-2005
Angl-C6-page022-82-2005
4/02/05
17:19
Page 76
ENGINE
CHECKING THE OIL PRESSURE
Engine
Temperature (°C)
Pressure (bars)
Rpm
Pressure (bars)
Rpm
Pressure (bars)
Rpm
2279-T.Bis
4103-T
(-).1503.K
4202-T
ES9A
DT17BTED4
80°C
2
900
5
3000
1 to 4
2500
X
X
X
X
NOTE: Oil pressure should be checked with the engine cold, after checking the oil level.
76
4/02/05
17:19
Page 77
ENGINE
Angl-C6-page022-82-2005
VALVE CLEARANCES
● Inlet
All types
Exhaust
Hydraulic adjustment
77
Angl-C6-page022-82-2005
4/02/05
17:19
Page 78
ENGINE
DRAINING, FILLING AND BLEEDING THE ENGINE COOLING CIRCUIT
Engine: ES9A
Tools.
[1] Filling cylinder
[2] Adaptor for filling cylinder
[3] Control rod for filling cylinder
: 4520-T
: 4222-T
: 4370-T
IMPERATIVE: Respect the safety and cleanliness requirements.
B1GP0BPC
The draining and refilling operations can be carried out using coolant fluid replacement equipment.
It is essential to follow the instructions as stated for that equipment.
Draining.
Remove the header tank cap with caution (engine cold).
Open the bleed screw of the radiator.
Slacken the drain screw (1) of the radiator
Open the plug (2) to drain the first bank of cylinders.
NOTE: The plug (2) is provided with a drain tube.
B1BP2BNC
78
4/02/05
17:19
Page 79
DRAINING, FILLING AND BLEEDING THE ENGINE COOLING CIRCUIT
Engine: ES9A
Open the plug (3) to drain the second bank of cylinders.
Remove the drain plugs (2) and (3).
Filling and bleeding the circuit.
Prior to any filling, rinse the cooling with fresh water.
WARNING: Check the sealing of the cooling circuit.
B1GP08TC
Open the bleed screws of the following components:
- Heater matrix outlet.
- Coolant outlet housing.
- Radiator.
Close the drain screw (1) of the radiator.
Refit the plugs (2) and (3) with a new seal ; tighten to
3 ± 0,3 m.daN.
Fit the filling cylinder assembly [1], [3], and [2] on the filler aperture.
Fill the cooling circuit.
NOTE: Keep the filling cylinder full to the maximum.
B1GP0BQC
79
ENGINE
Angl-C6-page022-82-2005
Angl-C6-page022-82-2005
4/02/05
17:19
Page 80
ENGINE
DRAINING, FILLING AND BLEEDING THE ENGINE COOLING CIRCUIT
Engine: ES9A
Reclose the bleed screw when the fluid flows out clear and without air bubbles.
Start the engine.
Maintain an engine speed of 1500/2500 rpm, up to the first cooling cycle (starting and stopping of
the cooling fan).
Block the filling cylinder [1] using the control rod [3].
Remove the filling cylinder assembly [1], [3] and [2].
Refit the header tank cap.
Stop the engine and wait for it to cool down.
B1GP08TC
Checks.
Start the engine.
Maintain an engine speed of 1500/2500 rpm, up to the first cooling cycle (starting and stopping of
the cooling fan).
Stop the engine and wait for it to cool down.
Remove the header tank cap with caution.
If necessary, top up the level to the maximum mark.
Refit the header tank cap.
B1GP0BQC
80
4/02/05
17:19
Page 81
DRAINING, FILLING AND BLEEDING THE ENGINE COOLING CIRCUIT
Engine: DT17BTED4
Tools.
[1] Filling cylinder
[2] Adaptor for filling cylinder
[3] Control rod for filling cylinder
: 4520-T
: 4222-T
: 4370-T
IMPERATIVE: Respect the safety and cleanliness requirements.
The draining and refilling operations can be carried out using coolant fluid replacement equipment.
It is essential to follow the instructions as stated for that equipment.
Draining.
Remove the header tank cap.
Open the bleed screw of the engine cooling radiator, located under the radiator on the LH side.
Remove the drain screw (1).
Drain the cylinder block.
B1GP0CNC
81
ENGINE
Angl-C6-page022-82-2005
Angl-C6-page022-82-2005
4/02/05
17:19
Page 82
ENGINE
DRAINING, FILLING AND BLEEDING THE ENGINE COOLING CIRCUIT
Engine: DT17BTED4
B1GP0CPC
B1GP0CQC
Filling and bleeding.
Open the bleed screw (2) on the heater matrix hose.
Open the bleed screw (3) of the engine cooling radiator.
Refit the drain screw (1) with a new seal.
Tighten the screw (1)
: 3 ± 0,1.
Fit the filling cylinder [1], control rod [3] and adaptor [2] assembly on the filler
aperture.
Fill the engine cooling circuit.
NOTE: Keep the filling cylinder full to the maximum.
Start the engine.
Close each bleed screw as soon as the liquid starts to flow out without air
bubbles.
Block the filling cylinder [1], using the control rod [3].
Remove the filling cylinder [1], control rod [3] and adaptor [2] assembly.
Refit the header tank cap.
Stop the engine.
Checks.
Start the engine.
Maintain an engine speed of 1600 rpm, up to the second cooling cycle (starting
and stopping of the cooling fan).
Stop the engine and wait for it to cool down.
Remove the header tank cap.
If necessary, top up the level of the header tank to the maximum mark.
Refit the header tank cap.
82
B1GP0CRC
Angl-C6-page83-100-2005
4/02/05
17:22
Page 83
BOSCH ME 7.4.7 INJECTION SYSTEM
Engine: ES9A
(1) Fuel consumption information
(2) Ignition injection test warning lamp
(3) Rev counter
(4) Air conditioning ECU
(5) Multifunction screen
(6) Built-in systems interface
(7) Transponder
(8) Automatic gearbox ECU
(9) Fuel pump, filter and pressure regulator (except grande exportation)
(10) Battery
(11) Pressostat
(12) Engine speed sensor
(13) Camshaft position sensor (x2)
(14) Motorised butterfly housing
B1HP1Z9P
83
INJECTION
Synopsis.
Angl-C6-page83-100-2005
4/02/05
17:22
Page 84
BOSCH ME 7.4.7 INJECTION SYSTEM
Engine: ES9A
Synopsis.
INJECTION
(15) Canister purge electrovalve
(16) Cooling fan
(17) Pencil type ignition coil (x6)
(18) Petrol injector (x6)
(19) Variable timing electrovalve (x2)
(20) Downstream oxygen sensor (x2)
(21) Upstream oxygen sensor (x2)
(22) Engine coolant temperature sensor
(23) Knock sensor (x2)
(24) Power steering pressure sensor
(25) Integrated pressure sensor
(26) Accelerator pedal position sensor
(27) Inlet air temperature sensor
(28) Diagnostic connector
(29) Ignition injection ECU
B1HP1Z9P
84
Angl-C6-page83-100-2005
4/02/05
17:22
Page 85
BOSCH ME 7.4.7 INJECTION SYSTEM
Engine: ES9A
Synopsis.
INJECTION
(30) Pulse damper
(31) Sparking plugs (x6)
(32) Fuel tank
(33) Canister reservoir
(34) Discharge valve
(35) Exhaust line
Specifications.
Cylindrical capacity (cc)
: 2946.
Idling speed (rpm) non-adjustable
: 700 ± 50.
Cut-off at maximum engine speed (rpm)
: 6520.
B1HP1ZAD
85
Angl-C6-page83-100-2005
4/02/05
17:22
Page 86
BOSCH ME 7.4.7 INJECTION SYSTEM
Engine: ES9A
Supplier
Fuel circuit
Reference
INJECTION
Component
Recommended fuel
Location
Fuel tank
32
Fuel pump, filter and
pressure regulator
9
MARWALL
Canister reservoir
33
PURFLUX
PPGF 30
Canister purge
electrovalve
15
BOSCH
0 280 142 317
EV 14
0 280 155 613
Petrol injectors
18
Pulse damper
30
BOSCH
0 280 161 500
86
Observations
Super unleaded 95 RON or 98 RON
Capacity 65 litres
Composition polyethylene
Electric pump submerged in the tank
Voltage, 12 V
Pressure, 3 bars
Flow, 115 à 120 l/h
Regulation pressure, 3,5 bars
Installation under the front LH wing
Electrovalve normally closed
2-way brown connector
Installation, under the front LH wing
Resistance, 24 ohms
Group of injectors, 1-2-3, 2-way brown connector
Group of injectors, 4-5-6, 2-way black connector
Marking, yellow in colour
Injectors, 4 jets
Resistance, 16 ohms
Installation, on the timing cover
Equipped with a SCHRAEDER valve
Angl-C6-page83-100-2005
4/02/05
17:22
Page 87
BOSCH ME 7.4.7 INJECTION SYSTEM
Component
Location
Integrated pressure sensor
25
Motorised butterfly housing
14
Accelerator pedal
position sensor
26
Ignition injection
ECU
29
Supplier
BOSCH
BOSCH
Air circuit
Reference
DS-S2 0
261 260 140
DVE5
0 280 750 041
14 43 33
Electrical circuit
ME 7.4.7.
0 261 B00 736
280 911
Power steering pressure
sensor
24
BITRON
87
Observations
3-way grey connector
Integrated in the inlet manifold
6-way black connector
Fixing, on the inlet manifold
6-way black connector
Supply, 5 volts
Fixing, on the accelerator
128-way connector
Sequential injection
"Flash" type Eprom (reprogrammable eprom)
Installation, in the electronic ECU compartment
2-way blue connector
Opening of contact at 20 bars
For ECU information
(steering on full lock)
Marking mauve ring seal
Fixing : on the power steering high pressure
pump outlet pipe
INJECTION
Engine: ES9A
Angl-C6-page83-100-2005
4/02/05
17:22
Page 88
BOSCH ME 7.4.7 INJECTION SYSTEM
Engine: ES9A
Electrical circuit
Component
INJECTION
Inlet air temperature sensor
Location
27
Supplier
JAEGER
Reference
Observations
2-way grey connector
402 084 01
Fixing: on the air filter inlet duct
Camshaft position
sensor
13
ELECTRICFIL
14 43 2514 43
25
3-way grey connector
Fixing: on the inlet camshaft bearing cap cover
3-way green connector
Knock sensor
23
BOSCH
0 261 231 10
Fixing: on the central part of the «V» of the engine block
Essential to respect tightening torque: 2 ± 0,5 m.daN
DAV
Engine coolant temperature
sensor
2-way green connector
402 243 03
Fixing: on the coolant outlet housing
22
Tightening torque:
14 43 32
Tighten to: 2 ± 0,2 m.daN
ELECTRICFIL
Engine speed sensor
12
2-way black connector
14 43 28
Fixing: on the gearbox clutch housing
88
Angl-C6-page83-100-2005
4/02/05
17:22
Page 89
BOSCH ME 7.4.7 INJECTION SYSTEM
Component
Location
Sparking plugs
31
Pencil type ignition
coils
17
Upstream oxygen sensor
21
Supplier
BOSCH
FGR8MQPE
NGK
PFR6E 10
SAGEM
BAC 1
2526140
Exhaust circuit
258 040 232
BOSCH
Downstream oxygen sensor
20
258 006 185
89
Observations
Electrode gap: 1 mm
Tightening torque
Tighten to: 1 ± 0,1 m.daN
Angular tightening: 90°
4-way black connector
Twin-static type ignition
4-way green connector
Front fixing: on the exhaust manifold
Rear fixing: on the pre-catalyser
4-way blue connector
Front fixing: on the pre-catalyser
Rear fixing: on the pre-catalyser
Tightening torque
Tighten to: 4,7 ± 0,1 m.daN
INJECTION
Engine: ES9A
Ignition circuit
Reference
Angl-C6-page83-100-2005
4/02/05
17:22
Page 90
PROHIBITED OPERATIONS: SIEMENS HDI DIRECT INJECTION SYSTEM
Engine: DT17BTED4
Cleaning.
The use of high pressure cleaners is prohibited.
Do not use compressed air.
INJECTION
Fuel supply circuit.
Required fuel: Diesel.
WARNING: Do not use other fuels.
Electrical circuit.
Swapping injection ECUs between two vehicles will render it impossible to start either vehicle.
It is forbidden to supply a diesel injector with 12 volts.
Do not disconnect a diesel injector when the engine is running.
Fuel high pressure pump.
Do not separate the fuel high pressure pump (1) from the following components:
- The sealing ring (a) (no replacement parts).
- The high pressure outlet connector (b) (will cause a malfunction).
- The fuel pressure regulator (c) (no replacement parts).
- The flow electrovalve (d) (no replacement parts).
B1HP23GC
90
Angl-C6-page83-100-2005
4/02/05
17:22
Page 91
PROHIBITED OPERATIONS: SIEMENS HDI DIRECT INJECTION SYSTEM
Engine: DT17BTED4
Diesel injectors.
Do not separate the diesel injector carrier (2) from the following components:
- Diesel injector (g) (no replacement parts).
- The fuel flow actuator (e) (destruction).
B1HP23HC
Do not move the nut (f) (will cause a malfunction).
Do not separate the union (h) from a diesel injector.
It is forbidden to clean the carbon deposits from the diesel injector nozzle.
Central fuel high pressure common injection rail.
Do not separate the fuel high pressure sensor (j) from the central fuel high pressure injection rail (3).
B1HP23JC
91
INJECTION
WARNING: Diesel and ultrasonic cleaners are prohibited.
Angl-C6-page83-100-2005
4/02/05
17:22
Page 92
SAFETY REQUIREMENTS: HDi DIRECT INJECTION SYSTEM
INJECTION
Safety requirements.
Preamble.
All interventions on the injection system must be carried out to conform
with the following requirements and regulations:
- Competent health authorities.
- Accident prevention.
- Environmental protection.
After the engine has stopped, wait 30 seconds before any intervention.
WARNING: Repairs must be carried out by specialised personnel
informed of the safety requirements and of the precautions to be
taken.
IMPERATIVE: The technician should wear clean overall.
NOTE: This waiting time is necessary in order to allow the high pressure
fuel circuit to return to atmospheric pressure.
Cleanliness requirements.
Preliminary operations.
Before working on the injection system, it may be necessary to
clean the apertures of the following sensitive componen (refer to
corresponding procedures):
- Fuel filter.
- Fuel high pressure pump.
- Fuel high pressure common injection rail.
- Fuel high pressure pipes
- Diesel injector carriers.
Safety requirements.
IMPERATIVE: Take into account the very high pressures in the high
pressure fuel circuit (1600 bars), and respect the requirements
below:
- No smoking in proximity to the high pressure circuit when work is being
carried out.
- Avoid working close to flame or sparks.
Engine running:
- Do not work on the high pressure fuel circuit.
- Always stay clear of the trajectory of any possible jet of fuel, which could
cause serious injuries.
- Do not place your hand close to any leak in the high pressure fuel circuit.
IMPERATIVE: After dismantling, immediately block the apertures of
sensitive components with plugs, to avoid the entry of impurities.
Work area:
- The work area must be clean and free of clutter.
- Components being worked on must be protected from dust.
92
Angl-C6-page83-100-2005
4/02/05
17:22
Page 93
CHECKS: LOW PRESSURE FUEL SUPPLY CIRCUIT
Engine: DT17BTED4
Ø 10 mm low pressure connector
Ø 8 mm low pressure connector
Pressure gauge for testing boost pressure
Extension
:
:
:
:
4215-T
4218-T
4073-T
4251-T
Kit 4073-T
Checks.
IMPERATIVE : Respect the safety and cleanliness requirements specific to high pressure
diesel injection (HDi) engines.
Connect the tool [1] between the booster pump and the fuel filter (white mark on the fuel supply
pipe).
Connect the tool [2] downstream of the diesel injectors, between the high pressure fuel pump and
the fuel filter green mark on the fuel return pipe.
Connect the tool [3] on tool [1] or on tool [2].
WARNING: Any check of pressure downstream of the fuel filter is prohibited.
B1BP3CRD
NOTE: To check the pressures while the vehicle is being driven, insert the extension [4] between
tool [3] and tools [1] or [2].
93
INJECTION
Tools.
[1]
[2]
[3]
[4]
Angl-C6-page83-100-2005
4/02/05
17:22
Page 94
CHECKS: LOW PRESSURE FUEL SUPPLY CIRCUIT
Engine: DT17BTED4
Checks on pressure: static.
Switch on the ignition.
INJECTION
For 3 seconds (normal functioning):
- Fuel supply pressure shown by the pressure gauge [3] = 1.1 ± 0.4 bar.
- Fuel return pressure shown by the pressure gauge [3] = 2 ± 0.5 bar.
Abnormal functioning:
Fuel supply
pressure
Fuel return
pressure
Checks
Between 2 and 3 bar
0.8 ± 0.4 bar
Check the condition of the diesel fuel filter
More than 3 bar
More than 0.8 bar
Check the fuel return circuit (pipe pinched)
Between
0.3 and 0.5 bar
Less than 0.8 bar
Check the fuel suppy circuit :
Booster pump (low pressure), piping
Impossible to start the engine:
- Fuel supply pressure less than 0.3 bar.
B1BP3CRD
94
Angl-C6-page83-100-2005
4/02/05
17:22
Page 95
CHECKS: TURBO PRESSURE
Tools.
[1] Pressure gauge for checking the pressure
[2] Tool for checking the inlet air pressure/vacuum
[3] LEXIA diagnostic tool
[4] PROXIA diagnostic tool
:
:
:
:
7073-T.A
(-).0171.G3
4171-T
4165-T
Checks.
IMPERATIVE: Respect the safety and cleanliness specific to high pressure diesel injection
engines.
Preliminary operations.
WARNING: Prior to any intervention, check the connections of the turbocharger pressure
regulation actuators.
NOTE: If an air flow fault is memorised by the diagnostic tool, refer to the chapter "Air flow from
the turbochargers".
Turbo pressure sensor.
Remove the engine cover.
Disconnect the connector "a".
Remove the turbo pressure sensor (1).
B1BP3CZC
95
INJECTION
Engine: DT17BTED4
Angl-C6-page83-100-2005
4/02/05
17:22
Page 96
CHECKS: TURBO PRESSURE
Engine: DT17BTED4
INJECTION
Connect:
- The tool [2a] in place of the turbo pressure sensor (1).
- The turbo pressure sensor (1) on the tool [2b].
- Tool [1] on tool [2], at "b".
Connect the diagnostic tool [3] or [4] to the vehicle's diagnostic socket:
- Put the diagnostic tool [3] or [4] in parameter measures.
Start the engine.
Accelerate to 2500 rpm.
Compare the pressure values read on the diagnostic tool and on the pressure gauge [1].
NOTE: If there is a significant difference in pressure, replace the turbo pressure sensor.
Air/air exhanger.
Check the condition of the following components:
- Air inlet pipe.
- Airoutlet pipe.
- Air /air exchanger.
Air flow from the turbochargers.
NOTE: If an air flow fault is memorised by the diagnostic tool, check the air flow from the turbocharger
incriminated.
Connect the diagnostic tool [3] or [4] to the vehicle's diagnostic socket:
- Put the diagnostic tool [3] or [4] in parameter measures.
Start the engine.
Accelerate to 2500 rpm.
Compare the air flows (mg/stroke) from the two turbochargers.
B1BP3D0C
96
Angl-C6-page83-100-2005
4/02/05
17:22
Page 97
CHECKS: TURBO PRESSURE
Engine: DT17BTED4
-
Stop the engine.
Remove the air filter with the two flowmeters.
Mark the flowmeters "d" and "c".
Remove both flowmeters.
Refit:
- Flowmeter "d" in place of flowmeter "c".
- Flowmeter "c" in place of flowmeter "d".
Start the engine.
Accelerate to 2500 rpm.
Compare the air flows (mg/stroke) from the two turbochargers:
- If the difference in air flow has changed turbochargers, replace the flowmeter that is faulty.
- If the difference in air flow is coming from the same turbocharger, check the condition of the air inlet
and outlet pipes of this turbocharger: replace or repair the parts that are faulty.
- If no anomaly is detected on the air inlet and outlet pipes of the turbocharger: replace the turbocharger.
B1HP24TC
97
INJECTION
Significant difference in pressure between the two turbochargers:
Angl-C6-page83-100-2005
4/02/05
17:22
Page 98
CHECKING THE AIR SUPPLY CIRCUIT SPECIFICATIONS
Engine: DT17BTED4
(1) Air filter: MECAPLAST
INJECTION
(2) Air/air heat exchanger: BEHR
(3) Front turbocharger: GARETT
(4) Air butterfly housing: MAN HUMEL
(5) Rear turbocharger: GARETT
(6) Flowmeters: SIEMENS VDO
B1HP26UD
98
Angl-C6-page83-100-2005
4/02/05
17:22
Page 99
CHECKING THE AIR SUPPLY CIRCUIT
Engine: DT17BTED4
Tool.
: FACOM DA 16
INJECTION
[1] Manual pressure-vacuum pump
Checks.
IMPERATIVE: Respect the safety and cleanliness specific to high pressure
diesel injection engines.
B1HP26DC
Checking the vacuum source (vacuum pump).
Connect the tool [1] on the take-off "a" of the vacuum pump (1).
Start the engine.
The value should be 0,85 ± 0,2 bar.
"Swirl" control electrovalve.
Connect the tool [1] on the vacuum supply "b" of the electrovalve (2).
Start the engine.
The value should be 0,85 ± 0,2 bar.
"Swirl" control diaphragm.
Connect the tool [1] on the "Swirl" control diaphragms (3) at "c".
Apply a vacuum of approx. 0,7 ± 0,2 bar, the "Swirl" butterfly should be fully
open.
B1HP26EC
99
B1HP26FC
Angl-C6-page83-100-2005
4/02/05
17:22
Page 100
SPARKING PLUGS
Vehicles
C6
3.0i 24S
Engine
BOSCH
Electrode
gap
NGK
Electrode
gap
ES9A
FGR8MQPE
1 mm
PFR6E10
1 mm
IGNITION
100
Tightening torque (m.daN)
Tightening
Angular tightening
: 1 ± 01
: 90° ± 5°
Angl-C6-page101-120-2005
4/02/05
17:25
Page 101
SPEEDOMETER
An E.E.C. decree of 25 June 1976, regulates the speed displayed by the speedmeter in relation to the actual speed travelled.
This decree stipulates:
- The speed indicated by a speedometer must never be lower than the actual vehicle speed.
- Between the speed displayed «SD» and the speed travelled «ST», there must always be the following relationship:
Example: For an actual speed of 100 Kph the speed displayed by the speedometer may be between 100 and 114 Kph.
The speed indicated by the speedometer may be influenced by:
- The speedometer.
- The tyres fitted to the vehicle.
- The final drive ratio.
- The speedometer drive ratio.
Any of these components can be checked without removing them from the vehicle (see information note N° 78-85 TT of 19 October 1978).
NOTE: Before replacing the speedometer, check the conformity of the following points:
- The tyres fitted to the vehicle.
- The gearbox final drive ratio.
- The speedometer drive ratio.
101
CLUTCH
GEARBOX
TRANSMISSION
ST < SD < 1.10 ST + 4 Kph
Angl-C6-page101-120-2005
4/02/05
17:25
Page 102
AM6 AUTOMATIC GEARBOX SPECIFICATIONS
Vehicle
Engine
Gearbox type
Sequence
ES9A
C6
Torque ratio
20 GH 07
AM6
Drive ratio
49 X 52
15 x 53
DT17BTED4
20 GG 07
CLUTCH
GEARBOX
TRANSMISSION
102
54 X 47
Angl-C6-page101-120-2005
4/02/05
17:25
Page 103
PROCEDURE PRIOR TO OPERATIONS: AM6 AUTOMATIC GEARBOX
Engines: ES9A - DT17BTED4
WARNING: In the emergency programme, an impact is felt when
changing P/R or N/R.
Reception of the customer.
Discuss with the customer, to find out all the malfunction symptoms.
Oil quality.
If the gearbox has suffered a serious fault resulting in a malfunction or
the destruction of a clutch, the oil will overheat and become
contaminated with impurities: the oil is said to be «burnt».
This is characterised by a black colour and the presence of an
unpleasant smell.
Oil level.
Preliminary conditions:
- Vehicle horizontal, parking brake off.
- Check that the gearbox is not in back-up mode (using a diagnostic tool).
- The oil temperature should be 60°C (+8, -2) (using a diagnostic tool).
- Press on the brake pedal, change through all the gears.
- Place the gear lever in position P.
With the engine running at idle, without power consumers (aircon,
heating, etc.):
- Remove the oil level plug.
The oil should flow out, then drip-drip.
Refit the oil level plug (the oil level is correct).
The oil does not flow out through the oil level plug (see operation: drain
fill - bleed the gearbox).
ESSENTIAL: The gearbox must be replaced.
103
CLUTCH
GEARBOX
TRANSMISSION
If a gearbox malfunction occurs, there are two possible configurations
depending on the seriousness of the fault:
- Gearbox in back-up mode with a replacement programme of (the fault
values are taken in substitution).
- Gearbox in back-up mode with an emergency programme (3rd hydraulic).
Angl-C6-page101-120-2005
4/02/05
17:25
Page 104
PRECAUTIONS TO BE TAKEN : AM6 AUTOMATIC GEARBOX
Engines: ES9A - DT17BTED4
Towing.
The front of the vehicle must be raised in order to be towed.
If the front of the vehicle cannot be raised.
Precautions to be taken
When performing electrical checks:
- The battery should be correctly charged.
- Never use a voltage source higher than 16V.
- Never use a test lamp.
IMPERATIVE:
- Put gear lever in position «N».
- Do not add any oil.
- Do not exceed 70 km/h (45 mph) over a distance of 100 km (60 miles)
maximum.
CLUTCH
GEARBOX
TRANSMISSION
Driving.
Never drive with the ignition switched off.
NOTE: The automatic gearbox is only lubricated when the engine is
running.
Repairs on electrical components.
Do not disconnect:
- The battery when the engine is running.
- The ECU when the ignition is switched on.
Repairs on mechanical components.
Never place the gearbox on the ground without protection.
Do not use the unions on the gearbox as handles for moving the
gearbox.
It is imperative that the converter retaining peg should be in place
when removing the gearbox.
It is imperative to use the centring pegs to couple the gearbox on the
engine.
Remove the converter retaining peg before coupling the gearbox on
the engine.
Before reconnecting a switch, check:
- The condition of the various contacts (for deformation, corrosion etc.)
- The presence and condition of the mechanical locking.
104
Angl-C6-page101-120-2005
4/02/05
17:25
Page 105
AM6 AUTOMATIC GEARBOX: GENERAL SPECIFICATIONS
Engines: ES9A - DT17BTED4
Identification.
(1) identification plate (riveted on the casing)
"a" Type of automatic gearbox (AISIN)
"b" Type of automatic gearbox (PSA)
"c" Component marking
"d" Serial no.
(2) identification label (affixed on the ECU)
"e" Date of manufacture
"f" Homologation code (PSA)
"g" ECU no. (PSA)
"h" Bar code (PSA)
"j" Gearbox no. (PSA)
"k" Bar code (AISIN)
"l" Serial no.
CLUTCH
GEARBOX
TRANSMISSION
B2CP3YRC
Specifications
Weight
Torque capacity
: 93 kg (approx.).
: 33 m.daN.
B2CP3YSC
105
Angl-C6-page101-120-2005
4/02/05
17:25
Page 106
AM6 GEARBOX: TIGHTENING TORQUES
Engines: ES9A - DT17BTED4
1
2
3
4
B2CP42WD
CLUTCH
GEARBOX
TRANSMISSION
5
6
7
8
9
Automatic gearbox heat exchanger
Hydraulic valve block casing
Filler plug
Torque converter screw [(ES9 3 screw) (DT17 6 screw)]
Pre-tightening
Slackening
Tightening
Sleeve stop
Gearbox support
Engine speed sensor (ES9J4)
Fixing of gearbox on cylinder block
Closing panel fixing
B2CP42XD
106
4,2 ± 0,4
1,5 ± 0,2
4 ± 0,4
2 ± 0,2
100°
6 ± 0,6
3,5 ± 0,3
5,5 ± 0,5
0,8 ± 0,1
6 ± 0,6
2 ± 0,2
Angl-C6-page101-120-2005
4/02/05
17:25
Page 107
AM6 GEARBOX: TIGHTENING TORQUES
Engines: ES9A - DT17BTED4
12
11
12
13
14
15
Oil induction cover
Hydraulic valve block (in the order indicated)
Oil temperature sensor tightening plate
ECU screws
Oil drain and overflow plug
Oil level plug
1 ± 0,1
1 ± 0,1
1 ± 0,1
2,5 ± 0,2
1 ± 0,1
4,8 ± 0,5
CLUTCH
GEARBOX
TRANSMISSION
B2CP42YD
B2CP42ZD
107
Angl-C6-page101-120-2005
4/02/05
17:25
Page 108
AM6 GEARBOX CONTROLS
Engines: ES9A - DT17BTED4
The gear selector is guided by the shape of the stepped gate and by a retaining spring which
pulls it to the left hand side.
The gear control has 5 positions:
- Position "P": parking (locking and immobilisation of the vehicle).
- Position "R": reverse gear.
- Position "N": neutral.
- Position "D" : drive (for use of the 6 gears in autoadaptive automatic operation).
- Position "M": manual (this position allows the driver to select his gears in one-touch mode by
pulling "M -" or pushing "M +" on the gear selector).
CLUTCH
GEARBOX
TRANSMISSION
NOTE: Only positions "P" or "N" authorise starting of the engine.
In position "M", the selection is enabled by an electronic sensor located close to the gear
selector:
- The variation of flux necessary to affect the sensor cells is obtained by a magnet on the lever
opposite the cells, provoking the changes of status.
- The information on this is transmitted to the gearbox ECU.
B2CP430D
108
Angl-C6-page101-120-2005
4/02/05
17:25
Page 109
AM6 GEARBOX CONTROLS
Engines: ES9A - DT17BTED4
The switch "a" positioned on the gear control panel allows the driver to choose one of the
following 3 driving programmes:
- Normal programme: The normal programme operates in the absence of any other selection
being made (auto-adaptive mode ; eco law).
- Sport programme: The sport programme permits a more dynamic driving style, with greater
performances and acceleration.
- Snow programme: The snow programme facilitates moving off and traction on ground that
has limited adhesion.
To revert to the normal programme, you have to press a second time on the sport or snow
switch.
B2CP430D
109
CLUTCH
GEARBOX
TRANSMISSION
NOTE: The vehicle is equipped with «shift lock». It is necessary to switch on the ignition and
press the brake pedal to release the selection lever from position "P".
Angl-C6-page101-120-2005
4/02/05
17:25
Page 110
AM6 GEARBOX CONTROLS
Engines: ES9A - DT17BTED4
Gearbox end.
The automatic gearbox is controlled by a cable.
“b” Push-button in pushed-in position
(1) Sleeve stop
(2) Control lever with ball-joint
(3) Automatic adjustment
CLUTCH
GEARBOX
TRANSMISSION
Automatic adjustment:
- Pull out button “b” to adjust the control.
- Push in button “b” to lock the adjustment of the control.
B2CP431C
110
Angl-C6-page101-120-2005
4/02/05
17:25
Page 111
AM6 GEARBOX CONTROLS: «SHIFT LOCK» FUNCTION
Engines: ES9A - DT17BTED4
IMPERATIVE: Respect the safety and cleanliness requirements, with reference to the brochure:
«Recommendations-Precautions».
The «shift lock» is a system that locks the gear selection lever in position «P».
Unlocking the «SHIFT LOCK» (normal operation).
Switch on the ignition.
Press the brake pedal and keep it pressed.
Move the gear selection lever out of position «P».
Unlocking the «SHIFT LOCK» (with an operating fault).
Should it be impossible to unlock the «shift lock» with the «Normal operation» method.
The fault may originate from one of the following components:
- «Shift lock».
- Gear lever position switch.
- Automatic gearbox ECU.
- Electrical harness.
- Battery voltage.
Operations to be performed.
Unclip the cover (1).
Unlock the «shift lock» by pressing at "a" with the aid of a screwdriver (screwdriver with a minimum length of
150 mm).
Move the gear selection lever out of position "P".
C5FP0RCD
111
CLUTCH
GEARBOX
TRANSMISSION
C5FP0RBC
Angl-C6-page101-120-2005
4/02/05
17:25
Page 112
PROCEDURE FOR INITIALISATION OF THE AUTOMATIC GEARBOX ECU
NOTE: For all these operations, follow the procedure in the diagnostic tool.
Replacement of the automatic gearbox without replacement of the ECU.
Carry out the following operations:
- Initialisation of the neutral position of the gear selection lever position sensor.
- Initialisation of the adaptation of the oil pressure regulators and electrovalves.
- Initialisation of the autoadaptatives.
- Resetting the oil usage counter to zero.
CLUTCH
GEARBOX
TRANSMISSION
Replacement of the automatic gearbox ECU.
Carry out the following operations:
- Read the value of the gearbox oil usage counter from the old ECU.
- Write the value of the oil usage counter into the new ECU.
- Initialisation of the neutral position of the gear selection lever position sensor.
- Initialisation of the adaptation of the oil pressure regulators and electrovalves.
- Initialisation of the autoadaptatives.
112
Angl-C6-page101-120-2005
4/02/05
17:25
Page 113
PROCEDURE FOR INITIALISATION OF THE AUTOMATIC GEARBOX ECU
Replacement of the automatic gearbox and of the automatic gearbox ECU.
Carry out the following operations:
- Initialisation of the autoadaptatives.
- Resetting the oil usage counter to zero.
- Initialisation of the adaptation of the oil pressure regulators and electrovalves.
NOTE: If downloading the automatic gearbox ECU, there is no specific operation, follow the procedure in the diagnostic tool.
IMPERATIVE: For a certain time, having carried out an ECU initialisation procedure, one may obtain gear changing quality that is more
or less good (adaptation of the ECU parameters to the gearbox). To improve the quality, it is necessary to perform a road test with
frequent changing through the gears (auto-adaptive laws).
113
CLUTCH
GEARBOX
TRANSMISSION
Draining of the automatic gearbox oil.
Carry out the following operations:
- Initialisation of the adaptation of the oil pressure regulators and electrovalves.
- Resetting the oil usage counter to zero.
Angl-C6-page101-120-2005
4/02/05
17:25
Page 114
DRAINING, FILLING AND TOPPING UP THE AM6 AUTOMATIC GEARBOX
Tool.
[1] Filling cylinder
: (-).0340
Respect the safety and cleanliness requirements.
Draining.
IMPERATIVE: Draining of the gearbox must be done with the oil hot (60°C minimum), in order to
ensure that the impurities in suspension in the oil are eliminated.
NOTE: Drainage is only partial, as the torque converter cannot be drained totally.
Raise the vehicle.
B1BP317C
CLUTCH
GEARBOX
TRANSMISSION
Remove:
- The oil level plug (2) by means of the Torx spanner.
- The drain plug (1) using a hexagonal spanner.
NOTE : Around 3 litres of oil should flow out.
Filling.
Fit the drain plug (1) (with a new seal).
Tighten the plug (1) to
B2CP3WZC
Remove:
- The air filter housing.
- The oil filler plug (3).
Use tool [1].
114
: 5 ± 1 mdaN.
Angl-C6-page101-120-2005
4/02/05
17:25
Page 115
DRAINING, FILLING AND TOPPING UP THE AM6 AUTOMATIC GEARBOX
WARNING: Do not take account of the information mentioned on tool [1].
Oil capacity for a dry gearbox: 7 litres (approx.).
Type of oil: JWS 3309 ESSO (red in colour).
Volume of oil remaining after draining: 4 litres (approx.).
Quantity of oil to be added: 3 litres (approx.).
B1BP317C
Checking the oil level.
Prior conditions:
- Vehicle in a horizontal position.
- Check that the gearbox is not in back-up mode.
Remove the filler plug (3).
Add 0.5 litre of extra oil into the gearbox.
Press the brake, change through all the gears.
Gear lever in position "P".
Engine running, at idle:
- Oil temperature 60°C (+ 8 ; - 2) (parameter measures with a diagnostic tool).
- Remove the level plug (2).
B2CP3WZC
115
CLUTCH
GEARBOX
TRANSMISSION
Refit the filler plug (3) (with a new seal).
Tighten the plug (3) to
: 4 ± 1 mdaN.
Initialise the oil usage counter (follow the procedure in the diagnostic tool).
Angl-C6-page101-120-2005
4/02/05
17:25
Page 116
DRAINING, FILLING AND TOPPING UP THE AM6 AUTOMATIC GEARBOX
Thread of oil, then "drip-drip".
Refit the level plug (2).
Tighten the plug (2) to
: 0.8 ± 0,1 mdaN.
"drip-drip" or nothing.
Refit the level plug (2).
Stop the engine.
Add 0.5 litre of extra oil into the gearbox.
Repeat the topping-up procedure.
B1BP317C
NOTE: The level is correct when the thread of oil becomes "drip-drip".
CLUTCH
GEARBOX
TRANSMISSION
Refit the level plug (2) (with a new seal).
Tighten the plug (2) to
Refit the filler plug (3) (with a new seal).
Tighten the plug (3) to
: 0.8 ± 0,1 mdaN.
: 4 ± 1 mdaN.
A level of oil that is too high can have the following consequences: Abnormal overheating of the oil, leaks of oil
causing a level which is too low resulting in destruction of the gearbox.
B2CP3WZC
116
Angl-C6-page101-120-2005
4/02/05
17:25
Page 117
CHECKING THE OIL PRESSURE IN THE AM6 AUTOMATIC GEARBOX
Tools.
[1] Flexible pipe and pressure gauge
[2] Flexible union
: 4601- TF1
: (-).0336.X
Toolkit 4601-T
Toolkit 8010-T
IMPERATIVE: Respect the safety and cleanliness requirements.
CLUTCH
GEARBOX
TRANSMISSION
B2CP45FC
Preliminary operations.
Remove the air filter housing.
Move aside the pipe (1).
Remove the screw (2).
Screw in the tool [2] in place of the screw (2).
B2CP45GC
117
Angl-C6-page101-120-2005
4/02/05
17:25
Page 118
CHECKING THE OIL PRESSURE IN THE AM6 AUTOMATIC GEARBOX
WARNING: Clean the flexible pipe of the tool [1] each time before use; the different
automatic gearbox oils cannot be intermixed.
Fit the tool [1] on the tool [2].
Perform the following operations:
- Raise the vehicle, wheels hanging.
- Apply the parking brake.
- Start the engine.
- Check the oil pressure.
CLUTCH
GEARBOX
TRANSMISSION
WARNING: Wait for the gearbox oil to reach a temperature between 58°C and 68°C.
Check the level of oil in the gearbox (see corresponding operation).
NOTE: Check the temperature of the oil using the diagnostic tool in parameter measures.
Gear lever position
Engine speed
Principal oil pressure
B1BP3END
118
: D.
: Idling.
: 3.7 to 4.2 bars.
Angl-C6-page101-120-2005
4/02/05
17:25
Page 119
CHECKING THE OIL PRESSURE IN THE AM6 AUTOMATIC GEARBOX
Checking the torque converter.
WARNING: This check has to be of short duration (2 seconds), as it causes a rapid
rise in the temperature of the oil in the automatic gearbox.
Gear lever position.
Maximum engine speed for ES9A
Maximum engine speed for DT17
: D.
: 2400 ± 50 rpm.
: 2600 ± 50 rpm.
Diagnosis:
- If the maximum engine speed obtained is lower than the value indicated, the torque
converter is the cause.
- If the maximum engine speed obtained is higher than the value indicated, the automatic
gearbox is the cause (slipping).
Additional operations.
Remove tools [1] and [2].
Refit the screw (2), with a new seal.
Reposition the pipe (1).
Refit the air filter housing.
B1BP3END
119
CLUTCH
GEARBOX
TRANSMISSION
Respect the following checking conditions:
- Engine at operating temperature.
- Gear lever in position D.
- Press on the brake pedal.
- Accelerate the engine to the maximum engine speed (see below).
Angl-C6-page101-120-2005
4/02/05
17:25
Page 120
TRANSMISSION
Gearbox oil seal mandrels
Tightening torques (m.daN)
Vehicle
Gearbox
Engines
Driveshaft
bearing
C6
AM6
ES9A - DT17BTED4
2 ± 0,2
Driveshaft
nut
34,5 ± 2
Right
Left
(-).0336.U
(-).0336.V
8010-T
(-).0336.W (1)
CLUTCH
GEARBOX
TRANSMISSION
(1) Guide for fitting driveshaft seal.
Tightening torques (m.daN) of the wheel bolts
CITROËN
ES9Al
DT17BTED4
Steel
Alloy
120
Tool kit
9±1
4/02/05
17:31
Page 121
WHEEL AND TYRES
3.0i 24S
S
Wheel
T
A
Name of rim
Normal operating pressure:
front/rear
Pressure for maximum load :
front/rear
Pressure: loaded, high speed:
front/rear
Tyre
Spare wheel
Normal operating pressure
Pressure for maximum load
Pressure: loaded, high speed
2,7 24V
XFV
Engine plate
Tyre/circumference
Type
225/55 R17 97W/2,071 m
UHZ
245/45 R18 100W/2,065m
245/45 R18 100W/2,065m
Michelin PRIMACY
7 J17-CH5-32
8 J18-CH5-33
8 J18-CH5-33
SATURNE
SAN MARIN 2
SAN MARIN 2
2,4/2,4
2,4/2,4
2,4/2,4
2,6/2,6
2,4/2,4
2,6/2,6
2,4/2,4
2,4/2,4
2,6/2,6
S
T
225/55 R17 97W
2,6
7 J17-5-32
2,4
2,6
2,6
2,4
2,6
S = Standard fitting.
T = Steel wheel.
A = Alloy wheel.
NOTE: The label indicating the recommended tyre pressures is affixed to the front LH door pillar.
121
AXLES
SUSPENSION
STEERING
Angl-C6-page121-169-2005
Angl-C6-page121-169-2005
4/02/05
17:31
Page 122
AXLES
SUSPENSION
STEERING
WHEEL AND TYRES
Identification of inflation pressures
NOTE: The label indicating the recommended tyre pressures is affixed to the front
LH door pillar.
«a» Recommended tyre inflation pressures (empty and under load)
«b» Tyre specifications
«c» Type of tyres
«d» Recommended inflation pressure for the spare wheel
B2GP01FD
122
4/02/05
17:31
Page 123
AXLES
SUSPENSION
STEERING
Angl-C6-page121-169-2005
WHEEL AND TYRES
Identification of the wheel bolts
(1) Wheel bolt (all rim types)
(2) Light alloy wheel
(3) Steel aluminium wheel
NOTE: If mixed fixing bolts are fitted on steel wheels, the shoulders of the bolts
remain free.
Tightening torques for the wheel bolts.
9 ± 1 m.daN
B2GP00JD
123
Angl-C6-page121-169-2005
4/02/05
17:31
Page 124
AXLES
SUSPENSION
STEERING
WHEEL AND TYRES
Deflation detection system
(4) Valve
(5) Antenna
(6) HF transmitter unit
(7) Washer
(8) Seal
(9) Cap
(10) Nut
Composition.
A SIEMENS HF transmitter module (6) integral to each wheel in the place of the
valve, each including a lithium battery.
An HF receiver in the communication module under the dashboard.
WARNING: Each time a tyre is replaced, it is necessary to replace the valve (4).
WARNING: Each time a wheel rim is replaced, it is necessary to replace the
seal (8).
WARNING: Each time a transmitter module is changed, it is necessary to have
the replacement recognised by the deflation detection ECU, using a diagnostic
tool.
B2GP01ND
124
4/02/05
17:31
Page 125
CHECKING AND ADJUSTING VEHICLE HEIGHT
Reference heights: REFERENCE = Ignition switched on
IMPERATIVE: Respect the safety and cleanliness requirements.
Tools.
[1]
[2]
[3]
[4]
Gauge for measuring radius of wheels (5 bolts)
Gauge for height under bodyshell
LEXIA station
PROXIA station
:
:
:
:
9801-T
2305-T
4171-T
4165-T
Preliminary operations.
Check the tyre pressures.
Place the vehicle on a 4 column lift.
Switch on the ignition.
Release the parking brake.
Put the vehicle in the high position.
Put the vehicle in the normal height position (driving height).
During: During the measuring, do not move the vehicle.
125
AXLES
SUSPENSION
STEERING
Angl-C6-page121-169-2005
Angl-C6-page121-169-2005
4/02/05
17:31
Page 126
AXLES
SUSPENSION
STEERING
CHECKING AND ADJUSTING VEHICLE HEIGHT
Warning: During measurement of reference heights: Do not switch off the ignition
Reference heights: REFERENCE = Ignition switched on
Measuring the front wheel radiuses
B3CP0AQD
Place the tool [1] on the wheel
fixing bolts.
Measure the wheel radiuses
using tool [2].
Measuring the front heights
B3CP0ASD
B3CP0ARD
Measure, using tool [2].
The front LH height H1M: Measure between the ground and zone A under the front subframe.
The front RH height H2M: Measure between the ground and zone B under the front subframe.
126
4/02/05
17:31
Page 127
AXLES
SUSPENSION
STEERING
Angl-C6-page121-169-2005
CHECKING AND ADJUSTING VEHICLE HEIGHT
Reference heights: REFERENCE = Ignition switched on
Measuring the rear wheel radiuses
B3CP06AC
Place the tool [1] on the wheel
fixing bolts.
Measure the wheel radiuses
using tool [2].
Measuring the rear heights
B3CP0AUD
B3CP0ATD
Measure, using tool [2].
The rear LH height H3M: Measure between the ground and zone C under the rear axle crossmember.
The rear RH height H4M: Measure between the ground and zone D under the rear axle crossmember.
127
Angl-C6-page121-169-2005
4/02/05
17:31
Page 128
AXLES
SUSPENSION
STEERING
CHECKING AND ADJUSTING VEHICLE HEIGHT
Reference heights: REFERENCE = Ignition switched on
Adjusting the heights.
Calculate the following values:
- Front LH
- Front RH
- Rear LH
- Rear RH
Connect the diagnostic tool [3] or [4] to the vehicle's
Switch on the ignition.
Perform a global test.
Go into the menu.
: K1M = R1 - H1M.
: K2M = R2 - H2M.
: K3M = R3 - H3M.
: K4M = R4 - H4M.
diagnostic socket.
Variable damping.
Adjustment of vehicle reference heights.
Enter the values K1M, K2M, K3M and K4M in the diagnostic tool.
WARNING: The values should consist of 4 figures: Example: K1 = 160 mm - enter the value 0160.
Checking the heights after adjustment.
Check the heights:
- Front LH
- Front RH
- Rear LH
- Rear RH
:
:
:
:
K1
K2
K3
K4
=
=
=
=
160 ± 6 mm.
160 ± 6 mm.
111 ± 6 mm.
111 ± 6 mm.
128
4/02/05
17:31
Page 129
VALUES FOR CHECKING AND ADJUSTING AXLE GEOMETRIES
IMPERATIVE: Respect the safety and cleanliness requirements.
Tools.
[1] Gauge for measuring radius of wheels (5 bolts)
[2] Gauge for height under bodyshell
: 9801-T
: 2305-T
WARNING: «Check and adjust the axle geometries at reference
height».
Conditions for checking and adjusting.
Check the tyre pressures.
Place the vehicle on a 4 column lift.
Check and adjust if necessary the vehicle heights (see corresponding
operation).
Steering rack locked at its zero point (see corresponding operation).
Switch off the ignition before removing the tools from the wheels.
Lower the vehicle.
Start the engine.
Put the vehicle in the high position.
Put the vehicle in the normal height position (driving height).
Stop the engine.
Switch on the ignition.
Check and adjust the front and rear axle geometries at reference
height.
WARNING: Do not switch off the ignition during checking and
adusting of the front and rear axle geometries.
NOTE: Front of vehicle (following the arrow).
NOTE
B3CP02UC
A < B = Positive figure:
+=
TOE-IN
A > B = Negative figure:
-=
TOE-OUT
129
AXLES
SUSPENSION
STEERING
Angl-C6-page121-169-2005
Angl-C6-page121-169-2005
4/02/05
17:31
Page 130
AXLES
SUSPENSION
STEERING
VALUES FOR CHECKING AND ADJUSTING AXLE GEOMETRIES
Rod for adjusting the rear tracking.
(1) Locking screw
(2) Adjusting screw
B3BP1BND
130
4/02/05
17:31
Page 131
AXLES
SUSPENSION
STEERING
Angl-C6-page121-169-2005
VALUES FOR CHECKING AND ADJUSTING AXLE GEOMETRIES
Reference heights: REFERENCE = Ignition switched on
Front axle
Rear axle
Dissymmetry of lower castor: 0° 30'.
Dissymmetry of lower camber: 0° 25'.
Dissymmetry of lower camber: 0° 30.
IMPERATIVE: Distribute symmetrically, LH / RH wheel, the total tracking value.
«Tyres: 225/55 R17»
Front axle
Vehicle
Tracking
mm
0°
C6
Adjustable
-1±1
- 0°09' ± 0°09'
Castor
Rear axle
Pivot
Angle
Camber
Non adjustable
5° 30' ± 30'
- 0°24' ± 30
8° 40' ± 30'
Tracking
Adjustable
4,32 ± 1
0° 34' ± 0°09'
Push
Angle
Non adjustable
Camber
- 1° 27' ± 30'
0° ± 12'
«Tyres: 245/45 R18»
Front axle
Vehicle
C6
mm
0°
Tracking
Adjustable
- 1,1 ± 1
- 0°09' ± 0°09'
Castor
Rear axle
Pivot
Angle
Camber
Non adjustable
5° 30' ± 30'
- 0°24' ± 30
8° 40' ± 30'
131
Tracking
Adjustable
4,58 ± 1
0° 34' ± 0°09'
Push
Angle
Non adjustable
Camber
- 1° 27' ± 30'
0° ± 12'
Angl-C6-page121-169-2005
4/02/05
17:31
Page 132
AXLES
SUSPENSION
STEERING
VALUES FOR CHECKING AND ADJUSTING AXLE GEOMETRIES
Warning: During measuring of PARKING heights: Switch off the ignition
PARKING heights: (values given AS A GUIDE only)
Front and rear PARKING heights (ignition switched off)
Front axle
B3CP0ATD
B3CP0ARD
Front LH: K1 = 175 ± 6 mm
Rear axle
Front RH: K2 = 175 ± 6 mm
Rear LH: K3 = 131 ± 6 mm
132
Rear RH: K4 = 131 ± 6 mm
4/02/05
17:31
Page 133
AXLES
SUSPENSION
STEERING
Angl-C6-page121-169-2005
VALUES FOR CHECKING AND ADJUSTING AXLE GEOMETRIES
PARKING heights: (values given AS A GUIDE only)
Front and rear PARKING heights (ignition switched off)
Front axle
Rear axle
Dissymmetry of lower castor: 0° 30'.
Dissymmetry of lower camber: 0° 25'.
Dissymmetry of lower camber: 0° 30.
IMPERATIVE: Distribute symmetrically, LH / RH wheel, the total tracking value.
«Tyres: 225/55 R17»
Front axle
Vehicle
Tracking
mm
0°
C6
Adjustable
- 2,32 ± 1
- 0°18' ± 0°09'
Castor
Rear axle
Pivot
Angle
Camber
Non adjustable
5° 30' ± 30'
- 0°30' ± 30
8° 21' ± 30'
Tracking
Adjustable
5,13 ± 1
0° 41' ± 0°09'
Pivot
Angle
Non adjustable
Camber
- 1° 54' ± 30'
0° ± 12'
«Tyres: 245/45 R18»
Front axle
Vehicle
C6
mm
0°
Tracking
Adjustable
- 2,46 ± 1
- 0°18' ± 0°09'
Castor
Rear axle
Camber
Pivot
Angle
Tracking
Camber
8° 21' ± 30'
Adjustable
5,43 ± 1
0° 41' ± 0°09'
- 1° 54' ± 30'
Non adjustable
5° 30' ± 30'
- 0°30' ± 30
133
Pivot
Angle
Non adjustable
0° ± 12'
Angl-C6-page121-169-2005
4/02/05
17:31
Page 134
AXLES
SUSPENSION
STEERING
FRONT AXLE
ES9A
Front subframe.
Front subframe in cast aluminium alloy.
NOTE: Subframe positioned by indexing on body.
Front subframe frame with screwed-in subframe extensions (UHZ engine).
(1) Front subframe frame crossmember
B3CP09BD
(2) Subframe extensions
DT17BTED4
(3) Front subframe
Front subframe frame with welded subframe extensions (XFV engine).
(3) Front subframe
(4) Front subframe frame
B3CP09LD
134
4/02/05
17:31
Page 135
AXLES
SUSPENSION
STEERING
Angl-C6-page121-169-2005
FRONT AXLE
Front pivot.
Front pivot fixed on the pivot support by means of an upper balljoint and a lower balljoint.
Front hub bearing:
- Diameter 83 mm.
- Bearing with double row of balls, with an integral magnetic wheel (48 pairs of poles).
Suspension leg:
- Front axle with wheels independent, of multi-arm type.
- Travel stop: height 60 mm.
- Anti-roll bar
Anti-roll bar
B3CP09CC
Engines
Diameter (mm)
Colour ref.
ES9A
23,5 mm
Yellow
DT17BTED4
24 mm
Pink
NOTE: The geometry specifications are given with the values for checking and adjusting the
axle geometries.
135
Angl-C6-page121-169-2005
4/02/05
17:31
Page 136
AXLES
SUSPENSION
STEERING
FRONT AXLE: TIGHTENING TORQUES
B3CP09DC
1
2
3
4
5
6
7
8
9
Engines: ES9A - DT17BTED4
Suspension leg
Body suspension upper support
Front suspension cylinder on Suspension upper support
Suspension upper arm on Suspension upper support
Suspension upper arm on Pivot support
Front anti-roll bar rod on Pivot support
Pivot upper balljoint on Pivot support
Pivot upper balljoint nut
Front anti-roll bar rod on Front anti-roll bar
Suspension lower arm on Pivot support
B3CP09EC
136
2,6 ± 0,3
2,4 ± 0,3
4,5 ± 0,6
8,5 ± 0,8
20,5 ± 2
15 ± 1,5
6 ± 0,6
5 ± 0,5
7,5 ± 1,1
4/02/05
17:31
Page 137
FRONT AXLE: TIGHTENING TORQUES
10
11
12
Engines: ES9A - DT17BTED4
Suspension leg
Pivot lower balljoint on Pivot support
Pivot lower balljoint on Pivot support
Steering rack balljoint on Front pivot
B3CP09FC
137
6,5 ± 0,9
17 ± 1,7
3,5 ± 0,3
AXLES
SUSPENSION
STEERING
Angl-C6-page121-169-2005
Angl-C6-page121-169-2005
4/02/05
17:31
Page 138
AXLES
SUSPENSION
STEERING
FRONT AXLE: TIGHTENING TORQUES
B3CP09GD
13
14
15
16
17
18
19
20
21
22
23
24
Engines: ES9A - DT17BTED4
Front subframe
Front subframe frame tie-bar on Body
Front subframe frame tie-bar on Front subframe frame
Front absorber support tie-bar
Front subframe frame on Subframe extension
Front subframe frame crossmember
Subframe extension on Front subframe
Front subframe stabiliser bar
Front subframe on Body
Suspension lower arm on Front subframe
Suspension lower arm on Front subframe
Front anti-roll bar bearing on Front subframe
Body yoke
B3CP09HD
138
5 ± 0,7
6,5 ± 0,9
6,5 ± 0,9
10 ± 1
10 ± 1
5,5 ± 0,5
12,5 ± 1,2
14 ± 1,4
6,5 ± 0,6
11 ± 1,1
4,5 ± 0,6
10 ± 1
4/02/05
17:31
Page 139
FRONT AXLE: TIGHTENING TORQUES
25
26
Engines: ES9A - DT17BTED4
Front subframe
Suspension lower arm support on Front subframe
Suspension lower arm on Front subframe
B3CP09TC
139
6,5 ± 0,9
12,3 ± 1,2
AXLES
SUSPENSION
STEERING
Angl-C6-page121-169-2005
Angl-C6-page121-169-2005
4/02/05
17:31
Page 140
AXLES
SUSPENSION
STEERING
REAR AXLE
Rear axle
(1)
(2)
(3)
(4)
Rear axle crossmember
Rear axle crossmember rear rubber bush
Rear axle crossmember front rubber bush
Suspension longitudinal arm
NOTE: Rear axle in cast aluminium alloy, of multi-arm type.
(5) Suspension upper arm
(6) Rear pivot
(7) Hub-bearing
(8) Tracking adjustment rod
(9) Suspension lower arm
B3DP0BYD
Rear pivot
Hub-bearing:
- The rear hub-bearing is equipped with an ABS radial target (48 pairs of poles).
Stub axle:
- Diameter 32 mm.
- The stub axle, joined onto the rear pivot, is not separable.
IMPERATIVE: The rear hub-bearing must not be placed in proximity to a source of
magnetism or of pollution by metal particles. Components must be clean and free from
any signs of abnormal wear or damage.
B3DP0BZD
140
4/02/05
17:31
Page 141
AXLES
SUSPENSION
STEERING
Angl-C6-page121-169-2005
REAR AXLE
(10) Rear anti-roll bar bearing
(11) Rear anti-roll bar bearing half-support
(12) Rear anti-roll bar
(13) Rear anti-roll bar rod
NOTE: The rear anti-roll bar bearings are not separable.
Anti-roll bar
Engines
Diameter (mm)
Colour ref.
ES9A - DT17BTED4
20,6
Orange
Vehicle geometry.
NOTE: The geometry specifications are given with the values for checking and adjusting the
axle geometries.
B3BP1AED
141
Angl-C6-page121-169-2005
4/02/05
17:31
Page 142
AXLES
SUSPENSION
STEERING
REAR AXLE: TIGHTENING TORQUES
B3DP0BUD
1
2
3
4
5
6
7
8
9
10
Engines: ES9A - DT17BTED4
Rear axle crossmember on Body
Rear anti-roll bar bearing on Body
Tracking adjustment rod on Rear pivot
Rear suspension cylinder on Rear pivot
Suspension longitudinal arm on Rear pivot
Suspension lower arm on Rear pivot
Suspension lower arm on Rear axle crossmember
Tracking adjustment rod on Rear axle crossmember
Locking of tracking adjustment rod
Suspension longitudinal arm on Body
Pre-tightening
Angular tightening
B3DP0BVD
142
7,5 ± 0,7
7 ± 0,7
1 ± 0,2
3,3 ± 0,3
150° ± 5°
4/02/05
17:31
Page 143
REAR AXLE: TIGHTENING TORQUES
11
12
13
14
15
16
17
Engines: ES9A - DT17BTED4
Suspension upper arm on Rear pivot
Suspension upper arm on Rear axle crossmember
Rear suspension cylinder on Rear axle crossmember
Rear anti-roll bar rod on Rear pivot
Rear anti-roll bar rod on Rear anti-roll bar
Rear anti-roll bar bearing half support
Rear hub-bearing nut
B3DP0BWD
B3DP0BXD
143
7 ± 0,7
4 ± 0,6
1,8 ± 0,4
25 ± 2
AXLES
SUSPENSION
STEERING
Angl-C6-page121-169-2005
Angl-C6-page121-169-2005
4/02/05
17:31
Page 144
AXLES
SUSPENSION
STEERING
ACTIVE SUSPENSION WITH VARIABLE DAMPING
Location of components
A: Front suspension
B: Rear suspension
NOTE: The rear stiffness regulator is equipped with two accumulators.
(1) Variable damping suspension actuator
(2) Front suspension accumulator
(3) LDS fluid reservoir
B3BP1ASD
(4) Front suspension cylinder
Front axle
(5) Built-in Hydro-electronic Interface (BHI)
(6) Front stiffness regulator
(7) Suspension pressure sensor
(8) Front stiffness regulator accumulator
(9) Wheel travel sensor
B3CP09AD
144
4/02/05
17:31
Page 145
ACTIVE SUSPENSION WITH VARIABLE DAMPING
Rear axle
(10) Rear suspension cylinder
(11) Rear suspension accumulator
(12) Variable damping suspension actuator
(13) Suspension pressure sensor
(14) Rear stiffness regulator accumulator
(15) Rear stiffness regulator
(16) Wheel travel sensor
Source of pressure.
Features.
Hydraulic fluid
: LDS TOTAL H50126.
The LDS fluid orange in colour is 100% synthetic.
Capacity of the hydraulic circuit
: 6.3 litres.
B3DP0BSD
LDS fluid reservoir
NOTE: LDS: Liquide Direction Suspension (steering/suspension fluid).
«a» LDS fluid reservoir filler (cap)
«b» Suction (BHI) (power steering pump)
«c» Return (stiffness regulators)
«d» Return (power steering pump)
«e» Return (filter)
«f» Suction (filter)
The level of the LDS fluid must be checked with the vehicle in the low position (refer to the
procedure «Depressurisation: suspension circuit»).
B4BP01SD
145
AXLES
SUSPENSION
STEERING
Angl-C6-page121-169-2005
Angl-C6-page121-169-2005
4/02/05
17:31
Page 146
AXLES
SUSPENSION
STEERING
ACTIVE SUSPENSION WITH VARIABLE DAMPING
Built-in Hydro-electronic Interface (BHI)
Composition of the Built-in Hydro-electronic Interface:
- An electric motor.
- A pump with 5 pistons.
- 4 electrovalves.
- 2 non-return valves.
- A pressure limiter.
- An anti-pulse accumulator.
- A filter.
- The suspension ECU.
Features of variable damping suspension.
Variable damping suspension ECU (CSS).
The ECU (CSS) is located in the engine compartment, in the ECU tray.
The ECU (CSS) manages the different damping laws, as a function of the information delivered
by the following components:
- The 4 wheel travel sensors.
- The 2 suspension pressure sensors.
- The speed of the vehicle.
- The speed of rotation of the steering wheel.
The suspension ECU (CSS) pilots the following components:
- The 4 variable damping suspension actuators.
- The Built-in Hydro-electronic Interface (BHI).
B3BP1A1C
146
4/02/05
17:31
Page 147
ACTIVE SUSPENSION WITH VARIABLE DAMPING
Wheel travel sensor
(9) Front RH wheel travel sensor
The wheel travel sensor defines the angular position of the suspension lower arm.
Identification of the sensors:
-
B3BP19ZC
Suspension pressure sensor
Front RH wheel travel sensor
Front LH wheel travel sensor
Rear RH wheel travel sensor
Rear LH wheel travel sensor
: Yellow.
: Red.
: Green.
: Blue.
IMPERATIVE: Before operating on a wheel travel sensor, uncouple its rod so as not to
go past the maximum angular travel (see corresponding operation).
The suspension pressure sensors (7) informs the suspension ECU (CSS) of the pressure in
the hydraulic high pressure pipes of the front suspension.
The sensor (13) informs the suspension ECU (CSS) of the pressure in the hydraulic high
pressure pipes of the rear suspension.
B3BP19YC
147
AXLES
SUSPENSION
STEERING
Angl-C6-page121-169-2005
Angl-C6-page121-169-2005
4/02/05
17:31
Page 148
AXLES
SUSPENSION
STEERING
ACTIVE SUSPENSION WITH VARIABLE DAMPING
Variable damping suspension actuator
Each suspension cylinder has a variable damping suspension actuator.
(1) Variable damping suspension actuators (front)
(12) Variable damping suspension actuators (rear)
Anti-roll bars:
Front anti-roll bar.
ES9A
: Diameter 23.5 mm Yellow.
DT17BTED4
: Diameter 24 mm
Pink.
Rear anti-roll bar.
ES9A and DT17BTED4
B3BP1A0D
148
: Diameter 20.6 mm Orange.
4/02/05
17:31
Page 149
ACTIVE SUSPENSION WITH VARIABLE DAMPING
One-touch control for body height
«g» One-touch control to raise body height
«h» Sport mode activation/deactivation switch
«j» One-touch control to lower body height
C5FP0R8C
149
AXLES
SUSPENSION
STEERING
Angl-C6-page121-169-2005
Angl-C6-page121-169-2005
4/02/05
17:31
Page 150
AXLES
SUSPENSION
STEERING
SUSPENSION: TIGHTENING TORQUES
B3CP09DC
1
2
3
4
5
6
7
8
9
Front suspension
Body suspension upper support
Front suspension cylinder on Suspension upper support
Suspension upper arm on Suspension upper support
Suspension upper arm on Pivot support
Suspension upper arm on Pivot support
Pivot upper balljoint on Pivot support
Pivot upper balljoint nut
Front anti-roll bar rod on Front anti-roll bar
Suspension lower arm on Pivot support
B3CP09EC
150
2,6 ± 0,3
2,4 ± 0,3
4,5 ± 0,6
8,5 ± 0,8
20,5 ± 2
15 ± 1,5
6 ± 0,6
5 ± 0,5
7,5 ± 1,1
4/02/05
17:31
Page 151
SUSPENSION: TIGHTENING TORQUES
10
11
12
13
14
15
Front pivot lower balljoint on Pivot support
Front pivot lower balljoint on Pivot support
Steering rack balljoint on Front pivot
Rear fixing of suspension lower arm on Front subframe
Rear fixing of suspension lower arm on Front subframe
Fixing of front anti-roll bar bearing on Front subframe
B3CP09FC
B3CP09WD
151
6,5 ± 0,9
17 ± 1,7
3,5 ± 0,3
11 ± 1,1
6,5 ± 0,6
4,5 ± 0,4
AXLES
SUSPENSION
STEERING
Angl-C6-page121-169-2005
Angl-C6-page121-169-2005
4/02/05
17:31
Page 152
AXLES
SUSPENSION
STEERING
SUSPENSION: TIGHTENING TORQUES
16
17
Fixing of suspension lower arm support on Front subframe
Front fixing of suspension lower arm on Front subframe
B3CP09XD
152
8 ± 0,8
12,3 ± 1,2
4/02/05
17:31
Page 153
AXLES
SUSPENSION
STEERING
Angl-C6-page121-169-2005
SUSPENSION: TIGHTENING TORQUES
18
19
20
21
22
23
24
25
B3DP0CPD
26
27
28
29
Rear suspension
Tracking adjustment rod on Rear pivot
Lower fixing of rear suspension cylinder on Rear pivot
Suspension longitudinal arm on Rear pivot
Suspension lower arm on Rear pivot
Rear anti-roll bar bearing on Body
Suspension lower arm on Rear axle crossmember
Tracking adjustment rod on Rear axle crossmember
Screw for locking of tracking adjustment rod
Suspension longitudinal arm on Body
Pre-tightening
Angular tightening
Suspension upper arm on Rear pivot
Suspension upper arm on Rear axle crossmember
Upper fixing of rear suspension cylinder on Rear axle crossmember
B3DP0CQD
153
7 ± 0,7
7,5 ± 0,7
7 ± 0,7
1 ± 0,2
3,3 ± 0,3
150° ± 5°
7 ± 0,7
Angl-C6-page121-169-2005
4/02/05
17:31
Page 154
AXLES
SUSPENSION
STEERING
SUSPENSION: TIGHTENING TORQUES
30
31
32
Rear suspension
Upper fixing of rear anti-roll bar rod on Rear pivot
Lower fixing of rear anti-roll bar rod on Rear anti-roll bar
Fixing of rear anti-roll bar half-bearing
B3DP0CRD
154
4 ± 0,6
1,8 ± 0,4
4/02/05
17:31
Page 155
DRAINING, FILLING AND BLEEDING THE HYDRAULIC SUSPENSION/STEERING CIRCUIT
Tools.
[1] Pliers for clic clips
[2] LEXIA diagnostic tool
[3] PROXIA diagnostic tool
: 4121-T
: 4171-T
: 4165-T
Draining.
Start the engine.
Place the vehicle in the low position.
Stop the engine.
Raise and support the vehicle, wheels hanging.
WARNING: The LDS fluid reservoir is pressurised.
Open the cap of the LDS fluid reservoir.
Remove:
- The front RH wheel.
- The front RH splash-shield.
Remove the clip (1) using tool [1].
Uncouple the hose (2) from the LDS fluid reservoir.
Drain the LDS fluid reservoir.
B3FP7HED
IMPERATIVE: Any LDS fluid recovered must not be re-used.
155
AXLES
SUSPENSION
STEERING
Angl-C6-page121-169-2005
Angl-C6-page121-169-2005
4/02/05
17:31
Page 156
AXLES
SUSPENSION
STEERING
DRAINING, FILLING AND BLEEDING THE HYDRAULIC SUSPENSION/STEERING CIRCUIT
Filling.
Couple the hose (2) on the LDS fluid reservoir.
Refit:
- The clip (1).
- The front RH splash-shield.
- The front RH wheel.
Lower the vehicle.
"a" maximum level for the LDS fluid
Fill the LDS fluid reservoir up to the maximum level for the LDS fluid "a".
B3FP7HFD
156
4/02/05
17:31
Page 157
DRAINING, FILLING AND BLEEDING THE HYDRAULIC SUSPENSION/STEERING CIRCUIT
Bleeding.
Connect tool [2] or [3] to the vehicle's diagnostic socket.
Switch on the ignition.
Perform a global test.
Go into the menu:
- Variable damping.
- Bleeding the suspension circuit.
Follow the instructions on the screen.
Apply a pressure of 0.5 bar in the LDS fluid reservoir (using a tool FACOM 920).
Start the engine.
Wait for the vehicle height to stabilise.
Place the vehicle in the high position.
Place the vehicle in the low position.
Move the steering in each direction, from lock to lock.
Stop the engine.
Check the LDS fluid level.
B3FP7HGD
157
AXLES
SUSPENSION
STEERING
Angl-C6-page121-169-2005
Angl-C6-page121-169-2005
4/02/05
17:31
Page 158
AXLES
SUSPENSION
STEERING
DRAINING, FILLING AND BLEEDING THE HYDRAULIC SUSPENSION/STEERING CIRCUIT
Checking and topping up the LDS fluid level.
NOTE: Checking the LDS fluid level is done with the vehicle in the forced low position
(hydraulic suspension circuit depressurised).
"a" Maximum level for the LDS fluid
"b" Minimum level for the LDS fluid
Open the cap (3).
If necessary, add LDS fluid up to the maximum level "a".
IMPERATIVE: A container of LDS that has been opened must be sealed and kept in a
clean place. A container of LDS has to be used up within two weeks of opening, after
which any unused LDS fluid must be disposed of.
B3FP7HGD
158
4/02/05
17:31
Page 159
POWER STEERING SPECIFICATIONS
Top of column
(1) Driver's airbag
(2) Steering wheel
(3) Controls under the steering wheel
(4) Steering lock
(5) Fixing of steering wheel on the shaft of the steering column
C5FP0U2D
Steering column
(6) Steering column support
(7) Fixing of steering cardan on the distributor valve stem
B3EP17SD
159
AXLES
SUSPENSION
STEERING
Angl-C6-page121-169-2005
Angl-C6-page121-169-2005
4/02/05
17:31
Page 160
AXLES
SUSPENSION
STEERING
POWER STEERING SPECIFICATIONS
Steering mechanism
The steering mechanism with integral ram is fixed on the front subframe by two studs.
The steering assistance valve has groove technology.
The hydraulic supply and return pipes are fixed on the steering assistance valve by means of
a flange.
The adjustment of the steering push-rod is via a screw plug «a».
IMPERATIVE: The toothed washers «b» must be placed between the steering mechanism
and the front subframe.
Engines ES9A/DT17BTED4.
Steering rack travel
Number of teeth on the distributor valve pinion
Steering ratio
Number of rotations of steering wheel (from lock to lock)
Inner angle of lock
Outer angle of lock
B3EP17TD
160
:
:
:
:
:
:
90 mm x 2.
9.
1/61,26.
2,94.
37°25'.
31°36'.
4/02/05
17:31
Page 161
AXLES
SUSPENSION
STEERING
Angl-C6-page121-169-2005
POWER STEERING SPECIFICATIONS
Steering assistance circuit
(8) Steering assistance valve
(9) Steering mechanism with integral ram
(10) Low pressure piping
(11) High pressure piping
(12) Power steering pump
(13) LDS fluid reservoir
LDS fluid reservoir.
The LDS fluid reservoir supplies the suspension circuit as well as the steering assistance
circuit (fluid: LDS TOTAL H50126).
Steering assistance pump with constant flow (engines: ES9A, DT17).
The power steering pump is driven by the accessories belt.
A stepper motor incorporated in the steering assistance valve modulates the steering assistance
as a function of the vehicle speed.
Regulation pressure
Diameter of the pulley of the power steering pump.
Engine ES9A
Diameter of the pulley of the power steering pump.
Engine DT17BTED4
B3EP17UD
161
: 115 ± 5 bars.
: 128 mm.
: 100 mm.
Angl-C6-page121-169-2005
4/02/05
17:31
Page 162
AXLES
SUSPENSION
STEERING
POWER STEERING SPECIFICATIONS
Setting the steering rack mid-point.
IMPERATIVE: Respect the precautions to be taken prior to any operation (refer to the
brochure "Recommendations-precautions").
Preliminary operation.
Raise and support the vehicle on 2-column lift.
Remove (on the RH side):
- The clip (1).
- The clip (2).
Detach the steering rack protection gaiter.
B3EP13UC
Setting.
Turn the steering wheel to full LH lock.
Measure the dimension X.
Turn the steering wheel to full RH lock.
Measure the dimension Y.
Calculate the dimension L = (Y - X) : 2.
Position the steering rack to the dimension "L" (mid point of the steering rack).
Additional operation.
Refit:
- The protection gaiter.
- The clip (2).
- The clip (1) (new).
B3EP13VD
162
4/02/05
17:31
Page 163
POWER STEERING: TIGHTENING TORQUES
Steering column
B3EP17GD
Steering mechanism with integral ram
1
2
3
4
5
6
7
8
9
10
11
12
Engines: ES9A - DT17BTED4
Steering wheel bolt
Upper nuts
Lower nuts
Fixing of steering cardan on valve stem
Union of hydraulic pipe on ram
Fixing of supply pipes bracket on distributor valve
Fixing of distributor valve on steering mechanism
Steering ball-joint nut
Locking nut for adjustment of steering track rods
Fixing of steering rack ball-joint
Steering mechanism stud
Steering mechanism nut
B3EP17HD
163
3,3 ± 0,5
2 ± 0,3
2 ± 0,3
2 ± 0,3
1,4 ± 0,35
0,8 ± 0,1
2 ± 0,2
3,5 ± 1
5,3 ± 0,8
9,0 ± 0,9
0,9 ± 0,2
14 ± 1,4
AXLES
SUSPENSION
STEERING
Angl-C6-page121-169-2005
Angl-C6-page121-169-2005
4/02/05
17:31
Page 164
AXLES
SUSPENSION
STEERING
POWER STEERING: TIGHTENING TORQUES
Steering assistance pump:
ES9A engine
13
14
15
16
Fixation
Fixation
Fixation
Fixation
of
of
of
of
Engines: ES9A - DT17BTED4
steering assistance pump on support
pulley on steering assistance pump
pulley on steering assistance pump
steering assistance pump on support
B3EP17JC
Steering assistance pump:
DT17BTED4 engine
B3EP17KC
164
2,5 ± 0,6
0,8 ± 0,2
2,2 ± 0,3
2 ± 0,3
4/02/05
17:31
Page 165
CHECKING THE STEERING ASSISTANCE PRESSURE (ES9A ENGINE)
E5AP2PND
Tools.
[1] Pipe spanner
[2] Set of 2 hose clamps
[3] Pressure checking assembly
[3a] Pressure gauge
[3b] Checking tube: Pressure gauge to tap
[3c] Checking tube: High pressure pipe to tap
[3d] Checking tube: High pressure pump to tap
[3e] 3-way tap
[4] Union
[5] Union
[6] Plug for checking sealing of the steering valve
:
:
:
:
:
:
:
:
:
:
:
FACOM 18.17
4153-T
(-).0710.AZ
(-).0710.B1
(-).0710.B2
(-).0710.B3
(-).0710.C
(-).0710.E1Z
(-).0710.E2Z
(-).0410.N
Precautions to be taken.
Work with care to avoid entry of polluting particles.
NOTE: Correct operation of the system requires the LDS fluid and the hydraulic components
to be perfectly clean.
Check:
- The level of the LDS fluid (see procedure: drain-fill-bleed the suspension circuit).
- The condition of the piping and unions.
B1BP3GPD
Using the tools.
Prepare the checking assembly [3], [4] and [5].
Remove the bracket (1).
Clamp the pipe at "a", using tool [2].
Uncouple and move aside the piping (2), using tool [1].
165
AXLES
SUSPENSION
STEERING
Angl-C6-page121-169-2005
Angl-C6-page121-169-2005
4/02/05
17:31
Page 166
AXLES
SUSPENSION
STEERING
CHECKING THE STEERING ASSISTANCE PRESSURE (ES9A ENGINE)
Attach the tool [3a].
Do up:
- The union [5] on the pipe (2).
- The union [4] on the steering assistance pump.
Connect the assembly [3] to the unions [4] and [5].
B1BP3GQD
Tighten all the unions.
Remove the tool [2].
Open the tap [3e].
Start the engine and allow it to run for 5 seconds.
Stop the engine.
Move the steering several times in each direction.
Check that there are no leaks.
Checking the steering assistance pump pressure.
Start the engine.
Close the tap [3e] for 5 seconds.
Open the tap [3e].
Accelerate between 1200 and 1500 rpm, the pressure should be : 115 ± 5 bars.
Stop the engine.
If the steering assistance pump pressure is correct, check the sealing of the valve.
B1BP3GRD
166
4/02/05
17:31
Page 167
CHECKING THE STEERING ASSISTANCE PRESSURE (ES9A ENGINE)
Checking the valve sealing.
Remove the exhaust line (3).
Move aside the heat shield from the steering mechanism.
Slacken the union (6) on the power steering ram.
Remove:
- The screw (4).
- The bracket (7).
B1JP08WD
Uncouple the two supply pipes (5) from the distributor valve, and move them aside.
Fit on the distributor valve the tool [6], tighten the screw to: 0,8 ± 0,1 m.daN.
Couple two pipes at the outlets of the pipes (5).
Move the steering slowly from lock to lock, to drain the ram.
Collect the LDS fluid in a tray.
Refit the exhaust line (3).
Open the tap [3e].
Start the engine.
Hold the engine speed between 1200 and 1500 rpm.
Hold the steering at full lock to the right, then at full lock to the left.
The pressure should adjust to
: 115 ± 5 bars.
B3EP185D
167
AXLES
SUSPENSION
STEERING
Angl-C6-page121-169-2005
Angl-C6-page121-169-2005
4/02/05
17:31
Page 168
AXLES
SUSPENSION
STEERING
CHECKING THE STEERING ASSISTANCE PRESSURE (ES9A ENGINE)
Remove:
- The exhaust line (3).
- The tool [6].
Couple the two supply pipes (5) on the distributor valve.
B1JP08WD
Refit:
- The bracket (7).
- The screw (4), tighten to 0,8 ± 0,1 m.daN.
Retighten the union (6) on the power steering ram; tighten to 1,4 ± 0,35 m.daN.
Refit the exhaust line (3).
Pinch the pipe at "a", using tool [2].
Remove:
- The assembly [3].
- The union [5] on the pipe (2).
- The union [4] on the steering assistance pump.
Couple the pipe (2), using tool [1].
Tighten the pipe (2) to 2 ± 0,2 m.daN.
Refit the bracket (1).
Bleed the hydraulic steering assistance circuit (see corresponding operation).
Top up the level of the LDS fluid (see procedure: drain-fill-bleed the suspension circuit).
B3EP185D
168
4/02/05
17:31
Page 169
BLEEDING THE HYDRAULIC STEERING ASSISTANCE CIRCUIT
Precautions to be taken.
Proceed with care so as to prevent any entry of polluting particles.
IMPERATIVE: Respect the safety and cleanliness requirements.
IMPERATIVE: Fill the LDS fluid reservoir with new fluid: TOTAL LDS.
Bleeding.
Check the level and top up the LDS fluid (see procedure: drain-fill-bleed the suspension circuit).
Apply a pressure of 0.5 bar in the LDS fluid reservoir (using tool FACOM 920).
Start the engine.
Wait for the vehicle height to stabilise.
Move the steering in each direction, from lock to lock.
Stop the engine.
Check the level and top up the LDS fluid (see procedure: drain-fill-bleed the suspension circuit).
169
AXLES
SUSPENSION
STEERING
Angl-C6-page121-169-2005
Angl-C6-PAGE170-194-2005
4/02/05
17:35
Page 170
BRAKES
BRAKE SPECIFICATIONS
3.0i 24S
Engine plate
ES9A
Master cylinder/diameter/travel
254 / TEVES / AMCT / AFT (2)
Supplier/type/piston diameter
Disc diameter
TRW / C II 40 + 45 WE - 30-12 PE / 40 et 45
Ventilated
330
Disc thickness/min. thickness
30/28
Brake pad grade
JURID-966 (with wear warning lamps)
Caliper/supplier/type/piston diameter
RR
Disc diameter
DT17BTED4
23,8 / 19,8/20,2/AFU (1)
Amplifier/supplier/type
FT
2,7 24S
TRW / C38 HR-PEX / 38
Ventilated
302
Disc thickness/min. thickness
22/20
Brake pad grade
GALFER / G4555
(1) AFU = Emergency braking assistance.
(2) AFT = Automatic lighting of hazard lamps under emergency braking.
170
4/02/05
17:35
Page 171
BRAKING SYSTEM: GENERAL SPECIFICATIONS
Braking system
Braking circuit
Braking circuit in the form of an X.
Disc brakes at the front and at the rear
(vehicles all types):
- The front brake discs are ventilated.
- The rear brake discs are ventilated.
Electric parking brake (FSE) acting via cables on the
rear wheels.
The compensator and main brake limiter functions are
assured by the ABS REF systems.
ESP is fitted as standard on the entire range.
NOTE: - REF (EBD) = Electronic Brakeforce
Distribution.
- ESP = Electronic Stability Programme.
B3FP7GED
171
BRAKES
Angl-C6-PAGE170-194-2005
Angl-C6-PAGE170-194-2005
4/02/05
17:35
Page 172
BRAKES
BRAKING SYSTEM: GENERAL SPECIFICATIONS
ABS/ESP hydraulic valve block
Components
Supplier
Reference
TRW
ESP
VSC 440
Hydraulic valve block
ECU
Observations
Located on the front LH chassis member:
4 regulation channels
25-way connector
Integral to the hydraulic valve block
2-way black connector
Front wheel sensor
The sensors, of inductive type, are fitted on the pivot
SIEMENS
VDO
Air gap non-adjustable: 0.25 to 1.65 mm
2-way black connector
Rear wheel sensor
The sensors, of inductive type, are fitted on the pivot
Air gap non-adjustable: 0.23 to 1.35 mm
The hub has a bearing with integral magnetic wheel
(48 pairs of poles)
Front pivot bearing
NSK
The rear hub-bearing has a radial ABS target
(48 pairs of poles)
Rear hub bearing
B3FP7GFC
172
4/02/05
17:35
Page 173
BRAKING SYSTEM: GENERAL SPECIFICATIONS
Parking brake
(1) Electrically-controlled parking brake system (FSE)
(2) Parking brake cables
(3) Cable for manual unlocking of the electric parking brake (FSE).
WARNING: It is forbidden to open the electric parking brake system in After Sales. If a
malfunctioning of the electric parking brake is diagnosed, it is necessary to replace it.
Changing of the parking brake cables does not necessitate opening of the electric parking
brake system (see corresponding operation).
B3FP7GDD
(4) Handle for manual unlocking of the electric parking brake (FSE)
(5) Switch for the electric parking brake (FSE)
If it is impossible to release the electric parking brake, a handle (4) located in the front central
armrest will mechanically unlock the electric parking brake.
C5FP0T8C
173
BRAKES
Angl-C6-PAGE170-194-2005
Angl-C6-PAGE170-194-2005
4/02/05
17:35
Page 174
BRAKES
TIGHTENING TORQUES: BRAKING SYSTEM
1
2
3
4
5
6
7
Front brakes
Front brake disc
Yoke on brake caliper
Unions on brake piping
Front brake caliper
Hydraulic valve block on intermediate support
Intermediate support on support
Front wheel sensor
1 ± 0,1
3 ± 0,2
4 ± 0,5
11,5 ± 1
0,8 ± 0,2
0,8 ± 0,1
B3FP7HMD
B3FP7HPD
B3FP7HND
174
4/02/05
17:35
Page 175
BRAKES
Angl-C6-PAGE170-194-2005
TIGHTENING TORQUES: BRAKING SYSTEM
8
9
10
Braking amplifier
Braking amplifier on support
Support on bulkhead
Master-cylinder
B3FP7HQD
B3FP7HRD
175
2,1 ± 0,3
Angl-C6-PAGE170-194-2005
4/02/05
17:35
Page 176
BRAKES
TIGHTENING TORQUES: BRAKING SYSTEM
11
12
13
14
Rear brakes
Rear brake caliper
Unions on brake piping
Rear brake caliper support
Rear wheel sensor
B3FP7HSD
B3FP7HTD
176
3,5 ± 0,3
1,5 ± 0,1
10,8 ± 1
0,8 ± 0,1
4/02/05
17:35
Page 177
TIGHTENING TORQUES: BRAKING SYSTEM
Parking brake
15
16
17
18
Electric parking brake system (FSE)
Nut for parking brake cables
Gyrometer/accelerometer sensor on support
Sensor support on body
B3FP7HUD
Gyrometer/accelerometer sensor
B3FP7HVD
177
0,4 ± 0,06
6 ± 0,6
0,9 ± 0,1
0,4 ± 0,06
BRAKES
Angl-C6-PAGE170-194-2005
Angl-C6-PAGE170-194-2005
4/02/05
17:35
Page 178
BRAKES
VALUES FOR CHECKING AND ADJUSTING THE BRAKING SYSTEM
Front brakes
Engines
Rear brakes
ES9A - DT17BTED4
Type
Ventilated brake discs
Engines
ES9A - DT17BTED4
Type
Ventilated brake discs
Diameter (mm)
330
Diameter (mm)
Nominal thickness (mm)
30
Nominal thickness (mm)
302
22
Minimum thickness (mm)
28
Minimum thickness (mm)
20
Difference in maximum thickness
on same circumference (mm)
0,01
Difference in maximum thickness
on same circumference (mm)
0,01
Maximum run-out (mm)
0,05
Maximum run-out (mm)
0,05
Front brake pads (engines all types)
Rear brake pads (engines all types)
Nominal thickness (mm)
13
Nominal thickness (mm)
11,15
Minimum thickness (mm)
3
Minimum thickness (mm)
2
178
4/02/05
17:35
Page 179
GENERAL FEATURES OF ELECTRIC PARKING BRAKE
B3FP7HWD
C5FP0W3D
Presentation.
(6) Electric parking brake control
"a" Parking brake warning lamp
Functioning of the electric parking brake.
To apply the parking brake:
Prior conditions:
- Vehicle stationary or not.
- Ignition switched on.
- Engine running or not.
Pull and release the control (6).
NOTE: The parking brake can be activated when the vehicle is moving, at whatever speed, but
only if the control (6) is kept pulled, the parking brake being deactivated as soon as the control (6)
is released.
NOTE: The electric parking brake has an "anti-lock" system for limiting the locking of the wheels
and guaranteeing vehicle stability if the parking brake is actioned while the vehicle is moving.
To release the parking brake:
Prior conditions:
- Vehicle stationary.
- Gear lever in position P.
- Ignition switched on.
- Engine running.
Press on the brake pedal.
Pull and release the control (6).
Parking brake warning lamp:
Condition for the warning lamp "a" coming on:
- Electric parking brake activated or incorrectly deactivated.
- Malfunctioning of the electric parking brake.
179
BRAKES
Angl-C6-PAGE170-194-2005
Angl-C6-PAGE170-194-2005
4/02/05
17:35
Page 180
BRAKES
GENERAL FEATURES OF ELECTRIC PARKING BRAKE
Presentation.
(1)
(2)
(3)
(4)
(5)
(6)
Handle for manual unlocking of the electric parking brake (FSE)
Cable for manual unlocking of the electric parking brake
Rear RH cable of the electric parking brake
Electric parking brake system (FSE)
Rear LH cable of the electric parking brake
Electric parking brake control
"a" Parking brake warning lamp
B3FP7HWD
Normal functioning of the electric parking brake.
Applying the parking brake.
Prior conditions:
- Vehicle stationary or not.
- Ignition switched on.
- Engine running or not.
Pull and release the control (6).
C5FP0W3D
180
4/02/05
17:35
Page 181
GENERAL FEATURES OF ELECTRIC PARKING BRAKE
NOTE: The parking brake can be activated when the vehicle is moving, at whatever speed, but only if
the control (6) is kept pulled, the parking brake being deactivated as soon as the control (6) is released.
NOTE: The electric parking brake has an "anti-lock" system for limiting the locking of the wheels and
guaranteeing vehicle stability if the parking brake is actioned while the vehicle is moving.
Releasing the parking brake.
B3FP7HWD
Prior conditions:
- Vehicle stationary.
- Gear lever in position P.
- Ignition switched on.
- Engine running.
Press on the brake pedal.
Pull and release the control (6).
Parking brake warning lamp.
Condition for the warning lamp "a" coming on:
- Electric parking brake activated or incorrectly deactivated.
- Malfunctioning of the electric parking brake.
C5FP0W3D
181
BRAKES
Angl-C6-PAGE170-194-2005
Angl-C6-PAGE170-194-2005
4/02/05
17:35
Page 182
BRAKES
GENERAL FEATURES OF ELECTRIC PARKING BRAKE
Releasing of the electric parking brake (with a fault).
NOTE: Impossible to release the parking brake with the method "Normal functioning".
The fault may be caused by the following components:
- Battery voltage.
- Malfunctioning of the electric parking brake system.
Open the central armrest.
Pull on the handle (7) located on the plastic part of the central armrest in order to release the parking
brake mechanically.
WARNING: This control does not permit application of the parking brake.
WARNING: It is forbidden to open up the electric parking brake system.
C5FP0W4D
182
4/02/05
17:35
Page 183
ELECTRIC PARKING BRAKE SYSTEM
Removing-refitting the electric parking brake system.
IMPERATIVE: Respect the safety and cleanliness requirements.
WARNING: Before disconnecting the battery, partially open the door windows.
Removing.
IMPERATIVE: Disconnect the battery prior to operating on the parking brake cables.
C5FP0VVD
IMPERATIVE: Perform a manual unlocking of the parking brake, using the handle located in
the central armrest, before operating on the parking brake cables.
Disconnect the battery.
Raise and support the vehicle, wheels hanging.
Remove the central console (1) (see corresponding operation).
Uncouple the handle (2) from the manual unlocking cable of the electric parking brake.
Remove:
- The exhaust line (4) (ES9A engine).
- The protection (5).
- The protection (3).
B1JP08XD
183
BRAKES
Angl-C6-PAGE170-194-2005
Angl-C6-PAGE170-194-2005
4/02/05
17:35
Page 184
BRAKES
ELECTRIC PARKING BRAKE SYSTEM
Uncouple the parking brake cable (6) from the brake caliper (on each side).
Unclip the parking brake cable at "a" (on each side).
Detach the brake cables from their attachments on the bodywork.
B3FP7HHD
Extract the manual unlocking cable of the electric parking brake from its location at "b".
B3FP7HJD
184
4/02/05
17:35
Page 185
ELECTRIC PARKING BRAKE SYSTEM
Slacken the nuts (7).
Remove the electric parking brake system assembly.
B3FP7HKD
Refitting.
Refit the electric parking brake system assembly.
Tighten the nuts (7)
: 0,4 ± 0,1 m.daN.
Attach the brake cables on their attachments on the bodywork.
Clip the parking brake cable, at "a" (on each side).
Couple the parking brake cable (6) on the brake caliper (on each side).
IMPERATIVE: Position the shim (8) (thickness 3 mm) at "c" (on each side).
Engage the manual unlocking cable of the electric parking brake in its location at "b".
Couple the handle (2) to the parking brake cable.
Refit the central console (1) (see corresponding operation).
Refit:
- The protections (5) and (3).
- The exhaust line (4) (ES9A engine).
Reconnect the battery.
Apply and release the electric parking brake.
Check the functioning of the electric parking brake.
NOTE: Remove the shim (8) from the brake calipers.
IMPERATIVE: Perform the operations that are necessary following a reconnection of the battery
(see corresponding operation).
B3FP7HLD
185
BRAKES
Angl-C6-PAGE170-194-2005
Angl-C6-PAGE170-194-2005
4/02/05
17:35
Page 186
BRAKES
ELECTRIC PARKING BRAKE CABLES
Removing-refitting the parking brake cables.
IMPERATIVE: Respect the safety and cleanliness requirements.
WARNING: Before disconnecting the battery, partially open the door windows.
Removing.
IMPERATIVE: Disconnect the battery prior to operating on the parking brake cables.
IMPERATIVE: Perform a manual unlocking of the parking brake, using the handle located in
the central armrest, before operating on the parking brake cables.
Disconnect the battery.
Raise and support the vehicle, wheels hanging.
IMPERATIVE: Do not introduce any foreign body into the electric parking brake system.
Remove the electric parking brake system (see corresponding operation).
"a" connector
(1) electric parking brake system (FSE)
(2) manual unlocking cable
Undo the nuts (3).
B3FP7HXD
186
4/02/05
17:35
Page 187
BRAKES
Angl-C6-PAGE170-194-2005
ELECTRIC PARKING BRAKE CABLES
Connector end.
Unclip and push back the ring (4).
Uncouple the parking brake cable (5).
Manual unlocking cable end.
B3FP7JOD
B3FP7HYD
Do up at «b».
Uncouple the parking brake cable.
B3FP7HZD
187
Angl-C6-PAGE170-194-2005
4/02/05
17:35
Page 188
BRAKES
ELECTRIC PARKING BRAKE CABLES
Refitting.
Connector end.
Clip the parking brake cable (5) at «c».
Clip the ring (4).
NOTE: Align the pin «d» with the notch «e».
B3FP7J1D
Do up the nut (3).
Tighten the nut (3) to
: 0,6 ± 0,1 m.daN.
B3FP7J2D
188
4/02/05
17:35
Page 189
BRAKES
Angl-C6-PAGE170-194-2005
ELECTRIC PARKING BRAKE CABLES
Manual unlocking cable end.
NOTE: Grease the cable worm (6).
Engage the parking brake cable (6) into the electric parking brake system.
Do up 3 turns anti-clockwise at "b".
NOTE: Align the pin "g" with the notch "f".
B3FP7JOD
Do up the nut (3).
Tighten the nut (3) to
: 0,6 ± 0,1 m.daN.
Refit the electric parking brake system (see corresponding operation).
Reconnect the battery.
Apply and release the electric parking brake.
Check the functioning of the electric parking brake.
IMPERATIVE: Perform the operations that are necessary following a reconnection of the
battery (see corresponding operation).
B3FP7J3D
189
Angl-C6-PAGE170-194-2005
4/02/05
17:35
Page 190
BRAKES
BRAKE FLUID CHECKS
IMPERATIVE: Respect the safety and cleanliness requirements.
WARNING: Brake fluid is toxic to health. Avoid any contact with your skin or with your eyes. If there is contact with your eyes, rinse immediately with copious amounts of water for several minutes.
WARNING: Brake fluid is highly corrosive to paintwork. If there is spillage onto the bodywork, clean the surface immediately.
Tools:
Brake fluid tester (*):
Supplier
Reference
Type
SURETEST
TLF
DOW AUTOMOTIVE
BETATEST
Measures the boiling point of brake fluid
FACOM OUTILLAGE
DF.16
EBT
06.1
Measures the rate of hydrometry of brake fluid
(*) The list not exhaustive, refer to the catalogue "Tools and Equipment".
Checks.
Remove the filter of the brake fluid reservoir.
IMPERATIVE: Any pollution of the brake fluid is forbidden. The brake fluid should be limpid and free of suspended matter or sediments.
Check the brake fluid, following the method recommended by the supplier of the testing equipment.
Test values:
Brake fluid
Minimum boiling point «Humid»
DOT 3
140°C
DOT 4
155°C
SUPER DOT 4
180°C
DOT 5
NOTE: If the tested value is lower than the minimum "humid" boiling point or within a tolerance of +10 % of this value, replace the brake fluid
(see corresponding operation).
IMPERATIVE: Use exclusively the hydraulic fluids that are approved and recommended.
190
4/02/05
17:35
Page 191
DRAINING, FILLING AND BLEEDING THE BRAKING SYSTEM
Tools.
[1] Generic bleeding apparatus
[2] LEXIA station
[3] PROXIA station
: «LURO» or similar
: 4171-T
: 4165-T
NOTE: Bleeding of the secondary braking circuit is done with the help of diagnostic tools [2] or [3].
Draining the brake fluid reservoir.
B1BP3G7D
Disconnect the battery.
Remove the engine cover (1) and the lid (2).
Disconnect the connector «a».
Take out the filter of the brake fluid reservoir (4).
Drain the brake fluid reservoir (1) to the maximum extent (if necessary, use a clean syringe).
Remove the pin (3) and the brake fluid reservoir (4).
Clean the brake fluid reservoir (4).
Refit the brake fluid reservoir (4), the pin (3) and the filter of the brake fluid reservoir.
Reconnect the connector.
Reconnect the battery.
IMPERATIVE: Perform the operations that are necessary following a reconnection of the
battery (see corresponding operation).
B3FP7H3D
191
BRAKES
Angl-C6-PAGE170-194-2005
Angl-C6-PAGE170-194-2005
4/02/05
17:35
Page 192
BRAKES
DRAINING, FILLING AND BLEEDING THE BRAKING SYSTEM
Filling the braking circuit.
WARNING: Use only the approved and recommended hydraulic fluids.
IMPERATIVE: Only use new brake fluid that has not emulsified; avoid any introduction of
impurities into the hydraulic circuit.
Fill the brake fluid reservoir (4).
Bleeding the primary braking circuit.
B3FP7H4D
WARNING: During the bleed operations: take care to maintain the level of the brake fluid in
the reservoir, keep it topped up.
WARNING: The ABS system must not be in action during the bleed operation.
WARNING: Respect the sequence for the opening of the bleed screws.
Front brake caliper
Rear brake caliper
: Bleed screw (5).
: Bleed screw (6).
Bleed each brake caliper, proceeding in the following sequence:
- Front LH wheel.
- Front RH wheel.
- Rear LH wheel.
- Rear RH wheel.
B3FP7H5D
192
4/02/05
17:35
Page 193
DRAINING, FILLING AND BLEEDING THE BRAKING SYSTEM
B3FP7H4D
B3FP7H5D
Using the bleeding apparatus.
Connect the bleeding apparatus [1] on the brake fluid reservoir (4).
Adjust the apparatus pressure to 2 bars.
For each brake circuit:
- Connect a transparent tube onto the bleed screw.
- Submerge the other end of the tube in a clean container.
- Open the bleed screw.
- Wait until the fluid is flowing out without air bubbles.
- Close the bleed screw.
- Remove the bleeding apparatus.
- Check the brake fluid level (should be between «DANGER» level and «MAXI» level).
- Fill if necessary with the approved and recommended synthetic brake fluid.
Without bleeding apparatus.
NOTE: Two operators are necessary.
For each brake circuit:
- Apply the brake pedal to place the circuit under pressure.
- Connect a transparent tube onto the bleed screw.
- Submerge the other end of the tube in a clean container.
- Open the bleed screw.
- Wait until the fluid is flowing out without air bubbles.
- Close the bleed screw.
NOTE: Recommence the process a second time if that is necessary.
- Check the brake fluid level (should be between «DANGER» level and «MAXI» level).
- Fill if necessary with the approved and recommended synthetic brake fluid.
193
BRAKES
Angl-C6-PAGE170-194-2005
Angl-C6-PAGE170-194-2005
4/02/05
17:35
Page 194
BRAKES
DRAINING, FILLING AND BLEEDING THE BRAKING SYSTEM
Bleeding the secondary braking system.
WARNING: During the bleeding operation, take care to maintain the level of brake fluid in
the reservoir and to top it up.
NOTE: Connect the bleeding apparatus [1] on the brake fluid reservoir (4).
Use the diagnostic tools [2] or [3].
Select the menu ESP VSC 440.
Bleed sequence: Menu ESP.
- Front LH wheel.
- Front RH wheel.
- Rear LH wheel.
- Rear RH wheel.
Follow the instructions given by the diagnostic tool.
At the end of the bleeding programme, check the brake fluid level and top up, if necessary.
Check the brake pedal travel (no lengthening), if not satisfactory repeat the bleeding procedure.
B3FP7H3D
194
Angl-C6-page195-202-2005
4/02/05
17:36
Page 195
SAFETY REQUIREMENTS: ACTIVE SUSPENSION WITH VARIABLE DAMPING
All operations on the hydraulic suspension circuit must be performed in conformity with the following requirements and regulations:
WARNING: Operations should be carried out by specialised personnel who have had training in the safety requirements and precautions to
be taken.
Safety requirements.
ESSENTIAL: In view of the special features of the hydraulic suspension system, observe the requirements below, before undertaking any
repair.
IMPERATIVE: Depending on the operation to be carried out, respect the requirements for supporting and securing the vehicle.
Wheels hanging
Wheels not hanging
Vehicle on the ground
2-column lift or secure the
vehicle on 4 axle stands
Vehicle on 4-column lift
Depressurisation of the circuit
(see corresponding operation)
Checking and adjusting of
heights (switch on ignition)
195
Other operations
(depressurisation of the
hydraulic circuit)
HYDRAULICS
Authorities competent in matters of health:
- Accident prevention.
- Environmental protection.
Angl-C6-page195-202-2005
4/02/05
17:36
Page 196
SAFETY REQUIREMENTS: ACTIVE SUSPENSION WITH VARIABLE DAMPING
During the operation.
HYDRAULICS
Wait for the pressure in the hydraulic circuit to fall fully before disconnecting the unions on the following components (risk of sudden sinking of the
vehicle):
- Built-in Hydro-electronic Interface (BHI).
- Front suspension cylinder.
- Rear suspension cylinder.
- Front stiffness regulator.
- Rear stiffness regulator.
- Suspension pressure sensors.
IMPERATIVE: Do not operate on the hydraulic circuit without making the pressure drop (see corresponding operation).
Engine running.
Do not operate on the hydraulic suspension circuit.
Always remain out of range of any possible projections of fluid, as these could cause serious injuries.
NOTE: In the event of contact of LDS fluid with the eyes, rinse them with copious amounts of water and seek specialist advice.
NOTE: In the event of lengthy contact of LDS fluid with the skin, wash it with soap and water.
WARNING: After the engine has stopped, wait 30 seconds before commencing any operation.
196
Angl-C6-page195-202-2005
4/02/05
17:36
Page 197
SAFETY REQUIREMENTS: ACTIVE SUSPENSION WITH VARIABLE DAMPING
IMPERATIVE: Do not remain underneath the vehicle during an operation to adjust vehicle heights or during actuator (electrovalve) tests.
IMPERATIVE: Any deforming of the wheel travel sensor supports is forbidden. If there is any deformation found, replace the component.
Cleanliness requirements.
Preliminary operations.
The work area must be kept clean and uncluttered.
The technician must wear clean overalls.
Components being stored during the repair must be protected from dust.
The tooling required for an operation on the suspension system should always be cleaned prior to the operation.
During the operation:
- Before operating on the suspension circuit, proceed to clean the hydraulic components and unions.
IMPERATIVE: Approved cleaner: SODIMAC degreaser.
IMPERATIVE: After a dismantling, immediately blank the hydraulic components and unions with plugs. The plugs should be used for one
operation only.
Any component that has been removed must be plugged and placed in a clean plastic bag.
IMPERATIVE: After a dismantling, any cleaning using compressed air or products is strictly prohibited. Any LDS fluid that is collected must
not be re-used. Any topping-up must be done with new fluid.
197
HYDRAULICS
WARNING: Non-respect of the cleanliness requirements may cause a contamination of the circuit and a malfunctioning of the suspension.
Angl-C6-page195-202-2005
4/02/05
17:36
Page 198
SUSPENSION SPHERES: GENERAL SPECIFICATION
Each suspension sphere is identified at "a", by one number and two letters, marked in bold characters:
- The number consists of 2 digits, corresponding to the nitrogen pressure inside the suspension sphere.
- The two letters identify the location of the suspension sphere.
HYDRAULICS
Other information marked on the suspension sphere:
- Day of the year of manufacture.
- Year of manufacture.
- Time of manufacture.
- Factory no. of the suspension sphere.
B3BP1BJD
198
Angl-C6-page195-202-2005
4/02/05
17:36
Page 199
SUSPENSION SPHERES: SPECIFICATION - IDENTIFICATION
Specifications.
The «slimline» accumulators are grey in colour.
NOTE: Recharging the «slimline» accumulators with nitrogen is impossible.
Volume of nitrogen
: 385 ± 15 cc.
Engine version
ES9A
Suspension sphere marking
Pressure rating (bars)
GO
50
Suspension sphere marking
Pressure rating (bars)
KS
40
DT17BTED4
Suspension cylinder accumulators (rear).
Engine version
ES9A
DT17BTED4
NOTE: The dampers are integral to the suspension cylinders (AMVAR cartridge). (*)
(*) AMVAR = Amortissement Variable (variable damping).
199
HYDRAULICS
Suspension cylinder accumulators (front).
Angl-C6-page195-202-2005
4/02/05
17:36
Page 200
SUSPENSION SPHERES: SPECIFICATION - IDENTIFICATION
Stiffness regulator accumulators (front).
NOTE: The dampers are integral to the hydractive regulator.
Engine version
Suspension sphere marking
Pressure rating (bars)
KR
70
Suspension sphere marking
Pressure rating (bars)
KS
40
ES9A
HYDRAULICS
DT17BTED4
Stiffness regulator accumulators (rear).
NOTE: The dampers are integral to the hydractive regulator.
Engine version
ES9A
DT17BTED4
The suspension cylinders on the same axle have to be equipped with the same type of suspension accumulators.
IMPORTANT: Tightening torque for the suspension accumulators
: 2,7 ± 0,5 m.daN.
200
Angl-C6-page195-202-2005
4/02/05
17:36
Page 201
DE-PRESSURISING THE HYDRAULIC SUSPENSION CIRCUIT
[1] PROXIA station
[2] LEXIA station
Go into the menu:
- Suspension.
- De-pressurisation.
Follow the instructions displayed on the screen.
Wait for the vehicle's suspension to sink completely.
NOTE: This operation takes around 3 minutes.
Switch off the ignition.
Disconnect the battery.
: 4165-T
: 4171-T
De-pressurisation.
NOTE: It is possible to de-pressurise the suspension by individual axle.
Using a diagnostic tool.
Without a diagnostic tool.
Start the engine.
Place the height control in the «LOW» position.
Wait for the vehicle height to reach the position required.
Stop the engine.
Connect the diagnostic tool [1] or [2] to the vehicle's diagnostic socket.
Switch on the ignition.
IMPERATIVE: Any LDS fluid that is collected must not be re-used.
NOTE: Collect the LDS fluid in order to keep the work area clean.
Respect the environment.
Start the engine.
Place the height control in the «LOW» position.
Stop the engine.
Carry out a global test.
201
HYDRAULICS
Tools.
Angl-C6-page195-202-2005
4/02/05
17:36
Page 202
DE-PRESSURISING THE HYDRAULIC SUSPENSION CIRCUIT
Front suspension: Undo the pressure release screw (1) by one turn.
Wait for the pressure in the hydraulic circuit to drop fully.
HYDRAULICS
Rear suspension: Undo the pressure release screw (2) by one turn.
B3BP1BED
Wait for the pressure in the hydraulic circuit to drop fully.
B3FP7HDD
202
Angl-C6-page203-217-2005
4/02/05
17:40
Page 203
AIR CONDITIONING R 134.a (HFC)
Engine version
Date
ES9A
Compressor
Refrigerant
Refill
(± 25 gr)
Variable
DT17BTED4
Oil quantity
cc
Oil
reference
SD 7 C16
135
SP 10
625
12/05 ➔
C6
capacity
525
203
AIR
CONDITIONING
Vehicle
Angl-C6-page203-217-2005
4/02/05
17:40
Page 204
SPECIAL FEATURES: AIR CONDITIONING SYSTEM
Compressor
Condenser
The variable capacity air conditioning compressor has external control.
The internal pneumatic valve is replaced by an external electrovalve.
The condenser has a cylinder incorporating the function of aircon fluid
reservoir and with integral filtering cartridge.
NOTE: The filtering cartridge is not interchangeable.
AIR
CONDITIONING
204
Angl-C6-page203-217-2005
4/02/05
17:40
Page 205
SPECIAL FEATURES: AIR CONDITIONING SYSTEM
Tightening
Requirements for fitting the inlet and outlet brackets:
- Aircon compressor.
- Aircon condenser.
- Aircon pressure reducer valve.
IMPERATIVE: Assembly requirement: the bracket(s) «f» must be against
their interface(s) before the nut(s) are tightened.
C5HP1CWC
205
AIR
CONDITIONING
IMPERATIVE: Respect the tightening torques.
Angl-C6-page203-217-2005
4/02/05
17:40
Page 206
SPECIAL FEATURES: AIR CONDITIONING SYSTEM (R 134.a)
Pollen filter
The pollen filter is located on the driver's side under the dashboard to the
right of the steering column.
IMPERATIVE: Respect the safety and cleanliness requirements.
Removing.
Remove the trim (1) under the dashboard (driver's side).
C5FP0S1C
Release the tab at "b".
Tilt, lift and remove the cover (2).
Remove the pollen filter (3).
NOTE: If the tab "b" is damaged, position a screw for soft materials at "a".
AIR
CONDITIONING
Refitting.
Refit the various components in reverse order to removal.
C5HP1BDD
206
Angl-C6-page203-217-2005
4/02/05
17:40
Page 207
SPECIAL FEATURES: AIR CONDITIONING SYSTEM (R 134.a)
Compressor lubricant
ESSENTIAL: The compressor lubricant is extremely hygroscopic; always use FRESH oil.
Checking the compressor oil level
There are three specific cases:
- 1) Repairs to a system without leaks.
- 2) Slow leak.
- 3) Fast leak.
a) - Using draining/recovery equipment not fitted with an oil decanter.
- Drain the system as slowly as possible via the LOW PRESSURE valve, so as not to lose any oil.
- No more oil should be added when filling the system with R 134.a fluid.
b) - Using draining/filling equipment fitted with an oil decanter.
- Drain the R 134.a fluid from the system in accordance with the instructions in the equipment handbook.
- Measure the amount of oil recovered.
- Add the same amount of NEW oil when filling the system with R 134.a fluid.
c) - Replacing a compressor.
- Remove the old compressor, drain it and measure the oil quantity.
- Drain the new compressor (supplied full), so that the same amount of NEW oil is left in the compressor as was in the old compressor.
- No more oil should be added when filling the system with R 134.a fluid.
207
AIR
CONDITIONING
1) Repairing a system without leaks.
Angl-C6-page203-217-2005
4/02/05
17:40
Page 208
SPECIAL FEATURES: AIR CONDITIONING SYSTEM (R 134.a)
Checking the compressor oil level (continued)
2) Slow leak.
Slow leaks do not lead to oil loss, therefore the same procedure should be followed as if there was no leak at all.
3) Fast leak.
This type of leak causes both oil loss as well as allowing air to enter the system.
It is therefore necessary to:
- Replace the dryer.
- Drain as much oil as possible (when replacing the faulty component).
Either before or during filling of the system with R 134.a fluid, introduce 80 cc of NEW oil into the system.
If changing one of the following components, add as below:
- A drying bottle
- A condenser or an evaporator
- A high pressure or low pressure pipe
- A drying cartridge
: 15 cc of compressor oil.
: 20 cc of compressor oil.
: 5 cc of compressor oil.
: 15 cc of compressor oil.
AIR
CONDITIONING
208
Angl-C6-page203-217-2005
4/02/05
17:40
Page 209
CHECKING THE EFFICIENCY OF THE AIR CONDITIONING SYSTEM
Equipment: EXXOTest
Tooling (tools and Equipment flash).
Equipment:VALEO
Exxoclim
: 2.4.2-1.
Clim test 2
: 4372-T.
Method of use
: See instructions.
Method of use
: See instructions.
E5AP2N4D
E5AP2N5D
209
AIR
CONDITIONING
Tooling.
Angl-C6-page203-217-2005
4/02/05
17:40
Page 210
CHECKING THE EFFICIENCY OF THE AIR CONDITIONING SYSTEM
Testing procedure.
Checking.
Position the equipment - Exxoclim or Clim test 2 - (see instructions).
Preliminary operations.
Close all the front air vents.
Start the engine.
Open the front air vent.
Activate the «air conditioning» control.
Position the air distribution control to «frontal flow».
Activate the «air recirculation» control.
Positions of the air conditioning controls:
- Temperature control on maximum cold (LH and RH).
- Blower control in maximum speed position.
AIR
CONDITIONING
Let the air conditioning operate for 5 minutes.
210
Angl-C6-page203-217-2005
4/02/05
17:40
Page 211
CHECKING THE EFFICIENCY OF THE AIR CONDITIONING SYSTEM
Reminder (for information)
Under-cooling.
The under-cooling represents the difference between the condensation temperature and the aircon fluid temperature at the aircon condenser outlet.
The under-cooling gives the quantity of aircon fluid (in the liquid state) in the air conditioning circuit.
Values
Origins
Solutions
SR < 2°C
Lack of aircon fluid in the aircon condenser
Add some aircon fluid
2°C < SR <4°C
Lack of aircon fluid in the aircon condenser
4°C < SR < 10°C/12°C
Correct quantity
SR > 10°C/12°C
Excess aircon fluid in the aircon condenser
Remove some aircon fluid
SR > 15°C
Over-heating.
The over-heating represents the difference between the aircon fluid temperature at the evaporator outlet and the evaporation temperature.
The over-heating gives the quantity of aircon fluid (in the liquid state) in the air conditioning circuit
Values for over-heating (SC).
Values
Origins
Solutions
2° < SC < 15°C
Correct quantity
SC > 15°C
Lack of aircon fluid in the cooling circuit
Add some aircon fluid
SC < 2°C
Excess aircon fluid in the cooling circuit
Remove some aircon fluid
Blown air temperature.
The blown air temperature should be between 2°C and 10°C.
211
AIR
CONDITIONING
Values for under-cooling (SR).
Angl-C6-page203-217-2005
4/02/05
17:40
Page 212
CHECKING THE EFFICIENCY OF THE AIR CONDITIONING SYSTEM
Aircon circuit diagnosis table (for information)
Principal problem
Symptom
Possible causes
Aircon compressor clutch
Lack of aircon fluid in the aircon circuit
The clutch of the aircon compressor does not
engage, or disengages suddenly
The aircon compressor does not turn
or stops suddenly
Aircon pressostat
Aircon evaporator sensor
Electrical circuit (wiring, fuses, etc.)
Auxiliaries drive belt
Aircon compressor
The clutch of the aircon compressor remains
engaged and stops suddenly
Filtering and drying cartridge
Aircon pressure reducer
Leak of aircon fluid
Aircon compressor clutch
AIR
CONDITIONING
212
Angl-C6-page203-217-2005
4/02/05
17:40
Page 213
CHECKING THE EFFICIENCY OF THE AIR CONDITIONING SYSTEM
Aircon circuit diagnosis table (for information)
Principal problem
Symptom
Possible causes
Incorrect adjustment of the aircon compressor
clutch
The clutch of the aircon compressor
remains engaged
The aircon compressor makes an abnormal
Aircon fluid quantity
Aircon compressor defective
Lack of aircon fluid in the aircon circuit
Aircon compressor valves defective
The clutch of the aircon compressor
remains engaged and slips
213
Aircon compressor clutch
Auxiliaries drive belt
AIR
CONDITIONING
noise
Angl-C6-page203-217-2005
4/02/05
17:40
Page 214
CHECKING THE EFFICIENCY OF THE AIR CONDITIONING SYSTEM
Aircon circuit diagnosis table (for information)
Principal problem
Symptom
Low pressure and high pressure too high
Possible causes
Aircon pressure reducer defective
Duct clogged
Low pressure too high and high pressure too low
Aircon compressor seal defective
Aircon evaporator sensor defective
Abnormal levels of pressure
Low pressure too low and high pressure too high
too high
Aircon pressure reducer jammed
Filtering and drying cartridge obstructed
Duct clogged
Duct clogged
Aircon pressure reducer jammed
Low pressure and high pressure too low
Lack of aircon fluid in the aircon circuit
Aircon compressor defective
AIR
CONDITIONING
214
Angl-C6-page203-217-2005
4/02/05
17:40
Page 215
CHECKING THE EFFICIENCY OF THE AIR CONDITIONING SYSTEM
Aircon circuit diagnosis table (for information)
Principal problem
Symptom
Low pressure normal and high pressure too high
Low pressure normal and high pressure too low
Possible causes
Presence of air in the aircon circuit
Aircon pressostat defective
Evaporator sensor defective
Abnormal levels of pressure
Low pressure too high and high pressure normal
Aircon pressure reducer jammed open
Low pressure too low and high pressure normal
Filtering and drying cartridge saturated or
clogged
Aircon pressure reducer iced up
Under cooling too weak
Air conditioning operating in
back-up mode
Lack of aircon fluid
Excess aircon fluid
Under cooling excessive
Presence of air in the aircon circuit
NOTE: In all cases, measure the excessive heating (SC) and the blow air temperature.
215
AIR
CONDITIONING
Filtering and drying cartridge clogged
Angl-C6-page203-217-2005
4/02/05
17:40
Page 216
AIR CONDITIONING SYSTEM R.134.a
Engine: ES9A
Tightening torques (m.daN).
(1) High pressure valve
(2) Low pressure valve
(3) Pressure reducer
(4) Pressure reducer outlet, tighten to
(5) Pressure reducer inlet, tighten to
(6) Clickfit union, tool
(7) Compressor inlet, tighten to
(8) Compressor outlet, tighten to
(9) Filtering cartridge
(10) Condenser outlet, tighten to
(11) Pressostat, tighten to
(12) Condenser inlet, tighten to
(13) Buffer capacity
AIR
CONDITIONING
«a» Compressor front support
«b» Compressor rear support
C5HP1E0P
216
:
:
:
:
:
:
:
:
:
0,6
0,6
8005-T.A Black
0,7
0,7
Not interchangeable
0,6
0,6
0,6
: 3,9
: 2,5
Angl-C6-page203-217-2005
4/02/05
17:40
Page 217
AIR CONDITIONING SYSTEM R.134.a
Engine: DT17BTED4
Tightening torques (m.daN).
«a» Compressor front support
«b» Compressor rear support
C5HP1DRP
217
:
:
:
:
:
:
:
:
:
0,6
0,6
8005-T.A Black
0,7
0,7
Not interchangeable
0,6
0,6
0,6
: 3,9
: 2,5
AIR
CONDITIONING
(1) High pressure valve
(2) Low pressure valve
(3) Pressure reducer
(4) Pressure reducer outlet, tighten to
(5) Pressure reducer inlet, tighten to
(6) Clickfit union, tool
(7) Compressor inlet, tighten to
(8) Compressor outlet, tighten to
(9) Filtering cartridge
(10) Condenser outlet, tighten to
(11) Pressostat, tighten to
(12) Condenser inlet, tighten to
(13) Buffer capacity