1
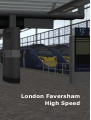
London Faversham
High Speed
© Copyright RailSimulator.com 2012, all rights reserved
Release Version 1.0
Train Simulator – London Faversham High Speed
1 ROUTE INFORMATION ................................................................
................................ .....................................................
................................ ..................... 4
1.1 High Speed 1 ............................................................................................................. 4
1.1.1 St. Pancras International station .................................................................................4
1.1.2 Ebbsfleet International Station ....................................................................................5
1.2 Chatham Main Line ..................................................................................................... 5
1.2.1 Faversham Station ........................................................................................................5
2 CLASS 395 ELECTRIC MULTIPLE UNIT ..............................................................
................................ .............................. 6
2.1 Class 395 .................................................................................................................. 6
2.2 Design & Specification ................................................................................................. 6
2.3 Driving the Class 395 .................................................................................................. 7
2.3.1
2.3.2
2.3.3
2.3.4
Cab Controls .................................................................................................................7
Additional Controls .......................................................................................................8
Driving ..........................................................................................................................9
Driver Reminder Appliance (DRA) .............................................................................10
2.4 Troubleshooting ........................................................................................................11
2.5 Creating a Class 395 train set ......................................................................................12
2.5.1 Scenario Editor (creating new scenarios) ..................................................................12
2.5.2 Class 395 Consist Formations ....................................................................................13
2.5.3 Assigning Destinations and Numbers ........................................................................14
2.6 Scenarios .................................................................................................................15
2.6.1
2.6.2
2.6.3
2.6.4
2.6.5
2.6.6
Class 395 Driver Training: Driving the Class 395 .....................................................15
Class 395 Driver Training: TVM Signalling ................................................................15
Far Horizons ...............................................................................................................15
Frost Fall .....................................................................................................................15
There and Back Again ................................................................................................15
Into Darkness .............................................................................................................15
3 CLASS 375 ‘ELECTROSTAR’ ELECTRIC MULTIPLE UNIT ....................................
................................ .... 16
3.1 Class 375 .................................................................................................................16
3.2 Design & Specification ................................................................................................16
Driving the Class 375 .......................................................................................................17
3.2.1 Cab Controls ...............................................................................................................17
3.2.2 Additional Controls .....................................................................................................18
3.3 Creating a Class 375 train set ......................................................................................19
3.3.1 Scenario Editor (if creating new scenarios) ..............................................................19
3.3.2 Class 375 Consist Formations ....................................................................................19
3.3.3 Assigning Destinations and Numbers ........................................................................22
4 OPERATION ................................................................
................................ ................................................................
................................ ..................................
................................ .. 23
4.1 TVM ........................................................................................................................23
4.1.1
4.1.2
4.1.3
4.1.4
Introduction ................................................................................................................23
TVM signals ................................................................................................................23
How to read TVM ........................................................................................................24
TVM by Example .........................................................................................................24
4.2 Signals.....................................................................................................................25
© Copyright RailSimulator.com 2013, all rights reserved
Page 2
Release Version 1.0
Train Simulator – London Faversham High Speed
4.2.1
4.2.2
4.2.3
4.2.4
4.2.5
4.2.6
Main Signal Head Aspects ..........................................................................................25
Theatre Type Signals .................................................................................................26
Feather Type Signals ..................................................................................................27
Ground Signals and Position Light Signals ................................................................27
Entering an Occupied Section of Track .....................................................................28
Repeater Signals ........................................................................................................28
4.3 Speed Signs ..............................................................................................................29
4.3.1 Permissible Speed Indicators .....................................................................................29
4.3.2 Permissible Speed Warning Indicators ......................................................................29
4.4 Safety Systems ..........................................................................................................30
4.4.1 AWS (Automatic Warning System) ............................................................................30
4.5 Traction Power ..........................................................................................................30
4.5.1 25kV AC Overhead .....................................................................................................30
4.5.2 750V DC Third Rail .....................................................................................................30
5 CREDITS ................................................................
................................ ................................................................
................................ ......................................
................................ ...... 31
© Copyright RailSimulator.com 2013, all rights reserved
Page 3
Release Version 1.0
Train Simulator – London Faversham High Speed
1 Route Information
1.1 High Speed 1
After the opening of the Channel Tunnel in 1994, high speed Eurostar trains running directly
to and from the European continent could only run at a maximum speed of 160 km/h (100
mph) on existing lines between London, Waterloo and the Channel Tunnel. Sharing the lines
with local traffic limited the number of services that could be run, and jeopardised service
reliability. As a result Parliament authorised the building of a dedicated high speed line,
legally passing the Channel Tunnel Rail Link Act 1996.
Plans were originally started by British Rail in the early 1970s for a route passing through
Tonbridge, however considerable environmental and social opposition saw this scheme
cancelled, along with plans for the Channel Tunnel itself.
A further scheme for the Channel Tunnel Rail Link proposed a tunnel approaching London
from the south-east to an underground terminus in the vicinity of Kings Cross station.
However governmental changes to the plans, involving urban regeneration in east London,
led to a change of route, with the approach from the east. This opened the possibility of
reusing the underused St. Pancras station as the terminus, with access via the North London
Line that crosses the throat of the station. This was rejected in 1994 as being
environmentally damaging and too difficult to construct. However, the idea of using St.
Pancras station as the core of the new terminus was retained and the scheme amended to
being linked by 20 kilometres (12 miles) of specially built tunnels to Dagenham via Stratford.
London and Continental Railways (LCR), a consortium comprising of the National Express
Group, Virgin Group, S. G. Warburg & Co, Bechtel and London Electric, was chosen by the UK
government in 1996 to build the line, reconstruct St. Pancras station as its terminus and to
take over the British share of the Eurostar operation. On 14 November 2006, LCR adopted
High Speed 1 as the brand name for the completed railway. Official legislation,
documentation and line-side signage, however, have continued to refer to "CTRL".
1.1.1 St. Pancras International station
Designed by William Barlow in 1863, situated on the Euston Road in the London Borough of
Camden, St. Pancras station opened in 1868. Serving as the southern terminus for the
Midland Railway between London and the East Midlands and Yorkshire, the station’s arched
roof was the largest single span roof in the world. It is situated next to the Great Northern
Railway’s Kings Cross station.
The red brick Gothic front façade completed in 1876, today a Grade 1 listed structure, served
as the Midland Grand Hotel. In 1935 the hotel was closed. Then known as the St. Pancras
Chambers, the building was used as railway offices until 1985.
The station was heavily damaged in the WWII blitz, however LMS Railway engineers soon
had the site fully operational. Planned demolition and amalgamation with Kings Cross
station in the 1960s were quashed after strong public opposition and the backing of Sir John
Betjeman to save the station.
Today, the restored station has 15 platforms, a shopping centre and a bus station, and is
served by London Underground's King's Cross St Pancras tube station. Train services
continue to serve lines to the Midlands with services being operated by East Midlands Trains.
It is also the terminus of HS1 used by Eurostar services to mainland Europe via the Channel
Tunnel, with services direct to Paris, Brussels and limited services to Avignon. Southeastern
operates over HS1 from dedicated platforms, with destinations across Kent using Class 395 trains.
© Copyright RailSimulator.com 2013, all rights reserved
Page 4
Release Version 1.0
Train Simulator – London Faversham High Speed
1.1.2 Ebbsfleet International Station
Opened in November 2007, Ebbsfleet is 10 miles outside of Greater London and only 5 miles
from the busy M25, allowing easy access for over 10 million commuters. It serves as a
junction from HS1 on to the domestic north Kent lines via Springhead Junction.
During the London Summer Olympics and Paralympics of 2012, held in Stratford, the Olympic
Javelin shuttle services were operated by Southeastern Trains over HS1. The service ran for
the duration of the games between London, St. Pancras and Ebbsefleet at the rate of twelve
trains per hour.
1.2 Chatham Main Line
Originally built by the South Eastern Railway (SER) and London, Chatham and Dover Railway
(LCDR) between London and Dover, the line between Strood and Faversham was opened
early in 1858. The LCDR joined with it's rival, the SER, in January 1899 to form the South
Eastern and Chatham Railway (SE&CR), giving LCDR services access into London Victoria.
The original line from London through to Medway was opened by the London and Greenwich
Railway from 1833 running a minimal service between London Bridge and Strood. The
section after Hoo Junction shared the tunnels between Higham and Strood with the Thames
& Medway Canal Company, with the single track running along the canal tow path and timber
props. The canal was primarily used to transport hops between the rivers Medway and
Thames, but due to their seasonal nature traffic was low. The railway and canal was
eventually brought out by the SER when the canal was finally drained, infilled and the
railway laid as double track.
The LCDR line between Strood and Faversham opened in two stages. The Chatham to
Faversham section was first, opening on 25 January 1858. It served Chatham, Rainham
(Kent), Sittingbourne, Teynham and Faversham. The second section opened on 29 March of
the same year between Strood and Chatham, with the lines from Strood station to the bridge
sharing SER metals. The SER lines ran into a separate terminus at Rochester, named
Chatham Central. Shortly after, the LCDR opened a new station at New Brompton. This was
to become known as Gillingham in October of 1912.
In 1923, railway grouping saw the LC&DR become part of the Southern Railway. Having
adopted the 750V DC third rail system as their traction power source, the line was one of the
first to receive the system in 1939, ahead of the 1955 BR modernisation plan. As part of the
plan, the track between Rainham in Kent and Newington was widened to 4 lines in 1959.
1.2.1 Faversham Station
Serving the ancient sea port town of Faversham, situated 49 miles (78 km) from London St
Pancras, Faversham station was originally built in 1858 by the East Kent Railway (EKR) as
part of the line between Canterbury and the SER station at Strood. The company was later
merged with the LC&DR and the site was rebuilt in 1898. It is this station which is now
Grade II listed.
Faversham engine shed (73E), also listed Grade II, has fallen into ruin in the junction with
the Whitstable and Canterbury lines to the east of the station. The brick built signal box
dates from 1959 when electrification was completed.
In 2009 preparatory works were carried out for services to London St Pancras via Ebbsfleet
International from 13 December. The Chatham Main Line east of Faversham was re-signalled
during 2011, with signaling transferred to the Gillingham power box, resulting in the
decommissioning of the Faversham signal box.
© Copyright RailSimulator.com 2013, all rights reserved
Page 5
Release Version 1.0
Train Simulator – London Faversham High Speed
2 Class 395 Electric Multiple Unit
2.1 Class 395
The Class 395 is a dual-voltage electric multiple unit (EMU) built for high-speed commuter
services on High Speed 1 and across selected routes on the integrated Kent franchise.
The 6-car units were built in Japan by Hitachi and capable of running at a maximum speed of
140 mph (225 km/h) under 25kV AC overhead electrification on High Speed 1, and 100 mph
(161 km/h) on 750V DC third rail supply on domestic lines.
Southeastern operated train services between London St Pancras, Stratford International and
Ebbsfleet International for the London 2012 Olympics and Paralympics using Class 395s. The
service was officially known as the 'Olympic Javelin Shuttle' with all units having the ‘Javelin’
branding beside the cab doors. Since the conclusion of the events this branding has been
removed and is reflected in our representation of the train.
2.2 Design & Specification
TOPS Number
Formation
Unit Weight
Vehicle Length
Vehicle Width
Body Construction
Power Collection
Design Speed
Brake Types
Seating
Class 395
DPTSO(A)-MSO-MSO-MSO-MSO-DPTSO(B)
268.5 tonnes
101.3m (332 ft 4 in)
2.81m (9 ft 2 in)
Aluminium
25kV AC overhead electrification
750V DC third rail
High Speed 1: 225 km/h (140 mph)
Network Rail: 160 km/h (99 mph)
Electropneumatic
340 seats + 12 tip up
© Copyright RailSimulator.com 2013, all rights reserved
Page 6
Release Version 1.0
Train Simulator – London Faversham High Speed
2.3 Driving the Class 395
2.3.1 Cab Controls
© Copyright RailSimulator.com 2013, all rights reserved
Page 7
Release Version 1.0
Train Simulator – London Faversham High Speed
Cab Controls (Contd.)
1
Reverser
10
TVM430 in-cab signaling display
2
Throttle and brake
11
Driver Reminder Appliance
3
Emergency brake
12
AWS flower
4
DC third rail power
13
AWS reset
5
CTRL overhead power
14
Wiper speed control
6
Pantograph up\shoes down
15
Horn
7
Pantograph down\shoes up
16
Headlights
8
Line voltage indicator
17
Sander
9
Speedometer
18
Cab light
2.3.2 Additional Controls
Keyboard Assignments (Underlined = default value)
Cycle Headlights (Tails, Off, Markers, Day, Night)
H / Shift + H
Toggle Blind
U
Toggle Emergency Brake Plunger
Backspace
Directional Lever (Reverse, Neutral, Forward)
W / S
AWS Reset Button Press
Q
Sander Button Press
X
Horn
Space
Combined Power / Brake
A / D
Pantograph Up / Shoes Down
P
Pantograph Down / Shoes Up
Shift + P
Switch to DC Power Mode
I
Switch to CTRL Power Mode
O
Reset Vigilance Device (DSD)
Numpad Enter
Signal Buzzer
C
Cab Light
L
Cycle Wiper Speed (0, 10, 40, 60)
W / Shift + W
Open / Close Coupler Hatch
B
Toggle Driver’s Reminder Appliance (DRA)
K
Open / Close Passenger Doors
T
© Copyright RailSimulator.com 2013, all rights reserved
Page 8
Release Version 1.0
Train Simulator – London Faversham High Speed
2.3.3 Driving
To move the Class 395 Electric Multiple Unit:
1. Move the directional lever into neutral.
2. Select the correct power mode for the track type. Press the DC button for 3rd rail
power, or press CTRL for overhead wires on the HS1 line. The speedometer will
switch between mph and km/h automatically.
Note : If the mode is already selected, nothing will happen. Otherwise the Line Volts
light will extinguish and the MCB / VCB light will illuminate to indicate the circuit
breakers have tripped.
3. Press the Pan Up / Shoes Down button to raise the pantograph / lower the 3rd rail
shoes. The Line Volts light should illuminate soon after. If not, ensure you have
selected the correct power mode.
4. When the Line Volts light is illuminated, press Pan Up / Shoes Down again, and
the MCB / VCB light should turn off to indicate the circuit breakers are closed.
5. Make sure the signal ahead is showing a proceed aspect. If it is, turn off the Driver’s
Reminder Appliance, otherwise wait until a proceed aspect is shown.
6. Check Door Interlock lights are illuminated. If not, the brakes will remain fully
applied if doors are open.
7. Move the directional lever into forward.
8. Move the combined power / brake handle into a power notch to start moving.
To stop the Class 395 Electric Multiple Unit during regular service:
•
Move the combined power / brake handle between MIN and MAX brake positions,
applying as much brake as necessary to ensure passenger comfort.
•
On approaching a station where no platform starting signal is present and the last
signal displayed a cautionary aspect, press the DRA button in to remind that the next
signal may be at a stopping aspect.
•
On stopping at a signal showing a stop aspect, press the DRA button in to prevent
power accidentally being applied before the signal clears.
•
Emergency braking can be instigated in a number of ways. The unit will automatically
apply the emergency brake in response to various safety systems:
•
Moving the combined power / brake handle into the E position. This position is
spring loaded and emergency braking will apply until the emergency alarm is reset.
•
Pressing an emergency plunger located on the front panel or the second man’s
panel. The plunger will remain pressed and the emergency brake will remain applied
until the plunger is reset and the emergency alarm is reset. Passing over a TPWS grid
when over speed, or a TPWS grid protecting a signal at a stop aspect.
•
Failing to respond to an AWS alarm after a few seconds.
•
Failing to reset the vigilance device.
•
Over speeding in a TVM block.
•
Passing into a non-permissive TVM block with the 000E aspect displayed in cab.
© Copyright RailSimulator.com 2013, all rights reserved
Page 9
Release Version 1.0
Train Simulator – London Faversham High Speed
2.3.4 Driver Reminder Appliance (DRA)
The class 395 is equipped with a Driver Reminder Appliance (DRA). This is a manual switch
which, when set, prevents the driver from applying power to move their train. It should be
set when stopping at a station and unset when moving off – but only after confirming a
proceed signal aspect.
•
•
To set the DRA, click the DRA plunger at the top of the console
to the left of the TVM430 display or press the K key on your
keyboard. The plunger will glow red when set.
To unset the DRA, click the plunger again or press the K key on
your keyboard. The plunger will no longer glow red.
© Copyright RailSimulator.com 2013, all rights reserved
Page 10
Release Version 1.0
Train Simulator – London Faversham High Speed
2.4 Troubleshooting
The Class 395 Electric Multiple Unit has a number of safety systems in place to prevent the
unit from moving unintentionally. If the vehicle won’t move, check the following:
NOTE: If the Class 395 consist is placed on track without power and the route has not been
specifically setup to support the Class 395, then this light may illuminate incorrectly. In this
case, check that the track has either 3rd rail or overhead wires. The Class 395 is designed to
work on any route with electrification, but for the full experience, the route must be setup
with Class 395 specific track properties.
•
•
•
•
•
•
•
•
Line Volts is not illuminated.
o Ensure the correct power mode is selected and press the Pan Up / Shoes
Down button. This light should now illuminate
MCB / VCB is illuminated
o If Line Volts is illuminated, press the Pan Up / Shoes Down button to close
the circuit breakers. This light should now extinguish
DRA light is illuminated
o Toggle the DRA button so the light is not illuminated to allow the vehicle to
apply power.
Directional Lever
o The directional lever must be in the Forward or Reverse position.
Vigilance Alarm is active
o Cancel the Vigilance Alarm by pressing the Vigilance Reset key (simulates
re-depressing the Driver’s Safety Device pedal)
Emergency Alarm is active
o Check both emergency brake plungers are reset to their normal position.
o Deactivate the vigilance alarm if active.
o Move the combined power / brake to the emergency position and release to
deactivate the emergency alarm.
Combined power / brake handle is in a power notch
o Move the combined power / brake handle to notch 0 to reset the handle.
o NOTE: If the handle is in a power notch when an interlock (e.g. DRA) is
tripped preventing power from being applied, then no power will be applied
when the interlock is reset until the combined power / brake handle is reset
Door Interlock lights are not illuminated
o If the door interlock lights are not illuminated (in the tripped state), then the
doors must be closed before brakes can be released.
© Copyright RailSimulator.com 2013, all rights reserved
Page 11
Release Version 1.0
Train Simulator – London Faversham High Speed
2.5 Creating a Class 395 train set
2.5.1 Scenario Editor (creating new scenarios)
To get the Class 395 ready for selection in a scenario that is not located on London
Favesham High Speed, you will need to enable it in the object set filters, which will add it to
the rolling stock browser list.
Follow these steps:
1. Enter the Scenario Editor. (Note: If a route is locked it will need to be unlocked first
before you can enter the Scenario Editor. Unlock by clicking the padlock icon in the
bottom right of the screen).
2. Click the Object Set Filter button (the small blue cube on the middle left panel).
3. In the new window which opens on the right hand side, select the following:
RSC / KentHighSpeed
4. The Class 395 vehicles will now appear in the list of rolling stock.
5. You may need to repeat this process on other routes or scenarios where you wish the
Class 395 to be available.
© Copyright RailSimulator.com 2013, all rights reserved
Page 12
Release Version 1.0
Train Simulator – London Faversham High Speed
2.5.2 Class 395 Consist Formations
Class 395 Train Set is made up of the following consist:
DPTSO(A)+MSO(A)+MSO(B)+MSO(C)+MSO(D)+DPTSO(B)
Unit Numbers are 395001 through to 395029
Individual Vehicle Numbers are:
DPTSO(A) : 390x1 running in 10s from 39011 through to 39291
MSO(A) : 390x2 running in 10s from 39012 through to 39292
MSO(B) : 390x3 running in 10s from 39013 through to 39293
MSO(C) : 390x4 running in 10s from 39014 through to 39294
MSO(D) : 390x5 running in 10s from 39015 through to 39295
DPTSO(B) : 390x6 running in 10s from 39016 through to 39296
© Copyright RailSimulator.com 2013, all rights reserved
Page 13
Release Version 1.0
Train Simulator – London Faversham High Speed
2.5.3 Assigning Destinations and Numbers
For developers wishing to make use of the units in their own scenarios and routes, it is
possible to customise the Destination Display during creation of a scenario. This allows the
train to correctly display an appropriate destination.
In order to display a specific destination, the correct value must entered into the vehicle
properties window. This number consists of a 12 digit value containing both a letter and
numbers.
The 12 digit value is arranged like so: dVVVVVVUUUUU
d
VVVVVV
UUUUU
= the Destination code (See the Destination List below)
= the Unit number displayed on the side of the coach
= the Vehicle number displayed on the driving vehicle
Example : a39500139011 (where “a” is for St Pancras International)
So the above value results in unit 39500139011, with vehicle number 39011, displaying “St
Pancras International” as the destination
2.5.3.1 Destination List
a
b
c
d
e
f
g
h
i
St Pancras International
Stratford International
Ebbsfleet International
Gravesend
Strood
Rochester
Gillingham
Chatham
Rainham
j
k
l
m
n
o
p
q
r
Sittingbourne
Faversham
Ashford International
Broadstairs
Canterbury West
Dover Priory
Folkestone Central
Maidstone West
Margate
© Copyright RailSimulator.com 2013, all rights reserved
Page 14
s
t
u
v
w
x
y
z
Sandwich
Ramsgate
Not in use
Not in use
Not in use
Not in use
Not in use
Not in use
Release Version 1.0
Train Simulator – London Faversham High Speed
2.6 Scenarios
2.6.1 Class 395 Driver Training: Driving the Class 395
Learn to drive the Class 395.
•
•
•
Date
Duration
Start Location
29/01/2013
20 minutes
Faversham
2.6.2 Class 395 Driver Training: TVM Signalling
Learn to use TVM signalling.
•
•
•
Date
Duration
Start Location
10/03/2013
15 minutes
Ebbsfleet International
2.6.3 Far Horizons
Drive a full run from St Pancras to Faversham.
•
•
•
Date
Duration
Start Location
24/04/2013
70 minutes
St Pancras International
2.6.4 Frost Fall
Drive the 395 from St Pancras, making your way towards Faversham. It is winter and a snow
storm is on the way which may disrupt your journey.
•
•
•
Date
Duration
Start Location
15/01/2013
60 minutes
St Pancras International
2.6.5 There and Back Again
Drive from Ebbsfleet to St Pancras, including the return journey.
•
•
•
Date
Duration
Start Location
07/08/2013
45 minutes
Ebbsfleet
2.6.6 Into Darkness
Drive an evening service from Faversham to St Pancras. The traffic ahead of you might slow
you down. Can you make it to all of your stops on time?
•
•
•
Date
Duration
Start Location
10/11/2013
75 minutes
Faversham
© Copyright RailSimulator.com 2013, all rights reserved
Page 15
Release Version 1.0
Train Simulator – London Faversham High Speed
3 Class 375 ‘Electrostar’ Electric Multiple Unit
3.1 Class 375
The Class 375 third-rail DC 4 car electric multiple units began service during 2002. Built by
Bombardier in Derby, England, they are a member of the ‘Electrostar’ train family, the most
numerous EMU built in post-privatisation Britain. Due to their high power consumption major
upgrades were carried out to the 750V DC third-rail power system used on the Southern
region. The trains are used extensively on services in south London and on rural commuter
services throughout Sussex and Kent where they replaced the aging 4CIG and 4VEP slamdoor stock.
3.2 Design & Specification
TOPS Number
Formation
Unit Weight
Vehicle Length
Vehicle Width
Body Construction
Power Collection
Vehicle Power
Design Speed
Coupling Type
Brake Types
Seating
Class 375
4-car: DMCO+MSO+TSO+DMCO
173.6 tonnes (35-48 tonnes per vehicle)
66ft 11in (20.4m)
9ft 2in (2.8m)
Aluminium body with steel ends
750v DC 3rd Rail
2,000HP (1,500kW)
100 MPH (161km/h)
Dellner
Air
242 Standard
© Copyright RailSimulator.com 2013, all rights reserved
Page 16
Release Version 1.0
Train Simulator – London Faversham High Speed
Driving the Class 375
3.2.1 Cab Controls
Main
1
2
3
4
5
6
7
console
Master key
Reverser
Combined throttle and
brake
Emergency brake
Brake pressure gauges
Speedometer
Cruise control speed
8
9
10
11
Cruise Control
AWS flower
AWS Reset
Windscreen wipers
16
17
Side
18
Guard communication
Notice board light
panel
3 rd Rail Shoe controls
12
13
14
15
Horn
Depot whistle
Sander
Cab light
19
20
21
22
Pantograph controls
Headlights
Taillights
Blinds
© Copyright RailSimulator.com 2013, all rights reserved
Page 17
Release Version 1.0
Train Simulator – London Faversham High Speed
3.2.2 Additional Controls
The following additional keys can be used with the Class 375 units.
Keystroke
Feature
Shift + D
Brake Hold. This can also be activated by pressing the button on
the end of the brake/throttle control (3)
Shift + P
Raise the 3 rd rail shoes. Also activated by pressing the blue
button on the upper left panel (18)
Ctrl
+ P
Lower the 3 rd rail shoes. Also activated by pressing the yellow
button on the upper left panel (18)
L
Cab Light
B
Depot Whistle
C
Guard communication (16)
Shift + Numpad Enter Toggle the Driver Vigilance Device. This is an audio only device
so has no visual prompt. By default this feature is turned off.
Numpad Enter Acknowledge a Driver Vigilance alert
© Copyright RailSimulator.com 2013, all rights reserved
Page 18
Release Version 1.0
Train Simulator – London Faversham High Speed
3.3 Creating a Class 375 train set
3.3.1 Scenario Editor (if creating new scenarios)
To get the Class 375 ready for selection in a scenario that is not located on London
Faversham High Speed, you will need to enable it in the object set filters, which will add it to
the rolling stock browser list.
Follow these steps:
6. Enter the Scenario Editor. (Note: If a route is locked it will need to be unlocked first
before you can enter the Scenario Editor. Unlock by clicking the padlock icon in the
bottom right of the screen).
7. Click the Object Set Filter button (the small blue cube on the middle left panel).
8. In the new window which opens on the right hand side, select the following:
RSC / KentHighSpeed
9. The Class 375 vehicles will now appear in the list of rolling stock.
10. You may need to repeat this process on other routes or scenarios where you wish the
Class 375 to be available.
3.3.2 Class 375 Consist Formations
Class Consist
DMOC - TOSL - DMOC
375/3
DMOC - PTOSL - MSOL - DMOC
375/6
DMOC - TOSL - MOSL - DMOC
375/7
DMOC - TOSL - MOSL - DMOC
375/8
DMOC - TOSL - MOSL - DMOC
375/9
The pantograph well should be at the centre of the formation.
Number Range
375301 - 375310
375601 - 375630
375701 - 375715
375801 - 375830
375901 - 375927
3 and 4 car formations are often used on local and branch stopping services.
7, 8, 9 and 10 car formations are used on off-peak fast services.
8 and 12 car formations are commonly seen on peak time fast and express service.
The following liveries are available in the London Faversham High Speed package. A
comprehensive collection of pre-built in each livery are also available in the scenario editor.
© Copyright RailSimulator.com 2013, all rights reserved
Page 19
Release Version 1.0
Train Simulator – London Faversham High Speed
Class 375 SE-White
Class 375 SE-WhiteGrey
© Copyright RailSimulator.com 2013, all rights reserved
Page 20
Release Version 1.0
Train Simulator – London Faversham High Speed
Class 375 SE-Blue
Class 375 SE-BlueStripe
© Copyright RailSimulator.com 2013, all rights reserved
Page 21
Release Version 1.0
Train Simulator – London Faversham High Speed
3.3.3 Assigning Destinations and Numbers
For developers wishing to make use of the units in their own scenarios and routes, it is
possible to customise the Destination Display during creation of a scenario. This allows the
train to correctly display an appropriate destination.
In order to display a specific destination, the correct value must entered into the vehicle
properties window. This number consists of a 12 digit value containing both a letter and
numbers.
The 12 digit value is arranged like so: dVVVVVUUUUUU
d
VVVVV
UUUUUU
= the Destination code (See the Destination List below)
= the Vehicle number displayed on the side of the coach
= the Unit number displayed on the front of the driving vehicle
Example : j78580375701 (where “j” is for Faversham)
So the above value results in unit 375701, with vehicle number 78580, displaying
“Faversham” as the destination
3.3.3.1 Destination List
c
d
e
f
London Victoria via
Mainstone East
London Victoria via
Bromley South
Cannon Street
Charing Cross
Ashford International
Canterbury East
g
h
i
a
b
j
Faversham
s
Rochester
k
Folkestone Central
t
Sevenoaks
l
m
n
o
Gillingham
Hastings
London Bridge
Margate
u
v
w
x
Canterbury West
p
Orpington
y
Dartford
Dover Priory via Chatham
q
r
Paddock Wood
Ramsgate via Chatham
z
Sheerness on Sea
Sittingbourne
Strood
Tonbridge
Ramsgate / Dover P
Divides at Faversham
Sorry, Not in Use
© Copyright RailSimulator.com 2013, all rights reserved
Page 22
Release Version 1.0
Train Simulator – London Faversham High Speed
4 Operation
4.1 TVM
4.1.1 Introduction
TVM (Transmission Voie-Machine or track-to-train transmission) is a form of in-cab signalling
originally deployed in France and used on high-speed railway lines. At high speeds it is not
possible for a driver to accurately see colour-light based railway signals along the track-side.
Signalling information is instead transmitted to the train and displayed as part of the train
controls. The driver is shown the safe operating speed, displayed in kilometres per hour. The
TVM-430 system transmits more information than traditional signalling would allow, including
gradient profiles and information about the state of signalling blocks further ahead. This high
degree of automation does not remove the train from driver control, although there are
safeguards that can safely bring the train to a stop in the event of driver error.
You will need to be able to understand the TVM signalling for the high-speed section of the
route.
4.1.2 TVM signals
These signs mark a TVM signal position and are placed
approximately 950m apart between Springhead Junction and St
Pancras. These are update positions which transmit line speed data
to the TVM430 in cab signaling system.
© Copyright RailSimulator.com 2013, all rights reserved
Page 23
Release Version 1.0
Train Simulator – London Faversham High Speed
4.1.3 How to read TVM
In the cab you will find a double row of square indicators. This is where target speeds for
the current and subsequent blocks are displayed to the driver, in the form of numbers (in
km/h) on a colour-coded background. Full line speed is indicated in white numerals on a
green background, while slower aspects are indicated in white numerals on a black
background and a full stop is indicated as "000" on a red background.
Line Speed Section
Warning Section
Execute Section
Neutral Section
Warning Light
Figure 1
TVM Display showing position of numbers and example numbers. Colours are a
representation but font colours are correct.
4.1.3.1 Line Speed Section
This section displays white numbers on a green background and can be either static or
flashing. This section only displays the numbers 225, 200 and 160. It shows that the train
may proceed to the maximum speed of the line displayed.
4.1.3.2 Warning Section
This section displays black numbers on a white diamond in a black background and will
either be static or flashing. This section warns the driver what the speed is at the next
signal. By example: if it is flashing 160 then you should to be doing less than 160 by the
next signal. If it is a static 160 then that means at the next signal the speed limit will be
160.
4.1.3.3 Execute Section
This section displays a black background with white numbers and will be either static or
flashing, telling the driver this is what you should currently be doing. A static execute
function would normally appear after a static warning indication. The 000 and three solid red
squares only appear in this section.
4.1.4 TVM by Example
Changes in speed limit can occur anytime regardless of where you are in a block. Speed
limits can only go down at a signal.
Let us say the TVM is displaying a static 225 line speed until you pass the next signal, when
it displays a flashing 225 line speed. This means that the speed past the next signal is going
to display a speed less than this, so you need to be slowing down and be doing less than 225
by the next signal.
When you reach the next signal the display shows a flashing 200 warning indication. This
indicates you need to continue braking to below 200 as the next signal is going to display a
© Copyright RailSimulator.com 2013, all rights reserved
Page 24
Release Version 1.0
Train Simulator – London Faversham High Speed
lower speed. At the next signal however, you get a static 160 warning indication. This means
that you need to be doing 160 by the next signal but don’t necessarily have to continue
decreasing speed as the next signal will display a static 160 execute indication. So you can
now do a maximum of 160 until the display tells you otherwise.
When speeds are going down there is limit on how far they can go down from certain
speeds. If you have a 225 displaying then it will not drop straight to 000. It would have to
count down through 225, 170, 000. The TVM can only drop to 000 from a maximum of 170.
And 225 can only drop to a minimum speed of 170 so it will not go from 225 to 160.
Below the TVM display is the speedometer, where the continuously varying target speed is
indicated, as well as the current speed. (Speed is measured by a redundant tachometer to a
precision of 2%.) For an indication, under a 300 km/h aspect, the computer will take action
only if the train exceeds 315 km/h.
4.2 Signals
4.2.1 Main Signal Head Aspects
Colour light signals are used for controlling running movements. They display aspects by
means of red, yellow and green coloured lights.
Signal Aspect
Red light
Single yellow light
Description
Danger
Caution
Double yellow lights
Preliminary caution
One flashing yellow light
Preliminary caution
for a diverging route
Double flashing yellow
lights
Indication of
diverging route
ahead of the next
but one signal
Clear
Green light
© Copyright RailSimulator.com 2013, all rights reserved
Page 25
Instruction to Driver
Stop.
Proceed: be prepared to stop at
the next signal.
Proceed: be prepared to find
the next signal displaying one
yellow light.
Proceed: Be prepared to find
the next signal displaying one
yellow light with feather
junction indicator for diverging
route(s).
Proceed: Be prepared to find
the next signal displaying one
flashing yellow light.
Proceed: The next signal is
displaying a proceed aspect.
Release Version 1.0
Train Simulator – London Faversham High Speed
4.2.2 Theatre Type Signals
A Theatre alphanumeric route indicator
indicates the route to be taken using
numbers or letters (or a combination of
numbers and letters).
A Theatre indicator is often used to show the
arrival platform number.
© Copyright RailSimulator.com 2013, all rights reserved
Page 26
Release Version 1.0
Train Simulator – London Faversham High Speed
4.2.3 Feather Type Signals
A Feather junction indicator indicates a diverging route to be taken by the angle at which a
line of five white lights is displayed. (Position 1 shown)
Feather Indication
No Feather Indication
Position 1 indication
Position 2 indication
Position 3 indication
Position 4 indication
Position 5 indication
Position 6 indication
Instruction to Driver
Obey main aspect, straight-ahead route is set
Obey main aspect, expect divergence to left
Obey main aspect, expect divergence to left
more extreme than that for position 1
Obey main aspect, expect divergence to left
more extreme than that for position 2
Obey main aspect, expect divergence to right
Obey main aspect, expect divergence to right
more extreme than that for position 4
Obey main aspect, expect divergence to right
more extreme than that for position 5
4.2.4 Ground Signals and Position Light Signals
Ground Signals and Position Light Signals (PLS) display
their aspects by means of the position and colour of lights.
Ground Signals are always illuminated and can have
miniature theatre indicators attached whereas PLS only
illuminate to allow a train to pass in to an occupied section
of line and are mounted as an addition to a main signal
head.
Signal Aspect
Description
Two red lights
Danger
No aspect
(located on a main aspect)
Two white lights
Caution
Instruction to Driver
Stop.
Obey main aspect.
The line ahead may be occupied. Proceed
cautiously towards the next stop signal, stop
board or buffer stops. Be prepared to stop
short of any obstruction. The associated main
aspect (where provided) may be passed at
danger.
© Copyright RailSimulator.com 2013, all rights reserved
Page 27
Release Version 1.0
Train Simulator – London Faversham High Speed
4.2.5 Entering an Occupied Section of Track
During a scenario your train may be scheduled to enter a platform or section of track that is
already occupied by another train or rolling stock. In this situation you should stop at the red
signal protecting this section of track as normal. Once your train has stopped press the TAB
key on your keyboard to request permission from the signalling centre to enter the occupied
section of track. When your train movement is approved the signal will illuminate the two
white lights on the position light signal if it has one.
4.2.6 Repeater Signals
A banner repeater signal indicates whether the signal ahead is
displaying a proceed aspect or is at danger. Modern fibre optic
banner repeating signals, as shown opposite, consist of a
rectangular unlit black background displaying a white circle with a
black bar.
Signal Display
Horizontal arm
Arm at an upper
quadrant angle of 45°
Instruction to Driver
Be prepared to find the related signal at danger
Related signal is exhibiting a proceed aspect
Repeater signals are intended to provide a driver with advance information of a signal that
may be obscured on approach. A train does not need to stop at a repeater signal, only at the
related signal if it is at danger.
Splitting banner signals provide two banner signal heads combined to form a splitting banner
repeating signal. These are used to indicate the aspect of a signal with a feather junction
indicator. If the related junction signal is displaying an illuminated feather then the lower
banner head displays an arm at an upper quadrant angle of 45°. Alternatively, if the related
junction signal is not displaying an illuminated feather and is indicating a straight ahead
route then the higher ‘main’ banner head displays an arm at an upper quadrant angle of 45°.
© Copyright RailSimulator.com 2013, all rights reserved
Page 28
Release Version 1.0
Train Simulator – London Faversham High Speed
4.3 Speed Signs
4.3.1 Permissible Speed Indicators
These signs display the permissible speed in M.P.H.
applicable to the section of line beyond the sign up to the
commencement of any subsequent permissible speed
section.
Remember to wait for the complete length of your train to
pass these signs before accelerating if the permissible line
speed is increasing. If the permissible line speed is
decreasing then you must reduce your speed before
passing these signs.
4.3.2 Permissible Speed Warning Indicators
These signs provide advance warning of a reduction in
permissible speed ahead. Permanent AWS Ramps
(Automatic Warning System) are often installed in
conjunction with these signs. In these cases the driver
must cancel the AWS warning when triggered on approach
to these signs.
© Copyright RailSimulator.com 2013, all rights reserved
Page 29
Release Version 1.0
Train Simulator – London Faversham High Speed
4.4 Safety Systems
4.4.1 AWS (Automatic Warning System)
AWS is provided to give train drivers in-cab
warnings of the approach to signals, reductions in
permissible speed and temporary/emergency speed
restrictions, and to apply the brakes in the event
that a driver does not acknowledge cautionary
warnings given by the system.
As a train approaches a signal, it passes over AWS
track equipment (magnets) which are fixed to the
sleepers between the running rails. The magnets are sensed by a receiver mounted under
the leading end of the train.
If the signal ahead is displaying a clear aspect (green), a bell (or an electronic ping) sounds
in the driver’s cab, and the AWS Sunflower indicator displays “all black”. No action in respect
of the AWS is required of the driver.
If the signal is displaying a caution or danger aspect (yellow, double yellow or red), a horn
sounds in the driver’s cab and the display shows “all black”. The driver has to acknowledge
the warning by pressing the “AWS Acknowledgement” push button. When the driver operates
the push button, the horn is silenced and the AWS Sunflower changes to a segmented yellow
and black circular display. If the driver fails to acknowledge the warning horn within a set
time period, the brakes are applied automatically.
Where AWS equipment is provided on the approach to reductions in permissible speed and
temporary/emergency speed restrictions, the cab equipment always operates in a manner
equivalent to the approach to a signal displaying a caution or stop aspect. The driver
receives a warning and has to respond to it accordingly; otherwise the brakes are applied
automatically.
4.5 Traction Power
4.5.1 25kV AC Overhead
This sign denotes that traction power is supplied via 25kV AC
overhead cables from this point forward.
The train pantograph should be raised in order to proceed.
4.5.2 750V DC Third Rail
This sign denotes traction power is supplied via 750V DC third
rail from this point forward.
The train should deploy the third rail shoes in order to proceed.
© Copyright RailSimulator.com 2013, all rights reserved
Page 30
Release Version 1.0
Train Simulator – London Faversham High Speed
5 Credits
RailSimulator.com would like to acknowledge the following for their invaluable input during
production and testing of London Faversham High Speed.
•
Beta Testing Team
•
Hitachi Rail Ltd
•
Staff at Hitachi Ashford Rail Depot
•
London & Continental Railways
© Copyright RailSimulator.com 2013, all rights reserved
Page 31
Release Version 1.0