1
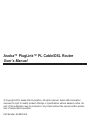
Asoka™ PlugLink™ PL Cable/DSL Router
User’s Manual
© Copyright 2003. Asoka USA Corporation. All rights reserved. Asoka USA Corporation
reserves the right to modify product offerings or specifications without advance notice. No
part of this publication may be produced in any format without the express written permission of Asoka USA Corporation.
Part Number: 65-9920-001
Asoka™ PlugLink™ PL Cable/DSL Router Manual
Table of Contents
Page
Introduction
2
Important Safety Information
3
Getting Intimate with your Powerline Device
4
Getting Started
5
Connecting the Asoka PlugLink PL Cable/DSL Router
6
LAN Side Setup Guide
8
Router Setup Guide
11
Internet Connection WAN Side Setup Guide
13
Powerline Encryption Setup Guide
18
Checking the Internet Service Provider Setup
19
Advanced Features
19
Router LAN Setup Guide
21
Advanced Tab Setup Guide
22
Troubleshooting Guide
23
Appendix A: Specifications
26
Appendix B: Glossary
27
Appendix C: Technical Support & RMA
28
Appendix D: FCC Statement
29
Appendix E: Limited Warranty Information
30
Notes
32
1
Asoka™ PlugLink™ PL Cable/DSL Router Manual
Introduction
Congratulations! As the proud owner of the state-of-the-art Asoka™
PlugLink™ PL Cable/DSL Router, connecting multiple computing devices
together to establish a Local Area Network (LAN) is as simple as 1-2-3. The
Asoka PlugLink PL Cable/DSL Router combines the power of a router, the
intensity of a Powerline network, and the flexibility of a 4-port switch. It is
an ideal solution to provide you with the ability to share high-speed
Internet access.
This manual provides a step by step installation guide to quickly get your
network connect to your broadband Internet connection. We also suggest
that you give yourself some time to play with your new powerline networking device.
All Asoka PlugLink networking devices are designed and manufactured to
meet Asoka’s and industry organizations’ (i.e. HomePlug Powerline Alliance,
IEEE, FCC, and UL) rigorous specifications and world-class quality standards. During development, our laboratory testing team put the PlugLink
networking device through strenuous evaluations and standards. We are
confident that the one you purchase will meet your own exacting standards.
Thank you for choosing Asoka and, by all means, enjoy your PlugLink PL
Cable/DSL Router!
For the latest product information, please visit us on the web at
www.asokausa.com.
2
Asoka™ PlugLink™ PL Cable/DSL Router Manual
Important Safety Information
This product is intended for connection to the AC power. The following precautions should be taken when using this product.
• Read all instructions before installing and operating this product.
• Follow all warnings and instructions marked on the product.
• Do not operate this product near water.
• This product relies on a building’s electrical installation for short-circuit (over current) protection. Ensure that a fuse or circuit breaker no
larger than 15 Amp is used on the phase conductors (all current-carrying conductors).
• Do not allow anything to rest on the product interconnect cords.
• Do not locate this product where people may walk on the cords.
• The PL Cable/DSL Router should be plugged directly into an AC wall
outlet. (Note: The appropriate voltage, 120/240V, will be
clearly marked on the box.)
• Only a qualified technician should service this product. Opening or
removing covers may result in exposure to dangerous voltage points
or other risks. (Note: Opening or removing the covers will void
your product warranty.)
• Unplug the PL Cable/DSL Router from the AC wall outlet and refer
the product to qualifed service personnel for the following conditions:
- When the interconnect cords are damaged or frayed.
- If liquid has been spilled onto the product.
- If the product has been exposed to rain or water.
- If the product does not operate normally when the operating
instructions have been followed.
- If the product exhibits a distinct change in performance.
3
Asoka™ PlugLink™ PL Cable/DSL Router Manual
Getting Intimate with your Powerline Device
Before installing your powerline networking device, please take a moment
to examine and familiarize yourself with it. Below is a diagram of the
PL9920-BBR along with a brief description of what each LED and port represent.
The front panel of the router has a number of LEDs indicating the status of
the device, their functions are:
PWR: Steady light indicates the device is powered up.
RDY: Flashes quickly after the router is powered up. When the router
is ready to use, the LED flashes every second to indicate the router is
functioning normally. If the LED stops flashing or flashes more rapidly
an error has occurred. Refer to the troubleshooting section for help.
LINK: One or more powerline devices have been detected on the network.
ACT: Traffic indicator on the powerline network (will flash occasionally even if no powerline device is connected).
WAN/LAN 1-4 10/100M: If LED is on, the connected device is a
100 Mbps device.
WAN/LAN 1-4 LINK/ACT: Steady light shows a device connected
to the port. Flashes when traffic on the port is detected.
4
Asoka™ PlugLink™ PL Cable/DSL Router Manual
Getting Started
What This Package Contains?
When you receive your PL9920-BBR, please check to be sure that your
package contains all of the following:
•
•
•
•
Asoka PL Cable/DSL Router (PL9920-BBR)
9 VDC Transformer
One 6 ft Ethernet CAT 5 Cable
User’s Manual
What are the Necessary Equipment?
• High-Speed Internet Connection
• Internet Access Unit (Cable/DSL Modem) with an Ethernet Port
• One or more computers with either Ethernet network cards or HomePlug
compliant Powerline network units
• Windows TCP/IP networking software installed on all computers
• Web browser installed on one or more computers
What Equipments can be used with the PL Cable/DSL Router?
•
•
•
•
•
•
Computers
Network Printers
Ethernet Hub or Switch
USB to Ethernet Bridge
Mp3 Players
Internet Enabled Video Game Consoles (i.e. XBox, PS2)
Important: After receiving the PL9920-BBR, please check for any
shipping damages to the carton and system unit before proceeding with any installations.
5
Asoka™ PlugLink™ PL Cable/DSL Router Manual
Connecting the Asoka PlugLink PL Cable/DSL Router
1. Turn off all computers and other devices that will be connected to the
router.
2. Connect the Ethernet port ‘WAN’ on the Asoka PL9920-BBR to the
Internet access unit (Cable/DSL Modem) using the supplied Ethernet cable.
3. Connect the computers or other networking devices to the router:
a) To connect a computer (other networking devices) directly to the
router, simply connect the computer’s Ethernet port o the router’s LAN
ports (only port 2-4) using an Ethernet cable.
b) To connect computers (other networking devcies) to the router
using other HomePlug powerline network adapters, such as an Asoka
PlugLink Wall Mount device, connect the computer’s Ethernet or USB
port to the Wall Mount and plug the Wall Mount directly to an outlet.
For more information, please refer to the HomePlug Certified product
installation guide. (Note: Connect the powerline network
adapters directly into an AC wall outlet. Do not plug the powerline network adapters to a power strip or extension cord.)
c) To connect an Ethernet Hub/Switch to the router, simply connect
one of the Ethernet ports on the Hub/Switch to the router using an
Ethernet cable. Be sure to connect to the router’s LAN 1 port. (Note:
LAN port 1 is meant for an Ethernet Hub/Switch. A crossover
cable must be used for LAN 1 port to connect a PC, printer,
etc.)
4) Power up the Internet access unit (Cable/DSL Modem).
6
Asoka™ PlugLink™ PL Cable/DSL Router Manual
5) Connect the power supply to the Asoka PL9920-BBR’s power port. Then
plug the power supply directly to an AC wall outlet. Wait until the ‘RDY’ LED
flashes with one second interval. (Note: Connect the power supply
directly into an AC wall outlet. Do not plug the power supply to a
power strip or extension cord.)
6) Turn on one or more of the devices on your network that will access the
Internet through the router.
7) All devices connected to the router and powered on will cause the corresponding ‘LINK’ light on the front of the router to turn on. Check that all
expected lights are on including the ‘WAN LINK/ACT’ light. Make sure that
the correct type of cabling is used for all ports. See the troubleshooting
guide if a light is not on. See illustration below for reference.
8) Now the necessary hardware setup is complete, and the software setup
of router and the connected computer begins.
7
Asoka™ PlugLink™ PL Cable/DSL Router Manual
LAN Side and WAN Side
The router creates a divider between the Internet (WAN side) and your
computers on the Local Area Network (LAN side). The router uses a
Firewall to protect the computers on your LAN from all other computers
connected to the Internet.
LAN Side Setup Guide
There are two parts of the software setup, first to get all equipment on the
LAN working with the router and then to get the router to connect to the
Internet. The connection of a local computer to the router is required first,
so that will be the first step.
The setup will be simplest if automatic IP address assignment (DHCP) is
used. To find out if DHCP is enabled, follow these steps depending on operating system:
8
Asoka™ PlugLink™ PL Cable/DSL Router Manual
Windows 98 SE/ME
1) In the Start Menu, select ‘Settings’ -->
‘Control Panel.’
2) Double click on the ‘Network’ icon.
3) Select the TCP/IP entry for the Ethernet
adapter or Powerline adapter used to connect to the router.
4) Click ‘Properties.’
5) Select the ‘IP Address’ tab.
6) Select
‘Obtain
an
IP Address
Automatically’ if not already selected.
7) If the computer was previously connected to the Internet, it may have an old
gateway setting. Remove the gateway
setting by clicking on the ‘Gateway’ tab
and remove any IP addresses.
8) Click ‘OK’ to close the TCP/IP properties
panel.
9) Click ‘OK’ to close the Network panel.
The changes will take effect when this
panel is closed.
9
Asoka™ PlugLink™ PL Cable/DSL Router Manual
Windows 2000/XP
1) Open Network Connections
• Win 2000: In the Start Menu, select
‘Settings’ --> ‘Network and Dial-up
Connections.’
• Win XP: In the Start Menu, select
‘Connect To’ --> ‘Show All Connections.’
2) Right click ‘Local Area Connection’ and
select ‘Properties.’
3) Select ‘Internet Protocol (TCP/IP)’ and
click ‘Properties.’
4) Select ‘Obtain an IP Address
Automatically’ and ‘Obtain a DNS server
automatically’ if not already selected.
5) Click ‘OK’ to close the TCP/IP properties
panel.
6) Click ‘OK’ to close the Network panel.
The changes will take effect when this
panel is closed.
10
Asoka™ PlugLink™ PL Cable/DSL Router Manual
Router Setup Guide
If the computer is connected to the router using a powerline network
device, the encryption password must be identical on both the router and
the powerline device connected to the computer. This can be achieved in
two ways:
• If the utility supplied with your powerline device supports remote
encryption key settings, use this feature to set the router password to
the same as the local powerline device password.
• If the utility supplied with your powerline device does not support
remote encryption key settings, then you will need to manually set the
router password to match the local powerline device password.
• If a computer is connected directly to the router using an Ethernet
cable, the computer will not need to do any encryption setup.
If your computer has been previously connected to the Internet
• If the computer has been used previously to share Internet access
using a proxy server, this must be disabled first.
• If the PC has a ‘Dial Up Manager’ enabled to connect to the Internet,
this must also be disabled.
Connection to the router using a web interface:
1) Open a web browser (Internet Explorer or Netscape) and enter the
router’s default address: 192.168.8.1 in the Address field, as shown below
and press ‘Enter.’
11
Asoka™ PlugLink™ PL Cable/DSL Router Manual
If the router is operating correctly, the first router setup page (below) will
appear. The setup pages are essential for setting up the router for Internet
access. Please refer to the troubleshooting guide if the router cannot be
accessed.
2) Under the Administrator Password field, type in the password ‘admin.’
(Note: If you would like to change the default password, please go to the
‘Administration tab’ and you will be able to change the password. Once you
enter the correct password and click ‘Login,’ the screen on the next page
will be displayed. For most Cable/DSL modem users, you will only need to
utilize the three (3) tabs under the ‘EZSetup’ tab. For users who require
additional features, you will be able to access those features under the
‘Advanced’ tab.
12
Asoka™ PlugLink™ PL Cable/DSL Router Manual
Internet Connection (WAN) Side Setup Guide
WAN Connection Type
The router supports four connection types: DHCP Client, Static IP, PPPoE,
and PPTP Client. Each setup screen and available features will differ
depending on what kind of Internet connection type you select. Please click
the corresponding button and fill in the fields with the info provided by your
Internet Service Provider.
Default IP Address and Subnet Mask
The Default IP Address is 192.168.8.1 for the router.
The Default Subnet Mask is 255.255.255.0 for the router.
13
Asoka™ PlugLink™ PL Cable/DSL Router Manual
Most users leave the Default IP Address and Subnet Mask AS IS. However,
for more advanced users, these fields can be changed. (Note: If you reset
the router through the ‘Administration’ tab, under the ‘Reset to Default,’ the
router will reset back to the above default IP address and subnet mask.)
DHCP Client Setup
Host Name and Domain Name
These fields allow you to enter a host and domain name for the router.
Some ISPs require these fields to be entered in order for the Internet connection to function properly. Please check with your ISP to see if it is necessary to fill these fields on your router.
14
Asoka™ PlugLink™ PL Cable/DSL Router Manual
By default, the router’s WAN Connection Type is set to DHCP client as
shown. It should be used only if your ISP supports DHCP.
To apply any changes in the setting page, click the ‘Save & Restart’ button.
Static IP Setup
If you have subscribed a permanent IP Address from your ISP, then you
must select Static IP and configure this particular settings page.
Your ISP will supply all the necessary information on all the fields for this
setup page. Please contact your ISP for the required information.
To apply any changes in the setting page, click the ‘Save & Restart’ button.
15
Asoka™ PlugLink™ PL Cable/DSL Router Manual
Point-to-Point Protocol (PPPoE) Client Setup
This type of connection is used by some DSL-based ISPs to establish
Internet connections for end users who did not purchase a Static IP
address along with their Internet service. Check with your ISP to see if they
are using PPPoE. If so, you will need to select this type of connection.
Ususally, ISPs that use PPPoE will require you to fill in ‘PPPoE Account’ and
‘PPPoE Password.’
Dial on Demand and Auto Disconnect: You can instruct the router to disconnect from the Internet by entering the number of seconds after inactivity. If you check on ‘Dial on Demand,’ the router will automatically reestablish your Internet connection as soon as you attempt to access the
Internet.
To apply any changes in the setting page, click the ‘Save & Restart’ button.
16
Asoka™ PlugLink™ PL Cable/DSL Router Manual
Point-to-Point Tunneling Protocol (PPTP) Client Setup
This setup page only applies to connections in Europe only. Your ISP will
provide all the information needed for this setup page. Please contact your
ISP for ther required information.
To apply any changes in the setting page, click the ‘Save & Restart’ button.
17
Asoka™ PlugLink™ PL Cable/DSL Router Manual
Powerline Encryption Setup Guide
The default password for the powerline encryption is ‘HomePlug.’ If you
preferred to change the password, simply type in the network password
and click on ‘Update.’ Once updated, ensure all other powerline devices on
your network use the same password as the router. (Please refer to the
installation guide for the other powerline devices for changing the password.) Now, press the ‘Scan Now’ button to get a list of all detected powerline devices. If a device is missing from this list, please refer to the troubleshooting section.
18
Asoka™ PlugLink™ PL Cable/DSL Router Manual
Checking the Internet Service Provider Setup
Press the ‘Device Info’ tab on the left side of the screen. When the page
appears, press the ‘Refresh’ button at the bottom of the screen. Make sure
that the fields related to your WAN settings are updated with the correct
values from your ISP.
Now the router should be ready to use. Restart the computers connected
to the router and try accessing the Internet using your web browser. Type
in a website address and allow the browser a while to detect the new network settings. The web page should appear shortly. The troubleshooting
section will help if no web site can be found.
Advanced Features
Router Administration
The administration tab allows you to perform the following tasks:
•
•
•
•
•
•
•
•
19
Reset System Setting to Factory Default
Backup System Setting
Restore System Setting to the Previous Setting
Change Login Password
Upgrade Firmware
View Event Log
Clone MAC Address
Restart System
Asoka™ PlugLink™ PL Cable/DSL Router Manual
Reset System Setting to Factory Default
Resets all settings back to the original state of the router. This will clear all
settings you might have previously inputted to the router and will restore
the router WAN IP address back to 192.168.8.1 and Subnet Mask to
255.255.255.0.
Backup System Setting
Save the current setting on the router to a file on a computer or floppy disk.
This is a great tool to have so that you can restore the router’s system setting quickly.
Restore System Setting to the Previous Setting
Revert back to the previous version of setting on the router.
Change Login Password
Change the login password on the web setup interface via 192.168.8.1.
Upgrade Firmware
Update your firmware on the router. Most current version of the firmware
can be found on web site www.asokausa.com.
View Event Log
View entries or event happening at router WAN port.
20
Asoka™ PlugLink™ PL Cable/DSL Router Manual
Clone MAC Address
Some ISPs and other services on the web uses MAC address authentication
for their service, when a service is established, you give your MAC address
to the company you are connecting to, when you log on to their server, the
server checks the MAC address of your computer to verify your identity and
service will be denied if the MAC address is different. If you install a router,
the computers on the Internet will see the router MAC address, and since
it is different from your computer’s MAC address, identity checks will fail.
Using MAC cloning will give the router the MAC address of your computer,
and any server on the Internet will pass the identity checks.
Restart System
Restart the router.
Router LAN Setup Guide
The built in DHCP server automatically assigns IP addresses to all connected computers, this is the best setup for most networks.
If a different range of IP addresses are required, enter the router setup
page and click the ‘LAN’ button. The router IP address and range of IP
addresses that the router provides to other computers can be entered here.
If a static IP address is needed, disable DHCP and click the ‘More’ button.
This allows a fixed IP address to be associated with a MAC address.
21
Asoka™ PlugLink™ PL Cable/DSL Router Manual
Advanced Tab Setup Guide
Access Control
The router can automatically block packets that are commonly used when
attempting to access a computer maliciously. It is a good idea to set up
these filters. However, somtimes it is necessary to allow certain packets to
use other Internet Services and the filtering of these packets must be
removed. When this feature is enabled, you will be allowed to block up to
eight (8) ports on the router.
MAC Filter
The MAC Filter function allows listing of MAC addresses of computers that
are not allowed Internet access, but can communicate with other computers on the local network.
Service Time
To only allow Internet access certain hours of the day, or for a certain period of time only, the router can be set up to automatically control access
and automatically switch Internet access off after a given time.
URL Blocking
A list of web addresses, up to eight (8) addresses, or words being a part of
a web address, can be provided to the router and it will not connect the
web sites in this list.
22
Asoka™ PlugLink™ PL Cable/DSL Router Manual
Virtual Server
The router normally protects all computers on the local network from outside access. The Virtual Server function will forward all traffic on a certain
port to a specified IP address. This is necessary to connect to web services like NetMeeting.
DMZ (De-Militarized Zone)
DMZ disables the protection the router firewall provides and opens the
specified computer completely for Internet access. This is dangerous as
hackers may get access to data on your computer, but enables services like
Internet Gaming and Audio/Video Conferencing that might otherwise be
blocked by the router.
Dynamic DNS
Maintaining a web site is difficult if the computer is not on a static IP WAN
address. The Dynamic DNA function allows a web address to be associated with a changing IP address. Visit www.dyndns.org for more info.
Troubleshooting Guide
A computer network contains many separate pieces of software and hardware that must work together for the network to operate. If any part of the
network does not work, the first step is to reset all networked devices to
give the equipment a clean start.
23
Asoka™ PlugLink™ PL Cable/DSL Router Manual
• Unplug all network devices.
• Turn the Internet access unit (Cable/DSL Modem) ‘On.’ Follow the
user guide to ensure correct operation.
• Plug in the router, wait for the RDY LED to start flashing with a one
second interval.
• Plug in any powerline devices to the wall sockets.
• Turn on all computers and network devices.
If this does not help, continue reading this troubleshooting guide to locate
the specific problem.
The computers can not access the router setup screen.
• Check that the PWR LED on the router is on and the RDY LED is
flashing with one second interval.
• For an Ethernet device, check the LNK LED on the router for the corresponding port to ensure the connectiong is working. If not, check
that the correct cable type is used. Expect for LAN Port 1, use straight
Ethernet cable. You will need a crossover cable for LAN Port 1.
• For a powerline device, ensure that the LNK LED is on (next to the
PWR LED). If not, ensure that the powerline device is operating correctly and the password is identical on the computer and the router.
• Follow the instructions in the ‘LAN Side Setup’ section to ensure all
computers are using DHCP to communicate with the router.
• Open a DOS prompt to get an IP address:
Windows 98 SE/ME
-
Select ‘Start’ --> ‘Run’ and Type ‘winipcfg’
Select the used network adapter
Refresh the IP Address
Check that the IP Address is 192.168.8.X
24
Asoka™ PlugLink™ PL Cable/DSL Router Manual
Windows 2000/XP
-
Select ‘Start’ --> ‘Run’ and Type ‘cmd’
Type ‘ipconfig /release’ and press ‘Enter’
Type ‘ipconfig /renew’ and press ‘Enter’
Type ‘ipconfig /all’ and check that the IP Address is 192.168.8.X
If all still fails, press the reset button on the back of the router with a pin
and repeat the steps.
The computers can access the router setup screen but not the
Internet.
• Check that the WAN LINK/ACT light is on. If not, there is no connection to the Internet. Check the cables to the DSL/Cable Modem
(must be crossover cable).
• Enter the 'WAN' setup and check that all settings match the settings provided by your Internet Service Provider.
• Check that the Advanced setup of the router does not prevent
Internet access or forwarding is set up to redirect Internet traffic. If
in doubt, reset the router from the 'Administration' screen or by
pressing the button on the back on the router to restore factory
default settings.
The RDY LED is flashing rapidly or not at all.
This indicates the router is not functioning properly. Reset the device
using a pin on the back of the router, then unplug the device from the
power and plug it back again. If this does not work, contact your dealer.
25
Asoka™ PlugLink™ PL Cable/DSL Router Manual
Appendix A: Specifications
WAN I/F
WAN cabling
LAN I/F
LAN cabling
Routing Protocols
Powerline
LED indication
Power Input
Dimensions
Unit Weight
Certification
Operating Temperature
Storage Temperature
Operating Humidity
One RJ-45 port, IEEE 802.3 100BaseT
UTP category 5 (10/100 Mbps).
Four RJ-45 ports, IEEE 802.3u 100BaseT
UTP category 5 (switched 10/100 Mbps).
TCP/IP, DHCP, NAT, PPTP, PPToE, IPSec, L2TP, RIP-1/2
HomePlug 1.0 Compliant 14 Mbps
Power, Ready, WAN/LAN Link/Act,
10/100, Full Duplex/Collision,
External, DC 6.5V DC/2A
155 x 105 x 20 mm (TBD)
320 g (11 ¼ oz)
FCC class B, CE mark, UL
0°C to 40°C (32°F to 104°F)
-20°C to 70°C (-4°F to 157°F)
10% to 85% non-condensing
26
Asoka™ PlugLink™ PL Cable/DSL Router Manual
Appendix B: Glossary
Crossover
Ethernet cable where the receive and transmit contacts are reversed.
DHCP
Protocol for automatically assigning IP addresses.
IP Address
The computer's logical address on the network.
LAN
Local Area Network, your computers attached to the router.
MAC Address
The computer's physical address on the network.
TCP/IP
Protocol necessary for Internet access.
WAN
Wide Area Network, the Internet side of the router.
27
Asoka™ PlugLink™ PL Cable/DSL Router Manual
Appendix C: Technical Support and RMA
Please contact the Asoka Service and Support Center at:
c/o Technical Support
Asoka USA Corporation
820 American Street
San Carlos, CA 94070
Main: (650) 591-3236
Support: (650) 591-3189
Fax: (650) 591-3782
Email: [email protected]
http://www.asokausa.com
Monday - Friday 9:00 AM - 5: 00 PM PST
28
Asoka™ PlugLink™ PL Cable/DSL Router Manual
Appendix D: FCC Statement
This equipment has been tested and found to comply with the limits for a Class B
digital device, pursuant to part 15 of FCC Rules. These limits are designed to provide reasonable protection against harmful interference in a residential installation.
This equipment generates, uses and can radiate radio frequency energy and, if not
installed and used in accordance with the instructions, may cause harmful interference to radio communications. However, there is no guarantee that interference will
not occur in a particular installation. If this equipment does cause harmful interference to radio or television reception, which can be determined by turning the equipment off and on, the user is encouraged to try to correct the interference by one
or more of the following measures:
• Reorient or relocate the receiving antenna.
• Increase the separation between the equipment and receiver.
• Connect the equipment into an outlet on a circuit different from that to which
the receiver is connected.
• Consult the dealer or an experienced radio/TV technician for help.
This device complies with Part 15 of FCC Rules.
Operation is subject to the following two conditions:
(1) This device may not cause harmful interference, and
(2) This device must accept any interference received, including interference
that may cause undesired operation.
FCC RF Radiation Exposure Statement:
This equipment complies with FCC RF radiation exposure limits set forth for an
uncontrolled environment. This equipment should be installed and operated with a
minimum distance of 20 centimeters between the radiator and your body.
29
Asoka™ PlugLink™ PL Cable/DSL Router Manual
Appendix E: Limited Warranty
Asoka USA warrants that (a) the hardware components of the Asoka product will be free from
defects in materials and workmanship under normal use for one (1) year from the date of purchase, and (b) the software components will perform substantially in accordance with Asoka's
published specifications for ninety (90) days from the date of purchase, but does not warrant
that the software will be error-free or free of all defects. If a defect or nonconformance exists
during the applicable warranty period, at its option Asoka will repair or replace the defective
parts or nonconforming software using new or refurbished replacement parts or media at no
additional charge to you. This warranty extends only to you, the original purchaser and is not
transferable to any subsequent purchasers. Warranty is void on products purchased or used
outside the United States and Canada.
Obtaining Warranty Service
If you purchased an Asoka product in the United States or Canada, you are entitled to repair
service during the applicable warranty period subject to the following terms.:
• You must return the product at your expense in its original shipping and packing
materials. A description of the problem must be included with the returned product.
• An RMA number obtained from Asoka USA must be placed on the exterior shipping container. An RMA number may be obtained by contacting Asoka USA at (650)
591-3189 (Monday through Friday, 9:00 a.m. to 5:00 p.m. PST, excluding holidays)
or by e-mail at [email protected] within the warranty period.
• You must provide Asoka with your original invoice as proof of place and date of
purchase.
The repaired or replaced product will be returned to you with shipping charges pre-paid for
shipments made inside the continental U.S. Asoka will not ship products outside the United
States or Canada.
Exclusions and Limitations
This Limited Warranty does not extend to any product not purchased or licensed from Asoka
or its authorized resellers or retailers. This Limited Warranty does not apply: (a) to damage
caused by accident, abuse, misuse, misapplication, unusual electrical fluctuation, or improper
transportation upon return to Asoka; (b) if you use parts not manufactured or sold by Asoka;
or (c) to damage caused by modification of the product or as a result of service by anyone
other than Asoka or an Asoka-authorized service provider.
30
Asoka™ PlugLink™ PL Cable/DSL Router Manual
EXCEPT AS PROVIDED IN THIS LIMITED WARRANTY STATEMENT, NEITHER ASOKA NOR ITS
THIRD PARTY SUPPLIERS MAKE ANY OTHER WARRANTIES AS TO THE PRODUCTS AND SERVICES AND THE PRODUCTS AND SERVICES ARE PROVIDED "AS IS" ANDWITH ALL FAULTS.
ASOKA AND ITS THIRD PARTY SUPPLIERS DISCLAIM ALL OTHER WARRANTIES, WHETHER
EXPRESSED OR IMPLIED, STATUTORY OR OTHERWISE, INCLUDING, BUT NOT LIMITED TO,
THE IMPLIED WARRANTIES OF MERCHANTABILITY, FITNESS OF A PARTICULAR PURPOSE,
TITLE, NON-INFRINGEMENT AND ACCURACY. ASOKA’S ENTIRE LIABILITY, AND YOUR EXCLUSIVE REMEDY HEREUNDER, IS LIMITED TO THE PRODUCT AS SET FORTH HEREIN OR A
REFUND OF THE PURCHASE PRICE.
Some states do not allow warranty limitations. In such states, the exclusion or limitations of
this Limited Warranty may not apply to you and, in such cases, Asoka assertsthe minimum
warranty permitted by law.
TO THE MAXIMUM EXTENT PERMITTED BY LAW, NETIHER ASOKA NOR ITS THIRD PARTY
SUPPLIERS SHALL BE LIABLE FOR ANY SPECIAL, INCIDENTAL, INDIRECT, OR CONSEQUENTIAL DAMAGES OF ANY KIND WHATSOEVER, NO MATTER HOW DENOMINATED (INCLUDING,
BUT NOT LIMITED TO, DAMAGES FOR LOSS OF PROFITS OR CONFIDENTIAL OR OTHER
INFORMATION, FOR BUSINESS INTERRUPTION, FOR PERSONAL INJURY, FOR LOSS OF PRIVACY, FOR FAILURE TO MEET ANY DUTY INCLUDING OF GOOD FAITH OR OF REASONABLE
CARE, FOR NEGLIGENCE, AND FOR ANY OTHER PUCUNIARY OR OTHER LOSS WHATSOEVER) ARISING OUT OF OR INANY WAY RELATED TO THE USE OF OR INABILITY TO USE THE
PRODUCT, THE PROVISION OR FAILURE TO PROVIDE SUPPORT SERVICES, OR OTHERWISE
IN CONNECITON WITH ANY PROVISION OF THE ASOKA TERMS ANDCONDITIONS OF SALE
OR AN END USER LICENSE AGREEMETN, EVEN IN THE EVENT OF THE FALUT, TORT (INCLUDING NEGLIGENCE), STRICT LIABILITY, BREACH OF CONTRACT, OR BREACH OF WARRANTY
OF ASOKA OR ANY SUPPLIER, AND REGARDLESS OF WHETHER OR NOT ASOKA HAS BEEN
ADVISED OF THE POSSIBLITY OF SUCH DAMAGES.
31
Asoka™ PlugLink™ PL Cable/DSL Router Manual
NOTES
32
Making Connectivity a Reality!
Asoka USA Corporation
820 American Street
San Carlos, CA 94070
Main: (650) 591-3236
Support: (650) 591-3189
Fax: (650) 591-3782
Email: [email protected]
http://www.asokausa.com