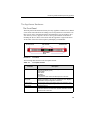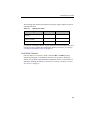
1
TM
InterScan Gateway Security Appliance M-Series
Deployment Guide
Trend Micro Incorporated reserves the right to make changes to this document and to the
products described herein without notice. Before installing and using the software, please
review the readme files, release notes (if any), and the latest version of the Getting Started
Guide, which are available from Trend Micro's Web site at:
http://www.trendmicro.com/download/documentation/
Trend Micro, the Trend Micro t-ball logo, IntelliTrap, InterScan, ScanMail, MacroTrap, and
TrendLabs are trademarks, registered trademarks, or servicemarks of Trend Micro,
Incorporated. All other product or company names may be trademarks or registered
trademarks of their owners.
Copyright© 2007 Trend Micro Incorporated. All rights reserved.
Document Part No. SAEM13093/70226
Release Date: March 2007
Protected by U.S. Patent No. 5,623,600 and pending patents.
The Trend Micro InterScan Gateway Security Appliance M-Series Deployment Guide is
intended to provide detailed information about deploying the hardware device in your
network. Read it before using the hardware.
Additional information about how to use specific features within the software is available in
the online help file, in the Trend Micro InterScan Gateway Security Appliance M-Series
Administrator’s Guide, and the online Knowledge Base at the Trend Micro Web site.
Trend Micro is always seeking to improve its documentation. If you have questions,
comments, or suggestions about this or any other Trend Micro documents, please contact us at
[email protected]. Your feedback is always welcome. Please evaluate this documentation
on the following site:
http://www.trendmicro.com/download/documentation/rating.asp
Contents
Contents
About This Manual
Audience .............................................................................................. iv
About This Deployment Guide ............................................................ iv
Document Conventions ..........................................................................v
Chapter 1:
Introducing InterScan Gateway Security Appliance
Trend Micro InterScan Gateway Security Appliance ........................ 1-2
Package Contents ............................................................................... 1-3
The Appliance Hardware ............................................................... 1-5
The Front Panel ........................................................................... 1-5
The Back Panel ........................................................................... 1-8
Chapter 2:
Mounting and Basic Deployment
Deployment Overview ....................................................................... 2-2
Stage 1. Mounting the Appliance ............................................... 2-2
Stage 2. Preconfiguring the Appliance ....................................... 2-3
Stage 3. Managing the Appliance ............................................... 2-3
Review Device Environmental Specifications ........................... 2-3
Decide on the Type of Mounting ................................................ 2-3
Mount an InterScan Appliance with a Rack Kit ......................... 2-4
Recommended Tools ..................................................................... 2-4
Four-Post Rack Mounting ........................................................... 2-5
Rack Kit ...................................................................................... 2-6
Preparing and Attaching the Slide Rails to the Appliance .......... 2-8
Installing the Slide Sets ............................................................. 2-11
Mounting the Appliance on the Rack ....................................... 2-14
Attaching the Rubber Feet for Freestanding Installation ............. 2-15
Basic Deployment ............................................................................ 2-15
Single Segment Deployment ....................................................... 2-16
Multiple Segment Deployment .................................................... 2-16
Additional Considerations for Multiple Segment Networks .... 2-17
Deployment Notes ....................................................................... 2-17
i
Trend Micro™ InterScan™ Gateway Security Appliance M-Series Deployment Guide
Chapter 3:
Advanced Deployment Options
Overview ............................................................................................3-2
Deployment Topologies .....................................................................3-4
Deploying in a Single Network Segment .......................................3-4
Deploying in a Network with Multiple Segments ..........................3-5
Advanced Deployment Scenarios .......................................................3-9
Operation Modes ............................................................................3-9
Transparent Proxy Mode ...........................................................3-10
Fully Transparent Proxy Mode .................................................3-11
Deployment in a DMZ Environment ...........................................3-12
Failover Deployment .................................................................3-14
Failover Deployment Scenario ..................................................3-15
LAN Bypass and Link State Failover Settings ..........................3-16
Deployment Recommendations ........................................................3-17
Deployment Issues ............................................................................3-18
Chapter 4:
Preconfiguring InterScan Gateway Security Appliance
Preparing for Preconfiguration ...........................................................4-2
Failopen Considerations (LAN bypass) ......................................4-2
Preconfiguring the Appliance .............................................................4-2
Assigning an IP Address ................................................................4-3
Connecting to the Network ............................................................4-4
Gather Device Network IP Information ......................................4-5
Choose a Preconfiguration Method ................................................4-5
Settings Configurable from the Preconfiguration Console .........4-6
Settings Configurable from the LCM Module ............................4-7
Using the Preconfiguration Console to Set Device Settings ..............4-8
Interfacing with the Preconfiguration Console ..............................4-8
Logging On to the Preconfiguration Console ..............................4-13
Preconfiguration Console Controls ..............................................4-14
Configuring Device Settings ........................................................4-15
Setting the Interface Speed and Duplex Mode .............................4-16
Exiting the Preconfiguration Console ..........................................4-16
Configuring InterScan Gateway Security Appliance
Using the LCM Module ........................................................4-17
ii
Contents
Chapter 4:
Preconfiguring InterScan Gateway Security
Appliance — continued
Connecting to the Network .............................................................. 4-19
Testing for Device Connectivity ...................................................... 4-19
Obtaining the Activation Code ........................................................ 4-20
Configuring InterScan Gateway Security Appliance ....................... 4-21
Testing the Appliance Connectivity ............................................ 4-21
Activating the Appliance ............................................................. 4-21
Chapter 5:
Troubleshooting and FAQs
Troubleshooting ................................................................................. 5-2
LAN Bypass ................................................................................... 5-4
Link State Failover ........................................................................ 5-5
Enabling or Disabling LAN Bypass and Link State Failover ..... 5-6
Accessing the Preconfiguration Console .................................... 5-6
Frequently Asked Questions .............................................................. 5-7
Contacting Technical Support ............................................................ 5-9
Appendix:
Specifications and Environment
Hardware Specifications ................................................................... A-2
Dimensions and Weight .................................................................... A-2
Power Requirements and Environment ............................................. A-3
Index
iii
Trend Micro™ InterScan™ Gateway Security Appliance M-Series Deployment Guide
List of Figures
Chapter 1. Introducing InterScan Gateway Security Appliance
Figure 1-1. InterScan Gateway Security Appliance package contents ............................1-3
Figure 1-2. Front Pane......................................................................................................1-6
Figure 1-3. LCM module features....................................................................................1-7
Figure 1-4. Back panel .....................................................................................................1-8
Figure 1-5. Port indicators..............................................................................................1-10
Chapter 2. Mounting and Basic Deployment
Figure 2-1. The appliance deployment overview chart....................................................2-2
Figure 2-2. InterScan appliance rack kit components ......................................................2-7
Figure 2-3. Slide front, back, and side view.....................................................................2-8
Figure 2-4. Rail lock device .............................................................................................2-9
Figure 2-5. Connecting the rail to the device ...................................................................2-9
Figure 2-6. Image of the mounting post and slot ...........................................................2-10
Figure 2-7. Mounting post inserted into mounting slot..................................................2-11
Figure 2-8. Slide set partially attached to the post of 4-post cabinet .............................2-12
Figure 2-9. Slide adjustment screw and nut for adjusting slide length ..........................2-13
Figure 2-10. The appliance with rail attached................................................................2-14
Figure 2-11. Basic deployment scenario - single segment network...............................2-16
Figure 2-12. Basic deployment scenario - multiple segment network ...........................2-16
Chapter 3. Advanced Deployment Options
Figure 3-1. Typical network topology before deploying InterScan Gateway Security
Appliance.....................................................................................................3-2
Figure 3-2. The most common deployment of InterScan Gateway Security
Appliance.....................................................................................................3-3
Figure 3-3. InterScan Gateway Security Appliance and clients deployed in the same
network segment..........................................................................................3-4
Figure 3-4. Problem: The appliance and clients deployed in different network segments,
with router as default gateway of the appliance and no
static routes set ............................................................................................3-6
iv
Contents
Chapter 3. Advanced Deployment Options — continued
Figure 3-5. Solution: Static route settings tell the appliance where to forward traffic
from clients deployed, even though they are in a different network
segment ....................................................................................................... 3-7
Figure 3-6. You can set static routes from the Web console (Administration >
IP Address Settings, Static Routes tab)....................................................... 3-8
Figure 3-7. In transparent proxy mode, the client's IP address becomes that of
the appliance.............................................................................................. 3-10
Figure 3-8. In fully transparent proxy mode, the IP address of the client
is unchanged.............................................................................................. 3-12
Figure 3-9. Deployment in a DMZ environment (requires two appliances).................. 3-13
Figure 3-10. Two InterScan appliances arranged in a link state
failover deployment .................................................................................. 3-15
Figure 3-11. Recommended position of InterScan Gateway Security Appliance
and other network devices in single- or multi-segment environments ..... 3-17
Figure 3-12. If the proxy server is deployed on the protected-network side
of the appliance, packet looping may occur.............................................. 3-18
Chapter 4. Preconfiguring InterScan Gateway Security Appliance
Figure 4-1. HyperTerminal display settings .................................................................... 4-9
Figure 4-2. The HyperTerminal Connect To screen...................................................... 4-10
Figure 4-3. HyperTerminal COM Properties screen ..................................................... 4-11
Figure 4-4. The appliance Preconfiguration console login screen................................. 4-12
Figure 4-6. The appliance Preconfiguration console main menu, accessed with
HyperTerminal .......................................................................................... 4-13
Chapter 5. Troubleshooting and FAQs
Figure 5-1. Preconfiguration console output screen when initializing a hard disk
that is not formatted or is improperly installed (the second part
of the re-initialization process).................................................................... 5-3
Figure 5-2. Preconfiguration console output screen when the appliance
has finished formatting the hard disk .......................................................... 5-3
v
Trend Micro™ InterScan™ Gateway Security Appliance M-Series Deployment Guide
List of Tables
About This Manual
Table 1. Conventions used in the Trend Micro InterScan Gateway Security Appliance
M-Series documentation ............................................................................... v
Chapter 1. Introducing InterScan Gateway Security Appliance
Table 1-1. The appliance package contents and descriptions .........................................1-4
Table 1-2. Front panel elements ......................................................................................1-6
Table 1-3. InterScan Gateway Security Appliance LED indicators ................................1-7
Table 1-4. Back panel elements ......................................................................................1-9
Table 1-5. Port indicator status .....................................................................................1-10
Chapter 2. Mounting and Basic Deployment
Table 2-1. InterScan appliance rack kit contents ............................................................2-6
Chapter 4. Preconfiguring InterScan Gateway Security Appliance
Table 4-1. Comparison of console preconfiguration features .........................................4-5
Chapter 5. Troubleshooting and FAQs
Table 5-1. LED indicator status ......................................................................................5-5
Chapter A. Specifications and Environment
Table A-1. Hardware specifications ............................................................................... A-2
Table A-2. InterScan Gateway Security Appliance dimensions and weight ................. A-2
Table A-1. Appliance power requirements and environmental specifications .............. A-3
vi
Contents
vii
Trend Micro™ InterScan™ Gateway Security Appliance M-Series Deployment Guide
viii
Introduction
About This Manual
Welcome to the Trend Micro InterScan Gateway Security Appliance M-Series
Deployment Guide. This book contains information about the tasks involved in
mounting and deploying the Trend Micro InterScan Gateway Security Appliance. Use
it in conjunction with the Trend Micro InterScan Gateway Security Appliance
M-Series Administrator’s Guide, which contains guidance on administering the appliance.
ix
Trend Micro™ InterScan™ Gateway Security Appliance M-Series Deployment Guide
Audience
This book is intended for network administrators who are preparing to mount and
deploy the InterScan Gateway Security Appliance. The manual assumes a working
knowledge of security systems and devices, as well as network administration.
About This Deployment Guide
The InterScan Gateway Security Appliance M-Series Deployment Guide discusses
the following topics:
Chapters
Chapter 1, Introducing InterScan Gateway Security Appliance
Chapter 2, Mounting and Basic Deployment
Chapter 3, Advanced Deployment Options
Chapter 4, Preconfiguring InterScan Gateway Security Appliance
Chapter 5, Troubleshooting and FAQs
Index
x
About This Manual
Document Conventions
To help you locate and interpret information easily, this guide uses the following
conventions:
TABLE 1. Conventions used in the Trend Micro InterScan Gateway Security
Appliance M-Series documentation
CONVENTION
DESCRIPTION
ALL CAPS
Acronyms, abbreviations, and names of certain commands and keys on the keyboard
Bold
Menus and menu commands, command buttons,
tabs, options, and ScanMail tasks
Italics
References to other documentation
Monospace
Examples, sample command lines, program code,
Web URL, file name, and program output
Note:
Configuration notes
Tip:
Recommendations
WARNING!
Reminders about actions or configurations to avoid
INT
InterScan Gateway Security Appliance interface connected to the protected network
EXT
InterScan Gateway Security Appliance interface connected to the external or public network (usually the
Internet)
xi
Trend Micro™ InterScan™ Gateway Security Appliance M-Series Deployment Guide
xii
Chapter 1
Introducing InterScan Gateway
Security Appliance
This chapter introduces InterScan™ Gateway Security Appliance and provides a
description of its components.
The topics discussed in this chapter include:
•
Trend Micro InterScan Gateway Security Appliance on page 1-2
•
Package Contents on page 1-3
•
The Appliance Hardware on page 1-5
•
LCM Module on page 1-6
•
The Back Panel on page 1-7
1- 1
Trend Micro™ InterScan™ Gateway Security Appliance M-Series Deployment Guide
Trend Micro InterScan Gateway Security
Appliance
Trend Micro™ InterScan™ Gateway Security Appliance delivers the most complete
all-in-one protection from viruses, spyware, spam and other threats at the Internet
gateway. The leading gateway antivirus vendor, Trend Micro, provides this
easy-to-deploy, worry-free appliance to block malware, stop inappropriate content or
email, and filter harmful URLs.
The appliance saves you time and money by:
•
Providing the tools to assist you to more effectively achieve regulatory
compliance
•
Preserving network resource availability and reducing spam so your employees
can be more productive
•
Integrating multiple products into one management console
Damage Cleanup Services dramatically reduces administrative effort, cost, and
downtime caused by spyware and viruses. Additionally, IntelliTrap heuristic
detection and Outbreak Prevention Services provide increased defense against
emerging threats.
1- 2
Introducing InterScan Gateway Security Appliance
Package Contents
Use the package contents checklist that came with the appliance to verify that the box
contains the complete set of components. Figure 1-1 displays the contents of the
shipping box.
FIGURE 1-1.
InterScan Gateway Security Appliance package contents
1- 3
Trend Micro™ InterScan™ Gateway Security Appliance M-Series Deployment Guide
TABLE 1-1.
Quantity
The appliance package contents and descriptions
Item
Description
1 unit
InterScan Gateway
Security Appliance
The InterScan Gateway Security Appliance
1 piece
Power cord
Supplies power to an InterScan Gateway Security
Appliance device (length is 79in/200cm)
1 piece
Ethernet cable (RJ-45
cable)
Connects a device to a computer used during Rescue Mode (length is 39in/100cm)
1 piece
Console cable (DB9)
Connects the appliance to the computer used during
preconfiguration (length is 79in/200cm)
1 set
Rack accessories
Mounts the appliance to a standard 19-inch rack cabinet
4 each
Rubber Mounting
Feet
The four (4) rubber feet are used for a freestanding
installation of the appliance. The rubber feet come
pre-die-cut on an adhesive sheet.
1 CD
Trend Micro Solutions CD for InterScan
Gateway Security
Appliance
The CD containing the appliance tools and available
documentation
The PDF documentation includes the:
•
Trend Micro InterScan Gateway Security
Appliance Getting Started Guide
The appliance tools include the:
•
1- 4
1 book
InterScan Gateway
Security Appliance
Getting Started Guide
1 sheet
InterScan Gateway
Security Appliance
Safety Sheet
1 sheet
InterScan Gateway
Security Appliance
Item Checklist Card
2 sheets
Product Support Information Stickers
Application Firmware Flash Utility
Printed versions of the documents
Introducing InterScan Gateway Security Appliance
The Appliance Hardware
The Front Panel
The front panel of the InterScan Gateway Security Appliance contains two (2) thumb
screws and a removable bezel for holding it in a fixed position in a rack cabinet. Use
these screws only in conjunction with the rail mounting kit. (See Trend Micro InterScan Gateway Security Appliance M-Series Getting Started Guide for details on
mounting the device.) These screws alone will not support the weight of the device.
At the center of the bezel is the Liquid Crystal Display (LCD) Module.
LCD module
Thumb screw
Thumb screw
Removable
bezel
FIGURE 1-2.
Front Pane
The following table describes each front panel element.
TABLE 1-2.
Front panel elements
Front Panel
Elements
Description
LCD Module
The LCD Module comprise the following items:
Liquid Crystal Display (LCD)
Control panel
Reset button
UID button
LED indicators
The rest of the table contains the descriptions for each item
Liquid Crystal Display (LCD)
A 2.6in x 0.6in (65mm x 16mm) dot display LCD that is capable of
displaying messages in two rows of 16 characters each. Displays
device status and preconfiguration instructions
Control panel
One five-button control panel that provides LCD navigation. Used
for inputting data during preconfiguration
Reset button
Restarts the device
LED Indicators 1 to 5
Indicates the Power, UID, System, Hard Disk, and Outbreak status
Power and UID have one color each; System, Hard Disk, and Outbreak have two colors each
1- 5
Trend Micro™ InterScan™ Gateway Security Appliance M-Series Deployment Guide
TABLE 1-2.
Front panel elements
Front Panel
Elements
Description
UID button
Unique ID button that illuminates a blue LED on the front and rear
of the device, which helps administrators locate the device for trouble-shooting or maintenance
Bezel
Detachable casing that covers and protects the front panel
Thumb screws
Used for fixed mounting in any standard 19-inch rack
LCM Module
The LCD and control panel elements are collectively referred to as the LCM module.
LCD
Reset Button
LED Indicators
FIGURE 1-3.
UID Button
Control Panel
LCM module features
LED Indicators
InterScan Gateway Security Appliance has five (5) light-emitting diodes (LEDs) that
indicate the POWER, UID, SYSTEM, HARD DISK, and OUTBREAK status.
The following table shows the possible behavior for each LED element:
TABLE 1-3.
LED
Name
POWER
InterScan Gateway Security Appliance LED indicators
Icon
State
Yellow, steady
Off (no color)
1- 6
Description
The appliance is operating normally
The appliance is off
Introducing InterScan Gateway Security Appliance
TABLE 1-3.
LED
Name
InterScan Gateway Security Appliance LED indicators (Continued)
Icon
UID
SYSTEM
HARD DISK
OUTBREAK
State
Description
Blue, steady
The UID LED lights up when the UID
button is pressed
Off (no color)
The UID LED is not illuminated (default
is off)
Red, flashing
The appliance is booting
Red, steady
Power-On Self-Test (POST) error
Yellow, flashing
The appliance OS and applications are
booting
Yellow, steady
The appliance program file (firmware)
encountered a critical error
Green, steady
The appliance program file (firmware) is
ready
Green, steady
The appliance hard disk is operating
normally
Red, steady
Hard disk has failed and the appliance
is operating in diskless mode
Green, steady
Outbreak Prevention Services (OPS) is
disabled
Red, flashing
OPS is enabled
The Back Panel
The back panel of the appliance contains a power receptacle, power switch, USB
ports, serial connection, fan vent, and LAN ports.
1- 7
Trend Micro™ InterScan™ Gateway Security Appliance M-Series Deployment Guide
AC power receptacle
Serial connection
Fan vent
FIGURE 1-4.
Power switch
MGT port
UID indicator
USB ports
EXT port
INT port
Back panel
The following table describes each back panel element.
TABLE 1-4.
Back panel elements
Element
Description
AC power receptacle
Connects to a power outlet and InterScan Gateway Security Appliance using the power cord (included in the package)
Power switch
Turns the device on and off
DB9 Serial Connection
Connects to a computer’s serial port with a DB9 type connection to
perform preconfiguration
Ports MGT, EXT,
INT
Copper Gigabit LAN port designated as the MANAGEMENT
EXTERNAL or INTERNAL port depending on the Operation Mode
Fan Vent
Cooling vent for three (3) system fans
UID LED and
UID Button
LED at the back panel of InterScan Gateway Security Appliance.
When a user presses the UID button, the UID LED illuminates. The
illuminated UID LED allows administrators to easily located InterScan Gateway Security Appliance for troubleshooting or maintenance
USB Ports
USB ports, reserved for future releases
Port Indicators
InterScan Gateway Security Appliance has three (3) user-configurable copper-based
Ethernet ports. Each Ethernet port has two (2) indicator lights that allow you to determine the port’s current state and duplex speed.
1- 8
Introducing InterScan Gateway Security Appliance
LED 2
FIGURE 1-5.
LED 1
Port indicators
1- 9
Trend Micro™ InterScan™ Gateway Security Appliance M-Series Deployment Guide
The following table describes the status of the port indicators when the device is
operating normally.
TABLE 1-5.
Indicator
Number
LED 1
LED 2
Port indicator status
Purpose
Port activity
Duplex speed
State
Description
Light off
The appliance is not
receiving data
Green, flashing
Receiving data
Light off
10mbps LED
Green, steady
100mbps LED
Yellow, steady
1000mbps LED
To understand how the port indicators work when InterScan Gateway Security
Appliance is operating in LAN bypass mode, see “LAN Bypass” in the InterScan
Gateway Security Appliance Online Help.
Note:
1-10
Loss of power to the InterScan Gateway Security Appliance automatically resets
the appliance to bypass mode, so that all data passes through.
Chapter 2
Mounting and Basic Deployment
Before beginning to configure an InterScan Gateway Security Appliance, plan how
to integrate it into your network. Determine which topology it will support and the
type of operation mode it will use.
This chapter explains how to plan for the deployment of the appliance based on
supported operation modes. It also provides deployment scenarios to facilitate
understanding of the various ways that the appliance can help protect the network.
This chapter contains the following topics:
•
Deployment Overview on page 2-2
•
Mounting an InterScan Gateway Security Appliance on page 2-4
•
Basic Deployment on page 2-16
2- 1
Trend Micro™ InterScan™ Gateway Security Appliance M-Series Deployment Guide
Deployment Overview
Follow the three stages of deployment to successfully install an InterScan appliance.
Stage 1. MOUNT the appliance
Decide how best to mount the appliance
1 Consider environmental factors
2 Mount the device
(See page 2-4)
Stage 2. PRECONFIGURE the appliance
1 Perform initial preconfiguration tasks
2 Perform preconfiguration
3 Connect the device to your network
(See page 4-2)
Stage 3. MANAGE the appliance
1 Deploy components
2 Configure basic settings
3 View and analyze antivirus information
(See InterScan Gateway Security Appliance Administrator’s Guide)
FIGURE 2-1.
The appliance deployment overview chart
Stage 1. Mounting the Appliance
Decide how best to mount InterScan Gateway Security Appliance:
2- 2
1.
Review Device Environmental Specifications on page 2-4
2.
Decide on the Type of Mounting on page 2-4
3.
Mount an InterScan Appliance with a Rack Kit on page 2-4
Mounting and Basic Deployment
Stage 2. Preconfiguring the Appliance
Perform the following preconfiguration tasks:
1.
Preparing for Preconfiguration on page 4-2
2.
Choose a Preconfiguration Method on page 4-5
3.
Connecting to the Network on page 4-17
Stage 3. Managing the Appliance
Manage the appliance from the Web console by performing the following tasks:
1.
Configure basic settings, including scan options, Network Outbreak Monitor,
exception lists, and component updates
2.
View and analyze security content information, including detailed summaries of
clients on the protected network, security logs, and event logs
Note:
This Deployment Guide discusses the first two stages of deployment. Stage 1,
Mounting the Appliance, is covered in this chapter, and stage 2, Preconfiguring the
Appliance, is covered in chapter 3. Refer to the InterScan Gateway Security
Appliance Administrator’s Guide or Online Help for instructions relating to
stage 3, Administering the Appliance.
2- 3
Trend Micro™ InterScan™ Gateway Security Appliance M-Series Deployment Guide
Mounting an InterScan Gateway Security
Appliance
Review Device Environmental Specifications
When deciding on a location for the device, consider the following:
•
Device dimensions and weight, see Appendix: Dimensions and Weight page
A-2
•
Environmental considerations, see Appendix: Power Requirements and
Environment page A-3
Decide on the Type of Mounting
The appliance can be mounted on a rack or on any stable, flat surface. Decide what
type of mounting works best for your environment.
•
To mount the appliance on a 19-inch rack using the rack set, see Mount an
InterScan Appliance with a Rack Kit on page 2-4
•
To mount the appliance on a flat surface using the rubber feet, see Attaching the
Rubber Feet for Freestanding Installation on page 2-15
WARNING! The appliance cannot be mounted on a two-post rack cabinet.
Mount an InterScan Appliance with a Rack Kit
If you are mounting more than one device, mount the first device in the lowest
available position in the rack.
Mount the appliance:
•
In a standard 19-inch four-post rack cabinet
The appliance requires 1 rack unit (RU) of vertical space in the rack.
WARNING! Ensure that the fan vent is not blocked.
2- 4
Mounting and Basic Deployment
Recommended Tools
Trend Micro recommends using the following tools to mount the appliance:
•
#2 Phillips-head screwdriver
•
Standard adjustable wrench or standard slip-joint pliers
Four-Post Rack Mounting
You can mount the appliance in a 19-inch standard cabinet rack.
Note:
Ensure that the rack cabinet side panel is longer than 25 inches (635mm).
To mount the appliance in a four-post rack cabinet:
WARNING! Do not install rack kit components designed for another system. Use only the
rack kit for the appliance. Using the rack kit for another system may damage
the device and cause injury to yourself and others.
1.
Verify the rack kit box contents.
2.
Attach the rails to the sides of the appliance.
3.
Attach the slide sets to the posts of the rack cabinet.
4.
Mount the appliance in the rack.
2- 5
Trend Micro™ InterScan™ Gateway Security Appliance M-Series Deployment Guide
Rack Kit
TABLE 2-1.
Quantity
2 slide
sets
(1 slide
and 1 rail
per set)
InterScan appliance rack kit contents
Item
Slide and rail sets
Description
Secure the device (fixed mount) or use to secure and
allow the device to slide in and out of a four-post rack
(sliding mount)
Note: The rail is assembled with the slide when the
appliance is shipped. Remove the rail from
the slide before mounting a device
8 pieces
10 pieces
Cage screws
Cage nuts
Secures the slide sets to the front and back rack posts
Note: Depending on the type of rack, the Cage nuts
may not be needed
2 pieces
2- 6
Rail screws
Secures the rails to the side panels of the device (one
per side)
Mounting and Basic Deployment
Slide (back-side view)
Rail (front-side view)
Cage screw
Cage nut
FIGURE 2-2.
InterScan appliance rack kit components
2- 7
Trend Micro™ InterScan™ Gateway Security Appliance M-Series Deployment Guide
Preparing and Attaching the Slide Rails to the Appliance
This task involves separating the rail from the slide set and attaching it to the side of
the device.
To prepare and attach the slide rails to the device:
1.
Holding the rail and slide set horizontally, with the back of the slide set facing
you, detach the rail from the slide by pulling the rail lock to the right.
Slide (back-side view)
Slide (side view)
Slide (front-side view)
FIGURE 2-3.
2- 8
Slide front, back, and side view
Mounting and Basic Deployment
Rail locking
device
Slide - back-side
Rail - front-side
FIGURE 2-4.
Note:
2.
Rail lock device
The rail lock is a white plastic sliding lever. The rail lock will be located on
the left side of the rail, facing you.
Attach a rail to the device side panel by placing the backside of the rail against
the side of the device.
Mounting post
Mounting slot
FIGURE 2-5.
Connecting the rail to the device
2- 9
Trend Micro™ InterScan™ Gateway Security Appliance M-Series Deployment Guide
There is a lip at one end of the rail. Make sure the end of the rail containing the
lip is towards the front of the device.
Mounting slot
Rail (front-side view)
Lip - front of rail
Mounting post
FIGURE 2-6.
Image of the mounting post and slot
On each side of the device are two metal mounting posts. Make sure that the
keyhole-shaped holes (mounting slots) in the rail match up with the mounting
posts, and then firmly slide the rail until the mounting posts are securely locked
into the mounting slots. See Figure 2-7. below.
2-10
Mounting and Basic Deployment
Mounting post
Mounting slot
FIGURE 2-7.
Mounting post inserted into mounting slot
3.
Use one (1) slide screw to secure the rail to the device.
4.
Repeat steps 1 through 3 for the other side.
Installing the Slide Sets
This task involves installation of the assembled slide sets to a four-post rack.
To install the slide sets:
1.
Remove the rack doors if the rack doors are still covering the rack slots where
you want to mount the appliance.
Tip:
2.
Refer to the documentation provided with the rack cabinet for details on how
to remove the rack doors.
Starting with the rack front post, hold and position the slide set lip to align with
the holes of the cage nuts.
2-11
Trend Micro™ InterScan™ Gateway Security Appliance M-Series Deployment Guide
Figure 2-8. is an image of a slide set that has been lined up with the cage nuts and
partially attached with one of the cage screws.
Cage screw used to attach the slide
Cage nuts
Slide set mounting hole
FIGURE 2-8.
Tip:
2-12
Slide set partially attached to the post of 4-post cabinet
An InterScan Gateway Security Appliance device occupies 1 RU (1.70in or
4.32cm, three rack holes) of vertical space in the rack.
3.
Insert a cage screw into the top-most hole of the slide set and tighten.
4.
Insert a cage screw into the bottom-most hole of the slide set and tighten.
5.
At the back of the cabinet, pull back the slide set until the mounting holes align
with their respective cage nut holes.
Mounting and Basic Deployment
Figure 2-9. is an image of a slide set and a close-up of the slide nut and screw that
can be loosened to adjust the length of the slide set.
Slide adjustment nuts
Slide adjustment screws
FIGURE 2-9.
Slide adjustment screw and nut for adjusting slide length
6.
Repeat steps 2 to 4 to secure the remaining slide set on the other side of the rack.
7.
Ensure that the slide sets are installed at the same level on each side of the rack.
2-13
Trend Micro™ InterScan™ Gateway Security Appliance M-Series Deployment Guide
Mounting the Appliance on the Rack
This task involves installing the device on the four-post rack cabinet.
Note:
Because of the size and weight of the appliance, never attempt to mount the device
on the rack by yourself.
To mount the appliance on the rack:
2-14
1.
Pull the two slides out of the rack until the release latches lock in a fully extended
position.
2.
Lift the device into position in front of the extended slides.
3.
Holding the top and bottom panels, align and fit the side panel rails on the left
and right slide sets.
Mounting and Basic Deployment
4.
Push the device, while holding the rail release open, into the rack until the front
of the device is flush against the front rack posts.
Rail release—allows
the appliance to be
slid out of cabinet
Thumb screw —used to stabilize
the device in a rack
FIGURE 2-10. The appliance with rail attached
5.
Twist the sun screws until tight to prevent the device from sliding in and out of
the rack.
Attaching the Rubber Feet for Freestanding Installation
For freestanding installation, ensure that the device has at least 2-inch (5.08cm) of
clearance on each side to allow for adequate airflow and cooling.
Use the pre-die-cut rubber feet that came with the device for a freestanding
installation. The rubber feet come pre-die-cut on an adhesive sheet. Remove each
rubber foot as needed being careful not to touch the adhesive surface. Stick the
rubber feet to the bottom of the device within 1-inch of each corner.
2-15
Trend Micro™ InterScan™ Gateway Security Appliance M-Series Deployment Guide
Basic Deployment
As shown in figure 2-11, Basic deployment scenario - single segment network, on
page 2-16, it is necessary to include a LAN switch, router, or hub after the appliance
in the basic deployment scenario. Including a router or switch after the appliance is
necessary because the appliance itself is not designed to work as a router or switch.
The appliance can be installed on a network that contains Ethernet devices such as
hubs, switches, and routers. Trend Micro recommends deploying the appliance
between a firewall that leads to the public network and a router, switch, or hub that
leads to the protected segment of the Local Area Network (LAN).
A router, switch, or hub is connected to the appliance internal (INT) port, creating a
protected network segment, and the connection to the external (EXT) port leads to the
public network. You can deploy the appliance on a single segment or multiple
segment network.
Single Segment Deployment
The image below describes just one example of how the appliance can be used to protect a network consisting of a single segment. For more advanced deployment, see see
Advanced Deployment Options on page 3-1
Internet
The appliance
Firewall
Segment
Switch
Hub
FIGURE 2-11. Basic deployment scenario - single segment network
2-16
Mounting and Basic Deployment
Multiple Segment Deployment
The image below describes just one example of how the appliance can be used to protect a network with multiple segments.
Internet
The appliance
Router
Firewall
Segments A, B, C
FIGURE 2-12. Basic deployment scenario - multiple segment network
Additional Considerations for Multiple Segment Networks
When deploying the appliance to a multiple segment network, consider the following:
•
The default gateway must be located on the external (EXT) side of the appliance
•
Use the same default gateway setting for both the appliance and the router that
connects the device to the segments.
•
Using the appliance Web console, add the static routes for each segment to the
appliance.
•
Disable the proxy settings from the HTTP URL Filtering screen if traffic is not
passing through the appliance.
For more detailed information on deploying to a multisegment environment, see
Deploying in a Network with Multiple Segments on page 3-5.
2-17
Trend Micro™ InterScan™ Gateway Security Appliance M-Series Deployment Guide
Deployment Notes
Consider the following when planning for to deploy the InterScan appliance:
•
•
Configure all network devices to ensure that all traffic to and from the protected
network goes through the appliance.
To protect an organization from network threats, position appliances at key
places on your network. The appliance should be able to scan all network traffic
to prevent, detect, or contain threats.
The appliance supports the following port speed and duplex mode settings:
• 10Mbps x half-duplex
•
100Mbps x full-duplex
• 10Mbps x full-duplex
•
1000Mbps x full-duplex
• 100Mbps x half-duplex
The appliance supports Failopen (LAN bypass). If the appliance should lose power or
become disabled for some reason, LAN bypass can be enabled to allow traffic to
continue to pass through the device. LAN bypass is enabled by default. For more
detailed information on configuring LAN bypass, see Enabling or Disabling LAN
Bypass and Link State Failover on page 5-6.
2-18
Chapter 3
Advanced Deployment Options
This chapter addresses advanced deployment options. For instructions on mounting
the physical device, see Mounting and Basic Deployment starting on page 2-1.
This chapter includes the following topics:
•
Deployment Topologies on page 3-4
•
Advanced Deployment Scenarios on page 3-9
•
Deployment Recommendations on page 3-17
•
Deployment Issues on page 3-18
3- 1
Trend Micro™ InterScan™ Gateway Security Appliance M-Series Deployment Guide
Overview
This chapter provides guidance on deploying the InterScan Gateway Security Appliance in the most common network topology as well as in more advanced topologies.
Note:
InterScan Gateway Security Appliance is not a firewall or a router. Always deploy
the appliance behind a firewall or security device that provides adequate NAT and
firewall-type protection.
A typical network topology, with no gateway protection is shown in figure 3-1.
Internet
Network switch or router
Firewall
NO GATEWAY
PROTECTION
FTP server
Mail server
HTTP server
Client computers in your network
FIGURE 3-1.
3- 2
Typical network topology before deploying InterScan
Gateway Security Appliance
Advanced Deployment Options
In a basic deployment of the appliance in the most common network topology, the
appliance sits between the network servers and the firewall, as shown in figure 3-2:
Internet
Network switch or router
Firewall
InterScan Gateway
Security Appliance
LAN switch, router, or hub
Mail server
FTP server
HTTP server
Client computers in your network
FIGURE 3-2.
The most common deployment of InterScan Gateway
Security Appliance
3- 3
Trend Micro™ InterScan™ Gateway Security Appliance M-Series Deployment Guide
Deployment Topologies
This section discusses the following types of deployment topologies:
•
Single network segment
•
Multiple network segments
Deploying in a Single Network Segment
In figure 3-3 on page 3-4, the network devices all belong in one network segment. All
devices, including clients have Class A IP addresses. The core switch is the clients'
default gateway. The router is the core switch and the default gateway of the appliance.
Note:
If the appliance is not deployed between the router and the core switch, the
connection will go through the core switch and then to its default gateway, which
is the router. In return, the router redirects traffic to the intended server, thus
bypassing the appliance altogether.
219.219.2.19
Server
1
2
10.2.2.23
Router1
InterScan Gateway
Security Appliance
10.2.2.25
10.2.211.136
Core
switch2
Default gateway of core switch and of the appliance
Default gateway of clients
FIGURE 3-3.
3- 4
Internet
10.2.2.1
InterScan Gateway Security Appliance and clients deployed
in the same network segment
Client
Advanced Deployment Options
If the appliance is deployed between a router and core switch within the same
network segment, the appliance can directly connect to the router or clients. If a
client issues a request to a server, the appliance receives the client’s outgoing
connection through TCP handshake. Because all devices are in the same segment,
there are no problems relaying packets between network devices. The appliance
passes the request to the router, which forwards it to the intended server.
Deploying in a Network with Multiple Segments
This section discusses deployment in a multiple-segment environment in which the
default gateway of the appliance is a device handling the Internet connection (for
example, a router or firewall).
In figure 3-5 on page 3-7, the appliance and clients belong in different network segments. The core switch and the appliance belong in one segment using a Class A IP
address. The core switch is the default gateway of the clients. The router is the core
switch and is the default gateway of the appliance.
If the clients and the appliance are on different network segments, the router passes
traffic to the Internet, but the appliance is unable to connect directly to the client. The
packet passes to the default gateway of the appliance, which is the router.
In this topology, the appliance passes the packet to the router. The routing decision
depends on the router. The SYN packet will be returned to the client through the
router and the core switch. (See figure 3-4 on page 3-6 for an illustration of this problem.)
3- 5
Trend Micro™ InterScan™ Gateway Security Appliance M-Series Deployment Guide
219.219.2.19
192.168.1.254
Server
1 Core
Internet
switch/default gateway of
the appliance
2 Default gateway of clients
Legend
FIGURE 3-4.
Router1
192.168.1.100
192.168.1.1
InterScan Appliance
Core
switch 2
Problem: Without knowing the
static IP routes, the appliance does
not know where to forward traffic.
Therefore, the appliance forwards
traffic to its default gateway, which
is the router.
= Traffic between the appliance and the clients
= Traffic between the appliance and the Internet
Problem: The appliance and clients deployed in different
network segments, with router as default gateway of the
appliance and no static routes set
A routing problem occurs whenever the router performs the following:
•
Sending SYN/ACK packet back to clients
•
Forwarding data to clients
These transactions lead to a decrease in the network throughput.
3- 6
10.2.211.136
Client
Advanced Deployment Options
219.219.2.19
192.168.1.254
Server
Internet
Router1
192.168.1.100
InterScan Appliance
192.168.1.1 10.2.211.136
Core
switch2
Client
1 Core
switch/default gateway of
the appliance
2 Default
gateway of clients
Legend
FIGURE 3-5.
= Traffic between the appliance and the clients
= Traffic between the appliance and the Internet
Solution: Static route settings tell the appliance where to
forward traffic from clients deployed, even though they are in
a different network segment
As a workaround, add static routing rules in the appliance. See figure 3-5 on page 3-7
for an illustration of the solution to this problem and see figure 3-6 on page 3-8 for
instructions on how to add static routes.
3- 7
Trend Micro™ InterScan™ Gateway Security Appliance M-Series Deployment Guide
FIGURE 3-6.
You can set static routes from the Web console
(Administration > IP Address Settings, Static Routes tab)
Refer to Deployment Recommendations on page 3-17 for tips to help minimize issues
in a multi-segment environment.
3- 8
Advanced Deployment Options
Advanced Deployment Scenarios
In addition to the basic deployment scenario, administrators can deploy InterScan
Gateway Security Appliance:
•
In two transparent proxy modes:
•
Transparent proxy mode
•
Fully transparent proxy mode
•
In a DMZ environment
•
In conjunction with a load-balancing device
•
In a single-segment environment
•
In a multi segment environment
Note:
InterScan Gateway Security Appliance cannot be deployed in a tagged VLAN
topology, because the appliance does not support VLAN tags.
Operation Modes
InterScan Gateway Security Appliance implements transparent proxy with bridging.
Note:
The appliance can be deployed as an inline (pass-through) device only. It cannot be
used as a router or proxy server.
All Ethernet packets are transferred between INT (eth0) and EXT (eth1) ports. In
transparent proxy with bridging, the appliance is transparent to other computers (that
is, clients, servers, network devices). Other network devices cannot address the appliance directly. However, they can address it at the network layer if an IP address is
assigned to the virtual bridge interface (br0).
Bridging is a technique for creating a virtual, wide-area Ethernet LAN running on a
single subnet. A network that uses Ethernet bridging combines an Ethernet interface
with one or more virtual tap interfaces and brides them together under the umbrella of
a single bridge interface. Ethernet bridges represent the software analog to a physical
Ethernet switch. An Ethernet bridge is a kind of software switch that network administrators can use to connect multiple Ethernet interfaces (either physical or virtual) on
a single computer while sharing a single IP subnet.
3- 9
Trend Micro™ InterScan™ Gateway Security Appliance M-Series Deployment Guide
The appliance supports two transparent proxy modes (“operation modes”):
•
•
Transparent proxy mode
Fully transparent proxy mode
The major difference between transparent and fully transparent proxy modes is the
“actual transparency” of the appliance with the destination server. The appliance
creates an independent connection to the destination server. In transparent proxy
mode, the destination server is aware of the IP address of the appliance.
In neither mode can the appliance keep the client’s MAC address when delivering the
request to the server.
Transparent Proxy Mode
InterScan Gateway Security Appliance enforces transparency through the following
behavior:
•
Clients do not see the presence of additional filters/scanners unless a violation is
detected.
• Administrators do not need any additional configuration on the client side.
• The destination servers still see the appliance IP address as the requestor.
For an illustration of how the appliance processes HTTP, FTP, SMTP, or POP3 traffic
in transparent proxy mode, see the figure below.
Source IP:
10.2.2.23
Source IP:
10.2.2.23
EXT
port
INT
port
proxy handlers
Server
Internet
Router
(Default gateway
of InterScan
appliance)
Source IP:
10.2.211.136
10.2.2.23
Switch
Operation mode:
Transparent proxy
10.2.211.136
Client
FIGURE 3-7.
3-10
In transparent proxy mode, the client's IP address becomes
that of the appliance
Advanced Deployment Options
When a client initiates a request, the request passes through the switch that is the
default gateway for clients in this segment. The appliance accepts the request through
the INT port, which redirects traffic to the corresponding proxy handler. After the
proxy handler processes the request, the appliance delivers the packet to the
destination server through the router (the default gateway of the appliance).
WARNING! The connection may be lost if the default gateway IP address of InterScan
Gateway Security Appliance is deployed behind the appliance.
In this mode, the source IP address is that of the InterScan Gateway Security
Appliance and the destination IP address is that of the destination server. The
appliance works in Layer 3 and has no knowledge of Layer 2 behavior.
Fully Transparent Proxy Mode
The appliance enforces full transparency through the following behaviors:
•
Clients/destination servers do not see the presence of additional filters/scanners
unless a violation is detected.
•
Administrators do not need any additional configuration on the client side.
3-11
Trend Micro™ InterScan™ Gateway Security Appliance M-Series Deployment Guide
Figure 3-8 below illustrates how the appliance processes traffic in fully transparent
proxy mode.
Source IP:
10.2.211.136
Source IP:
10.2.211.136
EXT
port
INT
port
Source IP:
10.2.211.136
proxy handlers
10.2.2.23
Server
Internet
Router
(Default gateway
of InterScan
appliance)
Switch
Operation mode:
Fully transparent proxy
10.2.211.136
Client
FIGURE 3-8.
In fully transparent proxy mode, the IP address of the client is
unchanged
When a client initiates a request, the request passes through the switch that is the
default gateway for clients in this segment. The appliance accepts the request through
the INT port, which redirects traffic to the corresponding proxy handler. After the
proxy handler processes the request, the appliance delivers the packet to the
destination server by way of the router (the default gateway of the appliance).
In this mode, the source IP address is the client’s address and the destination IP
address is that of the server. Bridge netfilter iptables is used to determine the route of
the destination server.
Deployment in a DMZ Environment
To protect both a corporate network and a DMZ (demilitarized zone or perimeter network), you can deploy two appliances:
3-12
•
One deployed to protect the corporate network
•
One deployed to protect the DMZ
Advanced Deployment Options
Because a DMZ is a network area (a subnetwork) that sits between an organization's
internal network and an external network, two appliances are necessary to protect
both areas.
See figure 3-9 for an illustration of a deployment with two appliances deployed as
mentioned above. In the illustration, the company LAN is the area with a gray border
and the DMZ is the area with a red border.
Internet
Network switch or router
Firewall
InterScan
appliance
A
LAN switch or router
Mail server
FTP server
SMTP
server
(for
example)
InterScan
appliance
B
Perimeter network
(DMZ)
HTTP server
Client computers in the company network
Primary network
FIGURE 3-9.
Deployment in a DMZ environment (requires two appliances)
3-13
Trend Micro™ InterScan™ Gateway Security Appliance M-Series Deployment Guide
Failover Deployment
If deploying two InterScan appliances, you can deploy them in such a way that if the
connection to one appliance is broken, the second appliance takes over the load of the
first appliance.
The basic steps for setting up a failover deployment are:
1.
Deploy two appliances in your network (see Failover Deployment Scenario on
page 3-15
2.
Ensure that LAN bypass, an option in the Preconfiguration console, is disabled
(disabled by default)
3.
Enable Link state failover, another option in the Preconfiguration console
(disabled by default)
For instructions on how to set these options, see Enabling or Disabling LAN
Bypass and Link State Failover on page 5-6.
3-14
Advanced Deployment Options
Failover Deployment Scenario
To achieve such a function, deploy two InterScan appliances between two load-balancing devices, as shown in figure 3-10.
Internet
Network switch or router
Firewall
Layer 4 network switch
(load balancer) #1
InterScan
appliance
A
InterScan
appliance
B
Layer 4 network switch
(load balancer) #2
LAN switch, router, or hub
Mail server
FTP server
HTTP server
Client computers in your network
FIGURE 3-10. Two InterScan appliances arranged in a link state failover
deployment
3-15
Trend Micro™ InterScan™ Gateway Security Appliance M-Series Deployment Guide
WARNING! In order for this kind of “failover” to work, LAN bypass must be disabled
and Link state failover must be enabled. They are both disabled by default.
LAN Bypass and Link State Failover Settings
In the Preconfiguration console, LAN bypass must be disabled and Link state
failover must be enabled in order for a load-balancing “failover” deployment to
work.
LAN Bypass
LAN bypass is a feature by which, if the appliance encounters an error that causes
scanning to stop, network traffic will still flow through the appliance unscanned, so
that network traffic is not interrupted (disabled by default).
Link State Failover
Link state failover is a feature by which, if either the INT or the EXT port stops functioning, both ports are automatically shut down (disabled by default).
Setting LAN Bypass and Link State Failover Options
If you have previously enabled LAN bypass, you can disable it through the InterScan
Gateway Security Appliance Preconfiguration console. Likewise, you can enable link
state failover on the same screen of the Preconfiguration console. See Enabling or
Disabling LAN Bypass and Link State Failover on page 5-6 for details.
3-16
Advanced Deployment Options
Deployment Recommendations
Figure 3-11 below shows the recommended deployment setup for the appliance.
Client
Switch
Proxy server
Router
Internet
FIGURE 3-11. Recommended position of InterScan Gateway Security
Appliance and other network devices in single- or
multi-segment environments
To minimize issues and speedily complete deployment, deploy the appliance:
•
Between a firewall that leads to the public network and a router, switch, or hub
that leads to the protected segment of the local area network.
Connect a router, switch, or hub to the INT port, thereby creating a protected
network. Connect the EXT port to a device that leads to the public network or
Internet.
•
Before a proxy server leading to the public network.
If deploying in a multi-segment environment, take note of the following
recommendations:
•
Connect the default gateway to the EXT port.
•
Use the same default gateway setting for both the appliance and the router that
connects the appliance to the segments.
•
Using the Web console, add the static routes for each segment to the appliance.
•
Disable the proxy settings from the HTTP URL Filtering screen if traffic is not
passing through the appliance.
Refer to Deployment Issues on page 3-18 to learn about the known deployment issues
in this release. For details about single and multi-segment deployment topologies, see
Deploying in a Single Network Segment on page 3-4 and Deploying in a Network with
Multiple Segments on page 3-5.
3-17
Trend Micro™ InterScan™ Gateway Security Appliance M-Series Deployment Guide
Deployment Issues
This release has the following limitations:
•
VLAN is not supported in either transparent or fully transparent proxy mode.
Some network devices use VLAN to separate network layers. This use causes
modified VLAN tags. The appliance cannot recognize VLAN tags. If deployed in
a VLAN environment, the appliance is unable to scan any of the four protocols,
and the Web console is inaccessible.
WARNING! If the appliance is deployed in a VLAN environment, the LCM LEDs are
unable to provide any indication that scanning is not working.
•
MAC address transparency is not supported in any operation mode.
•
Original bridge forwarding processing may be disturbed in both operation
modes. See Deployment Issues on page 3-18.
•
If the link is broken on the external (Internet-facing) side of the appliance, the
appliance cannot alert network devices on the external side. Likewise, if the
broken link is on the internal side, the appliance cannot alert devices on that side.
•
Packet looping may occur if packets pass through a proxy server before the
appliance.
Error
Client
Router
Proxy server
FIGURE 3-12. If the proxy server is deployed on the protected-network side
of the appliance, packet looping may occur
3-18
Internet
Chapter 4
Preconfiguring InterScan Gateway
Security Appliance
Preconfiguring InterScan™ Gateway Security Appliance requires the completion of
the following tasks:
•
Preparing for Preconfiguration on page 4-2
•
Preconfiguring the Appliance on page 4-2
•
Choose a Preconfiguration Method on page 4-5
•
Using the Preconfiguration Console to Set Device Settings on page 4-7
•
Configuring InterScan Gateway Security Appliance Using the LCM Module on
page 4-15
•
Connecting to the Network on page 4-17
•
Testing for Device Connectivity on page 4-17
4- 1
Trend Micro™ InterScan™ Gateway Security Appliance M-Series Deployment Guide
Preparing for Preconfiguration
Complete the following tasks before you preconfigure InterScan Gateway Security
Appliance:
•
•
•
Determine the administrator account password for the appliance.
Determine the host name for the appliance.
Prepare a machine that has terminal communications software, such as
HyperTerminal for Windows and a DB9 port.
Failopen Considerations (LAN bypass)
Failopen—also known as LAN bypass — is a fault-tolerant solution that allows the
appliance to continue to allow traffic to pass if device failure occurs. Failopen is
enabled by default. Use the preconfiguration console to disable or enable failopen.
(See Enabling or Disabling LAN Bypass and Link State Failover on page 5-6 for
detailed instructions.)
Tip:
If there is a firewall between the appliance and the Internet and the appliance is
operating in Transparent Proxy Mode, make sure that the appliance IP address is
added to the firewall list.
Preconfiguring the Appliance
Preconfiguring the appliance requires the completion of the following tasks.
To perform preconfiguration:
4- 2
1.
Gather device network IP information.
2.
Choose a preconfiguration method.
3.
Perform preconfiguration.
4.
Verify a successful deployment.
Preconfiguring InterScan Gateway Security Appliance
Your InterScan Gateway Security Appliance must have an IP address to operate in
your network.
WARNING! This appliance is a pass-through device. Therefore:
1. Do not place InterScan Gateway Security Appliance in front of
the network gateway (the network firewall, for example).
2. Do not reconfigure the network firewall to use the IP address of
InterScan Gateway Security Appliance as its default gateway
address.
Deployment in either of the above ways prevents the appliance from working.
Assigning an IP Address
Assign an IP address in any of three ways:
•
[Recommended] A DHCP server automatically assigns a dynamic IP address to
the appliance during deployment. This is the preferred method. Normally, there is
one DHCP server per subnet; however, you can use a DHCP relay agent to
support multiple subnets.
•
Use a terminal communications program, such as HyperTerminal (for Windows)
or Minicom (for Linux) to access the appliance Preconfiguration console and
manually assign a dynamic or static IP address to the appliance during
preconfiguration. If you choose to use a static IP address, you will need to set the
netmask address, default gateway address, and primary DNS address.
•
Using the LCD module, manually assign a dynamic or static IP address to the
appliance after you have mounted it on your network. If you choose to use a
static IP address, you will need to use the buttons on the LCD module to set the
netmask address, default gateway address, and primary DNS address. You can
also designate a host name in this way.
Note:
It may be necessary to provide a secondary DNS server address.
4- 3
Trend Micro™ InterScan™ Gateway Security Appliance M-Series Deployment Guide
Connecting to the Network
With a DHCP server, you can connect InterScan Gateway Security Appliance to your
network right out of the box without having to undergo a preconfiguration process.
Once connected, InterScan Gateway Security Appliance can handle various interface
speeds and duplex mode network traffic.
To connect the InterScan Gateway Security Appliance to your network:
1.
Connect one end of the Ethernet cable to the INT port (right side) and the other
end to the segment of the network that InterScan Gateway Security Appliance
will protect (the Protected Network).
2.
Connect one end of another Ethernet cable to the EXT port (left side) and the
other end to the part of the network that leads to the public network.
3.
Using the power switch in the back of the appliance, power on the device.
Note:
To prevent accidental shutdown of the appliance, the appliance power switch has
been modified from the standard On/Off convention. To power on InterScan
Gateway Security Appliance, simply press the Power Switch upward from the 0 to
1 position. To power off InterScan Gateway Security Appliance, press the power
switch upward from 0 to 1 and hold it in that position for a minimum of five
seconds, until the appliance powers off.
Gather Device Network IP Information
To help the preconfiguration process proceed smoothly, gather the following network
information before beginning:
Tip:
•
Use the system checklist from Appendix A to record your network information
IP address (static)
For static IP, you will need the following additional information:
•
4- 4
•
Primary DNS address
•
[Optional] Secondary DNS address
•
Gateway address
•
Netmask
Hostname (recommended)
Preconfiguring InterScan Gateway Security Appliance
Choose a Preconfiguration Method
Preconfigure the appliance using one of the following methods:
•
Preconfiguration console (recommended)
•
LCM module
The following table displays the differences between the LCM module and
Preconfiguration Console.
TABLE 4-1.
Comparison of console preconfiguration features
What you can do
Preconfiguration
console
Change passwords
x
Set the appliance IP address, netmask,
gateway address, and DNS addresses
x
View system logs
Initialize the appliance to the default settings
x
x
x
Reset the appliance
Restore default settings (factory settings)
LCD
Module
x
x
Note: The product license, network
settings, and OPS status will not
be reset.
Configure the interface speed and
duplex mode
x
Allow changes to take effect immediately
x
x
4- 5
Trend Micro™ InterScan™ Gateway Security Appliance M-Series Deployment Guide
Settings Configurable from the Preconfiguration Console
The Preconfiguration console is a terminal communications program that allows you
to configure or view any preconfiguration setting. These settings include:
•
Device Information & Status
•
Device IP Settings
•
Interface Settings
•
System Tools
•
Change Password
•
Log off with saving
•
Log off without saving
Examples of a terminal interface are HyperTerminal for Windows and Minicom for
Linux. For more information on how to access the Preconfiguration console, see
Interfacing with the Preconfiguration Console on page 4-7.
The terminal interface allows basic preconfiguration of appliance settings. If you do
not have access to a computer with terminal communications software, use the
appliance LCM module to perform preconfiguration.
Settings Configurable from the LCM Module
Use the LCD and control panel on the front of the device to configure the appliance
network settings, such as the IP address, hostname, netmask, gateway, and primary
and secondary DNS addresses.
4- 6
Preconfiguring InterScan Gateway Security Appliance
Using the Preconfiguration Console to Set
Device Settings
Preconfiguring the appliance using the preconfiguration console requires the
completion of the following tasks:
1.
Interfacing with the Preconfiguration Console on page 4-7
2.
Logging On to the Preconfiguration Console on page 4-12
3.
Configuring Device Settings on page 4-13
4.
Setting the Interface Speed and Duplex Mode on page 4-14
5.
Exiting the Preconfiguration Console on page 4-15
Interfacing with the Preconfiguration Console
Designate a local computer to interface with the appliance console port. Use a computer that has a serial port and terminal configuration software such as HyperTerminal
for Windows.
To access the preconfiguration console:
1.
Connect one end of the included console cable to the CONSOLE port on the
back panel of the device and the other end to the serial port (COM1, COM2, or
any other available COM port) on the designated local computer. (See
Figure 1-4. Back panel on page 1-8.)
Tip:
Trend Micro recommends that you configure HyperTerminal properties
so that the backspace key is set to delete and that you set the emulation
type to VT100J for best display results.
4- 7
Trend Micro™ InterScan™ Gateway Security Appliance M-Series Deployment Guide
2.
Open HyperTerminal (Start > Programs > Accessories > Communications >
HyperTerminal). For best display results, set the terminal emulation to
VT100J, as shown below.
FIGURE 4-1.
4- 8
HyperTerminal display settings
Preconfiguring InterScan Gateway Security Appliance
3.
Click File > New Connection. The Connection Description screen appears. Type
a name for the connection profile and click OK. The Connect To screen appears:
FIGURE 4-2.
The HyperTerminal Connect To screen
4.
In the Connect To screen, using the drop-down menu, choose the COM port that
your local computer has available and that is connected to the appliance.
5.
Click OK. The COM Properties screen appears. Use the following
communications properties:
•
Bits per second: 115200
•
Data Bits: 8
•
Parity: None
•
Stop bits: 1
•
Flow control: None
4- 9
Trend Micro™ InterScan™ Gateway Security Appliance M-Series Deployment Guide
FIGURE 4-3.
6.
Click OK. The COM Properties screen disappears and the screen is blank.
7.
At the blank HyperTerminal screen, type the appliance Preconfiguration console
password, or, if this is the first time you use the device, use the default password
admin and press ENTER. The console accepts the password, displays the Login
screen, and moves the cursor to the Login prompt.
Tip:
4-10
HyperTerminal COM Properties screen
Trend Micro recommends that you change the default password upon first
use. You can do so through the Preconfiguration console.
Preconfiguring InterScan Gateway Security Appliance
**************************************************
*
*
*
IGSA 1.1.1085 en Pre-Configuration
*
*
*
**************************************************
Password:
Log On
FIGURE 4-4.
8.
The appliance Preconfiguration console login screen
Press ENTER again. The appliance Preconfiguration console Main Menu appears,
as shown below.
===Main Menu===
1)
2)
3)
4)
5)
6)
7)
8)
9)
Device Information & Status
Device IP Settings
Interface Settings
System Tools
Advanced Settings
SSH Access Control
Change Password
Log Off with Saving
Log Off without Saving
:Change item. <ENTER>:Select item.
FIGURE 4-5.
The appliance Preconfiguration console main menu,
accessed with HyperTerminal
4-11
Trend Micro™ InterScan™ Gateway Security Appliance M-Series Deployment Guide
Logging On to the Preconfiguration Console
After preparing the terminal application, you are ready to use the preconfiguration
console.
To access the preconfiguration console:
1.
Power on the appliance (approximately 1-2 minutes) by completing the following
tasks:
a.
Connect the power cord to the DC power receptacle.
b.
Connect the power cord to an electrical outlet.
c.
Push the power switch to turn on the device.
The Welcome message appears in the LCD module when the system is
successfully powered on.
2.
Press Enter when the terminal interface displays InterScan Gateway Security
Appliance preconfiguration, Press <ENTER> to continue...
3.
Type the default administrator password:
After connection, the terminal screen appears blank.
Password: admin
Note:
Change the default password to a secure password immediately after logging
on for the first time.
Use this logon password for full access to all appliance preconfiguration features.
4.
After you log on, the Main Menu appears.
Note:
4-12
The preconfiguration console has a timeout value of three (3) minutes. If the
console is idle for three minutes, it automatically logs off the account.
Preconfiguring InterScan Gateway Security Appliance
Preconfiguration Console Controls
•
To change fields, press the UP ARROW, DOWN ARROW, and TAB keys to
jump from field to field.
•
To change field values, press the SPACEBAR to navigate through a list of
predefined values.
•
To navigate between screens, press the ENTER key.
Configuring Device Settings
Immediately after logging on to the preconfiguration console for the first time,
change the default password to a secure password. After changing the password, use
the Device Settings menu to configure the appliance host name.
To configure the InterScan Gateway Security Appliance device IP settings:
1.
On the Main Menu of the preconfiguration console, use the UP ARROW or
DOWN ARROW and select Device IP Settings. The Device IP Settings screen
appears.
Note:
2.
When you configure the device for the first time, the factory default settings
appear.
Use the UP ARROW or DOWN ARROW to navigate the Device IP Settings list.
•
Type - Choose whether to use a static or dynamic IP address (default is
dynamic).
If you select static, you will be required to set the netmask address, default
gateway address, and primary DNS address.
Note:
•
You may be required to provide the address for the secondary DNS
server address.
Host name - Type a host name that properly represents the appliance in the
network and on the Web console.
Trend Micro recommends that each InterScan appliance on your network have a unique
host name.
4-13
Trend Micro™ InterScan™ Gateway Security Appliance M-Series Deployment Guide
Tip:
Host names may be up to 63 alphanumeric characters (spaces not allowed).
Trend Micro recommends a unique descriptive host name to represent and
identify the InterScan Gateway Security Appliance device.
WARNING! If there is a NAT device in your environment, Trend Micro recommends
assigning a static IP address to InterScan appliance. Because different
port settings are assigned from your NAT, the appliance may not work
properly if dynamic IP addresses are used.
3.
After specifying the network settings, select Return to the Main Menu. The
console returns to the Main Menu screen.
4.
Select Log off with saving, to save settings and to log off.
Setting the Interface Speed and Duplex Mode
Use the preconfiguration console to configure the interface speed and duplex mode.
To set the interface speed and duplex mode:
4-14
1.
Log on to the appliance preconfiguration console using the administrator
password.
2.
On the Main Menu, select Interface Settings.
3.
On the Interface Settings screen, select the port to configure and use the space
bar to navigate a list of options. For example, to configure the interface speed and
duplex mode of the management (MGT) port, use the space bar to navigate
through a list of options.
4.
[Optional] LAN bypass - use the space bar to enable or disable LAN bypass.
5.
Log off the preconfiguration console for changes to take effect.
Preconfiguring InterScan Gateway Security Appliance
Exiting the Preconfiguration Console
Log off from the preconfiguration console after completing preconfiguration or modifying settings (for example, device settings) that require logging off for changes to
take effect.
To log off from the preconfiguration console:
1.
On the Main Menu of the preconfiguration console, select Log off with saving
or Log off without saving. A confirmation message appears.
2.
Select OK to log off.
Note:
In order to apply new settings, you must save before logging off.
Configuring InterScan Gateway Security Appliance Using
the LCM Module
With the LCM module, you can configure the appliance’s IP network settings. Use the
LCM module to access all configuration options.
There are five buttons on the LCM module:
•
Up arrow – cycles forward through the alphanumeric characters displayed on the
LCD
•
Down arrow – cycles backward through the alphanumeric characters displayed
on the LCD
•
Left arrow – moves the focus or cursor to the left
•
Right arrow – moves the focus or cursor to the right
Tip:
•
Use the Left and Right arrows to read the logs displayed on the LCD.
Enter – confirms selection or input
Note:
The LCD and keypad do not work when the system is powered off (even if the
device is plugged in to an AC power source).
4-15
Trend Micro™ InterScan™ Gateway Security Appliance M-Series Deployment Guide
To configure the appliance IP network settings through the LCM module:
1.
Press Enter. The Main Menu appears.
2.
Use the down arrow to select Configure.
3.
Press Enter and a prompt displays asking if you want to change settings.
Tip:
4.
The LCM module times out in three (3) minutes if there is no activity
initiated using the control panel.
To continue, ensure that a asterisk (*) is next to Yes. To abort, move the asterisk
(*) to the No position:
(*) Yes
( ) No
5.
Press Enter.
6.
If you selected Yes, a prompt appears asking to have the appliance IP address
dynamically assigned. Choose from one of the following options for assigning
the device and IP address:
•
To use a dynamic IP address, ensure that a asterisk (*) is next to Yes and
press Enter.
(*) Yes
•
( ) No
To manually enter a static IP address, do the following:
a. Ensure that a asterisk (*) is next to No and press Enter.
( ) Yes
(*) No
b. Type the new IP address, netmask, gateway address, primary DNS
address, and/or the secondary DNS address.
7.
Press Enter to save the settings when prompted.
The appliance immediately applies the new settings.
After completing these tasks, the hostname and IP address will appear in the device
LCD.
4-16
Preconfiguring InterScan Gateway Security Appliance
Connecting to the Network
Note:
Be sure to preconfigure the appliance before attempting to connect to the network.
To connect the appliance to your network:
Note:
After preconfiguration, switch off the device before connecting it to the
network.
1.
Connect one end of the Ethernet cable to the INT port and the other end to the
segment of the network that the appliance will protect (the Protected Network).
2.
Connect one end of another Ethernet cable to the EXT port and the other end to
the part of the network that leads to the public network.
3.
Power on the device.
Note:
InterScan Gateway Security Appliance can handle various interface speeds and
duplex mode network traffic.
Testing for Device Connectivity
Perform either of the following tasks to test whether you have successfully
configured the InterScan Gateway Security Appliance.
To test if the device is configured properly, do one of the following:
•
Ping the device to verify connectivity
•
Browse the appliance Web-interface by going to a PC on the protected network
and opening an IE browser to https://(hostname or IPAddress)
4-17
Trend Micro™ InterScan™ Gateway Security Appliance M-Series Deployment Guide
Obtaining the Activation Code
The Trend Micro sales team or sales representative provides the Registration Key.
Use the Registration Key to obtain a full version Activation Code.
To obtain the Activation Code:
1.
Go to the Trend Micro Online Registration Web site
(https://olr.trendmicro.com/registration). The Online
Registration page of the Trend Micro Web site opens.
2.
Perform one of the following:
•
If you are an existing Trend Micro customer, log on using your logon ID and
password.
•
If you are a new customer, click Register Your Product under New
customer registration.
3.
On the Enter Registration Key page, type or copy the appliance Registration
Key, and then click Continue.
4.
On the Confirm License Terms page, read the license agreement and then click I
accept the terms of the license agreement.
5.
On the Confirm Product Information page, click Continue Registration.
6.
Fill out the online registration form, and then click Submit.
7.
Click OK twice.
After the registration is complete, Trend Micro sends an Activation Code by email,
which you can then use to activate the appliance.
4-18
Preconfiguring InterScan Gateway Security Appliance
Configuring InterScan Gateway Security
Appliance
After preconfiguring the appliance, you are ready to configure the device and
commence network protection. Configure the device using the appliance Web
console.
Trend Micro recommends performing the following tasks after preconfiguring the
appliance:
•
Activate the product
•
Configure notification settings including setting the administrator password
•
Update scan engine and pattern files
•
Change the Web console password
Refer to the following documentation for related instructions:
•
InterScan Gateway Security Appliance Online Help – provides instructions on
how to configure the appliance.
Testing the Appliance Connectivity
Perform either of the following tasks to test whether you have successfully configured
the InterScan Gateway Security Appliance.
To test if the device is configured properly, do one of the following:
1.
Ping the device to verify connectivity; you can obtain the IP address by looking
at the LCD panel on the front of the device.
2.
Browse the InterScan Gateway Security Appliance Web interface by going to a
PC on the protected network and opening an Internet Explorer browser to
https://{The appliance IP Address}
4-19
Trend Micro™ InterScan™ Gateway Security Appliance M-Series Deployment Guide
Activating the Appliance
The Trend Micro sales team or sales representative provides the Registration Key.
Use the Registration Key to obtain a full version Activation Code.
To obtain the Activation Code:
4-20
1.
Visit the Trend Micro Online Registration Web site.
(https://olr.trendmicro.com/registration). The Online Registration
page of the Trend Micro Web site opens.
2.
Perform one of the following:
•
If you are an existing Trend Micro customer, log on using your logon ID and
password in the Returning, registered users section of the page.
•
If you are a new customer, select your Region from the drop-down menu in
the Not Registered section of the page and click Continue.
3.
On the Enter Registration Key page, type or copy the InterScan Gateway
Security Appliance Registration Key, and then click Continue.
4.
On the Confirm License Terms page, read the license agreement and then click
I accept the terms of the license agreement.
5.
On the Confirm Product Information page, click Continue Registration.
6.
Fill out the online registration form, and then click Submit. Trend Micro will
send you a confirmation message that you need to acknowledge by clicking OK.
7.
Click OK twice.
Preconfiguring InterScan Gateway Security Appliance
After the registration is complete, Trend Micro emails you an Activation Code,
which you can then use to activate InterScan Gateway Security Appliance.
A Registration Key has 22 characters (including the hyphens) and looks like this:
xx-xxxx-xxxx-xxxx-xxxx
An Activation Code has 37 characters (including the hyphens) and looks like this:
xx-xxxx-xxxxx-xxxxx-xxxxx-xxxxx-xxxxx
4-21
Trend Micro™ InterScan™ Gateway Security Appliance M-Series Deployment Guide
4-22
Chapter 5
Troubleshooting and FAQs
This chapter addresses troubleshooting issues that may arise during the InterScan™
Gateway Security Appliance preconfiguration process.
This chapter contains the following topics:
•
Troubleshooting on page 5-2
•
Frequently Asked Questions on page 5-7
•
Contacting Technical Support on page 5-9
5- 1
Trend Micro™ InterScan™ Gateway Security Appliance M-Series Deployment Guide
Troubleshooting
Why Is the Summary Screen not Logging Any Events? Why Aren’t
Any Logs Being Created?
Cause—The appliance requires hard disk initialization and reformatting. It is necessary to re-initialize the hard disk under the following conditions:
•
When upgrading InterScan Gateway Security Appliance to the latest build
version
•
When the Hard Disk LED in the front panel of the appliance is red, indicating
that the hard disk failed and the unit is already operating in diskless mode
Solution—Follow the procedure below.
To initialize the hard disk:
5- 2
1.
Log on the appliance Preconfiguration console. (See Interfacing with the
Preconfiguration Console on page 4-7.)
2.
Select option 4) System Tools from the Main Menu.
3.
On the System Tasks menu, select option 1) Hard Disk Initialization. The Hard
Disk Initialization screen appears, displaying the current status of the hard disk.
4.
Press any key. The appliance asks for confirmation.
5.
Select OK. The appliance removes the contents of the original partition and then
reboots.
6.
After the appliance has rebooted, repeat steps 1 through 3 above to format the
hard disk. The appliance formats the hard disk and then displays the following
message:
Troubleshooting and FAQs
FIGURE 5-1.
7.
Press any key. The appliance formats the hard disk and displays the following
screen when the formatting is complete:
FIGURE 5-2.
8.
Preconfiguration console output screen when initializing
a hard disk that is not formatted or is improperly
installed (the second part of the re-initialization process)
Preconfiguration console output screen when the
appliance has finished formatting the hard disk
Press any key. The appliance reboots. The hard disk is ready when the Hard Disk
LED in the appliance front panel turns green.
5- 3
Trend Micro™ InterScan™ Gateway Security Appliance M-Series Deployment Guide
I Can See the Console Output on the HyperTerminal but Some
Keystrokes Do Not Work
Cause—The HyperTerminal settings are incorrect or need refreshing.
Solution—Change the HyperTerminal emulation setting to something other than
VT100J and then change it back. If the problem persists, you can close
HyperTerminal and connect again.
The LCM Displays “[Error] No Connection”
Cause—InterScan Gateway Security Appliance is having a problem connecting to
the DHCP server.
Solution—First, check that the Ethernet cables are connected. By default, InterScan
Gateway Security Appliance uses a dynamic IP address from a DHCP server. Make
sure that InterScan Gateway Security Appliance can connect to the DHCP server to
get a valid IP address. Use another device and try to obtain an IP from the DHCP
server, or change the InterScan Gateway Security Appliance IP address to static.
The Device Does Not Turn off When I Press the Power Switch
Cause—The power switch is not being held down long enough.
Solution—The power switch has to be pressed for at least 5 seconds. The switch
is designed to function in this way to prevent an accidental shutdown.
LAN Bypass
LAN bypass is a fault-tolerance solution that allows InterScan Gateway Security
Appliance to continue to pass traffic if a software, hardware, or electrical failure
occurs.
InterScan Gateway Security Appliance has three (3) user-configurable Copper-based
Ethernet ports. Each Ethernet port has two (2) indicator lights that allow you to
determine the port’s current state and duplex speed. View the port indicator lights to
determine if LAN bypass is currently active.
5- 4
Troubleshooting and FAQs
The following table describes the different LAN bypass triggers and the associated
LED indicator status.
TABLE 5-1.
LED indicator status
Trigger
LED 1 Status
LED 2 Status
Software problems or system
rebooting
Yellow
OFF
Power cord is plugged in but
device is shutdown
Yellow
OFF
Power cord unplugged
OFF
OFF
LAN bypass is disabled by default. You can enable the feature through the InterScan
Gateway Security Appliance Preconfiguration console. See Enabling or Disabling
LAN Bypass and Link State Failover on page 5-6.
Link State Failover
Link state failover is a feature by which, if either the INT or the EXT port stops
functioning, both ports are automatically shut down. This feature is disabled by
default. You can enable it through the Preconfiguration console. For instructions on
enabling or disabling this feature, see Enabling or Disabling LAN Bypass and Link
State Failover on page 5-6.
5- 5
Trend Micro™ InterScan™ Gateway Security Appliance M-Series Deployment Guide
Enabling or Disabling LAN Bypass and Link State Failover
Accessing the Preconfiguration Console
Follow the procedures below to access the appliance Preconfiguration console.
To enable or disable LAN bypass and Link state failover:
1.
Access the Preconfiguration console as described in Using the Preconfiguration
Console to Set Device Settings on page 4-7.
2.
Select option 3, Interface Settings. The following screen appears:
Interface Settings
Current Interface Setting:
Name
MNG
EXT
INT
=====================================================================
speed&duplex
auto
auto
auto
Link state failover: [disable] Use Space to change the value
LAN bypass: [disable] Use Space to change the value
10H: 10 Mbps x
10F: 10 Mbps x
100H: 100 Mbps
100F: 100 Mbps
half-duplex
full-duplex
x half-duplex
x full-duplex
1000F: 1000 Mbps x full-duplex
auto: automatically select the best
Return to Main Menu
,<TAB>:Change field. <Space>:Change Value. <ENTER>:Select field.
FIGURE E-2. Preconfiguration console Interface Settings screen
5- 6
3.
Use the TAB key to select the LAN bypass field
4.
Press the SPACE bar on your keyboard to choose between disabled and enabled.
The LAN bypass value toggles between disabled and enabled.
5.
Use the TAB key to select the Link state failover field
6.
Press the SPACE bar on your keyboard to choose between disabled and enabled.
The Link state failover value toggles between disabled and enabled.
7.
Use the TAB key to select the Return to Main Menu field and press ENTER. The
Main Menu screen appears.
Troubleshooting and FAQs
8.
Select option 8, Log Off with Saving and press ENTER. The system saves your
settings and logs you off from the Preconfiguration console.
Frequently Asked Questions
Review these frequently asked questions for insight into issues that many users ask
about.
What Is the Purpose of the “ID” LED?
The ID LED helps users identify a specific InterScan Gateway Security Appliance in
a rack containing many devices. There are two ID LEDs. One is at the front of the
device, and the other is at the back of the device.
Can I Use the USB Ports to Transfer Files to and from InterScan
Gateway Security Appliance?
No, the USB ports are not enabled in this version. They are for future hardware extensibility.
Will InterScan Gateway Security Appliance Still Operate If the Hard
Disk Is Not Working?
Yes, when the hard disk is not working or not working properly, InterScan Gateway
Security Appliance will reboot into diskless mode. In diskless mode, InterScan Gateway Security Appliance still scans for threats, but some features are disabled, for
example, product updates, event logging, version rollbacks, item quarantine, and Outbreak Prevention Services. Additionally, InterScan Gateway Security Appliance scanning performance is decreased.
Does the “RESET” Pinhole Reset InterScan Gateway Security
Appliance to the Factory Default Settings?
No, the “RESET” pinhole just restarts the device and does not modify any configuration settings.
Is a Crossover Network Cable Needed to Connect InterScan Gateway
Security Appliance to Another Network Device?
No, a common RJ-45 Ethernet cable is enough because the device has an auto-switching/sensing capability.
5- 7
Trend Micro™ InterScan™ Gateway Security Appliance M-Series Deployment Guide
Can I Ping InterScan Gateway Security Appliance?
Yes, InterScan Gateway Security Appliance accepts ping packets.
Why Is Traffic Not Passing Through the Device When the Power Is
Off?
It is possible that the DC OFF LAN Bypass setting in the BIOS is disabled. To
enable DC OFF LAN Bypass, prepare a computer with terminal communications
software such as HyperTerminal. Connect the computer to the device. Reboot the
device and, during the initialization process, enter the BIOS configuration by pressing
the DELETE key. Enable DC OFF LAN Bypass. Doing so will allow traffic to pass
through the device when there is no direct current. By default, both DC ON LAN
Bypass and DC OFF LAN Bypass are enabled.
5- 8
Troubleshooting and FAQs
Contacting Technical Support
Trend Micro has sales and corporate offices in many cities around the globe. For
global contact information, visit the Trend Micro Worldwide site:
www.trendmicro.com/en/about/contact/overview.htm
Note:
The information on this Web site is subject to change without notice.
To contact Trend Micro Technical Support, visit the following URL:
http://esupport.trendmicro.com
5- 9
Trend Micro™ InterScan™ Gateway Security Appliance M-Series Deployment Guide
5-10
Appendix
Appendix A
Specifications and Environment
This appendix includes the following topics:
•
Hardware Specifications on page A-2
•
Dimensions and Weight on page A-2
•
Power Requirements and Environment on page A-3
A-1
Trend Micro™ InterScan™ Gateway Security Appliance M-Series Deployment Guide
Hardware Specifications
InterScan Gateway Security Appliance uses the following components:
TABLE A-1.
Hardware specifications
Component
Specification
CPU
LGA 775 Pentium 3.0GHz
Chipset
915GV
Memory
1GB (512MB x 2)
Compact
Flash
512MB
HDD
80GB SATA I hard disk
LAN Devices
PCI LAN card x 1 (supports LAN Bypass) onboard LAN: (management port)
Dimensions and Weight
The following specifications apply to InterScan Gateway Security Appliance:
TABLE A-2.
InterScan Gateway Security Appliance dimensions and weight
Element
Chassis dimension with bezel
(D x W x H)
System weight
A-2
Measurement
Depth: 505 mm
Width: 430 mm
Height: 42.4 mm
9Kg (19.8lbs)
Specifications and Environment
Power Requirements and Environment
The following power requirements and environmental specifications apply to
InterScan Gateway Security Appliance::
TABLE A-1.
Appliance power requirements and environmental specifications
Element
Specification
AC input voltage
90 to 264VAC (100 to 240 nominal)
AC input current (90VAC)
8.0A
AC input current (180VAC)
4.0A
Frequency
47 to 63Hz (50/60 nominal)
NORMAL OPERATING AMBIENT TEMPERATURE (AT SEA LEVEL)
Minimum (operating and idle)
32°F (0°C)
Maximum (operating, power supply on)
104°F (40°C)
Maximum rate of change
50°F per hour (10°C per hour)
STORAGE TEMPERATURE (AT SEA LEVEL)
Minimum
-4°F (-20°C)
Maximum
158°F (70°C)
Maximum rate of change
68°F per hour (15°C per hour)
HUMIDITY
Maximum (operating)
80% non-condensing
Maximum (non-operating)
95% non-condensing
A-3
Trend Micro™ InterScan™ Gateway Security Appliance M-Series Deployment Guide
A-4
Index
Index
A
Activation Code
obtaining 4-21
Appliance
deployment 2-1
Attaching the Slide Rails 2-8
Auto-switching/sensing capability 5-7
B
Back Panel
description 1-8
Back panel 1-8
AC power receptacle 1-9
elements 1-9
fan vent 1-9
port indicator status 1-10
port indicators 1-9
power switch 1-9
UID LED and UID button 1-9
USB ports 1-9
Bezel
front panel 1-5
BIOS
DC OFF LAN Bypass Configuration 5-8
C
Configuring Device Settings
with LCD Module 4-17
with preconfiguration console 4-15
Connecting to the Network 4-19
Connecting to the network
EXT port 4-4
INT port 4-4
Contact us 1-2
Crossover network cable 5-7
D
DC OFF LAN Bypass Configuration 5-8
Deploying the Appliance 2-1
Deployment 2-1, 3-1
Figures
fig. 2-01. Typical network topology before deploying InterScan Gateway Security Appliance 3-2
fig. 2-02. The most common deployment of InterScan Gateway Security Appliance 3-3
fig. 2-03. InterScan Gateway Security Appliance and clients deployed 3-4
fig. 2-04. Problem: The appliance and clients
deployed in different network segments,
with router as default gateway of the appliance and no static routes set 3-6
fig. 2-05. Solution:Static route settings tell the
appliance where to forward traffic from clients deployed, even though they are in a different network segment 3-7
fig. 2-06. You can set static routes from the
Web console (Administration > IP Address
Settings, Static Routes tab) 3-8
fig. 2-07. In transparent proxy mode, the client’s IP address becomes that of the appliance 3-10
fig. 2-08. In fully transparent proxy mode, the
client’s IP address becomes that of the appliance 3-12
fig. 2-09. Deployment in a DMZ environment
(requires two appliances) 3-13
fig. 2-10. Two InterScan appliances arranged
in a link state failover deployment 3-15
fig. 2-11. Recommended position of InterScan
Gateway Security Appliance and other network devices in single- or multi-segment
environments 3-17
InterScan Gateway Security Appliance is not a
firewall or a router 3-2
most common deployment scenario 3-3
options 3-1
overview 2-1
planning 2-2
Deployment Notes 2-17
I–1
Trend Micro™ InterScan™ Gateway Security Appliance M-Series Deployment Guide
Device
connectivity
ping 4-21
testing 4-21
dimensions and weight A-2
Dimensions and weight A-2
DMZ environment, deploying in 3-13
Documentation feedback 1-2
E
Ethernet cable 5-7
EXT port 4-4
F
Factory default settings 5-7
Failopen Considerations (LAN Bypass) 4-2
FAQs
Can I ping the appliance? 5-8
Can I use the USB ports to transfer files? 5-7
Is a crossover network cable needed? 5-7
RESET Pinhole 5-7
What is the purpose of the “ID” LED? 5-7
Why is traffic not passing through the appliance
when power is off? 5-8
Will the Appliance still work if the hard disk is not
working? 5-7
Feedback, documentation 1-2
Firewall
InterScan Gateway Security Appliance is not a
firewall or a router 3-2
Four-Post Rack Mounting 2-5
attaching the slide rails 2-8
installing the slide sets 2-11
rack kit contents 2-6
Freestanding Installation 2-15
Front Panel 1-6
control panel 1-6
LCD Module 1-5
LED indicators 1-6
removable bezel 1-5
reset button 1-6
thumb screws 1-5
UID button 1-6
Fully transparent proxy mode 3-12
I–2
H
Hardware specifications A-2
HyperTerminal
COM Properties screen 4-11
Connect To screen 4-10
I
Installing the Slide Sets 2-11
recommended tools 2-4
INT port 4-4
Introducing
Figures
fig. 1-02. Front Panel 1-6
fig. 1-04. Back panel 1-8
fig. 1-05. Port indicators 1-10
IP address
dynamic or static 4-3
LCD Module, assigning using a 4-3
Preconfiguration console, assigning using a 4-3
L
LAN bypass 1-11
passing traffic if failure occurs 5-4
LCM Console 1-6
Link state failover
deployment, illustrated 3-15
M
Mounting
installing the slide sets 2-11
rack kit contents 2-6
recommended tools 2-4
using four-post rack 2-5
using the rubber feet 2-15
Mounting the Appliance in the Rack 2-14
N
NAT 3-2
deploy the appliance behind a firewall or security
device that provides adequate NAT and
firewall-type protection 3-2
Network topology
most common 3-2
typical network topology before deploying
InterScan 3-2
typical, with no gateway protection 3-2
Index
O
R
Obtaining Activation Code 4-21
Obtaining Registration Key 4-21
Obtaining the Activation Code 4-20
Operation modes
fully transparent 3-12
transparent proxy 3-10
Rack Kit Contents 2-6
Reference
Figures
fig. C-02. The HyperTerminal Connect To
screen 4-10
fig. C-03. HyperTerminal COM Properties
screen 4-11
fig. C-04. The appliance Preconfiguration console login screen 4-12
fig. C-05. The appliance Preconfiguration console main menu, accessed via HyperTerminal 4-13
Registration Key
obtaining 4-21
Reset 5-7
RESET Pinhole 5-7
RJ-45 5-7
Router
InterScan Gateway Security Appliance is not a
firewall or a router 3-2
P
Ping 5-8
Port indicator status 1-10
Port indicators 1-10
Ports
EXT port 1-10
INT port 1-10
management port 1-10
status indicators 1-10
Power requirements and environmental specifications
A-3
Preconfiguration Console 4-8
configuring device settings, with 4-15
controls description 4-14
logging off 4-16
logging on 4-13
preparing 4-8
setting duplex mode, with 4-16
setting interface speed, with 4-16
Preconfiguration console
Interface Settings screen 5-6
login screen 4-12
main menu, accessed via HyperTerminal 4-13
output screen when initializing a hard disk that is
not formatted or is improperly installed (the
second part of the re-initialization process) 5-3
output screen when the appliance has finished
formatting the hard disk 5-3
preparing 5-6
Preconfiguration console output screen when the appliance has finished formatting the hard disk 5-3
Preconfiguration Methods 4-5
LCD Module, using 4-17
preconfiguration console, using 4-8
Proxy modes
fully transparent 3-12
S
Segments
deploying in multisegment network 3-17
deploying in single-segment network 3-17
Slide Rails
attaching to device 2-8
Slide Sets
installing 2-11
Specifications, hardware A-2
Static route settings, illustrated 3-7
Static route settings, Web console 3-8
T
Technology Reference
Figures
fig. C-01. Preconfiguration console Interface
Settings screen 5-6
Testing device connectivity
browse the Web 4-21
ping 4-21
I–3
Trend Micro™ InterScan™ Gateway Security Appliance M-Series Deployment Guide
Topology
most common network topology 3-2
typical network topology before deploying
InterScan 3-2
Transparent proxy mode 3-10
Troubleshooting
Figures
I–4
fig. 14-01. Preconfiguration console output
screen when initializing a hard disk that is
not formatted or is improperly installed (the
second part of the re-initialization process)
5-3
fig. 14-02. Preconfiguration console output
screen when the appliance has finished formatting the hard disk 5-3