1
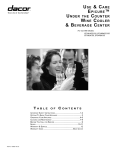
Installation Instructions
Built- In Wine Coolers, Beverage Centers
For use with models:
Part No. 100961 Rev. C
7081 621-01
EF24LBCSS, EF24LWCZ1SS, EF24LWCZ2SS,
EF24RBCSS, EF24RWCZ1SS, EF24RWCZ2SS
Table of Contents
Important Safety Instructions...................................................... 1
General Safety Precautions ....................................................... 1
Planning the Installation............................................................... 2
Electrical Requirements...............................................................2
Location Requirements................................................................3
Installation Instructions.............................................................3-4
Unpacking the Appliance............................................................. 3
Tools Required for Installation.....................................................3
Installation....................................................................................3
Handle Installation.......................................................................4
Before Operation.........................................................................4
Installation Checklist....................................................................4
IMPORTANT:
◊
Installer: In the interest of safety and to minimize problems, read these installation instructions completely before you begin the
installation process. Leave these installation instructions with the customer.
◊
Customer: Keep these installation instructions for future reference and the local building inspector’s use.
Customer Service Information
If You Need Help...
Product Data Label
If you have questions or problems with installation, contact your
Dacor ® dealer or the Dacor Customer Service Team. For repairs
to Dacor appliances under warranty call the Dacor Distinctive
Service line. Whenever you call, have the model and serial
number of the appliance ready. The model and serial number are
printed on the product data label.
◊
The product data label contains the model and serial
number information and the electrical requirements.
◊
It is located inside the door on the lower left side wall.
Dacor Customer Service
Phone: (800) 793-0093 (U.S.A. and Canada)
Monday — Friday 6:00 a.m. to 5:00 p.m. Pacific Time
Web site: www.Dacor.com
Dacor Distinctive Service (repairs under warranty only)
Phone: (877) 337-3226 (U.S.A. and Canada)
Monday — Friday 6:00 a.m. to 4:00 p.m. Pacific Time
All specifications are subject to change without notice. Dacor assumes no liability for changes to specifications.
© 2009 Dacor, all rights reserved.
Important Safety Instructions
Important Information About Safety
Instructions
The Important Safety Instructions and warnings in this manual
are not meant to cover all possible problems and conditions
that can occur. Use common sense and caution when installing,
maintaining or operating this or any other appliance.
Always contact the Dacor Customer Service Team about problems
and conditions that you don’t understand. See Customer Service
Information.
Safety Symbols and Labels
DANGER
DANGER – Immediate hazards that WILL result in severe
personal injury or death.
WARNING
WARNING – Hazards or unsafe practices that COULD result in
severe personal injury or death.
DANGER
IMPORTANT: To prevent child entrapment and suffocation,
when discarding an old appliance:
• Remove the door(s).
• Leave the racks in place so children cannot easily climb
inside.
• Cut the prongs off the power plug and discard them.
• Cut the power cable off and discard it separately from the
old appliance.
IMPORTANT: To avoid fire or explosion, do not operate the
appliance in the presence of explosive materials or fumes, such
as gasoline.
IMPORTANT: The interior lights on this appliance emit class 1M
laser radiation.
• Only a qualified service technician should replace the light
bulbs or remove the light covers.
• Service technicians: To avoid severe eye injury or electric
shock, disconnect power to the appliance before removing
the light covers or changing the light bulbs.
CAUTION
CAUTION – Hazards or unsafe practices that COULD result in
minor personal injury or property damage.
General Safety Precautions
To reduce the risk of fire, electric shock, serious injury or death when installing or using this appliance, follow basic safety precautions,
including the following:
WARNING
• This appliance is to be installed only by a qualified installer
according to these installation instructions.
• This appliance must be installed in a cabinet or counter
before it is used.
WARNING
• Never allow anyone, including children to sit, stand or
climb on any part of the appliance, including the door.
Doing so may cause, damage, serious injury or death.
• Do not tamper with the controls.
• Use this appliance only according to the accompanying
use and care manual. This appliance is not intended for
commercial use.
• Do not allow the ventilation grill below the door to become
obstructed. Make sure there is always good ventilation in
front of the appliance.
• Only a qualified service technician should service this
appliance, unless the service procedure is specifically
recommended in the literature accompanying it. Before
performing any type of service, disconnect the unit from
electric power.
• If “F0” or “F1” appears on the display, a fault has
occurred. Unplug the appliance and contact Dacor
customer service.
READ AND SAVE THESE INSTRUCTIONS
1
Planning the Installation
WARNING
IMPORTANT: Observe all governing codes and ordinances
during planning and installation.
Electrical Requirements
WARNING
IMPORTANT - This appliance is equipped with a three prong
grounding plug for your protection against possible electric
shock hazards. Plug it only into a dedicated, grounded three
prong electrical outlet. It is the responsibility of the customer to
make sure the proper type of outlet is installed. Do not under
any circumstances:
• Cut or remove the third (ground) prong from the power cord.
• Use an adapter plug.
• Use an extension cord.
• Use a power cord that is frayed or damaged.
Power supply cord with
three prong grounding plug
Location Requirements
Operating Environment
◊
Do not install this appliance where it is hit by direct sunlight or
near a stove, range top, radiator or similar heat source.
◊
The appliance is set to operate within the room temperature
limits listed below. These temperature limits should not be
exceeded.
Room Temperature requirements
for proper operation
61°F to 90°F (16°C to 32°C)
Location and Cabinet Layout Requirements
The Dacor wine cooler or beverage center can be recessed in an
opening between cabinets or installed at the end of a cabinet run
using a side panel to enclose it.
IMPORTANT:
◊
The installation location should permit the door to open a
minimum of 90°. The maximum angle the door can open is
105°.
◊
The appliance must be located so that the grill on the bottom
is not obstructed.
◊
The electrical outlet must be accessible after installation so
that the user can unplug the appliance.
◊
The floor under the appliance must be flat and level with the
surrounding floor.
NOTE: The overall height of the appliance can be increased by
1 ⅛” (28.6mm) by adjusting the feet. The cutout dimensions allow
for additional clearance for sliding the appliance into its recess
based on how you chose the final installation to look. Grounded type electrical outlet
(GFI not recommended)
◊
This appliance should have its own separate, 110-120 Vac,
15 Amp. grounded circuit controlled by a circuit breaker or
fuse. Follow the National Electrical Code and local codes and
ordinances when installing the electrical outlet.
◊
The electrical outlet must accept a grounded three prong
power cord. A ground fault circuit interrupter (GFCI) type
is not recommended because it may cause interruption
of operation. See Location Requirements for guidelines
regarding location of the electrical outlet.
◊
This appliance complies with current safety regulations and
EC directives 73/23/EEC and 89/336/EEC.
◊
In addition, this appliance complies with UL250 and is
designed to cool and store wine and beverages.
◊
The refrigerant system on this appliance has been tested for
leaks.
Cabinet Cutout and Product Dimensions
2
Installation Instructions
Unpacking the Appliance
WARNING
• If you receive a damaged product, immediately contact your
dealer or builder. Do not install or use a damaged appliance.
Installation
1. Adjust the appliance height to fit the cutout using the four
adjustable feet on the underside of the appliance.
2. Make sure all four feet hit the floor and that the appliance
does not rock.
• To prevent personal injury, property damage or damage to
the unit, this appliance should only be unpacked and set up
by two people.
• Keep packaging materials away from children. Plastic sheets
and bags can cause suffocation.
• Keep the appliance out of the weather. Avoid placing the
appliance in direct sunlight or near a stove, range top,
radiator or similar heat source.
• To protect the unit from possible damage, allow it to stand in
place 1/2 to 1 hour after delivery before turning the electricity
on. Doing so allows the refrigerant and system lubrication to
reach equilibrium.
◊
Protect the floor surface before you un-crate the unit. Put the
unit on cardboard, plywood, or preferably, a carpet remnant
(backing up) placed on the floor.
◊
Keep the floor protected when moving the appliance.
Tools Required for Installation
Make sure that you have the necessary tools and materials
available for a proper installation.
◊
Phillips screwdriver set
◊
Level
◊
Crescent wrenches
◊
Four (4) mounting screws (included)
◊
Allen wrench (included)
◊
Two (2) set screws (included)
◊
Handle (included)
3. Place the level on one of the racks inside the appliance.
Check to make sure the appliance is level front to back and
side to side. Readjust the feet if necessary.
4. Slide the appliance into the cutout.
5. Attach the appliance to the front of the cutout as shown using
the four (4) mounting screws included with the unit. The
screws can be installed into the bottom of the counter and/or
into the cabinet in any combination. All four screws must be
used.
Continued...
3
Installation Instructions
Handle Installation
Before Operation
1. Insert the end caps into
the center portion of the
handle.
NOTE: Dacor recommends cleaning the appliance according to
the cleaning instructions in the use and care manual before use.
2. Thread the included set
screws two turns into
the handle end caps.
◊
Read the use and care manual completely before operation.
◊
The importance of the proper installation of your Dacor
built-In appliance cannot be overemphasized. To ensure a
safe and proper installation, the following checklist should
be completed by the installer to ensure that no part of the
installation has been overlooked.
IMPORTANT:
Set screws
End caps
Installation Checklist
□□
□□
□□
□□
Has the appliance been secured in place in the countertop or
cabinet?
Are all leveling legs extended down to make contact with the floor? Is the unit level?
Is the power cord plugged into a properly grounded dedicated
three prong electrical outlet, which has been installed in
accordance with all applicable electrical codes?
Has the warranty been activated on-line or the warranty card
been filled out completely and mailed?
Once the power cord is connected and the unit is turned on,
the appliance will take several hours to cool down. Load the
compartment once it is cool. See the use and care manual for
further instructions.
3. Put both ends of the
handle over the handle
mounting pins on the
refrigerator.
4. Tighten both set screws
into place using the
included Allen wrench.
Do not overtighten.
4
If the appliance does not work after performing the above
checklist, contact Dacor Distinctive Service at (877) 337-3226. Do
not attempt to repair the appliance yourself.
Dacor is not responsible for the cost of correcting problems
caused by a faulty installation.
Dacor ● Phone: (800) 793-0093 ● FAX: (626) 403-3130 ● www.Dacor.com