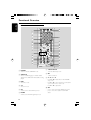
1
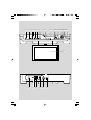
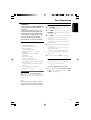
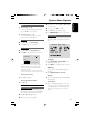
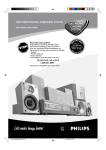
User guide
S M A RT. V E RY S M A RT.
MDR700 DVD Kitchen Radio
with TFT Display
Need help? Call us!
Magnavox representatives are ready to help you with
any questions about your new product. We can guide
you through Connections, First-time Setup, or any of
the Features.We want you to start enjoying your
new product right away!
CALL US BEFORE YOU CONSIDER
RETURNING THE PRODUCT!
1-800-705-2000
or
Visit us on the web at www.magnavox.com
1
Manufactured under license from Dolby Laboratories.
“Dolby”, “Pro-logic” and the double-D symbol are trademarks of Dolby Laboratories.
MANUFACTURED UNDER LICENSE FROM DIGITAL
THEATER SYSTEMS, INC. US PAT. NO 5,451,94;
5,956,674; 5,974,380; 5,978,762; 6,226,616;6,487,535
AND OTHER U.S. AND WORLDWIDE PATENTS ISSUED
AND PENDING.“DTS”AND “DTS DIGITAL SURROUND”
ARE REGISTERED TRADEMARKS OF DIGITAL THEATER
SYSTEMS, INC. COPYRIGHT 1996, 2003 DIGITAL
THE- ATER SYSTEMS, INC. ALL RIGHTS RESERVED.
This product incorporates copyright protection technology that is protected by method claims of certain U.S.
patents and other intellectual property rights owned by
Macrovision Corporation and other rights owners. Use of
this copyright protection technology must be authorized
by Macrovision Corporation, and is intended for home
and other limited viewing uses only unless otherwise authorized by Macrovision Corporation. Reserve engineering or disassembly is prohibited.
2
CAUTION
Use of controls or adjustments or
performance of procedures other
than herein may result in hazardous
radiation exposure or other unsafe
operation.
ATENCIÓN
El uso de mando o ajustes o la
ejecucción de métodos que no sean
los aquí descritos puede ocasionar
peligro de exposición a radiación.
1
2
3 45 6
7
89
0
! @ # $ % ^ &% * ^
MUTE
TIME
CH+
VOL-
SEARCH
SOURCE
SET
OK
VOL+
CH-
(
1
2
3
4
5
6
3
Return your Warranty Registration card today to
ensure you receive all the benefits you’re entitled to.
• Once your Magnavox purchase is
• So complete and return the Warranty
registered, you’re eligible to receive all the Registration Card enclosed with your
privileges of owning a Magnavox product. purchase at once, and take advantage
of these important benefits.
Warranty
Verification
Owner
Model
Confirmation Registration
Registering your product
within 10 days confirms
your right to maximum
protection under the
terms and conditions of
your Magnavox warranty.
Your completed Warranty
Registration Card serves
as verification of ownership in the event of product theft or loss.
Know these
safety symbols
Returning your Warranty
Registration Card right
away guarantees you’ll
receive all the information
and special offers which
you qualify for as the
owner of your model.
For Customer Use
Enter below the Serial No. which is located on the rear of the cabinet. Retain this
information for future reference.
Model No. ______________________
Serial No. _______________________
This “bolt of lightning” indi- WARNING: TO PREVENT
cates uninsulated material
FIRE OR SHOCK HAZARD, DO
within your unit which may NOT EXPOSE THIS EQUIPMENT
cause an electrical shock. For the
TO RAIN OR MOISTURE.
safety of everyone in your household,
please do not remove product covering. CAUTION: To prevent electric
The “exclamation point”
calls attention to features for
which you should read the
enclosed literature closely to prevent
operating and maintenance problems.
4
shock, match wide blade of plug to
wide slot, fully insert.
ATTENTION: Pour éviter les
choc électriques, introduire la lame la
plus large de la fiche dans la borne
correspondante de la prise et pousser
jusqu’au fond.
TR
ATION
N
S REG
IS
Visit our World Wide Web Site at http://www.magnavox.com
DED W
AY
EE
y!
r
r
Hu
IT
HIN 10 D
Congratulations on your purchase,
and welcome to the “family!”
Dear Magnavox product owner:
Thank you for your confidence in Magnavox.You’ve selected one of the
best-built, best-backed products available today. And we’ll do everything in
our power to keep you happy with your purchase for many years to come.
As a member of the Magnavox “family,” you’re entitled to protection by
one of the most comprehensive warranties and outstanding service networks in the industry.
What’s more, your purchase guarantees you’ll receive all the information
and special offers for which you qualify, plus easy access to accessories
from our convenient home shopping network.
And most importantly you can count on our uncompromising commitment
to your total satisfaction.
All of this is our way of saying welcome – and thanks for investing in a
Magnavox product.
P.S. Remember, to get the most from your Magnavox product,
you must return your Warranty Registration Card within
10 days. So please mail it to us right now!
5
IMPORTANT SAFETY INSTRUCTIONS
1. Read these instructions.
2. Keep these instructions.
3. Heed all warnings.
4. Follow all instructions.
5. Do not use this apparatus near
water.
6. Clean only with dry cloth.
7. Do not block any ventilation
openings. Install in accordance with
the manufacturer´s instructions.
8. Do not install near any heat sources
such as radiators, heat registers, stoves, or
other apparatus (including amplifiers) that
produce heat.
9. Do not defeat the
safety purpose of the
polarized or
grounding-type plug.
A polarized plug has two blades with one
wider than the other. A grounding type plug
has two blades and a third grounding prong.
The wide blade or the third prong are
provided for your safety. If the provided plug
does not fit into your outlet, consult an
electrician for replacement of the obsolete
outlet.
10. Protect the power cord from being
walked on or pinched, particularly at plugs,
convenience receptacles, and the point
where they exit from the apparatus.
11.Only use attachments/accessories
specified by the manufacturer.
12.
6
Use only with the cart, stand,
tripod, bracket, or table specified
by the manufacturer or sold with
the apparatus.When a cart is
used, use caution when moving
the cart/apparatus combination
to avoid injury from tip-over.
13. Unplug this apparatus during lightning
storms or when unused for long periods of
time.
14. Refer all servicing to qualified service
personnel. Servicing is required when the
apparatus has been damaged in any way,
such as power-supply cord or plug is
damaged, liquid has been spilled or objects
have fallen into the apparatus, the apparatus
has been exposed to rain or moisture, does
not operate normally, or has been dropped.
15.Battery usage CAUTION To
prevent battery leakage which may result in
bodily injury, property damage, or damage
to the unit:
Install all batteries correctly, + and - as
marked on the unit.
Do not mix batteries (old and new or
carbon and alkaline, etc.).
Remove batteries when the unit is not used
for a long time.
16.Apparatus shall not be exposed to
dripping or splashing.
17.Do not place any sources of danger
on the apparatus (e.g. liquid filled
objects, lighted candles).
18.This product may contain lead and mercury.
Disposal of these material may be regulated
due to environment considerations.
For disposal or recycling information,
please contact your local authorities
or the Electronic Industries Alliance :
www.eiae.org.
EL 6475-E004: 03/12
Español --------------------------------------------- 33
Note : This equipment has been tested and found to comply with the limits for a Class B digital device,
pursuant to part 15 of the FCC Rules. These limits are designed to provide reasonable protection against
harmful interference in a residential installation. This equipment generates, uses, and can radiate radio
frequency energy and, if not installed and used in accordance with the instruction manual, may cause
harmful interference to radio communications. However, there is no guarantee that interference will not
occur in a particular installation. If this equipment does cause harmful interference to radio or television
reception, which can be determined by turning the equipment off and on, the user is encouraged to try to
correct the interference by one or more of the following measures :
– Relocate the receiving antenna.
– Increase the separation between the equipment and receiver
– Connect the equipment into an outlet on a circuit different from that to which the receiver is connected.
– Consult the dealer or an experienced radio/TV technician for help.
The set complies with the FCC-Rules, Part 15.
Operation is subject to the following two conditions:
1. This device may not cause harmful interference, and
2. This device must accept any interference received, including interference that may cause undesired
operation.
IMPORTANT !
modifications not authorized by the manufacturer may void users authority to operate this device.
Nota : Este aparato ha sido probado y cumple con los límites correspondientes a un aparato digital de Clase
B, según la parte 15 de las Normas. FCC. Estos límites han sido diseñados para facilitar suficiente protección
frente a interferencias perjudiciales en una instalación residencial. Este aparato genera, utiliza y puede emitir
energía de frecuencias de radio y, si no se instala y utiliza según el manual de instrucciones, puede provocar
interferencias perjudiciales en las comunicaciones de radio. Sin embargo, no existe garantía de que las
interferencias no ocurrirán en una instalación particular. Si este aparato provoca interferencias perjudiciales en
la recepción de radio o television, que se puede identificar encendiendo y apagando el aparato,
recomendamos al usuario que intente solucionar las interferencias siguiendo una o más de las siguientes
medidas:
– Cambie la posición de la antena receptora.
– Aumente la separación entre el aparato y el receptor.
– Conecte el aparato a una toma de un circuito diferente al que está conectado el receptor.
– Consulte con el distribuidor o un técnico de radio/TV con experiencia para que le ayuden.
El aparato cumple las normas FCC, Parte 15.
Funcionamiento dependiente de dos condiciones siguientes:
1. Este aparato no puede provocar interferencia dañina, y
2. Este aparato debe aceptar cualquier interferencia recibida, incluyendo las interferencias que pueden
provocar un funcionamiento insuficiente.
¡IMPORTANTE!
las modificaciones no autorizadas por el fabricante pueden anular la autoridad de los usuarios para
utilizar este aparato.
7
Español
English ------------------------------------------------ 8
English
Index
Contents
English
General Information
Supplied accessories ............................................
Environmental information ................................
Maintenance ..........................................................
Safety information ................................................
Other Functions
9
9
9
9
Watching TV ........................................................ 21
Radio reception .................................................. 21
Fine tuning radio stations
Storing radio stations
Accessing stored radio stations
AV functions ........................................................ 21
Connections
Connecting external AV signal source ........... 10
Connecting TV signal input source ................. 10
Connecting FM/AM antennas .......................... 10
Connecting power adapter .............................. 11
Installing the System under a
Cabinet
Installing procedures .......................................... 12
Functional Overview
Front panel ........................................................... 13
Rear panel ............................................................ 13
Remote control ........................................... 14~15
System Menu Options
PICTURE .............................................................. 22
TV SETUP ..................................................... 22~23
Signal
Channel
Skip
Fine Tuning
Auto Memory
DVD SETUP ................................................. 23~25
General navigation
General Setup
Speaker Setup
Dolby Digital Setup
Video Setup
Preference Setup
TIMER SET ........................................................... 25
Setting the Timer
Remote Control Usage
Inserting batteries .............................................. 16
Using the remote control ................................ 16
Specifications ........................................... 26
Troubleshooting .................................... 27
Disc Operations
Playable discs ....................................................... 17
Playing discs ......................................................... 17
Using the disc menu ................................... 17~18
Basic playback controls .............................. 18~19
Stopping/Resuming playback
Pausing playback
Selecting track/chapter
Zoom
Repeat
Repeat A-B
Forward/reverse searching
Slow motion
Time search
Screen mode
Special disc features .................................... 19~20
Playing a Title (DVD)
Subtitles (DVD)
Changing the audio language (DVD/VCD)
Playing MP3
Playing JPEG Picture CD
Repeat (MP3/JPEG)
Fast forward/ reverse (MP3)
Zoom picture (JPEG)
Playback with multi-angles (JPEG)
8
Glossary ......................................................... 28
General Information
Supplied accessories
–
–
–
–
–
DC 12 V adapter
remote control
AM antenna
FM antenna
Mounting template, 12 spacers, 16 screws
Environmental information
All unnecessary packaging has been omitted.
We have tried to make the packaging easy to
separate into three materials: cardboard (box),
polystyrene foam (buffer) and polyethylene (bags,
protective foam sheet).
Your system consists of materials which can be
recycled and reused if disassembled by a
specialized company. Please observe the local
regulations regarding the disposal of packaging
materials, exhausted batteries and old
equipment.
Cleaning the disc lens
● After prolonged use, dirt or dust may
accumulate at the disc lens. To ensure good
playback quality, clean the disc lens with any
commercially available cleaner. Follow the
instructions supplied with cleaner.
English
This system complies with the FCC rules,
Part 15 and with 21 CFR 1040.10.
Operation is subject to the following two
conditions:
– This device may not cause harmful
interference, and
– This device must accept any interference
received, including interference that may
cause undesired operation.
Safety information
● Place the system on a flat, hard and stable
surface.
● Do not expose the system, batteries or discs to
excessive moisture, rain, sand or heat sources
caused by heating equipment or direct sunlight.
● Place the system in a location with adequate
ventilation to prevent internal heat build-up in
your system.
● The ventilation should not be impeded by
covering the ventilation openings with items,
such as newspapers table-cloths, curtains, etc.
● The apparatus shall not be exposed to dripping
or splashing.
● No objects filled with liquids, such as vases, shall
be placed on the apparatus.
● No naked flame sources, such as lighted candles,
should be placed on the apparatus.
● The mechanical parts of the set contain selflubricating bearings and must not be oiled or
lubricated.
Maintenance
Cleaning the Cabinet
● Use a soft cloth slightly moistened with a mild
detergent solution. Do not use a solution
containing alcohol, spirits, ammonia or abrasives.
Cleaning Discs
● When a disc becomes dirty,
clean it with a cleaning cloth.
Wipe the disc from the center
out.
● Do not use solvents such as
benzene, thinner, commercially available cleaners,
or antistatic spray intended for analog records.
9
Connections
English
Connecting external AV
signal source
● Make connections as follows:
Connecting FM/AM antennas
● Connect the supplied AM/FM antennas to listen
to radio programs.
b
Optional outdoor
FM antenna (not supplied)
Supplied AM
loop antenna
Supplied FM antenna
c
a
AUDIO
OUT
VIDEO OUT
AV SIGNAL SOURCE
c
Connecting TV signal
input source
a. Connect supplied FM Antenna
● Connect the supplied FM antenna to the FM
(75Ω) jack.
Cable TV Signal Input
To improve radio reception:
– Fully extend the FM antenna.
– Keep the FM antenna as horizontal as
possible.
b. If the FM reception is poor:
– Use a 75Ω coaxial cable (not supplied) to
connect the system to an outdoor FM antenna.
IMPORTANT!
– Do not connect the earth wire to any
gas pipe to avoid gas explosion.
– When connecting the system with an
outdoor FM antenna, earth the system to
protect it from lightning strikes.
c. Connect AM antenna
● Connect two black cords of the supplied AM
antenna to the AM and jacks.
Tip:
– To improve radio reception, move the AM
antenna away from the set and other
equipment.
10
English
Connections
Connecting power adapter
IMPORTANT!
– Do not connect the power cord until
all other connections have been made.
– Never make or change any
connections with the power switched on.
Note
– Each time you restart the set, it stores the last
function used.
This set is powered via a power adapter
(supplied). See the following diagram for details.
AC120V~
1
2
3
Connect the AC adapter to the jack marked
with DC 12V IN on the rear panel of the set.
Plug the two-prong end of the power cord to a
grounded power outlet.
When not using the set, turn off the power of
the set before unplugging the power connector
to prevent malfunctions.
11
Installing the Set under a Cabinet
English
IMPORTANT!
– Never plug in the AC power cord to
the power outlet before installation is
completed.
● You may install the set in the kitchen with or
without spacers.
The recommended mounting position of the set
is under a wall cabinet. See the following
diagram:
AC power cord
Cord clamp
Dimensions of the player: 370mm (14.57”) x 71
mm (2.80”) x 270 mm (10.63”) (W/H/D)
Tip:
– There should be at least 35mm (1.38”)
distance between the set and the wall.
Installing procedures
1
12
Mark the positions of the 4 holes by using the
supplied template. Drill four 1/4” diameter holes
as shown.
2
3
4
If the cabinet door overhangs the shelf and
obstructs the set, adjust the set or the shelf
height.
Install the set with the supplied mounting screws.
Keep at least 35mm (1.38”) distance between
the set and the wall.
CAUTION:
– Since the set is rather heavy, be
careful when installing.
– To reduce the risk of fire, do not place
any heating or cooking appliance
beneath the set, especially while the LCD
screen is open or on view.
– Mount the set so that its AC power
cord can be plugged directly into a wall
outlet.
– Do not use a converter or extension
cord.
– Install the set as far as possible from
sources of interference, such as a
refrigerator, microwave oven, fluorescent
lamp, etc.
Functional Overview
1 POWER
–
$ SET
–
–
enters or exits the STANDBY mode.
press to enter and exit the TIMER setup menu.
press to memorize a station in the AM/FM
status.
2 ÉÅ (PLAY/PAUSE)
%1
– starts or pauses playback.
–
–
–
3Ç
(STOP)
– stops playback.
/ 2
selects items in a setup menu.
decreases / increases volume.
decreases / increases values in the PICTURE
setup menu.
4 Disc Tray
^3
–
–
–
loads a disc.
54
–
–
goes to the beginning of the current track/
chapter (press once).
goes to the beginning of the previous track/
chapter when you press twice.
–
/ 4
selects items in a setup menu.
selects channels or radio stations forward/
backward in the TV or radio mode.
adjusts the value up/down when setting time.
& OK
–
confirms selections in the setup menu.
6¢
* TV/LCD SETUP
–
–
goes to the next track.
enters the LCD setup menu.
7 SOURCE
( LCD screen
–
–
switches between the DVD, TV, AV, FM and AM
modes.
80
–
(EJECT)
opens or closes the disc tray.
9 REMOTE SENSOR
–
receives operation signals from the remote
control.
0 Display panel
–
shows the time, status, radio frequency and radio
station number.
1 ANT INPUT
–
connect to the external antenna to receive TV
programs in the TV mode.
2 FM coaxial antenna
3 AM antenna
4 L/R AUDIO IN
–
–
–
–
–
presents a high-resolution picture.
Rear panel
!à/
á(SEARCH -/+)
Radio mode:
fine tunes down/up.
automatically searches for a radio station (press
and hold for about 1.5 seconds).
English
Front panel
connect to the audio input
5 VIDEO IN
connect to the video input.
6 DC 12V IN
DVD mode:
starts fast playback backward or forward.
@ MUTE
–
turns the speaker output on or off.
# TIME
–
to display the time/ enter time setting mode.
13
Functional Overview
English
Remote control
POWER SUBTITLE AUDIO
1
2
3
EJECT
*
(
DVD
1
2
3
4
5
6
7
8
9
+10
0
TV
4
)
AV
5
FM/AM
6
£
7
8
9
GOTO
TV/LCD SETUP
¡
DVD SETUP 16:9/4:3
CH+
INFO
OK
SET
LCD
ON/OFF
TIME
0
CH-
- SEEK +
!
MUTE
@
#
$
%
^
&
TITLE
MENU
ZOOM
REPEAT
A-B
SLOW
1 POWER
enters or exits the STANDBY mode.
2 SUBTITLE
– selects a subtitle language or disables subtitle
display when a DVD with multi-subtitles is being
played.
3 DVD
– selects disc mode.
4 TV
–
selects TV mode.
5 AV
–
switches to the external AV input mod.
6 FM/AM
–
14
§
≥
•
ª
º
⁄
+
VOL
switches to the FM/AM signal input mode.
¤
RC 518B
–
™
≤
∞
‹
›
7 TV/LCD SETUP
–
enters the LCD setup menu.
8 OK
–
confirms selections.
91
–
–
–
/ 2 / 3 / 4
Press 1 / 2 to adjust values in the PICTURE
setup menu.
Press 3 / 4 to select channels or radio stations
up and down in TV or radio mode.
Press 3 / 4 to adjust time.
0 SET
–
–
press to enter and exit the TIMER setup menu.
press to memorize a station in the AM/FM
status.
Functional Overview
–
–
–
á(SEEK -/+)
Radio mode:
fine tunes down/up.
automatically searches for a radio station (press
and hold for about 1.5 seconds).
Disc mode:
starts fast playback backward or forward.
@ É (PLAY)
–
starts playback.
#Ç
–
(STOP)
stops playback.
$ TITLE
–
displays the title of a disc (if available)
% MENU
∞ INFO
–
– repeats a title, chapter or the entire disc by
selecting Title, Chapter or All.
& A-B
–
sets and plays a section from point A to point B.
*0
–
(EJECT)
opens or closes the disc tray.
( AUDIO
–
selects a language when the DVD contains
multiple audio languages.
) Numeric Keypad (0-9)
–
displays detailed playback information.
§ LCD ON/OFF
–
Enables or disables LCD on-screen display in TV,
AV or DVD mode.
≥ TIME
–
to display the time/ enter time setting mode.
• ¢ (NEXT)
– goes to the next track.
ª4
(PREV)
– press once to go to the beginning of the current
track or chapter.
– press twice repeatedly to go to the beginning of
the previous track or chapter
– enters the disc menu.
^ REPEAT
English
!à/
º MUTE
–
turns on/off the speaker output.
⁄ Å (PAUSE)
–
pauses playback.
¤ VOL +/–
increases or decreases the speaker volume.
‹ SLOW
–
activates slow playback forward.
› ZOOM
–
enters and cycles through zoom functions. (Then,
you can use the direction buttons to pan around
the screen.)
select numbers by pressing these buttons.
¡ GOTO
–
selects the desired disc starting time, track or
title.
™ 16:9/4:3
–
switches the aspect ratio between 16:9 and 4:3.
£ +10
–
selects a number greater than 9 by pressing +10
first, and then another number button as
needed.
≤ DVD SETUP
–
enters the DVD setup menu.
15
Remote Control Usage
English
Using the remote control
Inserting batteries
1
Pull out the empty battery compartment as
illustrated.
1
2
Aim the Remote Control directly at the remote
sensor (IR) on the front panel.
Do not put any objects between the Remote
Control and the DVD Player while operating the
DVD Player.
MUTE
TIME
CH+
VOL-
SEEK
SOURCE
SET
OK
VOL+
CH-
7m
POWER SUBTITLE AUDIO
EJECT
DVD
1
2
4
5
7
8
+10
0
3
TV
6
AV
FM/AM
9
GOTO
TV/LCD SETUP
DVD SETUP 16:9/4:3
CH+
INFO
OK
2
SET
Put a CR2025 lithium battery (3V) into the
compartment. Make sure the + polarity is face
up.
8
3
Close the compartment.
TIME
LCD
ON/OFF
CH-
- SEEK +
MUTE
TITLE
MENU
ZOOM
REPEAT
A-B
SLOW
+
VOL
RC 518B
CAUTION:
– The remote control works best at a
distance less than 7m and with an angle
of up to 60o to the front of the set.
– The battery normally lasts for about
six months. This depends on how often
and for what operations the remote
control is used.
– If the remote control fails to work
even when it is operated near the player,
replace the battery.
– If the remote control is not used for a
long period of time, please remove the
battery from the remote control to
prevent any damage caused by leakage.
Batteries contain chemical substances so
they should be disposed of properly.
8
16
IMPORTANT!
– Depending on the DVD or VIDEO CD,
some operations may be different or
restricted.
– Do not push on the disc tray or put
any objects other than discs in the disc
tray. Doing so may cause malfunction.
– If the inhibit icon (Ø) appears on the
screen when a button is pressed, it
means the function is not available on
the current disc or at the current time.
Playing discs
1
2
3
Playable discs
Your DVD Player will play:
– Digital Versatile Discs (DVDs).
– Video CDs (VCDs).
– Super Video CDs (SVCDs).
– Digital Versatile Discs + Recordable
(DVD+R).
– Digital Versatile Discs + Rewritable
(DVD+RW).
– Compact Discs (CDs).
– MP3 disc on CD-R (W).
– Maximum 16 characters display.
– Supported sampling frequencies: 32 kHz, 44.1
kHz, 48 kHz.
– Supported Bit-rates: 32~192 kbps, variable
bitrates.
– Picture (JPEG) files on CD-R(W).
– JPEG/ISO 9660 format.
Region Codes
English
Disc Operations
4
5
Press POWER on the front panel or remote
control to switch on the set.
Press DVD on the remote control or press
SOURCE on the front panel and then switch
to the DVD mode.
Press EJECT to open the disc tray and load in a
disc, then press the same button again to close
the disc tray.
➜ Make sure the label side is facing up. For
double-sided discs, load the side you want to
play facing down.
Playback will start automatically (depending on
the disc type).
➜ If a disc menu appears on the screen, see
“Using the Disc Menu”.
➜ If the disc is locked by parental control, you
must enter your four-digit password. (See
“Password”)
At any time, simply press 9 to stop playback.
Using the disc menu
Depending on the disc, a menu may appear on
the screen once you load the disc.
To select a playback feature or item
● Use the 1 / 2 / 3 / 4 or Numeric Keypad
(0-9) on the Remote Control, then press ÉÅ
or OK to start playback.
DVDs must be labelled for ALL regions or
Region 1 in order to play on this DVD system.
You cannot play discs that are labeled for other
regions.
Note:
– If you are having trouble playing a certain disc,
remove the disc and try a different one. Improper
formatted discs will not play on this DVD Player.
17
Disc Operations
English
To access or exit the menu
● Press MENU on the Remote Control.
➜ For VCD with Playback Control (PBC)
feature (version 2.0 only), PBC playback allows
you to play Video CDs interactively, following the
menu on the display.
● In stop mode, use the Numeric Keypad (0-9)
to select a track and PBC will turn off.
➜ Playback will start automatically.
● During playback, press MENU.
➜ If PBC is ON, it will switch to OFF and
continue playback.
➜ If PBC is OFF, it will switch to ON and return
to menu screen.
Basic playback controls
Stopping / Resuming playback
1
During playback press 9 to stop.
➜ The DVD Player will memorize the point
where playback of the disc was stopped.
2
Press ÉÅ once on the front panel or É
(PLAY) on the remote control to resume
normal playback.
➜ The DVD Player will resume playback.
Note:
– This function will not operate if the disc is
removed from the DVD Player.
Selecting track/chapter
● Press 4 once to return to the current
chapter or track.
● Press 4 twice repeatedly to start playback
from the previous chapter or track.
● Press ¢ to start playback from the next
chapter or track.
● To go directly to any chapter/track, enter the
chapter/track number using the Numerical
Keypad (0-9).
Zoom
Zooming allows you to enlarge or reduce the
video image during playback.
1
2
1
During playback, press Å on the remote control
or ÉÅ on the front panel.
➜ Playback will pause and sound will be muted.
2
Press Å orÉÅ again to resume.
18
Press 1 / 2 / 3 / 4 to pan across the LCD
screen.
Repeat
● To repeat a title, chapter or track, press
REPEAT on the remote control.
➜ A Repeat Chapter/Title/All menu
appears when you press REPEAT.
Notes:
– REPEAT function is not available for VCD 2.0
when PCB is on.
– For repeat function of an MP3 disc, see “Repeat
(MP3/JPEG)”.
● Press 9 twice to stop playback of the disc
completely. When you press ÉÅ on the front
panel or É (PLAY) on the remote control again,
playback of the disc will start from the beginning.
Pausing playback
Press ZOOM repeatedly to increase and
decrease the playback video image.
Repeat A-B
1
2
3
Press A-B at your chosen starting point.
Press A-B again at your chosen end point.
➜ The section A and B can be set only within
the same chapter/track.
➜ The section will now repeat continuously.
To cancel, press A-B.
1
2
Forward/reverse searching
Special disc features
Press à / á during playback to select the
required speed: 2X, 4X, 8X, 16X or 32X
(backward or forward).
➜ Sound will be muted (DVD/VCD) or
intermittent (CD).
Playing a Title (DVD)
To return to normal speed, press É on the
remote control or ÉÅ on the front panel.
1
2
3
2
Press SLOW on the remote control during
playback to select the required speed: 1/2, 1/4, 1/
8 or 1/16.
➜ Sound will be muted.
To return to normal speed, press É on the
remote control orÉÅ on the front panel.
Time search
1
During playback of a DVD disc, press GOTO on
the remote control once.
➜ A menu appears on the screen, where you
can set or select items you prefer.
2
Press 3 / 4 to select an item.
3
Press OK to highlight this item.
4
Press 3 / 4 to select the desired option.
5
Press GOTO to return.
● When selecting Title or Chapter, press the
Numeric Keypad (0-9) to input the desired
title or chapter.
Notes:
– Some DVD discs do not support the search
function.
Use 1 / 2 / 3 / 4 or the Numeric Keypad
(0-9) to select a play option.
Press OK to confirm if necessary.
Subtitles (DVD)
Slow motion
1
Press MENU.
➜ The disc title menu appears on the TV screen.
● Press SUBTITLE on the remote control
repeatedly to select different subtitle languages.
Changing the audio language (DVD/
VCD)
For DVD
● Press AUDIO repeatedly to select different
audio languages.
For VCD
● Press AUDIO to select the available audio
channels provided by the disc (Stereo, Mono
Left, Mono Right or Mix-Mono).
Playing MP3
1
2
3
4
Load an MP3 format disc.
➜ A menu appears on the screen.
In the STOP position, press 3 / 4 to select
the directory you want.
Press OK, or 2 (PLAY) on the remote control
or ÉÅ on the front panel to confirm.
Press 3 / 4 again to select the desired track.
● During MP3 playback, you may press 4 or
¢ to turn pages.
Screen mode
● Press 16:9/4:3 on the remote control to switch
the screen aspect ratio between 16:9 and 4:3.
–
–
–
–
–
–
Supported MP3 disc formats:
ISO9660, Joliet, UDF 1.5
Maximum title number: 999 (depending on
filename length)
Maximum album number: 99
Supported sampling frequencies: 32 kHz, 44.1
kHz, 48 kHz
Supported Bit-rates: 32~192 (kbps), variable
bitrates
ID3 tags: V1.1, V2.2, V2.3, V2.4
19
English
Disc Operations
Disc Operations
English
Playing JPEG Picture CD
1
2
3
Load a JPEG Picture CD.
Press OK and 1 / 2 to select a submenu of
pictures.
Press 3 / 4 to select the contents.
Repeat (MP3/JPEG)
● Press REPEAT continuously to access different
play modes.
➜ Repeat One: keep a JPEG image still on the
screen or play an MP3 file repeatedly.
➜ Repeat Folder: play all files in the selected
folder repeatedly.
➜ Folder: play all files in the selected folder.
➜ Shuffle: play all files in the selected folder in
random order.
➜ Random: play all files in random order.
➜ Single: play the selected file once, then
return to the menu.
Fast forward/reverse (MP3)
● During playback, press à / á to fast forward
or reverse playback.
● To resume normal playback, press 2 (PLAY) on
the remote control or ÉÅ on the front panel.
Zoom picture (JPEG)
● During playback, press ZOOM to enable/disable
the zoom function.
● Use à / á(SEARCH/SEEK -/+) to view
the zoomed picture.
● The picture displayed will resume its normal size
when this function is disabled. In this case, you
can press MENU to return to the menu page.
20
Playback with multi-angles (JPEG)
● During playback, press 1 / 2 / 3 / 4 to
rotate the picture on the screen.
1: flip the picture vertically.
2: flip the picture horizontally.
3: rotate the picture anti-clockwise.
4: rotate the picture clockwise.
Watching TV
1
2
3
4
Ensure normal TV antenna and power cord
connection.
Switch on the system.
Press TV on the remote control or SOURCE
on the front panel to switch to the TV mode.
Press 3 / 4 on the remote control to select
the desired channel, or use the Numeric
Keypad (0-9) for input and then press OK for
confirmation if necessary.
Storing radio stations
● You can store up to 40 radio stations, 20 in each
band.
1
2
Press 3 / 4 to select a channel number.
3
Press SET again to confirm.
Note:
– If you press no button within 3 seconds after
pressing SET for the first time, the previous
frequency will appear on the display panel again,
and the station will not be saved.
Note:
– See “System Menu Options” for picture
parameter setup and TV setup.
Radio reception
1
Press AM or FM on the remote control or
SOURCE on the front panel to enter the AM
or FM mode.
2
Press à / á(SEARCH/SEEK -/+) for
about 1.5 seconds on the remote control or
front panel to start searching forward/backward
from the current frequency.
3
Press à / á(SEARCH/SEEK -/+) again to
stop searching.
➜ The radio frequency is displayed on the
display panel.
Fine Tuning radio stations
● Press à / á(SEARCH/SEEK -/+) briefly
and repeatedly.
Press SET to save your desired radio station.
➜ SAVE XX appears on the display panel, in
which XX represents the default station number.
Accessing stored radio stations
1
2
Press the Numeric Keypad (0-9) on the
remote control.
Press OK to confirm if necessary.
● You can also press 3 / 4 on the remote control
or front panel to find a stored station.
➜ When you select a stored radio station, CH
XX appears briefly on the display panel, in which
XX is the channel number of this radio station.
AV functions
The player has an additional AV input so it can
also function as a video cassette player, satellite
receiver, video game player etc.
● When an AV source is connected, press AV on
the remote control or SOURCE on the front
panel to enter the external AV input mode.
21
English
Other Functions
System Menu Options
English
1
PICTURE
TV SETUP
The options included in PICTURE setup page
are: ‘Brightness’, ‘Contrast’, ‘Color’, ‘Language’ and
‘Reset’.
The options included in TV SETUP page are:
‘Signal’, ‘Channel’, ‘Skip’, ‘Fine Tuning’ and ‘Auto
Memory’.
Press TV/LCD SETUP on the remote control
or front panel to enter the PICTURE setup
menu as illustrated.
(TV mode)
1
2
Press 3 / 4 to highlight an option.
3
Enter its submenu by pressing 2.
4
5
(DVD mode)
2
3
4
5
6
22
Press 3 / 4 to highlight an option in
‘Brightness’, ‘Contrast’ and ‘Color’.
Press 1 / 2 to adjust the value of the option
between 0 and 20.
Press 3 / 4 to highlight Language and then
press 1 / 2 to select English, Spanish or
French.
To restore the default setting, use 3 / 4 to
highlight Reset, and then press OK to confirm.
Press 1 on the remote control to exit the
PICTURE setup menu.
After entering the PICTURE setup menu in TV
mode, press 2 to enter TV SETUP.
Move the cursor by pressing 3 / 4 to highlight
the selected item.
Press 2 on the remote control to exit the TV
SETUP menu.
● Press 1 on the remote control to return to the
PICTURE setup menu.
Signal
● Press 2 to select the CATV TV signal input
mode.
● Press 1 to select the AIR TV signal input mode.
Channel
● Press 1 / 2 to change the channel number.
Note:
– In CATV input mode, you can select channels
from 2 to 125. In AIR input mode, you can select
channels from 2 to 69.
3
Skip
● To activate Skip, press 2.
➜ The current channel will be skipped when
you use 3 / 4 to select channels.
● To deactivate Skip, press 1.
➜ The channels will be played in sequence
when you select normal playback.
Fine Tuning
1
Press 3 / 4 to select Fine Tuning.
2
Press 1 / 2 to tune your channel.
Move the cursor by pressing 3 / 4 to highlight
the selected item.
4
If necessary, press OK to confirm.
5
Press 1 / 2 to adjust values/ setting.
● Press DVD SETUP on the remote control.
General Setup
The options included in General Setup page are:
‘TV Display’, ‘OSD Lang’, ‘Captions’ and ‘Screen
Saver’.
- - General
Setup Page - -
Auto Memory
1
Press 3 / 4 to select Auto Memory.
2
Press OK to enter the Auto Memory mode.
SEARCHING
CH 009
EXIT
TV display
● Select Normal/PS or Normal/LB for TV
display at 4:3 aspect ratio.
➜ The Auto Memory process takes a few
minutes, in which the set starts searching
channels from the lowest to highest in the
standard channel list.
➜ When this process ends, the set exits and
stores the channels by sequence in the memory.
To exit auto memory
● Press 1 during tuning.
To select the desired channel
● Press 3 / 4.
DVD SETUP
General navigation
The options included in DVD SETUP page are:
‘General Setup’, ‘Speaker Setup’, ‘Dolby Digital
Setup’, ‘Video Setup’ and ‘Preference Setup’.
1
Press 3 / 4 to highlight an option.
2
Enter its submenu by pressing 2.
● Select Wide for TV display at 16:9 aspect ratio.
OSD Lang
There are three different OSD languages for
selection.
● Select English, Spanish or French.
Captions
● Select to activate/deactivate captions ON/OFF
during playback.
Screen Saver
● Select to activate/deactivate the screen saver.
➜ To save energy, your activated screensaver
automatically powers down to standby mode
when the screensaver appears for several
minutes.
23
English
System Menu Options
System Menu Options
English
Video Setup
Speaker Setup
- - Speaker
Setup Page - -
The options included in Video Setup page are:
‘Sharpness’, ‘Brightness’ and ‘Contrast’.
- - Video
Setup Page - -
Downmix
● Select Lt/Rt in Downmix and the player will
output an audio signal in the Mix-Mono mode.
● Select Stereo and the player will output a
stereo signal.
Dolby Digital Setup
The options included in Dolby Digital Setup
page are: ‘Dual Mono’ and ‘Dynamic’.
Sharpness
– Adjusts the sharpness level: High, Medium and
Low.
Brightness
– Adjusts the brightness level. Range: -20-+20.
- - Dolby Digital Setup - -
Contrast
– Adjusts the contrast level. Range: -16-+16.
Preference Setup
The options included in Preference Setup page
are: ‘Audio, Subtitle, Disc Menu’, ‘Parental’,
‘Password’ and ‘Default’.
Dual Mono
You can use this function to select an option
from Stereo, L-Mono, R-Mono and MixMono.
Dynamic
This function allows you to adjust the linear
dynamic compression rate to achieve different
signal compression effects.
24
- - Preference Page - -
Audio, Subtitle, Disc Menu
TIMER SET
This setting allows you to hear or read the
subtitles of a DVD in your choice of English,
Spanish or French etc. if the disc contains
multiple languages.
This function enables you to set the start and
end time for playback in 1 of 4 signal sources.
The timer will then automatically switch the
system on and off after your defined period.
Setting the Timer
Parental
The rating of DVD discs equipped with the child
lock function is content-based and varies with
different discs. Depending on the particular disc,
you can lock out selected scenes or playback of
the entire disc.
1
2
3
4
English
System Menu Options
1
Press SET on the remote control to enter the
TIMER SET menu as illustrated.
Press 3 / 4 on the remote control to enter
parental control.
Enter its submenu by pressing 2.
Move the cursor by pressing 3 / 4 to highlight
the selected item.
2
Press OK to confirm.
3
Password
Parental control features are passwordprotected. The original setting is unlocked. This
setting allows you to input any password with
the Numeric Keypad (0-9).
Note:
– The Default Password is 1369, which is
always effective even after you have selected your
own password and changed it.To avoid the
possibility of others using the default password to
set the parental level and change the password,
you can record this default password in another
place and delete it from this manual. Some discs
can be limited depending on the age of users while
some discs cannot.
Default
You can use this function to reset all settings.
For preference setting, the set must be
in the STOP mode.
4
5
6
7
8
Highlight TIME and press 1 / 2 to select ON.
Highlight Power on / Power off and use the
Numeric Keypad (0-9) to input the desired
start /end time hour and minute.
Press 1 / 2 to switch between am and pm.
Make sure that the end time is later than the
start time.
To select your signal source, highlight SIGNAL
and press 1 / 2 to select CATV, AIR, FM or
AM.
To select your channel, highlight CHANNEL
and use the Numeric Keypad (0-9) to input
your desired TV channel.
➜ In the CATV signal input mode, there are 124
channels to choose from (2-125).
➜ In the AIR signal input mode, there are 68
channels to choose from (2-69).
Press SET to exit the TIMER SETUP menu.
➜ When playback of the signal source is over,
the player enters the STANDBY mode.
To cancel Timer
In the TIMER SETUP menu, highlight TIME
and press 1 / 2 to select OFF.
25
Specifications
English
AMPLIFIER
Output power .................................................. 2 x 2.5 W
Signal-to-noise ratio ........................................... ≥ 70 dB
Frequency response .......................... 20 Hz - 20 kHz
Impedance loudspeakers ...................................... 12 Ω
DVD PLAYER
Laser wavelength ......................................... 780/650nm
Signal system .............................................................. NTSC
Video format ......................................................... 4:3/16:9
Video S/N ............................................ 50dB (minimum)
Channel separation ............................................ ≥ 50 dB
Video display .................................................... .480 x 234
LCD screen size ................................................... 7 inches
TV/CATV
Sensitivity ....................................................................... 35dB
TUNER
AM wave range .................................... 530~1700 kHz
FM wave range ..................................... 87.5~108 MHz
GENERAL INFORMATION
AC Power .......................... AC100V~240V, 50/60Hz
Dimension .... 370mmx71mmx270mm (W/H/D)
................................ 14.57" x 2.80" x 10.63" (W/H/D)
Weight ............................. About 3.5kg (7.71 pounds)
Specifications and external appearance are
subject to change without notice.
26
Troubleshooting
English
WARNING
Under no circumstances should you try to repair the system yourself, as this will
invalidate the warranty. Do not open the system as there is a risk of electric shock.
If a fault occurs, first check the points listed below before taking the system for repair. If
you are unable to remedy a problem by following these hints, consult your dealer or
Magnavox for help.
Problem
Solution
Disc cannot play
✔
✔
✔
✔
No sound
✔ Check whether the set is connected securely.
✔ Make sure the set is not in the MUTE mode. If it
Make sure a disc is loaded.
Make sure a disc is loaded with the label side up.
Disc dirty or damaged. Clean the disc.
Make sure the region code of the player is the
same as that of the DVD disc loaded.
✔ Moisture has condensed in the player. Remove
the disc and leave the player power-on until the
moisture evaporates.
is, press MUTE to turn on the speaker.
✔ Check whether the volume on the set has been
set to the lowest level. If it has, turn up the
volume.
✔ Disc dirty/damaged. Clean or replace the disc.
No picture, unsteady picture or incorrect
picture position
✔ Make sure the video type of the AV signal source
is NTSC.
✔ Check whether the set is connected securely.
✔ Disc dirty/damaged. Clean or replace the disc.
Failure in playing a disc continuously or
repeated playback of a disc
✔ Make sure the player is not in the A-B repeat
status. If it is, press A-B to cancel A-B repeat.
✔ Disc dirty/damaged. Clean or replace the disc.
Remote control does not work
✔ Remove obstacles between the remote control
and the player, and point directly instead of at a
wide angle at the infrared sensor on the player.
✔ Make sure the battery has been inserted
properly (check polarity).
✔ Battery maybe exhausted. Replace the battery
with a new one.
27
Glossary
English
Aspect ratio: The ratio of vertical and
horizontal sizes of a displayed image. The
horizontal vs. vertical ratio of conventional TVs. is
4:3, and that of wide-screens is 16:9.
Bit Rate: The amount of data used to hold a
given length of music; measured in kilobits per
second, or kbps. Or, the speed at which you
record. Generally, the higher the bit rate better
the sound quality. However, higher bit rates use
more space on a Disc.
Chapter: Sections of a picture or a music
piece on a DVD that are smaller than titles. A
title is composed of several chapters. Each
chapter is assigned a chapter number enabling
you to locate the chapter you want.
Disc menu: A screen display prepared for the
selection of images, sound, subtitles, multi-angles,
etc recorded on a DVD.
Dolby Digital: A surround sound system
developed by Dolby Laboratories containing up
to six channels of digital audio (front left and
right, surround left and right and center).
DTS: Digital Theater Systems. This is a surround
sound system, but different from Dolby Digital.
The formats were developed by different
companies.
JPEG: A still-picture data compression system
proposed by the Joint Photographic Expert
Group, which features small decrease in image
quality in spite of its high compression ratio.
MP3: A file format with a sound data
compression system, “MPE” is the abbreviation of
Motion Picture Experts Group 1 (or MPEG-1)
Audio Layer 3. Through the MP3 format, one
CD-R or CD-RW can contain about 10 times as
much data volume as a regular CD can.
Multichannel: DVD is specified to have all
sound tracks constitute one sound field.
Multichannel refers to a structure of sound
tracks having three or more channels.
28
Parental control: A function of the DVD to
limit playback of the disc by the age of the users
according to the limitation level in each country.
The limitation varies from disc to disc; when it is
activated, playback will be prohibited if the
software’s level is higher than the user-set level.
Playback control (PBC): Refers to the signal
recorded on video CDs or SVCDs for
reproduction control. By using screen menus
recorded on a Video CD or SVCD that supports
PBC, you can enjoy interactive-type software as
well as software having a search function.
Region code: A system allowing discs to be
played only in preset regions. This unit will only
play discs that have compatible region codes. You
can find the region code of your unit from the
product label. Some discs are compatible with
more than one region (or ALL regions).
Surround: A system for users to create
realistic three-dimensional sound fields full of
realism by arranging multiple speakers around
the listener.
Title: The longest section of a picture or music
feature on DVD, music, etc., in video software, or
the entire album in audio software. Each title is
assigned a title number enabling you to locate
the title you want.
MAGNAVOX LIMITED WARRANTY
Ninety (90) Days Free Product Exchange
MAGNAVOX warrants this product against defect in material
or workmanship, subject to any conditions set forth as follows:
PROOF OF PURCHASE:
You must have proof of the date of purchase to exchange the
product. A sales receipt or other document showing the product and the date that you purchased the product as well as the
authorized retailer included, is considered such proof.
COVERAGE:
Warranty coverage begins the day you buy the product. For a
period of ninety (90) days from the date of purchase, if the
product is determined to be defective, Magnavox will exchange
the defective product with a new or renewed product, at its
option, at no charge.The replacement product is covered only
for the warranty period of the original product.When the warranty on the original product expires, the warranty on all
replaced products also expires.When it is necessary for you to
ship the product to Magnavox for exchange, you will pay the
shipping cost for shipment to Magnavox. Magnavox will pay the
shipping costs when returning a product to you.
Note:The exchange model supplied will be the most comparable one in Magnavox current inventory. Shipping of your product
to Magnavox implies intent to follow the specified requirements
of the warranty and exchange program. Product received by
Magnavox cannot be returned. Replacement product can only
be sent if all warranty requirements are met. Failure to follow
all requirements can result in delay of exchange process.
EXCLUDED FROM WARRANTY COVERAGE
Your warranty does not cover:
• Shipping charges to return defective product.
• Labor charges for installation or setup of the product, adjustment of customer controls on the product, and installation
or repair of antenna systems outside of the product.
• Product repair and/or part replacement because of improper
installation, connections to improper voltage supply, abuse,
neglect, misuse, accident, unauthorized repair or other cause
not within the control of Magnavox.
• A product that requires modification or adaptation to enable
it to operate in any country other than the country for
which it was designed, manufactured, approved and/or authorized, or repair of products damaged by these modifications.
• Damage occurring to product during shipping when improperly packaged or cost associated with packaging.
• Product lost in shipment and no signature verification of
receipt can be provided.
• A product used for commercial or institutional purposes
(including but not limited to rental purposes).
• Product sold AS IS or RENEWED.
WHERE WARRANTY EXCHANGE IS AVAILABLE:
Exchange is available in all countries where Magnavox officially
distributes the product. In countries where Magnavox does not
distribute the product, the local Magnavox organization will
attempt to exchange the product, although there may be a delay
if the appropriate product is not readily available or special customs processes are implied.
FOR EXCHANGE IN THE U.S.A., PUERTO RICO, OR
U.S.VIRGIN ISLANDS…
Contact Magnavox Customer Care Center at:
1-800-705-2000
FOR EXCHANGE IN CANADA…
1-800-661-6162 (French Speaking)
1-800-705-2000 (English or Spanish Speaking)
REPLACEMENT AS PROVIDED UNDER THIS WARRANTY IS
THE EXCLUSIVE REMEDY FOR THE CONSUMER. MAGNAVOX SHALL NOT BE LIABLE FOR ANY INCIDENTAL OR
CONSEQUENTIAL DAMAGES FOR BREACH OF ANY
EXPRESS OR IMPLIED WARRANTY ON THIS PRODUCT.
EXCEPT TO THE EXTENT PROHIBITED BY APPLICABLE
LAW, ANY IMPLIED WARRANTY OF MERCHANTABILITY OR
FITNESS FOR A PARTICULAR PURPOSE ON THIS PRODUCT
IS LIMITED IN DURATION TO THE DURATION OF THIS
WARRANTY.
Some states do not allow the exclusions or limitation of incidental or consequential damages, or allow limitations on how
long an implied warranty lasts, so the above limitations or exclusions may not apply to you. In addition, if you enter into a service contract agreement with the MAGNAVOX partnership
within ninety (90) days of the date of sale, the limitation on how
long an implied warranty lasts does not apply.
This warranty gives you specific legal rights. You may have other rights which vary from state/province to state/province.
Magnavox, P.O. Box 671539, Marietta, GA. 30006-0026
(Warranty: 4835 710 27750)
29