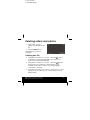
1
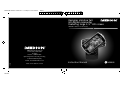
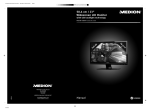
86288 Aldi AUS RC1 Cover.FH11 Tue Sep 21 13:21:30 2010 Seite 1 C M Y CM MY CY CMY K Designer slimline full HD digital camcorder featuring large 3.5'' LCD screen MEDION® LIFE® P47350 (MD 86288) MEDION Australia Pty Ltd St Leonards, NSW 2065 Australia Hotline: 1300 884 987 Operating Hours: Monday to Friday, 8:30 AM-6:00 PM (EST) 11/10 E-Mail: [email protected] Schwarz Web: www.medion.com.au Instruction Manual N26968 125 x 125 mm 14.10.2009 08:05 Table of contents What your 1 year warranty means .................. 5 Safety instructions ...................................... 6 Proper use ......................................................................... 6 System requirements ....................................................... 14 Before use ............................................... 15 Checking the package contents ....................................... 15 Overview of the device ............................... 16 Charging the batteries ............................... 18 Charging battery prior to first use .................................... 18 Charging battery in charge cradle .................................... 19 Charging battery in camcorder ........................................ 21 Start-up ................................................. 22 Inserting the memory card .............................................. 22 Key lock ........................................................................... 23 Operation................................................ 24 After Sales Support TEL: 1300 884 987 WEB Support: www.medion.com.au 1 18 x 16 mm 14.10.2009 08:05 Switching on camcorder .................................................. 24 Switching off camcorder .................................................. 24 Selecting operating mode................................................ 25 Recording videos ...................................... 26 Selecting video resolution................................................ 26 Starting recording/zoom function/ terminating recording27 Display in video mode ..................................................... 29 Taking pictures ......................................... 30 Taking picture/zooming .................................................. 30 Display in photo mode .................................................... 31 Viewing recorded videos and photos ............. 32 Video playback ................................................................ 32 Viewing photos ............................................................... 34 Exiting playback mode..................................................... 34 Deleting videos and photos ......................... 35 Deleting one file .............................................................. 35 Terminating deletion ....................................................... 36 Setup menu ............................................. 37 2 After Sales Support TEL: 1300 884 987 WEB Support: www.medion.com.au 125 x 125 mm 14.10.2009 08:05 Key tones ......................................................................... 37 TV standard ..................................................................... 37 TV frequency ................................................................... 38 Formatting memory card/ internal memory..................... 38 Setting date and time ...................................................... 39 Image quality settings ..................................................... 40 Exiting menu ................................................................... 40 Connecting camcorder to TV set .................... 41 Connection via HDMI ...................................................... 42 Connecting camcorder to computer ............... 43 Installing the software ............................... 44 DCF memory standard..................................................... 45 Card drive ........................................................................ 45 Memory folder structure .................................................. 46 Disposal .................................................. 47 Maintenance and care ............................... 48 Technical data.......................................... 49 After Sales Support TEL: 1300 884 987 WEB Support: www.medion.com.au 3 18 x 16 mm 14.10.2009 08:05 ArcSoft Total Media™ HDCam 2.0 .................. Introduction ............................................ Media Browser ......................................... Display modes .......................................... Function bar ............................................ Import media files .................................... Cut video clips .......................................... Burning AVCHD disks .................................. Edit video clips ......................................... Upload files to YouTube .............................. Upload files to Facebook ............................. Create photo albums ................................. Create album page .................................... 4 50 51 54 58 63 64 65 65 66 68 68 69 72 After Sales Support TEL: 1300 884 987 WEB Support: www.medion.com.au 125 x 125 mm 14.10.2009 08:05 What your 1 year warranty means Great care has gone into manufacturing this product and it should therefore provide you with years of good service when used correctly. In the event of product failure within its intended use over the course of the first year after the date of purchase, we will rectify the problem as quickly as possible once it has been brought to our attention. In the unlikely event of such an occurrence, or if you require any information about the product please contact us via our after sales support services, details of which can be found in this manual and on the product itself. After Sales Support TEL: 1300 884 987 WEB Support: www.medion.com.au 5 18 x 16 mm 14.10.2009 08:05 Safety instructions This unit is not intended for use by people (including children) with reduced physical, sensory or mental abilities, unless they are supervised by a person responsible for their safety or they have been instructed on its use. Children should be supervised to ensure they do not play with this unit. Keep the plastic packaging out of reach of children as it can cause suffocation! Proper use This camcorder is designed for the recording of pictures and video clips. Recorded pictures and videos can be transferred to a PC. Alternatively, they can be viewed on a TV via the USB-AV or HDMI interface. The camcorder is intended solely for private use and not for commercial purposes. Improper use shall void any warranty and liability on the part of the manufacturer. 6 After Sales Support TEL: 1300 884 987 WEB Support: www.medion.com.au 125 x 125 mm 14.10.2009 08:05 Symbols and key words used in these instructions DANGER! Warning: immediate mortal danger! CAUTION! Warning: possible mortal danger and/or serious irreversible injuries WARNING! Please note the following guidelines to avoid injuries and property damage! CAUTION! Please note the following guidelines to avoid property damage! PLEASE NOTE! Additional information on using the device After Sales Support TEL: 1300 884 987 WEB Support: www.medion.com.au 7 18 x 16 mm 14.10.2009 08:05 PLEASE NOTE! Observe the notes in the operating instructions! CAUTION! Warning: danger of electric shock! Bulleted item / information on operating steps and results Tasks to be performed Always adhere to the user instructions of the devices that you connect to the camcorder. Preventing electric shock 8 Never open the camcorder casing or the charger cradle, except to insert the battery. After Sales Support TEL: 1300 884 987 WEB Support: www.medion.com.au 125 x 125 mm 14.10.2009 08:05 Connect the charger cradle to a professionally installed AC 240 V ~ 50 Hz mains socket. To remove the power cord quickly and easily from the mains in an emergency, the socket must be easily accessible and close to the appliance. Do not kink or crush the power cord. Use only the charger supplied. Take measures to prevent moisture or liquid from penetrating the camcorder or the charger cradle. Never touch the charger cradle with wet hands. Never use the camcorder if the power cord is defective. To avoid any danger, replace the charger cradle and its power cord by a charger unit of the same type if either component is damaged. In such a case, please contact our service centre. In the event of a fault or malfunction, immediately switch off the camcorder. Protect the camcorder and charger cradle from rain and splash water. After Sales Support TEL: 1300 884 987 WEB Support: www.medion.com.au 9 18 x 16 mm 14.10.2009 08:05 Do not place vessels containing liquids, such as vases, on or near the appliance or the charger cradle and protect all parts of the device from rain and splash water. The vessel might tip over, and the liquid might impair the electrical safety of the product. Risk of explosion Never expose the batteries to excessive heat (sunlight, open fire, etc.). Do not throw batteries into a fire. Never short-circuit the (rechargeable) batteries. Do not dismantle (rechargeable) batteries. CAUTION! There is a risk of explosion, if rechargeable batteries are replaced incorrectly. Replace batteries only with the same or equivalent type. Preventing fire hazards Always uncoil the entire length of the power cord. Ensure there is adequate ventilation and never cover the charger cradle. 10 After Sales Support TEL: 1300 884 987 WEB Support: www.medion.com.au 125 x 125 mm 14.10.2009 08:05 Do not place naked flames – such as lit candles – on or near the unit. Risk of poisoning Keep the battery out of reach of children. Risk of chemical burns Always remove spent batteries from the device, as there is an increased risk of leakage. Avoid contact with skin, eyes and mucous membranes. If any of these areas come into contact with battery acid, rinse them immediately with plenty of clean water and contact a doctor without delay. Preventing damage to the camcorder If the battery is leaking, immediately remove it from the camcorder. Before inserting a new battery, clean the contacts. Use only the lithium-ion battery supplied. Before inserting the battery, check that the contacts in the camcorder and on the batteries are clean. If necessary, clean the battery connections with a clean, dry cloth or an eraser. After Sales Support TEL: 1300 884 987 WEB Support: www.medion.com.au 11 18 x 16 mm 14.10.2009 08:05 Do not touch the lens or lens mounting. Preventing damage to the battery Never insert the battery the wrong way round. Always ensure correct polarity at the +/- terminals. Never allow the battery to come into contact with liquids. Direct intense heat can damage the battery. Therefore do not expose the camcorder to any sources of direct heat. If the camcorder is not to be used for long periods, remove the battery. Preventing breakage Do not drop the camcorder. When carrying the camcorder, always place the strap around your wrist. Preventing data loss 12 Never interrupt the power supply while data are being processed. After Sales Support TEL: 1300 884 987 WEB Support: www.medion.com.au 125 x 125 mm 14.10.2009 08:05 Preventing damage to SD cards Never remove the SD card from the camcorder during the data saving process. Protection from condensation Do not expose the camcorder to rapid changes in temperature. Place the camcorder in a protective case or plastic bag before exposing it to any sudden changes in temperature. If the camcorder is cold, wait until it has reached room temperature before connecting it to the power cord. The device can safely be connected for charging as soon as the unit has reached room temperature. Do not use or store the camcorder in direct sunlight or at high ambient temperatures. Battery charge capacity At low temperatures the capacity of the battery might drop significantly as chemical reactions are slowed down. When recording in cold weather, keep a second battery pack in reserve in a warm place (e.g. trouser pocket). After Sales Support TEL: 1300 884 987 WEB Support: www.medion.com.au 13 18 x 16 mm 14.10.2009 08:05 System requirements If you wish to connect the camcorder to a PC, the computer must meet the following requirements: Pentium P III or higher (recommended: P4), free USB 2.0 interface and 1 GB of free hard disk space. Operating system and software: Windows® XP, Windows Vista® or Windows®7 Windows Media Player 10 or higher 14 After Sales Support TEL: 1300 884 987 WEB Support: www.medion.com.au 125 x 125 mm 14.10.2009 08:05 Before use Checking the package contents Please check your purchase to ensure that all items are included. If parts are missing, please contact us within 7 days of purchase. The following items are supplied with your product: Full HD camcorder 2 GB SD memory card 2 lithium-ion batteries Charge cradle with power cord HDMI cable USB/AV cable Case Carrying strap Software CD Software quick guide Operating instructions and warranty documents After Sales Support TEL: 1300 884 987 WEB Support: www.medion.com.au 15 18 x 16 mm 14.10.2009 08:05 Overview of the device Front and rear of camcorder 16 After Sales Support TEL: 1300 884 987 WEB Support: www.medion.com.au 125 x 125 mm 14.10.2009 08:05 1. Display 2. Operating LED 3. DEL button 4. SD card slot 5. LOCK 6. Speaker button 7. Arrow buttons 8. MODE button 9. Playback button 10. Record button 11. Camera lens 12. Charger LED 13. Microphone 14. USB port and HDMI port 15. Battery compartment cover 16. Fixture for carrying strap 17. Tripod socket After Sales Support TEL: 1300 884 987 WEB Support: www.medion.com.au 17 18 x 16 mm 14.10.2009 08:05 Charging the batteries Charging battery prior to first use Before using the camcorder for the first time, you must charge the battery. This can be done by placing the battery in the supplied charge cradle or directly in the camcorder, provided that the device is connected by the USB cable to a computer. The battery charge level is indicated by a symbol on the display: Battery fully recharged Battery half empty Battery empty, recharge! Removing and inserting battery Remove the cover of the battery compartment by sliding it towards the tripod socket. 18 After Sales Support TEL: 1300 884 987 WEB Support: www.medion.com.au 125 x 125 mm 14.10.2009 08:05 Remove the empty battery (if any) and insert the charged battery as shown. Charging battery in charge cradle Place the battery you wish to charge in the charge cradle. The battery contacts must touch the contacts on the charger. Push the battery against the spring contacts. Ensure that the battery is positioned properly below the guide edge in the tray. Using the power cord, connect the charge cradle to a AC 230 V ~ 50 Hz mains socket. The orange LED indicator lights up. After Sales Support TEL: 1300 884 987 WEB Support: www.medion.com.au 19 18 x 16 mm 14.10.2009 08:05 The charging time is approx. 2 hours. As soon as the battery is fully charged, the green LED indicator lights up. Disconnect the charge cradle from the mains supply. CAUTION! The charger is designed to prevent overcharging. Nonetheless, unplug the charger from the mains to avoid unnecessary power consumption. 20 After Sales Support TEL: 1300 884 987 WEB Support: www.medion.com.au 125 x 125 mm 14.10.2009 08:05 Charging battery in camcorder Ensure that the rechargeable battery is inserted in the camcorder. Connect the mini USB plug of the USB/AV cable to the camcorder and connect the other end of the cable to a free USB port of your computer. NOTE: The camcorder must be switched off for charging. The charging process starts immediately. During charging, the red charger LED on the side of the device lights up. The charging time is approx. 2 ½ hours. When the battery is fully charged, the charger LED is switched off. After Sales Support TEL: 1300 884 987 WEB Support: www.medion.com.au 21 18 x 16 mm 14.10.2009 08:05 Start-up Inserting the memory card To save files to a SD memory card, insert it in the card slot and push it in until it engages. The metal contacts must face towards the bottom of the device. To remove the memory card from the card slot, press the card gently in so that it disengages. NOTE: When the card is inserted photo and video files that are taken with the camcorder are stored on the card and can be viewed in playback mode. The display shows SD. 22 After Sales Support TEL: 1300 884 987 WEB Support: www.medion.com.au 125 x 125 mm 14.10.2009 08:05 If no memory card is inserted in the camcorder, the photo and video files are stored in the internal 128 MB memory and can also be viewed in playback mode. The display shows MEM. CAUTION! Do not use force when trying to insert the memory card! The card can only be inserted in one direction. Incorrectly inserted memory cards can damage the camcorder or the card. Key lock In photo mode or video mode, press the LOCK button to lock all buttons apart from the record button. The symbol is displayed. Press the LOCK button again to release the lock. After Sales Support TEL: 1300 884 987 WEB Support: www.medion.com.au 23 18 x 16 mm 14.10.2009 08:05 Operation Switching on camcorder Turn the display clockwise. The display is switched on and the green operating LED lights up. Switching off camcorder 24 Turn the display counterclockwise. The display light is off and the camcorder is switched off. After Sales Support TEL: 1300 884 987 WEB Support: www.medion.com.au 125 x 125 mm 14.10.2009 08:05 Selecting operating mode Repeatedly press the MODE button to select video or photo mode or to call up the setup menu. In video mode, the symbol is displayed in the left top corner of the display. In photo mode, the symbol is displayed in the left top corner of the display. After Sales Support TEL: 1300 884 987 WEB Support: www.medion.com.au 25 18 x 16 mm 14.10.2009 08:05 Recording videos Switch on the camcorder and select video mode by . pressing the MODE button Selecting video resolution Before starting recording, press the arrow buttons and to select the resolution of the video recording. The following resolutions are available: Setting Resolution in pixels Recording Playback frame rate frame rate Dimensions Sound 1080p 1920 x 1080 pixels 30 fps 30 fps 16:9 yes 720p60 1280 x 720 pixels 60 fps 60 fps 16:9 yes HD 1280 x 720 pixels 30 fps 30 fps 16:9 yes WVGA 848 x 480 pixels 60 fps 60 fps 4:3 yes QVGA* 320 x 240 pixels 120 fps 30 fps 4:3 no 26 After Sales Support TEL: 1300 884 987 WEB Support: www.medion.com.au 125 x 125 mm 14.10.2009 08:05 *NOTE REGARDING QVGA With QVGA, the images are recorded at 4x greater frame rate (120 fps). Use this option to record moving objects (sports videos, etc.). No sound is recorded! During playback, the recording video is shown in slow motion, as it is played at the standard frame rate of 30 fps. Starting recording/zoom function/ terminating recording Starting recording To start recording, press the record button. The record symbol REC is displayed in the top left corner of the display. In addition, the recording time is displayed. After Sales Support TEL: 1300 884 987 WEB Support: www.medion.com.au 27 18 x 16 mm 14.10.2009 08:05 Zooming during recording Press the arrow button to zoom out (wide angle). Press the arrow button to zoom in (tele lens angle). The digital zoom rate is displayed by means of a bar. NOTE: Digital zooming is not available with settings 1080p and QVGA. The zoom function is not available, if the key lock is applied. Terminating recording To terminate the recording, press the record button again. The record symbol REC on the display is off. 28 After Sales Support TEL: 1300 884 987 WEB Support: www.medion.com.au 125 x 125 mm 14.10.2009 08:05 Display in video mode 1. Video resolution (during recording REC ) 2. Memory to which data is saved 3. Battery charge level 4. Remaining recording time in % 5. Zoom level 6. Key lock After Sales Support TEL: 1300 884 987 WEB Support: www.medion.com.au 29 18 x 16 mm 14.10.2009 08:05 Taking pictures Switch on the camcorder and select photo mode by pressing the MODE button . Taking picture/zooming Take one picture Press the record button half down to activate automatic exposure measurement. To take the picture, press the record button. Zooming Repeatedly press the arrow button to zoom out (wide angle). Repeatedly press the arrow button to zoom in (tele lens angle). The digital zoom rate is displayed by means of a bar. 30 After Sales Support TEL: 1300 884 987 WEB Support: www.medion.com.au 125 x 125 mm 14.10.2009 08:05 Display in photo mode 1. Picture resolution 2. Memory to which data is saved 3. Battery charge level 4. Remaining number of pictures 5. Zoom level 6. Key lock After Sales Support TEL: 1300 884 987 WEB Support: www.medion.com.au 31 18 x 16 mm 14.10.2009 08:05 Viewing recorded videos and photos To view video recordings, select video mode. To view photos, select photo mode. Press the playback button photo files. to view the stored video or Browse through the recorded files by pressing the arrow buttons and select the file you wish to view. Press the arrow button to change from the file list to video/photo view. Press the arrow button to go back to the file list. Video playback Starting/terminating playback and adjusting volume To start a video playback, call up the video/photo file list and press the record button. To terminate the playback, press the record button again. 32 After Sales Support TEL: 1300 884 987 WEB Support: www.medion.com.au 125 x 125 mm 14.10.2009 08:05 During playback, you can adjust the volume by pressing the arrow buttons and . The current volume is indicated by means of a bar on the right side of the display. Fast forward/rewind, slow motion During playback, repeatedly press the arrow buttons and to change to fast forward/rewind. Fast forward/rewind is available at speed rates of 2x, 4x, 8x and 16x. During playback, repeatedly press the MODE button to select slow motion playback at rates of 1/2, 1/4, 1/8 or 1/16 of the standard speed. At slow motion rate 1/16, press the mode button again to return to normal playback rate. After Sales Support TEL: 1300 884 987 WEB Support: www.medion.com.au 33 18 x 16 mm 14.10.2009 08:05 Viewing photos Zoom function Repeatedly press the arrow button to zoom in by max. factor 8. Press the arrow button to zoom out. Press the record button half down to call up the navigation arrows. You can now move the zoom frame across the picture by pressing the arrow buttons . To return to the zoom function, press the record button again half down. The navigation arrows disappear. Exiting playback mode Press the MODE button to exit the playback mode and to select another operating mode. 34 After Sales Support TEL: 1300 884 987 WEB Support: www.medion.com.au 125 x 125 mm 14.10.2009 08:05 Deleting videos and photos Select video or photo playback mode and select a file. Press the DEL button. The delete function bar is displayed. Deleting one file Using the arrow buttons and , select the symbol to delete the currently displayed file. Press the record button. The selected file is deleted. Using the arrow buttons and , select the symbol and press the record button to delete all files in the selected mode (video or photo). You are prompted to confirm the command. Using the arrow buttons and , check the box and then press the record button to confirm that you wish to delete all files. After Sales Support TEL: 1300 884 987 WEB Support: www.medion.com.au 35 18 x 16 mm 14.10.2009 08:05 All files of the selected mode (video or photo) are deleted and message "NO FILE" is displayed. Using the arrow buttons and , select the symbol and press the record button to abort the delete process. Terminating deletion Using the arrow buttons and , select the symbol and press the record button or the MODE button to terminate the delete function. CAUTION! DATA LOSS! When deleted, the data is irretrievably lost. We therefore strongly recommend that you take a backup of your data before using the delete function. 36 After Sales Support TEL: 1300 884 987 WEB Support: www.medion.com.au 125 x 125 mm 14.10.2009 08:05 Setup menu Switch on the camcorder and select the setup menu by pressing the MODE button. Select a menu option using the arrow buttons and . Change the setting or value using the arrow buttons and . Key tones Switch key tones on or off. : key tones off : key tones on TV standard Select here the TV standard for video playback on a television set (NTSC or PAL). After Sales Support TEL: 1300 884 987 WEB Support: www.medion.com.au 37 18 x 16 mm 14.10.2009 08:05 TV frequency Select here the frequency for video playback on a television set (50 or 60 Hz). Formatting memory card/ internal memory Select this option to format the internal memory or the memory card (if inserted). Press the arrow button . At the prompt, use the arrow buttons and to check the box and confirm with the record button. The formatting process of the memory is started. To abort formatting, press the arrow button . 38 After Sales Support TEL: 1300 884 987 WEB Support: www.medion.com.au 125 x 125 mm 14.10.2009 08:05 CAUTION! DATA LOSS! When formatting the internal memory or the memory card, all stored data is irretrievably lost. During formatting, do not switch off the camcorder and do not remove the memory card! The internal memory or the memory card could otherwise be damaged so that the camcorder cannot be switched on again! We strongly recommend that you take a backup of your data before formatting the memory. Setting date and time Press the arrow button to call up the data and time settings. Using the arrow buttons and , select a field, then press the arrow buttons and to change the value. The date and time are displayed as follows: year (YY) – month (MM) – day (DD) hours (HH) – minutes (MM) – seconds (SS) To save the new settings, press the record button. After Sales Support TEL: 1300 884 987 WEB Support: www.medion.com.au 39 18 x 16 mm 14.10.2009 08:05 Image quality settings Select this option to adjust the bit rate for video recording. The higher the bit rate, the better the quality of your image and the larger the file: High bit rate (= large video file) Low bit rate (= small video file) The table below shows the available settings and associated bit rates for video recordings: Setting High bit rate Low bit rate 1080p 12 M 8M 720p60 12 M 8M HD 8M 4M WVGA 8M 4M QVGA* 4M 2M Exiting menu To exit the setup menu, press the MODE button again. 40 After Sales Support TEL: 1300 884 987 WEB Support: www.medion.com.au 125 x 125 mm 14.10.2009 08:05 Connecting camcorder to TV set To view photos and videos on a television set, proceed as follows: Connect the USB/AV cable to the USB port of the camcorder. Connect the white and yellow plugs of the USB/AV cable to the corresponding sockets on the television set. Switch on the television set. The camcorder’s LCD screen switches off. The photos will be displayed on the TV set. NOTE: As long as the camcorder is connected to a television set, the LCD screen is switched off. After Sales Support TEL: 1300 884 987 WEB Support: www.medion.com.au 41 18 x 16 mm 14.10.2009 08:05 Connection via HDMI To view recorded videos in HD, connect the camcorder with the HDMI cable to the digital port of your television set. 42 After Sales Support TEL: 1300 884 987 WEB Support: www.medion.com.au 125 x 125 mm 14.10.2009 08:05 Connecting camcorder to computer You can copy your pictures and videos to a computer. Connect the mini USB plug of the USB/AV cable to the camcorder and connect the other end of the cable to a free USB port on your computer. Switch on the camcorder so that the system can automatically detect the type of connected storage device. Supported operating systems: Windows XP; Windows Vista; Windows 7 After Sales Support TEL: 1300 884 987 WEB Support: www.medion.com.au 43 18 x 16 mm 14.10.2009 08:05 Installing the software The enclosed CD contains the driver files and the ArcSoft Total Media software, which allows you to edit your pictures and video files. Insert the CD in the CD drive of your computer. Normally, the CD is automatically recognised and its contents are displayed on the screen. If this is not the case, select the CD drive in Windows Explorer > My Computer and double-click the drive name to start the CD. The start page shows an overview of the contents of the CD. To install the software, double-click the Total Media HDCam.exe icon. To install the software, follow the on-screen instructions. 44 For more detailed information regarding the operation of the software, refer to the enclosed quick guide for ArcSoft Total Media. After Sales Support TEL: 1300 884 987 WEB Support: www.medion.com.au 125 x 125 mm 14.10.2009 08:05 DCF memory standard The files on your camcorder are managed (saved, named, etc.) as specified by the DCF standard (DCF = Design Rule for Camera File System). You can also use your camcorder to view files stored on memory cards from other DCF cameras. Card drive If your PC is equipped with a card drive or is connected to a card reader and you have saved your pictures and video clips on the memory card, you can of course use just the card to copy the files to your PC. After Sales Support TEL: 1300 884 987 WEB Support: www.medion.com.au 45 18 x 16 mm 14.10.2009 08:05 Memory folder structure The camcorder saves the recorded files in folders on the internal memory or on the memory card. The following folders are automatically created upon saving: 100MEDIA.: All photo and video files are saved in this folder, and the files are automatically named as "FILE" followed by a four-digit code. When file number "FILE9999" is reached, a new folder named "101DCIM" is created automatically, etc. A maximum of 999 folders can be set up. If another file is recorded after all 999 folders have been created and filled, a message appears, informing you that it is not possible to create another folder. In this case, proceed as follows: Insert a new memory card. A new file structure is set up, starting with file "0001" in folder "100DCIM". Do not attempt to change the folder and file structure on the camcorder (by renaming, etc.), as this might result in the loss of data. 46 After Sales Support TEL: 1300 884 987 WEB Support: www.medion.com.au 125 x 125 mm 14.10.2009 08:05 Disposal Packaging Your camcorder is packaged to protect it during transport. All packaging is made from raw materials that can be reused or recycled through normal household waste recycling. Device At the end of its service life, do not dispose of the camcorder through normal household waste. Dispose of it in an environmentally friendly manner by bringing it to a local WEEE collection point. Contact your local authority to find out where your nearest collection point is located. Batteries Do not dispose of spent batteries through normal household waste. The batteries must be brought to a collection point for batteries for safe disposal. After Sales Support TEL: 1300 884 987 WEB Support: www.medion.com.au 47 18 x 16 mm 14.10.2009 08:05 Maintenance and care Clean the housing, lens and display as follows: Clean the camera housing using a soft, dry cloth. Do not use thinners or detergents that contain oil, as these could damage your camcorder. Before cleaning the lens and the display, use a lens brush to remove any dust. Then wipe the lens and display with a soft cloth. Do not apply any pressure to the display and do not use hard objects to clean it. Do not use strong cleaning agents for the housing and lens (if there is dirt that cannot be removed, contact your dealer). 48 After Sales Support TEL: 1300 884 987 WEB Support: www.medion.com.au 125 x 125 mm 14.10.2009 08:05 Technical data Sensor: 5.0 mega pixels CMOS Aperture/ focal distance: F = 2.8 / f= 4.76 mm LCD monitor: 8.89 cm / 3.5 " LCD screen (16:9) File formats: JPEG, AVI Battery: NP40 rechargeable Li-ion battery 3.7 V; 720 mAh type: KLIC7001 Memory: Internal: 128 MB internal memory (usable memory may vary) External: SD/SDHC card (max. 8 GB) Port: Mini USB 2.0 Dimensions: 113 x 59 x 19 mm (H x W x D) Weight: 115 g, incl. battery N26968 Subject to technical modifications! After Sales Support TEL: 1300 884 987 WEB Support: www.medion.com.au 49 18 x 16 mm 14.10.2009 08:05 ArcSoft Total Media™ HDCam 2.0 Quick start instructions 50 After Sales Support TEL: 1300 884 987 WEB Support: www.medion.com.au 125 x 125 mm 14.10.2009 08:05 Introduction Total Media™ HDCam by ArcSoft is desktop software that combines media management and playback functions. Media management You can import media files for editing, uploading and creating photo books and albums from the device. Playback function With Total Media™ HDCam by ArcSoft you can view photos and playback video clips. System requirements Operating system: Windows XP SP2, Vista and Windows 7 CPU: Intel / AMD Dual-Core or higher Memory: 1 GB or more Graphics card: DirectX 9 or DirectX 10 (recommended) Port: Standard USB 1.1 connection or higher Hard drive: A minimum of 2 GB free fixed disk storage After Sales Support TEL: 1300 884 987 WEB Support: www.medion.com.au 51 18 x 16 mm 14.10.2009 08:05 Installation How to install the Total Media™ HDCam: 1. 2. 3. 4. Connect your device to your desktop or notebook PC. Insert the installation CD in the DVD/CD drive. The CD starts automatically. Follow the instructions to complete the installation. If the CD does not execute automatically follow the steps below to install the software: 1. 2. 3. 4. 5. 6. 52 Double-click on Workstation. Move the cursor to the DVD/CD drive. Right-click and then click Open. Double-click Total Media HDCam.exe. A wizard appears and guides you through the installation. Follow the instructions to complete the installation. After Sales Support TEL: 1300 884 987 WEB Support: www.medion.com.au 125 x 125 mm 14.10.2009 08:05 How to uninstall How to install the Total Media™ HDCam: 1. 2. 3. Click on Start > Programs > ArcSoft Total Media HDCam > Uninstall. A wizard appears and guides you through the uninstallation. Follow the instructions to complete the uninstallation. Language How to change the language of the user interface after installation: 1. 2. On the main screen click on Select a language and click on OK. Preferences. Registration and activation How to register and update the software: 1. On the main screen to create a connection with the 2. information centre click on . Select Upgrade, Patches or Registration. After Sales Support TEL: 1300 884 987 WEB Support: www.medion.com.au 53 18 x 16 mm 14.10.2009 08:05 Media Browser 1 2 3 54 After Sales Support TEL: 1300 884 987 WEB Support: www.medion.com.au 125 x 125 mm 14.10.2009 08:05 # 1 Area View mode area Function Offers three modes to display the media files. 2 Preview area To select and display file miniatures and detailed information 3 Function bar Lists the main function buttons. After Sales Support TEL: 1300 884 987 WEB Support: www.medion.com.au 55 18 x 16 mm 14.10.2009 08:05 View media files Follow the instructions below to view the media files on your device: 1. 2. 3. Connect the device to the computer. The device code is shown above the view mode area. To display all the media files on the device click on the device code. Device code Media files on the device 56 After Sales Support TEL: 1300 884 987 WEB Support: www.medion.com.au 125 x 125 mm 14.10.2009 08:05 To playback a video clip double-click the relevant clip or To pause/stop/continue playback of a video clip click on To playback the previous or next clip click To delete a file click on the icon of the relevant file. icon. To cut a video clip click on the To assess a file click on the icon of the relevant file. To view the properties of a file click on the icon of the relevant file. Double-click the relevant image to open the preview of an image in a new window. To open the preview of the previous or next image click on the left/right button. After Sales Support TEL: 1300 884 987 WEB Support: www.medion.com.au 57 18 x 16 mm 14.10.2009 08:05 Display modes There is a choice of three display modes to display the media files: Library view, calendar view and search view. Note: To view the media files on your device in the library or calendar view, you must first import the files. Library view The library view lists the "Own Creation" folder and other folders that are created when importing the files. 1. How to switch to library view To extend the library window click on Libraries. 2. Select the desired folder. 3. To switch to the library view click on View or edit the properties of a folder by selecting the folder and clicking . To delete a folder click on the 58 icon of the relevant folder. After Sales Support TEL: 1300 884 987 WEB Support: www.medion.com.au 125 x 125 mm 14.10.2009 08:05 Calendar view The calendar view uses the creation date of the files to arrange the media files. 1. 2. How to switch to calendar view To extend the calendar window click on Libraries. Select the desired folder. 3. To switch to the calendar view click on Three modes are available in the calendar view: Annual, Monthly and Daily mode. How to switch between the three different modes: To open the monthly mode click on the image of the desired year. To open the previous or next year - if available - click on or To open the daily mode click on the image of the desired month. To open the previous or next month - if available - click on or To return to the previous mode click on After Sales Support TEL: 1300 884 987 WEB Support: www.medion.com.au 59 18 x 16 mm 14.10.2009 08:05 Browser view Browser view enables you to search the media files on your computer with the aid of a tree structure. How to switch to browser view: 60 To extend the computer window click on Computer. To view the media files select the desired folder on your computer. To update the list of media files click on After Sales Support TEL: 1300 884 987 WEB Support: www.medion.com.au 125 x 125 mm 14.10.2009 08:05 Preview area The preview area has various options for selecting and displaying miniature file images and more detailed information for selection. Refer to the following table for a description of the relevant options: Option Name Function Evaluation filter Shows the media files as per the selected evaluation. New filter Shows the new media files. Type filter Shows the media files as per the selected type. Quick search Shows the media files as per the letter entered. After Sales Support TEL: 1300 884 987 WEB Support: www.medion.com.au 61 18 x 16 mm 14.10.2009 08:05 Miniature Modifies the size of the miniature images image slide with the aid of the slide control. control 62 Miniature images Shows the files as miniature images Details Shows the miniature images of the files together with detailed information. After Sales Support TEL: 1300 884 987 WEB Support: www.medion.com.au 125 x 125 mm 14.10.2009 08:05 Function bar The function bar lists the main function buttons. By clicking the buttons you access the relevant functions. A description of the relevant buttons is found in the following table: Button Name Import Function Imports media files from a camera, camcorder or memory device on the computer. File link Produces films with your video files. Produce AVCHD Burns your video data onto an AVCHD disk. Upload to YouTube Uploads the files to your YouTube account. Upload files to Facebook Uploads the files to your Facebook account. After Sales Support TEL: 1300 884 987 WEB Support: www.medion.com.au 63 18 x 16 mm 14.10.2009 08:05 Photo album Produces photo albums with your images. Album page Produces album pages with your images. Import media files How to import media files onto your computer: 1. 2. 3. 4. 5. 6. 64 Select the desired folder. Select the desired files. Click on Import. The "Import" window is displayed. Select Import new scenes, Import selected scenes or Import all scenes. Select a folder name or enter one. To import the files click on OK. After Sales Support TEL: 1300 884 987 WEB Support: www.medion.com.au 125 x 125 mm 14.10.2009 08:05 Cut video clips How to cut video clips: Click file link. The work area is displayed. 1. Move the desired video clips to the work area using dragand-drop. 2. Double-click to open the preview and edit the clips. 3. To cut the clips click on Continue. 4. Select the device and the path under which the cut clip is to be saved. Burning AVCHD disks How to burn AVCHD disks 1. 2. 3. 4. 5. Click on Create AVCHD. The work area is displayed. Move the desired video clips to the work area using dragand-drop. Double-click the relevant image to open the preview of an image in a new window. Click on Next. Select the drive with which you want to burn the AVCHD disk or the path to save the files on your computer. After Sales Support TEL: 1300 884 987 WEB Support: www.medion.com.au 65 18 x 16 mm 14.10.2009 08:05 Edit video clips How to edit a video clip: 1. Double-click on a video clip in the work area. The “Edit” window is displayed. 2. To select the start of your cut clip click on 3. To select the end of your cut clip click on 4. To save the cut clip click on A description of other tools in the "Edit" window is found in the following table: Button 66 Name Playback / Pause Function Stop Click to end playback of the clip. Previous Click to open the previous clip. Next Click to open the next clip. Click to playback or pause the clip. After Sales Support TEL: 1300 884 987 WEB Support: www.medion.com.au 125 x 125 mm 14.10.2009 08:05 Time field Click on the number; use the arrow keys to view a particular section of the video clip. Volume level Slide to adjust the volume. Full screen Click to open the full screen mode. After Sales Support TEL: 1300 884 987 WEB Support: www.medion.com.au 67 18 x 16 mm 14.10.2009 08:05 Upload files to YouTube How to upload the files to YouTube: Click on Upload to YouTube. The work area is displayed. 1. Move the desired file to the work area using drag-anddrop. 2. Click on Next. The log in window for YouTube is displayed. 3. Enter your YouTube user name and password. 4. To login to YouTube click on “Login”. 5. Follow the instructions to upload the file to YouTube. Upload files to Facebook To upload to Facebook: 1. 2. 3. 4. 5. 6. 68 Click on Upload to Facebook. The work area is displayed. Move the desired file to the work area using drag-anddrop. Click on Next. The login window for Facebook is displayed. Enter your Facebook email address and password. To login to Facebook click on “Login”. Follow the instructions to upload the file to Facebook. After Sales Support TEL: 1300 884 987 WEB Support: www.medion.com.au 125 x 125 mm 14.10.2009 08:05 Create photo albums How to create photo albums: 1. 2. 3. 4. 5. 6. 7. Click on Photo album. The work area is displayed. Drag the desired images into the work area. To start the print creations application by ArcSoft click on Continue. Select the categories for the photo albums to view the photo albums. Select a photo album. To open the “Photo album design" screen click on Continue. Observe the descriptions of the photo album design using the following diagram: After Sales Support TEL: 1300 884 987 WEB Support: www.medion.com.au 69 18 x 16 mm 14.10.2009 08:05 1 4 5 2 6 3 8 7 14 15 11 10 9 70 12 13 16 After Sales Support TEL: 1300 884 987 WEB Support: www.medion.com.au 125 x 125 mm 14.10.2009 08:05 1 Restart 2 Add images 3 Remove all 4 Block/ release design 5 Save design 6 New project 7 Undo / redo 8 Modify photo album template 9 Click icon to display the image page 10 Fill empty pages with images automatically 11 Click text or image to edit it 12 Photo album preview 13 Share photo album by email, image or SWF file 14 Search page 15 Edit page / page layout 16 Print / print options After Sales Support TEL: 1300 884 987 WEB Support: www.medion.com.au 71 18 x 16 mm 14.10.2009 08:05 Create album page How to create album pages: 1. Click on Album page. The work area is displayed. 2. 3. 4. 5. 6. 7. 72 Drag the desired image into the work area. To start the print creations application by ArcSoft click on Continue. Select the categories for the photo albums to view the photo albums. Select an album page. To open the “Photo album design" screen click on Continue. Observe the descriptions of the photo album design using the following diagram: After Sales Support TEL: 1300 884 987 WEB Support: www.medion.com.au 125 x 125 mm 14.10.2009 08:05 4 1 2 3 5 6 8 After Sales Support TEL: 1300 884 987 WEB Support: www.medion.com.au 7 9 10 11 73 18 x 16 mm 14.10.2009 08:05 1 Restart 2 Add images 3 Remove all 4 Block/release design 5 Save design 6 Undo / redo 7 Modify album page template 8 Click icon to display the image page 9 Album page preview 10 Share album page by email or image file 11 Print / print options 74 After Sales Support TEL: 1300 884 987 WEB Support: www.medion.com.au 86288 Aldi AUS RC1 Cover.FH11 Tue Sep 21 13:21:30 2010 Seite 1 C M Y CM MY CY CMY K Designer slimline full HD digital camcorder featuring large 3.5'' LCD screen MEDION® LIFE® P47350 (MD 86288) MEDION Australia Pty Ltd St Leonards, NSW 2065 Australia Hotline: 1300 884 987 Operating Hours: Monday to Friday, 8:30 AM-6:00 PM (EST) 11/10 E-Mail: [email protected] Schwarz Web: www.medion.com.au Instruction Manual N26968