1
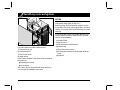
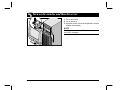
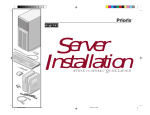
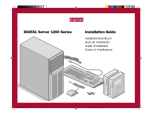
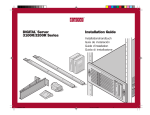
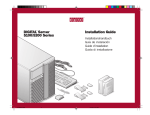
Prioris
TM
Server
Installation
WITH ServerWORKS
SEIGCVR.PM5
2
11/29/95, 6:20 AM
TM
QUICK LAUNCH
TY
hank ou
... for purchasing a Digital Prioris server.
The Prioris family represents
Digital’s continued commitment to
Uncompromising Quality, backed by
award-winning Customer Service and Support.
The following procedures will help you easily set up
your server’s hardware and software.
ServerWORKS Quick Launch
ServerWORKS Quick Launch delivers unparalleled achievement in streamlining the installation
and configuration of hardware components and
network operating system software on Digital’s
TM
Prioris line of servers. Quick Launch combines
an intuitive interface and versatile, time saving
features to produce a consistent and accurate installation optimized for Digital’s extremely powerful
and highly acclaimed Prioris servers.
Before you Begin
Select a suitable area for assembly and use. Ensure that
your workspace:
■
Is located next to electrical outlets and a telephone
jack
■
Is free from excessive heat, dust, and direct sunlight
Allows at least 7 inches of clearance on all sides for
proper air flow
See “Technical Specifications” in your User’s Guide for
temperature and humidity information.
■
If you do not wish to install the server yourself, contact
Digital Customer Service. A Customer Service Technician can install the server for you.
In addition to its automated yet extensible method
of express installations for Network Operating
Systems, Quick Launch provides a comprehensive archive of server documentation, troubleshooting assistance, and indispensable configuration utilities; all on one bootable CD!
2
Prioris Servers
1
Unpack your server and check the parts
Unpack and identify your server’s components.
Prioris server
Keyboard
The ServerWORKS software kit includes:
■
Mouse
Power cord
Server keys
Server software and documentation kits
VGA feature connector cable
Installation Guide
ServerWORKS Quick Launch kit: ServerWORKS
Quick Launch CD-ROM disk and Reference Guide.
ServerWORKS Manager kit: ServerWORKS Manager software and documentation.
The Prioris Server documentation kit includes:
■
■
This Installation Guide, User’s Guide, Documentation Overview, Options Manuals, Warranty and
Service Information, Diagnostic User’s Guide, and
Registration Card.
3
2
Install any internal options
NOTES
ISA cards should be installed after you run the System
Configuration Utility (SCU) in Step 6 or 7.
Before touching any circuit board or component, wear
an anti-static wrist strap, properly grounded to the server
chassis, or touch the metal frame to discharge any static
electricity.
If your server was not pre-configured at the factory, you
need the following minimum requirements to proceed
with the server installation:
■
■
■
If you have options to install, install them now.
1. Unlock security door
2. Unlock side panel
3. Remove side panel
4. Install options
Refer to these chapters in the User’s Guide for detailed
information on:
■
■
■
■
16 MB of RAM
SVGA monitor
540 MB minimum hard disk drive
Network card
Two or three button mouse
CD-ROM drive attached to the bootable SCSI controller
Keyboard
Expanding Your Server
■ Server Utilities
Also, refer to the documentation that came with the option kit for specific installation instructions.
■
4
Prioris Servers
3
Connect the cables
1. Connect the mouse and keyboard cables into the
corresponding connectors at the back of the server.
2. Place your monitor near your server. Connect the
monitor signal cable to the back of the monitor and
then connect it to the matching connector at the back
of your server.
NOTE
Some large screen monitors (17-inch diagonal and over)
require more power than the server’s auxiliary ac outlet
can supply. These monitors will have power cords that
must be connected directly into a wall outlet.
3. Connect the monitor power cord to the back of the
monitor and then connect it to the matching connector at the back of your server or into a wall outlet .
4. If you installed a network card, connect the network
cable now. Refer to the manufacturer’s documentation for more information.
Installation Guide
5
4
Connect the power cord
Connect the ac power cord to the server, then to your
power outlet.
CAUTION
The voltage select switch must match the
voltage supplied by your outlet. In North
American countries, 115 V ac current is
common. In other countries, 230 V ac
current is common. Make sure that the
voltage select switch is set to the correct
voltage. If it is not set correctly, you can
damage your server. The voltage select
switch is located above the monitor power
outlet.
Do not attempt to modify or use an
external 100 V ac (Japan only) or 115 V ac
power cord for 220-240 V ac input power.
Modifying either power cord can cause
severe equipment damage.
6
Prioris Servers
5
Turn on the monitor and then the server
1. Turn on the monitor.
2. Turn on the server.
3. Adjust the monitor contrast and brightness to obtain a
readable screen display.
NOTE
Refer to your User’s Guide for BIOS and Power-on-selftest (POST) messages.
Installation Guide
7
6
Run the Quick Launch CD-ROM program
1. Locate the Quick Launch CD-ROM disk in your
ServerWORKS software kit. Power on your server
and insert the CD-ROM disk. Press Ctrl + Alt + Del to
reboot your server.
2. When prompted, enter the MS-DOS partition size.
Quick Launch then creates an MS-DOS partition on
the hard disk drive using the FDISK utility. Afterwards,
your server automatically reboots.
The Quick Launch main menu appears and all utilities and related files (SCU, diagnostics, RAID, etc.)
are installed onto the MS-DOS partition.
Use the Quick Launch CD-ROM disk to complete the
server installation. Follow these steps to configure your
server and install an operating system.
NOTE
This procedure assumes that no additional EISA, PCI,
or ISA cards have been installed in your server. If you
installed optional expansion card(s), you need to perform the instructions on the next page.
8
3. Select Install Software from the Quick Launch main
menu. Choose Express for unattended operating
system installation of Microsoft Windows NT or Novell NetWare or choose Conventional for a traditional
operating system installation (SCO UNIX, OS/2, Microsoft Windows NT, or Novell NetWare).
Refer to the Quick Launch Reference Guide included
with the ServerWORKS software kit for detailed installation procedures.
Prioris Servers
7
If you installed optional expansion cards
Make sure you are familiar with using:
4. Select Install Software from the Quick Launch main
Use the Quick Launch CD-ROM disk to complete the
server installation. Follow these steps to configure your
server and install an operating system.
menu. Choose Express for unattended operating
system installation of Microsoft Windows NT or Novell
NetWare or choose Conventional for a traditional operating system installation (SCO UNIX, OS/2, Microsoft Windows NT, or Novell NetWare).
Refer to the Quick Launch Reference Guide included
with the ServerWORKS software kit for detailed installation procedures.
1. Locate the Quick Launch CD-ROM disk in your
NOTE
The System Configuration Utility (SCU)
■ The SCSISelect Utility
Refer to your User’s Guide and SCSI manuals for any
additional information.
■
ServerWORKS software kit. Power on your server
and insert the CD-ROM disk. Press Ctrl + Alt + Del to
reboot your server.
2. Use the SCU, when displayed, to configure the EISA
If you installed additional SCSI cards, make sure the
MS-DOS partition resides on the drive you want it to be
on. If not, shut down your server, change the order of
your cards and reconfigure your server.
option cards you installed or to enable the PCI cards.
If you installed ISA cards, check the current card
configuration to avoid IRQ or address conflicts before
manually setting jumpers and switches.
Your server automatically reboots after you save and
exit the SCU.
3. When prompted, enter the MS-DOS partition size.
Quick Launch then creates an MS-DOS partition on
the hard disk drive using the FDISK utility. Afterwards, your server automatically reboots.
The Quick Launch main menu appears and all utilities and related files (SCU, diagnostics, RAID, etc.)
are installed onto the MS-DOS partition.
Installation Guide
9
8
7
Express operating system installation
Express Installation Microsoft Windows NT Server & Novell NetWare
You will be asked to provide the following information before you can Express install Microsoft Windows NT or Novell
NetWare.
Windows NT Server
Novell NetWare
Full Name______________________________________
Server Name ___________________________________
Organization Name ______________________________
Organization Name_______________________________
Server Name ___________________________________
Frame Type _____________________________________
Product ID _____________________________________
Administrator Password ___________________________
NT Server Type _________________________________
Time Zone______________________________________
License________________________________________
Time Zone _____________________________________
Work Group Name_______________________________
Network
■ Install NWLink
■
Install NetBEUI
■
Install TCPIP
10
Fill in the information as required. Have your Microsoft
Windows NT or Novell Netware software kit ready. Follow the instructions on the screen to begin your operating system installation.
Prioris Servers
9
Creating server utility and device driver diskettes
Use the method described in Step 6 or 7 to boot the
Quick Launch CD-ROM disk and configure your server.
From the Quick Launch main menu, select Install Software. Choose the Conventional method to create operating system-specific device driver and server utility diskettes from image files located on the Quick Launch CDROM disk. You will need these diskettes to traditionally
install Windows NT, Novell NetWare, SCO UNIX, OS/2,
and other operating systems.
The following is a list of device drivers you might need:
If you prefer, you can create the required diskettes from
Windows 3.1 or Windows for Workgroups based workstations using these procedures:
Network—choose from several device drivers for
Digital supported network interface cards.
The following is a list of bootable server utilities:
1. Locate the Quick Launch CD-ROM disk in your
ServerWORKS software kit. Insert the CD-ROM disk
into the CD-ROM drive.
2. From the Windows Program Manager, select File,
then Run.
3. Enter:
qlaunch.exe
4. Select Install Software from the ServerWORKS
Quick Launch main menu.
5. Select Conventional and then your server’s operating
system. Select your server’s model name to view the
list of available disk images.
For more information, refer to the ServerWORKS Quick
Launch Reference Guide and the on-line help in the
ServerWORKS Quick Launch program.
Installation Guide
■
SCSI—enables your server to operate using an
Adaptec SCSI controller.
■
Mouse—enables your server to operate using a
Logitech mouse.
■
Video—enables your server to operate using the
onboard Cirrus video controller or other supported
video cards.
■
■
SCU—enables you to make a bootable SCU diskette for use when configuring your server and adding options.
■
Diagnostics—enables you to make a bootable
diskette for use when troubleshooting your server.
■
RAID—enables you to make a bootable RAID Configuration Utility diskette for use when configuring an
optional external RAID array.
11
10
Register your server and review your documentation
Register
If You Need Help
1. Record the server’s model number and serial number
If you have questions about your sever hardware, software, or warranty, please contact Digital’s Customer
Service organization.
here.
■ Server Model Description:
■
________________________________________
Before You Call Digital
(located on the front of the server)
1. Run the diagnostics shipped with your server to
Server Model Number and Serial Number:
________________________________________
(located on the back of the server)
2. Send in the registration card contained in your Prioris
Server documentation kit.
Warranty
■
3-year on-site hardware warranty.
■
Refer to your Warranty and Service Information for
specific warranty terms and conditions.
isolate the problem. You can run the diagnostics from
the MS-DOS partition created by Quick Launch or
you can create a diagnostics diskette from the Quick
Launch “Install Software” Conventional button.
2. Have the server’s model number and serial number
available before you call.
3. Record any error messages and be prepared to describe the sequence of events that led to your problem.
4. Call 1-800-354-9000.
For Technical Information
Technical information is available 24 hours a day on the
Digital bulletin board service (BBS). For access call:
US Digital BBS
■
12
1-508-496-8800
Prioris Servers
11
Install the ServerWORKS software
After your server and network operating system installation is complete, install Digital’s ServerWORKS Manager
to:
■
Access an easy-to-use server management interface
■
Monitor critical PC server statistics
■
Obtain an easy-to-read topology map of the network
Manage server fault conditions
Support distributed SNMP network devices from
anywhere on the LAN
■
■
NOTE
Refer to the ServerWORKS Manager README FIRST
letter and User’s Guide in the ServerWORKS software
kit for installation information.
Installation Guide
13
Prioris and ServerWorks are trademarks of Digital Equipment Corporation
SCO UNIX is a trademark of The Santa Cruz Operation, Inc.
OS/2 is a trademark of International Business Machines Corporation
MS-DOS, Windows NT, Windows 3.1 & Windows for Workgroups are registered trademarks of Microsoft Corporation
NetWare is a U.S. registered trademark of Novell, Inc.
Logitech is a trademark of LOGITECH, Inc.
All other trademarks and registered trademarks are the property of their respective holders.
PRINTED IN U.S.A.
SEIGCVR.PM5
1
11/29/95, 6:20 AM
Printed on
recycled paper