1
MAYTAG G_-.MIHI'"'
It.LEL, I nit,., n_,,_,,
MER6870, MER6770, MER6551
i '
i
,'ffrL
_
!
i!
__i_
_!
;
'_FE
'"_" _]Y...............
_i
,_,
Installer:
Pleaseleavethismanualwith
,,_, thisappliance.
Consumer:
Pleasereadand keepthis
'
_
r_
manualfor futurereference.
Keepsales
receipt
and/orcancelled
checkasproofof
purchase.
_
"
i::,
i
......
_ACE COOKING
. Pages 3-4
_:,
'_'
Pages 5-10
_.
U
ORE
vn,CALL
.vv
........
SerialNumber
DateofPurchase
,_
COOKING
• .......
.....
Pages 11-13
&CLEANING
Model
Numbe_ "_E
'_
Pages 1-2
_E_E .-,._.
Page l Z
_ARflANTY
• ...........
Page1
i!:
_
_ .........
_;
Inourcontinuing
efforttoimprove
the qualityandperformance
of
i
necessary
to makechangesto
theappliance
without
revising
this
guide,
,_;'
_
_
;_
i
,J
our
cook,
og
products,
,trna_
be
_UIDEDE
......
•
L'UTILISATEUR
. . . Page 1
DEL
USUARIO
.......
Ifyouhavequestions,
call:
Page 3
1-888-4MAYTAG
(1-888-462-9824)
1-800-688-2080
( U.S.TTYfor
hearing
orspeech
impaired)
(Mon.-FrL,
8am-8pmEastern
Time
Internet:http://www.maytag.com
Forserviceinformation,
seepage15.
Form No. A/03/O0
Pert No. 8113P257-60
......
http://www.maytag.com
74005366
Utho U.S,
IMPORTANT
SAFETY
INSTRUCTIONS
GENERAL
IFISTflUCTIOFIS
oi.
to,.oe
bowlsor coverovenracksor ovenbot-
ingthis appliancetoprevent
thepotentialrisk
offire,electricshock,personalinjuryor damageto the applianceas a resultof improper WARNING:
NEVERuseappliance
door(s),
usageof the appliance.Useapplianceonly or
drawer,
i
f
equipped,
as
a
stepstoolor
seatasthis mayresultin possibletipping
for its intendedpurposeas describedin this oftheappliance,
damagetotheappliance,
guide,
andseriousinjuries,
tOm.shock,ThiSfire,COUldor
damageresult
into
riskthe
appliance.°f
electric
Usefoilonlyasdirectedinthisguide.
Aerosol-type
cansareEXPLOSIVE
when
exposedto heatandmaybehighlyflammable.Donotuseorstorenearappliance,
To ensureproperand safe operation:Appliance must be properly installed and
groundedbya qualifiedtechnician,
Ifapplianceisinstallednearawindow,precautionsshouldbe takento preventcurtainsfromblowingOversurfaceelements.
COOKTOP
ALL RANGES CAN TIP AND
CAUSE INJURIES TO
NEVERuseappliancetowarmorheatthe
room.Failureto followthisinstructioncan
leadto possibleburns,injury,fire,ordamagetothe appliance,
NEVERleavesurfaceunitsunattended
especiallywhenusinghighheat.Anunattendedboilovercouldcausesmokinc
anda greasyspillovercancauseafire.
PERSONS
INSTALL ANTI-TIP DEVICE
PACKED WITH RANGE
FOLLOW
ALL INSTALLATION
INSTRUCTIONS
To reducerisk of tipping of the appliancefromabnormalusageor byexecssire loadingof theovendoor,the appliante must be secureby a properly installedanti-tipdevice,
NEVERwearloose-fitting
or hanginggar- Thisapplianceis equippedwithdifferen_
meritswhileusingtheappliance.Clothing sizesurfaceelements.Selectpanswitt
couldcatchutensilhandlesor igniteand flat bottoms large enough to cove_
causeburnsif garmentcomesin contact element.Fittingpansizeto elementwil
withhotheatingelements,
improvecookingefficiency.
To ensureproperoperationandto avoid
damagetotheapplianceor possibleinjury,
donotadjust,service,repairor replaceany
partof the applianceunlessspecifically
recommended
inthisguide.Referallother
If panissmallerthanelement,a portior
of the elementwill beexposedto direc
contact and could ignite clothingo
potholder.
Tocheckif deviceis properlyinstalled,look
servicingto a qualifiedtechnician.
underneathrangewith a flashlightto make
sureoneof the rearlevelinglegsis properly
engagedin the bracketslot.Theanti-tipdevicesecuresthe rearlevelinglegto thefloor
whenproperlyengaged.You
shouldcheckthis
anytimetherangehasbeenmoved.
NEVERstoreorusegasolineorothercombustibleorflammable
materials
intheoven,
nearsurfaceunitsor in thevicinityofthis
appliance
asfumescouldcreateafirehazardor anexplosion,
Only
certaintypesofglass,
lass/ceramic
ceramic,earthenware,
orgotherglazec
utensilsaresuitablefor cooktopor over
servicewithoutbreakingdueto thesud
denchangein temperature.
Followuten
sil manufacturer's
instructionswhenus
ingglass.
IH (AS[
OF FIRE
Topreventgreasefires,donotletcooking This appliancehasbeentestedfor saf_
greaseor otherflammablematerialsac- performanceusing conventionalcook
cumulatein or neartheappliance,
ware.Do not useanydevicesor acce,
Turnoffappliance
andventilating
hoodtoavoid
spreadingthe flame.Extinguishflamethen
turnonhoodto removesmokeandodor.
Use onlydry potholders.Moistor damp
potholdersonhotsurfacesmayresultina
steamburn.Do not let potholderstouch
hotheatingelements.Donot usea towel
soriesthat are not specificallyrecom
mendedinthismanual.Donotuseeyeli,
covers,stovetop grillsor add-onove
convectionsystems.Theuseof device
_Cooktop: Smotherfireor flamein a pan
witha lidor cookiesheet,
or other bulkyclothwhichcould easily
touchhot heatingelementsandignite,
NEVERpickupor moveaflamingpan.
Alwaysturnoffallcontrolswhencooking
iscompleted,
oraccessories
thatarenotexpresslyrec
ommended
inthismanualcancreates_
rious safetyhazards,result in perfol
manceproblems,and reducethe life c
the components
of thisappliance.
> Oven:Smotherfireorflamebyclosingthe
ovendoor.
NEVERheatunopenedcontainers
onthe
surfaceunitor intheoven.Pressure
buildDonotusewaterongreasefires.Usebaking upin the containermaycausecontainer
soda,a drychemicalorfoam-type
extinguisher to burstresultingin burns,injuryor damto smotherfire or flame,
ageto theappliance,
1
Turnpanhandletowardcenterofcooktol
notoutintotheroomor overanothersu
face element.This reducesthe risk c
burns,ignitionofflammable
materials,c
spillageif pan is accidentlybumped
reachedbysmallchildren.
Topreventdamageto removableheating
elements,donotimmerse,soakorclean
in adishwasher
or self-clean
oven.A damagedelementcouldshortresultingin a
fireor shockhazard.
Makesuredripbowlsarein placeas absenceofthesebowlsduringcookingcould
damagewiring,
Donot useovencleaners.Nocommercial
ovencleaneror ovenlinerprotectivecoatingof anykindshouldbeusedinor around
anypartof theoven.
Children
mustbe
that the
appliance
and utensilsin
ortaught
on it canbe
hot.Let
hot
Before serf-cleaningthe oven, remove utensilscoolin a safeplace,out of reachof
broilerpan,ovenracksand otherutensils smallchildren.Childrenshouldbetaughtthat
topreventexcessive
smoking,discoloration anapplianceisnota toy.Childrenshouldnot
of the ovenracksor possibledamageto beallowedtoplaywithcontrolsorotherparts
utensils,
ofthe unit.
6[ASS-CERAMI(
COOKTOP
Wipe up excessivespillovers,especially
greasy
NEVER cook on broken cooktop. If
cooktopshouldbreak,cleaningsolutions
andspilloversmaypenetratethe broken
cooktopandcreateariskofelectricshock,
itemscould damagethe applianceor be
burnedor seriouslyinjured.
spills,beforethecleancycletopreventsmoking,flare-upsor flaming.
It is normalfor thecooktopto becomehot
duringa cleancycle.Therefore,
avoidtouchingthecooktop,door,windowor ovenvent
Contactaqualified
technician
immediately, duringa cleancycle,
Cleancooktopwithcaution.Somecleanerscanproducenoxiousfumesifapplied
to a hotsurface,If awetsponge,cloth,or
HEA[IHGELEM[H[I
HOODS
...,,,...,,.,,..,,,,VI:NTIIATINr,
•
CleanpreventrangegreasehOOdor
otherandflammablefilters
frequentlYmaterialstO
!
from accumulating
on hoodor filterand to
avoidgreasefires.
Turnthefanonwhenflambeingfoods(such
as CherriesJubilee)underthe hood.
NEVER
to.o,
s.,.oe ,e.,,ng
IMPORI.
AflNIIY
i OIICE
bePapert°welisused°nah°tc°°kingarea'careful
toavoidsteamburn.
or oven
elements,areasnearelements,or inte-
WARNING
riorsufaoes of oven.
_
Useextremecautionwhen movingthe
greasepanor disposingofhotgrease.AIlowgreaseto coolbeforeattemptingto
movepan.
Heatingelementsmaybehoteventhough
theyaredarkin color.Areasnearsurface
elementsandinteriorsurfacesof anoven
maybecomehot enoughto causeburns,
Duringand afteruse,do not touchor let
clothingor otherflammablematerialscontactheatingelements,
areasnearelements,
TheCalifornia
SafeDrinkingWaterandToxic
EnforcementAct of 1986(Proposition65)
requiresthe Governorof Californiato publisha listof substancesknownto the State
ofCaliforniatocausecanceror reproductive
harm,andrequiresbusinesses
to warncus-
OVEN(S)
or interiorsurfacesof ovenuntiltheyhave
hadsufficienttimetocool.
tomersof potentialexposures
to suchsubstances.
Usecarewhenopeningdoor(s).Lethotair
orsteamescapebeforeremoving
orreplacingfood.
Forproper oven operationand performance,donotblockor obstructovenvent
duct.Whenovenis inuse,the areanear
Other potentiallyhot surfaces include:
Cooktop,areasfacingthe cooktop,oven
vent,andsurfacesnearthe ventopening,
ovendoor(s),areasaroundthedoor(s)and
ovenwindow(s),
"'---"--_)_[_-_,[[_NIN_I
"--OVEN
partof the applianceas theycouldbeinjuredor burned,
CAUTION:NEVERstoreitemsof interest
DEEP FAT FRYERS
Usersofthis applianceareherebywarned
thatwhenthe ovenis engagedin the selfcleancycle,theremay be somelowlevel
exposureto someof the listedsubstances,
includingcarbon monoxide.Exposureto
thesesubstances
canbeminimizedbyproperlyventingtheoventothe outdoorsduring
theself-clean
cyclebyopeninga windowand/
theventmayfeelhotorwarmtothetouch. CHILDI,_F[[Y
Alwaysplaceovenracksin desiredIocaor doorin the roomwherethe applianceis
tionswhileovenis cool.If rack mustbe NEVERleavechildrenaloneor unsuper- located.
movedwhile oven is hot, do not let visedin areawhereapplianceisin useor
potholdercontacthot elementin oven.
isstillhot.
IMPORTANTNOTICEREGARDINGPET
BIRDS:Neverkeeppetbirdsin thekitchen
NEVERallowchildrentositorstandonany orin roomswherethefumesfromthekitchen
Cleanonlypartslistedinthisguide.Donot
cleandoorgasket.Thegasketis essential
for a goodseal.Do not rub,damage,or to childrenin cabinetsaboveanappliance
movethegasket,
oronbackguardofarange.Childrenclimbingon appliance,dooror drawerto reach
couldreach.Birdshaveaverysensitiverespiratorysystem.Fumesreleasedduringan
ovenself-cleaning
cyclemaybeharmfulor
fatal to birds.Fumesreleaseddueto overheatedcookingoil,fat,margarineandoverheatednon-stick
cookwaremaybe equally
harmful.
SURFACE
COOKING
SURFACE
CONTROLS
Useto turnon the surfaceelements.An
infinitechoiceof heatsettingsis available
fromLOWtoHIGH.Theknobscanbeseton
or betweenanyofthesettings.
SE'R'ING
THECONTROLS
1. Placepanonsurfaceelement.
2. Pushinandturntheknobineitherdirectiontothe desiredheatsetting,
Thebackguardismarkedto
identifywhichelementthe
knobcontrols.Forexample,
([) 0 indicatesrightfront
([)0
element,
BeforeCooking
Alwaysplacea panonthe surface >- Cleanup messyspillsas soonas
unitbeforeyouturniton.Toprevent
possible.
damagetorange,neveroperatesurfaceunitwithouta paninplace.
OtherTips
>- NEVERusethecooktopasastorage >> Ifcabinetstorageisprovideddirectly
areaforfoodorcookware,
abovecookingsurface,limitittoitems
that are infrequentlyusedand can
DuringCooking
besafelystoredinanareasubjected
>
Besureyouknowwhichknobcontroiswhichsurfaceunit.Makesure
to heat.
Temperaturesmay be unsafefor
youturnedon the correctsurface
unit.
Begincookingona higherheatset- >
tingthenreducetoa lowersettingto
completetheoperation.Neverusea
itemssuchasvolatileliquids,cleanersor aerosolsprays.
NEVERleaveanyitems,especially
plasticitems,onthe cooktop.The
hotairfromtheventmayigniteflare-
highheatsettingforextendedcooking.
mableitems,meltorsoftenplastics,
or increasepressurein closedcon-
>- NEVERallowa panto boildry.This
coulddamagethepanandtheappli- >
ance.
tainerscausingthemto burst.
NEVERallowaluminumfoil, meat
probesor any othermetalobject,
>
otherthan a pan ona surfaceelement,to contactheatingelements.
>
3. Thereisanindicatorlightbyeachpairof
controlknobs.Whenoneor bothof the
surfacecontrolknobsis turnedon, the
lightwill turn on. The lightwill turnoff
whenthe surfaceelement(s)is turned
off.
4. Aftercooking,turn
knobtoOFF.Remove
pan.
DUALELEMENT
(SELECT MODELS)
Thecookingsurfaceisequippedwitha dual
elementlocatedintherightfrontposition.To
operate,pushinonthecontrolknobandturn
to the leftto controlthe largeelement,or
pushin
andturnto the rightto controlthe
smallelement.
NEVERtouchcooktopuntil it has
cooled.Expectsomepartsof the
cooktop,especiallyaroundthe surface units,to becomewarmor hot
duringcooking,Use potholdersto
protecthands.
SUGGESTED HEAT SETTINGS
_H,GH
The size,type of cookwareand cooking
operationwill affectthe heatsetting. For
information
oncookwareandotherfactors
affectingheatsettings,referto "Cooking
MadeSimple"booklet.
MED.
2
HIGH:
Low ,
4
6
Usetobringliquidto aboil.Alwaysreduce
settingtoa lowerheatwhenliquidsbeginto
boilorfoodsbeginto cook.
8_"_H_G"_8
}
AfterCooking
MED.
/
6
.,o.
MEDfU,_
MED.HIGH:
Useto brownmeat,heatoilfor deepfat
fryingor sauteing.Maintainfast boil for
largeamountsof liquids,
MED.LOW:
Usetocontinuecookingcoveredfoodsor
steamfoods.
MEDIUM:
Usetomaintainslowboilforlargeamounts
of liquidsandfor mostfryingoperations,
LOW:
Useto keepfoodswarmandmeltchocolateandbutter.
5LASS-[ERAMI[
SURFA[[
(SELE£T
MODELS}
lOlL
[L[MEHT
SUIEA.[E
(S{L[[T
MODELS}
GLASS-CERAMIC
SURFACE
I
I!
LIFT-UPPORCELAIN
COOKTOP
Cooktopmayemitlightsmokeandodorthefirstfewtimesthecooktopisused.
This
grasptheeooktop
isnormal,
frontedge.Gently
OnCanadian
models,
thesurface
willnotoperate
during
a
self-clean
c
ycle.
Whena controlisturnedon, a redglowcanbeseenthroughthe glass-ceramic Tolift:Whencool,
liftupuntilthetwo _._u_
o°RT
surface.Theelementwillcycleonandoffto maintainthe presetheatsetting,
supportrodssnapintoplace.
|
Glass-ceramic
cooktopsretainheatfor a periodoftimeafterthe unitisturnedoff.
WhentheHOTSURFACE
lightturnsoff(seebelow),thecookingareawillbecool
enoughtotouch,
To lower: Holdthecooktopfrontedgeand
carefullypushbackoneachsupportrodto
release.Thenlowerthe topintoplace.
!
NOTE:Donotattemptto liftthecooktop.
COILELEMENTS
COOKING
AREAS
> Neverusecooktopasa worksurfaceor _ Whenanelementis on,it willcycleon
cuttingboard.Nevercookfooddirectly
andoffto maintainthe heatsetting.
Thecookingareasonyourrangeareidentiffedby
patternsonthe glassceramicpermanent
surface.Formostefficientcook-
onthesurface.
_ Coilelementsareself-cleaning.Do not
_ Neverusefoil-typedisposablecontainimmerseinwater.
ersor placea trivetor wokringbetween To remove: When
the surfaceand pan. Theseitemscan cool, raise element.
markor etchthetop.
Carefullypulloutand
> Donotslidealuminumpansacrossa hot awayfromreceptacle.
surface.
Thepansmayleavemarkswhich
needtoberemovedpromptly.(SeeCleanTo replace: Insertele- \,-ER,_,NA,S
ing,page12.)
meritterminalsintoreceptacle.Guidethe
elementintoplace.Pressdownontheouter
> Makesurethesurfaceandthe panbot- edgeofelementuntilitsitslevelondripbowl.
tomarecleanbeforeturningonto pre-
ing,fit thepansizetotheelementsize.
Pansshouldnot extendmorethan1/2to
1-inchbeyondthe cookingarea.
Formoreinformation
oncookware,referto
"CookingMadeSimple"booklet,
HOTSURFACE_
LIGHTS
Eachelement__c_!
ventscratches.
DRIP BOWLS
hasaHOTSUR-_-/__
j
_ Topreventscratchingor damageto the
FACEindicatorlight. A _
glass-ceramic
top,do not leavesugar, Thedripbowlsundereachsurfaceelement
catchboiloversand mustalwaysbe used.
lightwill beilluminated
whenthe matching
saltorfatsonthecookingarea.Wipethe Absenceof dripbowlsduringcookingmay
cookingareais hot. Itwillremainon,even
cooktopsurfacewitha clean clothor
afterthecontrolisturnedoff,untilthearea
papertowelbeforeusing,
damagewiring.
hascooled.Theyarelocatedatthe front _ NeveruseasoileddishclothorspongetoTo preventthe riskof electricshockor fire,
centerofthecooktop,
cleanthe cooktopsurface.A film will neverlinedripbowlswithaluminumfoil.
remainwhichmaycausestainson the Dripbowlswill discoloror crazeovertime.
TIPSTOPROTECT
THE
cookingsurfaceaftertheareaisheated. Thiswillnotaffectcookingperformance.
GLASS-CERAMIC
SURFACE
Beforefirstuse,cleanthecooktop.(See
Cleaning,page12.)
Donotuseglasspans.Theymayscratch
thesurface,
Donotallowplastic,sugarorfoodswith
highsugarcontenttomeltontothe hot
cooktop. Shouldthis happen,clean
immediately.
(SeeCleaning,page12.)
Neverlet a pan boil dry as this will
damagethesurfaceandpan.
COIL ELEMENTSURFACE
avoidusinghighheatfor longperiods.
! OnCanadianmodels,thetwofrontelementswillnotoperateduringself-clean.
! Do
not useoversized
cookware.Pans
shouldnotextend
morethan1-2inches
! Cleancooktopaftereachuse.
beyondtheelement.
! WipeacidorsugarSpillsassoonasthe ! Whenhomecanningor cookingwithbig
cooktophascooledasthesespillsmay
pots,usethe CanningElement(Model
discoloror etchthe porcelain.
CE1).Contactyour Maytagdealerfor
To protectdrip bowlfinish:
detailsor call1-800-688-8408
to order.
! To lessen discolorationand crazing, I Cleanfrequently.(Seepage12.)
OVEN
COOKING
Theelectronic
controlisdesigned
foreaseinprogramming.
Thedisplaywindowonthecontrolshowstimeofday,timerandovenfunctions.
Messageswillscrolltopromptyourprogramming
steps.Thedisplayshowsthelowerovensetat375oFandTIMER1setfor45minutes.Bracket
line(upperleftside)coincides
withmessage
indisplay.ControlpanelshownincludesConvectBakefeature.
Upper Oven
12HourOff _merBeepsC_Em_
Beep_
5
6
Control
Lock Scroll
SpeedDisplay
Dim
Lower
Oven
..
J
> Besureall packingmaterialis
removedfromovenbeforeturningon.
> PreparedFoodWarning:Followfoodmanufacturer's
instructions.Ifaplasticfrozenfoodcontainerand/orits coverdistorts,
warps,or isotherwisedamaged
duringcooking,immediatelydiscardthefoodanditscontainer,
Thefoodcouldbecontaminated.
Followthemanufacturer's
directionswhenusingovencooking
bags.
>- Donotuseovenforstoringfood
orcookware,
Furtherinstructions
willscrollindisplay
Torecallthetimeofdaywhenanotherfunction
afterfunctionpadsarepressed,
is showing,pressCLOCKpad.Clocktime
cannotbechangedwhentheovenhasbeen
programmedforclockcontrolledcooking,
selfcleanor delayedself-clean.
NOTE: Thetemperatureor time will be
automatically
enteredfoursecondsafter
selection.
If morethan30 secondselapsebetween
pressingafunctionpadandtheAUTOSET
pador numberpads,the functionwill be
canceledandthedisplaywill returntothe
OVEN FUN(HONS
previousdisplay.
SETTING
UPPER
AND
LOWER
I
(ONfROt
OPTIONS
CANCEL
PAD
Use to cancelall programmingexcept the
ClockandTimerfunctions.
Severalcontroloptionsareindicated
under
the numberpadsonthe control.Factorysetoptionscanbechangedtoyourpreferences.Seepage9 for moreinformation.
_
AUTOSETPAD
Usewithfunctionpadsto automatically
set:
> 3500F baketemperature
OVEN
CONTROL
PADS
>_ Pressthe desiredfunctionpadfor
the upperor loweroven.
> Pressthe AUTOSET pador the
appropriate
numberpad(s)toenter
timeor temperature,
>- A beepwillsoundwhenanypadis
pressed.
A doublebeepwill soundif a programmingerroroccurs.
SETTING
THe
CLOCK
HIor LObroil
1. PressCLOCKpad,
IndicatorwordTIME >_ threehoursof cleaningtime
willflashin thedisplay.
> fourminutesof toastingtime
2. Presstheappropriate
numberpadsfor
the currenttime.(Timeis in a 12-hour
> 1700Fkeepwarmtemperature
format.)
Aftera powerinterruption,the last clock
> to changecontroloptions
timebeforethe interruption
willflash.
BAKE
PAD
BAKING
Usefor bakingandroasting.
1. PressBAKEpad.
CONVECT
BAKING
I If the TOASTINGfunctionis operat- (SELECT
MODELS)
ing in the upperovenwhenlower I Asa generalrule,whenconvection
ovenBAKEpadandtemperature
are
baking,set the oventemperature
2. Pressagainfor 350° F or pressthe
AUTOSETpad.Eachadditionalpress
entered,thecontrolwilldisplayHEATING DELAYEDX MIN followedby
WAIT. At the end of the delaythe
lowerovenwillstartautomatically,
250F lowerthan the conventional
recipeor preparedmixdirections.
Bakingtimewillbethesametoafew
minuteslessthandirections.
ofAUTOSETwillraisethetemperature
25oF.
Or,presstheappropriate
number
padsfor the desiredtemperaturebetween100° Fand5500F.
I To recall the set temperatureduring I Whenroastingmeatusingthe con3. Whentheoventurnson,a redpreheat
indicatorwill light.
LOWER
PREHEAT
BAKE
OVEN
ICON
BRACKET
vectionsetting,roastingtimesmay
beupto 30%less.(Maintainconverttionalroastingtemperatures.)
Seeroastingchartin "CookingMade
I Allow4-8minutesforthe upperovento
preheat.Allow 10-16minutesfor the
lowerovento preheat,
Simple" bookletfor recommended
roastingtemperatureand times,and
additionalbakingandconvection
cookingtips.
I Allow at least 1h-inchbetweenthe
bakingpanorcasseroleandthetop
elementintheupperoven.Loaf,angel BROILING
foodorbundtpansarenotrecommended
in theupperoven.
I If theTOASTING
functionis operating in the upperovenwhenlower
! Donot usetemperatures
below1400F
ovenBROILpadispressed,adouble
to keepfoodwarmor below200° Ffor
beepwillsoundanddisplaywill
read
cooking.Forfoodsafetyreasons,lower
TOASTING
WAITX MIN.
temperatures
arenotrecommended.
I HIbroilis usedfor mostbroiling.Use
I The backpartof the lowerovenbake
LObroilwhenbroilinglongercooking
element will NOT glow red during
foodstoallowthemtocooktowelldone
baking.Thisisnormal,
stagewithoutexcessivebrowning.
4. A singlebeepwillindicatethe ovenis
preheatedto theset temperature.
The
preheatindicatorwillturnoff.
5. Whencookingiscomplete,pressCANCELpad. Removefoodfromoven.
BAKEPAD
CONVEOT
(LowER
OVENONLY-
preheatpresstheBAKEpad.
! To change oven temperatureduring
cooking,pressthe BAKE padandthe
appropriatenumberpads.
!
SELECTMODELS)
1. PressCONVECTBAKEpad.
2. Pressagainfor
325° F or pressthe
AUTOSETpad.Eachadditional
press
ofAUTOSETwiliraisethetemperature
25°F.Or,presstheappropriatenumber
padsfor the desiredtemperaturebetween100° Fand5500F.
! Whenbakingfrozen,self-risepizzasin ! Nevercoverbroilerpaninsertwithaluthe upperoven,placethe pizzaon a
minumfoiI.Thispreventsfatfromdraincookiesheettoavoidoverbrowning,
ingtothe panbelow.
! Foradditionalbakingandroastingtips, ! Expectbroil times to be longerand
referto the "CookingMadeSimple"
browningto beslightlylighterif applibooklet,
anceisinstalledona 208voltcircuit.
.......
3. Whentheoventurnsona redpreheat
BROILPAD
indicator will light and the _
convecticonwill bedisplayed. _
Usefortop browningor broiling.Forbest
3. Foroptimalbroiling,preheatthreeto
fourminutesoruntilthebroilelementis
red.
4. A singlebeepwill indicatethe ovenis
preheatedto the settemperature.
The
preheatindicatorwillturnoff.
results,usethe broilerpanprovidedwith
yourrange.
1. PresstheBROILpad.
4. Placefoodin
ovenleavingthe
oven
dooropentothefirst
stopposition(about
fourinches).
5. When cooking is complete, press
CANCELpad.Removefoodfromoven.
2. Pressthe AUTOSETpadfor HIbroil,
pressagainfor LO broil,or pressthe
appropriate
numberpadstosetdesired
broil temperaturebetween300o and
550oF.
5. Follow broilingrecommendations
in
"CookingMadeSimple"booklet.
6. Whenbroilingiscomplete,
pressCANCELpad.Removefood
andbroilerpan
fromoven.
TOASTING
PAD
Settingthe Controlsfor Toasting:
5. At the endof thesettoastingtime,the
displaywill
readTOASTING
COMPLETE
andbeepfourtimes.Onereminderbeep TOASTING
will soundevery30secondsfor5 minutesor untilCANCELpadis pressedor
I Toastingisbasedontimenottemdoorisopened,
perature.
1. PresstheTOASTINGpad.
NOTE:Foroptimalresultswhentoasting
(UPPEROVENONLY)
Fortoastingbreadand productsthat are
toastedin atoasteror toasteroven.
2. Pressthe AUTOSETpadto set4 min- 4-5piecesof breador othersimilaritems,
utes of toastingtime. Each additional followdiagrambelowforfoodplacement.
presswill increasethe toastingtimeby
10seconds.
TOASTING
willbedisplayed,
_
_
Browningtimemayvary,watchtoast- _
ingcarefullytoavoidover-browning.
KEEPWARMPAD
(UPPER OVEN
3. TheAUTOSETtoastingtime
(4minutes)
canbechangedfor yourconvenience.
TochangetheAUTOSETtoastingtime,
pressTOASTING
pad,enterthedesired
time,thenpressand holdAUTOSET
padforseveralseconds.Thecontrolwill
beepandNEWAUTOSETENTERED
will bedisplayed,
ONLY)
Forsafelykeepingfoodswarmorforwarmingbreadsandplates,
1. PressKEEPWARMpad.
2. PressAUTOSET pad for 170° F or
pressthe appropriatenumberpadsfor
temperatures
between1450and1900F.
NOTE:TheAUTOSETtimeforTOAST- 3. KEEPWARMandthe temperatureseINGcanbesetfrom3to
oron
lectedwill bedisplayedwhenthefuncselectmodelsfrom
1010minutes
secondsto
10
tionisactive.
minutes.
4. Whenwarmingiscomplete,
pressCAN4. If the lowerovenis operatingwhenthe
CELpad.Removefoodfromtheoven.
TOASTINGpadispressed,TOASTING
NOTAVNLABLE- LOWEROVENIN
USEwillbedisplayed.
ToastTime*/
Food
ColdStart
SlicedWhiteBread3V2-4%min.
Food
Tortillas(flour)
Waffles(frozen)
ToasterPastry
(unfrozen)
3V2-4 min.
ToasterBreaks**,
HotPockets**
4- 5 rain.
Bagels
4_/2-5 min.
4_/2
- 43/4min
EnglishMuffins
3%- 4 min.
CheeseSandwich3%- 4_/2
min
ToasterPastry
(frozen)
4- 4_/2min.
* Toasting
timesareapproximate
andshouldbeusedasaguideonly.
** Brandnamesareregistered
trademarks
ofthe respective
manufacturers.
7
! Toastingtimeswillbeshorterwhen
the ovenis hot or whenrepeated
toastingfunctionsaredone.
KEEPWARM
Or,presstheappropriatenumberpads
tosetthetoastingtimeinminutesand
secondsbetween10secondsand 10
minutes.
! Formoreeven browningresults,
preheattheoven3-4minutes.
ToastTime*/
ColdStart
2_/2- 3 min.
I Foroptimalfoodqualityandnutrition,ovencookedfoodsshouldbe
keptwarmfornolongerthan1to2
hours.
II Foroptimalfoodqualityandcolor,
foods cookedon the rangetop
shouldbekeptwarmforanhouror
less.
I To keepfoodsfromdrying,cover
Iooselywithfoilor a lid.
I To warmdinnerrolls:
- coverrollslooselywithfoil and
placein upperoven.
- pressKEEPWARMandAUTO
SETpads.
- warmfor 12-15minutes.
I Towarm plates:
- place2 stacksofuptofourplates
eachinthe upperoven.
- pressKEEPWARMandAUTO
SETpads.
- warmforfiveminutes,turnoffthe
ovenandleaveplatesintheoven
for 15minutesmore.
- useonlyoven-safeplates,check
withthe manufacturer.
- don'tsetwarmdishesona cold
surfaceasrapidtemperature
changescouldcausecrazing.
......................
COOKTIME/STOP
TIMEPADS
(CLOCK
CONTROLLED
OVEN COOKING)
Usetoprogramtheovenstostartandstop
automatically.
Cooktimemaybesetforup
to 11hoursand59minutes(11:59). The
clockmustbefunctioning
andcorrectlyset
forthisfeatureto work.
Bothovensmaybe setfor clockcontrolledcooking.To set both ovens:
1. SetCOOKTIMEand baketemperaturesfor both ovens.
2. SetSTOPTIMEfor both ovens,
ThewordsSTOPTIMEmustbe
flashinginthe display
tosetSTOPTIME.
To Delaythe Startof CookingandTurn
Off Automatically:
3. PressSTOPTIMEpad.Displayshows
whenthe oven will stop basedon an
immediate
start.
4. PressSTOPTIME pad again.STOP
TIMEmustbeflashingtosetthe delay
starttime.
1. PressCOOKTIMEpad. COOKTIME
5. Pressthe appropriatenumberpadsto
enterthetimeyouwanttheoventostop.
2. Presstheupperor lowerovenBAKEor
CONVECT
BAKE(selectmodels)pad
andselectthe
baketemperature.
COOK
TIMEwill be displayedalongwiththe
temperature,
3. Oneminutebeforethe endofthe programmedcooktime,the lightwill turn
on,a beepwillsoundandCHECKFOOD
willbedisplayed.
LightwillturnoffautomaticallywhenCANCELpadispressed
orafterovendoorisopenedandclosed,
4. At the endof cooktime,the ovenwill
shutoffautomatically,
"End"andCOOK
TIMEwill bedisplayedandfourbeeps
will sound,
5. PressCANCELpad. Removefood
fromoven. If the programis not canceled,there will be 1 reminderbeep
everyminutefor upto 30minutes.
NOTE:TheCookTime/StopTimereminderbeepsmay be changed.See
ControtOptions(CookTimeBeeps),
page9.
The timer(s)may be set for any time
periodup to 99 hoursand 59 minutes
(99:59).
1. PressCOOKTIMEpad. COOKTIME The timer(s)operateindependentlyof
willflash.Presstheappropriate
number
padsto entercookingtimein hoursand anyotherfunction
andcanbeset
anotherovenfunction
isoperating.while
THE
minutes.
TIMERDOES NOT CONTROLTHE
2. Presstheupperor lowerovenBAKEor OVEN.
CONVECTBAKE(selectmodels)pad
andselectthebaketemperature.
COOK 1. PresstheTIMER1or2 pad. TIMER
TIMEwill be displayedalongwith the
1or 2 willflashrespectively.
0HR:00
temperature,
willappearin thedisplay.
To StartImmediatelyandTurnOffAutomatically:
willflash.Presstheappropriate
number
padstoentercookingtimeinhoursand
minutes.
L_Trr_ER2]
TIMERPADS
6. DELAYandBAKEwillbedisplayed,
7. At the endof the delayperiod,COOK
TIMEwill be displayedalongwith the
temperature.
2. Presstheappropriate
numberpadsto
enterdesiredtime.
3. TIMER1orTIMER2willbedisplayed.
If bothtimersareactiveTIMER1 + 2
will bedisplayed.
EXAMPLE:
To seta timerfor 5 minutes,presstheTIMER1 padandthe
numberpad5. Thecontrolwillbegin
countdown
aftera fourseconddelay.
4. Thelastminuteofthecountdown
will
bedisplayedin seconds.
5. Atthe endofthe settime,"END"will
8. Followsteps3-5in precedingsection,
be displayedand one four second
beepwillsoundfollowedbytwobeeps
every30secondsfor upto fiveminutes. Press the corresponding
TIMERpadto cancelthe beeps.
! Highlyperishablefoods suchas
dairyproducts,
pork,poultryorseafoodarenotrecommended
for delayedcooking,
! Clockcontrolledbakingis notrecommendedfor baked itemsthat
NOTE:TheTimerreminderbeepsat
theendofa settimemaybechanged.
SeeControlOptions(TimerBeeps),
page9.
requirea preheated
oven,suchas
cakes,cookiesandbreads,
To Cancela SetTime:
PressandholdthecorrespondingTiMER
padfor severalseconds.Aftera slight
delaythe timeof daywillappear.
OR
PresstheTIMERpadandthe"0"number
pad.Aftera slightdelaythetimerwillbe
canceled.
(ONTROL
OPTIONS
TOChangeFactorySetDefaultOptions: CONTROL
LOcK(4)
1. Controloptionsmaybechanged
byselectingtheSetupOptions(0) padand
the desiredoptionpad.(SeeOptions
below.)
Thefunctionpadsonthecontrolcanbe
Ifyouthinkthe
ovenisoperating
toocold
Iockedtopreventunwanteduseforsafetyorhot,youcanadjustit.
Bakeseveraltest
andcleaningbenefits.Thecurrent
timeof
itemsandthenadjustthetemperature
daywillremaininthedisplay,
settingnotmorethan100Fat a time.
2. Currentoptionwillappearinthedisplay. SCROLLSPEED(5)
3. PresstheAUTOSETpadtochangethe
option.
Thescrollspeedof the messagesin the
display may be changedfrom FASTto
4. PressCANCELpadtosetthedisplayedMEDIUMtoSLOW.
Thedefaultissetforthe
optionandexitthe program,
mediumspeed,
OPTIONS AVAILABLE:
12HOUROFF(1)
Theovenmay besetto turn off after12
hoursor stayon indefinitely.Thedefault
is settoturnoftafter12hours.
TIMERBEEPS(2)
Therearethree choicesfor the end of
"timer" remindersignals.
DISPLAY
DIM (6)
Thecontrolintensitymaybechangedfor
easierreading. Thedefaultis set forthe
highestintensity........ .Thefewer..... the
lesstheintensity.
TEMP
C/F(7)
Thetemperaturescalemay bechanged
to Centigradeor Fahrenheit.Thedefault
issetforFahrenheit.
30secondsfor uptofive minutes(de- The words whichscroll in the display
faultsetting),
maybechangedfromEnglishto French
_- Onebeepfollowedbytwobeepsevery or Spanish.
(9)
DEFAULT
factorysettingfor eachoption.
Therearethree choicesfor the end of
"clockcontrolledcooking"remindersignals.
DISPLAY
ON/OFF(CLOCK)
Thetime-of-daydisplaymaybe shut off
whenthe oven is not in a cookingor
> Fourshortbeepsfollowedbyonebeep cleaningfunction.
everyminutefor upto 30minutes(defaultsetting),
Fourshortbeepsfollowedbyonebeep
every30secondsforuptofiveminutes.
9
1. PresstheBAKEpad(upperor lower
oven)andenter5500F.
2. PressandholdtheBAKEpad(upper
or loweroven)for severalseconds
untilTEMPADJisdisplayed.
3. Pressthe AUTOSET pad - each
presschangesthetemperature
by5°
F. Thecontrolwill acceptchanges
from-35°to +350F.
4. Ifthe ovenwas previouslyadjusted,
the changewill be displayed. For
example,iftheoventemperature
was
reducedby 150 F, the displaywill
show-15oF.
presstheCANCELpadandthetime
of daywill reappearin the display.
The ovenwill nowbakeat the adjustedtemperature.
0YEti
[16t1TS
Thecontrolcanbe resetto restorethe
COOKTIMEBEEPS(3)
Fourshortbeepsfollowedby no other
beeps,
ToAdjust:
5. Whenyouhavemadetheadjustment,
Onebeepfollowedbytwo beepsevery LANGUAGE
(8) (selectmodels)
minuteforupto 30minutes.
Onebeepfollowedbynootherbeeps.
OVENTEMPERATURE
ADJUSTMENT
Theovenlight(s)automatically
comeson
whenthe door(s)is opened.Whenthe
door(s)is closed,pressthe LIGHTPad
(upperorloweroven)onthecontrolpanel
toturnthe light(s)onoroff.
Theovenlight(s)willnotoperateduringa
cleancycle.Theovenlight(s)will come
on automatically
oneminutebeforethe
endofa clockcontrolledcookingoperation.
OVEN
VENT
TO REMOVE
OVENRACKS:
RACK1:
Whentheovenis in use,theareanear
the vent may feel warmor hot to the
>- Pull rackstraightout untilit stopsatthe
touch. NEVERblockthe vent opening,
lock-stopposition;liftuponthefrontofthe
rackandpullout.
OVEN
VENT LOCATION
glideandrackbaseouttogether.
, ',,
MultipleRackCooking:
' __
Tworack:Userackpositions
2 and4,
or 1and4.
_ ForRolrerGlide
TM rack,pullboththerack
Whenhighmoisturefoods arecooked
in theupperoven,steammaybevisible
comingfrom the oven vent. This is
normal.
OY[N RACKS
All racksare designedwitha lock-stop
edge.
HALFRACKACCESSORY
To REPLACE
OVENRACKS:
Placerackontheracksupport
intheoven;
(LOWEROVEN)
tiltthefrontendupslightly;
sliderackback
Ahalfrack,toincrease
ovencapacity,
is
untilitclearsthelock-stopposition;lower
frontandslidebackintothe oven.
availableas an accessory.It fits in the
left,upperportbnof the ovenandprovidesspacefora vegetabledishwhena
largeroasteris onthe lowerrack.Contact your Maytag dealer for the
"HALFRACK"AccessoryKit or call
1-800-688-8408
toorder.
RACKPOSITIONS
0
[]
,
_
_
4
3
>" When pullingthe
II _'\_
upper oven rack _H_,.._>out to removeor _-!_
.,__
checkfood,
grasp
__
thetopedgeofthe
rack.
LOWEROVEN
Threerack:(convection
bakingonly,
selectmodels)Userack_ositions1,3
and5. (Seeillustration.'
-_v_
UPPEROVEN
Is equippedwith one rackand rack
position.
Usefor roastinglargecutsofmeat
andpoultry,frozenpies,dessert
soufflesor angelfoodcake,andtworackbaking.
2
Three-rack
Convection
(Racks 1, 3 and 5)
Baking
RACK4:
Usefortwo-rackbakingandforbroiling.
>_ Conventional:
Is equipped
withone
RollerGlide
TM rackandoneregular
flat
rack.
RACK3:
Usefor mostbakedgoodsona cookie
sheetorjellyrollpan,layercakes,
fruitpies,orfrozenconvenience
foods,
>- with
Convection(selectmodels):
Isequipped
andforbroiling.
one RollerGlide
TM rackand two
regularflatracks.
RACK2:
Useforroastingsmallcutsofmeat,casseroles,bakingloavesofbread,bundtcakes
or custardpies,andtwo-rackbaking.
CARE
&CLEAHIHG
CLEANPAD
Useto set a self-cleancycle. (Onlyone
oven may be cleanedat a time. Both
ovenswill lock when either is being
cleaned.)
ToDelaytheStartofaSelf-Clean
Cyele:
1. Followsteps1-4above.
2. Pressthe STOPTIME pad. STOP
TIMEwill flash.
3. As STOPTIMEflashes,pressthe appropriatenumberpadstoenterthetime
youwishtheovento stop.
1. Clean oven
frame, door , _
/_
I
\
_/_;:.,
/
4.
frame (area _\_-_(_i_
5.
outsideofgas-_--,,_._M%_/..,_h._,;/_/:/
__'-_.-_.__-,
ket)
and
" _---_(>_
around the
_
_/
openingin the doorgasketwith a nonabrasivecleaner such as Don Ami*.
Theseareasarenotexposedtocleaning
temperatures.
I
2. Removeovenracks.If racksareleftin
duringacleancycle,itmayimpairfunclion andtheywill discolor.Turnoff the
ovenlightandclosedoor.
3. PressCLEANpad.
4. Pressthe AUTOSETpadfor3 hoursof
cleaningtime,pressagainfor 4 hours
and
again if 2 hoursof cleantime is
desired.
8. Wipeout the oveninteriorwitha damp
cloth.Ifsoilremainsitindicatesthecycle
wasnotlongenough.
To CancelSelf-CleanCycle:
1. PressCANCELpad.
2. If LOC is NOTdisplayed,open oven
door. If LOCisdisplayed,allowovento
cool.
DELAYCLNandLOCwillbedisplayed,
Whenthe delay periodis completed
andcleaningbegins,CLEANING,
LOC
andthe cleantimewillbedisplayed.
To preventdamagetoovendoor,do
notattempttoopeneitherovendoor
whenthe LOCindicatorwordis displayed.
! Duringthe cleaningprocess,the
kitchenshouldbewellventilatedto
helpeliminatenormalodorsassociatedwithcleaning.Odorswilllessen
withuse.
cleaning.Thisistoavoid damageand possibleburns.
> To preventstainingor discoloralion,cleanappliance
aftereachuse.
>
If a partis removed,be sureit is
correctlyreplaced.
BROILER PAN AND INSERT
> Placesoapyclothoverinsertandpan;
letsoaktoloosensoil.
ingpadtoremovestubbornsoil.
> Broilerpanandinsertcanbecleanedin
dishwasher.
BRUSHED CHROME
It is normalforflare-ups,smokingor
flamingtooccurduringcleaningifthe
ovenis heavilysoiled. It is betterto
cleantheovenregularlyratherthan
towaituntilthereisaheavybuildupof
soil.
(SELECT MODELS)
Wipeupexcessgreaseor spillovers
to preventflare-ups. For ease in
cleaning,the bake elementin the
upperor lower ovencan be lifted
slightly(1to 1_/2
inches),
streaking
thesurface.Rinseandbuff.
> Topreventscratching,
donotuseabrasivecleaners.
> To restorelusterandremovestreaks,
followwithStainless
SteelMagicSpray*
(Part#20000008)**.
Chromewill permanentlydiscolorif soilis allowedto
bakeon.
I Wipeupsugaryandacidspillovers
suchas sweetpotatoes,tomatoor
milk-basedsaucespriorto a selfcleancycle.Porcelainenamelisacid
resistant,not acid proof and may
discolorif spillsare not wipedup
beforea self-cleancycle.
I A whitediscoloration
mayappearafter cleaningif acidor sugaryfoods
are not wipedup beforethe clean
cycle. This discoloration
is normal
andwillNOTaffectperformance,
11
> Be sureapplianceis off andall
partsarecoolbeforehandlingor
> Washinwarmsoapywater.Usescour-
!
5. CLEANINGandLOCplusthecleantime
willappearinthedisplayandbothovens
willlock.
6. When the clean cycle is complete,
CLEANEDwill bedisplayed.LOCwill
remainon until the oven has cooled
(approx.1 hour).
!
7. WhentheoveniscooI,
LOCwillnolonger
bedisplayed
andthedoormaybeopened.
CLEAHIHG
PROCEDUR
> Whencool,washwithsoapywater,
rinse
andbuffthesurface.
> Forheaviersoil,usea mildabrasive
cleanersuchas bakingsodaor Don
Ami*,rubbingwith the grainto avoid
CLOCK AND CONTROL
PAD AREA
> Toactivate"ControlLock"forcleaning,
seepage9.
> Wipewitha dampclothanddry.
> Glasscleanersmaybeusedifsprayed
onaclothfirst.DONOTspraydirectly
oncontrolpadanddisplayarea.
CONTROL KNOBS
GLASS
> Removeknobsin theOFFpositionby
>
pullingforward,
>Wash, rinseanddry.Donotuseabrasive
cleaning
agentsastheymayscratchthe
>
finish,
> Turnoneachelementto be surethe
knobshavebeencorrectlyreplaced.
>
DRIP BOWLS - SELECT
MODELS
Porcelain
maydiseolororcraze
ifoverheated.
Thisis normalandwill not affectcooking
performance.
Whencool,washaftereachuse,rinse
anddryto preventstainingordiscoloration.Maybewashedinthedishwasher,
> To cleanheavysoil,soakin hotsudsy
water,thenusea mildabrasivecleaner
suchasSoftScrub*andaplasticscouringpad.
--
OVENWINDOWS
_xDOORS
Avoidusingexcessive
amounts
ofwater
whichmayseepunderor behindglass
causingstaining,
Washwithsoapandwater.Rinsewith
clearwater
anddry.Glasscleanercanbe
usedif sprayedona clothfirst,
Donot useabrasivematerialssuchas
scouringpads,steelwoolor powdered
cleanersastheywillscratchglass,
GLASS-CERAMIC COOKTOP SELECT
MODELS
Neveruseovencleaners,chlorinebleach,
ammoniaor glasscleanerswith ammonia.NOTE:Callanauthorizedservicerff
theglas$-ceramictopshouldcrack,
break
orffmetaloraluminumfoilshouldmelton
thecooktop.
OVEN RACKS
> Cleanwithsoapywater.
> Removestubbornsoilwithcleansingpowtier or soap-filledscouringpad. Rinse
anddry.
> Ifovertime,racksdonotslideouteasily,
wipetherackedgeandracksupportwith
asmallamountofvegetableoiltorestore
easeofmovement,
thenwipeoffexcess
oil.Likewise,
placeonedropofvegetable
0ilonrackroller.
NOTE:Remove
ovenrad{sduringa clean
cycle.If racksareleftin theoven,it may
impairfunction
andtheywilldiscolor.
PLASTICFINISHES-
DOOR HANDLES,TRIM & END CAPS
> Whencool,cleanwithsoapandwater,
rinseanddry.
> LightSoil- Usesoapandwateranda
> Usea glasscleaneranda softcloth.
cleanclothor papertowel,ornon-abra> Forburnedonsoil,removefromrange,
siveoleanersuchasBonAmi*orCooktop
NOTE:Neveruseovencleaners,
abrasiveor
placeonnewspapers
andcarefully
spray
Cleaning
Creme**(PartNo.20000001). causticliquidorpowderedcleansersonplaswithcommercial
ovencleaner.(Donot
Rinseanddry.
ticfinishes.
Thesecleaningagentswillscratch
spraysurrounding
surfaces.)Placein
ormarfinish.
plasticbagand allowto soakseveral > HeavySoils or MetalMarks- Gently
hours.Wearingrubbergloves,remove
scrubwithCooktop
CleaningCremeand
NOTE:Topreventstainingor discoloration,
frombag,wash,rinseanddry.
a plasticscrubber.Reapplycleaner, wipeupfat,greaseor acid(tomato,lemon,
Coverwithdamppapertowelsto keep
vinegar,milk,fruitjuice,marinade)
immedimoist,letstand30to45minutes.
Scrub atelywitha drypapertowel.
ENAMEL (PAINTED) - SiDEPANELS
againto removeremaining
stain.Rinse
> Whencool,washwithwarmsoapywater, anddry.
PORCELAIN ENAMEL rinseanddry.Neverwipea warmorhot
> Burned-onorCrustySoils- Holdrazor
BACKGUARDAREA, TRIM ON GLASS
surfacewitha dampclothas this may
bladescraperat300angleandcarefully CERAMIC
SURFACE,
COOKTOP
ONCOIL
damagethesurfaceand maycausea
scrapeoffsoil.Cleanremaining
soilwith
SURFACE
steamburn.
methoddescribedabove.
Porcelain
enamelisglassfusedonmetaland
> Forstubbornsoil, usemildlyabrasive > MeltedSugarorPlastic-Immediately maycrackor chipwithmisuse.It is acid
cleaningagentssuchas bakingsoda
turnelementto LOWandscrapefrom
resistant,
notacidproof.Allspillovers,
espepasteorBonAmi*.Donotuseabrasive
hotsurfacetoacool
area.Then
ciallyacid or sugarspillovers,shouldbe
cleaners
suchassteelwoolpadsoroven
turnelementOFFandcool.
wipedupimmediately
witha drycloth.
cleaners.
Theseproducts
willscratchor
Cleanresiduewith ra> Whencool,washwithsoapywater,rinse
permanently
damage
thesurface,
zorbladescraper
anddry.
NOTE:Usedry towelor clothto wipeup
and Cooktop
spills,especially
acidorsugaryspills.SurCI e a n i n g
> Neverwipeoffawarm
orhotsurfacewith
facemaydiscolor
ordullifsoilisnotimmediCreme.
adampcloth.Thismaycausecracking
or
atelyremoved.Thisis especially
important
chipping.
forwhitesurfaces.
> Neveruseovencleaners,abrasiveor
OVEN INTERIORS
causticcleaning
agentsonexteriorfinish
>- Followinstructions
onpage11to seta
self-clean
cycle.
ofrange.
MAINf[NAN([
OV[H
DOOR(_)
_- Donotplaceexcessiveweightonor
standon an openovendoor.This
couldcausethe rangeto tip over,
breakthedoor,orinjuretheuser.
Donotattempttoopenorclosedoor
or operateovenuntildoorisproperly
replaced,
OVEN WINDOWIS)
To REPLACE
OVENLIGHTBULB:
Toprotecttheovendoorwindow:
1. Whenovenis coo],usefingertips
to
graspedgeofbulbcover.Pulloutand
remove.
1. Do not hitthe glasswith pots,pans,
furniture,
toys,or otherobjects.
2 Do not closethe ovendooruntilthe
ovenracksarein place.
Scratching,
hitting,jarringor stressing
the
glassmayweakenitsstructurecausingan
increased
riskofbreakage
ata laterdate.
Neverplacefingersbetweenhinge
andfrontovenframe.Hingearmsare
springmounted,if accidentallyhit,
[EVE[IN6 lEGS
thehingewillslamshutagainstoven
frameandcouldinjureyourfingers.
> Besuretheanti-tipbracketsecures
oneof therearlevelinglegsto the
Boththe upperand lowerovendoorsare
floor.Thisbracketpreventsthe range
removable,
TO REMOVE:
1. Whencool,openthe ovendoorto the
broilstop position(openedaboutfour
inches),
2. Graspdoorateachside.Donotusethe
doorhandletoliftdoor.
3. Lift
up evenlyuntildoorclearshinge
arms.
fromaccidentally
tipping.
1. Graspdoorat eachside.
2. Alignslots in the doorwith the hinge
armsonthe range.
3. Slidethedoordownontothehingearms
untilthedooriscompletely
seatedonthe
hinges.Pushdownonthetopcornersof
the doorto completelyseat door on
hinges.Doorshouldnotappearcrooked.
NOTE:Theovendoorona newrangemay
feel"spongy"whenit isclosed.Thisisnormalandwilldecreasewithuse.
13
of ceramicbase.
4. Replacebulbcoverbysnappinginto
place.
5. Reconnect
powertotherange.Reset
clock.
(0NVENIEN([
0UTET
Therangeshouldbeleveledwheninstalled.
If the rangeis not level,turn the plastic
levelinglegs,locatedat eachcornerofthe
(CANADIAN
MODELS
ONLY)
Theconvenience
cutletis locatedonthe
range,untilrangeis level. ,%,
I[ -_'_1
_i!j,
_J
Besureappliance
cordsdonotrestonor
nearthe surfaceelement.If the surface
element
isturnedon,thecordandoutletwill
lowerleftsideofthebackguard.
_f__,_.bedamaged.
_' _./._
#',_,-_',P
_R.4CKETTbe
convenienoe
outletcircuitbreakermay
LEVELW_LEG
trip if the smallappliancepluggedintoit
exceeds10 amps.To resetthe circuit
breaker,pressthe switchlocatedon the
@.
OVEN lIGHT(S)
To REPLACE:
2. Carefullyremoveoldbulbby pulling
straight out of ceramicbase.
3. Toavoiddamagingordecreasing
the
life ofthe newbulb,donottouchthe
bulbwithbarehandsorfingers.Hold
witha clothor papertowel.Pushnew
bulbprongsstraightintosmallholes
loweredgeofthebackguard.
Toassuretheproper replacement
bulb is used,orderbulb from Maytag
CustomerService.Call t-800-6888408,ask for part number74004458halogenbulb.
_/_
1.#
CIRCUITBREAKERSWITCH
>'- Disconnect
powerto range
beforereplacinglightbulb.
Allowovento coolbefore
replacinglightbulb.
_'- Makesurebulbcoverandbulb
arecoolbeforetouching.
B[fOR[
YOU
CALL
fOR
$[RVI([
FORMOSTCONCERNS,TRY
THESEFIRST:
BAKINGRESULTSARENOTAS
EXPECTEDOR DIFFERFROM
I Checkifovencontrols
havebeenpropedyset.
I Checkto besureplugis securelyinsertedintoreceptacle.
I Checkorre-setcircuitbreaker.
Checkor
replacefuse,
I Checkpowersupply,
PREVIOUSOVEN.
! Makesurethe ovenvent hasnot been
blocked.Seepg,10forlocation.
I Checktomakesurerangeislevel.
I Temperatures
oftenvary betweena new
ovenandan oldone.As ovensage,the
oventemperature
often"drifts"andmay
becomehotteror cooler. Seepg, 9 for
instructions
onadjusting
heoventemperature. NOTE:
It is nottrecommended
to
PARTOR ALL OF APPLIANCE
DOESNOTWORK.
adjustthetemperature
if onlyoneor two
NOTE:On Canadianmodelsduring a
recipesareinquestion.
self-cleancycle- glass.ceramiccook- I Checkthatoventemperature
isdecreased
ingsurfacewillnotoperate,andthetwo
by25° Fwhenconvectbaking,
frontelementsoncoil elementmodels I See"CookingMadeSimple"bookletfor
will not operate,
moreinformation
onbakeware
andbaking,
I Checkif surfaceand/orovencontrols
opened
whentheLOCindicator
wordisnot
displayed.
I Bothovenswilllockwheneitherovenis
cleaned,
MOISTURECOLLECTSONOVEN
WINDOWORSTEAMCOMESFROM
OVENVENT,
I Thisisnormalwhencookingfoodshighin
moisture.
I Excessive
moisturewasusedwhencleaningthewindow.
THERE IS A STRONGODOROR
LIGHTSMOKEWHENOVENIS
TURNEDON.
I This is normalfor a newrangeandwill
disappearafterafewuses.
Initiatingadean
havebeenproperly
set.Seepus.3 &5. FOODIS NOTBROILINGPROPERLY
I CheokifovendoorisunlockedafterselfOR SMOKESEXCESSIVELY.
cleancycle.Seepp.11.
I CheckifovenissetforadelayedcoekorI Check
ovenrackpositions.
Foodmaybe
tooclose
toelement.
deanprogram.
Seepgs,8& 11.
II Broilelementwasnotpreheated,
! Upperoven
maybein atoastingoperation.Lowerovenwilloperatewhenthe I Aluminum
foilwasincorrectly
used,Never
toastingoperation
iscompleted,
linethebroilerinsertwithfoil.
I Checkif ceil elementis properlyin- ! Ovendoorwasclosedduringbroiling.
Leave
stalledor needsto be replaced.See
the dooropento the firststop position
pp.4.
(about4 inches),
! Trimexcessfatfrommeatbeforebroiling.
cyclewill"burnoff"theodorsmorequickly.
I Turningonaventilationfanwilihelpremove
thesmokeand/orodor.
GLASS-CERAMICSURFACE
SHOWSWEAR.
I A soiledbroilerpanwasused.
"F" PLUSA NUMBERAND THE
MESSAGE:"CALL AN AUTHORIZED
SERVICEROR 888-462-9824"*
1. Tinyscratches
or abrasions.
I Cooktop
andpanbottomareclean,
Donotslideglass
ormetalpans is
acrosstop. Makesurepanbottom
OVENWILL NOTSELF-CLEAN.
! Checktomakesurethecycleisnotsetfor
a delayed
start.Seepg.11.
notrough,Usetherecommended
cleaning
agents.Seepp.12.
2, Metalmarks,
! Donotslidemetalpansacrosstop.
Whencool,deanwithCooktop
Cleaning
Creme.Seepp.12.
! Checkif doorisclosed,
OVENDID NOTCLEANPROPERLY.
I Longercleaning
timemaybeneeded,
I Excessive
foodsoilsontheovenbottom,
Useaself-cleancycle,
STEAMCOMESFROMVENTAREA.
I Whenhighmoisture
foodsarecooked
inthe
upperoven,steammaybevisiblecoming
fromtheventarea.Thisisnormal,
II Thisis
called
a faultcode,
If a faultcode
appears
in thedisplay
andbeepssound,
pressthe
CANCEL
pad.Ifthefaultcodeand
beepscontinue,disconnect
powerto the
appliance.
Waitafewminutes,
thenreconnect power.If fault codeandbeepsstill
continue,disconnectpowertotheappliance
andcallanauthorized
servicer.
! Excessivesp[Ifovers,
especiallysugaryand/II Iftheovenisheavilysoiled,
excessive
flareoracidfoods,werenotremoved
priortothe
upsmayresultinafaultcodeduringaclean
3. Brownstreaksandspecks,
self-deancycle,
cycle.PressCANCELpadandallowthe
! Spillsnotremovedpromptly.
Wiping
ovento cootforone hour,thenresetthe
withsoiledclothorsponge.Pan
cleancycle.Ifthefaultcodeandbeepsstill
bottomnotclean,
OVENDOORWILL NOTUNLOCK
continue,
disconnect
powertotheappliance
4. Areaswitha metallicsheen.
AFTERSELF-CLEANCYCLE.
andcallanauthorized
servicer.
! Mineraldeposits
fromwaterandfood. I Oveninterioris stillhot. Allowaboutone
5. Pittingorflaking,
! Sugaryboilovers
thatwerenot
removedpromptly.
Seepp,12.
hourfortheoventocoolafterthecompletionofa self-clean
cycle.Thedoorcanbe
* FOFI
PF_IORI_Ot_E
SERVICE
CALL
TOLL-FREE
1-888-4MAYTAG
(1-888-462-9824),
//YTA6 wArrANTYWttAt
IsNOT
(OVErID
BY RI NTIEs:
FullOneYearWarranty- Partsand Labor
1. Conditionsanddamagesresultingfrom anyofthe following:
a. Improperinstallation,
delivery,or maintenance.
Forone (1) yearfromthe originalretailpurchase date,anypart whichfails Jnnormal
homeusewill be repairedor replacedfreeof
charge,
b. Anyrepair,modification,
alteration,or adjustmentnotauthorizedbythe
manufacturer
or anauthorizedservicer.
c. Misuse,abuse,accidents,or unreasonable
use.
LimitedWarranties- PartsOnly
d. Incorrectelectriccurrent,voltage,or supply.
SecondYear- Afterthe firstyearfromthe
originalpurchasedate,partswhichfailin norrealhomeusewillberepairedorreplacedfree
of chargefor the part itself,with the owner
payingall othercosts,includinglabor,mileage andtransportation.
e. Impropersettingof anycontrol.
2. Warrantiesarevoidif the originalserialnumbershavebeenremoved,
altered,or cannotbereadilydetermined.
3. Lightbulbs.
ThirdThroughFifthYear- Fromtheoriginal
purchasedate,partslistedbelowwhichfail
in normalhomeusewill be repairedor replacedfreeof chargefor the partitself,with
the ownerpayingall othercosts,including
labor,mileageandtransportation.
>- ElectronicControls
5. Thecostof serviceor servicecallto:
a. Correctinstallationerrors.
b. Instructthe userontheproperuseof the product.
>- Glass-ceramic
Cooktop:dueto thermal
breakage.
>- ElectricHeatingElements:surface,broil
andbakeelementson electriccooking
4. Productspurchasedfor commercialor industrialuse.
c. Transporttheappliancetothe servicer.
6. Consequential
or incidentaldamagessustainedby any personas a result
ofanybreachof thesewarranties.
Somestatesdonotallowtheexclusionor
limitationof consequential
or incidentaldamages,so theabove exclusion
may notapply.
IF YOU NE[D SERV]([
appliances.
CanadianResidents
Theabovewarranties
onlycoveranappliance
II Callthe dealerfromwhomyourappliancewas purchasedor callMaytag
AppliancesSalesCompany,MaytagCustomerAssistanceat 1-888-4629824,USAto locateanauthorizedservicer.
installedinCanadathathasbeencertifiedor
listedby appropriate
testagenciesfor cornplJanceto a NationalStandardof Canada
unlesstheappliance
wasbroughtintoCanada
dueto transferof residencefromthe United
Statesto Canada.
II Be sure to retainproof of purchaseto verify warrantystatus.Referto
WARRANTY
for furtherinformationonowner'sresponsibilities
for warranty
service.
!
LimitedWarrantyOutsidethe UnitedStates
and Canada- PartsOnly
U.S.customersusingTTY for deaf,hearingimpairedor speechimpaired,
call 1-800-688-2080.
Fortwo(2)yearsfromthe dateoforiginalretail purchase,anypartwhichfailsin normal
homeusewillberepairedor replacedfreeof
chargeforthepartitself,withthe ownerpayingall othercosts,includinglabor,mileage
and transportation,
Thespecificwarranties
expressedaboveare
the ONLYwarrantiesprovidedby themanufacturer.Thesewarrantiesgiveyou specific
legalrights,and you may also haveother
rightswhichvaryfromstatetostate.
15
Ifthedealeror servicecompanycannotresolvetheproblem,writeto Maytag
AppliancesSalesCompany,
Attn.'CAIR®Center,P.O.Box2370,Cleveland,
TN 37320-2370,
or call1-888-4Maytag
for PriorityOneService (1-888462-9824).
NOTE:Whenwritingor callingabouta serviceproblem,pleaseincludethe
followinginformation:
a.Yourname,addressandtelephonenumber;
b. Modelnumberandserialnumber;
¢. Nameandaddressof yourdealeror servicer;
d. A cleardescriptionof the problemyouarehaving;
I
e. Proofof purchase(salesreceipt).
User'sguides,servicemanualsand parts informationare availablefror
MaytagAppliancesSalesCompany,MaytagCustomerAssistance.
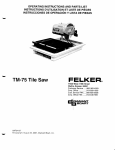
MAYTAG • 403 West Fourth Street North ° P.O. Box 39 • Newton, Iowa 50208