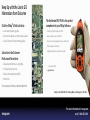
1
DELORME
XMap 6 GIS
®
Copyright © 2009 DeLorme.
Use subject to license agreement.
Getting Started Guide
Keep Up with the Latest GIS
Information from DeLorme
Click the XMap 6 NetLink tab to:
®
• Learn about product upgrades
• Discover new datasets as they become available
• Access DeLorme’s Product Knowledge Base
The Earthmate GPS PN-40 is the perfect
complement to your XMap Software.
• Transfer any map from XMap to the PN-40
• View your GIS data layers on the PN-40
• Create routes and navigate with point-to-point directions
• Collect waypoints and track files
Subscribe to the DeLorme
Professional Newsletter.
• Read about how others are using XMap
• Find usability tips and tricks
• Receive discounted product offers
• Much more
• Easily integrate field-collected data into your GIS
“… a new breed of GPS.”
—gpsreview.net
Visit xmap.com and click on the newsletter link.
Finally, a Handheld GPS for Viewing Maps and Imagery in the Field
xmap.com
For more information visit xmap.com
or call 1-800-293-2389
Table of Contents
Welcome to XMap.................................................................................................................... 2
What’s New in XMap 6............................................................................................................. 3
Key Features............................................................................................................................. 4
The XMap Family of GIS Products............................................................................................ 9
Installation Instructions............................................................................................................12
Modifying, Repairing, or Removing the Installation Settings................................................. 13
Helpful Information for Upgrading from a Previous Version of XMap.................................... 14
Interface Guide....................................................................................................................... 16
Helpful Information for Migrating from other DeLorme Products.......................................... 18
Helpful Information for Migrating from other GIS Products................................................... 19
Basic Functions....................................................................................................................... 20
Installing XMap Datasets........................................................................................................ 22
Add-ons for XMap................................................................................................................... 26
Getting Help............................................................................................................................ 27
Training.................................................................................................................................... 27
Troubleshooting....................................................................................................................... 27
Minimum System Requirements............................................................................................ 29
Contacting DeLorme............................................................................................................... 30
Welcome to XMap 6
Thank you for your purchase. XMap ® offers a unique combination of GIS, GPS, and
navigation tools that meet all of your mapping needs in a single, easy-to-use package.
In this Getting Started Guide, you will learn about:
• The XMap family of products
• What’s new in version 6 with updates for 6.1 and 6.2
• Installing and modifying XMap
• Upgrading from a previous version of XMap
• Migrating your data from another DeLorme product or GIS product
• Installing XMap datasets
• Troubleshooting
• And more!
This is a reference guide. For detailed instructions for using XMap, see the XMap Help;
open XMap, click the Help button
on the toolbar, and then click Help Topics. A link to
a printable User Guide on our website is also available from the Help menu.
Note: References to XMap 6 apply to all versions. Information that applies only to XMap
6.2 is indicated as such; XMap 6.2 includes all changes from XMap 6.1.
ATTENTION!!! Important Information for Existing DeLorme Software Users
To comply with Windows Vista™ standards and to provide a more stable and flexible
multiple user environment, the DeLorme Docs folder, where all of your data, projects, and
other DeLorme files are traditionally stored, is now located in the personal documents
folder on your computer, rather than on the root of the C drive. All new data created in
XMap 6 is stored in the personal documents folder, and default data paths no longer point
to any previously existing data on the root of the C drive.
For detailed information about how to migrate your existing data to the new file system, see
the XMap Help topic Migrating Data to the New DeLorme Docs Folder.
Note: All OpenSpace databases, layers, project files, draw layers, routes, XData databases,
and other data types from previous versions of XMap are fully compatible with XMap 6.
2
What’s New in XMap 6.2
•Updated and enhanced ArcSDE 9.3 support improves the ability to import and deploy
GIS databases to the field—synchronize large GIS layers for the field in record time!
•Shapefile support for XMap 6 Professional—import shapefiles into the GIS tab and apply
symbolization
Note: This is already available in XMap GIS Enterprise and XMap GIS Editor
•Faster data cutting for Earthmate GPS PN-Series GPS devices
What’s New in XMap 6.1
•New! NetLink Map Library subscription—download unlimited aerial and data for an
annual subscription of $29.95
•New! GIS tab in Options dialog box allows you to customize default layer and query
settings
•New! Automated update system; download updates to new versions of XMap
•New! Export files from XMap in Drawing Exchange (.dxf) format for use with AutoCAD
•Improved MrSID includes aux.xml support
What’s New in XMap 6
•Works on Windows Vista™ Improved multi-user permissions
•ArcSDE 9.2 support
•GIS layer append and replace features for import
•Improved GIS database synchronization (Enterprise only)
•GIS stationing support for field line assets with user-defined distance measures (Editor and
Enterprise only)
•Create GIS and draw map packages for use on Earthmate PN-Series GPS devices;
3
independently overlay other datasets
•Download NOAA charts from NetLink for use in XMap and on Earthmate PN-Series GPS
devices
•API access to routing, GPS navigation, and map controls
•GPS NavMode—a hands free full-screen navigation view in 2-D or 3-D
•Improved terrain profiling for multi-channel data—show travel speed, temperature, and
other variables against the terrain
•GeoTagger provides updated image and data-tagging features—combine digital photos or
data with GPS locations in a completely new way
•Route preferences for walking/jogging, cycling, off-roading, or driving
•Support for opening DeLorme Topo USA and Street Atlas projects; easily migrate your old
projects to XMap
Key Features
XMap API Command Window
XMap includes a command prompt utility (XMapi) that allows you to control the application
through the command line. The interface provides access to simple commands for
performing a variety of basic operations, such as panning and zooming the map, performing
quick searches, and creating routes. All operations are triggered from the command line but
control the running application. Any commands that require further input prompt the user
through the standard XMap user interface.
Support for Earthmate PN-Series GPS Devices
XMap is compatible with DeLorme’s Earthmate PN-Series GPS devices—fully-integrated
handheld GPS receivers that provide exceptional performance for outdoor and professional
activities. Purchase of a PN-Series GPS includes XMap USA Topographic Data, which
provides complete United States topographic and street map coverage, and a world base
map for use when traveling between major international cities and towns. Also included is a
bonus DVD dataset of Topo USA® precut maps at all magnifications. Note: The Topo USA
7.0 data on the bonus DVD and the XMap USA Topographic 2008 dataset use a new file
4
format for Earthmate PN-Series GPS devices to improve Find and map cutting accuracy. If
you have existing map packages with data in older topographic data formats, you will need
to re-cut the map packages you created to ensure routing integrity on the GPS device, as
well as to access new POIs and data described above.
You can use XMap to create highly detailed areas of interest to transfer to a PN-Series GPS
device. Your maps can include custom high-resolution imagery in MrSID, GeoTIFF, and GIS
data; DeLorme format imagery (aerial, satellite, and USGS quad data) available through the
NetLink tab; and a variety of symbols and waypoints. Once you select your areas of interest
and create your maps, you can use the XMap exchange function to send the maps to the
device along with custom routes, tracks, and waypoints. You can also view and control data
layers on a PN-Series GPS device.
For Earthmate PN-Series GPS device firmware updates, check the NetLink tab in XMap.
Database Manager
XMap automatically installs a DeLorme database application that provides essential tools
for DeLorme OpenSpace database management. Its easy-to-use interface allows database
administrators to add new SQL server connections, add server account users, create
databases and add users, modify database permissions, and create database subscriptions.
The database backup/restore utility allows you to back up critical GIS data on your computer
to remote media and restore it in the event of computer failure. You can open the Database
Manager within XMap or from the XMap install directory.
Bulk Importing and Exporting
The XMap GIS Bulk Importer/Exporter is a command prompt utility that installs with
XMap 6 GIS Editor and Enterprise. You can run the utility independently of the XMap
application and use it to automate the import and export of vector GIS layers with DeLorme
OpenSpace databases. Use batch files (.bat or .cmd) to import/export multiple files.
You can filter which attribute fields in a layer are included when exported, as well as
reference an existing query to filter which geometries and associated attribute records are
included in the exported data. Supported export formats include .openspace, .shp, .dxf,
.dwg, and .txt (Enterprise and Editor only).
Note: The OpenSpace Transfer File is a DeLorme proprietary format that stores
classification, query, label, and symbolization settings. They are designed to serve as exact
5
duplicates of their counterparts within the database and don’t allow filtering of attribute
fields during export; however, you can use queries to filter geometries and attribute
records. All exported layers are in the latitude/longitude coordinate system and WGS1984
datum.
Importing from an ArcSDE 9.2 or 9.3 Database
XMap 6 GIS Enterprise allows you to import layers directly from ESRI ArcSDE databases to
DeLorme databases. To import layers, use the Connect to Database utility in the GIS Import
Wizard to connect to the ArcSDE database. You must provide the server name on which
the ArcSDE installation resides, the port # (instance) of ArcSDE on the server (typically
5151), and the login name and password. When you have a connection to the ArcSDE
instance, you can select available databases and use the Import Wizard or Bulk Importer
to import layers from that database. You can import from ArcSDE 9.2 databases with all
versions of XMap 6. You can import from ArcSDE 9.3 databases with XMap 6.2.
Spatial Queries
Spatial queries allow GIS users to ask direct geographic questions about how GIS data is
spatially related. For example, “Which towns are located within a watershed?,” “Which
parcels contain toxic point source locations?,” “Which rivers are within 1,000 meters of a
road?,” “Which cities are within 100 miles of a selected city,” and so on. Spatial queries
combined with attribute queries allow you to uncover complex patterns between spatial
data layers and are a fundamental strength of a GIS. Note: XMap 6 Professional users can
run spatial queries but cannot create them.
Buffering
Use the Buffer tool to build polygon geometries around existing geometries in a layer. The
size of the buffer polygons is determined by a user-specified linear distance around the
edge of the geometries in the existing layer. The new output polygon geometries are a
merged combination of the original polygons and the buffer polygons. Buffering is often
used in GIS spatial analysis when proximity issues are of concern, such as site planning or
risk assessment.
Multiple Classifications
XMap-compatible DeLorme OpenSpace databases support the storage of more than one
6
classification against a GIS layer. The ability to create and store multiple classifications
against a layer is particularly useful for rapid analysis of the data in the layer. Once the
classifications are created, you can quickly switch between them for comparison to
discover trends in the data, rather than recreating each classification and applying it each
time. There is no limit to the number of classifications that can be stored against a layer, but
only one classification can be active at a time. Like queries, classifications are transferred
with a layer when it is duplicated or exported to an OpenSpace GIS file format.
Note: XMap 6 Professional users can view layer classifications but cannot create them.
Classification Templates
Classification Templates (.xmc files) are available in XMap 6 GIS Enterprise and XMap 6 GIS
Editor. They are very useful for quickly transferring an existing classification configuration
from one layer to another or between classifications within the same layer. Classification
templates are useful when multiple layers have the same attribute fields and general range
of attribute values. Once you create a classification for one of the layers and customize the
symbolization of each class, you can save this configuration to a template and then apply it
to the other layers. This can make your workflow more efficient.
Redlining & Layer Synchronization
Redlining refers to the process of using draw symbols, lines, and polygons to “mark up” a
GIS layer without actually editing the layer itself.
The process of redlining is useful when a field worker has a subscription to one or more
layers in a database created with XMap GIS Enterprise), but they do not have the proper
level of user permissions to directly edit the GIS layers, or they use XMap 6 Professional
and do not have the necessary editing tools. If, for instance, the field worker is tasked
with inspecting and updating information contained in a layer based on any observed or
measured changes (spatial or attribute), he or she can use the redline tool to make mark
ups against the layer. On returning from the field, the field worker can submit redline layers
to the data manager by clicking the synchronize button in the toolbar. The manager can
evaluate the redlines and use them as a reference for updating the appropriate GIS layers.
Check-out/in
The Check-out/in tool in XMap 6 GIS Enterprise is a data distribution feature for Enterprise
data management, editing, and updating. Individuals who have access to a layer in another
7
user’s workspace can check out or check in portions of a layer or an entire layer. Checkout
regions are determined by user-selected grids. These checkouts are exact copies of the
geometries and attributes from the source layer and can be copied into any database to
which the user has access. Once checked out, the user can edit the layer using the Editor
or Enterprise versions of XMap or simply use it for reference in the field. Once the user is
finished with the layer, they can check it in to the original source layer. All changes made to
the data in the check-out portion are updated in the source layer; this allows XMap users to
modify and update different portions of a single layer at a time.
Other Features
• High-resolution, recent imagery for many states available for purchase through the
NetLink tab
• Street Atlas USA™ 2009 Handheld included free
• Multi-point registration with transparency and color control (XMap 6 GIS Enterprise and
Editor only)
• Full U.S. National Grid support with easy to read grid and zone identifiers
• Topological editing and connectivity tools
• COGO—create vector GIS layers through coordinate geometry input
• Geocode addresses and lat/lon databases directly into vector GIS layers
• Reusable registration points in AutoCAD DWG/DXF file registration
• ESRI projection (.prj) file support
• Drag and drop importing of vector GIS layers
• Enterprise database management tools for the office and field
• Multiple base map data options
• Waypoints and draw object exchange with most popular handheld GPS models
• Split-screen map printing
• Enhanced 3-D terrain modeling with seamless fly over effect
• Customizable keyboard shortcuts
• GPX file support for draw object import and automatic route creation
• And much more!
8
The XMap GIS Family of Products
XMap 6 GIS Enterprise, XMap 6 GIS Editor, and XMap 6 Professional provide a three-tiered
GIS solution for efficiently creating, importing, editing, classifying, querying, and sharing
your GIS data in an enterprise environment. XMap 6 is equally suited as a standalone GIS
software solution or as a supplement component to your existing GIS infrastructure.
In addition to GIS, these versions of XMap include powerful routing and in-vehicle
navigation tools; advanced GPS support for field tracking and navigation; interoperability
with Earthmate PN-Series GPS devices for field data collection and exchange of map
data, waypoints, and tracks; map viewing software for PDAs; 3-D terrain modeling with
simulated fly-over functionality; advanced printing tools; and much more.
XMap 6 GIS Enterprise
The upper tier of the XMap suite is designed to meet the specific needs of enterprise GIS
managers who need to efficiently manage and deploy GIS data throughout a company.
XMap 6 GIS Enterprise also includes all of the features in XMap 6 GIS Editor.
• Access your existing GIS databases with ArcSDE support
• Ensure data integrity with check-out/check-in tools
• Share data across the enterprise with database synchronization tools
• Create your own raster data layers with multi-point image registration
• Use the API Command Window to perform basic mapping functions from a third-party
application
XMap 6 GIS Enterprise in conjunction with multiple seats of XMap 6 Professional provides a
complete field force GIS data collection system.
XMap 6 GIS Editor
XMap 6 GIS Editor is a perfect choice for small GIS departments or for a company or
organization that is considering the development of a GIS to increase productivity. XMap 6
GIS Editor also includes all the features in XMap 6 Professional.
• Import and work with a variety of GIS file formats including, ESRI .shp and .e00;
MapInfo .mif and .tab; AutoCAD .dwg and .dxf; and more
• Geocode your existing data in .mdb, .xls, and other formats to create GIS layers
9
• Create and edit points, lines, and polygons with freehand draw tools or with precise
coordinate geometry input tools
• Ensure the integrity of your line layers with topological editing
• Access advanced classification, annotation, buffer, and geospatial query tools
• Use the bulk importer-exporter for automated import and export of standard spatial
data files
• Share your data online with XMap Web
XMap 6 Professional
XMap 6 Professional is ideally suited for field crews and mobile professionals. By offering
access to GIS data that has been processed using the GIS Editor or GIS Enterprise editions
of XMap, it provides an affordable alternative to a full-fledged GIS for use on the road and in
the field.
•Optimize response time with the latest in-vehicle, voice-controlled navigation tools
•Perform country-wide searches of address locations and points of interest
•Easily redline data corrections to Enterprise GIS data and efficiently share these edits
with your GIS administrator
•View your data in stunning 3-D with the latest terrain modeling technology
•Shapefile support—import shapefiles into the GIS tab and apply symbolization
XMap 6 Professional offers essential and fundamental mapping functions that include data
visualization, access to aerial and satellite imagery, address-to-address routing, annotation
tools, document linking, advanced printing, GPS support, and more. In addition, you can
view and print GIS maps created using XMap 6 GIS Editor and XMap 6 GIS Enterprise.
10
Product Comparison
Multiple DeLorme base map options
Door-to-door GPS navigation
3-D terrain modeling
Phone number searching (data optional)
Third-party GPS support for data exchange
Routable road adding tool
MapShare for posting maps online
OpenSpace (vector GIS format) viewing
MrSID and GeoTIFF viewing
Split screen for side-by-side map views
Address geocoding
Redlining for field data updating *
Layer synchronization * Support for Earthmate PN-Series GPS devices
API for remote access to basic mapping functions
Shapefile import
Data symbolization
GIS check-out/check-in tool *
Vector data importing (.shp, .dxf, .mif, .gml, etc.)
Vector data creating and editing
Attribute importing and editing
Data classification
Buffer tools
Spatial and attribute query building
Enterprise Editor Professional
✓
✓
✓
✓
✓
✓
✓
✓
✓
✓
✓
✓
✓
✓
✓
✓
✓
✓
✓
✓
✓
✓
✓
✓
✓
✓
✓
✓
✓
✓
✓
✓
✓
✓
✓
✓
✓
✓
✓
✓
✓
✓
✓
✓
✓
✓
✓
✓
✓
✓
✓
✓
✓
✓
✓
✓
✓
✓
✓
✓
✓
✓
✓
✓
✓
11
Enterprise Editor Professional
XMap Web (online GIS) publishing
✓
✓
Multi-point image registration
✓
✓
ArcSDE support ✓
Administer databases for check-out/check-in
✓
Administer database subscriptions for synchronization
✓
Redline administration and integration
✓
*Note: These features require database administration with XMap Enterprise.
Installation Instructions
Follow the instructions below to install XMap 6.
1. Insert the installation DVD into your computer’s DVD drive. Setup automatically
begins. If not, browse to the DVD drive and double-click Setup.
2. On the License Verification screen, type your XMap license key in the text boxes.
3. Click Validate.
4. On the Welcome screen, click Next.
5. On the License Agreement screen, read the license agreement and select the I
accept the terms in the license aggrement option. Then, click Next.
6. On the User Information and Registration screen, if your computer is connected to the
Internet and you want to register online during the installation process, enter the
required information. Then, click Next.
OR
If you want to register later, type your first and last names in the boxes, clear the
Register Online check box, and then click Next.
7. On the Destination Folder screen, if you want to install XMap in a folder other than the
default location, click Change and select an alternate folder. Otherwise, click Next.
8. On the Customize Setup screen, to install all features as shown, click Next.
OR
12
To select or modify the program features you want to install, click the arrow next to
each feature to select an option.Then, click Next.
Note: If Palm OS or Windows Mobile software is detected on your computer, the
StreetAtlas USA 2009 Handheld option displays.
9. Click Install.
10.When prompted, click Finish. If you registered during installation, you will receive a
verification e-mail at the e-mail address you specified. Your product will not be
registered until you verify your registration.
Modifying, Repairing, or Removing the Installation Settings
After installation, you can modify, repair, or remove the installation using the Change option
in Add/Remove Programs.
1.From the Start menu, point to Control Panel and then browse to Add/Remove
Programs.
2.Under Currently Installed Programs, click to select your DeLorme XMap application.
3.In the highlighted block, click Change. The InstallShield wizard displays.
4.Click Next. The Program Maintenance screen displays.
5.If you want to modify which features are installed:
a. Select the Modify option and click Next.
b. To disable a feature, click the hard drive icon next to the option and then select the
This Feature Will Not Be Available option in the menu.
OR
To enable a feature, click the hard drive icon next to the option and then select the
This Feature Will Be Installed on Local Hard Drive option in the menu.
c. Click Next.
d. Click Install.
e. When prompted, click Finish.
6.If you want to repair any installation errors in the program (for example, if there are
13
missing or corrupt files, shortcuts, and/or registry entries), select the Repair option,
click Next, click Install, and then click Finish.
7.If you want to remove XMap from your computer, select the Remove option and click
Next. Then, click Remove to begin the removal process.
Helpful Information for Upgrading from a Previous Version of XMap
What To Do With Older OpenSpace GIS Layers
You can import OpenSpace layers from previous versions of XMap into XMap 6 using
the Import Wizard in the GIS Workspace subtab. Note: Layers that are stored in previous
versions of XMap databases will not have access to all of the features available in XMap 6.
To upgrade your older files to the XMap 6 format, use the New/Duplicate Layer feature
in the GIS tab and copy them to an XMap 6-compatible database. Advanced users can
convert multiple files using the XMap GIS Bulk Importer/Exporter by exporting the layers
from older XMap databases and OpenSpace files and importing them back into XMap 6
databases. The XMap Help topics include step-by-step procedures for using the Copy Layer
feature and the XMap GIS Bulk Importer/Exporter.
How to Connect to an Existing Database
XMap uses Microsoft SQL Server as its DeLorme OpenSpace database engine. You can
connect only to databases that were created in previous versions of XMap. You can use
the local version of Microsoft SQL Server that installs with XMap, or you can connect to an
existing SQL Server in an Enterprise environment where DeLorme OpenSpace databases
were previously created.
To connect to a local database created in XMap 4.5 using MSDE SQL Server 2000, type
<server name>\ DELORMEMAPPING and click Connect in the Attach Database dialog
box or when connecting to the database in Database Manager. Note that MSDE SQL
Server 2000 (with a local instance of “DELORMEMAPPING”) was automatically installed
when XMap 4.5 users selected to connect to a local database during installation.
OR
To connect to a local database created in XMap 5.x using SQL Server 2005 Express,
14
type <server name>\ XMAP5 and click Connect in the Attach Database dialog box or
when connecting to the database in Database Manager. Note that Microsoft SQL Server
2005 Express (with a local instance of “XMap5”) was automatically installed during the
XMap 5.x installation unless MSDE SQL Server 2000 was already present on your system.
OR
To connect to a local database created in XMap 6 using a new installation of SQL Server
2005 Express (one not previously installed with XMap 5.x), type <server name>\
XMAP6 and click Connect in the Attach Database dialog box or when connecting to the
database in Database Manager. Note that Microsoft SQL Server 2005 Express (with a
local instance of “XMap6”) is automatically installed during the XMap 6 installation unless
SQL Server 2005 Express with the XMap5 instance is already present on your system
OR
To connect to a database in an existing Enterprise SQL Server, type <server name>
and click Connect in the Attach Database dialog box or when connecting to the database
in Database Manager. Contact your database administrator if you experience problems
establishing a connection to the enterprise SQL Server.
Notes:
• To access the Attach Database dialog, select the Other option from the Database
drop-down list in the Create Layer, Manage Layers, and Import dialogs.
• For the server name of local editions of SQL 2000 or 2005 Express, try localhost,
(local), or <computer name>. Note that the computer name must be used if connecting
to a local database on the computer of another XMap user in your network group.
• XMap 6 uses either MSDE SQL Server 2000 or SQL Server 2005 Express. DO NOT
uninstall MSDE SQL Server 2000\DELORMEMAPPING if it is already present on your
system before installing XMap
• The XMap 6 install automatically installs SQL Server 2005 Express\XMap6 if it detects
the presence of MSDE SQL Server 2000\DELORMEMAPPING. You can connect to both
database instances in XMap 6 and migrate your data from the DELORMEMAPPING
instance to the XMap6 instance to take advantage of new features in XMap6 databases.
• MSDE 2000 and SQL Server 2005 Express have limited database capacities of 2 GB.
If you use XMap in an Enterprise environment, it is recommended that you store
DeLorme OpenSpace databases in an Enterprise version of Microsoft SQL Server that
15
Interface Guide
You can access most of the functions in XMap using the tabs
below the map area.
Map Data—Add data to projects and manage projects
GIS—Import or create vector GIS layers; link attribute data;
classify and adjust how the data displays; build queries; and
more
Print—Print single or multi-page maps of the current map
view, route details, elevation profiles, or XData datasets
Find—Search for locations on the map
Phone—Search for residential or business phone listings
(Phone Data required)
Info—Get information about a map feature
NetLink—Purchase datasets, learn about product updates,
link to www.delorme.com
ImageReg—Register images to a map
Draw—Add annotation or redline additions to a map
Profile—profile elevation graphs for a selected linear object
on a map
3-D—View and fly over your map in 3-D
Route—Create and manage routes
GPS—Connect a compatible GPS device to your system and
view your position in real time as you travel
Voice—Issue voice commands and receive spoken directions
Handheld Export—Export a map to an Earthmate PN-Series
GPS receiver or a PDA
XData—Import, locate, and manage data using an address,
ZIP Codes, or coordinates
16
Use the toolbar to perform many GISand toolbar functions. GIS toolbar task
committing changes, synchronizing da
managing projects, printing, routing, pr
Not all of the toolbar features are activa
want to view, right-click the toolbar. To
currently displayed in the toolbar. Click
-related operations in addition to standard mapping
ks include redlining, COGO editing, editing a layer,
ata, and more. Other toolbar features include
rofiling, online sharing, panning the map, and more.
ated by default. To modify which toolbar items you
oolbar options with a check mark next to them are
k the item to toggle it to show or hide it in the toolbar.
The map area contains a primary map and a
secondary map. Depending on the percentage
of the map area you have exposed, you may see
both maps or only one.
Viewing either the primary or secondary map is
helpful when you want to view a large area on
the map.
Splitting the map to view both the primary and
secondary maps allows you to view multiple
data types for the same geographic area, as
shown to the left.
To conceal/expose the primary/secondary
maps, either drag the map resize tool (the
vertical bar that splits the two map views) or
click the arrows on the resize tool to resize the
map area.tool to resize the map area as desired.
The Control Panel includes features
for viewing/controlling:
• Data zoom level
• Map panning
• Map rotation
• Coordinates
• Elevation
• Contour interval
• Map scale
17
does not have this size limitation.
What To Do With Existing Datasets
If you have saved any imagery or data, including Aerial Data Packets (ADPs), to the default
location in previous versions of DeLorme software (C:\DeLorme Docs\Downloads), you
must manually copy each file to the new DeLorme Docs\Downloads folder located in C:\
Documents and Settings\All Users\Documents\DeLorme Docs. This will allow the imagery
or data to automatically display as a base data connection. Each data and imagery type is
available to separately download from NetLink; however, you can still use any ADPs that
you may have.
If you have existing map datasets such as 3-D TopoQuads, XMap USA Street Level Data,
or XMap USA Topographic Data, you can view them in this version of XMap. The procedure
for viewing base map data in XMap 6 is the same in previous versions of XMap. The data
can be viewed while it is in your DVD drive or from your computer’s hard drive after the
data is saved. If the data does not display in XMap, click the Map Data tab, click Data, and
then click Base Data. Then add the hard drive location where the data is saved (the DVD
drive is automatically added as a base data location).
You can view older versions of Phone Data in XMap 6. For more information on connecting
Phone Data, see the Searching for Phone Book Listings and Using Phone Data with the
Phone Tab Help topics in XMap.
Helpful Information for Migrating from other DeLorme Products
You can import and use all of the files you created in previous versions of DeLorme
mapping software (including previous versions of XMap, Topo USA, and Street Atlas USA)
in XMap 6. For more information, see the Important Information for Existing DeLorme
Software Users on page 2.
•You can open projects/map files from Topo USA and Street Atlas in XMap. To open a
project, click the Map Data tab, click File, and then click Open to browse to the
project you want to view.
•To add existing route and draw files from XMap, Topo USA, and Street Atlas USA to
your current XMap project, click the Map Data tab, click the Data button, click Add,
then browse to the route or draw file location (usually the Navigation and Draw
18
folders in the DeLorme Docs folder).
•To add existing XData datasets from XMap or Street Atlas USA Plus to your current
XMap project, click the Map Data tab, click the Data button, click Add, then browse
to the XData dataset location (by default the Datasets folder in the DeLorme Docs
folder).
Note: In XMap 6 GIS Editor or XMap 6 GIS Enterprise, you can directly import draw files
and XData datasets into the OpenSpace GIS layers and use them in the GIS tab.
Helpful Information for Migrating from other GIS Products
If you are replacing your current GIS with XMap, or if you are using XMap in conjunction
with your current GIS, you must import your GIS files into XMap OpenSpace GIS databases
to use in XMap. The first step in migration is to know your data. If your data does not have
projection, coordinate, and datum information embedded in the file, you must specify these
parameters during import. This information is often included in an accompanying metadata
file.
You can import your data using the XMap GIS Bulk Importer/Exporter or the GIS Import
Wizard on the GIS tab. Alternatively, you can simply drag and drop the data files onto the
map and the import wizard will automatically begin.
Once the data is imported, use the tools in XMap to create subscriptions to the layers, user
accounts to OpenSpace databases, and more. For more information on these features, see
the XMap Help topics.
To add raster GIS layers, such as MrSID or GeoTIFF files, to your current XMap project,
select the Map Data tab, click the Data button and choose Add. Browse to the location of
the file and click OK.
19
Basic Functions
The XMap Help Topics include instructions for using all of the basic and advanced functions of
XMap. To access the Help Topics, click the Help button on the toolbar and then click Help
Topics.
Navigating the Map
There are multiple ways you can navigate the map:
•Use the Navigation tool to click the location on which you want to center the map.
•Use the grab-and-pan tool on the toolbar to drag the map in any direction.
•Use the search features
interest.
in the Find tab to center the map on your location of
•Double-click a layer in your GIS workspace to center the map on that layer.
•Drag the view box in the Overview Map to center the map on the location you want.
Zooming the Map In or Out
XMap includes several methods for zooming the map in or out:
•Drag-and-zoom map controls—with the Navigation tool selected, left-click and drag
the mouse in a down-right direction to zoom in or drag the mouse in an up-left
direction to zoom out. To move the view box to another location, press the SHIFT
key at any time during this procedure without switching back to the Navigation tool.
•Manually adjust the data zoom level with the Data Zoom scroll box in the Control
Panel.
•Use the zoom tools in the Control Panel to zoom the map in one level, out one level,
or out three levels.
•Press ALT+PAGE UP on your keyboard to zoom out to the next full data zoom level.
Press ALT+PAGE DOWN on your keyboard to zoom in to the next full data zoom
level.
•Rotate the mouse wheel (if available) to zoom in by individual data zoom level steps
or hold the SHIFT key while rotating the mouse wheel to zoom to the next full data
20
zoom level.
Changing the Base Map
You can add map datasets, such as XMap USA Street Level Data and USA Topographic
Data, to XMap using the Base Data feature. Click the Map Data tab, click Data, and then
click Base Data. Then add the path where the data is stored on your system. Once a dataset has been added to base data, it is automatically loaded in all other projects.
By default, the DVD drive on your computer is a base data location. Also, any compatible
datasets that you have saved to your hard drive since you installed XMap should display in
the Base Data locations list.
Changing the Map View to Show a Single Map or a Split Map
Use the split-window in XMap to view two maps at the same time.
You can access the left (secondary) map by sliding the divider bar that runs perpendicular
to the tab area. When you move the bar all the way to the left of the map, only the primary
map displays. When you move the bar all the way to the right, only the secondary map
displays. Drag the divider bar to adjust the display areas of the primary and secondary
maps.
Importing GIS Layers
You can import ESRI (.shp, .e00), MapInfo (.mif, .tab), AutoCAD (.dxf, .dwf, .dwg),
Geocode Types (.asc, .csv, .dbf, .txt, .mdb, .xls. .tab), XData datasets, DeLorme draw files,
and DeLorme OpenSpace GIS transfer files into a database that you can then classify,
symbolize, analyze, and edit. The import process varies depending on the type of file
that you are importing (for instance, if the file contains spatial reference information or if
it is a geocode file type). You can also import data from an ArcSDE database. For more
information, see the Working with GIS/Managing Layers in Your Workspace/Importing a
Layer into a Database Help topics.
Installing XMap Datasets
Most of the datasets that are described in this section can be installed to your computer’s
21
hard drive (helpful when you want to view multiple data types in a single project) or viewed
by inserting the data DVD into the DVD drive each time you want to view the data.
XMap Datasets
If XMap is not installed before you install the data or if your version of XMap is not listed
during the install, you must use the Map Data tab in XMap to manually add the data to the
base data. For more information, see Changing the Base Map on page 21.
XMap USA Street Level Data
This dataset can be saved on a hard drive or run from a DVD drive.
1.Ensure XMap is installed.
2.Insert the data DVD into your computer’s DVD drive. Once the DVD is detected, you
will be asked if you want to save the data to your hard drive. If you do want to save the
data, click Yes and proceed with the following steps. If you do not want to save the
data, click No (you will need to insert the data DVD into your DVD drive each time you
want to view the data in the program).
3.Click Next. The Destination Folder screen appears.
4.Optional: If you want to save the data somewhere other than the default location, click
Change. The Change Current Destination Folder screen opens; select a hard drive
location from the Look In drop-down list. You can also browse to the new location or
use the New Folder button to create a new folder for the data. Click OK.
OR
If you know the path where you want to install the data, enter it into the Folder
Name text box. Click OK.
5.Click Next.
6.On the Data Connection Options screen, select the check box next to each installed
DeLorme program that you want to use to view the dataset and then click Next.
Note: If this screen does not appear or if your software is not listed, you must
manually add the data to XMap. See Changing the Base Map on page 21.
7.On the Ready to Install Program screen, click Install.
22
8.When prompted, click Finish. The data automatically displays in the programs you
selected in step 6.
XMap USA Topographic Data
This dataset can be saved on a hard drive or run from a DVD drive. For best performance
when using the DVD from a DVD drive, first complete a Compact installation (see step 6).
1. Ensure XMap is installed.
2.
Insert the data DVD into your computer’s DVD drive. Once the DVD is detected, you
will be asked if you want to save the data to your hard drive. If you do want to save
the data, click Yes and proceed with the following steps. If you do not want to save
the data, click No (you will need to insert the data DVD into your DVD drive each time
you want to view the data in the program).
3. Click Next. The Destination Folder Screen appears.
4. Optional. On the Destination Folder screen, if you want to save the data somewhere
other than the default location, click Change. The Change Current Destination Folder
screen opens. Then:
Select a hard drive location from the Look In drop-down list. You can also browse to
the location or click the New Folder button to create a new folder for the data. Click OK.
OR
If you know the path where you want to install the data, type (or paste) it into the
Folder Name text box. Click OK.
5 Click Next. The Setup Type screen appears.
6 Select the Complete option if you want to install all of the data regions to your hard drive.
OR
Select the Custom option if you want to customize which data regions are saved to
your hard drive.
OR
Select the Compact option if you want to use the data DVD each time you want to
23
access the data. Select this option to install the minimum required amount of
connectivity data to your hard drive; you must insert the DVD to view the map data.
7 Click Next.
8. If you selected Complete or Compact in step 6, go to step 9. If you selected
Custom in step 6, the Custom Setup screen displays. Click the plus signs next to
West Regions or East Regions to show the individual regions for each. To learn which
states are included in a specific region, click to highlight it and then read the feature
description to the right.
• To disable a region, click the hard drive icon next to the option and then select the
This Region Will Not Be Available option in the menu.
• To change the location where a region is installed, highlight the region and then
click Change. Use the Change Current Destination Folder screen to select a new
hard drive location for the region.
•
To determine how much disk space is required/available for a data region,
highlight the region and then click Space. The Disk Space Requirements screen
displays the hard drive size and availability as well as the disk space required for
the selected region. Click OK.
Click Next.
9. On the Data Connection Options screen, select the check box next to each installed
DeLorme program that you want to use to view the dataset and then click Next.
Note: If this screen does not appear or if your software is not listed, you must
manually add the data to XMap. See Changing the Base Map on page 21.
10.On the Ready to Install program screen, click Install.
11.When prompted, click Finish. The data automatically displays in the programs you
selected in step 9.
NetLink Imagery and Data
You can download imagery and data ordered through XMap’s NetLink tab or receive it on
24
DVD. For more information, click the Map Library subtab on the NetLink tab. Follow the
steps below to save your data on DVD to your local hard drive.
Imagery and Data on DVD
1.Insert the DVD into your DVD drive.
2.Browse to your DVD drive.
3.Copy the entire contents of the DVD and paste it anywhere on your hard drive.
Sat 10
1.Insert the Sat 10 DVD into your DVD drive.
2. From the Start menu, click Run. Type D:\ Setup (where D:\ is the letter of the DVD
drive containing the Sat 10 DVD) in the command line text box and click OK.
3.Follow the on-screen directions to complete the data installation. The Sat 10 data
folder is then saved on your hard drive at Program Files\DeLorme\Sat.
3-D TopoQuads Data (USGS 71/2’ quads)
1.Create a folder on your hard drive called 3-D TopoQuads Data.
2.Within the 3-D TopoQuads Data folder, create a subfolder for your data DVD or create
subfolders for each of your regional data DVDs.
3. Insert the 3-D TopoQuads DVD into your DVD drive.
4. Using Microsoft Windows Explorer, browse to your DVD drive.
5. Right-click the DVD drive and click Copy.
6.Right-click the folder you created in step 2 and click Paste.
Adding Data to XMap
You can add imagery and data from NetLink to your base data to make it available in the
current project and all future projects, or you can add it to a specific project.
To add it as base data, see Changing the Base Map on page 21.
To add it to a specific project, open the project, click the Map Data tab, click Data, and
25
then click Add. Browse to your file and select it. Then select the map you want to add the
file to and click Add.
Phone Data
To install the phone data, insert the Phone Data DVD into your computer’s DVD drive and
follow the on-screen instructions in the installation wizard. To use the phone data from
the DVD without installing it, close the installation wizard, click the Phone tab, click Data,
browse to your DVD drive, and click OK.
Add-ons for XMap
This section describes some of the many DeLorme software and hardware product
offerings that work with your XMap system.
Map Datasets
DeLorme offers multiple base map datasets to suit your mapping and GIS needs. Some of
the many options include:
• XMap USA Street Level Data—Vector maps with routable street-level detail and
places of interest covering the United States and Canada
• XMap USA Topographic Data—Vectorized USGS topographic and elevation data with
over 300,000 miles of trails as well as street-level detail for the United States
• Imagery and Data—Includes various types of imagery and data, such as 10-meter
satellite imagery, USGS DOQQ, USGS 7.5-Minute Quads, NOAA Charts, a Digital
Elevation Model, and more. Previously called Aerial Data Packets (ADPs); you can still
use any ADPs you may have.
• Phone Data—Over 140 million searchable residential and business phone listings for
the United States and Canada
For more information about these datasets and others that DeLorme offers, visit www.
delorme.com or click the NetLink tab in XMap.
Earthmate GPS
The Earthmate family of products offers Bluetooth, laptop, PDA, and handheld GPS
26
solutions. For the latest in Earthmate offerings, visit www.delorme.com.
Additional Software
GeoSpider is a 3-D network adjustment software that provides surveyors and engineers
with the required tools and capabilities to verify the accuracy of their terrestrial and GPS
networks.
Getting Help
The Help system provides explanations of all of the features and functions of XMap. To
access the Help system, click the Help button on the toolbar and then click Help Topics.
A link to a printable User Guide on our website is also available from the Help menu. The
User Guide includes the entire Help system
contents in a portable document
format (.pdf). To access the User Guide, click the Help button in the toolbar and then click
User Guide.
Training
An official DeLorme training program for you and your colleagues can help you appreciate
the true worth of your purchase by optimizing your workflow and revealing the wide variety
of mapping tools that you now have at your disposal. DeLorme can conduct a training
program at your location, at DeLorme headquarters in Yarmouth, Maine, or online using a
Web meeting service.
To schedule your class, contact [email protected] or call 207-846-7000 and ask for the
training coordinator.
Troubleshooting
Map Data Doesn't Display in All Projects
The procedure for adding data to XMap varies depending on if you want to add the data to
the current project or if you want to add it to all projects. If you have only added the data to
the current project and you want to view it in all projects, you will need to add the data as
base data in the application.
Use the steps below to add a map dataset as base data.
1. Click the Map Data tab.
27
2.
3
4.
Click Data and then click Base Data. The Base Data Locations dialog box lists each
of the data sources on your system.
Click Add, select the hard drive location where you saved your data from the Browse
for Folder dialog box, and click OK. The OK button is enabled when you select a
folder containing a file that contains the properties of the map data being added.
Click Done.
What is my Server Name?
Your server name will vary, depending on if you are connecting to an MSDE database or
SQL Server 2005 Express database.
• To connect to an MSDE database, type <server name>\ DELORMEMAPPING in the
Attach Database dialog box or when connecting in Database Manager. The server
name can be localhost, (local), or the computer name.
• To connect to a SQL Server 2005 Express database, type <server name>\ XMAP6 in
the Attach Database dialog box or when connecting in Database Manager. The server
name can be localhost, (local), or the computer name.
• To connect to an Enterprise SQL Server database, type <server name> in the Attach
Database dialog box or when connecting in Database Manager. Contact your database
administrator if you experience problems establishing a connection to the Enterprise
SQL Server.
Workspace Does Not Display Any Layers
If there are no layers in your workspace, you may have accidentally removed the layers
from the workspace. To retrieve the layers, click the GIS tab, click the Workspace subtab
(if it is not currently selected), click the Layers button, and then click Manage. Select
the Source Database you want to pull layers from, highlight the layers in the Database,
and then click the Move or Move All button to move the layers into your workspace. If no
source databases are listed, click the Other option to connect to an existing database. If no
databases have been created, to recreate them with Database Manager or select the New
option in the Database drop-down list in the Create Layer or Import dialogs.
28
If you use the above procedure and you still cannot view layers in your workspace, contact
the Database Administrator to verify the database you are connected to is running correctly
and is not disconnected.
The Map View is Blank
If you installed compatible data to your hard drive before XMap was installed, your map
area may appear blank when you open the program. If your map area is blank, you must
update the Base Data settings in the Map Data tab to include that data in your projects. For
instructions on adding data to your base data settings, see the first Troubleshooting topic,
Map Data Doesn’t Display in All Projects.
Minimum System Requirements
• Microsoft® Windows XP, SP2 with 512 MB RAM (1 GB+ MB recommended)
• Microsoft Windows Vista™ Business, or Ultimate: 1 GB RAM (2+ GB recommended)
• Intel® Pentium PC 1.5 GHz or higher processor (1.5+ GHz Dual Core recommended)
• 1 GB of available hard-disk space (2 GB+ recommended). Note: 4.1 GB of available
hard disk space required to install phone data for all regions (can be run from DVD)
• 3D-capable video card with 64 MB VRAM (128+ MB recommended)
• Microsoft Internet Explorer 6.01 (Service Pack 1) or later
• DVD-ROM drive
• 1024 x 768 screen resolution or higher
Contacting DeLorme
For sales and general product questions, phone 800-293-2389 Monday–Friday (excluding
holidays). To order online, visit the XMap website at www.xmap.com.
29
You can also receive product support using the following resources:
Support Web Site: www.delorme.com/support
Community Forums: forum.delorme.com
E-mail: www.delorme.com/support/email_ts.asp
Phone: 207-846-8900 (visit www.delorme.com/support/policy.asp for operational hours.)
30
31
32