Download Whirlpool RS25AW Operating instructions
Transcript
No-Frost,
Side-by-Side
RefrigeratorFreezer
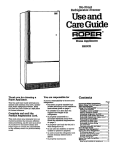
Use and
Care Guide
ROPER
Appliances
RS22AMXV
RS25AWXV
Thank you for choosing a Roper
appliance. This guide will help you
operate and maintain your new,
quality-built Roper refrigerator-freezer.
Keep this guide in a safe place for
future reference.
Complete and mail
the Product
Registration Card.
This card enters your warranty into our
warranty system that insures efficient
Energy-saving
tips.
. Check the door gaskets for a tight
seal. Level the refrigerator to be sure
of a good seal.
n Clean dust and lint from the
condenser coils every other month.
I Open the doors as seldom as possible.
Decide what you need before you
open the door. Remove everything
you need at one time. Organize and
claim
_ processing,
.
_. can be used as a proof
or purchase for Insurance claims and
helps Roper to contact you immediately
in the unlikely event of a product-safety
recall.
Please remember ...
It is your responsibility to be sure that
your refrigerator:
n Has been properly installed and
leveled according to the Installation
Instructions given on Page 3.
n Is installed on a floor that can support
label food so you will not have to
search for items you want. Close
door immediately after you remove
food items.
. Store food in the refrigerator and
freezer so that air movement is not
blocked.
n Set the refrigerator and freezer
temperatures so that the drinks
remain cold enough for your family’s
taste and ice cream remains
the weight of the refrigerator.
. .
. a grounded
. Is properly connecrea. to
electrical circuit that meets the
electrical requirements. (See Page 3.)
. Is properly used only for the job it was
designed to do.
. Is not used by children or anyone
unable to operate it properly.
. Is cold in both the refrigerator and
freezer sections before food is added.
. Is properly maintained.
firm. Do Not set temperatures colder
than they need to be.
. Set the Power-Saving Control on
“CONSUMESLESSENERGY” unless
moisture forms on the outside of the
refrigerator.
. Do Not install your refrigerator next to
your range, water heater, furnace,
radiator, other heat sources or in
direct sunlight.
Part No. 1124444Rev. A
Contents
Page No.
1
1
Product registration.
Energy-saving tips.
Food storage suggestions.
Important Safety Instructions.
2
2
Before using your refrigerator-freezer...
Removing labels...
Cleaning the refrigerator..
Plugging in the refrigerator...
Installing the refrigerator...
Leveling the refrigerator...
3
3
3
3
3
Safety Instructions
Reduce risk of fire, electrical shock, or personal injury when using your
refrigerator-freezer,
by following basic precautions, including the following:
. Read all operating instructions
before using your refrigeratorfreezer.
n
Using your refrigerator-freezer.
Setting the controls.
Changing control settings.
Power-Saver Control.
Adjusting meat drawer temperature. _
Adjusting the refrigerator shelves, Removing and adjusting freezer
shelves.
Removing crisper, meat drawer and
covers.
Removing the base grille.
Do Not store or use gasoline or
other flammable vapors and
liquids in the vicinity of this or any
other appliance. The fumes can
create a fire or explosion.
. Use only a properly grounded
electrical outlet. Check with a
qualified electrician if you are in
doubt as to whether the
refrigerator is properly grounded.
Do Not modify the plug on the
power cord. If it will not fit the
outlet, have a proper outlet
installed by a qualified electrician.
m Do Not use an extension
0
6
6
6
6
RS25AW
Changing the light bulbs.
Removing freezer basket.
Cold water and ice dispenser. ~
7-8
7
7
7-8
Before you call for service for your
cold water and ice dispenser..
8
9
-
If electricity goes off...
Vacation and moving guide.
10
10
Before you call for service...
Operating problems chart.
Normal operating sounds.
11
11
If you need assistance, service or
replacement parts..
warranty.
12
12
Food storage
suggestions.
For information about fresh and frozen
food storage techniques see a cookbook
or check with your local county
extension agent or public utility home
economist.
Store fresh or frozen foods in packages
or containers that provide a good seal
against air and moisture.
\
. Do Not allow children or anyone
unable to safely operate the
refrigerator-freezer
to operate,
play with or crawl inside the
refrigerator-freezer.
. Never discard or store your old
refrigerator-freezer
(even for just a
few days) without safely removing
or sealing the refrigerator-freezer
doors. Prevent entrapment and
suffocation accidents by reading
the enclosed safety booklet from
the Association of Home
Appliance Manufacturers.
Important note: Your freezer cannot quick-freeze large quantities of
food. Put in only as much unfrozen food as will freeze within 24
hours. (No more than 2 to 3 pounds of food per cubic foot of freezer
space.) Leave enough space for air to circulate around packages.
Check to make sure that you leave enough room at the front of the
freezer to tightly close the door.
Savethese Instructions.
Page 2
cord.
5
5
Using and maintaining special model
features.
RS22AM
Changing the light bulbs.
Removing freezer basket.
Automatic ice maker.
Cleaning your refrigerator-freezer.
Important
Before using your refrigerator-freezer...
A. Remove the energy and
sales information labels...
by lifting one edge of each label and
pulling straight off. Use a damp cloth to
take off any glue residue. Remove all
shipping tape.
a Do Not use any sharp instruments or
any harsh, abrasive cleansers.
. Do Not use rubbing alcohol or
flammable toxic solvents such as
acetone, gasoline, carbon
tetrachloride, etc.
. Do Not remove any permanent
instruction labels inside the
refrigerator.
. Do Not remove the Tech Sheet.
B. Clean the refrigerator ...
inside and out before plugging it into an
outlet. Cleaning instructions are given
on Page 9.
D. Install the refrigerator ...
according to the dimensions shown.
Leave extra space along the
hingerside walls to allow the doors to
be opened wider. Make sure ice maker
water supply line has been connected.
E. Level the refrigerator.
Use screwdriver
Do Not install the refrigerator:
I next to an oven, radiator or other
heat source;
I out in the weather or direct sunlight;
n in an area where the room
temperature will fall below 55°F
(13°C).
Leave l/2” (1.25 cm) at the top
and each side of the refrigerator
for easier installation.
1l-l
Rlght to raise;
left to lower
Make sure the refrigerator is level for
efficient operation.
1. Remove base grille (see Page 5).
2. Place a level on top of the
refrigerator - first side to side then
front to back. Turn each leveling
screw to the right to raise the front
of the refrigerator. Turn each
leveling screw to the left to
lower the front of the refrigerator.
3. Check the levelness again and
repeat Step 2 until the refrigerator
is level.
4. Replace base grille.
Do Not use an outlet that can be
turned off with a switch or pull
chain.
C. Plug the refrigerator ...
into a 115~volt, 60-Hz., AC only, 15- or
20-ampere, fused and properly
grounded electrical supply. Use a
separate circuit serving only the
refrigerator. See electrical requirements
and grounding instruction sheet in
literature package for complete details.
.
ti
Refrigerator can be installed
flush against back wall.
Page 3
Using your refrigerator-freezer.
Setting the controls.
Controls for the refrigerator and freezer
are in the refrigerator.
When you plug in the refrigerator ...
1. Set the Refrigerator Control to 3.
2. Set the Freezer Control to B.
3. Let the refrigerator and freezer
FREEZER CO/NTROL
compartments get cold for several
hours before adding food.
4. When the refrigerator keeps milk or
juice aIi cold as you like and the
freezer keeps ice cream firm, the
settings are correct for your
household.
REFRIGERATOR /CONTROL
Changing control settings.
1. Adjust the Refrigerator Control
according to the settings listed
below.
2. Wait 24 hours or more before making
additional adjustments to the
Refrigerator Control or adjusting the
Freezer Control.
I
POWER SAVER CONTROL
LIdHT SWITCH
Condition
Check if
Set control setting
Refrigerator section
TOO WARM.
Door is opened often.
Large amount of food added.
Too-warm room temperature.
Refrigerator
Freezer
4
A
Freezer section
TOO WARM.
Door is opened often.
Large amount of food added.
Too-cold room temperature
(freezer can’t cycle often enough).
Refrigerator
Freezer
3
C
Both sections
TOO WARM.
Door is opened often.
Large amount of food added.
Too-warm or too-cold room temperatures.
Refrigerator
Freezer
4
B
Refrigerator section
TOO COLD.
Controls not set correctly.
Refrigerator
Freezer
2
B
Ice is not made fast
enough.
Heavy ice usage.
Very cold room temperature
(can’t cycle often enough).
Refrigerator
Freezer
3
C
Power-Saver Control.
Adjusting meat drawer
temperature.
The Power-Saver Control operates
electric heaters around the door
openings. These heaters help keep
moisture from forming on the
outside of the refrigerator.
1. Set at “Consumes Less Energy”
when humidity is low.
2. Set at “Reduces Exterior Moisture”
when moisture appears on the
outside of the refrigerator. (A red dot
appears when the switch is in this
position.)
Page 4
The meat drawer temperature control
lets more or less cold air flow from an
opening between the freezer and the
refrigerator. This helps to keep the
meat drawer colder than the rest of the
refrigerator. Set the control to the
coldness level you want.
Using your refrigerator-freezer,
$~iI.st~g the refrigerator
.
continued.
Removing crisper, meat
drawer and covers.
Removing the base grille.
To remove:
1. Open the refrigerator and freezer
doors.
2. Pull grille outwards as shown.
3. Do Not remove Tech Sheet
fastened behind grille.
heavy food items.
To remove glass shelf:
1, Remove food from shelf,
2. Tilt up front.
3. Lift up back until hooks clear the
shelf support slots.
4. PuIl shelf straight out. Be careful
- glass shelves are heavy!
To replace glass shelf:
1. Insert the rear hooks into the shelf
support slots.
2. Tilt up front until hooks drop into
slot. Lower front of shelf to level
position.
metal clips
l-
SUJYPOR tabs 7
I
To remove crisper and meat drawer:
Removing and adjusting the
freezer shelves.
1. Slide crisper or meat drawer
straight forward to the guide stops.
2. Lift the front until it clears stops
3. Slide crisper or meat drawer the‘
rest of the way out.
4. Replace in reverse order.
To remove the covers;
2. Push up glass insert from the
bottom, then slide out with both
hands. (Be careful - the&s is
heavy!)
2. Lift front of cover frame and pull up
and out.
3. Repeat for meat drawer cover.
To remove the shelf:
1. Remove food from shelf.
2. Lift right side of shelf off wall
supports.
3. Slide shelf out of supports.
4. Replace in reverse order.
To adjust the shelf:
1. Remove food from shelf; then
remove shelf.
2. Slide supports upward and remove.
3. Slide supports downward into new
position.
4. Replace shelf.
Note: The cup-shaped supports go in
the back of the freezer.
meta; clips
\
SUPPorttabs
To replace:
1. Line up grille support tabs with
metal clips
2. Push firmly to snap into position.
3. Close the doors.
To replace covers:
1. Fit meat drawer cover notches into
supports on walIs of refrigerator.
Lower cover into place.
2. Repeat for crisper cover frame
3. Slide back of crisper cover glass
insert into place; then lower front.
Page 5
Using and maintaining
special model features.
Model RS22AM
Changing the light bulbs.
Automatic
ice maker
R‘eezer control
Remm-;go;
Ice bin
POwer-Sa ver
Electrical Shock Hazard
Unplug the refrigerator or
disconnect the main electric
power supply to the refrigerator.
Failure to do so can result in
electrical shock or injury.
To change refrigerator
light bulb:
1. Remove the light bulb from the
socket located behind the control
console.
2. Replace with a 40-watt, tubular
appliance bulb.
control
Freezer
light
Adjustable
freezer
shelves
Crisper
Freezer
storage
trivet
Base grille
Model and
serial number
label
utility
compartment
Light
Adjustable
glass shelves
Crisper
light
Statfonary
door she1 ves
Meat drawer
air control
Meat
drawer
Leveling
rollers
To change light bulb above crisper or
freezer light bulb:
1. Grasp front of light shield.
2. Pull bottom of shield forward until
it snaps free.
3. Remove bulb from socket.
4. Replace with a 40-watt, tubular
appliance bulb.
5. Place shield over bulb and snap
back into place.
Automatic ice maker.
(Models RS22AM and RS25AW).
Removing freezer trivet.
For proper air movement, keep freezer
trivet in place when the refrigerator is
operating.
To remove the trivet:
1. Lift trivet up.
2. Pull trivet forward.
To replace the trivet:
1. Slide trivet into refrigerator.
2. Lower trivet into place.
Page 6
1. Connect the ice maker to the water
supply before turning it on.
2. The ON/OFF lever is a wire signal
arm.
- Lower signal arm to make ice.
- Raise signal arm to turn off the ice
maker.
Automatic ice maker tips.
. Freezer must be cold enough for the
ice maker to work. This may take
eight hours or more before the right
temperature is reached.
. “First” ice may be discolored or
off-flavored because of new plumbing
connections. Throw away first few
batches of ice.
. Change ice cube size with the dial or
lever on the side of the ice maker.
. Ice crescents are normally attached at
the comer. They break apart easily.
. Normal sounds include water running
when the ice maker is working and
the thud of ice as it falls into the bin.
. If ice is not being made fast enough
and more ice is needed, turn the
Refrigerator Control to a higher
number. Wait 24 hours, and if this
does not increase the ice supply, turn
the Freezer Control to C.
n Raise the signal arm before you
remove the ice bin. When you return
the bin, push it all the way in and
lower the arm to the ON position.
n Cubes left in the bin for long periods
of time may develop an off-flavor, like
stale water. Throw old cubes away.
Cubes may also become smaller if
stored for a long time.
. Good water quality is important for
good ice quality. It is not
recommended that you connect the
ice maker to a softened water
supply. If a softened water supply
cannot be avoided, it is important to
maintain the water softener so it
operates properly. Water softener
chemicals, such as salt from a
malfunctioning softener, can damage
the ice maker mold and lead to poor
quality ice.
Using and maintaining
special model features.
Model RS25AW
Changing the light bulbs.
Freezer
Ifght
POwer-Sa ver
Freezer
control
Electrical Shock Hazard
Unplug the refrigerator or
disconnect the main electric
power supply to the refrigerator.
Failure to do so can result in
electrical shock or injury.
To change refrigerator
light bulb:
1. Remove the bulb from the socket
located behind the control console.
2. Replace with a 40-watt, tubular
appliance bulb.
Automatic
fee maker
Ice bin
Freezer
light
Adjustable
freezer shelves
Crisper
cover
Crisper
Meet
drawer
- control
- Light
- utmy
compartment
* Model and
serial number
label
. Adjustable
glass shelves
Crisper
- light
- Door
shelves
- Meat drawer
air control
To change light bulb above crisper:
1. Grasp front of light shield.
2. Lift front of shelf up and pull shield
out.
3. Remove bulb from socket.
4. Replace with a 40-watt, tubular
appliance bulb.
5. Place shield over bulb and push
into place.
To change upper freezer light bulb:
1. Lift top of shield up and pull shield
out.
Cold water and ice
dispenser.
2. Remove bulb from socket.
3. Replace with a 40-watt, tubular
appliance bulb.
4. Place shield over bulb and snap
into place.
To change lower freezer light bulb:
1. Push in sides of light shield until it
snaps free.
2. Remove bulb from socket.
3. Replace bulb with a 40-watt,
appliance bulb.
4. Place shield over bulb and snap
into place.
Removing the freezer basket.
To remove the basket:
1. Slide the basket forward to the
guide stops.
2. Lift front of basket until it clears
stops. Slide basket the rest of the
way out.
To replace the basket:
1. Place basket on the slides.
2. Lift slightly until the stops clear the
front of guides.
3. Slide basket in.
B. How to dispense ice.
1. Press a sturdy glass against the ice
dispenser bar. (Pressure and
tumbling ice can break a fragile
glass.)
2. To stop the ice from dispensing,
remove the glass.
Note: “First” ice may be discolored or
off-flavored because of new plumbing
connections. Throw away first few
batches of ice.
C. How the cold water
dispenser works.
The small tray beneath the dispenser is
designed to evaporate small spills. Do
Not pour water into it. There is no drain
in this tray.
A. How the ice dispenser
works.
Ice comes from the ice maker storage
bin in the freezer. When the dispenser
bar is pressed, ice falls through a chute
between the ice bin and dispenser and
out an open trap door. When the
dispenser bar is released, a faint
buzzing sound may be heard for a few
seconds.
Chilled water comes from a 50-ounce
(1.5 1)tank (approximate) behind the
meat drawer. When the refrigerator is
first hooked up, rinse the tank and pipes
by pressing the water dispenser with a
sturdy glass or jar. Discard 2 to 3 quarts
(1.9 to 2.8 1). Then allow the first
tankful of water to chill for several
hours.
D. How to dispense cold
water.
1. Press a sturdy glass against the
water dispenser bar. (Pressure can
break a fragile glass.)
2. To stop the water from dispensing,
remove glass.
Page 7
Model RS25AW
Using and maintaining
special model features.
E. Removing and emptying
the ice storage bin.
. Large amounts of ice (more than two
glasses) should be taken from the ice
maker storage bin not the dispenser.
Do Not use harsh or abrasive
The dispenser motor may stop if the
cleansers or solvents.
dispenser bar is held in too long. If
6. Slide the bin back into place. Make
the motor stops, it will restart in
sure it is pushed in all the way.
about 3 minutes.
7. Lower the signal arm to the ON
. Cubes left in the bin for long periods
position to restart ice production.
of time may develop an off-flavor, like
F. Automatic Ice maker.
stale water. Throw old cubes away.
Cubes may also become smaller if
For use and care information, see Page 6.
stored for a long time.
. Good water quality is important for
G. Changing ice dispenser
good ice quality. It is not
light bulb.
recommended that you connect the
1. Remove the bulb from the socket
ice maker to a softened water
inside the dispenser area.
supply. If a softened water supply
2. Replace bulb with a heavy-duty,
cannot be avoided, it is important to
lo-watt bulb.
maintain the water softener so it
Cold water and ice dispenser
operates properly. Water softener
chemicals, such as salt from a
tips.
malfunctioning softener, can damage
. Use only ice crescents from the ice
the ice maker mold and lead to poor
maker. Other shapes will not
quality ice.
dispense properly.
Remove the ice maker storage bin if:
- ice dispenser has not or will not be
used for a week.
- a power failure causes ice to melt
and freeze together.
- ice dispenser is not used regularly.
1. Lift covering panel up from the
bottom and slide it back to the
rear.
2. Lift the ice maker signal arm until
it clicks into the OFF position. Ice
can be dispensed, but no more will
be made.
3. Lift the front of the storage bin and
pull the bin out.
4. Empty the bin. Use hot or warm
water to melt any remaining ice.
Do Not use sharp objects to break
up ice in the bin. This can
damage the bin and dispenser
mechanism.
Continued
5. Wash the bin with mild detergent.
Rinse well.
Before you call for service for your cold water and ice dispenser...
If you are having an operating problem, check this chart to see what might be the cause before you call for assistance.
Operating problem
Check if
What to do
Cold water and ice
dispenser will not work.
Freezer door is open.
Close the freezer door.
Ice dispenser will not
work.
Ice storage bin is pushed in all the
way.
Non-crescent-shaped ice is in bin.
Push bin in all the way.
Use only ice crescents from ice maker. Other shapes
Old ice has clumped together.
won’t dispense properly.
Throw away old ice and make new.
Ice dispenser stops
working.
Ice dispenser bar is held in too long.
Wait about 3 minutes for dispenser motor to reset.
Large amounts of ice should be taken from the bin,
not through the dispenser.
Off-taste or odor in ice.
Airborne odors are near ice.
Ice is old.
Water quality is good.
Use ice immediately or store in covered container.
Throw away old ice and make new.
Water containing minerals (such as sulfur) may
require a filter.
Store frozen foods in packages or containers that
provide a good seal against moisture and air.
Clean ice storage bin and freezer. Directions are on
Pages 8 & 9.
Properly hook up ice maker water supply. See
Installation Instructions.
Note: First ice may be discolored or off-flavored
because of new plumbing connections. Throw
away first few batches of ice and make new ice.
Foods are properly wrapped.
Ice bin and freezer are clean.
Ice maker is properly plumbed.
New ice maker.
Page 8
Cleaning your refrigerator-freezer.
Both the refrigerator and freezer
sections defrost automatically. To help
prevent odors, wipe up spills
immediately. Clean both sections once
a month.
A. Turn Refrigerator Control to
OFF and unplug it.
B. Take out all removable parts
and clean according to the
following directions:
Reduce risk of fire, electrical shock,
personal injury or damage when
using your refrigerator-freezer
by
following basic precautions
including the following:
mUnplug power supply cord or
disconnect power supply at the
fuse or circuit breaker box before
cleaning your refrigerator-freezer.
mDo Not clean shelves, crisper bins,
the interior, etc. with flammable
fluids. This can create a fire or
explosion.
mDo Not use any sharp instruments
to clean your refrigerator-freezer.
. Do Not use window sprays,
abrasive scouring cleansers,
rubbing alcohol or flammable
toxic solvents such as acetone,
gasoline, carbon tetrachloride,
etc. to clean your refrigeratorfreezer. This can scratch or
damage surfaces or parts.
What to use
How to clean
Removable parts
(shelves, crispers,
meat pans, etc.)
Sponge or cloth; mild detergent
and warm water.
Wash with wet sponge or cloth. Rinse and dry.
Outside
Sponge, cloth or paper towel;
mild detergent and warm
water; appliance wax (or good
auto paste wax).
Wash with wet sponge, cloth or paper towel. Rinse and
dry. Twice a year - apply appliance wax or good auto
paste wax to painted metal surfaces with a clean, soft
cloth. Waxing painted, metal surfaces provides rust
protection. Do Not use wax on plastic parts.
Inside walls (Allow the
freezer walls to warm
up so cloth won’t
stick.)
Sponge, soft cloth or paper towel;
mild detergent and warm water
OR two tablespoons (26 g)
baking soda to one quart (.95L)
warm water.
Wash with wet sponge, cloth or paper towel. Rinse and
dry.
Door liners and gaskets
Sponge, soft cloth or paper towel;
mild detergent and warm
water.
Wash with wet sponge, cloth or paper towel. Rinse and
dry.
Dark plastics
(covers and panels)
Soft, clean sponge or soft cloth;
mild detergent and warm
water.
Wash with wet sponge or soft cloth. Rinse and dry.
Defrost pan
Sponge or soft cloth; mild
detergent and warm water.
Remove base grille. (See Page 5). Lift defrost pan over
wire brace (remove any tape). Wash defrost pan with
wet sponge or cloth and mild detergent. Rinse and dry.
Replace defrost pan with notched corner to the rear.
Push pan all the way in. Check that defrost pan tubing
is pointing into pan. Replace base grille.
Condenser coil
Vacuum cleaner with extended,
narrow attachment.
Remove base grille (see Page 5). Vacuum dust and lint
from condenser coils at least every other month.
Replace base grille.
Floor under refrigerator
Floor cleaner.
Roll refrigerator out away from wall. Clean the floor. Roll
refrigerator back into place. Check levelness of
refrigerator.
Page 9
If electricity
goes off...
A. Call the power company.
Ask how long power will be off.
for every cubic foot of freezer space.
This will keep food frozen for 2 to 4
days.
B. Keep both doors closed if
service will be interrupted 24
hours or less.
This will help frozen food stay frozen.
C. If service is disrupted for more
than 24 hours ...
Remove all frozen food and store in a
frozen food locker
OR
Place 2 lbs. (0.9 kg) of dry ice in freezer
Wear gloves to protect your hands
from dry ice bums.
Failure to do so could result in dry
ice bums.
OR
If dry ice or a food locker is not
available, use perishable food at once or
preserve by other methods.
NOTE: A full freezer stays colder
longer than a partly filled one.
A freezer full of meat stays colder
longer than a freezer full of baked
goods.
If food contains ice crystals, it may
be safely refrozen, but the quality
and flavor of the food may be
affected.
Use refrozen food quickly. If the
condition of the food is poor, or you
feel it is unsafe to eat, dispose of it
immediately.
Vacation and moving guide.
Before you
leave
What to do
Automatic Ice Maker
For less than four
weeks
Use up perishable foods. Freeze other food items.
Lift signal arm to turn off the ice
maker. Shut off water supply to
the ice maker. Empty ice bin.
For more than four
weeks
Remove all food.
Turn Refrigerator Control to OFF.
Unplug refrigerator.
Clean, rinse and dry the interior.
Keep refrigerator and freezer doors slightly open by taping wood
or rubber blocks at the top of each door. This allows air to enter
the refrigerator and freezer and prevents odors and mold from
building up inside while you’re away.
At least one day before you
leave Shut off water supply to the ice
maker.
When last load of ice drops, lift
signal arm to turn off ice
maker.
Empty ice bin.
Personal Injury Hazard
Do Not allow children near the refrigerator when the doors
are blocked open. Children may become injured or trapped.
To restart refrigerator when you return, see Page 4 for resetting
controls.
Moving
Page 10
Remove all food.
Pack frozen foods in dry ice.
Turn Refrigerator Control to OFF.
Unplug refrigerator.
Clean, rinse and dry the interior.
Take out all removable parts.
Wrap removable parts in paper and tape them all together. Store
inside refrigerator.
Raise leveling legs.
Tape the doors shut.
Tape the electric cord to the cabinet exterior.
When you reach your new home, replace the removable parts
and follow steps beginning on Page 3.
Remember to reconnect the water supply line.
At least one day before you
move Shut off water supply to the ice
maker. Disconnect the water
line.
When last supply of ice drops,
lift signal arm to turn off ice
maker.
Empty ice bin.
Before you call for service...
If you are havmg an operating problem,
check this chart to see what might be
the cause before you call for assistance.
Operating
txoblem
Check that
What to do
Refrigerator will not run.
Power cord is plugged into a live circuit with
proper voltage.
Firmly plug power cord into electrical outlet.
Check circuit voltage at fuse/circuit breaker
box.
Switch Refrigerator Control to ON.
Replace fuse with a time-delay fuse of the
correct capacity. Reset circuit breaker.
Refrigerator Control is turned on.
Fuse has blown or circuit breaker has
tripped. Also check if a time-delay fuse
has been used.
Rattling, jingling noise or
unfamiliar sounds.
Nothing is on top or behind the refrigerator
when the refrigerator is operating.
These are “normal operating” sounds:
humming from fans, clicking from
thermostat or defrost cycle, or defrost
water drainina into the defrost pan.
Remove objects from the top or from behind
the refrigerator.
R”b”,otg “Normal operating sounds” section
Ice maker will not
make ice.
Freezer compartment has had enough time
to get cold. With a new refrigerator it may
require cooling overnight to reach proper
temperature.
Signal arm is in the down position to start
the ice maker.
Water valve is turned to open position and
water is reaching the ice maker.
Allow freezer to get cold enough.
Water in the defrost pan.
Weather is hot and muggy.
Hot and muggy weather can cause water to
collect in the drain pan. Since water levels
may reach half-full in the pan, be sure to level
the refrigerator so the pan does not overflow.
Light does not work.
Fuse has blown or circuit breaker has
tripped.
Power cord is plugged into a live circuit with
proper voltage.
Replace fuse with a time-delay fuse of the
correct capacity. Reset circuit breaker.
Firmly plug power cord into electrical outlet.
Check circuit voltage at fuse/circuit breaker
box.
Replace bulb with an appliance bulb. Follow
instructions on Pages 6 & 7.
Bulb is burned out.
Motor runs too long.
Condenser is free of lint and dust.
Weather or room is hot or muggy.
Door has been opened frequently or a large
amount of food has been added to the
refrigerator or freezer compartments.
Put signal arm in the down position.
Turn water valve to open position.
Remove dust and lint from the condenser coils
with a vacuum cleaner.
If the temperature outside or inside is warm,
motor-running noises are normal.
Decide which food items you need before
opening the refrigerator or freezer section.
Motor noise is also normal when large
amounts of food are added to the
refrigerator-freezer compartments.
Remember - your new refrigerator may be
larger than your old refrigerator. It may have
more space to cool, which requires a
longer-running motor.
Normal operating sounds.
You can expect to hear the following
sounds when your refrigeratorfreezer is operating.
running. The defrost timer also clicks
when the defrost cycle starts and
stops.
Slight hum or soft hiss as the
refrigerator’s fan motor moves air.
a Water sounds occur as water gurgles
through tubing for a few minutes
after refrigerator stops running. You
may also hear defrost water runnmg
into the defrost-water pan.
n
. Clicking or snapping sounds occur
when the refrigerator starts and stops
I Buzzing sounds (from the ice maker
water valve), trickling water and
clatter (or thud) of ice may be heard.
. Operating sounds from the
high-efficiency compressor and motor
may last longer than your older
refrigerator.
Page 11
If you need assistance, service or replacement
parts...
Read the warranty. Contact your local
dealer to recommend a local service
company or to obtain replacement parts.
You will need the model number and
serial number when you call for
assistance or service. Both numbers are
located on a label attached on the
inside, right wall of the refrigerator
cabinet near the top of the unit.
This Roper applianceis warrantedby
Whirlpool Corporation to be free from
defect in material and workmanship to
the original domestic purchaser. Any
parts which we find to be defective will
be repaired or replaced at our option
subjectto the following limitations:
LIMITED WARRANTY
-
Appliances
1. Repair or replace during the first thirty (30) days from the date of purchase any finishes (porcelain, enamel or other) and glass parts
which we find to be defective.
2. Repair or replace during the first (1st) year from date of purchase any other part except for the finish, which we find to be defective
3. Repair or replace during the first five (5) years from date of purchase any magnetron (on those units so equipped) which we find to be
defective. Labor on any magnetron under warranty is limited to the first (1st) year from date of purchase.
4. During the second (2nd) through the fifth (5th) years from the date of original purchase on any product so equipped, any Part of the
refrigerating system (compressor, evaporator, condenser, drier or connecting tubing) or any part of the washer gear case assembly
found defective in material or workmanship, will be supplied. Labor on the refrigerating system and gear case assembly under this
warranty is limited to the first (1 s-t) year from the date of original purchase.
5. Replacement parts furnished under the terms of this warranty are warranted only for the unexpired portion of the original warranty
period and transportation charges relative to obtaining parts involved are the responsibility of the original consumer purchaser.
6. This warranty applies only to products properly installed, adjusted and operated in accordance with instructions found in the product
literature. This warranty does not apply to any product which has been subjected to alteration, misuse, improper installation or
delivery damage. Nor does it apply to costs for any service requested for demonstration or to confirm proper operation of appliance,
or when used in other than, single-family household use.
7. Any repairs made under the terms of this warranty must be performed by a Roper brand appliance servicer authorized by warrantor.
SHOULDYOU HAVE ANY QUESTIONSCONCERNINGTHIS WARRANTY, PLEASE CONTACT:
Customer Relations Dept.
ROPER Brand Appliances
2000 M 63 North
Benton Harbor, MI 49022
CalI TolI Free l-(800) 44-ROPER
l-(800) 447-6737
Between 8:00 a.m. - 4:30 p.m.
Monday thru Friday, Eastern Time
If you write or call, please furnish complete model and serial number of appliance and date of purchase.
Under no circumstances shall Whirlpool Corporation be liable under this warranty for any loss of any
incidental or consequential damages and aU IMPLIED WARRANTIES ARE LIMlTED TO THE SAME TIME
PERIODS STATED HEREIN ON EXPRESS WARRANTIES FOR ROPER BRAND APPLIANCES.
Some states do not allow the exclusion or limitation of consequential damages or limitations of how long
an implied warranty may last, so the above limitations or exclusions may not apply to you. This
warranty gives you specific legal rights. and you may have other rights which may vary from state to
state,
THIS IS A LIMITED WARRANTY WITHIN THE MEANING OF THAT TERM AS DEFINED
IN THE MAGNUSON-MOSSACT OF 1975.
If you need servicefor your Roperbrand appliance:
9 Contact your selling dealer for the authorized servicer in your area.
-ORmPhone l(800) 44.ROPER [l-(800)447-6737] BETWEEN
8:00-4:30 Eastern Time - Monday thru Friday.
Part No. 1124444Rev. A
0 1989 Whirlpool Corporation
Appliances
Printed in U.S.A.


