1
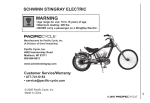
®
®
Gas-powered Scooter
Model 50GR06BL and 50GR06SV
WARNING
• READ ALL WARNINGS AND ASSEMBLY/USE INSTRUCTIONS. KEEP THIS MANUAL WITH THE SCOOTER FOR FUTURE
REFERENCE.
• SEVERE INJURY OR DEATH can result if you do not follow the instructions in this manual.
• Maximum loading: 225 lbs. (102 kg).
• ALWAYS wear a Department of Transportation (DOT) approved motorcycle helmet when operating this scooter.
• This scooter is designed to hold only the driver. NEVER carry a passenger on the scooter.
• THIS SCOOTER HAS A 4-STROKE ENGINE AND REQUIRES UNLEADED 90 OCTANE OR HIGHER GASOLINE, WITHOUT
METHANOL ADDITIVES.
www.schwinnscooters.com
Table of Contents
Introduction ........................................................................................1
Specifications ......................................................................................1
Vehicle Record.....................................................................................1
Safety Precautions............................................................................1-3
Features ...........................................................................................4-5
Description of Features .......................................................................6
Key, Ignition Switch and Steering Lock.........................................6
Engine Stop Switch and Starter Button.........................................6
Headlight and Turn Signal ............................................................6
Throttle .........................................................................................6
Helmet Storage Hook ...................................................................6
Brakes ...........................................................................................7
Kick Starter....................................................................................7
Center Stand.................................................................................7
Luggage Rack ...............................................................................7
VIN Badge and Access Plate..........................................................7
Automatic Transmission ................................................................7
Before Every Ride ................................................................................8
Check the Fuel Level .....................................................................8
Check the Brakes ..........................................................................8
Check the Turn Signals, Brake Lights and Horn ............................8
Check the Tires .............................................................................8
Check the Rear View Mirrors.........................................................8
Starting the Scooter ............................................................................8
Automatic Choke ..........................................................................9
Kick Start.......................................................................................9
Electric Start..................................................................................9
Breaking In the Scooter.....................................................................10
Riding the Scooter ............................................................................10
Entering Roadways .....................................................................10
Acceleration and Deceleration ....................................................10
Braking .......................................................................................10
Parking........................................................................................10
Routine Care and Maintenance ........................................................11
Refueling.....................................................................................11
Tire Maintenance ........................................................................11
Rear Drum Brake Adjustment .....................................................12
Check Rear Drum Brake Shoe Wear............................................12
Check Front Disc Brake Fluid Level .............................................12
Check Front Disc Brake Pad Wear...............................................12
Adding Engine Oil ......................................................................13
Changing Engine Oil ..................................................................13
Adding Transmission Oil .............................................................13
Changing Transmission Oil .........................................................13
Battery Maintenance...................................................................14
Inspecting the Battery Terminals.................................................14
Replacing the Battery..................................................................14
Battery Disposal ..........................................................................14
Replacing the Fuse......................................................................15
Cleaning or Replacing the Air Filter ............................................15
Replacing the Spark Plug ............................................................15
Cleaning .....................................................................................16
Troubleshooting ................................................................................16
Reporting Safety Defects...................................................................16
Professional Maintenance Schedule ..................................................17
Limited Warranty ..............................................................................18
Emissions Performance Warranty ......................................................18
Introduction
KEEP THIS MANUAL WITH THE SCOOTER
This manual should be kept with the vehicle and should remain with the scooter when resold or otherwise transferred to a
new owner or operator. This manual contains important safety information and instructions which should be read carefully
and thoroughly before the rider operates the scooter.
LICENSES, REGISTRATION AND INSURANCE
Although this scooter is equipped for legal operation in the United States, prior to operation of this scooter you must
consult your state and local government ordinances concerning driver’s license requirements, license plates and proper
registration. Before operating this scooter, consult your agent concerning proper insurance coverage in your state.
Specifications
Engine ....................................................4-Stroke Air Cooled
Dispacement..............................................................49.5 cc
Cylinders .............................................................................1
Starter ..........................................................Electric and Kick
Transmission ..................................................Automatic CVT
Transmission Oil...............................Multi-weight SAE 85/90
Transmission Oil Capacity ............................4.1 oz/0.12 liter
Front and Rear Tires.............................................3.50" – 10"
Tire Pressure.....................................26 psi Front/29 psi Rear
Front Brake .....................................................................Disc
Rear Brake ....................................................................Drum
Brake Fluid .............................................Type 3/Type 4 DOT
Brake Fluid Capacity .......................................30 ml (1.0 oz)
Suspension Front ...................................................Telescopic
Suspension Rear ...........................................Damping Shock
Fuel Capacity ...............................................1.32 gal (5 liter)
Fuel Type ...............................Unleaded 90 Octane or Better
Gas Mileage* .....................................117 mpg (50 km/liter)
Driving Range* .......................................155 miles (250 km)
Engine Oil.....................................Multi-weight SAE 15W-40
Engine Oil Capacity....................................0.8 qt (0.75 liter)
Maximum Speed on Flat ......................29.8 mph (48 km/h)
Seat Storage ............................................0.70 cu ft (20 liter)
Luggage rack load capacity............................10 lbs (4.5 kg)
Length ....................................................71.3 in (1810 mm)
Width** .....................................................27.2 in (690 mm)
Height** ..................................................44.5 in (1130 mm)
Dry Weight ...............................................188.1 lb (85.3 kg)
* Estimate for 180 lb load on level ground
** Not including mirrors
All specifications are subject to change without notice.
Vehicle Record
• Write the Vehicle Identification Number (VIN) of your scooter here for future reference. When speaking to your dealer,
you may need to provide the model number and the VIN, found on the VIN badge located on the back side of the front
fairing. Find your model number on the Certificate of Origin that came with your scooter.
Model Number (circle one):
50GR06BL 50BR06SV
VIN number _______________________________________
• If you experience problems, are missing parts, or need service or repairs for your scooter, contact your local dealer.
Safety Precautions
WARNING
• The engine exhaust from this product contains chemicals known to
the State of California to cause cancer, birth defects or other
reproductive harm.
1
Safety Precautions,
continued
WARNING
SEVERE INJURY OR DEATH CAN RESULT IF YOU DO NOT FOLLOW THE INSTRUCTIONS IN THIS MANUAL.
• DO NOT attempt to ride the scooter until you have read and understood the purpose and operation of all the
controls described in this manual.
• ALWAYS wear a Department of Transportation (DOT) approved motorcycle helmet when operating this scooter.
• NEVER exceed maximum load capacity for the scooter. Combined weight of the rider, gear and any accessories
must never exceed maximum load capacity of 225 lbs. (102 kg). Overloading can impair the stability and
performance of the scooter, possibly causing an accident.
• NEVER use headphones or personal radios while riding the scooter.
• ALWAYS keep both hands on the handlebars and both feet on the footrests of the scooter while moving. ALWAYS
wear shoes.
• This scooter is designed to hold only the driver. NEVER carry a passenger on the scooter.
• ALWAYS observe local and state laws for operating gas-powered vehicles on public roads.
• NEVER exceed speed limits. ALWAYS use turn signals to indicate your intention to turn. Follow your state’s driver
safety guidelines for turn signal use.
• ALWAYS keep a safe distance from other vehicles on the road.
• ALWAYS drive at a speed that is appropriate for the terrain, conditions and your experience.
• NEVER attempt wheelies, jumps or other stunts.
• NEVER drive the scooter under the influence of alcohol or drugs.
• ALWAYS inspect the scooter before riding to make sure it is in safe operating condition. Refer to “Before Every
Ride” on page 8 and “Routine Care and Maintenance” on page 11.
• NEVER leave the key in the ignition after riding the scooter. Keep the key in a safe place to prevent unauthorized
use of the scooter.
• NEVER modify the scooter. Modification of this scooter could lead to an accident resulting in SERIOUS INJURY OR
DEATH. Any modification to the scooter, including the use of performance parts, voids all warranties.
• The exhaust system can become very hot and cause burns. Allow the muffler and other hot parts to cool before
touching.
WARNING
GASOLINE AND ITS VAPORS ARE EXTREMELY FLAMMABLE AND EXPLOSIVE AND CAN CAUSE SEVERE BURNS
OR DEATH.
• ALWAYS fill the fuel tank outdoors. NEVER fill the fuel tank indoors.
• If gas spills, DO NOT start the engine until all the spilled gas has evaporated and vapors have dissipated.
• Keep gasoline away from open flames, sparks, pilot lights or other sources of ignition.
• NEVER smoke while refueling the scooter.
• Make sure the fuel lines, tank and cap do not have cracks or leaks.
• Make sure the fuel cap is securely in place before starting the engine.
• NEVER start or operate the scooter near any open containers of gasoline, paint thinner or any other flammable
liquids. Vapors could ignite causing a fire or explosion.
WARNING
GASOLINE ENGINES GIVE OFF CARBON MONOXIDE, AN ODORLESS, COLORLESS, POISONOUS GAS. BREATHING CARBON
MONOXIDE CAN CAUSE NAUSEA, FAINTING, OR DEATH.
• ALWAYS start and operate the scooter outdoors. NEVER start or operate the engine in an enclosed area, even if
the doors and/or windows are open.
2
Safety Precautions,
continued
WEAR A DEPARTMENT OF TRANSPORTATION (DOT) APPROVED MOTORCYCLE HELMET
• Most serious motorcycle injuries and fatalities are due to head injuries. ALWAYS wear a Department of Transportation
(DOT) approved motorcycle helmet when riding the scooter. Look for labels from the Safety Helmet Council of America,
the American National Standard Institute (ANSI) or the Snell Memorial Foundation.
• Your helmet must fit snugly on your head and have no cracks, frayed straps or broken fasteners.
WEAR EYE AND FACE PROTECTION
• ALWAYS wear approved protective eye wear when operating the scooter.
WEAR PROTECTIVE CLOTHING
• ALWAYS wear shoes when driving the scooter.
• Wear long sleeves and pants to cover arms and legs for protection.
• Avoid loose clothing that could get caught in the scooter.
• Use gloves designed for use on motorcycles. They will offer protection to your hands and allow the full use of all controls.
STAY VISIBLE ON THE ROAD
• ALWAYS be aware of other vehicles on public roads. Many accidents are caused when drivers of cars do not see scooters
who share the road.
• Wear bright or reflective clothing to increase your visibility to other motorists.
• ALWAYS use turn signals to indicate your intention to turn. Follow your state’s driver safety guidelines for turn signal use.
• Stay out of the blind spots of other drivers.
• For safety and increased visibility, the headlight is always on when operating the scooter. Use the low beam whenever
there is oncoming traffic.
3
Features
Headlight
Seat Lock (left side)
Seat
Storage Compartment
(under seat)
Spark Plug Access Panel
Muffler
Battery/Fuse Compartment
Engine Oil Cap and Dipstick
Engine Oil Drain Plug
Center Stand
Rear View Mirror
High Beam
Low Beam
CONTROLS
Rear View Mirror
Engine Stop Switch
Throttle
Rear Brake Lever
Horn Button
Turn Signal
Switch
4
Front Brake Lever
Electric Starter
Button
Features,
continued
Instrumentation
Brake Master Cylinder
Left Turn Signal
Right Turn Signal
Key and Ignition Switch
VIN Badge
Fuel Cap
Tail Light
Right Turn Signal
Left Turn Signal
VIN Access Plate
License Plate Bracket
Air Filter Housing
Kickstarter
Transmission Oil Cap
Transmission Drain Plug
Rear Drum Brake
Adjustment Nut
INSTRUMENTATION
High Beam Indicator
Left Turn Signal Indicator
Right Turn Signal Indicator
Speedometer
Odometer
Fuel Gauge
5
Description of Features
KEY, IGNITION SWITCH, STEERING LOCK, SEAT LOCK AND FUEL CAP
• Your scooter comes with two keys. Keep the spare key in a safe place in case one key is lost. The key can be duplicated if
necessary. DO NOT use anything other than the Schwinn Campus key in the ignition.
• The key turns the scooter on and off, engages the steering lock and opens the seat/storage compartment and opens the
fuel cap. NOTE: DO NOT turn the key in the ignition while the scooter is in motion. Turn the key ONLY when the scooter
is at a complete stop.
• TO TURN THE POWER ON, place the key in the ignition and turn to the ON
position. Refer to “Starting the Scooter”
on pages 8 and 9 for detailed instructions. The key cannot be removed in the ON
position. Do not leave the key in
the ON
position if the scooter is not running. The battery will drain.
• TO TURN THE POWER OFF, turn the key to the OFF
position. The key can be removed in the OFF
position.
• TO ENGAGE THE STEERING LOCK, turn the handlebars all the way to the left. Turn the key to the OFF
position to
turn the power off. Push the key in and turn to the LOCK position. Remove the key. Test the lock by turning the
handlebars to the left and the right. If properly locked, the handlebars will not move. To help prevent theft, ALWAYS lock
the scooter when left unattended.
• TO ACCESS THE STORAGE COMPARTMENT UNDER THE SEAT, insert the ignition key into the lock on the left side of
the seat.
• TO CLOSE THE SEAT, PRESS DOWN FIRMLY TO LOCK. Remove the key.
WARNING
• Storage area under the seat is 0.64 cubic feet (18 liters). NEVER exceed maximum load capacity for the
scooter. Combined weight of the rider, gear and any accessories must never exceed maximum load capacity of
225 lbs. (102 kg). Overloading can impair the stability and performance of the scooter, possibly
causing an accident.
• Do not carry oil, fuel or pressurized items in the storage compartment as they could overheat and
explode, causing serious injury or death.
• Do not place fragile, valuable or heat-sensitive items in the storage compartment.
• The storage compartment is not waterproof.
• TO UNLOCK THE FUEL CAP, swivel the cover out of the way. Insert the ignition key and turn to the left (counterclockwise). To lock the fuel cap, turn the key to the right (clockwise).
ENGINE STOP SWITCH AND STARTER BUTTON (RIGHT HANDLEBAR)
: Move the switch to the ON
• ON
position.
position to allow the engine to start. The engine will not start in the OFF
• OFF
: Move the switch to the OFF
position to shut down power to the electrical system. Use this feature only
when other attempts to stop the scooter have failed. For example, if the throttle is stuck or malfunctioning, or if the
scooter falls over.
• ELECTRIC STARTER BUTTON
: With one brake lever pulled, press the starter button to start the scooter with battery
power. Refer to “Starting the Scooter”, pages 8 and 9 for detailed instructions.
NOTE: The scooter can also be started with the kick starter. Refer to “Starting the Scooter” on pages 8 and 9 for
instructions.
HEADLIGHT AND TURN SIGNAL (LEFT HANDLEBAR)
• For safety and increased visibility, the headlight is always on when operating the scooter. Use the low beam whenever
there is oncoming traffic.
• LOW BEAM
: Use the low beam when traveling in traffic and during the day.
• HIGH BEAM
: Use the high beam to see further at night. Do not use the high beam when traveling behind another
vehicle or if there is oncoming traffic.
: Push the switch to the LEFT
• TURN SIGNAL
turning right. The center position is OFF.
6
when turning left, and push the switch to the RIGHT
when
Description of Features,
continued
THROTTLE (RIGHT HANDLEBAR GRIP)
• ACCELERATE: Twist the throttle toward you.
• DECELERATE: Twist the throttle away from you or loosen your grip and the throttle setting will automatically return
to idle.
BRAKES
• FRONT BRAKE LEVER: The FRONT brake lever is attached to the RIGHT handlebar.
• REAR BRAKE LEVER: The REAR brake lever is attached to the LEFT handlebar.
• For more information about using the brakes, see “Riding the Scooter”, page 10. To adjust brakes, see “Front and Rear
Brake Adjustment” on page 12.
KICK STARTER
• Use the kick starter to start the scooter or prime the engine in the following situations:
- If the scooter has been driven less than 100 miles (160 kilometers).
- In cold or wet weather.
- If the fuel tank has run completely dry (and more fuel has been added).
- If the scooter has been stored for more than two weeks.
- If the scooter fails to start using the electric starter button.
- If the battery is discharged.
• The kick starter can be used to “prime” the fuel system prior to using the electric start button. See “Starting the Scooter”,
pages 8 and 9 for detailed instructions on using the kick starter.
CENTER STAND
• Always use the center stand on level ground.
• To extend the center stand and park the scooter, grasp the left handlebar grip and the luggage rack with your right
hand. Place your right foot on the foot peg of the center stand and push straight down. The rear wheel will raise slightly
as the scooter comes to rest on the center stand.
• To retract the center stand, grasp both handlebar grips and push the scooter forward. NOTE: Be sure your feet and legs
are clear of the center stand. The center stand has a strong spring and will retract under the scooter very quickly.
LUGGAGE RACK
WARNING
• Maximum load for the luggage rack is 10 lbs. (4.5 kg). NEVER exceed maximum load capacity for the
scooter. Combined weight of the rider, gear and any accessories must never exceed maximum load capacity of
225 lbs. (102 kg). Overloading can impair the stability and performance of the scooter, possibly
causing an accident.
• Evenly distribute the load on the luggage rack and secure with straps.
• Do not attach anything to the handlebars, fenders or footrests.
VIN BADGE AND ACCESS PLATE
• You will need your Vehicle Identification Number when registering your scooter with your local government or contacting
your dealer. The VIN appears in two places: on the VIN badge, located on the back side of the front fairing, and under
the VIN access plate.
AUTOMATIC TRANSMISSION
• Your new scooter has an automatic transmission that does not require the use of a clutch or gear shift.
7
Before Every Ride
For your safety and to keep the scooter in good working order, ALWAYS perform the following checklist before every ride.
If you find any damaged or worn parts, DO NOT use the scooter. Contact your dealer for repairs.
CHECK THE FUEL LEVEL
• Check the fuel gauge. Add fuel if necessary.
CHECK THE BRAKES
• Apply the front and rear brakes to make sure they are working correctly. Refer to “Front and Rear Brake Adjustment” on
page 12.
CHECK THE TURN SIGNALS, BRAKE LIGHTS AND HORN
• Turn the ignition key to the ON
position to provide power to the scooter. Move the turn signal to the LEFT
and
RIGHT
positions and make sure turn the signal lights and the turn indicator lights on the speedometer are functioning
properly.
• Apply the front brake and make sure the brake light is functioning properly. Repeat this test for the rear brake.
to make sure horn is functioning properly.
• Push the horn button
CHECK THE TIRES
• Make sure the tires are inflated to the proper pressures: the front tire should be inflated to 26 PSI and the rear tire should
be inflated to 29 PSI. Make sure there are no cuts, punctures or excessively worn tread on the tires. Refer to “Tire
Maintenance” on page 11 for details.
CHECK THE REAR VIEW MIRRORS
• Make sure the mirrors are clean, secured and adjusted properly so you can have a clear view of vehicles behind the
scooter.
Starting the Scooter
WARNING
• DO NOT attempt to ride the scooter until you have read and understood the purpose and operation of all the
controls described earlier in this manual.
• Maximum combined weight of rider and cargo must not exceed 225 lbs. (102 kg).
• ALWAYS wear an approved Department of Transportation (DOT) motorcycle helmet when operating this scooter.
WARNING
GASOLINE ENGINES GIVE OFF CARBON MONOXIDE, AN ODORLESS, COLORLESS, POISONOUS GAS. BREATHING CARBON
MONOXIDE CAN CAUSE NAUSEA, FAINTING, OR DEATH.
• ALWAYS start and operate the scooter outdoors. NEVER start or run the engine in an enclosed area, even if the
doors and/or windows are open.
WARNING
• The engine exhaust from this product contains chemicals known
to the State of California to cause cancer, birth defects or other
reproductive harm.
8
Starting the Scooter,
continued
AUTOMATIC CHOKE
NOTE: Your new scooter is equipped with an Automatic Choke. There is no manual choke and no need to apply the
throttle while starting.
KICK START
• For the first 100 miles (160 kilometers) it is recommended that you kick start the scooter, or use the kick starter to
“prime” the engine (force fuel into the carburetor) prior to using the electric starter. This preserves battery life and
reduces wear to the electrical starter
during the break-in period.
• The center stand must be down in order to use the kick starter. NOTE: Do not attempt to sit on the seat and start the
scooter with the center stand down.
• Place the key in the ignition and turn it to the ON
• Move the engine stop switch to the ON
the OFF
position.
position.
position. NOTE: The scooter will not start when the engine stop switch is in
• Stand to the left of the scooter. Grasp the handlebar grip with your left hand and the luggage rack with your
right hand.
• Pull either brake lever. NOTE: The scooter will not start unless one brake is applied while starting.
• Extend the kick starter foot peg.
• “Kick” down on the kick starter quickly, then allow it to spring back into position. Repeat this procedure until the engine
starts. NOTE: You are forcing fuel up into the carburetor with each “kick”. It may take many “kicks” to start the engine for
the first time.
• When the engine starts, apply enough throttle to idle the engine for 20 to 30 seconds. NOTE: DO NOT open the throttle
while kick starting. Open the throttle only after the engine has started.
NOTE: To prolong engine life, allow the engine to reach normal operating temperature before driving. This usually takes
about 2 to 3 minutes.
• Retract the kick starter foot peg to its original position before driving.
• Grasp both handlebar grips and push the scooter forward to retract the center stand under the scooter. Mount the scooter.
• Use the kick starter to start the scooter or prime the engine in the following situations:
- If the scooter has been driven less than 100 miles (160 kilometers).
- In cold or wet weather.
- If the fuel tank has run completely dry (and more fuel has been added).
- If the scooter has been stored for more than two weeks.
- If the scooter fails to start using the electric starter button.
- If the battery is discharged.
ELECTRIC START
• Retract the center stand and sit on the seat with both feet on ground.
• Place the key in the ignition and turn it to the ON
• Move the engine stop switch to the ON
the OFF
position.
position.
position. NOTE: The scooter will not start when the engine stop switch is in
• Pull either brake lever. NOTE: The scooter will not start unless one brake is applied while starting.
• Press the electric starter button
for no more than five (5) seconds until the engine starts. Release the button as soon as
the engine starts. NOTE: DO NOT press the electric starter button continuously for more than five seconds. Damage to
the starter could occur.
• If engine doesn’t start, wait ten (10) seconds and repeat the starting procedure.
• If repeated attempts fail, use the kick starter to start the scooter or prime the engine. See “Kick Start” section above.
• When the engine starts, apply enough throttle to idle the engine for 20 to 30 seconds. NOTE: DO NOT open the throttle
while starting. Open the throttle only after the engine has started.
• NOTE: To prolong engine life, allow the engine to reach normal operating temperature before driving. This usually takes
about 2 to 3 minutes.
9
Breaking In the Scooter
• For the first 100 miles (160 kilometers) it is recommended that you kick start the scooter, or use the kick starter to
“prime” the engine (force fuel into the carburetor) prior to using the electric starter. This preserves battery life and
reduces wear to the electric starter during the break-in period.
• ALWAYS allow the engine to warm up for 2 to 3 minutes before driving.
• Do not drive the scooter at a constant speed for long periods of time during the break-in period. Avoid overheating
the engine.
Riding the Scooter
ENTERING ROADWAYS
• Apply the turn signal if needed.
• Make sure there is no oncoming traffic. ALWAYS be aware of other vehicles on public roads. Many accidents are caused
when drivers of cars do not see scooters who share the road.
• Release the brake and gradually advance the throttle for smooth acceleration.
ACCELERATION AND DECELERATION
• Adjust speed by twisting the throttle. Twist the throttle toward you to accelerate. Twist the throttle away from you to
decelerate. NOTE: Your new scooter has an automatic transmission, so there is no clutch and no need to shift gears.
• ALWAYS allow the engine to warm up thoroughly before hard acceleration, or damage to the engine could occur.
BRAKING
WARNING
• ALWAYS apply the front and rear brakes simultaneously to slow down or come to a stop.
• BE CAUTIOUS when using the front brake. Loss of traction on the front wheel can make both steering and
braking ineffective. Using the front brake in loose gravel or wet road conditions can result in loss of traction.
• DO NOT continually engage the brakes for an extended period of time. This causes excessive wear and can
overheat the brakes, causing brake failure which could result in serious injury or death.
• In wet driving conditions, be aware that normal stopping distances are increased.
PARKING
NOTE: Always park on smooth, level ground.
• Turn the ignition key to the OFF
position. Remove the key.
• Move the engine stop switch to the OFF
position.
• Dismount the scooter and engage the center stand.
• DO NOT park on a slope or on soft surfaces. The scooter could tip over.
• DO NOT park near flammable materials.
• Engage the steering lock to prevent theft (see instructions on page 6).
10
Routine Care and Maintenance
WARNING
• When performing routine maintenance on the scooter, NEVER start or run the engine in an enclosed area,
even if the doors and/or windows are open. ALWAYS start and operate the scooter outdoors.
• Allow the engine, muffler and other hot parts to cool before touching.
• Conduct cleaning and maintenance using the center stand (see page 7) on a smooth, flat, hard surface.
WARNING
GASOLINE AND ITS VAPORS ARE EXTREMELY FLAMMABLE AND EXPLOSIVE AND CAN CAUSE SEVERE BURNS OR
DEATH.
• Keep gasoline away from open flames, sparks, pilot lights or other sources of ignition.
• NEVER smoke while refueling the scooter.
• Fill fuel tank outdoors or in a well-ventilated area.
• If fuel spills, DO NOT start engine until the spilled fuel has evaporated and vapors have dissipated.
• Make sure the fuel lines, tank and cap do not have cracks or leaks.
• NEVER start or operate the scooter near gasoline, paint thinner, or any other flammable liquids. Vapors could
ignite causing a fire or explosion.
• If you swallow gasoline, DO NOT INDUCE VOMITING. If you inhale gasoline vapor and feel ill, or spill gasoline into
your eyes, see a physician immediately.
• If you spill gasoline on your skin or clothing, change clothing and wash your skin with soap and water.
REFUELING
THIS SCOOTER HAS A 4-STROKE ENGINE AND REQUIRES UNLEADED 90 OCTANE OR HIGHER GASOLINE, WITHOUT
METHANOL ADDITIVES.
• Turn the engine OFF
and allow the engine to cool at least two (2) minutes before removing the fuel cap.
• The fuel cap is located at the rear of the scooter, behind the seat. To unlock the fuel cap, insert the ignition key and turn
to the left (counter-clockwise). Remove the cap to add fuel.
• Use UNLEADED 90 octane or higher gasoline without Methanol additives only. The tank holds 1.32 gallons (5 liters)
of fuel.
• DO NOT overfill the fuel tank. Fill tank to about 1.5 inches below the top of the tank to allow for fuel expansion.
• Wipe up spills immediately. Gasoline may damage paint and plastic parts. Do not start the engine until the spilled fuel
evaporates and the vapors have dissipated.
• NEVER add anything to the gasoline in the fuel tank.
• Replace the fuel cap securely.
TIRE MAINTENANCE
WARNING
• DO NOT over-inflate the tire or underinflate the tires. The tires could slip off the wheel rims during braking,
causing the scooter to become unstable and turn over in a curve.
• To check the tire pressure, remove the cap from the valve stem and set aside. Use a tire pressure gauge to measure the air
pressure in the tires. The correct pressure for the front tire is 26 PSI, and for the rear tire is 29 PSI.
• Inspect the rims. If the rims are cracked or bent do not ride the scooter. They must be replaced.
• Check the tires for wear and damage. If you notice cuts, punctures or excessively worn tread, the tire needs to be
replaced. Contact your dealer for replacement parts and service.
11
Routine Care and Maintenance,
continued
REAR DRUM BRAKE ADJUSTMENT
• Test the rear brake lever free play. Apply light
pressure to the left brake lever until you feel the
brake engage. There should be very little free play
between the “at rest” position of the brake lever
and the applied position of the brake lever.
Acceptable free play is between 3/8" and 3/4" (Fig.
1). Keep the brake cable adjusted to maintain
acceptable free play.
1
2
2a
Pivot Pin
Brake
Brake
Adjustment
Adjustment
Nut
Nut
Between
3/8" and 3/4"
• Use a wrench to adjust the brake adjustment nut
on the rear wheel (Fig. 2). Tighten as necessary
until the correct freeplay is established.
NOTE: If you tighten the nut too much, the rear wheel will “drag”, even if the brake is not applied.
• Make sure the brake adjustment nut is in the correct position after adjusting. The curved side of the nut must rest snugly
against the pivot pin (Fig 2a). Check brake operation.
CHECK REAR DRUM BRAKE SHOE WEAR
3
REAR DRUM BRAKE
• As the drum brake shoe linings wear, freeplay in the brake lever will increase. Each
time the brake adjustment nut is tightened to decrease freeplay in the brake lever,
the brake wear indicator will move to a position closer to the minus (–) sign (Fig. 3).
• The indicator should never reach the minus sign. Brake shoes should be
inspected and replaced by a QUALIFIED MECHANIC before the indicator reaches
the minus sign. The brake shoe must be replaced before the lining reaches the
minimum allowed thickness of 0.06" (1.5 mm). The brake drum must never
measure larger than 3.892" (99.0 mm) in diameter.
Time to replace
brake shoe
CHECK FRONT DISC BRAKE FLUID LEVEL
• Locate the front brake master cylinder under the housing near the right handlebar
(Fig. 4). If the fluid level in the window is at or below the low-level mark, take the
scooter to your dealer for service.
4
CHECK FRONT DISC BRAKE PAD WEAR
• As the disc brake pads wear, the depth of the notches in the disc brake pads will
decrease (Fig. 5). NOTE: The disc rotor has been removed for clarity in Fig. 5.
The disc rotor is shown in place in Fig. 5a.
• Never allow the notches to wear away completely. Brake pads should be
inspected and replaced by a QUALIFIED MECHANIC while the notches are still
visible. The brake pads must be replaced before the pads reach the minimum
allowed thickness of 0.072" (1.85 mm). The minimum allowed thickness for the
disc rotor is 0.118" (3.0 mm).
WARNING
• Never allow the front disc brake notches to wear away completely.
• Never allow the rear drum brake pad indicator to reach the minus sign.
• Even if working properly, the brakes should be inspected by your dealer at
the intervals listed in the Professional Maintenance Schedule on page 17.
12
Master
Cylinder
5
FRONT DISC BRAKE
5a
Time to replace
brake shoes
Routine Care and Maintenance,
continued
CAUTION
• Always allow the engine to cool before performing any routine maintenance. When hot, scooter parts can cause severe burns.
ADDING ENGINE OIL
1
DIPSTICK
• Oil should be checked every 300 miles (480 kilometers).
• Stop on smooth, level ground, turn the ignition OFF
and remove the key.
• Use the center stand to park the scooter and allow the engine to cool.
ADD
FULL (DO NOT overfill)
• Unscrew the dipstick (Fig. 1), found on the right side of the scooter (see
photo on page 4). Wipe the dipstick clean with a cloth and dip it back into
the oil reservoir (do not screw it back in).
• Pull the dipstick out and read the oil level. Oil level should fall within the diamond pattern (Fig. 1).
• If oil level reaches the ADD point (Fig. 1), add oil. Use enough multi-weight SAE 15/40 lubricating oil to keep the level
between between FULL and ADD. IMPORTANT: DO NOT overfill.
• Replace the dipstick and tighten firmly by hand.
CHANGING THE ENGINE OIL
• Change the engine oil after the first 200 miles (320 kilometers), and every 2,500 miles (4,000 kilometers) or six (6)
months, whichever comes first.
• Locate the drain plug found under the crank case (refer to photo on page 4).
• Place an oil pan under the drain plug. Use a wrench to unscrew the plug and allow the oil to drain out. Replace the plug
and tighten firmly using the wrench. DO NOT overtighten.
• Unscrew the dipstick (Fig. 1), found on the right side of the scooter (see photo on page 4).
• Use a funnel to pour 0.8 qt. (0.75 liter) multi-weight SAE 15/40 lubricating oil into the engine oil reservoir.
• Re-check the oil level with the dipstick.
• Replace the dipstick and tighten firmly by hand.
• Consult your local authorities for instructions on the proper disposal of used oil.
ADDING TRANSMISSION OIL
• Inspect the rear drive area for signs of oil leakage. If you suspect the level is low, you may need to add transmission oil.
• Using a wrench, unscrew the transmission oil cap, found on top of rear drive assembly, beside the rear wheel (refer to
photo on page 5).
• There is no gauge or dip stick to measure the transmission oil level. The transmission oil is full when the fluid level is even
with the bottom edge of the fill hole.
• Using a funnel, pour enough multi-weight SAE 85/90 oil into the transmission oil reservoir to top off.
• Replace the transmission oil cap and tighten firmly with a wrench. DO NOT overtighten.
CHANGING TRANSMISSION OIL
• Change the transmission oil after the first 200 miles (320 kilometers), and every 2,500 miles (4,000 kilometers) or six (6)
months, whichever comes first.
• Locate the drain plug, found on the left side of the scooter, near the rear wheel, underneath the rear drive assembly (refer
to photo on page 5).
• Place an oil pan under the drain plug. Use a wrench to open the plug and allow the remaining oil to drain out. Replace
the plug and tighten firmly with a wrench. DO NOT overtighten.
• Locate the oil cap, found on top of rear drive assembly, beside the rear wheel (refer to photo on page 5).
• Use a funnel to pour 4.1 oz. (120 cc) multi-weight SAE 85/90 oil into the transmission oil reservoir.
• Replace the transmission oil cap and tighten firmly with a wrench. DO NOT overtighten.
• Consult your local authorities for instructions on the proper disposal of used oil.
13
Routine Care and Maintenance,
continued
BATTERY MAINTENANCE
• The battery is sealed and does not require electrolyte replacement.
• To help preserve the life of the battery, use the kick starter method to start your scooter for short trips (see page 9).
• The battery charge is maintained with current from the alternator.
INSPECTING THE BATTERY TERMINALS
1
• ALWAYS turn the scooter off and remove the key before inspecting
the battery.
• Periodically check the battery for leakage or corrosion. Using a Phillips
screwdriver, remove the screws from the battery door in the floor board.
Set aside the hardware. Open the battery door.
Negative
Terminal
Positive
Terminal
Fuse
Box
• Visually inspect the battery, its cables and terminals for damage.
• If you see corrosion on the battery terminals, they will need to
be cleaned.
• NEVER pick up the battery by its cables or connectors.
• Pull the terminal covers back to expose both battery terminals. Using a
Phillips screwdriver or wrench, disconnect the negative (black) cable from the battery terminal first, then disconnect the
positive (red) cable from the battery terminal (Fig 1). When removing the cables from the battery, make sure they do not
come in contact with each other.
• Lift the battery up and out of the compartment. Handle the battery carefully.
• Gently clean the posts with a wire brush.
• Wipe the posts clean with a damp cloth (a dry cloth may cause static electricity).
• Lower the battery into the compartment.
• Reconnect the positive (red) cable to the positive terminal. Reconnect the negative (black) cable to the negative terminal.
When re-connecting the cables to the battery, make sure they do not come in contact with each other.
• Replace the terminal covers.
• Replace the battery door, and secure it with the screws.
REPLACING THE BATTERY
• The scooter battery will need to be replaced if:
- The battery has completely discharged.
- The battery has leaked.
- The battery casing is cracked or damaged.
• Contact your dealer to purchase a new battery. Use of an unauthorized battery will void the warranty.
• Follow the instructions above for accessing and removing the battery.
• Lower the new battery into the compartment.
• Reconnect the positive (red) cable to the positive terminal. Reconnect the negative (black) cable to the negative terminal.
• Replace the battery door, and secure it with the screws.
BATTERY DISPOSAL
• NEVER throw the battery away in the trash or burn it in a fire. In most areas, it is illegal to
burn lead acid batteries or put them in a landfill.
• Take the exhausted battery to an approved lead acid battery recycle center, such as an
auto parts
store lead-acid.
or battery
retailer.
Contains
Must
be recycled or disposed
properly. For further information, please
collection service to find out if they offer disposal of lead acid batteries.
• Call yourofwaste
call .......
Do not dispose of the battery or battery acid in any unapproved place. Follow your state
guidelines for proper disposal procedure.
14
Routine Care and Maintenance,
continued
REPLACING THE FUSE
1
Fuse Case
• If the electrical system is not working properly, a fuse may have blown.
• Turn the ignition OFF
.
• Using a Phillips screwdriver, remove the screws from the battery door found in
the floor board. Set aside the hardware. Open the battery door.
• Locate and open the fuse case. You will see two fuses, one is in use, and the other
is a spare.
• Inspect the fuse for broken wires.
• If you find a blown fuse, remove it. Insert a new fuse, making sure it fits snugly
into the socket. A loose connection will cause electrical problems, and possibly
overheat the fuse contacts.
• ALWAYS replace the fuse with a new fuse of the same amperage rating. DO NOT replace it with a fuse of higher
amperage rating. Extensive damage to the electrical system could occur.
• Close the fuse case and place the fuse and battery cables completely inside the battery compartment. Make sure the
terminal covers are in place. Replace the battery door and secure it with the screws.
• If the new fuse blows out immediately, contact your dealer for repairs.
CLEANING OR REPLACING THE AIR FILTER
2
• Check the air filter after 600 miles (960 kilometers); then again every 2,500
miles (4,000 kilometers) or 6 months.
• The air filter may become clogged with dirt and dust, causing a decrease in
engine power. Keep the air filter clean for optimal scooter performance.
NOTE: If you live in a coastal or arid area or drive on dirt or gravel roads, you
may need to clean or replace the air filter more frequently.
• Look on the left side of the scooter and locate the air filter cover. Using a
Phillips screwdriver, remove the filter cover screws (Fig. 2) and set aside.
• Remove the cover (Fig. 3) to expose the air filter. Gently remove the air filter;
be careful not to tear it.
• Shake the air filter vigorously to remove dust and debris. NEVER use water to
clean the air filter.
• Inspect the air filter. If it is damaged, it must be replaced. Contact your dealer
to obtain a new filter.
• If the air filter is clean and reusable, carefully press the air filter back into place.
Replace the cover and secure the filter cover screws. NOTE: Make sure the
filter and cover fit together properly before tightening the screws. Gaps may
cause the engine to run improperly.
REPLACING THE SPARK PLUG
• If the scooter is hard to start, it may be necessary to clean or replace
the spark plug or adjust the electrode gap. Replace it with an A7RTC
spark plug only. NOTE: Correct gap for the spark plug is 0.024” to
.032” (0.6 to 0.8 mm). Incorrect gap can cause damage to the
scooter’s engine.
• Allow the engine to cool before changing the spark plug.
• Remove the screw and access panel located below the front edge of
the seat (Fig. 4).
• Pull the spark plug cover off the spark plug (Figs. 5 and 6). Use a
spark plug socket wrench to remove the spark plug from the
cylinder (Fig. 7).
• Insert the new spark plug into the cylinder and tighten firmly by
hand. Use the spark plug socket wrench and tighten another 1/2
to 3/4 turn.
• Replace the spark plug cover securely over the spark plug. Replace
the access panel and secure it with the screw.
4
3
5
Spark Plug
Cover
6
7
15
Routine Care and Maintenance,
continued
CLEANING
Keep your scooter clean so it will look good and perform well. Before washing, remove the contents of the storage compartment.
WARNING
• DO NOT allow water to come in contact with the ignition, battery, fuse compartment or other electrical parts.
• DO NOT use high-pressure washers, as they can cause damage to the scooter’s body, mechanical and
electrical parts.
• Hand wash with mild soap and water using a soft rag or mitt. DO NOT use a brush that could scratch the finish. DO
NOT use abrasive cleansers.
• Rinse thoroughly with clean water. DO NOT allow water to come in contact with any electrical components. Dry with a
chamois or soft, absorbent cloth.
Troubleshooting
Scooter will not start.
1. Make sure you have fuel in the fuel tank.
2. Make sure you are squeezing one brake lever while starting the scooter. The scooter will not start if a brake is not applied.
3. Make sure the engine stop switch is in the ON
position.
4. Make sure the key is in the ignition and turned to the ON
position.
5. The spark plug may need replacing (see “Replacing the Spark Plug”, page 15).
6. The fuse may have blown. Check the fuse (see “Replacing the Fuse”, page 15).
7. The engine may be overheated. Allow it to cool before attempting to restart the scooter.
8. The battery may be discharged. Use the kick starter (see “Starting the Scooter”, page 9), or charge or replace the
battery, (see “Replacing the Battery”, page 14).
Poor engine power or poor fuel economy.
1. The air filter may be dirty (see “Cleaning or Replacing the Air Filter”, page 15).
2. The spark plug may need to be adjusted or replaced (see “Replacing the Spark Plug”, page 15).
3. The tires may be over-inflated or under-inflated. Check tire pressure (see “Tire Maintenance”, page 11).
Pacific Cycle, Inc., 4902 Hammersley Road, Madison, WI 53711
Reporting Safety Defects
If you believe that your vehicle has a defect which could cause a crash or could cause injury or death, you should
immediately inform the National Highway Traffic Safety Administration (NHTSA) in addition to notifying Pacific
Cycle, Inc.
If NHTSA receives similar complaints, it may open an investigation, and if it finds that a safety defect exists in a
group of vehicles, it may order a recall and remedy campaign. However, NHTSA cannot become involved in any
individual problems between you, your dealer, or Pacific Cycle, Inc.
To contact NHTSA you may either call the Auto Safety Hotline toll-free at 1-800-424-9393
(366-0123 in Washington, DC area) or write to:
NHTSA
U.S. DEPARTMENT of TRANSPORTATION
400 7th Street SW, (NSA-11)
Washington, DC 20590
You can also obtain other information about motor vehicle safety from the Hotline.
16
Professional Maintenance Schedule
Contact your dealer for all inspections, repairs and major routine maintenance of the follwing items at the
recommended intervals. Failure to follow the maintenance schedule voids all warranties.
Initial 200 miles
600 miles
At 2,500 miles (4,000 km)
At 5,000 miles (8,000 km)
Item
(320 km)
(960 km)
or 6 months
or 6 months
Fuel Line
X
X
X
X
X
X
X
X
X
X
X
X
X
X
X
X
X
X
X
X
X
X
X
X
X
X
X
X
X
X
X
X
X
X
X
X
X
Speedometer Cable
X
X
X
Throttle Grip and Cable
X
X
X
Turn Signal
X
X
X
Brake Light
X
X
X
Headlight
X
X
X
Nuts, Bolts and Screws
X
X
X
Fuel Filter
Valve Gap
X
Oil Filter Screen Cap
Cooling Fan
Drive Belt
X
Every 12 months
Transmission Oil
X
Braking System
X
Brake Fluid
Every 24 months
Wheels/Rims
Tires
X
Wheel Bearings
Steering Bearings
X
Rear Shock Absorber
Chassis Fasteners
X
EMISSION CONTROL DEVICES AND SYSTEMS: Contact your dealer for all inspections, repairs and major
routine maintenance of the follwing items at the recommended intervals.
600 miles
(960 km)
At 2,500 miles (4,000 km)
or 6 months
At 5,000 miles (8,000 km)
or 6 months
X
X
X
Air Filter
X
X
X
Intake Manifold
X
X
X
Spark Plug
X
X
X
Ignition Coil
X
X
X
CDI
X
X
X
X
X
X
Item
Fuel System
Carburetor Assembly
Intake System
Ignition System
After Treatment System
Catalyst/Muffler
17
Limited Warranty
THE EXPRESS WARRANTIES AS CONTAINED HEREIN ARE EXCLUSIVE AND IN LIEU OF ALL OTHER WARRANTIES, EXPRESS
OR IMPLIED, INCLUDING IMPLIED WARRANTIES OF MERCHANTABILITY AND FITNESS FOR A PARTICULAR PURPOSE.
THERE ARE NO WARRANTIES THAT EXTEND BEYOND THE DESCRIPTION IN THIS LIMITED WARRANTY.
Pacific Cycle extends the following LIMITED WARRANTY to the original purchaser of the Schwinn® scooter:
Warranty coverage is limited to the original purchaser for personal non-commercial use only and is not assignable or transferable.
Limited Warranty – If a part is defective in material or workmanship, Pacific Cycle, at its option, will authorize the repair or
replacement of the defective part for up to one year from the date of original purchase.
Exceptions, Exclusions, and Conditions – Warranty does not cover wear and tear, abuse, misuse, alteration or modification of the
equipment, improper maintenance or repair, improper assembly, accident, personal injury or other damage resulting from use of
the equipment, or conditions or occurrences beyond the control of Pacific Cycle including damage from transportation, fire, flood,
or other Acts of God. Pacific Cycle is not responsible for economic loss, lost profits, inconvenience, loss or damage to personal
property, direct, indirect, or consequential damages. Failure to follow the maintenance schedule voids all warranties.
The obligation of Pacific Cycle under this warranty is limited solely to the repair or replacement of parts covered by this warranty.
Any modification to the scooter, including the use of performance parts, voids all warranties. All other costs including shipping for
warranty repairs are the obligation of the owner. Pacific Cycle is not responsible for any damage incurred during transport. Any
questions should be directed to Customer Service and must include: model number, date of purchase, name of store where
purchased and original sales receipt or proof of purchase.
This warranty gives you specific legal rights. You may have other rights which may vary from state to state.
Emissions Performance Warranty
For a period of five years from the date of purchase, Pacific Cycle, Inc. warrants to the purchaser and each subsequent purchaser
of the scooter that the vehicle is designed, built and equipped to conform at the time of sale with all United States emissions
standards and that it is free from defects in materials and workmanship. Failure resulting from owner abuse and/or lack of proper
maintenance are not covered by this warranty. Maintenance, replacement or repair of the emission control devices and systems
may be performed by any automotive repair establishment or individual using any certified part. The owner may bring a claim
under the emissions performance warranty through an authorized Schwinn Motor Scooters dealer. The owner of the scooter may
obtain further information concerning the emission performance warranty or may report violations of the terms of the emission
performance warranty by contacting the Director, Field Operations and Support Division (6406J), Environmental Protection
Agency, 405 “M” Street, SW, Washington, D. C. 20460 (Attention: Warranty Claim).
Scooter Noise Regulation
TAMPERING WITH THE NOISE CONTROL SYSTEM IS PROHIBITED
Federal law prohibits the following acts or the causing thereof: (1) The removal or rendering inoperative by any person
other than for purposes of maintenance, repair, or replacement of any device or element of design incorporated into any
new vehicle for the purpose of noise control prior to its sale or delivery to the ultimate purchase or while it is in use or (2)
the use of the vehicle after such device or element of design has been removed or rendered inoperative by any person.
“AMONG THOSE ACTS PRESUMED TO CONSTITUTE TAMPERING ARE THE ACTS LISTED BELOW.” These acts include
tampering with the following systems; i.e., modification, removal, etc.
Exhaust system
• Muffler/Catalyst
Intake System
• Air Filter Case
• Air Filter Element
Manufactured for Pacific Cycle, Inc. (A Division of Dorel Industries)
Pacific Cycle, Inc., 4902 Hammersley Road, Madison, WI 53711
©2006 Pacific Cycle, Inc. • Made in China • Printed February 2006
Schwinn® is a registered trade mark of Pacific Cycle, Inc.
www.schwinnscooters.com
18