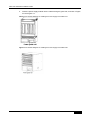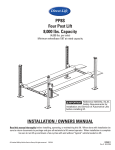
1
DES-7200 Hardware Installation Guide DES-7200 Series Hardware Installation Guide Revision No.:V1.6 Date: 2010/7/23 Copyright statement All rights reserved. D-Link Corporation reserves all copyrights o f t his do cument. A ny r eproduction, ex cerption, ba ckup, modification, transmission, translation or commercial use of this document or any portion of this document, in any form or by any means, without the prior written consent of D-Link Corporation is prohibited. Exemption statement This document is provided “as i s”. The c ontents of t his document are subject to change without any notice. P lease obtain the latest information through the D-Link Corporation website. D-Link Corporation endeavors to ensure content accuracy and will not shoulder any responsibility for losses and damages caused due to content omissions, inaccuracies or errors. Preface Thank you for using our switches. This manual provides you with detailed operation guide that allows you to easily install and use the switches. Scope This manual introduces f unctional a nd physical f eatures of our s witches and pr ovides installation procedures, troubleshooting, technical specifications, and rules of using cables and c onnectors. I t i s i ntended f or t he us ers t hat h ave s ome experience i n i nstalling and maintaining network hardware and want to learn the above information. At the same time, i t i s assumed that t he us ers of this s witch are already familiar with the related terms and concepts of Ethernet. Document Structure Chapter 1 “ Product Overview” des cribes t he s cope of a pplication, m ain f eatures, technical specifications, and related extension modules of the product. Chapter 2 “ Preparation Before Installation” l ists t he s afety, p ower s upply, and s ite requirements that must be met before the switch can be installed. Chapter 3 “Product Installation” describes how to install the switch as a whole and its various modules, and to connect the power supply and the grounding cables. Chapter 4 “DES-7206/7210 Maintenance” describes how to maintain the switch in use. Chapter 5 “Troubleshooting” describes the problems that may occur during the installation and use of this switch and how to handle them. Handling Method. Appendix A “Connectors and Connection Media”. Related Documents Software Ma nual——covering C LI c ommands, configuration gu ide, v ersion r elease not es, and system messages. Obtaining Documentation You can obtain the documentation you need through the following channels: Internet: http://www.dlink.com Documentation CD-ROM: The documentation of D-Link Corporation switches is stored in the CD-ROM package, which is provided to you together with the product you purchase. The CD-ROM is updated frequently, and may be more current than the printed documents. Obtaining Technical Assistance D-Link C orporation provides ex cellent technical s upport s ervices f or a ll o ur products. You can obtain the technical assistance you need through any of the following channels: Technical Assistance D-Link Corporation Website, On D-Link Corporation Website, you can obtain the latest technical information, reasons of common faults, problem analysis, product application solution and software upgrading information. D-Link C orporation customer s ervice c enter, w hich c an provide a ll c ustomers w ith needed t echnical as sistance f or: products, t echnologies an d s olutions. T he c ustomer service center provides responsive technical support for your product installation problems, software configuration problems, and other network performance problems. Documentation Conventions The symbols used in this document are described as below: Note Warning Danger This s ymbol br ings your a ttention. I t i ncludes s ome helpful s uggestions and references. This symbol means that you must be extremely careful. It reminds you to avoid behaviors that can bring data loss and cause damage to a device. This symbol means danger. You are in a situation that may c ause personal injury, It reminds you to take precautions before using a device. Contents 1 Product Overview ................................................................................................................................ 1-1 1.1 1.2 1.3 1.4 1.5 1.6 2 Product Overview.......................................................................................................................1-1 Technical Specifications of DES-7206/7210 ..............................................................................1-2 1.2.1 Product Features ...........................................................................................................1-2 1.2.2 Technical Specifications ................................................................................................1-4 Product Appearance ..................................................................................................................1-6 1.3.1 Appearance of the DES-7210 .......................................................................................1-6 1.3.2 Appearance of the DES-7206 .......................................................................................1-7 DES-7206/7210 Hardware Composition....................................................................................1-7 1.4.1 Chassis ..........................................................................................................................1-7 1.4.2 Module Plug-in Frame ...................................................................................................1-8 Ventilation/Heat Dissipation System of the DES-7206/7210 .....................................................1-9 DES-7206/7210 Modules .........................................................................................................1-10 1.6.1 7200-CM1~4 Control Modules: ................................................................................... 1-11 1.6.2 7200-24G Module .......................................................................................................1-14 1.6.3 7200-24 Module ..........................................................................................................1-15 1.6.4 7200-48 Module ..........................................................................................................1-17 1.6.5 7200-2XG Module .......................................................................................................1-19 1.6.6 7200-4XG Module .......................................................................................................1-20 1.6.7 7200-24P Module ........................................................................................................1-21 1.6.8 7200-48P Module ........................................................................................................1-23 1.6.9 7200-24GE Module .....................................................................................................1-25 1.6.10 7200-24G2XG Module ................................................................................................1-26 1.6.11 7200-ASE3 Module .....................................................................................................1-28 1.6.12 7206/7210-Fan Module ...............................................................................................1-29 1.6.13 7200-1200AC/2000AC Power Module ........................................................................1-29 1.6.14 7200-1200DC/2000DC Power Module .......................................................................1-30 Preparation Before Installation ............................................................................................................ 2-1 2.1 2.2 2.3 2.4 Safety Suggestions ....................................................................................................................2-1 2.1.1 Safety Precautions for Installing the System ................................................................2-1 2.1.2 Safety Precautions for Removing..................................................................................2-1 2.1.3 Electrical Safety.............................................................................................................2-2 2.1.4 Static Discharge Damage Prevention ...........................................................................2-3 2.1.5 Laser Safety ..................................................................................................................2-4 Installation Site Requirements ...................................................................................................2-4 2.2.1 Requirements for Rack Mounting..................................................................................2-4 2.2.2 Ventilation Requirements ..............................................................................................2-4 2.2.3 Temperature and Humidity Requirements ....................................................................2-6 2.2.4 Cleanness Requirements ..............................................................................................2-6 2.2.5 Power Requirements .....................................................................................................2-7 System Grounding Requirements ..............................................................................................2-7 2.3.1 Safety Ground ...............................................................................................................2-7 2.3.2 Lightning Ground ...........................................................................................................2-7 2.3.3 EMC Ground .................................................................................................................2-8 2.3.4 EMI Consideration .........................................................................................................2-8 2.3.5 Precaution for Fiber Connection ...................................................................................2-9 Requirements of Installation Tools .............................................................................................2-9 1 2.5 3 Product Installation.............................................................................................................................. 3-1 3.1 3.2 3.3 3.4 3.5 3.6 3.7 3.8 3.9 3.10 3.11 3.12 3.13 3.14 3.15 3.16 3.17 3.18 4 Installation Flow .........................................................................................................................3-2 Installation Verification ...............................................................................................................3-3 Cabinet Installation ....................................................................................................................3-3 3.3.1 Precautions ...................................................................................................................3-3 3.3.2 Simple Installation Steps ...............................................................................................3-3 Mounting the DES-7210/7206 into the Cabinet .........................................................................3-4 3.4.1 Precautions ...................................................................................................................3-4 3.4.2 Simple Installation Steps ...............................................................................................3-4 Installing the Fan Tray................................................................................................................3-4 Installing the Power Supply........................................................................................................3-5 Installing the Handle ..................................................................................................................3-9 Installing the Cabling Rack of the DES-7210...........................................................................3-10 Installing the Air Filter of the DES-7210 ...................................................................................3-12 Connecting the System Ground ...............................................................................................3-12 3.10.2 Precautions .................................................................................................................3-13 3.10.3 Simple Grounding Steps .............................................................................................3-13 Connecting the DC Power Supply to the Power Module .........................................................3-13 3.11.2 Precautions .................................................................................................................3-14 3.11.3 Simple Connection Steps ............................................................................................3-14 Connecting the AC Power Supply to the Power Module .........................................................3-14 3.12.2 Precautions .................................................................................................................3-15 3.12.3 Simple Connection Steps ............................................................................................3-15 Connecting the Cable of the Management Module .................................................................3-15 3.13.1 Simple Connection Steps ............................................................................................3-15 Removing Boards from the DES-7210/7206 ...........................................................................3-16 3.14.1 Steps for Removing Boards ........................................................................................3-16 Installing Boards on the DES-7210/7206.................................................................................3-17 3.15.1 Simple Steps of Board Installation ..............................................................................3-17 Connecting the External Interface Cables ...............................................................................3-17 3.16.1 Precautions .................................................................................................................3-17 3.16.2 Simple Connection Steps ............................................................................................3-17 Binding the Cables ...................................................................................................................3-18 3.17.1 Precautions .................................................................................................................3-18 3.17.2 Simple Binding Steps ..................................................................................................3-18 Installation Check .....................................................................................................................3-18 3.18.1 Cabinet Check .............................................................................................................3-18 3.18.2 Checking the Cables ...................................................................................................3-18 3.18.3 Checking the Power Supply ........................................................................................3-18 DES-7210/7206 Maintenance ............................................................................................................. 4-1 4.1 4.2 4.3 5 Unpacking Inspection Requirements .........................................................................................2-9 2.5.1 Checking Goods ............................................................................................................2-9 Monitoring Function of the DES-7210/7206 ..............................................................................4-1 DES-7210/7206 Hardware Maintenance ...................................................................................4-1 4.2.1 Board Maintenance .......................................................................................................4-1 4.2.2 Ventilation System Maintenance ...................................................................................4-1 4.2.3 Power Supply Maintenance ..........................................................................................4-2 Remote Maintenance .................................................................................................................4-2 Troubleshooting .................................................................................................................................. 5-1 2 5.1 5.2 General Flow for Troubleshooting Installation Faults.................................................................5-1 Common Troubleshooting Procedures.......................................................................................5-2 Appendix A Connectors and Connection Media B Mini-GBIC and 10G XENPAK Modules Warranties and Tech Support Information 3 DES-7200 Hardware Installation Guide 1 1.1 Product Overview Product Overview In recent years as the Internet users grow at an explosive rate, they are no longer satisfied with various existing ways of communications that rely largely on telephone networks, and demand telecom operators to provide multimedia services such as voice, data, and image. The t raditional n arrowband ac cess method c an n o l onger m eet t he ne eds f or t elecom services, while the broadband access technology will bring about tremendous changes t o the life and work of the people. Compared w ith t he br oadband access methods s uch as A DSL and H FC, t he E thernet access method features such advantages as high bandwidth and low cost. The Ethernet is the most direct way of bearing the IP service, which is the major service of the broadband metropolitan area network (MAN). The network and users do not need to add any other s pecial equipment, r educing t he c ost i n protocol c onversion. I n ad dition, t he Ethernet access method is ideal for the users densely populated in residential areas and it accommodates the trend where optical fibers are used for the access network. Therefore, the Ethernet gains rapid development and wide application in the broadband access field. In t his s ituation, D-Link Corporation introduces hi gh-density m ulti-service I Pv6 c ore r outer switch DES-7200 by sparing great efforts, after the release of the multi-service 10-Gigabit core router switch DES-7200 being ap plicable t o the backbone Ethernet. DES-7200, as a multi-service I Pv6 10-Gigabit core r outer s witch of t he ne w ge neration, pr ovides pow erful defense ability while ensuring high performance and large capacity. It also boasts the ability of s ervice add ition an d ex pansion on d emand, t hus s atisfying t he des ign r equirements of equal emphasis on s ervice and per formance. C urrently, t wo m odels ar e available, DES-7206 and DES-7210, which offer ten vertical slots and six horizontal slots respectively. The DES-7210 series multi-service Ipv6 10-Gigabit core router switch provides users with high-speed non-blocking data switching. With powerful switching and routing functions and secure intelligent technologies, it can be used together with various series of D-Link switches t o pr ovide us ers w ith c omplete e nd-to-end s olutions. I t is ideal f or l arge-scale network core backbone and heavy traffic node switch. By expanding with high-performance multi-service c ards, t he DES-7200 series s witches s upport po licy r outing a nd IPV6, a nd satisfies customers’ flexible and complex application requirements. Applications: Core l ayers of s uch ent erprise net works of educ ational, f inancial a nd g overnmental organizations Running environment that needs powerful routing function and carrier-class security & reliability High-layer switching of enterprise networks with high bandwidth and 10G needs Enterprise en vironment t hat ne eds t o pr ovide high Q oS assurance f or v arious applications 1-1 DES-7200 Hardware Installation Guide 1.2 1.2.1 Technical Specifications of DES-7206/7210 Product Features Powerful expandability DES-7200 supports strategic routing and IPv6. It provides f aster and more effective processing ability by expanding high-performance multi-service cards. Hot-swappability With a modular design, all the switching modules, management modules, power supply, and fan tray of the DES-7200 are hot swappable, allowing modules to be replaced without first shutdown of the system. Redundancy configuration The DES-7200 provides system redundancy configuration, particularly dual redundancy for its power s upply a nd m anagement m odule, which gr eatly e nhances s ystem reliability and stability. Powerful data processing design Complicated f unctions of t he DES-7200 such as s witching, r outing, A CL, and Q oS ar e implemented v ia har dware, w hich avoids t he i mpact pr oduced b y t he implementation v ia software on high-speed data processing. The management module per forms such f unctions as r oute m anagement, net work management, and network service. The user interface module can independently implement such f unctions as har dware r outing, s witching and m ulticast. O n t he ot her ha nd, t he user switching port independently implements hardware ACL and QoS. All these greatly enhance the processing capability of the equipment as a whole. High security assurance Physical security: The DES-7200 provides physical security assurance such as redundant management modules, redundant power modules, hot-swappability of each module. Virus and attack protection: Responding t o t he i ncreasingly m ore n etwork v iruses and at tacks i n t he net work environment, the DES-7200 provides powerful network virus and attack prevention, not only ACL, but also Source IP Spoofing prevention, among many others. The DES-7200 provides the m ultiple-port s ynchronous m onitoring t echnology, which supports flexible network monitoring and offers higher monitoring capability. Equipment management security: To pr event no n-administrators f rom l ogging i n and manipulating t he n etwork equ ipment, which affects network transmission and security, the DES-7200 provides the SSH encrypted login function and the source IP restriction for telnet/web login. Access security: The hardware supports IP, MAC, and port binding to enhance user access control. They support 802.1X to meet 6-element binding access restriction. The switch supports IGMP source port check to effectively control invalid multicast sources and improve network security. 1-2 DES-7200 Hardware Installation Guide The PVLAN (port protection) is used to isolate the information exchanged between users, without needing to occupy the VLAN resources. The port MAC address lock and port MAC address access quantity restriction can bar the access from illegal hosts. A full range of application support techniques (QoS, multicast) The DES-7200 provides multiple traffic classification techniques and QoS techniques, including SP, WRR, CAR, and HOL, to provide needed techniques of bandwidth assurance for various applications. The DES-7200 provides m ultiple m ulticast s upport techniques, including I GMP snooping, IGMP, PIM ( SM, D M), and D VMRP, t o ens ue r easonable b andwidth oc cupation when multicast services are provided in the network. Supporting L2 VPN (VPLS) The DES-7200 supports S ervice P rovider V LAN ( Double T agging, V LAN t unnel), which enables s econdary VLAN identification f or switched data. The outer layer IDs are us ed t o create VPNs a nd pr ovide link s election, while the i nner l ayer I Ds ar e used to i dentify t he service VLAN f unction and i mplement L2 VPNs i n the Ethernet environment, of fering a solution to t he a bsence of dat a t ransmission s ecurity c ontrol in t he t raditional E thernet environment. ECMP/WCMP (Equal-Cost Multipath Routing/ Weight-Cost Multipath Routing) In t he network env ironment where m ultiple links r each t he s ame destination address, t he packets to the destination address can take only one link of them when the traditional routing technology is used, with all other links being in the standby or inactive status. In addition, the switching b etween t he links t akes s ome t ime i n t he dynamic r outing environment. On t he other hand, the ECMP and WCMP can use multiple links at the same time in such network environment. This not only increases the transmission bandwidth, but also backs up the data transmission for the failed link without delay and packet loss. Supporting sophisticated dual-core technology The DES-7200 supports multiple STPs and VRRPs including 802.1D, 802.1W, and 802.1S, offering sophisticated dual-core assurance technologies. Providing visual status display DES-7200 is embedded with an LCD screen, used for providing current system information such as working time and system utilization. Supporting the advanced 10-Gigabit Ethernet technology DES-7200 provides current m ainstream 10-Gigabit LAN t ransmission s tandards s uch as 10GBASE-R and 10GBASE-W. Supporting the PoE technology DES-7200 provides c able cards s upporting P oE. P oE des ign c ompletely c onforms t o t he requirements of the IEEE 802.3af standards. DES-7210 provides up to 198 fast Ethernet PoE ports; DES-7206 provides up to 192 fast Ethernet PoE ports, offering flexible network expansion for large enterprise parks. High-density port design DES-7210 provides up t o 384 f ast E thernet p orts, 192 10 00M optical f iber p orts and 32 10-Gigabit ports; DES-7206 provides up to 192 fast Ethernet ports, 96 1,000M optical fiber ports and 16 10-Gigabit ports, offering flexible network expansion for large enterprise parks. 1-3 DES-7200 Hardware Installation Guide 1.2.2 Technical Specifications Table 1-1 Technical Specifications Product Model DES-7210: DES-7206: Module slot 10 (two for the management engine modules) 6 (two for the management engine modules) VLAN 4K L2 Protocol IEEE802.3, IEEE802.3u, IEEE802.3z, IEEE802.3ae, IEEE802.3x, IEEE802.3ad, IEEE802.3af, IEEE802.1p, IEEE802.1x, IEEE802.3ab, IEEE802.1Q, IEEEE802.1d, IEEEE802.1w, IEEEE802.1s, RERP, SPAN/RSPAN, IGMP Snooping, jumbo frame(9Kbytes), QinQ, RLDP L3 Protocol BGP4, OSFPv2/v3, RIPv1,/v2, IGMP v1/v2/v3, PIM-SM/DM, Policy-based Routing, ECMP/WCMP, VRRP Virus and attack protection Comprehensive ACL, Source IP Spoofing prevention Management mode SNMPv1/v2, Telnet, Console, CLI, RMON and SSH Other protocols VRRP, BootP/DHCP client, ARP PROXY, DHCP relay and Syslog Control Module 7200-CM2, 7200-CM4 I/O Module (HW ver. A1/A2) 7200-24G, 7200-24, 7200-48, 7200-2XG, 7200-4XG, 7200-24P, 7200-48P Enhanced I/O Module (HW ver. A3) 7200-24G, 7200-24, 7200-48, 7200-2XG, 7200-4XG, 7200-48P, 7200-24GE, 7200-24G2XG ASE Module 7200-ASE3 Fan Module 7210-FAN Hot swap ability Supported Management redundancy Supported 7200-CM1, 7200-CM3 7206-FAN Power supply/fan 7200-1200AC: Rated voltage :100-240VAC,50/60Hz Tolerance range:90-264VAC,47-63Hz Total power:1200W 7200-2000AC: Rated voltage :100-240VAC,50/60Hz Tolerance range:90-176VAC,47-53Hz 1200W 176-264VAC,57-63Hz 2000W Power supply Total power:2000W 7200-1200DC: Rated voltage:-48VDC Tolerance range:-36VDC - -72VDC TotalPower: 1200W 7200-2000DC: Rated voltage:-48VDC Tolerance range:-36VDC - -72VDC TotalPower: 2000W 1-4 DES-7200 Hardware Installation Guide Product Model DES-7210: DES-7206: Power supply redundancy Supported (must be the same type [all AC or DC]) Fan 7210-FAN (supporting hot swap ability and fault alarming) 7206-FAN (supporting hot swap ability and fault alarming) Environment EMC GB9254-1998 FCC Class A Safety regulation GB4943-2001 MTBF 438,352hrs Operating temperature 0 to 40°C Storage temperature -40 to 70°C Operating humidity 10% - 90% RH 505,339hrs Weight Main unit: 67.5kg Main unit: 43.5kg Dimensions 956x436.8x448 ( mm H x W x D) 647.4x436.8x508 ( mm H x W x D) 1-5 DES-7200 Hardware Installation Guide 1.3 1.3.1 Product Appearance Appearance of the DES-7210 Figure 1-1 Appearance of the DES-7210 (1) (2) (3) (4) (5) (6) 1-6 1. Air outlet layer: the air outlet layer of the entire system, discharging air on three sides; 2. Fan tray: the slot for the fan tray, which is the main heat dissipation unit of the system; 3. Modular p layer: providing 10 v ertical m odule s lots, which h ouse different f unctional modules; 4. Wiring layer: arranging and leading out various cables in good order, while preventing the drooping cables from blocking the air inlet; 5. Air inlet layer: the air inlet channel of the heat dissipation system, suctioning air into the chassis; 6. Power layer: supporting two AC or DC power supplies for the maximum. DES-7200 Hardware Installation Guide 1.3.2 Appearance of the DES-7206 Figure 1-2 Appearance of the DES-7206 (3) (1) (2) 1.4 1. Module layer: offering up to 6 module slots; 2. Power layer: supporting two AC or DC power supplies for the maximum. 3. Air outlet: located at the back of the chassis to discharge air. DES-7206/7210 Hardware Composition The DES-7210 hardware system consists of the chassis, power system, system modules, cabling rack, fan tray, air inlet/outlet ducts and air filter. The DES-7206 hardware system consists of the chassis, power system, system modules, and fan tray. 1.4.1 Chassis 1.4.1.1 DES-7210 chassis The DES-7210 uses a standard 19-inch chassis, whose standard height is 1,045mm, width is 436. 8mm, and dept h is 448 m m. I t c onsists o f t he s ystem module l ayer, f an l ayer, ai r inlet/outlet layer, cabling rack, air filter, and power layer. 1-7 DES-7200 Hardware Installation Guide The system module layer is a module plug-in frame, which mechanically supports various modules of the DES-7210 system. At the bottom of the chassis are two power frames, above which are the air inlet layer. The air filter is located between the air inlet layer and the cabling rack, which is located below the system module l ayer. A bove t he s ystem module l ayer i s t he f an layer, which houses s ix layers. At the top of the chassis is the air outlet layer, which works by the induced draught. 1.4.1.2 DES-7206 chassis The DES-7206 uses a standard 19-inch chassis, whose standard height is 736.4mm, width is 436. 8mm, and dept h is 508 m m. I t c onsists o f t he s ystem module layer, f an layer an d power layer. The functional module layer is a module plug-in frame, which mechanically supports various modules of the DES-7206 system. At the top of the chassis are two power frames. Located at the back of the chassis module plug-in box, the fan layer is the house of six fans, which induct air. 1.4.2 Module Plug-in Frame The DES-7210/7206 module frame consists of the module slots and backplane. The DES-7210 offers 10 m odule slots, of which the two in the m iddle ar e for the management modules only. The eight slots on both sides can accommodate a mix of various user m odules. F or t he DES-7210, t he m odules ar e inserted vertically, a nd t hey hav e t he same hei ght of 412 m m, depth of 350 m m, and t hickness of 2. 0 mm. The DES-7210 backplane i mplements t he interconnection of high-speed data links bet ween the switching management c ards and m odule line c ards a nd t hat of v arious m anagement and c ontrol signals. The DES-7206 offers s ix module s lots, of w hich the t wo i n the middle are f or the management modules only. The four slots on the upper and lower sides can accommodate a mix of various user modules. For the DES-7206, the modules are inserted horizontally, and they have t he s ame w idth of 412 mm, dept h of 350 mm, and t hickness of 2. 0 mm. The DES-7200 backplane implements the interconnection of high-speed data links between the switching management cards and module line cards and that of various management and control signals. 1. Functions of the DES-7210/7206 backplane Interconnecting v arious s ignals bet ween m odules and pr communication channels oviding Passive backplane Supporting active/standby switching between management modules Supporting automatic identification of various slots Implementing distributed power supply Introducing monitoring signal lines of the fan and power supply high-speed 2. Slot numbers of the DES-7210/7206 When in full configuration, the modules in the module slots of the DES-7210 are as below: 1-8 Two management modules serving as mutual backup Eight modules selected to meet the specific needs DES-7200 Hardware Installation Guide The slots for the two management modules are in the middle, and they are identified as M1 and M2 from left to right. The other eight module line cards are numbered as 1-8 from the left to the right. When in full configuration, the modules in the module slots of the DES-7206 are as below: Two management modules serving as mutual backup Four modules selected to meet the specific needs The slots for the two management modules are in the middle, and they are identified as M1 and M2 from bottom up. The other four module line cards are numbered as 1-4 from bottom up. 1.5 Ventilation/Heat Dissipation System of the DES-7206/7210 The oper ating t emperature of t he DES-7206/7210 is 0 -40°C. T he t hermal de sign m ust ensure t hat t he s urface t emperature of t he c omponents do es n ot exceed the m aximum allowed temperature of 50-80% at such an ambient temperature, while allowing for reliability, security, and reparability. In the thermal design of the DES-7206/7210, the fans are used to induct air for a forced convection in order to ensure the normal running of the equipment in the specified environment. Figure 1-3 and Figure 1-4 show the v entilation/heat dissipation solution. Figure 1-3 Ventilation/Heat Dissipation Solution of the DES-7210 Note This structure is designed with air inlet at front/back and two sides, and air outlet at top back and both sides. Six 120*120*38 fans are used to blow the air to the outside for convection and ultimately heat dissipation. Therefore, the chassis should be mounted at a place with adequate spacing around for air circulation. 1-9 DES-7200 Hardware Installation Guide Figure 1-4 Ventilation/Heat Dissipation Solution of the DES-7206 Note 1.6 This structure is designed with air inlet from the front panels of the modules, and air outlet at the back. Six 120*120*38 fans are used to blow the air to the outside for convection and ultimately heat dissipation. Therefore, the chassis should be mounted at a place with adequate spacing around for air circulation. DES-7206/7210 Modules DES-7210/7206 supports the modules described in Table 1-1. 7200-CM1~CM4: A s t he s witching a nd c entral c ontrol m odule of t he DES-7210/7206, th e 7200 Comtrol Modules implements the management of t he entire system, including L2/L3 processing, r oute m anagement, c ontrol an d m anagement us er ac cess, and ne twork and operation maintenance. 7200-24G module: I t provides 12 10 00BASE-X SFP i nterfaces and 12 o ptical-electrical multiplexing 1000M interfaces and supports up to 24 1000BASE-X SFP interfaces or supports 12+M 1000BASE-X SFP interfaces and N 10/100/1000BASE-T interfaces, where M plus N equals 12. It features the functions of layer-2/3 wire speed switching and routing, and supports multi-mode SFP with the wavelength being 850nm, single-mode SFP module with that being 1310nm, and long-distance SFP module and SFP copper interface with that being 1550nm. 7200-24: It provides twelve 10/100/1000BASE-T electrical ports and twelve optical/electrical combo 1000M interfaces, and supports up to twenty-four 10/100/1000BASE-T interfaces or 12+M 10/ 100/1000BASE-T i nterfaces and N 100 0BASE-X i nterfaces, w here M pl us N equals 12. I t f eatures t he f unctions of l ayer-2/3 wire s peed s witching and r outing, an d supports multi-mode SFP with the wavelength being 850nm, single-mode SFP module with that being 1310nm, and long-distance SFP module and SFP copper interface with that being 1550nm. 7200-48: It pr ovides forty-four 10/100/1000BASE-T 1000M electrical p orts and f our optical/electrical combo 1000M interfaces, and supports up to forty-eight 10/100/1000BASE-T interfaces, or 44+M 10/100/1000BASE-T interfaces and N 1000BASE-X interfaces where M plus N equals to 4. It features the f unctions of layer-2/3 wire s peed s witching an d r outing, an d 850nm s upports m ulti-mode SFP, 13 10nm single-mode S FP m odule, and 1550nm l ong-distance S FP m odule an d S FP c opper interface. 1-10 DES-7200 Hardware Installation Guide 7200-2XG module: I t provides t wo 10-Gigabit XFP i nterfaces. It f eatures t he f unctions of layer-2/3 wire speed switching and routing, and supports multi-mode XFP module with the wavelength being 850nm, single-mode XFP module with that being 1310nm, and single XFP module with that being 1550nm. 7200-4XG module: I t pr ovides f our 10-Gigabit XFP interfaces. I t f eatures t he f unctions of layer-2/3 wire speed switching and routing, and supports 850nm multi-mode XFP module, 1310nm single-mode XFP module, and 1550nm single XFP module. 7200-24P: It provides twelve 10/100/1000BASE-T electrical ports and twelve optical/electrical c ombo 10 00M i nterfaces, a nd s upports up t o twenty-four 10/100/1000BASE-T interfaces or 12+M 10/100/1000BASE-T interfaces and N 1000BASE-X i nterfaces, w here M plus N eq uals 1 2. The 24 10/ 100/1000BASE-T 1000M electrical i nterfaces s upport I EEE 80 2.3af. T he P oE por t, the default one, c an be di rectly connected PoE d evices. I t f eatures t he f unctions of layer-2/3 wire s peed s witching a nd routing, and supports multi-mode SFP with the wavelength being 850nm, single-mode SFP module with that being 1310nm, and long-distance SFP module and SFP copper interface with that being 1550nm. 7200-48P module: It provides forty-four 10/100/1000BASE-T 1000M electrical ports and four optical/electrical combo 1000M interfaces, and supports up to forty-eight 10/100/1000BASE-T interfaces, or 44+M 10/100/1000BASE-T interfaces and N 1000BASE-X interfaces where M plus N equals to 4. The 48 10/100/1000BASE-T 1000M electircal interfaces support IEEE 802.3af and are considered to be PoE ports by default to conenct PoE devices directly.It features the functions of layer-2/3 wire speed switching and routing, an d 85 0nm s upports multi-mode S FP, 13 10nm s ingle-mode S FP m odule, a nd 1550nm long-distance SFP module and SFP copper interface. 7200-24GE module: I t provides 24 SFP interfaces t hat s upport 1 000BASE-X an d 100BASE-X modes. It features the functions of layer-2/3 wire speed switching and routing, and supports 850nm m ulti-mode S FP m odule, 13 10nm s ingle-mode S FP m odule, and 1550nm single SFP module and SFP copper interface. 7200-24G2XG module: I t provides 24 SFP interfaces t hat s upport 10 00BASE-X and two 10-Gigabit XFP i nterfaces. I t f eatures t he f unctions o f l ayer-2/3 wire s peed s witching a nd routing. The SFP ports support 850nm multi-mode SFP module, 1310nm single-mode SFP module, 1 550nm s ingle S FP m odule and SFP copper i nterface. T he X FP p orts support multi-mode XFP module with the wavelength being 850nm, single-mode XFP module with that being 1310nm, and single XFP module with that being 1550nm. 7200-ASE3 module: It enables the MPLS function of the chassis. 7206/7210-Fan: As t he f an t ray of t he s ystem, i t p rovides s ix 120 *120*38 f ans, w hich guarantee reliable heat dissipation of the system. 7200-1200AC/2000AC: As t he A C p ower m odule of t he s ystem, i t pr ovides the input interface for 110/220V AC power supply. 7200-1200DC/2000DC: As t he DC p ower m odule o f t he s ystem, i t pr ovides the input interface for -48V DC power supply. 1.6.1 7200-CM1~4 Control Modules: Figure 1 -5, 1 -7 shows t he bas ic ap pearance of t he 7200-CM1/CM3 which i s t he m ajor management module of the DES-7206; Figure 1-6, 1-8 shows the basic appearance of the 7200-CM2/CM4 which i s t he m ajor management m odule of DES-7210. T he 7200 Control Module performs such f unctions as s ystem switching, s ystem s tatus c ontrol, r oute management, user access control and management, and network maintenance. Inserted in slots M1 an d M 2 o n t he backplane of t he c hassis, t he m anagement m odule s upports active/standby redundancy for hot backup and also hot swappability. 1-11 DES-7200 Hardware Installation Guide Note In t he s ystem, t here m ust be at least one 7200 Control Module f or t he system t o w ork nor mally. However, you are r ecommended t o c onfigure this module for both slots for higher reliability. Figure 1-5 Basic Appearance of the 7200-CM1 Figure 1-6 Basic Appearance of the 7200-CM2 Figure 1-7 Basic Appearance of the 7200-CM3 Figure 1-8 Basic Appearance of the 7200-CM4 1. Interface The 7200 Control Modules provides three interfaces: 1-12 USB interface: By connecting the USB interface, USB storage devices can keep logs, host versions, alarms and other diagnosis information, thus facilitating online upgrade of switch software and log information keeping. Console port: As the serial communication port, it uses the RS-232 interface level and uses s tandard RJ45 connector. T his por t i s used to c onnect t he s erial p ort of t he background t erminal c omputer f or s uch t asks as s ystem debug , c onfiguration, maintenance, management, and host software load. 10/100M MGMT port: As the 10/100BASE-T Ethernet port, it uses the RJ-45 connector. This por t c an be us ed t o connect t he E thernet p ort of t he bac kground c omputer f or program l oading. I t c an a lso be us ed t o c onnect t he eq uipment s uch as r emote N M workstation f or r emote management of t he e quipment. When i t i s c onnected t o t he Ethernet port of t he b ackground c omputer, t he s tandard ne twork c able s uffices. F or remote management of the equipment, you can use standard network cable to connect it to the HUB or switch, from which it is further connected to the NM workstation on the LAN. You can use the standard network cable to connect it to the router, from which it is further connected to the NM workstation on the WAN. DES-7200 Hardware Installation Guide Note Note The Firmware v10.0 does not support any USB interface. To use a USB interface, you must adopt the Firmware v10.1 or a later version. To secure data and prevent damage on the device, it is recommended to use qua lified U SB f lash di sk. The U SB interface of DES-7200 is compatible with most USB controllers. Some types of USB flash disk may not be identified. You are recommended to use Patriot and Start-net Digital USB flash disk. 2. LEDs The 7200-Control Module provides various system LEDs, as described in the following table: Table 1-2 LEDs on the Front Panel Sign Description Detailed Information Status System LED OFF: The module has not been powered on Red: The module is faulty Flashing green: The module is initializing; if it keeps on flashing, the module is faulty Solid gr een: T he m odule h as f inished i nitialization and can perform switching normally Primary Primary/standby management module LED OFF: T he c urrent m odule i s t he standby management module Green: The current module is the active management module Alarm Fault alarm OFF: Free from fault Red: System fault LED1 (Full duplex) OFF: Working in the half duplex mode Yellow: Working in the full duplex mode LED2 ( Link/ACT) OFF: Port is not linked Green: Port is linked Flashing green: data transmission 10/100M MGMT Port LED 3. Technical Specifications Table 1-3 Technical Specifications of the 7200-Control Modules Product Model 7200-CM1 7200-CM2 7200-CM3 Standard Compliance IEEE 802.3-2002 IEEE 803.ab, IEEE 802.1D, and IEEE 802.1Q Management mode CLI, Telnet and Web-based Port type One 10/100M Ethernet port as the management port One standard RJ45 serial port LED Status, Primary, Alarm and 10/100M MGMT Port LED Hot swap ability Supported Management redundancy Supported Power consumption <30W 7200-CM4 <50W 1-13 DES-7200 Hardware Installation Guide 1.6.2 Product Model 7200-CM1 7200-CM2 EMC GB9254-1998 FCC Class A Safety regulation GB4943-2001 MTBF 246,987hrs Operating temperature 0 to 40°C Storage temperature -40 to 70°C Operating humidity 10% - 90% RH Weight Net weight: 2.8 Kg Dimensions 436*346×30 ( Lx W x Hmm) 240,558hrs 7200-CM3 7200-CM4 174,420hrs 173,868hrs 7200-24G Module Figure 1-9 shows the basic appearance of the 7200-24G, which is the line card module of the DES-7210/7206. 7200-24G provides 1 2 10 00M SFP por ts an d 1 2 100 0M optical-electrical multiplexing ports, and supports up to 24 1000BASE-X interfaces or 12+M 1000BASE-X i nterfaces and N 100 0BASE-T interfaces, where M plus N eq uals 12. It features the function of layer-2/3 wire speed switching. The 7200-24G module supports the hot swap function and also supports hot swapping of SFP ports. Figure 1-9 Basic Appearance of the 7200-24G 1. Interface 7200-24G provides 12 1000M SFP ports and 12 1000M optical-electrical multiplexing ports. It features the function of layer-2/3 switching with the 1000M wire speed. When the function of aut omatic negot iation is enabl ed, t he 1 000M el ectrical i nterface s upports aut omatic MDI/MDI-X identification. The SFP ports support short-wave (850nm, m ulti-mode) and long-wave ( 1310nm, s ingle-mode) 100 0M SFP o ptical m odules a nd long-wave (1550nm) 1000M SFP optical modules and SFP copper ports, thus facilitating configuration for users. In addition, the SFP port supports hot swappability of the SFP module. Note The 7200-24G provides twelve SFP optical ports of 10/100/1000BASE-T ports t hat ar e i n t he c ombo f orm. I n ot her words, eac h SFP por t corresponds t o on e 1 0/100/1000BASE-T por t, a nd only one por t c an be used at a time, with the other being unavailable. The MDI/MDI-X automatic identification of the 10/100/1000M electrical ports takes effect only when auto negotiation is enabled. 2. LEDs The 7200-24G provides various system LEDs, as described in the following table: 1-14 DES-7200 Hardware Installation Guide Table 1-4 LEDs on the Front Panel Sign Description Detailed Information Status System LED OFF: The module has not been powered on Red: Module fault Flashing green: The module is initializing Solid green: The module has finished initialization and can perform switching normally Link/ACT Port status LED OFF: Port is not linked Green: Port is linked Flashing green: data transmission at the port 3. Technical Specifications Table 1-5 Technical Specifications of the 7200-24G 1.6.3 Product Model 7200-24G Standard Compliance IEEE 802.3-2002 IEEE 803.ab, IEEE 802.1D, and IEEE 802.1Q 802.1X authentication Port type Providing 12 SFP 1000M module ports and 12 1000M optical-electrical multilplexing por ts ( suppporting 1000BASE-SX/LX,1000BASE-TX, 1000BASE-LH and 10/100/1000BASE-TX) Transmission media 1000BASE-SX(850nm) 62.5/125um MMF: 220m 1000BASE-SX(850nm) 50/125 um MMF: 500m 1000BASE-LX(1310nm) 9/125 um SMF: 10KM (550m for multi-mode optical fibers) 1000BASE-LH(1310nm) 9/125 um SMF: 40KM 10/100/1000BASE-TX: 100m (Category-5 UPT) LED Status, Link/ACT LEDs Hot swappability Supported Power consumption <75W EMC GB9254-1998 FCC Class A Safety regulation GB4943-2001 MTBF 167,577hrs Operating temperature 0 to 40°C Storage temperature -40 to 70°C Operating humidity 10% - 90% RH Weight Net weight: 2.8 Kg Dimensions 436*346*45 ( L x W x Hmm) 7200-24 Module Figure 1-10 shows the basic appearance of the 7200-24, which is the line card module of the DES-7210/7206. The 7200-24 provides twelve 10/100/1000BASE-T electrical interfaces and twelve optical/electrical combo 1000M interfaces, which deliver L2/L3 wire-speed switching. It is hot swappable while supporting the hot swappability of the SFP port. 1-15 DES-7200 Hardware Installation Guide Figure 1-10 Basic Appearance of the 7200-24 1. Interface 7200-24: It provides twelve 10/100/1000BASE-T electrical ports and twelve optical/electrical combo 1000M interfaces, and supports up to twenty-four 1000BASE-T interfaces or 12+M 1000BASE-T interfaces and N 1000BASE-X interfaces, where M plus N equals 12. When the f unction of aut omatic nego tiation is en abled, t he 100 0M el ectrical i nterface s upports automatic MDI/MDI-X identification. The SFP ports support short-wave (850nm, multi-mode) and long-wave (1310nm, single-mode) 1000M SFP optical modules and long-wave (1550nm) 1000M SFP optical modules and SFP copper ports, thus facilitating configuration for users. Note The 7200-24 provides twelve SFP optical ports and 10/100/1000BASE-T ports t hat ar e i n t he c ombo f orm. I n ot her words, eac h SFP por t corresponds t o on e 1 0/100/1000BASE-T por t, a nd only one por t c an be used at a time, with the other being unavailable. The MDI/MDI-X automatic identification of the 10/100/1000M electrical ports takes effect only when auto negotiation is enabled. 2. LEDs The 7200-24 provides various system LEDs, as described in the following table: Table 1-6 LEDs on the Front Panel Sign Status Link/ACT Description Detailed Information System LED OFF: The module has not been powered on Red: Module fault Flashing green: The module is initializing Solid green: The module has finished initialization and can perform switching normally Port status LED OFF: Port is not linked Green/Yellow: Port is linked Flashing green: data transmission at 1000M Flashing yellow: data transmission at 10/100M 3. Technical Specifications Table 1-7 Technical Specifications of the 7200-24 1-16 Product Model 7200-24 Standard Compliance IEEE 802.3-2000 IEEE 803.ab, IEEE 802.1D, and IEEE 802.1Q 802.1X authentication Port type Providing twelve 10/100/1000BASE-T electrical ports and twelve optical/electrical c ombo 1 000M i nterfaces, and supporting up t o t wenty-four 1000BASE-T interfaces or 12+M 1000BASE-T interfaces and N 1000BASE-X interfaces, where M plus N equals 12. DES-7200 Hardware Installation Guide 1.6.4 Product Model 7200-24 Transmission media 10/100/1000BASE-T: 100m (Category-5 UPT) 1000BASE-SX(850nm) 62.5/125um MMF: 220m 1000BASE-SX(850nm) 50/ 125um M MF: 500m 1000BASE-LX(1310nm) 9/125um S MF: 10KM 1000BASE-LH(1310nm) 9 /125um S MF: 40KM LED Status, Link/ACT Hot swappability Supported Power consumption <85W+15.4xN (N indicates the PoE port being used, of which the value is less than 24.) EMC GB9254-1998 FCC Class A Safety regulation GB4943-2001 MTBF 166,442hrs Operating temperature 0 to 40°C Storage temperature -40 to 70°C Operating humidity 10% - 90% RH Weight Net weight: 2.8 Kg Dimensions 436*346*45 ( L x W x Hmm) 7200-48 Module Figure 1 -11 shows t he ba sic app earance of t he 7200-48, t he l ine c ard m odule of t he DES-7200 series. The 7200-48 provides 44 10/100/1000BASE-T electrical 1000M interfaces and 4 optical/electrical combo 1000M interfaces, which deliver L2/L3 wire-speed switching. The 7200-48 is hot swappable. Figure 1-11 Basic Appearance of the 7200-48 1. Interface 7200-48 provides 44 10/100/1000BASE-T el ectrical por ts and 4 optical/electrical c ombo 1000M i nterfaces, and s upports up t o 48 1000BASE-T i nterfaces or 44+M 1 000BASE-T interfaces and N 1000BASE-X interfaces, where M plus N equals 4. When the function of automatic neg otiation i s enabled, t he 1000M e lectrical i nterface s upports aut omatic MDI/MDI-X identification. The SFP ports support short-wave (850nm, m ulti-mode) and long-wave ( 1310nm, s ingle-mode) 100 0M SFP o ptical m odules a nd long-wave (1550nm) 1000M SFP optical modules and SFP copper ports, thus facilitating configuration for users. Note The 7200-48 provides four 10/100/1000BASE-T SFP optical ports that are in the multiplexing form. In other words, each SFP port corresponds to one 10/100/1000BASE-T port, and only one port can be used at a time, with the other being unavailable. The MDI/MDI-X automatic identification of the 10/100/1000M electrical ports takes ef fect onl y when auto ne gotiation i s enabled. 1-17 DES-7200 Hardware Installation Guide 2. LEDs The 7200-48 provides various system LEDs, as described in the following table: Table 1-8 LEDs on the Front Panel Sign Status Link/ACT Description Detailed Information System LED OFF: The module has not been powered on. Red: Module fault Flashing green: The module is initializing. Solid green: The module has finished initialization and can perform switching normally. Port status LED OFF: Port is not linked. Green/Yellow: Port is linked. Flashing green: Data is transmitted at 1000M. Flashing yellow: Data is transmitted at 10/100M. 3. Technical Specifications Table 1-9 Technical Specifications of the 7200-48 1-18 Product Model 7200-48 Standard Compliance IEEE 802.3-2000 IEEE 803.ab, IEEE 802.1D, and IEEE 802.1Q 802.1X authentication Port type Twelve 10/100/1000BASE-T electrical ports and twelve optical/electrical combo 1000M interfaces; Up to twenty-four 1000BASE-T interfaces or 12+M 1000BASE-T interfaces and N 1000BASE-X interfaces, where M plus N equals 12. Transmission media 10/100/1000BASE-T: 100m (Category-5 UPT) 1000BASE-SX(850nm) 62.5/125um MMF: 220m 1000BASE-SX(850nm) 50/125um M MF: 500m 1000BASE-LX(1310nm) 9/125um S MF: 10KM 1000BASE-LH(1310nm) 9 /125um S MF: 40KM LED Status, Link/ACT Hot swappability Supported Power consumption <100w EMC GB9254-1998 FCC Class A Safety regulation GB4943-2001 MTBF 151,112hrs Operating temperature 0 to 40°C Storage temperature -40 to 70°C Operating humidity 10% to 90% RH Weight Net weight: 3.5 Kg Dimensions 436*346*45mm ( L x W x H) DES-7200 Hardware Installation Guide 1.6.5 7200-2XG Module Figure 1-12 shows the basic appearance of the 7200-2XG, which is the line card module of the DES-7200 series. 7200-2XG provides t wo 10-Gigabit XFP interfaces and f eatures the function of layer-2/3 wire speed switching. The 7200-2XG is hot swappable, while supporting hot swappability of the XFP ports. Figure 1-12 Basic Appearance of the 7200-2XG 1. Interface 7200-2XG provides t wo 10-Gigabit XFP m odule i nterfaces and f eatures t he f unction of layer-2/3 s witching with t he 10-Gigabit wire s peed. The XFP por ts s upport s hort-wave (850nm, m ulti-mode), l ong-wave ( 1310nm, s ingle-mode) and long-wave (1550nm) 10-Gigabit XFP optical modules, thus facilitating configuration for users. 2. LEDs The 7200-2XG provides various system LEDs, as described in the following table: Table 1-10 LEDs on the Front Panel Sign Description Detailed Information Status System LED OFF: The module has not been powered on Red: Module fault Flashing green: The module is initializing Solid green: T he m odule h as f inished i nitialization a nd c an perform switching normally Link/ACT Port status LED OFF: Port is not linked Green: Port is linked Flashing green: data transmission at the port 3. Technical Specifications Table 1-11 Technical Specifications of the 7200-2XG Product Model 7200-2XG Standard Compliance IEEE 802.3-2002 IEEE 803.ab, IEEE 802.1D, and IEEE 802.1Q 802.1X authentication Port type Providing two 10-Gigabit XFP interfaces Transmission media 10GBASE-SR(850nm) 62.5/125um MMF: 220m 1000BASE-LR(1310nm) 9/ 125 um S MF: 10KM ( 550m f or m ulti-mode optical fibers) 10GBASE-LH(1550nm) 9/125 um S MF: 40KM LED Status, Link/ACT Hot swappability Supported Power consumption <75W EMC GB9254-1998 FCC Class A Safety regulation GB4943-2001 1-19 DES-7200 Hardware Installation Guide 1.6.6 Product Model 7200-2XG MTBF 180,698hrs Operating temperature 0 to 40°C Storage temperature -40 to 70°C Operating humidity 10% - 90% RH Weight Net weight: 2.8 Kg Dimensions 436*346*45 ( L x W x Hmm) 7200-4XG Module Figure 1 -13 shows t he basic app earance of t he 7200-4XG, t he l ine c ard m odule of t he DES-7200 s eries. 7200-4XG provides four 10-Gigabit XFP i nterfaces an d f eatures t he functions of layer-2/3 wire speed switching. The 7200-4XG is hot swappable. Figure 1-13 Basic Appearance of the 7200-2XG 1. Interface 7200-4XG provides four 10-Gigabit XFP m odule i nterfaces and f eatures t he f unction of layer-2/3 s witching with t he 10-Gigabit wire s peed. The XFP por ts s upport s hort-wave (850nm, m ulti-mode), l ong-wave ( 1310nm, s ingle-mode) and long-wave (1550nm) 10-Gigabit XFP optical modules, thus facilitating configuration for users. 2. LEDs The 7200-4XG provides various system LEDs, as described in the following table: Table 1-12 LEDs on the Front Panel Sign Description Detailed Information Status System LED OFF: The module has not been powered on. Red: Module fault Flashing green: The module is initializing. Solid green: T he m odule h as f inished i nitialization a nd c an perform switching normally. Link/ACT Port status LED OFF: Port is not linked. Green: Port is linked. Flashing green: Data is transmitted on the port. 3. Technical Specifications 1-20 DES-7200 Hardware Installation Guide Table 1-13 Technical Specifications of the 7200-4XG 1.6.7 Product Model 7200-4XG Standard Compliance IEEE 802.3-2002 IEEE 803.ab, IEEE 802.1D, and IEEE 802.1Q 802.1X authentication Port type Four 10-Gigabit XFP interfaces Transmission media 10GBASE-SR(850nm) 62.5/125um MMF: 220m 1000BASE-LR(1310nm) 9/ 125 um S MF: 10K M ( 550m f or m ulti-mode optical fibers) 10GBASE-LH(1550nm) 9/125 um S MF: 40KM LED Status, Link/ACT Hot swappability Supported Power consumption <100W EMC GB9254-1998 FCC Class A Safety regulation GB4943-2001 MTBF 174,055hrs Operating temperature 0 to 40°C Storage temperature -40 to 70°C Operating humidity 10% to 90% RH Weight Net weight: 2.8 Kg Dimensions 436*346*45mm ( L x W x H) 7200-24P Module Figure 1-14 shows the basic appearance of the 7200-24P, which is the line card module of the DES-7200 s eries. 7200-24P provides t welve 1 0/100/1000BASE-T el ectrical por ts and twelve optical/electrical combo 1000M interfaces, and supports up to twenty-four 1000BASE-T i nterfaces or 12+ M 1 000BASE-T i nterfaces and N 10 00BASE-X i nterfaces, where M p lus N e quals 12. It f eatures t he f unction of l ayer-2/3 wire s peed s witching an d supports hot plug-in. The hot pull-out function is limited to some extent and it only supports the hot swapping function of SFP interface modules. Figure 1-14 Basic Appearance of the 7200-24P 1. Interface 7200-24P provides twelve 10/100/1000BASE-T electrical ports and twelve optical/electrical combo 1000M interfaces, and supports up to twenty-four 1000BASE-T interfaces or 12+M 1000BASE-T i nterfaces an d N 10 00BASE-X i nterfaces, w here M pl us N equ als 12. The 1000 electrical interface supports PoE devices by default. When the function of automatic negotiation is enabled, it supports automatic MDI/MDI-X identification. The SFP ports support s hort-wave (850nm, m ulti-mode) and l ong-wave ( 1310nm, s ingle-mode) 1 000M SFP optical modules and long-wave (1550nm) 1000M SFP optical modules and SFP copper ports, thus facilitating configuration for users. 1-21 DES-7200 Hardware Installation Guide The 7200-24P provides twelve SFP optical ports and 10/100/1000BASE-T ports t hat ar e i n t he c ombo f orm. I n ot her words, eac h SFP por t corresponds t o on e 1 0/100/1000BASE-T por t, and on ly on e port can be used at a time, with the other being unavailable. The MDI/MDI-X automatic identification of the 10/100/1000M electrical ports takes effect only when auto negotiation is enabled. Note 7200-24P does not support the hot pull-out operation. You need to perform the following operations to achieve it: 1. Disconnect all cables connected with cable card ports; 2. Hold the Mode button for over three seconds until all LEDs on the cable card ports are off; 3. Configure the pull-out operation through software commands. (For relevant software configuration commands, refer to the corresponding software description.) Warning 2. LEDs The 7200-24P provides various system LEDs, as described in the following table: Table 1-14 LEDs on the Front Panel Sign Description Detailed Information Status System LED OFF: The module has not been powered on Red: Module fault Flashing green: The module is initializing Solid gr een: T he m odule ha s f inished i nitialization and can perform switching normally Mode LED status indication Green: Data exchange indication Orange: PoE status indication Port status LED When Mode is green: OFF: Port is not linked Green: Port is linked Flashing green: data transmission at the port When Mode is orange: Off: The PoE device does not work normally. Green: The PoE device works normally. Link/ACT 3. Technical Specifications Table 1-15 Technical Specifications of the 7200-24P 1-22 Product Model 7200-24P Standard Compliance IEEE 802.3-2000 IEEE 803.ab, IEEE 802.3af, IEEE 802.1D and IEEE 802.1Q 802.1X authentication Port type Providing t welve 10/ 100/1000BASE-T el ectrical por ts and t welve optical/electrical combo 1000M interfaces, and supporting up to twenty-four 1000BASE-T interfaces or 12+M 1000BASE-T interfaces and N 1000BASE-X interfaces, where M plus N equals 12. Providing up to 24 PoE ports DES-7200 Hardware Installation Guide 1.6.8 Product Model 7200-24P Transmission media 10/100/1000BASE-T: 100m (Category-5 UPT) 1000BASE-SX(850nm) 62.5/125um M MF: 220m 1000BASE-SX(850nm) 50/125um MMF: 500m 1000BASE-LX(1310nm) 9/125um SMF: 10KM 1000BASE-LH(1310nm) 9 /125um SMF: 40KM LED Status, Link/ACT Hot swappability Supported Power consumption <85W+15.4xN (N indicates the PoE port being used, of which the value is less than 24.) EMC GB9254-1998 FCC Class A Safety regulation GB4943-2001 MTBF 153,221hrs Operating temperature 0 to 40°C Storage temperature -40 to 70°C Operating humidity 10% - 90% RH Weight Net weight: 2.8 Kg Dimensions 436*346*45 ( L x W x Hmm) 7200-48P Module Figure 1 -15 shows t he b asic appear ance of t he 7200-48P, t he l ine c ard m odule of t he DES-7200 s eries. 7200-48P provides 44 10/100/1000BASE-T e lectrical 1000M i nterfaces and 4 optical/electrical c ombo 1000M interfaces, and s upports up to 48 1000BASE-T interfaces or 44+M 1000BASE-T interfaces and N 1000BASE-X interfaces where M plus N equals 4. The 7200-48P module is hot swappable. Figure 1-15 Basic Appearance of the 7200-48P 1. Interface 7200-48P provides 44 10/100/1000BASE-T electrical 1000M interfaces and 4 optical/electrical combo 1000M interfaces, and supports up to 48 1000BASE-T interfaces or 44+M 1000BASE-T interfaces and N 1000BASE-X interfaces where M plus N equals 4. The 1000M electrical i nterface supports P oE b y def ault. Automatic MD I/MDI-X id entification is available on ly when automatic negotiation i s en abled. The SFP por ts s upport s hort-wave (850nm, m ulti-mode) and long-wave ( 1310nm, s ingle-mode) 1000 M SFP op tical m odules and long-wave (1550nm) 1000M SFP optical modules and SFP copper ports, thus facilitating configuration for users. Note: The 7200-48P provides twelve SFP optical ports and 10/100/1000BASE-T ports that are i n t he c ombo f orm. I n ot her words, e ach S FP por t c orresponds t o one 10/100/1000BASE-T port, and only one port can be us ed at a t ime, w ith t he other being unavailable. T he MD I/MDI-X aut omatic identification of t he 10/ 100/1000M e lectrical ports takes effect only when auto negotiation is enabled. 1-23 DES-7200 Hardware Installation Guide 7200-48P does not support the hot pull-out operation. You need to perform the following operations to achieve it: 1. Disconnect all cables connected to the cable card ports; 2. Hold the Mode button for over three seconds until all LEDs on the cable card ports go off; 3. Configure the pull-out operation through software commands. (For relevant software configuration commands, refer to the corresponding software description.) Warning 2. LEDs The 7200-48P provides various system LEDs, as described in the following table: Table 1-16 LEDs on the Front Panel Sign Description Detailed Information Status System LED OFF: The module has not been powered on. Red: Module fault Flashing green: The module is initializing. Solid gr een: T he m odule ha s f inished i nitialization and can perform switching normally. Mode LED status indication Green: Data exchange indication Orange: PoE status indication Port status LED Electrical interface: When Mode is green (switching): OFF: Port is not linked. Green: Port is linked at 1000M. Yellow: Port is linked at 10/100M. Flashing: Data is transmitted on the port. When Mode is orange (PoE): Off: The PoE device does not work normally. Green: The PoE device works normally. Yellow: the PoE device is overloaded. Red: The port cannot be powered. Optical interface: OFF: Port is not linked. Green: Port is linked. Flashing green: Data is transmitted on the port. Link/ACT 3. Technical Specifications Table 1-17 Technical Specifications of the 7200-48P 1-24 Product Model 7200-48P Standard Compliance IEEE 802.3-2000 IEEE 803.ab, IEEE 802.3af, IEEE 802.1D and IEEE 802.1Q 802.1X authentication Port type 44 10/100/1000BASE-T el ectrical 1000M i nterfaces and 4 optical/electrical combo 1000M interfaces; Up to 48 1000BASE-T interfaces, or 44+M 1000BASE-T interfaces and N 1000BASE-X interfaces where M plus N equals to 4. Up to 48 PoE ports. DES-7200 Hardware Installation Guide 1.6.9 Product Model 7200-48P Transmission media 10/100/1000BASE-T: 100m (Category-5 UPT) 1000BASE-SX(850nm) 62.5/125um M MF: 220m 1000BASE-SX(850nm) 50/125um MMF: 500m 1000BASE-LX(1310nm) 9/125um SMF: 10KM 1000BASE-LH(1310nm) 9 /125um SMF: 40KM LED Status, Link/ACT Hot swappability Supported Power consumption <100W+15.4xN (N indicates the PoE port being used, of which the value is less than 48.) EMC GB9254-1998 FCC Class A Safety regulation GB4943-2001 MTBF 141,824hrs Operating temperature 0 to 40°C Storage temperature -40 to 70°C Operating humidity 10% to 90% RH Weight Net weight: 2.8 Kg Dimensions 436*346*45mm ( L x W x H) 7200-24GE Module Figure 1 -16 shows t he ba sic app earance of t he 7200-24GE, t he l ine c ard m odule of t he DES-7200 series. 7200-24GE 24 1000M and 100M combo SFP interfaces, that is, it supports 100 0BASE-X an d 100 BASE-X m odes. It f eatures t he f unction o f l ayer-2/3 w ire speed switching. The 7200-24GE module is hot swappable. Figure 1-16 Basic Appearance of the 7200-24GE 1. Interface 7200-24GE provides 24 1000M and 100M combo SFP interfaces, that is, it supports 1000BASE-X and 100BASE-X modes. It features the function of layer-2/3 switching with the 1000M wire speed. The SFP ports support short-wave (850nm, multi-mode) and long-wave (1310nm, s ingle-mode) an d l ong-wave (1550nm) 1000M /100M SFP op tical m odules and SFP copper ports. The module is hot swappable. 2. LEDs The 7200-24GE provides various system LEDs, as described in the following table: Table 1-18 LEDs on the Front Panel Sign Status Description Detailed Information System LED OFF: The module has not been powered on. Red: Module fault Flashing green: The module is initializing. Solid green: The module has finished initialization and can perform switching normally. 1-25 DES-7200 Hardware Installation Guide Sign Link/ACT Description Detailed Information Port status LED OFF: Port is not linked. Green: The 1000BASE-X Port is linked. Flashing green: Data is transmitted on the 1000BASE-X port. Orange: The100BASE-X port is linked. Flashing orange: Data is transmitted on the 100BASE-X port. 3. Technical Specifications Table 1-19 Technical Specifications of the 7200-24GE 1.6.10 Product Model 7200-24GE Standard Compliance IEEE 802.3-2002 IEEE 803.ab, IEEE 802.1D, and IEEE 802.1Q 802.1X authentication Port type 24 1000M and 1 00M combo SFP interfaces (supporting 1000BASE-X/ and 100BASE-X) Transmission media 1000BASE-SX(850nm) 62.5/125um MMF: 220m 1000BASE-SX(850nm) 50/125 um MMF: 500m 1000BASE-LX(1310nm) 9/125 um SMF: 10KM (550m for multi-mode optical fibers) 1000BASE-LH(1310nm) 9/125 um SMF: 40KM LED Status, Link/ACT LEDs Hot swappability Supported Power consumption <75W EMC GB9254-1998 FCC Class A Safety regulation GB4943-2001 MTBF 220,531hrs Operating temperature 0 to 40°C Storage temperature -40 to 70°C Operating humidity 10% to 90% RH Weight Net weight: 2.8 Kg Dimensions 436*346*45mm ( L x W x H) 7200-24G2XG Module Figure 1-17 shows the basic appearance of 7200-24G2XG, the link card of DES-7200 series. 7200-24G2XG comes with two 10G XFP ports, 12 gigabit SFP ports and 12 gigabit optical-electrical m ultiplex ports, and s upports up t o 2 X FP ports pl us 24 1000BASE-X interfaces, or 2 XFP ports plus 12+M 1000BASE-X interfaces + N 1000BASE-T interfaces where M+ N= 12. Moreover, i t offers La yer 2/3 l ine r ate s witching. 7200-24G2XG supports hot-swapping as well as hot-swapping on XFP and SFP ports. Figure 1-17 Basic Appearance of the 7200-24G2XG 1-26 DES-7200 Hardware Installation Guide 1. Interface 7200-24G2XG comes with two 10G XFP ports, 12 gigabit SFP ports and 12 gigabit optical-electrical multiplex ports, and offers gigabit-level line rate of Layer 2/3 switching. With auto-negotiation enabled, the gigabit electrical port supports automatic MDI/MDI-X identification. The gigabit SFP optical module of short wave (850nm, multi mode), long wave (1310nm, single mode) and long distance (1550nm) is supported on the SFP port. The SFP copper port is also supported to offer flexible configuration. The SFP module is hot swappable on the SFP port. 7200-24G2XG offers 12 multiplex ports whose 10/100/1000BASE-T port is SFP optical port. O nly o ne por t is a vailable at a t ime. The aut omatic MDI/MDI-X function of the 10/100/1000M electrical port takes effect only after auto negotiation is enabled. Note 2. LEDs 7200-24G2XG comes w ith various L ED i ndicators. The f ollowing t able describes t hese indicators: Table 1-20 LEDs on the Front Panel Sign Description Detailed Information Status System indicator Off: The module is not powered on. Red: The module fails. Flashing green: The module is initializing. Constant green: The module is initialized and can switch Module Module indicator Off: The module is not available. Green: The module is available. Link/ACT Port s indicator Off: The port is not linked. Green: The port is linked. Flashing green: Data is transmitted through the port. tatus 3. Technical Specifications Table 1-21 Technical Specifications of the 7200-24G2XG Product Model 7200-24G2XG Standard Compliance IEEE 802.3 -2002 Ethernet standard IEEE 803.ab, IEEE 802.1D, and IEEE 802.1Q 802.1X Port type 12 SFP gigabit ports and 12 gigabit optical-electrical multiplex ports (supporting 1000BASE-SX/LX,1000BASE-TX, 1000BASE-Lh and 10/100/1000BASE-TX) Transmission media 1000BASE-SX(850nm) 62.5/125um MMF: 220m 1000BASE-SX(850nm) 50/125 um MMF: 500m 1000BASE-LX (1310nm) 9/125 um SMF: 10KM (550m for multimode optical fibers) 1000BASE-LH(1310nm) 9/125 um SMF: 40KM 10/100/1000BASE-TX: 100m (Cat-5 UPT twisted pairs) 10GBASE-SR(850nm) 62.5/125um MMF: 220m 10GBASE-LR(1310nm) 9/125 um SMF: 10KM(550m for multimode optical fibers) 10GBASE-ER(1550nm) 9/125 um SMF: 40KM LED Status, Link/ACT, module indicator 1-27 DES-7200 Hardware Installation Guide 1.6.11 Product Model 7200-24G2XG Hot swappability Supported Power consumption <75W EMC GB9254-1998 FCC Class A Safety regulation GB4943-2001 MTBF 151,800hrs Operating temperature 0 to 40°C Storage temperature -40 to 70°C Operating humidity 10% to 90% RH Weight Net weight: 2.8 Kg Dimensions 436*346*45mm ( L x W x H) 7200-ASE3 Module Figure 1-19 shows the basic appearance of 7200-ASE3. The 7200-ASE3 is an agent card that s upports MPLS. T he line c ard d oes not provide an y ex ternal p ort for i mproving the performance of DES-7200 series. Figure 1-18 Basic Appearance of the 7200-ASE3 1. Indicators 7200-ASE3 m odule pr ovides t he LE Ds f or i ndicating s ystem s tatus, as des cribed i n t he following table: Table 1-22 LEDs on the Front Panel Sign Status Description Detailed Information System LED OFF: The module has not been powered on. Red: Module fault Flashing green: The module is initializing. Solid green: The module has finished initialization and can perform switching normally. 3. Technical Specifications Table 1-23 Technical Specifications of the 7200-ASE3 1-28 Product Model 7200-ASE3 Standard Compliance IEEE 802.3-2002 IEEE 803.ab, IEEE 802.1D, and IEEE 802.1Q 802.1X authentication LED Status Hot swappability Supported Power consumption <100W DES-7200 Hardware Installation Guide 1.6.12 Product Model 7200-ASE3 EMC GB9254-1998 FCC Class A Safety regulation GB4943-2001 MTBF 172,738hrs Operating temperature 0 to 40°C Storage temperature -40 to 70°C Operating humidity 10% to 90% RH Weight Net weight: 2.8 Kg Dimensions 436*346*45mm ( L x W x H) 7206/7210-Fan Module The 7210-Fan is t he f an module of t he DES-7210, while t he 7206-Fan i s t hat o f t he DES-7206. T he 7206/7210-Fan pr ovides a s ound heat d issipation s ystem f or t he e ntire system to ensure the stable working of the system. The 7210-Fan provides various system LEDs, as described in the following table: Table 1-24 LEDs on the Front Panel of the 7210-FAN Sign Description Detailed Information Power Power LED OFF: The fan tray has not been powered on Solid green: The fan module is normally powered on Alarm Alarm LED OFF: Normally working Red: The fan tray fails Note 1.6.13 In the DES-7210/7206 system, when the 7206/7210-Fan has an alarm, it means that the fan tray has failed. When this happens, you should replace the failed one with a normal one as promptly as possible, preferably within 10 minutes. The 7206/7210-Fan is hot swappable. 7200-1200AC/2000AC Power Module As t he A C power m odule of t he s ystem, t he 7200-1200AC/2000AC provides t he input interface of 110/220V AC power supply for the DES-7210/7206. Note Warning The DES-7210/7206 system supports 1+1 redundancy for the AC power supply. F or higher s tability an d r eliability of t he entire s ystem, you are recommended to configure 1+1 redundancy of the 7200-1200AC/2000AC for the DES-7210/7206. The DES-7210/7206 system supports 1 +1 r edundancy f or bot h t he A C power s upply and D C p ower s upply. However, p lease n ote that the t wo power supplies in the 1+1 redundancy must be of the same power module. In ot her words, t hey m ust be b oth AC p ower s upplies or D C p ower supplies. Do not mix them, as this may cause abnormal running or even damage of t he s ystem. I n addi tion, t wo po wer m odules ar e m andatory when a P oE d evice i s i n use. 7200 single po wer d oes not s upport a ny POE device. 1-29 DES-7200 Hardware Installation Guide 1.6.14 7200-1200DC/2000DC Power Module As the D C po wer m odule of t he s ystem, t he 7200-1200DC/2000DC provides t he i nput interface of -48V DC power supply for the DES-7210/7206. Note Warning 1-30 The DES-7210/7206 system supports 1+1 redundancy for the DC power supply 7200-1200DC/2000DC. F or h igher s tability a nd r eliability of t he entire system, you are recommended to configure 1+1 redundancy of the 7200-1200DC/2000DC for the DES-7210/7206. The DES-7210/7206 system supports 1 +1 r edundancy f or bot h t he A C power supply 7200-1200DC/2000DC and DC power supply 7200-1200DC/2000DC. However, please note that the two power supplies in the 1+1 redundancy must be of the same power module. In other words, they must be both AC power supplies or DC power supplies. Do not mix them, as this may cause abnormal running or even damage of the system. In add ition, t wo po wer m odules ar e m andatory when a P oE device i s i n use. 7200 single power does not support any POE device. DES-7200 Hardware Installation Guide 2 2.1 Preparation Before Installation Safety Suggestions To av oid personal i njury an d equipment d amage, p lease c arefully read t he s afety suggestions before you install the DES-7210/7206. The following safety suggestions do not cover all possible dangers. Note 2.1.1 2.1.2 Safety Precautions for Installing the System Keep the chassis clean, free from any dust. Do not place the equipment in a walking area. Do not wear loose clothes or any other things that may be caught by the chassis during installation and maintenance. Turn of f al l po wer s upplies and unplug a ll p ower c ables bef ore you c an r emove t he chassis. Safety Precautions for Removing The DES-7210/7206 is large and heavy. When you handle them, please pay attention to the following requirement: Avoid moving the equipment frequently. At least two persons are needed to move the equipment. Do not attempt to move the equipment by one person only. Keep ba lanced i n m oving t he eq uipment, and a void i njuring your l eg a nd f eet or spraining your waist. Turn of f al l po wer s upplies and unplug a ll p ower c ables bef ore you c an r emove t he equipment. First remove all the line cards, fan tray, and power module from the chassis before you can m ove the DES-7210/7206 by using t he h andles on bot h s ides, t o a void an y damage. 2-1 DES-7200 Hardware Installation Guide Figure 2-1 Schematic Diagram for Correctly Moving the DES-7210 Figure 2-2 Schematic Diagram for Correctly Moving the DES-7206 Warning 2.1.3 2-2 Do not move the equipment by grasping the panel, power supply handle, ventilation h oles of t he c hassis, as t hey are not d esigned t o bear t he weight of t he e ntire eq uipment. F ailing to d o s o m ay cause dam age or even injure yourself. Electrical Safety Please observe local r egulations a nd s pecifications when p erforming e lectrical operations. Relevant operators must be qualified. Please c arefully c heck for an y potential da nger in t he working ar ea, f or ex ample, ungrounded po wer s upply, unr eliable g rounding of t he p ower s upply, and d amp/wet ground or floor. Find out the location of the emergency power supply switch in the room before installation. First cut off the power supply in the case of an accident. DES-7200 Hardware Installation Guide Do not maintain the equipment alone when it is energized, unless absolutely necessary. Be sure to make a careful check before you shut down the power supply. Do not pl ace t he e quipment i n a d amp/wet location. D o no t l et an y liquid e nter t he chassis Connect the negative and positive lines correctly according to the instructions when DC power supply is used. All grounding conductors should be connected before and disconnected after the line and neutral(AC)/ input(DC) c onductors. - Min. 1 0mm² ( 6AWG) pr otective grounding conductor s hould be pr ovided t o t he equipment grounding terminals on rear panel. - For po wer s upply unit 7200-2000DC, m in. 1 0mm² ( 6AWG) pr otective grounding conductor should be provided to input terminal; - For po wer s upply unit 7200-1200DC, m in. 4m m² ( 10AWG) pr otective grounding conductor should be provided to input terminal; - For po wer s upply unit 7 200-2000AC and 72 00-1200AC, m in. 2. 5mm² ( 12AWG) protective grounding conductor should be provided to input terminal. Warning Warning 2.1.4 Any nonstandard a nd i naccurate electrical op eration c an cause an accident s uch as f ire or el ectrical at tack, t hus causing s evere e ven f atal damages to human bodies and equipment. Direct or i ndirect t ouch t hrough a wet o bject on h igh-voltage a nd m ains supply can bring a fatal danger. Static Discharge Damage Prevention Although m uch has been done in t he DES-7210/7206 to pr event s tatic el ectricity, gr eat damage may be caused to the circuitry and equipment when the static electricity exceeds a certain limit. In the communication network of the DES-7210/7206, electrostatic induction may come from the following sources: External electric field produced by the high-voltage supply cable, lightning, etc; Internal systems such as the indoor floor and the entire structure. To prevent damage from static electricity, you must pay attention to the following: 1. Proper grounding of the equipment and floor 2. Dust prevention measures are taken in the room. 3. An appropriate humidity is maintained. 4. Always wear an anti-static wrist strap when you touch any circuit board. 5. Try to hold a circuit board by its edges. Do not touch any components or the PCB. 6. Do not let any clothes touch a circuit board. An antistatic wrist strap can only prevent static electricity from human damaging the circuit board, but cannot prevent any static electricity on clothes. 2-3 DES-7200 Hardware Installation Guide 2.1.5 Laser Safety Among the modules supported by the DES-7210/7206, there are a great number of optical modules that are Class I laser products. Therefore, pay attention to the following during your use of this product: When a fiber transceiver works, ensure that the port has been connected with an optical fiber or is covered with a dust cap, to keep out dust and avoid burning your eyes. Do not stare into any optical port. Danger 2.2 Do not s tare into any optical por t u nder a ny c ircumstances, a s this m ay cause permanent damage to your eyes. Installation Site Requirements The DES-7210/7206 must be used indoors. To ensure the normal working and a prolonged useful file of the equipment, the installation site must meet the following requirements. 2.2.1 Requirements for Rack Mounting If you plan to mount the DES-7210/7206 in a frame, you must verify that the frame meets the following conditions: 2.2.2 Install the switch in an open cabinet as much as possible. If you install the switch inside a c losed cabinet, please make sure t hat the cabinet has a good ventilation an d heat dissipation system. Make sure that the cabinet is firm enough to bear the weight of the DES-7210/7206 and its installation accessories. Make sure that the dimensions of the cabinet spare certain space for the installation of the front, rear, left and right panels of the DES-7210/7206 for the sake of heat dissipation. The frame should be properly grounded. Ventilation Requirements Figure 2 -3 an d F igure 2-4 s how t he v entilation r equirements of t he DES-7210/7206. Yo u must ens ure that s ufficient s pacing is r eserved at t he ventilation op enings to ensure t he normal w orking of v entilation. After v arious c ables h ave be en c onnected, t hey s hould b e arranged into bundles or placed on the cabling rack, to avoid blocking the air inlets. 2-4 DES-7200 Hardware Installation Guide Figure 2-3 Schematic Diagram for the Ventilation of the DES-7210 Figure 2-4 Schematic Diagram for the Ventilation of the DES-7206 2-5 DES-7200 Hardware Installation Guide 2.2.3 Temperature and Humidity Requirements To ensure the normal working and a prolonged useful life of the DES-7210/7206, appropriate temperature and humidity must be maintained in the equipment room. If the equipment room has temperature and humidity that do not meet the requirements for a long time, the equipment may be damaged. In an en vironment w ith h igh r elative h umidity, t he i nsulating m aterial m ay have bad insulation or even leak electricity, and sometimes the materials may suffer from mechanical performance change and metallic parts may get rusted. On the other hand, in an environment with low relative humidity, the insulating strip may dry and shrink, and static electricity may occur easily and endanger the circuit on the equipment. In an environment with high temperature, the equipment is subjected to even greater harm, as its performance may degrade significantly and its useful life may be shortened in the case of long-term exposure that expedites the aging process. Therefore, t he am bient t emperature and humidity of t he DES-7210/7206 equipment must meet the requirements listed in Table 2-1: Table 2-1 Temperature and Humidity Requirements of the DES-7210/7206 Temperature Relative Humidity Long-term condition Short-term condition Long-term condition Short-term condition 0ºC-45ºC 0ºC-45ºC 40%-65% 10%-90% 1. Note 2.2.4 2. The ambient temperature and humidity are measured at the point that is 1.5m above the floor and 0.4m before the equipment when there is no protective plate in front or back of the equipment rack. The short-term working condition applies where the continuous working period does not exceed 48 hours and the accumulative total period within a year does not exceed 15 days. Cleanness Requirements Dust pos es t he t op t hreat to t he r unning of t he eq uipment. The i ndoor dus t falling on t he equipment may be adhered by the static electricity, causing bad contact of the metallic joint. Such electrostatic adherence may occur more easily when the relative humidity is low, not only affecting the useful life of the equipment, but also causing communication faults. Table 2-2 shows the requirements for the dust content and granularity in the equipment room. Table 2-2 Requirements for the Dust content and Granularity in the Equipment Room 0.5 Maximum diameter (ìm) 3 Max. density (Particles/m ) Note 2-6 1.4 x 10 1 7 7 x 10 3 5 2.4 x 10 5 5 1.3 x 10 5 The ai r f ilter of t he DES-7210 must b e c leaned at r egular i ntervals t o ensure good ventilation and dust prevention. DES-7200 Hardware Installation Guide Apart from dust, the salt, acid and sulfide in the air in the equipment room must also meet strict r equirements, as s uch poi sonous s ubstances may accelerate t he c orrosion of t he metal and t he aging of s ome p arts. T he equ ipment room s hould be pr otected f rom t he intrusion of harmful gases (for example, sulfur dioxide, sulfured hydrogen, nitrogen dioxide, and chlorine), whose requirements are listed in Table 2-3. Table 2-3 Requirements for Harmful Gases in the Equipment Room 2.2.5 3 3 Gas Average (mg/m ) Maximum (mg/m ) Sulfur dioxide 0.2 1.5 Sulfured hydrogen 0.006 0.03 Nitrogen dioxide 0.04 0.15 Ammonia 0.05 0.15 Chlorine 0.01 0.3 Power Requirements When the DES-7210/7206 uses the AC power supply: AC input voltage: 90Vac~264Vac, 47Hz~63Hz Power: 1200W/2000W When the DES-7210/7206 uses the DC power supply: DC input voltage: DC - 36Vdc ~ -75Vdc Power: 1200W/2000W Note 2.3 The DES-7210/7206 provides 1+1 redundancy of power supply. You are recommended to use multiple power supplies for the equipment to ensure its c ontinuous and s table working b y a voiding t he i mpact o f unex pected power failures on t he e quipment. However, you must not e t hat the redundancy p ower s upplies must be of t he s ame t ype; a m ix of po wer supplies is not allowed. System Grounding Requirements A g ood grounding s ystem i s t he bas is f or t he stable and r eliable o peration of t he DES-7210/7206. It is the chief condition to prevent lightning stroke and resist interference. Please c arefully c heck t he gr ounding c onditions o n t he installation s ite ac cording to t he grounding requirements, and perform grounding properly as needed. 2.3.1 Safety Ground The equipment using AC power supply must be grounded by using the yellow/green safety grounding cable. Otherwise, when the insulating resistance decreases the power supply and the enclosure in the equipment, electric shock may occur. 2.3.2 Lightning Ground The l ightning pr otection s ystem of t he f acility is a separate s ystem t hat c onsists of t he lightning rod, downlead conductor and the connector to the grounding system, which usually shares t he po wer r eference gr ound an d yellow/green s afety c able gr ound. T he l ightning discharge ground is for the facility only, irrelevant to the equipment. 2-7 DES-7200 Hardware Installation Guide 2.3.3 EMC Ground The gr ound r equired f or E MC des ign i ncludes s hielding gr ound, f ilter gr ound, noise a nd interference suppression, and level reference. All the above constitute the comprehensive grounding r equirements. T he gr ounding r esistance s hould be less t han 1. T he DES-7210/7206 chassis is installed with two grounding posts, as shown in Figure 2-5. Post 1 is i nstalled f or s hell protection a nd p ost 2 i s installed f or c ircuit working. T he t wo ar e converged on the grounding post of the cabinet. Figure 2-5 Schematic Diagram for the Grounding of the DES-7210/7206 The system cables must ensure the normal working of the equipment. Before you connect the cables, please carefully read the following precautions. 2.3.4 EMI Consideration Various i nterference s ources, f rom ei ther o utside or i nside the equ ipment or app lication system, af fect t he s ystem in t he c onductive ways s uch as c apacitive c oupling, i nductive coupling, and electromagnetic radiation. There are two types of electromagnetic interferences: radiated interference and conducted interference, depending on the type of the propagation path. When the energy, often RF energy, from a component arrives at a sensitive component via the s pace, t he en ergy i s k nown as r adiated interference. T he i nterference s ource c an be both a par t of t he i nterfered s ystem and a completely electrically isolated unit. Conducted interference r esults from t he electromagnetic wire or signal cable c onnection between the source and the sensitive component, along which cable the interference conducts from one unit to another. Conducted interference often affects the power supply of the equipment, but can be c ontrolled b y a f ilter. R adiated i nterference m ay af fect an y s ignal pat h in t he equipment, and is difficult to shield. 2-8 1. Effective measures should be taken for the power system to prevent the interference from the electric grid. 2. The working ground of the routers should be preferably separated and kept as far away as pos sible f rom t he gr ounding d evice of t he po wer equ ipment or t he an ti-lightning grounding device. DES-7200 Hardware Installation Guide 2.3.5 3. Keep the equipment away from high-power radio transmitter, radar transmitting station, and high-frequency large-current device. 4. Measures must be taken to isolate static electricity. Precaution for Fiber Connection Before you connect the fibers, verify that the optical connector type and fiber type match the optical interface type used, and pay attention to the Tx and Rx directions of the fiber. The Tx end of this equipment should be connected to the Rx end of the opposite equipment, and the Rx end of this equipment to the Tx end of the opposite equipment. 2.4 Requirements of Installation Tools Table 2-4 List of Installation Tools 2.5 2.5.1 Common tools Cross screwdriver, s traight s crewdriver, related electric and opt ical cables Bolts, diagonal pliers, straps Special-purpose tools Anti-static tool Meter Multimeter Unpacking Inspection Requirements Checking Goods 1. DES-7210/7206 chassis carton Whether various panels of the equipment have been installed and adjusted properly Documentation 2. DES-7210/7206 accessories carton Whether the power module of the equipment is the required AC or DC module Fan tray Antistatic hand ring Screwdriver Power cable (for AC power configuration only) Documentation 3. Module carton It contains the modules, packing list and documentation of the DES-7210/7206. Note The above lists the items of a normal delivery, which may differ from the actual delivery. All depend on the purchasing contract. Please check your goods carefully against the packing list or purchasing contract. If you have any questions or there are any errors, please contact your distributor. 2-9 DES-7200 Hardware Installation Guide 3 Product Installation 1. Note 2. Before you install the DES-7210/7206, make sure you have carefully read Chapter 2 and this chapter. Make sure that the requirements set forth in Chapter 2 have been met. 3-1 DES-7200 Hardware Installation Guide 3.1 Installation Flow Assembly of the DES-7210/7206 before installation Install the cabinet Mount the DES-7210/7206 into the Connect the system ground Connect the power supply (AC or DC) DC AC Insert various modules Connect external port cables or fibers of various modules Bind cables or fibers Installation check End 3-2 DES-7200 Hardware Installation Guide 3.2 Installation Verification The DES-7210/7206 is a kind of c omplicated eq uipment, s o you m ust c arefully plan a nd arrange its i nstallation location, ne tworking m ode, po wer s upply, and wiring b efore installation. Verify the following before installation: 3.3 3.3.1 The installation location offers sufficient flow of air. The installation location meets the requirements of the equipment for temperature and humidity. The po wer s upply that m eets t he r equirements has been pr ovided at t he installation location. The related network cables have already been deployed at the installation location. Rated DC or AC power supply is selected. Cabinet Installation Precautions When you install the cabinet, pay attention to the following: 3.3.2 All expansion bolts for fastening the cabinet base to the ground should be installed and tightened in sequence from bottom up (large plain washer, spring washer, and nut), and the installation holes on the base and the expansion bolts should be well aligned. After the cabinet is installed, it should be stable and still. After the cabinet is installed, it should be vertical to the ground. When a cabinet is put side on side with another cabinet in the same equipment room, they should be aligned in a straight line, with an error less than 5 mm. The f ront/back door s of t he c abinet s hould b e pr operly i nstalled, op en a nd close smoothly. The locks should work normally, and all keys should be complete. There s hould b e no u nnecessary f ormal l abels i nside t he cabinet an d on various boards. Blank panels should be installed completely. Fastening screws of various devices in the cabinet should be tightened, complete, and of the same model. Various boards of the equipment should be installed securely, and the fastening screws on the panel should be tightened. All wiring i nlets at t he top and b ottom of t he c abinet s hould b e installed with rodent-resistant nets where the seams should be no more than 1.5 cm in diameter, to prevent rodents and other small animals from entering the cabinet. Antistatic wrist straps should be provided in the cabinet. Simple Installation Steps 1. Plan o n t he a vailable s pace bef ore i nstalling t he c abinet, f or w hose f ront a nd bac k doors sufficient spacing must be reserved for maintenance. 2. Mount and fasten the 19” cabinet at the designed location as planned. 3. Install the appropriate chute and cables. 3-3 DES-7200 Hardware Installation Guide 4. 3.4 3.4.1 Install the tray and wiring layer on the rack according to the configuration of one rack with one cabinet and one rack with multiple cabinets. Mounting the DES-7210/7206 into the Cabinet Precautions Before the DES-7210/7206 is mounted into the cabinet, first verify that the front and back brackets of the cabinet are at the right locations. If the bracket is in the too front, the front panel of the equipment may be too close to the front door, so that the front door cannot be closed when n etwork c ables and p igtail f ibers are c onnected. U sually, you should ensure that the spacing of at least 10mm is reserved between the front panel of the equipment and that of the cabinet after installation. Verify the following before installation: The c abinet h as be en f astened pr operly and v arious modules in t he f rame h ave be en installed. There should be no obstacles for installation in the frame and in the surrounding. The equipment to be installed is ready, and has been moved to a place of easy handling and close to the frame. 3.4.2 3.5 Simple Installation Steps 1. Levelly lift the DES-7210/7206 by two persons on both sides, and slowly move it to the front of the frame. 2. Levelly lift the DES-7210/7206 to a position slightly higher than the tray or the slide rail of t he c abinet, p ut t he eq uipment on to the t ray or t he s lide r ail, an d push i t i nto t he cabinet. 3. Fasten the DES-7210/7206 onto the cabinet with screws. There are fastening notches on bo th t he l eft and r ight of t he f ront pane l o n t he e quipment f rame. U se s crews t o fasten t hem t o t he f astening bracket of t he c abinet. A fter f astened, t he equipment should be stable and still in the cabinet. Installing the Fan Tray The DES-7210/7206 provides a ventilation system, 7210-FAN for DES-7210, and 7206-FAN for DES-7206. Install the fan tray by performing the following steps: 3-4 1. Remove t he blank pane l o f the fan tray by loosing the captive s crews with a s traight screwdriver and the cross screws with a cross screwdriver. 2. Push the fan into the cabinet along the guide rail. 3. Tighten the captive screws with a straight screwdriver. Figure 3-2 and Figure 3-3 show the installed fan tray DES-7200 Hardware Installation Guide Figure 3-1 Installing the Fan Tray of the DES-7210 Figure 3-2 Installing the Fan Tray of the DES-7206 3.6 Installing the Power Supply The DES-7210/7206 system provides AC and DC power, which can be installed in the same way by performing the following steps: 1. Remove any blank panel of the power module by loosening the two cross screws with a cross screwdriver, as shown in Figure 3-4 and 3-5. 3-5 DES-7200 Hardware Installation Guide Figure 3-3 Schematic Diagram for Installing the Power Supply of the DES-7210 Figure 3-4 Schematic Diagram for Installing the Power Supply of the DES-7206 3-6 DES-7200 Hardware Installation Guide 2. Insert the power supply module into the cabinet along the guide rail, as shown in Figure 3-6 and Figure 3-7: Figure 3-5 Schematic Diagram for Installing the Power Supply of the DES-7210 Figure 3-6 Schematic Diagram for Installing the Power Supply of the DES-7206 3-7 DES-7200 Hardware Installation Guide 3. Tighten the screws on both sides of the power supply by using a straight screwdriver, as shown in Figure 3-8 and Figure 3-9. Figure 3-7 Schematic Diagram for Installing the Power Supply of the DES-7210 Figure 3-8 Schematic Diagram for Installing the Power Supply of the DES-7206 3-8 DES-7200 Hardware Installation Guide 3.7 Installing the Handle For eas y handling of t he s ystem, t he DES-7210/7206 chassis i s pr ovided w ith a handle, which can be installed by performing the following steps: 1. Align the handle with the sunk hole on the fastening bar; 2. Tighten the cross M4 sunk screws provided with the unit, as shown in Figure 3-10 and Figure 3-11. Figure 3-9 Installing the Handle of the DES-7210 Figure 3-10 Installing the Handle of the DES-7206 3-9 DES-7200 Hardware Installation Guide 3.8 Installing the Cabling Rack of the DES-7210 The cabling rack of the DES-7210 can be performed by performing the following steps: 1. Remove the blank panel of the tracing rack by loosing the captive screws with a straight screwdriver and the cross screws with a cross screwdriver, as shown in Figure 3-12. Figure 3-11 Installing the Cabling Rack of the DES-7210 2. 3-10 Install the panel of the tracing rack by tightening the two captive screws with a straight screwdriver a nd t he f our c ross s crews with a c ross s crewdriver, as s hown i n Figure 3-13. DES-7200 Hardware Installation Guide Figure 3-12 Installing the Cabling Rack of the DES-7210 3. Fasten t he c abling r ack b y using t he c ross M 3 s crews pr ovided, as s hown in Figure 3-14. ( The c abling r ack i s av ailable in t wo s izes, a nd you c an s elect t he appropriate one) Figure 3-13 Installing the Cabling Rack of the DES-7210 3-11 DES-7200 Hardware Installation Guide 3.9 Installing the Air Filter of the DES-7210 Simply push the air filter of the DES-7210 into the cabinet along the guide rail, as shown in Figure 3-15. Figure 3-14 Installing the Air Filter of the DES-7210 Note You are recommended to install the air filter as the last step of the chassis installation. 3.10 Connecting the System Ground A working ground GND is installed on the back of DES-7210/7206. In order to protect the system, t he gr ound m ust b e well t reated. GND i s di rectly c onnected to t he ground bar or ground pole of the equipment room. 3-12 DES-7200 Hardware Installation Guide Figure 3-15 Connection of grounding posts on the DES-7210/7206 back 3.10.2 3.10.3 Precautions The s ectional area of t he gr ounding c able s hould be det ermined ac cording t o t he possible maximum current. Cables of good conductor should be used. Do not use bare wire. The grounding resistance for combined grounding should be less than 1Ω. Simple Grounding Steps 1. Release the nut on the rear grounding post of the equipment. 2. Lock the terminal of the grounding cable to the grounding pole. 3. Tighten the nut. 4. Connect the related terminals according to the above steps and the wiring diagram. 3.11 Connecting the DC Power Supply to the Power Module Connect t he r elated D C p ower c able ac cording t o t he I D o n t he p anel of t he D C po wer module and the location requirement. as shown in the following diagram. 3-13 DES-7200 Hardware Installation Guide Figure 3-16 Schematic Diagram for the Connection of the DC Power Cable 3.11.2 3.11.3 Precautions Before c onnecting t he p ower s upply, you m ust v erify that the external p ower s upply provided matches the power module installed of this equipment. Before connecting the power cable, you must make sure that the switch of the power module is at the OFF position. The power cables of various colors must be connected to the appropriate wiring posts. You must ensure that the power cables connected are in good contact. Simple Connection Steps 1. Remove the protection cover of the DC wiring terminal. 2. Lock t he pow er c able t o t he appr opriate t erminal ac cording t o t he identification, and tighten the pressing screw. 3. Put on the protection cover and tighten the screw. 4. Connect the other end of the power cable to the corresponding socket or connector. 3.12 Connecting the AC Power Supply to the Power Module Connect t he r elated AC power cable according t o t he I D on t he pane l of t he A C p ower module and the location requirement, as shown in the following diagram. 3-14 DES-7200 Hardware Installation Guide Figure 3-17 Schematic Diagram for the Connection of the AC Power Cable 3.12.2 3.12.3 Precautions Before c onnecting t he p ower s upply, you m ust v erify t hat the external p ower s upply provided matches the power module installed of this equipment. Before connecting the power cable, you must make sure that the switch of the power module is at the OFF position. The power cable with a standard 3-pin connector should be used for connection. You must ensure that the power cables connected are in good contact. Simple Connection Steps 1. Insert the plug of the power cable into the power module. 2. Connect the other end of the power cable to the corresponding socket or connector. 3.13 Connecting the Cable of the Management Module 3.13.1 Simple Connection Steps 1. Connect the end of the Ethernet cable with the RJ45 connector to the Ethernet port of the equipment management module (7210/7200-CM1), and the other end to the NM or control terminal. 2. Connect t he e nd of t he standard D B9 s erial c able with t he RS-232 s erial p ort t o t he RS-232 serial port of the equipment management module, and the other end to the NM or control terminal. Note The DES-7210/7206 system must have at least one management module to work normally. 3-15 DES-7200 Hardware Installation Guide 3.14 Removing Boards from the DES-7210/7206 3.14.1 Steps for Removing Boards 1. Unplug all cables/fibers such as optical fibers and RJ45 twisted pairs from the panel. 2. Tighten two captive screws on the panel. 3. Draw out the board by holding the ejector with both hands, as shown in Figure 3-18 and Figure 3-20. 1. Warning 2. Always wear an anti-static wrist strap before plugging/unplugging a board. Do not hold the edge of the PCB or collide the components on the PCB. Figure 3-18 Schematic Diagram for the Components of the DES-7210 3-16 DES-7200 Hardware Installation Guide Figure 3-19 Schematic Diagram for the Components of the DES-7206 3.15 Installing Boards on the DES-7210/7206 3.15.1 Simple Steps of Board Installation 1. Remove the appropriate component card or blank panel according to 3.14. 2. Replace it with the appropriate card and insert into the guide rail. 3. Push the card into position by using the ejector, and tighten the two captive screws on the card with a straight screwdriver. 1. Warning 2. Do not hold the edge of the PCB or collide the components on the PCB. When you plug/unplug a PCB module, use the ejector, instead of forcedly. 3.16 Connecting the External Interface Cables 3.16.1 3.16.2 Precautions Correctly distinguish single-mode and multi-mode fibers and interfaces. Avoid bends of small radius at the connector. Simple Connection Steps 1. Connect one end of the RJ45 connector for configuring Ethernet cables to the Ethernet interface of t he de vice b oard and t he ot her e nd t o t he N MS or a c ontrol terminal; or connect one end of the standard RJ45 serial port cable to the serial port of the device board and the other end to the NMS or a control terminal. 2. Insert t he single-mode or m ulti-mode f iber into the a ppropriate interface ac cording t o the identification on the panel of the line card. Distinguish the Rx/Tx end of the optical fiber. 3-17 DES-7200 Hardware Installation Guide 3. Insert the twisted pair with the RJ45 port into the appropriate interface according to the identification on the panel of the line card. Distinguish the crossover cable and straight-through cable. 4. Connect the cables and optical fibers of each board in sequence. 3.17 Binding the Cables 3.17.1 3.17.2 Precautions The power cables and other cables should be bound in a visually pleasing way. When you bind fibers, make sure that the fibers at the connectors have natural bends or bends of large radius. You should not bind optical fibers and twisted pairs too tightly, as this may press hard the fibers and affect their useful life and transmission performance. Simple Binding Steps 1. Bind the drooping part of the optical fibers and twisted pairs of each board, and lead them to both sides of the chassis according to the convenience. For the DES-7200, you can l ead out t he o ptical f ibers and t wisted p airs b y using t he c abling c hute o n t he chassis. 2. On both s ides of t he c hassis, f asten t he o ptical f ibers or t wisted p airs t o t he c abinet cable management ring or cabling chute. 3. For the power cables, you should bind them closely along the bottom of the chassis, in a straight line wherever possible. 3.18 Installation Check 3.18.1 3.18.2 3.18.3 3-18 Cabinet Check Verify if the external power supply matches the distribution panel of the cabinet. After the equipment is installed, check if the front/back cabinet doors can be closed. Verify that the cabinet has been fastened completely, and does not move or tilt. Verify that t he equipment has be en i nstalled i n t he cabinet, and a ll t he c ables ha ve been fastened to the cabinet. Checking the Cables Verify that the optical fibers and twisted pairs match the interfaces. Verify that the cables have been bound properly. Checking the Power Supply Verify t hat the po wer cables ar e i n go od contact and c omply with t he s afety requirements. Verify t hat t he p ower m odule has bee n f astened o nto t he e quipment w ith t he t wo screws on the panel. Turn on the power switch and verify that the power module can work normally. DES-7200 Hardware Installation Guide 4 4.1 DES-7210/7206 Maintenance Monitoring Function of the DES-7210/7206 When the DES-7210/7206 is running, you can monitor the status of each board by inspecting the status LED of the appropriate board. When the Status LED of a board is OFF, RED, or flashing, it means that the board is faulty, in which case you need to find out the cause, and s hut do wn t he po wer when n ecessary. When t he A larm LE D of t he m ain management boar d i s r ed, i t m eans t hat t he s ystem has a f ault, i n which c ase you c an determine and eliminate the fault by viewing with the management software. When the Alarm LED of the fan tray is red, it means that the fan tray is faulty, in which case you need to replace or repair the fan tray. When the FAIL LED of the power supply is red, it means that the power supply is faulty, in which case you should replace it promptly. The DES-7210/7206 allows you t o m onitor v arious s tatus of t he s ystem b y executing t he appropriate CLI commands, including: In-position status of the module or board Configuration information and status of the port Working status of the fan and power supply Temperature status of the system For t he m onitoring c ommands, s ee t he DES-7200 Configuration Guide of t he DES-7210/7206. 4.2 4.2.1 DES-7210/7206 Hardware Maintenance Board Maintenance When you need to replace a board in the case of a fault, perform replacement according to the instructions provided in Section 3.9. 4.2.2 Ventilation System Maintenance The f an i n t he equ ipment i s pr ovided with t he f ault monitoring s ignals. When t he f an fails, an appropriate alarm will occur. To replace the fan, first loosen the fastening screw on the fan tray. Replace the failed fan with a good one. Tighten the fastening screws of the fan tray. 4-1 DES-7200 Hardware Installation Guide During the process, you should clean the air filter of the DES-7210/7206. Note 4.2.3 Power Supply Maintenance When the power supply fails, you only need to disconnect the power cable, loosen the two panel screws on the power module, unplug the power module, replace it with a good one, and tighten the panel screws, and then connect the power cables. 4.3 Remote Maintenance The DES-7210/7206 supports remote m aintenance. By utilizing t he I nternet, a us er c an realize c ommunication t hrough r emote T elnet l ogin. D uring installation a nd n etworking, DES-7210/7206 and t he I nternet are c onnected, therefore, t he us er c an log i n t o t he DES-7210/7206 in the Telnet mode and maintain DES-7210/7206 remotely through various monitoring commands. 4-2 DES-7200 Hardware Installation Guide 5 5.1 Troubleshooting General Flow for Troubleshooting Installation Faults Abnormal working after installation Check the cabinet installation Check t he m ounting o f t he DES-7210/7206 in the cabinet Check the power connection Check the installation of the power module Check the line cards and other plug-in units on the backplane Check the installation and fastening of the line cards Contact Technical Support of D-Link for hardware problems Check the indicators on the line cards Check the connection of the fibers or cables of various ports Check the connection of the serial port and its parameters 5-1 DES-7200 Hardware Installation Guide 5.2 Common Troubleshooting Procedures Fault 1: The system login password is lost. [Fault Description] The s ystem l ogin password of t he s witch is f orgotten or l ost, a nd s o it i s no t possible t o configure the data. [Troubleshooting] Please contact D-Link Customer Service Department for technical support. Fault 2: The AC power module does not work. [Fault Description] The Status L ED of eac h line c ard i s OFF, t he Power LED of the fan tray is OFF (only f or DES-7210), and the fan does not work. The LED on the panel of the power module is OFF. The fan does not work. [Troubleshooting] First place the switches of all the power modules to OFF. Check if the cables of the cabinet have been correctly connected. Check whether the power cables are tightly connected to the cabinet power sockets and power modules. Check whether the power modules are installed correctly. If necessary, check whether the connectors on the backboard of the power system are tightened. Check if there is a mix of AC and DC power supplies. Fault 3: The DC power module does not work. [Fault Description] The Status L ED of eac h line c ard i s OFF, t he Power LED of the fan tray is OFF (only f or DES-7200), and the fan does not work. The LED on the panel of the power module is OFF. The fan does not work. [Troubleshooting] First place the switches of all the power modules to OFF. Check if the cables of the cabinet have been c orrectly c onnected. Check whether the cabinet power s ockets and DC po wer modules ar e t ightly c onnected i n a c orrect w ay. Check w hether t he p ower m odules ar e installed c orrectly. I f nec essary, pull out the power modules and c heck whether the connectors on the backboard of the power system are tightened. Check if there is a mix of AC and DC power supplies. Fault 4: An exception occurs to the LEDs when cable cards are powered on. [Fault Description] The Status LED of the line card is OFF, flashing, or RED. The Link/ACT LED of the line card is solid ON when no network cable or optical fiber is plugged. [Troubleshooting] Check if the line card is firmly inserted. If yes, install the line card again and ensure that it is inserted into position, before you tighten the fastening screws. If the line card still does not work, check if the connector of the slot on the backplane is loose. If yes, insert the board to another slot for a try. If the slot and connection are not the cause, return the line card for repair. 5-2 DES-7200 Hardware Installation Guide Fault 5: The LED is abnormal after a line card works for some time. [Fault Description] The Status LED of the line card is OFF or RED. The Link/ACT LED of the line card is solid ON when no network cable or optical fiber is plugged. The fault remains after restart. [Troubleshooting] Check if the board gets loose. If yes, install the line card again and ensure that it is inserted into pos ition, before you tighten t he f astening screws. I f t he l ine c ard s till do es not work, check if the connector of the slot on the backplane is loose and check if the guide rail of the slot is deformed. If yes, insert the board to another slot for a try. If the slot and connection are not the cause, return the line card for repair. Fault 6: The LED of the management board is abnormal. [Fault Description] The LE D of t he m anagement board b ecomes abnor mal af ter t he b oard i s powered on or works for some time. For example, the Status LED is flashing or OFF, and the Alarm LED is red. [Troubleshooting] Check if the management board gets loose. If yes, install the management card again and ensure that it is inserted into position, before you tighten the fastening screws. If the line card still does not work, check if the connector of the slot on the backplane is loose and check if the guide rail of the slot is deformed. If yes, insert the board to another slot for a try. If the slot and connection are not the cause, return the management card for repair. When the Alarm LED is red, the cause may be the fault of another module in the system, in which c ase you c an c heck ot her m odules ( for ex ample, l ine c ard, f an, po wer, a nd overheating) for any alarm. If yes, you should first handle the faults of other modules. You can also identify the faults by logging in to the management software. Fault 8: The fan tray does not work or an exception occurs to the LED. [Fault Description] After the system is started, the fans in the fan tray do not work or the Power LED is OFF, and the Alarm LED is red. [Troubleshooting] Check i f t he c onnection between t he f an t ray a nd t he b ackplane i s s ecure and i f t he connector gets loose. If the connection is secure, you need to replace the fan tray. Fault 9: The serial port console has no output. [Fault Description] After the system is started, the serial port console does not display any information. [Troubleshooting] Check whether serial port cables are connected correctly and whether the connected serial port is identical with that configured on the super terminal. Check whether the configuration of the serial port on the super terminal is the same as that described in DES-7200 Configuration Guide. If not, modify the serial port configuration parameters. If there is still no serial p ort pr inted information, pl ease c ontact D-Link Customer S ervice D epartment f or technical support. Fault 10: The serial port console outputs illegible characters. [Fault Description] 5-3 DES-7200 Hardware Installation Guide The serial port console outputs illegible characters. [Troubleshooting] Such problem i s r elated to t he s ettings of t he s erial p ort. C heck i f t he s ettings of s uch parameters as the baud rate match those in the DES-7210/7206 Configuration Guide. 5-4 DES-7200 Hardware Installation Guide A A.1 Appendix Connectors and Connection Media 1000BASE-T/100BASE-TX/10BA SE-T Port The 1000BASE-T/100BASE-TX/10BASE-T is a port that supports adaptation of three rates, and automatic MDI/MDIX Crossover at these three rates. The 1000BASE-T complies with IEEE 802.3ab, and us es t he c able of 100-ohm C ategory-5 or Supper C ategory-5 U TP or STP, which c an b e up to 10 0 m . The 10 00BASE-T por t uses f our p airs of wires f or transmission, al l of w hich must be c onnected. Figure A -1 s hows t he c onnections of t he twisted pairs used by the 1000BASE-T port: Figure A-1 Schematic Diagram for the Four Twisted Pairs of the 1000BASE-T Straight-Through Crossover Switch Switch Switch Switch 1TP0+ 1TP0+ 1TP0+ 1TP0+ 2TP0- 2TP0- 2TP0- 2TP0- 3TP1+ 3TP1+ 3TP1+ 3TP1+ 6TP1- 6TP1- 6TP1- 6TP1- 4TP2+ 4TP2+ 4TP2+ 4TP2+ 5TP2- 5TP2- 5TP2- 5TP2- 7TP3+ 7TP3+ 7TP3+ 7TP3+ 8TP3- 8TP3- 8TP3- 8TP3- In addition t o the above cables, the 100BASE-TX/10BASE-T can also use 100-ohm Category-3, 4, 5 cables f or 10Mbps, and 1 00-ohm Category-5 c ables for 100Mb ps, which can be up to 100 m. Figure A-2 shows the pinouts of the 100BASE-TX/10BASE-T: Figure A-2 Pinouts of the 100BASE-TX/10BASE-T Figure A-3 shows the connections of the straight-through and crossover twisted pairs of the 100BASE-TX/10BASE-T. A-1 Appendix DES-7200 Hardware Installation Guide Figure A-3 Connections of the Twisted Pairs of the 100BASE-TX/10BASE-T A.2 Optical Fiber Connection For the optical fiber ports, select single-mode or multiple-mode optical fibers for connection according t o t he f iber m odule c onnected. T he c onnection s chematic di agram i s s hown i n Figure A-4: Figure A-4 Schematic Diagram for Optical Fiber Connection Switch A-2 S witch TX TX RX RX DES-7200 Hardware Installation Guide B Appendix Mini-GBIC and 10G XENPAK Modules We pr ovide the ap propriate 10 00M S FP m odule ( Mini-GBIC m odule) a nd 10G X ENPAK module for the types of interfaces of the switch modules. You can select the SFP or XENPAK module to suit your specific needs. Below the models and technical specifications of some 1000M SFP and 10G XENPAK modules are listed for your reference. B.3 Models and Technical Specifications of the Mini-GBIC (SFP) Module Table B-1 Models and Technical Specifications of the Mini-GBIC (SFP) Module Mini-GBIC (SFP) Core Modular Wavelength Media Type Size Bandwidth (nm) (nm) (MHz/km) Mini-GBIC850 SX 62.5 62.5 50.0 50.0 160 200 400 500 220M 275M 500M 550M 62.5 50.0 50.0 Single-mode 9/10 optical fiber 500 400 500 - 550m 550m 550m 10km Multi-mode optical fiber Multi-mode optical fiber Mini-GBIC1300 LX Mini-GBICZX50 Mini-GBICZX80 1550 Mini-GBICN/A GT Note Reception Optical Transmission Intensity Sensitivity Standard (dbm) Distance Compliance MAX MAX Single-mode N/A optical fiber N/A CAT 5 UTP N/A N/A -4 -3 -17 -20 IEEE802.3 50 Km 0 -22 80 Km 4.7 -22 100M N/A N/A For t he Mini-GBIC-ZX50 o r Mi ni-GBIC-ZX80, o ne on -line o ptical attenuator s hould be added on the link to avoid the overload of the optical receiver when short single-mode optical fibers are used. B-1 B.4 Models and Technical Specifications of the 10G XENPAK Module Table B-2 Models and Technical Specifications of the 10G XENPAK Module XENPAK Model Wavelength Media Type (nm) Core Size (nm) Optical Modular Transmission Intensity Bandwidth Distance (MHz/km) (MAX) 62.5 200 160 Max: 33 m Max: 22 m 50 2000 500 400 Max: 300 m Max: 82 m Max: 66 m -1.0 dBm -11.98 dBm Max. 10KM; 0.5dBm -12.6dBm Reception Standard sensitivity Compliance (MAX) 10GBASE850 SR Multi-mode optical fiber (SC connector) 10GBASE1310 LR Single-mode optical fiber 10 (SC connector) N/A 10GBASE1550 ER Single-mode optical fiber 10 (SC connector) N/A Max. 40KM; 62.5 500 Max: 300 m 50 400 500 Max: 240 m Max: 300 m Single-mode optical fiber 10 (SC connector) N/A Max. 10KM; -0.5dBm -14.85dBm (per lane) (per lane) Cable N/A Max: 15 m N/A Multi-mode optical fiber (SC connector) 10GBASE1310 LX4 10GBASEN/A CX4 4dBm -13.4dBm -0.5dBm -14.25dBm (per lane) (per lane) XENPAK MSA R3.0 IEEE 803.ak N/A For the 10GBASE-ER, you need to avoid the overload of the optical receiver when the transmission distance is short: As long as the optical power at the reception end of the fiber is greater than or equal to -1 dBm, you should add an appropriate optical attenuator between the fiber at both ends of the link and the reception port of the 10GBASE-ER, so that the optical power at the reception end falls under -1 dBm. Note B.5 N/A IEEE 803.ae Models and Technical Specifications of the 10G XENPAK Module Table B-3 Models and Technical Specifications of the 10G XENPAK Module XENPAK Model Wavelength (nm) 10GBASE850 SR B-2 Media Type Multi-mode optical fiber (LC connector) Optical Core Modular Transmission Intensity Size Bandwidth Distance (nm) (MHz/km) (MAX) 62.5 200 160 Max: 33 m Max: 22 m 50 2000 500 400 Max: 300 m Max: 82 m Max: 66 m Reception Standard sensitivity Compliance (MAX) IEEE 803.ae -1.0 dBm -11.98 dBm XFP M R1.0 SA DES-7200 Hardware Installation Guide XENPAK Model Wavelength (nm) Media Type Appendix Optical Core Modular Transmission Intensity Size Bandwidth Distance (nm) (MHz/km) (MAX) Reception Standard sensitivity Compliance (MAX) 10GBASE1310 LR Single-mode optical fiber 10 (LC connector) N/A Max. 10KM; 0.5dBm -12.6dBm 10GBASE1550 ER Single-mode optical fiber 10 (LC connector) N/A Max. 40KM; 4dBm -13.4dBm B-3 Subject to the terms and conditions set forth herein, D-Link Systems, Inc. (“D-Link”) provides this Limited Warranty: • • Only to the person or entity that originally purchased the product from D-Link or its authorized reseller or distributor, and Only for products purchased and delivered within the fifty states of the United States, the District of Columbia, U.S. Possessions or Protectorates, U.S. Military Installations, or addresses with an APO or FPO. Limited Warranty: D-Link warrants that the hardware portion of the D-Link product described below (“Hardware”) will be free from material defects in workmanship and materials under normal use from the date of original retail purchase of the product, for the period set forth below (“Warranty Period”), except as otherwise stated herein. Limited Lifetime Warranty for the product is defined as follows: • • • Hardware: For as long as the original customer/end user owns the product, or five (5) years after product discontinuance, whichever occurs first (excluding power supplies and fans) Power supplies and fans: Five (5) Years Spare parts and spare kits: Ninety (90) days The customer's sole and exclusive remedy and the entire liability of D-Link and its suppliers under this Limited Warranty will be, at D-Link’s option, to repair or replace the defective Hardware during the Warranty Period at no charge to the original owner or to refund the actual purchase price paid. Any repair or replacement will be rendered by D-Link at an Authorized D-Link Service Office. The replacement hardware need not be new or have an identical make, model or part. D-Link may, at its option, replace the defective Hardware or any part thereof with any reconditioned product that D-Link reasonably determines is substantially equivalent (or superior) in all material respects to the defective Hardware. Repaired or replacement hardware will be warranted for the remainder of the original Warranty Period or ninety (90) days, whichever is longer, and is subject to the same limitations and exclusions. If a material defect is incapable of correction, or if D-Link determines that it is not practical to repair or replace the defective Hardware, the actual price paid by the original purchaser for the defective Hardware will be refunded by D-Link upon return to D-Link of the defective Hardware. All Hardware or part thereof that is replaced by D-Link, or for which the purchase price is refunded, shall become the property of D-Link upon replacement or refund. Limited Software Warranty: D-Link warrants that the software portion of the product (“Software”) will substantially conform to D-Link’s then current functional specifications for the Software, as set forth in the applicable documentation, from the date of original retail purchase of the Software for a period of ninety (90) days (“Software Warranty Period”), provided that the Software is properly installed on approved hardware and operated as contemplated in its documentation. D-Link further warrants that, during the Software Warranty Period, the magnetic media on which D-Link delivers the Software will be free of physical defects. The customer's sole and exclusive remedy and the entire liability of D-Link and its suppliers under this Limited Warranty will be, at D-Link’s option, to replace the non-conforming Software (or defective media) with software that substantially conforms to D-Link’s functional specifications for the Software or to refund the portion of the actual purchase price paid that is attributable to the Software. Except as otherwise agreed by D-Link in writing, the replacement Software is provided only to the original licensee, and is subject to the terms and conditions of the license granted by D-Link for the Software. Replacement Software will be warranted for the remainder of the original Warranty Period and is subject to the same limitations and exclusions. If a material non-conformance is incapable of correction, or if D-Link determines in its sole discretion that it is not practical to replace the non-conforming Software, the price paid by the original licensee for the non-conforming Software will be refunded by D-Link; provided that the nonconforming Software (and all copies thereof) is first returned to D-Link. The license granted respecting any Software for which a refund is given automatically terminates. Non-Applicability of Warranty: The Limited Warranty provided hereunder for Hardware and Software portions of D-Link's products will not be applied to and does not cover any refurbished product and any product purchased through the inventory clearance or liquidation sale or other sales in which D-Link, the sellers, or the liquidators expressly disclaim their warranty obligation pertaining to the product and in that case, the product is being sold "As-Is" without any warranty whatsoever including, without limitation, the Limited Warranty as described herein, notwithstanding anything stated herein to the contrary. Submitting A Claim: The customer shall return the product to the original purchase point based on its return policy. In case the return policy period has expired and the product is within warranty, the customer shall submit a claim to D-Link as outlined below: • The customer must submit with the product as part of the claim a written description of the Hardware defect or Software nonconformance in sufficient detail to allow D-Link to confirm the same, along with proof of purchase of the product (such as a copy of the dated purchase invoice for the product) if the product is not registered. • The customer must obtain a Case ID Number from D-Link Technical Support at 1-877-453-5465, who will attempt to assist the customer in resolving any suspected defects with the product. If the product is considered defective, the customer must obtain a Return Material Authorization (“RMA”) number by completing the RMA form and entering the assigned Case ID Number at https://rma.dlink.com/. • After an RMA number is issued, the defective product must be packaged securely in the original or other suitable shipping package to ensure that it will not be damaged in transit, and the RMA number must be prominently marked on the outside of the package. Do not include any manuals or accessories in the shipping package. D-Link will only replace the defective portion of the product and will not ship back any accessories. • The customer is responsible for all in-bound shipping charges to D-Link. No Cash on Delivery (“COD”) is allowed. Products sent COD will either be rejected by D-Link or become the property of D-Link. Products shall be fully insured by the customer and shipped to D-Link Systems, Inc., 17595 Mt. Herrmann, Fountain Valley, CA 92708. D-Link will not be held responsible for any packages that are lost in transit to D-Link. The repaired or replaced packages will be shipped to the customer via UPS Ground or any common carrier selected by D-Link. Return shipping charges shall be prepaid by D-Link if you use an address in the United States, otherwise we will ship the product to you freight collect. Expedited shipping is available upon request and provided shipping charges are prepaid by the customer. D-Link may reject or return any product that is not packaged and shipped in strict compliance with the foregoing requirements, or for which an RMA number is not visible from the outside of the package. The product owner agrees to pay D-Link’s reasonable handling and return shipping charges for any product that is not packaged and shipped in accordance with the foregoing requirements, or that is determined by D-Link not to be defective or nonconforming. What Is Not Covered: The Limited Warranty provided herein by D-Link does not cover: Products that, in D-Link’s judgment, have been subjected to abuse, accident, alteration, modification, tampering, negligence, misuse, faulty installation, lack of reasonable care, repair or service in any way that is not contemplated in the documentation for the product, or if the model or serial number has been altered, tampered with, defaced or removed; Initial installation, installation and removal of the product for repair, and shipping costs; Operational adjustments covered in the operating manual for the product, and normal maintenance; Damage that occurs in shipment, due to act of God, failures due to power surge, and cosmetic damage; Any hardware, software, firmware or other products or services provided by anyone other than D-Link; and Products that have been purchased from inventory clearance or liquidation sales or other sales in which D-Link, the sellers, or the liquidators expressly disclaim their warranty obligation pertaining to the product. While necessary maintenance or repairs on your Product can be performed by any company, we recommend that you use only an Authorized D-Link Service Office. Improper or incorrectly performed maintenance or repair voids this Limited Warranty. Disclaimer of Other Warranties: EXCEPT FOR THE LIMITED WARRANTY SPECIFIED HEREIN, THE PRODUCT IS PROVIDED “AS-IS” WITHOUT ANY WARRANTY OF ANY KIND WHATSOEVER INCLUDING, WITHOUT LIMITATION, ANY WARRANTY OF MERCHANTABILITY, FITNESS FOR A PARTICULAR PURPOSE AND NON-INFRINGEMENT. IF ANY IMPLIED WARRANTY CANNOT BE DISCLAIMED IN ANY TERRITORY WHERE A PRODUCT IS SOLD, THE DURATION OF SUCH IMPLIED WARRANTY SHALL BE LIMITED TO NINETY (90) DAYS. EXCEPT AS EXPRESSLY COVERED UNDER THE LIMITED WARRANTY PROVIDED HEREIN, THE ENTIRE RISK AS TO THE QUALITY, SELECTION AND PERFORMANCE OF THE PRODUCT IS WITH THE PURCHASER OF THE PRODUCT. Limitation of Liability: TO THE MAXIMUM EXTENT PERMITTED BY LAW, D-LINK IS NOT LIABLE UNDER ANY CONTRACT, NEGLIGENCE, STRICT LIABILITY OR OTHER LEGAL OR EQUITABLE THEORY FOR ANY LOSS OF USE OF THE PRODUCT, INCONVENIENCE OR DAMAGES OF ANY CHARACTER, WHETHER DIRECT, SPECIAL, INCIDENTAL OR CONSEQUENTIAL (INCLUDING, BUT NOT LIMITED TO, DAMAGES FOR LOSS OF GOODWILL, LOSS OF REVENUE OR PROFIT, WORK STOPPAGE, COMPUTER FAILURE OR MALFUNCTION, FAILURE OF OTHER EQUIPMENT OR COMPUTER PROGRAMS TO WHICH D-LINK’S PRODUCT IS CONNECTED WITH, LOSS OF INFORMATION OR DATA CONTAINED IN, STORED ON, OR INTEGRATED WITH ANY PRODUCT RETURNED TO D-LINK FOR WARRANTY SERVICE) RESULTING FROM THE USE OF THE PRODUCT, RELATING TO WARRANTY SERVICE, OR ARISING OUT OF ANY BREACH OF THIS LIMITED WARRANTY, EVEN IF D-LINK HAS BEEN ADVISED OF THE POSSIBILITY OF SUCH DAMAGES. THE SOLE REMEDY FOR A BREACH OF THE FOREGOING LIMITED WARRANTY IS REPAIR, REPLACEMENT OR REFUND OF THE DEFECTIVE OR NON-CONFORMING PRODUCT. THE MAXIMUM LIABILITY OF DLINK UNDER THIS WARRANTY IS LIMITED TO THE PURCHASE PRICE OF THE PRODUCT COVERED BY THE WARRANTY. THE FOREGOING EXPRESS WRITTEN WARRANTIES AND REMEDIES ARE EXCLUSIVE AND ARE IN LIEU OF ANY OTHER WARRANTIES OR REMEDIES, EXPRESS, IMPLIED OR STATUTORY. Governing Law: This Limited Warranty shall be governed by the laws of the State of California. Some states do not allow exclusion or limitation of incidental or consequential damages, or limitations on how long an implied warranty lasts, so the foregoing limitations and exclusions may not apply. This Limited Warranty provides specific legal rights and you may also have other rights which vary from state to state. Trademarks: D-Link is a registered trademark of D-Link Systems, Inc. Other trademarks or registered trademarks are the property of their respective owners. Copyright Statement: No part of this publication or documentation accompanying this product may be reproduced in any form or by any means or used to make any derivative such as translation, transformation, or adaptation without permission from D-Link Corporation/D-Link Systems, Inc., as stipulated by the United States Copyright Act of 1976 and any amendments thereto. Contents are subject to change without prior notice. Copyright 2004 by D-Link Corporation/D-Link Systems, Inc. All rights reserved. CE Mark Warning: This is a Class A product. In a residential environment, this product may cause radio interference, in which case the user may be required to take adequate measures. FCC Statement: This equipment has been tested and found to comply with the limits for a Class A digital device, pursuant to part 15 of the FCC Rules. These limits are designed to provide reasonable protection against harmful interference in a commercial installation. This equipment generates, uses, and can radiate radio frequency energy and, if not installed and used in accordance with the instructions, may cause harmful interference to radio communication. However, there is no guarantee that interference will not occur in a particular installation. Operation of this equipment in a residential environment is likely to cause harmful interference to radio or television reception. If this equipment does cause harmful interference to radio or television reception, which can be determined by turning the equipment off and on, the user is encouraged to try to correct the interference by one or more of the following measures: • • • • Reorient or relocate the receiving antenna. Increase the separation between the equipment and receiver. Connect the equipment into an outlet on a circuit different from that to which the receiver is connected. Consult the dealer or an experienced radio/TV technician for help. For detailed warranty information applicable to products purchased outside the United States, please contact the corresponding local D-Link office. Product Registration Register your D-Link product online at http://support.dlink.com/register/ Product registration is entirely voluntary and failure to complete or return this form will not diminish your warranty rights. Tech Support Technical Support You can find software updates and user documentation on the DLink website. D-Link provides free technical support for customers within the United States and within Canada for the duration of the service period, and warranty confirmation service, during the warranty period on this product. U.S. and Canadian customers can contact D-Link technical support through our website, or by phone. Tech Support for customers within the United States: D-Link Technical Support over the Telephone: USA - 877-DLINK-55 (877-354-6555) D-Link Technical Support over the Internet: http://support.dlink.com Tech Support for customers within Canada: D-Link Technical Support over the Telephone: 877-354-6560 D-Link Technical Support over the Internet: http://support.dlink.com Technical Support United Kingdom (Mon-Fri) Home Wireless/Broadband 0871 873 3000 (9.00am–06.00pm, Sat 10.00am-02.00pm) Managed, Smart, & Wireless Switches, or Firewalls 0871 873 0909 (09.00am – 05.30pm) (BT 10ppm, other carriers may vary.) Ireland (Mon-Fri) All Products 1890 886 899 (09.00am-06.00pm, Sat 10.00am-02.00pm) €0.05ppm peak, €0.045ppm off peak Times Internet http://www.dlink.co.uk ftp://ftp.dlink.co.uk Technische Unterstützung Deutschland: Österreich: Schweiz: Web: http://www.dlink.de Telefon: +49(0)1805 2787 Zeiten: Mo. –Fr. 09:00 – 17:30 Uhr Web: http://www.dlink.at Telefon: +43(0)820 480084 Zeiten: Mo. –Fr. 09:00 – 17:30 Uhr Web: http://www.dlink.ch Telefon: +41(0)848 331100 Zeiten: Mo. –Fr. 09:00 – 17:30 Uhr 0,14 € pro Minute 0,116 € pro Minute 0,08 CHF pro Minute * Gebühren aus Mobilnetzen und von anderen Providern können abweichen. Assistance technique Assistance technique D-Link sur internet :http://www.dlink.fr Assistance technique D-Link par téléphone : 0820 0803 03 0.12 € TTC/min depuis un poste fixe Du lundi au vendredi de 9h à 19h (hors jours fériés) Asistencia Técnica Asistencia Técnica Telefónica de D-Link: +34 902 30 45 45 0,067 €/min De Lunes a Viernes de 9:00 a 19:00 http://www.dlink.es Supporto tecnico Supporto Tecnico dal lunedì al venerdì dalle ore 9.00 alle ore 19.00 con orario continuato Telefono: 199400057 http://www.dlink.it/support TECHNISCHE ONDERSTEUNING Technische ondereuning voor klanten in Nederland: www.dlink.nl / 0900 501 2007 / €0.15per minuut. Tech Support for customers within Belgium: www.dlink.be / 070 66 06 40 / €0.175per minuut(spitsuren), €0.0875per minuut(daluren) Technische ondereuning voor klanten in Luxemburg: www.dlink.be / +32 70 66 06 40 Pomoc techniczna Telefoniczna pomoc techniczna firmy D-Link: 0 801 022 021 Pomoc techniczna firmy D-Link świadczona przez Internet: http://www.dlink.eu/support/ Technická podpora Web: http://www.dlink.cz/support/ E-mail: [email protected] Telefon: 225 281 553 Telefonická podpora je v provozu: PO- PÁ od 08.00 do 17.00 Pevná linka 1,78 CZK/min - mobil 5.40 CZK/min Technikai Támogatás Tel. : 06 1 461-3001 Fax : 06 1 461-3004 Land Line 14,99 HUG/min - Mobile 49.99,HUF/min email : [email protected] URL : http://www.dlink.hu Teknisk Support D-Link Teknisk telefon Support: 820 00 755 (Hverdager 08:00-20:00) D-Link Teknisk Support over Internett: http://www.dlink.no Teknisk Support D-Link teknisk support over telefonen: Tlf.: 9013 8899 Normale åbningstider: Hverdage kl. 08:00 - 20:00 D-Link teknisk support på Internettet: http://www.dlink.dk Teknistä tukea asiakkaille Suomessa: Arkisin klo. 9 - 21 numerosta : 06001 5557 Internetin kautta : http://www.dlink.fi Teknisk Support D-Link Teknisk Support via telefon: 0900-100 77 00 Vardagar 08.00-20.00 D-Link Teknisk Support via Internet: http://www.dlink.se Assistência Técnica Assistência Técnica da D-Link na Internet: http://www.dlink.pt e-mail: [email protected] Τεχνική Υποστήριξη D-Link Hellas Support Center Κεφαλληνίας 64, 11251 Αθήνα, Τηλ: 210 86 11 114 (Δευτέρα- Παρασκευή 09:00-17:00) Φαξ: 210 8611114 http://www.dlink.gr/support Tehnička podrška Hvala vam na odabiru D-Link proizvoda. Za dodatne informacije, podršku i upute za korištenje uređaja, molimo vas da posjetite D-Link internetsku stranicu na www.dlink.eu www.dlink.biz/hr Tehnična podpora Zahvaljujemo se vam, ker ste izbrali D-Link proizvod. Za vse nadaljnje informacije, podporo ter navodila za uporabo prosimo obiščite D-Link - ovo spletno stran www.dlink.eu www.dlink.biz/sl Suport tehnic Vă mulţumim pentru alegerea produselor D-Link. Pentru mai multe informaţii, suport şi manuale ale produselor vă rugăm să vizitaţi site-ul D-Link www.dlink.eu www.dlink.ro Technical Support You can find software updates and user documentation on the D-Link website. Tech Support for customers in Australia: Tel: 1300-766-868 24/7 Technical Support Web: http://www.dlink.com.au E-mail: [email protected] India: Tel: 1800-233-0000 (MTNL & BSNL Toll Free) +91-832-2885700 (GSM, CDMA & Others) Web: www.dlink.co.in E-Mail: [email protected] Indonesia, Malaysia, Singapore and Thailand: Tel: +62-21-5731610 (Indonesia) Tel: 1800-882-880 (Malaysia) Tel: +65 6501 4200 (Singapore) Tel: +66-2-719-8978/9 (Thailand) 24/7, for English Support only Web: http://www.dlink.com.sg/support/ E-mail: [email protected] Korea: Tel: +82-2-2028-1815 Monday to Friday 9:00am to 6:00pm Web: http://www.d-link.co.kr E-mail: [email protected] New Zealand: Tel: 0800-900-900 24/7 Technical Support Web: http://www.dlink.co.nz E-mail: [email protected] Technical Support You can find software updates and user documentation on the D-Link website. Tech Support for customers in Egypt: Tel: +202-2919035, +202-2919047 Sunday to Thursday 9:00am to 5:00pm Web: http://support.dlink-me.com E-mail: [email protected] Iran: Tel: +98-21-88880918,19 Saturday to Thursday 9:00am to 5:00pm Web: http://support.dlink-me.com E-mail: [email protected] [email protected] Israel: Magshimim 20, Petach Tikva 49348 Main Tel: 972-3-9215173 Customer Support Tel: 972-3-9212886 Web: www.dlink.co.il Pakistan: Tel: +92-21-4548158 +92-21-4548310 Monday to Friday 10:00am to 6:00pm Web: http://support.dlink-me.com E-mail: [email protected] South Africa and Sub Sahara Region: Tel: +27-12-665-2165 08600 DLINK (for South Africa only) Monday to Friday 8:30am to 9:00pm South Africa Time Web: http://www.d-link.co.za E-mail: [email protected] Turkey: Tel: +90-212-2895659 Monday to Friday 9:00am to 6:00pm Web: http://www.dlink.com.tr E-mail: [email protected] U.A.E and North Africa: Tel: +971-4-4278127 (U.A.E) Sunday to Thursday 9.00AM to 6.00PM GMT+4 Web: http://www.dlink-me.com E-mail: [email protected] Saudi ARABIA (KSA): Tel: +966 01 217 0008 Fax: +966 01 217 0009 Saturday to Wednesday 9.30AM to 6.30PM Thursdays 9.30AM to 2.00 PM E-mail: [email protected] Техническая поддержка Обновления программного обеспечения и документация доступны на Интернет-сайте D-Link. D-Link предоставляет бесплатную поддержку для клиентов в течение гарантийного срока. Клиенты могут обратиться в группу технической поддержки D-Link по телефону или через Интернет. Техническая поддержка D-Link: +7(495) 744-00-99 Техническая поддержка через Интернет http://www.dlink.ru e-mail: [email protected] SOPORTE TÉCNICO Usted puede encontrar actualizaciones de softwares o firmwares y documentación para usuarios a través de nuestro sitio www.dlinkla.com SOPORTE TÉCNICO PARA USUARIOS EN LATINO AMERICA Soporte técnico a través de los siguientes teléfonos de D-Link PAIS NUMERO HORARIO Argentina 0800 - 12235465 Lunes a Viernes 08:00am a 21:00pm Chile 800 - 835465 ó (02) 5941520 Lunes a Viernes 08:00am a 21:00pm Colombia 01800 - 9525465 Lunes a Viernes 06:00am a 19:00pm Costa Rica 0800 - 0521478 Lunes a Viernes 05:00am a 18:00pm Ecuador 1800 - 035465 Lunes a Viernes 06:00am a 19:00pm El Salvador 800 - 6335 Lunes a Viernes 05:00am a 18:00pm Guatemala 1800 - 8350255 Lunes a Viernes 05:00am a 18:00pm México 01800 - 1233201 Lunes a Viernes 06:00am a 19:00pm Panamá 011 008000525465 Lunes a Viernes 05:00am a 18:00pm Perú 0800 - 00968 Lunes a Viernes 06:00am a 19:00pm Venezuela 0800 - 1005767 Lunes a Viernes 06:30am a 19:30pm Soporte Técnico de D-Link a través de Internet www.dlinkla.com e-mail: [email protected] & [email protected] Suporte Técnico Você pode encontrar atualizações de software e documentação de usuário no site da D-Link Brasil. A D-Link fornece suporte técnico gratuito para clientes no Brasil durante o período de vigência da garantia deste produto. Suporte Técnico para clientes no Brasil: Website para suporte: www.dlink.com.br/suporte e-mail: [email protected] Telefones para contato: Clientes de São Paulo: 2755 6950 Clientes das demais regiões: 0800 70 24 104 Segunda à Sexta-feira, das 9:00h às 21:00h Sábado, das 9:00h às 15:00h D-Link 友訊科技 台灣分公司 技術支援資訊 如果您還有任何本使用手冊無法協助您解決的產品相關問題,台灣 地區用戶可以透過我們的網站、電子郵件或電話等方式與D-Link台灣 地區技術支援工程師聯絡。 D-Link 免付費技術諮詢專線 0800-002-615 服務時間:週一至週五,早上9:00到晚上9:00 (不含周六、日及國定假日) 網 站:http://www.dlink.com.tw 電子郵件:[email protected] 如果您是台灣地區以外的用戶,請參考D-Link網站全球各地 分公司的聯絡資訊以取得相關支援服務。 產品保固期限、台灣區維修據點查詢,請參考以下網頁說明: http://www.dlink.com.tw 產品維修: 使用者可直接送至全省聯強直營維修站或請洽您的原購買經銷商。 Dukungan Teknis Update perangkat lunak dan dokumentasi pengguna dapat diperoleh pada situs web D-Link. Dukungan Teknis untuk pelanggan: Dukungan Teknis D-Link melalui telepon: Tel: +62-21-5731610 Dukungan Teknis D-Link melalui Internet: Email : [email protected] Website : http://support.dlink.co.id Technical Support この度は弊社製品をお買い上げいただき、誠にありがとうご ざいます。 下記弊社 Web サイトからユーザ登録及び新製品登録を 行っていただくと、ダウンロードサービスにて サポート情報、ファームウェア、ユーザマニュアルを ダウンロードすることができます。 ディーリンクジャパン Web サイト URL:http://www.dlink-jp.com 技术支持 办公地址:北京市东城区北三环东路 36 号 环球贸易中心 B 座 26F 02-05 室 邮编: 100013 技术支持中心电话:8008296688/ (028)66052968 技术支持中心传真:(028)85176948 各地维修中心地址请登陆官方网站查询 网址:http://www.dlink.com.cn 办公时间:周一到周五,早09:00到晚18:00 Registration Card All Countries and Regions Excluding USA Print, type or use block letters. Your name: Mr./Ms_____________________________________________________________________________ Organization: ________________________________________________ Dept. ____________________________ Your title at organization: ________________________________________________________________________ Telephone: _______________________________________ Fax:________________________________________ Organization's full address: ______________________________________________________________________ ____________________________________________________________________________________________ Country: _____________________________________________________________________________________ Date of purchase (Month/Day/Year): _______________________________________________________________ Product Model Product Serial No. * Product installed in type of computer * Product installed in computer serial No. (* Applies to adapters only) Product was purchased from: Reseller's name: ______________________________________________________________________________ Telephone: _______________________________________ Answers to the following questions help us to support your product: 1. Where and how will the product primarily be used? Home Office Travel Company Business Home Business Personal Use 2. How many employees work at installation site? 1 employee 2-9 10-49 50-99 100-499 500-999 1000 or more 3. What network protocol(s) does your organization use ? XNS/IPX TCP/IP DECnet Others_____________________________ 4. What network operating system(s) does your organization use ? D-Link LANsmart Novell NetWare NetWare Lite SCO Unix/Xenix PC NFS 3Com 3+Open Cisco Network Banyan Vines DECnet Pathwork Windows NT Windows 98 Windows 2000/ME Windows XP Others__________________________________________ 5. What network management program does your organization use ? D-View HP OpenView/Windows HP OpenView/Unix SunNet Manager Novell NMS NetView 6000 Others________________________________________ 6. What network medium/media does your organization use ? Fiber-optics Thick coax Ethernet Thin coax Ethernet 10BASE-T UTP/STP 100BASE-TX 1000BASE-T Wireless 802.11b and 802.11g wireless 802.11a Others_________________ 7. What applications are used on your network? Desktop publishing Spreadsheet Word processing CAD/CAM Database management Accounting Others_____________________ 8. What category best describes your company? Aerospace Engineering Education Finance Hospital Legal Insurance/Real Estate Manufacturing Retail/Chain store/Wholesale Government Transportation/Utilities/Communication VAR System house/company Other________________________________ 9. Would you recommend your D-Link product to a friend? Yes No Don't know yet 10.Your comments on this product? __________________________________________________________________________________________ __________________________________________________________________________________________