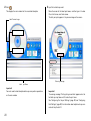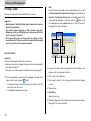
1
LPCW-50
application version 1.0
For Windows®
User’s Guide
• We recommend that you use this product for printing on blank,
unrecorded CD-R discs and other media.
• Printing on CD-R discs and other media that already has data
recorded on it may cause the data to become corrupted.
• Note that TDK Recording Media Europe S.A. shall not be held
liable for any loss or corruption of data recorded on CD-R
discs and other media arising through the use of this product.
Be sure to read the Safety Precautions contained in this manual
before trying to use for the first time, and always keep this manual
on hand for future reference.
Important!
The copyright of this User’s Guide and all rights related to the software
shall revert to CASIO COMPUTER CO., LTD.
Read This First!
• TDK Recording Media Europe S.A. shall not be held liable for any loss
or claims by you or any other person or entity that may arise through
the use of this product.
• Reproduction of this manual in any form, either in part or its entirety,
is forbidden without the express permission of CASIO COMPUTER
CO., LTD. You are granted permission to use this software for your
own personal use. Any and all other use of this software without the
express permission of CASIO COMPUTER CO., LTD. is forbidden
under international copyright laws.
• The contents of the manual are subject to change without notice.
• Due to the time required for printing on paper, contents of the
manual may be outdated by the version of software supplied to you.
Because of this, the software and the contents of the displays it
produces may be different from those described in this manual, or
some items described in this manual may no longer be available.
• Microsoft, Windows, Windows Media and Windows NT are registered
trademarks or trademarks of Microsoft Corporation in the United States
and other countries.
• Pentium is a registered trademark of Intel Corporation in the United
States.
• Macintosh, Mac OS and TrueType are registered trademarks of Apple
Computer, Inc. in the United States and other countries.
• Easy CD Creator is a trademark of Roxio, Inc. in the United States.
• Other company and product names used herein may also be company
and product names of others.
• The CD/DVD LABEL PRINTER application is an application
designed to run under Windows 98, 98SE, Me, 2000
Professional, or XP.
• The application may not be able to run correctly on certain
system hardware and software configurations.
• See page 17 for information about minimum computer system
requirements.
© Copyright 2002 CASIO COMPUTER CO., LTD. All rights reserved
• Be sure to read this manual carefully before attempting to use the
product for the first time.
1
Safety Precautions
Thank you for purchasing this quality TDK product. Before using it, be
sure to read the following Safety Precautions. Keep the manual in a
convenient location for future reference when necessary.
Warning
This symbol indicates information that, if ignored or applied
incorrectly, creates the possibility of death or serious personal
injury.
Caution
This symbol indicates information that, if ignored or applied
incorrectly, creates the possibility of personal injur y or material
damage.
Examples of graphic markings
indicates something you should not do. The symbol shown
here indicates you should not try to take the unit apart.
indicates something you should do. The symbol shown here
indicates you should unplug the unit from the wall outlet.
2
Warning
Smoke, abnormal odor, overheating, and other
abnormalities
Continued use of the product while it is emitting smoke or
strange odor, or overheating creates the risk of fire and
electric shock. Immediately per form the following steps
whenever any of the above symptoms are present.
1. Disconnect the USB cable.
2. Unplug the power cord from the wall outlet.
3. Contact your original retailer.
Power cord, AC adaptor, USB cable
Misuse of the power cord, AC adaptor, or USB cable creates
the risk of fire and electric shock.
Make sure you follow the precautions listed below.
• Use only items that come bundled with the product.
• Use only a power source whose output matches the rating
marked on the plate on the back of the product.
• Never plug the power cord into a wall outlet that is shared
by other devices, or into a shared extension cord.
Warning
Power cord, AC adaptor, USB cable
Misuse of the power cord, AC adaptor, or USB cable can
damage it and create the risk of fire and electric shock.
Make sure you follow the precautions listed below.
• Never place heavy objects on these items or subject them
to direct heat.
• Never modify these items or subject them to bending.
• Do not subject these items to twisting or pulling.
• Should the power cord, AC adaptor, or USB cable or its
plug ever become damaged, contact your original retailer.
Power cord, AC adaptor, USB cable
Never touch the power cord, AC adaptor, or USB cable or
its plugs while your hands are wet.
Doing so creates the risk of electric shock.
Dropping and rough treatment
Continued use of the product after it has been damaged due
to dropping or other rough treatment creates the risk of fire
and electric shock. Immediately perform the following steps
if the product should ever become damaged.
1. Disconnect the USB cable.
2. Unplug the power cord from the wall outlet.
3. Contact your original retailer.
Warning
Do not disassemble or modify the product.
Never try to take the product apart or modify it in any way.
Doing so creates the risk of electric shock, burn injury, or
other personal injury.
Leave all internal inspection, maintenance, and repair up to
your original retailer.
Water and foreign objects
Water, liquids, or foreign objects (especially metal) getting
inside the product creates the risk of fire and electric shock.
Immediately perform the following steps if liquid or a foreign
object should ever get inside the product.
1. Disconnect the USB cable.
2. Unplug the power cord from the wall outlet.
3. Contact your original retailer.
Do not incinerate.
Never dispose of the product by incineration. Doing so creates
the risk of fire and personal injury due to explosion.
Plastic bag precaution
Never place the plastic bags in which the product comes
packed over your head. Doing so creates the risk of
suffocation.
Particular care is required in households where young
children are present.
3
Caution
Power cord, AC adaptor, USB cable
Misuse of the power cord, AC adaptor, or USB cable can
damage it and create the risk of fire and electric shock.
Make sure you follow the precautions listed below.
• Never locate these items near a stove or other source of
intense heat.
• When unplugging the power cord and USB cable, be sure
to grasp the plug. Never pull on the cord or cable.
• Plug in the power cord into the wall outlet as far as it will
go.
• Plug in the USB cable into the computer and the printer
as far as it will go.
• Before leaving the product unattended for long periods
(such as when you go on a trip), unplug the power cord
and USB cable.
• At least once a year, clean away any dust built up in the
area around the prongs of the power cord’s plug.
Keep heavy objects off.
Never place a heavy object on top of the product. Doing so
can cause the object to lose balance and fall, creating the
risk of personal injury.
4
Caution
Location
Avoid the locations listed below for the pr oduct. Such
locations create the risk of fire and electric shock.
• Areas subject to high humidity and large amounts of dust
• Food preparation areas or other location subjected to oil
steam
• Near heaters, on a heated carpet, in direct sunlight, in a
closed vehicle parked in the sun, and other areas
subjected to high heat.
Avoid unstable surfaces.
Never place the product on an unstable table, desk, etc.
Doing so can cause the product to fall, creating the risk of
personal injury.
Connection precaution
Connect only items that come bundled with the product to
its connectors. Connecting a non-bundled item creates the
risk of fire and electric shock.
High temperature precaution
Never touch the print head or other metal objects near the
head. These items become very hot, and touching them
creates the risk of burn injury.
Operating Precautions
Observe the following precautions to ensure that the printer provides
you with the years of trouble-free operation for which it is designed.
• Avoid use in areas subjected to direct sunlight, high humidity, and
temperature extremes.
Operating Temperature Range: 10°C to 35°C (50°F to 95°F)
• Never allow paper clips, pins, or other similar objects to get inside the
printer mechanism.
• Never place objects on top of the printer.
• Never try to take the printer apart. Doing so can lead to malfunction.
• Never drop the product, tip it over, or subject it to strong impact.
• Never touch the print head.
• Never use excessive force when pulling the disc tray. The disc tray will
not open unless the power cord, AC adaptor, and USB cable are
connected to the printer.
5
Contents
Label Making Overview
Label Creation Basics .................................................. 27
Safety Precautions ........................................................ 2
Operating Precautions ................................................... 5
Unpacking the Printer .................................................... 8
To
To
To
To
create a label ..........................................................
print a label .............................................................
save label data .........................................................
quit the CD/DVD LABEL PRINTER application .............
27
31
32
32
About the Bundled CD-ROM and CD-R ............................. 8
Using this Manual .......................................................... 9
Button Operations .......................................................... 9
Label Making with Preset Templates
How to use this Manual ............................................... 11
LPCW-50 Printer Features ........................................... 12
Automated Label Layout ............................................... 33
General Guide .............................................................. 16
Using the Assistant Feature ......................................... 35
Using the CD/DVD LABEL PRINTER Application ............. 17
Using the Assistant screen ........................................... 35
Your Computer and Minimum System Requirements ........ 17
Using the Main Window ............................................... 36
Installing the CD/DVD LABEL PRINTER Application ........ 18
Importing Text Data ..................................................... 38
To install the application ................................................ 18
To uninstall the application ............................................ 20
Connecting to a Power Source and a PC ....................... 21
To connect to a power source and a PC ......................... 21
To disconnect from a power source and a PC ................. 22
Loading and Removing the Ink Ribbon Cassette ............. 23
To load the Ink ribbon cassette into the printer ............... 23
To replace the ink ribbon cassette ................................. 26
Importing CD-Text Data for a Music Label .......................
Importing Media Player Data for a Music Label ...............
Importing Easy CD Creator Data for a Music Label ..........
Importing File and Folder Name
for a Data Label or Digital Image Label .......................
38
39
41
42
Useful Text Input Functions .......................................... 43
Saving Label Data ........................................................ 44
Opening a Label Data File ............................................. 45
Creating a Data Index File ............................................ 46
Configuring Layout Settings .......................................... 47
To configure layout settings ........................................... 47
Configuring Text Layout Settings .................................... 48
6
Configuring Font Settings ............................................. 50
Inserting an Image into a Label ..................................... 52
To input an image from a file .........................................
Capturing a PC Screen Image ........................................
Controlling the Aspect Ratio of an Image ........................
About color images... ...................................................
52
52
54
55
Inserting an Image into a Label
(Free Design Templete) ............................................... 65
To insert an image into a label ....................................... 65
To delete an image field ................................................ 65
Resizing a Field (Free Design Template) ......................... 66
Aligning and Resizing Fields (Free Design Template) ....... 67
To align fields ............................................................... 68
Original Label Making
Configuring Field Properties (Free Design Template) ....... 69
Creating an Original Label Layout .................................. 57
Useful Text Input Functions
(Free Text Template, Free Design Template) ................. 70
Free Text Label Template Main Window ..........................
Free Design Label Template Main Window ......................
Free Design and Free Text Template Main Windows ........
Toolbars ......................................................................
To reposition and resize a field ...................................... 69
58
58
59
59
Configuring Font Settings
(Free Text Template, Free Design Templete) ................ 61
Inserting a Label Background Image
(Free Text Layout) ...................................................... 62
Fields (Free Design Templete) ....................................... 63
Field Types ................................................................... 63
Common Text Field and Image Field Operations ............... 63
Inputting Text into a Text Field (Free Design Templete) ... 64
To
To
To
To
input text manually ...................................................
input text imported from a file ...................................
configure font settings for the text in a field ...............
delete a text field .....................................................
64
64
65
65
Printing and Other Operations
Printing a Label ........................................................... 72
To print a label ............................................................. 72
Configuring Advanced Settings ..................................... 76
To configure advanced print settings .............................. 76
Registering and Deleting a Phrase Memor y Entry ............ 76
To configure advanced layout settings ............................ 77
Using Help ................................................................... 78
To use Help .................................................................. 78
Caring for the Printer .................................................. 79
Phrase Library List ...................................................... 80
Troubleshooting ........................................................... 80
Error Messages ........................................................... 82
Specifications .............................................................. 83
7
Unpacking the Printer
About the Bundled CD-ROM and CD-R
Make sure that all of the items shown below are present as you unpack
the printer. If anything is missing, contact your original retailer.
TDK LPCW-50
CD/DVD LABEL
PRINTER
Power cord*
TDK ink ribbon
cassette (black)
TR-18BK-T
CD/DVD LABEL PRINTER
Application
CD-ROM
AC adaptor
AD-2105S
USB cable
(1.8 meters)
(5.9 feet)
TDK CD-R 80
Positioning guide
* The shape of the power cord that comes with the LPCW-50 printer
depends on the geographic area where you purchase it.
8
Handling Precautions
• Handle the disc to avoid finger smudges, dir t, scratches, etc. on either
of its surfaces.
• Should the disc become dir ty, use an eyeglass cleaning cloth or some
other soft dry cloth to wipe it lightly from the center of the disc outwards
towards its edge. Never use phonograph record cleaner or any other
cleaning agent.
• Never write on either of the disc’s surfaces with a pen or pencil or
other sharp writing utensils, or af fix a sticker to the disc surfaces.
• Use of a disc that is cracked or deformed, or a disc that has adhesive
on it is dangerous. Never use such a disc.
Storage Precautions
• Avoid storing discs in areas subjected to high temperature, high
humidity, or direct sunlight.
• When you are not using a disc, store it in its original case.
• Avoid storing a disc so its label comes in direct contact with the surface
of a vinyl case, bag, etc.
Warning!
Never play a CD-ROM disc on any device that is not specifically designed
to play back CD-ROM discs. Audio output at a high volume setting creates the risk of damaged hearing and damage to audio speakers.
Using this Manual
This User’s Guide explains operation of the LPCW-50 printer and the
CD/DVD LABEL PRINTER application, which is designed to run under
Windows® 98, 98SE, Me, 2000 Professional, or XP (referred to in this
manual collectively as “Windows”).
Note that this User’s Guide does not contain information about using
Windows, and assumes that you are already familiar with the following
standard Windows operations.
• Mouse operations such as click, double-click, right-click, drag, drag
and drop, etc.
• Menu operations using the mouse
• Text input using the keyboard
• Standard Windows window operations
Using the Assistant Feature
The CD/DVD LABEL PRINTER application has an Assistant feature
that guides you step-by-step through certain operations. (See page
35.)
Help
You can access information about procedures and precautions using the CD/DVD LABEL PRINTER application’s Help feature. (See
page 78.)
Button Operations
All operations in this manual are performed using the mouse.
• Command operations are indicated as shown below.
1.
If you are not already familiar with these and other basic Windows
operations, see the user documentation that came with your PC or
Windows package.
2.
1. Click the
button.
2. On the menu that appears, click
New.
• Dialog box button operations are indicated as shown below.
3.
9
3.Click Save.
• All of the sample screens in this manual show operation under
the English version of Windows XP. Screens appear differently
when running the application under another operating system.
• Note that the screen images shown in this manual may differ
somewhat from those that actually appear on your computer
screen.
10
How to use this Manual
Getting Ready
• Unpacking (page 8)
• Installing the Software (page 18)
The sections of this manual are arranged as shown below.
Refer to the indicated pages for details.
Label Making Overview (page 27)
• This section takes you through the basic label creation and printing process,
using a music CD label as an example.
Label Making
with Preset Templates
Automated Label Layout (page 33)
• Connecting to Your PC (page 21)
• Removing the Packing
Materials/Loading the Ink
Ribbon Cassette (page 23)
• This section describes how to create
labels quickly and easily using preset
templates.
• You can select a music label, data
label, or digital image label template.
Original Label Making
Creating an Original Label Layout
(page 57)
• This section describes how to layout
text and images to create exactly the
type of look you want.
• A Free Text label template gives you
wide ranging control over text you
input into a label.
• A Free Design label template provides
you with maximum freedom when
creating your label design.
Troubleshooting Guide
(page 80)
• Check this section whenever you run into
problems.
• Here you will find details about online
help and error messages.
Printing and Other Operations (page 72)
This section explains how to print a completed label.
• Simply place the CD-R onto the tray as instructed by the message that appears on the screen.
• This section also provides details about other settings.
11
LPCW-50 Printer Features
Your LPCW-50 Printer lets you quickly and easily print labels on a CD-R, CD-RW, and other types of discs.
• Music Discs
Labels can include artist names and track titles (page 33).
You can also import track names from
Windows MediaTM Player, or Easy CD
Creator, or you can import CD-Text
from a CD (page 38).
• Screen shots shown in this manual
are based on Media Player for
Windows XP.
12
Important!
This printer and its software do not include functions for recording to a CD-R, CD-RW or other types of discs.
• Data Discs
You can import the names of folders and
files you plan to store on a disc and print
them on its label. You can also type in
information manually (pages 33 and 42).
Business report.xls
Holiday work.xls
New employees research data.doc
Weekly meeting summary.doc
New order.xls
Counter error data.doc
• Digital Image Discs
You can import recording dates and image
descriptions from your PC and print them
on the label. You can also type in
information manually (pages 33 and 42).
13
LPCW-50 Printer Features
• Print with TrueType® fonts installed on your
PC (page 50).
• Support for both text and images (page 52).
Note that images are printed in monochrome.
• A collection of preset templates lets
you produce great looking labels with
minimum effort.
14
• A Free Text Template allows more control
over the appearance and layout of text (Free
Text → page 57).
• A Free Design template gives you almost total
freedom for laying out text and images to
create exactly the look you want (Free Design
→ page 57).
15
General Guide
Front
Back
Front cover
Open this cover to
load or remove the
ink ribbon cassette.
Indicator lamp
• Lights when the printer is connected
correctly to a PC.
• Flashes when printing is in progress.
Eject button
Press to open the disc
tray.
Carriage
Print head
Disc tray
16
Disc positioning guides
These guides help to position the disc
correctly when you place it onto the
tray.
If the disc tray will not open due
to printer malfunction, you can
open it manually by inserting a
thin, pointed object (at least 20
mm long, and less than 1.5 mm
thick) into this hole.
Use this hole to manually open
the disc tray only when absolutely necessary. Do not use it
normally to open the tray.
* Do not use an object with an
easily breakable tip. Doing so
creates
the
risk
of
malfunction.
Do this first!
The front parts of the printer are secured with tape to protect them during shipment. Make sure you remove
the tape before using the printer for
the first time.
AC adaptor terminal
Connect the bundled AC
adaptor here.
USB port
Connect the bundled USB cable here when connecting to
your PC.
Using the CD/DVD LABEL PRINTER
Application
This section describes the computer system required to run the CD/
DVD LABEL PRINTER application.
Your Computer and Minimum System
Requirements
Minimum System Requirements
OS: Microsoft® Windows® 98, 98SE, Me, 2000 Professional, or XP
PC: IBM PC/AT or compatible with the following specifications.
• Windows 98, 98SE, Me, 2000 Professional, or XP pre-installed
• Pentium®II 266MHz or higher CPU or CPU recommended for running
the OS you are using.
• USB port
Memory: 64MB minimum (128MB minimum recommended)
Hard disk: At least 40MB available for installation of this application, at
least 60MB available for running the application.
PC
The following shows an example of a computer that meets the minimum
requirements to run the application. Check to make sure that your computer has a similar configuration.
Display: Color display (256 colors minimum, High-Color recommended),
compatible with Windows 98, 98SE, Me, 2000 Professional,
or XP, and capable of being connected to your computer.
Resolution: 800 × 600 or higher
Computer
With a display adaptor that supports at
least 256 colors.
Pointing device: Mouse or other equivalent device compatible with W indows 98, 98SE, Me, 2000 Professional, or XP
Hard disk
Color display
Capable of displaying
at least 256 colors.
CD drive
Keyboard
CD drive
Keyboard
Mouse
• The application may not run correctly on certain system hardware and
software configurations.
• Operation under Windows 3.1, 95, and NT®, on a Macintosh®, and
under Mac® OS is not suppor ted.
• Operation of this application is not guaranteed on a computer upgraded
to Windows 98, 98SE, Me, 2000 Professional, or XP from another
OS.
USB port
The locations of the various ports may be different on your computer.
17
Installing the CD/DVD LABEL PRINTER
Application
This section describes the steps you need to per form to install the CD/
DVD LABEL PRINTER application.
Important!
• Be sure to install the CD/DVD LABEL PRINTER application before you
connect the printer to your PC. (See page 21.) Connecting before you
install the application can result in improper operation.
• Make sure you quit all other applications running on your PC before
starting installation. Installing while other applications are running can
result in incorrect installation.
• The examples in this manual show installation from a CD drive named
drive E:.
Note
Depending on how your PC is configured, the above screen may not
appear automatically. If this screen does not appear on your computer, click the Windows Start button and then select Run. On the
dialog box that appears, type in E:\Setup\Setup.exe and then click
OK.
2. Select the language of the version you want to install, and then click
OK.
To install the application
1. Start up Windows, and place the CD/DVD LABEL PRINTER Application CD-ROM into your computer’s CD drive.
• The installer should star t up automatically, and display the screen
shown below.
3. Click Next.
This causes the Preceding License Agreement to appear.
18
Important!
Be sure to read all of the terms and conditions of the Preceding
License Agreement.
4. If you agree to be bound by the agreement, click Yes.
This causes the Software End User License Agreement to appear.
Important!
Be sure to read all of the terms and conditions of the Software End
User License agreement.
5. If you agree to be bound by the agreement, click Yes.
6. Check the installation location, and then click
Next.
• This starts installation.
• A screen appears to let you know when the installation is complete.
Note
The InstallShield Wizard Complete screen may not appear in some
cases. If you can see the CD DVD LABEL PRINTER icon on your
computer’s desktop, it means that the application is installed pr operly.
If you want to change the installation location, click Browse.
7. Click Finish.
A CD DVD LABEL PRINTER shortcut icon should be on your Windows desktop.
19
5. Click Yes.
To uninstall the application
1. Click the Windows Start button, and then click
Control Panel.
2. Click the Add or Remove Programs icon.
This causes the Add or Remove Programs dialog box to appear.
3. In
the list of installed software, click CD/DVD LABEL PRINTER to
select it.
List of installed software
4. Click the Change/Remove
20
button.
This deletes the CD/DVD LABEL PRINTER application.
Note
Some files may cause a separate confirmation dialog box to appear
before they can be deleted. If you are unsure about where you should
keep a file, select No.
Connecting to a Power Source and a PC
3. Connect the AC adaptor to the printer’s AC adaptor terminal 1, and
then plug the power cord into a household power outlet 2.
Use the power cord and AC adaptor that come bundled with the printer
to connect to a power source. Use the bundled USB cable to connect to
a PC.
Important!
Perform the following procedures only after you have installed the CD/
DVD LABEL PRINTER application on your computer (See page 18) .
2
1
To connect to a power source and a PC
1. Connect the power cord to the AC adaptor.
Important!
• Make sure you use a standard household power outlet rated for
the voltage specified on the rating plate on the back of the printer.
• Use only the power cord and AC adaptor that come with the printer.
4. Connect the USB cable to the USB por t of the printer.
2. Connect the USB cable to the USB por t of the PC.
Important!
Be sure you connect directly to the USB port of the PC. Connecting
through a hub or chaining through another USB device may cause
misoperation.
The side with the arrow should be pointing down.
• The first time you connect the USB cable, you have to remove the
tape covering the printer’s USB port.
21
Important!
• Do not operate the printer while it is standing up on its side. Also,
you should not store the printer standing on its side when you are
not using it.
• Note that you cannot load or remove a disc unless both the AC
adaptor and USB cable are connected to the printer.
To disconnect from a power source and a PC
1. Unplug the USB cable from the PC and printer.
2. Unplug the power cord from the wall outlet, and then unplug the AC
adaptor from the printer.
Connecting for the First Time
• A USB driver installation Wizard starts up automatically the first
time you connect the printer to your computer after installing the
CD/DVD LABEL PRINTER application. Follow the instructions that
appear on the display to install the USB driver.
• If you are running Windows XP, the message shown below will
appear during USB driver installation. When it does, click Continue
Anyway to proceed with the installation.
1
2
1
2
Important!
Never disconnect the AC adaptor, power cord, or USB cable while a
print operation is in progress. Doing so creates the risk of malfunction.
• If you are running Windows 2000, the warning message “Digital
Signature Not Found” may appear during USB driver installation.
When it does, click Yes to proceed with the installation.
• The above messages do not appear on a system running Windows
98, 98SE, or ME.
22
Loading and Removing the Ink Ribbon
Cassette
Rotate in the direction
of the arrows.
You must load an ink ribbon cassette into the printer in or der to print.
Important!
• Note that you will not be able to open the disc tray and load the ink
ribbon cassette unless the power cord/AC adaptor and USB cable are
both connected to the printer. See “Connecting to a Power Source and
a PC” on page 21 for more information.
• The carriage is secured in place by packing material to protect it against
damage. Before using the printer for the first time, use the procedure
on page 24 of this manual to remove the packing material.
• When the ink ribbon cassette requires replacement, purchase a TR18 ink ribbon cassette.
Important!
Loading the ink ribbon cassette while the ribbon is slack can lead to
malfunction.
3. Press the Eject button on the front of the printer.
To load the Ink ribbon cassette into the printer
1. Remove the stopper from the ink ribbon cassette.
Stopper
Eject button
This causes the disc tray to come out par t way.
Important!
Make sure there is nothing in front of the printer to interfere with
movement of the disc tray.
2. Insert a pen or other similar object into the ink ribbon cassette’s hub,
and rotate the hub to take up any slack.
• To rotate the hub, it is best to use an object whose sur face is not
too smooth.
• If the ribbon is very slack, you may need to rotate the hub a number
of times.
Note
You can also open the disc tray by clicking the
button (page 37)
on the CD/DVD LABEL PRINTER application screen.
23
4. Gently pull out the disc tray as shown below.
Before using the printer for the first time...
When you purchase the printer, the carrier is secured in place by
packing materials at the locations shown in the illustration below.
Important!
Be sure to perform the procedures from page 18 through page 24
of this manual before removing the packing material.
Disc tray
Important!
• Never use excessive force when pulling the tray.
• Do not press down on the tray with excessive force. Doing so can
damage the tray.
• If you accidentally pull the disc tray out so far that it detaches from
the printer unit, carefully replace the end of the tray onto the rail.
Carefully pull out the packing materials in the direction
indicated by the arrows.
5. Open the front cover.
Ribbon winder shaft
Front Cover
Important!
Do not apply excessive force to the ribbon winder shaft. Doing so can
cause the shaft to bend.
24
Important!
Never perform any of the following actions while the carriage packing material is in place. Doing so creates the risk of printer malfunction.
• Continually pressing the Eject button on the front of the printer.
• Continually clicking the
button on the CD/DVD LABEL PRINTER
application main window.
• Print operation.
6. Position
the ink ribbon cassette so the ink ribbon passes under the
8. Close the front cover.
print head.
Print head
Ink ribbon
Notes
• Check to make sure that there is no slack in the ink ribbon.
• If the ribbon is slack, perform step 2 of this procedure to tighten it
up.
7. Gently
Important!
Always make sure you close the front cover before closing the disc
tray.
9. Close the disc tray.
Press the disc tray with your hand until it clicks.
press the Ink ribbon cassette against the carriage until you
hear it click securely into place.
Carriage
Important!
If you press the Eject button while the disc tray is open, the printer
will perform an internal process and emit a noise. This does not indicate malfunction.
Note
The color of the disc you are printing on can cause printing to become a different color than that expected from the ink ribbon you are
using.
25
To replace the ink ribbon cassette
Replacing the Front Cover
If the front cover accidentally becomes detached from the printer,
use the following procedure to replace it.
1.Connect the power cord, AC adaptor, and USB cable to the printer,
1. Press the Eject button on the front of the printer.
This causes the disc tray to come out par t way.
Important!
Make sure there is nothing in front of the printer to interfere with
movement of the disc tray.
and connect the USB cable to your PC.
2.Gently pull out the disc tray.
Note
See page 21 for more information about making connections.
3. Open the front cover.
4. Taking care that the carriage
2. Press the Eject button on the front of the printer.
does not move, grasp the ink ribbon
cassette on either side with your fingers and pull it towards you.
This causes the disc tray to come out par t way.
3. Gently pull out the disc tray.
Note
See pages 23 and 24 for details about how to per form steps 2
and 3.
4. While
bending the cover guides on the left and right inward,
insert the front cover spindles on either side between the printer
case and cover guides.
5. Insert the spindles until they enter the holes provided in the printer
cover.
Cover guide
Spindle
5. Install another ink ribbon cassette.
Storing a Partially Used Ink Ribbon Cassette
Install a stopper on the partially used ink ribbon cassette, place the
cassette into its plastic bag, and then into its box. Store it where it
will not be exposed to dirt and dust.
Number of Prints Per Ink Ribbon Cassette
•
•
Upper or Lower Label Only:
Approximately 40 prints
Upper and Lower Label:
Approximately 20 prints
Upper label
Lower label
Printer case
26
Label Making Overview
Label Creation Basics
Now that everything is set up, let’s try creating a label.
This section runs through the basics of label making, from layout, to
printing, and saving the label in a file.
To create a label
1. On your Windows desktop, double-click the CD DVD LABEL PRINTER
short cut icon.
Example: Music CD label
Note
You can also start up the application by clicking the Windows Start
button and then All Programs. Next, point to TDK, and then click CD
DVD LABEL PRINTER. Note that the location of the application may
be different on your computer, depending on what you specified when
you installed it.
After CD/DVD LABEL PRINTER application star ts up, a label template menu appears.
27
2. Click
3. Input the text data you want.
.
This displays the main window for the music label template.
Label Preview Image
Move the cursor to the label input boxes, and then type in the disc
title, artist names, and track names.
The text you input appears in the preview image on the screen.
Warning message
Label Input Boxes
Important!
You must select a label template before you can perform operations
on the main window.
28
Important!
The warning message “Printing string is overflow” appears when the
text data you input does not fit inside the print area.
See “Configuring Text Layout Settings” (page 48) and “Configuring
Font Settings” (page 50) for information about adjustments you can
make to help the text fit.
Configuring Template Setting
4. Click
.
This displays a dialog box for selecting the print pattern.
6. Click
.
This displays a dialog box for selecting the text layout.
Note
See page 48 for details about changing the text layout pattern.
Note
See page 47 for details about print pattern setting.
5. Click
7. Click
.
.
29
11. Click the
Selecting a Font
Artist Name tab.
8. Click
.
This displays a dialog box for making font settings.
12.Select 2 for Size, and then click
OK.
This completes input of the label data.
9. Confirm that Title tab is selected.
Note
If a different tab is displayed, click Title.
10. For Size, select
30
2.
Note
See page 50 for details about font settings.
To print a label
Important!
• See the separate “Quick Start Guide” sheet for important information
about printing conditions.
• This printer supports printing on 12cm diameter discs only.
Attempting to print on a CD-R single or on a business car d CD-R can
cause damage to the printer.
• We recommend that you use this product for printing on blank,
unrecorded media. Printing on media that already had data recorded
on it may cause the data to become corrupted.
1. Click
2. In
accordance with the instructions on the screen, place the disc
onto the tray.
.
• Carefully pull out the disc tray to the position shown in the illustration.
Set the disc onto the tray so it is
inside of these raised guides.
When placing the disc on the tray, take special care that it is oriented
correctly to allow proper positioning of the label printing.
Important!
Make sure there is nothing in front of the printer to interfere with
movement of the disc tray.
• This displays a dialog box for printing.
Important!
• Check to make sure that there is no dirt, dust, or other foreign
matter on the disc tray or the disc. Dir t or dust can scratch the
recording surface of the disc and make it impossible to record data
onto the disc.
• Make sure the label side of the disc is facing up (so you can see it)
and the recording side is facing down (towards the tray). Placing
the disc onto the tray upside-down will result in printing on the
recording side of the disc, which will make the disc unrecordable.
• Printing will be performed inside the
area indicated by the guidelines on the
disc tray. If the disc already has a logo
or other marking on it, position it so
printing will be performed in a blank
Guidelines
area of the disc.
Printing is performed here.
Note
See page 73 for full details about how to position the disc on the tray.
31
3. Close the disc tray.
Press the disc tray with your hand until it clicks.
To save label data
1. Click
.
2. On the menu that appears, click
Save.
4. Click Start printing.
• This starts the print operation.
• The disc tray opens automatically after printing is complete. Carefully
pull out the tray and remove the disc.
Important!
Never disconnect the AC adaptor, power cord, or USB cable while a
print operation is in progress. Doing so creates the risk of malfunction.
Note
See page 72 for details about printing.
3. Check the file name and then click
Save.
The label data is saved in your Windows My Documents folder.
Note
See page 44 for details about saving label data.
To quit the CD/DVD LABEL PRINTER application
1. Click
.
2. On the menu that appears, click
Exit.
Note
You can also quit the application by clicking the
button in the
upper right corner of a main window.
Important!
You cannot quit the application while a print operation is in pr ogress.
Wait until printing is finished before you quit.
32
Label Making with Preset Templates
3. Click the label template you want to use.
Automated Label Layout
A selection of content-specific preset label formats makes label creation
as easy as selecting the right format and filling in the blanks. The following procedure shows how to do this, using the music label template as
an example.
• You can select from among five label templates. Selecting a template
displays its main window, which contains the elements for the
template you select.
• Input the text you want.
Music Label
1. On the main window, click
.
2. On the menu that appears, click
New.
This displays a dialog box for selecting the label template.
Data Label
Select one of these preset templates for easy label creation.
Select one of these templates to
create an original layout (page 57).
33
Digital Image Label
• If you want to create your own original layout, select the Free Text or
Free Design template. See “Creating an Original Label Layout” on page
57 for more information.
34
Using the Assistant Screen
Using the Assistant Feature
The Assistant feature provides you with step-by-step guidance for creating
labels and performing other operations. Clicking the
button on the
main window displays the Assistant screen. The Assistant screen does
not appear while the Free Text or Free Design label template is displayed.
When you are unsure of CD/DVD LABEL PRINTER application operations...
Follow the instructions on the Assistant screen for quick and easy labels.
Even after you are accustomed to making labels...
Since the Assistant screen changes in accordance with the operation
you are performing on the main window, you can refer to it whenever you
need a bit of advice.
When this option is selected, the
Assistant screen appears whenever you
start up the CD/DVD LABEL PRINTER
application.
35
Using the Main Window
The information in this section describes the main window for the music
label template.
1
2
3
t
8
9
0
r
When you want to do this:
Create a new label (page 33)
Open an existing label data
Save label data you are currently working on
Import CD-Text, Media Player, Easy CD Creator
data for a music label, or file names and folder
names for a data or digital image label Impor t
Output a list of file names on a printer (page
46)
4 5
67
y
2 File Button
Clicking the
button displays a menu of commands that you can
use to perform the operations described below.
q
w
Quit the CD/DVD LABEL PRINTER application
Click a file name to display the corresponding label
data. Note that only the last five files you have
saved appear in this list.
Select this
command:
New
Open
Save
Import
Create Data
Index File
Exit
Documents
3 Advanced Settings Button
Displays a dialog box for more advanced printing and phrase settings
(page 76).
4 Help Button
Displays help.
e
1 Label Format Indicator
The icon that appears here indicates the type of label template that is
currently displayed in the main window.
Music Label
Free Text Label
Data Label
Free Design Label
Digital Image Label
36
button displays a menu of commands that you can
Clicking the
use to perform the operations described below.
• Display online help
• Access the TDK Website
• Display version information about the software
5 Assistant Button
Displays an Assistant window in the upper right corner of the main
window.
This button is displayed on the music, data, and digital image label
templates only.
6 Minimize Button
Minimizes the main window into the menu bar.
7 Exit Button
Quits the CD/DVD LABEL PRINTER application.
8 Printing Pattern Panel
This panel shows the location and orientation of the printing on the
currently selected label. Click this panel when you want to change the
location and orientation of the printing.
9 Text Layout Panel
This panel shows the currently selected text layout. Click this panel
when you want to change the text layout.
e Label Input Boxes
These boxes are for inputting label text, either manually or by impor ting it. The text you input immediately appears in the preview image on
the screen.
The type of label input boxes that appear on the main window depend
on the type of label template.
r Print Button
Click to start a print operation.
t Label Preview Image
You can use this image to get an idea of what your label will look like,
before you actually print it.
y Eject Button
Opens the disc tray. This button performs the same operations as
the Eject button on the front of the printer (page 16).
Important!
The Eject button is disabled while a printing operation is in progress.
0 Image Button
Displays a dialog box for selecting graphic images (page 52).
q Font Button
Displays a dialog box for selecting the font type, attributes, and size.
w Magnifying Glass Button
Displays a dialog box with an enlarged preview image.
37
Importing Text Data
You can import CD-Text data or track and incorporate it into the music
label template. CD-Text data or track data can be created using Media
Player or Easy CD Creator data.
In the case of a data label template and digital image label template, you
can import file names and folder names. Importing text data eliminates
the need to type it in manually.
Important!
• You will not be able to impor t CD-Text if your CD drive does not suppor t
CD-Text reading.
• All import data sources (CD-Text, Media Player track data, Easy CD
Creator project list, folder name, file name) are included on the Import
menu of the Free Text template and Free Design template.
3. Set
the disc whose data you want to read into the CD drive of your
computer, confirm that the correct drive name is displayed in “Drive
Selection” and then click the Start Import button.
Importing CD-Text Data for a Music Label
Before getting started, be sure you have the disc whose CD-Text data
you want to import on hand.
What is CD-Text?
CD-Text is text data on a CD that provides the disc title, artist names,
track names, and other information. You can import such text using
the CD/DVD LABEL PRINTER application and incorporate it into music labels. Note that some CDs may not contain CD-Text data.
1. On the music label template main window, click the
button.
2. Click Import and then Import CD-Text.
This displays a dialog box for selecting the drive where the CD that
contains the text is located.
38
• Language: If the disc whose CD-Text data you are importing has
more than one language versions, you will be able to
select from up to eight different languages. The selection
is dimmed if the disc supports only one language.
Important!
The CD/DVD LABEL PRINTER application suppor ts display of English,
Japanese, Korean, and Chinese. Note, however, that your system
may not be able to display Japanese, Korean and Chinese correctly if
it is not configured for the special characters used by these languages.
•
•
•
•
•
Title: This is the title of the disc.
Artist Name: This is the name of the artist.
Tracks: These are the titles of the songs on the disc.
Select All Tracks: Click here to select all of the track names.
Deselect All Tracks: Click here to deselect all of the selected track
names.
• If you do not want a particular song title to be imported into the
label input boxes, uncheck it.
Importing Media Player Data for a Music Label
What is Media Player?
• Media Player is an application that lets you playback and manage
multimedia files that are on your computer or the Internet. CD/
DVD LABEL PRINTER application lets you impor t play lists created
using Media Player. This capability is supported for data created
using Media Player 7.0 or higher.
• Screen shots shown in this manual are based on Media Player for
Windows XP.
Note
Screen contents and operational procedures may be slightly different
for other supported Windows versions.
1. Start up Media Player.
4. After checking the track names in the label input boxes, click
OK.
The CD-Text data is displayed in the label input boxes and the label
preview image.
Important!
Depending on the type of disc you are trying to import from, you may
not be able to import CD-Text data correctly.
2. Place the disc that contains the play list data you want to impor t into
the CD drive of your computer.
39
3. After
importing the track list, select Export Playlist to File... from
the File menu, and save data to a playlist file.
With Media Player 7.0, it is not necessar y to copy the music.
Note
See Media Player online help for full details about its operation.
4. Start up the CD/DVD LABEL PRINTER application.
5.
On the music label main window, click the
button.
7. Select the playlist you created in step 3, and then click
Open.
A dialog box for selecting the specific text you want to impor t appears
after all the text on the CD is read.
Note
In some cases, you may not be able to impor t artist name data from
a playlist file created using Media Player on a computer running
Windows XP.
6. On the menu that appears, click Import and then Import Media Player
Track Data.
This displays a dialog box for opening a file.
8. After checking the song titles in the label input boxes, click
OK.
The data you import appears in the label impor t boxes and the preview image.
40
Importing Easy CD Creator Data for a Music Label
6. On menu that appears, click Import and then Import Easy CD Creater
Project List.
This displays a dialog box for opening a file.
Note
Easy CD Creator
• Easy CD creator is CD-R and CD-RW writing software. CD/DVD
LABEL PRINTER application suppor ts project lists created using
Easy CD Creator for incorporation into a music label. This capability
is supported for data created using Easy CD Creator 4.0 and 5.0.
• All the screen shots shown in this manual are from Easy CD Creator
5.0.
Important!
• Only project lists created for a music CD can be opened with CD/
DVD LABEL PRINTER application.
• Import of project file created by adding an audio file to a track from
a computer hard disk is not imported.
7. Select
the project list you create in step 3, and then click Open. A
dialog box for selecting the specific text you want to impor t appears
after all the text is imported.
1. Start up Easy CD Creator.
2. Place the disc that contains the data you want to impor t into the CD
drive of your computer.
3. Use Easy CD Creator to save the project list.
This saves the project list.
Note
See Easy CD Creator user documentation and online help for details
about its operation.
4. Start up CD/DVD LABEL PRINTER application.
5. On the music label template main window, click
.
8. After checking the song titles in the label input boxes, click
OK.
The data you import appears in the label impor t boxes and the preview image.
41
Importing File and Folder Name for a Data Label or
Digital Image Label
Use the following procedures to import a folder name and file names for
data label or digital image label.
1. On
the data label template or digital image label template main win-
dow, move the cursor to the label input box where you want to import
the file names, and then click
.
2. Click Import and then Import File Name.
To import a folder name
1. On
To import file names
the data label template or digital image label template main win-
This displays a dialog box for selecting files.
dow, move the cursor to the label input box where you want to import
the folder name, and then click
.
2. Click Import and then Import Folder Name.
This displays a dialog box for selecting a folder.
3. Select the names of the files you want to impor t, and then click OK.
The file names you import appear in the label input box and the preview image.
3. Select the folder name you want to impor t, and then click OK.
The folder name you impor t appears in the label input box and the
preview image.
42
Note
• You can select a range of file names by clicking the name at one
end of the range to select it, and then holding down your PC
keyboard’s Shift key as you click the name at the other end of the
range.
• You can select multiple file names that are not next to each other
by holding down your PC keyboard’s Ctrl key as you click them.
• Note that even when there are multiple file names selected, only
one file name appears in the Title.
Useful Text Input Functions
Right-clicking the CD/DVD LABEL PRINTER application main window displays a shortcut menu of commands that come in handy during text
input.
w
e
1
2
3
4
5
6
7
8
9
0
q
Before text editing
r
When text has
been edited
1 Copy
Copies the selected text to the clipboard.
2 Paste
Pastes the contents of the clipboard at the current cursor position.
3 Move Up
Moves the line that is currently selected in a label input box one line
up.
4 Move Down
Moves the line that is currently selected in a label input box one line
down.
6 Insert
Inserts a new line above the one that is currently selected in a label
input box.
7 Time Stamp
Stamps the current date into the label input box.
The date that is stamped is the one being kept by your PC’s clock.
8 Phrase Memory
Shows a list of preset phrases. Clicking a phrase inser ts it at the
current cursor position.
9 Music
Displays a list of preset phrases you can input into a music label
template label input box. Clicking a phrase inser ts it at the current
cursor position.
0 Digital Image
Displays a list of preset phrases you can input into a digital image
label template label input box. Clicking a phrase inser ts it at the current cursor position.
q User
Shows a list of preset phrases registered by you. Clicking a phrase
inserts it at the current cursor position. See page 76 for information
about registering preset phrases.
w Undo
Undoes the last operation.
e Cut
Cuts selected text and places it onto the clipboard.
r Select All
Selects all the text in a line.
5 Delete
Deletes the line or text string selected in a label input box.
43
3. Click Save As.
Saving Label Data
1. Click the
This displays the Save As dialog box.
button.
2. On the menu that appears, click
Save.
This displays a dialog box for saving label data.
• Save: This button appears if this is the first time you are saving the
label data. Clicking this button saves the data, assigning the title name
as the file name. If the label data you are editing has already been
saved, this button name changes to Overwrite. Clicking Overwrite
replaces the existing data with the version you are editing on your PC
screen.
• Save as: This displays a dialog box for saving the label data under a
different file name.
• Cancel: This closes the dialog box without saving anything.
44
4. Specify the folder in
Save in, and type a file name into File name.
5. Click Save to save the data.
Opening a Label Data File
Perform the following steps when you want to open an existing label
data file.
1. Click the
button.
2. On the menu that appears, click
Open.
This displays a dialog box for selecting the file you want to open.
3. Select the name of the file you want to open, and then click
Open.
The data in the file is displayed in the label input box and the label
preview image.
Note
You can also open a label data file by clicking the File Open icon on
the Label Template Menu (Page 33).
45
Creating a Data Index File
For a disc that contains so much data that it cannot fit on a label, you
can use the following procedure to create a data index file that you can
print out on a computer printer.
1. Click the
3. Select the folder for which you want to create a data index, and then
click OK.
This displays the Save As dialog box.
button.
2. On the menu that appears, click
Create Data Index File.
This displays a dialog box for selecting a folder.
4. Specify the folder in
Save in and type a file name in to File name.
You can specify either CSV or TXT as the file type.
5. Click Save to save the data and create a data index file.
Note
You can open a data index file using standar d word processor or
spreadsheet software, and then print from there.
46
Configuring Layout Settings
You can control the appearance of your labels using the printing pattern and text layout panels, and the Font and Image buttons.
Any changes you make to a label are immediately reflected in the label
preview image.
Important!
With print patterns 8 through q, only one line of text can be printed
in each label print area, regardless of the font size (1 ×, 2×, 3×) setting.
To configure print pattern settings
1. Click the
To configure layout settings
panel.
This displays a menu for selecting a print pattern.
The print pattern controls the location and the orientation of the printing
on a label.
For text input
Indicates text and
image orientation.
For image input
Available Print Patterns
The 11 CD/DVD LABEL PRINTER print patterns are shown below.
1
4
Text areas
7
0
q
2. Click the print pattern to which you want to change.
2
5
8
3
6
9
This causes the print pattern panel and the label preview image to
change in accordance with the print pattern you selected.
Image area
47
To modify a preset print pattern
Configuring Text Layout Settings
1. On the main window, click
You can select from a number of different layouts for the text on your
labels.
.
This displays a dialog box for selecting a print pattern.
2. Click
.
About the Layout Panel
This Displays a menu of options.
This displays a dialog box for configuring advanced print pattern settings.
1
2
Templete
Music Label
1
The settings you configure are reflected here.
3. Click
2
the Label 1 and Label 2 down arrow buttons and select the
setting you want for each of the label areas, and then click OK.
This causes the print pattern panel and the label preview image to
change in accordance with the settings you configured.
Item
Title
Artist Name
Data Label
Title
Digital Image Label
Music Label
Tracks
Data Label
Contents
Date
Digital Image Label Location
Image
Information
Meaning
Centered in the label area.
Indicates the following.
• Text alignment
(left, center, right)
• Item per line
(1 or 2)
• Numbered/Nonnumbered lines
Available Text Layouts
When you specify an image for Label 1 or Label 2, you can specify
insertion of Image 1 or Image 2. See Inserting an Image into a Label
on page 52 for information about Image 1 and Image 2.
To specify this image:Select a print pattern that shows this:
Image 1
Image 2
Image 1, Image 2
48
The 10 CD/DVD LABEL PRINTER text layouts are shown below.
1
3
5
7
9
2
4
6
8
0
Note
Layouts 3 4 5 6, 9, and 0 allow fewer characters per line than
the other layouts.
To configure text layout settings
To modify a preset text layout
1. Click the
1. On the main window, click
panel.
This displays a menu for selecting a text layout.
2. Click
.
.
This displays a menu for selecting a text layout.
The settings you configure are reflected here.
2. Click the text layout to which you want to change.
This causes the text layout panel and the label preview image to change
in accordance with the text layout you selected.
3. Configure
the settings you want for each item, and then click OK.
This causes the text layout panel and the label preview image to change
in accordance with the text layout you selected.
49
3. Click the L button in Font.
Configuring Font Settings
Use the procedures in this section to control the font, attribute, and size
settings of label text.
1. On the main window, click the
button.
This displays a dialog box for configuring font settings.
4. Select the font you want from the list that appears.
5. In the
Font Style group, select one or more of the available options
(Double Wide, Italic, Bold).
Note
The standard default is all font styles unchecked.
2. Select a tab and then make the settings you want.
The tabs that appear on the above dialog box depend on the type of
label template you are using.
50
When you are using this type of
template:
These tabs are:
Music Label
Data Label
Digital Image Label
Title, Artist Name, Tracks
Title, Contents
Title, Date/Location,
Image Information
6. In the Font Size group, select the font size you want.
7. After completing the settings, click
OK.
The settings you configure are reflected in the preview image on the
Important!
You can input text for up to six text input areas in a single label. Note
that the number of lines you can input is af fected by the font size you
select. If you specify a 2-line font size for the title font and ar tist
name, when creating a music CD label, for example, you will be able
to input only two lines of song title text.
main window.
L
Important!
• With print patterns 8 through q (page 47) , only one line of text
can be printed in each label print area, regardless of the font size
(1×, 2×, 3×) setting.
• With print patterns 1, 4, and 5 (page 47), selecting certain font
sizes can cause text on the upper par t of the label preview image to
shift to the lower part, or text on the lower part of the image to
shift to the upper part.
51
Inserting an Image into a Label
2. Click Open Image.
You can use either of following two methods to input an image into a label.
• Inputting an image from a file
• Capturing a PC screen image
Important!
• To input an image into a label, you need to select print patter n 6 or
pattern 7 (page 47), or a setting that is marked with
on the
Advanced Print Pattern Settings dialog box (page 48).
• Even if you are inserting a color image, it is printed in monochrome in
accordance with the “Dithering” settings. See page 55 for more
information.
• To view the actual print image, click
.
3. Select the file name of the BMP or JPEG image you want to input, and
then click Open.
This displays the selected image in color in the center of the Image
Settings dialog box preview area.
4. After making sure the preview shows the image you want, click
To input an image from a file
1. On the main window, click the
button.
OK.
Note that the layout preview image on the main window shows the
image you selected in monochrome.
This displays the Image dialog box.
Note
• See page 55 for information about monochrome conversion dithering
settings.
Capturing a PC Screen Image
Perform the following steps to capture a screen image and insert it into
a label.
1. On the main window, click the
This minimizes the main window.
52
button.
2. Display the screen you want to capture.
3. On the Windows task bar, click CD/DVD LABEL PRINTER.
5. Click Capture.
This minimizes the main window.
Note
To cancel the capture operation, press the Esc key or right-click your
mouse.
This displays the main window.
6. Locate the mouse pointer at one of the corners of the area you want
to select for capture. Holding down the left mouse button, drag the
pointer to the corner that is diagonally opposite the one you star ted
from.
4. On the main window, click the
This displays the Image dialog box.
button.
This draws a selection
boundary around the area.
Guidelines also appear that correspond to the area of the layout size.
A color image of the selected area appears in the Image Settings dialog
box preview area.
53
7. After making sure the preview shows the image you want, click
OK.
Controlling the Aspect Ratio of an Image
Note that the layout preview image on the main window shows a
monochrome version of the image you selected.
Perform the following steps to specify whether the aspect ratio should
be maintained when the image is resized, and to specify the position of
the image.
Note
• See page 55 for information about monochrome conversion dithering
settings.
1. While
an image is displayed in the preview area of the Image Set-
tings dialog box, select the Maintain aspect ratio setting you want.
To save a captured image to your PC’s hard disc
1. While
the captured image is shown on the Image Settings dialog
box, click Save.
2. Specify the folder in Save in and type a file name into
3. Click Save.
4. Click OK.
Captured images are always saved in BMP format.
54
File name.
When you want to do this:
Do this:
Enlarge or reduce the image
to fit the label area while
maintaining the ratio between
the image’s vertical and
horizontal dimensions.
Select the Maintain aspect
ratio check box.
Enlarge or reduce the image
to fit the label area without
maintaining the ratio between
the image’s vertical and
horizontal dimensions.
Clear the Maintain aspect
ratio check box.
About color images...
Maintain Aspect Ratio On
When you insert a color image, it is automatically conver ted to a monochrome image. The colors of the image are expressed as different shades
of gray.
1. While
the image you inser ted is displayed in the layout preview im-
age, click the L button in Dithering.
Maintain Aspect Ratio Off
Note that the Image Position settings appear dimmed and are not
available when the Maintain aspect ratio check box is cleared.
2. While
an image is displayed in the preview area of the Image Set-
tings dialog box, select the setting you want under Image Position.
3. When all the settings are the way you want, click
OK.
• The settings you configure are reflected in the preview image on
the main window.
Note
To view the actual print image, click
.
55
2. Select “Pattern” or “Error Diffusion” and then click
OK.
The dithering setting you select is reflected in the label preview image
on the screen.
Difference between Pattern and Error Diffusion
Dithering
With both dithering methods and dark colors are printed blacker,
while light colors are a lighter shade of gray. Compared with Pattern dithering, Error Diffusion takes longer, but the printout looks
better.
Pattern
Error Diffusion
56
Original Label Making
Creating an Original Label Layout
There are two templates for creating an original label layout: the Free Text label template and the Free Design label template. For details about more
basic label creation procedures, see the steps under “Automated Label Layout”.
Free Text Label Template
Free Design Label Template
• The Free Text label template lets you input text using many of the same
techniques available on a word processor application.
• You can specify the font, font size, and other settings on a text string
level. Images can be inserted as the background of a label (page 62),
and you can even insert different images for the upper label area and
the lower label area.
• The Free Design Label Template gives you maximum control over the
appearance of the label you are creating.
• It lets you input text and images into individual fields, which you can
then place in label areas as you like.
• You can have a total of 40 fields in the upper and lower label ar eas.
Free Text and Free Design Common Characteristics
•
•
•
•
The following characteristics are common to both the Free Text label template and the Free Design label template.
CD-Text, Media Player, and Easy CD Creator track name data, as well as file names and folder names can be impor ted into labels.
Font and font size settings are configured using toolbar buttons.
The Text Layout panel appears dimmed, which means it is not available.
57
Free Text Label Template Main Window
Free Design Label Template Main Window
1 Print Pattern Panel
2 Toolbar
4 Insert Image
7 Measurement Unit Button
8 Work Area Size
Button
Button
5 Insert Text
1 Print Pattern
Button
Panel
2 Toolbar
9 Insert Image
Button
3 Work Area
6 Print Area
58
3 Work Area
Free Design and Free Text Template Main Windows
Free Text Template
1 Print Pattern Panel
This panel shows the location and orientation of the printing on the
currently selected label. Click this panel when you want to change
the text layout.
8 Work Area Size Button
Clicking these buttons changes the size of the work area as described below.
ONE: Clicking this button displays the top label area only in the work
area.
ALL: Clicking this button expands the work area so it displays both
top label area and the bottom label area.
2 Toolbar
Contains a selection of useful editing tools. Click a tool to use it. See
“Toolbars” on the right for more information.
9 Insert Image Button
Click to insert a image field.
3 Work Area
This is the area where you layout the label.
Toolbars
4 Insert Image Button
Click to insert an image or a background image.
The following describes the tools that are available in the toolbars on the
Free Text and Free Design label template main windows.
Free Text Template
Free Design Template
See “Free Text Template” for information about 1, 2, and 3.
5 Insert Text Button
Click to insert a text field.
6 Print Area
Indicates the area within the work area that is actually printed. You
can move the print area by dragging it.
Any text or images that are outside of the print area are not printed.
7 Measurement Unit Button
Shows the currently selected measurement unit.
Each click of the measurement unit button cycles through the units
in the following sequence: mm (millimeters) → Pel (pixels) → inch →
mm.
1
2
3
4
1 Font Settings
Use these tools to select the font, font size, etc.
2 Show Background Button
On the Free Text label template main window, this button displays
the selected background image.
3 Editing Tools
Use these tools to cut, copy, and paste text and fields, and to undo
editing operations.
4 Background Image Settings Button
On the Free Text label template main window, this button displays a
dialog box for configuring background image settings.
59
Free Design Template
Send
–To Front
–To Back
1
3
5
See “Free Text Template” for information about 1 and 3.
5 Layout Button
Alignment
The commands in this submenu align fields on a reference field.
–Left
Aligns the selected fields on their left sides.
–Center Horizontally Aligns the selected fields on their horizontal
centers.
–Right
Aligns the selected fields on their right sides.
–Top
Aligns the selected fields on their tops.
–Center Vertically
Aligns the selected fields on their ver tical
centers.
–Bottom
Aligns the selected fields on their bottoms.
Uniform Spacing
–Vertical
–Horizontal
Center
–Vertical
–Horizontal
60
–Forward
–Back
Resize
–By Width
–By Height
Makes all of the selected fields the same
height and/or width.
–By Height and Width
Other
–Maximize
–Center
– Maintain Aspect
Ratio and Center
Arranges three or more fields so they are
evenly spaced vertically.
Arranges three or more fields so they are
evenly spaced horizontally.
Centers the selected fields ver tically in the
print area.
Centers the selected fields horizontally in
the print area.
Sends the selected field to the front of all
the fields.
Sends the selected field to the back of all
the fields.
Sends the selected field one level for ward.
Sends the selected field one level back.
Enlarges the field so it fills the print area.
Moves the field to the center of the print
area.
Maximizes the field while maintaining its
aspect ratio, and centers it in the print
area.
Important!
Certain fonts and font size settings can cause poor printing r esults.
Configuring Font Settings
(Free Text Template, Free Design Template)
This section describes how to configure font settings for text you input
manually into the work area, or text you import (page 38).
You can select font, font size, font style, and text alignment fr om the
toolbar.
Font Setting Tools
■ To change font style settings
You can use the following procedure to italicize or bold text.
1. Input text into the work area.
2. Highlight the characters whose font style setting you want to change.
3. Click
to make the selected text bold, or
to make the text italic.
• Your font style setting is reflected in the work area and the preview
image.
• Selecting bold text and clicking
or italicized text and clicking
removes the corresponding style and returns the text to normal.
■ To change the alignment of text
You can align text so it is left-aligned, centered, or right-aligned.
■ To specify the font
1. Input text into the work area.
1. Input text into the work area.
2. Locate the cursor inside the text whose alignment you want to change.
2. Highlight the characters whose font setting you want to edit.
3. Click
3. On the toolbar, click the down arrow button, and then select the font
you want from the list that appears.
• Your font selection is reflected in the work area and the preview
image.
to left-align the text,
to center the text, or
to right-align
the text.
• The alignment you specify is reflected in the work area and the
preview image.
■ To specify the font size
1. Input text into the work area.
2. Highlight the characters whose font size you want to specify.
3. On the toolbar, click the down arrow button, and then select the font
size you want from the list that appears.
• Your font size selection is reflected in the work area and the preview
image.
• If the font size you want is not included in the list, select the font
size box in the toolbar and type in the size you want.
61
Inserting a Label Background Image
(Free Text Layout)
1. On the main window, click
.
2. Click
, and then select the image you want to inser t.
• The image appears in the preview image on the main window.
• One image can be inser ted per label area.
After you insert an image into print pattern
, you cannot input
text. To insert a label background image, choose
or
.
Note
• See “Inserting an Image into a Label” on page 52 for information
about inserting images.
• See “Configuring Lauout Settings” on page 47 for information about
print patterns.
To specify the image orientation
1. On the main window, click
.
This displays the Advanced Free Text Settings dialog box.
2. Specify the orientation for the images in the upper label area and the
lower label area, and then click OK.
To turn off display of background images
1. On the main window, click
.
This turns off display of the background images. Clicking
turns display of the background image back on.
again
Note
• Text overlaid on a background image can become distor ted when
printed. Because of this, we recommend that you lay out your label
so the text is not overlaid on an image.
• Clicking
displays an enlarged preview image, which comes in
handy when layout label elements.
62
Fields (Free Design Templete)
This section contains general information about fields. It also explains
operations that are common to both text and image fields.
To select a field for inputting or editing text, click anywhere inside the
field boundary.
A text field is selected for text input and editing when it appears as
shown below.
Field Types
A field is a kind of box you can inser t into the work area to hold text or an
image. Text goes into text fields, while images go into image fields.
Selecting a single field causes it to be enclosed with a gray selection
boundary. Selection boundaries do not appear on printouts.
Text Field
Image Field
Image Field: Click anywhere inside an image field to select it.
An image field that has a light gray boundar y around it can be moved or
deleted.
Common Text Field and Image Field Operations
The following operations are the same for both text fields and image
fields.
■ To move a field
■ Selecting a Field
Select the field and then drag it to the location you want.
Text Field: Click on the boundary of a field to select it. You can move or
delete a field whose boundary appears as shown below.
Note
• For fine movement of a field, use your keyboard arrow keys. Each press
of an arrow key moves the selected field one dot.
To delete a field
Select the field and then press the Delete key.
The shape of the mouse pointer changes when it is located near a field
boundary.
If the text field has a white background and the cursor flashing inside it
(for text input and editing), click the boundar y of the field again.
63
Inputting Text into a Text Field
(Free Design Templete)
The following describes how to input, edit, and delete text.
1. Using the procedure under “Importing Text Data”on page 38, impor t
the text from a file.
A dialog box for selecting the specific text you want to impor t appears
after all the text is imported.
1
To input text manually
1. On the main window, click
.
This inserts a text field into the upper label area.
2. Type in the text you want.
To input text imported from a file
Use this procedure below to import text from a CD-Text, Media Player, or
Easy CD Creator file, and input it into a label.
64
2
1 Indicates the number of fields that can still be inser ted. A label can
contain up to 40 fields total.
The Separate and Batch buttons appear dimmed and unavailable
when there are 40 fields in a label.
2 Batch:
Imports all selected items into a single field.
Separate:
Using this option imports only the titles, artist names, and track names
whose check boxes are selected into individual fields.
2. Click Batch or Separate.
• The text you input here appears in the work area and the label
preview image.
Note
• When you import file names and folder names, click OK.
• When you import file names and folder names, each name is inserted into its own field.
Inserting an Image into a Label
(Free Design Templete)
Use the procedures in this section to inser t an image into a label and to
delete a label image.
To insert an image into a label
1. On the main window, click
To configure font settings for the text in a field
1. Highlight the text whose font settings you want to change.
2. Use the toolbar to configure font, font size, and font style settings.
Note
See “Toolbars” on page 59 for more information.
, configure settings for the image you
want to insert, and then click OK.
• This inserts the image in the center of the print area.
• If the selected image is larger than the work area, it is resized to fit
while maintaining the relationship between its horizontal and ver tical
dimensions (aspect ratio).
To delete an image field
To delete a text field
1. Select the image field you want to delete.
1. Select the text field you want to delete.
2. Press the
2. Press the Delete key on your computer keyboard.
Delete key on your computer keyboard.
This deletes the image field.
This deletes the text field.
65
Resizing a Field (Free Design Template)
Use the procedures in this section when you want to change the size of
a field.
Important!
Note that the result obtained when you resize a field depends on whether
it is a text field or an image field.
1. Select the field you want to resize so it is enclosed by a gray selection
boundary.
2. Use
one of the techniques described below to drag one of the four
corner handles on the boundary to resize the field.
Example: Simple drag operation
J
• Simple Drag Operation
Simply dragging a corner handle resizes the field, without maintaining
its aspect ratio.
• [Shift] + Drag
This resizes the field while maintaining its aspect ratio. The field is
enlarged or reduced with the corner that is diagonally opposite
from the one you are dragging fixed.
• [Shift] + [Ctrl] + Drag
This also resizes the field while maintaining its aspect ratio. The
field is enlarged and reduced with its center fixed.
66
Important!
Resizing a text field does not affect the size of the text inside the field.
J
Aligning and Resizing Fields
(Free Design Template)
A selection of useful commands makes it possible to instantly position
fields on a label and to make multiple fields the same size (See page 60).
■ To make multiple fields the same size
You can resize multiple fields so they are the same size as a reference
field that you specify.
Example: Resizing fields by height and width
Reference field
Note
You can use the following procedures for both text fields and image fields.
■ What is alignment?
L
Aligned fields
The CD/DVD LABEL PRINTER application lets you align multiple fields
vertically or horizontally in relation to a reference field that you specify.
Example: To center fields vertically
Reference field
L
Aligned fields
67
2. To make a different field the reference field, hold down the Ctrl key as
To align fields
1. Drag the mouse on the label so the fields you want to align or resize
you click the new reference field.
are enclosed in the selection boundar y.
This is the reference field.
L
3. Click the
button.
This displays a menu.
Note
• See “Toolbars” on page 59.
4. On the menu, select
Alignment.
5. On the submenu that appears, select the command you want.
The selected fields are aligned in accordance with the command you
select.
Thin boundary
Selection boundary
• The reference field is surrounded by a relatively thick gray boundary,
while other selected fields are surrounded by thin boundaries.
NOTE
• You can also select and deselect fields using Shift + click.
• To deselect all of the currently selected fields, simply click anywhere
outside of the selected fields.
68
The above shows the result of Alignment – Center Vertically
3. Input the values you want. The settings you configure are reflected in
Configuring Field Properties
(Free Design Template)
the preview image on the main window.
4. Click the Size tab.
Clicking the
button and then Properties displays a dialog box that you
can use to change the properties of a field.
Note
The unit of measurement (millimeters, pixels, inches) used on the Field
Properties dialog box is the same as that selected with the ruler unit of
measurement button (Page 59).
To reposition and resize a field
1. Select the field you want to reposition. On the main window, click
.
Note
If multiple fields are selected, only the reference field (the one with
the gray selection boundary) can be repositioned.
2. On the menu that appears, click
Properties.
This displays the Field Properties dialog box.
Print Area Location
These values indicate the
relative location of the
print area from the upper
left corner of the work
area. Changing the values
in the box causes the
print area to move to the
new location.
Size and Zoom Factor
Inputting a value in one box automatically changes the value in the
other box.
Maintain aspect ratio
When this check box is selected, the field is resized while maintaining
the relative ratio between its vertical and horizontal dimensions.
When this checkbox is cleared, a field can be resized by changing the
horizontal or vertical dimension only.
Dimensions:
These are the dimensions of the image when it was originally captured or imported from a file.
5. Input the values you want and then click OK. The settings you configure
are reflected in the preview image on the main window.
69
Useful Text Input Functions
(Free Text Template, Free Design Template)
This section describes various useful functions you can access on the
shortcut menu that appears when you right-click on the Free Text label
template or Free Design label template.
Right-clicking the mouse while the cursor is located in the work area
displays one of the shortcut menus shown below.
When a field is not selected
8 Phrase Memory
Phrase Memory lets you select and input preset words and expressions from a menu.
When a field is selected
Free Design Template
(When an image field is selected.)
w
e
70
7
8
9
0
q
4 Paste
Inserts the clipboard contents into the work area.
7 Time Stamp
Stamps the current date into the work area. The date that is stamped
is the one being kept by your PC’s clock.
6
1
2
3
4
5
6
3 Copy
Copies the currently selected field and places it onto the clipboard.
6 Select All
Selects all of the fields in the work area.
2
3
4
5
1
2
3
4
5
6
2 Cut
Cuts the currently selected field from the label and places it onto the
clipboard.
5 Delete
Deletes the selected field.
1
Free Text Template
Free Design template
(When a text field is selected.)
1 Undo
Undoes the last operation you per formed.
r
t
9 Music
Displays music phrases and expressions. Select the phrase you want
from the submenu that appears to input it.
0 Digital Image
Displays digital image phrases and expressions. Select the phrase
you want from the submenu that appears to input it.
q User
Shows a list of preset phrases registered by you. Clicking a phrase
inserts it at the current cursor position. See page 76 for information
about registering preset phrases.
Note
See the “Phrase Library List” on page 80 for more information.
w Return to Original Size (Image Field only)
This command change the size of the field so the image within it is
the same size it was when captured or imported.
e Layout
Use the commands on the submenus to align fields and to move
them forward and back.
Note
• See “Toolbars” on page 59.
• See “Aligning and Resizing Field” on page 67.
r Dithering (Image Field Only)
Use the submenu that appears to select either Pattern or Error
Diffusion for the dithering method.
t Properties
Displays a dialog box that shows the properties of the selected field.
You can also configure position and size settings on the properties
dialog box.
Note
See “Configuring Field Properties” on page 69 for more information.
71
Printing and Other Operations
Printing a Label
Perform the steps below to print label data on the printer.
Important!
• See the separate “Quick Start Guide” sheet for important information
about printing conditions.
• This printer supports printing on 12cm diameter discs only.
Attempting to print on a CD-R single or on a business car d CD-R can
result in damage to the printer.
• We recommend that you use this product for printing on blank,
unrecorded media. Printing on media that already had data recorded
on it may cause the data to become corrupted.
Note
Note that the disc tray does not open automatically when you have
the Manually open Disc tray before printing option selected for the
Auto Disc Tray Operation Setting item on the Print tab of the Advanced Settings dialog box. In this case, click the
button on the
Print dialog box or press the Eject button on the front of the printer.
See page 16 for more information.
1
To print a label
Important!
Check the following points before you start to print.
• Make sure the printer is plugged into a power outlet and connected to
your computer (page 21).
• Make sure an ink ribbon cassette is loaded in the printer (page 23).
1 Shows how the disc should be oriented and the print location in accordance with the selected print pattern.
1. While
2 Click to start a print operation.
the label data you want to print is displayed in the label input
boxes, click the main window’s
button.
• This causes the disc tray to come out par t way. Gently pull out the
disc tray the rest of the way.
• This displays a dialog box for printing.
2
3
4
5
6
3 Click to skip the Label 1 (first) printing and per form Label 2 (second)
printing.
4 Stops printing.
5 Eject Button.
Opens the disc tray.
6 Displays a dialog box for more advanced printing and phrase settings.
See page 76 for more information.
72
2. Place the disc whose label you want to print into the disc tray.
3. Place the positioning guide on top of the disc.
Place the positioning guide here.
Note
If the label of the disc you are using does not have specific printing
areas, you can skip steps 3 and 4.
Set the disc onto the tray so it
is inside of these raised guides.
Make sure you check the print layout and orientation before placing
the disc onto the tray.
Important!
• Check to make sure that there is no dirt, dust, or other foreign
matter on the disc tray or the disc. Dir t or dust can scratch the
recording surface of the disc and make it impossible to record
data onto the disc.
• Place the disc onto the tray so the label side of the disc is facing up
(so you can see it) and the recording side is facing down (towards
the tray). Placing the disc onto the tray upside-down will result in
printing on the recording side of the disc, which will make the disc
unrecordable.
4. After positioning the disc, remove the positioning guide.
J
Place the positioning guide while watching the guidelines on the disc
tray.
Note
Adjust the position of the disc so printing does not overlap logos, etc.
See “Positioning the Disc on the Tray” on page 75 for more information.
Important!
Make sure to remove the positioning guide before printing.
73
5. Close the disc tray.
Press the disc tray with your hand until it clicks.
When printing in both the upper label area (LABEL 1)
and lower label area (LABEL 2)...
7. Rotate the disc 180 degrees and place it back onto the tray.
6. Click Start Printing.
This starts the first printing.
Position the disc so the
first printing is located
here, and then set the disc
onto the tray.
Important!
Never disconnect the AC adaptor, power cord, or USB cable while a
print operation is in progress. Doing so creates the risk of malfunction.
• The disc tray opens slightly after printing is complete. Gently pull
out the tray the rest of the way.
• If you are printing only the upper label area (LABEL 1) or only lower
label area (LABEL 2), printing ends with this step. Other wise, you
should continue with the following steps below.
8. Repeat steps 3 and 4 to position the disc.
Note
See “Positioning the Disc on the Tray” on page 75 for more information.
9. Click Start Printing.
This starts the second printing.
Important!
• Never disconnect the AC adaptor, power cord, or USB cable while
a print operation is in progress. Doing so creates the risk of
malfunction.
The disc tray opens automatically after printing is complete. Carefully
pull out the tray and remove the disc.
74
Positioning the Disc on the Tray
Use the positioning guide to adjust the position of the disc on the
tray in the following cases.
• When the label of the disc already has logos or other markings
• When performing separate upper block and lower block
printings
When the label of the disc already has logos or other markings
Note that you cannot print over a logo. Position the disc so the logo
or other markings on the disc label are not inside the shaded area.
Printing will be
performed inside
the area indicated
by the guidelines on
the disc tray.
Guidelines
When performing separate upper block and lower block printings
Before performing the second printing, rotate the disc 180 degrees. Next, position the disc so the first printing is within the shaded
area.
Area of first
printing
Area of second
printing
75
Registering and Deleting a Phrase Memory Entry
Configuring Advanced Settings
On the main window or the print dialog box, click
. This displays a
dialog box for making advanced label creation or print settings.
You can register frequently used terms and phrases for instant recall
whenever you need them. See “Useful Text Input Functions” on pages 43
and 70 for information about using phrase.
To configure advanced print settings
1. On the main window or Print dialog box, click the
1. On the main window or Print dialog box, click the
button.
button.
2. Click the Phrase Memory tab.
2. Click the Print tab.
Print Density
Shift the slider left or right to adjust print density when printing is too
dark or too light.
Auto Disc Tray Operation Setting
Use this setting to control whether the printer unit’s disc tray should
be opened automatically or manually before printing is started.
3. After everything is the way you want, click
76
OK.
To register a new phrase
Type the phrase you want to register into the text box, and then click
Save.
To delete a phrase
Click the phrase you want to delete so it is highlighted, and then click
Delete.
3. After everything is the way you want, click
OK.
To configure advanced layout settings
Use the following procedure to save the settings of a layout you create,
and to control what appears when you click the Print Pattern panel and
Text Layout panel.
1. On the main window or print dialog box, click the
button.
2. Click the Other tab.
Important!
The Text Layout panel (page 48) and font button settings cannot be
saved for the Free Text layout and Free Design layout.
Select the check box next to Show advanced print pattern settings
only if you want the Advanced Print Pattern Settings dialog box
(page 48) to appear when you click the Print Pattern panel. The
Select Print Pattern dialog box appears when this check box is cleared.
Select the check box next to Show advanced text layout settings
only if you want the Advanced Text Layout Settings dialog box (page
49) to appear when you click the Text Layout panel. The Select Text
Layout dialog box appears when this check box is cleared.
3. After everything is the way you want, click
OK.
Save Style
Clicking the Save button saves the current print pattern, text layout,
and font settings and makes the initial default settings.
• The settings you save will be applied the next time you create a label
using the same template.
• You can save one setup per label template.
77
Using Help
The online help feature lets you access the following type of information.
• Information about functions and supplementar y information
• Software version information
• Connection on the TDK Website
To use Help
1. On the main window, click the
button.
2. Click Help.
3. Use
standard Windows online help procedures to find the informa-
tion you need.
78
You can also obtain assistance by accessing the TDK Website.
While your computer is connected to the Internet, click
and
then click TDK Website. This will take you to the TDK Website
where you will find the latest news and other information about
TDK or USB peripheral products.
Caring for the Printer
A dirty print head can make it impossible to obtain good printing r esults.
Perform the following steps to clean the print head when it becomes
dirty.
Important!
• Use only a cotton swab or some other soft material to clean the print
head.
• Note that you will not be able to open the disc tray or the front cover
unless the power cord, AC adaptor and USB cable are connected to
the printer. Open the front cover before disconnecting cables. See
page 23 for information about opening the disc tray and front cover,
and page 22 for information about disconnecting cables.
1. Press
the Eject button on the front of the printer or click the
button on the main window.
This causes the disc tray to come out par t way.
2. Gently pull out the disc tray as far as it will go.
If there is a disc in the disc tray, remove it.
3. Open the front cover.
If there is an ink ribbon cassette loaded in the printer, remove it.
6. Use a cotton swab moistened with alcohol to clean the print head.
You can use a commercially available cassette tape recorder head
cleaning kit to clean the print head.
Insert the tip of the
cotton swab and slide it
lightly back and forth
along the depression in
the print head.
Cleaning the Printer Exterior
Wipe the exterior of the printer with a cloth moistened with plain
water. Wring all excess liquid from the cloth before wiping the printer.
Never use benzene, alcohol, thinner, or other volatile agents to clean
the printer exterior. Doing so can damage the case.
4. Unplug the USB cable from the PC and printer.
5. Unplug the power cord from the wall outlet, and then unplug the AC
adaptor from the printer.
79
Phrase Library List
Troubleshooting
The following is a list of the built-in phrase librar y contents. See page 43
and 70 for information about using phrase.
Consult this troubleshooting guide whenever you star t to have problems
with the printer or application. If you cannot find the solution to your
problem below, contact your original retailer.
Phrase Memory
TEL:
FAX:
POST CODE:
Extension:
Direct:
E-mail:
http://
Contact:
Manager:
Term:
Issue Date:
Music
Big Hit
Hit Album
Best Of
Omnibus
My Favorites
80
Digital Image
Date Recorded:
Recorded By:
Recorded At:
Image Quality Setting:
High:
Normal:
Economy:
Symptom
● Nothing works.
● The disc tray
does not open
when the
Eject button
is pressed.
Possible Cause
Recommended Action
The software is not
installed.
Disconnect the USB
cable and re-install the
software. Installing the
software also installs
the driver. After reinstalling, connect the
USB cable again.
The USB cable, AC
adaptor, or power
cord is not connected.
Carefully make all of
the required
connections (page 21).
Your PC is not turned
on.
Start up your PC.
The USB cable, AC
adaptor, or power
cord is not connected.
Carefully make all of
the required
connections (page
21).
Your PC is not turned
on.
Start up your PC.
* If the disc tray does not open when you are trying
to remove a disc from the printer, you can use the
procedure on page 16 to open the tray manually.
Symptom
● Printing is not
clear.
● Printing is
poor quality.
● Printing is too
light.
Possible Cause
Recommended Action
Any of the following
can interfere with
proper printing.
• A disc label that is
not smooth.
• A disc label that
has a design or
lines printed on it.
• A disc label that
support ink jet
printing only.
See the separate
“Quick Start Guide”
sheet for information
about recommended
media.
Dirty print head
Clean the print head.
(page 79).
Improper print density
Adjust the print
density. (page 76).
● Printing is
misaligned.
Improper alignment of
the disc in the tray
Use the alignment
guide when aligning
the disc in the tray
(page 72).
● Cannot print.
The ink ribbon is used
up.
Replace the ink ribbon
cassette with a new
one (page 23).
The driver is not
installed correctly.
Disconnect the USB
cable and re-install
the software.
Installing the software
also installs the
driver. After reinstalling, connect the
USB cable again.
Symptom
● The last part
of input data
does not
print.
● Cannot import
CD-Text.
Possible Cause
Recommended Action
Too many characters
per line
Use a smaller font
size or reduce the
number of characters
per line.
Too many lines
Use a smaller font
size or reduce the
number of lines.
The music CD you are
trying to import from
does not have any
CD-Text on it.
Type text manually
into the label input
boxes, or find a
Website on the
Internet that contains
the data you want to
include on the label,
copy it, and then
paste it into the label
input boxes.
Your CD drive does not
support reading of CDText.
● Cannot create
a data index
file.
The specified drive or
media where you are
trying to save the
data is write
protected or full.
Remove the write
protection or delete
data you no longer
need to make room
from the data index
file. Other options
include switching to a
different drive or
different media.
81
Message
Error Messages
Recommended Action
Page
The label file cannot be
imported because it is
corrupted or an
unsupported format.
Message
Specify a proper label file
format.
pages
38 – 42
The text data cannot be
imported because it is
corrupted or an
unsupported format.
Create a new song title
list and try again.
page 39
There is still a Disc in the
printer. Remove the Disc
to quit.
Remove the disc and then
quit.
pages
31 and
72
Eject could not be
performed because the
printer is turned off or it
is not connected to the
computer. Correct the
problem and then try
ejecting again.
Make sure the printer is
connected correctly to
your PC.
page 21
The printer is turned off
or it is not connected to
the computer.
Make sure the printer is
connected correctly to
your PC.
Make sure the printer is
connected correctly to a
power source.
Make sure the printer is
connected correctly to a
power source.
82
page 21
Recommended Action
Page
The printer is turned off
or it is not connected to
the computer. Check to
make sure that the
printer model specified by
the print settings is
correctly connected to
the computer. After
correcting the problem,
try printing again.
Make sure the printer is
connected correctly to
your PC.
page 21
There is no ink ribbon
cassette loaded in the
printer. Load an ink
ribbon cassette and then
try printing again.
Correctly load an ink
ribbon cassette into the
printer and try printing
again.
page 23
The ink ribbon cassette is
empty. Replace the ink
ribbon cassette and then
try again.
Replace the ink ribbon
cassette.
page 26
There is not enough ink
ribbon cassette for the
next printing. Replace the
ink ribbon cassette after
you finish the current
printing.
Replace the ink ribbon
cassette before
performing the next
printing.
page 26
There is no Disc loaded in
the printer. Load a Disc
and then try printing
again.
Make sure that a disc is
correctly set on the tray.
pages
31 and
72
Make sure the printer is
connected correctly to a
power source.
Specifications
Printing
Resolution: 200dpi
Approximate Speed: 9.0mm per second (black ink ribbon)
5.1mm per second (silver, red, or blue ink
ribbon)
Print System : Thermal transfer
Print Width : Approximately 16mm
Print Length : Approximately 74mm
Actual printing speed depends on printing environment, conditions,
etc.
Power Supply
Power Consumption: 13W (Power supplied both through household
power plug and USB por t.)
Other
Dimensions
: 57 (H) × 180 (W) × 186 (D) mm
(2 1/4"H × 71/ 16"W × 7 5/16"D)
Weight
: Approximately 750g (1.7 Ibs)
Operating Temperature : 10°C to 35°C (50°F to 95°F)
83
TDK Recording Media Europe S.A.
Z.I. Bommelscheuer
P.O. Box 120
L-4902 Bascharage
Grand Duchy of Luxembourg
MO0209-A