1
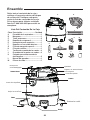
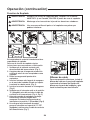
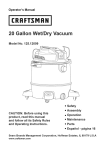
Operator’s Manual
20 Gallon Wet/Dry Vacuum
Model No. 125.12009
CAUTION: Before using this
product, read this manual
and follow all its Safety Rules
and Operating Instructions.
Safety
Assembly
Operation
Maintenance
Parts
Español - página 16
Sears Brands Management Corporation, Hoffman Estates, IL 60179 U.S.A
www.craftsman.com
Warranty
CRAFTSMAN ONE YEAR FULL WARRANTY
FOR ONE YEAR from the date of purchase, this product is warranted against
defects in material or workmanship. A defective product will be replaced free of
charge.
For warranty coverage details to obtain free replacement, visit the web page:
www. craftsman.com/warranty
This warranty does not cover bags, filters, hose or attachments, which are
expendable parts that can wear out from normal use within the warranty period.
This ONE YEAR warranty is void if this product is ever used while providing
commercial services or if rented to another person. For 90 DAY commercial and
rental use terms, see the Craftsman warranty web page.
This warranty gives you specific legal rights, and you may also have other rights
which vary from state to state.
Sears Brands Management Corporation, Hoffman Estates, IL 60179
IMPORTANT SAFETY INSTRUCTIONS
READ AND UNDERSTAND ALL
INSTRUCTIONS BEFORE USING THIS
VACUUM
motor can ignite flammable vapors or
dust.
• Do not vacuum anything that is burning
or smoking, such as cigarettes, matches,
or hot ashes.
• Keep cord away from heated surfaces.
• Do not expose to rain. Store indoors.
• Do not unplug by pulling on cord. To
unplug, grasp the plug, not the cord.
• Do not use with damaged cord, plug or
other parts.
• If vac is not working as it should, has
been dropped, damaged, left outdoors,
or dropped into water, take it to a service
dealer for inspection and repair before
using it again.
• Do not pull or carry by cord, use cord as
handle, close a door on cord, or pull
cord around sharp edges or corners.
• Do not run Wet/Dry Vac over cord.
• Do not handle plug or the Wet/Dry Vac
with wet hands.
• To reduce the risk of health hazards
from vapors or dusts, do not vacuum
toxic materials.
• Do not store near hazardous materials.
• Do not use this Wet/Dry Vac with a torn
filter or without the filter installed except
when vacuuming liquids as described in
the operation section of this manual.
• Do not allow to be used as a toy. Close
attention is necessary when used by or
near children.
• To reduce the risk of injury from accidental
Read and understand this operator's
manual and all labels on the Wet/Dry
Vacuum cleaner before operating. Safety is
a combination of common sense, staying
alert and knowing how your vacuum works.
Use this Wet/Dry Vac only as described in
this manual. To reduce the risk of personal
injury or damage to your Wet/Dry Vac, use
only Craftsman recommended accessories.
Household Type
SAVE THIS MANUAL
FOR FUTURE REFERENCE.
When using an electrical appliance,
basic precautions should always be
followed including the following:
WARNING:
TO REDUCE
THE RISK OF FIRE, ELECTRIC
SHOCK OR INJURY:
• Do not run vac unattended.
• Do not vacuum, or use this Wet/Dry Vac
near flammable liquids, gases, or explosive
vapors like gasoline or other fuels,
lighter fluids, cleaners, oil-based paints,
natural gas, hydrogen, or explosive dusts
like coal dust, magnesium dust, grain
dust, or gun power. Sparks inside the
2
starting, unplug power cord before
changing or cleaning filter.
• Do not leave Wet/Dry Vac unattended
when plugged in. Unplug from outlet
when not in use and before servicing.
• Turn off Wet/Dry Vac before unplugging.
• Do not put any object into ventilation
openings. Do not vacuum with any
ventilation openings blocked; keep free
of dust, lint, hair or anything that may
reduce air flow.
• Keep hair, loose clothing, fingers, and
all parts of body away from openings
and moving parts.
• To reduce the risk of falls, use extra
care when cleaning on stairs.
When using as blower:
• Direct air discharge only at work area.
• Do not use Wet/Dry Vac as a sprayer.
• Do not direct air at bystanders.
• Keep children away when blowing.
• Wear safety goggles.
Observe the following warnings that
appear on the motor housing of your Vac:
DOUBLE INSULATED
GROUNDING NOT REQUIRED.
WHEN SERVICING USE ONLY
IDENTICAL REPLACEMENT PARTS.
Polarized Plug
To reduce the risk of electrical shock, this
appliance has a polarized plug (one with
the blade wider than the other). This plug
will fit in a polarized outlet only one way.
If the plug does not fit fully in the outlet,
reverse the plug. If it still does not fit,
contact a qualified electrician to install the
proper outlet. Do not change the plug in
any way. Double insulation
eliminates
the need for the three wire grounded
power cord and grounded power supply
system.
WARNING: When using as a blower:
Wear safety goggles labeled "ANSI
Z87.1" (Canada CSA Z94.3) on the
package. Turn unit off before setting on
ground or releasing grasp of handle.
Electric shock could occur if used on
wet surfaces. Direct tool discharge only
at work area. Do not direct discharge at
bystanders. Keep children away.
Extension Cords
When using an extension cord with your Wet/Dry Vac refer to the following table to
determine the required A.W.G. (American Wire Gauge) wire size. Before using
Wet/Dry Vac, make sure it is in good working condition, including power cord.
Also, make sure extension cord is in good working condition prior to use. Make
repairs or replacements before using the vacuum cleaner. Only use extension cords
that are rated for outdoor use.
Length of Extension Cord
110V-120V
25 Feet
7.5 Meters
Amps
0-6
7-10
18
18
50 Feet
100 Feet
15.25 Meters
30.5 Meters
A.W.G Wire Size
16
16
16
14
14
11-12
16
16
13-16
14
12
150 Feet
45.7 Meters
14
12
12
Not recommended
3
Introduction
This Wet/Dry Vac is intended for
vacuuming wet and dry materials and
may be used as a blower.
Read this operator's manual to
familiarize yourself with the product
features and to understand the specific
usage of your new Wet/Dry Vac.
Table of Contents
Section
Page
Section
Page
Warranty ................................................. 2
Maintenance .........................................10
Important Safety Instructions ........... 2
Emptying the Collection Tank ........ 10
Polarized Plug .................................... 3
Installing & Cleaning
the Supplied Cartridge Filter.......... 10
Extension Cords ..................................... 3
Installing A Replacement
Cartridge Filter ................................ 11
Introduction ............................................ 4
Table of Contents ................................... 4
Installing & Cleaning
Foam Sleeve Filter .......................... 12
Assembly ................................................ 5
Carton Contents List ......................... 5
Cleaning & Disinfecting
the Wet/Dry Vac .............................. 12
Unpacking Your Wet/Dry Vacuum
& General Assembly .......................... 6
Storage .............................................12
Troubleshooting ....................................13
Operation ................................................ 7
Repair Parts...........................................14
Vacuuming Dry Materials .................. 7
Vacuuming Liquids ............................ 8
Blowing Feature ................................. 9
Noise Diffuser ..................................... 9
4
Assembly
Remove entire contents of carton and
check for parts inside the collection
tank. Check each item against the
Carton Contents List. If any parts are
missing or damaged please call
1-800-469-4663 for replacement.
A
B
Carton Content List
Key
A
B
C
D
E
F
G
H
I
J
K
L
M
C
Description ..........................Qty.
Vac Assembly .......................... 1
Hose ........................................ 1
Extension Wands .................... 2
Utility Nozzle ........................... 1
Crevice Tool............................. 1
Floor Squeegee Nozzle .......... 1
Foam Sleeve Filter .................. 1
Cartridge Filter ........................ 1
Caster Assembly Screws........ 4
Caster Feet Assemblies.......... 4
Hose Storage Rack ................. 2
Operator’s Manual .................. 1
Noise Diffuser.......................... 1
D
E
M
F
G
H
J
K
L
I
Handle
On/Off Switch
Hose Storage Rack
Power Head
Blower Port
Latch
Vacuum Port
Collection Tank
Base
Caster Assemblies
Caster
Drain
5
Assembly (continued)
A Phillps head screw driver is required.
1
2
3
4
5
6a
6b
6c
6d
7
8
9
10
! WARNING: Do not plug in power
6. Position the hose storage rack
as illustrated. Fully insert one end
of the hose storage rack into the
slot illustrated buy the arrow, then
pull the other end of the hose
storage rack to align with the
corresponding arrow and insert into
the slot until it is secured in place.
(Fig. 6a - Fig. 6d)
7. Place the power head back on the
collection tank, and secure into
place using the 2 side latches.
(Fig. 7 & Fig. 8)
8. Insert the locking end of the hose
into the port on the collection tank
and turn to lock in to place. (Fig. 9)
9. Choose the desired accessory and
insert onto the end of the hose
(Fig. 10)
10. After vac use, store hose,
accessories and cord as illustrated
on page 12.
cord to power outlet, make sure
plug is disconnected before
assembling the wet/dry vac.
UNPACKING YOUR WET/DRY
VACUUM & GENERAL ASSEMBLY
1. Verify that the power cord is
disconnected from the outlet.
(Fig. 1)
2. Undo the latches. (Fig. 2)
3. Lift the power head off the collection
tank and place on a flat clean
surface. (Fig. 3)
4. Remove the contents from inside the
collection tank, make sure you have
all contents as listed on carton
content list on page 5. (Fig. 4)
5. With the power head removed, turn
the collection tank upside down.
Insert the four caster assemblies
into each socket. Apply pressure
until caster assemblies fully seated.
(Fig. 5) Secure them with the screws
provided. Do not over tighten the
screws.
6
Operation
Vacuuming Dry Materials
! WARNING: Be sure to read, understand and apply all the information in the
Important Safety Instructions section at the beginning of this operator's manual.
Do not vacuum in areas with flammable gases, vapors, or explosive dusts in the
air. Flammable gases or vapors include but are not limited to: lighter fluid,
solvent type cleaners, oil-base paints, gasoline, alcohol or aerosol sprays.
Explosive dusts include but are not limited to: coal, magnesium, grain or gun
powder. To reduce the risk of health hazards from vapors or dust, do not
vacuum toxic materials.
1
2
3
4
1. Verify that the power cord is
disconnected from the outlet. (Fig. 1)
2. For dry vacuuming, the cartridge filter
must be installed correctly. To verify,
please refer to Installing Cartridge Filter
on page 10.
3. Place the power head back on the
collection tank, and secure it in place
using the latches. (Fig. 2)
4. Insert the locking end of the hose into
the vacuum port and lock in place. (Fig.
3).
5. Choose the desired accessory and
insert onto the end of the hose. (Fig. 4)
6. Plug the power cord into the outlet.
(Fig. 5)
7. Turn the motor on by pressing the
power switch to the ‘I’ (ON) position
and begin vacuuming. (Fig. 6)
8. Once you have completed vacuuming,
press the power switch to the ‘O’ (OFF)
position and unplug the power cord
from the outlet.
45
O = OFF
6
I = ON
DO NOT USE THE CARTRIDGE FILTER
FOR LIQUID VACUUMING.
CAUTION: Do not vacuum drywall dust,
fireplace soot or ash with standard
Wet/Dry filter. This is very fine dust
which will not be captured by the filter
and may cause damage to motor. To
purchase the fine dust filter, call 1-800469-4663 or visit a Sears store.
7
Operation (continued)
Vacuuming Liquids
! WARNING: Be sure to read, understand and apply all the information in the
Important Safety Instructions section at the beginning of this operator's manual.
Do not vacuum in areas with flammable gases, vapors, or explosive dusts in the
air. Flammable gases or vapors include but are not limited to: lighter fluid,
solvent type cleaners, oil-base paints, gasoline, alcohol or aerosol sprays.
Explosive dusts include but are not limited to: coal, magnesium, grain or gun
powder. To reduce the risk of health hazards from vapors or dust, do not
vacuum toxic materials.
! WARNING: Do not plug in power cord to power outlet, make sure plug is
disconnected before assembling the Wet/Dry Vac.
1
2
4
3
1. Verify that the power cord is
disconnected from the outlet. (Fig. 1)
2. Remove cartridge filter as shown in
Removing and Cleaning Cartridge
Filter on page 10. Then install the
foam sleeve filter as shown in
Installing Foam Sleeve Filter on page
12 and secure power head back on
the collection tank.
5
IMPORTANT! When vacuuming large
quantities of liquids, do not immerse the
nozzle completely in the liquid; leave a
gap at the tip of the nozzle opening to
allow air inflow. The machine is fitted with
a float valve that stops the suction action
when the collection tank reaches its
maximum capacity. You will notice an
increase in motor speed. When this
happens, turn off the machine,
disconnect from power supply, and drain
the liquid into a suitable receptacle or
drain. To continue vacuuming, refit the
collection tank with the drain cap. After
wet vacuuming, turn the machine off and
remove plug from power supply. Empty
the collection tank, clean and dry the
inside and outside before storage.
DO NOT USE THE CARTRIDGE FILTER
FOR LIQUID VACUUMING.
3. Fit the desired nozzle to the vacuum
hose. (Fig. 2)
4. Verify that the power switch is in the ‘O’
OFF position before plugging the
power cord into the outlet. (Fig. 3)
5. Turn the motor on by pressing the
switch to the ‘I’ ON position. (Fig. 4)
6. Once you have completed vacuuming,
press the power switch to the 'O' (OFF)
position and unplug the power cord
from the outlet.
7. After use, empty the collection tank by
unscrewing the drain cap and drain
liquids into suitable receptacle or
drain. (Fig. 5) Remember to refit the
drain cap to the tank after draining.
REMEMBER! The foam filter must be
removed after wet vacuuming and a
cartridge filter must be installed before
dry vacuuming again.
8
Operation (continued)
Blowing Feature
! WARNING: Always wear safety goggles complying with ANSI Z87.1 (or in
Canada, CSA Z94.3) before using blower.
! WARNING: Keep bystanders clear from blowing debris.
! WARNING: Wear a dust mask if blowing creates dust that might be inhaled.
1
2
6
7
3
4
This Wet/Dry Vac has blowing capabilities.
To use the blower feature follow the
instructions listed.
1. Verify that the power cord is
disconnected from the outlet. (Fig. 1)
2. Make sure the collection tank is empty
before using as a blower.
3. Remove hose from the vacuum port.
4. Insert the larger end of the hose into the
blowing port on the back side of the
power head. (Fig. 2)
5. Fit the desired attachment to the hose.
(Fig. 3)
6. Verify that the power switch is in the ‘O’
OFF position before plugging the power
cord into the outlet. (Fig. 4, Fig. 5)
7. Before turning ON the vac, firmly hold
the loose end of the hose. Turn the
motor on by pressing the switch to the ‘I’
ON position. (Fig. 6)
8. Once you have completed blowing,
press the power switch to the 'O' (OFF)
position and unplug the power cord
from the outlet. (Fig. 7)
5
Noise Diffuser
For quiet operation, install the noise diffuser
into the blower port by inserting the locking
end of the diffuser into the blower port and
turning clockwise to lock into place.
9
Maintenance
Emptying the Collection Tank
1
2
3
4
7. Place power head on collection tank and
secure latches.
1. Verify that the power cord is
disconnected from the outlet. (Fig. 1)
2. Disconnect the hose from the vacuum.
(Fig. 2)
3. Undo the latches and remove the power
head from the collection tank. (Fig. 3)
Place power head on a soft, clean
surface upside down.
4. Clear all dirt or debris from the collection
tank and hose into a proper waste
container. (Fig. 4)
5. Clean or replace the filters.
6. Check the hose, attachments, and
power cord to verify that they have not
been damaged.
NOTICE! The filter included is made of
high quality material designed to stop small
dust particles. The filter should be used for
dry pick-up only. A dry filter is necessary
to pick up dust. If the dust filter is wet, it
will clog quickly and be very difficult to
clean. Handle the filter carefully when
removing it for cleaning and replacing it.
Check the filters for tears or small holes; a
small hole can let dust pass through and
out of the cleaner. Do not use a filter with
holes or tears; replace it immediately.
Installing & Cleaning the Supplied Cartridge Filter
1
2
3
4
5
Removing and Cleaning Cartridge Filter
1. Position power head in the upside down
position. If the retainer nut was used to
secure the filter, remove retainer nut by
turning counter clockwise.
2. Carefully lift filter up from filter cage.
(Fig. 5)
Installing Cartridge Filter
1. Verify that the power cord is
disconnected from the outlet. (Fig. 1)
2. Undo the latches and remove the
power head from the collection tank.
3. Place power head on a clean surface in
upside down position.
4. Slide the cartridge filter over the filter
cage. (Fig. 2) Carefully push filter down
until it is fully seated on the power head.
(Fig. 3)
5. To secure filter; put on retainer nut and
turn clockwise to tighten until snug. Do
not over tighten. (Fig. 4)
NOTE: For best cartridge filter cleaning
results, cleaning should be conducted
outdoors and not indoors.
3. To clean a dry cartridge filter after it has
been removed, gently tap it against the
inside wall of the container or brush the
dirt off. Debris will begin to break up,
loosen and fall.
10
Maintenance (continued)
!
IMPORTANT! Clean or change the
cartridge filter regularly for best
performance.
ALWAYS USE CARTRIDGE FILTER FOR
DRY VACUUMING. If the machine is
used without the cartridge filter, the motor
will burn out and the warranty will be voided.
Always keep spare filters on-hand.
WARNING: Always disconnect
the plug from the power outlet
before removing the power head
from the collection tank.
Installing A Replacement Cartridge Filter
Craftsman Filter with Rubber Top
1
2
Craftsman Filter with Plastic Top
3
1a
2a
3a
THIS VACUUM CLEANER IS DESIGNED TO USE CRAFTSMAN CARTRIDGE FILTERS.
1. Carefully slide the Craftsman cartridge
filter over the filter cage and press
down on the outside edge of the filter
until the rubber gasket on the bottom of
the filter fits securely around the base
of the filter cage and against the lid.
(Fig. 1)
2. Align the small center hole in the top of
the filter over the post on the filter cage.
Press firmly on top of the filter near the
post to allow the filter to seat over the
post. (Fig. 2)
3. To further secure filter, put on retainer
nut and turn clockwise to tighten until
snug. (Fig. 3)
1. Carefully slide the Craftsman cartridge
filter over the filter cage with the flat end
of the filter towards the power head.
(Fig. 1a)
2. Carefully push filter down until it is fully
seated on the power head. (Fig. 2a)
3. To secure filter; put on retainer nut and
turn clockwise to tighten until snug. Do
not over tighten. (Fig. 3a)
NOTE: Always retain the original retainer nut. Do not misplace it while removing or replacing
the cartridge filter.
11
Maintenance (continued)
Installing & Cleaning Foam Sleeve Filter
1
2
3
4
Installing Foam Sleeve Filter
1. Verify that the power cord is
disconnected from the outlet. (Fig. 1)
2. Remove power head from collection
tank. If cartridge filter is installed,
remove as shown on page 10 "Removing
and Cleaning Cartridge Filter".
3. Carefully slide foam sleeve filter
down over the filter cage making sure
the whole cage is covered. (Fig. 2 & 3)
4. Place power head on collection tank and
secure latches.
5
Cleaning Foam Sleeve Filter
1. With the removed power head in the
upside down position, carefully
remove foam sleeve filter. (Fig. 4)
2. Use a mild soap and water solution to
wash foam sleeve filter and rinse with
clean water. (Fig. 5)
3. Allow filter to air dry before installing and
using again.
1
2
Cleaning and Disinfecting the
Wet/Dry Vac
To keep your Wet/Dry Vac looking its best,
clean the outside with a dampened cloth,
then dry with a clean towel.
To clean the inside of the collection tank:
1. Empty debris out.
2. Wash collection tank thoroughly with
warm water and mild soap.
3. Wipe out with dry cloth.
3
Storage
Before prolonged storage or as needed
(i.e. after waste water pick up) the
collection tank should be disinfected.
To disinfect the collection tank:
1. Pour 1 gallon of water and 1 teaspoon
chlorine bleach into the collection tank.
2. Let solution stand for 20 minutes,
carefully swishing every few minutes,
making sure to wet all inside surfaces
of the collection tank.
3. Empty collection tank after 20 minutes.
Rinse with water until bleach smell
is gone. Allow collection tank to dry
completely before sealing the motor on
the collection tank.
Before storing your vac, the collection tank
should be emptied and cleaned. The cord
should be wrapped and hung on the hook
of the handle. The hose and accessories
should be stored as illustrated above
(Fig. 1-3) so they can be readily available
when needed. Store vac indoors.
12
Troubleshooting
WARNING: TO REDUCE THE RISK OF ELECTRIC SHOCK
UNPLUG BEFORE TROUBLESHOOTING.
Problem
Possible Causes
Corrective Action
Vacuum will not operate .
1) No power supply.
1) Check power supply – cord,
breakers, fuses.
2) Faulty power cord.
2) Unplug and check the power
cord. If damaged, have it
repaired by a professional.
3) Collection tank is full.
4) Switch in the wrong position.
3) Empty collection tank.
4) Press the ON ‘I’ button on
the power head.
1) Attach or replace the
Dust comes out from motor cover.
1) The cartridge filter is
missing or damaged.
Reduced efficiency and
motor/speed vibration.
1) There is a blockage in the
nozzle, hose, or the tank
inlet. The dust filter is
clogged by fine dust.
13
cartridge filter.
1) Check nozzle, hose and
tank inlets for blockage.
Take off the filter and clean it.
Or install new filter.
Repair Parts
125.12009 20 Gallon Wet/Dry Vac
Always order by part number, not by key number. Always mention the model number when
ordering parts. The model number is found on the serial plate located on the vacuum. To
order parts, call 1-800-469-4663.
WARNING: Servicing of double-insulated wet/dry vacuum.
With double-insulated wet/dry vacuum, two systems of insulation are provided instead
of grounding. No grounding means is provided on a double-insulated appliance, nor
should a means for grounding be added. Servicing a double insulated wet/dry vacuum
requires extreme care and knowledge of the system, and should be done only by
qualified service personnel. Replacement parts for a double-insulated wet/dry vacuum
must be identical to the parts they replace. Your double-insulated wet/dry vacuum
is marked with the words ‘double insulated’ and the symbol
(square within a
square) may also be marked on the appliance.
Key No.
1
2
3
4
5
6
7
8
9
10
11
12
13
14
15
16
17
18
19
20
Part Number
VJHAPF.10.07
VJKAPF.10.00.X0
TVQTZS.06.YZ.W2.00
VJ51PF.10.04.W2.00
TVQTDK.17.01.F3
VJKBPF.10.10.F3.SY
TVQTXK.16.01
TVQTXK.19.01
VB01PF.X0.02
TVQTJC.29.00
17854
16922
FV6761.00.00
16902
16928
17888
17816
FV9543.11.01
TVQTZH.02.CF.W2.01
VJKBBZ.20.D6.01
Description
Hose Storage Rack
Power Head
Float
Filter Cage
Latch
Collection Tank
Vacuum port deflector
Hose inlet
Drain Cap Assembly
Caster and Foot Assembly
Extension Wands
Utility Nozzle
Floor / Squeegee Nozzle
Crevice Tool
Hose
Foam Sleeve
Cartridge Filter
Nut
Noise Diffuser
Operator's Manual
14
Quantity
2
1
1
1
1
1
1
1
1
4
2
1
1
1
1
1
1
1
1
1
Repair Parts (Continued)
20 Gallon Wet/Dry Vac
15
Manual Del Operador
Aspiradora Para Materiales
Húmedos/Secos De 20 Galones
Núm. de modelo 125.12009
Seguridad
PRECAUCIÓN: Antes de usar
este producto, lea este manual
y siga todas las reglas de
seguridad e instrucciones de
operación.
Ensamble
Operación
Mantenimiento
Piezas
English- Page 1
Sears Brands Management Corporation, Hoffman Estates, IL 60179 EE.UU.
www.craftsman.com
Garantía
GARANTÍA TOTAL DE UN AÑO DE CRAFTSMAN
DURANTE UN AÑO a partir de la fecha de compra, este producto está garantizado
contra defectos de material o mano de obra. Un producto defectuoso será
reemplazado sin ningún costo.
Para detalles sobre la cobertura de la garantía para obtener un reemplazo gratuito,
visite la página web: www.craftsman.com/warranty. Esta garantía no cubre bolsas de
cubierta, filtros, mangueras o accesorios, que son partes consumibles que pueden
desgastarse por el uso normal dentro del periodo de la garantía. Esta garantía de UN
AÑO es inválida si este producto alguna vez se usa para servicios comerciales o si
se renta a otra persona. Para obtener los términos de uso comercial y de renta por
90 DÍAS, consulte la página web de la garantía de Craftsman.
Esta garantía le ofrece derechos legales específicos y también puede tener otros
derechos que varían de estado a estado.
Sears Brands Management Corporation, Hoffman Estates, IL 60179
INSTRUCCIONES DE SEGURIDAD IMPORTANTES
LEA Y COMPRENDA TODAS LAS
INSTRUCCIONES ANTES DE USAR ESTA
ASPIRADORA.
Lea y entienda este manual del operador y
todas las etiquetas de la aspiradora de material
húmedo/seco antes de operarla. La seguridad es
una combinación de sentido común, mantenerse
alerta y saber cómo funciona su aspiradora.
Use esta aspiradora de material húmedo/seco
únicamente como se describe en este manual.
Para reducir el riesgo de lesiones personales o
daños a la aspiradora de material húmedo/seco,
use únicamente los accesorios recomendados
de Craftsman.
Tipo doméstico
GUARDE ESTE MANUAL
PARA CONSULTA FUTURA.
Al utilizar un electrodoméstico, siempre se
deben seguir las precauciones básicas,
incluyendo las siguientes:
ADVERTENCIA:
PARA REDUCIR EL RIESGO DE
INCENDIOS, DESCARGA ELÉCTRICA
O LESIONES:
• No deje la aspiradora desatendida.
• No aspire ni use esta aspiradora de material
húmedo/seco cerca de líquidos inflamables,
gases o vapores explosivos como gasolina u
otros combustibles, líquidos encendedores,
limpiadores, pinturas con base de aceite, gas
natural, hidrógeno o polvos explosivos como
polvo de carbón, polvo de magnesio, polvo
de granos o pólvora. Las chispas dentro del
motor pueden encender vapores o polvos
inflamables.
• No aspire nada que se esté quemando o
emitiendo humo, como cigarrillos, cerillos
o cenizas calientes.
• Mantenga el cable alejado de superficies
calientes.
• No la exponga a la lluvia. Almacénela en
interiores.
• No desconecte jalando el cable de corriente.
Para desconectar, sujete el enchufe y no el cable.
• No la use con el cable, enchufe u otras partes
dañadas.
• Si la aspiradora no está funcionando como
debería, se ha dejado caer, está dañada, se
dejó a la intemperie o cayó en agua, llévela a un
distribuidor de servicio para que la inspeccione y
repare antes de usarla de nuevo.
• No la jale ni cargue por el cable, ni use el cable
como agarradera, no cierre una puerta sobre
el cable ni jale el cable por bordes filosos ni
esquinas.
• No pase la aspiradora de material húmedo/seco
por encima del cable.
• No maneje el enchufe ni la aspiradora de material
húmedo/seco con manos húmedas.
• Para reducir el riesgo de peligros a la salud
debido a vapores o polvos, no aspire materiales
tóxicos.
• No almacene la aspiradora cerca de materiales
peligrosos.
• No use esta aspiradora de material húmedo/
seco con un filtro rasgado o sin el filtro instalado,
excepto cuando se aspiren los líquidos que se
describen en la sección de operación de este
manual.
• No permita que se use como un juguete. Se
necesita poner mucha atención cuando se usa
cerca de niños.
• Para reducir el riesgo de una lesión por un
encendido accidental, desconecte el cable de
corriente antes de cambiar o limpiar el filtro.
17
• No deje la aspiradora de material húmedo/seco
desatendida cuando la conecte. Desconéctela
del tomacorriente cuando no está en uso y antes
de realizar el servicio.
• Apague la aspiradora de material húmedo/seco
antes de desconectarla.
• No coloque ningún objeto en las aberturas
de ventilación. No aspire con ninguna de las
aberturas de ventilación bloqueadas; manténgala
libre de polvo, pelusa, cabello o cualquier objeto
que pudiera reducir el flujo de aire.
• Mantenga el cabello, ropa holgada, dedos y
todas las partes del cuerpo lejos de las aberturas
y partes móviles.
• Para reducir el riesgo de caídas, tenga mucho
cuidado al limpiar escaleras.
Cuando se use como soplador:
• Dirija la descarga de aire únicamente hacia el
área de trabajo.
• No use la aspiradora de material húmedo/
seco como un atomizador.
• No dirija el aire hacia los transeúntes.
• Mantenga a los niños alejados del soplador.
• Use lentes de seguridad.
Enchufe polarizado
Para reducir el riesgo de una descarga
eléctrica, este electrodoméstico tiene un
enchufe polarizado (uno con un contacto más
ancho que el otro). Este enchufe entrará en un
tomacorriente polarizado solo de una manera.
Si el enchufe no entra por completo en el
tomacorriente, invierta el enchufe. Si aún no
entra, comuníquese con un electricista calificado
para instalar el tomacorriente adecuado. No
modifique el enchufe de ninguna manera. El
doble aislamiento
elimina la necesidad de
una extensión de tres contactos con conexión a
tierra y un sistema de suministro de energía con
conexión a tierra.
Obedezca las siguientes advertencias
queaparecen en la caja del motor de su
aspiradora:
NO REQUIERE DE CONEXIÓN A
TIERRA CON DOBLE AISLAMIENTO.
AL REALIZAR EL SERVICIO, USE
ÚNICAMENTE PARTES DE REPUESTO
IDÉNTICAS.
ADVERTENCIA:
• Por su propia seguridad, lea y entienda
el manual del propietario.
• No permita que la unidad funcione si
está desatendida.
• No levante cenizas calientes, carbón,
materiales tóxicos, inflamables u otros
materiales peligrosos.
• No la use alrededor de líquidos
explosivos o vapores.
ADVERTENCIA: Para reducir el riesgo
de una descarga eléctrica, no la exponga a la
lluvia y almacénela en interiores.
ADVERTENCIA: Al usar como soplador:
Use lentes de seguridad con la etiqueta
"ANSIZ87.1" (Canadá CSA Z94.3) en
el paquete. Apague la unidad antes
de colocarla sobre el suelo o soltar la
agarradera. Podría ocurrir una descarga
eléctrica si se usa en superficies húmedas.
Dirija la descarga de aire únicamente al
área de trabajo. No dirija la descarga hacia
los transeúntes. Mantenga la máquina lejos
de los niños.
Extensiones
Al usar una extensión con la aspiradora de material húmedo/seco, consulte la siguiente
tabla para determinar el tamaño de cable A.W.G. (calibre americano de cables) requerido.
Antes de usar la aspiradora de material húmedo/seco, asegúrese de que esté en buenas
condiciones, incluyendo el cable de corriente.
Además, asegúrese de que la extensión esté en buenas condiciones antes de usarla.
Realice las reparaciones o reemplazos necesarios antes de usar la aspiradora. Solo use
extensiones que están clasificadas para uso en exteriores.
Longitud de las extensiones
110V-120V
25 pies 7,5 metros
Amperes
0-6
7-10
11-12
13-16
50 pies 15,25 metros
100 pies 30,5 metros
150 pies 45,7 metros
Tamaño de cable de A.W.G
18
18
16
14
16
16
16
12
16
14
14
14
12
12
No se recomienda
18
Introducción
Esta aspiradora de material húmedo/seco
está diseñada para aspirar materiales
húmedos y secos, además puede usarse
como un soplador.
Lea este manual del operador para
familiarizarse con las características
del producto y para entender el uso
específico de su nueva aspiradora de
material húmedo/seco.
Índice
Sección
Página
Sección
Página
Garantía .................................................... 17
Mantenimiento ......................................... 25
Instrucciones de seguridad
importantes .......................................... 17
Cómo vaciar el tanque de
recolección ......................................... 25
Enchufe polarizado.............................. 18
Instalación y limpieza del filtro de
cartucho proporcionado .................... 25
Extensiones .............................................. 18
Instalación de un filtro
de cartucho de reemplazo................. 26
Introducción ............................................. 19
Índice ..................................