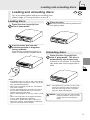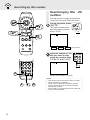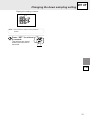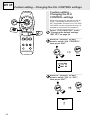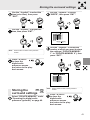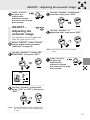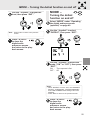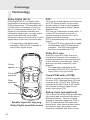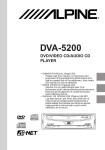
1
R DVA-5205 DVD/VIDEO CD/ CD PLAYER • OWNER’S MANUAL (Page 2-67) Please read this manual- to maximize your enjoyment of the outstanding performance and feature capabilities of the equipment, then retain the manual for future reference. • MODE D’EMPLOI (Page 72-137) Veuillez lire ce mode d’emploi pour tirer pleinement profit des excellentes performances et fonctions de cet appareil, et conservez-le pour toute référence future. • MANUAL DE OPERACION (Página 138-??) Lea este manual, por favor, para disfrutar al máximo de las excepcionales prestaciones y posibilidades funcionales que ofrece el equipo, luego guarde el manual para usarlo como referencia en el futuro. DIGITAL VIDEO Precautions Warning This symbol means important instructions. Failure to heed them can result in serious injury or death. DO NOT DISASSEMBLE OR ALTER. Doing so may result in an accident, fire or electric shock. KEEP SMALL OBJECTS SUCH AS BATTERY OUT OF THE REACH OF CHILDREN. Swallowing them may result in serious injury. If swallowed, consult a physician immediately. USE THE CORRECT AMPERE RATING WHEN REPLACING FUSES. Failure to do so may result in fire or electric shock. USE ONLY IN CARS WITH A 12 VOLT NEGATIVE GROUND. (Check with your dealer if you are not sure.) Failure to do so may result in fire, etc. DO NOT OPERATE ANY FUNCTION THAT TAKES YOUR ATTENTION AWAY FROM SAFELY DRIVING YOUR VEHICLE. Any function that requires your prolonged attention should only be performed after coming to a complete stop. Always stop the vehicle in a safe location before performing these functions. Failure to do so may result in an accident. DO NOT WATCH VIDEO WHILE DRIVING. Watching the video may distract the driver from looking ahead of the vehicle and cause an accident. KEEP THE VOLUME AT A LEVEL WHERE YOU CAN STILL HEAR OUTSIDE NOISE WHILE DRIVING. Failure to do so may result in an accident. USE THIS PRODUCT FOR MOBILE 12V APPLICATIONS. Use for other than its designed application may result in fire, electric shock or other injury. 2 Precautions Caution This symbol means important instructions. Failure to heed them can result in injury or property damage. DO NOT BLOCK VENTS OR RADIATOR PANELS. Doing so may cause heat to build up inside and may result in fire. DO NOT MIX NEW BATTERIES WITH OLD BATTERIES. INSERT WITH THE CORRECT BATTERY POLARITY. When inserting the batteries, be sure to observe proper polarity (+ and –) as instructed. Rupture or chemical leakage from the battery may cause fire or personal injury. HALT USE IMMEDIATELY IF A PROBLEM APPEARS. Failure to do so may cause personal injury or damage to the product. Return it to your authorized Alpine dealer or the nearest Alpine Service Center for repairing. 3 Precautions Temperature Be sure the temperature inside the vehicle is between +60°C (+140°F) and –10°C (+14°F) before turning your unit on. Moisture Condensation You may notice the CD playback sound wavering due to condensation. If this happens, remove the disc from the player and wait about an hour for the moisture to evaporate. Damaged Disc Do not attempt to play cracked, warped, or damaged discs. Playing a bad disc could severely damage the playback mechanism. Maintenance If you have problems, do not attempt to repair the unit yourself. Return it to your Alpine dealer or the nearest Alpine Service Station for servicing. Never Attempt the Following Do not grip or pull out the disc while it is being pulled back into the player by the automatic reloading mechanism. Do not attempt to insert a disc into the unit when the unit power is off. Inserting Discs Your player accepts only one disc at a time for playback. Do not attempt to load more than one disc. Make sure the label side is facing up when you insert the disc. Your player will automatically eject any disc that is inserted incorrectly. Playing a disc while driving on a very bumpy road may result in skips, but this will not scratch the disc or damage the player. Irregular Shaped Discs Make sure the discs you use in this unit do not have any irregularities. The outer and inner edges should be round and smooth. Use of irregularly shaped discs may cause damage to the mechanism. New Discs As a protective measure to prevent the CD from jamming, the CD player will automatically eject discs with irregular surfaces or inserted incorrectly. When a new disc is inserted into the player and ejected after initial loading, using your finger, feel around the inside of the centre hole and outside edge of the disc. If you feel any small bumps or irregularities, this could inhibit proper loading of the disc. To remove the bumps, rub the inside edge of the hole and outside edge of the disc with a ball-point pen or other such instrument, then insert the disc again. Installation Location Make sure the DVA-5205 will not be installed in a location subjected to: • • • • 4 Direct sun and heat High humidity and water Excessive dust Excessive vibrations CONTENTS Precautions Warnings and Cautions ............................... 2 Contents ...................................................... 5 Custom setting – Changing the Closed Caption setting .................... 35 Custom setting – Changing the Ai-NET settings .... 36 Custom setting – Changing the H.U. Control settings ........................ 38 Quick Guide About DVDs ................................................. 6 Discs playable on this DVD player ............... 7 When using remote control ......................... 8 Loading and unloading discs ....................... 9 Turning the power on and off ..................... 10 Switching between NTSC and PAL configuration ....................................... 11 Adjusting the volume ................................. 11 Playing discs .............................................. 12 Stopping playback ..................................... 13 Fast-forwarding/fast-reversing ................... 14 Finding the beginnings of chapters or tracks .... 14 Playing still frames (pausing) ..................... 15 Frame-by-frame playback .......................... 15 Slow motion playback ................................ 15 Convenient Functions Searching by title number .......................... 16 Searching directly by chapter or track number .. 17 Searching by elapsed time ........................ 18 Chapter/track/title repeat playback ............ 19 Switching the audio language ................... 19 Switching the angle ................................... 20 Switching the subtitles (subtitle language) ...... 20 Displaying the subtitles .............................. 21 Displaying the disc status .......................... 22 Video Output ON/OFF ............................... 23 SET UP Changing the Default Settings Changing the default settings (setup) ........ Changing the language setting .................. Changing the TV screen settings .............. Changing the country code setting ............ Setting the rating level (parental lock) ....... Changing the downsampling setting .......... Changing the digital output setting ............ Changing the LED indicator setting ........... 24 24 26 27 28 30 32 34 Digital Audio Processor (Optional) Operating the digital audio processor (optional) .... 40 Adjusting the parametric equalizer ............ 41 Adjusting the surround settings ................. 42 Storing the surround settings .................... 43 Recalling the surround settings ................. 44 Adjusting the time compensation .............. 45 Using the Pro Logic mode ......................... 45 ADJUST – Setting the speaker mode ........ 46 ADJUST – Adjusting the acoustic image ... 47 ADJUST – Mixing the rear audio channels ....... 48 ADJUST – Center speaker time compensation ..... 49 ADJUST – Rear speaker time compensation ... 50 ADJUST – Achieving powerful sound at low volumes .. 51 ADJUST – Adjusting the speaker level ...... 52 MODE – Adjusting the volume, fader and balance ..... 53 MODE – Adjusting the subwoofer ............. 54 MODE – Turning the defeat function on and off ..... 55 Operating from the Head Unit (CDA-7965) Operating from the head unit ..................... 56 Operating from the head unit’s remote control unit ..... 58 Others Terminology ............................................... List of language codes .............................. In case of difficulty ..................................... Specifications ............................................ Functions of remote control unit buttons ... 60 61 62 63 64 5 About DVDs About DVDs Music CDs and DVDs have grooves (tracks) in which the digital data is recorded. The data is represented as microscopic pits recorded into the track – these pits are read by a laser beam to play the disc. On DVDs, the density of the tracks and pits is twice that of CDs, so DVDs can contain more data in less space. • Multi angle function* (page 20) When the DVD contains a movie shot from multiple angles, the desired angle can be selected from the remote control unit. 1.2 mm DVDs Minimum bit length 0.9 µm • Multiple audio* (page 19) Movies can be recorded in up to eight languages. The desired language can be selected from the remote control unit. • Subtitles function* (page 20) Movies can include subtitles in up to 32 languages. The desired subtitle language can be selected from the remote control unit. CD-ROMs Minimum bit length - 0.9 µm Moreover, DVDs offer a variety of functions. 0.6 mm 0.6 mm Track pitch • Multi story function* 1.6 µm With this function, a single movie includes various story lines. You can select different story lines to view various versions of the same movie. Operation differs from disc to disc. Story line selection screens including instructions appear during the movie. Just follow the instructions. Track pitch 0.74 µm Note: * The functions audio languages, subtitle languages, angles, etc., differ from disc to disc. For details, refer to the disc’s instructions. A 12 cm disc can contain one movie or about four hours of music. In addition, DVDs provide sharp picture quality with vivid colors thanks to a horizontal resolution of over 500 lines (compared to less than 300 for VHS tape). With the addition of an optional, digital audio processor (PXA-H510), you can recreate the power and presence of a movie theater with Dolby Digital 5.1-channel Surround. 6 Discs playable on this DVD player Discs playable on this DVD player • Playable discs The discs listed below can be played on this DVD player. Other discs cannot be played. Mark (logo) Recorded content Disc size • DVD region number (playable region number) This DVD player will play back any disc whose region number is 1 (or All). DVDs with a region number other than those listed below, cannot be played on this DVD player. Max. playing time 1 One-sided disc Approx. 4 hours 12 cm* Two-sided disc Approx. 8 hours Audio + Video (Moving pictures) DVD Video One-sided disc Approx. 80 Minutes 8 cm One-sided disc Approx. 160 Minutes Video CD DIGITAL VIDEO Audio + Video (Moving pictures) 12 cm Music CD Audio • Video CDs This DVD player is compatible with playback control (PBC) compatible video CDs (version 2.0). “PBC” is a function by which you can use menu screens recorded on the disc to find the scene you want to watch and view various types of information in dialog style. • Disc terminology Title If titles are programmed for the DVD, these are the largest unit of division of the information recorded on the disc. Chapter Each Title may also be divided into smaller divisions called Chapters. These can be specific scenes or musical selections. Approx. 74 Minutes 8 cm Approx. 20 Minutes 12 cm Approx. 74 Minutes 8 cm (CD single) Approx. 20 Minutes VIDEO CD ALL * Two-layer DVD disc compatible • Discs that cannot not be played DVD-ROMs, DVD-R/DVD-RAMs, CD-ROMs, CD-R/CD-RWs, photo CDs, etc. * This product incorporates copyright protection technology that is protected by method claims of certain U.S. patents and other intellectual property rights owned by Macrovision Corporation and other rights owners. Use of this copyright protection technology must be authorized by Macrovision Corporation, and is intended for home and other limited viewing uses only unless otherwise authorized by Macrovision Corporation. Reverse engineering of disassembly is prohibited. * Manufactured under license from Dolby Laboratories. “Dolby”, “Pro Logic” and the double-D symbol are trademarks of Dolby Laboratories. * “DTS” and “DTS Digital Out” are trademarks of Digital Theater Systems, inc. 7 When using remote control When using remote control • Changing Switch To operate the DVD Player shift the changing switch to the “DVD” side. Operate while viewing the blue characters on the remote control unit. Replacing the batteries Opening the battery cover Push on the cover and slide it as indicated by the arrows then the cover will be removed. DVD / AUDIO Replacing the battery Switching to “AUDIO” makes it possible to operate Alpine audio products as well. Operate while viewing the white characters on the remote control unit. • Point the remote control at the remote sensor within about 2 meter. • It may not be possible to operate the remote control unit if the remote control sensor is exposed to direct sunlight. • The remote control is a small, light weight precision equipment. To avoid damage, early battery wearing, operations error and deterioration of operation feeling, take care of the followings. - Do not apply any shock. - Do not put in a trouser pocket. - Keep free from splashing of a drink, moisture and dusts. - Do not place in direct sunshine. Remove the old batteries. Insert new ones matching the (+) and (–) polarities as shown in the diagram inside the remote control. - + + Closing the cover Push the cover in the arrow direction until a click is heard. Note: Use two AA size batteries. Warning DO NOT OPERATE THE EQUIPMENT OR LOOK AT THE SCREEN WHILE DRIVING THE VEHICLE. Operating the equipment may distract the driver from looking ahead of the vehicle and cause accident. Always stop the vehicle in a safe location before operating this equipment. 8 Loading and unloading discs Loading and unloading discs DVD Video CD CD Turn on the power before loading and unloading discs. (Refer to page 10 “Turning the power on and off”.) Loading discs Press the door in gently then slide it downwards. Close the door. Be sure to close the door to prevent dust from getting inside. POW ER OPEN DVD POW ER OPEN DVD Insert the disc with the side containing words or diagrams facing upwards. Once the disc is partially inserted, it is drawn in automatically. Playback starts. Unloading discs Press the door in gently then slide it downwards. The disc is automatically ejected part way. DVD If the disc is not removed, it is automatically drawn back into the player after a while. POW ER OPEN Notes: • If the ignition key is on ACC or ON, a disc can be inserted even when the power is OFF. The power then goes ON automatically. • Never insert a navigation map disc. If inserted it may cause a failure. • For two-sided DVDs, play one side of the disc to the end, then unload the disc, turn it over and reload it to play the other side. Refer to the indications on the disc (“Side 1”/”Side 2”). • Never insert map discs for navigation purposes as they could damage the equipment. • If wrong disc, upside-down discs or dirty discs have been inserted, “DISC ERROR” is displayed. Open the door and remove the disc. DVD Note: If the ignition key is on ACC or ON, a disc can be removed even when the power is OFF. After removing the disc, the power goes OFF again automatically. close the door while the disc Caution Never is being unloaded. Doing so could scratch the disc or damage the player. 9 Turning the power on and off N LD VO Turning the power on and off VO LU P Press “POWER”. The power turns on. POWER NTSC/PAL connected with an Alpine Caution When head unit If the DVA-5205 is connected to anything other than the CVA-1005/ IVA-C800, the default DVD setting must be changed. See page 36, “Custom setting – Changing the AiNET settings” to change the SETUP to CD mode before using it. To turn the power off, press “POWER” again. POWER NTSC/PAL Notes: • With this unit connected to an Ai-NET compatible head unit, there will be about a 3 second delay during power-up from the remote control. This is caused by the systems communications being carried out by the various components and is not a defect. • When connected with an Ai-NET compatible head unit, the power cannot be turned off from the remote control unit. Turn off the DVA-5205’s power by switching the head unit’s source. For details, refer to “Operating from the head unit” (page 56). Play Position Memory Function • Even if you turn power off or switch the Ignition Key to OFF during playback or change the video source, playback will continue from the point where playback stopped when the power is turned ON again. The play position memory is released if the disc is removed or the Reset switch is pressed. • Reading this manual Tips Stopping playback Stopping playback These indicate the discs for which the function can be used. DVD Video CD CD Press the stop button during playback to stop playback. That position is stored in the memory. Press “ L ” during playback. • Tips CHG ...DVDs Video CD ...Video CDs CD ...Music CDs Using the PRE-STOP function When the PRE-STOP function is used, the position at which playback is stopped is stored in the memory, and playback resumes from that position. Press “ L ” once during playback. “PRE-STOP” is displayed. CHG Press “ : ” in the PRE-STOP mode. Playback starts from the position at which it was stopped. 10 DVD This indicates supplementary explanation of operation of this system. Switching between NTSC and PAL configuration Adjusting the volume Switching between NTSC and PAL configuration Adjusting the volume Adjust the volume for connecting only with the Digital Audio Processor (PXAH510). Switch the video output configuration to NTSC or PAL according to the type of television and the disc recording method. Press NTSC/PAL for at least 5 seconds. Move the rotary encoder to the right or left. Turn to the right to increase the volume. Turn to the left to decrease the volume. POWER DN VOL NTSC/PAL Notes: • NTSC is the standard and there is no need to change the setting. The system is set to NTSC at time of shipment from the factory. • The image output configuration must be correct. Otherwise the following message appears and playback does not start: “VIDEO SIGNAL SYSTEM IS NOT CORRECT”. VOL U P Note:If an Ai-NET product (head unit) has been connected in addition to the Digital Audio Processor (PXA-H510), or if this equipment is connected singly to a TV monitor, adjust the volume on the connected equipment. DVD Video CD • Using the Number Keys. This describes use of the Number Tips Keys, particularly the +10 key. CD To input 10: Press the +10 key once and then press the 0 key. To input 16: Press the +10 key once and then press the 6 key. To input 23: Press the +10 key twice and then press the 3 key. * Each time the +10 key is pressed, the number increases by one decimal. 11 Playing discs Playing discs DVD Video CD CD • With some DVDs, certain operations Caution are disabled. Such operations are ENT SOURCE SLOW CHG not possible on such DVDs. • The DVD functions described in this manual are not supported by all DVDs. See the individual DVDs instructions for details on the features supported. • Fingerprints on a disc may adversely affect playback. If a problem occurs, remove the disc and check for fingerprints on the playback side. Clean the disc if necessary. • When using the remote control, be careful to press one button at time. Pressing multiple buttons at the same time may cause erroneous operation. • Even if you switch the power or the Ignition Key to OFF during playback or change the video source, playback will continue from the point where it stopped when the power is turned ON again. If the disc is removed or the Reset switch is pressed, the play position memory is released. Press “ : ”. Playback starts. SOURCE SLOW DVD Video CD UP 0 ∼ 9 、 +10 • If a menu screen appears On DVDs and video CDs with playback control (PBC), menu screens may appear automatically. If this happens, perform the operation described below to start playback. Note: For many discs, the menu screen can also be displayed by pressing “MENU” or “TITLE” for at least 2 seconds. 12 Stopping playback DVD menu Use the “Joystick” or the number keys (“0” to “9” and ”+10”) to select the desired item, then press “ENT” or “ : ”. 1 2 4 ENT 5 6 8 0 or Press “ L ” during playback. 9 OP/ CL ENT CD Press the stop button during playback to stop playback. That position is stored in the memory. ANGLE 7 DVD Video CD 3 SUB T. ON/OFF. AUDIO or Stopping playback CHG UP +10 SOURCE SLOW • Tips Using the PRE-STOP function When the PRE-STOP function is used, the position at which playback is stopped is stored in the memory, and playback resumes from that position. Press “ L ” once during playback. “PRE-STOP” is displayed. Note: For some discs it is not possible to select items from the menu screen using the number keys (“0” to “9” and ”+10”). CHG Video CD menu Press “ : ” in the PRE-STOP mode. Use the number keys (“0” to “9” and ”+10”) to select the desired number, then press “ENT” or “ : ”. 1 2 Playback starts from the position at which it was stopped. SOURCE SLOW 3 SUB T. ON/OFF. AUDIO 4 5 6 ANGLE 7 8 OP/ CL 0 ENT or 9 UP +10 SOURCE SLOW • Canceling the PRE-STOP function Either press “ L ” again in the PRE-STOP mode or eject the disc and turn the power or the ignition key off to clear the memory. Notes: • The PRE-STOP function cannot be used with video CDs equipped with playback control (PBC) when the PBC function is turned on. The menu screen appears when “ L ” is pressed. • For some discs, the position at which playback was stopped may not be accurate. Note: Playback starts at the beginning of the disc whenever ignition is turned off or another Ai-NET source is selected. Note: The menu screen does not appear when the PBC function is turned off. If this is the case, press “MENU” to turn on the PBC function. 13 Fast-forwarding/fast-reversing Finding the beginnings of chapters or tracks Fast-forwarding/ fast-reversing During playback, press “c ” (fastreverse) or “ f ” (fast-forward) for at least 2 seconds. DVD Video CD CD A.PROC DEFEAT SOUR CE or SLO W A. PROC MUTE RPT DEFEAT Press “ : ” to return to normal playback. SOURCE SLOW Notes: • No sound or subtitles are played during fastforwarding/fast-reversing. • For DVDs and video CDs with playback control (PBC), the menu screen may reappear during fast-forwarding/fast-reversing. DVD Finding the beginnings of chapters or tracks During playback, press“ c ” or “ f ”. The chapter/track switches each time the button is pressed, and playback of the selected chapter/track starts. Video CD CD A.PROC DEFEAT or RPT f: Press this to start playback from the beginning of the following chapter or track. c : Press this to start playback from the beginning of the current chapter or track. 14 Playing still frames (pausing) Frame-by-frame playback Slow motion playback Frame-by-frame playback Note: Some DVDs do not have chapters. Supplementary explanation “Chapters” are divisions of movies or musical selections on DVDs. “Tracks” are divisions of movies or musical selections on video and music CDs. In the pause mode, press “ ”. During playback, press “ ” once. Press “ : ” to resume playback. Video CD CD MUTE MUTE The picture advances by one frame each time the button is pressed. Press “ : ” to resume normal playback. DVD Playing still frames (pausing) DVD Video CD SOURCE SLOW Note: No sound is played during frame-by-frame playback. Slow motion playback DVD Video CD During playback, press “SLOW” for at least 2 seconds. SOURCE SLOW Press “ : ” to resume normal playback. SOURCE SLOW SOURCE SLOW Notes: • No sound is played during the still frame mode. • When a playback starts after about 5 minutes of temporary still (pause), a picture or sound may stop for an instant period, but this is not a failure. Notes: • No sound is played during slow motion playback. • Slow playback is not available when playing back a slide show. 15 Searching by title number Searching by title number DVD Use this function to easily find positions on the DVD using the DVD’s title menu. ENT LIST GO TO TITLE SOURCE SLOW During playback, press “GO TO”. LIST GO TO TITLE The mode switches each time the button is pressed. Select “TITLE”. BAND RTN V.OUT TITLE CHAPT TIME Normal playback Input the number of the title you want to play using the number keys (“0” to “9” and “+10”). 1 2 4 5 7 8 0 9 UP +10 (When title number 1 is input) UP 0 ∼ 9 、 +10 16 6 ANGLE OP/ CL DN CLR 3 SUB T. ON/OFF. AUDIO Notes: • This function cannot be used on discs on which no title numbers are recorded. • Press “CLR” to delete the last digit in the title number. Press “CLR” for at least 2 seconds to clear all title numbers. • Press “RTN” to cancel the title search mode and resume normal playback. Searching directly by chapter or track number Press “ : ” or “ENT”. Playback starts from the selected title number. SOURCE SLOW ENT or Notes: • This function cannot be used on discs on which no chapter numbers are recorded. • Press “CLR” to delete the last digit in the chapter/ track number. Press “CLR” for at least 2 seconds to clear “Chapter” and “Track” numbers. • Press “RTN” to cancel the chapter/track search mode and resume normal playback. • With video discs containing playback control (PBC), function of “searching directly by track number” is not available under the PBC ON status. Press “ : ” or “ENT”. DVD Searching directly by chapter or track number Video CD CD Playback starts from the selected chapter or track. SOURCE SLOW or ENT Use this function to easily move to the beginnings of the chapters or tracks on the disc. During playback, press “GO TO”. The mode switches each time the button is pressed. Select “CHAPT” or “TRACK”. LIST GO TO TITLE DVD Video TITLE CHAPT TIME Normal playback Video-CD/CD TRACK TIME Normal playback Input the number of the chapter or track you want to play using the number keys (“0” to “9” and “+10”). 1 2 3 SUB T. ON/OFF. AUDIO 4 5 6 ANGLE 7 8 OP/ CL 0 9 UP +10 (When chapter number 12 is input) 17 Searching by elapsed time Searching by elapsed time DVD Video CD CD Use this function to search by specifying the elapsed time. During playback, press “GO TO”. ENT LIST GO TO TITLE BAND SOURCE The mode switches each time the button is pressed. Select “TIME”. LIST GO TO TITLE RTN SLOW V.OUT DVD Video RPT DISC TITLE CHAPT TIME Normal playback Video-CD/CD TRACK TIME Normal playback Input the elapsed time from which you want to start playback using the number keys (“0” to “9” and “+10”). 1 2 3 SUB T. ON/OFF. AUDIO 4 5 6 ANGLE 7 8 OP/ CL 0 9 UP +10 3 AUDIO DN CLR (When 1 hour, 30 minutes is input as the elapsed time) 0 ∼ 9 、 18 UP +10 Notes: • Input the hours first, followed by the minutes, then the seconds. • Press “CLR” to delete the last digit in the elapsed time. Press “CLR” for at least 2 seconds to erase all the set times. • Press “RTN” to cancel the elapsed time search mode and resume normal playback. • With DVDs, the precision of the elapsed time search function differs from disc to disc. • With video discs containing playback control (PBC), function of “searching by elapsed time” is not available under the PBC ON status. Chapter/track/title repeat playback Switching the audio language Switching the audio language Press “ : ” or “ENT”. Playback starts from the specified elapsed time. SOURCE SLOW ENT or DVD Video CD On DVDs including multiple audio modes or multiple audio languages, the audio language can be switched during playback. During playback, press “AUDIO” for at least 2 seconds. 3 The sound switches between the different audio modes recorded on the disc each time the button is pressed. Chapter/track/ title repeat playback DVD Video CD CD Use this function to play the disc’s titles, chapters or tracks repeatedly. During playback, press “RPT”. Notes: • The language selected with the default settings is set when the power is turned on or the disc is replaced. If the disc does not include that language, the disc’s default language is set. • For some discs it is not possible to switch the audio language during playback. • Some time may be required for the audio language to change. RPT DISC The repeat mode switches each time the button is pressed. DVD Video CD AUDIO Chapter The chapter is played repeatedly. Title The title is played repeatedly. Repeat off The mode returns to normal playback. (setting at factory shipping) • Video CDs with multiplex audio During playback, press “AUDIO” for at least 2 seconds. 3 AUDIO The combination of the left and right channels changes each time the button is pressed. LL RR LR CD Track The track is played repeatedly. Disc The entire disc is played repeatedly. Repeat off (setting at factory shipping) Note: The track/disc repeat modes cannot be used on video CDs with playback control (PBC). Press “MENU” to turn the PBC function off. 19 Switching the angle Switching the subtitles (subtitle language) Switching the angle DVD With DVDs on which images photographed from multiple angles are recorded, the angle can be switched during playback. ENT DISP MENU SET LIST GO TO TITLE SOURCE SLOW During playback, press 5 “ANGLE” for at least 2 seconds. ANGLE The angle switches between the angles recorded on the disc each time the button is pressed. Notes: • Some time may be required for the angle to change. • Depending on the disc, the angle may switch in one of two ways. - Seamless : The angle switches smoothly. - Non-seamless : When the angle is switched, a still picture is displayed first, after which the angle switches. DISP. TUNER 2 ON/OFF 1 Switching the subtitles (subtitle language) DVD With DVDs on which multiple subtitle languages are recorded, the subtitle language can be switched during playback. SUB T. 5 ANGLE During playback, press “SUB T.” for at least 2 seconds. UP 0 ∼ 9 、 +10 1 SUB T. The subtitle language switches between the languages recorded on the disc each time the button is pressed. Notes: • Some time may be required for the subtitle language to change. • The language selected with the default settings is set when the power is turned on or the disc is replaced. If the disc does not include that language, the disc’s default language is set. 20 Displaying the subtitles Displaying the disc status Displaying the subtitles DVD Displaying the disc status DVD With DVDs on which subtitles are recorded, you can select whether to display the subtitles or not during playback. Use the procedure described below to display the status (title number, chapter number, etc.) of the currently playing DVD on the screen. During playback, press “– ON/OFF” for at 2 least 2 seconds. ON/OFF During playback, press DISP. TUNER “DISP.”. The currently displayed subtitles are turned on and off each time the button is pressed. Note: For some discs, the subtitles will be displayed even when this is set to off. The playback status is displayed. TV system (NTSC or PAL) Operating mode Current title number Current subtitle language Current angle number • Tips Switching from the menu For some discs, the audio language, angle and subtitles can be switched from the disc menu. Press “MENU” or “TITLE” (for at least 2 seconds), select the item, then press “ENT”. DISP MENU SET or LIST GO TO TITLE ENT Use the “Joystick” or the number keys (“0” to “9” and “+10”) to select the language or angle, then press “ENT” or “:”. 1 2 Current chapter number Current audio language Repeat setting (Only during repeat playback) Audio recording system Press “DISP.” once more to turn the display off. DISP. TUNER 3 SUB T. ON/OFF. AUDIO 4 5 6 ANGLE 7 ENT ENT or or 8 OP/ CL 0 9 UP +10 SOURCE SLOW 21 Displaying the disc status Displaying the disc status Video CD CD Use the procedure described below to display the status (track number, etc.) of the currently playing video CD or music CD on the screen. LIST GO TO TITLE BAND RTN UT V.O DISP. TUNER During playback, press DISP. TUNER “DISP.”. The playback status is displayed. Playback control (PBC) ON/OFF (For video CDs only) TV system (NTSC or PAL) Playback disc (CD: Music CD VCD: Video CD) Current track Operating mode number Track playback time Repeat setting (Default setting-disc repeat) Note: For music CDs, the playing status is displayed even when “DISP.” is not pressed. Press “DISP.” once more to turn the display off. 22 DISP. TUNER Video output ON/OFF Video output ON/OFF (Only when CVA-1005/IVA-C800 is connected) Note: This output is at a fixed level and requires a preamp with a volume control to adjust listening levels. When this unit is used with the CVA-1005/ IVA-C800 + the TME-M750 (Extra Monitor for Rear Seat), the DVD video can be viewed independently of what’s being viewed on the CVA-1005/IVA-C800. For example, DVD video can be monitored on the Rear Monitor, while a Navigation map is displayed on the CVA1005/IVA-C800. If an audio source is selected, the main audio system will be used to listen to the CVA-1005/IVA-C800. Use the RCA connectors at the rear of the DVA-5205 to feed audio to your Rear monitor. Set AUX OUT of “Selecting Rear Monitor” on the CVA-1005/IVAC800 side to AUX 1. Change the source on the CVA1005/IVA-C800 side to MD, CD, radio, etc. Use the “Playing 2 Sources Simultaneously” function on the CVA-1005/IVA-C800 side to select DVD with the V.SEL button. Press V.OUT on the remote control unit for this equipment at least 2 seconds. BAND RTN T U V.O To release, press V.OUT for at least 2 seconds. Note: Refer to the Instruction Manual of the CVA1005/IVA-C800 for operation on the CVA1005/IVA-C800 side. 23 Changing the default settings (setup) SET UP Changing the language settings Changing the default settings (setup) The factory default settings can be changed to suit your personal preferences and usage. ENT In the stop mode, press “SET” for at least 2 seconds. DISP MENU SET BAND RTN DISP MENU SET The default setting menu appears. UT V.O Note: This operation cannot be performed in the PRE-STOP mode. Use the “Joystick” to make the selection, then press “ENT”. For the procedure after ENT selecting the setting item, refer to the pages indicated on the table below. or ENT Item Description See page LANGUAGES Set the audio language, subtitle →P24 language and menu language. Note: When the settings are changed, the old settings are overwritten. Make a note of the current settings before making changes. The settings are not cleared even when the vehicle’s battery is disconnected. TV SCREEN Set the screen size according to →P26 the type of TV monitor being used. COUNTRY CODE Set the country code when setting the rating level. →P27 RATING LEVEL Set the rating level (parental lock). →P28 DOWN SAMPLING Takes DVD digital sound and →P30 converts it into 48K/16BIT sampling digital sound. DIGITAL OUT Set the digital output. 24 →P32 LED INDICATOR Set whether the front panel’s →P34 LED indicators are on or off. CUSTOM SETUP Set the Closed Caption and Ai-NET setting. →P35 Changing the language settings The audio language, subtitle language and menu language can be set according to your preferences. Select “LANGUAGES” under “Changing the default settings (SET UP)” on page 24. SET UP Changing the language settings ORIGINAL The disc is played with the audio language set as the priority language for the disc. (AUDIO only) Use the “Joystick” to make the selection, then press “ENT”. ENT ENT AUDIO Set the audio language produced from the speakers. SUBTITLE Set the language of the subtitles displayed on the screen. MENU LANGUAGE Set the language used for the menus (title menu, etc.). The setup screen for the selected language is displayed. AUTO The disc is played with the subtitle language set as the priority language for the disc. (SUBTITLE only) OTHERS Set this to play the disc with a language other than one of the languages displayed. Use the keys “0” to “9” to input the 4-digit country code, then press “ENT”. For the country codes, refer to “List of language codes” (page 61). Use the “Joystick” to select the desired language, then press “ENT”. ENT ENT Displays the setting contents. SET UP AUDIO (audio languages) SUBTITLE (subtitle languages) MENU LANGUAGE (menu languages) Notes: • If the disc does not include the selected language, the disc’s default language is set. • Languages set upon shipment from the factory: Audio language : ORIGINAL Subtitle language : AUTO Menu language : AUTO • Press “RTN” to return to the previous screen. Press “SET” for at least 2 seconds. The settings are stored and the set up mode is canceled. DISP MENU SET 25 SET UP Changing the TV screen settings Changing the TV screen settings Use the procedure described below to set the output screen according to the type of TV monitor being used. ENT Select “TV SCREEN” under “Changing the default settings (SET UP)” on page 24. DISP MENU SET BAND RTN UT V.O Use the “Joystick” to make the selection, then press “ENT”. ENT ENT 4 : 3 LETTERBOX Select this when connected to a conventional 4:3 size (normal TV aspect ratio) monitor. There may be black stripes visible at the top and bottom of the screen. The width of these stripes will depend upon the original aspect ratio of the theatrical release of the movie. DN CLR 0 ∼ 9 4 : 3 PAN-SCAN Select this when connected to a conventional 4:3 size monitor. The picture will fill the entire TV screen. However, due to the mismatch in aspect ratio, parts of the movie at the extreme left and right sides will not be visible. 26 Changing the country code setting 16 : 9 WIDE Select this when connected to a wide screen TV. This is selected upon shipment from the factory. Press “ENT” to reset the country code. SET UP ENT Use keys “0” to “9” to input the 4-digit country code, then press “ENT”. Displays the setting contents. 1 2 3 SUB T. ON/OFF. AUDIO 4 5 6 ANGLE 7 8 9 OP/ CL 0 Notes: • For some discs, the picture may not be set to the selected screen size. (For details, refer to the explanation on the disc’s jacket.) • Press “RTN” to return to the previous screen. Press “SET” for at least 2 seconds. The settings are stored and the set up mode is canceled. DISP MENU SET Changing the country code setting Set the country code when setting the rating level (Parental lock). Select “COUNTRY CODE” under “Changing the default settings (SET UP)” on page 24. US : 8583 Displays the setting contents. ENT SET UP Notes: • Can be erased one digit at a time each time “CLR” is pressed. • Press “RTN” to return to the previous screen. Press “SET” for at least 2 seconds. The settings are stored and the set up mode is canceled. DISP MENU SET 27 SET UP Setting the rating level (parental lock) Setting the rating level (parental lock) Use this function to restrict the viewing of movies to children of appropriate age levels only. ENT Select “RATING LEVEL” under “Changing the default settings (SET UP)” on page 24. DISP MENU SET Press “ENT”. The password input mode is set. ENT Use keys “0” to “9” to input the 4digit password. The password is set to 1111 is upon shipment from the factory. 1 2 3 SUB T. ON/OFF. AUDIO 4 5 6 ANGLE 7 8 OP/ CL 0 Input numbers are displayed “ ”. 0 ∼ 9 Press “ENT”. ENT 28 9 Setting the rating level (parental lock) Use the “Joystick” to select the rating level, then press “ENT”. Select “OFF” to cancel the parental lock or if you do not want to set a rating level. The higher the number, the higher the rating level. SET UP • Changing the rating level temporarily Tips Some discs may request that you change the rating level set in the default settings during playback. In this case, the following message appears on the screen: Still picture ENT Still Picture ENT When this appears, if you do not input the correct password either playback does not continue or a picture for a different rating level is played. Displays the setting contents. Note: Press “RTN” to return to the previous screen. Press “SET” for at least 2 seconds. The settings are stored and the set up mode is canceled. DISP MENU SET SET UP Notes: • If you want to change the password, select “CHANGE PASSWORD”, then input the new password (4 digits). • Write down the password on a piece of paper and store the piece of paper somewhere in case you forget it. • On unrated DVDs, playback will not be restricted even if the rating level is set. • Once set, this rating level remains in memory until changed. To enable the play of discs of higher rating levels or to cancel the parental lock, the setting must be changed. • Not all DVDs provide a Parental Lock feature. If you are unsure about a DVD, play it first to confirm. Do not leave DVDs accessible to young children for whom you deem them inappropriate. . 29 SET UP Changing the down sampling setting Changing the down sampling setting ENT DISP MENU SET Converts linear PCM (LPCM) voice signals recorded on the DVD disc to downsampling 48 kHz/16 bit digital signals and outputs them from the optical cable. Select “DOWN SAMPLING” under “Changing the default settings (SET UP)” on page 24. Move the “Joystick” up and down to choose ON or OFF and, then press “ENT”. ENT ENT ON The digital signals recorded on the DVD disc with 96K/24bit, 48K/24bit, 48K/20bit sampling are converted into digital signals with 48K/16bits sampling for output from the optical cable. OFF The digital signals recorded on the DVD disc with 96K/24bit, 48K/24bit, 48K/20bit sampling are not converted into digital signals with 48K/16bits sampling. They are not output from the optical cable. Set to ON at time of shipment from factory. 30 Changing the down sampling setting SET UP Displays the setting contents. Note: Press “RTN” to return to the previous screen. Press “SET” for at least 2 seconds. The settings are stored and the set up mode is canceled. DISP MENU SET SET UP 31 SET UP Changing the digital output setting Changing the digital output setting Use the following procedure to set the audio signal output from the DVA-5205. ENT DISP MENU SET Select “DIGITAL OUT” under “Changing the default settings (SET UP)” on page 24. Use the “Joystick” to make the selection, then press “ENT”. ENT ENT AUTO The digital output is switched automatically according to the type of audio signals being played. Be sure to select “AUTO” when you want to connect a digital audio processor and play Dolby Digital audio. “AUTO” is selected upon shipment from the factory. LPCM The audio signals recorded on the disc are converted into 48 kHz/16 bit (for DVDs) or 44.1 kHz (for video CDs and CDs) linear PCM audio signals for output. 32 Changing the digital output setting Displays the setting contents. Press “SET” for at least 2 seconds. The set up are stored and the set up mode is canceled. SET UP DISP MENU SET Note: Press “RTN” to return to the previous screen. • Audio output/Optical digital audio output Disc Audio recording format Digital output setting DVD DTS AUTO LPCM Dolby Digital AUTO LPCM Linear PCM AUTO (48 kHz) LPCM Linear PCM AUTO (96 kHz) LPCM Down sampling setting Optical digital audio Analog audio output (when a output (Ai-NET, digital audio RCA output) processor is connected) ON DTS X OFF DTS X ON X X OFF X X ON Dolby Digital O OFF Dolby Digital O ON LPCM (48kHz/16 bit) O OFF x O ON LPCM (48kHz/16 bit) O OFF x O ON LPCM (48kHz/16 bit) O OFF x O ON LPCM (48kHz/16 bit) O OFF x O ON LPCM (48kHz/16 bit) O OFF x O Video CD MPEG AUTO or LPCM ON or OFF LPCM (44.1kHz) O CD Linear PCM AUTO or LPCM ON or OFF LPCM (44.1kHz) O SET UP 33 SET UP Changing the LED indicator setting Changing the LED indicator setting Use the following procedure to set whether or not the product’s LED indicators are on or off. ENT Select “LED INDICATOR” under “Changing the default settings (SET UP)” on page 24. DISP MENU SET BAND RTN Use the “Joystick” to select the “ON” or “OFF”, then press “ENT”. UT V.O ENT ENT ON The LED indicators are lit, indicating the product’s operating status. “ON” is selected upon shipment from the factory. OFF The LED indicators are turned off. When “OFF” is set, the indicators do not light even when the power is on. 34 Custom setting – Changing the Closed Caption Displays the setting contents. SET UP Move the “ Joystick” up and down to select “ON” or “OFF”, then press “ENT”. ENT ENT Note: Press “RTN” to return to the previous screen. Press “SET” for at least 2 seconds. DISP MENU SET The settings are stored and the set up mode is canceled. Custom setting – Changing the Closed Caption setting DVD includes so-called “closed captions” which describe the scene to persons with impaired hearing. It is possible to turn the closed captions ON and OFF. ON Displays the closed captions. OFF Does not display the closed captions. Set to OFF at time of shipment from factory. Displays the setting contents. SET UP Select “CUSTOM SETUP” under “Changing the default settings (SET UP)” on page 24. Move the “ Joystick” up and down to select “CLOSED CAPTION”, then press “ENT”. ENT Notes: • Please be aware that closed captions are different from titles. • Press “RTN” to return to the previous screen. ENT Press “SET” for at least 2 seconds. The settings are stored and the set up mode is canceled. DISP MENU SET 35 SET UP Custom setting – Changing the Ai-NET settings Custom setting – Changing the Ai-NET settings ENT DISP MENU SET The Ai-NET settings are used to output the sound of connected Ai-NET products. Select “CUSTOM SETUP” under “Changing the default settings (SET UP)” on page 24. Use the “Joystick” to select “AiNET SETUP”, then press “ENT”. ENT ENT Use the “Joystick” to select “DVD” or “CD”, then press “ENT”. ENT ENT 36 Custom setting – Changing the Ai-NET settings DVD Set to “DVD” when connected to the CVA-1005/ IVA-C800. Operations can be performed using the CVA1005/IVA-C800’s main menu screen. For details, refer to the operating instructions of the CVA-1005/IVA-C800. “DVD” is selected upon shipment from the factory. CD Set to “CD” when connected to an Ai-NET product (head unit) other than the CVA-1005/ IVA-C800. Operations can be performed from the head unit. For details, refer to “Operating from the head unit” (page 56). Press “SET” for at least 2 seconds. The settings are stored and the set up mode is canceled. SET UP DISP MENU SET Turn off the vehicle’s ignition, then turn it on again. Displays the setting contents. Notes: • Press “RTN” to return to the previous screen. • Operations cannot be performed using the main menu screen if the Ai-NET setting is set to “CD” when connected to the CVA-1005/IVA-C800. • If the Ai-NET setting is set to “DVD” when connected to an Ai-NET compatible head unit other than the CVA-1005/IVA-C800, the only operation possible from the head unit is the volume adjustment operation. • When the Ai-NET setting is set to “CD”, the operable functions and displays may differ depending on the connected Ai-NET compatible head unit. SET UP 37 SET UP Custom setting – Changing the H.U. CONTROL settings Custom setting – Changing the H.U. CONTROL settings When connecting this equipment with an Ai-NET compatible head unit or an AiNET compatible AV head unit (CVA-1005/ IVA-C800), set the equipment so that it is possible to control from the head unit. ENT DISP MENU SET BAND RTN UT V.O Select “CUSTOM SETUP” under “Changing the default settings (SET UP)” on page 24. Move the “Joystick” up and down to select “H.U. CONTROL”, then press “ENT”. ENT ENT Move the “Joystick” up and down to select “ON” or “OFF”, then press “ENT”. ENT ENT 38 Custom setting – Changing the H.U. CONTROL settings SET UP ON Possible to operate from an Ai-NET compatible head unit or an Ai-NET compatible AV head unit (CVA-1005/IVAC800). OFF Not possible to operate from an Ai-NET compatible head unit or an Ai-NET compatible AV head unit (CVA-1005/IVAC800). Set to OFF at time of shipment from factory. Displays the setting contents. Note: Press “RTN” to return to the previous screen. Press “SET” for at least 2 seconds. The settings are stored and the set up mode is canceled. DISP MENU SET SET UP 39 Operating the digital audio processor (optional) Operating the DVD VideoCDCD digital audio processor (optional) When used with a digital audio processor (PXAH510), operation is possible from the remote control unit included with the DVA-5205. Also refer to the PXA-H510’s operating instructions. ENT BAND RTN UT V.O During playback, press “A.PROC”. V. SEL The setting menu appears. A. PROC BAND Use the “Joystick” to make the selection, then press “ENT”. A. PROC BAND For the procedure after making a selection, refer to the pages indicated on the table below. ENT ENT Item Description PARAMETRIC- Adjust the parametric equalizer’s band frequency, EQ band width and level. →P41 SURROUND Select one of six surround modes according to the →P42 music source using DSP (digital signal processing). PRIVATEMEMORY Store and recall up to six parametric equalizer adjustments and settings. TIMEEliminate time delays resulting from the distance CORRECTION between the listening position and the speakers. 40 See page →P43 →P45 DOLBY SURROUND MODE Switch between the Dolby Digital input and the Pro →P45 Logic input. ADJUST Adjust the speaker mode, speaker level, etc. →P46 MODE Adjust the volume, fader, balance, etc. →P53 Adjusting the parametric equalizer Adjusting the parametric equalizer Select “PARAMETRIC-EQ” under “Operating the digital audio processor (optional)” on page 40. Use the “Joystick” to select the band to be set, then press “ENT”. The band whose frequency is indicated in yellow can be adjusted. The parametric equalizer’s setting screen consists of two pages. Press “BAND” for at least 2 seconds to switch between pages 1 and 2. ENT ENT Use the “Joystick” to select the band width (Q-FACT), then press “ENT”. ENT ENT Use the “Joystick” to adjust the band width, then press “ENT”. ENT ENT Use the “Joystick” to select the level (LV), then press “ENT”. ENT ENT Use the “Joystick” to adjust the level, then press “ENT”. V. SEL A. PROC BAND ENT ENT Note: Press “RTN” to return to the previous screen. Use the “Joystick” to adjust the frequency, then press “ENT”. ENT ENT Press “A.PROC” V. SEL to close the digital audio processor screen and return to the playback screen. A. PROC BAND 41 Adjusting the surround settings Adjusting the surround settings This adjustment is not possible when Dolby Digital or Pro Logic is turned on for the DVA5205’s audio output. ENT Select “SURROUND” under “Operating the digital audio processor (optional)” on page 40. BAND RTN UT V.O Use the “Joystick” to select the surround mode, then press “ENT”. There are six surround modes. ENT ENT A. PROC BAND Press “ENT”. The level (LV) value turns yellow. ENT Use the “Joystick” to adjust the level (LV), then press “ENT”. ENT 42 ENT Storing the surround settings Use the “Joystick” to select the time (echo time), then press “ENT”. ENT Use the “Joystick” to select “WRITE”, then press “ENT”. ENT ENT ENT Use the “Joystick” to adjust the time, then press “ENT”. ENT ENT Use the “Joystick” to select the number at which you want to store the settings (“PRIVATE-MEMORY 1” to “PRIVATE-MEMORY 6”), then press “ENT”. Note: Press “RTN” to return to the previous screen. Press “A.PROC” V. SEL to close the digital audio processor screen and return to the playback screen. A. PROC ENT BAND DVD Storing the surround settings Video CD ENT Note: Press “RTN” to return to the previous screen. CD Select “PRIVATE-MEMORY” under “Operating the digital audio processor (optional)” on page 40. Press “A.PROC” V. SEL to close the digital audio processor screen and return to the playback screen. A. PROC BAND 43 Recalling the surround settings DVD Recalling the surround settings Video CD Select “PRIVATE-MEMORY” under “Operating the digital audio processor (optional)” on page 40. ENT BAND RTN UT V.O Use the “Joystick” to select the number of the settings you wish to recall (“PRIVATE-MEMORY 1” to “PRIVATE-MEMORY 6”), then press “ENT”. ENT ENT A. PROC BAND Note: Press “RTN” to return to the previous screen. Press “A.PROC” V. SEL to close the digital audio processor screen and return to the playback screen. 44 CD A. PROC BAND Adjusting the time compensation Using the Pro Logic mode DVD Adjusting the time compensation Video CD CD Using the Pro Logic mode DVD Video CD CD Select “TIME-CORRECTION” under “Operating the digital audio processor (optional)” on page 40. Select “DOLBY SURROUND MODE” under “Operating the digital audio processor (optional)” on page 40. Use the “Joystick” to select the speaker to be adjusted, then press “ENT”. Use the “Joystick” to make the selection, then press “ENT”. ENT ENT Use the “Joystick” to adjust the time, then press “ENT”. ENT ENT ENT DOLBY DIGITAL “DOLBY DIGITAL” is set automatically when the disc is Dolby Digital compatible and the DVD video player’s audio output setting is set to “AUTO”. DOLBY PRO LOGIC Note: Press “RTN” to return to the previous screen. Press “A.PROC” V. SEL to close the digital audio processor screen and return to the playback screen. ENT “DOLBY PRO LOGIC” or “OFF” can be selected when the disc is Dolby Pro Logic compatible and the DVD video player’s audio output setting is set to “LPCM”. When “OFF” is selected, the surround settings cannot be adjusted. Note: Press “RTN” to return to the previous screen. A. PROC BAND Press “A.PROC” V. SEL to close the digital audio processor screen and return to the playback screen. A. PROC BAND 45 ADJUST – Setting the speaker mode ADJUST – Setting the speaker mode DVD Video CD CD This adjustment cannot be made when Dolby Pro Logic is set to “OFF”. ENT Select “ADJUST” under “Operating the digital audio processor (optional)” on page 40. BAND RTN UT V.O Use the “Joystick” to select the speaker to be set (“FRONT”, “CENTER” or “REAR”), then press “ENT”. ENT ENT A. PROC BAND Use the “Joystick” to switch the mode. ENT ENT FRONT LARGE/SMALL CENTER OFF/LARGE/SMALL REAR OFF/LARGE/SMALL Note: Press “RTN” to return to the previous screen. 46 ADJUST – Adjusting the acoustic image Press “A.PROC” V. SEL to close the digital audio processor screen and return to the playback screen. ADJUST – Adjusting the acoustic image Use the “Joystick” to select the level item, then press “ENT”. A. PROC BAND ENT DVD Video CD CD Use the “Joystick” to adjust the level, then press “ENT”. This adjustment cannot be made when Dolby Pro Logic is set to “OFF”. Select “ADJUST” under “Operating the digital audio processor (optional)” on page 40. Use the “Joystick” to select “BIPHANTOM”, then press “ENT”. ENT ENT ENT ENT ENT Note: Press “RTN” to return to the previous screen. Press “A.PROC” V. SEL to close the digital audio processor screen and return to the playback screen. A. PROC BAND Use the “Joystick” to select the mode (“ON” or “OFF”), then press “ENT”. ENT ENT Note: The “BI-PHANTOM” setting is automatically set to “OFF” when the center speaker is set to “OFF”. 47 ADJUST – Mixing the rear audio channels ADJUST – Mixing the rear audio channels DVD Video CD CD Use this function to mix the audio signals for the front to those output from the rear speakers. ENT BAND RTN Select “ADJUST” under “Operating the digital audio processor (optional)” on page 40. UT V.O Use the “Joystick” to select “REAR MIX”, then press “ENT”. ENT ENT A. PROC BAND Use the “Joystick” to select the mode (“ON” or “OFF”), then press “ENT”. ENT ENT Note: The “REAR MIX” setting is automatically set to “OFF” when the rear speaker is set to “OFF”. Use the “Joystick” to select the level item, then press “ENT”. ENT 48 ENT ADJUST – Center speaker time compensation Use the “Joystick” to adjust the level, then press “ENT”. ENT ENT Note: Press “RTN” to return to the previous screen. Press “A.PROC” V. SEL to close the digital audio processor screen and return to the playback screen. ADJUST – DVD Video CD CD Center speaker time compensation Compensation is not possible when the center speaker is set to “OFF”. Select “ADJUST” under “Operating the digital audio processor (optional)” on page 40. Use the “Joystick” to select “CENTER DELAY”, then press “ENT”. ENT A. PROC BAND ENT Use the “Joystick” to adjust the level, then press “ENT”. ENT ENT Note: Press “RTN” to return to the previous screen. Press “A.PROC” V. SEL to close the digital audio processor screen and return to the playback screen. A. PROC BAND 49 ADJUST – Rear speaker time compensation ADJUST – DVD Video CD CD Rear speaker time compensation Compensation is not possible when the rear speakers are set to “OFF”. ENT Select “ADJUST” under “Operating the digital audio processor (optional)” on page 40. BAND RTN UT V.O Use the “Joystick” to select “REAR DELAY”, then press “ENT”. ENT ENT A. PROC BAND Use the “Joystick” to adjust the level, then press “ENT”. ENT ENT Note: Press “RTN” to return to the previous screen. Press “A.PROC” V. SEL to close the digital audio processor screen and return to the playback screen. 50 A. PROC BAND ADJUST – Achieving powerful sound at low volumes ADJUST – DVD Video CD Achieving powerful sound at low volumes CD This setting is only possible with Dolby Digital outputs. Press “A.PROC” V. SEL to close the digital audio processor screen and return to the playback screen. A. PROC BAND Select “ADJUST” under “Operating the digital audio processor (optional)” on page 40. Use the “Joystick” to select “LISTENING”, then press “ENT”. ENT ENT Use the “Joystick” to select the mode. ENT L-NIGHT For powerful sound at low volumes (to compensate for high levels of background noise such as road noise) STANDARD For more powerful sound at regular volumes MAXIMUM For the regular sound Note: Press “RTN” to return to the previous screen. 51 ADJUST – Adjusting the speaker level ADJUST – Adjusting the speaker level DVD Video CD CD Select “ADJUST” under “Operating the digital audio processor (optional)” on page 40. ENT BAND RTN UT V.O Press “BAND” for at least 2 seconds to switch the “ADJUST” screen. V. SEL A. PROC BAND A. PROC BAND Use the “Joystick” to select “TEST TONE”, then press “ENT”. ENT ENT Use the “Joystick” to select “ON”, then press “ENT”. Test tones are produced for two seconds from each speaker. ENT ENT Note: Test tones are not produced from the center and rear speakers when these speakers are set to “OFF”. 52 MODE – Adjusting the volume, fader and balance Use the “Joystick” to select the speaker, then press “ENT”. Adjust so that the volume level from the different speakers is the same. MODE – DVD Video CD Adjusting the volume, fader and balance CD When a head unit is connected using Ai-NET connections, adjust the volume, fader and balance from the head unit. ENT ENT Use the “Joystick” to adjust the level, then press “ENT”. ENT ENT Select “MODE” under “Operating the digital audio processor (optional)” on page 40. Use the “Joystick” to select the item to be adjusted, then press “ENT”. ENT ENT Note: Press “RTN” to return to the previous screen. Once the levels of V. SEL all the speakers have been adjusted, either set “TEST TONE” to “OFF” or press “A.PROC” to close the digital audio processor screen and return to the playback screen. A. PROC BAND Use the “Joystick” to adjust. ENT Note: Press “RTN” to return to the previous screen. Press “A.PROC” V. SEL to close the digital audio processor screen and return to the playback screen. A. PROC BAND 53 MODE – Adjusting the subwoofer MODE – Adjusting the subwoofer DVD Video CD CD Select “MODE” under “Operating the digital audio processor (optional)” on page 40. ENT BAND RTN UT V.O Use the “Joystick” to select “SUBW”, then press “ENT”. ENT ENT A. PROC BAND Use the “Joystick” to select the mode (“ON” or “OFF”), then press “ENT”. ENT ENT Note: The subwoofer cannot be adjusted when set to “OFF”. Use the “Joystick” to select the level item, then press “ENT”. ENT 54 ENT MODE – Turning the defeat function on and off Use the “Joystick” to adjust the level, then press “ENT”. ENT ENT Note: Press “RTN” to return to the previous screen. Press “A.PROC” V. SEL to close the digital audio processor screen and return to the playback screen. MODE – DVD Video CD CD Turning the defeat function on and off Select “MODE” under “Operating the digital audio processor (optional)” on page 40. Use the “Joystick” to select “DEFEAT”, then press “ENT”. ENT ENT A. PROC BAND Use the “Joystick” to select the mode (“ON” or “OFF”), then press “ENT”. ON : OFF : The response is flat. Off ENT ENT Notes: • When “DEFEAT” is set to “ON”, the “PARAMETRIC-EQ”, “SURROUND”, “PRIVATE-MEMORY” and “TIME-CORRECTION” settings cannot be adjusted. • Press “RTN” to return to the previous screen. Press “A.PROC” V. SEL to close the digital audio processor screen and return to the playback screen. A. PROC BAND 55 Operating from the head unit CDA-7965 (head unit) DVA-5205 (player) Operating from the head unit The DVA-5205 can also be operated from the head unit. This section describes operations from the CDA-7965 (the recommended head unit). Note that some of the functions cannot be operated from the DVA-5205. Playing DVDs, video CDs and CDs Press “SOURCE” and select the CD (DVA-5205) mode. The mode switches each time the button is pressed. TUNER CD (Built-in) CD(DVA-5205) CHANGER * ( * only when a changer is connected.) The DVA-5205’s power is on when the CD mode is selected, off when other modes are selected. To set the pause mode, press ”. “ Press “ ” again to resume playback. Note: Playback starts at the beginning of the disc whenever ignition is turned off or another Ai-NET source is selected. 56 Operating from the head unit Displaying the CD title Press “TITLE” to display the CD title, etc., on the head unit’s display. Press “TITLE” on the head unit. The display pattern changes each time the button is pressed. Operation display (CDA-7965) TRACK NO./TIME*1 Clock display mode Text display mode Text display mode Title display mode Clock display Disc Name display*2 Track Name display*2 Title display*3 Notes: *1In the TRACK NO./TIME display mode the time display shows 0:00 and does not move. *2Displayed during playback of a text compatible CD (when using an optional text compatible). “NO TEXT” will be displayed when the CD is not text compatible. *3“--------” will be displayed when the title has not been inputted. <Functions operable from the CDA-7965> Switch Operation SOURCE Turns the power on and off. When pressed again, the source switches. The DVD player’s power is on when the CD mode is selected, off when other modes are selected. TITLE RPT Switches the display pattern. / Sets the title input mode. DVD: Chapter repeat Video CD/CD: Switches between track repeat and disc repeat f Starts playback from the beginning of the following chapter/track. When pressed and held in, fast-forwards the disc. c Starts playback from the beginning of the current chapter/track. When pressed and held in, fast-reverses the disc. :/j Switches between play and pause. Rotary Encoder Adjust the volume. Notes: • The functions and operations may differ when using with a head unit other than the CDA-7965. • For video CDs with playback control (PBC), turn PBC off. • Titles can be input for video CDs and CDs. For details, refer to the operating instructions of the connected head unit. 57 Operating from the head unit’s remote control unit Operating from the head unit’s remote control unit The DVA-5205 can be operated from the remote control unit included with the head unit. Remote control operations Operation • 58 Remote Control unit RUE-4185 RUE-4160 RUE-4165 P10 Power on/off O O O P14 Fast-forward/fast-reverse O O O P15 Still picture (pause) O O O P14 Chapter/track search O O O There may be restrictions to some of the functions and displays depending on the Ai-NET compatible product (head unit/remote control unit) being used. Operating from the head unit’s remote control unit ENT ENT ENT A.SEL SOURCE AUDIO SEL RUE-4185 RUE-4160 MENU RUE-4165 RUE-4165 Operating DVDs, video CDs and CDs First see “Remote control operations” (page 58). 1 Press “SOURCE” , “AUDIO SEL” or “A. SEL”to set the CD (DVA-5205) mode. The DVA-5205’s power is on when the CD mode is selected, off when other modes are selected. 2 To set the pause mode, press “ 3 Press and hold “c” or “f” continuously to make FF or RW operation. (RUE-4185, RUE-4160) Tilt and hold the joystick in left or right direction to make FF or RW operation. (RUE-4165) 4 Press “c” or “f” to make a track or chapter skip. (RUE-4185, RUE-4160) Tilt the joystick in left or right direction to make a track or chapter skip. (RUE-4165) Press “ ” or “ENT”. ” or “ENT” again to resume playback. Notes: • For adjusting the volume and other basic operations, refer to the head unit’s operating instructions. • For video CDs with playback control (PBC), turn PBC off. Warning Do not operate or view the display while driving. Drivers should not operate the product or view the display while driving. Doing so could be distracting, leading to accidents. Always stop the vehicle in a safe place before operating the product or viewing the display. 59 Terminology Terminology Dolby Digital (AC-3) DTS Dolby Digital (AC-3) is a digital audio compression technology developed by Dolby Laboratories. It is compatible with not only stereo (2-channel) sound, but also 5.1-channel surround sound. The signals for the different channels are completely independent, so large quantities of audio data can be recorded efficiently on discs, and since the sound is digital there is little loss of sound quality. This is a home-use digital sound format of the DTS Sound System, a high quality sound system for use in movie theaters which was developed by Digital Theater Systems Corp. DTS has six independent sound tracks. It realizes DTS surround sound with a superior feeling of presence for use in theaters and other settings. DTS is the abbreviation for Digital Theater System. * To enjoy DTS surround sound you need the separately sold DTS digital audio processor. The DVD video software should be compatible with DTS. * The separately sold digital audio processor (PXA-H510) is required to enjoy Dolby Digital sound. Dolby Pro Logic Center speaker Front speakers Rear speakers Subwoofer Speaker layout for enjoying Dolby Digital sound/dts sound 60 Dolby Pro Logic is a Dolby Surround format which restores four channels of signals recorded onto two channels back to four channels (front left/right, center and rear surround (monaural)) upon playback. * The separately sold digital audio processor (PXA-H510) is required to enjoy Dolby Pro Logic sound. Linear PCM audio (LPCM) LPCM is a signal recording format used for music CDs. Whereas music CDs are recorded at 44.1 kHz/16 bits, DVDs are recorded at 48 kHz/16 bits to 95 kHz/24 bits, thereby achieving higher sound quality than music CDs. Rating levels (parental lock) This is a function of the DVD for restricting the viewing age as stipulated by laws in different countries. The way in which viewing is restricted differs from DVD to DVD. Sometimes the DVD cannot be played at all, other times certain scenes are skipped, and other times certain scenes are replaced with other scenes. List of language codes List of language codes (For details, see page 25.) Abbreviation AA AB AF AM AR AS AY AZ BA BE BG BH BI BN BO BR CA CO CS CY DA DE DZ EL EN EO ES ET EU FA FI FJ FO FR FY GA GD GL GN GU HA HI HR HU Code 6565 6566 6570 6577 6582 6583 6589 6590 6665 6669 6671 6672 6673 6678 6679 6682 6765 6779 6783 6789 6865 6869 6890 6976 6978 6979 6983 6984 6985 7065 7073 7074 7079 7082 7089 7165 7168 7176 7178 7185 7265 7273 7282 7285 Language Afar Abkhazian Afrikaans Amharic Arabic Assamese Aymara Azerbaijani Bashkir Belorussian Bulgarian Bihari Bislama Bengali, Bangla Tibetan Breton Catalan Corsican Czech Welsh Danish German Bhutani Greek English Esperanto Spanish Estonian Basque Persian Finnish Fiji Faroese French Frisian Irish Scots Gaelic Galician Guarani Gujarati Hausa Hindi Croatian Hungarian Abbreviation HY IA IE IK IN IS IT IW JA JI JW KA KK KL KM KN KO KS KU KY LA LN LO LT LY MG MI MK ML MN MO MR MS MT MY NA NE NL NO OC OM OR PA PL Code 7289 7365 7369 7375 7378 7383 7384 7387 7465 7473 7487 7565 7575 7576 7577 7578 7579 7583 7585 7589 7665 7678 7679 7684 7686 7771 7773 7775 7776 7778 7779 7782 7783 7784 7789 7865 7869 7876 7879 7967 7977 7982 8065 8076 Language Armenian Interlingua Interlingue Inupiak Indonesian Icelandic Italian Hebrew Japanese Yiddish Javanese Georgian Kazakh Greenlandic Cambodian Kannada Korean Kashmiri Kurdish Kirghiz Latin Lingala Laotian Lithuanian Latvian, Lettish Malagasy Maori Macedonian Malayalam Mongolian Moldavian Marathi Malay Maltese Burmese Nauru Nepali Dutch Norwegian Occitan (Afan) Oromo Oriya Punjabi Polish 61 List of language codes List of language codes (Continued) (For details, see page 25.) Abbreviation PS PT QU RM RN RO RU RW SA SD SG SH SI SK SL SM SN SO SQ SR SS ST SU SV 62 Code 8083 8084 8185 8277 8278 8279 8285 8287 8365 8368 8371 8372 8373 8375 8376 8377 8378 8379 8381 8382 8383 8384 8385 8386 Language Pashto, Pushto Portuguese Quechua Rhaeto-Romance Kirundi Romanian Russian Kinyarwanda Sanskrit Sindhi Sangho Serbo-Croatian Singhalese Slovak Slovenian Samoan Shona Somali Albanian Serbian Siswati Sesotho Sundanese Swedish Abbreviation SW TA TE TG TH TI TK TL TN TO TR TS TT TW UK UR UZ VI VO WO XH YO ZH ZU Code 8387 8465 8469 8471 8472 8473 8475 8476 8478 8479 8482 8483 8484 8487 8575 8582 8590 8673 8679 8779 8872 8979 9072 9085 Language Swahili Tamil Telugu Tajik Thai Tigrinya Turkmen Tagalog Setswana Tongan Turkish Tsonga Tatar Twi Ukrainian Urdu Uzbek Vietnamese Volapuk Wolof Xhosa Yoruba Chinese Zulu List of country codes List of country codes Abbreviation AD AE AF AG AI AL AM AN AO AQ AR AS AT AU AW AZ BA BB BD BE BF BG BH BI BJ BM BN BO BR BS BT BV BW BY BZ CA CC CD Code 6568 6569 6570 6571 6573 6576 6577 6578 6579 6581 6582 6583 6584 6585 6587 6590 6665 6666 6668 6669 6670 6671 6672 6673 6674 6677 6678 6679 6682 6683 6684 6686 6687 6689 6690 6765 6767 6768 CF CG CH CI CK 6770 6771 6772 6773 6775 Country Andorra United Arab Emirates Afghanistan Antigua and Barbuda Anguilla Albania Armenia Netherlands Antilles Angola Antarctica Argentina American Samoa Austria Australia Aruba Azerbaijan Bosnia and Herzegovina Barbados Bangladesh Belgium Burkina Faso Bulgaria Bahrain Burundi Benin Bermuda Brunei Darussalam Bolivia Brazil Bahamas Bhutan Bouvet Island Botswana Belarus Belize Canada Cocos (Keeling) Islands Congo, the Democratic Republic of the Central African Republic Congo Switzerland Cote d’lvoire Cook Islands Abbreviation CL CM CN CO CR CU CV CX CY CZ DE DJ DK DM DO DZ EC EE EG EH ER ES ET FI FJ FK FM Code 6776 6777 6778 6779 6782 6785 6786 6788 6789 6790 6869 6874 6875 6877 6879 6890 6967 6969 6971 6972 6982 6983 6984 7073 7074 7075 7077 FO FR GA GB GD GE GF GH GI GL GM GN GP GQ GR 7079 7082 7165 7166 7168 7169 7170 7172 7173 7176 7177 7178 7180 7181 7182 Country Chile Cameroon China Colombia Costa Rica Cuba Cape Verde Christmas Island Cyprus Czech Rempublic Germany Djibouti Denmark Dominica Dominican Republic Algeria Ecuador Estonia Egypt Western Sahara Eritrea Spain Ethiopia Finland Fiji Falkland Islands Micronesia, Federated States of Faroe Islands France Gabon United Kingdom Grenada Georgia French Guiana Ghana Gibraltar Greenland Gambia Guinea Guadeloupe Equatorial Guinea Greece 63 List of country codes List of country codes (Continued) 64 Abbreviation GS Code 7183 GT GU GW GY HK HM 7184 7185 7187 7189 7275 7277 HN HR HT HU ID IE IL IN IO 7278 7282 7284 7285 7368 7369 7376 7378 7379 IQ IR IS IT JM JO JP KE KG KH KI KM KN KP 7381 7382 7383 7384 7477 7479 7480 7569 7571 7572 7573 7577 7578 7580 KR KW KY KZ LA 7582 7587 7589 7590 7665 LB LC LI LK LR 7666 7667 7673 7675 7682 Country South Georgia and the South Sandwich Islands Guatemala Guam Guinea-Bissau Guyana Hong Kong Heard Island and McDonald Islands Honduras Croatia Haiti Hungary Indonesia Ireland Israel India British Indian Ocean Territory Iraq Iran, Islamic Republic of Iceland Italy Jamaica Jordan Japan Kenya Kyrgyzstan Cambodia Kiribati Comoros Saint Kitts and Nevis Korea, Democratic People’s Republic of Korea, Republic of Kuwait Cayman Islands Kazakstan Lao People’s Democratic Republic Lebanon Saint Lucia Liechtenstein Sri Lanka Liberia Abbreviation LS LT LU LV LY MA MC MD MG MH MK Code 7683 7684 7685 7686 7689 7765 7767 7768 7771 7772 7775 ML MM MN MO MP MQ MR MS MT MU MV MW MX MY MZ NA NC NE NF NG NI NL NO NP NR NU NZ OM PA PE PF PG 7776 7777 7778 7779 7780 7781 7782 7783 7784 7785 7786 7787 7788 7789 7790 7865 7867 7869 7870 7871 7873 7876 7879 7880 7882 7885 7890 7977 8065 8069 8070 8071 Country Lesotho Lithuania Luxembourg Latvia Libyan Arab Jamahiriya Morocco Monaco Moldova, Republic of Madagascar Marshall Islands Macedonia, The former Yugoslav Republic of Mali Myanmar Mongolia Macau Northern Mariana Islands Martinique Mauritania Montserrat Malta Mauritius Maldives Malawi Mexico Malaysia Mozambique Namibia New Caledonia Niger Norfolk Island Nigeria Nicaragua Netherlands Norway Nepal Nauru Niue New Zealand Oman Panama Peru French Polynesia Papua New Guinea List of country codes List of country codes (Continued) Abbreviation PH PK PL PM PN PR PT PW PY QA RE RO RU RW SA SB SC SD SE SG SH SI SJ SK SL SM SN SO SR ST SV SY SZ TC TD TF TG TH Code 8072 8075 8076 8077 8078 8082 8084 8087 8089 8165 8269 8279 8285 8287 8365 8366 8367 8368 8369 8371 8372 8373 8374 8375 8376 8377 8378 8379 8382 8384 8386 8389 8390 8467 8468 8470 8471 8472 Country Abbreviation Philippines TJ Pakistan TK Poland TM Saint Pierre and Miquelon TN Pitcairn TO Puerto Rico TP Portugal TR Palau TT Paraguay TV Qatar TW Reunion TZ Romania UA Russian Federation UG Rwanda UM Saudi Arabia Solomon Islands US Seychelles UY Sudan UZ Sweden VA Singapore Saint Helena VC Slovenia VE Svalbard and Jan Mayen VG Slovakia VI Sierra Leone VN San Marino VU Senegal WF Somalia WS Suriname YE Sao Tome and Principe YT El Salvador YU Syrian Arab Republic ZA Swaziland ZM Turks and Caicos Islands ZW Chad French Southern Territories Togo Thailand Code 8474 8475 8477 8478 8479 8480 8482 8484 8486 8487 8490 8565 8571 8577 8583 8589 8590 8665 8667 8669 8671 8673 8678 8685 8770 8783 8969 8984 8985 9065 9077 9087 Country Tajikistan Tokelau Turkmenistan Tunisia Tonga East Timor Tur ??? Trinidad and Tobago Tuvalu Taiwan, Province of China Tanzania, United Republic of Ukraine Uganda United States Minor Outlying Islands United States Uruguay Uzbekistan Holy See (Vatican City State) Saint Vincent and the Grenadines Venezuela Virgin Island, British Virgin Islands, U.S Viet Nam Vanuatu Wallis and Futuna Samoa Yemen Mayotte Yugoslavia South Africa Zambia Zimbabwe 65 In case of difficulty • If operation freezes, the screen goes black or the unit should otherwise not function properly, try turning the power off then back on. Alternatively, try the following methods in the order listed until the DVA-5205 returns to normal playbak mode: 1) Change the source from DVD to another source then return to DVD mode. 2) Turn the car’s ignition OFF and back ON again. 3) Press the RESET button on the face of the DVA-5205. • This guide will help you isolate the problem if the unit is at fault. Otherwise, make sure the rest of your system is properly connected or consult your authorized Alpine dealer. Symptom Unit does not operate. Cause Fuse is blown. Remedy Replace with a fuse of the specified capacity. (See installation instructions.) Monitor’s power is not turned on. Turn on the monitor’s power. Operation is unstable. No picture is produced. Condensation. Wait a while (about 1 hour) for the condensation to dry. Remote control unit’s batteries are worn. Replace the remote control unit’s batteries with new ones. Remote control sensor or transmitter is dirty. Clean the sensor or transmitter. Monitor’s mode is not switched to the mode you want to see. Switch to the mode you want to see. Monitor’s parking brake cord is not connected. Connect the monitor’s parking brake cord and set the parking brake. (For details, refer to the monitor’s instructions.) Monitor’s parking brake is not set. Playback does not start. Disc is loaded upside-down. Check the disc and load it with the labeled side facing upward. Disc is dirty. Clean the disc. A disc not able to playback with this unit is loaded. Check if the disc is able to be played back Parental lock is set. Cancel the parental lock or change the rating level. Setup menu is displayed. Press “SET” to turn the menu off. Disc is being fast-forwarded or fast-reversed. The picture may be slightly disturbed, but this is normal. Vehicle’s battery power is weak. Check the battery power and wiring. (The unit may malfunction if the battery power is under 11 volts with a load applied.) Monitor’s fluorescent tube is worn. Replace the monitor’s fluorescent tube. Image stops sometimes. Disc is scratched. Replaced with a non-scratched disc. NO DISC No disc is loaded. Load a disc. Disc is dirty. Clean the disc. NOT VALID Remote control operation is not possible. For some discs or playing modes, certain operations are not possible. This is not a malfunction. REGIONAL CODE VIOLATION Disc does not match regional code number. Load a disc that matches the regional code number. VIDEO SIGNAL SYSTEM IS NOT CORRECT PAL disc is loaded. Load an NTSC disc. HI-TEMP Protective circuit is activated to high temperature. Turn the power (main unit power when not connected) OFF on the connected head unit and then turn the power ON again. If the display still does not disappear, leave the power OFF until the temperature decreases and then turn the power ON again. Picture is unclear or noisy. 66 Specifications Signal system .................................... NTSC/PAL Horizontal resolution ......................... 500 lines or greater Video output level .............................. 1Vp-p (75 ohms) Video S/N ratio .................................. DVD: 60 dB Audio S/ N ratio DVD: 95 dB CD: 93 dB Frequency response ......................... DVD: 5 Hz to 22 kHz (±1 dB) (48 kHz sampling) DVD: 5 Hz to 44 kHz (±1 dB) (96 kHz sampling) CD: 5 Hz to 20 kHz (±1 dB) Dynamic range DVD: 90 dB or greater CD: 93 dB or greater Wow & flutter ..................................... Below measurable limit Channel separation ........................... 80 dB Harmonic distortion ........................... 0.03% Audio output ...................................... 800 mV Power supply .................................... DC 14.4V (operating range: 11 to 16V) Operating temperature range ............ –10° to +60°C Weight ............................................... 1.6 kg (3 lbs. 8 oz) External dimensions (W x H x D) ...... 178 x 50 x 185 mm (7” x 2” x 7-1/4”) • For improvement purposes, specifications and design are subject to change without notice. • The illustrations in this manual may appear different from the actual product due to printing conditions. 67 Functions of remote control unit buttons Operating the DVA-5205 DVD Video Player When operating the DVA-5205 set the DVD/AUDIO switch to the “DVD” side. VOL UP L DN VO 1 2 q ENT 3 4 DISP MENU SET 5 SOURCE LIST GO TO TITLE BAND RTN SLOW V.OUT A. PROC DEFEAT r DISP. TUNER RPT DISC ; 68 y V. SEL POWER A. PROC BAND NTSC/PAL o CHG t 8 9 p u i e MUTE 6 7 w 1 2 3 a SUB T. ON/OFF AUDIO 4 5 6 ANGLE 7 DN CLR 8 OP/ CL 0 9 UP +10 s 1 Joy Stick Selects the items displayed on the screen. 2 ENT button Determines the selected item. 3 Rotary Encoder Adjusts the volume when only the Digital Audio Processor is connected. 4 MENU button Displays the DVD menu. SET button Press for at least 2 seconds to summon the SET UP (initial setting) screen. 5 : Button Playback. SLOW Button Press at least 2 seconds for slow motion playback. 6 .;; Button Seeks the start for video and audio data. Press at least 2 seconds for Fast Forward of video and audio data. 7 ::. Button Seeks the start for video and audio data. Press at least 2 seconds for Rewind of video and audio data. 8 DISP. Button Displays the playback state on the screen. Functions of remote control unit buttons 9 RPT Button Repeat playback. p POWER Button Turns the power ON and OFF. NTSC/PAL Button Press for at least 5 seconds to change between NTSC and PAL. q DVD/AUDIO Switch Used to switch between DVD and Audio operation. w GO TO Button Used to go directly to start of selection. TITLE Button Press for at least 2 seconds to display the Title Menu. e RTN Button Used to return the selection screen just prior to the present screen. V.OUT Button Used to switch between Video and Audio output to the rear monitor. : Button r ../ .. Used for Pause and Frame-by-Frame playback. ■ Button t Used to stop playback. y A.PROC Button Used to summon the processor control screen when connected with the Digital Audio Processor. BAND Button Press for at least 2 seconds to switch the menu screen when controlling the Digital Audio Processor. u SUB T. Button Press for at least 2 seconds to change the subtitles. i –ON/OFF Button Press for at least 2 seconds to turn the subtitles ON and OFF. ANGLE Button o Press for at least 2 seconds to change the angle. ; CLR Button Removes numbers (one character at a time) that have been selected and input. Press for at least 2 seconds. All the characters which were selected and input are erased. a AUDIO Button Press for at least 2 seconds to change the audio output. 10-Key Pad s Used to input numbers. Note: Operation may not be accepted depending on the type of disc and the playback conditions. At such a time the following mark is displayed on the screen: 69 Functions of remote control unit buttons Operating audio for the Alpine Ai-NET When operating audio for the Alpine Ai-NET, set the DVD/AUDIO switch to the “AUDIO” side. VOL UP L DN VO 1 2 q ENT 3 4 DISP MENU SET 5 SOURCE LIST GO TO TITLE BAND RTN SLOW V.OUT A. PROC DEFEAT r DISP. TUNER RPT DISC ; y V. SEL POWER A. PROC BAND NTSC/PAL o CHG t 8 9 p u i e MUTE 6 7 w 1 2 3 a SUB T. ON/OFF AUDIO 4 5 6 ANGLE 7 DN CLR 8 OP/ CL 0 9 UP +10 s 1 Joy Stick Music Sensor/Fast Forward/Rewind/ Disc Change/Preset Selection/SEEK 2 ENT Button Play/Pause 3 Rotary Encoder Volume adjustment 4 DISP Button Spectrum Analyzer display ON/OFF 5 SOURCE Button Source switching 6 A.PROC Button Audio Processor Switch 7 DEFEAT Button Defeat Mode ON/OFF. 8 TUNER Button Switches to Radio Mode. 9 DISC Button Slave CD/MD mode switching. p Power Button Power ON/OFF switching. q DVD/AUDIO Switch Switching between DVD and Audio operation. w LIST Button Changes the title list display. Press for at least 2 seconds to switch to title input screen. e BAND Button Radio Band switching r MUTE Button Mute t CHG Button Switches to CHANGE Mode. y V.SEL Button V.SEL Switching Note: Some controls may not be possible depending on the audio device being used. 70 Memo 71 R SERIAL NUMBER: INSTALLATION DATE: INSTALLATION TECHNICIAN: PLACE OF PURCHASE: Alpine Electronics, Inc. Tokyo office: 1-1-8 Nishi Gotanda, Shinagawa-ku, Tokyo 141-8501, Japan Tel.: (03) 3494-1101 Alpine Electronics of America, Inc. 19145 Gramercy Place, Torrance, California 90501, U.S.A. Tel.: 1-800-ALPINE-1 (1-800-257-4631) Alpine Electronics of Canada, Inc. Suite 203, 7300 Warden Ave. Markham, Ontario L3R 9Z6, Canada Tel.: 1-800-ALPINE-1 (1-800-257-4631) Alpine Electronics of Australia Pty. Ltd. 6-8 Fiveways Boulevarde Keysborough, Victoria 3173, Australia Tel.: (03) 9769-0000 Alpine Electronics GmbH Kreuzerkamp 7-11 40878 Ratingen, Germany Tel.: 02102-45 50 Alpine Italia S.p.A. Via C. Colombo 8, 20090 Trezzano Sul Naviglio MI, Italy Tel.: 02-48 47 81 Alpine Electronics France S.A.R.L. (RCS PONTOISE B 338 101 280) 98, Rue De La Belle Etoile, Z.I. Paris Nord II B.P. 50016 F-95945, Roissy, Charles de Gaulle Cedex, France Tel.: 01-48 63 89 89 Alpine Electronics of U. K., Ltd. 13 Tanners Drive, Blakelands, Milton Keynes MK14 5BU, U.K. Tel.: 01908-61 15 56 ALPINE ELECTRONICS DE ESPAÑA, S.A. Portal De Gamarra 36, Pabellón 32 01013 Vitoria (Alava) - Apdo. 133, Spain Tel.: 34-45-283588 Sankei Kikaku Co., Ltd. 1-13-38, Hinodai, Hino, Tokyo, Japan Designed by ALPINE Japan Printed in Japan (S) 68P30540Y29-O DVA-5205 R 68P30540Y60-O Printed in Japan (S) DVD/VIDEO CD/CD PLAYER English ■ GUIDE FOR INSTALLATION AND CONNECTIONS • Please read this GUIDE FOR INSTALLATION AND CONNECTIONS and the OWNER'S MANUAL thoroughly to familiarize yourself with each control and function. We at ALPINE hope that your new DVA5205 will give you many years of listening enjoyment. In case of problems when installing your unit, please contact your authorized ALPINE dealer. Points to Observe for Safe Usage • Read this manual carefully before starting operation and use this system safely. We cannot be responsible for problems resulting from failure to observe the instructions in this manual. • This manual uses various pictorial displays to show how to use this product safely and to avoid harm to yourself and others and damage to your property. Here is what these pictorial displays mean. Understanding them is important for reading this manual. • Meaning of displays Warning Caution This symbol means important instructions. Failure to heed them can result in serious injury or death. Français ■ GUIDE D'INSTALLATION ET DE CONNEXIONS • Prière de lire attentivement ce GUIDE D'INSTALLATION ET DE CONNEXIONS et le MODE D'EMPLOI pour se familiariser avec chaque commande et fonction. Chez Alpine, nous espérons que le nouveau DVA-5205 donnera de nombreuses années de plaisir d'écoute. En cas de problèmes lors de l'installation de l'unité, prière de contacter le revendeur agréé d'ALPINE. Points à respecter pour une utilisation sûre Puntos que debe respetar para un uso seguro • Lea atentamente este manual antes de comenzar la operación y la utilización del sistema sin riesgos. Declinamos toda responsabilidad si se ocasionan problemas por no respetar las instrucciones dadas en este manual. • Este manual utiliza diversas ilustraciones para mostrar como utilizar este aparato de manera segura, para evitar la exposición de sí mismo y de otras personas a peligros y para evitar de estropear el aparato. He aquí la significación de dichas ilustraciones. Es muy importante que las comprenda bien para la lectura de este manual. Avertissement This symbol means important instructions. Failure to heed them can result in injury or property damage. Warning Avertissement GARDER LES PETITS OBJETS COMME LES PILES HORS DE PORTEE DES ENFANTS. L’ingestion de tels objets peut entraîner de graves blessures. En cas d’ingestion, consulter immédiatement un médecin. MANTENGA LOS OBJETOS PEQUEÑOS, COMO LAS PILAS, FUERA DEL ALCANCE DE LOS NIÑOS. La ingestión de estos objetos puede provocar lesiones graves. Si esto ocurre, consulte con un médico inmediatamente. USE THE CORRECT AMPERE RATING WHEN REPLACING FUSES. Failure to do so may result in fire or electric shock. UTILISER DES FUSIBLES DE L’AMPERAGE APPROPRIE. Il y a risque d’incendie ou de décharge électrique. UTILICE EL AMPERAJE CORRECTO CUANDO CAMBIE FUSIBLES. De lo contrario, puede producirse un incendio o una descarga eléctrica. USE ONLY IN CARS WITH A 12 VOLT NEGATIVE GROUND. (Check with your dealer if you are not sure.) Failure to do so may result in fire, etc. A UTILISER UNIQUEMENT SUR DES VOITURES A MASSE NEGATIVE DE 12 VOLTS. (Vérifiez auprès de votre concessionnaire si vous n’en êtes pas certain.) Il y a risque d’incendie, etc. UTILICE LA UNIDAD SOLAMENTE EN VEHÍCULOS QUE TENGAN 12 VOLTIOS CON NEGATIVO A MASA. (Consulte a su distribuidor en caso de duda.) De no ser así, podría ocasionar un incendio, etc. BEFORE WIRING, DISCONNECT THE CABLE FROM THE NEGATIVE BATTERY TERMINAL. Failure to do so may result in electric shock or injury due to electrical shorts. AVANT TOUTE CONNEXION, DEBRANCHER LE CABLE DE LA BORNE NEGATIVE DE LA BATTERIE. Il y a risque de choc électrique ou de blessure par courts-circuits. ANTES DE EFECTUAR EL CABLEADO, DESCONECTE EL CABLE DEL TERMINAL NEGATIVO DE LA BATERÍA. De no hacerlo así, podría ocasionar una descarga eléctrica o heridas debido a cortocircuitos eléctricos. DO NOT SPLICE INTO ELECTRICAL CABLES. Never cut away cable insulation to supply power to other equipment. Doing so will exceed the current carrying capacity of the wire and result in fire or electric shock. NE PAS DENUDER LES CABLES ELECTRIQUES. Ne jamais enlever la gaine isolante pour alimenter un autre appareil. Il y a risque de dépassement de la capacité de courant et, partant, d’incendie ou de choc électrique. NO EMPALME CABLES ELÉCTRICOS. Nunca corte el aislamiento de un cable para suministrar energía a otro equipo. Esto hace que la capacidad portadora del cable se supere y puede ser la causa de incendios o descargas eléctricas. DO NOT ALLOW CABLES TO BECOME ENTANGLED IN SURROUNDING OBJECTS. Arrange wiring and cables in compliance with the manual to prevent obstructions when driving. Cables or wiring that obstruct or hang up on places such as the steering wheel, gear lever, brake pedals, etc. can be extremely hazardous. NE PAS COINCER LES CABLES AVEC DES OBJETS VOISINS. Positionner les câbles conformément au manuel de manière à éviter toute obstruction en cours de conduite. Les câbles qui obstruent ou dépassent à des endroits tels que le volant, le levier de changement de vitesses, la pédale de frein, etc., peuvent s’avérer extrêmement dangereux. IMPIDA QUE LOS CABLES SE ENREDEN CON LOS OBJETOS SITUADOS ALREDEDOR. Disponga la instalación eléctrica y los cables conforme a lo descrito en el manual para evitar obstáculos durante la conducción. Los cables que obstaculizan la conducción o que cuelgan de partes del vehículo como el volante de dirección, la palanca de cambios, los pedales de freno, etc., se consideran extremadamente peligrosos. DO NOT DAMAGE PIPE OR WIRING WHEN DRILLING HOLES. When drilling holes in the chassis for installation, take precautions so as not to contact, damage or obstruct pipes, fuel lines, tanks or electrical wiring. Failure to take such precautions may result in fire.’ NE PAS ENDOMMAGER DE CONDUITES NI DE CABLES LORS DU FORAGE DES TROUS. Lors du forage de trous dans le châssis en vue de l’installation, veiller à ne pas entrer en contact, endommager ni obstruer de conduites, de tuyaux à carburant ou de fils électriques. Le non-respect de cette précaution peut entraîner un incendie. EVITE DAÑAR LOS TUBOS Y EL CABLEADO CUANDO TALADRE AGUJEROS. Si taladra agujeros en el chasis durante la instalación, tome las precauciones necesarias para no rozar, dañar u obstruir los tubos, las tuberías de combustible, los depósitos o el cableado eléctrico. De lo contrario, podría provocar un incendio. DO NOT USE BOLTS OR NUTS IN THE BRAKE OR STEERING SYSTEMS TO MAKE GROUND CONNECTIONS. Bolts or nuts used for the brake or steering systems (or any other safety-related system), or tanks should NEVER be used for installations or ground connections. Using such parts could disable control of the vehicle and cause fire etc. NE PAS UTILISER DES ECROUS NI DES BOULONS DU CIRCUIT DE FREINAGE OU DE DIRECTION POUR LES CONNEXIONS DE MASSE. Les boulons et les écrous utilisés pour les circuits de freinage et de direction (ou de tout autre système de sécurité) ou les réservoirs ne peuvent JAMAIS être utilisés pour l’installation ou la liaison à la masse. L’utilisation de ces organes peut désactiver le système de contrôle du véhicule et causer un incendie, etc. NO UTILICE TUERCAS O PERNOS EN EL SISTEMA DE FRENOS O DE DIRECCIÓN PARA REALIZAR LAS CONEXIONES A MASA. Los pernos o tuercas empleados en los sistemas de freno o de dirección (o en cualquier otro sistema relacionado con la seguridad del vehículo), o los depósitos, NUNCA deben utilizarse para instalaciones de cableado o conexión a masa. Si utiliza tales partes podrá incapacitar el control del vehículo y provocar un incendio, etc. MAKE THE CORRECT CONNECTIONS. Failure to make the proper connections may result in fire or product damage. EFFECTUER CORRECTEMENT LES CONNEXIONS. Il y a risque de blessures ou de dommages à l’appareil. REALICE LAS CONEXIONES CORRECTAMENTE. Una conexión incorrecta puede producir un incendio o dañar el equipo. Attention Prudencia DO NOT BLOCK VENTS OR RADIATOR PANELS. Doing so may cause heat to build up inside and may result in fire. NE PAS OBSTRUER LES SORTIES D’AIR NI LES PANNEAUX DU RADIATEUR. Une surchauffe interne peut se produire et provoquer un incendie. NO OBSTRUYA LOS ORIFICIOS DE VENTILACIÓN O LOS PANELES DEL RADIADOR. Si los bloquea, el calor podría acumularse en el interior y producir un incendio. USE SPECIFIED ACCESSORY PARTS AND INSTALL THEM SECURELY. Be sure to use only the specified accessory parts. Use of other than designated parts may damage this unit internally or may not securely install the unit in place. This may cause parts to become loose resulting in hazards or product failure. UTILISER LES ACCESSOIRES SPECIFIES ET LES INSTALLER CORRECTEMENT. Utiliser uniquement les accessoires spécifiés. L’utilisation d’autres composants que les composants spécifiés peut causer des dommages internes à cet appareil ou son installation risque de ne pas être effectuée correctement. Les pièces utilisées risquent de se desserrer et de provoquer des dommages ou une défaillance de l’appareil. UTILICE LOS ACCESORIOS ESPECIFICADOS E INSTÁLELOS CORRECTAMENTE. Asegúrese de utilizar los accesorios especificados solamente. La utilización de otras piezas no designadas puede ser la causa de daños en el interior de la unidad o de una instalación incorrecta. Las piezas pueden aflojarse, lo que, además de ser peligroso, puede provocar averías. DO NOT INSTALL IN LOCATIONS WITH HIGH MOISTURE OR DUST. Avoid installing the unit in locations with high incidence of moisture or dust. Moisture or dust that penetrates into this unit may result in product failure. NE PAS INSTALLER A DES ENDROITS TRES HUMIDES OU POUSSIEREUX. Eviter d’installer l’appareil à des endroits soumis à une forte humidité ou à de la poussière en excès. La pénétration d’humidité ou de poussière à l’intérieur de cet appareil risque de provoquer une défaillance. NO INSTALE LA UNIDAD EN LUGARES MUY HÚMEDOS O LLENOS DE POLVO. Evite instalar la unidad en lugares con altos índices de humedad o polvo. Si entra polvo o humedad, el equipo puede averiarse. HAVE THE WIRING AND INSTALLATION DONE BY EXPERTS. The wiring and installation of this unit requires special technical skill and experience. To ensure safety, always contact the dealer where you purchased this product to have the work done. FAIRE INSTALLER LE CABLAGE ET L’APPAREIL PAR DES EXPERTS. Le câblage et l’installation de cet appareil requiert des compétences techniques et de l’expérience. Pour garantir la sécurité, faire procéder à l’installation de cet appareil par le distributeur qui vous l’a vendu. CONFÍE EL CABLEADO Y LA INSTALACIÓN A PROFESIONALES. El cableado y la instalación de este equipo requieren una competencia y experiencia técnica confirmada. Para garantizar la seguridad, póngase siempre en contacto con el distribuidor al que ha comprado el equipo para confiarle estas tareas. ARRANGE THE WIRING SO IT IS NOT CRIMPED OR PINCHED BY A SHARP METAL EDGE. Route the cables and wiring away from moving parts (like the seat rails) or sharp or pointed edges. This will prevent crimping and damage to the wiring. If wiring passes through a hole in metal, use a rubber grommet to prevent the wire’s insulation from being cut by the metal edge of the hole. FAIRE CHEMINER LE CABLAGE DE MANIERE A NE PAS LE COINCER CONTRE UNE ARETE METALLIQUE. Faire cheminer les câbles à l’écart des pièces mobiles (comme les rails d’un siège) et des arêtes acérées ou pointues. Cela évitera ainsi de coincer et d’endommager les câbles. Si un câble passe dans un orifice métallique, utiliser un passe-cloison en caoutchouc pour éviter que la gaine isolante du câble ne soit endommagée par le rebord métallique de l’orifice. DISPONGA EL CABLEADO DE FORMA QUE LOS CABLES NO SE DOBLEN, NO SE CONTRAIGAN NI ROCEN UN BORDE METÁLICO AFILADO. Aleje los cables y el cableado de piezas móviles (como los raíles de los asientos) o de bordes puntiagudos o afilados. De esta forma evitará dobleces y daños en el cableado. Si los cables se introducen por un orificio de metal, utilice una arandela de goma para evitar que el borde metálico del orificio corte el aislamiento del cable. Precautions Précautions Precauciones IMPORTANT Please record the serial number of your unit in the space provided on the back cover of Owner’s Manual and keep it as a permanent record. The serial number plate is located on the bottom of the unit. IMPORTANT Enregistrer le numéro de série de l’appareil dans l’espace prévu au dos du mode d’emploi et le conserver en permanence. La plaque de numéro de série est située au fond de l’appareil. IMPORTANTE Anote el número de serie de su unidad en el espacio proporcionado en la cubierta posterior del manual de operación, y consérvelo como un registro permanente. La placa con el número de serie está ubicada en la parte inferior de la unidad. • Be sure to disconnect the cable from the (–) battery post before installing your DVA-5205. This will reduce any chance of damage to the unit in case of a short-circuit. • Be sure to connect the color coded leads according to the diagram. Incorrect connections may cause the unit to malfunction or damage the vehicle’s electrical system. • When making connections to the car’s electrical system, be aware of the factory installed components (e.g. onboard computer). Do not tap into these leads to provide power for this unit. When connecting the DVA-5205 to the fuse box, make sure the fuse for the intended circuit of the DVA-5205 has the appropriate amperage. Failure to do so may result in damage to the unit and/or the vehicle. When in doubt, consult your ALPINE dealer. • S’assurer de déconnecter le câble du pôle (–) de la batterie avant l’installation du DVA-5205. Ceci réduit les risques d’endommager l’unité en cas de court-circuit. • S’assurer de connecter les conducteurs codés en couleur se conformant au schéma. Des connexions incorrectes peuvent occasionner le mauvais fonctionnement de l’unité ou le dégât du système électrique du véhicule. • Lors de la connexion des câbles au système électrique du véhicule, il faut être conscient des composants installés en usine (tel qu’un ordinateur de bord). S’assurer de ne pas brancher à ces conducteurs pour fournir l’alimentation à cette unité. Lors de la connexion du DVA-5205 au boîtier à fusible, s’assurer que le fusible du circuit désigné pour le DVA-5205 a l’ampérage approprié. Sinon, l’unité et/ou le véhicule peuvent être endommagés. En cas de doute, consulter le revendeur ALPINE. • Asegúrese de desconectar el cable del polo (–) de la batería antes de instalar su DVA-5205. Esto reducirá las posibilidades de averiar la unidad en caso de cortocircuito. • Asegúrese de conectar los conductores con clave de colores según el diagrama. Unas conexiones incorrectas pueden ocasionar un mal funcionamiento de la unidad o pueden dañar el sistema eléctrico del vehículo. • Cuando haga las conexiones al sistema eléctrico del vehículo, tenga en cuenta los componentes que vienen instalados de fábrica (como un computador incorporado, por ejemplo). No conecte a estos conductores para proporcionar alimentación a esta unidad. Al conectar el DVA-5205 a la caja de fusibles, asegúrese de que el fusible designado para el circuito del DVA-5205 sea del amperaje adecuado. De lo contrario, la unidad y/o el vehículo podrán sufrir daños. Cuando tenga dudas, consulte a su distribuidor ALPINE. 1. Preparation/Préparatifs/Preparativos Check accessory parts./Vérifier les accessoires./Compruebe los accesorios. x1 Double-sided tape/ Bande adhésive à double face/Cinta adhesiva de dos caras RCA-extension cable (for video signal 5m)/Câble de rallonge de type RCA (Pour signaux vidéo 5m)/Cable de extensión de tipo RCA (para señal de video 5m) Ai-NET cable (50cm)/ Câble Ai-NET (50cm)/ Cable Ai-NET (50cm) Remote control/ Télécommande/ Mando a distancia Remote control holder/ Support de la télécommande/ Soporte del mando a distancia Battery (AA size)/ Pile (taille AA)/ Batería (tamaño AA) x1 x1 Fiber optic cable (5m)/ Câble fibre optique (5m) Cable óptico de fibra (5m) x1 x1 x1 x2 1 Bracket/Support/ Soporte Power cable (50cm)/ Câble d’alimentation (50cm)/Cable de la alimentación (50cm) w Pan screw (M2.6x6)/ e Flat head screw r Front frame/ t Metal mounting strap/ y Vis plate (M2,6x6)/ (M5x8)/Vis à tête Monture frontale/ Attache de montage en Tornillo plano plate (M5x8)/Tornillo Montura frontal métal/Banda de montaje de cabeza plana metálica (M2,6x6) (M5x8) x2 2 3 x4 x2 x1 x1 Hex nut (M5) u Bolt stud/ Ecrou à six Filetage de pans (M5)/ boulon/ Tuerca Perno hexagonal (M5) x1 Park the vehicle in a safe and level location./ Stationner le véhicule dans un endroit sûr et sur un sol plat./ Aparque el vehículo en un lugar seguro y nivelado. Apply the brake and remove the ignition key./ Actionner le frein et retirer la clé d'allumage./ Eche el freno de mano y quite la llave de arranque. x1 2-2 Mounting the remote control holder/Montage du support de la télécommande/Montaje del soporte para el mando a distancia • • x1 i Velcro tape/ Ruban Velcro/ Cinta Velcro x1 Reinforcement screws o/ Vis de renforcement o/ Tornillos de refuerzo o Remote control/ Télécommande/ Mando a distancia Remote control holder/ Support de la télécommande/Soporte del mando a distancia If the remote control is in direct sunlight, remove it from the holder and keep it in the glove box./Si la télécommande est exposée à la lumière directe du soleil, la déposer du support et la mettre dans la boîte à gants./Cuando los rayos de sol incidan directamente sobre el Blue Protective Paper/ i* mando a distancia, quítelo del soporte y guárdelo en la guantera. Papier de protection bleu/ Console box, etc./ Console centrale, etc./ When the holder cannot be mounted securely with double-sided adhesive tape i, mount Papel de protección azul Consola central, etc. it by using screws o./Si le support ne peut pas être monté fermement avec la bande • Double-sided adhesive tape (Before putting on the holder, clean dirt on the mounting location)/ adhésive à double face i, utiliser les vis o pour installer celui-ci./Si el soporte no puede Bande adhésive à double face (avant adhésion au support, ser montado firmemente con cinta adhesiva por ambos lados i, fíjelo con tornillos o. nettoyer la saleté de l’emplacement de montage)/ Cinta adhesiva por ambos lados. (Antes de fijar el soporte, limpie el lugar donde la vaya a fijar) 2-3 Mounting/Montage/Montaje Mount within 30° from horizontal./ Monter dans 30° de l’horizontale./ Montar a unos 30° de la horizontal. Less than 30°/ Inférieur à 30°/ Menos de 30° Cautions: Do not block the unit’s fan or heat sink, thus preventing air circulation. If blocked, heat will accumulate inside the unit and may cause a fire. Attention: N’obstruez pas les orifices de ventilation ou de chauffage de l’appareil, ce qui gênerait la circulation de l’air. En cas de blocage, la chaleur s’accumulerait dans l’appareil et pourrait causer un incendie. Precauciones: No bloquear el ventilador de la unidad o el disipador térmico, para no impedir la circulación del aire. Si se bloquea, el calor se acumulará dentro de la unidad y podría causar un incendio. Air ventilation hole/Trou de ventilation d’air/Agujero de la ventilación de aire <Rear side/Côté arrière/Lado trasero> Notes: Do not mount the unit in a location of extreme temperature fluctuations (such as near an air conditioner or heater vent). Disc read failures or other problems may result. If mounted in such location, failures such as “Disc can not read.” or other failure may occur. Remarques: N’assemblez pas l’appareil dans un endroit où se produisent de fortes variations de température (telles qu’à proximité d’une soufflerie d’air conditionné ou de chauffage). Des erreurs de lectures des disques ou d’autres problèmes pourraient se produire. S’il est installé dans de tels endroits, des défaillances telles que “Disc can not read.”(Le disque ne peut pas être lu.) ou même d’autres défaillances peuvent se produire. Notas: No montar la unidad en un sitio con fluctuaciones extremadas de temperatura (tales como cerca de un acondicionador de aire o calefactor). Puede producir fallos en la lectura del disco u otros problemas. Si se monta en dichos sitios, fallos tales como “Disc can not read.” (el disco no se puede leer) u otros fallos pueden ocurrir. ● When mounting using Velcro fastener/Lors de la fixation avec une fermeture Velcro/Cuando se monte usando la cremallera Velcro 1 Placer la fermeture Velcro 9. Ponga la cremallera Velcro 9. Attach two pieces of Velcro fastener 9 with the rough side facing toward the DVD unit. Placer deux morceaux de fermeture Velcro 9 avec la face rugueuse face à l'appareil de DVD. Coloque dos trozos de cremallera Velcro 9 con el lado rugoso mirando hacia la unidad de DVD. 2 Placer deux pièces de fermeture Velcro 9 sur les positions de fixation. Ponga dos trozos de cremallera Velcro 9 en las posiciones de fijación. Placer deux pièces de fermeture Velcro (la face souple) 9 sur les positions de montage et fixer l'appareil. Ponga dos trozos de cremallera Velcro (las caras suaves) 9 en las posiciones de fijación y fije la unidad. Continuer avec 4 Fixation des conducteurs, etc. Continúa en 4 . Sujeción de los cables, etc. 1 Place Velcro fastener 9. Put on two pieces of Velcro fastener 9 on the mounting positions. Put on two pieces of the Velcro fastener (soft one) 9 on the mounting positions and mount the unit. Continued to 4 . Securing leads, etc. Velcro fastener/ Fermeture Velcro/ Cremallera Velcro Floor/Plancher/Suelo ● When mounting on the rear tray/Lors du montage sur la plage arrière/Cuando se monte en la bandeja trasera 1 Mount the brackets 1 on the unit. Mount the brackets 1 at both sides of the unit with screws with double washer (M5x10) 3. Fixer les supports 1 sur l'appareil. Fije los soportes 1 en la unidad. Fixer les supports 1 sur les deux côtés de l'appareil à l'aide de vis avec rondelle double (M5x10) 3. Fije los soportes 1 en ambos lados de la unidad con los tornillos con doble arandela (M5 x 10) 3. 3 1 (Bottom side)/ (Face inférieure)/ (Lado inferior) 2 Attach the unit on the rear tray. 3 Fixer l'appareil sur la plage arrière. Fije la unidad en la bandeja trasera. Attach the unit securely with hex bolts (M6x50) 4, flanged hex nut (M6) 7, spring washers (M6) 6, and wing nuts (M6) 8. Fixer l'appareil fermement à l'aide de boulons à six pans (M6x50) 4, d'écrous à six pans avec rondelle (M6) 7, de rondelles à ressort (M6) 6, et d'écrous à oreilles (M6) 8. Fije la unidad firmemente con los pernos hexagonales (M6 x 50) 4, tuerca hexagonal de brida (M6) 7, arandelas de resorte (M6) 6, y tuercas de mariposa (M6) 8. Continued to 4 . Securing leads, etc. Continuer avec 4 Fixation des conducteurs, etc. Continúa en 4 . Sujeción de los cables, etc. 4 7 x2 x4 x4 Remote sensor (one set) (5.5m)/Détecteur de télécommande (un poste) (5,5m)/Sensor del mando a distancia (una unidad) (5,5m) Antes de completar el montaje del sensor, asegúrese de que el lugar seleccionado se encuentra dentro del campo de operación del mando a distancia. Quite el papel trasero de la cinta adhesiva y presione el sensor en el lugar seleccionado para el montaje. Remote control sensor unit/ Unité de réception de la télécommande/ Unidad de sensor del mando a distancia 2 Floor base/Revêtement 3 Screw with double du plancher/Base para el washer (M5x10)/Vis avec suelo rondelle double (M5x10)/ Tornillo con doble arandela (M5x10) 1 each left and right/1 pour côté gauche et droit chacun/ Uno derecho y otro izquierdo x4 x4 Avant de terminer le montage du capteur sensoriel, vérifiez que l’endroit choisi est bien dans le champ d’action de la télécommande. Retirez la deuxième partie de la bande adhésive et installez fermement le capteur sensoriel sur la zone de montage choisie. x1 4 Hex bolt (M6x50)/ 5 Flanged self-tapping 6 Spring washer 8 Wing nut (M6)/ 9 Velcro fastener/ p Mounting sleeve/ 7 Flanged head hex nut Boulon à six pans screw (M5x15)/Vis (M6)/Rondelle à Ecrou à oreilles Fermeture Velcro/ Gaine de montage/ (M6)/Ecrou hexagonal à (M6x50)/Perno autotaraudée à ressort (M6)/ (M6)/Tuerca de Cremallera Velcro Manguito de montaje tête à embase (M6)/ hexagonal (M6x50) embase (M5x15)/ Arandela de mariposa (M6) Tuerca hexagonal de Tornillo autorroscante resorte (M6) cabeza embridada (M6) embridado (M5x15) x4 Before completing the sensor mounting, make sure the location selected is within the operating range of the remote control. Peel off the backing of the adhesive tape and press the sensor onto the selected mounting location. Advertencia KEEP SMALL OBJECTS SUCH AS BATTERY OUT OF THE REACH OF CHILDREN. Swallowing them may result in serious injury. If swallowed, consult a physician immediately. Ai-NET cable (5.5m)/ Câble Ai-NET (5,5m)/ Cable Ai-NET (5,5 m) 2 Este símbolo indica que las instrucciones son importantes. De no tenerse en cuenta, podría ocasionarse heridas graves o daños materiales. NO DESMONTE NI ALTERE LA UNIDAD. Si lo hace, podrá ocasionar un accidente, un incendio o una descarga eléctrica. Notas: • Cuando utilice un monitor con sensor del mando a distancia incorporado, tales como el TME-M750, el sensor externo no se utiliza. • Al montar la unidad con cinta adhesiva de dos caras, asegúrese de que la superficie donde se vaya a montar esté seca y limpia de suciedad y grasa. Press the double-sided adhesive tape onto the back of the remote control sensor unit./ Appuyer la bande adhésive à double-face sur l’arrière de l’unité de réception de la télécommande./ Presione la cinta adhesiva de dos caras, sobre la parte de atrás de la unidad de sensor del mando a distancia. graves o muerte. Prudencia Remarques: • Lorsque vous utilisez un moniteur avec une commande sensorielle intégrée, tel que le TMEM750, le capteur sensoriel externe n’est pas utilisé. • Quand vous assemblez l’appareil avec de la bande adhésive à double-face, veillez à ce que la surface d’assemblage soit sèche, propre et non graisseuse. 1 Este símbolo indica que las instrucciones son importantes. De no tenerse en NE PAS DESASSEMBLER NI MODIFIER L’APPAREIL. Il y a risque d’accident, d’incendie ou de choc électrique. 1 Notes: • When using a monitor with a built-in remote control sensor, such as the TME-M750, the external sensor is not used. • When mounting the unit with double-sided adhesive tape, make sure the mounting surface is dry and free from dirt or grease. Advertencia cuenta, podría ocasionarse heridas DO NOT DISASSEMBLE OR ALTER. Doing so may result in an accident, fire or electric shock. Caution 2-1 Mounting the remote control sensor unit/Montage de l’unité de réception de la télécommande/Montaje de la unidad de sensor del mando a distancia • Significación de las ilustraciones Ce symbole désigne des instructions importantes. Le non-respect de ces instructions peut entraîner de graves blessures, voire la mort. Ce symbole désigne des instructions importantes. Le non-respect de ces instructions peut entraîner des blessures ou des dommages matériels. . Attention 2. Mounting/Montage/Montaje Español ■ GUIA DE INSTALACION Y CONEXIONES • A fin de familiarizarse con los controles y funciones de la unidad, lea detenidamente esta GUIA DE INSTALACION Y CONEXIONES junto con el MANUAL DE OPERACION. Nosotros en ALPINE esperamos que su nuevo DVA-5205 le brinde muchos años de placer auditivo. En caso de presentarse algún problema durante la instalación de la unidad, tome contacto con su distribuidor autorizado ALPINE. • Lire attentivement ce manuel avant de commencer l'opération et l'utilisation du système en toute sécurité. Nous dégageons toute responsabilité des problèmes résultant du non-respect des instructions décrites dans ce manuel. • Ce manuel utilise divers affichages illustrés pour montrer comment utiliser cet appareil en toute sécurité, pour éviter de s'exposer soi-même et les autres personnes aux dangers et pour éviter d'endommager l'appareil. Voici la signification de ces affichages illustrés. Il est important de bien les comprendre pour la lecture de ce manuel. • Signification des affichages (RCS PONTOISE B 338 101 280) Sankei Kikaku Co., Ltd. 1-13-38, Hinodai, Hino, Tokyo, Japan x4 q Side bracket/Support latéral/Soporte lateral 6 8 ● When mounting the unit directly on the floor/Lors du montage de l'appareil directement sur le plancher/ Cuando la unidad sea montada directamente en el suelo 1 Mount the brackets 1 on the unit. Mount the brackets 1 at both sides of the unit with screws with double washer (M5x10) 3. 1 each left and right/ 1 pour côté gauche et droit chacun/ Uno derecho y otro izquierdo Fije los soportes 1 en la unidad. Fixer les supports 1 sur les deux côtés de l'appareil à l'aide de vis avec rondelle double (M5x10) 3. Fije los soportes 1 en ambos lados de la unidad con los tornillos con doble arandela (M5 x 10) 3. 3 o Self-tapping screw/ Vis autotaraudée/ Tornillo autorroscante x2 Fixer les supports 1 sur l'appareil. 1 2 3 Monter l'appareil sur le plancher. Monte la unidad en el suelo. Mount the unit on the floor with flanged selftapping screws (M5x15) 5 and spring washers (M6) 6. Fixer l'appareil au plancher à l'aide de vis autotaraudées à embasse (M5x15) 5 et de rondelles à ressort (M6) 6. Monte la unidad en el suelo con los tornillos autorroscantes embridados (M5x15) 5 y arandelas de resorte (M6) 6. Warning: Do not damage pipe or wiring when drilling holes. Avis: Ne pas endommager le tuyau ou le câblage lors du perçage de trous. Advertencia: No dañe tubos ni cableado al perforar los agujeros. Continued to 4 . Securing leads, etc. Continuer avec 4 Fixation des conducteurs, etc. Continúa en 4 . Sujeción de los cables, etc. Mount the unit on the floor. 5 6 ● When mounting with floor base brackets/ Lors de la fixation avec des supports de revêtement de plancher/ Cuando se monte con los soportes de base para el suelo 1 Mount the brackets 1 on the unit. Mount the brackets 1 at both sides of the unit with screws with double washer (M5x10) 3. 3. Connections/Connexions/Conexiones Fixer les supports 1 sur l’appareil. Fije los soportes 1 en la unidad. Fixer les supports 1 sur les deux côtés de l'appareil à l'aide de vis avec rondelle double (M5x10) 3. Fije los soportes 1 en ambos lados de la unidad con los tornillos con doble arandela (M5 x 10) 3. 3 1 3 2 Determine mounting position of the unit under the carpet./ Déterminer la position de fixation de l'appareil sous la moquette./ Determine la posición de montaje de la unidad debajo de la alfombrilla. 3 Cut the carpet in "x" shape with a cutter and insert the floor base 2 from under side of the carpet./ Couper la moquette en forme de "x" avec une lame et insérer le revêtement du plancher 2 en-dessous la moquette./ Corte la alfombrilla haciendo agujeros en forma de "x" con una cuchilla y ponga las bases para el suelo 2. 4 Mount the unit on the carpet with spring washer (M6) 6 and wing nuts (M6) 8. Continued to 4. Securing leads, etc. 2 Fixer l'appareil sur la moquette à l'aide de rondelles à ressort (M6) 6 et d'écrous à oreilles (M6) 8. Continuer avec 4 Fixation des conducteurs, etc. Fije la unidad en la alfombrilla con la arandela de resorte (M6) 6 y las tuercas de mariposa (M6) 8. Continúa en 4. Sujeción de los cables, etc. 8 6 1 Switched Power Lead (Ignition) (Red) Connect this lead to an open terminal on the vehicle’s fuse box or another unused power source which provides (+) 12V only when the ignition is turned on or in the accessory position. 2 Fuse Holder (1A) 3 Ground Lead (Black) Connect this lead to a good chassis ground on the vehicle. Make sure the connection is made to bare metal and is securely fastened using the sheet metal screw provided. 4 Battery Lead (Yellow) Connect this lead to the positive (+) post of the vehicle’s battery. 5 Fuse Holder (5A) 6 Remote Control Input Lead (White/Brown) Connect this lead to the remote control output lead of ALPINE product used in combination. 7 Video Output Connector Connect this connector to the video inputs of a product (TV monitor) used in combination. 8 Ai NET Connector (Black) Connect this to the output or input connector of other product equipped with Ai-NET. Connect this connector to the Digital Audio Processor (PXAH510) or Ai-NET connector of the Head unit (when Digital Audio Processor is not connected). 9 Ai-NET Connector (Gray) Connect this to the output or input connector of other product equipped with Ai-NET. Connect this connector to the Head unit (when the Digital Audio Processor is connected) or to the Ai-NET connector a CD Changer (when the Digital Audio Processor is not connected). p Remote Control Eye Jack Connect this to the remote control sensor unit. Not used when using a monitor with a built-in remote control sensor unit. A remote control sensor unit is needed when a monitor or navigation unit made by other company is connected. q Digital Output Terminal (Optical) This terminal is used to connect DVA-5205 to ALPINE digital product (Digital Audio Processor PXA-H510). These products include a fiber optic cable that will plug directly into the Digital Output Terminal of the DVA-5205. w RCA Extension Cable (Included with DVD video player) e Ai-NET Cable 5.5m (Included with DVD video player) Use a proper Ai-NET cable (refer to r) depending on a mounting location. r Ai-NET Cable 50cm (Included with DVD video player) Use a proper Ai-NET cable (refer to e) depending on a mounting location. t Fiber Optic Cable (Included with DVD video player) y Remote sensor Not used when a monitor with a remote sensor is used. A remote sensor is needed when a monitor or navigation unit made by other company is connected. u AUX Video Input (AUX1) Terminal Connect video output lead of a DVA-5205 to this terminal. i Digital Input Terminal (Optical) Connect this terminal to the digital output terminal, fiber optic cable of a DVA-5205. o Ai-NET Cable (Included with CD Shuttle) ; Ai-NET Connector Connect this to the output or input connector of other product equipped with Ai-NET. a System Switch When connecting a digital audio processor using Ai-NET feature, place this switch in the EQ/DIV position. When no digital audio processor is connected, leave the switch in the NORM position. s Audio Output Connector This output may be connected to a Rear Monitor with a volume control or an auxiliary audio preamp. This is used to monitor the DVD audio while the main audio system is being driven by another source (such as Radio or CD). d RCA Extension Cable (Sold separately) f AUX Audio Input (AUX1) Terminal Connect audio output lead of a DVA-5205 to this terminal. ● When mounting on the in-dash panel/ Montage sur le panneau du tableau de bord/ Montaje en el panel del tablero de instrumentos 1 Slide the mounting sleeve into the dashboard. Install the supplied side brackets to the DVD unit. Glisser la gaine de montage à l’intérieur du tableau de bord. Installer les supports latéraux fournis sur l’unité de DVD. Deslizar el manguito de montaje en el tablero de instrumentos. Instalar los soportes laterales suministrados en la unidad de DVD. Note: Before changing the System switch position on the Head unit, make sure that the power is turned on. 1 Fil d’alimentation commutatif (Allumage) (Rouge) Brancher ce fil à un terminal ouvert dans la boîte de fusibles du véhicule, ou à une autre source d’alimentation non utilisée fournissant (+) 12 V, uniquement lorsque l’allumage est en marche ou en position accessoire. 2 Porte-Fusible (1 A) 3 Fil de masse (Noir) Brancher ce fil à une masse sûre du châssis du véhicule. Assurez-vous que la connexion a été faite à du métal nu, et qu’elle est solide, en utilisant la vis à tôle fournie. 4 Fil de la batterie (Jaune) Brancher ce fil à la borne positive (+) de la batterie du véhicule. 5 Porte-Fusible (5 A) 6 Fil d’entrée de la télécommande (Blanc/Marron) Brancher ce fil au fil de sortie de la télécommande du produit ALPINE utilisé en combinaison. 7 Connecteur de sortie vidéo Raccorder ce connecteur aux entrées vidéo d’un produit (moniteur télé) utilisé en combinaison. 8 Connecteur Ai-NET (Noir) Raccorder ce connecteur au connecteur d’entrée ou de sortie d’un autre produit équipé de l’Ai-NET. Raccorder ce connecteur au processeur audio numérique (PXAH510), ou au connecteur Ai-NET de l’unité principale (lorsque le processeur audio numérique n’est pas branché. 9 Connecteur Ai-NET (Gris) A raccorder au connecteur d’entrée ou de sortie d’un autre produit équipé de l’Ai-NET. Branchez ce connecteur à l’appareil principal (quand le processeur audio numérique est connecté) ou alors branchez un changeur CD au connecteur Ai-NET (quand le processeur audio numérique n’est pas connecté). p Jack de l’émetteur de la télécommande Brancher ce jack à l’unité de réception de la télécommande. N’est pas utilisé lors de l’utilisation d’un moniteur équipé d’une unité de réception de télécommande intégrée. Une unité de réception de télécommande est nécessaire lorsqu’un moniteur ou un appareil de navigation fabriqué par une autre firme est connecté. q Borne de sortie numérique (Optique) Cette borne est utilisée pour connecter le DVA-5205 à un produit numérique ALPINE (Processeur Audio Numérique PXA-H510). Ces produits disposent d’un câble en fibre optique qui se branche directement à la borne de sortie numérique du DVA-5205. w Câble d’extension RCA (Inclus avec le lecteur DVD vidéo) e Câble Ai-NET 5,5 m (Inclus avec le lecteur DVD vidéo) Utiliser un câble Ai-NET approprié r selon l’endroit de montage. r Câble Ai-NET 50 cm (Inclus avec le lecteur DVD vidéo) Utiliser un câble Ai-NET approprié e selon l’endroit de montage. t Câble de fibre optique (Inclus avec le lecteur DVD vidéo) y Détecteur de la télécommande N’est pas utilisé lorsqu’un moniteur équipé d’un détecteur de télécommande est utilisé. Un détecteur de télécommande est nécessaire lorsqu’un moniteur ou un appareil de navigation fabriqué par une autre firme est connecté. u Borne d’entrée vidéo AUX (AUX1) Brancher le connecteur de sortie vidéo d’un DVA-5205 à cette borne. i Borne d’entrée numérique (optique) Brancher cette borne à la borne de sortie numérique, avec le câble de fibre optique d’un DVA-5205. o Câble Ai-NET (Inclus avec le changeur de CD) ; Connecteur Ai-NET A raccorder au connecteur d’entrée ou de sortie d’un autre produit équipé de l’Ai-NET. a Commutateur du système Lors de la connexion d’un processeur audio numérique utilisant la fonction Ai-NET, placer ce commutateur sur la position EQ/DIV. Lorsqu’aucun processeur audio numérique n’est connecté, laisser le commutateur dans la position NORM. s Connecteur de sortie audio Cette sortie peut être connectée à un moniteur pour le siège arrière avec commande de volume ou à un préamplificateur audio auxiliaire. Ceci est utilisé pour contrôler le DVD audio pendant que le système audio principal est en train d’être excité par une autre source (par exemple, radio ou CD). d Câble de rallonge RCA (Vendu séparément) f Borne d’entrée audio AUX (AUX1) Brancher le connecteur de sortie audio d’un DVA-5205 à cette borne. 1 Cable de la alimentación conectado (Ignición) (Rojo) Conectar este cable a un terminal abierto de la caja de fusibles del vehículo o a alguna otra fuente de alimentación no utilizada que proporcione (+) 12 V sólo cuando la ignición este encendida o en la posición de acceso. 2 Soporte del fusible (1A) 3 Cable de masa (Negro) Conectar este cable a una buena masa en el vehículo. Asegúrese de realizar la conexión a un metal sin revestimiento y de que esté fijamente sujetado usando el tornillo de lámina de metal proporcionado. 4 Cable de la batería (Amarillo) Conecte este cable a la patilla positiva (+) de la batería del vehículo. 5 Soporte del fusible (5A) 6 Cable de entrada del mando a distancia (Blanco/Marrón) Conectar este cable al cable de salida del mando a distancia del producto ALPINE utilizado en combinación. 7 Conector de la salida de video Conectar este conector a las entradas de video de un producto (monitor TV) utilizado en combinación. 8 Conector Ai NET (Negro) Conectarlo al conector de salida o entrada de otros productos equipados con Ai NET. Conectar este conector al procesador audio digital (PXAH510) o al conector Ai-NET de la unidad principal (cuando el procesador audio digital no esté conectado). 9 Conector Ai-NET (Gris) Conectarlo al conector de salida o entrada de otros productos equipados con Ai-NET. Conectar este conector a la unidad principal (cuando el procesador digital audio esté conectado) o al conector Ai-NET de un cambiador CD (cuando el procesador digital audio no esté conectado). p Anilla Jack del mando a distancia Conectarlo a la unidad de sensor del mando a distancia. No utilizarlo cuando se use un monitor con una unidad de sensor del mando a distancia incluido. Se necesita una unidad de sensor del mando a distancia cuando se conecta un monitor o unidad de navegación fabricado por otra empresa. q Terminal de salida digital (Optica) Se utiliza este terminal para conectar un DVA-5205 a un producto digital ALPINE (Procesador audio digital PXA-H510). Estos productos incluyen un cable de fibra óptica que se enchufará directamente en el terminal de salida digital del DVA-5205. w Cable de extensión RCA (incluido con el reproductor de video DVD) e Cable Ai-NET 5,5 m (incluido con el reproductor de video DVD) Utilizar un cable Ai-NET apropiado r dependiendo del sitio de colocación. r Cable Ai-NET 50 cm (incluido con el reproductor de video DVD) Utilizar un cable Ai-NET apropiado e dependiendo del sitio de colocación. t Cable de fibra óptica (incluido con el reproductor de video DVD) y Sensor del mando a distancia No utilizarlo cuando se use un monitor con sensor del mando a distancia. Se necesita un sensor del mando a distancia cuando se conecta un monitor o unidad de navegación fabricado por otra empresa. u Terminal de entrada de video AUX (AUX1) Conectar el conductor de salida video de un DVA-5205 a esta entrada. i Terminal de entrada digital (Óptico) Conectar este terminal al terminal de salida digital, cable de fibra óptica de un DVA-5205. o Cable Ai-NET (incluido con CD Shuttle) ; Conector Ai-NET Conectarlo al conector de salida o entrada de otros productos equipados con Ai-NET. a Interruptor del sistema Al conectar un procesador audio digital utilizando la característica Ai-NET, colocar este interruptor en la posición EQ/DIV. Cuando no se encuentra conectado ningún procesador audio digital, dejar el interruptor en la posición NORM. s Conector de salida audio Esta salida puede ser conectada a un monitor posterior con control de volumen o a un preamplificador audio auxiliar. Es útil para controlar el DVD audio mientras que el sistema audio principal está siendo excitado por otra fuente (por ejemplo, radio o CD). d Cable de extensión RCA (Vendido separadamente) f Terminal de entrada de audio AUX (AUX1) Conectar el conductor de salida audio de un DVA-5205 a esta entrada. Remarque: Avant de changer la position du commutateur du système sur l’unité principale, assurez-vous que l’alimentation est activée. Nota: Antes de cambiar la posición del conmutador de sistema en la unidad principal, asegúrese de que la alimentación esté activada. ● Connect AV head unit/digital audio processor that supports Ai-NET./Brancher l’unité principale/le processeur audio numérique AV qui permet l’utilisation de l’Ai-NET./Conectar la unidad principal AV/procesador audio digital que soporta Ai-NET. Ignition Key p q • DVA-5205 Setup/ Paramétrage du DVA-5205/ Configuración del DVA-5205 Cl de contact Dashboard/Tableau de bord/ Tablero de instrumentos 2 IGNITION 1 Llave de encendido 3 Battery (Red) w GND Batterie Batera (Black) r 5 DVA-5205 BATTERY 4 (Yellow) REMOTE IN 6 AUX1 DVA-5205 2 Reinforce the DVD unit with the metal mounting strap supplied. Connect each input lead coming from an amplifier or equalizer to the corresponding output lead coming from the left rear of the DVA-5205. Connect all other leads of the DVA-5205 according to details described in the “Connections” section. NOTE: For the screws “★”, “★★”, provide a proper screw to the chassis installing location. Renforcer l’unité de DVD avec l’attache de montage métallique fournie. Connecter chaque fil d’entrée venant d’un amplificateur ou d’un égaliseur aux fils de sortie correspondants venant de l’arrière gauche du DVA-5205. Brancher tous les autres fils selon les détails donnés dans la section “Connexions”. REMARQUE: Sur les vis “★”, “★★”, se procurer une vis appropriée à l’emplacement d’installation du châssis. Refuerce la unidad de DVD con la banda de montaje metálica proporcionada. Conectar cada cable de entrada proveniente de un amplificador o ecualizador al cable de salida correspondiente proveniente de la parte trasera izquierda del DVA-5205. Conectar todos los demás cables del DVA-5205 según los detalles descritos en la sección “Conexiones”. NOTA: A propósito de los tornillos “★”, “★★”, prepare un tornillo apropiado al lugar de instalación del chasis. H.U. Control Setting/ Réglage du H.U. Control/ Ajuste de H.U. Control ON 11 22 10 23 (Sold Separately) (Vendu sparment) (Vendido separadamente) 7 12 8 13 9 14 CVA-1005/ CVA-1005/IVA-C800 24 IVA-C800 Tuner Monitor (Sold Separately) 17 (Vendu sparment) (Vendido separadamente) * 20 15 16 21 NORM EQ/DIV 20 PXA-H510 Digital Audio 18 Processor (Sold Separately) (Vendu sparment) CD Shuttle (Vendido separadamente) 20 (Ai-NET) 19 (Sold Separately) Screw/Vis/Tornillo (Vendu sparment) t y DVD Refer to page 36-39 of the owner’s manual./Se reporter aux pages 102-105 du mode d’emploi./Vea las páginas 168171 del manual de operación. REMOTE OUT (White/Brown) (White/Brown) Ai-NET Setting/ Réglage du Ai-NET/ Ajuste de Ai-NET (Vendido separadamente) Note: * The remote sensor is described as a connection example. The remote sensor is not used for this system. For details, refer to the item y Remote sensor of “3. Connections” above. Remarque: * Le détecteur de télécommande n’est décrit que comme exemple pour la connexion. Le détecteur de télécommande n’est pas utilisé pour ce système. Pour des détails, référezvous à l’article y Détecteur de télécommande de “3. Connexions” cidessus. Nota: * Se describe el sensor del mando a distancia como un ejemplo de conexión. No se utiliza el sensor del mando a distancia para este sistema. Para más detalles, remítase al ítem y Sensor del mando a distancia “3. Conexiones” de arriba. u ● Connect AV head unit that supports Ai-NET./Brancher l’unité principale AV qui permet l’utilisation de l’Ai-NET./ Conectar la unidad principal AV que soporta Ai-NET. Ground lead/Conducteur de mise à la terre/ Cable de puesta a tierra REMOTE IN Chassis/Châssis/Chasis 6 DVA-5205 • DVA-5205 Setup/ Paramétrage du DVA-5205/ Configuración del DVA-5205 REMOTE OUT AUX1 (White/Brown) (White/Brown) DVA-5205 11 3 Slide the DVA-5205 into the dashboard. When the unit is in place, make sure the locking pins are fully seated in the down position. This can be done by pressing firmly in on the unit while pushing the locking pin down with a small screwdriver. This ensures that the unit is properly locked and will not accidentally come out from the dashboard. Install the supplied Front Frame. Removal 1. Use a small screwdriver (or similar tool) to push the locking pins to the “up” position. As each pin is unlocked, gently pull out on the unit to make sure it does not re-lock before unlocking the second pin. 2. Pull the unit out, keeping it unlocked as you do so. Glisser le DVA-5205 dans le tableau de bord. Lorsque l’unité est en place, assurez-vous que les broches de fermeture sont ajustées à fond dans la position basse. Ceci peut être effectué en poussant fermement l’appareil tout en abaissant les broches de fermeture avec un petit tournevis. Ainsi, l’unité est correctement verrouillée, et ne sortira pas par accident du tableau de bord. Installer la monture frontale fournie. Démontage 1. Utiliser un petit tournevis (ou un outil similaire) pour relever les broches de fermeture en position “haute”. Lorsqu’une des broches est déverrouillée, tirer doucement sur l’unité, pour que la première broche ne se referme pas avant d’avoir déverrouillé la seconde. 2. Retirer l’unité, tout en faisant en sorte qu’elle ne se reverrouille pas. Deslizar el DVA-5205 en el tablero de instrumentos. Cuando la unidad se encuentra en su sitio, asegúrese de que las clavijas de cierre se encuentran completamente en posición hacia abajo. Esto se puede llevar a cabo presionando la unidad firmemente hacia adentro mientras que se empuja la clavija de cierre hacia abajo con un pequeño destornillador. Esto asegura que la unidad se encuentre debidamente bloqueada y que no saldrá del tablero de instrumentos accidentalmente. Instalar la montura frontal suministrada. Retirar 1. Utilizar un pequeño destornillador (o herramienta similar) para empujar la clavija de cierre a la posición “up”. A medida que se desbloquea cada clavija, suavemente tirar de la unidad para asegurarse de que no se vuelva a bloquear antes de desbloquear la segunda clavija. 2. Sacar la unidad manteniéndola desbloqueada mientras que la saca. 22 10 CVA-1005/ 23 (Sold Separately) (Vendu sparment) 24 CVA-1005/IVA-C800 IVA-C800 Tuner Monitor (Vendido separadamente) 17 (Sold Separately) Ai-NET Setting/ Réglage du Ai-NET/ Ajuste de Ai-NET DVD H.U. Control Setting/ Réglage du H.U. Control/ Ajuste de H.U. Control ON (Vendu sparment) (Vendido separadamente) 7 12 8 14 Refer to page 36-39 of the owner’s manual./Se reporter aux pages 102-105 du mode d’emploi./Vea las páginas 168171 del manual de operación. 21 20 NORM EQ/DIV CD Shuttle (Ai-NET) 9 19 (Sold Separately) (Vendu sparment) (Vendido separadamente) ● Connect Head unit/TV monitor/digital audio processor that supports Ai-NET./Brancher l’unité principale/le moniteur TV/le processeur audio numérique qui permet l’utilisation de l’Ai-NET./Conectar la unidad principal/monitor de TV/ procesador audio digital que soporta Ai-NET. REMOTE IN 6 • DVA-5205 Setup/ Paramétrage du DVA-5205/ Configuración del DVA-5205 REMOTE OUT AUX1 (White/Brown) (White/Brown) (Sold Separately) 24 (Vendu sparment) DVA-5205 (Vendido separadamente) 17 11 AV-Interface Unit TME-M790 etc. Monitor TME-M790 etc. (Sold Separately) (Sold Separately) (Vendu sparment) 22 10 Lock pin/ Broche de fermeture/ Clavija de cierre 23 (Vendido separadamente) (Vendido separadamente) CD H.U. Control Setting/ Réglage du H.U. Control/ Ajuste de H.U. Control ON Head Unit 7 15 (Vendu sparment) Ai-NET Setting/ Réglage du Ai-NET/ Ajuste de Ai-NET 12 (Ai-NET) (Sold Separately) 8 13 9 20 (Vendu sparment) (Vendido separadamente) 14 21 NORM EQ/DIV Refer to page 36-39 of the owner’s manual./Se reporter aux pages 102-105 du mode d’emploi./Vea las páginas 168171 del manual de operación. 20 JAPANESE CAR VOITURE JAPONAISE PXA-H510 18 VEHICULO JAPONES Digital Audio Processor (Sold Separately) 20 To install using the vehicle’s genuine bracket. Installez avec l’applique d’origine du véhicule. Instale utilizando el soporte genuíno del vehículo. (Vendu sparment) CD Shuttle (Vendido separadamente) (Ai-NET) 19 (Sold Separately) (Vendu sparment) (Vendido separadamente) Head unit/Unité principale/ Unidad principal ● Connect Head unit/TV monitor that supports Ai-NET./Brancher l’unité principale AV/le moniteur TV qui permet l’utilisation de l’Ai-NET./Conectar la unidad principal/monitor de TV que soporta Ai-NET. e Ground lead/Conducteur de mise à la terre/ Cable de puesta a tierra REMOTE IN 6 (White/Brown) • DVA-5205 Setup/ Paramétrage du DVA-5205/ Configuración del DVA-5205 REMOTE OUT AUX1 (White/Brown) (Sold Separately) (Vendu sparment) DVA-5205 DVA-5205 (Vendido separadamente) 17 11 Mounting bracket/Applique de montage/Soporte de montaje 24 22 10 Monitor TME-M790 etc. AV-Interface Unit TME-M790 etc. (Sold Separately) (Sold Separately) (Vendu sparment) (Vendu sparment) (Vendido separadamente) (Vendido separadamente) 23 Head Unit Ai-NET Setting/ Réglage du Ai-NET/ Ajuste de Ai-NET CD H.U. Control Setting/ Réglage du H.U. Control/ Ajuste de H.U. Control ON with Ai-NET 4 Securing leads, etc. Take care wiring leads are not jammed by moving parts such as seat rail, etc. and not damaged by touching protruded objects. Fixation des conducteurs, etc. Sujeción de los cables, etc. 7 12 (Sold Separately) 20 (Vendu sparment) (Vendido separadamente) Faire attention à ce que les fils de câblage ne soient pas emmêlés dans les pièces mobiles, par exemple, le rail du siège, etc. et ne soient pas endommagés en entrant en contact avec des objets en saillie. Tenga cuidado para evitar que los conductores se enreden con las partes móviles tales como el carril del asiento, etc. o que se dañen por tocar objetos salientes. 8 14 9 19 21 NORM CD Shuttle (Ai-NET) (Sold Separately) (Vendu sparment) (Vendido separadamente) EQ/DIV Refer to page 36-39 of the owner’s manual./Se reporter aux pages 102-105 du mode d’emploi./Vea las páginas 168171 del manual de operación. //////ILPINE, Z;.$$f /NOTE/NOTE/NOTA ‘JT’~-I/-rIc3~)i(f-C~~)~i~t~~a,~~~~ zoxEe\ lRFt47~Y ~~~~TL~~~~~~~~~~~~~~~~~, imlTL~7 7 lm;$mlcck 0 Bmaa5 cl ~e/-lJv, _________-___--------------Caution when mounting EO3a) to the rear deck In this case, the bracket covers more than half of the air ventilation holes. It is no problem for the remaining air ventilation holes and the cooling effect with fan. ------------------m-m------- Attention lors du montage sur la plage arribre Dans ce cas, le support obstruera a moitie les trous de ventilation d’air. Ceci ne pose pas de probleme ni aux trous de ventilation d’air restants ni au refroidissement avec le ventilateur. ------------------------m--s Atencibn cuando monte en la repisa trasera En este case, el soporte cubrira mas de la mitad de 10sagujeros de la ventilation de aire. Esto no representa un problema ni para 10s agujeros de ventilation de aire restantes ni para la refrigeration con el ventilador. 68P41262Y34-0 CAUTION/ATTENTION/PRECAUCl6N //////ILPINE. CAUTION-Laser radiation when open, DO NOT STARE INTO BEAM (Bottom side of unit) (c&b infbrieur de I’appareil) (Lado inferior de la unidad) I CAUTION - Laser radiation when open, DO NOT STARE INTO BEAM I ATTENTION -Rayonnement laser quand I’appareil est ouvert, NE PAS FIXER LE FAISCEAU PRECAUCldN - Radiaci6n lkser al abrirse, NO MIRE FIJAMENTE EL HAZ SpecificationdSpkificationdEspecificaciones PlCKUPlCAPTAGElRECOGlDA Wave length/Longueur d’ondellongitud de onda Laser PowerlPuissnnce du laser/Potencia de kise~ 65.5 nm CLASS II 68P41262Y79-0 (Y) LPINE, lMlTED WARRANTY ALPINE ELEClHGNICS (ii’ AIVIEHICA, INC. AND ALPINE OF CANADA INC. (“AlpIne”), are dedicated to clo&ty craftsmarnshlt, ani are pleased to offer ths Warranty We suggest that you read rt thoroughly Should you have <!ny questlox please cotltaci ~OI.II Dealer or contact Alpine at one of the telephone numbers listed below product was shipped to an Authorized Alpine Service Center or AlpIne. AlpIne WIII pay the return shopping charges @ You should provide a detailed description of the problem(s) for which service IS required @ You must supply proof of your purchase of the product $ You must package the product securely to avoid damage during shipment l HOW WE LIMIT IMPLIED WARRANTIES: ANY IMPLIED WARRANTIES INCLUDING FITNESS FOR USE AND MERCHANTABILITY ARE LIMITED IN DURATION TO THE PERIOD OF THE EXPRESS WARRANTY SET FORTH ABOVE AND NO PERSON IS AUTHORIZED TO ASSUME FOR ALPINE ANY OTHER LIABILITY IN CONNECTION WITH THE SALE OF THE PRODUCT l HOW WE EXCLUDE CERTAIN DAMAGES: ALPINE EXPRESSLY DISCLAIMS LIABILITY FOR INCIDENTAL AND CONSEQUENTIAL DAMAGES CAUSED BY THE PRODUCT THE TERM “INCIDENTAL DAMAGES REFERS TO EXPENSES OF TRANSPORTING THE PRODUCT TO THE ALPINE SERVICE CENTER, LOSS OF THE ORIGINAL PURCHASER’S TIME. LOSS OF 1HE USE OF THE PRODUCT, BUS FARES, CAR RENTALS OR OTHERS COSTS RELATING TO THE CARE AND CUSTODY OF THE PRODUCT THE TERM ‘CONSEQUENTIAL DAMAGES’ REFERS TO THE COST OF REPAIRING OR REPLACING OTHER PROPERTY WHICH IS DAMAGED WHEN THIS PRODUCT DOES NOT WORK PROPERLY THE REMEDIES PROVIDED UNDER THIS WARRANTY ARE EXCLUSIVE AND IN LIEU OF ALL OTHERS OHOW STATE/PROVINCIAL LAW RELATES TO THE WARRANTY: Tills Warranty gives you speclflc legal rights, and you n;ay also have other rights whfch vary from state to state and pfovlnce to province In addition, some statesiprovinces do not allow llmrtatlons on how long an implied warranty lasts. and some do not allow the exclusfon or IJtnltatJon of Incidental or consequentJal damages. Accordingly llrnftations as to these matters contaIned heleft> lnay not apply to you OIN CANADA ONLY: This Warrat?ty is not valid unless your Alpfne car audio product has been Installed in your vehicle by an Authorlzeu lJ?stallation Center, and this warranty stamped upon Jnstallatlon by the Jnstallatlon center OHOW TO CONTACT CUSTOMER SERVICE: Should the product require service, please call the folIowIng Inumber for your [nearest Authorized Alpfne Serbtce Center -I-- U.S.A. CANADA 1-800-ALPINE-1 l-800-ALPINE-1 (l-800-257-4631) (l-800-257-4631) !0f-line Electronm of America, inc., iii I ‘5 Ctamcrcy Place. Torrance, Callfornla 90501, U S A k.i0,ine F:lectronms of Canada. Inc. :AI!II ?03 7300 Warden Ave Markham Ontario L3R 9Z6. Canada 54B41874WOl-E NOTE/REMARQUE/NOTA < English > Correction Note on the “H.U.CONTROL” 0 l H.U. CONTROL setting (page 38) correct Incorrect Sensng uponshlpment fromlacloryOH1 Sertlng uponshipment lromfactoryOn When the DVA-5205 IS connected to an Alpine AI-NET system, there is no need to change the H.U. CONTROL setting. If not connected to an Alpine Ai-NET system, after connecting be sure to perform steps 1 to 8 before using. RBglage de la commande H.U. (page 108) correct Incorrect Wglage B la sorhed’usine Off 1 Rhglagea la sortie d’usine: On Si le DVA-5205 est connect6 a un systi?me Alpine AiNET, il n’est pas necessaire de changer le rbglage de commande H.U. Si il n’est pas connect6 B un systeme Alpine Ai-NET, veuillez vous assurer d’effectuer les &apes 1 .?I8 apr&s avoir effect& la connexion et avant I’utilisation. Correccibn 0- Aiuste de H.U.CONTROL GaIna I lncorrecto unit if control in an from 1, Connect the remote control sensor unit. (Remote control operations are not possible unless the remote control sensor unit is connected.) 2. Press the “V.OUT’ button on the remote control unit for at least 2 seconds to turn the power on. 3. Press the ‘SET” button on the remote control unit for at least 2 seconds to display the initial setup (“SETUP”) menu screen. (If the disc has started playing, set the stop mode first.) 4. From the menu, select “CUSTOM SETUP” to display the custom setup menu. 5. Check the settings on the custom setup menu. (Refer to page 38 of the operating instructions.) l Is “H.U.CONTROL” set to “ON”? --f Change the setting to “OFF”. 6. Once the setting has been made, press the “SET’ button on the remote control unit for at least 2 seconds to turn off the initial setup menu screen. 7. Press the “V.OUF button on the remote control unit again for at least 2 seconds to turn the power off. 8. Turn the ACC power off. Correction l setting Use the procedure described below to reset the the power cannot be turned on from the remote unit due to the fact that the unit is not connected Alpine AI-NET system or has been disconnected an AI-NET system. 178) Correct0 Ajusresobreenviodelat&brictiOH 1 Apsle sobreenviodelafAbrIca.On Cuando el DVA-5205 est& conectado en un sistema AiNET Alpine, no hay necesidad de cambiar el ajuste de control H.U. Si no est& conectado en un sistema AI-NET Alpine, despu& de conectar asegfirese de realizar 10s pasos del 1 al 8 antes de utilizarlo. Resetting is now completed. Once the ACC power is turned back on, the unit’s power can now be turned on with the remote control unit’s “POWER” button. l Check the following if the sound of the head unit or changer is not produced or the volume is low when the unit is connected in an Alpine AI-NET system: l Is the “H.U.CONTROL” setting on the initial setup (“SETUP”) menu set to “OFF”? + Change the setting to “ON”. Note on the remote control unit I l Though “DISC DN” and “DISC UP” are indicated on the included remote control unit, these operations cannot be performed on this unit. Refer to the left figure. : Correction: DISC DN, DISC UP are added. Correction: DISC DN, DISC UP ont Bti! ajout6s. Correcckk: Han sido atiadidos DVA-5205 Part of the remote control unit has been changed. “Functions of remote control unit buttons” (pages 68 to 70) DISC DN, DISC UP IIIIll NO POSTAGE NECESSARY IF MAILED IN THE UNITED STATES BUSINESS REPLY MAIL FIRST CLASS MAIL PERMIT N. 320 TORRANCE, CA.90509 POSTAGE WILL BE PAID BY ADDRESSEE ALPINE ELECTRONICS OF AMERICA, INC. Attention : MARKETING SERVICES P.O. Box 2859 Torrance, CA 90509-9939 III II I I II II II II III1 I II Business Replay Mail No PostageStamp NecessaryIf Mailed In Canada Postagewill be paid by ALPINE ELECTRONICS OF CANADA, INC. Suite 203, 7300 Warden Ave. Markham, Ontario L3R 9Z6 T FOR USE IN CANADA,PLEASEFOLD HEREAND ENSURETHAT CANADIANADDRESSFACESUP. ltlHl3tlfISN3 ‘dfl S33VJ sswaav NVXl3VUV aNV 3t13H CllOzl3SV’3ld ‘KX-I NI 35X-ltlOzl .j, Thank you for choosing Alpine. To keep you informed and to serve you better, please complete and return this product registration card. L--- ~. n MODELNUMBER: NAME: n DATEOF PURCHASE: L-J HOMEADDRESS: I Months -1 -_J Year -~-i 1. D Yes + (Brand Name) ~ 2. ONo n comments for products WSTORETYPEWHEREPURCHASED: 1. 0 Car AudioSpecialist 2. 0 Audio/VideoStore 3. 0 Electronics/Appliance Store 4. 0 Other WType of vehicle in which this unit is installed. PHONENUMBER: ~ (Areacode, WGENDER 1. cl Male n AGE / PurchasedYear: 1 ~ : 1 ModelYear: / : j : n Purpose of buying this unit? ~1. 0 Addition +. 0 Replacement *Previous brand replaced? 1. CI Factoryinstalled 2. 0 Alpine 3. 0 Other --f (BrandName) years old 1 n MARITALSTATUS SHOWwas this vehicle purchased? 2. Cl Lease 1. 0Buy 9. 0 MonitorController 10. 0 Video Monitor 11. 0 Navigation 12. 0 MobileMayday 13. CI VideoTapePlayer 14. D Processor/Equalizer 15. 0 Security 16. 0 Other 2. a Female Model: e-mail: n PRODUCTPURCHASED 1. 0 CassettePlayer 2. 0 CD Player 3. 0 MD Player 4. 0 DVDPlayer 5. 0 CD Changer 6. D Amplifier 7. 0 Speaker 8. 0 Subwoofer 2 .J Two or More times 1. ii First time WWhen you purchased this Alpine unit,did you compare it with other brands? n lf navigation system, which monitor? 1. il Alpine + (ModelNo.) 2. U Other + (BrandName) Make: n Have you purchased Alpine products before? 1. 0 Single 2. Cl Married MYour highest level of education completed: 4. 0 Completed4 Yr. College 1. 0 High SchoolStudent 5. 0 CompletedGraduateSchool 2. 0 High SchoolGraduate 3. 0 2Yr. Degree/SomeCollege n Which ethnicity best describes yourself: 4. 0 Asian 1. D Caucasian 2. 0 Hispanic 5. 0 Other 3. 0 African-American n Have you purchased Alpine products before? 2. 0 Two or Moretimes 1, 0 Firsttime n When you purchased this Alpine unit,did you compare it with other brands? 1. 0 Yes + (BrandName) 2. Ll No 1. 0 Less than $30,000 2. cl $30,000 - $50,000 3. 0 $50,000- $70,000 n GENDER 1. 0 Male n AGE 1 6. U 7. 0 8. 0 9. 0 10. 0 Engineeringfiechnrcal Farming/Fishing Retired Student Other n HOUSEHOLDINCOME WComments for products n MARITALSTATUS flOCCUPATION 1, 0 Executive/Managerial 2. 0 Secretarial/Clerical 3. 0 Sales 4. Cl GeneralLabor 5. 0 Professional 4. cl $70,000 - $90,000 5. 0 $90,000- $110,000 6. 0 Over $110,000 2. 3 Female years old 1 0 Single 2. U Marrred mYour highest level of education completed: 4 -t Completed4 Yr. College 1 I High SchoolStudent 2. 2 High SchoolGraduate 5. 2 CompletedGraduateSchool 3. ;I 2Yr. Degree/SomeCollege HWhich ethnicity best describes yourself: 1. 3 Caucasian 4 7 Asran 2. -I Hispanic 5. ;;I Other 3. U African-American Thank you for your cooperation. This information will remain confidential with Alpine and its affiliates and will not be sold to anyone. PART NO. 68P3034OYOl-0