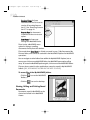
1
F50 Front matter.qxd
06/01/2001
4:07 PM
Page i
MultiPASS F50
Color Bubble JetTM printer/copier/scanner/fax
User’s Manual
F50 Front matter.qxd
06/01/2001
4:07 PM
Page ii
Canon F50 MultiPASS Color Bubble Jet printer/copier/scanner/fax User’s Manual.
Copyright
This manual is copyrighted by Canon U.S.A. Inc. with all rights reserved. Under the copyright laws, this
manual may not be reproduced in any form, in whole or in part, without the prior written consent of Canon
U.S.A. Inc.
© 2001 Canon U.S.A. Inc.
Disclaimer
Canon U.S.A. Inc. has reviewed this manual thoroughly in order that it will be an easy to use guide to your
Canon F50 MultiPASS multi-fuction printer. All statements, technical information and recommendations in
this manual and in any guides or related documents are believed reliable, but the accuracy and
completeness thereof are not guaranteed or warranted, and they are not intended to be, nor should they be
understood to be, representation or warranties concerning the products described.
Specifications are subject to change without notice.
All print speeds based on draft mode. Print speed will vary depending on system configuration, software,
document complexity, print mode and page coverage.
Star partner, Canon U.S.A. Inc., has determined that this product meets the
Energy Star guidelines for energy efficiency.
As an Energy
All information regarding non-Canon products was compiled from publicly available information. No
representation is made regarding the accuracy thereof.
Trademarks
Canon and MultiPASS are registered trademarks and F50 is a trademark of Canon Inc.
Canon U.S.A. Inc.
Digital Home and Personal Systems Division
2995 Redhill Avenue
Costa Mesa, CA 92626
PRINTED IN THAILAND
Part number XXXXXXXXXXXXXXX [PART NUMBER NEEDED]
06/01/2001
4:07 PM
Page iii
Contents
F50 Contents.qxd
Contents
1
Introduction
What the F50 Can Do . . . . . . . . . . . . . . . . . . . . . . . . . . . . . . . . . . . . .1
The MultiPASS Suite Toolbar . . . . . . . . . . . . . . . . . . . . . . . . . . . .1
Getting More Help . . . . . . . . . . . . . . . . . . . . . . . . . . . . . . . . . . . . . . .1
The F50 Unit . . . . . . . . . . . . . . . . . . . . . . . . . . . . . . . . . . . . . . . . . . . .2
Control Panel Menus . . . . . . . . . . . . . . . . . . . . . . . . . . . . . . . . . . . . .3
How to Load Paper and Envelopes . . . . . . . . . . . . . . . . . . . . . . . . . . .3
Specifying Paper Size and Type . . . . . . . . . . . . . . . . . . . . . . . . . .3
Loading Paper . . . . . . . . . . . . . . . . . . . . . . . . . . . . . . . . . . . . . . .3
2
How to Use the MultiPASS Toolbar
Getting Help for the Toolbar . . . . . . . . . . . . . . . . . . . . . . . . . . . . . . .5
Using the MultiPASS Toolbar . . . . . . . . . . . . . . . . . . . . . . . . . . . . . . .6
Modifying Toolbar Settings . . . . . . . . . . . . . . . . . . . . . . . . . . . . .6
Working with Saved MultiPASS Files . . . . . . . . . . . . . . . . . . . . . . . . .7
Accessing Saved MultiPASS Files . . . . . . . . . . . . . . . . . . . . . . . .7
Viewing, Editing and Printing Saved Documents . . . . . . . . . . . .8
Working with the Address Book . . . . . . . . . . . . . . . . . . . . . . . . .9
Faxing or Emailing Saved Documents . . . . . . . . . . . . . . . . . . . . .9
Receiving Faxes on your PC . . . . . . . . . . . . . . . . . . . . . . . . . . . . . . .10
The MultiPASS Status Monitor . . . . . . . . . . . . . . . . . . . . . . . . . . . . .10
3
Setting up Your Fax
Connecting Your Fax . . . . . . . . . . . . . . . . . . . . . . . . . . . . . . . . . . . .11
Configuring Your Fax . . . . . . . . . . . . . . . . . . . . . . . . . . . . . . . . . . . .12
Entering Sender Information . . . . . . . . . . . . . . . . . . . . . . . . . . .12
iii
F50 Contents.qxd
06/01/2001
4:07 PM
Page iii
Contents
Switching from Touch Tone to Rotary Dialing . . . . . . . . . . . . . .13
Setting the Fax Receive Mode . . . . . . . . . . . . . . . . . . . . . . . . . .14
Setting Distinctive Ring Pattern . . . . . . . . . . . . . . . . . . . . . . . .15
Setting up and Printing Reports . . . . . . . . . . . . . . . . . . . . . . . . . . .16
Activity Report . . . . . . . . . . . . . . . . . . . . . . . . . . . . . . . . . . . . . .16
TX (transmission) Report . . . . . . . . . . . . . . . . . . . . . . . . . . . . .16
Other Reports . . . . . . . . . . . . . . . . . . . . . . . . . . . . . . . . . . . . . .16
Printing Reports on Demand . . . . . . . . . . . . . . . . . . . . . . . . . . .18
Enabling/Disabling Automatic Reports . . . . . . . . . . . . . . . . . . .18
4
How to Fax
Sending and Receiving Faxes Manually . . . . . . . . . . . . . . . . . . . . . .22
Sending Faxes . . . . . . . . . . . . . . . . . . . . . . . . . . . . . . . . . . . . . .22
Faxing from your PC . . . . . . . . . . . . . . . . . . . . . . . . . . . . . . . . . .22
Redialing a Busy Number . . . . . . . . . . . . . . . . . . . . . . . . . . . . .22
Receiving Faxes . . . . . . . . . . . . . . . . . . . . . . . . . . . . . . . . . . . . .23
Cancelling a Fax . . . . . . . . . . . . . . . . . . . . . . . . . . . . . . . . . . . . .24
Faxing Automatically . . . . . . . . . . . . . . . . . . . . . . . . . . . . . . . . . . . .24
One-Touch Speed Dialing . . . . . . . . . . . . . . . . . . . . . . . . . . . . .24
Coded Speed Dialing . . . . . . . . . . . . . . . . . . . . . . . . . . . . . . . . .26
Group Dialing . . . . . . . . . . . . . . . . . . . . . . . . . . . . . . . . . . . . . .28
Faxing to a group . . . . . . . . . . . . . . . . . . . . . . . . . . . . . . . . . . . .30
Working with Faxes Stored in Memory . . . . . . . . . . . . . . . . . . . . . .31
Printing and Deleting Documents in Memory . . . . . . . . . . . . . .31
Controlling Fax Appearance and Quality . . . . . . . . . . . . . . . . . . . . .34
Sending a Color Fax: . . . . . . . . . . . . . . . . . . . . . . . . . . . . . . . . .34
Setting Contrast and Resolution . . . . . . . . . . . . . . . . . . . . . . . .34
Other Fax Features . . . . . . . . . . . . . . . . . . . . . . . . . . . . . . . . . . . . . .36
iii
F50 Contents.qxd
06/01/2001
4:07 PM
Page iv
F50 User’s Manual
5
How to Print
What is a Printer Driver? . . . . . . . . . . . . . . . . . . . . . . . . . . . . . . . . .37
Getting Help for the Printer Driver . . . . . . . . . . . . . . . . . . . . . . . . . .37
Selecting the F50 Printer for Use . . . . . . . . . . . . . . . . . . . . . . . . . . .38
Canceling A Print Job . . . . . . . . . . . . . . . . . . . . . . . . . . . . . . . . . . . .38
Improving Printed Images . . . . . . . . . . . . . . . . . . . . . . . . . . . . . . . .39
Adjusting Printer Settings from the Printer Driver Interface . . .39
6
How to Copy
Loading Documents . . . . . . . . . . . . . . . . . . . . . . . . . . . . . . . . . . . . .41
Clearing Paper Jams in the ADF . . . . . . . . . . . . . . . . . . . . . . . . .42
Making Copies . . . . . . . . . . . . . . . . . . . . . . . . . . . . . . . . . . . . . . . . .43
Reducing or Enlarging the Image Copied . . . . . . . . . . . . . . . . . . . .44
Shrinking an Image to Fit the Page . . . . . . . . . . . . . . . . . . . . . . . . .45
Setting Paper Size and Type . . . . . . . . . . . . . . . . . . . . . . . . . . . . . .46
Adjusting Image Quality . . . . . . . . . . . . . . . . . . . . . . . . . . . . . . . . .46
Adjusting Image Exposure . . . . . . . . . . . . . . . . . . . . . . . . . . . . . . . .47
Other Copy Features . . . . . . . . . . . . . . . . . . . . . . . . . . . . . . . . . . . .48
7
How to Scan
Scanning from Within an Application . . . . . . . . . . . . . . . . . . . . . . .49
Using ScanGear . . . . . . . . . . . . . . . . . . . . . . . . . . . . . . . . . . . . . . . .50
Using the Scan Button for One-push Functions . . . . . . . . . . . . . . . .50
8
How to Maintain Your F50
Cleaning Your F50 . . . . . . . . . . . . . . . . . . . . . . . . . . . . . . . . . . . . . .53
Replacing Ink Tanks . . . . . . . . . . . . . . . . . . . . . . . . . . . . . . . . . . . . .53
iv
F50 Contents.qxd
06/01/2001
4:07 PM
Page v
Contents
Maintaining the Printhead . . . . . . . . . . . . . . . . . . . . . . . . . . . . . . . .54
Printing a Nozzle Check Pattern . . . . . . . . . . . . . . . . . . . . . . . .54
Cleaning the Printhead . . . . . . . . . . . . . . . . . . . . . . . . . . . . . . .55
Aligning the Printhead . . . . . . . . . . . . . . . . . . . . . . . . . . . . . . . .56
9
How to Troubleshoot
Tips for Troubleshooting . . . . . . . . . . . . . . . . . . . . . . . . . . . . . . . . .59
10
Appendix
Safety Information . . . . . . . . . . . . . . . . . . . . . . . . . . . . . . . . . . . . . .75
Regulatory Information (from F50) . . . . . . . . . . . . . . . . . . . . . . . . .77
Canadian Radio Interference Regulations . . . . . . . . . . . . . . . . .77
Specifications . . . . . . . . . . . . . . . . . . . . . . . . . . . . . . . . . . . . . . . . .78
Limited Warranty—U.S. Only . . . . . . . . . . . . . . . . . . . . . . . . . . . . . .81
v
06/01/2001
4:07 PM
Page 1
1
Introduction
What the F50 Can Do
Congratulations on purchasing your Canon F50 MultiPASS multifunction unit!
The F50 eliminates the need for multiple devices in your home or office by
incorporating the functions of:
•
Printer Print crisp, clear color or black and white pages from your PC.
•
Copier Use your F50 as a stand-alone copier for color or B&W copies.
•
Scanner Scan high-resolution images to your PC.
•
Fax Use as a stand-alone fax, or send and receive faxes from your PC. You
can also send full color faxes!
The MultiPASS Suite Toolbar
You can use the F50 as a stand-alone device for faxing or copying, or with your
computer as a fully-integrated printer/copier/ scanner/fax. From your PC, you
can access and navigate many of the features using the MultiPASS toolbar.
Getting More Help
This manual describes some of the features of your F50 and how to use them.
For more information, see the online guides available on your MultiPASS Suite
CD-ROM.
You can also access online help from the MultiPASS toolbar (see chapter 2 “How
to Use the Toolbar”) or the printer driver (see chapter 5 “How to Print”).
1
Introduction
F50 Chapter 1.qxd
F50 Chapter 1.qxd
06/01/2001
4:07 PM
Page 2
F50 User’s Manual
The F50 Unit
Front View
ADF (AUTOMATIC DOCUMENT FEEDER)
ADF COVER
DOCUMENT GUIDE
MULTI-PURPOSE
TRAY and COVER
Insert paper or
envelopes
DOCUMENT OUTPUT
SLOT
CONTROL PANEL
ADF REFERENCE
OUTPUT TRAY
Inside View
DOCUMENT COVER
Open to place a document
on the glass
SCANNING UNIT
Open to install the
printhead and ink tanks
SCANNER
LOCK
GLASS
CARTRIDGE
HOLDER
REFERENCE
SHEET
2
OPEN BUTTON
Push to open the scanning unit
06/01/2001
4:07 PM
Page 3
Control Panel Menus
Menu options on the control panel vary
depending on whether Copy, Fax or Scan mode
is selected.
Tips on Navigating the
Control Panel Menus
Set
Some options are common to all modes.
Stop/Reset
Introduction
F50 Chapter 1.qxd
Press the Set button to
move down to the next
menu level or select a
menu option.
Press Stop/Reset at any
time to exit the menus.
How to Load Paper and Envelopes
Specifying Paper Size and Type
If copying on specialty paper (glossy, high resolution, transparency or photo),
you can optimize results by setting the paper size and type from the F50 control
panel. If printing on specialty paper, select the appropriate paper type from the
printer driver. For procedures, see the chapters on printing, copying or faxing in
this manual, or the documentation included on your Software Setup CD-ROM.
Loading Paper
To load paper or other media:
1
Adjust paper guide
Slide the paper guide to the left.
2
Insert paper
Fan the the sheets, then tap the stack
edge to align.
Insert into the paper tray, with the print
side facing up, with the edge aligned to
the right.
The print side is usually the glossier or
brighter white side. When using
specialty media, do not touch the print
side.
PAPER LIMIT MARK
3
F50 Chapter 1.qxd
06/01/2001
4:07 PM
Page 4
F50 User’s Manual
To load envelopes:
1
Adjust paper guide
Slide the paper guide to the left.
2
Insert envelopes
Before loading, press the corners and
sides of the envelopes to make them
as flat as possible. Insert into the
paper tray, with the print side facing
up and aligned to the right.
Make sure that none of the flaps
overlap. If the envelope edges are not
flat, crease them with the side of pen.
With the address side facing up and
pointed in the direction shown, align
the stack with the right side of the
paper rest, then insert the stack into
the printer.
3
Readjust paper guide
Move the guide securely to the edge of
the envelopes.
4
06/01/2001
4:08 PM
Page 5
2
How to Use the MultiPASS Toolbar
The Canon MultiPASS Suite is a software program that provides tools for quickly
accessing and using many of the features of your F50. With the MultiPASS Suite,
your F50 is fully integrated with your PC as a printer/copier/scanner/fax.
Documents scanned through the MultiPASS Toolbar can be saved and edited, or faxed
or emailed. You can also customize the settings for the different toolbar features.
The MultiPASS Toolbar icons provide quick access to a number of scanning
operations.
Scan to Mail scans an image and faxes it or attaches it to an email.
Scan to Save scans an image and saves it as a file which can later be
viewed, edited, printed or sent as a fax or email.
Scan Photo scans an image, saves it in your My Documents folder, and
sends it to an image processing application.
My MultiPASS accesses the My MultiPASS folders, from which saved files
can be viewed, edited, printed or sent as fax or email.
Settings allows editing of settings for all scan operations.
Getting Help for the Toolbar
Online help is available for the toolbar to explain more about different features
or options and how to use them.
To access online help from the toolbar:
icon on the toolbar, or
•
Click the
•
Right-click any screen area of the window to access the What’s This?
help description for that area, or
•
Click the
key in the upper right corner, then click the feature you
want to know more about.
5
How to Use the Toolbar
F50 Chapter 2.qxd
F50 Chapter 2.qxd
06/01/2001
4:08 PM
Page 6
F50 User’s Manual
Using the MultiPASS Toolbar
Opening the toolbar provides direct access to the MultiPASS features. Once the
toolbar is open, you can access the desired feature directly.
To access the toolbar:
Click the Canon MultiPASS Toolbar icon
on your desktop , or
Go to Start, then Programs. Select Canon MultiPASS Suite 4.0, then Canon
MultiPASS Toolbar.
Modifying Toolbar Settings
Toolbar Settings define the settings used for scan operations started from the
MultiPASS toolbar. Before using the MultiPASS Toolbar, set up each option
using Toolbar Settings.
You can set a custom image type, resolution (image quality) and paper size for
each scan operation. For scan operations that open other applications (such as
Scan Photo), you can select the application to open.
You can also set up to three custom scan operations with the Custom1,
Custom2 and Custom3 tabs. Custom operations only show on the toolbar if
they’ve been set up to do so.
To change Toolbar Settings:
1
Select option to be modified
Click
on the MultiPASS Toolbar,
then select the tab for the setting you
want to modify, or
Right-click the toolbar icon to open that
setting’s tab directly.
2
Define settings for operation
Type the desired modifications for each
operation, referring to the online help
as needed.
6
06/01/2001
4:08 PM
Page 7
When one tab is complete, select the next
tab and continue.
Click OK to save the new settings and exit the
dialog.
To set up MultiPASS Fax in your e-mail
application:
1
Configure email server
Click Start, then Control Panel, then doubleclick the Mail icon. A dialog box will open.
2
Add new profile
Click Services, then Add.
3
Select Canon
In the Add Service to Profile dialog box, then
Canon MultiPASS Fax, then OK.
How to Use
Introduction
the Toolbar
F50 Chapter 2.qxd
Tips for Modifying
Toolbar Settings
For Scan Photo, click Set to
specify the application to open
after scanning with this
MultiPASS Toolbar option.
Consult your image processing
documentation for the program to
select.
If you want to use OCR (an optical
character reader that converts
scanned text into a word
processing format), access the
Scan Text tab. Click Set to select
the OmniPage OCR software that
comes with the MultiPASS, or
select another OCR software
application.
For detailed instructions on setting up an e-mail profile, see your Windows
documentation.
Working with Saved MultiPASS Files
When a document is scanned with the Scan to Save option or is saved from
within MultiPASS for any other reason, it is saved in the My MultiPASS folders.
From these folders, a saved document can be
viewed, edited, sent as a fax or email attachment,
Tips for Using Files
or printed.
Saved in the
MultiPASS Suite
Accessing Saved MultiPASS Files
When you access files saved through MultiPASS,
the Exploring My MultiPASS window will open.
Folders are pre-set:
Outbox for faxes not successfully sent or
scheduled for later transmission.
Files saved from applications that
can print to the F50 can be faxed,
printed or emailed. Files from
other applications cannot be
faxed or printed, and can only be
sent with an email as an
attachment.
7
F50 Chapter 2.qxd
06/01/2001
4:08 PM
Page 8
F50 User’s Manual
Received Faxes for faxes
received when the F50 is set to
receive all incoming faxes on
the PC. See “Receiving Faxes on
the PC” on page 12.
Scan to Save for documents
scanned with the scan-to-save
option.
Sent Faxes for faxes sent
through the MultiPASS Suite.
There is also a MultiPASS menu
option for faxing or emailing
documents directly from this window.
Files saved when Scan Photo is clicked are saved in your C:/My Documents/My
Pictures folder, and cannot be used within the MultiPASS Explorer for MultiPASS
operations.
You can navigate to other folders from within the My MultiPASS Explorer, but as
soon as you click on a non-MultiPASS folder, the MultiPASS menu option will go
away. To access the MultiPASS options again, click on one of the MultiPASS folders.
Files you have created in other applications cannot be saved in My MultiPASS
folders. [KEV, BETA WORKS THIS WAY BUT WE NEED TO VERIFY]
To access files in the My MultiPASS folders:
Click the
Toolbar, or
icon on the MultiPASS
Click the
icon on the desktop.
Viewing, Editing and Printing Saved
Documents
Documents saved in MultiPASS can be
viewed and edited in the MultiPASS
Viewer.
8
F50 Chapter 2.qxd
06/01/2001
4:08 PM
Page 9
1
How to Use the Toolbar
To use the MultiPASS Viewer:
Access document
Navigate to the document folder, then double-click the document. The
MultiPASS Viewer will open and display the document.
2
View or edit document
On the MultiPASS Viewer, you can rotate the document and perform other
basic editing tasks. To print the document, click Print on the MultiPASS
Viewer toolbar.
Working with the Address Book
Unless you specify otherwise, the MultiPASS software uses the MultiPASS
Address Book to store all of your address book entries. You create the Address
Book the first time you open it.
To create the Address Book:
1 Open Canon Address Book Profiles
Click Start, then Programs, then Canon
MultiPASS Suite, then Canon Address Book
Profiles.
2 Create an Address Book
Click Create New Windows Address Book file
for MultiPASS, then click OK.
3 Open your new Address Book
Open My MultiPASS from your desktop, then
open the MultiPASS drop down menu, then
click Address Book.
Faxing or Emailing Saved Documents
You can fax a document saved in MultiPASS or
attach it to an email.
To fax or email a document:
1
Select document
Navigate to the document folder, then click
the document to highlight.
Tips on Sending
Faxes or Emails
Using MultiPASS
When prompted, enter the name
and fax number and/or email
address of the recipient, then
click Add to Recipient List. This
information will also be stored in
the MultiPASS address book for
future use.
To fax or email to multiple
recipients (sometimes referred to
as sequential broadcasting),
continue to enter fax numbers or
email addresses and click Add to
Recipient List.
Once fax or email data is entered,
you have the option to Send Now
or Send Later. If you click Send
Later, you will be prompted to
enter a date and time to send the
fax or email.
9
F50 Chapter 2.qxd
2
06/01/2001
4:08 PM
Page 10
Access Send dialog
From the MultiPASS menu, select Send Quick Fax. A dialog box will open.
3
Send document
Select the Fax option to send a fax, or the Email option to send an email with
the document attached. Follow the on-screen instructions.
Receiving Faxes on your PC
You can set up the F50 to automatically receive faxes to the MultiPass Suite.
Faxes are saved in the My MultiPASS/Received Faxes folder where they can be
viewed or printed on demand.
To receive faxes to the MultiPASS Suite:
1
Access toolbar
Click the
2
icon on the MultiPASS Toolbar.
Set up Fax Receive mode on the PC
In MultiPASS explorer click the MultiPASS menu, then select Device
Setup/Speed Dial, then MultiPASS F50.
Click the Receive Fax tab.
Under Receive Conditions, click the drop-down menu next to When Computer
is On.
Select Send to PC to save incoming faxes on your computer, or select Print
Fax to enable incoming faxes to print.
The MultiPASS Status Monitor
The Status Monitor displays a list of the F50’s currently running jobs. If no jobs
are running it shows the F50 as idle.
To open the Status Monitor:
Go to Start, then Programs.
Select Canon MultiPASS Suite 4.0, then Canon MultiPASS Status Monitor.
10
F50 Chapter 3.qxd
06/01/2001
4:08 PM
Page 11
3
Setting Up Your Fax
Setting up Your Fax
Below are the control panel buttons you will use for setting up your fax.
ON/OFF button
Resume button
LCD panel
Scroll
keys
Set
button
Menu button
Fax button
Numeric keypad
Before you can use your F50 for faxing, you will need connect the F50 to your
phone line, then fully configure the F50 for faxing.
Connecting Your Fax
Connect your F50 to the wall jack as shown on the next page.
•
If you are using an answering machine on the same phone line, connect it to
the F50.
•
If you are using a telephone on the same phone line, connect it to the F50.
•
If you are using both an answering machine and a phone, connect the
answering machine to the F50, then connect the phone to the answering
machine.
•
If you are connecting the F50 to the same line as your PC’s modem, connect
the modem line to the F50.
11
F50 Chapter 3.qxd
06/01/2001
4:08 PM
Page 12
F50 User’s Manual
F50 and phone
F50 and answering machine
Wall jack
Answering
Machine
F50, answering machine and phone
Phone
Wall jack
F50 and PC modem
PC
Wall jack
Answering
Machine
Phone
Wall jack
FAX MODE MENUS
FAX/TEL AUTO SW
Configuring Your Fax
FAX ONLY MODE
1. RECEIVE MODE
There are specific steps you should take to
configure your fax for optimum performance:
•
•
•
•
MANUAL MODE
ANS. MACHINE MODE
Enter your sender information
Ensure that your F50 is set for the correct
dialing based on your phone service (tone
or pulse)
Select the mode you wish to use for
receiving faxes
Set up a distinctive ring pattern if this
feature is available from your phone
company and in use.
1. DOC. MEMORY LIST
2. MEMORY REFERENCE
To enter sender information:
12
2. PRINT DOCUMENT
3. DELETE DOCUMENT
4. FILE PRINT
1. ACTIVITY REPORT
3. REPORTS/LISTS
2. SPEED DIAL LIST
3. USER DATA LIST
4. DOC. MEMORY LIST
4.TEL REGISTRATION
1. 1-TOUCH SPD DIAL
2. CODED SPEED DIAL
3. GROUP DIAL
Entering Sender Information
FCC rules state that sender information must
be transmitted with every fax sent. This
information includes the fax number,
personal or company name and the date and
time sent.
DRPD
1. USER SETTINGS
5. FAX SETTINGS
2. REPORT SETTINGS
3. TX SETTINGS
4. RX SETTINGS
6. PRINTER SETTINGS
7. SYSTEM SETTINGS
06/01/2001
1
4:08 PM
Page 13
Access DATE & TIME
Fax
Press
Press
Menu
Tips on Entering Names
and Numbers
to enter Fax Mode.
until FAX SETTINGS appears.
Set
three times to access DATE & TIME.
Press
2
Enter current date and time
Refer to the table below for which
numeric key to press for each
character. Press each key once or
more until the desired character
appears.
Menu
Press
to scroll through date and
time fields. Use the numeric keys to enter
date (MMDDYY), and time (HH:MM in 24hour format).
Set
Press
3
to save.
Access UNIT TELEPHONE #
Menu
Press
appears.
until UNIT TELEPHONE #
Set
Press
4
A 60-second pause will return the
F50 to standby mode without
saving the data entered.
to access.
Enter fax/phone number
Menu
From the numeric keypad, enter fax/phone
number (up to 20 digits, including spaces).
Press
Press
character.
to enter a space.
to delete an entered
Set
Press
5
to save.
Enter name
Set
Press
again, then use the numeric keypad to enter your name or
company name (up to 24 characters, including spaces).
Stop/Reset
Set
When done, press
to save, then
to exit.
Switching from Touch Tone to Rotary Dialing
Your F50 is set to operate with a touch tone line. If your line does not support
13
Setting Up Your Fax
F50 Chapter 3.qxd
F50 Chapter 3.qxd
06/01/2001
4:08 PM
Page 14
F50 User’s Manual
touch tone dialing, you can reset the F50 for rotary dialing. See the Online
User’s Guide for instructions on how to switch from Touch Tone to Rotary
Dialing.
Setting the Fax Receive Mode
There are five possible modes for receiving faxes:
FAX/TEL AUTO SW
If you connect a phone to an extension line for the same
line as the F50 but not directly to the F50, the phone will
ring for all incoming fax and voice calls. If the call is
answered on the extension phone before the F50 picks
up, you still have the option of receiving the fax. See
“Receiving Faxes” on page 25.
FAX ONLY MODE
The F50 will automatically receive all calls as fax calls.
Voice calls will not be recognized by the F50 in this
mode.
DRPD
Distinctive Ring Pattern Detection (DRPD) allows the F50
to distinguish between incoming voice and fax calls. Use
this setting if you have multiple phone numbers on the
same line, and DRPD enabled on these lines by your
phone company. This mode should also be used if you
have voice mail service on the line instead of an
answering machine. See “Setting a Distinctive Ring
Pattern” on page 17.
MANUAL MODE
If a phone is connected to the F50, the phone will ring
every time a call comes in. You can answer the call, or
press Start to receive an incoming fax after lifting the
handset.
ANS. MACHINE MODE An answering machine must be connected to the F50,
and the call will go to the answering machine first. If a
fax tone is detected on the incoming call message, the
F50 will receive the fax.
See chapter 4 “How to Fax” for procedures on receiving and sending faxes.
To select a receive mode:
14
F50 Chapter 3.qxd
06/01/2001
1
4:08 PM
Page 15
Access RECEIVE MODE
Fax
Press
to enter Fax Mode.
2
Menu
until RECEIVE MODE appears. Press
to access.
Select receive mode
Set
Press
setting.
Menu
to scroll through receive modes, then press
to save the
Stop/Reset
Press
to exit.
Setting Distinctive Ring Pattern
Distinctive Ring Pattern Detection (DRPD) is a service offered by most phone
companies, providing multiple phone numbers with different ring patterns on
the same line. The F50 can detect the different ring patterns and will respond
accordingly. One phone number can be assigned for telephone calls that the
F50 will not answer. Another phone number can be assigned for faxes that the
F50 will receive automatically.
To use this feature, you will need:
•
Two phone lines connected to the F50. The lines must be joined by a device
that combines two lines to one, and the single line must be plugged into the
LINE jack at the back of the F50.
•
A different custom ring pattern assigned to each line through your local
phone company. For the fax line, choose from the following patterns:
Normal ring
Double ring
Short-short-long ring
Short-long-short ring
The default fax selection for your F50 is Double Ring. All calls made to the
number you have designated for double ring will be answered as a fax by
the F50.
The Distinctive Ring Pattern Detection (DRPD) feature on the F50 will function
correctly only when your phone lines and the F50 have been set up as described
15
Setting Up Your Fax
Set
Press
F50 Chapter 3.qxd
06/01/2001
4:08 PM
Page 16
F50 User’s Manual
above. DPRD settings on the F50 must match the ring patterns assigned by the
phone company.
To set your custom fax ring pattern:
1
Access RX SETTINGS
Fax
Press
to enter Fax Mode.
Set
Press
Menu
until FAX SETTINGS appears. Press
to access.
Set
Menu
Press
2
until RX SETTINGS appears. Press
to access.
Set DRPD SELECT FAX
Set
Menu
Press
3
until DRPD:SELECT FAX appears. Press
to select.
Set ring pattern
Menu
Press
to scroll to the ring pattern assigned to your fax line.
Stop/Reset
Set
Press
to select. When done, press
to exit.
Setting up and Printing Reports
The F50 provides a variety of fax-related reports and lists. The two most
frequently used are the Activity and TX (transmission) reports.
Activity Report
Shows recent sent and received fax transactions. This report automatically
prints after every 20 transmissions, unless disabled. It can also be printed on
demand.
TX (transmission) Report
A TX Report automatically prints when an error occurs while sending, unless
disabled. It can be also be set to print after every transmission.
Other Reports
Other automatic reports available from the F50 include:
16
06/01/2001
4:08 PM
Page 17
Setting Up Your Fax
F50 Chapter 3.qxd
INDICATES
AN ENTRY THAT
HAS APPEARED
ON A PREVIOUS
REPORT
TRANSACTION (TX/RX) NUMBER
TRANSACTION MODE
COLOR TRANSACTION
ERROR CORRECTION MODE TRANSACTION
ERROR PAGE
ERROR CODE
Stop/Reset WAS PRESSED DURING TRANSACTION
TRANSACTION DURATION
Activity Report
•
RX (reception) Report shows faxes received. When enabled, it can be set to
automatically print after each fax received, or only when an error occurs.
•
Multi TX/RX Report is a multiple transaction/reception report that prints
automatically after group faxing. This report cannot be printed on demand.
•
Memory Clear Report automatically prints when power is restored after a
power outage, showing titles of documents deleted from memory during the
power failure. This report cannot be printed on demand.
The remaining reports can be printed on demand only.
•
User Data List prints all of the entered sender information and current
settings.
•
Doc. Memory List prints a list of documents in memory, along with the
transaction number (TX/RX no.) for each document. See “Working with Faxes
Stored in Memory” on page 34.
There are also three reports relating to speed dialing:
17
F50 Chapter 3.qxd
06/01/2001
4:08 PM
Page 18
F50 User’s Manual
•
1-Touch Spd Dial List prints the names and numbers entered for one-touch
speed dialing buttons.
•
Coded Speed Dial List prints the names and numbers entered for coded
speed dialing codes.
•
Group Dial List prints names and numbers entered for group dialing.
Printing Reports on Demand
To print a report on demand:
1
Access REPORTS/LISTS
Fax
Press
Press
Menu
to enter Fax Mode.
until REPORTS/LISTS appears.
Set
Press
2
to access.
Select report
Menu
Press
to scroll through reports.
Set
Press
to print the selected report.
Enabling/Disabling Automatic Reports
Automatic printing for the TX Report, RX Report and Activity Report can be
turned off and on. If automatic reporting is disabled for a report, you can still
print it on demand. See “Printing Reports on Demand” above.
To enable/disable TX Report or RX Report automatic printing:
1
Access TX REPORT or RX REPORT
Press
Fax
to enter Fax Mode.
Set
Press
Press
18
Menu
until FAX SETTINGS appears. Press
Menu
until REPORT SETTINGS appears.
to access.
06/01/2001
4:08 PM
Page 19
Set
Press
Tips for Printing
Speed Dialing Reports
to access.
Press
REPORT.
Menu
to scroll to TX REPORT or RX
The SPEED DIAL LIST option
provides access to the three
speed-dialing reports:
Setting Up Your Fax
F50 Chapter 3.qxd
Set
Press
2
to access.
Enable/disable automatic printing
Menu
Press
•
1-TOUCH LIST
•
CODED DIAL LIST
•
GROUP DIAL LIST
to scroll through options:
PRINT ERROR ONLY causes a report to print only when a
transmission error (TX) or receipt error (RX) occurs.
OUTPUT NO disables automatic printing.
OUTPUT YES prints a report every time a fax is sent (TX) or received (RX).
Set
Press
to select.
If you enabled printing for the TX Report, continue to the next step.
Stop/Reset
Otherwise, press
3
to exit.
enable or disable fax page (TX Report only)
If you select PRINT ERROR ONLY or OUTPUT YES for a TX Report, you can print
the first page of the fax (B&W only) after the report has printed.
ON prints the first page of the fax after the report.
OFF disables this feature.
Set
Press
Menu
to scroll to ON or OFF, then press
to select.
Stop/Reset
Press
to exit.
To enable/disable Activity Report automatic printing:
19
F50 Chapter 3.qxd
06/01/2001
4:08 PM
Page 20
F50 User’s Manual
1
Access ACTIVITY REPORT
Fax
Press
Press
Menu
to enter Fax Mode.
until FAX SETTINGS appears.
Set
Press
to access.
Menu
Press
until REPORT SETTINGS appears.
Set
Press
to access.
Menu
Press
to scroll to ACTIVITY REPORT.
Set
Press
2
to access.
Turn automatic printing off or on for Activity Report
Menu
Press
to scroll through selections:
ON causes a report to print after every 20 transactions.
OFF disables automatic printing.
Set
Press
to select.
Stop/Reset
Press
20
to exit.
06/01/2001
4:08 PM
Page 21
4
How to Fax
Below are the control panel buttons you will use for faxing.
ON/OFF button
Coded Dial
button
Resume button
Fax button
LCD panel
Set
button
Scroll keys
Menu button
One-Touch
Speed Dial
buttons
Color/B&W button
Numeric keypad
Image Quality button
Exposure button
Hook button
Stop/Reset button
Start button
With the F50, you can:
•
Send or receive faxes manually
•
Send faxes with coded dialing or one-touch speed dialing
•
Send the same fax to a selected group of recipients.
When a fax is sent or received from the F50, the fax data is stored in the F50’s
memory. Depending on the density of information on a page, up to 270 pages of
fax information can be stored at a time. This allows you to review faxes sent or
received.
You can also send faxes in color, and change the image quality and contrast.
21
How to Fax
F50 Chapter 4.qxd
F50 Chapter 4.qxd
06/01/2001
4:08 PM
Page 22
F50 User’s Manual
Sending and Receiving Faxes Manually
Faxes can be sent manually from the F50 at any time.
Depending on the mode you’ve set for receiving faxes (see “Setting up the Fax
Receive Mode” on page 16) you can also manually receive faxes if needed.
Sending Faxes
To manually send a fax:
1
Enter fax mode
Fax
Press
2
to enter fax mode.
Load document in ADF
Insert the document face up in the ADF tray.
3
Dial number
Hook
Press the
button if you want to hear the dial tone, dial sequence and fax
tone while the F50 connects to the receiving fax machine.
Using the numeric keypad, dial the number.
4
Send fax
Start
Press
to send the fax. The fax will be scanned and sent.
Faxing from your PC
You can fax an electronic document directly from your PC with the MultiPASS
Suite Toolbar. For more information, see chapter 2 “How to Use the MultiPASS
Toolbar” starting on page 7.
You can also fax directly from your word processing program. Select Print from
your program’s file menu, and choose Canon MultiPASS F50 Fax as the printer.
The Send Fax dialog box will appear. Type in the fax number and click Send.
Redialing a Busy Number
There are two methods of redialing: manual and automatic.
22
F50 Chapter 4.qxd
06/01/2001
4:08 PM
Page 23
If a fax does not go through the first time you send it, the F50 will automatically
try two more times to send the fax at 2 minute intervals, unless the process is
interrupted. If all attempts are unsuccessful, the transmission will be cancelled
and an error report printed.
When automatic redial is in use, the LCD panel displays the message AUTO
REDIAL.
You can also adjust the number of redialing attempts and the time interval
between attempts. For more information, see the Online User’s Guide.
Press
Redial/
Pause
How to Fax
To manually redial a fax number:
to redial the last number entered from the numeric keypad.
To cancel automatic redial:
Stop/Reset
Wait until the F50 starts dialing the number, then press the
Confirm deletion by pressing the
button.
key.
Receiving Faxes
If your F50 is set up for FAX/TEL AUTO mode or MANUAL mode and you have a
phone connected to your F50, you have the option of picking up an incoming
voice call and then manually receiving a fax.
To manually receive a fax:
1
Answer incoming call
Fax
Press
to enter fax mode.
When phone rings, pick up handset.
2
Receive fax
If you hear a fax tone (slow beep), press
handset.
Start
on the F50, then hang up the
If a voice caller is on the line, ask the caller to start sending their fax
by pressing Start on their machine. When you hear a slow beep, press
on the F50, then hang up the handset.
Start
23
F50 Chapter 4.qxd
06/01/2001
4:08 PM
Page 24
F50 User’s Manual
Cancelling a Fax
You can cancel current incoming or outgoing faxes.
To cancel an outgoing fax while a document is scanning:
Stop/Reset
Press
to cancel the fax and eject the document. An Error TX Report will
automatically print.
To cancel a fax after a document has been scanned or to cancel an
incoming fax:
Stop/Reset
Press
to cancel. A prompt will display on the LCD panel asking you to
confirm cancellation. Press
automatically print.
to confirm or
to cancel. An Error TX Report will
Faxing Automatically
There are several shortcuts for sending faxes to frequently used numbers.
One-Touch Speed Dialing
Coded Speed Dialing
Group Dialing
You can also review faxes stored in memory that have been sent, will be sent, or
have been received.
One-Touch Speed Dialing
You can enter up to 12 fax numbers for quick number retrieval.
Before One-Touch Speed Dialing can be used, a number must be entered and
assigned to a speed-dial button.
You can print a list of numbers entered for One-Touch Speed Dialing at any time.
For procedures, see “Printing Reports on Demand” on page 21.
To program a one-touch fax number:
1
Access 1-TOUCH SPD DIAL
Fax
Press
24
to enter fax mode.
06/01/2001
4:08 PM
Page 25
Menu
Press Menu then
to scroll until TEL
REGISTRATION appears.
Set
twice to access 1-TOUCH SPD DIAL.
Press
2
Select a speed dial button
Menu
Press
to scroll through one-touch
speed dialing codes.
Tips on Entering
Names and Numbers
Into the F50
Refer to the table below for the
numeric key to press for each
character. Press each key once or
more until the desired character
appears.
If a one-touch speed dialing code is already
used, the phone number will appear next to
the one-touch button number. If a group is
registered for a one-touch button (see “Group
Dialing” on page 31), the message GROUP
DIAL appears next to the code.
How to Fax
F50 Chapter 4.qxd
Set
Scroll to an unused code and press
3
twice.
Enter fax number
From the numeric keypad, enter the phone
number (up to 20 digits, including spaces).
Set
Press
4
twice to save the settings.
A 60-second pause will return to
F50 to standby mode without
saving the data entered.
Press
character.
Enter name
Use the numeric keypad to enter the name
that is associated with the number (up to 16
characters, including spaces).
Menu
Press
Press
Redial/
Pause
to delete an entered
to enter a space.
to enter a pause.
Set
Press
to save the settings.
Enter more one-touch speed dial numbers as needed.
Stop/Reset
When you are finished, press
to exit.
To send a fax using One-Touch Speed Dialing:
1
Enter fax mode
25
F50 Chapter 4.qxd
06/01/2001
4:08 PM
Page 26
F50 User’s Manual
Fax
Press
2
to enter fax mode.
Load document in ADF
Insert the document face up in the ADF tray.
3
Select phone number
Press the one-touch speed dial button that corresponds to the desired
number. The fax will automatically be scanned and sent.
Coded Speed Dialing
You can enter an additional 100 numbers for quick retrieval using a two-step
procedure.
As with one-touch speed dial, the coded speed dial numbers must be entered
before they can be used. You can print a list of numbers entered for Coded
Speed Dialing at any time. For procedures, see “Printing Reports on Demand”
on page 18.
To enter a Coded Speed Dial number:
1
Access CODED SPEED DIAL
Fax
Press
Press
to enter fax mode.
Menu
Menu
then
until TEL REGISTRATION appears.
Set
Press
to access.
Set
Press
2
Menu
until CODED SPEED DIAL appears. Press
to access.
Select code (00-99)
Press
Menu
to scroll through the codes.
If a speed dial code is already set up, the number will appear. If a group is
registered for that code (see Group Dialing on page 31), the message GROUP
DIAL appears.
Set
Scroll to an unused code and press
26
twice.
06/01/2001
3
4:08 PM
Page 27
Enter fax number
From the numeric keypad, enter the fax/phone number (up to 20 digits,
including spaces).
Set
Press
4
twice to save the settings.
Enter name
Use the numeric keypad to enter the name that is associated with the
number (up to 16 characters, including spaces).
Set
Press
to save the settings.
How to Fax
F50 Chapter 4.qxd
Enter more coded speed dial numbers as needed.
Stop/Reset
When you are finished, press
to exit.
To delete or edit a ONE TOUCH or CODE SPEED DIAL entry:
1
Access entered number
Fax
Press
to enter fax mode.
Access the one-touch number or coded speed dial code as described in steps
1 and 2 of the previous procedures.
2
Delete or edit phone number
Press
to delete all or part of the phone number.
If editing, enter the correct phone number.
Set
Press
3
twice to save these settings.
Delete or edit name
Press
to delete all or part of the name.
If editing, enter the correct name.
Stop/Reset
Set
Press
twice to save these settings. Press
to exit.
27
F50 Chapter 4.qxd
06/01/2001
4:08 PM
Page 28
F50 User’s Manual
To send a fax using Coded Speed Dialing:
1
Enter fax mode
Fax
Press
2
to enter fax mode.
Load document in ADF
Insert the document face up in the ADF tray.
3
Select number
Press
Coded Dial
then, using the numeric keypad, enter the desired code.
The fax will automatically be scanned and sent.
Group Dialing
You can send the same fax to a group of numbers that have been entered for
one-touch or coded speed dialing. For example:
Sales Contact Group:
Joe (one-touch dial position 02)
Fred (one-touch dial position 03)
Mary (one-touch dial position 04)
Customer Group:
ABC Supplies (coded dial position 21)
Thrift Supplies (coded dial position 22)
Best Hardware (coded dial position 14)
You can combine one-touch dial and coded dial entries in a single group dial
list. However, you cannot manually enter phone numbers into a group dial list.
Before setting up a group dial list, print a list of one-touch or coded speed dial
numbers and codes. You can also print group dial lists after they are set up. See
“Printing Reports on Demand” on page 18 for procedures.
To set up a group dial list:
1
Access GROUP DIAL
Fax
Press
Press
28
to enter fax mode.
Menu
then
Menu
until TEL REGISTRATION appears.
06/01/2001
4:08 PM
Page 29
Set
Press
to access.
Set
Press
2
Menu
until GROUP DIAL appears. Press
to access.
Select code for group
Press
Menu
to scroll through one-touch speed dial codes (01 to 12), or
Coded Dial
Press
then use the numeric keypad to choose an empty coded dial
code (00-99).
If a speed dial slot is already in use, 1-TOUCH SPD DIAL, CODED SPEED DIAL
or GROUP DIAL appears.
Set
When an unused code has been displayed or entered, press
3
twice.
Assign one-touch/coded speed dial codes to group
Press the one-touch buttons to assign one-touch speed dial codes to the
group, and/or
Coded Dial
Press
then use the numeric keypad to assign coded speed dial codes
to the group (00 to 99).
As you press or enter each one-touch or coded speed dial code, it is
automatically added to the group dial list.
Set
When you have finished adding codes to add to the group dial list, press
twice to save the list.
4
Enter a group name
Set
Use the numeric keypad to enter a name for the group dial list. Press
save.
to
To delete an entry from the group dial list:
1
Access GROUP DIAL
Fax
Press
to enter fax mode.
29
How to Fax
F50 Chapter 4.qxd
F50 Chapter 4.qxd
06/01/2001
4:08 PM
Page 30
F50 User’s Manual
Press
Menu
Menu
then
until TEL REGISTRATION appears.
Set
Press
to access.
Set
Menu
Press
2
until GROUP DIAL appears. Press
to access.
Select group dial list
Menu
Press
to scroll through one-touch codes and group dial lists, or
Coded Dial
Press
then enter the coded group number.
Set
Press
3
twice.
Delete entry
Press
Menu
to scroll through phone numbers.
Set
Press and hold
to delete the displayed entry. Press
to save.
Set
If you want to delete another phone number, press
the phone number list again.
and
to access
Stop/Reset
When you are finished deleting phone numbers, press
to exit.
To delete a group dial list:
Deleting all phone numbers from a group dial list automatically deletes the
group.
Faxing to a group
To fax to a group:
1
Enter fax mode
Fax
Press
30
to enter fax mode.
F50 Chapter 4.qxd
06/01/2001
2
4:08 PM
Page 31
Load document in ADF
Insert the document face up in the ADF tray.
3
select group
Press the One-Touch Speed Dialing button for the group dial list, or
Coded Dial
The group name will display in the LCD. The document is scanned, and faxing
begins automatically.
Working with Faxes Stored in Memory
Printing and Deleting Documents in Memory
The F50 can store up to 50 documents or 270 pages in memory.
A stored document can be printed for review or deleted from memory.
A document is stored in memory when:
•
The document is scanned for memory sending or delayed sending, and has
not yet been sent.
•
The document is scanned for sequential sending. (See “Tips on Sending
Faxes or Emails Using MultiPASS” on page 11.)
•
If the MultiPASS Suite has been set to automatically upload faxes to the PC
and a fax comes in when the PC is off, the fax will stay in the F50’s memory
until PC is turned on again. The fax will then automatically upload to the PC
and be deleted from memory.
•
A fax received when the F50 is being used for other tasks, or cannot print
due to error (such as paper not loaded). When the F50 becomes able to
print, any faxes received during this period will automatically be printed
then deleted from memory.
When memory is full, the operations described above cannot be
performed. Regularly deleting documents from memory keeps the
memory free for these operations.
31
How to Fax
press
on the control panel, and enter the code for the group dial list
on the numeric keypad.
F50 Chapter 4.qxd
06/01/2001
4:08 PM
Page 32
F50 User’s Manual
To print or delete a specific document, you must first print a document list and
locate the document’s reference number (TX/RX NO.) on the list.
To print a document list:
1
Access DOCUMENT MEMORY LIST
Fax
Press
Press
to enter fax mode.
Menu
Menu
then
until MEMORY REFERENCE appears.
Set
to access DOC. MEMORY LIST.
Press
2
Print report
Set
Press
to print the document list.
To print a document stored in memory:
1
Review document list
Review the document list to find the TX/RX NO. that refers to the document
you would like to print.
2
Access PRINT DOCUMENT
Fax
Press
to enter fax mode.
Set
Press Menu then
access.
Menu
until MEMORY REFERENCE appears. Press
Press Menu then
access.
Menu
until PRINT DOCUMENT appears. Press
to
Set
3
to
Select document
Set
Press
32
Menu
until the document TX/RX NO. appears. Press
to select.
06/01/2001
4
4:08 PM
Page 33
Print document
Press
to print just the first page of the document, or press
entire document.
to print the
To print another document, repeat the procedure from step 3.
Stop/Reset
When finished printing documents, press
to exit.
To delete a document from memory:
1
Review document list
How to Fax
F50 Chapter 4.qxd
Review the document list to find the TX/RX NO. that refers to the document
you want to delete.
2
Access DELETE DOCUMENT
Fax
Press
Press
to enter fax mode.
Menu
Menu
then
until MEMORY REFERENCE appears.
Set
Press
to access.
Set
Press
3
Menu
until DELETE DOCUMENT appears. Press
to access.
Select document
Set
Press
4
Menu
until the document TX/RX NO. appears. Press
to select.
Delete document
Press
to delete or
to cancel.
To delete another document, repeat the procedure from step 3.
Stop/Reset
When finished deleting documents, press
to exit.
33
F50 Chapter 4.qxd
06/01/2001
4:08 PM
Page 34
F50 User’s Manual
Controlling Fax Appearance and Quality
There are several settings you can control to change or improve the appearance
of your faxed documents.
Sending a Color Fax:
Your F50 can send color faxes to other fax machines with color capability. The
default fax transmission is black and white, so before sending a color fax, the
color setting must be selected.
If you try to send a color fax to a fax machine that does not support color, you
may receive an error message. Should this occur, see [troubleshooting topic and
page number] for the remedy.
To send a color fax:
1
Enter fax mode
Fax
Press
2
to enter fax mode.
Load document in ADF
Insert the document face up in the ADF tray.
3
Select color
Press
4
Color /B&W
to select. The color indicator light will come on.
Dial number
Using the numeric keypad, dial the number.
Start
Press
to send the fax. The fax will be scanned and sent.
If TRY AGAIN IN B&W appears in the LCD, the receiving fax machine does not
accept color faxes.
When the transmission is complete (or cancelled) the F50 will revert to B&W
mode.
Setting Contrast and Resolution
34
06/01/2001
4:08 PM
Page 35
When a document is placed into the F50 for faxing, it is first scanned. There are
two settings that affect the quality of the scanned (and faxed) document:
Contrast is the degree of difference between light and dark. A higher contrast
will make blacks darker and whites brighter, while a lower contrast setting will
make the differences between black and white less distinguished.
Resolution controls the fineness or clarity of a printout. Low resolutions may
cause text and graphics to have a jagged appearance, while higher resolutions
provide smoother curves and lines, crisp text and graphics, and a better match
to traditional typeface designs.
To adjust contrast:
How to Fax
F50 Chapter 4.qxd
Fax
Press
Press
to enter fax mode.
Exposure
to access SCAN CONTRAST.
Menu
Press
to adjust the contrast up or down.
Set
Press
to save the settings.
To set the scanning resolution:
1
Access FAX RESOLUTION
Fax
Press
to enter fax mode.
Image Quality
to access FAX RESOLUTION.
Press
2
Select resolution
Menu
Press
to select one of the following resolutions:
B&W STANDARD For most text-only documents.
B&W FINE For fine-print documents.
B&W PHOTO (black & white mode only) for documents that contain photos.
Set
Press
to save the settings.
35
F50 Chapter 4.qxd
06/01/2001
4:08 PM
Page 36
F50 User’s Manual
Other Fax Features
There are other features described in documentation available online.
Sequential Broadcasting Allows you to scan a document once and send it to
several manually entered phone numbers. You can send the document to a
maximum of 113 destinations. For more information, see “Tips on Sending
Faxes and Emails Using MultiPASS” on page XX.
36
F50 Chapter 5.qxd
06/01/2001
4:08 PM
Page 37
5
How to Print
Using your F50 with your computer lets you print basic business documents in
B&W or color on a variety of specialty media. For a full list of Canon specialty
media that can be used with your F50, see the inside back cover of this manual.
What is a Printer Driver?
How to Print
Most computers require special software to link the software applications you
use to create documents or images with your printer. This software, called a
printer driver, converts information from the application into a format that the
printer can understand. The Canon F50 printer driver also provides other
features, such as monitoring the unit’s paper supply and ink levels.
Menus vary between applications. Consult your application user
documentation if the Print option is not listed.
Getting Help for the Printer Driver
Online help is available for the toolbar to explain more about different features
or options and how to use them.
To access online help from the printer driver:
Press the F1 key, or
Right-click any screen area of the window to access the What’s This? help
description for that area, or
Click the
key in the upper right corner, then click the feature you want to
know more about, or
Click the
button when it is available.
37
F50 Chapter 5.qxd
06/01/2001
4:08 PM
Page 38
F50 User’s Manual
Selecting the F50 Printer for Use
If the F50 is the only printer connected to your computer, it will automatically be
set as the default (main) printer. However, if your computer has access to
multiple printers, you can set the F50 as the default printer.
If another printer is set as the default printer, you can select the F50 for a
specific print job from within most Windows applications.
To set the F50 as your default printer:
1
Access Printers
From your PC, click Start, then Settings, then Printers.
2
Set as Default
Right-click the Canon F50 printer icon, then click Set as Default. The Canon
F50 printer icon will display a check mark indicating it is the default printer.
To select the F50 from within an application:
1
Access Print Dialog
With the application open, click File, then Print.
2
Select Canon F50
Select Canon F50 from the printer name drop-down list, then click OK.
Canceling A Print Job
There are several ways to cancel a print job in progress:
To cancel a print job from the printer:
Stop/Reset
Press
to cancel the job and eject the paper.
To cancel a print job from the print dialog box:
When a job is printing on the F50, a print status dialog box displays on your
screen.
38
F50 Chapter 5.qxd
06/01/2001
4:08 PM
Page 39
Click Cancel at any time while the print dialog is open to cancel the current
job. The job will be cancelled and the paper ejected.
To cancel a job from Windows:
1
Access Printers
While the print job is running, click Start, then Settings, then Printers.
2
Delete job
Double-click Canon F50, click the print job, then press the Delete key.
Two important factors control the quality and output of your printed images:
•
Using recommended paper or specialty media for printing graphic images or
photographs can significantly improve then quality of your printout.
Also, always use the specific Canon inks for your F50 printer, as noted on
the inside back cover.
•
There is a variety of settings you can use to enhance the quality of the print,
the colors and the way in which the document comes out of the printer.
These settings can be adjusted from the printer driver interface, or, in some
instances, directly from the MultiPASS Suite Toolbar.
Adjusting Printer Settings from the Printer Driver Interface
From the printer driver, you can control the quality of your printed output.
While in the printer driver, refer to the online help for more information on how
to use these settings.
Some of the settings that can be controlled from the printer driver include:
Main tab From this tab, you can change the print quality manually, based on
the media type being used, or by using the Print Advisor wizard. You can
also access color balance, intensity and brightness adjustments.
Page Setup tab Use to adjust page size, orientation and number of copies.
Effects tab Apply special effects to the printout, including Image Optimizer
(to smooth jagged edges formed when enlarging a photo or graphic from its
39
How to Print
Improving Printed Images
F50 Chapter 5.qxd
06/01/2001
4:08 PM
Page 40
F50 User’s Manual
original size), and Photo Optimizer PRO (automatically adjusts a
photographic image created with a digital camera to compensate for
unsatisfactory color balance and over- or under-exposure before printing).
To access the printer driver:
From an application File menu, select Print.
With Canon F50 as the selected printer, click Properties. The Properties
window will open to the Main tab. Click the desired tab to bring to the top.
40
F50 Chapter 6.qxd
06/01/2001
4:08 PM
Page 41
6
How to Copy
Below are the control panel buttons you will use for making copies.
Resume button
LCD panel
Scroll
keys
Set
button
Paper Select button
Enlarge/Reduce button
Copy button
Numeric keypad
Image Quality button
Menu button
Color/B&W button
How to Copy
ON/OFF button
Stop/Reset button
Start button
Exposure button
The F50 provides high-quality B&W or color copies, and can make up to 99
copies at a time. If copying more than one document, you can feed multiple
pages through the automatic document feeder (ADF). You can also adjust the
scale and quality of the copied image.
Loading Documents
MAX. 0.16"
MAX. 0.16"
COLOR FAX: MAX. 0.24"
To ensure that the full area of the document is
copied, verify that text and graphics are
within the illustrated shaded area.
To load a document directly on the glass:
•
Place the document on the glass, face down.
•
Align the upper left corner of the document
to be copied with corner shown.
MAX. 0.18"
Letter/Legal*
MAX. 0.18"
41
F50 Chapter 6.qxd
06/01/2001
4:08 PM
Page 42
F50 User’s Manual
•
Place the top of the document flush to the
guide plate.
To load a document in the ADF:
•
Lift the document cover to make sure there
are no documents on the glass.
•
Adjust the document guide tabs as needed.
•
Insert the document(s) in the ADF tray as shown, facing up, until you hear a beep.
The F50 will feed the top page first.
You can load up to 30 letter-size pages of 20 lb.
paper in the ADF at one time, or up to 10 legalsize pages.
If a paper jam occurs, see below.
Clearing Paper Jams in the ADF
If documents are fed into the ADF (automatic
document feeder) improperly, they can jam.
Jams can also be caused by paper stacked incorrectly in the multi-purpose tray.
To remove a jam from the paper output tray:
1
Remove paper
Gently pull any jammed paper out of the paper output.
2
Restart operation
Resume
Press
to start the operation again.
If you do not see jammed paper in the paper
output, check the scanning unit for a jam.
To remove a jam from the scanning unit:
1
Shut off power
Press the
42
ON/OFF
button to turn the F50 off.
F50 Chapter 6.qxd
06/01/2001
2
4:08 PM
Page 43
Open the scanning unit
Push the Open button to open the scanning
unit.
3
Remove jammed paper
Gently pull the jammed paper from the center
to remove.
Be careful not to touch the
components inside of the F50.
When the paper is out, close the scanning
unit.
5
Restart operation
Resume
to start the operation again.
How to Copy
Press
To remove a jam in the ADF:
1
Stop operation
Stop/Reset
Press
2
to stop the operation.
Remove paper
If a multipage document is loaded, remove all
pages from the ADF except the jammed page.
3
Remove jammed document
Resume
Press
to eject the jammed document,
or open the ADF feeder cover, then raise the
green lever. Pull out jammed paper.
Making Copies
You can copy a document in B&W (the default) or
color, and make single or multiple copies.
Tips on Clearing
Paper Jams
If print media jams in the multipurpose tray, the LCD displays a
CLEAR PAPER JAM message.
If a jam occurs while a fax is
being received into the machine’s
memory, that fax will print
automatically when the jam is
cleared and you press Resume.
43
F50 Chapter 6.qxd
06/01/2001
4:08 PM
Page 44
F50 User’s Manual
To copy a document:
1
COPY MODE MENUS
Load document
1. SPECIAL COPY
Place document(s) to be copied either
directly on the glass or into the ADF.
1. IMAGE REPEAT
2. MIRROR IMAGE
2. RECEIVE MODE
3. ENTIRE IMAGE
2
Set COPY mode
Press
3. MEMORY REFERENCE
Copy
to access.
To make a color copy:
4. REPORTS/LISTS
Color /B&W
Press
once. The color function
indicator will light up.
5. TEL REGISTRATION
1. CLEANING
Use the numeric keypad to set the number of
copies needed.
3
6. FAX SETTINGS
2. ALIGN PRINTHEAD
7. PRINTER SETTINGS
3. BOTTOM MARGIN
8. SYSTEM SETTINGS
1. DISPLAY LANGUAGE
Start copying
Start
Press
to start copying.
2. AUDIBLE TONES
When done, the F50 will beep.
Reducing or Enlarging the Image Copied
You can reduce or enlarge the copy size within a range of 25% to 400% by using
preset percentages for reducing or enlarging, or set the percentage ratios manually.
To enlarge or reduce using preset ratios:
1
Select ENLARGE/REDUCE
Copy
Press
Press
2
Enlarge/
Reduce
once to access.
Set ratio
Press
44
to access copy mode.
Menu
Set
to scroll through copy ratios. Press
to select.
F50 Chapter 6.qxd
06/01/2001
4:08 PM
Page 45
To enlarge or reduce copy ratios manually:
1
Select ENLARGE/REDUCE
Press
Enlarge/
Reduce
Tips on Copying
The LCD display shows the
number of remaining pages
during copying.
twice to access.
Stop/Reset
2
Set ratio
Use the numeric keypad to enter a
Menu
percentage, or press
to enter a
percentage in 1% increments.
Resume
Set
Press
to select.
The Stop/Reset button
reverts settings to
default.
When the multipurpose tray is empty,
the LCD displays LOAD
PAPER. Load paper in
the tray, then press
Shrinking an Image to Fit the Page
If the image to be copied is larger than the
output paper, you can automatically reduce the
image to fit the page on which it will be copied.
Stop/Reset
If paper jams, press
Stop/Reset.
Resume
Remove all documents
from the ADF, then
press Resume. The
jammed document will
To fit an image on a page:
eject.
1
Set COPY Mode
Press
Copy
to access copy mode.
Color /B&W
To make a color copy, press
once.
The color function indicator will light up.
Copying documents with graphics
requires more memory. If you
encounter difficulties, copy fewer
pages at a time.
Set the number of copies needed using the numeric keypad.
2
Select ENTIRE IMAGE
Set
Press
Menu
then
to access selections.
Set
Press
3
or
Menu
until ENTIRE IMAGE displays, then press the
button.
Start copying
Start
Press
to begin copying.
45
How to Copy
Resume.
F50 Chapter 6.qxd
06/01/2001
4:08 PM
Page 46
F50 User’s Manual
Setting Paper Size and Type
If copying on paper other than letter-size plain paper, you can optimize results
by setting the paper size and type from the F50 control panel.
To change paper size and type:
1
Set paper size
Copy
Press
to access copy mode.
Paper Select
Press
to access.
Menu
Press
sizes.
to scroll through paper sizes. Select from Letter, Legal or A4
Set
Press
2
to select a paper size and view paper type.
Set paper type
Menu
Press
to scroll through paper types:
PLAIN for plain paper (default)
GLOSSY for Glossy Photo Paper
H. RES for Canon High Resolution Paper
TRANS for transparency paper
PHOTO for High Gloss Photo Film
Set
Press
to select.
Adjusting Image Quality
Low image quality may cause text and graphics to have a jagged appearance,
while a higher image quality provides smoother curves and lines, and crisp text
and graphics.
The F50 has image quality settings. Select the setting that most closely matches
your needs.
46
F50 Chapter 6.qxd
06/01/2001
4:08 PM
Page 47
To adjust the image quality:
1
Select IMAGE QUALITY
Copy
Press
Press
2
to access copy mode.
Image Quality
to access.
Select type
Menu
Press
to scroll through quality types.
For black & white, select from:
B&W TEXT for text-only documents
B&W PHOTO for photographic documents (photos are copied with 64
levels of gray)
For color, press the
Color /B&W
How to Copy
B&W DRAFT for high-speed copying at lower image quality
button, then select from:
COLOR NORMAL for normal color copying
COLOR FINE for higher quality color copying
COLOR FAST for high-speed copying with lower quality
Set
Press
to select.
Adjusting Image Exposure
Exposure controls the lightness or darkness of the copied document. If a
document copies too light or too dark, you can adjust the exposure settings.
There are nine different levels of exposure to help you adjust your document.
To adjust the copy exposure:
47
F50 Chapter 6.qxd
06/01/2001
4:08 PM
Page 48
F50 User’s Manual
1
Select EXPOSURE
Copy
Press
Press
2
to access copy mode.
Exposure
to access.
Set exposure level
Press
Press
once or more to lighten the copy.
Menu
once or more to darken the copy.
Set
Press
to set your selection.
Stop/Reset
This setting will remain for one minute unless
is pressed.
Other Copy Features
The F50 has other copy features available, including:
Repeating an image on a page: Allows you to tile an image multiple times on
a single page.
Create a mirror image Copies a document in reverse (mirror) image.
For more information on these features, see the online documentation, or refer
to the menu options chart in the Appendix.
48
F50 Chapter 7.qxd
06/01/2001
4:08 PM
Page 49
7
How to Scan
The scanning process creates a digital copy of a document. The copy can then
be saved, sent as a fax or email attachment, printed or brought into an image
processing application such as PhotoShop for editing.
There are two basic ways to obtain a scanned image:
From within an application Open an image processing application, then,
from within the application, open the scanning software and perform the
scan. The scanned image will automatically be brought into the application.
How to Scan
With the MultiPASS Suite Scan a document directly with the MultiPASS
Suite. To scan a document directly with the MultiPASS Suite and save it for
later faxing, printing, or email attachment, see chapter 2 “How to Use the
MultiPASS Toolbar.” To scan a document and print immediately without
saving, see chapter 6 “How to Copy.”
Scanning from Within an Application
Most image processing applications use the TWAIN driver standard for
scanning. Much in the same way your printer driver allows your computer to
communicate with your printer, a TWAIN driver makes it possible to send a
scanned document from a scanner to your application.
When your F50 is connected to your PC and the software loaded, you can scan a
document from the F50 in most image processing applications.
This is usually done from the File menu, using either an Import or Acquire menu
option. Refer to the documentation for your image processing application if
needed for the exact procedure to access the scanner from within the
application.
To scan from an application:
1. Load document
Open the F50 cover and place the document face down on the glass.
49
F50 Chapter 7.qxd
06/01/2001
4:09 PM
Page 50
F50 User’s Manual
Align the document as shown.
2. Acquire image
From your image processing application,
select Canon MultiPASS F50 Scanner as the
TWAIN SOURCE if not already selected.
Access the scanner software to acquire the
image.
Using ScanGear
Rather than use your image
processing application to adjust
your scan settings, you can
adjust these settings in, and
scan directly from, the MultiPASS
Suite’s Scangear driver.
To enable ScanGear:
Click the Settings icon on the
toolbar, then click the Toolbar
Settings tab.
Under General, click to check the box for Show ScanGear before scanning.
When this option is enabled, the ScanGear dialog box will open automatically
whenever you scan from the MultiPASS Suite.
Using the Scan Button for One-push Functions
You can set the Scan button on the F50’s control panel to instantly perform any
of the Toolbar’s functions.
To enable a particular function for the Scan button:
1
Access Toolbar Settings
Click Settings on the Toolbar, then click the Toolbar Settings tab.
50
06/01/2001
4:09 PM
Page 51
2 Activate Scanner Push Button dialog
Click the drop-down list under When Scanner Push Button pressed.
Select from this list the function you would like to assign to the Scan button
on the control panel.
You can also select this setting by right-clicking the MultiPASS Toolbar icon
on the taskbar, then selecting from the list under When Scanner Push Button
pressed.
How to Scan
F50 Chapter 7.qxd
51
F50 Chapter 7.qxd
06/01/2001
F50 User’s Manual
52
4:09 PM
Page 52
F50 Chapter 8.qxd
06/01/2001
4:09 PM
Page 53
8
How to Maintain Your F50
Routine maintenance for your F50 includes keeping your unit clean, changing
the ink tanks as needed and maintaining the printhead.
Cleaning Your F50
Clean your F50 periodically with a soft, dry, lint-free clothclean to maintain
image quality, and to keep the unit free of dust and debris.
When ink runs out in an ink tank, a message will appear in the LCD panel:
INK EMPTY.
The message will also specify which tank is empty: C for cyan, M for magenta, Y
for yellow or B for black.
To replace an empty ink tank:
1
Open unit
Make sure the power is on. Push the Open
button, then lift the scanning unit. The
printhead holder automatically moves to the
center.
Do not manually force the
printhead holder or try to
prevent its movement. To do so
could damage the unit.
2
Remove empty ink tank
Press the tab on the front of the empty tank,
then remove and discard.
53
How to Maintain Your F50
Replacing Ink Tanks
F50 Chapter 8.qxd
06/01/2001
4:09 PM
Page 54
F50 User’s Manual
3
Prepare new ink tank
Take the new ink tank from its package and
remove the protective tape and cap.
4
Install new ink tank
Holding the tank at a slight angle, align it with
the correct color slot, then gently insert it.
Press down until it clicks into place.
Do not force an ink tank into the printhead. If the ink tank does not go in
smoothly, reseat it, then try again.
5
Close the F50
Press the scanning unit closed until it clicks securely into place.
Maintaining the Printhead
Routine printhead maintenance can extend the life of your F50 printhead.
Printing a Nozzle Check Pattern
The printhead discharges ink through nozzles—tiny openings from which the ink
is sprayed. If faded or streaked colors and text appear on your output, some of
the nozzles may be clogged. You can check this by printing a nozzle check
pattern.
To print a nozzle check pattern from the F50 control panel:
1
Select PRINTER SETTINGS
Press
Menu
until PRINTER SETTINGS appears.
Set
Press
2
to select.
Print nozzle check pattern
The CLEANING option displays. Press
54
Set
to select.
F50 Chapter 8.qxd
06/01/2001
4:09 PM
Page 55
The NOZZLE CHECK option displays.
Set
Press
to select.
If the pattern is broken, missing, or a
specific color is not printed, clean the
printhead. See “Cleaning the
Printhead” below.
Cleaning the Printhead
If the printed nozzle check pattern is broken, missing, or a specific color is not
printed, the printhead needs to be cleaned. Perform normal printhead cleaning
first, then perform a deep printhead cleaning only if normal cleaning does not
provide the desired result.
Cleaning the printhead consumes ink. Cleaning too often uses ink
unnecessarily.
To perform a normal printhead cleaning from the control panel:
1
Select PRINTER SETTINGS
Press
2
Menu
until PRINTER SETTINGS appears, then press
Set
twice.
Select HEAD CLEANING
Menu
Press
to scroll to HEAD CLEANING, then press
the cleaning process.
Set
once to begin
Wait until the process is complete.
55
How to Maintain Your F50
If patterns are not uniformly solid,
align the printhead. See “Aligning the
Printhead” on page 58.
F50 Chapter 8.qxd
06/01/2001
4:09 PM
Page 56
F50 User’s Manual
3
View nozzle check pattern
Print another nozzle check pattern. If the pattern is broken, missing, or a
specific color is not printed, perform a deep printhead cleaning.
To perform a normal printhead cleaning from the printer driver:
1
Access status monitor
With the printer on, click Start, then Settings, then Printers.
Right-click the Canon F50 icon, then select Properties.
Select the Maintenance tab, then click the Head Cleaning button. The printer
will clean the printhead.
2
Print nozzle check pattern
Print another nozzle check pattern. If the pattern is broken, missing or a
specific color is not printed, perform a deep printhead cleaning. If you have
performed a deep printhead cleaning and the nozzle check pattern is still not
correct, refer to the Troubleshooting section for additional information.
3
Close status monitor
Click on the top right corner of the window to close the Status Monitor, then
click OK to close the Properties window.
Aligning the Printhead
When you install a new printhead or replace an old printhead, you will need to
align the position of the printhead before printing.
Several sheets of paper are required to align the printhead.
To align the printhead from the control panel:
1
Select PRINTER SETTINGS
Press
Menu
until PRINTER SETTINGS appears.
Set
Press
56
once.
06/01/2001
2
4:09 PM
Page 57
Select ALIGN PRINTHEAD
Menu
Press
to scroll to ALIGN PRINTHEAD.
Set
Press
twice.
The F50 will print the vertical line pattern.
3
Enter value
Review the V LINE PATTERN printout.
Menu
Press
to scroll to change V value, then press
the value for the most uniformly solid box in column A.
Set
Press
4
Menu
to scroll to
to select. CHANGE V VALUE will appear again.
Repeat step 3 for each column
Set
Press
How to Maintain Your F50
F50 Chapter 8.qxd
to select. CHANGE V VALUE will appear again.
Set
When finished with the vertical line pattern, press
5
once.
Print lateral line pattern
The F50 will print the lateral line pattern.
CHANGE L VALUE will appear in the LCD. Press
6
Set
once.
Enter value
Press
column G.
Set
Press
Menu
to scroll to the value for the most uniformly solid box in
once. CHANGE L VALUE will appear again.
57
F50 Chapter 8.qxd
06/01/2001
4:09 PM
Page 58
F50 User’s Manual
7
Repeat step 6
Press
column H.
Menu
Set
Press
58
once.
to scroll to the value for the most uniformly solid box in
F50 Chapter 9.qxd
06/01/2001
4:09 PM
Page 59
9
How to Troubleshoot
Tips for Troubleshooting
Troubleshooting usually falls into one of the following categories:
Error Message
You are getting an error message from the software (displayed
on the screen) or the printer (displayed in the LCD panel).
Installation
The software will not install properly.
Printer
The printer is not working properly or the printed output is not
coming out as expected.
How to Troubleshoot
Copying
Copies are not coming out as expected.
Scanning
Scanned images are not properly scanning.
Faxing
The fax feature is not working as expected.
Customer Care Center
Canon offers a full range of customer technical support options.
If you encounter difficulties during installation or operation for your F50, quickly
scan all topics until you find a description that approximates your difficulty. Go
through the related solutions until you find one that works.
59
F50 Chapter 9.qxd
06/01/2001
4:09 PM
Page 60
F50 User’s Manual
LCD Messages
A message displays in the LCD panel when the F50 performs a function or
encounters an error.
Message
Possible Cause
Try This
AUTO REDIAL
Line was busy or
did not pick up
Wait for the F50 to automatically redial the number. To cancel
automatic redialing, wait until the F50 starts to redial, then press
Stop/Reset.
BUSY /
NO SIGNAL
Number dialed
was busy
Try sending the document at a later time.
Number dialed
was not a fax
number
Verify the fax number, then try again.
Receiving party’s
fax machine not
working
Contact the receiving party and request that they verify their fax
machine is on, connected and has paper and ink or toner.
Receiving party
is not using a G3
fax machine
Contact the receiving party and ask them to send or receive the
document using a G3 fax. [WHAT DOES THIS MEAN AND DOES IT APPLY
TO OUR MARKET--SU]
Incorrect touch
tone/rotary
pulse setting
Set your F50 to the setting (touch tone or rotary) that matches your
phone line. See “Switching from Touch Tone to Rotary Dialing” on page
XX.
No response from
receiving fax
Contact the receiving party and request that they verify their fax
machine is on, connected and has paper, ink and toner. You can
also try sending the fax manually.
For an overseas call, add pauses to the number. See “Sending Faxes”
on page XX.
60
C INK EMPTY
Cyan ink tank is
empty
Replace the ink tank. See “Replacing Ink Tanks” on page XX.
CARTRIDGE
JAMMED
Printhead
cannot move
This problem is usually due to a paper jam. Clear the paper jam or
obstruction, then press RESUME. Do not attempt to move the printhead
manually.
CHANGE
CARTRIDGE
(#052)
Scanning unit is
open and
printhead is
moving to the
center of the F50
Wait until the printhead stops moving, then replace the printhead or
ink tanks if necessary. To replace ink tanks see “Replacing Ink Tanks”
on page XX.
When finished, close the scanning unit and wait for the F50 to
return to standby mode.
[WILL LCD ERROR MESSAGE SAY “CARTRIDGE” OR “PRINTHEAD”?]
CHECK COVER
Scanning unit
opened during
operation
Close the scanning unit.
This message will also display after CHANGE CARTRIDGE appears in
the LCD.
06/01/2001
Message
4:09 PM
Page 61
Possible Cause
Try This
CHECK PAPER
SIZE
PAPER SIZE setting Load the correct paper size or change the PAPER SIZE setting. See
different than
“Specifying Paper Size and Type” on page XX.
loaded paper
CHECK
PRINTER
Printhead not
moving
Check for any obstruction (paper clip or other small object). Also check
for a paper jam and clear the jam if necessary. Then press RESUME and
start again.
Waste tank is full
The F50 has a built-in waste ink tank to hold the ink consumed during
printhead cleaning. Contact the Customer Care Center to have the
waste ink tank replaced.
Printhead is
defective
Check the printhead for signs of damage. If the printhead needs to be
replaced contact the Customer Care Center.
CLEAR ADF
Paper jammed in
the ADF
Remove the document you are trying to copy or send, then try again.
DOC. TOO
LONG
Document is too
long
The document you are trying to fax is longer than 39.4 inches. Reduce
the length of the document so that it is shorter than 39.4 inches, then
resend it.
ECM RX
F50 is receiving a
fax in Error
Correction Mode
(ECM)
ECM receptions may take longer than normal receptions. If faxes are
taking too long to receive, you can turn off ECM mode. To turn off ECM
mode:
1. Press Menu, then <+ -> until FAX SETTINGS appears. Press Set.
2. Press <+ -> until RX SETTINGS appears, then press Set. ECM RX is
selected. Press Set.
3. Press <+ -> to set ECM to OFF. Press Set.
ECM TX
F50 is sending a
fax using Error
Correction Mode
(ECM)
ECM transmissions may take longer than normal transmissions. If faxes
are taking too long to send, you can turn off ECM mode. To turn off ECM
mode:
1. Press Menu, then <+ -> until FAX SETTINGS appears. Press Set.
2. Press <+ -> until TX SETTINGS appears, then press Set. ECM TX is
selected. Press Set.
3. Press <+ -> to set ECM to OFF. Press Set.
K INK EMPTY
Black ink tank is
empty.
Replace the ink tank. See “Replacing Ink Tanks” on page XX.
LOAD PAPER
PRESS
RESUME KEY
No paper loaded
Load paper in the multi-purpose tray. Make sure the stack is below the
paper limit mark. Press RESUME to continue printing.
M INK EMPTY
Magenta tank is
empty.
Replace the ink tank. See “Replacing Ink Tanks” on page XX.
MEMORY FULL
(#037)
Too many
documents in
memory
Delete any documents stored in memory. See “Printing and Deleting
Documents in Memory” on page XX.
Document too
large for memory
capacity
Divide the document and send or copy each part separately. To free
up more memory, print or delete any documents stored in memory that
are no longer needed. See “Printing and Deleting Documents in
Memory” on page XX.
61
How to Troubleshoot
F50 Chapter 9.qxd
F50 Chapter 9.qxd
06/01/2001
4:09 PM
Page 62
F50 User’s Manual
Message
Possible Cause
Try This
MEMORY
USED—nn%
Shows percentage
of memory used
If you need more memory, wait for the machine to send any faxes. Also,
print or delete any documents in memory that you no longer need. See
“Printing and Deleting Documents in Memory” on page XX.
NO RX
PAPER
(#012)
Recipient’s fax
out of paper or
memory is full
Contact the receiving party and have them load paper in their fax
machine or free up space in their fax memory.
NO TEL # (#22) No phone
number
Use regular dialing, or use a one-touch speed dial button or coded
speed dial code. See “One-Touch Speed Dialing” on page XX, or
“Coded Speed Dialing” on page XX.
NOT
AVAILABLE
(#025)
A group speeddialing number
was manually
entered
Use regular dialing, or enter a one-touch speed dialing button or coded
speed dialing code that only has one number assigned to it.
PUT IN
CARTRIDGE
Printhead not
installed
Install the printhead.
REC’D IN
MEMORY
Fax received and
stored in memory
A received fax is stored in memory when the F50 is busy with other
tasks , or the F50 could not print due to an error such as no paper or
ink. If the F50 was busy, the fax will print as soon as it is finished with
other tasks. If necessary, clear the paper jam, load paper in the multipurpose tray or replace the empty ink tank.
RECEIVED
IN FILE
Fax received in
memory
Upload the document to your computer, or print the document. See
“Printing and Deleting Documents in Memory” on page XX.
MultiPASS Status
Monitor is not
running
Start the MultiPASS Status Monitor. On the Windows desktop, click
Start, then Programs. In the Programs menu, click on MultiPASS Suite,
then MultiPASS Status Monitor.
Color fax was sent
to B&W machine
Try sending again in B&W. If you send a color document to a fax
machine that does not support color faxing, the document will not be
sent and the LCD will display TRY AGAIN IN B&W. Send the fax again
in black & white.
TRY AGAIN
IN B&W
(#085)
Alternatively, you can enable the COLOR DIRECT TX setting that allows
you to send color documents to any fax machine.
To enable COLOR DIRECT TX:
1. Press Menu, then <+ -> until FAX SETTINGS appears. Press Set.
2. Press <+ -> until TX SETTINGS appears. Press Set.
3. Press <+ -> until COLOR DIRECT TX appears. press Set.
4. Press <+ -> to set COLOR DIRECT TX to ON. Press Set.
62
TX/RX
CANCELED
STOP/RESET was
pressed
TX/RX NO.
nnnn
ID number is being When the F50 sends or receives a fax, it assigns a unique identification
assigned to the fax number (nnnn) to the fax.
Try sending again.
06/01/2001
Message
4:09 PM
Page 63
Possible Cause
Try This
TX/RX NO nnnn F50 is sending a
SCANNING P.
document and
nnnn
memory is full
MEMORY FULL
(three
messages
toggle)
The F50 continues to send the document as memory becomes
available. This is not an error condition.
WAIT COOLING Printhead is too
hot
Wait a few moments for the F50 to cool down, then resume printing
when the LCD message changes.
WRONG
CARTRIDGE
Printhead not
installed correctly
Re-install the printhead.
Y INK EMPTY
Yellow ink tank is
empty.
Replace the ink tank. See “Replacing Ink Tanks” on page XX.
Troubleshooting Software Installation
(Information not yet available)
Problem
Cannot install
MultiPASS
Suite
Possible Cause
Try This
Previous software
version installed
Always uninstall the previous version of the software prior to installing
a new version. Close your MultiPASS monitoring program, such as the
MultiPASS Status Monitor, MultiPASS Background, or MultiPASS
Server. Also, if applicable, close the MultiPASS Toolbar. Remove the
software using Windows’ Add/Remove Programs or from the
Canon MultiPASS uninstall program. Refer to your current Canon
MultiPASS Suite software manual for details.
Installation not
starting
automatically when
CD is inserted into
the drive
If printer driver installation did not start automatically when you
loaded the CD-ROM:
1. Double-click My Computer on the Windows desktop, then doubleclick the CD-ROM drive.
2. Double-click setup.exe.
PC cannot detect
F50 when
connected via USB
Exit the setup process and remove the device from Windows Device
Manager, then restart the installation.
To remove the device:
1. Cancel and exit the current installation.
2. Click Start, then Settings, then Control Panel.
3. Double-click the System icon then click Device Manager tab.
4. Click the ‘+’ sign next to Universal Serial Bus controllers. This will
open the drop down list. The device will display F50 or Unknown
Device. If F50 does not appear, check for the device under the
Unknown Device tab.
5. Highlight the device, then click the Remove button. If you are unable
to remove the device, turn off the F50, wait five seconds, then turn
it back on.
6. Disconnect the USB cable from the F50.
7. Restart the installation process.
63
How to Troubleshoot
F50 Chapter 9.qxd
F50 Chapter 9.qxd
06/01/2001
4:09 PM
Page 64
F50 User’s Manual
Problem
Cannot install
MultiPASS
Suite
Possible Cause
Try This
Other applications
running in
background
Close any open software applications, including anti-virus programs,
as they can interfere with the installation routine. Then try installing
the software again.
PC resources
are low, not
enough disk space
Your PC may have limited disk space available. Delete all temporary
files.
For Windows 98 , ME or NT users you can run the Disk Cleanup utility.
1. Click Start, then Programs, then Accessories, then System Tools,
then Disk Cleanup.
2. Select the drive you want to clean, then click OK.
3. Check Temporary Files, then click OK. The files will be
deleted.
Also, you can limit the applications that startup each time you
turn on your PC, by using Selective Startup. Consult your PC’s
manual for instructions to enable this function.
Error:
MultiPASS
hardware
could not be
initialized
64
PC cannot detect
F50
See Troubleshooting Software procedure “Cannot install MultiPASS
Suite” on page XX.
F50 not connected
to correct port
1.
2.
3.
4.
PC resources
are low
See Troubleshooting Software procedure “Cannot install MultiPASS
Suite” on page XX.
Corrupt file
installation
During installation, a file was corrupted. Uninstall, then reinstall the
MultiPASS Suite software.
1. Close the MultiPASS Status Monitor, then the MultiPASS Toolbar.
2. Click Start, then Settings, then Control Panel.
2. Double-click Add/Remove Programs.
3. In the Install/Uninstall tab, click Canon MultiPASS Suite, then click
OK.
4. Follow the onscreen instructions, then restart your PC when the
process is complete.
5. If your F50 is connected via a USB port, disconnect the cable, then
reconnect it when prompted by the setup program.
MultiPASS Status
Monitor cannot
detect the F50
Check that the printer cable is securely connected in the correct
printer port. Do not connect the F50 through another device.
Printer and or PC
needs to be reset
To reset PC and the F50:
1. Close all applications, then shut down your PC.
2. Turn the printer off, wait 5 seconds, then turn it on again. When
the LCD displays standby mode, turn your PC back on.
Click Start, then Settings, then Printers.
Right-click MultiPASS Printer icon, then select Properties.
Click the Details tab.
Confirm that the F50 is connected to the port as specified in the
Print to the following port box. If it is not, click the down arrow to
the right of this box and click the correct port.
5. Click Apply, then OK.
6. Restart your PC.
06/01/2001
Problem
4:09 PM
Page 65
Possible Cause
Error:
MultiPASS Status
unable to
Monitor not
communicate
running
with the device
Try This
To print to the MultiPASS, the MultiPASS Status Monitor must be
running. Launch the Status Monitor from the MultiPASS Program menu.
See “The MultiPASS Status Monitor” on page XX.
Loose printer cable Verify the cable is securely connected to your PC and the correct
printer port.
Corrupt printer
driver file
Error: log in
currently in
progress
See Troubleshooting Software Installation procedure listed under
“Error: MultiPASS hardware could not be initialized” on page XX.
Computer needs to Reboot your PC.
be reset
MultiPASS Toolbar
launched before
MultiPASS Status
Monitor
Set the MultiPASS Toolbar to not load during Windows Startup.
To change toolbar settings see “Modifying Toolbar Settings” on page
XX.
Printer and or PC
need to be reset
To reset PC and the F50:
1. Close all applications, then shut down your PC.
2. Turn the printer off, wait 5 seconds, then turn it on again. When the
LCD displays standby mode, turn your PC back on.
Corrupt file
installation
See Troubleshooting Software Installation procedure listed under
“Error: MultiPASS hardware could not be initialized” on page XX.
Error: device
unavailable
Printer and or PC
need to be reset
To reset PC and the F50:
1. Close all applications, then shut down your PC.
2. Turn the printer off, wait 5 seconds, then turn it on again. When the
LCD displays standby mode, turn your PC back on.
Error:
incompatible
device
Printer and or PC
need to be reset
To reset PC and the F50:
1. Close all applications, then shut down your PC.
2. Turn the printer off, wait 5 seconds, then turn it on again. When the
LCD displays standby mode, turn your PC back on.
Corrupt file
installation
See Troubleshooting Software Installation procedure listed under
“Error: MultiPASS hardware could not be initialized” on page XX.
Error: scan
failed
Corrupt file
installation
See Troubleshooting Software Installation procedure listed under
“Error: MultiPASS hardware could not be initialized” on page XX.
Computer
locks/freezes
while printing
Corrupt file
installation
See Troubleshooting Software Installation procedure listed under
“Error: MultiPASS hardware could not be initialized” on page XX.
Error: failed to
start Status
Monitor
Unable to print Printer and or PC
from the Web
need to be reset
Corrupt file
installation
To reset PC and the F50:
1. Close all applications, then shut down your PC.
2. Turn the printer off, wait 5 seconds, then turn it on again. When the
LCD displays standby mode, turn your PC back on.
See Troubleshooting Software Installation procedure listed under
“Error: MultiPASS hardware could not be initialized” on page XX.
65
How to Troubleshoot
F50 Chapter 9.qxd
F50 Chapter 9.qxd
06/01/2001
4:09 PM
Page 66
F50 User’s Manual
Troubleshooting Faxing
Problem
Cannot send a
fax
Possible Cause
Try This
F50 overheated
Unplug the machine and let it cool for several minutes, then plug it in
and try sending again.
Phone line
not connected or
working properly
Make sure all line connections are secure.
Make sure F50 is set for the correct telephone line type, either pulse
or tone.
Make sure there is a dial tone when you press Hook, or when you lift
the handset of the telephone connected to the machine. If there is no
dial tone, contact your local telephone company.
F50 answers
all calls
Document not
loaded correctly
Remove the document. Fan the edges of the sheets to remove static
cling then tap the edges of the stack against a flat surface so the stack
is aligned.
Number not
registered
Check the one-touch speed dialing button or coded speed dialing code
and make sure it is registered correctly.
Receiving party's
fax machine out of
paper
Call the receiving party and ask them to make sure paper is loaded in
their fax machine.
Error occurred
during sending.
Print an ACTIVITY REPORT and check for an error. See “Printing
Reports on Demand” on page XX.
A color fax has
been sent to a
B&W fax machine
If a color fax has been sent to a B&W machine, the document will not
be sent and the LCD will display TRY AGAIN IN B&W. Send again in
black & white. Alternatively, you can enable the COLOR DIRECT TX
setting to allow you to send color documents to any fax machine. To
enable COLOR DIRECT TX, see LCD error message TRY AGAIN IN B&W
on page XX.
Other documents
transmitting from
F50 memory
Allow time for the documents to finish sending, then try again.
The receiving fax
machine may not
be a G3 fax
machine
Make sure the receiving fax machine is compatible with G3 fax
machines.
Error occurred
during sending.
Print an ACTIVITY REPORT and check for an error. See “Printing
Reports on Demand” on page XX.
Wrong number
Dial the number again, or check that you have the correct number.
F50 set to manual
mode
See “Setting up the Fax Receive Mode” on page XX.
F50 clicks and F50 in use or
In Use/Memory memory is full
flashes
66
Wait for the F50 finish, then try again, and/or delete unnecessary
documents from the memory.
06/01/2001
4:09 PM
Page 67
Problem
Possible Cause
Try This
Faxes sent
are dirty or
spotted
Scanner
components are
dirty
Check the F50 by making a copy. If the copy is clear, the problem may
originate from sender’s fax machine. If the copy is spotted or dirty,
clean the scanner components.
Document not
loaded correctly
Remove the document. Fan the edges of the sheets to remove static
cling, then tap the edges of the stack against a flat surface so the stack
is aligned. Load the stack in the ADF correctly, or place one page on .
the glass.
Receiving party's
fax machine does
not support ECM
If the receiving party's fax machine does not support ECM, then the
document is sent in normal mode without error checking.
ECM disabled
To enable ECM:
1. Press Menu, then <+ -> until FAX SETTINGS appears. Press Set.
2. Press <+ -> until TX SETTINGS appears, then press Set. ECM TX is
selected. Press Set.
3. Press <+ -> to set ECM to ON. Press Set.
Errors occur
while sending
Poor phone
connection
Lower the transmission speed:
1. Press Menu, then <+ -> until FAX SETTINGS appears. Press Set.
2. Press <+ -> until TX SETTINGS appears. Press Set.
3. Press <+ -> until TX START SPEED appears. press Set.
4. Press <+ -> to scroll through transmission speeds. Press Set to
select.
Cannot
receive a fax
automatically
Phone line not
connected
properly
Make sure all phone line connections are secure.
Error occurred
during reception
Check the LCD for an error message. You can also print an ACTIVITY
REPORT and check for an error. See “Setting up and Printing Reports”
on page XX.
F50 not set to
receive
automatically
For the F50 to receive faxes automatically, the receive mode must be
set to FAX ONLY MODE, FAX/TEL AUTO SW, ANS.MACHINE MODE, or
DRPD. See “Faxing Automatically” on page XX.
Memory is full
Print out any documents stored in the memory. See “Printing and
Deleting Documents in Memory” on page XX.
MultiPASS Suite
received the fax
Check the MultiPASS suite for received faxes. See “XXXX” on page XX.
Multi-purpose
tray empty
Make sure paper is loaded in the multi-purpose tray. See “Loading
Paper” on page XX.
Error occurred
during reception
Check the LCD for an error message. You can also print an ACTIVITY
REPORT and check for an error. See “Setting up and Printing Reports”
on page XX.
Call was
disconnected
You may have disconnected the call by pressing Start and hanging up
before the sender could send the fax.
Cannot send
using error
correction
mode (ECM)
Cannot
receive a fax
manually
67
How to Troubleshoot
F50 Chapter 9.qxd
F50 Chapter 9.qxd
06/01/2001
4:09 PM
Page 68
F50 User’s Manual
Problem
Possible Cause
Cannot
receive
using ECM
Sending party’s
fax machine may
not support ECM
If the sending party’s fax machine does not support ECM, then the
document is received in normal mode without error checking.
ECM disabled
See Troubleshooting Faxing procedure “Cannot send using Error
Correction Mode (ECM)” on page XX.
F50 not set to
switch
automatically
between phone
and fax reception
For the F50 to switch automatically, the receive mode must be set to
FAX/TEL AUTO SW, ANS.MACHINE MODE, or DRPD. If you have set
ANS.MACHINE MODE, confirm that an answering machine is connected
to the F50 and that it is turned on with an outgoing message properly
recorded. See “Setting up Fax Receive Mode” on page XX.
Error has occurred
during reception
Check the LCD for an error message, or print an ACTIVITY REPORT to
check for an error. See “Setting up and Printing Reports” on page XX.
The F50 does
not switch
automatically
between the
phone and fax
reception
Try This
Sending fax
Receive the fax manually. See “Sending and Receiving a Fax Manually”
machine is not
on page XX.
capable of sending
a “send” signal
Printout is
poor, blotched
or uneven
Paper not loaded
Make sure paper is loaded in the multi-purpose tray.
Wrong paper type
Make sure the loaded paper meets the paper requirements for the F50.
See “Specifying Paper Size and Type” on page XX.
Printhead is
clogged
Clean the printhead. See “Cleaning the Printhead” on page XX.
ECM disabled
See Troubleshooting Faxing procedure “Cannot send using Error
Correction Mode (ECM)” on page XX.
Faulty phone line
or bad connection
See Troubleshooting Faxing procedure “Error occurred while sending”
on page XX.
Sending fax
not functioning
properly
The sending fax machine usually determines the fax’s quality. Call the
sender to resolve the problem.
Errors occur
Sender’s fax not
frequently
functioning
while receiving properly
Faxes do not
print
68
Call the sender to resolve the problem.
Faulty phone line
or bad connection
See Troubleshooting Faxing procedure “Error occurred while sending”
on page XX.
Printhead or ink
tanks incorrectly
installed
Ensure the printhead and/or ink tanks are installed correctly. Re-install
them if necessary. See “Replacing Ink Tanks” on page XX.
Printhead is dirty
Clean the printhead. See “Cleaning the Printhead” on page XX.
One or more ink
tanks need to be
replaced
Replace the ink tanks. See “Replacing Ink tanks” on page XX.
F50 Chapter 9.qxd
06/01/2001
4:09 PM
Page 69
Troubleshooting Printing
Problem
No printout
Possible Cause
Power cord not
plugged in
securely
Try This
Check that the power cord is plugged securely into the F50 and into
the wall outlet. If the F50 is plugged into a power strip, make sure the
power strip is plugged in and turned on.
Printhead not
installed properly
Re-install the printhead.
F50 or computer
was turned on
when printer cable
was connected
Turn off and unplug the F50 and turn off the PC. Plug the F50 back in,
and turn the PC on again.
One or more ink
tanks are empty
Determine if the ink tanks are empty. See “Monitoring Ink Levels”
on page XX. Replace the ink tanks if necessary. See “Replacing Ink
Tanks” on page XX.
Alarm light
comes on and
F50 beeps
while printing
Paper is jammed
Clear the paper jam. If there is no paper jam, unplug and turn off the
F50 , wait five seconds, then plug it in again. If the problem is resolved,
the alarm light will turn off, the cartridge holder will move to its home
position on the right side, and the LCD will return to standby mode. If
the alarm light remains lit, contact the Customer Care Center.
Printed text or
images are
skewed
Paper not loaded
correctly
Make sure the paper is loaded properly in the multi-purpose tray, and
that the paper guide is adjusted correctly. See “Loading Paper” on
page XX.
Make sure the paper exit path is clear.
Printout does
not match
paper size
Paper not
correctly loaded
and aligned
Make sure the paper is loaded and aligned correctly in the multipurpose tray. See “Loading Paper” on page XX.
Wrong media type
selected
Make sure the correct media type is selected. See “Specifying Paper
Size and Type” on page XX.
Printing
suspended
after each line
Printhead is too hot When the printhead has become too hot, the F50 slows its printing to
protect the printhead. Stop printing and wait several minutes for the
printhead to cool, then resume printing.
Printed paper
curls
Printout contains
large amount of
ink
Leave the page in the output tray for 30 to 60 seconds to allow the ink
to dry, then remove the page carefully without touching any printed
areas.
Paper too thin
Printing dense graphics on light paper stock can cause the paper to
curl. Try using heavier stock.
F50 not
connected to
computer
Make sure the F50 is plugged in, and that the printer cable is securely
connected to the F50 and your computer.
Device time
out on
computer
How to Troubleshoot
Printer cable not
Check the printer cable connection.
securely connected
to the F50 and/or
your computer
69
F50 Chapter 9.qxd
06/01/2001
4:09 PM
Page 70
F50 User’s Manual
Problem
Possible Cause
Device time
out on
computer
Paper not
correctly loaded
and aligned
Make sure the paper is loaded and aligned correctly in the multipurpose tray. See “Loading Paper” on page XX.
Paper jam
Clear any paper jams. See “Clearing Paper Jams” on page XX.
F50 is unplugged
Plug in the F50 and try printing again.
F50 turned off
Power up the F50 and try printing again.
F50 not connected
Check the printer cables and ensure they are securely connected.
Then try printing again.
Paper jam
Clear any paper jams. See “Clearing Paper Jams” on page XX.
Error: writing
to LPT1
Try This
Troubleshooting Print Quality
Problem
Possible Cause
Printouts in
black only
Application does
not support color
printing
Try printing from a different application.
Printhead requires
cleaning
Print a Nozzle Check Pattern to determine if the printhead requires
cleaning. See “Printing a Nozzle Check Pattern” on page XX for
instructions on evaluating the printout. If the printhead requires
cleaning, see “Cleaning the Printhead” on page XX.
Printhead not
installed properly
Make sure the printhead is installed properly.
Printhead requires
cleaning
Print a Nozzle Check Pattern to determine if the printhead requires
cleaning. See “Printing a Nozzle Check Pattern” on page XX for
instructions on evaluating the printout. If the printhead requires
cleaning, see “Cleaning the Printhead” on page XX.
Printing on wrong
side of paper
Some paper types have a correct side for printing. Try turning the
paper over and printing on the other side.
Printhead not
installed properly
Make sure the printhead is installed correctly.
One or more ink
tanks are empty
Check if one or more ink tanks are empty. See “Monitoring Ink Levels”
on page XX. If an ink tank is empty, see “Replacing and Ink Tank” on
page XX.
Printhead not
aligned after
installation
Align the printhead. See “Aligning the Printhead” on page XX.
Unsupported
print media
Make sure you are using a print media supported by the F50. See the
inside back cover for a list of supported media.
Printout
contains
smudges,
spotting or
white streaks
70
Try This
06/01/2001
4:09 PM
Page 71
Problem
Possible Cause
Try This
Colors are
missing
Printhead requires
cleaning
Print a Nozzle Check Pattern to determine if the printhead requires
cleaning. See “Printing a Nozzle Check Pattern” on page XX for
instructions on evaluating the printout. If the printhead requires
cleaning, see “Cleaning the Printhead” on page XX.
Colors are
uneven
Inappropriate print Try different settings and paper types. See “Specifying Paper Size and
settings
Type” on page XX.
Printhead requires
cleaning
Print a Nozzle Check Pattern to determine if the printhead requires
cleaning. See “Printing a Nozzle Check Pattern” on page XX for
instructions on evaluating the printout. If the printhead requires
cleaning, see “Cleaning the Printhead” on page XX.
One or more ink
tanks are empty
Check if one or more ink tanks are empty. See “Monitoring Ink Levels”
on page XX. If an ink tank is empty, see “Replacing Ink Tanks” on page
XX.
Troubleshooting Scanning
Problem
Possible Cause
Try This
Error: scan
failed
Corrupt printer
driver file
See Troubleshooting Software Installation procedure listed under
“Error: MultiPASS hardware could not be initialized” on page XX.
Cannot use
OCR software
Corrupt printer
driver file
See Troubleshooting Software Installation procedure listed under
“Error: MultiPASS hardware could not be initialized” on page XX.
Troubleshooting Copying
Problem
Copies cannot
be made
Possible Cause
Try This
One or more ink
tanks are empty
Check if one or more ink tanks are empty. See “Monitoring Ink Levels”
on page XX. If an ink tank is empty, see “Replacing Ink Tanks” on page
XX.
Document not
loaded correctly
Remove the document. Fan the edges of the sheets to remove static
cling, then tap the edges of the stack against a flat surface so the
stack is aligned. Load the stack in the ADF correctly, or place one page
on the glass. Make sure the ADF cover is closed.
Printhead not
installed properly
Make sure the printhead is installed properly.
Printhead requires
cleaning
Print a Nozzle Check Pattern to determine if the printhead requires
cleaning. See “Printing a Nozzle Check Pattern” on page XX for
instructions and evaluating the printout. If the printhead requires
cleaning, see “Cleaning the Printhead” on page XX.
71
How to Troubleshoot
F50 Chapter 9.qxd
F50 Chapter 9.qxd
06/01/2001
4:09 PM
Page 72
F50 User’s Manual
Troubleshooting Hardware
Problem
No power
going to F50
Possible Cause
Try This
Power cord not
plugged in
Check that the power cord is plugged securely into the F50 and the
wall outlet. If the F50 is plugged into a power strip, ensure that the
power strip is plugged in and turned on.
Power cord not
supplying power
Check the power cord by substituting it with another cord. If the F50
powers up, the original cord is faulty.
Power outage
If power is suddenly lost due to an outage or accidental unplugging, a
built-in battery retains the user data settings and the speed dialing
settings. However, any sent or received documents stored in memory
will be lost.
When power is restored to the F50, it will automatically print a list of
documents that were stored in memory at the time of the power
outage.
If there is no paper loaded when power is restored, the LCD displays
LOAD PAPER PRESS RESUME KEY. If this occurs, load paper into the
multi-purpose tray and press RESUME.
During a power outage, you cannot receive or copy documents. You
can receive voice calls if you have a phone attached to the F50 which
does not require power to operate.
Paper does not Too many sheets
load
in multi-purpose
tray
Make sure loaded paper does not exceed the paper limit mark. See
“Loading Paper” on page XX for paper load limits.
Troubleshooting Paper Feeding
Problem
Possible Cause
Try This
Paper does
not load
Paper not loaded
correctly
Make sure that paper is loaded correctly in the multi-purpose tray,
and that the paper guide is adjusted properly. See “Loading Paper”
on page XX.
Multiple
sheets feed at
once
Paper not loaded
correctly
Make sure that paper is loaded correctly in the multi-purpose tray, and
that the paper guide is adjusted properly. See “Loading Paper” on
page XX.
Sheets of paper
sticking
Fan the paper stack before loading it in the multi-purpose tray. This
keeps the sheets of paper from sticking together.
Too many sheets
in multi-purpose
tray
Make sure loaded paper does not exceed the paper limit mark. See
“Loading Paper” on page XX for paper load limits.
Do not exceed the maximum loading capacity of the multi-purpose tray.
Do not force the paper stack into the multi-purpose tray.
72
F50 Chapter 9.qxd
06/01/2001
Problem
Multiple
sheets feed at
once
4:09 PM
Page 73
Possible Cause
Different paper
types
Try This
Load only one type of paper at a time. Make sure you load paper that
meets the paper requirements for the F50. See the inside back cover
for a list of media types supported by the F50.
Transparencies Transparencies
do not feed
not loaded
correctly
correctly
Make sure the transparencies are loaded properly, and do not load
more than 30 Transparencies in the multi-purpose tray. See “How to
Load Paper and Envelopes” on page XX.
Repeated
paper jams
Paper not loaded
correctly
Make sure that paper is loaded correctly in the multi-purpose tray,
and that loaded paper does not exceed the paper limit mark. See
“Loading Paper” page XX.
Unsupported print
media
Make sure you are using a print media supported by the F50. See the
inside back cover for a list of supported media.
Envelopes not
loaded correctly
Make sure the envelopes are loaded properly. See “How to Load
Paper and Envelopes” on page XX.
Unsupported
envelope type
Envelopes must be U.S. commercial #10 or European DL envelopes.
Scanning lock has
not been unlocked
Press Open on the document cover. Set the scanning lock to unlock.
See diagram on page XX.
Envelopes do
not load
F50 makes
grinding noise
Customer Care Center
•
For e-mail support, the latest driver downloads and answers to frequently
www.usa.canon.com)
asked questions (w
•
24-hour, 7-day-a-week automated support for troubleshooting issues on
1-800-423-2366)
most current products (1
•
24-hour, Fax-On-Demand System for product specifications and technical
1-800-526-4345)
information (1
•
Free technical support Monday–Saturday (excluding holidays) for products
1-757-413-2848)
still under warranty** (1
•
Technical support 7 days a week (excluding holidays) for products no longer
1-757-413-2848)
under warranty, at $9.99 per call (1
Within Canada, call for technical support 24 hours a day, 7
1-800-OK-CANON).
days a week (1
*
Support program specifics are subject to change without notice.
**
Refer to the product information starting on page XX for warranty details.
73
How to Troubleshoot
Canon offers a full range of customer technical support* options:
F50 Chapter 10.qxd
06/01/2001
4:09 PM
Page 75
10
Appendix
Safety Information
This guide uses the following icons to indicate situations that could cause damage or injury:
Always follow the instructions provided in Warnings to prevent potential or serious personal
injury or death as a result of careless operation of the equipment.
Always follow the instructions provided in Cautions to prevent minor injuries to yourself or
damage to the equipment as a result of careless operation of the equipment.
Read and follow all of these cautions and warnings to ensure the safe use of the printer. To avoid the hazards
of fire, personal injury, or damage to the printer, never attempt to use the printer in any way other than the
methods described in this guide.
This product emits a low level magnetic flux. If you use a cardiac pacemaker and experience
abnormalities, please move away from this product and consult your doctor.
Choosing a Location
Never place the printer near flammable solvents such as alcohol, thinner, etc. To avoid the
hazards of fire or electric shock, keep all flammable liquids away from the printer.
•
Never set the printer on a surface that is unstable or subject to excessive vibration. The printer could tip or
fall and cause injury.
•
Never use the printer in a location that is subject to high humidity, dust, high temperatures, or direct
sunlight.
•
Set up and use the printer in a location where ambient temperature is within 41°F–95°F and 10%–90%
humidity with no condensation.
Keep the power outlet for the printer free of all obstacles so you can unplug the power cord at
any time. Such obstacles could prevent you from unplugging the printer when a printer fault
occurs and cause a fire or electric shock. The socket-outlet shall be installed near the
equipment and shall be easily accessible.
•
Always carry the printer with both hands holding both ends of the printer. To avoid dropping the printer
and causing injury, always carry it carefully when moving it to another location.
Power Supply
Never attempt to plug the power cord into a power outlet when your hands are wet. To avoid
electric shock, make sure that your hands are dry.
•
Always push the plug completely into the power outlet. A loose or poorly connected plug could cause a
fire or electric shock.
75
Appendix
Never place the printer on a thick carpet or rug. Fibers or dust entering the printer could cause
a fire.
F50 Chapter 10.qxd
06/01/2001
4:09 PM
Page 76
F50 User’s Manual
Never cut, modify, stretch, bend, or twist the power cord, and never place heavy objects on the
power cord. A power leak from a damaged power cord could cause a fire or electric shock.
Never plug the printer power cord into a power outlet (power board, double adapter, etc.) that
is shared by other devices or office equipment. To prevent the hazards of fire or electric shock,
avoid overloading power points.
•
Never use the printer if the power cord is bundled or knotted. To prevent the hazards of fire or electric
shock, make sure the power cord is straight.
If you detect smoke, unusual odors, or strange noises around the printer, immediately press
the POWER button to turn off the printer and disconnect the power plug. To avoid fire or electric
shock, never use the printer under these conditions. Call the Customer Care Center.
•
Always grasp the plug when you unplug the power cord. Pulling on the power cord could damage the cord
and cause a fire or electric shock.
Never use an extension cord. To avoid a fire or electric shock, always plug the power cord
directly into the power outlet.
Never use a power supply voltage other than that supplied in the country where you purchased
the printer. Using incorrect voltage could cause a fire or electric shock. The correct power
supply voltage for this printer is AC 120V, 60 Hz.
Cleaning and Maintaining the Printer
Use only a slightly damp cloth to clean the printer. Never use flammable solvents like alcohol,
benzene, thinner, etc. If a flammable solvent contacts an electrical component inside the
printer, a fire or electric shock could result.
Always unplug the printer power cord before you clean the printer. If you mistakenly turn on
the printer while cleaning it, you could touch moving components inside the printer and suffer
injury.
Never attempt to disassemble or modify the printer. The printer contains high voltage
components which could cause a fire or serious electric shock.
Working Around the Printer
Never use flammable sprays near the printer. Gases in the spray could cause a fire or electric
shock if they come in contact with electrical components inside the printer.
Never insert your fingers or hands inside the printer while it is printing. The printer contains
moving parts which could cause injury.
Never place anything on top of the printer, especially metal objects (paper clips, staples, etc.),
or containers with flammable solvents (alcohol, thinners, etc.). Objects falling into the printer
could cause a fire or electric shock.
If any foreign object, especially a piece of metal or liquid, falls into the printer, immediately
press the POWER button to turn off the printer, unplug the power cord, then call the Customer
Care Center. Continuing to use the printer after a foreign object has fallen into it could cause a
fire or electric shock.
Printhead and Ink Tanks
For safety, always store printhead and ink tanks out of the reach of small children. If a child
accidentally licks or ingests any ink, consult a physician immediately.
Never subject a printhead or ink tank to shocks or excessive vibration. Shaking could cause ink
to leak and stain clothing.
76
F50 Chapter 10.qxd
06/01/2001
4:09 PM
Page 77
Never touch the printhead or electrical contacts on a printhead immediately after removing it
from the printer. These metal parts become very hot during printing and could cause minor
burns.
Turning the F50 Off
To avoid printer malfunction always use the ON/OFF button to turn the printer on and off. Never remove the
power cord from the power outlet until you have turned off the printer by pressing the ON/OFF button. Once
off, you can unplug the power cord from the power outlet.
Using the Printer Near Appliances and Fluorescent Lamps
Allow at least 6 inches clearance between the printer and another appliance or a fluorescent lamp. Electrical
noise generated by a fluorescent lamp placed too close to the printer could cause the printer to malfunction.
Regulatory Information (from F50)
Color Printer Model K10206 ( (F50) [NEW NUMBERS NEEDED]
This device complies with Part 15 of the FCC Rules. Operation is subject to the following two conditions: (1)
This device may not cause harmful interference, and (2) this device must accept any interference received,
including interference that may cause undesired operation.
Note: This equipment has been tested and found to comply with the limits for a Class B digital device,
pursuant to Part 15 of the FCC Rules. These limits are designed to provide reasonable protection against
harmful interference in a residential installation. This equipment generates, uses and can radiate radio
frequency energy and, if not installed and used in accordance with the instructions, may cause harmful
interference to radio communications. However, there is no guarantee that interference will not occur in a
particular installation. If this equipment does cause harmful interference to radio or television reception,
which can be determined by turning the equipment off and on, the user is encouraged to try to correct the
interference by one or more of the following measures:
•
•
•
•
Reorient or relocate the receiving antenna.
Increase the separation between the equipment and receiver.
Connect the equipment into an outlet on a circuit different from that to which the receiver is connected.
Consult the dealer or an experienced radio/TV technician for help.
Use of a shielded cable is required to comply with Class B limits in Subpart B of Part 15 of the FCC Rules.
Do not make any changes or modifications to the equipment unless otherwise specified in the manual. If such
changes or modifications should be made, you could be required to stop operation of the equipment.
Appendix
Canon U.S.A. Inc.
Digital Home and Personal Systems Division
2995 Red Hill Avenue
Costa Mesa, CA 92626
1-800-423-2366
Canadian Radio Interference Regulations
This digital apparatus does not exceed Class B limits for radio noise emissions from a digital apparatus as set
out in the interference-causing equipment standard entitled “Digital Apparatus”, ICES-003 of the Industry
Canada.
Cet appareil numérique respecte les limites de bruits radio éléctiques applicables aux appareils numériques
77
F50 Chapter 10.qxd
06/01/2001
4:09 PM
Page 78
F50 User’s Manual
de Classe B prescrites dans la norme sur le matériel brouilleur: “Appareils Numériques”, NMB-003 édictée par
l’Industrie Canada.
Specifications
System Requirements
•
CD-ROM drive, or access to one over a network connection
•
256-color SVGA monitor or greater
•
Microsoft Internet Explorer version 4.0 or later
Microsoft Windows 95/98
IBM or compatible computer with a Pentium 90 processor or higher,
32 megabytes (MB) of RAM. 64 MB of RAM or more is recommended
Windows NT 4.0:
IBM or compatible computer with a Pentium 90 processor or higher,
32 megabytes (MB) of RAM. 64 MB of RAM or more is recommended,
Service Pack 4 or later
Windows Me:
IBM or compatible computer with a Pentium 150 processor or higher,
32 megabytes (MB) of RAM. 64 MB of RAM or more is recommended
Windows 2000:
IBM or compatible computer with a Pentium 133 processor or higher,
64 megabytes (MB) of RAM. 128 MB of RAM or more is recommended.
60 MB of available hard disk space. 150 MB of available hard disk space
is recommended
The MultiPASS Suite for Windows 98/Me and Windows 2000 supports both parallel and USB ports.
For parallel port connection: Shielded, bi-directional, IEEE-1284-compatible parallel cable 6.6 feet or shorter
For USB port connection (Windows 98/Me and Windows 2000 only): USB cable 16.4 feet in length or shorter.
General Specifications
Power Source
120 V/60 Hz
Power Consumption
Maximum: Approx. 39.6 W / Standby: Approx. 5.8 W
Weight
14.6 lb. (with components)
Environmental Conditions
Temperature: 41º – 95ºF / Humidity: 10% – 90%
Liquid Crystal Display (LCD)
20 ×2
Display Languages
English/French/Spanish
Applicable Standards
Electrical Safety: UL, C-UL
Radiation: FCC Part 15 Class B IC
Other: FCC Part 68 IC,
Energy Star compliant
Multi-Purpose Tray Capacity
100 Sheets 20lb plain paper / 10 Envelopes maximum
Ink Specifications
BJ ink tank colors
BCI-3eBK, BCI-3eC, BCI-3eM, BCI-3eY
ADF and Glass Specifications
Type of document
78
Glass: thick paper, documents with uneven surfaces, photographs, small documents,
ADF: multipage documents of the same thickness and weight
06/01/2001
4:09 PM
Page 79
Size
(W x L)
Glass: 8.6 x 39” maximum / 3.15 x 1.77” minimum
ADF: 8.6 x 39” maximum / 8.27 x 5.83” minimum
Quantity
Glass: 1 sheet
ADF: 30 letter size sheets maximum, 10 legal size sheets maximum, 1 sheet for all other
Weight
Glass: 10.7 to 90 lb.
ADF: 10.7 to 24 lb.
Print Specifications
Printing Method
Bubble Jet ink on-demand
Paper Handling
Automatic feed
Print Speed*
Color Printing, fast: 10 pages/minute
Black Printing, fast: 15 pages/minute
* Based on Canon standard pattern
Max. Resolution
2400 (horizontal) ×1200 (vertical) dpi
Printable Area
8.5 x 11 paper
8.5 x 14 paper
Standard #10 envelope
8 x 10.8 (max.)
8 x 13.8 (max.)
8.34 x 3.87 (max.)
Recommended Print Media
media
plain paper, letter or legal, 17-30 lb.
Standard #10 envelopes
Glossy Photo Paper
Banner Paper
High Resolution Paper
Bubble Jet Paper
Transparencies
High Gloss Photo Film
Glossy Photo Cards
8 x 8.86 (recommended)
8 x 11.94 (recommended)
8.34 x 3.87 (recommended)
load limit
100 sheets of up to 20 lb.
10 envelopes maximum
10 sheets
2-6 connected sheets
80 sheets maximum
100 sheets maximum
30 sheets
1 sheet
20 cards
Copy Specifications
Copy Speed
B&W, letter size:
Color, normal mode, letter size:
Color, fine mode, 4 ×6 in.:
Color, fast mode, letter size:
Approx. 11 pages/minute
Approx. 7.5 pages/minute
Approx. ?? pages/minute
Approx. 7.5 pages/minute
No. of Copies
Black & White: Maximum 99 copies
Color: Maximum 99 copies
Scanning Resolution B&W TEXT: 600 ×600 dpi
B&W PHOTO: 600 ×600 dpi with halftone
B&W DRAFT: 300 ×300 dpi
COLOR NORMAL: 300 ×300 dpi, full color
COLOR FINE: 300 ×300 dpi, full color
COLOR FAST: 300 ×300 dpi, full color
Density Adjustment
9 levels
Reduction
Enlargement
25% – 99%
101% – 400%
Appendix
F50 Chapter 10.qxd
Scan Specifications
Scanning Method
Solid-state electronic scanning by contact image sensor
Compatibility
TWAIN
79
F50 Chapter 10.qxd
06/01/2001
4:09 PM
Page 80
F50 User’s Manual
Scanning Speed
B&W Text (30 – 150 dpi):
B&W Text (151 – 300 dpi):
B&W Text (301 – 600 dpi):
Grayscale (30 – 150 dpi):
Grayscale (151 – 300 dpi):
Grayscale (301 – 600 dpi):
Color (30 – 150 dpi):
Color (151 – 300 dpi):
Color (301 – 600 dpi):
Effective Scanning Width
Scanning Resolution
Scanning Image Processing
8.4 x 14”
600 ×1200 dpi
Halftones: 256 levels of grey / Color: 16,777,216 colors
5 seconds/page
5 seconds/page
5 seconds/page
5 seconds/page
5 seconds/page
5 seconds/page
15 seconds/page
15 seconds/page
15 seconds/page
Fax Specifications
Applicable Line
Public Switched Telephone Network (PSTN)
Compatibility
G3
Data Compressing System
MH, MR, MMR, JBIG, JPEG
Modem Type
Fax modem
Modem Speed
33600/14400/9600/7200/4800/2400 bps / Automatic fallback
Transmission Speed
B&W: Approx. 3 seconds/page* at 33.6 Kbps, ECM-MMR,
transmitting from memory (* Based on ITU-T No. 1 Chart, standard mode.)
Color: Approx. 1 minute/page* at 33.6 Kbps, ECM-JPEG, transmitting from
memory (* Based on Canon COLOR FAX TEST SHEET)
Scanning Image Processing
UHQ™ (Ultra High Quality) image enhancement
Halftones: 64 levels of grey
Density adjustment 3 levels
Transmission/Reception Memory
Up to approximately 270 pages*
* Based on ITU-T No. 1 Chart, standard mode.
Fax Scanning Speed
5.3 seconds/page*
* Based on ITU-T No. 1 Chart, standard mode.
Fax Resolution
B&W STANDARD:
B&W FINE:
B&W PHOTO:
COLOR STANDARD:
COLOR FINE:
203 pels/in. ×98 lines/in.
203 pels/in. ×196 lines/in.
203 pels/in. ×196 lines/in.
200 ×200 dpi
200 ×200 dpi
Dialing
Automatic dialing
Coded speed dialing (100 destinations)
Regular dialing (with numeric buttons)
Manual redialing
Networking
Sequential broadcast (Max. 113 destinations)
Automatic Fax/Tel switchover
Non-ring reception
DRPD (Distinctive Ring Pattern Detection)
Non-delivery report
Telephone Connection
80
One-touch speed dialing (12 destinations)
Group dialing (Max. 111 destinations)
Automatic redialing
Redial/Pause button
Automatic reception
Remote reception by telephone
(Default ID: 25)
ECM deactivation
ACTIVITY REPORT (after every 20
transactions)
TTI (Transmit Terminal Identification)
Telephone/answering machine (CNG detecting signal)/data modem
F50 Chapter 10.qxd
06/01/2001
4:09 PM
Page 81
Limited Warranty—U.S. Only
The limited warranty set forth below is given by Canon U.S.A. Inc. (“Canon”) with respect to the Canon brand
computer peripheral product (the “product”) that you have purchased, when purchased and used in the United
States. The product that you have purchased is the only product to which this warranty card and the limited
warranty provided by Canon and stated on the card apply.
Your product, when delivered to you in new condition in its original container, is warranted against defects in
materials or workmanship as follows: for a period of one (1) year from the date of original purchase, defective
parts or a defective product returned to a Canon repair facility or a Canon Authorized Service Facility (“ASF”)
for such product, as applicable, and proven to be defective upon inspection, will be exchanged for new or
comparable rebuilt parts, or a refurbished product, as determined by the Canon repair facility or the ASF.
Warranty repair or replacement shall not extend the original warranty period of the defective product. This
limited warranty does not cover any supplies or accessories, including without limitation, ink tanks, as to
which there shall be no warranty or replacement.
This limited warranty shall only apply if the product is used in conjunction with compatible computer
equipment and compatible software, as to which items Canon shall have no responsibility.
Non-Canon brand equipment and software that may be distributed with the product are sold “as is,” without
warranty of any kind by Canon, including any implied warranty regarding merchantability or fitness for a
particular purpose, and all such warranties are disclaimed. The sole warranty, if any, with respect to such nonCanon brand items is given by the manufacturer or producer thereof.
This limited warranty covers all defects encountered in normal use of the product, and does not apply in the
following cases:
(a) Loss of or damage to the product due to abuse, mishandling, improper packaging by you, alteration,
accident, electrical current fluctuations, failure to follow operating, maintenance or environmental instructions
prescribed in Canon’s instruction manual, or service performed by someone other than a Canon repair facility
or an ASF.
(b) Use of parts or supplies (other than those sold by Canon) that cause damage to the product or cause
abnormally frequent service calls or service problems.
(c)
If the product has had its serial number or dating altered or removed.
WITHOUT LIMITING THE FOREGOING, YOU ASSUME ALL RISK AND LIABILITY FOR LOSS, DAMAGE OR INJURY TO
YOU AND YOUR PROPERTY AND TO OTHERS AND THEIR PROPERTY ARISING OUT OF USE OR MISUSE OF, OR
INABILITY TO USE THE PRODUCT NOT CAUSED DIRECTLY BY THE NEGLIGENCE OF CANON. (SOME STATES DO NOT
ALLOW THE EXCLUSION OR LIMITATION OF INCIDENTAL OR CONSEQUENTIAL DAMAGES, SO THE ABOVE
EXCLUSION OR LIMITATION MAY NOT APPLY TO YOU.) THIS LIMITED WARRANTY SHALL NOT EXTEND TO ANYONE
OTHER THAN THE ORIGINAL PURCHASER OF THE PRODUCT, OR THE PERSON FOR WHOM IT WAS PURCHASED AS
A GIFT, AND STATES YOUR EXCLUSIVE REMEDY.
Canon offers a full range of customer technical support* options:
For e-mail technical support, the latest driver downloads and answers to frequently asked questions
(www.usa.canon.com)
81
Appendix
NO IMPLIED WARRANTY, INCLUDING ANY IMPLIED WARRANTY OF MERCHANTABILITY OR FITNESS FOR A
PARTICULAR PURPOSE, APPLIES TO THE PRODUCT AFTER THE APPLICABLE PERIOD OF THE EXPRESS LIMITED
WARRANTY STATED ABOVE, AND NO OTHER EXPRESS WARRANTY OR GUARANTY, EXCEPT AS MENTIONED ABOVE,
GIVEN BY ANY PERSON OR ENTITY WITH RESPECT TO THE PRODUCT SHALL BIND CANON. (SOME STATES DO NOT
ALLOW LIMITATIONS ON HOW LONG AN IMPLIED WARRANTY LASTS, SO THE ABOVE LIMITATION MAY NOT APPLY
TO YOU.) CANON SHALL NOT BE LIABLE FOR LOSS OF REVENUES OR PROFITS, INCONVENIENCE, EXPENSE FOR
SUBSTITUTE EQUIPMENT OR SERVICE, STORAGE CHARGES, LOSS OR CORRUPTION OF DATA, OR ANY OTHER
SPECIAL, INCIDENTAL OR CONSEQUENTIAL DAMAGES CAUSED BY THE USE OR MISUSE OF, OR INABILITY TO USE
THE PRODUCT, REGARDLESS OF THE LEGAL THEORY ON WHICH THE CLAIM IS BASED, AND EVEN IF CANON HAS
BEEN ADVISED OF THE POSSIBILITY OF SUCH DAMAGES. IN NO EVENT SHALL RECOVERY OF ANY KIND AGAINST
CANON BE GREATER IN AMOUNT THAN THE PURCHASE PRICE OF THE PRODUCT SOLD BY CANON WHICH CAUSED
THE ALLEGED DAMAGE.
F50 Chapter 10.qxd
06/01/2001
4:09 PM
Page 82
F50 User’s Manual
24-hour, 7-day-a-week, automated support for troubleshooting issues on most current products (800-423-2366)
24-hour, Fax-On-Demand System for product specifications and technical information (800-526-4345)
Free technical support Monday—Saturday (excluding holidays) for products still under warranty (757-413-2848)
Technical support 7 days a week (excluding holidays) for products no longer under warranty, at $9.99 per call
(757-413-2848)
If the problem can’t be corrected by using one of the above technical support options, you will be asked to
follow the applicable procedures for warranty service. Note that a dated proof of purchase ( (bill of sale) is
required to verify eligibility at the time of service. This requirement will be satisfied by providing a copy of your
dated bill of sale. You will also need to supply the product serial number.
Carry-In/Mail-In
Carry-In/Mail-In is a service program by which your defective product is repaired by an ASF. The name and
telephone number of the ASF(s) nearest to your location may be obtained from our Web site at:
www.usa.canon.com, or by calling the Canon Customer Care Center at 1-800-423-2366. If shipping is involved,
it is your responsibility to properly package and send your defective product, together with your dated proof of
purchase, a complete explanation of the problem and a return address, to the ASF at your expense. Do not
include any other items with your product. The repair(s) covered by this limited warranty will be made and the
product will be returned to you without charge by the ASF. Repairs not covered under this limited warranty will
be charged to you at such costs as each ASF may generally establish from time to time.
InstantExchange
InstantExchange is a warranty program that expedites, usually by the next business day, the exchange of a
defective product with a refurbished product. The refurbished product you receive will be covered by the
balance of the period remaining on your original limited warranty. Note that by using this service you will keep
the replacement product that is sent to you, and your originally purchased product shall become the property
of Canon. InstantExchange warranty program service is available only during the express limited-warranty
period for your product and only in the continental United States, Alaska and Hawaii during such period.
If the Canon Customer Care Center representative cannot correct the problem with your product over the
telephone, and you elect InstantExchange warranty program service, the representative will issue you a
reference number upon verification of warranty eligibility. You will be asked for information pertaining to your
defective product and for a ship-to location for the replacement product (street address only). You must also
provide a major credit card number that will be pre-authorized by Canon in an amount up to the cost of a new
product at the time you elect InstantExchange warranty program service. Your credit card number will be
charged in an amount up to the cost of a new product (i) if you do not return your defective product to a Canon
repair facility by the date specified by Canon and in the manner described below; (ii) if the defect(s) in the
product is/are not covered by this limited warranty; or (iii) if the warranty period on the product has expired or
has not been sufficiently established by your supplying the appropriate documentation.
The Canon repair facility will ship out the replacement product via overnight courier, prepaid by Canon. After
receipt of the replacement product (with instructions and a pre-paid return waybill), follow the instructions to
ship the defective product to a Canon repair facility. You must return the defective product in the shipping
carton in which the replacement product was packed (be sure to retain your printhead and ink tanks), and you
must include the reference number, a copy of your dated proof of purchase (bill of sale) and a complete
explanation of the problem. Do not include any other items in the return shipping container.
This limited warranty gives you specific legal rights, and you may also have other rights that vary from state to
state.
82
*
Support program specifics are subject to change without notice.
†
InstantExchange warranty program service is subject to availability of refurbished replacement units.
††
9 a.m.–5 p.m. (local), Monday–Friday (excluding holidays). The Canon Customer Care Center must receive pertinent
information by 3 p.m. (E.S.T.) to ensure next-business-day InstantExchange warranty program service (two-business-day
InstantExchange warranty service for Alaska and Hawaii). Canon does not guarantee next-business-day service in the
event of factors beyond Canon’s reasonable control.