1
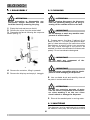
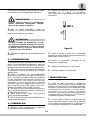
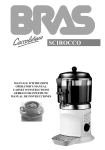
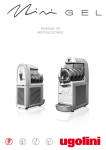
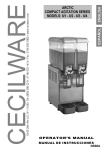
DELICE
CHOCO-1
OPERATOR’S MA NUAL
MA N UA L D E I NS T R U C C I ON E S
NS18A
DELICE-CHOCO-1
EC DECLARATION OF CONFORMITY
We Ugolini S.p.A. - Via dei Pioppi 33 - 20090 Opera Milano - Italy declare, under our responsability, that the products
DELICE - DELICE SILVER - DELICE GOLD 230V 50Hz are in conformity with the following Standards:
- EN 292 Part 1 1991
- EN 60555-2 1994
- EN 292 Part 2 1991
- EN 60555-3 1986
- EN 60335-1 1995
- EN 61000-3-2 1986
- EN 60335-2-15 2001
- EN 61000-3-3 1994
- DIN VDE 700 Teil 15, 2001
Following the provisions of the DirectivesEC 73/23, EC 98/37, EC 89/336.
DECLARACIÓN DE CONFORMIDAD CE
Nosotros Ugolini S.p.A. - Via dei Pioppi 33 - 20090 Opera Milano - Italy declararamos, bajo nuestra responsabilidad, que
los productos DELICE - DELICE SILVER - DELICE GOLD 230V 50Hz responden con las siguientes Normativas:
- EN 292 Part 1 1991
- EN 60555-2 1994
- EN 292 Part 2 1991
- EN 60555-3 1986
- EN 60335-1 1995
- EN 61000-3-2 1986
- EN 60335-2-15 2001
- EN 61000-3-3 1994
- DIN VDE 700 Teil 15, 2001
En cumplimiento de las Normas EC 73/23, EC 98/37, EC 89/336.
see data plate on the machine
ver la placa del distribuidor
(place and mfr. year - lugar y año de producción)
Ugolini S.p.A.
L’Amministratore Delegato
4
8
Ai sensi dell’art.13 del Decreto Legislativo 25 Luglio 2005, n.151 “Attuazione delle Direttive 2002/95/CE, 2002/96/CE e 2003/108/CE, relative alla
riduzione dell’uso di sostanze pericolose nelle apparecchiature elettriche
ed elettroniche, nonchè allo smaltimento dei rifiuti”.
Il simbolo del cassonetto barrato riportato sull’apparecchiatura o sulla sua
confezione indica che il prodotto alla fine della propria vita utile deve essere raccolto separatamente dagli altri rifiuti.
La raccolta differenziata della presente apparecchiatura giunta a fine vita è organizzata e gestita dal produttore. L’utente che vorrà disfarsi della presente apparecchiatura dovrà quindi contattare il produttore e seguire il sistema che questo ha
adottato per consentire la raccolta separata dell’apparecchiatura giunta a fine vita.
L’adeguata raccolta differenziata per l’avvio successivo dell’apparecchiatura dismessa al riciclaggio, al trattamento e allo smaltimento ambientalmente compatibile contribuisce ad evitare possibili effetti negativi sull’ambiente e sulla salute e
favorisce il reimpiego e/o riciclo dei materiali di cui è composta l’apparecchiatura.
Lo smaltimento abusivo del prodotto da parte del detentore comporta l’applicazione
delle sanzioni amministrative previste dalla normativa vigente.
Pursuant to the European Directives 2002/95/EC, 2002/96/EC and 2003/
108/EC, on restricting the use of hazardous substances in electric and
electronic equipment and on the disposal of waste material.
The crossed out wheelie bin symbol applied to equipment or packaging
means that the product should be collected separately from other types of
waste at the end of its useful life.
The separate collection of equipment that has reached the end of its life cycle is
organised and managed by the manufacturer. A user that wishes to dispose of this
product should therefore contact the manufacturer and follow the instructions given
with respect to the separate collection of obsolete equipment.
Correct separate collection and the subsequent recycling, treatment and environmentally compatible disposal of discarded equipment is of aid in avoiding possible
negative effects for the environment and people's health and facilitates the re-use
or recycling of the materials of which the equipment is made.
Illegal disposal of this product on part of the owner will give way to the application
of administrative fines as provided by current laws.
Conformément aux Directives européennes 2002/95/CE, 2002/96/CE et
2003/108/CE, relatives à la réduction de l'utilisation de substances dangereuses dans les appareils électriques et électroniques, ainsi qu'à l'élimination conforme et au recyclage des déchets.
Le symbole de la poubelle barrée indiqué sur l'appareil ou sur sa boîte indique qu'à la fin de sa vie utile ce produit doit être éliminé séparément des
autres déchets et conformément aux lois en vigueur en la matière.
La collecte différenciée de cet appareil à la fin de sa vie utile, est organisée et gérée
par le producteur. Par conséquent, lorsque l'utilisateur souhaitera jeter cet appareil
il devra contacter le producteur et respecter le système que ce dernier aura mis en
place pour réaliser la collecte différenciée des appareils arrivés à la fin de leur vie
utile.
La collecte différenciée correctement effectuée, suivie de l'envoi des appareils éliminés au recyclage, avec traitement et élimination des déchets dans le plus strict
respect de l'environnement, est une procédure fondamentale qui contribue à éviter
les possibles effets négatifs sur notre environnement et sur notre santé, et qui favorise la réutilisation et/ou le recyclage des matériaux qui composent ces appareils.
L'élimination abusive de ce produit par son propriétaire comporte l'application de
sanctions administratives sévères, prévues par la réglementation en vigueur.
Laut EG-Richtlinien 2002/95/EG, 2002/96/EG und 2003/108/EG zur Beschränkung der Verwendung gefährlicher Stoffe in elektronischen Geräten sowie zur Abfallentsorgung.
Das Symbol des durchgestrichenen Abfallcontainers auf der Packung gibt
an, dass das Produkt zum Ende seiner Lebensdauer getrennt von den anderen Abfällen entsorgt werden muss.
Die getrennte Abfallsammlung dieses Geräts am Ende seiner Lebensdauer wird
vom Hersteller organisiert und verwaltet. Der Nutzer, der das Gerät entsorgen
möchte, muss sich daher mit dem Hersteller in Verbindung setzen und das System
befolgen, das dieser angewendet hat, um das Altgerät der getrennten Abfallsammlung zuzuführen.
Eine angemessene Mülltrennung, die das Altgerät zur Wiederverwertung und
umweltverträglichen Entsorgung führt, trägt dazu bei, mögliche negative Auswirkungen auf die Umwelt und die Gesundheit zu vermeiden und fördert die Wiederverwendung bzw. das Recycling der Materialien, aus denen das Gerät besteht.
Die unerlaubte Entsorgung des Produkts durch den Benutzer zieht die Anwendung
der von der geltenden Richtlinie vorgesehenen Ordnungsstrafen nach sich.
En virtud de las Directivas europeas 2002/95/CE, 2002/96/CE y 2003/
108/ CE, relativas a la reducción del uso de sustancias peligrosas en los
aparatos eléctricos y electrónicos, así como a la eliminación de residuos.
El símbolo del contenedor tachado que aparece impreso sobre el aparato
o sobre su embalaje indica que al finalizar la vida útil del producto éste
nunca debe depositarse junto al resto de residuos.
La recogida selectiva de este equipo cuando llegue al final de su vida útil la gestionará y organizará el fabricante. El usuario que desee deshacerse de este equipo
deberá ponerse en contacto con el fabricante y seguir el sistema que éste haya
adoptado para permitir la recogida selectiva del aparato que haya llegado al final
de su vida útil.
La recogida selectiva adecuada para el posterior reciclaje, tratamiento y eliminación del equipo inservible, compatible con el medio ambiente, contribuye a evitar
posibles efectos negativos para el medio ambiente y para la salud y favorece la
reutilización y/o el reciclaje de los materiales de los que está compuesto el equipo.
La eliminación inadecuada del producto por parte de su propietario comportará la
aplicación de las sanciones administrativas previstas por la normativa vigente.
3
DELICE-CHOCO-1
1 TECHNICAL CHARACTERISTICS
shown on the data plate. Plug the unit into a
grounded, protected single phase electrical supply according to the applicable electrical codes
and the specifications of your machine. If you
want to make a fixed connection to the network,
connect the cord to a bipolar wall breaker with a
contact gap of at least 3mm(0.125”). not use
extension cords to connect the unit electrically.
Delice/Choco-1
Transparent removable bowls
n
Capacity of each bowl, approx.
Gal
1
1.32
Dimensions:
width
Inches 10.25
depth
Inches
12.5
height
Inches
19.5
Net weight, approx.
Lbs
15
Gross weight, approx.
Lbs
19
Adjustable thermostats
n
ATTENTION
Ensure that the unit is grounded correctly;
if not it may cause electric shock to persons or damage the dispenser.
5 The dispenser does not leave the factory
2
presanitized and sanitized. Prior to use it must be
disassembled, cleaned and sanitized according
to the instructions in chapter 5.3 CLEANING.
Noise level lower than 70 dB (A)
4 TO OPERATE PROPERLY AND
SAFELY
IMPORTANT
Electric specifications: read the information on the data plate of each single
dispenser, situated on the underside. The
serial number of the units is preceded by #
1 Read the instruction booklet before using the
dispenser.
2 Use the dispenser only if it is grounded correctly.
3 Do not use extension cords to connect the
dispenser electrically.
4 Do not operate the dispenser if it is not closed and blocked with screws.
5 Do not place fingers or objects in the cooling
fissures and faucet outlet panels louvers.
6 Do not remove the container when the unit is
in operation.
7 This unit is not meant to be used outside.
8 This unit is not to be installed in areas
subject to water-spouts.
9 Do not use water-jets to clean the unit.
10 This unit can work in a room temperature
range between +5° and +35°C.
The manufacturer reserves the right to make
changes without any prior notification.
2 INTRODUCTION
It is necessary to Read this instruction manual carefully to know the specifications of the dispenser.
As all mechanical products, this unit requires cleaning and maintenance. Its working order can be
compromised by possible errors made by the
operator during disassembly and cleaning. For
this reason it is important that the staff in charge
of the dispenser is qualified to carry out the day to
day operations, which are dismantling, cleaning,
sterilisation and reassembly.
3 INSTALLATION
ATTENTION
1 Remove the dispenser from the packaging.
Do not remove the container until the hot
plate is cold.
(This should be kept for any future requirement)
2 Check the dispenser has not been damaged
during transport. The forwarding agent must be
notified immediately of any claim.
3 Install the dispenser on a counter top that will
support its weight, even with a full load.
4 Before connecting the dispenser electrically
check that the voltage (in the network) is as
ATTENTION
Do not remove the container from the
dispenser when it contains hot products.
4
IMPORTANT
The dispenser is equipped with a thermostat, on
the right side, to adjust the temperature of the
product.
Place the unit on an horizontal surface.
Comment: the dispenser is also equipped with a
second thermostat on the underside to regulate
the temperature of the hot plate. This is calibrated
in the factory. If necessary, it is possible to act on
the thermostat reducing the temperature of the
hot plate to prevent possible burns. This will lengthen the heating time of the product and it will
never be possible to obtain a product at a higher
temperature to that set for the hot plate.
ATTENTION
In case of damages, the power cord must
be replaced by qualified personnel only in
order to prevent any shock hazard.
5 OPERATING PROCEDURES
1 Clean and sanitize the dispenser prior to use
following the instructions in chapter 5.3 CLEANING.
2 Fill the bowl with product, prepared according to the instructions of the manufacturer.
3 Install the cover above the container making
sure that it is placed correctly.
4 Set the control switch (see charter 5.1. COMMAND DESCRIPTIONS)
5 The dispenser should always operate with
the cover installed in order to prevent possible
contamination of the product.
6 The dispenser must run without interruptions; heating will stop automatically when the
product is ready for dispensing. The mixing
device will continue to operate.
7 The dispenser is supplied with a container
with a closed removable bottom to facilitate cleaning and sterilisation.
5. 2 OPERATION HELPFUL HINTS
Preparation hot chocolate: preparation following
the traditional artisan method, mix the cocoa with
milk or water well in a pan before pouring it into
the bowl. Follow the instructions of the manufacturer if using packaged instantaneous products. It
is possible to mix these directly in the container.
Activate the dispenser turning the switch to position 1. Turn the thermostat knob to 90°C (194F) to
obtain the cooking temperature of the product.
When the hot beverage is ready lower the temperature to the value required for dispensing turning
the thermostat knob.
IMPORTANT
IMPORTANT
Before switching off the dispenser completely (switch at position 0), bring the thermostat to the lowest temperature and wait for
the product to cool down. This stops the
product (if not agitated) from sticking to the
hot plate.
This appliance is not intended for use by
person (including children) with reduced
physical sensory or mental capabilities, or
lack of experience and knowledge unless
they have been given supervision or
instruction concerning use of the appliance
by a person responsible for their safety.
Children should be supervised to ensure
that they do not play with the appliance.
6 CLEANING AND SANITIZING
PROCEDURES
5. 1 DESCRIPTION OF CONTROLS
Position 0 :
power is turned off
Cleaning and sanitizing are essential to maintain
perfect taste and maximum efficiency from your
dispenser. The procedures described below are
general and can vary due to the sanitary
regulations of the local health authorized.
Position I
mixer and heating device in
working order
The product must be taken out of the dispenser
before it is disassembled for cleaning.
The dispenser is equipped with a general switch
whose functions are:
:
5
DELICE-CHOCO-1
6. 1 DISASSEMBLY
6. 2 CLEANING
ATTENTION
ATTENTION
Before proceeding to disassemble any
component always disconnect the unit
from the electricity removing the plug.
Before cleaning disconnect the dispenser
from the electricity taking out the plug or
turning off the outside switch on the wall.
1 Empty the bowl and remove the lid
2 Remove the mixer from the central shaft
3 Dismantle the faucet following the sequence
IMPORTANT
shown (see fig. 1).
Do not attempt to wash any machine components in a dish washer.
1 Prepare approx. four litres (2 gallons) of hot
water (45-60° C, 113-140F) and specific detergent in a bowl according to the instructions of the
manufacturer; a solution, which is too concentrated, may cause damage to the parts to be
washed, one that is too diluted will not clean adequately. Do not use abrasive detergents.
IMPORTANT
Do not wash any component of the
machine in the dishwasher.
figure 1
IMPORTANT
4 Remove the container, lifting it upwards.
5 Remove the drip-tray and empty it. lavaggio.
Use detergents compatible with the plastic
parts to avoid damaging the dispenser.
2 Use a suitable brush and carefully clean all
the parts in contact with the drink.
ATTENTION
Do not use excessive amounts of water
near the electric components of the dispenser when washing it as this can cause
electric shock or damage the dispenser.
3 Rinse all the washed parts in running water.
6. 3 SANITIZING
The dispenser must be sanitized prior to starting
the machine, every day. Do not allow the unit to
6
supplied by the manufacturer or other grease
compatible with polycarbonate.
sit for extended periods of the time after sanitization.
1 Before starting the procedure described
below wash hands with an anti-bacterial soap.
2 Prepare at least. four litres of hot water (4560°C, 113-140F) and sterilising product legally
approved in your Country, following the instructions of the manufacturer. If there is no specific
sterilising product prepare a solution of water
and bleach in the following ratio: 1 tbsp: 2 litres
(0.5gal) of water.
3 Immerse all the parts to be sterilised in the
solution for time indicated by the manufacturer.
4 Allow the sterilized parts to air dry on a clean
surface.
5 Use non-abrasive cloths to dry the external
parts.
6. 4 ASSEMBLY
1 Put the drip-tray and grill in place.
2 Lubricate the faucet piston (in the area A
shown in fig. 2) using food grade approved lubricant.
figure 2
3 Reassemble the faucet assembly on the container in the opposite way to which it was
dismantled (see fig. 1).
4 Install the container putting the central shaft
in place.
5 Insert the mixer in the central shaft.
6 Position the cover on the container.
7 MAINTENANCE
1 Daily: check the dispenser for any loss of
product from the gaskets. If there is, first check
the dispenser is assembled correctly making
sure that the gaskets need no lubricating and
they are not faulty or worn. In this case they must
be replaced with original parts.
2 To avoid damage to the dispenser the plastic
parts must be lubricated only with the grease
7
DELICE-CHOCO-1
2 Comprobar que el distribuidor no haya
1 CARACTERÍSTICAS TÉCNICAS
sufrido daños en el transporte. En caso
contrario, proceder inmediatamente a hacer las
reclamaciones pertinentes al transportista.
Delice/Choco1
Contenedores transparentes n
desmontables
Capacidad de cada contenedor, Gal
aproximada
1
3 Apoyar el distribuidor sobre una mesa para
1.32
4 Antes de proceder a la instalación eléctrica
descansar el peso, incluso a carga completa.
del distribuidor, comprobar que la tensión de la
red sea la indicada en la placa. Conectar el
distribuidor en una red monofase, ayudándose
de una toma a tierra en conformidad con las
normas vigentes. Si se quisiera realizar una
conexión fija a la red, conectar el cable a un
interruptor de pared bipolar con una apertura
para los contactos de al menos 3 mm (0.125”).
No utilizar alargos para realizar la conexión
eléctrica del aparato.
Dimensiones:
ancho
Inches
largo
Inches
10.25
12.5
alto
Inches
19.5
Peso neto, aproximado
kg
15
Peso bruto, aproximado
kg
19
Termostatos regulables
n
2
Nivel de ruido inferior a 70dB (A)
ATTENCION
Comprobar que el aparato esté conectado
a tierra correctamente; en caso contrario
se corre el peligro de electrocución de las
personas o de causar daños en el distribuidor.
IMPORTANTE
Características eléctricas: leer los datos
indicados en la placa de cada distribuidor;
ésta se encuentra bajo el mismo distribuidor. Los números de matrícula de los aparatos están precedidos por el símbolo #.
Los datos indicados en la placa son los
únicos datos de referencia.
5 El distribuidor no viene lavado y saneado de
fábrica. Antes de usarlo, es necesario
desmontarlo, lavarlo y sanearlo siguiendo las
instrucciones del capítulo 5.3 LIMPIEZA.
Se reserva el derecho de aportar modificaciones
sin previo aviso.
4 PARA UN FUNCIONAMIENTO
SEGURO Y CORRECTO
2 INTRODUCCIÓN
1 No usar el distribuidor antes de haber leído
Es necesario leer atentamente este manual de
instrucciones a fin de conocer todas las
características del distribuidor.
Al igual que todos los productos mecánicos, este
distribuidor necesita ciertos cuidados y limpieza.
Su buen funcionamiento podría depender
además de posibles errores cometidos por el
operario en las fases de desmontaje y de
limpieza. Por este motivo es importante que las
operaciones de desmontaje, lavado,
saneamiento y montaje, siendo éstas diarias, se
conozcan bien sin posibilidad de error a quien va
a utilizar el distribuidor.
el presente manual de instrucciones.
2 No usar el distribuidor si la conexión a tierra
no es correcta.
3 No usar alargos para la conexión eléctrica
del distribuidor.
4 No poner en funcionamiento el distribuidor si
no está cerrado y debidamente fijado con
tornillos.
5 No introducir los dedos ni objetos en las
fisuras de refrigeración y en la apertura del grifo.
6 No extraer el contenedor cuando la máquina
está en funcionamiento.
3 INSTALACIÓN
7 Aparato no apto para uso exterior.
8 Aparato no apto en instalaciones donde
1 Extraer el distribuidor del embalaje; se
aconseja su conservación en caso de futura
necesidad.
haya cercano fuentes de agua .
9 Para la limpieza no utilizar chorros de agua
8
10 Para el correcto funcionamiento, coma la
temperatura ambiente debe estar comprendida
ientre 5°C y 35°C.
7 El distribuidor dispone de contenedor con
fondo cerrado extraíble para facilitar las
operaciones de limpieza y saneamiento.
IMPORTANTE
IMPORTANTE
El aparato debe ser instalado sobre un
plano horizontal.
Este aparato no es apto para ser manipulado por niños o personas con deficiencias
mentales o sensoriales, o falta de experiencia o suficiente conocimiento del mismo, a
no ser que se ponga a disposiciòn una
supervisiòn o instrucciòn por parte de una
persona responsabile de su seguridad. Los
niños deben ser controlados para evitar
que jueguen con el aparato.
ATTENCION
No extraer el contenedor hasta que la placa
calefactora esté fría.
5. 1 DESCRIPCIÓN DE LOS
MANDOS
ATTENCION
No extraer el contenedor del distribuidor si
éste contiene producto caliente.
El distribuidor dispone de un interruptor general
cuyas funciones son:
ATTENCION
Posición 0
:
Posición I
:
el distribuidor está apagado
funcionan tanto el dispositivo
de agitación como el
dispositivo de calentamiento.
El distribuidor también dispone de un termostato
situado en el lado derecho para regular la
temperatura del producto.
Nota: el distribuidor también dispone de un
segundo termostato, situado bajo el distribuidor,
para regular la temperatura de la placa
calefactora. Éste viene calibrado de fábrica. En
caso necesario, para evitar que el producto se
queme, es posible reducir la temperatura de la
placa calefactora mediante este termostato. En
este caso se alargarán los tiempos de
calentamiento del producto y no será posible
obtener un producto a una temperatura superior
a la configurada para la placa calefactora.
Si el cable de alimentación está dañado,
debe ser substituito por el fabricante o
desde su servicio de asistencia técnica o,
en cualquier caso, por una persona cualificada con el fin de evitar cualquier tipo de
riesgo.
5 INSTRUCCIONES DE EMPLEO
1 Lavar y sanear el distribuidor antes de
utilizarlo siguiendo las instrucciones del capítulo
5.3 LIMPIEZA.
2 Llenar el contenedor con el producto
deseado, preparado según las instrucciones del
fabricante.
3 Montar la tapa encima del contenedor
comprobando que quede colocada
correctamente.
5. 2 SUGERENCIAS
Preparación del chocolate: siguiendo el método
artesanal, disolver bien el cacao en una cazuela
antes de verterlo en el contenedor del
distribuidor. En caso de utilizar productos
instantáneos envasados, seguir las instrucciones
del fabricante. Con este tipo de productos, la
mezcla puede efectuarse directamente en el
contenedor.
A continuación, accionar el distribuidor colocando
el interruptor en posición I. Girar el mando del
termostato hasta la posición de 90°C (194 F)para
obtener la temperatura de cocción del producto.
4 Utilizar los mandos (véase el capítulo 5.1
DESCRIPCIÓN DE LOS MANDOS).
5 El distribuidor debe funcionar siempre con la
tapa montada para evitar que el producto se
contamine.
6 El
distribuidor
debe
funcionar
ininterrumpidamente: el calentamiento se parará
automáticamente cuando el producto esté listo
para la distribución. El dispositivo de agitación
seguirá funcionando.
9
DELICE-CHOCO-1
3 Desmontar el grifo siguiendo la secuencia
C u a n d o e l c ho c o l a t e e s t é l i s t o , ba j a r l a
indicada (véase figura 1).
temperatura al valor deseado para la distribución
mediante el mando del termostato.
IMPORTANTE
Antes de apagar por completo el distribuidor (posición 0), poner el termostato a la
posición de temperatura mínima y esperar
a que el producto se enfríe. Así se evitará
que el producto (si no se agita) se pegue a
la placa calefactora.
6 LIMPIEZA
Limpieza y lavado son fundamentales para
garantizar la perfecta conservación del gusto de
figura 1
la bebida y la máxima eficacia del distribuidor.
Los procedimientos descritos a continuación
4 Levantar el contenedor para extraerlo.
deben considerarse de carácter general y
5 Extraer el cajón recogegotas y vaciarlo.
pueden variar por efecto de la reglamentación
sanitaria vigente.
6. 2 LAVADO
Antes de desmontar el distribuidor para su
lavado, es necesario vaciar el producto.
ATTENCION
Antes de proceder a las operaciones de
limpieza, desconectar siempre el aparato
de la corriente extrayendo la clavija de la
toma de corriente o apagando el interruptor
exterior de pared.
6. 1 DESMONTAJE
ATTENCION
IMPORTANTE
Antes de desmontar cualquier componente
desconectar siempre el aparato de la corriente extrayendo la clavija de la toma de
corriente o apagando el interruptor exterior
de pared.
No lavar ningún componente de la máquina
en el lavavajillas.
1 Llenar un barreño con aproximadamente
cuatro litros de agua caliente (45-60°C, 113140F) y detergente específico respetando
rigurosamente las instrucciones del fabricante;
una solución demasiado concentrada puede
causar daños en las partes a lavar, mientras que
1 Vaciar el contenedor y quitar la tapa.
2 Extraer el mezclador del eje central.
10
2 Lubricar el pistón del grifo (en la zona A
una solución demasiado diluida puede no limpiar
lo suficiente. No usar detergentes abrasivos.
indicada en la Figura 2) utilizando
exclusivamente la grasa adecuada para uso
alimentario.
IMPORTANTE
A fin de prevenir daños en el distribuidor,
utilizar solamente detergentes compatibles con las piezas de plástico.
2 Usar un cepillo adecuado y lavar con
cuidado con la solución detergente todas las
piezas en contacto con la bebida.
ATTENCION
Durante el lavado del distribuidor, no utilizar excesiva cantidad de agua cerca de los
componentes eléctricos; en caso contrario
se podría correr el riesgo de electrocución
o de daños en el distribuidor.
figura 2
3 Enjuagar con agua corriente todas las piezas
lavadas.
3 Volver a montar el grifo en el contenedor
siguiendo el orden inverso de las operaciones de
desmontaje (véase Figura 1).
6. 3 HIGIENIZACION
4 Montar el contenedor colocando el eje
central en su alojamiento.
El saneamiento debe efectuarse usto antes de
poner en funcionamiento el distribuidor, todos los
días; evitar que éste permanezca inactivo
durante mucho tiempo después del saneamiento.
1 Antes de iniciar los procedimientos descritos
a continuación, lavarse las manos con un jabón
antibacterias
2 Llenar un barreño con aproximadamente
cuatro litros de solución de agua caliente (4560°C, 113-140F) y producto saneador aprobado
por las autoridades del país de utilización en
conformidad con las especificaciones del
fabricante. Si no se dispone de un producto
saneador específico, preparar una solución de
agua e hipoclorito de sodio (lejía) a razón de 1
cuchara por cada 2 litros (0.5gal) de agua.
3 Sumergir en la solución todas las piezas que
deban sanearse durante el tiempo indicado por
el fabricante del producto.
4 Dejar secar al aire, sobre una superficie
limpia, las piezas saneadas.
5 Secar las piezas externas del distribuidor sin
utilizar trapos abrasivos.
5 Montar el mezclador en el eje central.
6 Colocar la tapa en el contenedor.
7 MANUTENCION
1 Todos los días: comprobar el estado del
distribuidor y verificar que no haya pérdidas de
producto en las juntas. Si se detectan pérdidas,
controlar en primer lugar que el distribuidor esté
c or r ec ta me nte mo nta do ; a c ont i nu ac i ón ,
comprobar que las juntas no precisen
lubricación, así como que no estén defectuosas
o desgastadas. En este caso, sustituirlas por
recambios originales del fabricante.
2 A fin de prevenir daños en el distribuidor, las
piezas de plástico deben lubricarse únicamente
con la grasa proporcionada por el fabricante o
con otra grasa compatible con policarbonato.
6. 4 REMONTAJE
1 Montar el cajón recogegotas y la rejilla en
sus alojamientos correspondientes.
11
DELICE-CHOCO-1
SPARE PARTS LIST
DESCRIPCION PIEZAS DE REPUESTO
1
2
2
3
4
5
6
6
7
8
8
8
00611
n/a
n/a
00612
00613
00614
n/a
00615
00616
n/a
n/a
00617
Driving shaft
Heating plate holder
Golden heating plate holde
M4 Clip
Thermostat bulb holder
Spring for bulb holder
Heating plate
Heating plate
Limit switch
Complete gear motor
Complete gear motor
Complete gear motor
Eje transmisión
Soporte para plancha calentadora
Soporte para plancha calentadora oro
Clip M4
Guia-sensor termóstato
Muelle para guia-sensor termóstato
Plancha calentadora
Plancha calentadora
Fusible de seguridad
Motorreductor completo
Motorreductor completo
Motorreductor completo
12
2449_29 V 0.1 08E13
9
9
9
10
10
10
11
n/a
n/a
n/a
n/a
n/a
n/a
n/a
Side panel
Golden side panel
Side panel -”silver”
Machine body
Golden machine body
Machine body -”silver”
Side panel for controls
11
n/a
Golden side panel for controls
11
12
13
14
15
15
15
16
17
17
n/a
00124
00619
00620
00621
n/a
n/a
00622
00623
n/a
Side panel for controls -”silver”
Switch
5-95°C (32-194F) thermostat
5-125°C (32-248F) thermostat
Base
Golden base
Base -”silver”
Rubber leg
Drip tray cover
Golden drip tray cover
18
18
18
19
20
21
21
22
23
24
25
26
27
28
29
30
30
31
32
32
33
34
35
36
38
39
40
40
41
41
00624
n/a
n/a
n/a
00625
00626
n/a
00627
n/a
n/a
n/a
n/a
00628
00629
00101
n/a
00630
n/a
n/a
n/a
00631
00632
00633
00634
00635
22800-26466
22800-26458
22800-26456
22800-26459
22800-26457
Panel lateral
Panel lateral oro
Panel lateral -”plata”
Cuerpo maquina
Cuerpo maquina oro
Cuerpo maquina -”plata”
Panel lateral completo
de mandos
Panel lateral completo
de mandos oro
Panel lateral completo de mandos -”plata”
Interruptor
Termóstato 5-95°C (32-194F)
Termóstato 5-125°C (32-248F)
Base
Base oro
Base -”plata”
Piede de goma
Rejilla cajón recoge-gotas
Rejilla cajón
recoge-gotas oro
Bandeja goteo
Bandeja goteo oro
Bandeja goteo -”plata”
Pasacable
Pomo para tapa
Tapa contenedor
Tapa contenedor oro
Mezclador
Arbol del contenedor
OR para àrbol central
Fondo del contenedor
Dado para eje central
Junta contenedor
Pistón del grifo
Junta OR del grifo
Palanca grifo rossa
Palanca grifo
Muelle del grifo
Pivote rojo de la palanca
Pivote negro de la palanca grifo
Contenedor
OR del contenedor
Contenedor completo
Brida para motorreductor
Eje central
Fijador
Drip tray
Golden drip tray
Drip tray -”silver”
Cable clamp
Cover knob
Bowl cover
Golden bowl cover
Mixer
Bowl shaft
Bowl shaft O-ring
Bowl bottom plate
Central shaft nut
Bowl gasket
Faucet piston
Faucet piston O-ring
Red faucet handle
Black Faucet handle
Faucet spring
Red faucet handle pin
Black faucet handle pin
Bowl
Bowl O-ring
Bowl assembly
Gear motor flange
Central shaft
Tap ring
Thermostat knob 5-95 °C
Thermostat knob 32-194F
Thermostat knob 5-125 °C
Thermostat knob 32-248 F
Pomo para termostato
Pomo para termostato
Pomo para termostato
Pomo para termostato
WIRING DIAGRAM / ESQUEMA ELECTRICO
1
2
3
4
5
6
Switch
5-125°C (32-248F) Thermostat
Limit switch 152°C (305.6F)
Resistance
5-95°C (32-194F) Thermostat
Gear motor
13
Interruptor
Termóstato 5-125°C (32-248F)
Fusibile de seguridad 152°C (305.6F)
Resistencia
Termóstato 5-95°C (32-194F)
Motoreductor
DELICE-CHOCO-1
NOTES - NOTAS:
14
NOTES- NOTAS:
15
CECILWARE CORPORATION
43-05 20th Avenue
Long Island City, N.Y. 11105
Tel. (800) 935 2211
Fax (718) 932 7860
[email protected]
www.cecilware.com
2449_49 R0.2 08M06