1
Fiery Command WorkStation
20 May 2014
© 2014 Electronics For Imaging. The information in this publication is covered under Legal Notices for this
product.
Fiery Command WorkStation
Contents
3
Contents
Overview
. . . . . . . . . . . . . . . . . . . . . . . . . . . . . . . . . . . . . . . . . . . . . . . . . . . . . . . . . . . . . . . . . . . . . . . . . . . . . . . . . . 13
Command WorkStation . . . . . . . . . . . . . . . . . . . . . . . . . . . . . . . . . . . . . . . . . . . . . . . . . . . . . . . . . . . . . . . . . . . . . . . 13
The Command WorkStation workspace . . . . . . . . . . . . . . . . . . . . . . . . . . . . . . . . . . . . . . . . . . . . . . . . . . . . . . . . . 13
Job Center . . . . . . . . . . . . . . . . . . . . . . . . . . . . . . . . . . . . . . . . . . . . . . . . . . . . . . . . . . . . . . . . . . . . . . . . . . . . . . . . . . 14
Device Center . . . . . . . . . . . . . . . . . . . . . . . . . . . . . . . . . . . . . . . . . . . . . . . . . . . . . . . . . . . . . . . . . . . . . . . . . . . . . . . 16
Adding and connecting a Fiery server
. . . . . . . . . . . . . . . . . . . . . . . . . . . . . . . . . . . . . . . . . . . . . . . . 17
Access levels . . . . . . . . . . . . . . . . . . . . . . . . . . . . . . . . . . . . . . . . . . . . . . . . . . . . . . . . . . . . . . . . . . . . . . . . . . . . . . . . . 17
Connecting to a server . . . . . . . . . . . . . . . . . . . . . . . . . . . . . . . . . . . . . . . . . . . . . . . . . . . . . . . . . . . . . . . . . . . . . . . . 17
Add and connect to a Fiery server . . . . . . . . . . . . . . . . . . . . . . . . . . . . . . . . . . . . . . . . . . . . . . . . . . . . . . . . . . . . . . 17
Search for an available Fiery server . . . . . . . . . . . . . . . . . . . . . . . . . . . . . . . . . . . . . . . . . . . . . . . . . . . . . . . . . . . . . 18
Log off the Fiery server . . . . . . . . . . . . . . . . . . . . . . . . . . . . . . . . . . . . . . . . . . . . . . . . . . . . . . . . . . . . . . . . . . . . . . . 18
Change users for a Fiery server . . . . . . . . . . . . . . . . . . . . . . . . . . . . . . . . . . . . . . . . . . . . . . . . . . . . . . . . . . . . . . . . 19
View another Fiery server . . . . . . . . . . . . . . . . . . . . . . . . . . . . . . . . . . . . . . . . . . . . . . . . . . . . . . . . . . . . . . . . . . . . . 19
The Servers list . . . . . . . . . . . . . . . . . . . . . . . . . . . . . . . . . . . . . . . . . . . . . . . . . . . . . . . . . . . . . . . . . . . . . . . . . . . . . . 19
Customizing Command WorkStation
. . . . . . . . . . . . . . . . . . . . . . . . . . . . . . . . . . . . . . . . . . . . . . . . . 22
Set Command WorkStation preferences . . . . . . . . . . . . . . . . . . . . . . . . . . . . . . . . . . . . . . . . . . . . . . . . . . . . . . . . 22
Manage Job Center columns . . . . . . . . . . . . . . . . . . . . . . . . . . . . . . . . . . . . . . . . . . . . . . . . . . . . . . . . . . . . . . . . . . 23
Change the column display . . . . . . . . . . . . . . . . . . . . . . . . . . . . . . . . . . . . . . . . . . . . . . . . . . . . . . . . . . . . . . . . . . . 23
Adjust the width of a column . . . . . . . . . . . . . . . . . . . . . . . . . . . . . . . . . . . . . . . . . . . . . . . . . . . . . . . . . . . . . . . . . . 24
Resize panes and queues . . . . . . . . . . . . . . . . . . . . . . . . . . . . . . . . . . . . . . . . . . . . . . . . . . . . . . . . . . . . . . . . . . . . . . 24
Resize the Printing and Processing queues . . . . . . . . . . . . . . . . . . . . . . . . . . . . . . . . . . . . . . . . . . . . . . . . . . . . . . 24
Resize the Job Summary and Servers list panes . . . . . . . . . . . . . . . . . . . . . . . . . . . . . . . . . . . . . . . . . . . . . . . . . 24
Customize the toolbar . . . . . . . . . . . . . . . . . . . . . . . . . . . . . . . . . . . . . . . . . . . . . . . . . . . . . . . . . . . . . . . . . . . . . . . . . 24
Default toolbar icons . . . . . . . . . . . . . . . . . . . . . . . . . . . . . . . . . . . . . . . . . . . . . . . . . . . . . . . . . . . . . . . . . . . . . . . . . . 25
Configuring server settings
. . . . . . . . . . . . . . . . . . . . . . . . . . . . . . . . . . . . . . . . . . . . . . . . . . . . . . . . . . . . 26
View, save, or print server configuration settings . . . . . . . . . . . . . . . . . . . . . . . . . . . . . . . . . . . . . . . . . . . . . . . . 26
View server configuration settings . . . . . . . . . . . . . . . . . . . . . . . . . . . . . . . . . . . . . . . . . . . . . . . . . . . . . . . . . . . . . 26
Save the server configuration as a file . . . . . . . . . . . . . . . . . . . . . . . . . . . . . . . . . . . . . . . . . . . . . . . . . . . . . . . . . . 26
Print the server configuration page . . . . . . . . . . . . . . . . . . . . . . . . . . . . . . . . . . . . . . . . . . . . . . . . . . . . . . . . . . . . . 26
Access Configure . . . . . . . . . . . . . . . . . . . . . . . . . . . . . . . . . . . . . . . . . . . . . . . . . . . . . . . . . . . . . . . . . . . . . . . . . . . . . 27
Which version of Configure am I using? . . . . . . . . . . . . . . . . . . . . . . . . . . . . . . . . . . . . . . . . . . . . . . . . . . . . . . . . 27
Fiery Command WorkStation
Contents
4
Configuration workflow . . . . . . . . . . . . . . . . . . . . . . . . . . . . . . . . . . . . . . . . . . . . . . . . . . . . . . . . . . . . . . . . . . . . . . . 28
Users and groups . . . . . . . . . . . . . . . . . . . . . . . . . . . . . . . . . . . . . . . . . . . . . . . . . . . . . . . . . . . . . . . . . . . . . . . . . . . . 28
Server setup . . . . . . . . . . . . . . . . . . . . . . . . . . . . . . . . . . . . . . . . . . . . . . . . . . . . . . . . . . . . . . . . . . . . . . . . . . . . . . . . 38
Network setup . . . . . . . . . . . . . . . . . . . . . . . . . . . . . . . . . . . . . . . . . . . . . . . . . . . . . . . . . . . . . . . . . . . . . . . . . . . . . . 47
Configuring protocols . . . . . . . . . . . . . . . . . . . . . . . . . . . . . . . . . . . . . . . . . . . . . . . . . . . . . . . . . . . . . . . . . . . . . . . . 59
Configure printer settings . . . . . . . . . . . . . . . . . . . . . . . . . . . . . . . . . . . . . . . . . . . . . . . . . . . . . . . . . . . . . . . . . . . . . 65
Configure PDL . . . . . . . . . . . . . . . . . . . . . . . . . . . . . . . . . . . . . . . . . . . . . . . . . . . . . . . . . . . . . . . . . . . . . . . . . . . . . . 66
Set up PrintMe . . . . . . . . . . . . . . . . . . . . . . . . . . . . . . . . . . . . . . . . . . . . . . . . . . . . . . . . . . . . . . . . . . . . . . . . . . . . . . 69
Exit Configure . . . . . . . . . . . . . . . . . . . . . . . . . . . . . . . . . . . . . . . . . . . . . . . . . . . . . . . . . . . . . . . . . . . . . . . . . . . . . . . 70
About backup and restoring . . . . . . . . . . . . . . . . . . . . . . . . . . . . . . . . . . . . . . . . . . . . . . . . . . . . . . . . . . . . . . . . . . . 70
Back up or restore Fiery server settings
. . . . . . . . . . . . . . . . . . . . . . . . . . . . . . . . . . . . . . . . . . . . . . . . . . . . . . . . 71
Back up Fiery Server settings from Configure . . . . . . . . . . . . . . . . . . . . . . . . . . . . . . . . . . . . . . . . . . . . . . . . . . . 71
Back up Fiery Server settings from Command WorkStation . . . . . . . . . . . . . . . . . . . . . . . . . . . . . . . . . . . . . . . 72
Restore Fiery Server settings from Configure . . . . . . . . . . . . . . . . . . . . . . . . . . . . . . . . . . . . . . . . . . . . . . . . . . . . 72
Restore Fiery server default settings from Configure . . . . . . . . . . . . . . . . . . . . . . . . . . . . . . . . . . . . . . . . . . . . . 72
Restore Fiery server settings from Command WorkStation . . . . . . . . . . . . . . . . . . . . . . . . . . . . . . . . . . . . . . . . 72
Managing Fiery Central workflows
. . . . . . . . . . . . . . . . . . . . . . . . . . . . . . . . . . . . . . . . . . . . . . . . . . . 74
About Fiery Central . . . . . . . . . . . . . . . . . . . . . . . . . . . . . . . . . . . . . . . . . . . . . . . . . . . . . . . . . . . . . . . . . . . . . . . . . . . 74
Connect to or disconnect from a Fiery Central server . . . . . . . . . . . . . . . . . . . . . . . . . . . . . . . . . . . . . . . . . . . . . 74
Fiery Central server workspace . . . . . . . . . . . . . . . . . . . . . . . . . . . . . . . . . . . . . . . . . . . . . . . . . . . . . . . . . . . . . . . . 76
View Fiery Central jobs . . . . . . . . . . . . . . . . . . . . . . . . . . . . . . . . . . . . . . . . . . . . . . . . . . . . . . . . . . . . . . . . . . . . . . . 76
Customize Fiery Central Job Center . . . . . . . . . . . . . . . . . . . . . . . . . . . . . . . . . . . . . . . . . . . . . . . . . . . . . . . . . . . . 77
View or edit the Fiery Central license . . . . . . . . . . . . . . . . . . . . . . . . . . . . . . . . . . . . . . . . . . . . . . . . . . . . . . . . . . . 77
Configure Fiery Central . . . . . . . . . . . . . . . . . . . . . . . . . . . . . . . . . . . . . . . . . . . . . . . . . . . . . . . . . . . . . . . . . . . . . . . 78
Fiery Central Manager . . . . . . . . . . . . . . . . . . . . . . . . . . . . . . . . . . . . . . . . . . . . . . . . . . . . . . . . . . . . . . . . . . . . . . . . 79
Access Fiery Central Manager . . . . . . . . . . . . . . . . . . . . . . . . . . . . . . . . . . . . . . . . . . . . . . . . . . . . . . . . . . . . . . . . . 79
Fiery Central Printer Groups . . . . . . . . . . . . . . . . . . . . . . . . . . . . . . . . . . . . . . . . . . . . . . . . . . . . . . . . . . . . . . . . . . . 79
Back up or restore Fiery Central . . . . . . . . . . . . . . . . . . . . . . . . . . . . . . . . . . . . . . . . . . . . . . . . . . . . . . . . . . . . . . . 82
Use Fiery Central Paper Catalog . . . . . . . . . . . . . . . . . . . . . . . . . . . . . . . . . . . . . . . . . . . . . . . . . . . . . . . . . . . . . . . 83
Set up VDP file search paths . . . . . . . . . . . . . . . . . . . . . . . . . . . . . . . . . . . . . . . . . . . . . . . . . . . . . . . . . . . . . . . . . . 84
Set up Digital StoreFront connections . . . . . . . . . . . . . . . . . . . . . . . . . . . . . . . . . . . . . . . . . . . . . . . . . . . . . . . . . . 85
Viewing jobs
. . . . . . . . . . . . . . . . . . . . . . . . . . . . . . . . . . . . . . . . . . . . . . . . . . . . . . . . . . . . . . . . . . . . . . . . . . . . . . 86
Fiery Preview . . . . . . . . . . . . . . . . . . . . . . . . . . . . . . . . . . . . . . . . . . . . . . . . . . . . . . . . . . . . . . . . . . . . . . . . . . . . . . . . . 86
View information for processed jobs . . . . . . . . . . . . . . . . . . . . . . . . . . . . . . . . . . . . . . . . . . . . . . . . . . . . . . . . . . . 86
View spooled, unprocessed jobs . . . . . . . . . . . . . . . . . . . . . . . . . . . . . . . . . . . . . . . . . . . . . . . . . . . . . . . . . . . . . . . 87
Page View, Sheet View, and Reader View . . . . . . . . . . . . . . . . . . . . . . . . . . . . . . . . . . . . . . . . . . . . . . . . . . . . . . 89
Fiery Command WorkStation
Contents
5
Settings pane . . . . . . . . . . . . . . . . . . . . . . . . . . . . . . . . . . . . . . . . . . . . . . . . . . . . . . . . . . . . . . . . . . . . . . . . . . . . . . . 90
Open Reader View . . . . . . . . . . . . . . . . . . . . . . . . . . . . . . . . . . . . . . . . . . . . . . . . . . . . . . . . . . . . . . . . . . . . . . . . . . . 91
Toolbar icons in Preview . . . . . . . . . . . . . . . . . . . . . . . . . . . . . . . . . . . . . . . . . . . . . . . . . . . . . . . . . . . . . . . . . . . . . . 92
Preview a raster image . . . . . . . . . . . . . . . . . . . . . . . . . . . . . . . . . . . . . . . . . . . . . . . . . . . . . . . . . . . . . . . . . . . . . . . . 93
Toolbar icons in Raster Preview . . . . . . . . . . . . . . . . . . . . . . . . . . . . . . . . . . . . . . . . . . . . . . . . . . . . . . . . . . . . . . . 94
Merging pages in Raster Preview . . . . . . . . . . . . . . . . . . . . . . . . . . . . . . . . . . . . . . . . . . . . . . . . . . . . . . . . . . . . . . 94
VDP Raster Preview . . . . . . . . . . . . . . . . . . . . . . . . . . . . . . . . . . . . . . . . . . . . . . . . . . . . . . . . . . . . . . . . . . . . . . . . . . 94
Printing
. . . . . . . . . . . . . . . . . . . . . . . . . . . . . . . . . . . . . . . . . . . . . . . . . . . . . . . . . . . . . . . . . . . . . . . . . . . . . . . . . . . . 97
Import jobs for printing . . . . . . . . . . . . . . . . . . . . . . . . . . . . . . . . . . . . . . . . . . . . . . . . . . . . . . . . . . . . . . . . . . . . . . . 97
Import a job into the Print queue . . . . . . . . . . . . . . . . . . . . . . . . . . . . . . . . . . . . . . . . . . . . . . . . . . . . . . . . . . . . . . . 97
Import jobs from external Fiery Server archives . . . . . . . . . . . . . . . . . . . . . . . . . . . . . . . . . . . . . . . . . . . . . . . . . . 98
Setting print options . . . . . . . . . . . . . . . . . . . . . . . . . . . . . . . . . . . . . . . . . . . . . . . . . . . . . . . . . . . . . . . . . . . . . . . . . . 98
View job properties . . . . . . . . . . . . . . . . . . . . . . . . . . . . . . . . . . . . . . . . . . . . . . . . . . . . . . . . . . . . . . . . . . . . . . . . . . 98
Job actions in the Job Properties window . . . . . . . . . . . . . . . . . . . . . . . . . . . . . . . . . . . . . . . . . . . . . . . . . . . . . . . 99
Print option categories . . . . . . . . . . . . . . . . . . . . . . . . . . . . . . . . . . . . . . . . . . . . . . . . . . . . . . . . . . . . . . . . . . . . . . 100
Fiery Impose templates in Job Properties . . . . . . . . . . . . . . . . . . . . . . . . . . . . . . . . . . . . . . . . . . . . . . . . . . . . . . 101
Preset print settings . . . . . . . . . . . . . . . . . . . . . . . . . . . . . . . . . . . . . . . . . . . . . . . . . . . . . . . . . . . . . . . . . . . . . . . . 101
Server Presets . . . . . . . . . . . . . . . . . . . . . . . . . . . . . . . . . . . . . . . . . . . . . . . . . . . . . . . . . . . . . . . . . . . . . . . . . . . . . 104
Remove raster data from a job
. . . . . . . . . . . . . . . . . . . . . . . . . . . . . . . . . . . . . . . . . . . . . . . . . . . . . . . . . . . . . . . 107
Printing methods . . . . . . . . . . . . . . . . . . . . . . . . . . . . . . . . . . . . . . . . . . . . . . . . . . . . . . . . . . . . . . . . . . . . . . . . . . . . 107
Use Tray Alignment . . . . . . . . . . . . . . . . . . . . . . . . . . . . . . . . . . . . . . . . . . . . . . . . . . . . . . . . . . . . . . . . . . . . . . . . . 107
Sample Print . . . . . . . . . . . . . . . . . . . . . . . . . . . . . . . . . . . . . . . . . . . . . . . . . . . . . . . . . . . . . . . . . . . . . . . . . . . . . . . 108
Proof Print . . . . . . . . . . . . . . . . . . . . . . . . . . . . . . . . . . . . . . . . . . . . . . . . . . . . . . . . . . . . . . . . . . . . . . . . . . . . . . . . . 109
Sequential Print . . . . . . . . . . . . . . . . . . . . . . . . . . . . . . . . . . . . . . . . . . . . . . . . . . . . . . . . . . . . . . . . . . . . . . . . . . . . . 110
Set up Sequential Print . . . . . . . . . . . . . . . . . . . . . . . . . . . . . . . . . . . . . . . . . . . . . . . . . . . . . . . . . . . . . . . . . . . . . . 111
Set Sequential Print options in Configure . . . . . . . . . . . . . . . . . . . . . . . . . . . . . . . . . . . . . . . . . . . . . . . . . . . . . . 111
Use Quick Doc Merge . . . . . . . . . . . . . . . . . . . . . . . . . . . . . . . . . . . . . . . . . . . . . . . . . . . . . . . . . . . . . . . . . . . . . . . . 112
Managing jobs
. . . . . . . . . . . . . . . . . . . . . . . . . . . . . . . . . . . . . . . . . . . . . . . . . . . . . . . . . . . . . . . . . . . . . . . . . 114
Search for jobs . . . . . . . . . . . . . . . . . . . . . . . . . . . . . . . . . . . . . . . . . . . . . . . . . . . . . . . . . . . . . . . . . . . . . . . . . . . . . . 114
Filter a job list . . . . . . . . . . . . . . . . . . . . . . . . . . . . . . . . . . . . . . . . . . . . . . . . . . . . . . . . . . . . . . . . . . . . . . . . . . . . . . . 114
Export a job list
. . . . . . . . . . . . . . . . . . . . . . . . . . . . . . . . . . . . . . . . . . . . . . . . . . . . . . . . . . . . . . . . . . . . . . . . . . . . . 115
Move jobs to another queue . . . . . . . . . . . . . . . . . . . . . . . . . . . . . . . . . . . . . . . . . . . . . . . . . . . . . . . . . . . . . . . . . . 115
Reorder jobs . . . . . . . . . . . . . . . . . . . . . . . . . . . . . . . . . . . . . . . . . . . . . . . . . . . . . . . . . . . . . . . . . . . . . . . . . . . . . . . . 116
Send jobs to another Fiery server . . . . . . . . . . . . . . . . . . . . . . . . . . . . . . . . . . . . . . . . . . . . . . . . . . . . . . . . . . . . . 116
Archive jobs . . . . . . . . . . . . . . . . . . . . . . . . . . . . . . . . . . . . . . . . . . . . . . . . . . . . . . . . . . . . . . . . . . . . . . . . . . . . . . . . . 116
Drag and drop file management . . . . . . . . . . . . . . . . . . . . . . . . . . . . . . . . . . . . . . . . . . . . . . . . . . . . . . . . . . . . . . 117
Fiery Command WorkStation
Contents
Fiery JDF Jobs
6
. . . . . . . . . . . . . . . . . . . . . . . . . . . . . . . . . . . . . . . . . . . . . . . . . . . . . . . . . . . . . . . . . . . . . . . . . . 118
About Fiery JDF and JMF . . . . . . . . . . . . . . . . . . . . . . . . . . . . . . . . . . . . . . . . . . . . . . . . . . . . . . . . . . . . . . . . . . . . 118
Fiery JDF Setup . . . . . . . . . . . . . . . . . . . . . . . . . . . . . . . . . . . . . . . . . . . . . . . . . . . . . . . . . . . . . . . . . . . . . . . . . . . . . 118
Enabling JDF-submitting applications . . . . . . . . . . . . . . . . . . . . . . . . . . . . . . . . . . . . . . . . . . . . . . . . . . . . . . . . . . 118
Fiery JDF workflow . . . . . . . . . . . . . . . . . . . . . . . . . . . . . . . . . . . . . . . . . . . . . . . . . . . . . . . . . . . . . . . . . . . . . . . . . . 119
Submit the JDF job . . . . . . . . . . . . . . . . . . . . . . . . . . . . . . . . . . . . . . . . . . . . . . . . . . . . . . . . . . . . . . . . . . . . . . . . . 119
Display JDF column headings in Command WorkStation . . . . . . . . . . . . . . . . . . . . . . . . . . . . . . . . . . . . . . . . . 119
Fiery JDF jobs and virtual printers . . . . . . . . . . . . . . . . . . . . . . . . . . . . . . . . . . . . . . . . . . . . . . . . . . . . . . . . . . . . . 120
Specify JDF settings for a job . . . . . . . . . . . . . . . . . . . . . . . . . . . . . . . . . . . . . . . . . . . . . . . . . . . . . . . . . . . . . . . . 120
Job Info tab . . . . . . . . . . . . . . . . . . . . . . . . . . . . . . . . . . . . . . . . . . . . . . . . . . . . . . . . . . . . . . . . . . . . . . . . . . . . . . . . 120
Run List tab . . . . . . . . . . . . . . . . . . . . . . . . . . . . . . . . . . . . . . . . . . . . . . . . . . . . . . . . . . . . . . . . . . . . . . . . . . . . . . . . 121
Close Job tab . . . . . . . . . . . . . . . . . . . . . . . . . . . . . . . . . . . . . . . . . . . . . . . . . . . . . . . . . . . . . . . . . . . . . . . . . . . . . . 121
Add JDF job media to the Paper Catalog . . . . . . . . . . . . . . . . . . . . . . . . . . . . . . . . . . . . . . . . . . . . . . . . . . . . . . . 122
Resolve media conflicts in JDF jobs . . . . . . . . . . . . . . . . . . . . . . . . . . . . . . . . . . . . . . . . . . . . . . . . . . . . . . . . . . . 122
About Fiery Dashboard
. . . . . . . . . . . . . . . . . . . . . . . . . . . . . . . . . . . . . . . . . . . . . . . . . . . . . . . . . . . . . . . . 123
Create an EFI Passport account (free) . . . . . . . . . . . . . . . . . . . . . . . . . . . . . . . . . . . . . . . . . . . . . . . . . . . . . . . . . . 123
Sign on to Fiery Dashboard . . . . . . . . . . . . . . . . . . . . . . . . . . . . . . . . . . . . . . . . . . . . . . . . . . . . . . . . . . . . . . . . . . . 123
Fiery Dashboard data collection
. . . . . . . . . . . . . . . . . . . . . . . . . . . . . . . . . . . . . . . . . . . . . . . . . . . . . . 125
Authorize data collection . . . . . . . . . . . . . . . . . . . . . . . . . . . . . . . . . . . . . . . . . . . . . . . . . . . . . . . . . . . . . . . . . . . . . 125
Cancel authorization for data collection . . . . . . . . . . . . . . . . . . . . . . . . . . . . . . . . . . . . . . . . . . . . . . . . . . . . . . . . 125
Managing color
. . . . . . . . . . . . . . . . . . . . . . . . . . . . . . . . . . . . . . . . . . . . . . . . . . . . . . . . . . . . . . . . . . . . . . . . . 126
Color print options . . . . . . . . . . . . . . . . . . . . . . . . . . . . . . . . . . . . . . . . . . . . . . . . . . . . . . . . . . . . . . . . . . . . . . . . . . . 126
View or edit default color settings . . . . . . . . . . . . . . . . . . . . . . . . . . . . . . . . . . . . . . . . . . . . . . . . . . . . . . . . . . . . . 126
Profiles . . . . . . . . . . . . . . . . . . . . . . . . . . . . . . . . . . . . . . . . . . . . . . . . . . . . . . . . . . . . . . . . . . . . . . . . . . . . . . . . . . . . . 133
View profile properties . . . . . . . . . . . . . . . . . . . . . . . . . . . . . . . . . . . . . . . . . . . . . . . . . . . . . . . . . . . . . . . . . . . . . . 134
Compare profile gamuts . . . . . . . . . . . . . . . . . . . . . . . . . . . . . . . . . . . . . . . . . . . . . . . . . . . . . . . . . . . . . . . . . . . . . 134
Import or export profiles . . . . . . . . . . . . . . . . . . . . . . . . . . . . . . . . . . . . . . . . . . . . . . . . . . . . . . . . . . . . . . . . . . . . . 134
Create or delete profiles . . . . . . . . . . . . . . . . . . . . . . . . . . . . . . . . . . . . . . . . . . . . . . . . . . . . . . . . . . . . . . . . . . . . . 136
Edit profile settings . . . . . . . . . . . . . . . . . . . . . . . . . . . . . . . . . . . . . . . . . . . . . . . . . . . . . . . . . . . . . . . . . . . . . . . . . 137
Edit profile content . . . . . . . . . . . . . . . . . . . . . . . . . . . . . . . . . . . . . . . . . . . . . . . . . . . . . . . . . . . . . . . . . . . . . . . . . . 137
Print a test page . . . . . . . . . . . . . . . . . . . . . . . . . . . . . . . . . . . . . . . . . . . . . . . . . . . . . . . . . . . . . . . . . . . . . . . . . . . . 139
Adjust the gray balance of a profile . . . . . . . . . . . . . . . . . . . . . . . . . . . . . . . . . . . . . . . . . . . . . . . . . . . . . . . . . . . . 140
Calibration (pre-System 10) . . . . . . . . . . . . . . . . . . . . . . . . . . . . . . . . . . . . . . . . . . . . . . . . . . . . . . . . . . . . . . . . . . . 140
Calibrator modes . . . . . . . . . . . . . . . . . . . . . . . . . . . . . . . . . . . . . . . . . . . . . . . . . . . . . . . . . . . . . . . . . . . . . . . . . . . 141
Fiery Command WorkStation
Contents
7
Calibrate with ColorCal . . . . . . . . . . . . . . . . . . . . . . . . . . . . . . . . . . . . . . . . . . . . . . . . . . . . . . . . . . . . . . . . . . . . . . 141
Calibrate with the ES-1000 . . . . . . . . . . . . . . . . . . . . . . . . . . . . . . . . . . . . . . . . . . . . . . . . . . . . . . . . . . . . . . . . . . . 143
Calibrate with the Eye-One . . . . . . . . . . . . . . . . . . . . . . . . . . . . . . . . . . . . . . . . . . . . . . . . . . . . . . . . . . . . . . . . . . . 144
Apply measurements to multiple calibration sets . . . . . . . . . . . . . . . . . . . . . . . . . . . . . . . . . . . . . . . . . . . . . . . . 145
Create or delete custom calibration sets . . . . . . . . . . . . . . . . . . . . . . . . . . . . . . . . . . . . . . . . . . . . . . . . . . . . . . . 146
Restore default measurements . . . . . . . . . . . . . . . . . . . . . . . . . . . . . . . . . . . . . . . . . . . . . . . . . . . . . . . . . . . . . . . 147
Calibration (System 10 and later) . . . . . . . . . . . . . . . . . . . . . . . . . . . . . . . . . . . . . . . . . . . . . . . . . . . . . . . . . . . . . 147
Calibration for black-and-white printing . . . . . . . . . . . . . . . . . . . . . . . . . . . . . . . . . . . . . . . . . . . . . . . . . . . . . . . . 148
Calibration workflow . . . . . . . . . . . . . . . . . . . . . . . . . . . . . . . . . . . . . . . . . . . . . . . . . . . . . . . . . . . . . . . . . . . . . . . . 148
Start Calibrator . . . . . . . . . . . . . . . . . . . . . . . . . . . . . . . . . . . . . . . . . . . . . . . . . . . . . . . . . . . . . . . . . . . . . . . . . . . . . 148
Print a calibration page . . . . . . . . . . . . . . . . . . . . . . . . . . . . . . . . . . . . . . . . . . . . . . . . . . . . . . . . . . . . . . . . . . . . . . 149
Using the spectrophotometer to measure patches . . . . . . . . . . . . . . . . . . . . . . . . . . . . . . . . . . . . . . . . . . . . . . 149
Using ColorCal to measure patches . . . . . . . . . . . . . . . . . . . . . . . . . . . . . . . . . . . . . . . . . . . . . . . . . . . . . . . . . . . 150
Import measurements from an alternate measurement instrument . . . . . . . . . . . . . . . . . . . . . . . . . . . . . . . . 152
View measurement results . . . . . . . . . . . . . . . . . . . . . . . . . . . . . . . . . . . . . . . . . . . . . . . . . . . . . . . . . . . . . . . . . . 153
Export measurement data . . . . . . . . . . . . . . . . . . . . . . . . . . . . . . . . . . . . . . . . . . . . . . . . . . . . . . . . . . . . . . . . . . . 154
Reset measurement data . . . . . . . . . . . . . . . . . . . . . . . . . . . . . . . . . . . . . . . . . . . . . . . . . . . . . . . . . . . . . . . . . . . . 154
Calibrator preferences . . . . . . . . . . . . . . . . . . . . . . . . . . . . . . . . . . . . . . . . . . . . . . . . . . . . . . . . . . . . . . . . . . . . . . . 155
Calibration settings . . . . . . . . . . . . . . . . . . . . . . . . . . . . . . . . . . . . . . . . . . . . . . . . . . . . . . . . . . . . . . . . . . . . . . . . . 157
Customize Image Enhance settings . . . . . . . . . . . . . . . . . . . . . . . . . . . . . . . . . . . . . . . . . . . . . . . . . . . . . . . . . . . 160
Image Enhance Visual Editor . . . . . . . . . . . . . . . . . . . . . . . . . . . . . . . . . . . . . . . . . . . . . . . . . . . . . . . . . . . . . . . . . 161
When to use IEVE or the Image Enhance print option . . . . . . . . . . . . . . . . . . . . . . . . . . . . . . . . . . . . . . . . . . . 161
Opening large jobs . . . . . . . . . . . . . . . . . . . . . . . . . . . . . . . . . . . . . . . . . . . . . . . . . . . . . . . . . . . . . . . . . . . . . . . . . . 162
Presets . . . . . . . . . . . . . . . . . . . . . . . . . . . . . . . . . . . . . . . . . . . . . . . . . . . . . . . . . . . . . . . . . . . . . . . . . . . . . . . . . . . . 162
Adjusting an image . . . . . . . . . . . . . . . . . . . . . . . . . . . . . . . . . . . . . . . . . . . . . . . . . . . . . . . . . . . . . . . . . . . . . . . . . 162
Saving edits to a job . . . . . . . . . . . . . . . . . . . . . . . . . . . . . . . . . . . . . . . . . . . . . . . . . . . . . . . . . . . . . . . . . . . . . . . . . 162
Start Image Enhance Visual Editor . . . . . . . . . . . . . . . . . . . . . . . . . . . . . . . . . . . . . . . . . . . . . . . . . . . . . . . . . . . 163
Use presets . . . . . . . . . . . . . . . . . . . . . . . . . . . . . . . . . . . . . . . . . . . . . . . . . . . . . . . . . . . . . . . . . . . . . . . . . . . . . . . . 163
Open a large job . . . . . . . . . . . . . . . . . . . . . . . . . . . . . . . . . . . . . . . . . . . . . . . . . . . . . . . . . . . . . . . . . . . . . . . . . . . . 164
Adjust tone . . . . . . . . . . . . . . . . . . . . . . . . . . . . . . . . . . . . . . . . . . . . . . . . . . . . . . . . . . . . . . . . . . . . . . . . . . . . . . . . 164
Adjust color . . . . . . . . . . . . . . . . . . . . . . . . . . . . . . . . . . . . . . . . . . . . . . . . . . . . . . . . . . . . . . . . . . . . . . . . . . . . . . . . 165
Adjust sharpness . . . . . . . . . . . . . . . . . . . . . . . . . . . . . . . . . . . . . . . . . . . . . . . . . . . . . . . . . . . . . . . . . . . . . . . . . . . 166
Correct red eye . . . . . . . . . . . . . . . . . . . . . . . . . . . . . . . . . . . . . . . . . . . . . . . . . . . . . . . . . . . . . . . . . . . . . . . . . . . . . 166
Spot colors . . . . . . . . . . . . . . . . . . . . . . . . . . . . . . . . . . . . . . . . . . . . . . . . . . . . . . . . . . . . . . . . . . . . . . . . . . . . . . . . . . 167
Spot color groups and definitions . . . . . . . . . . . . . . . . . . . . . . . . . . . . . . . . . . . . . . . . . . . . . . . . . . . . . . . . . . . . . 167
Select the output profile for spot color edits . . . . . . . . . . . . . . . . . . . . . . . . . . . . . . . . . . . . . . . . . . . . . . . . . . . . 168
Change the order of spot colors or groups . . . . . . . . . . . . . . . . . . . . . . . . . . . . . . . . . . . . . . . . . . . . . . . . . . . . . 168
Find a spot color . . . . . . . . . . . . . . . . . . . . . . . . . . . . . . . . . . . . . . . . . . . . . . . . . . . . . . . . . . . . . . . . . . . . . . . . . . . . 168
Fiery Command WorkStation
Contents
8
Edit a spot color . . . . . . . . . . . . . . . . . . . . . . . . . . . . . . . . . . . . . . . . . . . . . . . . . . . . . . . . . . . . . . . . . . . . . . . . . . . . 169
Optimize spot colors . . . . . . . . . . . . . . . . . . . . . . . . . . . . . . . . . . . . . . . . . . . . . . . . . . . . . . . . . . . . . . . . . . . . . . . . 169
Create, rename, or delete a spot color or color group . . . . . . . . . . . . . . . . . . . . . . . . . . . . . . . . . . . . . . . . . . . . 170
Import and export custom color groups . . . . . . . . . . . . . . . . . . . . . . . . . . . . . . . . . . . . . . . . . . . . . . . . . . . . . . . . 171
View the gamut of a color group . . . . . . . . . . . . . . . . . . . . . . . . . . . . . . . . . . . . . . . . . . . . . . . . . . . . . . . . . . . . . . 171
Color swatch pages and swatch books . . . . . . . . . . . . . . . . . . . . . . . . . . . . . . . . . . . . . . . . . . . . . . . . . . . . . . . . 172
Print a color swatch page or swatch book . . . . . . . . . . . . . . . . . . . . . . . . . . . . . . . . . . . . . . . . . . . . . . . . . . . . . . 172
Measure and import spot color values . . . . . . . . . . . . . . . . . . . . . . . . . . . . . . . . . . . . . . . . . . . . . . . . . . . . . . . . . 173
Substitute colors . . . . . . . . . . . . . . . . . . . . . . . . . . . . . . . . . . . . . . . . . . . . . . . . . . . . . . . . . . . . . . . . . . . . . . . . . . . 174
Two-color print mapping . . . . . . . . . . . . . . . . . . . . . . . . . . . . . . . . . . . . . . . . . . . . . . . . . . . . . . . . . . . . . . . . . . . . . 175
Managing server resources
. . . . . . . . . . . . . . . . . . . . . . . . . . . . . . . . . . . . . . . . . . . . . . . . . . . . . . . . . . . 177
Virtual printers . . . . . . . . . . . . . . . . . . . . . . . . . . . . . . . . . . . . . . . . . . . . . . . . . . . . . . . . . . . . . . . . . . . . . . . . . . . . . . 177
Create, edit, or duplicate virtual printers . . . . . . . . . . . . . . . . . . . . . . . . . . . . . . . . . . . . . . . . . . . . . . . . . . . . . . . 177
Manage virtual printers . . . . . . . . . . . . . . . . . . . . . . . . . . . . . . . . . . . . . . . . . . . . . . . . . . . . . . . . . . . . . . . . . . . . . . 178
Print to virtual printers from Windows . . . . . . . . . . . . . . . . . . . . . . . . . . . . . . . . . . . . . . . . . . . . . . . . . . . . . . . . . 179
Print to virtual printers from Mac OS . . . . . . . . . . . . . . . . . . . . . . . . . . . . . . . . . . . . . . . . . . . . . . . . . . . . . . . . . . 179
Paper Catalog . . . . . . . . . . . . . . . . . . . . . . . . . . . . . . . . . . . . . . . . . . . . . . . . . . . . . . . . . . . . . . . . . . . . . . . . . . . . . . . 180
Choose media from Paper Catalog . . . . . . . . . . . . . . . . . . . . . . . . . . . . . . . . . . . . . . . . . . . . . . . . . . . . . . . . . . . . 181
Set up Paper Catalog . . . . . . . . . . . . . . . . . . . . . . . . . . . . . . . . . . . . . . . . . . . . . . . . . . . . . . . . . . . . . . . . . . . . . . . . 182
Manage the Paper Catalog database . . . . . . . . . . . . . . . . . . . . . . . . . . . . . . . . . . . . . . . . . . . . . . . . . . . . . . . . . . 186
Media attributes . . . . . . . . . . . . . . . . . . . . . . . . . . . . . . . . . . . . . . . . . . . . . . . . . . . . . . . . . . . . . . . . . . . . . . . . . . . . . 188
Common media attributes . . . . . . . . . . . . . . . . . . . . . . . . . . . . . . . . . . . . . . . . . . . . . . . . . . . . . . . . . . . . . . . . . . . 189
Feed Direction . . . . . . . . . . . . . . . . . . . . . . . . . . . . . . . . . . . . . . . . . . . . . . . . . . . . . . . . . . . . . . . . . . . . . . . . . . . . . 191
Grade . . . . . . . . . . . . . . . . . . . . . . . . . . . . . . . . . . . . . . . . . . . . . . . . . . . . . . . . . . . . . . . . . . . . . . . . . . . . . . . . . . . . . 191
Media Unit . . . . . . . . . . . . . . . . . . . . . . . . . . . . . . . . . . . . . . . . . . . . . . . . . . . . . . . . . . . . . . . . . . . . . . . . . . . . . . . . . 191
Opacity . . . . . . . . . . . . . . . . . . . . . . . . . . . . . . . . . . . . . . . . . . . . . . . . . . . . . . . . . . . . . . . . . . . . . . . . . . . . . . . . . . . . 192
Tab Properties . . . . . . . . . . . . . . . . . . . . . . . . . . . . . . . . . . . . . . . . . . . . . . . . . . . . . . . . . . . . . . . . . . . . . . . . . . . . . . 192
Texture . . . . . . . . . . . . . . . . . . . . . . . . . . . . . . . . . . . . . . . . . . . . . . . . . . . . . . . . . . . . . . . . . . . . . . . . . . . . . . . . . . . . 192
Type Details . . . . . . . . . . . . . . . . . . . . . . . . . . . . . . . . . . . . . . . . . . . . . . . . . . . . . . . . . . . . . . . . . . . . . . . . . . . . . . . 193
US Basic Size . . . . . . . . . . . . . . . . . . . . . . . . . . . . . . . . . . . . . . . . . . . . . . . . . . . . . . . . . . . . . . . . . . . . . . . . . . . . . . 194
Weight . . . . . . . . . . . . . . . . . . . . . . . . . . . . . . . . . . . . . . . . . . . . . . . . . . . . . . . . . . . . . . . . . . . . . . . . . . . . . . . . . . . . 195
Tray association . . . . . . . . . . . . . . . . . . . . . . . . . . . . . . . . . . . . . . . . . . . . . . . . . . . . . . . . . . . . . . . . . . . . . . . . . . . . . 196
Tray association display . . . . . . . . . . . . . . . . . . . . . . . . . . . . . . . . . . . . . . . . . . . . . . . . . . . . . . . . . . . . . . . . . . . . . . 197
Assign media to a tray . . . . . . . . . . . . . . . . . . . . . . . . . . . . . . . . . . . . . . . . . . . . . . . . . . . . . . . . . . . . . . . . . . . . . . . 197
Smart media . . . . . . . . . . . . . . . . . . . . . . . . . . . . . . . . . . . . . . . . . . . . . . . . . . . . . . . . . . . . . . . . . . . . . . . . . . . . . . . 198
Monitor media status in a tray . . . . . . . . . . . . . . . . . . . . . . . . . . . . . . . . . . . . . . . . . . . . . . . . . . . . . . . . . . . . . . . . 200
Change the column display2 . . . . . . . . . . . . . . . . . . . . . . . . . . . . . . . . . . . . . . . . . . . . . . . . . . . . . . . . . . . . . . . . . 201
Fiery Command WorkStation
Contents
9
VDP resources . . . . . . . . . . . . . . . . . . . . . . . . . . . . . . . . . . . . . . . . . . . . . . . . . . . . . . . . . . . . . . . . . . . . . . . . . . . . . . . 201
Manage FreeForm masters . . . . . . . . . . . . . . . . . . . . . . . . . . . . . . . . . . . . . . . . . . . . . . . . . . . . . . . . . . . . . . . . . . 201
Back up VDP resources . . . . . . . . . . . . . . . . . . . . . . . . . . . . . . . . . . . . . . . . . . . . . . . . . . . . . . . . . . . . . . . . . . . . . . 202
Restore VDP resources . . . . . . . . . . . . . . . . . . . . . . . . . . . . . . . . . . . . . . . . . . . . . . . . . . . . . . . . . . . . . . . . . . . . . . 202
View and delete global resources . . . . . . . . . . . . . . . . . . . . . . . . . . . . . . . . . . . . . . . . . . . . . . . . . . . . . . . . . . . . . 203
Fonts . . . . . . . . . . . . . . . . . . . . . . . . . . . . . . . . . . . . . . . . . . . . . . . . . . . . . . . . . . . . . . . . . . . . . . . . . . . . . . . . . . . . . . . 203
Manage fonts on the Fiery server . . . . . . . . . . . . . . . . . . . . . . . . . . . . . . . . . . . . . . . . . . . . . . . . . . . . . . . . . . . . . 203
Back up and restore fonts . . . . . . . . . . . . . . . . . . . . . . . . . . . . . . . . . . . . . . . . . . . . . . . . . . . . . . . . . . . . . . . . . . . . 204
View user and group privileges . . . . . . . . . . . . . . . . . . . . . . . . . . . . . . . . . . . . . . . . . . . . . . . . . . . . . . . . . . . . . . . 204
Access Users & Groups . . . . . . . . . . . . . . . . . . . . . . . . . . . . . . . . . . . . . . . . . . . . . . . . . . . . . . . . . . . . . . . . . . . . . 204
View detailed user and group privileges . . . . . . . . . . . . . . . . . . . . . . . . . . . . . . . . . . . . . . . . . . . . . . . . . . . . . . . . 205
Compare rights . . . . . . . . . . . . . . . . . . . . . . . . . . . . . . . . . . . . . . . . . . . . . . . . . . . . . . . . . . . . . . . . . . . . . . . . . . . . . 205
View or add Printing Groups . . . . . . . . . . . . . . . . . . . . . . . . . . . . . . . . . . . . . . . . . . . . . . . . . . . . . . . . . . . . . . . . . . 205
Access Printing Groups . . . . . . . . . . . . . . . . . . . . . . . . . . . . . . . . . . . . . . . . . . . . . . . . . . . . . . . . . . . . . . . . . . . . . . 206
Add a Printing Group
. . . . . . . . . . . . . . . . . . . . . . . . . . . . . . . . . . . . . . . . . . . . . . . . . . . . . . . . . . . . . . . . . . . . . . . 206
Use the Job Log . . . . . . . . . . . . . . . . . . . . . . . . . . . . . . . . . . . . . . . . . . . . . . . . . . . . . . . . . . . . . . . . . . . . . . . . . . . . . 206
View the Job Log . . . . . . . . . . . . . . . . . . . . . . . . . . . . . . . . . . . . . . . . . . . . . . . . . . . . . . . . . . . . . . . . . . . . . . . . . . . 206
Print the Job Log . . . . . . . . . . . . . . . . . . . . . . . . . . . . . . . . . . . . . . . . . . . . . . . . . . . . . . . . . . . . . . . . . . . . . . . . . . . 207
Export the contents of the Job Log . . . . . . . . . . . . . . . . . . . . . . . . . . . . . . . . . . . . . . . . . . . . . . . . . . . . . . . . . . . 207
Export and/or clear the contents of the Job Log . . . . . . . . . . . . . . . . . . . . . . . . . . . . . . . . . . . . . . . . . . . . . . . . . 207
Graphic arts tools
. . . . . . . . . . . . . . . . . . . . . . . . . . . . . . . . . . . . . . . . . . . . . . . . . . . . . . . . . . . . . . . . . . . . . . . 208
Fiery graphic arts features . . . . . . . . . . . . . . . . . . . . . . . . . . . . . . . . . . . . . . . . . . . . . . . . . . . . . . . . . . . . . . . . . . . . 208
Fiery Graphic Arts Package, Premium Edition . . . . . . . . . . . . . . . . . . . . . . . . . . . . . . . . . . . . . . . . . . . . . . . . . . . 208
Fiery Productivity Package . . . . . . . . . . . . . . . . . . . . . . . . . . . . . . . . . . . . . . . . . . . . . . . . . . . . . . . . . . . . . . . . . . . 209
Control Bar . . . . . . . . . . . . . . . . . . . . . . . . . . . . . . . . . . . . . . . . . . . . . . . . . . . . . . . . . . . . . . . . . . . . . . . . . . . . . . . . . . 209
Print a Control Bar on each page by default . . . . . . . . . . . . . . . . . . . . . . . . . . . . . . . . . . . . . . . . . . . . . . . . . . . . 210
View and edit a Control Bar . . . . . . . . . . . . . . . . . . . . . . . . . . . . . . . . . . . . . . . . . . . . . . . . . . . . . . . . . . . . . . . . . . 210
Create a custom or duplicate Control Bar . . . . . . . . . . . . . . . . . . . . . . . . . . . . . . . . . . . . . . . . . . . . . . . . . . . . . . 210
Export, import, or delete a custom Control Bar . . . . . . . . . . . . . . . . . . . . . . . . . . . . . . . . . . . . . . . . . . . . . . . . . 211
Restore the default Control Bar . . . . . . . . . . . . . . . . . . . . . . . . . . . . . . . . . . . . . . . . . . . . . . . . . . . . . . . . . . . . . . . 211
Trapping . . . . . . . . . . . . . . . . . . . . . . . . . . . . . . . . . . . . . . . . . . . . . . . . . . . . . . . . . . . . . . . . . . . . . . . . . . . . . . . . . . . . 211
Set default auto trapping for all jobs . . . . . . . . . . . . . . . . . . . . . . . . . . . . . . . . . . . . . . . . . . . . . . . . . . . . . . . . . . . 211
Specify the trap width . . . . . . . . . . . . . . . . . . . . . . . . . . . . . . . . . . . . . . . . . . . . . . . . . . . . . . . . . . . . . . . . . . . . . . . 212
Specify trap color reduction . . . . . . . . . . . . . . . . . . . . . . . . . . . . . . . . . . . . . . . . . . . . . . . . . . . . . . . . . . . . . . . . . . 212
Specify trap shape . . . . . . . . . . . . . . . . . . . . . . . . . . . . . . . . . . . . . . . . . . . . . . . . . . . . . . . . . . . . . . . . . . . . . . . . . . 212
Specify trap object types . . . . . . . . . . . . . . . . . . . . . . . . . . . . . . . . . . . . . . . . . . . . . . . . . . . . . . . . . . . . . . . . . . . . 213
Progressives . . . . . . . . . . . . . . . . . . . . . . . . . . . . . . . . . . . . . . . . . . . . . . . . . . . . . . . . . . . . . . . . . . . . . . . . . . . . . . . . 213
Fiery Command WorkStation
Contents
10
View or edit Progressives settings . . . . . . . . . . . . . . . . . . . . . . . . . . . . . . . . . . . . . . . . . . . . . . . . . . . . . . . . . . . . 213
Halftone simulation for proofing . . . . . . . . . . . . . . . . . . . . . . . . . . . . . . . . . . . . . . . . . . . . . . . . . . . . . . . . . . . . . . 214
View or edit custom halftone screens . . . . . . . . . . . . . . . . . . . . . . . . . . . . . . . . . . . . . . . . . . . . . . . . . . . . . . . . . 214
Paper simulation white point editing . . . . . . . . . . . . . . . . . . . . . . . . . . . . . . . . . . . . . . . . . . . . . . . . . . . . . . . . . . 215
Edit Paper Simulation white point values . . . . . . . . . . . . . . . . . . . . . . . . . . . . . . . . . . . . . . . . . . . . . . . . . . . . . . . 215
Preflight . . . . . . . . . . . . . . . . . . . . . . . . . . . . . . . . . . . . . . . . . . . . . . . . . . . . . . . . . . . . . . . . . . . . . . . . . . . . . . . . . . . . . 216
Configure and run Preflight check . . . . . . . . . . . . . . . . . . . . . . . . . . . . . . . . . . . . . . . . . . . . . . . . . . . . . . . . . . . . . 217
ImageViewer . . . . . . . . . . . . . . . . . . . . . . . . . . . . . . . . . . . . . . . . . . . . . . . . . . . . . . . . . . . . . . . . . . . . . . . . . . . . . . . . 217
Start ImageViewer . . . . . . . . . . . . . . . . . . . . . . . . . . . . . . . . . . . . . . . . . . . . . . . . . . . . . . . . . . . . . . . . . . . . . . . . . . 218
Adjust the image preview . . . . . . . . . . . . . . . . . . . . . . . . . . . . . . . . . . . . . . . . . . . . . . . . . . . . . . . . . . . . . . . . . . . . 218
Resize the image . . . . . . . . . . . . . . . . . . . . . . . . . . . . . . . . . . . . . . . . . . . . . . . . . . . . . . . . . . . . . . . . . . . . . . . . . . . 218
View color values in the image . . . . . . . . . . . . . . . . . . . . . . . . . . . . . . . . . . . . . . . . . . . . . . . . . . . . . . . . . . . . . . . 219
Display color separations . . . . . . . . . . . . . . . . . . . . . . . . . . . . . . . . . . . . . . . . . . . . . . . . . . . . . . . . . . . . . . . . . . . . 219
Edit color response or gray response using curves . . . . . . . . . . . . . . . . . . . . . . . . . . . . . . . . . . . . . . . . . . . . . . 219
Edit colors using the color wheel . . . . . . . . . . . . . . . . . . . . . . . . . . . . . . . . . . . . . . . . . . . . . . . . . . . . . . . . . . . . . 220
Edit gray response curve through image . . . . . . . . . . . . . . . . . . . . . . . . . . . . . . . . . . . . . . . . . . . . . . . . . . . . . . . 220
Apply color edits to one or all pages . . . . . . . . . . . . . . . . . . . . . . . . . . . . . . . . . . . . . . . . . . . . . . . . . . . . . . . . . . . 221
Apply color edits through a local file . . . . . . . . . . . . . . . . . . . . . . . . . . . . . . . . . . . . . . . . . . . . . . . . . . . . . . . . . . . 221
Apply color edits through a server preset . . . . . . . . . . . . . . . . . . . . . . . . . . . . . . . . . . . . . . . . . . . . . . . . . . . . . . 221
Apply color curve from Curve2/Curve3 file . . . . . . . . . . . . . . . . . . . . . . . . . . . . . . . . . . . . . . . . . . . . . . . . . . . . . 222
Apply gray response curve edits
. . . . . . . . . . . . . . . . . . . . . . . . . . . . . . . . . . . . . . . . . . . . . . . . . . . . . . . . . . . . . 222
Print the job with edits . . . . . . . . . . . . . . . . . . . . . . . . . . . . . . . . . . . . . . . . . . . . . . . . . . . . . . . . . . . . . . . . . . . . . . 223
Export soft proof to PDF . . . . . . . . . . . . . . . . . . . . . . . . . . . . . . . . . . . . . . . . . . . . . . . . . . . . . . . . . . . . . . . . . . . . . 223
Compare the monitor profile to the output profile . . . . . . . . . . . . . . . . . . . . . . . . . . . . . . . . . . . . . . . . . . . . . . . 224
Install current edits on the Fiery Server . . . . . . . . . . . . . . . . . . . . . . . . . . . . . . . . . . . . . . . . . . . . . . . . . . . . . . . . 224
Restore the factory default response curve on the Fiery Server . . . . . . . . . . . . . . . . . . . . . . . . . . . . . . . . . . . 224
Set ImageViewer preferences . . . . . . . . . . . . . . . . . . . . . . . . . . . . . . . . . . . . . . . . . . . . . . . . . . . . . . . . . . . . . . . . 224
Booklet Maker
. . . . . . . . . . . . . . . . . . . . . . . . . . . . . . . . . . . . . . . . . . . . . . . . . . . . . . . . . . . . . . . . . . . . . . . . . . . 226
Booklet Maker imposition . . . . . . . . . . . . . . . . . . . . . . . . . . . . . . . . . . . . . . . . . . . . . . . . . . . . . . . . . . . . . . . . . . . . 226
About Booklet Maker and Fiery Impose . . . . . . . . . . . . . . . . . . . . . . . . . . . . . . . . . . . . . . . . . . . . . . . . . . . . . . . . 226
Access Booklet Maker . . . . . . . . . . . . . . . . . . . . . . . . . . . . . . . . . . . . . . . . . . . . . . . . . . . . . . . . . . . . . . . . . . . . . . . . 226
Access Booklet Maker from the printer driver . . . . . . . . . . . . . . . . . . . . . . . . . . . . . . . . . . . . . . . . . . . . . . . . . . 227
Access Booklet Maker from Command WorkStation . . . . . . . . . . . . . . . . . . . . . . . . . . . . . . . . . . . . . . . . . . . . 227
Create a booklet . . . . . . . . . . . . . . . . . . . . . . . . . . . . . . . . . . . . . . . . . . . . . . . . . . . . . . . . . . . . . . . . . . . . . . . . . . . . . 227
Create a booklet from the Booklet Maker window . . . . . . . . . . . . . . . . . . . . . . . . . . . . . . . . . . . . . . . . . . . . . . 227
Create a booklet by using the Booklet Maker wizard . . . . . . . . . . . . . . . . . . . . . . . . . . . . . . . . . . . . . . . . . . . . . 228
Booklet type . . . . . . . . . . . . . . . . . . . . . . . . . . . . . . . . . . . . . . . . . . . . . . . . . . . . . . . . . . . . . . . . . . . . . . . . . . . . . . . . . 228
Fiery Command WorkStation
Contents
11
Saddle binding . . . . . . . . . . . . . . . . . . . . . . . . . . . . . . . . . . . . . . . . . . . . . . . . . . . . . . . . . . . . . . . . . . . . . . . . . . . . . 230
Nested Saddle binding . . . . . . . . . . . . . . . . . . . . . . . . . . . . . . . . . . . . . . . . . . . . . . . . . . . . . . . . . . . . . . . . . . . . . . 231
Perfect binding . . . . . . . . . . . . . . . . . . . . . . . . . . . . . . . . . . . . . . . . . . . . . . . . . . . . . . . . . . . . . . . . . . . . . . . . . . . . . 232
1-up Perfect binding . . . . . . . . . . . . . . . . . . . . . . . . . . . . . . . . . . . . . . . . . . . . . . . . . . . . . . . . . . . . . . . . . . . . . . . . . 233
Paper size . . . . . . . . . . . . . . . . . . . . . . . . . . . . . . . . . . . . . . . . . . . . . . . . . . . . . . . . . . . . . . . . . . . . . . . . . . . . . . . . . . . 233
Same as document size . . . . . . . . . . . . . . . . . . . . . . . . . . . . . . . . . . . . . . . . . . . . . . . . . . . . . . . . . . . . . . . . . . . . . 234
Shrink document page to fit a selected paper size . . . . . . . . . . . . . . . . . . . . . . . . . . . . . . . . . . . . . . . . . . . . . . . 235
Shrink to fit option . . . . . . . . . . . . . . . . . . . . . . . . . . . . . . . . . . . . . . . . . . . . . . . . . . . . . . . . . . . . . . . . . . . . . . . . . . 235
Page alignment . . . . . . . . . . . . . . . . . . . . . . . . . . . . . . . . . . . . . . . . . . . . . . . . . . . . . . . . . . . . . . . . . . . . . . . . . . . . . 237
Align pages . . . . . . . . . . . . . . . . . . . . . . . . . . . . . . . . . . . . . . . . . . . . . . . . . . . . . . . . . . . . . . . . . . . . . . . . . . . . . . . . 237
Page alignment and gutters . . . . . . . . . . . . . . . . . . . . . . . . . . . . . . . . . . . . . . . . . . . . . . . . . . . . . . . . . . . . . . . . . . 240
Creep compensation . . . . . . . . . . . . . . . . . . . . . . . . . . . . . . . . . . . . . . . . . . . . . . . . . . . . . . . . . . . . . . . . . . . . . . . . 242
Mixed Media with 1-up perfect binding . . . . . . . . . . . . . . . . . . . . . . . . . . . . . . . . . . . . . . . . . . . . . . . . . . . . . . . . 242
Specify Mixed Media settings in Booklet Maker . . . . . . . . . . . . . . . . . . . . . . . . . . . . . . . . . . . . . . . . . . . . . . . . 243
Navigate through jobs in Mixed Media . . . . . . . . . . . . . . . . . . . . . . . . . . . . . . . . . . . . . . . . . . . . . . . . . . . . . . . . . 244
View the layout of a job as pages . . . . . . . . . . . . . . . . . . . . . . . . . . . . . . . . . . . . . . . . . . . . . . . . . . . . . . . . . . . . . 244
View the layout of a job as sheets . . . . . . . . . . . . . . . . . . . . . . . . . . . . . . . . . . . . . . . . . . . . . . . . . . . . . . . . . . . . 245
Booklet Maker Mixed Media limitations . . . . . . . . . . . . . . . . . . . . . . . . . . . . . . . . . . . . . . . . . . . . . . . . . . . . . . . . 245
Add a cover . . . . . . . . . . . . . . . . . . . . . . . . . . . . . . . . . . . . . . . . . . . . . . . . . . . . . . . . . . . . . . . . . . . . . . . . . . . . . . . . . 245
Change the document size within an application . . . . . . . . . . . . . . . . . . . . . . . . . . . . . . . . . . . . . . . . . . . . . . . 246
Change the unit of measurement . . . . . . . . . . . . . . . . . . . . . . . . . . . . . . . . . . . . . . . . . . . . . . . . . . . . . . . . . . . . . 246
Preview a booklet . . . . . . . . . . . . . . . . . . . . . . . . . . . . . . . . . . . . . . . . . . . . . . . . . . . . . . . . . . . . . . . . . . . . . . . . . . . . 247
Booklet workflow examples . . . . . . . . . . . . . . . . . . . . . . . . . . . . . . . . . . . . . . . . . . . . . . . . . . . . . . . . . . . . . . . . . . 247
Print a Perfect booklet . . . . . . . . . . . . . . . . . . . . . . . . . . . . . . . . . . . . . . . . . . . . . . . . . . . . . . . . . . . . . . . . . . . . . . . 247
Print a Saddle booklet . . . . . . . . . . . . . . . . . . . . . . . . . . . . . . . . . . . . . . . . . . . . . . . . . . . . . . . . . . . . . . . . . . . . . . . 247
Print a Nested Saddle booklet . . . . . . . . . . . . . . . . . . . . . . . . . . . . . . . . . . . . . . . . . . . . . . . . . . . . . . . . . . . . . . . . 248
Booklet Maker limitations . . . . . . . . . . . . . . . . . . . . . . . . . . . . . . . . . . . . . . . . . . . . . . . . . . . . . . . . . . . . . . . . . . . . 248
Booklet Maker glossary . . . . . . . . . . . . . . . . . . . . . . . . . . . . . . . . . . . . . . . . . . . . . . . . . . . . . . . . . . . . . . . . . . . . . . 249
Index
. . . . . . . . . . . . . . . . . . . . . . . . . . . . . . . . . . . . . . . . . . . . . . . . . . . . . . . . . . . . . . . . . . . . . . . . . . . . . . . . . . . . . . 253
Fiery Command WorkStation
Contents
12
Fiery Command WorkStation
Overview
13
Overview
Command WorkStation
Command WorkStation is the print job management interface for Fiery Servers.
With Command WorkStation, you can connect to multiple Fiery Servers and then manage jobs from a single
location. The intuitive interface makes complex tasks simple for operators and administrators, regardless of the
number or types of jobs you process.
Job Center and Device Center are integrated features of Command WorkStation that include tools to search for jobs,
preview jobs, assign workflows, and manage digital and offset print jobs. You can use Command WorkStation tools
to do the following tasks:
•
Modify and merge jobs
•
View information about jobs and Fiery Servers
•
View, select, and modify custom print options
•
View and modify custom workflows
A number of optional features are available on Fiery Servers and all are documented in this Help system. However,
optional features only display in Command WorkStation if they are supported by the connected Fiery Server. For
example, if the connected Fiery Server supports only black and white printing you cannot print in color.
You can see the Fiery system version installed on your print controller in Device Center, on the General info tab (See
The Command WorkStation workspace on page 13).
For more information about Command WorkStation features, see Utilities, which is part of the user documentation
set.
Fiery Central
Fiery Central software integrates your production systems to make existing or new copiers/printers more scalable
and productive. It combines multiple Fiery Driven digital printers, and other select copiers/printers, into a
centralized print production system that you can access through Command WorkStation.
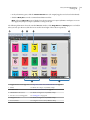
The Command WorkStation workspace
With the main window, you can access frequently used features. You can customize the display of the main window
by collapsing or expanding panes and queues.
The Command WorkStation main window includes the following areas:
•
Main menus - Access commands through these menus (see Commands for managing jobs in a queue on page
14).
•
Job Center - Use to view and manage jobs sent to the connected Fiery Server. Job Center includes the Printing
and Processing queues.
Fiery Command WorkStation
Overview
14
•
Device Center - Use to configure the connected Fiery Server and access various print management tools.
•
Servers - Use to connect and disconnect Fiery Servers, and to view status and error messages and consumables.
•
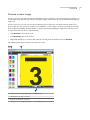
Job Summary - View the page content (thumbnails) of a processed job. From the Job Summary pane, you can
open Preview to see information about spooled, unprocessed jobs, and jobs with and without raster data.
Job Center
The Command WorkStation Job Center is a centralized location where you can view and manage jobs sent to the
connected Fiery Server. Job Center includes the Printing and Processing queues and the Held, Printed, and Archive
lists.
You can use Job Center to do the following:
•
Search for jobs, view job properties, and preview jobs across all Fiery Servers. A customizable tool bar allows
users to see detailed information about their jobs.
•
Assign workflows and manage jobs
•
Group jobs for efficient job management and visibility of job status
•
View the status of all Fiery Servers
•
View information on copier/printer, consumables and media, and job requirements
Commands for managing jobs in a queue
You can access commands for a job that is displayed in the Held, Printed, or Archived queues in Job Center. Rightclick on a job in a queue to display the list of commands or select one from the Actions menu.
Optional features are displayed only if they are supported by the connected Fiery Server.
Apply Workflow
Displays a list of server presets and virtual printers which can be applied to
the selected job.
Archive
Archives a selected job.
Calibrate job
Links to Calibrator.
Color Verification (option)
Opens the Color Verification Assistant, part of the Fiery Color Profiler
Suite.
Compose (option)
Opens Fiery Compose (if supported), where you can define the chapter
divisions of a job, print ranges of pages on varying types of media, insert
blank media between pages, and insert tab media containing text labels (if
the printer supports tab printing).
Delete
Deletes a selected job.
Duplicate
Creates a copy of the selected job.
Image Enhance Visual Editor
(option)
Opens Image Enhance Visual Editor (IEVE), an image enhancing application
that provides a visual workspace for adjusting individual images in PDF or
PostScript jobs submitted to Fiery Servers (including jobs submitted
through Fiery JDF workflows). For more information, see IEVE Help.
ImageViewer
Opens ImageViewer (if supported) displaying the first page of a single job
(displays the first selected job if multiple jobs are selected). For more
information, see ImageViewer on page 217.
Fiery Command WorkStation
Overview
15
Impose (option)
Opens Fiery Impose, which applies imposition layouts to jobs for custom
printing, binding, and trimming. Fiery Impose also applies impositions to
variable data jobs and saves imposed jobs as PDF files.
JobMaster (option)
Opens Fiery JobMaster, which provides advanced PDF-based job
preparation tools for scanning, tab creation and insertion, page numbering,
chapter creation, and late stage editing.
Merge Jobs
Creates merged jobs in the Held list. For more information, see Use Quick
Doc Merge on page 112.
Preflight
Opens the Preflight Settings dialog box with a single selected job displayed
(displays the first selected job if multiple jobs are selected) and checks most
the common areas of output error to ensure that files print successfully. For
more information, see Preflight on page 216.
Preview
Opens the Preview dialog box, where you can view thumbnail images of
pages in the job.
Print
Prints a selected job.
Print and Delete
Prints and then deletes a selected job.
Print and Hold
If a selected job is processed, sends the job to the Printing queue. If a
selected job is not processed, sends the job to the Processing queue. After
the job prints, a raster of the job is kept when it is returned to the Held list.
Print Next
Sends a selected job to the top of the Printing queue without interrupting
the job that is currently printing. Has the same result as dragging the job to
the top of the Printing queue.
Process and Hold
Sends a selected job from the Held, Printed, or Archived lists to the
Processing queue.
Process Next
Sends a selected job to top of the Processing queue without interrupting the
job that is currently printing. Has the same result as dragging the job to the
top of the Processing queue.
Proof Print
Prints a proof (a copy) of a selected job without changing the job's original
copy count. For more information, see Proof Print on page 109.
Properties
Opens the Job Properties window, which displays information about a
selected job. If multiple jobs are selected, properties that are not shared by
the selected jobs are blank.
Remove Raster
Removes the raster of a selected job from the Held or Archived lists.
Rename
Renames a selected job.
Rush Print
Sends a selected job to the top of the Printing queue and immediately prints
the job, interrupting the job that is currently printing.
Send To
Moves a job to the queue of another Fiery Server. The destination Fiery
Server must be connected to Command WorkStation, otherwise it is not
displayed in the Send To list.
View Preflight Report
Opens the Preflight Report dialog box. For more information, see Preflight
on page 216.
Fiery Command WorkStation
Overview
16
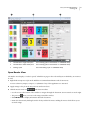
Device Center
The Command WorkStation shows system information in a single workspace. You can use the Device Center to
configure the connected Fiery Server and access various print management tools. You can integrate server setup
functions, set user privileges, and set up queues and job logs.
You can use Device Center to do the following tasks:
•
View information about the connected Fiery Server, including information about consumables on the associated
copier/printer.
•
View and modify a diagram of your color workflow
•
View and modify Paper Catalog, variable data printing (VDP), color profile, spot color, and font settings
•
View available virtual printers and server presets, and automate image correction with Image Enhance settings
•
View and compare user privileges as assigned by your administrator
•
View a detailed log of all processed and printed jobs
Device Center includes the following tabs:
•
General - View information about the connected Fiery Server, including the IP address, capacity (amount of
hard disk drive space available), and a list of installed options and packages. The General tab includes the
following tabs: General Info, Server Configuration, and Tools.
•
Color Setup - View and modify a diagram of your color workflow. The Color Setup tab includes the following
tabs: Color Management, Control Bar, Trapping, Progressives, and Halftone Simulation.
•
Resources - View and modify Paper Catalog, variable data printing (VDP), color profiles, spot colors, and font
settings. The Resources tab includes the following tabs (if supported by the connected Fiery Server): Paper
Catalog, VDP Resources, Profiles, Spot Colors, and Fonts.
•
Workflows - View a list of available virtual printers and server presets, and automate the correction of images
with Image Enhance settings. The Workflows tab includes the following tabs: Job Presets, Virtual Printers, and
Image Enhance.
•
Users - View and compare user privileges as assigned by your Administrator. The Users tab includes the Users
& Groups tab, Compare Rights tab, and the Configure button. With the Configure button, you can modify user
and group privileges.
•
Logs - With the Logs tab, you can view a detailed log of all processed and printed jobs. The Logs tab includes the
Job Log tab.
Fiery Command WorkStation
Adding and connecting a Fiery server
17
Adding and connecting a Fiery server
Access levels
You can log on as Administrator, Operator, or Guest. Administrators can set passwords for each type of user.
•
Administrator - Has full access to all Command WorkStation and Fiery Server control panel functions. An
Administrator password is required.
•
Operator - Has access to all Job Center functions. In Device Center, an Operator does not have access to
Configure, Backup and Restore, changing passwords, and deleting the Job Log. An Operator can view Paper
Catalog, virtual printers, and color management functions, but cannot edit them. An Operator password is
required.
•
Guest - Can download, view job status, edit preferences, change layouts, but cannot access the Job Log, or make
changes to Fiery Server Setup. No password is required.
For more information about setting access levels, see Configuration and Setup, which is part of the user
documentation set.
Connecting to a server
To use Command WorkStation, you must connect to a Fiery Server.
The Servers list of the Command WorkStation workspace manages access to any available Fiery Server. You can
choose to add (and connect to), remove, and disconnect from, a Fiery Server.
You can search for a Fiery Server by entering the DNS name or IP address in the Connect to Servers dialog box.
After the server connection is made and authenticated, the IP address switches to the Fiery Server name in the
Servers list. Command WorkStation can be connected to more than one Fiery Server at a time.
Add and connect to a Fiery server
You can add, connect to, and reconnect to a Fiery Server.
Before you begin
Before you add a Fiery Server, you need its DNS name or IP address. If you do not have the DNS name or the IP
address, you can use search to find any available Fiery Server on the network.
Fiery Command WorkStation
Adding and connecting a Fiery server
18
1 Do one of the following:
•
To add a Fiery Server, click Server > Connect New or click the green plus sign in the Servers list. Type
the IP address or DNS name for the Fiery Server in the Connect to a server field, and then click the plus
sign icon to add it to the list of servers. Then click Connect.
To search for an available Fiery Server, click the Search icon.
•
To connect to a new Fiery Server, click Server > Connect New. In the Connect to a server field, type the
print controller’s IP address or DNS name and click Connect.
To find a Fiery Server by name or IP address, look in the Disconnected servers list in the Connect to Server
window. If not, you can click the Search icon.
•
To reconnect to a Fiery Serverselect it and click Server > Connect (or click the Connect icon).
You can also reconnect by double-clicking on the Fiery Server.
2 Select Administrator, Operator, or Guest from the User list, and type the appropriate password.
You do not need to type a password when logging in as Guest.
Note: In addition to the three default user names of Administrator, Operator, and User, users can login with
their own user names if the network administrator has set them as a member of one of the groups in
Configure > User Accounts.
3 Click Login.
Search for an available Fiery server
If you do not have the DNS name or IP address of a Fiery Server, you can search by parameters by using an advanced
auto search.
1 In the Connect to Server dialog box, click the Search icon (magnifying glass) to open the Search window.
2 Select Auto Search, IP Range, or Subnet to specify the range to search, and then click Go.
Any available Fiery Server that matches the search criteria is shown. You can filter the search result list by typing
a keyword in the Filter by keyword field.
3 Select the Fiery Server from the results list and click Add to add it to the Server List.
Log off the Fiery server
Logging off the Fiery Server terminates the connection between the Fiery Server and Command WorkStation.
1 Select a Fiery Server from the Servers list.
2 Do one of the following:
•
Click the minus sign icon to disconnect and remove the Fiery Server from the Servers list.
•
Click the disconnect icon located to the right of the minus sign icon.
•
Right-click the Fiery Server and choose Disconnect or Remove from List.
Fiery Command WorkStation
Adding and connecting a Fiery server
19
Change users for a Fiery server
You use the Switch User command to log in as another user.
1 Click Server > Switch User to display the Login window.
2 Select Administrator, Operator, or Guest from the User list.
3 Type the password for the specified user.
You do not need to type a password when logging in as Guest.
4 Click Login.
View another Fiery server
You can switch the view from one connected Fiery Server to another in Command WorkStationCommand
WorkStation.
•
Do one of the following:
•
Click Server > Switch to, and then choose another Fiery Server from the submenu.
•
Click another Fiery Server in the Servers list to switch views from one connected Fiery Serverto another.
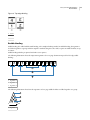
The Servers list
The Servers list shows information about Fiery Servers that you are connected to or that are in the Favorites list.
The Servers list is "drop zone", which means that you can drag and drop files to the Servers list. It is designed so that
status and error messages, and information about consumables, displays immediately below the name of the Fiery
Server. It can be expanded or collapsed by clicking the double arrow in the section title. If you exit Command
WorkStation, the Servers list is retained.
Status icons
The following status icons appear in the Servers list :
Adds a new Fiery Server and opens the Connect to Server window.
Disconnects and removes the Fiery Server from the Servers list.
Disconnects the Fiery Server, which remains in the Servers list.
Connects to the Fiery Server and opens the Login window.
Indicates that the Fiery Server is idle without errors.
Indicates that the Fiery Server is busy processing or printing.
Indicates that the Fiery Server has encountered an error either processing or printing.
Indicates that the Fiery Server is connected to Command WorkStation.
Indicates that the Fiery Server is not connected to Command WorkStation.
Fiery Command WorkStation
Adding and connecting a Fiery server
20
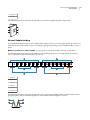
Consumables
Consumables are limited resources such as paper, toner or ink, and staples that are used (or "consumed") by the
copier/printer to print jobs.
Information about consumables is available in:
•
The Servers list, in the Consumables section immediately below the name of the Fiery Server. Click the arrow to
expand the section, if needed.
•
Device Center > General > General Info > Consumables.
The Consumables section in both the Servers list and Device Center includes information about available paper
trays, paper levels, and current toner or ink levels. From Device Center, you can also find additional information
about waste toner, fuser oil, and staples. To view informaton about a tray, you can:
•
Double-click the tray.
•
Select the tray and click the arrow.
If the Fiery Servers supports tray association, you can assign media entries in Paper Catalog to specific copier/printer
trays.
Server information
The Server Information tab, which is the second tab located in the lower-left corner, provides a snapshot of
information for the selected Fiery Server.
The tab displays general information, such as the RAM allocated to the Fiery Server system software and hard disk
usage for different kinds of jobs.
To view a detailed and complete list of information, choose Device Center > General > General Info.
Error and status messages
The Servers list provides information about the status of the Fiery Server and error messages about on the copier/
printer.
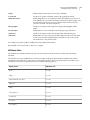
Status messages
Status messages may be about the Fiery Server or copier/printer. The messages are as follows:
Idle
Busy
Printing
Fiery Server or copier/printer is idle.
Fiery Server is processing a job.
Fiery Server is printing a job.
Canceling
Fiery Server is canceling a job.
Sleep
Copier/printer is in Sleep mode.
Low Power
Copier/printer is in Low Power mode.
Calibration
Copier/printer is performing calibration.
Maintenance Required
Scheduled copier/printer maintenance is required.
Warming Up
Copier/printerr is warming up after waking from sleep or low power mode.
Toner Near Empty
The specified toner is almost empty. Time to order new toner.
Fiery Command WorkStation
Adding and connecting a Fiery server
21
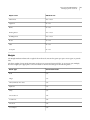
Error messages
Error messages are very important messages about issues that impact both the Fiery Server and the copier/printer
and prevent jobs from printing (for example, a paper jam). If multiple errors occur simultaneously, the most critical
error appears first. After the first error is resolved, the next error appears.
The following are examples of error messages that may appear:
•
Check copier/printer power and cable connections
•
Copier/printer serial communications lost
•
Printing suspended
•
Copier/printer front door open
•
Toner empty
•
Paper jam
Paper mismatch errors
If a job is submitted to print, and it does not match the paper or paper tray attributes, the job generates an error. The
job remains in the Print queue or is blocked, canceled or suspended based on Fiery Server settings.
The Fiery Server has the following mismatch error modes:
•
Suspend on Mismatch
•
Cancel on Mismatch
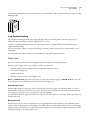
Suspend on Mismatch jobs remain in the Print queue for an interval of time ("the timeout period") defined in Setup.
During this time, a mismatch error message and a timer appear. The timer indicates how much time you have to
correct the error before the job is released from the Print queue and canceled. To avoid automatic cancellation of the
job, you must load the correct paper in the paper tray before the timeout period ends. Meanwhile, the next job
prints. If that job prints before the timeout period ends, the Suspend on Mismatch job is resubmitted to the Print
queue.
Fiery Command WorkStation
Customizing Command WorkStation
22
Customizing Command WorkStation
Set Command WorkStation preferences
You can set preferences globally for Command WorkStation—for example, to control application settings such as
animated graphics, or to define the paths to temporary folders.
1 Do one of the following to open the Preferences dialog box:
•
On a Windows computer, click Edit > Preferences.
•
On a Mac OS computer, click Command WorkStation > Preferences.
2 Specify any of these preferences:
• Automatically connect to servers from previous session - Applies only to users with saved passwords.
When selected, instructs Command WorkStation to automatically connect to each Fiery Server that you
connected to previously.
• Automatically check for updates - Opens the Fiery Software Manager to check for a more recent version
of Command WorkStation software and the Fiery applications online.
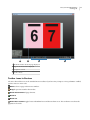
• Enable Cube Rotation - Turns on the display of cube rotation during transitions.
• Enable Animation - Turns on the display of animated graphics in the processing and printing bars for the
specified Fiery Server.
• Enable Tooltips - Turns on the display of pop-up text that describes Command WorkStation buttons and
options. When this option is selected, tips appear when you hold the mouse pointer over the button or option.
• Monitor Profile - Either displays the operating system setting for the monitor profile or allows you to select
the monitor profile for your primary monitor. The monitor profile is used by Color Editor and Paper
Simulation. The profile chosen during installation is the default. Click the Browse button to locate and import
a new monitor profile.
• Temporary Path - Specifies the folder where Command WorkStation temporarily stores copies of the jobs
you edit or change. To change the temporary path, click Browse and specify a folder.
• PS to PDF Conversion - Specifies the default Adobe PDF setting used when converting files to PDF for
Impose/Compose and Quick Doc Merge. Select Use server conversion, if supported to allow the Fiery
Server to convert the files on the server rather than on the user computer, and to select the PDF setting that
you want to use. Select User selected joboptions file to allow the user to browse and upload their own
profile. If nothing is selected, the Fiery Server will use its own default profile.
Server conversion is often faster than downloading the file to the client computer for conversion, and then reuploading it to the Fiery Server afterward. However, this option is not recommended in the following
scenarios:
•
There are licensed fonts installed only on the user's computer, which are required for conversion.
•
If a newer Adobe Acrobat version is available, the conversion must be done with the newer version to
support the new Acrobat features.
Fiery Command WorkStation
Customizing Command WorkStation
•
The user wants to ensure that the Fiery Server resources are allocated for processing only, not for file
conversion.
•
The user is connected to a previous version of the Fiery Server, which does not support server side
conversion.
23
• Imposition Template Path - Specifies the folder where the Imposition templates are located for Command
WorkStation. To change the template folder path, click Browse and specify a folder.
• Scale - Specifies the default scale value used for imposed jobs. Choose Scale to Fit or 100%.
• Finish Size - Specifies the default finished size for imposed jobs based on Crop Box or user defined values.
The Based on Crop Box setting is the default and is dependent on the PDF crop box. The User Defined
setting allows Fiery Impose to detect trim box settings, when present within the document, and use them as the
default finished size.
• Application Language - Allows you to select the language you want Command WorkStation to display in.
By default, Command WorkStation uses the local operating system language, if the language is supported. If
the language is not supported, Command WorkStation uses English, or the language selected during software
installation (Windows only).
• Units - Specifies the units of measurement used to display attributes, such as page sizes and custom sizes, that
you enter in the Job Properties dialog box and in the Command WorkStation window. This setting does not
affect predefined page-size values.
Note: If Impose is installed and turned on, the Units setting also applies to the values entered manually in the
Imposition window.
- Select Enable caching to allow Command WorkStation to store information such as
thumbnails, locally, to allow for faster viewing of jobs on screen. Specify the folder to store the cached
information. Click Change Folder to browse to a new path location. Click Clear Cache to remove the stored
data from the folder specified. Use the sliding menu to specify the maximum disk space used for caching.
• Cache Preferences
3 Do one of the following:
•
Click Reset to reset the default values. (The default values vary by Fiery Server.)
•
Click OK to close the Preferences dialog box.
Manage Job Center columns
You can customize column headings for the Printing, Processing, Held, Printed, and Archived job windows. Change
the order of these columns or add/delete them to present information relevant to your particular print environment.
Change the column display
You can specify sets of Job Center columns, add columns, or remove them.
1 Right-click any column below the window title bar.
2 Select either Standard Set or VDP Set.
3 Select an item from the menu to add to or remove from the columns.
Fiery Command WorkStation
Customizing Command WorkStation
24
Adjust the width of a column
You can change the width of a Job Center column.
•
Drag a column border to the left or right.
Resize panes and queues
You can expand or collapse the Printing, Processing, Job Summary, and Servers list panes according to your
workstation's needs.
Resize the Printing and Processing queues
You can expand, collapse, or change the location of the queue.
•
Do one of the following:
•
From Job Center, double-click the Printing or Processing bar to expand or collapse the window.
•
Click and hold the window grip (
location.
•
Click View > Expand/Collapse Printing Queue or View > Expand/Collapse Processing Queue.
) on bottom of the window queue and drag it up or down to the new
Resize the Job Summary and Servers list panes
You can expand, collapse, or change the location of the pane.
•
Do one of the following:
•
Click the arrow icon ( ) on top of the window's title bar to move the window left or right to the new location.
•
Click View > Expand/Collapse Job Info or View > Expand/Collapse Server List.
Customize the toolbar
You can add toolbar icons to the Job Center toolbar. You can also restore the default toolbar icons, change the size of
icons, and display icons with or without text.
Some toolbar icons are available only if the Fiery Server supports them.
1 Right-click anywhere in the toolbar, and select Customize from the submenu that appears.
2 Add or remove toolbar icons by dragging to or from the toolbar. You can add the following toolbar icons:
• Archive - Archives the selected job.
• Backup and Restore - Opens the Backup and Restore window.
• Compose - Opens the Compose window for the selected job.
• Configure - Opens the Configure window for the selected Fiery Server.
• Help - Opens the Help window.
• Impose - Opens the Impose window for the selected job.
Fiery Command WorkStation
Customizing Command WorkStation
25
• JobMaster - Opens the JobMaster window for the selected job.
• Process - Processes the selected job.
• Resume Printing - Resumes printing of all jobs.
• Separator - Adds a vertical line between each icon in the toolbar.
• Suspend Printing - Suspends printing of all jobs.
3 Specify how the toolbar icons should be shown by right-clicking the toolbar and choosing an option:
• Icons - Displays the toolbar buttons as icons without text.
• Icons and Texts - Displays the toolbar buttons as icons with text.
• Use Small Icons - Displays the toolbar buttons as small icons. You can also select the Icons and Texts option
in conjunction with this option.
4 Click Restore Default Set to return to the default toolbar icons.
Default toolbar icons
The Job Center toolbar contains several icons by default.
New job
Import
Print
Opens the Fiery Compose/Impose/JobMaster window, where you can
create a brand new print job.
Opens the Import dialog box.
Prints the selected job.
Properties
Opens the Job Properties window for the selected job.
Preview
Opens the Preview window with the selected job displayed.
Delete
Deletes the selected job.
Calibrate
Opens the Calibrator window for the Fiery Server.
Logs
Opens the Job Log window.
Paper Catalog
Opens the Paper Catalog window.
Start Sample Print
Prints extra page(s) to an easily accessible output tray during a long print job
to verify that the copier/printer is performing as expected.
Stop Sample Print
Stops printing sample page(s).
Note: Some tools are available only if the Fiery Server supports them.
Fiery Command WorkStation
Configuring server settings
Configuring server settings
View, save, or print server configuration settings
The Server Configuration tab lists the current Fiery Server settings.
View server configuration settings
From the Server Configuration tab, you can view categories of Fiery Server settings or change the Setup options.
1 Connect to the desired Fiery Server and click Device Center > General > Server Configuration.
2 Do one of the following:
•
Click the shortcuts on the left side of the page to view settings for a particular category.
•
Click Configure in the bottom-right corner of the window to change current Fiery Server Setup options.
Save the server configuration as a file
You can save the server configuration as a file for each Fiery Server you are connected to. This is especially useful if
you are managing multiple Fiery Servers and want to keep track of any changes made in Fiery Server Setup.
1 Connect to the desired Fiery Server and do one of the following:
•
Click Device Center > General > Server Configuration.
•
Choose Go > Server Configuration.
2 Click Save As.
3 Specify the file name and location.
4 Click PDF or Plain Text for the export file type.
5 Click Save.
Print the server configuration page
After you have performed Setup, print the server configuration to confirm your settings, and post it near the Fiery
Server for quick reference. Users need the information on this page, such as the current printer default settings.
1 Connect to the desired Fiery Server and do one of the following:
•
Click Device Center > General > Server Configuration.
•
Choose Go > Server Configuration.
26
Fiery Command WorkStation
Configuring server settings
27
2 Do one of the following:
•
Click Print, select the printer to send your Server Configuration page to, and then click Define if you want to
specify different job properties for the print job from what is currently set as default on the Fiery Server. Click
Print again to print the page.
•
Click File > Print > Server Configuration. A Server Configuration page is sent to the printer you are
currently connected to. The page prints with the default paper size and options of the Fiery Server.
Access Configure
Use Configure to set up the Fiery Server. Setup is required the first time the Fiery Server is turned on or after system
software is installed. You also use Configure to specify information about the network environment and printing
preferences for jobs that users send to the Fiery Server.
1 Connect to the desired Fiery Server, log in as an Administrator, and access Configure one of the following ways:
•
Click Device Center > General > Configure.
•
Click Device Center > Users > Configure.
•
Choose Server > Configure.
2 Change current Fiery Server Setup options.
Note: Some Configure options may not be supported by your Fiery Server.
Next steps
For information about Configure options not discussed in this Help, see Configuration and Setup, which is part of
the user documentation set.
Which version of Configure am I using?
There are two versions of Configure, and they are specific to the Fiery Server you are connected to. For example, you
may connect to a Fiery Server and see one version of Configure, and then connect to another Fiery Server and see a
Configure with a significantly different, improved interface.
For example:
•
If the Fiery system software is FS100/100Pro or earlier, the Fiery Server uses the older version of Configure.
•
If the Fiery system software is FS150/150Pro or later, the Fiery Server uses the latest version of Configure.
The following types of topics about Configure exist:
•
Procedures that are specific to only FS100/100Pro or earlier.
•
Procedures that are specific to only FS150/150Pro or later.
•
Combined procedures that describes what to do when connected to a Fiery Server with FS100/100Pro or earlier,
and notes about what to do with FS150/150 Pro or later.
If a topic does not include FS100/100Pro or FS150/150Pro in the title, it is a combined procedure.
1 In Command WorkStation, click Device Center.
Fiery Command WorkStation
Configuring server settings
28
2 In Device Center, click General and then General Info.
Information specific to the Fiery Server you are connected to displays.
Next to Fiery System, the codebase of the Fiery Server displays.
Configuration workflow
With Configure, you can view and maintain Fiery Server settings that are necessary for printing and processing jobs
over the network.
1 If necessary, view server configuration settings by connecting to the desired Fiery Server and clicking Device
Center > General > Server Configuration.
2 If you want to change the settings, click Configure in the lower-right corner.
3 From Configure, navigate to the setting that you want to change.
Important: There are two versions of Configure and they are specific to the Fiery Server you are connected to. If
you are not sure which version of Configure you are using, see Which version of Configure am I using? on page
27.
4 After you have changed the setting for an option, do one of the following:
•
On FS100/100 Pro or later: Click Undo or Apply.
•
On FS150/FS150 Pro or later: Click Cancel or Save.
5 When you have finished making your changes, reboot the Fiery Server.
Note: The changes you make are not applied until the Fiery Server reboots.
Users and groups
You can define privileges for the users who access the Fiery Server by assigning them to groups. Several groups are
provided by default, and you can create new groups. All users in a group have the same privileges.
You can view detailed information about users and groups from Command WorkStation > Device Center >
Users.
In addition to assigning the users that you have created to a group, you can add users from your organization's global
address list. To do so, you must first enable LDAP services on the Fiery Server.
Create new users (FS100/100Pro)
If users are not in the global address list or contact list, you can create them manually. Any name that appears in the
contact list can become a user that you assign to a group.
Important: If you are connected to a Fiery Server with FS100/100 Pro or earlier, use this procedure. If you are not
sure about which version of Configure you are using, see Which version of Configure am I using? on page 27. An
alternative procedure about what to do with FS150/150Pro is available.
The Administrators and Operators groups have a default user named "admin" or "operator," respectively.
1 From Configure, select Users and Groups.
Fiery Command WorkStation
Configuring server settings
29
2 Click Contact List.
You can define a password when you create a new user. Follow your organization’s guidelines for the minimum
length of the password and for the frequency with which it must be changed.
3 Click Add.
4 Type the appropriate information in the fields, and click Save.
Note: To create several users in succession, click Save and Add.
Create new users (FS150/150Pro)
If users are not in the global address list or contact list, you can create them manually. Any name that appears in the
contact list can become a user that you assign to a group.
Important: If you are connected to a Fiery Server with FS150/150 Pro or later, use this procedure. If you are not
sure about which version of Configure you are using, see Which version of Configure am I using? on page 27. An
alternative procedure about what to do with FS100/100Pro is available.
The Administrators and Operators groups have a default user named "admin" or "operator," respectively.
1 From Configure, select User Accounts.
2 Click the Fiery Contact List button.
3 In the Fiery Contact List dialog box, click the Add User button.
4 In the Create User dialog box, specify the required information. Click Create.
5 Click Close.
Create groups (FS100/100Pro)
When you create a group, you define its privileges. You can add new or existing users to the group when you create
it, or you can create a group without adding users and then add them later.
Before you begin
Important: If you are connected to a Fiery Server with FS100/100 Pro or earlier, use this procedure. If you are not
sure about which version of Configure you are using, see Which version of Configure am I using? on page 27. An
alternative procedure about what to do with FS150/150Pro is available.
To add users from your organization's global address list, you must first enable LDAP services on the Fiery Server.
1 From Configure, select Users and Groups.
The current list of groups is displayed, including several default groups.
Fiery Command WorkStation
Configuring server settings
30
2 In the Users and Groups window, select or clear Allow users to print without authentication.
If this option is selected, anyone can print to the Fiery Server, regardless of whether you define that person as a
user, add users to a group, or assign privileges to the groups.
If this option is cleared, only users in groups for which you have enabled printing privileges can print. Also, users
in the Guests group cannot print, unless you otherwise set printing privileges for the Guests group. By default, the
Guests group has no printing privileges.
Note: If your copier/printer also offers a user authentication method, you may not be able to use both the copier/
printer and the Fiery Server authentication methods simultaneously.
3 Click Create Group.
4 Enter a group name and a description.
5 Select the appropriate privileges.
Note: These privileges may not be supported on all Fiery Servers.
• Calibration - Allows members of this group to calibrate the Fiery Server. Only Administrator and Operator
groups have access to this privilege.
• Create Server Presets
their job.
- Allows members of this group to save a set of print options that users can select for
• Fiery Mailbox - Allows members of this group to have individual mailboxes.
• Manage Workflows - Allows members of this group to create, edit, and delete Server Presets and virtual
printers.
• Print in B&W - Restricts members to print only in black and white.
• Print in Color and B&W - Allows members to print in color and grayscale.
Note: If you cleared the option Allow users to print without authentication, the Fiery Server still allows jobs to
be submitted without authentication from Hot Folders.
6 Do one of the following:
•
To create the group without adding users, click Save.
•
To add users to the group, click Save and Add Members.
7 In the Show contacts from list, choose the source of users.
Global Address List (if LDAP is configured and enabled) contains names from your organization's corporate
database. Contact List contains users that you have already created.
8 Select the name from the Available contacts list and click Add.
The user appears in the Members list on the right.
Groups created in Configure that share domain groups obtained from the corporate server via LDAP are updated
dynamically. This is useful because the Fiery Server automatically verifies changes (such as additional group
members) in the LDAP domain groups and updates the Fiery Server group.
9 To search for a name in the Available contacts list, type the first part of the name in the Search field and click Go.
10 To return to the full list of Available contacts, click Reset.
Fiery Command WorkStation
Configuring server settings
31
11 If the name you want to add does not exist, click Add New, type the appropriate information in the Add New
Contact window, and then click Save.
12 To save your changes, click Save in the Add Member window.
Create groups (FS150/150Pro)
When you create a group, you define its privileges. You can add new or existing users to the group when you create
it, or you can create a group without adding users and then add them later.
Before you begin
Important: If you are connected to a Fiery Server with FS150/150 Pro or later, use this procedure. If you are not
sure about which version of Configure you are using, see Which version of Configure am I using? on page 27. An
alternative procedure about what to do with FS100/100Pro is available.
To add users from your organization's global address list, you must first enable LDAP services on the Fiery Server.
1 From Configure, in Security > Printing Privileges set Allow printing from to Authorized users.
•
If All users is selected, anyone can print to the Fiery Server, regardless of whether you define that person as a
user, add users to a group, or assign privileges to the groups.
•
If Authorized users is selected, only users in groups for which you have enabled printing privileges can
print. Also, users in the Guests group cannot print, unless you otherwise set printing privileges for the Guests
group. By default, the Guests group has no printing privileges.
Note: If your copier/printer also offers a user authentication method, you may not be able to use both the copier/
printer and the Fiery Server authentication methods simultaneously.
2 In User Accounts, click Add Group..
The current list of groups is displayed, including several default groups.
3 In the Add Group dialog box, enter a group name and a description, and select privileges for the group.
4 Select the appropriate privileges.
Note: These privileges may not be supported on all Fiery Servers.
• Calibration - Allows members of this group to calibrate the Fiery Server. Only Administrator and Operator
groups have access to this privilege.
• Create Server Presets
their job.
- Allows members of this group to save a set of print options that users can select for
• Fiery Mailbox - Allows members of this group to have individual mailboxes.
• Manage Workflows - Allows members of this group to create, edit, and delete Server Presets and virtual
printers.
• Print in B&W - Restricts members to print only in black and white.
• Print in Color and B&W - Allows members to print in color and grayscale.
Note: If Allow printing from is set to Authorized users, the Fiery Server still allows jobs to be submitted
without authentication from Hot Folders.
Fiery Command WorkStation
Configuring server settings
32
5 Do one of the following:
•
To create the group without adding users, click Save.
•
To add users to the group, click Save and Add Users.
If you choose Save and Add Users, the Assign User dialog box displays.
6 In the Assign User dialog box, add or remove users from one of the following: the Fiery Contact List or Global
Address List.
• Fiery Contact List - Contains users that you have already created.
• Global Address List - LDAP must be configured and enabled. Contains names from your organization's
corporate database.
Groups created in Configure that share domain groups obtained from the corporate server via LDAP are updated
dynamically. This is useful because the Fiery Server automatically verifies changes (such as additional group
members) in the LDAP domain groups and updates the Fiery Server group.
Add users to existing groups (FS100/100Pro)
You can add existing users to an existing group, or you can create users and add them to the existing group. You can
add users to as many groups as you want.
Important: If you are connected to a Fiery Server with FS100/100 Pro or earlier, use this procedure. If you are not
sure about which version of Configure you are using, see Which version of Configure am I using? on page 27. An
alternative procedure about what to do with FS150/150Pro is available.
Creating a user, even with the required password and user name, does not assign any privileges to that user until you
add the user to a group. If you selected the Allow users to print without authentication check box, a user that is not
in a group can print but does not have any other privileges until the user is added to a group.
1 From Configure, select Users and Groups.
2 Select the group to which you want to add users and click View Detail.
3 In the Group Membership section, click Add.
4 In the Show contacts from list, choose the source of users.
Global Address List (if LDAP is configured and enabled) contains names from your organization's corporate
database. Contact List contains users that you have already created.
5 Select the name from the Available Contacts list and click Add.
The user appears in the Members list on the right.
6 To search for a name in the Available contacts list, type all or the first part of the name in the Search field and
click Go.
7 To return to the full list of Available contacts, click Reset.
8 If the name you want to add does not exist, click Add New, type the appropriate information in the Add New
Contact window, and then click Save.
9 To save your changes, click Save in the Add Member window.
10 In the View Group Detail window, click Close.
Fiery Command WorkStation
Configuring server settings
33
Add users to existing groups (FS150/150Pro)
You can add existing users to an existing group, or you can create users and add them to the existing group. You can
add users to as many groups as you want.
Important: If you are connected to a Fiery Server with FS150/150 Pro or later, use this procedure. If you are not
sure about which version of Configure you are using, see Which version of Configure am I using? on page 27. An
alternative procedure about what to do with FS100/100Pro is available.
Creating a user, even with the required password and user name, does not assign any privileges to that user until you
add the user to a group. If you selected the Allow users to print without authentication check box, a user that is not
in a group can print but does not have any other privileges until the user is added to a group.
1 From Configure, select User Accounts.
2 Select the group to which you want to add users, click Assign Users, and choose one of the following:
• Add from Contact List
• Add from Global Address List
Global Address List (if LDAP is configured and enabled) contains names from your organization's corporate
database. Contact List contains users that you have already created.
3 If the name you want to add does not exist, click Create New User & Assign, type the appropriate information
in the Create User dialog box, and then click Save.
Create mailboxes for scan jobs
To create mailboxes, you add users to a group that allows the Fiery Mailbox privilege.
1 Add users to a group.
You can add users to any group, not necessarily the default Scan Users group.
2 Assign the group the Fiery Mailbox privilege.
Mailboxes are created with the same names as the user names.
Move users among groups (FS100/100Pro)
When you move users from one group to another, your changes affect the user immediately.
Important: If you are connected to a Fiery Server with FS100/100 Pro or earlier, use this procedure. If you are not
sure about which version of Configure you are using, see Which version of Configure am I using? on page 27. An
alternative procedure about what to do with FS150/150Pro is available.
Note: If you are connected to a Fiery Server with FS150/150Pro, this exact functionality does not exist, but you can
easily add users to groups.
1 From Configure, select Users and Groups.
2 Select the group in which the user currently exists.
3 Click View Detail.
4 Select the check box to the left of the user's name.
To select all users in the group, select the check box to the left of the User Name heading at the top of the list.
Fiery Command WorkStation
Configuring server settings
5 In the Move To list, select the group to which you want to move the user; then click Close.
Remove users from groups (FS100/100Pro)
You can remove a user from a group. Any jobs that the user has already sent to the Fiery Server are still processed,
and the Job Log retains the name of the user with relevant job information.
Important: If you are connected to a Fiery Server with FS100/100 Pro or earlier, use this procedure. If you are not
sure about which version of Configure you are using, see Which version of Configure am I using? on page 27. An
alternative procedure about what to do with FS150/150Pro is available.
After you remove a user from a group, the user still remains in the Contact List.
Note: You cannot remove the default users named "admin" or "operator."
1 From Configure, select Users and Groups.
2 Select the group in which the user exists.
3 Click View Detail.
4 Select the check box to the left of the user's name.
To select all users in the group, select the check box to the left of the User Name heading at the top of the list.
5 Click Remove.
Remove users from groups (FS150/150Pro)
You can remove a user from a group. Any jobs that the user has already sent to the Fiery Server are still processed,
and the Job Log retains the name of the user with relevant job information.
Important: If you are connected to a Fiery Server with FS150/150 Pro or later, use this procedure. If you are not
sure about which version of Configure you are using, see Which version of Configure am I using? on page 27. An
alternative procedure about what to do with FS100/100Pro is available.
After you remove a user from a group, the user still remains in the Fiery Contact List.
Note: You cannot remove the default users named "admin" or "operator."
1 From Configure, select User Accounts.
2 Select the group in which the user exists.
3 Move the cursor over the name of the user you want to remove from the group.
Notice that the Edit and Delete icons display.
4 Click the Delete icon.
The user is deleted from the group, but not from the Fiery Contact List.
5 Alternatively, after 2, click the Assign User button and click Add from Contact List.
6 In the Assign User dialog box, select the check box for users that you want to remove and click Remove User.
34
Fiery Command WorkStation
Configuring server settings
Change user attributes (FS100/100Pro)
You can change user attributes, such as the user password and e-mail address. If the user is already logged in, your
changes affect the user when the user logs out and logs in again.
Important: If you are connected to a Fiery Server with FS100/100 Pro or earlier, use this procedure. If you are not
sure about which version of Configure you are using, see Which version of Configure am I using? on page 27. An
alternative procedure about what to do with FS150/150Pro is available.
To change the default Administrator and Operator passwords, you can use the following procedure or configure a
new password .
1 From Configure, select Users and Groups.
2 Click Contact List.
3 Select the user and click View/Edit.
4 In the Contact Information window, specify the new user information.
Note: You cannot edit the User Name. You also cannot edit the LDAP name from the Fiery Server.
5 Click Save; then click Close to close the Contact List window.
Change user attributes (FS150/150Pro)
You can change user attributes, such as the user password and e-mail address. If the user is already logged in, your
changes affect the user when the user logs out and logs in again.
Important: If you are connected to a Fiery Server with FS150/150 Pro or later, use this procedure. If you are not
sure about which version of Configure you are using, see Which version of Configure am I using? on page 27. An
alternative procedure about what to do with FS100/100Pro is available.
To change the default Administrator and Operator passwords, you can use the following procedure or configure a
new password .
1 From Configure, select User Accounts.
2 Click the Fiery Contact List button.
3 Move the cursor over the name of a user.
Notice that the Edit icon displays.
4 Click the Edit icon. In the Edit User dialog box, edit user attributes and click Save.
5 Alternatively, select the group in which the user exists.
If you select the Adminstrators group, notice that the column on the left is the Groups column and that the
column on the right is the User of Administrators Group. The name of the column on the right changes
based on which group you select.
6 Repeat steps 3-4.
Change group privileges (FS100/100Pro)
Important: If you are connected to a Fiery Server with FS100/100 Pro or earlier, use this procedure. If you are not
sure about which version of Configure you are using, see Which version of Configure am I using? on page 27. An
alternative procedure about what to do with FS150/150Pro is available.
35
Fiery Command WorkStation
Configuring server settings
36
1 From Configure, select Users and Groups.
2 Select the group whose privileges you want to change.
3 Click View Detail.
4 Click Edit Properties.
5 Select or clear the privileges that you want.
Note: These privileges may not be supported on all Fiery Servers.
• Calibration - Allows members of this group to calibrate the Fiery Server. Only Administrator and Operator
groups have access to this privilege.
• Create Server Presets - Allows members of this group to save a set of print options that users can select for
their job.
• Fiery Mailbox - Allows members of this group to have individual mailboxes.
• Manage Workflows - Allows members of this group to create, edit, and delete Server Presets and virtual
printers.
• Print in B&W - Restricts members to print only in black and white.
• Print in Color and B&W - Allows members to print in color and grayscale.
6 Click Save; then click Close.
Change group privileges (FS150/150Pro)
Important: If you are connected to a Fiery Server with FS150/150 Pro or later, use this procedure. If you are not
sure about which version of Configure you are using, see Which version of Configure am I using? on page 27. An
alternative procedure about what to do with FS100/100Pro is available.
1 From Configure, select User Accounts.
2 Move the cursor over the name of a group.
Notice that the Edit icon displays.
3 Click the Edit icon. In the Edit Group dialog box, select or clear privileges and click Save.
Note: These privileges may not be supported on all Fiery Servers.
• Calibration - Allows members of this group to calibrate the Fiery Server. Only Administrator and Operator
groups have access to this privilege.
• Create Server Presets - Allows members of this group to save a set of print options that users can select for
their job.
• Fiery Mailbox - Allows members of this group to have individual mailboxes.
• Manage Workflows - Allows members of this group to create, edit, and delete Server Presets and virtual
printers.
• Print in B&W - Restricts members to print only in black and white.
• Print in Color and B&W - Allows members to print in color and grayscale.
Fiery Command WorkStation
Configuring server settings
37
Delete users or groups (FS100/100Pro)
You can delete a user from the Fiery Server completely. Any jobs that the user has already sent to the Fiery Server are
still processed, and the Job Log retains the name of the user with relevant job information.
Important: If you are connected to a Fiery Server with FS100/100 Pro or earlier, use this procedure. If you are not
sure about which version of Configure you are using, see Which version of Configure am I using? on page 27. An
alternative procedure about what to do with FS150/150Pro is available.
Deleting a group does not delete the users in the group from the system.
Note: You cannot delete the default users named "admin," "operator," or "guest," and you cannot delete the
Administrators, Operators, or Guests group.
1 From Configure, select Users and Groups.
2 Do one of the following:
•
To delete a user, click Contact List and select the user.
•
To delete a group, select the group.
3 Click Delete, and then click OK when prompted.
Delete users or groups (FS150/150Pro)
You can delete a user from the Fiery Server completely. Any jobs that the user has already sent to the Fiery Server are
still processed, and the Job Log retains the name of the user with relevant job information.
Important: If you are connected to a Fiery Server with FS150/150 Pro or later, use this procedure. If you are not
sure about which version of Configure you are using, see Which version of Configure am I using? on page 27. An
alternative procedure about what to do with FS100/100Pro is available.
Deleting a group does not delete the users in the group from the system.
Note: You cannot delete the default users named Administrator, Operator, or Guest, and you cannot delete the
Administrators, Operators, or Guests group.
1 From Configure, select User Accounts.
2 To delete a user from the Fiery Server completely, do the following:
a) Click the Fiery Contact List button.
b) In the Fiery Contact List dialog box, move the cursor over the name of the user you want to delete.
Notice that the Edit and Delete icons display.
Note: The Delete icon only displays if your are allowed to delete the user.
c) Click the Delete icon.
The user is deleted from the Fiery Server completely.
d) Click Close.
Fiery Command WorkStation
Configuring server settings
38
3 To delete a group, do the following:
a) In the Groups column, move the cursor over the name of the group you want to delete.
Notice that the Edit and Delete icons display.
Note: The Delete icon only displays if your are allowed to delete the group.
b) Click the Delete icon.
When prompted for confirmation, click Yes. The group is deleted from the Fiery Server completely.
Server setup
Use Server pages to configure system settings. You can perform tasks such as specifying the Fiery print controller’s
general settings, setting job options, configuring Administrator and Operator passwords, managing the Job Log, and
specifying JDF settings.
Set the Fiery Server name
You can specify the name of the Fiery Server and configure other general settings.
Important: There are two versions of Configure and they are specific to the Fiery Server you are connected to. This
is a combined procedure that describes what to do when connected to a Fiery Server with FS100/100Pro or earlier,
and notes about what to do with FS150/150 Pro or later. If you are not sure which version of Configure you are
using, see Which version of Configure am I using? on page 27.
1 From Configure, choose Server > General.
Note: If you are connected to a Fiery Server with FS150/150Pro, choose Fiery Server > Server Name instead.
2 Type a name for the Fiery Server as you want it to appear on the network.
Note: If you have more than one Fiery Server, do not assign them the same name.
Set the Fiery Server regional settings
You can specify the Fiery Server language and other regional settings, such as date format, number format,
measurement units, default paper sizes, color region, and date and time.
You can also assign a Network Time Protocol Server (NTP) on the Internet to set the date and time automatically.
Note: If you set the date or time manually and also select Set Time and Date Automatically, the Fiery Server
uses the date and time provided by the NTP server.
Configure language and regional settings
When you select a language, regional settings (except time and date) are configured automatically based on your
selection. You can also manually change any of the settings as needed.
Important: There are two versions of Configure and they are specific to the Fiery Server you are connected to. This
is a combined procedure that describes what to do when connected to a Fiery Server with FS100/100Pro or earlier,
and notes about what to do with FS150/150 Pro or later. If you are not sure which version of Configure you are
using, see Which version of Configure am I using? on page 27.
Fiery Command WorkStation
Configuring server settings
39
1 From Configure, choose Server > Regional Settings.
Note: If you are connected to a Fiery Server with FS150/150Pro, choose Fiery Server > Regional Settings
instead.
2 In Server Language, select a language.
3 To use the same language as the printer, select Use Print Engine Language.
In addition to using the language of the printer, the Fiery Server uses the appropriate regional settings for the
language.
4 If you want to change the regional settings individually (such as only Measurement Units), change the settings as
needed.
5 Apply or save your changes.
Note: The Fiery Server must reboot to apply the language change.
Configure date and time manually
The Regional Settings feature enables you to manually set a time zone and daylight savings settings.
Important: There are two versions of Configure and they are specific to the Fiery Server you are connected to. This
is a combined procedure that describes what to do when connected to a Fiery Server with FS100/100Pro or earlier,
and notes about what to do with FS150/150 Pro or later. If you are not sure which version of Configure you are
using, see Which version of Configure am I using? on page 27.
1 From Configure, choose Server > Regional Settings.
Note: If you are connected to a Fiery Server with FS150/150Pro, choose Fiery Server > Regional Settings
instead.
2 Specify the date and time.
Configure date and time automatically (FS100/100Pro)
You can use an automatic date and time mechanism by selecting a time server and a polling interval.
Important: If you are connected to a Fiery Server with FS100/100 Pro or earlier, use this procedure. If you are not
sure about which version of Configure you are using, see Which version of Configure am I using? on page 27. An
alternative procedure about what to do with FS150/150Pro is available.
1 Choose Configure > Server > Regional Settings.
2 Next to Date and Time, click Set.
3 In the window that appears, select Set Time and Date Automatically and then select the appropriate Time
Server and Polling Interval.
The polling interval determines how frequently the Fiery Server receives updates from the Time Server.
Fiery Command WorkStation
Configuring server settings
40
Configure date and time automatically (FS150/150Pro)
You can use an automatic date and time mechanism by selecting a time server and a polling interval.
Important: If you are connected to a Fiery Server with FS150/150 Pro or later, use this procedure. If you are not
sure about which version of Configure you are using, see Which version of Configure am I using? on page 27. An
alternative procedure about what to do with FS100/100Pro is available.
1 From Configure, choose Fiery Server > Regional Settings.
2 Select Set Time and Date Automatically and then select click the Manage link.
3 Select a time server and polling interval.
The polling interval determines how frequently the Fiery Server receives updates from the time server.
Set job options
You can configure settings for options that affect all jobs, such as whether to enable the Printed queue.
Important: There are two versions of Configure and they are specific to the Fiery Server you are connected to. This
is a combined procedure that describes what to do when connected to a Fiery Server with FS100/100Pro or earlier,
and notes about what to do with FS150/150 Pro or later. If you are not sure which version of Configure you are
using, see Which version of Configure am I using? on page 27.
1 From Configure, choose Server > Jobs.
2 Select or clear Enable Printed Queue.
Note: If you are connected to a Fiery Server with FS150/150Pro, you can find this setting in Job
Management > Printed Queue instead. Select Save printed jobs.
If this option is enabled, you can reprint jobs from the Printed queue without resending them to the Fiery Server.
If this option is not enabled, jobs are deleted from the Fiery Server hard disk after they are printed.
3 In the Jobs Saved in Printed Queue field, type the number of jobs you want to be saved in the Printed queue.
Note: This option is available only if you enable the Printed queue. Be aware that jobs saved in the Printed queue
occupy space on the Fiery Server hard disk.
4 To print a start page when the Fiery Server is turned on or restarted, select Print Start Page.
Note: If you are connected to a Fiery Server with FS150/150Pro, you can find this setting in Fiery Server
instead. Select the Print Start Page check box.
The start page lists the Fiery Server, the current date and time, the amount of memory installed, the network
protocols enabled, and the print connections published.
5 To display a preview thumbnail of a job in Command WorkStation while it is being processed, select Preview
While Processing.
Note: If you are connected to a Fiery Server with FS150/150Pro, you can find this setting in Job Management
instead. Select the Preview while processing check box.
If you do not enable this option, users can see a preview by processing and holding the job. Also, users with
Impose can preview a held job that has not been processed.
Note: Selecting this option may slow Fiery Server processing time.
Fiery Command WorkStation
Configuring server settings
41
6 To configure the Fiery Server to begin processing (RIPping) large PS or PCL jobs before they are done spooling,
select Enable RIP While Receive.
Note: If you are connected to a Fiery Server with FS150/150Pro, you can find this setting in Job Management
instead. Select the RIP while Receive check box.
Be aware of the following limitations before enabling this option:
•
PDF and VDP jobs are not supported with Rip While Receive because these jobs must spool completely before
they are processed.
•
Enable RIP While Receive may cause some jobs to print out of the order in which they were received over the
network. If you need to ensure that jobs are printed sequentially in a "First In, First Out" (FIFO) workflow,
enable Sequential Print.
Note: If you are connected to a Fiery Server with FS150/150Pro, you can enable Sequential Print from Job
Submission > Sequential Print.
•
Depending on the network environment and the speed of the client computer submitting the job to the Fiery
Server, enabling RIP While Receive can monopolize Fiery Server resources for a long time, preventing smaller
and/or faster jobs from "skipping ahead" and processing while the RIP While Receive job is still spooling.
7 To securely erase a job from the Fiery Server after printing, do the following:
•
Select Secure Erase (if the feature is supported by your Fiery Server).
Note: Selecting this option may slow Fiery Server processing time. For more information about this feature,
see the Secure Erase document that accompanies your Fiery Server. The information may be a in separate
document or may be part of Configuration and Setup.
Note: If you are connected to a Fiery Server with FS150/150Pro, you can find this setting in Fiery Server >
Security > Secure Erase instead.
•
From Operational Mode, specify when the files are erased on the Fiery Server (if the feature is supported by
your Fiery Server).
8 Sample Print enables users to print a sample to another output tray to verify the quality of a long print job while it
is printing. To set up this feature, specify the following options:
• Frequency - Specify whether to print a certain number of page sheets for all jobs or only the current job. To
perform a Sample Print only when requested by the operator, select On-demand.
• Content - Select the type of job for which to perform a Sample Print. If the job is collated, an entire output set
is printed as the sample. If the job is uncollated, a single sheet is printed as a sample. If the sample content is a
set, once the printed sheet interval triggers the Fiery Server to print a sample, the sample begins printing at the
beginning of the next set.
• Output Tray - Choose the tray for the Sample Print. If you select Disable for the Output Tray, the sample
sheet is not printed. If the output tray of the job and the output tray for the sample page are the same, the
sample page prints.
Sample Print jobs output as an extra set and do not affect the collated output order.
Note: Not all Fiery Servers support the Sample Print option.
Note: If you are connected to a Fiery Server with FS150/150Pro, you can find this setting in Job
Management > Sample Print instead.
Fiery Command WorkStation
Configuring server settings
42
9 Job Mismatch enables users to specify how to handle jobs that cannot print because of missing media.
Note: If you are connected to a Fiery Server with FS150/150Pro, you can find this setting in Job
Management > Job Mismatch instead.
10 Apply or save your changes.
Process jobs with missing media (FS100/100Pro)
If a job lacks the media originally specified, you can define how the Fiery Server handles that job. You can send the
job to the Hold queue and define whether to cancel subsequent processing of the job or suspend the processing.
Important: If you are connected to a Fiery Server with FS100/100 Pro or earlier, use this procedure. If you are not
sure about which version of Configure you are using, see Which version of Configure am I using? on page 27. An
alternative procedure about what to do with FS150/150Pro is available.
1 If the Jobs page is not active, from Configure choose Server > Jobs.
2 To cancel processing of a job and send it to the Hold queue, select Enable Mismatch Action.
3 From the Mismatch Action list, choose Suspend or Cancel.
If you choose Suspend, other jobs that do not have errors continue to process and print.
4 In the Timeout field, specify the amount of time the Fiery Server waits before it suspends or cancels the
processing of a job and sends it to the Hold queue.
5 If you specified Suspend for Mismatch Action, you can select Cancel Job Processing after timeout expires.
6 Click Apply.
Process jobs with missing media (FS150/150Pro)
If a job lacks the media originally specified, you can define how the Fiery Server handles that job. You can send the
job to the Hold queue and define whether to cancel subsequent processing of the job or suspend the processing.
Important: If you are connected to a Fiery Server with FS150/150 Pro or later, use this procedure. If you are not
sure about which version of Configure you are using, see Which version of Configure am I using? on page 27. An
alternative procedure about what to do with FS100/100Pro is available.
1 If the Jobs page is not active, from Configure choose Fiery Server > Job Management > Job Mismatch.
2 To cancel processing of a job and send it to the Hold queue, select Enable Job Mismatch and set Mismatch
Action to one of the following:
• Suspend - Other jobs that do not have errors continue to process and print.
• Cancel - Cancel processing of a job and send it to the Hold queue
3 In the Timeout field, specify the amount of time the Fiery Server waits before it suspends or cancels the
processing of a job and sends it to the Hold queue.
4 If you specified Suspend for Mismatch Action, you can select Cancel job processing after time out expires
5 Click Save.
Fiery Command WorkStation
Configuring server settings
43
Configure Administrator and Operator passwords (FS100/100Pro)
You can set the default Administrator and Operator passwords. By default, the Administrator password is set on the
Fiery Server, but the Operator password is not. Change the Administrator password to protect the Fiery Server from
unauthorized changes.
Important: If you are connected to a Fiery Server with FS100/100 Pro or earlier, use this procedure. If you are not
sure about which version of Configure you are using, see Which version of Configure am I using? on page 27. An
alternative procedure about what to do with FS150/150Pro is available.
Note: Keep track of the passwords that you set.
For more information about passwords, see Configuration and Setup, which is part of the user documentation set.
1 From Configure, choose Server > Password.
2 Do any of the following:
•
In the Administrator or Operator section, type the new password in the Enter New Password and Verify New
Password fields.
Note: Passwords are case-sensitive.
•
To remove the Operator password, place the cursor in each field for that password without typing anything.
3 Click Apply.
Configure Administrator and Operator passwords (FS150/150Pro)
You can set the default Administrator and Operator passwords. By default, the Administrator password is set on the
Fiery Server, but the Operator password is not. Change the Administrator password to protect the Fiery Server from
unauthorized changes.
Important: If you are connected to a Fiery Server with FS150/150 Pro or later, use this procedure. If you are not
sure about which version of Configure you are using, see Which version of Configure am I using? on page 27. An
alternative procedure about what to do with FS100/100Pro is available.
Note: Keep track of the passwords that you set.
For more information about passwords, see Configuration and Setup, which is part of the user documentation set.
1 From Configure, choose Security.
2 Choose one of the following:
• Adminstrator Password
• Operator Password
3 Enter and confirm a new password. Click Save.
Fiery Command WorkStation
Configuring server settings
44
Manage the Job Log (FS100/100Pro)
The Job Log is a file saved on the Fiery Server. It lists all the jobs processed by the Fiery Server from the time the Job
Log was last cleared or the Fiery Server software was reinstalled.
Important: If you are connected to a Fiery Server with FS100/100 Pro or earlier, use this procedure. If you are not
sure about which version of Configure you are using, see Which version of Configure am I using? on page 27. An
alternative procedure about what to do with FS150/150Pro is available.
Each Job Log entry includes the user name, document name, print time and date, and number of pages.
1 From Configure, choose Server > Job Log.
2 To configure the Fiery Server to automatically export the Job Log via E-mail or SMB, select Enable auto
export.
If you select this option, specify a date and time for the export to occur. The Job Log is exported as a CSV
(Comma Separated Values) file.
3 To ensure that the Job Log is cleared automatically after it is exported, select Clear Job Log after exporting.
Note: The Job Log is cleared even if the export was unsuccessful. Do not select this option if you are using the
Job Log as critical accounting information. In this case, we recommend that you ensure that the Job Log is saved
successfully, and then clear it from the Fiery Server.
4 To export the Job Log via E-mail, type the destination e-mail address. To export the Job Log via SMB, type the
SMB address, user name and password. Click Verify to make sure the SMB information is entered correctly.
5 To require that users enter the Administrator password before printing the Job Log, select Require Password
to Print Job Log.
6 Select the paper size for the printed Job Log, and then click Apply.
Manage the Job Log (FS150/150Pro)
The Job Log is a file saved on the Fiery Server. It lists all the jobs processed by the Fiery Server from the time the Job
Log was last cleared or the Fiery Server software was reinstalled.
Important: If you are connected to a Fiery Server with FS150/150 Pro or later, use this procedure. If you are not
sure about which version of Configure you are using, see Which version of Configure am I using? on page 27. An
alternative procedure about what to do with FS100/100Pro is available.
Each Job Log entry includes the user name, document name, print time and date, and number of pages.
1 From Configure, choose Fiery Server > Job Log.
2 To configure the Fiery Server to automatically export the Job Log via E-mail or SMB, select Enable Auto
Export Job Logs.
If you select this option, specify a date and time for the export to occur. The Job Log is exported as a CSV
(Comma Separated Values) file.
3 To ensure that the Job Log is cleared automatically after it is exported, select Clear job log after exporting.
Note: The Job Log is cleared even if the export was unsuccessful. Do not select this option if you are using the
Job Log as critical accounting information. In this case, we recommend that you ensure that the Job Log is saved
successfully, and then clear it from the Fiery Server.
4 To export the Job Log via email, select Email and provide the required information.
Fiery Command WorkStation
Configuring server settings
45
5 To export the Job Log via SMB, select SMB and provide the required information. Click Validate to make sure
the SMB information is entered correctly.
6 To require that users enter the Administrator password before printing the Job Log, select Require Password.
7 Select the paper size for the printed Job Log, and then click Save.
Specify JDF settings (FS100/100Pro)
JDF (Job Definition Format) technology is an XML-based open industry standard for job tickets. It simplifies the
information exchange among different graphic arts applications and systems.
Important: If you are connected to a Fiery Server with FS100/100 Pro or earlier, use this procedure. If you are not
sure about which version of Configure you are using, see Which version of Configure am I using? on page 27. An
alternative procedure about what to do with FS150/150Pro is available.
Fiery JDF allows submission of JDF jobs to a Fiery Server from applications that allow creation of JDF tickets.
Use Configure to specify JDF settings and to view the Fiery JDF version, the JDF Device ID, and the JMF URL.
1 From Configure, choose Server > JDF.
2 Select Enable JDF.
3 If a virtual printer is configured for the Fiery Server, select one from the Use Job Settings from Virtual
Printer option.
Note: Specify this option only if it applies to your specific workflow.
4 Specify a default print queue action from Job Action.
5 Select Override JDF job with the above settings, if you want to override the settings specified in the JDF
ticket.
6 Specify how you want the JDF jobs closed once they are printed.
7 Specify the items required for closing a JDF job. The items you select here must be filled out before the job can
close automatically or manually.
8 Specify the network paths where the Fiery Server searches for common resources.
The Fiery Server searches these network paths in the order that you specify until it finds the necessary objects.
When you type a path, the Fiery Server does not verify whether it exists on the network.
Note: Inform users of these paths so that their jobs can access the resources.
9 Click Apply.
Specify JDF settings (FS150/150Pro)
JDF (Job Definition Format) technology is an XML-based open industry standard for job tickets. It simplifies the
information exchange among different graphic arts applications and systems.
Important: If you are connected to a Fiery Server with FS150/150 Pro or later, use this procedure. If you are not
sure about which version of Configure you are using, see Which version of Configure am I using? on page 27. An
alternative procedure about what to do with FS100/100Pro is available.
Fiery JDF allows submission of JDF jobs to a Fiery Server from applications that allow creation of JDF tickets.
Fiery Command WorkStation
Configuring server settings
46
Use Configure to specify JDF settings and to view the Fiery JDF version, the JDF Device ID, and the JMF URL.
1 From Configure, choose Job Submission > JDF Settings.
2 Select Enable JDF.
3 If a virtual printer is configured for the Fiery Server, select one from the Use Job Settings from Virtual
Printer option.
Note: Specify this option only if it applies to your specific workflow.
4 Specify a default print queue action from Job action.
5 Select Override JDF job with the above settings, if you want to override the settings specified in the JDF
ticket.
6 Specify how you want the JDF jobs closed once they are printed.
7 Specify the items required for closing a JDF job. The items you select here must be filled out before the job can
close automatically or manually.
8 Specify the network paths where the Fiery Server searches for common resources.
The Fiery Server searches these network paths in the order that you specify until it finds the necessary objects.
When you type a path, the Fiery Server does not verify whether it exists on the network.
Note: Inform users of these paths so that their jobs can access the resources.
9 Click Save.
Specify contact information
You can specify the contact information for people who provide support for the Fiery Server and print device.
Important: There are two versions of Configure and they are specific to the Fiery Server you are connected to. This
is a combined procedure that describes what to do when connected to a Fiery Server with FS100/100Pro or earlier,
and notes about what to do with FS150/150 Pro or later. If you are not sure which version of Configure you are
using, see Which version of Configure am I using? on page 27.
1 From Configure, choose Server > Support.
Note: If you are connected to a Fiery Server with FS150/150Pro or later, choose Fiery Server and then choose
either Fiery Support Contact Information or Printer Support Contact Information.
2 Type contact information into the available fields.
3 Apply or save your changes.
Schedule system software updates
System Update lets you schedule regular inquiries to an update server on the Internet for available Fiery Server
updates. The Fiery Server checks automatically for updates by contacting an update server periodically over the
Internet.
Important: If you are connected to a Fiery Server with FS100/100 Pro or earlier, use this procedure. If you are not
sure about which version of Configure you are using, see Which version of Configure am I using? on page 27. An
alternative procedure about what to do with FS150/150Pro is available.
Fiery Command WorkStation
Configuring server settings
47
System Update can notify you when updates are available. Notification is provided on the Fiery Server Control Panel
and the monitor connected to the Fiery Server (if supported).
1 From Configure, choose Server > System Update.
Note: If you are connected to a Fiery Server with FS150/150Pro, you can find settings mentiond in the procedure
in Fiery Server > System Updates instead.
2 Select Enable System Updates.
3 Specify when the Fiery Server should contact the update server.
4 If supported, choose a method for updating the Fiery Server operating software (Operating System Updates),
system software (Fiery System Updates), and utility software (Fiery Application Updates):
• Automatically download and install updates - Automatically downloads and installs updates on the
Fiery Server. Your intervention is not required unless a particular update requires the Fiery Server to reboot.
• Download updates and send notification - Automatically downloads updates to the Fiery Server. You
must then install the updates.
• Send notification when updates are available - Displays a message on the Fiery Server when new
updates are available. You must retrieve and install the updates.
Note: The above three options may not be available for the Fiery Server.
5 If you use a proxy server to connect through a firewall to the Update server, click Proxy Settings, select Enable
Proxy, and type the appropriate information in the following fields:
Note: If you are connected to a Fiery Server with FS150/150Pro, click the HTTP Proxy Settings link instead
and then provide the required information about the proxy server.
• Address - Proxy server IP address
• Port
- Port used by the proxy server
• User Name - User name for accessing the proxy server
• Password
- Password for accessing the proxy server
6 Save the proxy settings you supplied.
7 Apply or save your changes.
Network setup
Use Network pages to specify the active network systems that transmit print jobs to the Fiery Server.
Enter network addresses and names to be used by computers, servers, and the Fiery Server when they communicate
with each other. Make sure that the Fiery Server is connected to a functioning network so that it can query the
network for the appropriate information.
Fiery Command WorkStation
Configuring server settings
48
Configure Ethernet speed
Specify the speed of the network to which the Fiery Server is attached. You can use the Auto Detect feature if you do
not know the speed.
Important: There are two versions of Configure and they are specific to the Fiery Server you are connected to. This
is a combined procedure that describes what to do when connected to a Fiery Server with FS100/100Pro or earlier,
and notes about what to do with FS150/150 Pro or later. If you are not sure which version of Configure you are
using, see Which version of Configure am I using? on page 27.
1 From Configure, choose Network > Port > Ethernet.
Note: If you are connected to a Fiery Server with FS150/150Pro, you can find settings mentiond in the procedure
in Network > Ethernet instead.
2 Select the speed of the network to which the Fiery Server is attached.
Select Auto Detect (10/100/1000) if your network environment is mixed or you do not know the network
speed.
The 1 Gbps (gigabit per second) setting is full-duplex.
3 Apply or save your changes.
Configure the USB port
Define the default handling of jobs sent to the USB port of the Fiery Server. Users can use the USB port on the Fiery
Server to connect a Windows computer or a USB device that contains files to print.
Important: There are two versions of Configure and they are specific to the Fiery Server you are connected to. This
is a combined procedure that describes what to do when connected to a Fiery Server with FS100/100Pro or earlier,
and notes about what to do with FS150/150 Pro or later. If you are not sure which version of Configure you are
using, see Which version of Configure am I using? on page 27.
1 From Configure, choose Network > Port > USB.
Note: If you are connected to a Fiery Server with FS150/150Pro, you can find the settings mentioned in this
procedure in Job Submission > USB instead.
2 Select Enable USB Port.
3 Choose settings for these options:
• Ignore EOF Character - Specifies that the Fiery Server ignores end-of-file (EOF) messages in a file. Under
normal circumstances, leave this option cleared. To print PostScript files in binary format (not ASCII), enable
this option. When this option is selected, the Fiery Server uses the USB port timeout value to determine when
the end of the file has been reached. However, if you experience printing problems, clear this option.
• Port Timeout - The number of seconds the Fiery Server waits without receiving data from the USB port
before deciding that the current job is complete. Until the timeout, the Fiery Server cannot receive new jobs
through the USB port, but it can continue to receive network print jobs.
• Default queue - The print connection where jobs printed to the USB port are sent. Only the print
connections that you published are displayed. This list can also include virtual printers that have been defined
(if the Fiery Server supports this feature).
Fiery Command WorkStation
Configuring server settings
49
4 To allow users to print jobs automatically when they connect a USB media device to the USB port on the Fiery
Server, choose a setting from Autoprint.
Jobs are printed as soon as the USB device is connected to the Fiery Server.
5 Apply or save your changes.
Next steps
For more information about automatic printing from USB devices, see Configuration and Setup, which is part of the
user documentation set.
Configure 802.1x authentication
When 802.1x authentication is enabled, the Fiery Server uses one of the two EAP methods to seek authentication
from an 802.1x authentication server (such as a RADIUS server), often through an intermediate access point (an
authenticator).
Important: There are two versions of Configure and they are specific to the Fiery Server you are connected to. This
is a combined procedure that describes what to do when connected to a Fiery Server with FS100/100Pro or earlier,
and notes about what to do with FS150/150 Pro or later. If you are not sure which version of Configure you are
using, see Which version of Configure am I using? on page 27.
The Fiery Server seeks this authentication at startup time, or when the Ethernet cable is disconnected and
reconnected. If the Fiery Server is successfully authenticated, it is allowed access to the network.
1 From Configure, choose Network > Port > 802.1x Authentication.
Note: If you are connected to a Fiery Server with FS150/150Pro, you can find the settings mentioned in this
procedure in Network > 802.1x Authentication instead.
2 If you want the Fiery Server to request authentication over 802.1x when connecting to the network, select Enable
802.1x Authentication.
3 From the Select EAP Type menu, select the type of EAP.
4 Enter the user name and password.
This is what the Fiery Server uses to request authentication from an 802.1x authentication server.
5 If you chose PEAP-MSCHAPv2 as the EAP type and want the Fiery Server to use a trusted root certificate when
communicating with the authentication server, select Validate Server Certificate.
If you want the Fiery Server to validate the server certificate, place the certificate in the list of trusted certificates
of the Fiery Server. See Manage certificates on page 64.
6 Save or apply your changes.
Configure LDAP
If your Fiery Server supports this option, you can configure the Fiery Server to communicate with corporate
information servers at your organization by means of the LDAP protocol.
Important: There are two versions of Configure and they are specific to the Fiery Server you are connected to. This
is a combined procedure that describes what to do when connected to a Fiery Server with FS100/100Pro or earlier,
and notes about what to do with FS150/150 Pro or later. If you are not sure which version of Configure you are
using, see Which version of Configure am I using? on page 27.
Fiery Command WorkStation
Configuring server settings
50
The Fiery Server can access lists of e-mail addresses to be used with features such as sending scan jobs to e-mail.
Note: The time difference between the LDAP server and the System Time of the Fiery Server (Server > General >
Date and Time) must be five minutes or less.
1 From Configure, choose Network > Services > LDAP.
If you are connected to a Fiery Server with FS150/150Pro, you can find the settings mentioned in this procedure
in Network > LDAP.
2 Click Configure LDAP.
Note: If you are connected to a Fiery Server with FS150/150 Pro or later, skip this step.
3 In the LDAP Configuration window, select Enable LDAP.
4 Type the server name or IP address of the LDAP server.
The LDAP server IP address and host name must be registered on the DNS server.
5 Type the port number for communicating to the LDAP server.
6 To require secure communication, select Secure Communication (SSL/TLS).
The Fiery Server automatically determines the type of communication that the LDAP server supports and
connects accordingly.
7 If authentication is required, select Authentication Required and then specify the type of authentication.
8 Type the user name and password for connecting to the LDAP server.
9 If you selected GSSAPI as the authentication type, type the domain name for the LDAP server in the Domain
field.
10 In Advanced Options, for Search Base, type the location where the Fiery Server searches to locate the LDAP
server. To verify the search base location, click Validate.
11 In the Maximum Entries field, type the maximum number of entries that the Fiery Server accepts from the LDAP
server.
12 In the Search Timeout field, specify the maximum amount of time that the Fiery Server spends in attempting to
communicate with the LDAP server.
13 Apply or save all changes.
Configure Windows Printing (SMB)
Windows Printing enables Server Message Block (SMB), the file and printer sharing protocol built into Windows.
Enabling SMB allows the Fiery Server to be listed on the network so that Windows computers can print to a
particular print connection (Hold, Print, or Direct) on the Fiery Server.
Before you begin
Windows Printing uses TCP/IP, so you must configure TCP/IP on the Fiery Server and on all computers that use
Windows printing.
Important: There are two versions of Configure and they are specific to the Fiery Server you are connected to. This
is a combined procedure that describes what to do when connected to a Fiery Server with FS100/100Pro or earlier,
and notes about what to do with FS150/150 Pro or later. If you are not sure which version of Configure you are
using, see Which version of Configure am I using? on page 27.
Fiery Command WorkStation
Configuring server settings
51
For information about setting up a Windows computer for Windows printing, see Printing, which is part of the user
documentation set, and your Windows documentation.
1 From Configure, choose Network > Services > Windows Printing (SMB).
Note: If you are connected to a Fiery Server with FS150/150Pro, you can find the settings mentioned in this
procedure in Job Submission > Windows Printing instead.
2 Select Enable Windows Printing (SMB).
3 If your Fiery Server supports both PostScript and PCL, select the type of printer driver that is available for users
to download when they install printer drivers with the Point and Print method of installation.
4 Apply or save your changes.
Configure LPD
You can configure Line Printer Daemon (LPD) printing.
Before you begin
For LPD printing, you must enable TCP/IP on the Fiery Server
Important: There are two versions of Configure and they are specific to the Fiery Server you are connected to. This
is a combined procedure that describes what to do when connected to a Fiery Server with FS100/100Pro or earlier,
and notes about what to do with FS150/150 Pro or later. If you are not sure which version of Configure you are
using, see Which version of Configure am I using? on page 27.
1 From Configure, choose Network > Services > LPD.
Note: If you are connected to a Fiery Server with FS150/150Pro, you can find the settings mentioned in this
procedure in Job Submission > LPD instead.
2 Select Enable LPD Printing.
Note: If you are connected to a Fiery Server with FS150/150Pro, select Enable.
3 Select the print connection on the Fiery Server to which LPD jobs are sent.
In addition to the standard print connections Print queue and Hold queue, published virtual printers (if
supported by your Fiery Server) are also listed.
4 Apply or save your changes.
Configure Port 9100
Enabling Port 9100 services allows applications to open a TCP/IP socket to the Fiery Server at Port 9100 to download
a print job.
Important: There are two versions of Configure and they are specific to the Fiery Server you are connected to. This
is a combined procedure that describes what to do when connected to a Fiery Server with FS100/100Pro or earlier,
and notes about what to do with FS150/150 Pro or later. If you are not sure which version of Configure you are
using, see Which version of Configure am I using? on page 27.
1 From Configure, choose Network > Services > Port 9100.
Note: If you are connected to a Fiery Server with FS150/150Pro, click Job Submission > Port 9100 instead.
Fiery Command WorkStation
Configuring server settings
52
2 Select Enable Port 9100 Services.
Note: If you are connected to a Fiery Server with FS150/150Pro, click Enable instead.
3 Choose one of the published Fiery Server print connections to which Port 9100 is associated:
•
Direct Connection
•
Print queue
•
Hold queue
In addition to the standard print connections Print queue and Hold queue, published virtual printers (if
supported by your Fiery Server) are also listed.
4 Apply or save your changes.
Configure FTP
Enabling FTP services allows users to send jobs to an FTP server so that other users can share those jobs.
Important: There are two versions of Configure and they are specific to the Fiery Server you are connected to. This
is a combined procedure that describes what to do when connected to a Fiery Server with FS100/100Pro or earlier,
and notes about what to do with FS150/150 Pro or later. If you are not sure which version of Configure you are
using, see Which version of Configure am I using? on page 27.
The Fiery Server supports an FTP proxy that uses the connection format "target_username@target_system_name /
target_username@target_ip_address". Other connection types may not work properly.
1 From Configure, choose Network > Services > FTP.
Note: If you are connected to a Fiery Server with FS150/150Pro, click Job Submission > FTP Printing
instead.
2 Select Use FTP Passive Mode for outbound connection if you are using an external FTP server.
3 Select Enable FTP Printing.
4 In the Default FTP Queue list, select the print connection on the Fiery Server to which FTP jobs are sent.
In addition to the standard print connections Print queue and Hold queue, published virtual printers (if
supported by your Fiery Server) are also listed.
5 To require a valid user name and password to print a document, select Require Password for Printing.
The user name and password must be authorized by the administrator.
6 Specify the FTP timeout.
7 Apply or save your changes.
Fiery Command WorkStation
Configuring server settings
53
Configure Web services and IPP printing
Enabling Web services allows users to use WebTools. TCP/IP must be enabled on the Fiery Server and user
computers. Each computer must also have a Java-enabled Web browser installed and a valid IP address or DNS host
name.
Important: There are two versions of Configure and they are specific to the Fiery Server you are connected to. This
is a combined procedure that describes what to do when connected to a Fiery Server with FS100/100Pro or earlier,
and notes about what to do with FS150/150 Pro or later. If you are not sure which version of Configure you are
using, see Which version of Configure am I using? on page 27.
After enabling Web services, you can enable Internet Printing Protocol (IPP).
For information about browser and computer requirements, see Configuration and Setup; for information about
setting up user computers to use IPP printing, see Printing. These documents are part of the user documentation set.
1 From Configure, choose Network > Services > Web.
2 Select or clear Enable Web Services.
Note: If you are connected to a Fiery Server with FS150/150Pro or later, you may not be able to access Web
Services using Configure and may need to use the printer control panel to enable or disable Web Services.
3 Select or clear Enable IPP.
Note: If you are connected to a Fiery Server with FS150/150Pro, in Job Submission, select the IPP check box.
4 Apply or save your changes.
Configure SNMP
Enable SNMP to allow remote access to Configure and other Fiery Server features.
Important: There are two versions of Configure and they are specific to the Fiery Server you are connected to. This
is a combined procedure that describes what to do when connected to a Fiery Server with FS100/100Pro or earlier,
and notes about what to do with FS150/150 Pro or later. If you are not sure which version of Configure you are
using, see Which version of Configure am I using? on page 27.
1 From Configure, choose Network > Services > SNMP.
Note: If you are connected to a Fiery Server with FS150/150Pro, you can find settings mentioned in this
procedure in Network > SNMP instead.
2 Select Enable SNMP.
3 To restore the Fiery Server to its original SNMP settings, click Restore SNMP Configuration.
Note: If SNMP settings have been changed since you loaded the SNMP page, you must click Restore SNMP
Configuration before you make changes.
Note: If you are connected to a Fiery Server with FS150/150Pro, click the Restore button instead.
4 From the Security Level list, select one of the following:
• Minimum - Corresponds to functionality in SNMP version 1.
• Medium - Offers more security for SNMP version 3.
• Maximum - Most secure setting for SNMP version 3.
Fiery Command WorkStation
Configuring server settings
54
5 Type the names for Read Community and Write Community.
6 To specify a user name that does not require authentication or encryption with the SNMP server, type the name
in the Unsecure User Name field.
7 To specify a user name that requires authentication or encryption with the SNMP server, type the name in the
Secure User Name field, and specify the following information:
•
User Authentication Type (MD5 or SHA)
•
User Authentication Password - the password for reading MIB values based on the secure user name
•
User Privacy Type - type of encryption (DES or None)
•
User Privacy Password
8 Apply or save your changes.
Configure scan settings
If your Fiery Server supports scanning, you can configure settings for scan jobs, including the destination, default file
format, and frequency of deletions.
Important: There are two versions of Configure and they are specific to the Fiery Server you are connected to. This
is a combined procedure that describes what to do when connected to a Fiery Server with FS100/100Pro or earlier,
and notes about what to do with FS150/150 Pro or later. If you are not sure which version of Configure you are
using, see Which version of Configure am I using? on page 27.
1 From Configure, choose Network > Services > Scan.
Note: If you are connected to a Fiery Server with FS150/150, you can find settings mentioned in this procedure
in Scan instead.
2 Select Enable Scan.
Note: If you are connected to a Fiery Server with FS150/150Pro, select Enable document scanning from the
glass or document feeder instead.
3 Select the destination for scan jobs.
If you selected FTP and use a proxy server, select Enable Proxy and type the relevant information in the fields
for Proxy Server, Port, User Name, and User Password.
Note: If you are connected to a Fiery Server with FS150/150Pro, click the Configure Proxy Settings link
instead.
4 Choose the default file format for scan jobs.
5 Choose the frequency with which the Fiery Server clears scan jobs.
6 Apply or save your changes.
Configure e-mail services
You can enable e-mail services to take advantage of Fiery Server functionality, such as sending jobs to the Fiery
Server over e-mail, or scanning a job and sending it over e-mail to an address.
Enabling e-mail services is required for all e-mail and Internet Fax (IFAX) functionality.
Fiery Command WorkStation
Configuring server settings
55
For more information about managing e-mail services, see Configuration and Setup, which is part of the user
documentation set.
Enable e-mail services
When you enable e-mail services, you specify settings such as those for the incoming and outgoing mail server.
Important: There are two versions of Configure and they are specific to the Fiery Server you are connected to.
This is a combined procedure that describes what to do when connected to a Fiery Server with FS100/100Pro or
earlier, and notes about what to do with FS150/150 Pro or later. If you are not sure which version of Configure
you are using, see Which version of Configure am I using? on page 27.
1 From Configure, choose Network > Services > E-mail.
The information on this screen is read-only.
Note: If you are connected to a Fiery Server with FS150/150Pro, click Network > Email instead.
2 At the bottom of the screen, click the E-mail Setup button.
Note: If you are connected to a Fiery Server with FS150/150 Pro or later, skip this step.
3 Select Enable E-mail, and then specify the following information:
• Display Name - The name displayed in e-mails sent from the Fiery Server.
• Fiery E-mail Address - The address from which the Fiery Server receives e-mail.
4 Specify the following information about the Incoming Mail Server:
• Server type - The type of server.
• Server - The name of the incoming mail server.
• Port - Type the number of the port used for e-mail communication.
• SSL/TLS - If the mail server requires communication to be secure, select this checkbox to use the secure
communication protocol.
• User name, Password - If the mail server requires a username/password to make a connection, you
must specify this information.
• Polling Interval - Specifies how often the Fiery Server checks the e-mail server for new e-mail.
5 Specify the following information about the Outgoing Mail Server:
• Server - The name of the outgoing mail server.
• Port - Type the number of the port used for e-mail communication. If port 25 is blocked (for example, to
reduce the amount of e-mail spam), type the number of the port that is permitted to communicate using
SMTP.
• SSL/TLS - If the mail server requires communication to be secure, select this checkbox to use the secure
communication protocol.
• Use POP before SMTP - This option appears only if you chose POP3 for the incoming mail server type.
Fiery Command WorkStation
Configuring server settings
56
• Authentication required - The Fiery Server supports MD5, PLAIN, and LOGIN authentication. After
negotiation with the e-mail server, the Fiery Server chooses an authentication method automatically in this
preference order: MD5, PLAIN, and LOGIN.
• User name, Password - If the mail server requires a user name/password to make a connection, you
must specify this information.
6 Specify the following additional information:
• Accept all SSL certificates - If the mail server requires the e-mail client to possess a certificate, select
this checkbox to accept automatically all certificates from the connected mail servers to enable
communication.
• Timeout - Specifies the maximum amount of time that elapses before the Fiery Server stops attempting to
connect to the mail server.
• Enable Remote Diagnostics - Select this option to troubleshoot e-mail printing issues.
• Administrator E-mail Address - The address from which the administrator manages the e-mail address
books.
7 Apply or save your changes.
Enable printing via e-mail
By specifying the print connection, you enable the Fiery Server to accept jobs sent to it as attachments.
Important: There are two versions of Configure and they are specific to the Fiery Server you are connected to.
This is a combined procedure that describes what to do when connected to a Fiery Server with FS100/100Pro or
earlier, and notes about what to do with FS150/150 Pro or later. If you are not sure which version of Configure
you are using, see Which version of Configure am I using? on page 27.
1 From Configure, choose Network > Services > Print via E-mail.
Note: If you are connected to a Fiery Server with FS150/150Pro, you can find settings mentioned in this
procedure in Job Submission > Print via email instead.
2 Select Enable Print via E-mail.
3 Specify the print connection on the Fiery Server to which e-mail jobs are sent.
4 To allow users to choose whether to receive an e-mail response from the Fiery Server after they submit jobs
as e-mail attachments, select Send Print Notifications.
5 Apply or save your changes.
Retrieve Help commands
You can retrieve a list of additional Help commands from the Fiery Server by sending an e-mail to the Fiery Server.
1 Start your e-mail application and open a new message window.
2 Type the e-mail address of your Fiery Server in the To: line.
3 Type #Help in the Subject: line.
4 Send the message.
Fiery Command WorkStation
Configuring server settings
57
Configure Bonjour
Bonjour allows for zero configuration while you set up, install, add, or remove the Fiery Server from the network.
This allows Mac OS computers to detect and connect to the Bonjour-enabled Fiery Server for printing.
Important: There are two versions of Configure and they are specific to the Fiery Server you are connected to. This
is a combined procedure that describes what to do when connected to a Fiery Server with FS100/100Pro or earlier,
and notes about what to do with FS150/150 Pro or later. If you are not sure which version of Configure you are
using, see Which version of Configure am I using? on page 27.
1 From Configure, choose Network > Services > Bonjour.
Note: If you are connected to a Fiery Server with FS150/150Pro, you can find settings mentioned in this
procedure in Network > Bonjour instead.
2 Select Enable Bonjour.
3 Type the Bonjour Service Name.
4 From the Preferred Printing Protocol list, select the protocol that the Fiery Server uses when using the Bonjour
service.
The list displays only the protocols that you have enabled; the Default queue displays the print connection for the
selected protocol.
This information is read-only. If no default connection can be defined (such as for IPP), the Print queue is used.
5 Apply or save your changes.
Configure Direct Mobile Printing
Direct Mobile Printing enables direct wireless printing to the Fiery Server from supported mobile devices.
Before you begin
To use Direct Mobile Printing, supported mobile devices must be connected to the same wireless network subnet as
the Fiery Server.
If Direct Mobile Printing is running on more than one Fiery Server, you must assign different Bonjour names to each
Fiery Server. Otherwise, user authentication problems will occur.
Important: There are two versions of Configure and they are specific to the Fiery Server you are connected to. This
is a combined procedure that describes what to do when connected to a Fiery Server with FS100/100Pro or earlier,
and notes about what to do with FS150/150 Pro or later. If you are not sure which version of Configure you are
using, see Which version of Configure am I using? on page 27.
The paper size specified for Default paper sizes is used for all Direct Mobile Printing jobs.
1 If you are connected to a a Fiery Server with FS150/150Pro, in Configure, enable the following items:
•
Ports 5353 (Multicast DNS), 80 (HTTP), 631 (IPP), and 6310 (Direct Mobile Printing).
•
IPP
•
Bonjour (including the check box in Bonjour Setup).
•
Publish Print Queue.
2 If you are connected to a Fiery Server with FS150/150Pro, in Configure, click Security > TCP/IP Port Filtering
and complete the remaining steps in this procedure.
Fiery Command WorkStation
Configuring server settings
58
3 Select Enable TCP/IP Port Filter and enable the following ports:
• 80 (HTPP)
• 631 (IPP)
• 5353 (Multicast DNS)
4 Click Job Submission and do the following:
a) Click Queues and select Publish Print Queue.
b) Select IPP.
c) Click Web Services for Devices (WSD) and select Enable WSD.
d) Click Direct Mobile Printing and select Enable Direct Mobile Printing.
5 Click Network > Bonjour and select Enable Bonjour.
Configure SLP
The Service Location Protocol (SLP) is a service discovery protocol that allows computers and other devices to find
services in a local area network without prior configuration.
Important: There are two versions of Configure and they are specific to the Fiery Server you are connected to. This
is a combined procedure that describes what to do when connected to a Fiery Server with FS100/100Pro or earlier,
and notes about what to do with FS150/150 Pro or later. If you are not sure which version of Configure you are
using, see Which version of Configure am I using? on page 27.
1 From Configure, choose Network > Services > SLP.
Note: If you are connected to a Fiery Server with FS150/150Pro, you can find settings mentioned in this
procedure in Network > Service Location Protocol (SLP) instead.
2 Select Enable SLP.
3 Define an additional Scope to be included with the published SLP services.
4 Apply or save your changes.
Configure Web Services for Devices (WSD)
Web Services for Devices (WSD) allows computers to discover printers and other devices on the network. You must
enable port 3702 (WS-Discovery).
Important: There are two versions of Configure and they are specific to the Fiery Server you are connected to. This
is a combined procedure that describes what to do when connected to a Fiery Server with FS100/100Pro or earlier,
and notes about what to do with FS150/150 Pro or later. If you are not sure which version of Configure you are
using, see Which version of Configure am I using? on page 27.
1 From Configure, choose Network > Services > WSD.
Note: If you are connected to a Fiery Server with FS150/150Pro, you can find settings mentioned in this
procedure in Job Submission > Web Services for Devices (SWD) instead.
2 Select Enable WSD.
Fiery Command WorkStation
Configuring server settings
59
3 Choose the default print connection.
4 Apply or save your changes.
Configuring protocols
When you specify TCP/IP settings, you can assign addresses automatically from a DHCP or BOOTP server.
If you use this approach, make sure that the appropriate server is running before configuring the settings for TCP/IP
for Ethernet, DNS, WINS Server, security, IPsec, or certificates.
Configure TCP/IP for Ethernet
You can specify that the Fiery Server obtains its IP address automatically or set the address manually.
Before you begin
Note: The Fiery Server stores assigned IP addresses, even if you disable TCP/IP later. If you must assign the Fiery
Server IP address to another device, first set the Fiery Server address to the loopback address (127.0.0.1).
The Fiery Server requires a unique, valid IP address. You can specify that the Fiery Server obtains its IP address
automatically or set the address manually. If you allow the Fiery Server to obtain the IP address automatically, it also
obtains the gateway address automatically.
If you want to set other kinds of IP addresses automatically, such as for a DNS or WINS server, you must allow the
Fiery Server to obtain its own IP address automatically.
Allow the Fiery server to obtain its TCP/IP address automatically
For the Fiery Server to obtain its IP address automatically, you make specifications about the protocol. You can
have the Fiery Server obtain the gateway address automatically or manually.
Important: There are two versions of Configure and they are specific to the Fiery Server you are connected to.
This is a combined procedure that describes what to do when connected to a Fiery Server with FS100/100Pro or
earlier, and notes about what to do with FS150/150 Pro or later. If you are not sure which version of Configure
you are using, see Which version of Configure am I using? on page 27.
1 From Configure, choose Network > Protocol > TCP/IP > Ethernet.
Note: If you are connected to a Fiery Server with FS150/150Pro, you can find settings mentioned in this
procedure in the following locations instead:
•
Network > IPv4 Address
•
Network > IPv6 Address
2 In the Select IPv4 Address section, select automatically.
Note: This setting can obtain both the IP address and gateway address for the Fiery Server, or you can
choose to set the gateway address manually.
Note: If you are connected to a Fiery Server with FS150/150Pro, select Automatic instead.
Fiery Command WorkStation
Configuring server settings
60
3 If your network uses IPv6 addresses, select Enable IPv6.
Note: While it may be possible to disable IPv4 and enable IPv6, IPv4 must be enabled for IPv6 to work.
Note: If you are connected to a Fiery Server with FS150/150Pro, click Network > IPv6 Address and select
Enable IPv6 Address instead.
4 Choose whether to obtain the gateway address automatically or manually.
Note: If you are connected to a Fiery Server with FS150/150Pro, you must perform this action from
Network > IPv4 Address. Configure IP Address must be set to Manual first and your must type an IP
address in the Default Gateway field manually.
5 Apply or save your changes.
Set TCP/IP addresses for the Fiery server manually
When you set TCP/IP addresses manually, you specify the IP address, subnet address, and make specifications
about the gateway address.
Important: There are two versions of Configure and they are specific to the Fiery Server you are connected to.
This is a combined procedure that describes what to do when connected to a Fiery Server with FS100/100Pro or
earlier, and notes about what to do with FS150/150 Pro or later. If you are not sure which version of Configure
you are using, see Which version of Configure am I using? on page 27.
1 From Configure, choose Network > Protocol > TCP/IP > Ethernet.
Note: If you are connected to a Fiery Server with FS150/150Pro, you can find settings mentioned in this
procedure in the following locations instead:
•
Network > IPv4 Address
•
Network > IPv6 Address
instead.
2 In the Select IPv4 address, section, select manually.
Note: If you are connected to a Fiery Server with FS150/150Pro, select Manual instead.
3 Type the IP address and subnet address in the respective fields.
4 If your network uses IPv6 addresses, select Enable IPv6.
Note: If you are connected to a Fiery Server with FS150/150Pro, click Network > IPv6 Address and select
Enable IPv6 Address instead.
5 Select one of the following in the Select Gateway address section:
• Automatically - The Fiery Server obtains a gateway address automatically.
• Manually - Type an IP address for the gateway in the IP Address field.
Note: If you are connected to a Fiery Server with FS150/150Pro, you must perform this action from
Network > IPv4 Address. Configure IP Address must be set to Manual first and your must type an IP
address in the Default Gateway field manually.
6 Apply or save your changes.
Fiery Command WorkStation
Configuring server settings
61
Configure DNS
Configure DNS settings to allow the Fiery Server to resolve a name to an IP address.
Before you begin
To allow the Fiery Server to obtain a DNS address automatically, you must first allow the Fiery Server to obtain its
own IP address automatically.
Important: There are two versions of Configure and they are specific to the Fiery Server you are connected to. This
is a combined procedure that describes what to do when connected to a Fiery Server with FS100/100Pro or earlier,
and notes about what to do with FS150/150 Pro or later. If you are not sure which version of Configure you are
using, see Which version of Configure am I using? on page 27.
1 From Configure, choose Network > Protocol > TCP/IP > DNS.
Note: If you are connected to a Fiery Server with FS150/150Pro, you can find settings mentioned in this
procedure in Network > IPv4 Address instead.
2 To obtain a DNS address automatically, select Get DNS Address Automatically.
To assign DNS server IP addresses manually, clear this option.
Note: If you are connected to a Fiery Server with FS150/150Pro, set Configure DNS Server to Automatic
instead.
3 If you are manually assigning DNS server IP addresses, type the primary DNS server IP address, secondary DNS
server IP address, and domain name.
4 Apply or save your changes.
Configure WINS server (name resolution)
You can specify whether to use a WINS server for name resolution. This allows users to access network resources by
name instead of IP address.
Before you begin
To allow the Fiery Server to obtain a WINS address automatically, you must first allow the Fiery Server to get its own
IP address automatically.
Important: There are two versions of Configure and they are specific to the Fiery Server you are connected to. This
is a combined procedure that describes what to do when connected to a Fiery Server with FS100/100Pro or earlier,
and notes about what to do with FS150/150 Pro or later. If you are not sure which version of Configure you are
using, see Which version of Configure am I using? on page 27.
1 From Configure, choose Network > Protocol > TCP/IP > WINS Server.
Note: If you are connected to a Fiery Server with FS150/150Pro, you can find settings mentioned in this
procedure in Network > IPv4 Address instead.
2 Select Use WINS Server.
Note: If you are connected to a Fiery Server with FS150/150Pro, select Confgure WINS Server instead.
3 Select one of the following:
• Automatically - Specifies the WINS server IP address automatically.
• IP address - Allows you to specify the WINS Server IP address manually.
Fiery Command WorkStation
Configuring server settings
62
Note: If you are connected to a Fiery Server with FS150/150Pro, these controls are labeled Automatic and
Manual instead.
4 In the NetBIOS Name field, type the name of the Fiery Server.
The name appears on the network when users access the Fiery Server through SMB (Server Message Block). This
name is the same name as the Fiery Server.
5 Apply or save your changes.
Configure security
To control connections to the Fiery Server, you can allow communication through specific IP ports, or you can
restrict a range of IP addresses.
Allow communication through specific IP ports
To restrict unauthorized connections to the Fiery Server, you can allow network activity to specific ports.
Commands or jobs sent from unauthorized ports are ignored by the Fiery Server.
Important: There are two versions of Configure and they are specific to the Fiery Server you are connected to.
This is a combined procedure that describes what to do when connected to a Fiery Server with FS100/100Pro or
earlier, and notes about what to do with FS150/150 Pro or later. If you are not sure which version of Configure
you are using, see Which version of Configure am I using? on page 27.
1 From Configure, choose Network > Protocol > TCP/IP > Security.
Note: If you are connected to a Fiery Server with FS150/150Pro, you can find settings mentioned in this
procedure in Security > TCP/IP Port Filtering instead.
2 Select Enable Port Filtering and specify the ports to enable.
Select only the ports that you want to authorize on the Fiery Server.
Note: If you are connected to a Fiery Server with FS150/150Pro, select Enable TCP/IP Port Filter instead.
3 Apply or save your changes.
To enable Remote Desktop access on the Fiery Server, make sure that port 3389 is enabled, and that the
Remote Desktop option is enabled.
Note: Not every Fiery Server supports the port 3389 option.
Allow or restrict a range of IP addresses
Restrict unauthorized connections to the Fiery Server by defining a range of IP addresses.
You can allow access only to the range of IP addresses or block access from the IP addresses. You can maintain
separate ranges that you need for allowing and blocking. Commands or jobs sent from unauthorized IP
addresses are ignored by the Fiery Server.
Important: There are two versions of Configure and they are specific to the Fiery Server you are connected to.
This is a combined procedure that describes what to do when connected to a Fiery Server with FS100/100Pro or
earlier, and notes about what to do with FS150/150 Pro or later. If you are not sure which version of Configure
you are using, see Which version of Configure am I using? on page 27.
Fiery Command WorkStation
Configuring server settings
63
1 From Configure, choose Network > Protocol > TCP/IP > Security.
Note: If you are connected to a Fiery Server with FS150/150Pro, you can find settings mentioned in this
procedure in Security > IP Address Filtering instead.
2 Select the IPv4 tab and select Enable IPv4 Filtering, or select the IPv6 tab and select Enable IPv6
Filtering.
Note: If you are connected to a Fiery Server with FS150/150Pro, select the IPv4 Address Filtering and
IPv6 Address Filtering check boxes instead.
3 If you add several ranges, choose the type of policy that you apply to the majority of IP address ranges that
you want to add. From the Default Filter Policy list, choose Accept to allow a range of IP addresses. Choose
Deny to block a range of IP addresses.
Note: Use the Default Filter Policy list as an aid when you want to add several ranges consecutively. When
you eventually define the range, you can choose Accept or Deny, regardless of the setting for the default.
Settings in the Default Filter Policy list do not apply to ranges after you have added them.
4 Click Add.
Note: If you are connected to a Fiery Server with FS150/150Pro, click Add IPv4 Address Filtering or
Add IPv6 Address Filtering instead.
5 In the window that appears, choose Accept or Deny for the range of IP addresses.
6 Type the range of IP addresses (IPv4) or type the IPv6 Address and Prefix Length (IPv6), and then save your
changes.
7 Repeat the previous steps to add more ranges.
8 Apply or save your changes.
Important: If you set a range of IP addresses to deny but do not also set a range to accept, all network
communication to the Fiery Server is disabled.
Configure IPsec (Internet Protocol Security)
If users' computers support IPsec, you can enable the Fiery Server to accept encrypted communications from users.
Important: There are two versions of Configure and they are specific to the Fiery Server you are connected to. This
is a combined procedure that describes what to do when connected to a Fiery Server with FS100/100Pro or earlier,
and notes about what to do with FS150/150 Pro or later. If you are not sure which version of Configure you are
using, see Which version of Configure am I using? on page 27.
1 From Configure, choose Network > Protocol > TCP/IP > IPsec.
Note: If you are connected to a Fiery Server with FS150/150Pro, you can find settings mentioned in this
procedure in Security > IPSpec instead.
2 Select Enable IPsec.
3 To define the preshared key, type it in the Preshared key box.
If you define the preshared key, all incoming communication that uses IPsec must contain this key.
4 Apply or save your changes.
Fiery Command WorkStation
Configuring server settings
64
Manage certificates
Secure Sockets Layer (SSL) technology secures the Fiery Server by encrypting information and providing
authentication.
An SSL certificate consists of a public key and a private key. The public key encrypts information, and the private key
deciphers it. Private keys can be 1024 to 2048 bits long and include all printable characters. The maximum size is
16KB.
There are trusted and non-trusted certificates. A trusted certificate has no private key, only a certificate file. For
each, you can add or delete a certificate. You cannot delete a certificate if it is currently assigned to a service.
Add a certificate or private key
When you add an SSL certificate or private key, you specify its location.
Important: There are two versions of Configure and they are specific to the Fiery Server you are connected to.
This is a combined procedure that describes what to do when connected to a Fiery Server with FS100/100Pro or
earlier, and notes about what to do with FS150/150 Pro or later. If you are not sure which version of Configure
you are using, see Which version of Configure am I using? on page 27.
1 From Configure, choose Network > Protocol > TCP/IP > Certificates.
Note: If you are connected to a Fiery Server with FS150/150Pro, you can find settings mentioned in this
procedure in Security > Trusted Certificates instead.
2 Click Add.
3 Type the location of the certificate or private key, or click the corresponding Browse button to locate it.
Click Add.
4 To view information about a certificate, double-click the certificate in the list.
Assign a certificate to the Web server portion of the Fiery Server
You can assign or reassign a certificate used by the Web server.
Important: There are two versions of Configure and they are specific to the Fiery Server you are connected to.
This is a combined procedure that describes what to do when connected to a Fiery Server with FS100/100Pro or
earlier, and notes about what to do with FS150/150 Pro or later. If you are not sure which version of Configure
you are using, see Which version of Configure am I using? on page 27.
1 From Configure, choose Network > Protocol > TCP/IP > Certificates.
Note: If you are connected to a Fiery Server with FS150/150Pro, you can find settings mentioned in this
procedure in Security > Server Certificate instead.
2 Click Create Self Signed Certificate.
3 Specify and save your certificate information.
4 To change the certificate used by the Web server, select the certificate, click Change Certificate, and then
specify the location of the certificate or private key.
Fiery Command WorkStation
Configuring server settings
65
Delete an assigned certificate
Before you begin
You can delete an assigned certificate.
Important: There are two versions of Configure and they are specific to the Fiery Server you are connected to.
This is a combined procedure that describes what to do when connected to a Fiery Server with FS100/100Pro or
earlier, and notes about what to do with FS150/150 Pro or later. If you are not sure which version of Configure
you are using, see Which version of Configure am I using? on page 27.
1 From Configure, choose Network > Protocol > TCP/IP > Certificates.
Note: If you are connected to a Fiery Server with FS150/150Pro, you can find settings mentioned in this
procedure in Security > Trusted Certificates instead.
2 Select the certificate.
Note: If you are connected to a Fiery Server with FS150/150Pro, move the cursor over the certificate you
want to delete. Noticed the Delete icon displays.
3 Click Delete.
Configure printer settings
Use Printer pages to publish print connections and set other settings that affect job processing.
Important: There are two versions of Configure and they are specific to the Fiery Server you are connected to. This
is a combined procedure that describes what to do when connected to a Fiery Server with FS100/100Pro or earlier,
and notes about what to do with FS150/150 Pro or later. If you are not sure which version of Configure you are
using, see Which version of Configure am I using? on page 27.
1 From Configure, choose Printer > General.
2 If the Fiery Server supports PostScript and PCL, select Default Personality to specify the default page
description language for jobs.
Note: If you are connected to a Fiery Server with FS150/150Pro, you can find this setting in RIP > Printer
Default Personality instead.
3 Select the print connections to publish on the Fiery Server:
• Direct Connection - Transmits jobs directly to the Fiery Server, but only when the Fiery Server is idle.
• Print queue - The standard Fiery Server queue, where jobs are processed and printed in the order in which
they are received.
• Hold queue - The storage area for printing jobs later from the job management tools.
Note: If you are connected to a Fiery Server with FS150/150Pro, you can find this setting in Job Submission >
Queues instead.
4 To allow the Fiery Server to maintain the print order on print runs consisting of many jobs, select Enable
Sequential Print.
Note: If you are connected to a Fiery Server with FS150/150Pro, you can find the remaining settings in this
procedure in Job Submission > Sequential Print instead.
Fiery Command WorkStation
Configuring server settings
66
5 Select a value for the Timeout, which defines how long the Fiery Server should wait for the next job in the
sequential run, before timing out and considering the run complete.
6 Select Publish Sequential Print Queue to make the Sequential Print Queue available via all supported
printing protocols and from Command WorkStation, virtual printers, and Hot Folders.
7 Apply or save your changes.
Configure PDL
Use PDL (printer description language) pages to define default settings for jobs.
Configure PostScript settings
You can configure settings that affect PostScript jobs. These settings affect jobs for which users have not specified a
setting.
Important: There are two versions of Configure and they are specific to the Fiery Server you are connected to. This
is a combined procedure that describes what to do when connected to a Fiery Server with FS100/100Pro or earlier,
and notes about what to do with FS150/150 Pro or later. If you are not sure which version of Configure you are
using, see Which version of Configure am I using? on page 27.
Some combinations of settings may not be appropriate (for example, specifying duplex printing on transparencies). If
you specify an inappropriate combination of settings, no error message appears.
1 From Configure, choose PDL > PS.
Note: If you are connected to a Fiery Server with FS150/150Pro, you can find settings mentioned in this
procedure in RIP > PS settings instead.
2 Specify settings for the options.
3 Apply or save your changes.
Next steps
For information about PostScript settings, see Configuration and Setup, which is part of the user documentation set.
Configure PCL settings
If your Fiery Server supports PCL, you can set the default settings for the following options that affect all PCL jobs.
Important: There are two versions of Configure and they are specific to the Fiery Server you are connected to. This
is a combined procedure that describes what to do when connected to a Fiery Server with FS100/100Pro or earlier,
and notes about what to do with FS150/150 Pro or later. If you are not sure which version of Configure you are
using, see Which version of Configure am I using? on page 27.
These settings affect jobs for which users have not specified a setting. Some combinations of settings might not be
appropriate (for example, specifying duplex printing on transparencies). If you specify an inappropriate combination
of settings, no error message appears.
1 From Configure, choose PDL > PCL.
Note: If you are connected to a Fiery Server with FS150/150Pro, you can find settings mentioned in this
procedure in RIP > PCL settings instead.
Fiery Command WorkStation
Configuring server settings
67
2 Specify settings for the options.
3 Apply or save your changes.
Next steps
For information about PCL settings, see Configuration and Setup, which is part of the user documentation set.
Configure VDP settings
You can specify the record length for FreeForm 1 jobs and the network locations (paths) for objects used by variable
data printing (VDP), such as common objects, PPML objects, and VPS objects.
Important: There are two versions of Configure and they are specific to the Fiery Server you are connected to. This
is a combined procedure that describes what to do when connected to a Fiery Server with FS100/100Pro or earlier,
and notes about what to do with FS150/150 Pro or later. If you are not sure which version of Configure you are
using, see Which version of Configure am I using? on page 27.
1 From Configure, choose PDL > VDP.
Note: If you are connected to a Fiery Server with FS150/150Pro, you can find settings mentioned in this
procedure in RIP > VDP instead.
2 If users will apply imposition or duplex printing to a FreeForm 1 job, select the length of the record:
• Job - Defines the record boundary as the entire job.
• FreeForm Master - Defines the record boundary as the length of the FreeForm master.
3 Specify the number of records to examine (parse) while a VPS job is spooling.
If you type a number, the Fiery Server examines a sample number of records to determine whether the record
length is consistent among records. If the records in this sample have the same length, the Fiery Server assumes
all records in the job have the same length.
If the Fiery Server detects that any of the records have a different length (whether you specify All Records or a
sample number), the Fiery Server examines all records when necessary for processing or imposition purposes. If
the Fiery Server does not detect any different lengths in the sample records at spool time, but detects a
subsequent record with a different length, the user is prompted for further action.
4 Click Add to specify the network paths where the Fiery Server searches for common objects, PPML objects, and
VPS objects.
5 In the window that appears, type the path name or click Browse to locate the path.
If you type the path name, use the format of a mapped drive (for example, Z:\folder) or a UNC (for example, \
\computer name\folder).
6 If the path is located on a computer that requires authentication, select Remote Server Authentication, and
then enter the appropriate user name and password.
7 Click OK.
8 To add more paths, click Add and repeat these steps.
9 Apply or save your changes.
Fiery Command WorkStation
Configuring server settings
68
Configure native document settings
Native document conversion allows the automatic conversion and printing of Microsoft Office files (Word,
PowerPoint, and Excel).
Important: There are two versions of Configure and they are specific to the Fiery Server you are connected to. This
is a combined procedure that describes what to do when connected to a Fiery Server with FS100/100Pro or earlier,
and notes about what to do with FS150/150 Pro or later. If you are not sure which version of Configure you are
using, see Which version of Configure am I using? on page 27.
When a user sends these files to the Fiery Server as e-mail attachments or using the USB Media Server feature, the
Fiery Server sends them to the PrintMe server for conversion to PostScript files. The files are then printed on the
Fiery Server.
Note: Not every Fiery Server support this option.
1 From Configure, choose PDF > Native Documents.
Note: If you are connected to a Fiery Server with FS150/150Pro, you can find settings mentioned in this
procedure in RIP > Native Documents instead.
2 Select Enable Native Document Conversion using PrintMe.
The connection to the PrintMe server is initiated. Follow the on-screen instructions. You must enable DNS to use
this option.
3 If you want an e-mail to be sent to the administrator when the PrintMe licensing updates change, select Send
licensing updates to the Fiery administrator e-mail address.
4 Apply or save your changes.
Configure APPE
You can enable Adobe PDF Print Engine (APPE) to allow the Fiery Server to process and render PDF jobs without
the need to convert them to PostScript.
Important: There are two versions of Configure and they are specific to the Fiery Server you are connected to. This
is a combined procedure that describes what to do when connected to a Fiery Server with FS100/100Pro or earlier,
and notes about what to do with FS150/150 Pro or later. If you are not sure which version of Configure you are
using, see Which version of Configure am I using? on page 27.
1 From Configure, choose PDL > Adobe PDF Print Engine.
Note: If you are connected to a Fiery Server with FS150/150Pro, you can find settings mentioned in this
procedure in RIP > APPE instead.
2 Select Enable Adobe PDF Print Engine (APPE).
3 If you want the Adobe PDF Print Engine Preferred option in Job Properties to be selected by default for all PDF
jobs, select Use Adobe PDF Print Engine Preferred for PDF jobs.
4 Apply or save your changes.
Once enabled in Configure, a checkbox for Adobe PDF Print Engine Preferred is available in Job Properties.
Next steps
For information about Fiery Server options that appear in Job Properties, see Printing, which is part of the user
documentation set.
Fiery Command WorkStation
Configuring server settings
69
Configure Set Page Device (SPD) media mapping
Set Page Device (SPD) commands are instructions within PostScript, VIPP, and VPS files that specify certain
attributes of a print job.
Important: There are two versions of Configure and they are specific to the Fiery Server you are connected to. This
is a combined procedure that describes what to do when connected to a Fiery Server with FS100/100Pro or earlier,
and notes about what to do with FS150/150 Pro or later. If you are not sure which version of Configure you are
using, see Which version of Configure am I using? on page 27.
You can enable SPD Media Mapping to allow the Fiery Server to recognize and apply some of these attributes,
including:
•
Paper attributes (for example, Media Type and Media Color)
•
Finishing attributes (for example, stapling or folding)
•
Generic attributes (for example, number of copies)
1 From Configure, select PDL.
Note: If you are connected to a Fiery Server with FS150/150Pro, click RIP and select the Set Page Device
check box instead.
2 Click SPD.
3 Select Enable Set Page Device Mapping.
4 Apply or save your changes.
Once enabled in Configure, the SPD mapping option is available in Job Properties.
Next steps
For information about Fiery Server options that appear in Job Properties, see Printing, which is part of the user
documentation set.
Set up PrintMe
Use these options to define settings for PrintMe cloud printing. Users can upload a document to the PrintMe cloud
service and then print the document to the copier/printer from the Fiery Control Panel.
Enable PrintMe cloud printing
When you enable PrintMe, you may need to specify information about the proxy server.
Important: There are two versions of Configure and they are specific to the Fiery Server you are connected to. This
is a combined procedure that describes what to do when connected to a Fiery Server with FS100/100Pro or earlier,
and notes about what to do with FS150/150 Pro or later. If you are not sure which version of Configure you are
using, see Which version of Configure am I using? on page 27.
1 From Configure, choose PrintMe.
Note: If you are connected to a Fiery Server with FS150/150Pro, you can find settings mentioned in this
procedure in Job Submission > PrintMe instead.
2 Click Enable PrintMe.
Fiery Command WorkStation
Configuring server settings
70
3 If your Fiery Server uses a proxy server on your network, click Proxy Settings.
Note: If you are connected to a Fiery Server with FS150/150Pro, click the Manage link instead.
4 Click Enable Proxy.
Note: If you are connected to a Fiery Server with FS150/150Pro, select Enable HTTP Proxy instead.
5 Type the information about the proxy server, and click Save.
6 Apply or save your changes.
Upgrade the PrintMe subscription
In Configure, you can upgrade PrintMe.
Important: There are two versions of Configure and they are specific to the Fiery Server you are connected to. This
is a combined procedure that describes what to do when connected to a Fiery Server with FS100/100Pro or earlier,
and notes about what to do with FS150/150 Pro or later. If you are not sure which version of Configure you are
using, see Which version of Configure am I using? on page 27.
1 From Configure, choose PrintMe > Upgrade.
Note: If you are connected to a Fiery Server with FS150/150Pro, you can find settings mentioned in this
procedure in Job Submission > PrintMe instead. Click the Upgrade link.
2 Type the information and submit or save your changes.
Exit Configure
After you save your changes, the changes won’t take effect until you reboot the Fiery Server.
•
Do one of the following:
•
Reboot the Fiery Server so that the changes take effect.
•
If you do not want to reboot the Fiery Server yet, quit or log out to exit Configure. The changes are saved.
Some changes are not activated until the Fiery Server is rebooted.
About backup and restoring
You can back up and restore several categories of settings (if your Fiery Server supports them).
•
Fiery settings (includes all the settings selected in Configure)
•
Color settings (includes profile edits made with Color Editor, user-added profiles, spot colors, and substitute
colors)
•
Preflight presets
Fiery Command WorkStation
Configuring server settings
•
Scan settings (current scan templates and settings, if your Fiery Server supports this feature)
•
Command WorkStation settings (includes user-created tab presets, local job presets, Command WorkStation
preferences, imposition templates)
71
Note: The Command WorkStation settings option is not available on all Fiery Servers. When supported, this
option is available only from Command WorkStation on the Fiery Server with an attached monitor, keyboard,
and mouse.
•
FreeForm/VDP Resources (includes FreeForm masters and other VDP resources, such as PPML resources and
links)
•
Paper Catalog (settings made in Paper Catalog but may not include tray associations)
•
Virtual Printers (all user-created virtual printers and their settings)
•
Server presets
•
Fonts (user-installed fonts)
•
Job Log (a list of processed jobs)
Note: We recommend that you save the backup file to a network server, not the Fiery Server itself. Otherwise,
when you reinstall system software, the backup file is deleted.
Important information to consider when you back up and restore:
•
Saved Backup and Restore settings can be used from both Configure and Command WorkStation.
•
In the case of upgrading your Fiery Server to a a new system software version, you can restore the backup file
created from the previous version. However, all new settings not available in the previous system software are set
to system default.
•
Backup and Restore settings can be restored to another Fiery Server of the exact same model and version, but in
this case, settings such as Server Name, IP address and Network settings are reset to system defaults. This
prevents problems with both Fiery Servers co-existing on the same network.
Back up or restore Fiery server settings
You can back up or restore Fiery Server settings from Configure or from Command WorkStation.
Note: The Restore Fiery Settings and Restore Default Fiery Settings option are not available for every Fiery Server.
Back up Fiery Server settings from Configure
From Configure, you can choose which Fiery Server settings you want to back up.
Important: There are two versions of Configure and they are specific to the Fiery Server you are connected to. This
is a combined procedure that describes what to do when connected to a Fiery Server with FS100/100Pro or earlier,
and notes about what to do with FS150/150 Pro or later. If you are not sure which version of Configure you are
using, see Which version of Configure am I using? on page 27.
1 From Configure, choose Server > Backup/Restore and click Backup.
Note: If you are connected to a Fiery Server with FS150/150Pro, choose Fiery Server > Backup instead.
2 Follow the on-screen instructions to back up your settings.
Fiery Command WorkStation
Configuring server settings
72
Back up Fiery Server settings from Command WorkStation
From Command WorkStation, you can choose which Fiery Server settings you want to back up.
1 Connect to the desired Fiery Server and do one of the following:
•
Click Device Center > General > Tools > Backup & Restore.
•
Select Server > Backup & Restore.
2 Click Backup.
3 Select the items you want to back up.
4 In the dialog box that appears, select a location to save the file and specify a name for the backup file.
5 (Optional) Select Add date to file name.
6 Click Next, and then click Finish.
Restore Fiery Server settings from Configure
If you previously backed up Fiery Server settings, you can restore them from Configure.
Important: There are two versions of Configure and they are specific to the Fiery Server you are connected to. This
is a combined procedure that describes what to do when connected to a Fiery Server with FS100/100Pro or earlier,
and notes about what to do with FS150/150 Pro or later. If you are not sure which version of Configure you are
using, see Which version of Configure am I using? on page 27.
1 From Configure, choose Server > Backup/Restore and click Restore.
Note: If you are connected to a Fiery Server with FS150/150Pro, choose Fiery Server > Restore instead.
2 Follow the on-screen instructions to restore your settings.
Restore Fiery server default settings from Configure
After you restore default settings from Configure, the Fiery Server must reboot to revert to them.
1 From Configure (Device Center > General > Configure), choose Server > Backup/Restore.
2 Click Restore Default Fiery Settings.
Restore Fiery server settings from Command WorkStation
If you previously backed up Fiery Server settings, you can restore them from Command WorkStation.
1 Connect to the desired Fiery Server and do one of the following:
•
Click Device Center > General > Tools > Backup & Restore.
•
Select Server > Backup & Restore.
2 Click Restore.
3 In the dialog box that appears, browse to the location of the configuration settings you want to restore and click
Open or select a recent backup.
Fiery Command WorkStation
Configuring server settings
4 Click Next and select the items you want to restore.
5 Click Next, and then click Finish.
73
Fiery Command WorkStation
Managing Fiery Central workflows
74
Managing Fiery Central workflows
About Fiery Central
Fiery Central is a modular, Paper Catalog, PDF-based production workflow tool that provides efficient load-balanced
network printing to high-volume print environment.
Fiery Central delivers an automated workflow in the following ways:
•
Manages job submission, printer queues, and spooling
•
Provides efficient load-balancing and printing for high-volume and production print environments
•
Provides a workflow automation framework
Fiery Central software
Fiery Central standard features include the following:
•
Fiery Command WorkStation for advanced job management
•
Fiery Central Driver for job submission
•
Fiery Hot Folders
•
Fiery Printer Delete Utility
•
Archiving
•
Fiery Impose
•
Fiery JobMaster
•
Support for up to 10 printer groups based on the number of licensed printers
•
Support for three Fiery-driven printers, with the ability to add more
The Fiery Color Profiler Suite is an optional feature.
The Fiery Central Balance option includes the following:
•
Automatic job routing, job splitting, load-balancing, and error recovery among groups of printers
•
All Fiery Central standard features
Connect to or disconnect from a Fiery Central server
When you connect to a Fiery Central Server, information about the printer groups and the printers in each group is
automatically shown in the Servers pane.
Before you begin
Before you add a Fiery Central Server that you want to monitor, make sure that you have the server DNS name or IP
address.
Fiery Command WorkStation
Managing Fiery Central workflows
75
If you type an IP address, the Servers pane will show what you typed. After the server connection has been made and
authenticated, the IP address switches to the Fiery Central Server name in the Servers pane.
Connect to a Fiery Central server from the network
To connect to a Fiery Central Server from the network, you type the IP address or DNS name and then log in.
1 Click Server > Connect New to display the Connect to Server window.
2 Type the IP address or DNS name for the Fiery Central Server in the Connect to a server field, and then click
the plus sign icon to add it to the Servers pane or click Connect to open the Login window.
To find a Fiery Central Server by name or IP address, look in the Disconnected servers list in the Connect to
Server window. If not, you can click the Search icon.
3 Select Administrator, Operator, or Guest from the list, and type the appropriate password.
You do not need to type a password when logging in as Guest.
4 Click Login.
Re-connect to a Fiery Central server in the Servers pane
You can log back in to a Fiery Central Server after disconnecting.
1 Do one of the following:
•
Select a Fiery Central Server and click Server > Connect.
•
Select a Fiery Central Server and click the Connect icon.
•
Double-click on the Fiery Central Server.
2 Select Administrator, Operator, or Guest from the list, and type the appropriate password.
You do not need to type a password when logging in as Guest.
3 Click Login.
Log off the Fiery Central server
The Servers pane allows you to disconnect from a Fiery Central Server.
1 Select a Fiery Central Server from the Servers pane.
2 Do one of the following:
•
Click the minus sign icon to disconnect and remove the Fiery Central Server.
•
Click the disconnect icon located to the right of the minus sign icon.
Fiery Command WorkStation
Managing Fiery Central workflows
76
Fiery Central server workspace
The workspace lists Fiery Central Server connections, consumables, and errors and alerts. It also provides the Fiery
Central Device Center interface and Paper Catalog Map.
Servers pane in Fiery Central
The Servers pane shows the authenticated Fiery Central Server connections.
Fiery Central servers appear in the Servers pane with the following indicators:
Fiery Central Server
Printer Group within the Fiery Central Server
Fiery Server within the Fiery Central Server
Disconnected Fiery Server within the Fiery Central Server
Generic PostScript printer or non-Fiery printer within the Fiery Central Server
Consumables
The Consumables section in the Servers pane includes information about consumables for a selected Fiery Server
within a printer group. You must be logged on to the Fiery Server to see its consumables.
Consumable information is not available for a Fiery Central Servers, printer groups, non-Fiery Servers, or generic
PostScript printers.
Viewing server information
To view a detailed and complete list of server information, click Device Center > General > General Info.
Viewing status and error messages
View status information about the Fiery Central Server, the Fiery Server or the non- Fiery printer and error messages
about the copier/printer the server is connected to in the Servers pane, in the section immediately below the name of
the Fiery Server.
The Printer Group that contains the Fiery Server or non-Fiery printer with the error is shown with an error icon in
the Servers pane. If multiple errors occur at the same time, the most critical error displays first. After you resolve it,
the next error displays, and so on, until all errors are resolved.
View Fiery Central jobs
You can view Fiery Central jobs in the Job Summary pane or in the Fiery Central Job Center. The Job Center gives
you the option of filtering out non-Fiery Central jobs.
When you select a printer group, only the jobs that are assigned to the selected group in the Fiery Central Server are
shown in the Job Center. Similarly, when you select a specific Fiery Server within a printer group, the Job Center
displays jobs that are on the Fiery Server. If you select a non-Fiery or generic PostScript printer, only Fiery Central
jobs are shown in the Job Center.
Fiery Command WorkStation
Managing Fiery Central workflows
•
77
Do one of the following:
•
Right-click a Fiery Server in a printer group in the Servers pane, and select Show only Central Jobs.
•
Select a Fiery Server in a printer group in the Servers pane, and click View > Show only Central Jobs.
•
Select a Fiery Server in a printer group in the Servers pane, and select Central Jobs from the list box in the
Held/Printed/Archived pane.
Customize Fiery Central Job Center
You can customize the toolbar icons and column headers in the Processing and Printing panes of the Job Center for
Fiery Central.
To customize these items, the Fiery Central Server or printer group must be selected in the Servers pane.
Customize Fiery Central toolbar icons
You can use a default set up Fiery Central toolbar icons, move icons in and out of the toolbar, and determine
whether toolbar icons are displayed with text.
1 Right-click anywhere in the toolbar, and select Customize from the menu that appears, or select Fiery Central
Set to use the default pre-arranged Fiery Central toolbar icons.
2 Drag the DSF toolbar icon to or from the toolbar.
The DSF icon allows you to launch a pre-defined Digital StoreFront (DSF) Website.
3 Specify how the toolbar icons should be shown by right-clicking the toolbar and choosing an option.
4 Click Done when you have finished.
Display Fiery Central column headings
When the Fiery Server receives a Fiery Central job and displays it in the Command WorkStation Hold or Print
queue, Fiery Central column headings can provide useful information about the job.
•
To display column headings for a Fiery Central job, right-click in the column heading bar and select Central
Set.
The default Fiery Central set of headings is added. Click More to see additional Fiery Central categories.
View or edit the Fiery Central license
The Fiery Central License Manager displays the terms of your Fiery Central license. You can access this feature only
from Command WorkStation installed on the Fiery Central Server.
If you have licensed additional Fiery Central applications or features, you can enter updated license information
without running the installation program. You must enter this updated license information in the Fiery Central
License Manager before you can use new features. You can also update your license during Fiery Central software
installation.
Note: You can create a maximum of 10 printer groups for each Fiery Central Server.
Fiery Command WorkStation
Managing Fiery Central workflows
78
1 Do one of the following:
•
Click Device Center > General > Tools and click Launch FC License Manager.
•
Click Server > Central Tools > Manage Fiery Central License.
•
Click Start > Programs > EFI > Fiery Central > Fiery Central License Manager.
2 To enter licensing information, enter the activation key code exactly as displayed on the Fiery Central License
Form included in your Fiery Central software package.
Configure Fiery Central
You configure Fiery Central from the Fiery Central Bar, which appears at the top of the computer screen after you
complete installation of the Fiery Central software and restart the server.
Configure the Fiery Central server
You can configure the Fiery Central Server from WebTools, from Configure, or from Device Center.
•
Do one of the following:
•
Right-click the Fiery Central Bar, select WebTools, and then select the Configure tab. (For information about
using WebTools Configure, click the Online Help icon in the WebTools Configure window.)
•
In Command WorkStation, click Server > Configure.
•
In Command WorkStation, click Device Center > General > Tools, and then click Configure in the lowerright corner.
Note: This feature can only be accessed from Command WorkStation installed on the Fiery Central Server.
You can launch WebTools from the Fiery Central Bar at any time to update your server configuration to reflect
changes in your Fiery Central printing environment.
Enable JDF in Configure
JDF (Job Definition Format) technology is an XML-based open industry standard for job tickets. It simplifies the
information exchange among different graphic arts applications and systems.
Fiery JDF allows submission of JDF jobs to the Fiery Central Server from applications that allow creation of JDF
tickets. Use Configure to specify JDF settings and to view the Fiery JDF version, the JDF Device ID, and the JMF
URL.
1 From Configure, click Server > JDF.
2 Select Enable JDF to enable JDF functionality.
3 Specify a default print queue action from Job Action.
4 Select Override JDF job with the above settings, if you want to override the settings specified in the JDF
ticket.
5 Click Apply.
Fiery Command WorkStation
Managing Fiery Central workflows
79
Fiery Central Manager
Fiery Central Manager allows you to create printer groups, add new printers, change printer group settings, and
configure VDP settings and DSF connection settings.
Access Fiery Central Manager
The Fiery Central Manager window, which appears after you install Fiery Central, allows you to perform tasks such
as configuring and editing printer groups.
•
Do one of the following:
•
Right-click the Fiery Central Bar and select Fiery Central Manager.
•
Click Start > All Programs > EFI > Fiery Central > Fiery Central Manager.
•
In Command WorkStation, click Device Center > General > Tools, and then click Launch Manage
Groups, or from Server > Central Tools, select Manage Groups.
Note: This feature can only be accessed from Command WorkStation installed on the Fiery Central Server.
Fiery Central Printer Groups
A printer group is a set of printers and default print options. Printer groups allow the Fiery Central Server to route
jobs to printers and balance them across multiple printers.
Fiery Central may have multiple printer groups. If the optional Balance module is installed, the printer groups may
each contain multiple printers, and each printer may belong to one or more groups.
A printer group appears on the network as a virtual printer, and has both Print and Hold queues. Jobs printed with
the Fiery Central printer driver, Hot Folders, or other printing utilities associated with the printer group can be
tagged with any of the print options provided by printers in the group.
Create or edit a printer group
To allow Fiery Central to print jobs to the printers, you must create a printer group.
Before you begin
Note: Before you configure printer groups, you must have the IP address or server DNS name for each printer you
want to use with Fiery Central. Make a note of any additional options installed with each printer.
When you create printer groups, keep in mind the capabilities of your printers, the types of printing you will be
doing, and if speed or custom printing is a priority.
1 In the Fiery Central Manager window, select the Printer Groups tab.
2 To add a printer group, click Add; to edit an existing printer group, select a group and click Edit.
3 Type a Group Name to identify the printer group, add a description (optional), and then click Next.
A Group Name can be up to 16 characters long. The name cannot include special characters, hyphens, spaces, or
underscores.
Fiery Command WorkStation
Managing Fiery Central workflows
80
4 Type the IP address or printer name in the IP/Server Name field.
For printers that maintain multiple queues and treat each as a separate printer, enter a Queue Name to locate the
printer for selection.
5 Select the server family and printer model from the Model list.
The Port Number field is filled in by default (631).
6 Do one of the following:
•
Click Search.
•
Click Auto Discovery to search for available Fiery Servers on the network. Auto Discovery searches only the
Fiery Central Server with its local TCP/IP subnet.
Note: Auto Discovery will not find non-Fiery printers or generic PostScript printers on the network. You have
to manually add them to the printer group by using their IP address or printer name.
7 In the Available Printers list, select a printer and click the arrow button to move it to the Selected Printers list.
8 In the Edit/Configure Printer window, confirm that the Printer Name is correct and unique.
9 Click Paper Catalog Map to set up the Paper Catalog or tray selection for the printer you are editing and
configuring.
The Paper Catalog Map feature is available only if the Fiery Server or non-Fiery printer supports it.
10 Verify that the Installable Options pane lists the options installed on the printer, and then click OK.
You can specify optional and printer-specific options such as staplers, stackers, and booklet finishers for
individual printers in a printer group. The Fiery Central Manager incorporates these additional features into
printer group PPD files for printing.
Note: When you add a Fiery Server to a printer group, the configurable options are selected by default. You
manually install printer-specific options for non-Fiery printers.
11 Add and configure additional printers.
Move any other printers you want for that group, one by one, to the Selected Printers list, and then configure
them. You can also remove printers from the group.
12 Click Next when you have added and configured all of the printers you have selected for the printer group.
13 Set the default options for the printer group:
•
Select the Load Balance option for balancing individual print jobs among the printers in the group. If you set
Load Balance to Preferred Printer, also select a printer from the printer group in the Preferred Printer
field.
•
Set the Use Printer Type default, and specify whether black-and-white or color printers are used exclusively
for jobs sent to this group.
•
Set one of the Cover Sheet/Merge Options.
•
Set the Maximum Number of Printers.
•
Select Reroute on Error to send the remaining portion of a job to the Fastest Single Engine when an error
occurs at the destination printer. If you do not select this option, jobs wait in the destination printer's Print
queue until the error is cleared.
Fiery Command WorkStation
Managing Fiery Central workflows
81
14 Click Next; then review the summary information for the printer group and click Save.
If you need to make changes, click Cancel to discard the current printer group and create a new one.
15 With the printer group selected in the Fiery Central Manager Printer Groups pane, select Make Printer Group
drivers available through WebTools if you want users to be able to download Fiery Central printer drivers
through an Internet browser.
If you are using a Windows or Mac OS X computer, select this option so that users can download the printer
driver files and associated printer files from the Web.
16 Select the printer queues that you want to publish.
17 To save changes and create the printer group, click OK in the Fiery Central Manger dialog box.
Printer group options
You can specify the following Load Balance, Cover Sheet/Merge, and Reroute on Error options when you set up a
printer group.
Load Balance options
Fastest Single Engine
Prints the entire job to the fastest printer that meets the print specifications
of the job.
Preferred Printer
Prints the entire job to the printer you specify.
Copy Split
Sends multiple copies of a single document to different printers, based on
print specifications and the current print load on each printer. Copy Split
requires a minimum of two color printers or two black-and-white printers.
Long Job Split
Splits a single copy of a document across different printers. Long Job Split
requires a minimum of two color printers or two black-and-white printers.
Color Split
Splits all copies across two printers, with color content sent to the fastest
color printer in the group, and black-and-white content sent to the fastest
black-and-white printer in the group. Color Split requires a minimum of
one color and one black-and-white printer.
Cover Sheet/Merge options
None
Does not generate cover sheets or insert inline pages.
Cover Sheet-Manual Merge
Automatically generates covers sheets with information about each portion
of the job to aid in manual merging.
Bar Code-Offline Merge
Automatically generates cover sheets containing bar codes for collation by
an offline merge finisher. This option is available only when Load Balance is
set to Color Split.
No Cover Sheet-Inline Merge
Inserts preprinted pages from an inline insertion tray. This option is
available only if a black-and-white printer in the group has an insertion tray,
and if Load Balance is set to Color Split.
Reroute on Error parameters
Job Time Out
Specifies how long a job waits in the destination printer's Print queue when
an error occurs, before being rerouted.
Fiery Command WorkStation
Managing Fiery Central workflows
Total Reroutes
82
Specifies how many reroutes are allowed for a single job. When the
maximum is reached, the job waits in the Print queue of the last printer
until the error is cleared.
Manage printer groups
After you have a printer group set up, you can manage the group by adding or deleting printers from the group, or
view information about the printer group.
1 In the Fiery Central Manager window, select the Printer Groups tab to display printer groups.
2 Select an existing printer group, and do any of the following:
•
Click Edit to update the group, or View to see the summary information for the group.
•
Click Delete to remove the selected printer group.
•
Click Add to add a new group.
•
Select Make Printer Group drivers available through WebTools if you would like users to be able to
download Fiery Central Manager printer drivers through an Internet browser.
Note: If you are using a Windows or Mac OS client, this option should be selected so users can download the
printer driver files and associated printer files from the Web.
•
Select the printer queues you want to publish (selected by default).
3 Click OK to save changes and create the printer group.
Back up or restore Fiery Central
The Fiery Central Manager allows you to back up printer group information so your printer groups can be restored
after system crashes or upgrades.
Before you begin
Note: Before restoring from a backup, you must delete all existing printer groups. You cannot merge backed up
printer groups with existing printer groups.
The following information is backed up:
•
Printer group information
•
Paper Catalog
•
Paper Catalog mapping
Note: The backup and restore feature can only be accessed from Command WorkStation installed on the Fiery
Central Server.
Fiery Command WorkStation
Managing Fiery Central workflows
83
Back up Fiery Central
You can back up printer group information, Paper Catalog, and Paper Catalog mapping by using a wizard.
1 Start the Backup tool using one of the following methods:
•
Click Backup in the Printer Groups tab of the Fiery Central Manager.
•
In Command WorkStation, click Device Center > General > Tools, click Launch Backup & Restore, and
then click Backup in Fiery Central Manager.
•
From Server > Central Tools, select Manage Backup & Restore, and then click Backup in Fiery Central
Manager.
2 Follow the instructions in the Backup & Restore wizard.
Restore Fiery Central
You can restore printer group information, Paper Catalog, and Paper Catalog mapping by using a wizard.
1 Start the Restore tool using one of the following methods:
•
Click Restore in the Printer Groups tab of the Fiery Central Manager.
•
In Command WorkStation, click Device Center > General > Tools, click Launch Backup & Restore, and
then click Restore in Fiery Central Manager.
•
From Server > Central Tools, select Manage Backup & Restore, and then click Restore in Fiery Central
Manager.
2 Follow the instructions in the Backup & Restore wizard.
During the restore process, Paper Catalog Map will be opened to restore Paper Catalog mapping. You can check
the restored mapping.
Note: A printer group cannot be restored if any of the printer devices are no longer accessible on the network.
Use Fiery Central Paper Catalog
The Fiery Central Paper Catalog provides a uniform inventory of media, allowing users to specify the exact media
they want for a job.
When Fiery Central Paper Catalog media is mapped to corresponding Paper Catalog media on the Fiery Server, jobs
printed with Paper Catalog media print directly to printers stocked with that media.
Note: The Paper Catalog Map feature is available only if the Fiery Server or non-Fiery printer supports it.
Create Paper Catalog entries for Fiery Central
If you are logged on to a Fiery Server on the Fiery Central Server as Administrator, you can create Fiery Central
Paper Catalog entries.
•
Access Paper Catalog from Command WorkStation > Device Center > Resources > Paper Catalog.
Fiery Command WorkStation
Managing Fiery Central workflows
84
Map the Paper Catalog
You must set up the printer's paper catalog and associate printer trays with paper catalog media before printing for
correct operation. Printers are assumed to have paper catalog media stocked at all times.
1 In the Add/Remove Printers window, select a printer in the Selected Printers list and click Edit/Configure.
To access the Add/Remove Printers window, you must be adding or editing a printer group.
2 Do one of the following:
•
In the Edit/Configure Printer window, click Paper Catalog Map.
•
In Command WorkStation, on the Fiery Central Server, click Device Center > Resources > Paper
Catalog, and then click Mapping. This is not available on client computers.
The Paper Catalog Map utility appears. If a printer has a paper catalog, you must map the printer's paper catalog
entries to the appropriate Fiery Central Paper Catalog.
You can import the printer's paper catalog entries into the Fiery Central Paper Catalog by selecting Add as New
in the Fiery Central Paper Catalog column.
If a printer does not have a paper catalog, you must map the Fiery Central Paper Catalog entries to appropriate
media attributes for that printer.
Set up VDP file search paths
Fiery Central Manager allows you to specify shared locations for VDP resources.
You can set up file search paths that can be used globally for all jobs for the following types of variable data printing
elements: common resources, PPML objects, or VPS objects.
Note: To define job specific search paths, use the VDP tab of Command WorkStation Job Properties for the specific
job.
1 In the Fiery Central Manager window, click the VDP tab.
2 Click Add for the type of resources you want to add locations for: Common, PPML, or VPS.
•
PPML objects use PPML (Personalized Print Markup Language), an XML-based language developed by PODi,
considered an industry standard. To print documents in PPML format, use a third-party software application
that is compatible with PPML format.
•
VPS objects use Creo VPS, an extension of the PostScript language developed by Creo. All of the page elements
must be packaged inside the Creo VPS file. To print, you must have an application that emits the Creo VPS
data stream.
Note: Some PPML and Creo VPS jobs do not contain all of the variable data job resources in a single file. In
these cases, specify the location of the variable data job external resources so that Fiery Central can access them.
These shared locations must have read permissions from Fiery Central and the Fiery Servers.
3 Browse to the location of the stored objects and click OK.
Fiery Command WorkStation
Managing Fiery Central workflows
Set up Digital StoreFront connections
Fiery Central can make a shortcut to the Digital StoreFront (DSF) Website available in Command WorkStation.
Before you can use the shortcut, you must configure its settings by entering the URL to the DSF server.
1 In the Fiery Central Manager window, click the DSF Settings tab.
2 Select Enable DSF.
3 Type the Web address for the DSF website in the DSF URL field.
4 Click Test Connection to check the connection to the DSF Website.
85
Fiery Command WorkStation
Viewing jobs
86
Viewing jobs
Fiery Preview
You can view the page and sheet content of a job in Fiery Preview and specify print options. You can perform
additional make-ready tasks in preparation for printing jobs, including imposition.
Fiery Preview is a pre-raster image process (pre-RIP) preview and displays jobs that have been spooled, but not
processed. If you have Fiery Impose and Fiery Compose or Fiery JobMaster enabled, you can integrate the functions
of the combined workflows in the Preview window, and view the results of your actions before printing.
•
Fiery Impose converts jobs to PDF file format and allows you to create imposition layouts.
•
Fiery Compose allows you to set chapters, add blank pages, and specify different media for a job.
•
Fiery JobMaster offers access to complex document preparation tasks such as tab insertion, scanning,
chapterization, page numbering, and late stage editing. JobMaster includes Fiery Compose options.
Note: For information on Fiery Impose/Compose/JobMaster, see JobMaster Help.
Note: You can create a brand new print job in the Fiery Impose/Compose/JobMaster window by selecting the
New Job icon in the Command WorkStation tool bar. Create a new job when you want to prepare a job from a
scanned document, print a tabs-only job, or combine existing jobs, starting from an empty job.
Reader Preview is accessed from the main Fiery Preview window and displays jobs as they will look after they are
printed.
If you select Preview for a processed job, the job opens in raster preview mode. Printed and archived jobs with
raster data can be previewed. Archived jobs with raster data must be archived on the Fiery Server.
If you have Fiery Graphic Arts Package, Premium Edition, installed, you can view the raster image of a processed job
in ImageViewer and adjust colors and perform other soft-proofing actions. ImageViewer is accessed from a button in
the raster preview window.
To open a rasterized job and specify settings in Fiery Impose/JobMaster/Compose, select the job in Command
WorkStation Job Center and select Remove Raster from the Actions menu.
View information for processed jobs
The Job Summary pane lists specific information for the a selected job that has been processed and displays
thumbnails for all pages in that job. The selected job file name is shown at the top of the pane, along with thumbnails
for all pages of the job, only if processed and held.
If a job is processed, you can view it in the Job Summary pane in Job Center. The Raster Preview window for a
processed job does not open Fiery Compose, Fiery JobMaster, or Fiery Impose. You can open ImageViewer if the
Fiery Graphic Arts Package, Premium Edition or the Fiery Productivity Package is supported on the Fiery Server.
Start Command WorkStation and select a processed job in the held list to display it in the Job Summary pane.
The Job Summary pane is at the right of the Command WorkStation window.
Fiery Command WorkStation
Viewing jobs
1 Job name
2 Thumbnail of processed job
3 Number of page displayed
4 Navigation tools. The magnifying glass opens the job in the raster preview window.
5 Total number of pages in the job or number of VDP records (only for VDP jobs) and number of copies
6 Media information, such as page size, orientation, media type or media weight
7 Job instructions/notes to the operator
8 Run Preflight on the job or view the Preflight report
9 Last action taken on the job, such as spooled, processed, or printed, along with a date and time stamp
View spooled, unprocessed jobs
To view spooled jobs, you use the Preview window.
1 In Job Center, select a spooled job in the Held queue.
Note: If the job is processed, you see the job in raster preview and have access to limited functions.
2 Choose one of the following ways to open the Preview window:
•
Right-click and select Preview.
•
In the Actions menu, select Preview.
•
Click the Preview icon in the Command WorkStation toolbar.
87
Fiery Command WorkStation
Viewing jobs
•
In the Job Summary pane, click the Launch Preview icon (the magnifying glass icon below the thumbnail).
•
Click the New job icon in the Command WorkStationtool bar.
Note: Choosing New job creates a blank job in the Fiery Impose/Compose/JobMaster workspace. You can
then apply Fiery Impose/Compose/JobMaster settings to the job.
The following illustration shows the standard Preview window. If the Page View and Settings panes are hidden
when you first open Preview, click the arrows at the left and right of the toolbar respectively.
1 Toggle arrows to access page view See Page View, Sheet View, and Reader View on page 89
2 Menus
See Menus in Compose in JobMaster Help
3 Toolbar icons
See Toolbar icons in Preview on page 92
4 Thumbnails in sheet view
See About viewing sheets in JobMaster Help
5 Arrows to access settings pane
See Settings pane on page 90
6 Navigation tools
See About viewing sheets in JobMaster Help
7 Zoom controls
See Using the Zoom tools in JobMaster Help
88
Fiery Command WorkStation
Viewing jobs
89
Page View, Sheet View, and Reader View
The Page View displays the thumbnail preview of the working document - the input.
If you have Fiery Compose or Fiery JobMaster enabled, in Page View, you can accomplish the following tasks:
•
Insert page(s) from other documents
•
Insert blank pages
•
Add tabs
•
Insert other jobs
•
Merge jobs
•
Delete pages
•
Reorder page(s)
•
Replace page(s)
•
Edit content
For more information, see JobMaster Help.
The Sheet View shows the imposition (layout of the content on the sheets as they will be printed on the copier/
printer) of the job. It is a pre-RIP preview of the actual sheet.
The Reader View opens a secondary window to display the document as it will look to the reader when printed, after
it has been folded, cut, and bound.
The illustration below shows thumbnails displayed in the Page View and the Sheet View panes. Any actions you
perform in the Page View pane are immediately displayed in the Sheet View.
Fiery Command WorkStation
Viewing jobs
1
Page View pane
See "View a job in the Compose window" in JobMaster Help.
2
Page View toolbar icons
See "Toolbar icons in Compose" in JobMaster Help.
3
Thumbnails in Page View
See "Viewing pages as thumbnails" in JobMaster Help.
4
Sheet View toolbar icons
See "Toolbar icons in Compose" in JobMaster Help.
5
Sheet View pane
See "View a job in the Compose window" in JobMaster Help.
6
Thumbnails in Sheet View
See "About viewing sheets" in JobMaster Help.
90
Settings pane
In the Settings pane of the Preview window, you can specify imposition settings, and the changes you make are
displayed in the Sheet View pane.
Imposition settings are performed with Fiery Impose software. If you have not activated a Fiery Impose license, you
can still impose a spooled job in the Preview window and use Fiery Impose in Demo mode. You will be able to save
the job as a .dbp file to the Fiery Server, but not as Adobe PDF. You can print the job with a watermark.
Note: If the Settings Pane is not displayed in the Preview window, click the arrows in the Preview window toolbar.
To view imposition settings, select Booklet or Gangup from the menu at the top of the Settings pane.
Fiery Command WorkStation
Viewing jobs
1
Thumbnails in Page View pane
See "Viewing jobs as thumbnails" in JobMaster Help
2
Thumbnails in Sheet View pane
See "Viewing jobs as thumbnails" in JobMaster Help
3
Settings pane
See "Previewing a job" in JobMaster Help
91
Open Reader View
The Reader View displays a “reader’s spread,” which shows pages in the order and layout in which they are meant to
be read.
1 Right-click an unprocessed job in the Held list in Command WorkStation and select Preview.
You can select Fiery Impose, Compose, or JobMaster if any of the applications are activated.
2 Apply settings to the job in the Fiery Preview window and save.
3 Click the Reader View icon
in the bottom toolbar.
•
Use the arrows at the bottom of the window to navigate through the document. Zoom controls are at the right.
•
The pan icon
•
Click Media Info to display information about the document.
•
Rotate the document by holding down the Alt key and the left mouse. Rolling the mouse wheel allows you to
zoom the image.
allows you to move the image around the window.
Fiery Command WorkStation
Viewing jobs
92
1 Media information about the pages displayed
2 Pages from the document displayed
3 Navigation controls
4 Zoom controls
Toolbar icons in Preview
The icons shown below are on the standard Preview toolbar. If you have Fiery Compose or Fiery JobMaster enabled,
you have access to more tools.
Select a sheet or page in the Preview window.
Drag the preview around in the window.
Show measurement of page elements.
Zoom in.
Zoom out.
Show sheet content toggles between thumbnail view and the wireframe view. The wireframe view shows the
pagination of records.
Fiery Command WorkStation
Viewing jobs
Preview a raster image
If a job is processed, you can view it in the Job Summary pane in Job Center, or in the Raster Preview window, you
see the raster image that will be produced on the paper output. A job must be processed. Minimal functionality is
supported.
If a job is processed, you can view it in the Job Summary pane in Job Center. The Raster Preview window for a
processed job does not open Fiery Compose, Fiery JobMaster, or Fiery Impose. You can open ImageViewer if the
Fiery Graphic Arts Package, Premium Edition or the Fiery Productivity Package is supported on the Fiery Server
To open Raster Preview, do one of the following:
•
Click Preview in the Actions menu.
•
Click Preview button in the toolbar.
•
Right-click (Windows) or Control-click (Mac OS) selected job in the Held list and select Preview.
The following illustration shows the raster preview of a job.
1 Toolbar icons for saving, duplicating, or deleting the job
2 Thumbnails in the Page View pane
3 Raster file in the Raster View pane
4 Navigation tools for paging through the job and displaying the sheet number
93
Fiery Command WorkStation
Viewing jobs
94
Toolbar icons in Raster Preview
The icons shown below are on the standard Raster Preview toolbar. If you have Compose enabled, you have access to
more tools.
Save the currently displayed file under a new name.
Duplicate the selected page(s).
Delete the selected page(s).
Launch ImageViewer opens the ImageViewer window if the Fiery Server supports either the Fiery
Graphic Arts package or the Fiery Productivity Package.
Merging pages in Raster Preview
You can open multiple Preview windows with different jobs, but all jobs must come from the same Fiery Server. You
can edit the jobs in each window separately. You can also drag pages from one window to another.
When you drag a page from one window to another, the source window (from which you dragged the job) becomes
Read Only. The destination window is editable, but you must save the new job with merged pages in the destination
window before the source window becomes editable again.
VDP Raster Preview
You can preview a processed Variable Data Printing (VDP) job in the Raster Preview window. Previews include any
imposition settings that may have been applied to the job. The content of the job is displayed actual size, organized
by records or finished sets.
In the VDP Raster Preview, you can do the following:
•
Navigate through the job by records or finished sets and pages or surfaces. The navigation parameters displayed
change dynamically, depending on whether the job is imposed or not.
•
Change the size of the thumbnails in the Page View.
•
Expand or collapse records or thumbnails.
•
Open the job in the ImageViewer window.
Note: The Save, Duplicate, and Delete functions are not available for VDP jobs displayed in the Raster Preview
window.
Preview of a VDP job before imposition
When a processed VDP job is displayed before imposition in the Raster Preview window, you can navigate by records
and pages. You can also open the job in the ImageViewer window, if it is supported by the Fiery Server.
Note: The Save, Duplicate, and Delete functions are not available for VDP jobs displayed in the Raster Preview
window.
Fiery Command WorkStation
Viewing jobs
95
Preview of a VDP job after imposition
When a processed VDP job is displayed after imposition in the Raster Preview window, you can navigate by finished
sets and surfaces.
If you want to impose a processed VDP job, you must remove the raster data, impose the job, save it in .dbp format,
process it, and then open it in the Raster Preview window. You can also open the job in the ImageViewer window,
if it is supported by the Fiery Server.
Note: The Save, Duplicate, and Delete functions are not available for VDP jobs displayed in the Raster Preview
window.
Fiery Command WorkStation
Viewing jobs
96
Display of gangup VDP jobs
If a VDP job is imposed as Gangup (either Cut & Stack or Deploy) and the Stack Size is set to All, the job
consists of one finished set. In this workflow, you can navigate by surface only. If the Stack Size is set to more than
one, you can navigate by finished set and surface, as with any other imposed VDP job.
Fiery Command WorkStation
Printing
97
Printing
Import jobs for printing
You can print files by importing them directly into Fiery Server queues, or import jobs that have been archived to
external locations (other than the Fiery Server hard disk).
Import a job into the Print queue
Print files by importing them directly to the Fiery Server. You can import multiple jobs at a time and maintain the
format of the files.
You must be an Administrator or Operator to import jobs. You can import multiple jobs at a time, if you wish.
Importing files to a queue is similar to printing through a printer driver or application, but jobs sent using the Print
command are converted to PostScript, unlike the Import function, which maintains the file format. You can import
files by dragging and dropping them to
•
Connected Fiery Servers in the Servers list
•
Printing or Processing queues
•
Held list
However, for the best control over how files import, use the Import dialog box. With this dialog box, you can easily
apply a workflow (server preset or virtual printer) to files at the time of import. Generally, you cannot do this when
you import files by dragging and dropping (the Servers list is the only exception to this rule).
1 Drag and drop files or folders from the computer to the Printing or Processing queue, or the Held list.
The Import dialog box does not display when you drag and drop files or folders to these locations. The entire
contents of folders are imported.
2 To open the Import dialog box, do one of the following:
•
Click File > Import Job.
•
In Job Center, click the Import icon in the toolbar.
•
Drag and drop files or folders to a connected Fiery Server in the Servers list.
3 In the Import dialog box, click Add and navigate to the location of the file you want to add, and then click Open.
Repeat this for additional files you want to import.
4 If desired, use Move up and Move down buttons to change the order of import.
5 Do one of the following:
•
Select Apply default settings.
•
Select Apply Workflow and then choose from a list of server presets and virtual printers which are currently
published on the Fiery Server.
Fiery Command WorkStation
Printing
98
The two options above only appear if server presets or virtual printers have been set up on the Fiery Server.
6 Select a job action. For example:
• Process and Hold (default)
• Print
• Print & Hold
• Print & Delete
Other choices may appear based on the capabilities of the Fiery Server. If supported by your Fiery Server, you can
also specify sequential printing to maintain the printed order for print runs consisting of many jobs.
Import jobs from external Fiery Server archives
Import jobs that have been archived to external locations (other than the Fiery Server hard disk).
1 Do one of the following:
•
Select the file on your computer desktop and drag and drop it into the specified queue in Command
WorkStation.
•
Click File > Import Archived Job.
2 Select the directory containing the archived job.
If the directory you want does not appear in the list, click Add to locate and add the directory, and then click OK.
3 Click OK.
Setting print options
The print options for a job, accessed from the Job Properties window, specify such information as whether the job
should print single-sided or duplex or be stapled.
You can specify print options from the printer driver on the client computer originating the print job. After a print
job reaches the Fiery Server, an operator can use Command WorkStation Job Properties to view or change these
print options. For example, an operator might do the following:
•
View the job's print settings, including instructions to the operator
•
Override settings
•
Print a list of the current job properties to a local print device
View job properties
You can view or override the print options for a selected job in either in the Held, Printed, or Archived lists.
If you are an operator and have not changed any settings or print options for a job in Command WorkStation, the
Job Properties window reflects all the job settings a user entered in the PostScript printer driver before sending the
job, or the default settings in the PostScript printer driver.
Jobs that are imported into Command WorkStation will show either the settings included with the job (for
PostScript jobs only) or the default job settings for the Fiery Server (for PDF files or jobs imported without job
information).
Fiery Command WorkStation
Printing
99
View or override job properties
You can view or change the print options for a job.
1 Double-click a job in the Held or Printed list, or select the job and do one of the following:
•
Right-click to select Properties.
•
Click Job Center > Properties.
•
Click Actions > Properties.
To select multiple jobs on a single Fiery Server, use Shift-click, Ctrl-click (on Windows), or Cmd-click (on Mac
OS X); then click Properties. After the multiple jobs have opened, specifying a value in the Job Properties
window applies it to all jobs by default. The Summary tab allows a side-by-side comparison of the print options
for multiple jobs.
2 Click each icon in the toolbar to view the print options.
For some options, changing the setting requires that the job be reprocessed.
3 If you want to override the print options, make the changes, and then click OK to save your override settings or
click Print to save and print the job with your settings.
When you click Print, the Job Properties window closes and prints the job with the current settings.
Some settings cannot be applied instantly to jobs that are processed and held, because the job needs to be reprocessed to apply the settings. In this case, the "Jobs will be processed again before printing" message will appear
in Job Properties.
View a summary of a job's existing print properties
The Job Properties window allows you to print a summary of a job’s current properties.
1 In the toolbar of the Job Properties window, click the Summary icon.
2 To print a list of the job's existing properties, click Print Summary.
Note: Some print options available in the printer driver are not displayed in the Job Properties window. For
information about specific print options and settings and where to set them, see your Fiery Server
documentation.
Job actions in the Job Properties window
You can use common job actions, such as Print, and Process and Hold, within the Job Properties window. The
default job action is Print.
Print
Causes the Fiery Server to queue the job to process and then print. If the job
is already processed, the Fiery Server will queue the job to print.
Print and Hold
Causes the Fiery Server to queue the job to process, print, and then return
the job to the Hold queue in a processed state.
Print and Delete
Causes the Fiery Server to queue the job to process, print, and then delete
the job. This action ensures the printed job is not saved to the Printed list,
which is often required for secure printing.
Hold
Causes the job to be spooled to the Fiery Server until the operator takes
further action. Held jobs can exist in a pre-processed or processed state.
Fiery Command WorkStation
Printing
100
Process and Hold
Causes the Fiery Server to queue the job to process and then return the job
to the Hold queue. This action also generates an additional copy of the job
in the Printed list. You can use this job action to preview any job before
printing it.
Proof Print
Allows you to print a single copy of a job to verify output. After the job
finishes printing, it is set back to the original number of copies and retains
the raster that was created (or used if pre-existing) from the proof print.
Proof Print is available from the right-click menu, Job Properties, and Hot
Folders.
Print option categories
The Job Properties print options are grouped into categories for quick access.
Quick Access
Duplicate print options from the other job properties groups. It is
customizable, so any Job Override print option can be added or removed
from the view. The Quick Access tab lets you find print options quickly
without having to browse through all of the Job Properties tabs.
Job Info
All information about the job, including user information that may be
required for user authentication, secure print properties, job handling, and
document server.
Media
Attributes and sources of paper to print and insert.
Layout
Information about how the file is positioned or imaged on the media/sheet,
except for positioning that compensates for finishing options, for example,
Tray Alignment.
Color
Color settings and graphic arts features (when turned on). This tab will be
hidden when connected to a black-and-white copier/printer.
Image
All Image Quality settings supported by the connected Fiery Server and
copier/printer.
Finishing
Print options related only to finishing equipment on the copier/printer, and
also image shifting to compensate for finishing options.
VDP
All Variable Data Printing (VDP) settings, such as FreeForm and advanced
VDP settings.
Stamping
All image stamping options that add or hide/remove any image on the job.
This also includes watermark properties that define the placement and style
of the watermark.
Note: The Stamping tab may not be supported for all Fiery Servers.
Summary
A summary of the job's existing print properties.
Fiery Command WorkStation
Printing
101
Fiery Impose templates in Job Properties
If you save a template in Fiery Impose (requires Fiery Impose license), the template is available in the Job Properties
window. Choosing the Impose template sets all the relevant job property settings, allows proper use of relevant job
property settings, and prevents conflicting print settings.
Preset print settings
A preset is a collection of print settings in the Job Properties window that you can access at a later time.
Server Presets can be accessed from Job Properties and printer drivers, and they can be applied to workflows such as
Hot Folders and Virtual Printers.
Job presets are listed in the Presets drop-down menu in the Job Properties window. You can select one of the job
presets from the list, or create a new preset based upon the current options selected in the Job Properties window. If
a job is not currently using a preset, the preset field is blank. All properties display the initial default settings. When
you select a job preset, all settings are updated to reflect the saved preset. If you change any print settings, the Presets
list reverts to blank.
There are two types of job presets:
•
Local Presets – Saved on the user's local computer, and not shared with other users.
•
Server Presets – Saved on the Fiery Server or Fiery Central Server and shared with other users of the Fiery
Server or Fiery Central Server.
Applying presets
Job presets can be applied using one of the following methods:
•
Import a job into Command WorkStation using File > Import Job or the Import
toolbar icon in Job Center. You can then select Apply workflow and then select from the list of presets in the
File(s) to import window.
•
Select a job in the Held/Printed/Archived pane in Job Center and click the Properties toolbar icon. Select a
Local or Server Preset from the Presets list.
•
Right-click a job in the Held/Printed/Archived pane in Job Center, select Apply Workflow and then select a
preset from the list.
Create a Local or Server Preset
If you are an Administrator, you can create, edit, rename, unpublish, publish, and delete Server Presets in Device
Center > Workflows > Job Presets. You can save a Local Preset in the Job Properties window only.
You create a Local or Server Preset by choosing the settings in the Job Properties window, and then saving them in
the Presets list.
Administrators can save a preset as a Local Preset or Server Preset. Operators can save only a Local Preset.
Fiery Command WorkStation
Printing
102
Create a local preset
Administrators and operators can save settings in the Job Properties window as local presets.
1 Double-click a job in the Held or Printed list, or select the job and do one of the following:
•
Right-click to select Properties.
•
Click Job Center > Properties.
•
Click Actions > Properties.
2 Adjust the print settings for each tab as desired.
3 Under Presets, choose Save Preset.
4 Enter a descriptive name for the preset, and select Local or Printer Group Local for the preset type.
For Fiery Central, the preset name is unique across the printer groups.
5 Click Save.
The Local Presets are available any time you access the Job Properties window. They remain on your local hard
disk until you delete them.
Note: The user authentication information, such as the user name and password, are not saved as part of the
preset.
Create a server preset
Administrators can save settings in the Job Properties window as server presets. These presets are saved on the
Fiery Server and shared with its users.
1 Click Device Center > Workflows > Job Presets.
2 Click New.
For Fiery Central, the printer group is automatically selected according to the selection in the preset pane.
3 Enter a descriptive name for the preset.
Spaces are not valid in preset names.
4 Enter a description for the preset (optional).
5 For Fiery Central, select one of the available printer groups and specify print settings from Job Properties.
6 Click Define to specify the job properties, and then click Save.
Note: The user authentication information, such as the user name and password, are not saved as part of the
preset.
The Server Presets are available any time you access Device CenterWorkflowsJob Presets or the Job
Properties window. They remain on the Fiery Server until an Administrator deletes them.
After a Server Preset is created, the Settings pane (located on the right side) shows the settings modified from
the defaults, and locked settings. The Server Preset is published automatically so it can be shared with other
users connected to the Fiery Server.
Fiery Command WorkStation
Printing
103
Change presets for print jobs
You can choose a different preset to apply to all jobs. You can also edit or rename a preset, delete a local preset, or
revert to the default preset.
You work with presets in the Job Properties window. To display it, double-click a job in the Held or Printed list, or
select the job and click Job Center > Properties.
Choose a different preset
You can change the current set of print options to another preset.
•
In the Job Properties window, under Presets, select a different preset.
The preset is used until you select another one, or make further changes to Job Properties.
Edit a preset
A preset includes most print options that you set in the Job Properties window. You can override a setting in the
Job Properties window after choosing a preset.
1 In the Job Properties window, under Presets, select Manage Local Presets.
2 Select the preset you want to edit, and change the print settings.
The Presets field becomes blank.
3 Select Save Preset from the Presets list.
4 Type the same preset name, specify Local Preset or Server Preset, and then click OK to save the preset.
5 Click OK to replace the current preset of the same name.
Delete a Local Preset
You can delete a local preset with the Manage Local Presets feature in the Job Properties window.
1 In the Job Properties window, under Presets, select Manage Local Presets.
2 Select a preset and click Delete.
Rename a preset
You can rename a local preset with the Manage Local Presets feature in the Job Properties window.
1 In the Job Properties window, under Presets, select Manage Local Presets.
2 Select a preset and click Rename.
3 Enter a descriptive name for the preset and click Save.
Revert to the default preset
You can apply the default preset to a job to revert the print options to their default settings.
•
In the Job Properties window, under Presets, select Printer's Default.
Fiery Command WorkStation
Printing
104
Server Presets
Server Presets provide a consistent set of printing options that all users can use. Users can save Local Presets to their
computer, but only an Administrator can save, edit, publish, and delete Server Presets.
Server Presets are accessible from:
•
Command WorkStation (select Device Center > Workflows > Job Presets, and from Job Center >
Properties)
•
Hot Folders (see Hot Folders Help)
•
Virtual Printers (see Virtual printers on page 177)
•
Windows and Mac OS X printer drivers
An Administrator can create Hot Folders and virtual printers based on a Server Preset. Editing the Server Preset also
changes the settings for those Hot Folders and virtual printers.
Archived jobs with Server Presets
Archived jobs retain the job information and the preset name. When an archived job is restored to the same Fiery
Server or Fiery Central Server from which it was created, the Server Preset is shown in the Presets column header for
any of the Job Center windows, such as Processing and Printing.
Tracking edited presets
If a Server Preset was modified after it was applied to a held, printed, or archived job, the Preset name is marked with
an asterisk (*). In other words, the preset was edited by an Administrator since the job was submitted. To use the
latest settings, re-apply the preset to the job.
If the Presets column header was added to any of the Job Center windows (Printing, Processing, Held, Printed, or
Archived), the asterisk and job name are displayed in the Presets column.
Edit, delete or unpublish Server Presets
You can edit, delete, or unpublish a server preset in Device Center > Workflows > Job Presets.
You must be logged on to the Fiery Server or Fiery Central Serveras Administrator to perform these operations.
If you edit or delete a Server Preset that is currently being used, the changes will affect only future jobs. The changed
preset settings are applied instantly to any Hot Folders or virtual printers using the specified Server Preset.
Jobs already in the Held or Printed list of the Fiery Server do not automatically reflect edits made to the preset. If you
want to update any jobs in the queues of the Fiery Server with a newly edited preset, you need to re-apply the preset
to the job using Job Properties.
Edit Server Presets
Administrators can edit server presets.
1 Select the preset you want to edit, and click Edit from the toolbar.
2 Enter a description for the change (optional).
3 Click Define to change the print settings; then click OK.
Fiery Command WorkStation
Printing
105
Delete Server Presets
Administrators can delete server presets.
1 Select a preset (unpublished or published) from the list and click Delete from the toolbar.
2 Click Yes.
Any Hot Folders and virtual printers linked to the deleted preset will be disconnected. However, they will
preserve the preset settings of the deleted preset.
Unpublish Server Presets
An unpublished preset is not available for use in the printer drivers or the Job Properties window. After you
unpublish a Server Preset, you can publish it again.
1 Select a Server Preset with the published icon from the list.
2 Click Unpublish in the toolbar.
The preset is shown with the unpublished icon.
3 Click Yes.
Any Hot Folders and virtual printers linked to the unpublished preset will be disconnected. However, they
will preserve the preset settings of the unpublished preset.
About locked server presets
You can lock or unlock a server preset’s print settings in Device Center > Workflows > Job Presets.
You must be logged on to Fiery Server as Administrator to perform these operations.
Locking a setting in a Server Preset ensures that:
•
It is applied to all files imported to Command WorkStation using the preset.
•
It can be overridden in the printer driver job properties after it is selected, but when it is overridden, the Preset
list becomes blank.
•
Hot Folders jobs also inherit the same locked settings (assuming the Hot Folders uses the Server Preset).
•
Virtual printers show the settings as locked. Client printer drivers connected to a virtual printer are unable to
modify the setting.
Locks apply only at the time of job submission. After the jobs are at the Fiery Server, any locked setting can be edited
in Command WorkStation Job Properties.
Lock or unlock settings in Server Presets
You must be logged on to Fiery Server as Administrator to lock or unlock print settings in mDevice Center >
Workflows > Job Presets.
1 Select the preset you want to edit, and click Edit from the toolbar.
2 Enter a description for the change (optional).
3 Click Define to change the print settings.
Fiery Command WorkStation
Printing
106
4 Do one of the following:
•
Click Lock All to lock all the print settings.
•
Click the lock icon to lock a specific print setting.
•
Click Unlock All to unlock all the print settings.
•
Click the lock icon to change it to the unlock icon for a specific print setting.
5 Click OK.
Export and import Server Presets
You can export Server Presets to a file (Exported Presets.fjp) from one Fiery Server or Fiery Central Server, and then
import the file on another similar Fiery Server or Fiery Central Server in Device Center > Workflows > Job
Presets.
You can also export Server Presets for safekeeping by using the Backup & Restore tool (Device Center > General >
Tools). Preset Backup files cannot be restored to a different Fiery Server or Fiery Central Server.
When importing a presets file, the new presets can be merged with existing ones, or can replace existing presets.
You must be logged on to the Fiery Server as Administrator to export and import Server Presets.
Export Server Presets
Administrators can export Server Presets for use on another Fiery Server or .
1 Click Export from the toolbar.
2 Browse to a location to save the Exported Presets.fjp file.
3 Click Save.
Import Server Presets
After exporting Server Presets from one Fiery Server or Fiery Central Server, administrators can import them for
use on another similar Fiery Server or Fiery Central Server.
1 Click Import from the toolbar.
2 Choose Merge with existing or Replace existing.
If the Server Presets are merged, the presets in the imported file are added to the existing presets on the Fiery
Server or Fiery Central Server. If there are any duplicate names, the imported presets will have a numeric
suffix appended to the end of the preset name, such as FirstTest-1.
If the Server Presets are replacing existing presets, all the current Server Presets are deleted and replaced
with the Server Presets contained in the newly imported Fiery Job Preset file.
3 Browse to the location of the Exported Presets.fjp file.
4 Click Open.
Fiery Command WorkStation
Printing
107
Remove raster data from a job
You can remove the raster data from a job if necessary (for example, to change a job property that requires
reprocessing).
Raster data is generated and linked with a job that is processed or processed and held.
This icon indicates a processed job with raster data.
This icon indicates a spooled job without raster data.
1 Select the processed or held job in the Held list.
2 Click Actions > Remove Raster.
Printing methods
You can shift page content by using the Tray Alignment feature, verify that the copier/printer is performing correctly
by using the Sample Print feature during a long print job, and check output by using the Proof Print feature.
Use Tray Alignment
The Tray Alignment feature shifts and rotates content on the page to correct misalignment problems caused by the
imperfections of the paper tray.
The correction produces even margins which are ideal for registration on duplex (2-sided) printing.
Note: You must be an Administrator to use Tray Alignment.
1 In the Main window, select the connected Fiery Server.
2 Do one of the following:
•
Select Server > Align Tray.
•
In Device Center, select General > Tools > Tray Alignment.
3 In the Tray Alignment window, specify the tray you want to align from the Tray list.
4 Specify the paper size loaded in the tray from the Paper Size list.
Note: The size you specify must match the actual paper size. For example, if you specify Letter size paper but
load Legal size paper in the tray, the tray alignment effort is invalidated. Perform a new tray alignment for each
combination of tray and paper size.
5 Select Align for duplex to print a duplex page, or clear this check box to print a single-sided page.
6 Click Continue to print the tray alignment test page.
7 When the page has printed, follow the instructions on the alignment page.
8 In the Adjustment Settings area, enter the value where the fold crosses each of the three scales marked A, B, and
C, for Side 1. If you chose to align for duplex printing, enter the values for the three scales on Side 2 of the page.
Click Apply.
9 After you enter all of the alignment values, click Print Verification Page to print the new alignment page.
10 Click Close.
Fiery Command WorkStation
Printing
108
Sample Print
The Sample Print feature allows you to print extra pages to an easily accessible output tray during a long print job, to
verify that the printer is performing as expected.
For example, when a job is currently printing to a closed elevator (such as 1000 pages to an output tray that cannot
be opened until the entire job is completed), you can use the sample print function to print a separate page or
finished output set to an open output tray to verify the output. If the output is unsatisfactory, you can take corrective
action.
Use Sample Print only with printers that have multiple output trays; it is useful when one of the output trays is
closed and not easily accessed during printing.
You can print an extra sheet or output set as follows:
•
On-demand during the printing of a job
•
Every N-sheets during the currently printing job
•
Every N-sheets until canceled (can span jobs)
You can set up the Sample Print default settings for the specified Fiery Server using Configure (Server >
Configure). (See Command WorkStation Help.)
Start or stop a sample print
When the job is printing, you can initiate a sample print. The default setup values are applied and any existing
sample print command in progress is overridden.
1 To initiate a sample print, select Server > Start Sample Print while a job is printing.
The Fiery Server performs the sample print based on the options specified in Configure.
If Start Sample Print appears dimmed or unavailable, then the Fiery Server is already performing a sample print
or it is not available for the specified Fiery Server.
2 To cancel a sample print, select Server > Stop Sample Print.
Set Sample Print options in Configure
You can configure the Fiery Server to print sample prints at a predefined interval that spans print jobs.
Important: There are two versions of Configure and they are specific to the Fiery Server you are connected to. This
is a combined procedure that describes what to do when connected to a Fiery Server with FS100/100Pro or earlier,
and notes about what to do with FS150/150 Pro or later. If you are not sure which version of Configure you are
using, see Which version of Configure am I using? on page 27.
This lets you print sample pages on a regular basis, either as a regular spot check or as a more methodical process
where you can create an archive of printed sheets documenting the print quality at regular intervals.
In Configure, an Administrator can specify the content to print, the interval at which it is printed, and the output
tray to use for the sample print job.
1 In Configure (Server > Configure), click Server > Jobs.
Note: If you are connected to a Fiery Server with FS150/150Pro, you can find this setting in Job
Management > Sample Print.
Fiery Command WorkStation
Printing
109
2 Specify Sample Print option settings as desired.
• Frequency - Specify Every or On-demand. When you select Every, the Fiery Server prints a sample
repeatedly as defined by the printed sheet(s) interval. A sample print can be printed for all jobs until the Fiery
Server is restarted or the sample print mode is canceled, or for the current job only until it finishes printing or
is canceled. When you select On-demand, a single sample is printed.
Note: Printed sheets include all pages printed by the Fiery Server, including system pages.
• Content - Specify Sheet (for any kind of job) or Sheet (for uncollated job) / Set (for collated jobs).
When you select Sheet (for any kind of job), a single sheet is printed as the sample. If the job is collated, an
entire output set is printed as the sample. If the job is uncollated, a single sheet is printed as the sample. If the
sample content is a set and the printed sheet interval triggers the Fiery Server to print a sample, the Fiery
Server will begin printing the sample at the beginning of the next set.
• Output Tray - Specify the output tray for the sample print jobs. All installed output trays that do not require
finishing options are listed.
Note: The job's finishing options are not applied to the sample print job, except for duplex options.
3 After you have changed the setting for an option, do one of the following:
•
On FS100/100 Pro or later: Click Undo or Apply.
•
On FS150/150 Pro or later: Click Cancel or Save.
4 Restart the Fiery Server.
Proof Print
Use Proof Print to print a proof (copy) to check the printed output of your job without changing the job's original
copy count.
When you apply Proof Print to your job, the selected job is sent to the Printing queue with the number of copies set
to one. The original job retains the specified number of copies and job properties and uses the raster data that was
created from the proof print to print subsequent jobs.
If you apply Proof Print to a processed job (with a raster), the job goes directly to the Printing queue and does not
process again unless a change is made to the job.
Proof Print jobs appear in the Job Log with the number of copies set to one.
Additionally, you can use Sample Print to print extra pages to an output tray during a long print job to verify that the
copier/printer is performing as expected.
Print a proof
You can use Proof Print by right-clicking on a job in the Held or Printed list, or you can access the command from
the Actions menu or from job actions within Job Properties and Hot Folders.
•
Do one of the following:
•
From Job Center, right-click a job in the Held or Printed list and select Proof Print.
•
Click Actions > Proof Print.
Fiery Command WorkStation
Printing
110
If you select Proof Print with a variable data printing job, the printed proof is one copy of the first record. If you
select Proof Print with an imposed variable data printing job, the printed proof is a set associated with the first
record (all sheets that contain the first record).
Sequential Print
The Sequential Print feature allows the Fiery Server to maintain the job order on certain jobs sent from the network.
The workflow is "First In, First Out" (FIFO).
This feature is used especially in the production print and CRD (Corporate Reprographics Department)
environments because jobs are submitted in a specific record or report order. Usually each record is sent as a
separate job, which may contain a few pages.
The Fiery Server needs to know which jobs are being submitted to the Sequential Print queue, and ensure that any
other jobs submitted during a sequential run do not interrupt the sequential run, or end up printed in the middle of
it.
Sequential printing can be configured on the Fiery Server. After it is turned on, the Sequential Print queue will be
available through the following supported printing protocols:
•
Command WorkStation Import command
•
MyDocs WebTools
•
Hot Folders
•
Virtual Printers
•
SMB Printing
•
LPR or LPD
•
Port 9100 (when it is routed to the Sequential Print queue in Configure)
The Sequential Print feature is not available on integrated Fiery Servers.
Sequential Print run process
The sequential print run (burst) begins when the first file is spooled to the Sequential Print queue. The sequential
print run is marked with a unique group ID.
The time-out interval defines the amount of time the Fiery Server should wait between jobs submitted to the same
group ID. After the sequential print run begins, each job that is spooled before the time-out elapses will re-trigger
the time-out to the initial settings. After the time-out period elapses, the Fiery Server considers the sequential run
complete.
When specifying the time-out interval, consider the following:
•
Network traffic
•
Size of the jobs in the sequential print run
•
Spool time, which is the amount of time spent in preparing each job to ensure that time-out does not elapse
before the entire sequential run is submitted
Setting the time-out for a long period may result in the Fiery Server locking the system from processing other files
after the last file in the sequential run was spooled.
Jobs submitted in a sequential print run arrive at the Processing queue and wait until all jobs are received, then they
are submitted to the Printing queue in the order that they were received.
Fiery Command WorkStation
Printing
111
Sequential Print run interruptions
The Fiery Server takes care to maintain the print order as long as you do not interrupt the printing order. The
following actions, if applied, will cause printing disorder of the jobs:
•
Rush Print
•
Print Next
•
Process next
•
Re-order jobs processing and printing jobs in queue
•
Suspend on Mismatch
•
Preview
•
Hold
•
Sample Print
•
Cancel a job from the sequential printing group
Set up Sequential Print
You can set up Sequential Print for a new Hot Folder or virtual printer.
•
When creating a Hot Folder or virtual printer, select Sequential Print from the Job Action list.
You can send sequential jobs to the Fiery Server, which performs the sequential print run based on the options
specified in Configure.
Set Sequential Print options in Configure
You can configure the Fiery Server to maintain the job order on certain jobs sent from the network.
Important: There are two versions of Configure and they are specific to the Fiery Server you are connected to. This
is a combined procedure that describes what to do when connected to a Fiery Server with FS100/100Pro or earlier,
and notes about what to do with FS150/150 Pro or later. If you are not sure which version of Configure you are
using, see Which version of Configure am I using? on page 27.
This lets you keep jobs together in a sequential run, as specified by a time-out interval. The Sequential Print queue
can also be published on the network for other users to access.
In Configure, an Administrator can turn on Sequential Print, specify how long to wait between jobs in the sequential
run, and publish the Sequential Print queue on the network.
1 Click Server > Configure to open the Configure dialog box.
2 In Configure, click Printer > General.
Note: If you are connected to a Fiery Server with FS150/150Pro, you can find this setting in Job Submission >
Sequential Print.
3 Select the Enable Sequential Print check box.
Fiery Command WorkStation
Printing
112
4 Specify the Timeout interval as desired.
The time-out interval defines how long the Fiery Server should wait for the next job in the sequential run, before
timing out and considering the run complete.
Setting the time-out for a long period may result in the Fiery Server locking the system from processing other
files after the last file in the sequential run was spooled.
5 Select the Publish Sequential Print Queue check box if you want the queue to be available to all users on the
network.
6 After you have changed the setting for an option, do one of the following:
•
On FS100/100 Pro or later: Click Undo or Apply.
•
On FS150/150 Pro or later: Click Cancel or Save.
7 Restart the Fiery Server.
Use Quick Doc Merge
Quick Doc Merge allows you to merge multiple files or jobs together so they can be printed as a single job on the
Fiery Server.
Documents to be merged must be either PostScript or PDF format. When merged into one job on the Fiery Server,
the job becomes VDP format.
A Quick Doc Merge job overwrites all Job Properties settings for the individual documents to the Fiery Server default
settings. Therefore, you must set Job Properties after you combine the separate documents into the single Quick Doc
Merge job.
1 Do one of the following:
•
From Job Center, right-click a job in the Held list and select Merge Jobs.
•
Click Actions > Merge Jobs.
Note: Only pre-processed jobs can be merged together.
2 Click Add from Network to browse and select PostScript or PDF files to import.
3 Click Add from Fiery to display a list of all PostScript and PDF files in the Hold queue on the Fiery Server.
4 When the jobs you selected are listed, click Move Up or Move Down to change the order in which they are
printed. Click Remove to remove a job.
5 If desired, select Define each document as a separate finished chapter.
Selecting this option applies finishing options for the job to each chapter. For example, if this option is selected
and the merged job has the job property Stapled, each of the merged jobs is stapled individually. If the option is
deselected, the entire merged job is stapled together.
6 Type a name for the merged document in the Save QDM Job as field.
7 Click Save.
The job is created and listed in the Held list.
Fiery Command WorkStation
Printing
8 Specify job properties for the new Quick Doc Merge job.
Note: FreeForm settings in Job Properties cannot be applied to a Quick Doc Merge job.
113
Fiery Command WorkStation
Managing jobs
114
Managing jobs
Search for jobs
Search for and locate jobs on a connected Fiery Server using search parameters such as the file name, file size, or
date.
Limit your search to jobs on a selected Fiery Server or on all connected Fiery Servers. Search for jobs in the Held,
Printed, or Archived list.
1 Click Edit > Search or type in a file name in the global Search field located to the right of the Job Center toolbar
buttons.
2 Specify a date to start the job search.
3 Specify a file size for the job.
4 Select a specific Fiery Server or all Fiery Servers from the Servers list.
5 Click the Search icon (magnifying glass) to locate the jobs that meet the specified search criteria.
6 Select a job from the results list to view detailed information about the job.
7 Click Locate Item to locate the specific job from the search results.
8 Do one of the following:
•
Sort results by job, date, server, or status (held, printed, or archived).
•
Specify whether all jobs or only the held jobs, completed jobs, or archived jobs are shown in the search results.
•
Click a found job and select Locate Item to switch Command WorkStation to the specific Fiery Server with
the job selected.
•
Double-click a found job to open the Job Properties window, where you can change print options. You can
then click Print to print the job on the Fiery Server where the job was located.
Filter a job list
You can filter the view of a job list to display only jobs that match specific attributes.
In the Held, Printed, and Archived lists, and in the Job Log, each column displays an attribute of the job. You can
filter the job list to restrict the display to only jobs that match specified values for one or more attributes.
You can specify different filters for different job lists and servers. Filter settings remain until you change them or exit
Command WorkStation.
Fiery Command WorkStation
Managing jobs
115
1 In any field that appears below a column heading in a job list, type the value that you want to search for.
If an arrow appears next to the field, you can also click the arrow and select from a list of values.
The list of jobs is restricted to the jobs that match the search value.
2 Optionally, type a value in one or more additional fields to further restrict the list.
Only jobs that match all of the search values are displayed.
3 To clear all filters and display all jobs in the list, click Clear Filter.
Export a job list
You can export the list of jobs in either the Held, Printed, or Archived list.
1 Click either the Held, Printed, or Archived list.
2 Select File > Export.
3 Navigate to the location you want to export the file and click Save.
Move jobs to another queue
You can move jobs to the Processing or Printing queue from the Held, Printed, and Archived lists. Additionally, you
can specify that a job be printed and then removed from the queue.
•
Select any job from the Held, Printed, or Archived lists, click Actions and select one of the following:
• Print - Sends a job to Printing queue.
• Print and Hold - Sends the selected job from the Held, Printed, or Archived list to the Processing queue if the
job is not processed, or to the Printing queue if it is processed. After printing is completed, a raster of the job is
kept when it is returned to the Held list.
• Print and Delete - Sends the selected job from the Held, Printed or Archived list to the Processing queue if
the job is not processed, or to the Printing queue if it is processed. After printing is completed, the job is
deleted. Use this option if you want to print a job securely and ensure that jobs are not archived on the Fiery
Server.
• Hold - Sends a job to the Held list.
• Process and Hold - Processes a job but does not print it.
• Archive - Archives the job to the Archived list.
• Proof Print - Prints a single copy of a job to verify output. This option is not available for archived jobs.
You can also select a job in one of the queues and drag it into another queue.
Fiery Command WorkStation
Managing jobs
116
Reorder jobs
You can reorder the jobs in the Printing or Processing queue.
•
Do one of the following:
•
From Job Center, select a job in the Printing or Processing queue and drag the file either up or down in the job
list.
•
Select a job in the Processing or Printing queue and select Actions > Move Up or Actions > Move Down.
•
If supported on your Fiery Server, select a job in the Processing or Printing queue and select Actions > Print
Next to allow the Fiery Server to process the job as soon as the current job is finished processing.
•
If supported on your Fiery Server, select a job in the Processing or Printing queue and select Actions > Rush
Print to allow the Fiery Server to interrupt a currently printing job to print a Rush Print job. The Fiery Server
waits until the currently finishing set of the job is completed before printing the Rush Print job. After the Rush
Print job is finished, the Fiery Server resumes printing the interrupted job.
Send jobs to another Fiery server
With the Send to command, you can transfer jobs to another connected Fiery Server.
When you transfer a job to an identical Fiery Server, raster data is transferred. When you transfer a job to a different
Fiery Server, only the source file is transferred, not the actual raster data. When transferring a job, review and respecify, if necessary, all job properties, because non-identical Fiery Servers may behave differently.
1 Do one of the following:
•
Select any held job in the Job Center and drag it to another Fiery Server in the Servers list.
•
Select any held job in the Job Center and click Actions > Send to.
•
Right-click any held job in the Job Center and select Send to.
2 Select a Fiery Server.
3 Click Yes to confirm the transfer of the job.
Archive jobs
Archive jobs internally to the Fiery Server hard disk or externally to removable media or networked drives.
After you archive a job, it appears in the Archived tab of Job Center.
1 Do one of the following:
•
Select any job in the Printed or Held list and drag it to the Archive lists.
Note: You cannot drag jobs from a computer to the Archive list. You can only drag jobs to the Archive list if
they are already on the Fiery Server
•
Select any held job in the Job Center and click Actions > Archive.
•
Right-click any held job in the Job Center and click Archive.
Fiery Command WorkStation
Managing jobs
117
2 Do one of the following:
•
Select Server Internal in the directories list, and click OK.
•
To specify another location, click Manage, and then click Add. Browse to the folder to which you want to
archive the job and click OK.
3 If you do not want to change the archive options for future archived jobs, select Don't ask me again; then click
OK.
Drag and drop file management
Move files around with drag and drop functionality.
You can drag and drop files into a number of different regions or "drop zones". This functionality gives you the
ability to move files from a computer to Command WorkStation and, later, from one drop zone to another. This is
an ease-of-use feature for file management and job workflow. The following drop zones are available:
•
Connected Fiery Server in the Servers list
•
Printing queue
•
Processing queue
•
Held list
•
Archived list
Fiery Command WorkStation
Fiery JDF Jobs
118
Fiery JDF Jobs
About Fiery JDF and JMF
Fiery JDF adds support for various JDF intent and process elements. You can use Command WorkStation to view
JDF settings and resolve errors, such as media mismatch, during job processing.
Job Definition Format (JDF) is an open standard, XML-based file format that allows you to automate the print
production process by passing data between different applications. By simplifying data exchange, JDF makes digital
production faster and more efficient, while also facilitating faster movement of job details. A JDF electronic ticket
specifies how a job is to be handled and produced from customer concept to final production.
Think of the JDF file as an electronic version of a customer’s specifications for a particular job. For instance, a job
ticket with the customer’s request for a job with the specifications “100 copies of a 10-page document on 20# lettersize white paper, printed duplex, black-and- white” would be represented in a standardized XML format readable by
JDF-enabled devices, in other words, the JDF ticket.
Job Messaging Format (JMF) is the communication protocol used in a JDF workflow. JMF messages contain
information about events (start, stop, error), status (available, offline, and so on), results (count, waste, and so on).
Fiery JDF turns on integrated, bi-directional communication of JDF intent or JDF process job tickets between JDFsubmitting applications a Fiery Server using JMF.
Support for JMF allows the Fiery Server to provide feedback on the status of the JDF job and production data (such
as time of delivery/printing and materials used) to the JDF-submitting application.
Fiery JDF Setup
JDF must be turned on in Configure to allow JDF jobs to be submitted to the Fiery Server. You can specify JDF
parameters when you configure the Fiery Server.
•
Default virtual printer - Select a virtual printer, if desired.
•
Default job action - Choose from Hold, Process and Hold, Print, Print and Hold.
•
Override JDF job - Default print settings override the JDF settings.
•
Job Closing - Specify Auto or Manual job closing.
•
Required for Closing - Specify what information is required for closing.
•
Common Global Paths - Add, edit, or remove file search paths over SMB.
Enabling JDF-submitting applications
Fiery JDF contains an enablement mechanism to test and certify JDF-submitting applications. The specific JDFsubmitting applications are turned on for Fiery JDF either in the Fiery Server or by a JMF (Job Messaging Format)
message sent from the JDF-submitting application.
Fiery Command WorkStation
Fiery JDF Jobs
119
If a JDF-submitting application has not been turned on, the following indicators alert users to jobs from applications
not yet tested and certified:
•
A warning icon is displayed for the job in the Command WorkStation job list.
•
A warning message is displayed in the JDF Details dialog box.
•
A JMF comment is returned to the JDF-submitting application with information on how to certify the
application.
Fiery JDF workflow
During job processing, the Fiery Server uses JMF (JDF's Job Messaging Format) to send back status and audit
information to the JDF job-submitting application.
When a JDF job is submitted to the Fiery Server, the job is checked for any errors or conflicts. If there are none, the
operator can select additional print actions from the Actions menu in Command WorkStation, or choose to print
the job directly.
If there is an error, the job is flagged in the Held list with an error icon.
The Job Errors window gives you a choice to fix or ignore JDF ticket conflicts. Ignoring a conflict may result in the
job being printed, but with missing JDF information.
After a JDF job is printed, a message signaling job completion is automatically returned to the submitting application
if the Fiery Server has been configured for Automate Job Close. For Manual Job Close, the operator needs to close
the job through the Command WorkStation window when printing is completed to his satisfaction.
Submit the JDF job
You can submit a JDF ticket through a Hot Folder filter or traditional JDF-submitting application using the JMF URL
of the Fiery Server.
1 Send a job to a Fiery Server from a JDF-submitting application.
Note: You cannot import a JDF job or send it from the printer driver.
2 The job is sent through JMF (Job Messaging Format). The submitting application sends the job to the JMF URL
of the Fiery Server.
3 Enter the JMF URL of the Fiery Server in the following format:
http://<host>:<port> (for example, http://192.168.1.159:8010)
Display JDF column headings in Command WorkStation
When a JDF job has been received by the Fiery Server and displayed in the Command WorkStation Held or Printed
list, you can select a JDF set of column headings to display useful information about the JDF job.
•
To display column headings for a JDF job, right-click in the column heading bar and select JDF Set.
The default JDF set of headings is added. Click More to see additional JDF categories.
Fiery Command WorkStation
Fiery JDF Jobs
120
Fiery JDF jobs and virtual printers
Virtual printers can be defined on the Fiery Server and referenced inside a JDF ticket as a NamedFeature.
In Fiery JDF Setup, you can specify a virtual printer for job submission. The job would then use the job settings in
that virtual printer, if so configured in the Fiery Server (in the JDF section of Configure). Any settings in the JDF
ticket override the “unlocked” virtual printer settings.
For more information about virtual printers, see Virtual printers on page 177.
Specify JDF settings for a job
You can set options for a JDF job in the JDF Settings window when you select a JDF job in the Held or Printed list.
•
To open the JDF Settings window, right-click and select JDF Settings or click the JDF Settings button in the
Job Summary pane.
The following tabs are available from the JDF Settings window:
•
Media - Displays the media attributes of the JDF job next to the corresponding Paper Catalog entry. Media for
the JDF job can be mapped manually to a Paper Catalog entry in this tab. See Enabling JDF-submitting
applications on page 118.
•
Job Info - Displays information found in the JDF ticket. Allows you to specify additional MIS details and add
comments.
•
Run List - Displays the customer-supplied files used to generate the content of the JDF job. Allows you to add,
edit, and reorder the files in the window.
•
Close Job - Allows the job to be manually closed by the operator.
The following actions are available in every tab:
•
Close Job - Closes the job, according to the parameters set in Configure.
•
View Paper Ticket - This option is turned on if the JDF-submitting application included a human-viewable
copy of the original job ticket.
•
OK - Saves the settings and closes the window.
•
Cancel - Closes the window without saving any changes to settings.
Job Info tab
The Job Info tab displays JDF information about the job being submitted.
The Job Name, Job ID, and Source fields are automatically populated.
The following panes are automatically populated and are read-only:
•
Job Header
•
Scheduling
•
Customer Info
Fiery Command WorkStation
Fiery JDF Jobs
121
MIS Details
The MIS Details pane, select a setting from the drop-down menu for each of the following categories:
•
Chargeable - Specifies if the job should be charged.
•
Work Type - Specifies if and how the job should change.
•
Work Type Details - Specifies the reason for the change. Certain values of Work Type Details are valid only
with certain values of Work Type. For example, if Work Type is Original, Work Type Details is ignored.
•
Operation Mode - Specifies the type of operation mode.
Comments
The Comments area is populated with JDF comments as read-only, but you can add comments by clicking the Add
button and typing your comments in the blank field.
The comments appear in the Job Notes field in the Job Properties Job Info tab.
Run List tab
The Run List tab displays the location of the PDL files used to generate the content page artwork to populate a JDF
job. The file paths are displayed in the order that they are pulled to print the job. Each path supports one file type per
job. Different protocols are supported.
•
Supported protocols: HTTP, FTP, SMB, MIME, local files
•
Supported file types: PDF, Postscript, PPML, ZIP
Note: Multiple file types are not supported for the same job. If your first entry is connecting to a PDF file, then all
files for the job should be PDF.
You can add paths, edit the path names, or remove the path.
Note: You cannot remove validated paths that are required for the job from the Run List. At least one valid entry is
required for a job.
If the JDF ticket has the file names, but the files cannot be located in the path defined in Configure, an alert icon is
displayed. You can then select Edit and insert the correct path.
You can double-click the entry to open the Add/Edit dialog box.
Close Job tab
When Manual Job Close is selected, the operator must close jobs in order for the submitting application to receive
production information on the job, even if the job was canceled.
Other users can close jobs to record and return the actual completion status of the job to the sender. Print MIS
Solution users receive production status during the run, and receive audit detail for costing when the job is closed
out of the Fiery Server.
You can close a job manually at any time during the Fiery JDF workflow, provided that any required information has
been provided.
In Fiery JDF Setup, you specify either auto or manual closing for jobs, and what information, if any, is required to
close a job.
Fiery Command WorkStation
Fiery JDF Jobs
122
The Close Job tab displays the following fields, which are automatically populated:
•
Paper Catalog - Lists the media specified in the JDF ticket. You can change this entry if a different media was
used.
•
Employee ID - Comes from the login the user used when logging in to Command WorkStation.
•
Media Product ID - Refers to the Product ID in Paper Catalog.
•
Planned Sheets - Comes from the JDF ticket.
•
Actual Sheets - Comes from the Fiery Server Job Log.
You can override the entries for these fields if required, except for Media Product ID and Planned Sheets.
Add JDF job media to the Paper Catalog
When a JDF ticket is submitted to the Fiery Server, the server attempts to automatically map the specified media for
the JDF job with a corresponding entry in the Paper Catalog on the Fiery Server.
If automatic media mapping fails, you can view the JDF job media in the JDF ticket and manually select a Paper
Catalog media entry for the job.
1 If you want to add the media used in the JDF job, select it from the JDF ticket and add it to the Paper Catalog in
the Media tab.
2 Select Add/Map to Paper Catalog from the Map to Paper Catalog menu.
Next steps
For general information about adding new media to the Paper Catalog, see Create a new Paper Catalog entry on page
184.
Resolve media conflicts in JDF jobs
If a JDF ticket uses media that cannot be automatically mapped to the Paper Catalog, Command WorkStation
displays an error for the job. You can add the media for the JDF job to the Paper Catalog to resolve the problem,
either by mapping it to an existing media entry or adding it as a new entry.
1 Right-click the selected JDF job and select JDF Settings, or select the JDF job and click the JDF Settings
button in the Job Summary pane.
2 Select Fix the JDF conflict.
3 In the JDF Settings Media tab, select a corresponding media entry from the Map to Paper Catalog drop-down
menu, or select Add/Map to Paper Catalog, and click OK.
Next steps
The parameters of the media specified for the JDF job are listed alongside the parameters of the Paper Catalog media
entry selected. You can now print the job.
Fiery Command WorkStation
About Fiery Dashboard
123
About Fiery Dashboard
Fiery Dashboard is a cloud-based service that monitors production in your print shop and provides analytics on
printer utilization, system uptime, color metrics, media usage, job status and more. It helps you track productivity
and get greater control of your operations.
Fiery Dashboard includes two main components:
•
The cloud-based service
•
The Fiery data collector collects job log data from Fiery Servers, and uploads it to the cloud.
This topic focuses on how Fiery Dashboard is authorized to collect data with Command WorkStation. To learn more
about the cloud-based service and user interface, see http://www.efi.com/fierydashboard.
Before you begin:
•
An Internet connection is needed for the client computer running Command WorkStation.
•
A standard Internet browser on the client computer is needed, such as Internet Explorer 10 or later, Chrome 32
or later, Firefox 28 or later, and Safari 5 and later.
•
An EFI Passport account must be created.
Create an EFI Passport account (free)
Command WorkStation uses the EFI Passport account to authorize the Fiery data collector to upload data from the
connected Fiery Servers.
1 In Command WorkStation, click Edit > Authorize.
2 In the Authorize dialog box, click Learn more about Fiery Dashboard or Launch Fiery Dashboard
You could skip these steps and go to http://passport.efi.com and follow the instructions to create a user account.
A page opens (in the default browser of the client computer) with easy-to-understand instructions about how to
create an EFI Passport account.
Sign on to Fiery Dashboard
You can sign on to Fiery Dashboard through the Authorize dialog box in Command WorkStation.
1 In Command WorkStation, click Edit > Authorize.
2 In the Authorize dialog box, click Launch Fiery Dashboard.
The Fiery Dashboard opens in the default browser of the client computer.
Fiery Command WorkStation
About Fiery Dashboard
3 Click Sign In.
You could go to http://fierydashboard.efi.com and sign in using your EFI Passport account.
For more information on Fiery Dashboard, see http://www.efi.com/fierydashboard.
124
Fiery Command WorkStation
Fiery Dashboard data collection
125
Fiery Dashboard data collection
Data collection occurs through the Fiery data collector that runs in the background on the client computer.
Data is collected and uploaded to the cloud regardless of whether Command WorkStation is currently running or
not.
After you authorize data collection, the Job Log data is uploaded to the authorized account. Authorizing Fiery
Dashboard will allow information to be collected from all Fiery Servers connected to this instance of Command
WorkStation. If Command WorkStation is connected to additional Fiery Servers in the future, data is also collected
from those Fiery Servers, if data collection is still authorized.
The data collected is accessible to the authorized user only. The data collected provides specific metrics, such as
number of color pages printed, or pages printed per users or printer.
Authorize data collection
You can authorize data collection through the Authorize dialog box in Command WorkStation.
1 In Command WorkStation, click Edit > Authorize This Computer.
2 In the Authorize dialog box, enter the complete EFI Passport user name and password.
Fiery Dashboard is now authorized to collect data with Command WorkStation.
Cancel authorization for data collection
You can cancel data collection through the Authorize dialog box in Command WorkStation.
1 In Command WorkStation, click Edit > Deauthorize.
2 In the Authorize dialog box, enter your EFI Passport password to confirm deauthorization.
Fiery Dashboard stops collecting data from Command WorkStation.
Fiery Command WorkStation
Managing color
126
Managing color
Color print options
Color print options control the color management applied to a print job.
The color print options in the Color Management window of Command WorkStation show the default color print
settings for the Fiery Server. A default color print setting is applied if the color print setting has not otherwise been
specified for the job. A user can override the default settings for a job by changing them in the printer driver or in Job
Properties.
The color print options in the Color Management window of Command WorkStation are displayed in a flow
diagram representing the color processing that takes place on the Fiery Server. Some advanced processing is not
shown. Advanced color print options are set in the Advanced Edit window.
Default color print settings are referenced in other locations that list color print options. For example, the Printer’s
default setting in the printer driver refers to the default setting.
Calibration is determined by the output profile, not by a print option. The calibration setting displayed is the one
associated with the selected output profile.
For more information about printing with color print options, see Color Printing, which is part of the user
documentation set.
View or edit default color settings
You can view or edit default settings for most color print options in the Color Management window. Some of the
more advanced color print options are not shown in this window and must be set in the Advanced Edit window.
1 In Device Center, click the Color Setup tab, click Color Management, and select basic default options.
2 To set more advanced options, click Expert Settings.
3 In the Advanced Edit window, click the tab containing the print option, select a setting, and click OK.
CMYK/Grayscale Source and RGB/Lab Source
The CMYK/Grayscale Source and RGB Source print options allow you to define the color spaces of the CMYK
and RGB data, respectively, in your document so that the appropriate color conversion occurs on the Fiery Server.
Commonly used color spaces are available on the Fiery Server. For others, you can import custom profiles to the
Fiery Server.
CMYK/Grayscale Source
To properly manage color in a printed image that was separated using an ICC profile, the same profile must be
specified for printing the image.
Fiery Command WorkStation
Managing color
127
The CMYK/Grayscale Source profile setting you specify depends on the CMYK profile or press standard for
which the CMYK data was separated. This option affects CMYK data only.
•
For images that were separated using a custom separation (such as a separation produced with an ICC profile),
select the corresponding profile on the Fiery Server with the CMYK/Grayscale Source setting.
•
For images that were separated for a press standard, select the press standard as the CMYK/Grayscale Source
setting.
The CMYK/Grayscale Source option can be set to any CMYK source profile that is present on the Fiery Server.
If you do not want CMYK data in a job to be converted to a CMYK source color space, you can select one of the
following settings:
•
None or Bypass Conversion - These settings send the original CMYK data in the job to the printer without
conversion, but with calibration applied. The None setting or the Bypass Conversion setting is recommended
if you use another color management system instead of ColorWise (for example, ColorSync or Photoshop).
If your document contains an embedded CMYK profile, select None or select the Use Embedded Profile
When Present (CMYK) option. The embedded profile is applied to CMYK data.
Note: For some older models of Fiery Server, the embedded profile is applied to CMYK data regardless of the
CMYK/Grayscale Source setting. For all models of Fiery Server, selecting the None setting or the Use
Embedded Profile When Present (CMYK) option results in using the embedded profile.
•
ColorWise Off - This setting sends the original CMYK data in the job to the printer without calibration applied
and without converting the CMYK data. The CMYK data is still subject to maximum density constraints,
however.
The ColorWise Off setting is available for a specific job but it cannot be the default setting on the Fiery Server.
You select this setting for a specific job.
Note: When you print with the ColorWise Off setting, make sure that the options you choose in your application do
not cause the application to modify CMYK data. You must specify No Color Management in the application when
you print with the ColorWise Off setting.
RGB/Lab Source
When you specify a profile for RGB Source, the Fiery Server overrides source color space definitions or profiles that
other color management systems may have specified. For example, if your document contains an embedded RGB
profile, the RGB Source setting overrides it.
When you specify an RGB source profile, the output from the Fiery Server is consistent across platforms. The RGB
Source options are as follows:
•
EFIRGB - Specifies an EFI-defined color space recommended for users who have no detailed information about
their RGB data.
•
sRGB (PC) - A Microsoft and Hewlett-Packard recommended color space designed for typical home and office
applications.
•
Apple Standard - Specifies the color space of an older Mac OS computer monitor.
•
Adobe RGB (1998) - An Adobe-defined color space, used in some pre-press workflows as the default working
space for Adobe Photoshop.
Fiery Command WorkStation
Managing color
128
•
ECI-RGB - The European Color Initiative (ECI) recommended space for use as an RGB working color space and
color data exchange format for ad agencies, publishers, reproduction, and printing houses.
•
Fiery RGB - An EFI-defined color space recommended for users of office applications. This color space is
similar to EFIRGB but is larger and can provide a more desirable blue output.
In cases where you do not want RGB Source to override another specified source color space, either select None or
select the Use Embedded Profile When Present (RGB) option, whichever setting your Fiery Server supports.
If RGB Source is set to None, or the Use Embedded Profile When Present (RGB) option is enabled, the Fiery
Server ignores RGB Source and uses the RGB profile embedded in the print job (if any) as the RGB source profile.
CMYK/Grayscale Device Link and RGB/Lab Device Link
The CMYK/Grayscale Device Link option or the RGB/Lab Device Link option, along with the Output Profile
option, allows you to select a CMYK-to-CMYK device link profile or an RGB-to-CMYK device link profile
(respectively).
To be selected for a print job, a device link profile must reside on the Fiery Server and be associated with a specific
source profile (CMYK/Grayscale Device Link for a CMYK-to-CMYK device link profile or RGB/Lab Device
Link for an RGB-to-CMYK device link profile) and output profile (the Output Profile setting).
When you select the source profile and output profile settings associated with a device link profile, the Fiery Server
bypasses its normal color management and applies the device link conversion to the color data in the job. The source
profile and the output profile are not used.
Profiles that do not reside on the Fiery Server do not appear as settings. A device link profile that is not associated
with a source profile setting and an output profile setting cannot be selected for a job. Therefore, even though the
source profile and output profile that are associated with a device link profile are not used to calculate color
conversions, they must reside on the Fiery Server.
Use Embedded Profile When Present (CMYK and RGB)
You can specify whether the Fiery Server uses the source profile (either CMYK or RGB) that is embedded in the
print job rather than the source profile specified in the print settings.
CMYK
If you turn on Use Embedded Profile When Present (CMYK), the Fiery Server ignores the CMYK/Grayscale
Source option and uses the CMYK profile embedded in the print job (if any) as the CMYK source profile. If you
turn off this option, the Fiery Server uses the profile specified in the CMYK/Grayscale Source option.
When a CMYK profile is embedded in a job and Use Embedded Profiles When Present (CMYK) is enabled for
the job, or when a job is sent with PostScript Color Management, the job contains calibrated CMYK (or
CIEBasedDEFG) data. For jobs containing calibrated CMYK, the CMYK processing options are not used. Instead,
the RGB/Lab Rendering Intent option, which normally affects only RGB or Lab data, is used to process the
calibrated CMYK data. The RGB Source setting does not affect calibrated CMYK data.
RGB
If you turn on Use Embedded Profile When Present (RGB), the Fiery Server ignores the RGB Source option
and uses the RGB profile embedded in the print job (if any) as the RGB source profile. If you turn off this option, the
Fiery Server uses the profile specified in the RGB Source option.
Fiery Command WorkStation
Managing color
129
CMYK/Grayscale Processing Method
The CMYK Processing Method option allows you to define the CMYK-to-CMYK conversion method for the
CMYK data in a print job.
•
Pure Primaries - If your Fiery Server supports this setting, it outputs the primary colors in a job (C only, M
only, or Y only) as primary colors, using only a single colorant. The result is pure-looking primary colors, with
minimal banding in gradients.
Pure Primaries compromises overall color accuracy. Do not use Pure Primaries if color accuracy is
important, such as when printing press proofs.
•
Quick - If your Fiery Server supports this setting, it applies one-dimensional transfer curves to adjust output
densities in the cyan, magenta, yellow, and black channels. This technique leads to eye-pleasing color output
because pure primary colors are not contaminated by other colorants. Do not use Quick for final documents
that are used as press proofs. Other methods offer better color accuracy.
•
Full (Source GCR) - Provides a complete and accurate simulation based on colorimetric transformations. Hues
are preserved, even for primary colors. The gray component replacement (GCR) level that was specified in the
original (source) document is approximated. However in some cases, if the black colorant is not dark enough by
itself to render the darkest tones in the source color space, CMY is added to the output black for better color
accuracy. Process black expressed in CMY is reproduced using CMY colorants.
This method can be used to preserve pure black objects without converting them to CMYK. However, the Gray
(CMYK) option is a more typical method for preserving pure black.
•
Full (Output GCR) - Provides a complete and accurate simulation based on colorimetric transformations. Hues
are preserved, even for primary colors. With this method, the Gray Component Replacement (GCR) level that
was specified in the original document is not preserved. Instead, all CMYK data is reseparated using the GCR
level specified by the output profile. This simulation technique is similar to traditional ICC color-matching
methods and is more appropriate than Full (Source GCR) for full-color printing designed for a traditional
press, but reproduced on your printer.
Note: When you specify Pure Black On for Black Text and Graphics, and Full (Output GCR) or Full (Source
GCR) for CMYK Processing Method, the black text and graphics in your document are printed with 100% black.
Black Point Compensation
The Black Point Compensation option lets you control the output quality of shadow areas for CMYK source
colors.
Use Black Point Compensation to enhance details in shadows when the CMYK source space is larger than the
gamut of the printer. In proofing applications, when the CMYK source space is smaller than the gamut of the
printer, do not use this option.
Black Point Compensation is supported for a Fiery Server with FS150/!50 Pro software or later.
Note: For RGB source colors, black point compensation is always applied.
Black point compensation works by scaling the source colors so that the darkest point in the source profile maps to
the darkest point in the output profile.
Fiery Command WorkStation
Managing color
130
RGB/Lab Rendering Intent
The RGB/Lab Rendering Intent option specifies a rendering intent for RGB/Lab-to-CMYK color conversion. This
conversion can be optimized for the type of color image being printed.
To control the appearance of images, such as prints from office applications or RGB photographs from Adobe
Photoshop, select the appropriate rendering intent. The Fiery Server allows you to select from the four rendering
intents currently found in industry-standard ICC profiles.
Note: If you experience tone reproduction problems, use the Photographic setting.
Rendering intent
Best used for
Equivalent ICC rendering intent
Photographic - Typically
results in less-saturated output
than presentation rendering
when printing out-of-gamut
colors. This style preserves
tonal relationships in images.
Photographs, including scans and images
from stock photography CDs and digital
camera images.
Image, Contrast, and Perceptual
Presentation - Creates
Artwork and graphs in presentations. This
style can be used for mixed pages that
contain presentation graphics and
photographs.
Saturation, Graphics
Relative Colorimetric -
Advanced use when color matching is
important, but you prefer white colors in the
document to print as paper white. This style
may also be used with PostScript color
management to affect CMYK data for
simulation purposes.
Relative Colorimetric
Absolute Colorimetric -
Situations when exact colors are needed and
visible borders are not distracting. This style
may also be used with PostScript color
management to affect CMYK data for
simulation purposes.
Absolute Colorimetric
saturated colors but does not
match printed colors precisely
to displayed colors. In-gamut
colors, such as flesh tones, are
rendered well. This style is
similar to the Photographic
rendering intent.
Provides white point
transformation between the
source and destination white
points. For example, the bluishwhite color (gray) of a monitor
is replaced by paper white. This
style avoids visible borders
between blank spaces and
white objects.
Provides no white point
transformation between the
source and destination white
points. For example, the bluishwhite color (gray) is not
replaced by paper white.
Fiery Command WorkStation
Managing color
131
Separate RGB/Lab to CMYK Source
The Separate RGB/Lab to CMYK Source option determines how RGB colors (as well as Lab and XYZ colors) are
converted to CMYK. This option defines the color spaces that are used by the Fiery Server to separate the RGB data
into CMYK values.
•
When Separate RGB/Lab to CMYK Source is turned on, all RGB colors are first converted to the CMYK
color space defined by the CMYK/Grayscale Source print option before being converted to the CMYK color
space of the printer (as defined by the Output Profile print option). The result is a simulation of the RGB colors
that would be output from a printer with the characteristics defined by the CMYK/Grayscale Source profile.
With Separate RGB/Lab to CMYK Source, for example, if a high-quality ICC profile is available for another
printer, your printer can simulate the behavior of that other printer.
•
When Separate RGB/Lab to CMYK Source is turned off, all RGB colors are converted directly to the CMYK
color space of the printer (as defined by the Output Profile print option).
Spot Color Matching
The Spot Color Matching option provides automatic matching of spot colors in a job with their best CMYK
equivalents.
•
When Spot Color Matching is turned on, the Fiery Server uses a built-in table to generate the closest CMYK
matches of spot colors that the copier/printer can produce. (New tables are generated automatically for each
output profile that you add to the Fiery Server.)
With Fiery Spot-On, the Fiery Server uses the CMYK matches determined through Command WorkStation Spot
Colors.
•
When Spot Color Matching is turned off, the Fiery Server processes the spot color as CMYK data and uses
CMYK equivalents defined by the spot color manufacturer, such as PANTONE. These are the same CMYK
equivalents used by applications that include spot color libraries.
Note: A spot color that is not included in the built-in table is simulated using the alternate color that is provided in
the document.
For jobs that include spot colors, turn Spot Color Matching on unless you are printing proofs of process color
press simulations. In that case, turn Spot Color Matching off and select the appropriate CMYK/Grayscale
Source setting.
Gray and Black (CMYK and RGB)
When the Gray (RGB) option is turned on, any RGB color that has equal R, G, and B values is printed as K-only
black instead of CMYK black. Similarly, when Gray (CMYK) is turned on, any CMYK color where C, M, and Y are 0
(zero), and K is any value is printed as K-only black instead of CMYK black.
You can turn on Gray (RGB) or Gray (CMYK) for either Text and Graphics or Text, Graphics, and Images.
"Graphics" refers to vector graphics. "Images" refers to bitmap images.
The following limitations apply:
•
The Gray (RGB) and Gray (CMYK) options have no effect on a job that is sent as separations.
•
If CMYK Processing Method is set to Pure Primaries, Gray (CMYK) does not affect the output.
•
If CMYK Processing Method is set to Quick, Gray (CMYK) does not affect the output.
Fiery Command WorkStation
Managing color
132
•
If Separate RGB/Lab to CMYK Source is turned on, Gray (RGB) is turned off. Likewise, if Gray (RGB) is
turned on, you cannot turn on Separate RGB/Lab to CMYK Source.
•
If Black Text and Graphics is set to Pure Black On or Rich Black On, it takes precedence over Gray (RGB)
and Gray (CMYK) for 100% black text and graphics.
•
If a gray is specified as a spot color, Gray (RGB) and Gray (CMYK) do not affect that gray.
Black Text and Graphics
The Black Text and Graphics option affects black text and vector graphics. When you set this option to Pure
Black On, the black generated by applications (RGB=0, 0, 0 or CMYK=0%, 0%, 0%, 100%) is printed using black
only.
With Black Text and Graphics set to Pure Black On, black text and line art are not misregistered, since only one
colorant is used. This setting also eliminates blasting, which is an undesirable effect that occurs when excess
amounts of toner, combined with certain types of paper stock, cause objects to spread beyond their defined
boundaries.
For some jobs, we recommend setting Black Text and Graphics to Normal. For example, if a job includes
gradient fills that use black, the Normal setting gives the best result.
If you set Black Overprint to Text or Text/Graphics, Black Text and Graphics must be set to Pure Black On.
Important: Use Black Text and Graphics only when printing composites, not separations.
The following table describes the behavior of Black Text and Graphics with black defined in different color
spaces.
Note: PostScript applications, such as QuarkXPress, may convert elements defined as RGB=0, 0, 0 to four-color
CMYK black before sending the job to the Fiery Server. These elements are not affected by the Black Text and
Graphics option.
For more information, see Fiery Color Reference, which is part of the user documentation set.
Black Overprint
The Black Overprint option specifies whether black text, or black text and vector graphics (where black is defined
as RGB=0, 0, 0, or as CMYK=0%, 0%, 0%, 100%) print over colored backgrounds. If you turn off this option, black
text, or black text and graphics knock out colored backgrounds. Knocking out can create a white edge around
objects, or a "halo," caused by the misalignment of color plates.
The Black Overprint option has the following settings:
•
Text - Black text overprints colored backgrounds, eliminating white gaps and reducing the halo effect from
misregistration of colors. You can select this setting only if the Black Text and Graphics option is set to Pure
Black On.
•
Text/Graphics - Black text and graphics overprint colored backgrounds, eliminating white gaps and the halo
effect from misregistration of colors. You can select this setting only if the Black Text and Graphics option is
set to Pure Black On.
•
Off - Black text and graphics knock out colored backgrounds.
Note: PostScript applications may perform their own black overprint conversions before printing.
Fiery Command WorkStation
Managing color
133
An example of how you might use this setting is a page that contains black text on a light blue background. The
background blue is CMYK=40%, 30%, 0%, 0%. The black text is CMYK=0%, 0%, 0%, 100%.
•
With Black Overprint set to Text or Text/Graphics, the final text or graphic portions of the page are
overprinted, or combined with the underlying color. Black colors generated by applications (for example,
RGB=0, 0, 0 or CMYK=0%, 0%, 0%, 100%) are printed using black only. This means that black text and line art do
not exhibit halftone artifacts (as long as the printer is calibrated correctly). No transition in cyan and magenta
occurs and the quality of the output is improved, because it does not show artifacts near the edges of text.
•
With Black Overprint set to Off, the border of the text or graphic is on an edge that has cyan and magenta on
one side (outside the object) and black on the other side (inside the object). This transition may cause visible
artifacts due to the practical limitations of the printer.
Note: The reproduction of CMYK components is affected by the CMYK/Grayscale Source setting and calibration
when CMYK is not 0%, 0%, 0%, 100%.
Output Profile
The Output Profile print option specifies the output profile used to process a job. Color data in a print job is
converted to the color space of the printer, which is described by the output profile. In addition, the calibration that
is associated with the output profile is applied to the job before printing.
The Fiery Server includes one or more default output profiles, each created for a specific media type. You can also
import your own output profiles to the Fiery Server.
The Use media defined profiles if available setting automatically selects the output profile associated with the
media type used in a print job rather than a specific output profile. If a print job uses media from Paper Catalog, the
output profile specified for the media in Paper Catalog will be used.
CMYK/Grayscale Device Link or RGB Device Link - When you select a specific output profile in combination
with one of these options, the combination specifies a CMYK-to-CMYK or RGB-to-CMYK device link profile.
The CMYK/Grayscale Device Link or RGB Device Link profile setting and the Output Profile setting are used
in combination to activate a device link profile. The device link profile must already be associated with specific
settings for Output Profile and CMYK/Grayscale Device Link or RGB Device Link. In this case, the selected
output profile is not used for color management, since the device link profile is used.
Profiles
Profile Manager in Command WorkStation allows you to manage the ICC profiles that reside on the Fiery Server.
Color Editor (in Profile Manager) allows you to create a custom profile from an existing CMYK profile and use the
AutoGray feature to adjust the gray balance of output profiles.
Profile Manager also provides access to the custom Paper Simulation feature for CMYK source profiles if your Fiery
Server supports this feature.
The Fiery Server uses the following types of profiles for color management:
•
An RGB source profile defines the source color space for RGB (and Lab) colors in a print job. Typical devices
using RGB profiles are monitors, scanners, and digital cameras. An RGB source profile enables the Fiery Server
to convert RGB colors in a print job to the CMYK color space of the copier/printer accurately.
•
A CMYK source profile defines the source color space for CMYK colors in a print job. Typical devices using
CMYK profiles are printing presses and digital printers. A CMYK source profile enables the Fiery Server to
convert CMYK colors in a print job to the CMYK color space of the copier/printer accurately.
Fiery Command WorkStation
Managing color
134
•
An output profile describes the color characteristics of the copier/printer when printing to a specific media type.
An output profile is associated with a calibration that describes the expected color output densities of the copier/
printer. The output profile and its associated calibration are applied to all color data in a print job.
•
A device link profile describes the conversion from a specific source color space to an output color space. With
device link profiles, the complete conversion from the source device to the destination device is defined, and the
Fiery Server does not calculate the conversion.
The Fiery Server supports two kinds of device link profiles: RGB source to CMYK destination and CMYK source
to CMYK destination.
A device link profile must be associated with a source profile setting (CMYK/Grayscale Device Link for a
CMYK-to-CMYK device link profile or RGB/Lab Device Link for an RGB-to-CMYK device link profile) and an
Output Profile setting, otherwise the device link profile cannot be selected for a job.
View profile properties
Profile Manager in Command WorkStation displays information (such as device or paper type) for the profiles on
the Fiery Server.
A green check mark to the left of a profile name indicates that the profile is the default profile. For example, a green
check mark next to the sRGB (PC) profile under RGB Source Profiles means that sRGB (PC) is the default setting for
the RGB/Lab Source option. You can change the default profile in the Color Management window.
A lock icon to the left of the profile name indicates that the profile is factory-installed and cannot be deleted or
edited.
1 In Device Center, click the Resources tab and then click Profiles.
2 In Profile Manager, click the profile to select it. The properties of the selected profile are shown on the right side
of the window.
Compare profile gamuts
If Fiery Color Profiler Suite is installed on your computer, you can use Fiery Profile Inspector to compare the gamuts
of two profiles. Profile Inspector displays the gamuts in three-dimensional models, allowing you to see the colors that
do and do not overlap between the two gamuts. For example, one profile might have a wider range in the blue hues.
1 In Device Center, click the Resources tab, click Profiles and select a profile.
2 While pressing the Ctrl key, select the second profile (both profiles are selected).
3 Right-click either profile and select Compare Profiles.
Profile Inspector opens in a separate window. For more information, click the Help icon in Profile Inspector.
Import or export profiles
Profile Manager in Command WorkStation allows you to import profiles to the Fiery Server to make the profiles
available for printing jobs on the Fiery Server. Use the export function to back up profiles, so that no custom profiles
are lost, for example, when the Fiery Server software is updated.
You can also export a profile to your computer to use it with an ICC-aware application, such as Adobe Photoshop.
Fiery Command WorkStation
Managing color
135
Import profiles
You can import a source profile (RGB or CMYK), an output profile, or a device link profile to the Fiery Server.
Before you begin
Note: On Windows, a profile must have a file name extension of .icc or .icm to be selectable for importing. On Mac
OS, a profile must have a file type of “profile.”
1 In Device Center, click the Resources tab, click Profiles and then click Import.
2 Select a folder in the Location list.
• Manage Custom Locations - Allows you to add or delete folders designated as custom locations. Custom
locations are displayed in the Location list.
• All - Selects all folders in the Location list.
•
OS-installed folders are defined as follows.
Operating
System
Folder Name
Displayed
Path to Folder
Windows
System
WINDOWS\system32\spool\drivers\color
Other
All other paths used by Windows to install profiles
System
/System/Library/ColorSync/Profiles
Computer
/Library/ColorSync/Profiles
User
~/Library/ColorSync/Profiles
Other
All other paths used by Mac OS to install profiles
Mac OS X
Profiles in the selected folder are displayed and can be selected. Subfolders are included when you select an OSinstalled folder. Subfolders are not included when you select a custom location.
3 Select a profile.
4 For a CMYK profile, select a setting for Import profile as.
• CMYK Source and Simulation - To use the profile as a CMYK source profile. Select if you want the Fiery
Server to simulate another printer or press standard.
• Output - To use the profile as an output profile. Select for a custom profile of your copier/printer.
5 Click Import.
6 If the Profile Settings dialog box is displayed, select settings for this profile and click OK.
You set the profile settings when the imported profile is a new profile (not a replacement of a profile already on
the Fiery Server).
Fiery Command WorkStation
Managing color
136
Export profiles
You can export a profile from the Fiery Server as a backup measure or to use the profile with an ICC-aware
application such as Adobe Photoshop.
1 In Device Center, click the Resources tab, and then click Profiles.
2 Select the profile and click Export.
3 Browse to the desired location on your computer and click Choose (Mac OS) or OK (Windows) to save the
profile.
Create or delete profiles
Profile Manager in Command WorkStation allows you to create new output profiles and device link profiles and
delete profiles that are no longer needed.
You must have Fiery Color Profiler Suite installed on your computer to create new profiles.
Create output profiles
If Fiery Color Profiler Suite is installed on your computer, you can use Fiery Printer Profiler to create an output
profile.
Note: You can also create an output profile by editing an existing output profile in Color Editor and saving it as a
new profile.
You can start Fiery Printer Profiler from Profile Manager in Command WorkStation.
1 In Device Center, click the Resources tab, and then click Profiles.
2 Click New and select Output Profile.
Printer Profiler opens in a separate window. For more information about using Printer Profiler to create an output
profile, see the online Help for Printer Profiler.
Note: You can also start Fiery Printer Profiler from Command WorkStation Calibrator, after you create a new
calibration setting.
Create device link profiles
If Fiery Color Profiler Suite is installed on your computer, you can use Fiery Device Linker to create a device link
profile.
You can start Fiery Device Linker from ProfileManager in Command WorkStation.
1 In Device Center, click the Resources tab, and then click Profiles.
2 Click New and select Device Link.
Device Linker opens in a separate window. For more information about using Device Linker to create a device link
profile, see the online Help for Device Linker.
Fiery Command WorkStation
Managing color
137
Delete profiles
You can delete profiles that are no longer needed. Deleting profiles also helps to free up disk space on the Fiery
Server. You cannot delete locked profiles.
1 In Device Center, click the Resources tab, click Profiles, and select the profile.
2 Click Settings, set Label in Driver to Unassigned, and then click OK.
Note: Label in Driver is not available for models of Fiery Server. If this option does not appear, skip this step.
3 Click Delete, and then click Yes to confirm.
Edit profile settings
Profile settings are attributes that determine how the Fiery Server uses the profile. For example, you can assign a
description or media type to a profile. Profile settings do not affect the content of the profile.
1 In Device Center, click the Resources tab, and then click Profiles.
2 Select a profile and click Settings.
3 In the Profile Settings window, set the options as needed and click OK. The selections that are available depend
on the type of profile and the model of Fiery Server.
• Profile Description - A description that identifies the profile. The description cannot be changed if the
profile is locked.
• Label in Driver - A predefined name that the profile is associated with. If the printer driver does not have
Two-Way Communication enabled, you can still select this profile using the predefined name. The label of an
RGB source profile or CMYK source profile cannot be changed if the profile is locked.
• Media Type - One or more media settings that an output profile is associated with. When the Output
Profile setting for a job is set to Use Media Defined Profile, the output profile associated with the media
setting of the job is used.
If Media Type is not shown, use Paper Catalog to configure media-defined profiles. (See Paper Catalog.)
• Calibration - The calibration to associate with an output profile.
• CMYK Source Profile or RGB Source Profile - The source profile setting associated with a device link
profile. A device link profile is selected for a job by a specific combination of source profile and output profile
settings. A CMYK-to-CMYK device link profile has a CMYK Source Profile setting. An RGB-to-CMYK
device link profile has an RGB Source Profile setting .
Note: Edits made to a CMYK source profile do not apply when a device link profile associated with the CMYK
source profile is used.
• Output Profile - The output profile setting associated with a device link profile.
Edit profile content
Command WorkStation provides Color Editor for editing CMYK profiles. Fiery Color Profiler Suite provides Fiery
Profile Editor, which you can access from Command WorkStation to edit output profiles.
In Color Editor, you can edit a CMYK profile (CMYK source or output profile). Use Color Editor to fine-tune the
density curves of a profile.
Fiery Command WorkStation
Managing color
138
In Fiery Profile Editor (part of Fiery Color Profiler Suite), you can edit the color data that define the gamut of an
output profile .
Edit profiles in Color Editor
With Color Editor, you can adjust features such as brightness, CMYK density curves, target densities and gray
balance (for output profiles), and paper simulation (for CMYK source profiles).
Edits made with Color Editor are for printing with the Fiery Server only. They do not affect the profile if the profile is
used in another context.
1 In Device Center, click the Resources tab, and then click Profiles.
2 Select a profile and click Edit.
3 Select Color Editor.
Note: If Fiery Color Profiler Suite is not installed on your computer, you can skip this step. Color Editor will
open automatically.
4 In Color Editor, adjust the density curves. For fine adjustments, work with only one or two colors at a time.
The curves on the graph map the input percentage to the output percentage for each of the four color channels
(C, M, Y, and K). The percentages refer to the size of the CMYK halftone dots.
•
To show or hide the C, M, Y, or K curves, click the "eye" icon for each color.
•
To bring a curve to the front, click its color bar, next to the "eye" icon.
•
To adjust the brightness of the curves that are shown, use the plus and minus buttons.
•
To adjust a curve, drag a point on the curve, click a point and type new numbers in the Input and Output
fields, or click a point and use the arrow keys to move it.
Note: Adjust the curves after you adjust the brightness.
5 For output profiles: Optionally, if your Fiery Server stores the calibration target in the output profile, you can edit
the maximum densities of the calibration target (the D-Max values) for each color (C, M, Y, and K).
If the D-Max values are not shown, then your Fiery Server stores the calibration target separately from the output
profile. In this case, you can view and adjust the D-Max values in Calibrator.
Caution: Even if you can edit the maximum density values, we recommend that you only view them. A
calibration target represents the ideal values for calibration, and the output profile contains these values.
The calibration target should not be changed unnecessarily.
6 For output profiles: Optionally, adjust the gray balance of the output profile by clicking AutoGray.
7 For CMYK source profiles: Optionally, if the Fiery Server supports paper simulation, configure settings for white
point simulation by clicking Paper Simulation.
8 Optionally, print a test page.
9 When you are finished, click Save and enter a description for the new profile.
Important: If you do not enter a new description, the edited profile overwrites the original. If you edit and save a
locked profile, you can only save it as a copy. A locked profile cannot be overwritten.
Fiery Command WorkStation
Managing color
139
Edit profiles in Fiery Profile Editor
If Fiery Color Profiler Suite is installed on your computer, you can use Fiery Profile Editor to edit an output profile.
With Profile Editor, you can adjust global color features such as rendering intent and CMYK density curves, as well
as adjust specific hues, colors, or even a specific data point in the profile gamut.
1 In Device Center, click the Resources tab and then click Profiles.
2 Select an output profile, click Edit, and then select Fiery Profile Editor.
Next steps
For more information about using Fiery Profile Editor to edit a profile, click the Help icon in Profile Editor.
Print a test page
After editing a profile in Color Editor, you can print a test page that shows images with and without your edits.
The test page is either your own sample image or the comparison page provided by the Fiery Server.
Print the comparison page
You can print the comparison page provided by the Fiery Server. The comparison page shows a variety of images and
color patches printed with and without the profile edits.
1 In Device Center, click the Resources tab, and then click Profiles.
2 Select a profile and click Edit. If Fiery Color Profiler Suite is installed on your computer, select Color Editor.
3 In Color Editor, click Test Print.
4 Select Comparison Page, select the desired settings for Paper Size and Input Tray, and click Print.
Print a sample image
You can create a sample image to print as a test page. The sample image is a user-defined CALIB.PS file in the Hold
queue.
1 In a graphics application, create a file to be used as the sample image.
2 Save the sample image as a PostScript or Encapsulated PostScript (EPS) file called CALIB.PS.
3 In Command WorkStation, import the file to the Hold queue of the Fiery Server.
4 In Job Center, double-click the CALIB.PS job and set the job properties for printing the page.
5 In Device Center, click the Resources tab, and then click Profiles.
6 Select a profile and click Edit. If Fiery Color Profiler Suite is installed on your computer, select Color Editor.
7 In Color Editor, click Test Print.
8 Select Sample Image Page and click Print.
Fiery Command WorkStation
Managing color
140
Adjust the gray balance of a profile
The AutoGray feature allows you to adjust the gray balance of output profiles. Gray balance refers to the quality of
neutral gray tones in a profile. In many cases, gray tones may contain a bluish or reddish color cast. AutoGray helps
shift these tones back toward neutral gray.
Before you begin
If you are satisfied with the gray balance of the copier/printer, you do not need to use AutoGray.
To use AutoGray, you need a grayscale strip. If you do not have a grayscale strip, obtain one from the manufacturer
of your copier/printer or from the Tiffen company at www.tiffen.com.
Note: AutoGray is not available if the copier/printer does not have a built-in scanner.
1 In Device Center, click the Resources tab, and click Profiles.
2 Select an output profile and click Edit. If Fiery Color Profiler Suite is installed on your computer, select Color
Editor.
3 In Color Editor, click AutoGray.
4 Select the input tray to use for printing the measurement page and click Print. The Paper Size is automatically
set to LTR/A4.
5 Retrieve the measurement page from the printer.
6 Follow the on-screen directions for placing the grayscale strip and the AutoGray measurement page on the glass
(platen), and click Continue.
7 When the adjustment is complete, click OK.
Color Editor displays the adjusted output profile curve. AutoGray inserts new edit points to modify the gray
balance, in much the same way an expert user would have done manually.
8 To accept the AutoGray adjustment and save the results, click Save.
9 Click Done (Windows) or Close (Mac OS) to close Color Editor.
Calibration (pre-System 10)
Calibrating the Fiery Server ensures consistent and reliable color output. Calibration adjusts for variations in the
color output of the printer, which changes over time and under different printing conditions.
Calibrator versions
Command WorkStation offers two versions of Calibrator, for different versions of Fiery Server software. You can
find the Fiery System version in Command WorkStation, in Device Center on the General Info tab under the
General tab.
•
System 8 or 9 (and any variants): This version of Calibrator is described in this Help.
•
All other Fiery system versions: You can access Help by clicking the Help button in the Calibrator windows.
Calbrator workflow
You can calibrate the Fiery Server using Calibrator in Command WorkStation. Calibration requires you to select a
measurement method, select a calibration set, print a measurement page, measure the page, and apply the
measurement data to the Fiery Server.
Fiery Command WorkStation
Managing color
141
You can calibrate the Fiery Server using different measurement methods. To find out which methods are supported
for your Fiery Server, see Color Printing, which is part of the user documentation set.
If the Fiery Server supports multiple calibrations, you can perform the calibration procedure for each one, using the
appropriate paper type in each case. In this case, the Fiery Server stores different measurement data for each
calibration. However, you may choose to calibrate one time for multiple paper types if the papers are very similar. In
this case, at the end of the calibration procedure, you can apply the same measurement data to selected calibrations
or all calibrations.
Changing a calibration has the potential to affect all jobs for all users, so consider limiting the number of people
authorized to perform calibration. By default, only users with Administrator privileges can access calibration.
Only one user at a time can use Calibrator. If you try to calibrate when another user is using Calibrator, an error
message is displayed.
How calibration is used
Because the color output is affected by the paper type, both calibration and output profiles are typically specific to a
paper type. Every output profile on the Fiery Server is associated with a calibration. The calibration is applied to a job
when the job is printed using the particular output profile that is associated with the calibration.
Note: To see the calibration associated with a particular output profile, check the profile settings. For a calibration
to have an effect, it must be associated with one or more output profiles.
Calibrator modes
Calibrator provides two modes: Standard and Expert. You can perform all essential calibration tasks in Standard
mode. Expert mode offers additional options to print a test page and to view measurement data.
•
Print Pages - Enables you to see the effects of the new calibration in printed output. With the Print Pages
option, you can print Comparison Pages showing the results of the new measurements with any profile
associated with the currently selected calibration set. You can create a custom Comparison Page and save it as a
PostScript or Encapsulated PostScript (EPS) file called CALIB.PS. Next, print the file to the Hold queue of the
Fiery print controller. You can also create a CALIB.PS file by renaming any job in the Hold queue.
•
View Measurements - Enables you to examine the measurement data. With the View Measurements option,
you can view the current set of measurements as a table or graph that shows both the measurements and the
target curves.
When more than one profile uses the same target, an additional menu called Plot Against is displayed in the upperright corner of the dialog box. It lists all output profiles that use that same calibration set. Selecting an output profile
from this menu displays the target curves associated with that profile. If each output profile contains a unique
calibration target, the curves displayed also change when you switch profiles.
Calibrate with ColorCal
ColorCal allows you to calibrate the Fiery Server without the use of a measurement instrument. Instead, ColorCal
uses the scanner of the copier/printer to measure density values.
Before you begin
With ColorCal, you can prepare the scanner for ColorCal before calibrating the Fiery Server, using the Color Control
Patches and grayscale strips included in the customer media pack that comes with your Fiery Server. You also need
the grayscale strip to calibrate the Fiery Server.
Note: A measurement instrument can provide more accurate calibration than ColorCal can. Use a measurement
instrument, such as the ES-1000 spectrophotometer, if one is available.
Fiery Command WorkStation
Managing color
142
Some models of Fiery Server support preparation of the scanner even if the grayscale strip is missing. In this case, the
Fiery Server uses the measurements from the previous calibration or, if the Fiery Server has never been calibrated, a
default set of measurements. However, for best results, use the grayscale strip.
Scanner preparation is optional. We recommend that you prepare the scanner after maintenance or service, or
whenever the copier/printer output has been altered.
For some models of Fiery Server, you must perform additional steps at the copier/printer. In this case, you can print
an instruction page in Calibrator that describes the additional steps.
Print measurement page and prepare scanner
When you print the ColorCal measurement page, you can choose to prepare the scanner as well. You perform
scanner measurement using the grayscale strip, Color Control Patches strip, and ColorCal Scanner Page.
These instructions apply to Calibrator version 1.3. If you have Calibrator version 2.0, help is supplied with the
application.
1 In Device Center, click General, click Tools, and click Calibrate.
2 In Calibrator, under Select Measurement Method, select ColorCal.
3 Under Check Print Settings, select a calibration set, either by name or by the print settings associated with the
calibration set.
Note: If more than one calibration set is listed under Check Print Settings, select the calibration set associated
with the output profile you use most often.
4 Under Generate Measurement Page, click Print.
5 Select appropriate settings for printing the measurement page.
• ColorCal Page - Prints either one of the 256 ColorCal patterns chosen at random or a specific pattern
designed for your copier/printer.
• Single Pattern - Prints the pattern you specify. Enter the pattern number in the Patch Page Number field.
This option is useful if you want to reprint the same pattern you have printed before.
Sorted patches are printed on the page in order of hue and saturation levels. Randomized patches are printed in
random order. Randomized patches can help to compensate for density inconsistencies on different areas of the
page.
6 If you want to perform scanner preparation, select Print scanner calibration page. If you want to skip scanner
preparation, clear Print scanner calibration page.
7 Click Print. Retrieve the ColorCal measurement page and, if printed, the ColorCal Scanner Page. If you did not
print the ColorCal Scanner Page, skip the rest of this procedure and proceed to calibrating the Fiery Server.
8 In Calibrator, under Get Measurements, click Measure.
9 Place the grayscale strip, Color Control Patches strip, and ColorCal Scanner Page in the correct positions on the
glass (platen) as indicated on the ColorCal Scanner Page.
Place the grayscale strip face down on the glass (platen) so that it will be centered along the top edge of the
ColorCal Scanner Page. Then place the Color Scale strip face down on the glass (platen) so it is centered below
the grayscale strip, keeping a distance of 0.25 inch to 0.5 inch between the two strips. Finally, place the ColorCal
Scanner Page face down over the strips.
10 Click Continue to start the scanner measurement.
Fiery Command WorkStation
Managing color
143
11 Click Continue to complete scanner preparation.
Next steps
The next step is to calibrate the Fiery Server.
Calibrate the Fiery server
You perform ColorCal calibration using the grayscale strip and the ColorCal measurement page.
Before you begin
For this procedure, you must have just printed the ColorCal measurement page in Calibrator and, optionally,
prepared the scanner.
1 In Calibrator, under Get Measurements, click Measure.
2 Place the grayscale strip face down on the glass (platen) along the top edge of the glass so that it is centered along
the top edge of the measurement page.
3 Place the ColorCal measurement page face down over the grayscale strip, as indicated on the ColorCal
measurement page. Make sure that the patches on the grayscale strip do not overlap the color patches. Close the
platen glass cover, being careful not to move the grayscale strip and color measurement page.
4 Click Continue to start the ColorCal measurement.
5 Click OK to complete calibration.
6 To apply the measurement data to the Fiery Server, click Apply.
7 To close Calibrator, click Done.
Calibrate with the ES-1000
Using the ES-1000 spectrophotometer, you can measure printed color patches and automatically download the
measurements to the Fiery Server.
1 In Device Center, click General, click Tools, and click Calibrate.
2 In Calibrator, under Select Measurement Method, select the ES-1000.
3 Under Check Print Settings, select a calibration set, either by name or by the print settings associated with the
calibration set.
Note: If more than one calibration set is listed under Check Print Settings, select the calibration set associated
with the output profile you use most often.
4 Under Generate Measurement Page, click Print.
5 Select appropriate options for your measurement instrument and click Print to print the measurement page.
Sorted patches are printed on the page in order of hue and saturation levels. Randomized patches are printed in
random order. Randomized patches can help to compensate for density inconsistencies on different areas of the
page.
6 Under Get Measurements, click Measure and select the options that match the printed measurement page.
7 Click Measure.
Fiery Command WorkStation
Managing color
144
8 Place the ES-1000 in the calibration cradle.
White point calibration is used to calibrate the spectrophotometer and compensate for gradual drifts in the
instrument. Make sure the sample aperture is in full contact with the white tile on the calibration cradle. If you do
not place it correctly in the calibration cradle, the spectrophotometer does not return accurate measurements.
Note: The serial numbers of the ES-1000 and the cradle must match for accurate ES-1000 calibration.
9 Click OK and follow the instructions for measuring the strips (in the Status field of the Measurements dialog
box).
10 For a more accurate measurement, place several sheets of plain white paper beneath the measurement page or
use a backer board if it is available. The extra sheets block underlying colors from being read by the instrument.
11 Orient the measurement page so that strips are horizontal and the scan direction (indicated by the arrows at the
beginning of each strip) is left to right.
12 Hold the ES-1000 with its length perpendicular to the scan direction, and place the tip of the sensor on the white
space at the start of the specified color.
13 Press and hold the ES-1000 button and wait for a beep or wait for the background color in the dialog box to
change from green to white.
Note: To hear a beep with a Windows computer, you must install a sound card and speaker(s). You may have to
turn up the volume on your computer to hear the beep.
14 After you hear a beep or see the dialog box background color change, slide the ES-1000 at a slow but consistent
pace across the strip. (Take about five seconds to slide the length of the strip.)
15 Release the button when all the patches in the strip have been measured and you reach the white space at the end
of the strip.
When a strip is measured successfully, the dialog box background color changes to green, and the cross hair
moves to the next color. If the strip is not measured successfully, the dialog box background color changes to red,
and a message directs you to try again.
16 Repeat for all the strips in the order indicated on the screen.
17 When all the patches have been read successfully, click Accept.
18 To apply the measurement data to the Fiery Server, click Apply.
19 Cick OK to complete the calibration process.
Calibrate with the Eye-One
Using the Eye-One spectrophotometer, you can measure printed color patches and automatically download the
measurements to the Fiery Server.
1 In Device Center, click General, click Tools, and click Calibrate.
2 In Calibrator, under Select Measurement Method, select the Eye-One.
3 Under Check Print Settings, select a calibration set, either by name or by the print settings associated with the
calibration set.
Note: If more than one calibration set is listed under Check Print Settings, select the calibration set associated
with the output profile you use most often.
Fiery Command WorkStation
Managing color
145
4 Under Generate Measurement Page, click Print.
5 Select appropriate options for your measurement instrument and click Print to print the measurement page.
Sorted patches are printed on the page in order of hue and saturation levels. Randomized patches are printed in
random order. Randomized patches can help to compensate for density inconsistencies on different areas of the
page.
6 Under Get Measurements, click Measure and select the options that match the printed measurement page.
7 Click Measure.
8 Place the Eye-One in the calibration cradle.
White point calibration is used to calibrate the spectrophotometer and compensate for gradual drifts in the
instrument. Make sure the sample aperture is in full contact with the white tile on the calibration cradle. If you do
not place it correctly in the calibration cradle, the spectrophotometer does not return accurate measurements.
9 Click OK and follow the instructions for measuring the strips (in the Status field of the Measurements dialog
box).
10 For a more accurate measurement, place several sheets of plain white paper beneath the measurement page or
use a backer board if it is available. The extra sheets block underlying colors from being read by the instrument.
11 Orient the measurement page so that strips are horizontal and the scan direction (indicated by the arrows at the
beginning of each strip) is left to right.
12 Hold the Eye-One with its length perpendicular to the scan direction, and place the tip of the sensor in the white
space at the start of the specified color.
13 Press and hold the Eye-One button and wait for a beep or wait for the background color in the dialog box to
change from green to white.
Note: To hear a beep with a Windows computer, you must install a sound card and speaker(s). You may have to
turn up the volume on your computer to hear the beep.
14 After you hear a beep or see the dialog box background color change, slide the Eye-One at a slow but consistent
pace across the strip. (Take about five seconds to slide the length of the strip.)
15 Release the button when all the patches in the strip have been measured and you reach the white space at the end
of the strip.
When a strip is measured successfully, the dialog box background color changes to green, and the cross hair
moves to the next color. If the strip is not measured successfully, the dialog box background color changes to red,
and a message directs you to try again.
16 Repeat for all the strips in the order indicated on the screen.
17 When all the patches have been read successfully, click Accept.
18 To apply the measurement data to the Fiery Server, click Apply.
19 Cick OK to complete the calibration process.
Apply measurements to multiple calibration sets
If your Fiery Server supports the Apply to All Calibration Sets option, you can copy the measurements from the
calibration you are currently performing to all calibration sets on the Fiery Server or to selected calibration sets.
1 In Device Center, click General, click Tools, and click Calibrate.
Fiery Command WorkStation
Managing color
146
2 In Calibrator, select or clear Apply to All Calibration Sets.
•
Selecting this option affects the calibration data for all calibration sets and therefore the output from all output
profiles will also change. Be sure that this option is appropriate for all output profiles. For best results, each
type of media should have its own calibration data.
•
Clearing this option allows you to apply the current calibration to a subset of the calibration sets on the Fiery
Server. Specify the calibration sets by clicking Customize next to Apply to All Calibration Sets.
Note: If any of the selected calibration sets are not associated with an output profile, you receive a warning but
can choose to apply the measurements to that calibration set anyway.
3 Calibrate the Fiery Server.
Create or delete custom calibration sets
If your Fiery Server supports custom calibration sets, you can create a calibration set for a specific paper type or for
certain printing conditions by editing a copy of an existing calibration set.
Before you begin
For more information about when to create a custom calibration set, see Color Printing, which is part of the user
documentation set.
Create custom calibration sets
To create a custom calibration set, you copy an existing calibration set and edit it.
1 In Calibrator, under Calibration Set, click the list and select Manage.
2 Select a calibration set from the Calibration Set list.
Select the calibration set for the paper that is the most similar to your paper. For example, the calibration set
might be for the same brand of paper but a different weight.
3 Under Calibration Page, type a new description for Recommended Paper, select the setting(s) associated with the
paper, and click Save.
The Recommended Paper description and settings are displayed when you print the measurement page for
calibration, to remind you to load the correct paper.
Note: The settings for your new calibration set are copied from the original calibration set, so you only need to
change the settings that are different.
4 Type a new name for the calibration set and select an output profile to associate it with.
Use a name that describes the paper name, weight, and type plus any other specific printing conditions (for
example, halftone or gloss settings). The name can have a maximum of 70 characters.
A copy of the selected output profile will be created and associated with the new calibration set. The copy has the
name of the calibration set appended to it.
5 Click OK.
The new calibration set is added.
Fiery Command WorkStation
Managing color
147
Delete custom calibration sets
When you delete a custom calibration set, the output profile associated with it is not deleted. The profile is
automatically associated with another calibration set.
1 In Calibrator, under Calibration Set, click the list and select Manage.
2 Select the calibration set, click Delete, and then click OK.
A message indicates that the output profile associated with the deleted calibration set will be associated with a
different calibration set after the deletion.
If you do not need the output profile after deleting the calibration set (for example, because the profile is just a
copy of another output profile that was created when you created the calibration set), you can delete the profile.
3 To close the window, click Cancel.
Important: Clicking Cancel does not undo the deletion. The calibration set is deleted when you click OK.
Restore default measurements
You can restore the factory default measurements to all calibration sets or only certain calibration sets.
1 Do one of the following:
•
•
If you want to restore the default measurements to all calibration sets, select Apply to All Calibration Sets
If you want to restore the default measurements to particular calibration sets, deselect Apply to All
Calibration Sets, click Customize, and select the calibration sets..
2 Click Restore Device.
3 Click OK to confirm.
Calibration (System 10 and later)
The output of a printer changes over time and under different printing conditions. Calibration helps to ensure
consistent and reliable output.
Calibration measures current output densities and then adjusts print jobs to achieve the desired output densities (the
calibration target or calibration goal). The calibration applied to a job is associated with the particular output profile
that is used for the job.
Changing calibration may affect all jobs for all users, so try to limit the number of people authorized to perform
calibration.
Only one user at a time can use Calibrator. If you try to calibrate when another user is using Calibrator, an error
message appears.
Command WorkStation offers two versions of Calibrator, for different versions of Fiery Server software. You can
find the Fiery System version in Command WorkStation, in Device Center on the General Info tab under the
General tab. For System 10 and later, you can access this Help by clicking the Help button in the Calibrator
windows
Fiery Command WorkStation
Managing color
148
Calibration for black-and-white printing
Some of the calibration features that are related to color are not available for black-and-white printing. With a single
colorant, calibration can be simpler.
For black-and-white printing:
•
Output profiles and calibration settings are not selectable.
•
You cannot view calibration measurements (curves) or print a test page.
•
You cannot export or import measurement data. You cannot import the calibration target.
•
Only the EFI spectrophotometer is supported as a measurement method, with a single patch layout. ColorCal is
not supported.
Calibration workflow
When you calibrate a Fiery Server, you perform the following tasks.
•
Print a calibration page, which contains patches of various colors (or shades of gray, for black-and-white
printers) in a specific layout. You use this page to measure the current output of the printer.
The output of the printer changes with time and usage. For the most current data, always measure a newly
printed calibration page.
•
Measure the color values of the patches on the calibration page using a spectrophotometer or ColorCal.
Note: For black-and-white printers, ColorCal is not supported as a measurement method.
•
Apply the measurements.
The measurement data is saved with the specific calibration setting. When you print a job with the calibration
setting, the measurement data is used to calculate the calibration adjustment that is needed to produce the
desired output (the calibration target).
Start Calibrator
How you start Calibrator depends on what you want to do.
1 To calibrate for any calibration setting on the Fiery Server, do one of the following:
•
In Job Center, click the Calibrate icon in the toolbar.
•
In Device Center, click the General tab, click Tools, and then click Calibrate.
2 To calibrate for the calibration setting used in a particular job, select the job in Job Center and then select
Actions > Calibrate.
If you use this method, calibration updates only the calibration setting that is used to print this job.
Fiery Command WorkStation
Managing color
149
Print a calibration page
When you print a calibration page, first specify the calibration setting (color printers), paper source, and
measurement method.
•
For color printers, if the calibration setting that you want is not selectable, it is probably because you started
calibration for a selected job. When you start calibration for a specific job, only the calibration setting that is used
to print the job is shown.
The recommended paper and the date and time of the most recent calibration measurements associated with the
selected calibration setting are displayed. If no date and time are given, the Fiery Server has not been calibrated
(for this calibration setting).
•
Be sure the paper source contains paper that is appropriate for the calibration setting. If a warning appears under
the Paper Source setting, it might be because the paper source does not match the calibration setting. You can
either select a different calibration setting or a different paper source.
1 Set the following options:
•
For color printers. select a calibration setting in the Calibrate for list.
•
Click the desired paper source in the Paper source list.
•
Click a method in the Measurement method list.
2 Click Continue to print the calibration page and proceed to measurement
Using the spectrophotometer to measure patches
You use the spectrophotometer to manually measure color patches.
Using the spectrophotometer consists of these tasks:
•
Calibrate the spectrophotometer.
•
Measure the calibration page using the spectrophotometer.
•
View and save the measurements.
Calibrator supports several types of spectrophotometer, including:
•
EFI ES-1000
•
EFI ES-2000
•
X-Rite i1Pro
•
X-Rite i1Pro2
Other types of measurement instruments may be supported by the printer connected to the Fiery Server.
When the EFI ES-2000 or X-Rite i1Pro2 is used in ES-1000 compatibility mode, its indicator lights may not operate.
On-screen messages indicate the state of the spectrophotometer.
Fiery Command WorkStation
Managing color
150
Calibrate the spectrophotometer
Calibrate the spectrophotometer to prepare it for measuring the calibration page.
Before you begin
Make sure that both the white tile on the cradle and the instrument aperture are clean. If the white tile has a cover,
make sure that the cover is open.
White point calibration is used to compensate for gradual drifts in the spectrophotometer. The spectrophotometer
must be placed in its cradle, and the sample aperture must be in full contact with the white tile on the cradle. If you
do not place it correctly in the cradle, the spectrophotometer does not return accurate measurements.
The serial numbers of the spectrophotometer and the cradle must match for accurate calibration.
1 After printing the calibration page, place the spectrophotometer in its cradle.
2 Click Continue or press the button on the spectrophotometer.
Next steps
If the calibration is successful, you can proceed to measure the calibration page.
Measure the calibration page
You use the spectrophotometer to measure color patches by scanning each strip of patches in order.
When a strip is scanned successfully, the display indicator is green, and the arrow in the display moves to the next
strip. If the strip is not scanned successfully, the display indicator is red, and a message directs you to try again.
1 For more accurate measurement, place several sheets of plain white paper beneath the calibration page or use a
backup board if it is available.
2 Orient the calibration page so that strips are horizontal and the scan direction (indicated by the arrow at the
beginning of the strip shown in the display or on the calibration page) is left to right.
3 Hold the spectrophotometer with its length perpendicular to the scan direction, and place the tip of the sample
aperture on the white space at the start of the specified strip.
4 Press and hold the spectrophotometer button and wait for a signal (an indication on the display or a sound).
5 After you see or hear the signal, slide the spectrophotometer at a slow but consistent pace across the strip.
6 Take about five seconds to scan the length of the strip.
7 Release the button when all the patches in the strip have been scanned and you reach the white space at the end
of the strip.
8 Repeat for all the strips in the order indicated on the display.
For black-and-white printers, there is a single strip.
9 When all the strips have been scanned successfully, click Continue to view the measurement results.
Using ColorCal to measure patches
ColorCal allows you to calibrate the Fiery Server without a measurement instrument. Instead, ColorCal uses the
scanner of the printer to measure density values.
For black-and-white printers, ColorCal is not supported as a measurement method.
Fiery Command WorkStation
Managing color
151
Note: A measurement instrument can provide more accurate calibration than ColorCal can. Use a measurement
instrument, such as a spectrophotometer, if one is available.
ColorCal measurement consists of these tasks:
•
Prepare the scanner for ColorCal.
•
Measure the calibration page using the scanner.
•
View and save the measurements.
Prepare the scanner
When you prepare the scanner for ColorCal, you use the scanner to measure patches on a color control patches
strip, a gray scale strip, and the ColorCal Scanner page that you printed. The color control patches and gray scale
strips are included in the customer media pack that came with your Fiery Server.
Scanner preparation is optional, but we recommend that you prepare the scanner after maintenance or service, or
whenever the printer output has been altered.
•
Scanner preparation is enabled for ColorCal calibration by default. You can disable scanner preparation for
ColorCal calibration by clearing the Prepare scanner for ColorCal calibration checkbox in Preferences.
•
When you perform ColorCal calibration, you can skip scanner preparation and go directly to measurement by
clicking Skip.
Note: Some types of Fiery Server support the preparation of the scanner even if the gray scale strip is missing. In this
case, the Fiery Server uses the measurements from the previous scanner preparation or, if this is the first ColorCal
calibration, a default set of measurements. However, for best results, prepare the scanner using a gray scale strip.
1 Place the gray scale strip, color control patches strip, and ColorCal Scanner page in the correct positions on the
glass (platen) as indicated in the instructions displayed on the screen.
a) Place the gray scale strip face down on the glass (platen) so that it will be centered along the top edge of the
ColorCal Scanner page.
b) Place the color control patches strip face down on the glass (platen) so it is centered below the gray scale strip,
keeping a distance of 0.25 inch to 0.5 inch (0.635 cm to 1.27 cm) between the two strips.
c) Finally, place the ColorCal Scanner page face down over the strips.
2 Click Continue to start scanner preparation.
3 Click OK to proceed to measure the calibration page.
Measure the ColorCal calibration page
When you measure color patches in ColorCal, use the gray scale strip along with the ColorCal calibration page that
you printed. The gray scale strip is included in the customer media pack that came with your Fiery Server.
Measure the ColorCal calibration page after you prepare the scanner, unless you skipped scanner preparation.
1 If you have just prepared the scanner, remove the ColorCal Scanner page and the color control patches strip.
2 Place the gray scale strip face down on the glass (platen). Place the strip along the top edge of the glass (platen)
and center it along the top edge of the calibration page.
Fiery Command WorkStation
Managing color
152
3 Place the ColorCal Calibration page face down over the gray scale strip.
Make sure that the patches on the gray scale strip do not overlap the color patches on the ColorCal Calibration
page.
4 Close the platen glass cover, being careful not to move the gray scale strip and ColorCal Calibration page.
5 Click Continue to start the ColorCal measurement.
6 When the measurement is complete, click OK to view the measurement results.
Import measurements from an alternate measurement instrument
For color printers, you can use your own measurement data from an alternate measurement instrument, record your
readings in a text file, and then import the data into Calibrator. Measurement data must be in Simple ASCII File
Format (SAIFF).
The file name extension must be .cm0 or cm1.
1 In the Calibrator main window, select Load measurements from file from the Measurement method list.
2 Browse to the location of the file and click Open.
File format for importing measurement data
A specific file format is used to specify the Status T density measurements of a patch page for importing CMYK data
into Calibrator. The format has a number of requirements.
•
The file format is ASCII.
•
The first line must be #!EFI 3.
•
In between the first line and the data, there must be the line type: 1DST.
•
For the data, there must be five numbers per line, separated by one or more spaces, in this order: Percentage of
toner/ink, Cyan measurement, Magenta measurement, Yellow measurement, Black measurement.
•
The percentage is expressed as a decimal number (such as 0.5 or 0,5 for 50%).
•
A measurement must be between -0.1 to 3.0 (inclusive)
•
The first line of data must contain the measurements for the 0% sample, the last line must contain the
measurements for the 100% sample, and the percentages of the lines in between must increase from lowest to
highest.
•
No more than 256 lines of data are allowed.
•
Comment lines must start with a pound sign (#) followed by a space. A comment must be on a line by itself.
The measurement data is treated as absolute and is adjusted to become paper-relative by subtracting the density
values of the first line from the remaining patches.
Example:
#!EFI 3
# EFI ColorWise 2.0 Data
type: 1DST
# percent Cyan Magenta Yellow Black
Fiery Command WorkStation
Managing color
153
0.000 0.0300 0.0400 0.0200 0.0400
0.003 0.0600 0.0700 0.0800 0.0700
0.011 0.1000 0.1000 0.1000 0.1000
(…more data…)
0.980 1.6700 1.3400 0.8900 1.6700
1.000 1.7200 1.4300 0.9300 1.7500
View measurement results
After you measure a calibration page or import measurements, the measurement results are ready to be applied.
Applying (saving) the measurement data overwrites the existing data. For color data, you can view the measurement
data in a graph to check the data before applying it.
Measurement results are shown as a set of density curves for C, M, Y, and K. For comparison, the calibration target
data is also shown as a set of thicker density curves in the same graph, and the maximum density values are
compared numerically.
1 After you have successfully measured the calibration page or imported measurements from a file, click View
Measurements.
2 To hide or show curves, click the
icon next to the appropriate label:
• Measured - Hides or shows the measured density curves.
• Target - Hides or shows the target density curves.
• Cyan, Magenta, Yellow, or Black - Hides or shows the measured and target density curves for the specific
colorant.
Visual difference
For color measurements, the visual difference percentage is a convenient way to evaluate the calibration accuracy.
Measurement data is displayed in paper relative density units (Status T). The Fiery Server calculates the visual
difference percentage using the Murray-Davies formula, which takes into account the exponential nature of density
measurements.
If the measured maximum density is less than the target maximum density, it means that the printer is currently
performing lower than expected using this calibration setting. A printed output at 100% of this colorant does not
result in the maximum density that this type of printer is expected to print. This situation is acceptable in many
proofing situations, because simulated CMYK color spaces typically do not require the maximum density that the
printer is capable of.
If the measured maximum density is more than the target maximum density, it means that the printer is currently
performing higher than expected using this calibration setting. To meet the calibration target, the Fiery Server does
not need to specify 100% of the colorant. However, the full gamut of the printer is not being used.
An application such as Adobe Photoshop uses units of percentage from 0% (paper white) to 100% (maximum
density). Assuming the output profile used in Adobe Photoshop matches the calibrated state of the Fiery Server, a
visual difference of -5% for cyan means that the printer cannot produce the cyan color values specified in Adobe
Photoshop between 95% and 100%. A visual difference of +5% for cyan means that the printer can produce all the
cyan color values specified in Adobe Photoshop, and could produce up to 5% denser cyan values as well.
Fiery Command WorkStation
Managing color
154
Print a test page
For color printers, you can print a test page that shows a side-by-side comparison of an image that was printed using
a particular calibration setting and the same image that was printed using the default calibration setting.
1 In Command Workstation Device Center, click the General tab, click Tools, and then click Manage under
Calibrate.
2 Select the calibration setting and click View Measurements.
3 Click Test Print.
Test page
For color printers, the test page lets you compare the current calibration data with the default calibration data for the
Fiery Server. The default calibration data is either the factory default data (for factory-supplied calibration settings)
or the initial measurement data (for custom calibration settings).
The test page contains color bars and images printed with the calibration data you are evaluating. There are two
versions of each image. The upper version shows the image printed with the default calibration data and the lower
version shows the image printed with the calibration data you are evaluating.
The color bars show a gradation from highlight to shadow for each colorant. The gradations should be smooth,
without sudden shifts in density, with the exception of the 100% K patch, which can appear darker as a result of the
black processing in color management.
If the test page does not appear satisfactory, it might be because the output profile associated with the calibration
setting is not appropriate for the paper and print settings.
Export measurement data
For color printers, you can export the measurement data for a particular calibration setting to a .cm0 file.
1 In Command WorkStation Device Center, click the General tab, click Tools, and then click Manage under
Calibrate.
2 Select the calibration setting and click View Measurements.
3 Click Export Measurements.
4 Browse to the file location, change the file name if desired, and click Save.
Reset measurement data
You can reset the measurement data for a particular calibration setting to the default data (either the factory default
data or, for a custom calibration setting, the initial measurement data). This option is not available if the current
measurement data is already the default data.
Reset measurement data for color printers
For color printers, there may be one or more calibration settings.
1 In Command Workstation Device Center, click the General tab, click Tools, and then click Manage under
Calibrate.
2 Select the calibration setting and click View Measurements.
Fiery Command WorkStation
Managing color
155
3 Click Reset to Default Measurements.
4 Click Yes to confirm.
Reset measurement data for black-and-white printers
For black-and-white printers, there is a single calibration setting.
1 In Command Workstation Device Center, click the General tab, click Tools, and then click Calibrate.
2 Click Reset to Default Measurements.
3 Click Yes to confirm.
Calibrator preferences
The settings in the Preferences window affect various aspects of the calibration procedure. You can set the default
calibration method and patch layout, the calibration time limit (expiration), and the default profiling method and
patch layout.
Note: You must have Administrator privileges to change preferences.
Calibration method and patch layout
For color printers, you can set the default measurement method and patch layout. The patch layouts that are
available for printing the calibration page vary by patch order and number of patches.
A greater number of patches yields more measurement data, which may produce better results. However, more
patches take longer to measure.
•
Sorted patches are printed on the page in the order of their hue and saturation levels.
•
Random , Randomized, or Unsorted patches are printed on the page in random order, to help compensate for
density inconsistencies on different areas of the page.
•
If the Fixed Pattern patch layout is available for ColorCal on your Fiery Server, it prints the color patches in a
randomized pattern that you can specify by number. This layout is useful if you want to reprint the same pattern
that you have printed before.
Scanner preparation for ColorCal
If you select ColorCal as the default calibration method, you can require scanner preparation by default before
calibrating the Fiery Server.
We recommend that you prepare the scanner after maintenance or service, or whenever the printer output has been
altered. If you do not select the Prepare scanner for ColorCal calibration option in Preferences, scanner
preparation is skipped.
Note: Scanner preparation affects ColorCal only. It does not prepare the printer for other types of scanning.
Fiery Command WorkStation
Managing color
156
Calibration status (expiration)
If you set a time limit for a calibration, an outdated calibration results in status messages in Command WorkStation
and can cause a job to be suspended.
Command WorkStation displays a warning (yellow) for the job in the Job Center when the calibration will be
outdated within 30 minutes, and an error (red) when the calibration is outdated.
If the calibration of a job is outdated, the Fiery Server can suspend the job when you try to print it. The suspended
job is not printed but remains in the Printing queue in a suspended state.
The calibration status is checked just before the job is sent to print. If the calibration becomes outdated while a job is
printing, the job will not be suspended. We recommend that you calibrate before printing a long job to minimize the
possibility of the calibration becoming outdated while the job is printing.
If you double-click the suspended job, you can do one of the following:
•
Calibrate the Fiery Server for the job's calibration setting(s). After you update the calibration measurements,
select the suspended job and print it.
•
Continue printing the job using the outdated measurement data. Select this option if output consistency is not
important for this job.
Types of jobs affected by calibration limit
The Fiery Server can determine if the calibration is outdated for most jobs, including:
•
Jobs submitted from an application using the Fiery PostScript printer driver or Fiery VUE.
•
Imported PDF and TIFF jobs.
•
Jobs that have been processed (including processed VPS and VIPP jobs).
The Fiery Server cannot determine if the calibration is outdated and therefore will not suspend the following types of
jobs:
•
PCL and PJL jobs.
•
Jobs submitted from an application without using the Fiery PostScript printer driver or Fiery VUE. This includes
VPS and VIPP jobs that have not been processed.
•
Jobs submitted through the Direct connection. These type of jobs cannot be suspended in any case.
In addition, the Fiery Server does not check the calibration of jobs that were printed using the Force Print command.
The Force Print command can be used on jobs that were suspended because of a job mismatch (the paper or
finishing required for the job was not available). These types of jobs, because they are being forced to print, are not
checked for calibration.
Set calibration time limit and job suspension
You can set a calibration time limit and set whether Command Workstation suspends the job if calibration has
expired.
•
In the Calibration Preferences dialog box, do any of the following:
•
To set an expiration time, select Set time limit and display status in Job Center and specify a time
interval (1-23 hours or 1-200 days).
•
To enable job suspension, select Suspend printing when calibration expires.
Fiery Command WorkStation
Managing color
157
Printer Profiler measurement method and patch layout
If the Fiery Server supports color printing and Fiery Color Profiler Suite is installed on your computer, you have the
option to create a custom output profile after you create a custom calibration setting. You can set the default
measurement method and patch layout for Printer Profiler.
The list of measurement methods and the list of available patch layouts are provided by Fiery Color Profiler Suite.
ColorCal is not available as a measurement method for profiling. It does not provide enough accuracy.
Calibration settings
If your Fiery Server supports color printing, you can access one or more calibration settings. Typically, calibration
settings and output profiles are appropriate for specific paper and printing conditions. A calibration setting can be
associated with more than one output profile.
To find out which calibration setting is associated with a particular output profile, check the profile settings in
Command WorkStation.
View job properties of a calibration setting
You can view the job properties associated with a calibration setting. The calibration setting is appropriate for
printing jobs that have the same job properties. These job properties are used to print the calibration page.
The Job Properties window displays all the print settings associated with the calibration setting, whether related to
calibration or not. The settings are specified when the calibration setting is created. You cannot modify the settings
of an existing calibration setting.
Many print settings have no effect on calibration. However, print settings that affect image quality (such as the
halftone screen or resolution) do affect calibration.
Settings in the Color tab of the Job Properties window are ignored when printing the calibration page.
1 In Command Workstation Device Center, click the General tab, click Tools, and then click Manage under
Calibrate.
2 Click the calibration setting to select it.
3 Click View Properties to view the calibration setting’s Job Properties.
View measurement data of a calibration setting
Measurement data is saved when you calibrate for a specific calibration setting. The measurement data can be
displayed on a graph with the calibration target data, so that you can see how closely the measured printer output
matches the calibration target.
1 In Command Workstation Device Center, click the General tab, click Tools, and then click Manage under
Calibrate.
2 Click the calibration setting to select it.
3 Click View Measurements.
Fiery Command WorkStation
Managing color
158
Create a custom calibration setting
When you create a custom calibration setting, the spectrophotometer is automatically selected as the measurement
method. ColorCal is not available as a method because it does not use a colorimetric instrument.
You must have Administrator privileges to create a custom calibration setting.
After you create a new calibration setting, you associate it with an output profile. Depending on your paper, a new
calibration setting may not give satisfactory results when used with an existing output profile. If it does not, we
recommend that you create a new, custom output profile based on your paper.
•
If you select an existing profile, select the profile for the paper that is the most similar to your paper. A copy of
this profile with the same name as the calibration setting is created, and the existing calibration target (goal) of
the profile is changed to a new target calculated using the calibration measurements. The new calibration setting
is associated with this profile.
•
If you create a new, custom output profile, a profiling measurement page is printed. You measure the page using
Printer Profiler in Fiery Color Profiler Suite, and the resulting profile is imported to the Fiery Server and
associated with your new calibration setting.
1 In Command WorkStation Device Center, click the General tab, click Tools, and then click Manage under
Calibrate.
2 Click Create New.
3 Select the calibration setting that best matches your paper or select Server default, and click OK.
4 Type a new name for the calibration setting.
5 (Optional) For Recommended paper, type the name of your paper.
6 (Optional) For Paper reorder number, type the product ID number for your paper.
This information can usually be found on the paper packaging. To find out more about a recommended paper,
perform an Internet search on the paper reorder number.
7 (Optional) Type information in the Comment field.
8 Check the list of properties (print settings) related to calibration.
9 If you want to change one or more print settings, click Properties, make the changes, and then click OK.
Do not select any settings (such as finishing options) that will make your calibration page unmeasurable.
10 Click Continue.
11 Select the Paper Source for printing the calibration page and click Continue.
12 Follow the on-screen instructions to measure the calibration page.
13 To print a test page, click View Measurements, and then click Test Print.
You can print a test page to help you decide whether to associate the calibration setting with an existing output
profile or create a new output profile.
14 Do one of the following to associate the new calibration setting with an output profile:
•
Select an output profile from the list of profiles that reside on the Fiery Server.
•
If Fiery Color Profiler Suite is installed on your computer, click Create New Profile to create a new, custom
output profile using Fiery Color Profiler Suite.
Fiery Command WorkStation
Managing color
159
Edit the calibration target
The maximum densities of the calibration target (D-Max values) that is associated with a specific calibration setting
are editable when you create the calibration setting. For each colorant (C, M, Y, and K), you can type a new value, or
you can import a calibration target from a file.
The edited target data replaces the target data currently associated with this calibration setting when you apply the
current measurement data.
Import the target data from a file if you have an existing profile and calibration target from another Fiery Server that
you want to use on this Fiery Server. For best results, however, use profiles and calibration data that have been
created specifically for this Fiery Server and its printer.
Even though you can edit the maximum density values, we recommend that you do so with caution. A calibration
target represents the ideal values for calibration and should not be changed unnecessarily.
1 After you have successfully measured the calibration page for the new calibration setting, click View
Measurements.
2 Do one of the following:
•
Type new values for the D-Max values under Target.
•
Click Import Target, browse to the file location, select the file, and click Open.
3 Continue creating the calibration setting.
Edit a calibration setting
You can edit the basic information of a custom calibration setting. You cannot edit a factory-supplied calibration
setting.
Job properties (print settings) cannot be edited since any measurement data saved with the calibration setting would
become invalid. To edit the job properties of a calibration setting, create a new calibration setting based on the
existing one.
You must have Administrator privileges to edit a custom calibration setting.
1 In Command WorkStation Device Center, click the General tab, click Tools, and then click Manage under
Calibrate.
2 Select the calibration setting in the list and click Edit.
3 Specify the following settings:
• Name - Type a name that describes the paper name, weight, and type plus any other specific printing
conditions (for example, halftone or gloss settings). The name can have a maximum of 70 characters.
• Recommended paper - Type the name of your paper.
• Paper reorder number - Type the product ID number for your paper. This information can usually be found
on the paper packaging.
• Comment - (Optional) Type additional descriptive information. This information appears in the list of
calibration settings available on the Fiery Server.
Fiery Command WorkStation
Managing color
160
Delete a custom calibration setting
You can delete a custom calibration setting if it is not associated with the default output profile. You cannot delete a
factory-supplied calibration setting.
You must have Administrator privileges to delete a custom calibration setting.
1 In Command Workstation Device Center, click the General tab, click Tools, and then click Manage under
Calibrate.
2 Select the calibration setting in the list and click Delete.
Customize Image Enhance settings
The default settings for the Apply Image Enhancement print option automatically optimize the exposure, color,
shadows, highlights, and sharpness of each specified image in a job. If the default settings do not provide satisfactory
results, you can customize the Apply Image Enhancement settings for properties such as brightness, contrast, and
red-eye correction.
The Apply Image Enhancement print option, when selected for a job, applies photo finishing enhancement to
color images on specified pages or sheets of a job when it is printed. This option affects only photographic images,
not graphics such as logos or charts.
The Apply Image Enhancement print option is located in the Image tab of the printer drivers and Job Properties.
For more information about this print option, see Printing, which is part of the user documentation set.
1 In Device Center, click the Workflows tab and click Image Enhance.
2 Click Edit.
3 Click Custom Settings, modify the settings, and then click OK.
• Exposure - Enables the Dynamic Correction, Contrast, and Brightness controls.
If Dynamic Correction is selected, the Fiery Server analyzes each image and automatically applies the correct
contrast and brightness, using separate values for contrast and brightness. Dynamic correction attempts to fill
the full dark to light range.
You can also specify contrast and brightness adjustments manually. If Dynamic Correction is selected, any
manual adjustments that you make to the Contrast and Brightness controls are applied in addition to
automatic contrast and brightness adjustments. If Dynamic Correction is not selected, Contrast and
Brightness manual adjustments are applied to the original image.
• Color - Enables the Cast Correction, Tone, and Saturation controls.
If Cast Correction is selected, the Fiery Server analyzes each image and automatically corrects the color
balance of the image.
You can also specify tone and saturation adjustments manually. If Cast Correction is selected, manual
adjustments that you make are applied in addition to the Cast Correction automatic adjustments. Color
balance adjustments are applied, and then any Tone and Saturation adjustments are applied. If Cast
Correction is not selected, Tone and Saturation manual adjustments are applied to the original image.
• Shadows & Highlights - Enables the Auto Correction, Shadows, and Highlights controls.
If Auto Correction is selected, the Fiery Server analyzes each image and attempts to correct for shadows that
are too dark and highlights that are too light. You can specify Shadows and Highlights enhancements
manually if you clear the Auto Correction option first.
Fiery Command WorkStation
Managing color
• Sharpness - Enables the Skin Sharpness and Non-skin Sharpness
161
controls.
The Skin Sharpness control affects flesh tones in an image. The Non-skin Sharpness control affects the
other colors in the image. The range for each control is from -100 (softening) to 100 (sharpening).
• Red-Eye Correction - Red-eye is the condition in which a light source, usually a flash built into a camera,
reflects from the retina in the subject's eye, causing a red pupil in the photo.
If Red-Eye Correction is selected, the Fiery Server analyzes the image and attempts to identify and correct
the red-eye condition. You can adjust the size of the correction area using the Region control, where 100
corresponds to just the area of the red pupil.
Image Enhance Visual Editor
Image Enhance Visual Editor (IEVE) is an image enhancing application that provides a visual workspace for
adjusting individual images in PDF or PostScript jobs submitted to the Fiery Server (including jobs submitted
through Fiery JDF workflows).
Adjustments made in IEVE affect the job on the Fiery Server and are not applied to the original source document.
With IEVE, you can:
•
Apply enhancements to one or more images on a page or multiple pages.
•
See the effects of settings on images as they are applied and fine-tune images before printing.
•
Save sets of settings as presets, which you can later apply to other jobs.
Limitations
•
Edit a job in IEVE on one client computer at a time. Editing on multiple client computers can give unexpected
results.
•
If you edit and save a job in IEVE and then open it in an earlier version of IEVE, some edits may not appear or
may be removed.
•
IEVE is limited to opening files 100 pages or less.
•
IEVE is limited to extracting 50 images from a single page.
•
If the edges of an image are not at right angles to the other edges of that image (for example, like the edges of a
square or rectangle) and the edges of the page, the image cannot be selected for editing. This includes images
rotated at non-right angles from the base of the page and images that are not square or rectangular.
When to use IEVE or the Image Enhance print option
Use Image Enhance Visual Editor (IEVE) to make specific adjustments that require fine-tuning and visual
inspection before printing; use the Image Enhance print option to make simple, quick adjustments that do not
require visual inspection before printing.
Although IEVE and Image Enhance are independent of each other, you should not use IEVE and Image Enhance
to adjust images in a job at the same time. Using both at the same time applies settings from both, which may have
unexpected effects on the appearance and quality of images.
Fiery Command WorkStation
Managing color
162
Opening large jobs
IEVE is limited to opening files 2GB or less. In some cases, a large job may not open or display correctly.
This might happen for the following reasons:
•
IEVE is installed on a Fiery Server that also has a FACI kit installed. You may need to increase the hard disk
space available on the Fiery Server.
•
If memory or disk space is limited, IEVE may be unable to correctly open and render some large files even
though they are less than 2GB.
Presets
You can apply presets to one or more pages or to one or more images on a page or multiple pages.
These predefined presets are available:
•
Automatic - Enables Auto for Levels, Highlights & Shadows, and Color Balance, and sets Definition,
Saturation, Fleshtone Saturation, Sharpness, and Fleshtone Sharpness to optimal levels.
•
No Correction - Sets all controls to their original, unmodified settings and returns images to their original state.
For PDF files, all adjustments to the selected images are removed. For PostScript files, all adjustments to the
selected images made since the last time you saved the file are removed.
You can also create custom presets by saving a set of settings as a preset.
Custom presets can be deleted, but you cannot delete the Automatic and No Correction presets. If you delete a
custom preset for a job that is open, IEVE applies the No Correction preset. Deleting a preset does not affect the
settings of images that you already applied the preset to.
Adjusting an image
You can adjust images using the features in the Preview tab or the Split tab in the Adjustments pane.
You can either:
•
Apply a preset to the image.
•
Edit the Tone, Color, Sharpness, and Red-Eye Correction settings as you want.
Note: Some job properties that do not affect the appearance of images, such as finishing options, might not be
applied to the proof print.
Saving edits to a job
Saving edits has different results for PDF and PostScript jobs.
•
If you edit and save a PDF job, your adjustments are preserved in the saved job. If you close IEVE and
subsequently open the same PDF job, the controls are set as you saved them. You can manually fine-tune the
settings or undo any changes that did not have the desired effect.
•
If you edit and save a PostScript job, the edits are incorporated into the job and can no longer be undone. If you
close IEVE and subsequently open the same job in IEVE, the images appear as edited but all controls are at their
default settings.
Fiery Command WorkStation
Managing color
163
Start Image Enhance Visual Editor
You open Image Enhance Visual Editor (IEVE) from jobs in Command WorkStation.
•
In the Hold queue, right-click the job and then select Image Enhance Visual Editor.
Use presets
You can create and apply presets. You can also delete custom presets, but you cannot delete the Automatic and No
Correction presets. Deleting a preset does not affect settings of images that already have the preset applied.
Create a preset
You can create a preset using existing settings or create your own settings.
1 Either select an image that already has the settings you want to save or make the desired adjustments to the
selected image.
2 In the Preset list, choose Save As.
3 Type a name for the preset and click OK.
Delete a preset
The preset is deleted from the Preset list, and the No Correction preset is applied to the current image.
1 In the Preset list, choose the preset to delete.
2 Click Delete and click Yes to confirm.
Note: The preset is deleted and the No Corrections preset is applied to the current image.
Apply a preset to an image
You can apply a preset to an image or multiple images.
1 Select the image.
2 In the Preset list, select a preset.
Apply a preset to one or more pages
You can apply a preset to one or more pages.
1 In the Preset list, click the preset.
2 Click Apply to next to the Preset list.
3 Select Pages and enter a page range or select All Pages.
Fiery Command WorkStation
Managing color
164
Reset an image
Applying the No Correction preset resets images to their original state. For PDF files, all adjustments to the
selected images are removed. For PostScript files, all adjustments to the selected images made since the last time you
saved the file are removed.
1 Select the image.
2 Do one of the following:
•
Under Adjustments, click Reset.
•
In the Presets list, choose No Correction.
Open a large job
In some cases, a large job may not open or display correctly if Image Enhance Visual Editor (IEVE) is installed on
the Fiery Server that also has a FACI kit installed. Increasing the hard disk space available on the Fiery Server may
correct this problem.
1 Close IEVE and Command WorkStation.
2 Create a folder for the temporary files on the E: drive. Name the folder Temp.
3 On the Windows Start menu, click Control Panel.
4 In Control Panel, double-click System.
5 In the System Properties dialog box, click the Advanced tab. Click Environment Variables.
6 In the Environment Variables dialog box, at the top, select the TEMP variable. Click Edit.
7 In the Edit User Variable dialog box, enter the path to the Temp folder you created in step 2. Click OK.
8 Repeat steps 6-7 for the TMP variable. Use the same path as in step 7.
Note: The next time you open a large job, IEVE will use this temporary folder and the job should render correctly.
Adjust tone
Tone settings affect the tone levels (contrast and brightness) as well as the highlights and shadows of an image. If
details in highlight or shadow areas are hard to see because of exposure or lighting problems, you can use
Highlights and Shadows settings to make them more visible.
Adjust tone automatically
You can apply the Automatic preset to adjust tone automatically.
•
Click Automatic in the Presets menu.
Fiery Command WorkStation
Managing color
165
Adjust tone manually
You can adjust tone characteristics individually. For the Highlights and Shadows settings, you can enter a value
from 0 to 100 and for all other settings, you can enter a value from -100 to 100.
•
Set any of the following in the Tone section of the Adjustments pane:
• Auto (Levels) - Analyzes the image and automatically sets the tone levels to achieve the best appearance. This
adjustment corrects for underexposure and overexposure.
If the image is already optimized, or nearly optimized, you may not notice a difference. After you enable Auto,
you can still fine-tune Highlight and Shadows settings, if desired.
• Brightness - Increases or decreases the brightness of an image.
• Contrast - Increases or decreases the contrast of an image.
• Definition - Increases or decreases the amount of definition (detail) in an image without affecting the amount
of contrast in the image.
• Auto (Highlights & Shadows) - Calculates optimal highlight and shadows level and automatically applies
them to the image, updating the Highlights and Shadows settings.
If the image is already optimized, or nearly optimized, you may not notice a difference. After you enable Auto,
you can still fine-tune Highlights and Shadows settings, if desired.
• Highlights - Enhances the details in highlighted portions of an image to make them more visible.
• Shadows - Enhances the details in areas of shadow to make them more visible.
Adjust color
If you have optimized the tone reproduction, typically the only remaining color problem is a color cast—an
imbalance in the colors of the image. Color settings affect the overall color balance and saturation.
Adjust color automatically
You can apply the Automatic preset to adjust color automatically.
•
Click Automatic in the Presets menu.
Adjust color manually
You can adjust color manually without using a preset.
•
Set any of the following in the Color section of the Adjustments pane:
• Temperature - Sets the blue-yellow color balance (the b channel in Lab color space).
• Tint - Sets the red-green color balance (the a channel in Lab color space).
• Saturation - Increases or decreases the saturation of all colors in an image.
• Fleshtone Saturation - Increases or decreases the saturation of only fleshtones in an image, rather than the
saturation of the entire image.
Fiery Command WorkStation
Managing color
•
166
Lock (Saturation) - When selected, increasing or decreasing a Saturation setting increases or decreases
other Saturation settings the same amount. For example, if Saturation is 10, Fleshtone Saturation is 20,
and the lock is on, then increasing Saturation to 15 increases Fleshtone Saturation to 25 at the same time.
• Auto (Color Balance) - Automatically corrects the color balance (temperature and tint) of the image to
achieve the best appearance.
If the image is already optimized, or nearly optimized, you may not notice a difference. After you enable Auto,
you can still fine-tune Color Balance settings, if desired.
Adjust sharpness
You can improve a blurry image by increasing sharpness or soften an image by decreasing sharpness. Softening is
sometimes desired for special effects and in portraits.
Adjust sharpness automatically
You can apply the Automatic preset to adjust sharpness automatically.
•
Click Automatic in the Presets menu.
Adjust sharpness manually
You can adjust sharpness manually without using a preset.
•
Set any of the following in the Sharpness section of the Adjustments pane:
• Sharpness - Affects the non-fleshtone colors in an image.
• Fleshtone Sharpness - Affects fleshtones in an image.
Note: Setting Sharpness and Fleshtone Sharpness to the same value can have undesirable results. This is
because the level of sharpness that produces clear rendering of objects can cause people in an image to appear
to have pitted or textured skin. In most cases, setting Sharpness higher than Fleshtone Sharpness yields
the best results.
•
Lock (Sharpness) - Increasing or decreasing a Sharpness setting increases or decreases the other
Sharpness setting by the same amount. For example, if Sharpness is 15, Fleshtone Sharpness is 0, and
the lock is on, then increasing Sharpness to 30 increases Fleshtone Sharpness to 15 at the same time.
Correct red eye
Red-Eye Correction analyzes the image and attempts to identify and correct red-eye. You can select an area to
correct and adjust the area by increasing or decreasing its tolerance.
The Tolerance setting applies to all Red-Eye Correction areas in an image.
1 Select the image that you want to adjust.
2 Under Red-Eye Correction, click On.
The application analyzes the image and displays a rectangular marqee around the areas that it determins to
contain a red eye.
Fiery Command WorkStation
Managing color
167
3 Do one of the following:
•
To delete a Red-Eye Correction area, click the red X at the corner of the marquee.
•
To create a Red-Eye Correction area manually, make sure Red-Eye Correction is On and then click and
drag in the image to create a marquee.
•
To resize a Red-Eye Correction area, drag a handle on the marquee.
4 If you want to change the degree of Red-Eye Correction, increase or decrease the Tolerance to a value that
just eliminates the red eye:
•
Increase Tolerance to make the red-eye mask larger.
•
Decrease Tolerance make the red-eye mask smaller.
5 If you want to hide the marquees after you finish Red-Eye Correction, select Hide Marquees.
Note: Red-Eye Correction is still applied when the marquees are hidden.
Spot colors
The Spot Colors feature is a spot color (named color) manager in Command WorkStation that allows you to edit
spot color definitions on the Fiery Server and create custom spot color definitions. Spot Colors is a part of the SpotOn feature. If Spot-On is available for your Fiery Server and is enabled, you can adjust and manage lists of spot colors
and their CMYK equivalents.
Spot Colors comes pre-loaded with libraries of named colors such as those from PANTONE, HKS, TOYO, and DIC.
The spot color libraries store the original colors with their device-independent definitions (Lab values). For each
output profile on the Fiery Server, Spot Colors computes the best available CMYK reproduction of each spot color.
Each time a new profile is generated or updated, Spot Colors automatically recalculates the best CMYK equivalents.
You can create a list of “substitute” colors. These are colors that, when called for in a document by their RGB or
CMYK values, are substituted with a different color having the CMYK values from the Spot Colors color definition.
This permits exact color control and overrides individual RGB and CMYK colors.
If Two-Color Print Mapping is available for your Fiery Server, and is enabled, Spot Colors also allows you to assign
spot colors and process colors to the generic colors that are used in a job. The Two-Color Print Mapping feature is
designed for print shop operators to simulate a two-color press. You can print a two-color job to a two-color device
by mapping the colors in a job to the colors that are already created on the device.
Spot color groups and definitions
With the Spot Colors feature in Command WorkStation, you can edit spot color definitions on the Fiery Server and
create custom spot color definitions. Only one user at a time can use Spot Colors.
The Spot Colors window consists of three parts:
•
The left side displays a list of color groups.
•
The middle displays a list of spot colors included in the currently selected color group.
•
The right side displays the definition of the currently selected spot color as well as swatches showing the original
Lab value and the CMYK value after conversion by the output profile.
An exclamation point icon in the spot color definition indicates that one or more colorants have reached their
maximum values.
Fiery Command WorkStation
Managing color
168
By default, the Fiery Server has several PANTONE color groups, including PANTONE Goe, and a System color
group. It might have the DIC, HKS, and TOYO color groups as well. These standard groups are locked. You cannot
delete, rename, or export a locked group, and you cannot add, rename, or delete the spot colors in a locked group or
change the priority order of the spot colors.
Select the output profile for spot color edits
The Fiery Server maintains a spot color dictionary for each output profile. When you edit spot colors, your edits are
applied to spot colors in jobs that are printed using the specified output profile.
Depending on your Fiery Server, you can either select the output profile directly or you can specify the print settings
(job properties) of a job that will use the spot colors that you are editing. The Fiery Server determines the output
profile from the print settings.
Specifying the print settings is useful if the Output Profile setting for the job that will use the edited spot colors is
Use Media Defined Profiles rather than a specific profile. In this case the Fiery Server determines the output
profile from the job’s media settings, so you cannot tell which output profile to edit the spot colors for.
1 In Device Center, click the Resources tab and click Spot Colors.
2 If Output Profile appears at the top of the Spot Colors window, select the output profile from the list.
3 If Properties appears at the top of the Spot Colors window, click Properties, select the print settings for the job
that will use the edited spot colors, and click OK.
The print settings in the Properties window are the current default settings on the Fiery Server.
Note: Print settings that are not related to color management are ignored. In the case of a Mixed Media job, the
print settings for the first page are used.
The Spot Colors window is updated with the Paper Source and Output Profile settings.
Change the order of spot colors or groups
To find a spot color definition, the Fiery Server searches the colors in the color groups in the order that they are
displayed under Spot Colors. When multiple spot colors have the same name, priority is given to the one that the
Fiery Server finds first when searching from the top of the list. You might find it necessary to change the order of
color groups, or of spot colors within a group, to give priority to a particular spot color definition.
Note: You cannot change the order of colors within a locked color group.
1 In Device Center, click the Resources tab and click Spot Colors.
2 Select the color group or color.
3 Drag it to a new location in the list.
Find a spot color
You can search for a spot color by name. The Fiery Server searches the colors in the color groups in the order that
they are displayed in Spot Colors. When multiple spot colors have the same name, priority is given to the first name
found in the list.
1 In Device Center, click the Resources tab and click Spot Colors.
2 Click Find.
Fiery Command WorkStation
Managing color
169
3 Type all or part of the spot color name and click Next.
Note: The search is case-sensitive.
To search backward, click Previous.
Edit a spot color
You can define the CMYK values of a spot color by typing the numerical values, by selecting a visual match from a
pattern of color swatches, or by measuring the color of a physical object using a measurement device.
The Spot Color Matching print option automatically matches spot colors with their best CMYK equivalents so that
spot colors can be simulated using the CMYK colorants. However, you may want to adjust the default CMYK
equivalents to achieve a better match for your specific printing conditions. You can modify spot color definitions
using Spot Colors.
1 In Device Center, click the Resources tab and click Spot Colors.
2 Find and double-click the spot color.
3 Do one (or a combination) of the following:
•
To edit the CMYK percentage values directly, click in the C, M, Y, or K field and type a new value. Use the Tab
key to move from one field to the next. The new color is displayed next to Current Pick.
•
To select a new color visually, click a color patch in the lower area of the dialog box.
The selected color becomes the new Current Pick and is displayed in the center patch of the center cluster.
Neighboring patches show updated hue variations from the center patch, in the hue directions indicated by the
colored arrows. The left and right clusters show variations of saturation or brightness (whichever is selected for
Tuning Mode) from the center cluster. To control the degree of variation in the neighboring patches, move
the slider closer to Fine (for smaller variation) or Coarse (for larger variation). To see the CMYK value of any
patch displayed under Toner Usage, move the cursor over the patch.
Note: When you select certain colors, an exclamation point icon may appear in the upper-right corner of the
dialog box. This icon indicates that one or more colorants have reached their maximum values.
•
To select a new color using a measurement instrument, see Measure and import spot color values on page 173.
4 To print a test page, click Print.
Matching spot colors accurately on a monitor is very difficult. Always print a test page to get the proper color
match.
5 Click OK to save your edits.
Optimize spot colors
If Fiery Color Profiler Suite is installed on your computer, you can use spot color optimization in Fiery Device Linker
to optimize spot color definitions. With optimization, you can measure printed samples of spot colors and use the
measurement data to adjust the spot color definitions.
For more information about using Device Linker to optimize spot colors, click the Help icon in Device Linker.
1 In Device Center, click the Resources tab and click Spot Colors.
Fiery Command WorkStation
Managing color
170
2 Do one of the following:
•
Select one or more spot colors (press the Control key to select each additional color), right-click a selected
color, and select Spot Color Optimizer.
•
Click Edit and select Spot Color Optimizer. You can then select spot colors in Device Linker.
3 When the optimization in Device Linker is complete, click Done to return to the Spot Colors window.
Create, rename, or delete a spot color or color group
You can create, rename, or delete spot colors or color groups. You cannot make changes to a spot color or color
group that is locked.
Create a spot color or color group
You can create a new spot color in an existing group or a new color group.
1 In Device Center, click the Resources tab and click Spot Colors.
2 Select the location in the spot color list or color group list where you want the new spot color or color group to be
placed and click New.
3 Select Spot Color or Group and type a name for the spot color or color group.
4 For a spot color, specify the definition.
You can define the CMYK values of a spot color by typing the numerical values, by selecting a visual match from
a pattern of color swatches, or by measuring the color of a physical object using a measurement device. In
addition, you can define the spot color by its Lab values.
5 To save and add another spot color or group, click Add Another.
6 To save the new spot color(s) or group(s), click OK.
Rename a spot color or color group
You can change the name of an existing spot color or color group if it is not locked. If you are matching the name of
a spot color to the name used in a particular job, be sure to match the name exactly, including uppercase or
lowercase letters and spaces.
1 In Device Center, click the Resources tab and click Spot Colors.
2 Right-click the spot color or group and select Rename.
3 Type a new name and press the Enter key or the Return key.
Delete a spot color or color group
You can delete a spot color or color group (and the spot colors in the group) if it is not locked.
1 In Device Center, click the Resources tab and click Spot Colors.
2 Right-click the spot color or group and select Delete.
3 Click Yes to confirm.
Fiery Command WorkStation
Managing color
171
Import and export custom color groups
You can export custom color groups from the Fiery Server to your computer as ICC files. You can import custom
color groups from your computer to the Fiery Server.
Imported color groups are added to the spot color group list and are immediately enabled for use on the Fiery Server.
Import a custom color group
To support spot color definitions in addition to the ones provided on the Fiery Server, you can import a named color
profile from your computer as a custom color group.
1 In Device Center, click the Resources tab and click Spot Colors.
2 Select the location in the color group list where you want to add the imported color group.
3 Click Import.
4 Locate and select the desired color group.
Although many ICC profiles may be displayed, you can import only an ICC named color profile.
5 Click Open.
The imported group is added to the color group list above the previously selected group, where it has priority over
the groups below it. If the imported group has the same name as an existing group in the list, you are prompted to
rename the imported group.
Export a custom color group
To share a custom color group with another Fiery Server, you can export the group to a local copy that can be
imported to the other Fiery Server. You cannot export a locked color group.
1 In Device Center, click the Resources tab and click Spot Colors.
2 Select the color group that you want to export.
3 Click Export.
4 Type a name for the file and select a file type.
5 Browse to the location where you want to save the file and click Save.
View the gamut of a color group
If Fiery Color Profiler Suite is installed on your computer, you can use Fiery Profile Inspector to view a model of the
spot colors in a group compared to the gamut of the selected output profile.
1 In Device Center, click the Resources tab and click Spot Colors.
2 Select the color group that you want to view and click Inspect.
Next steps
Profile Inspector opens in a separate window. For more information about using Profile Inspector to compare spot
colors to the output profile, click the Help icon in Profile Inspector.
Fiery Command WorkStation
Managing color
172
Color swatch pages and swatch books
You can print a swatch page for an individual spot color containing all its neighboring spot colors. You can also print
a swatch book for a color group containing all of the spot colors in the group or selected colors in the group.
Spot color matching
When you print a swatch page or a swatch book, Spot Colors prints the job with the following job properties:
•
If the Fiery Server lets you select an output profile in the Spot Colors main window, Spot Colors prints a swatch
book or swatch page using the specified output profile and the default job properties of the Fiery Server.
•
If the Fiery Server lets you select Job Properties in the Spot Colors main window, Spot Colors prints a swatch
book or swatch page using the job properties you select. If you do not select any job properties in Spot Colors,
Spot Colors uses the default job properties of the Fiery Server.
In this case, if the Spot Color Matching option is disabled in the job properties, a message notifies you of this
setting. Because Spot Color Matching must be enabled for the spot color definitions in Spot Colors to be used,
Spot Colors always prints swatch books and swatch pages with the Spot Color Matching option enabled,
regardless of the job properties set in Spot Colors or on the Fiery Server.
Calibration
Calibrating the Fiery Server ensures consistent and reliable color output. Calibration adjusts for variations in the
color output of the printer, which changes over time and under different printing conditions.
When you print a swatch page or a swatch book, if a warning appears indicating that the calibration is outside of the
limits, it means that the Fiery Server is configured to detect when a job will be printed using an out-of-date
calibration. (Not all types of Fiery Server support this feature.) You can ignore the warning and continue to print, but
for consistent color, print pages from Spot Colors using only calibrations that are up to date.
Print a color swatch page or swatch book
You print a color swatch page for a single spot color. You print a swatch book for a group of spot colors.
Print a spot color swatch page
When you print a swatch page, you select a spot color and a pattern.
1 In Device Center, click the Resources tab and click Spot Colors.
2 Select the spot color and click Print.
Alternatively, in the Edit Spot Color dialog box or the New Spot Color dialog box, click Print.
3 Select a layout.
• Color Search Pattern - Prints patches with the same pattern as displayed in the Edit Spot Color or New Spot
Color dialog box.
• Color Neighbor Pattern - Prints the patches in the Edit Spot Color or New Spot Color dialog box in a 3-
column by 8-row format.
4 If you did not already specify the Paper Source in the print settings (Properties), select a paper size and a paper
source for printing.
Fiery Command WorkStation
Managing color
173
5 Click Print or OK (whichever is supported by your Fiery Server) to print the swatch page.
Print a color swatch book
When you print a swatch book, you select a spot color group and a layout.
1 In the Spot Colors window, select a color group and do one of the following:
•
To print a swatch book of all of the spot colors in a color group, select the group and click Print.
•
To print a swatch book of selected colors in a color group, select the group in the Spot Colors window,
Control-click to select the spot colors, and then click Print.
2 Select a layout.
• Color Swatches 8X4 prints patches in a 4-column by 8-row format.
• Color Swatches 8X8 prints patches in an 8-column by 8-row format.
3 If you did not already specify the Paper Source in the print settings (Properties), select a paper size and a paper
source for printing.
4 Click Print or OK (whichever is supported by your Fiery Server) to print the swatch page.
Measure and import spot color values
If you have a measurement instrument (such as the EFI ES-2000 spectrophotometer) that can measure a single color
sample, you can import a measured color value directly into a spot color definition. This feature allows you to match
spot colors based on the actual colors of physical objects, such as the red of a printed logo or the yellow of a
packaging envelope.
Before you begin
Note: To use an X-Rite i1Pro or i1Pro 2, you must use an instrument obtained from EFI. An instrument obtained
from another source will not work with Spot Colors.
1 Install and set up the spectrophotometer for use with your computer.
For installation and setup instructions, see the documentation that accompanies the instrument.
2 In Device Center, click the Resources tab and click Spot Colors.
3 Make sure that the instrument is connected and click Instrument.
4 Place the spectrophotometer in its calibration cradle and click Calibrate. Calibration improves the accuracy of
measurements.
5 Select the desired color group and click New > Spot Color, or double-click the spot color to edit.
6 Place the spectrophotometer over the target color, making sure to center the sample aperture over the color.
Fiery Command WorkStation
Managing color
174
7 Press the button on the spectrophotometer to take the measurement. The measured CMYK values are imported
into Spot Colors as follows:
•
If an individual color is selected in the color list, its definition is updated to the measured color.
•
If the Edit Spot Color or New Spot Color window is open, the Current Pick is updated to the measured
color.
•
If a group is selected in the color group list, a new color with the measured values is created within the group.
Substitute colors
The Substitute Colors feature is used to map a color in a job to a different color in the printed output.
Color substitutions affect only text, vector graphics, and line art. They have no effect on raster images.
When a color is defined as a substitute color, the settings for an RGB color (such as RGB Source, Rendering Style,
and RGB Separation) or CMYK color (such as CMYK Simulation Profile and CMYK Simulation Method) have no
effect. The color is converted with a process similar to spot color conversion.
Important: You cannot use the Substitute Colors and Postflight features at the same time. These print options are
constrained.
Using the Substitute Colors feature involves the following tasks:
•
Configure the Substitute Color values in Command WorkStation.
•
Print a document with the Substitute Colors print option turned on.
Configure substitute colors
A substitute color resides in a special type of spot color group called a substitute group. For a substitute color, you
specify the CMYK value of the original color and the CMYK value of the color that substitutes for the original color.
1 In Device Center, click the Resources tab and click Spot Colors.
2 If a substitute group already exists, select the substitute group and skip to 5. Otherwise, to create a substitute
group, select the location in the color group list where you want the new substitute group to be placed.
3 Click New and select Substitute Group.
4 Type a name for the group and click OK.
5 Select the location in the color list where you want the new substitute color to be placed.
6 Click New and select Substitute Color .
7 Select a color mode for specifying the original color value.
8 Select a tolerance degree for the original color.
Tolerance determines how close a particular color must be to the original color to match. Small and Large are
defined as follows:
Color mode
Small tolerance range
Large tolerance range
CMYK (0-100%)
+/- 0.25%
+/- 0.5%
Fiery Command WorkStation
Managing color
Color mode
Small tolerance range
Large tolerance range
RGB (Device Code 0-255)
+/- 0.25
+/- 1
RGB (0-100%)
+/- 0.25%
+/- 0.5%
175
Note: Tolerance does not affect the substituted color.
9 Type the values for the original color. Use the Tab key to move from one field to the next.
10 Under Converted, click Edit.
11 Type the values for the converted color and click OK.
Two-color print mapping
With Two-Color Print Mapping, you can map the process colors in a job to the process colors on a two-color printer
(Cyan, Magenta, Yellow, Black, or a spot color). The Two-Color Print Mapping feature is designed for print shop
operators to do the proofing for a two-color printer.
You can print a two-color job to a two-color printer by mapping the process colors in the job to the colors that are
on the printer.
Note: Two-Color Print Mapping is different from Substitute Colors. Two-Color Print Mapping converts the process
colors used in a job. Substitute Colors converts one color in a job to a different color.
Using the Two-Color Print Mapping feature involves the following tasks:
•
Configure the Two-Color Print Mapping values in Command WorkStation.
•
Print a document with the Two-Color Print Mapping print option turned on.
The following limitations apply when you use this feature:
•
Two-Color Print Mapping is ignored when Composite Overprint and Combine Separations are enabled.
•
Postflight does not report on Two-Color Print Mapping, because Postflight reports the source state of a
document before any color conversions.
•
You cannot select Two-Color Print Mapping and Substitute Colors for a job at the same time. Also, you cannot
select a substitute color when you configure Two-Color Print Mapping.
Configure two-color print mapping
To configure Two-Color Print Mapping, you specify an output color for each original color in a job.
1 In Device Center, click the Resources tab and click Spot Colors.
2 Click 2-Color Print Mapping.
3 For each of the two process colors, select the original process color used in the job.
Initially, Black and Magenta are displayed as the original process colors. When you change the color selection, the
Print As process color selection changes to the same process color. This is to avoid accidentally mapping one
process color to a different process color.
Fiery Command WorkStation
Managing color
176
4 Under Print As, select a process color or a spot color to map the process color to. To select a spot color, select a
color group and color name from the lists.
5 Click OK. The Two-Color Print Mapping group is saved and it is added to the groups listed in the Spot Colors
window.
Fiery Command WorkStation
Managing server resources
177
Managing server resources
Virtual printers
Virtual printers give users a way to print to the Fiery Server using predefined job settings. Virtual printers are
published on the network so users can set them up as a printer on their computer.
By default, three virtual printers are already set up to correspond to the Print, Hold, and Direct queues.
Administrators can manage virtual printers in Command WorkStation. They can duplicate the print and hold virtual
printers and modify their settings, but cannot duplicate the direct virtual printer. Administrators can also create new
virtual printers.
When a virtual printer in the list is selected, its job properties are displayed on the panel at the right.
The toolbar provides access to various tasks.
Administrators can publish job presets as virtual printers. See Preset print settings on page 101.
Create, edit, or duplicate virtual printers
By default, three virtual printers are set up to correspond to the Print, Hold, and Direct queues. You cannot edit
these printers, but you can duplicate them and edit them, or you can create new virtual printers.
The direct virtual printer cannot be modified, but Administrators can modify the print and hold virtual printers.
Administrators can duplicate one of the default virtual printers, or another virtual printer, and modify its settings.
Only Administrators can create, edit, and duplicate virtual printers. Administrators can also publish job presets as
virtual printers.
1 Do one of the following:
•
To create a virtual printer, click New in the toolbar.
•
To edit a virtual printer, click Edit in the toolbar.
•
To duplicate a virtual printer, click Duplicate in the toolbar.
2 Specify the following:
• Printer Name - If you are creating or duplicating a printer, type an alphanumeric name.
Note: Once a virtual printer has been created or duplicated, its name cannot be changed, although the print
settings can be changed.
• Description - Add or modify comments to describe the virtual printer to users—for example, "duplex
company brochure."
• Job Actions - Select one of the standard Fiery Server actions, such as Hold, Process and Hold, Print, Print
and Hold, or Print and Delete. Sequential Print is also displayed if it has been enabled in Configure.
• Job Properties - Select Define to access Job Properties and specify print settings. Server presets are also listed
as choices.
Fiery Command WorkStation
Managing server resources
178
Note: You can lock any job setting by clicking its lock icon.
3 If required, select Preflight and edit the settings:
• Default preset - Indicates that the default Preflight settings will be used unless you edit them.
• Edit - Allows you to select from other presets or specify each setting.
• On critical error - Specifies the action to be performed if any critical errors are found. Use Job Action refers
to the job action specified for the virtual printer.
Locked job settings
Locking a job setting prevents other users from changing the setting.
Note the following:
•
Submitting a job to the virtual printer through the Windows printer driver - Locked settings are dimmed.
The user cannot modify the settings.
•
Submitting a job to the virtual printer through the Mac OS printer driver - The user can modify the locked
settings, but when the job reaches the Fiery Server, the job prints according to the locked job settings. Any
changes made by the user are overridden.
•
Importing a job to Command WorkStation using a virtual printer - The imported job uses the locked settings
on the Fiery Server and overrides any conflicting settings that came with the job.
•
Unlocked job settings - The user can change job settings, and the job prints according to these settings. But if a
job setting is not specified, the job uses the virtual printer setting.
Publish job presets as virtual printers
A server job preset can be published as a virtual printer.
1 In Device Center, click Workflows, and then click Job Presets.
2 Select a preset and click Publish as Virtual Printer.
3 In the New Virtual Printer dialog box, specify settings.
Note: You can specify all the settings except for Job Properties. The job properties used are those specified for
the server preset.
Manage virtual printers
The Fiery Server Administrator can publish, unpublish, or delete a virtual printer.
The standard Fiery Server queues (direct, print, and hold) are listed in the virtual printers list, but cannot be deleted.
The print and hold default virtual printers can be edited.
Fiery Command WorkStation
Managing server resources
•
179
Select a virtual printer in the list and click one of the following in the toolbar:
• Publish
to publish the selected virtual printer on the network.
The virtual printer is shared over the network when SMB printing is enabled in Server Configuration.
• Unpublish to remove the selected virtual printer from the network.
The virtual printer no longer appears as a shared printer. It also no longer appears as a printer you can import
jobs to in Command WorkStation.
• Delete to delete the selected virtual printer.
Print to virtual printers from Windows
Virtual printers are published on the network. To print to a published virtual printer from a Windows client
computer, you must first add the virtual printer. Then you must update the installable options.
For information about adding printers, see Printing, which is part of the user documentation set.
Update the installable options
To print to a virtual printer from a Windows computer, you must make sure two-way communication is enabled and
update the installable options.
1 Locate the virtual printer in Printers and Faxes.
2 Right-click the virtual printer, and choose Properties.
3 Click the Installable Options tab and make sure that Two-Way Communication with the Fiery Server is
enabled.
4 Click Update.
Print a job
To print to a virtual printer from Windows, you must select job settings.
1 Open the file and select Print from the File menu.
2 Click Properties.
3 Make sure that the Fiery Printing tab is selected, and click the tabs to select job settings.
Print to virtual printers from Mac OS
Virtual printers are published on the network. To print to a published virtual printer from a Mac OS client
computer, you must first add the virtual printer. Before adding the virtual printer, install the printer driver from the
User Software DVD or from WebTools.
For information about installing printer drivers, see Printing, which is part of the user documentation set.
Fiery Command WorkStation
Managing server resources
180
Add a virtual printer to Mac OS
When you add a virtual printer in Mac OS, you specify settings such as the IP address or DNS name of the Fiery
Server, the virtual printer name, and the print connection to use.
Before you begin
Before adding a virtual printer, you must install the printer driver for the Fiery Server.
1 Choose System Preferences from the Apple menu, and then choose Print & Fax.
2 Click the "+" button to add a printer.
3 Click IP or IP Printer in the Printer Browser dialog box.
4 Select Line Printer Daemon - LPD from the Protocol list, type the IP address or DNS name of the Fiery Server
in the Address field, and then type the virtual printer name in the Queue field.
5 Enter a name for the virtual printer in the Name field.
If you do not enter a name in the Name field, the virtual printer appears in the printer list as the IP address of the
Fiery Server.
6 Select the printer driver you just installed from the Print Using menu.
7 Click Add.
8 Click Continue.
When you send jobs to the Fiery Server using this printer, the settings for the virtual printer are applied to your
job.
Next steps
Before printing a job, you must update the installable options.
Update installable options and print a job
To print to a virtual printer from a Mac OS computer, you must make sure two-way communication is enabled so
any installable options are updated.
1 Open a file and choose Print from the File menu.
2 Choose the virtual printer as your printer.
3 Choose Fiery Features from the drop-down list and select Two-Way Communication.
When Two-Way Communication is enabled, the virtual printer will be updated with the options installed on the
copier/printer.
4 Click Print.
Paper Catalog
Paper Catalog is a system-based paper warehouse database, which can store attributes of any media stock available in
a production print shop.
The Paper Catalog database resides on the Fiery Server and is not affected when you reboot or clear the Fiery Server.
If Paper Catalog is supported on the Fiery Server, any user can select media for a job from the Paper Catalog in the
printer driver or in Job Properties in Command WorkStation.
Fiery Command WorkStation
Managing server resources
181
To set up and manage Paper Catalog, you must log in to Command WorkStation with Administrator access.
Access levels
The level of Paper Catalog functionality available to you depends on how you log into Command WorkStation. The
relevant access levels are:
•
Administrator - Has full access to all Command WorkStation and Fiery Server functions. Administrator
password is required.
•
Operator - Has access to all Job Center functions. In Device Center, does not have access to Configure, Backup
and Restore, changing passwords, and deleting the Job Log. Can view Paper Catalog, virtual printers, and color
management functions, but cannot edit them. Operator password is required.
Paper Catalog allows Administrators to:
•
Define multiple media attribute combinations and assign unique names to each combination
•
Assign color profiles for each media
•
Select predefined media when they submit their job
•
Assign media to trays
•
Specify which Paper Catalog columns are available for users
•
Centrally maintain their Paper Catalog database
Paper Catalog allows Operators to:
•
Select predefined media when they submit their job
•
Assign media to trays
Choose media from Paper Catalog
Once the Paper Catalog has been set up and entries defined, you can select media from the catalog and assign it to
your job.
Administrators can access Paper Catalog from:
•
Media and Mixed Media in Job Properties
•
Booklet Maker in Job Properties
•
Fiery Impose, Compose, or JobMaster, if supported
Choose from Paper Catalog in Job Properties
Paper Catalog is available from the Job Properties dialog box in Command WorkStation.
1 Double-click a job in the Job Center window, or select the job and either right-click to select Properties or
choose Actions > Properties.
2 Click the Media button.
Fiery Command WorkStation
Managing server resources
182
3 Select the desired item from the Paper Catalog list. To view the media attributes associated with each entry, click
the Select button.
You can also select from the Paper Catalog in the Mixed Media interface.
If you select Booklet in the Layout tab, you can choose Select from Paper Catalog when assigning media.
Note: If you specify a Paper Catalog entry and then use Job Properties to change the page size (or another
attribute associated with the entry), the Paper Catalog assignment is canceled. Job Properties subsequently
displays "none defined" for Paper Catalog.
Choose from Paper Catalog in Fiery Compose
Administrators can access Paper Catalog from Fiery Command WorkStationCompose, if supported.
1 Right-click a spooled job in the Held or Printed queues in the Job Center, and select Compose.
2 In the List/Page View pane in Preview, right-click the desired page and select Assign Media.
3 In the window that appears, click the arrow beside the Media field to display the media menu.
4 Scroll down and select Choose from Paper Catalog.
5 In the Paper Catalog window, select your desired media and click OK.
6 Click OK again.
For more information, see Fiery Compose Help.
Choose from Paper Catalog in Fiery Impose
Administrators can access Paper Catalog from Fiery Impose, if supported.
1 Right-click a spooled job in the Held or Printed queues in the Job Center, and select Impose.
2 In the Settings pane in the Preview window, click the Edit button next to the Sheet field.
3 In the window that appears, click the arrow beside the Media field to display the media menu.
4 Scroll down and select Choose from Paper Catalog.
5 In the Paper Catalog window, select your desired media and click OK.
6 Click OK again.
For more information, see Fiery Impose Help.
Set up Paper Catalog
An Administrator creates Paper Catalog entries that describe all the media available for use with the copier/printer.
If a job restored from an Archive contains a Paper Catalog entry that is not in the database, Paper Catalog
automatically creates a new entry with the Archive attributes.
Only an Administrator can access setup options for Paper Catalog to customize it for specific print shop scenarios.
1 Log into the desired Fiery Server as Administrator. Enter the Administrator password if one has been set.
Fiery Command WorkStation
Managing server resources
183
2 Do one of the following:
•
Click Device Center, and choose Resources > Paper Catalog.
•
Choose Server > Paper Catalog to open the Paper Catalog main window.
•
If a Paper Catalog icon has been added to the Job Center toolbar, click the Paper Catalog icon.
In the Paper Catalog window, you can create new entries, edit entries, delete entries, duplicate entries, and
manage the Paper Catalog database.
Choose Paper Catalog settings
When creating a Paper Catalog entry, administrators can choose from two sets of media attributes: Printer (PPD)
based and JDF (Job Definition Format).
•
The PPD set of media attributes are specific to the Fiery Server. The name of each setting is standard across
devices, but the list of possible options vary. The PPD settings are the default. The PPD set is recommended for
new and intermediate users.
•
The JDF set of media attributes comes from the printing industry standard specifications for Job Definition
Format. This set of media attributes is not specific to the Fiery Server, and allows for smooth mapping of media
definitions from MIS-job submission workflows. The JDF set is recommended for advanced users familiar with
the JDF workflow.
Note: The Fiery Server must support JDF printing and the feature must be enabled in Configure.
Some of the media attributes are common to both sets, although the naming may be slightly different. The JDF set
provides more granularity.
1 Open Paper Catalogfrom Device Center > Resources or by clicking the Paper Catalog icon in Job Center.
2 Click Settings in the Paper Catalog menu bar.
3 Select either PPD or JDF specifications.
Change the column display in Paper Catalog
The column headings in the Paper Catalog window change dynamically, according to whether you are using PPDbased media attributes or JDF media attributes.
Administrators can change the order of these columns in the display, or add/delete the columns to present
information useful to your particular print environment. To adjust the width of a column, drag the column border to
the left or right.
Note: Tray is always the first column heading and cannot be moved or deleted.
1 In the Paper Catalog window, right-click in the column heading bar.
2 Do one of the following:
•
Click Add to choose an item from the menu to add to the columns.
•
Click Delete to remove a column.
•
Click Move Left or Move Right to move a column in the desired direction.
Fiery Command WorkStation
Managing server resources
184
Create a new Paper Catalog entry
Duplicate names for catalog entries are allowed when you create a new Paper Catalog entry, except on some copiers/
printers. On those copiers/printers, duplicate names are ignored by Paper Catalog.
Note: Only an Administrator can access Paper Catalog Setup.
1 Open Paper Catalog from Device Center > Resources or by clicking the Paper Catalog icon in Job Center.
2 Click Settings in the Paper Catalog menu bar to choose either PPD-based or JDF specifications.
PPD is the default set of media attributes.
3 Click the Add New icon .
4 In the New (media) window, specify the attributes.
You must make a selection for each setting marked with an asterisk (*).
Note: If you enter an incorrect value for a media attribute, and move on to another media attribute, the incorrect
media attribute will revert to its previous value.
•
If you selected JDF settings, click the tabs to specify the attributes.
Specify JDF attributes in Paper Catalog
You can specify JDF media attributes and feed direction for a Paper Catalog media entry.
Note: Only an Administrator can specify JDF attributes.
1 Do one of the following:
•
In the main Paper Catalog window, click the Add New icon .
•
To edit an existing catalog entry, select the entry and click the Edit button.
2 In the New > Basic or New > Other Attributes window, enter information in the text fields, or click the
arrow to access the drop-down menu for an attribute.
For information about a specific attribute, see Media attributes on page 188.
3 Specify Feed Direction by clicking either Long Edge Feed or Short Edge Feed.
To specify additional settings, see Specify color profile settings on page 184.
The new entry appears as an editable (white) entry line in the Paper Catalog window.
Specify color profile settings
You can associate a Fiery Server color output profile with a Paper Catalog entry.
Any default or custom Fiery Server color profile appears listed by name as a possible Paper Catalog attribute.
Note: Only an Administrator can access Paper Catalog Setup.
Fiery Command WorkStation
Managing server resources
185
1 Do one of the following:
•
In the main Paper Catalog window, click the Add New icon .
•
To edit an existing catalog entry, select the entry and click the Edit button.
2 In the New > Settings window, assign the following appropriate profile options to your catalog entry:
• Front Color Profile - Default color profile applied only to the front side of the media. This attribute can be
overridden by specifying a different color profile in Job Properties. Appears in both the PPD and JDF settings.
• Back Color Profile - Default color profile applied only to the back side of the media. This attribute can be
overridden by specifying a different color profile in Job Properties. Appears in both the PPD and JDF settings.
3 Specify Feed Direction by clicking either Long Edge Feed or Short Edge Feed.
4 Specify additional settings.
The new entry appears as an editable (white) entry line in the Paper Catalog window.
Duplicate a Paper Catalog entry
You can duplicate an existing catalog entry and then customize it to create a new entry.
Duplicate names for catalog entries are allowed when you create a new Paper Catalog entry, except on some copiers/
printers. On those copiers/printers, duplicate names are ignored by Paper Catalog.
Note: Only an Administrator can access Paper Catalog Setup.
1 In the main Paper Catalog window, select the Paper Catalog entry that you want to duplicate.
2 Click the Duplicate button.
The duplicated entry appears at the bottom of the list.
3 Click OK when finished.
4 To customize your catalog entry, click the Edit button. See Edit or delete a catalog entry on page 185.
Note: You can also right-click a Paper Catalog entry, and choose Edit or Duplicate.
Edit or delete a catalog entry
You can edit or delete a Paper Catalog entry, with a few limitations.
You cannot delete or edit an entry if:
•
Any job on the Fiery Server, either printing, held, or already printed, is using the Paper Catalog entry.
•
The Paper Catalog entry is assigned to a tray.
•
The Paper Catalog entry is locked.
If you try to delete a Paper Catalogg entry that is associated with a job or assigned to a tray, a message asks if you
want to remove the association with the job or the tray.
Only an Administrator can access Paper Catalog Setup.
Fiery Command WorkStation
Managing server resources
186
Edit a catalog entry within the main Paper Catalog window
You can specify media attributes and values for Paper Catalog entries.
1 In the main Paper Catalog window, select the entry that you want to edit, and click Edit or double-click the
selected entry.
Editable entries appear as white rows.
2 Enter information in the text fields, or click the arrow to display the drop-down menu for that attribute.
Choose the new attribute setting or enter the new attribute value.
All changes are automatically saved.
Note: If you enter an incorrect value for a media attribute, and move on to another media attribute, the
incorrect media attribute will revert to its previous value.
Delete a catalog entry
You can delete one or more Paper Catalog entries in the main Paper Catalog window.
1 In the main Paper Catalog window, select the Paper Catalog entry that you want to delete from the list.
Use shift-click to select multiple sequential entries, and Ctrl-click to select multiple entries that are not
sequential.
2 Click the Delete icon .
An alert message asks if you want to delete the entry.
3 Click Yes.
Note: You can also select multiple entries and right-click them to choose Delete.
Define a custom page size
Administrators can define a custom page size when creating or editing a Paper Catalog entry.
1 Do one of the following:
•
Click the Add New icon.
•
To edit an existing catalog entry, select the entry and click the Edit button.
2 Do one of the following:
•
In PPD settings, click Custom and enter the custom page values for that catalog entry.
•
In JDF settings, click Custom in the Basic tab and enter the custom page dimensions.
Manage the Paper Catalog database
When the Paper Catalog database is set up, you can export it, merge it with another Paper Catalog database, reset it
to factory defaults, and publish or unpublish Paper Catalog media entries.
Only an Administrator can manage the Paper Catalog database.
Fiery Command WorkStation
Managing server resources
187
Export the Paper Catalog database
Exported databases are saved as .xml files and can be imported back into Paper Catalog at any time.
Before you begin
Before you replace your Paper Catalog database or reinstall system software, we recommend that you first back up
your existing database by exporting it to a remote location. You can choose to export all entries in the database or a
subset.
Note: Only an Administrator can access Paper Catalog Setup.
1 Click the Export icon and choose Export All....
If you only want to export some of the media entries, you can select multiple entries in the Paper Catalog and
choose Export Selected.... You can Shift-click to select sequential entries, or Ctrl-click to select nonsequential
entries.
2 Navigate to the location on your computer or network where you want to save the exported database file.
3 Enter a name for the database file; then click Save.
The exported database is saved as an .xml file.
Replace the Paper Catalog database
You can import a new database to replace your existing Paper Catalog database.
Before you begin
Before you replace your Paper Catalog database, we recommend that you first archive your existing database by
exporting it.
Note: Only an Administrator can access Paper Catalog Setup.
1 In the main Paper Catalog window, click the arrow beside the Import icon and choose Replace Existing....
2 Navigate to the replacement database .xml file on your computer or network, and click Open.
3 Click Yes in response to the alert message.
Merge Paper Catalog databases
You can import the entries from another database to create a merged Paper Catalog database.
If the imported database contains an entry that has identical attributes as an entry in the original database, the new
entry is not imported and the original entry remains intact in the merged database.
Note: Only an Administrator can access Paper Catalog Setup.
1 In the main Paper Catalog window, click the arrow beside the Import icon and choose Merge with Existing....
2 Navigate to the database .xml file on your computer or network that you want to import, and click Open.
Your current Paper Catalog database is now merged with the one you just selected.
Note: When you merge databases, all color profile associations in the imported database are discarded.
Next steps
Repeat the process for additional Paper Catalog databases that you want to merge into the existing one.
Fiery Command WorkStation
Managing server resources
188
Reset the Paper Catalog to factory defaults
The Reset to Factory command allows you to revert your Paper Catalog database to the factory default entries and
attributes.
Before you begin
Any added or edited catalog entries are lost when you reset the Paper Catalog to factory defaults, unless they have
been assigned to a job, assigned to a tray, or are locked. To save your customized entries, first export your existing
catalog database before you reset it to factory defaults.
Note: Only an Administrator can access Paper Catalog Setup.
1 Click the arrow to the left of the Settings button.
2 Choose Reset to Factory.
3 Click Yes in response to the alert message.
Unpublish or publish Paper Catalog media entries
By default, all Paper Catalog entries are visible and selectable for a job by users; in other words, they are "published."
When an administrator unpublishes an entry, it is dimmed in the Paper Catalog main window, and does not appear
in the Paper Catalog list in Job Properties or the printer driver. An Administrator can also choose to hide
unpublished entries in the Paper Catalog window.
When an entry, or entries, have been unpublished, an administrator can always publish them again.
1 In the main Paper Catalog window, select the entry or entries you want to publish or unpublish.
Use shift-click to select multiple sequential entries, and ctrl-click to select multiple entries that are not sequential.
2 Do one of the following:
•
To unpublish an entry, click the arrow to the left of the Settings button and select Unpublish.
•
To publish an entry, Click the Publish icon in the Paper Catalog menu bar.
Note: You can also right-click a Paper Catalog entry, or entries, and choose Unpublish or Publish.
Media attributes
When you create or edit a Paper Catalog entry, you can select from a number of media attributes. To set media
attributes for a catalog entry, use the main Paper Catalog window or the Edit window.
Mandatory attributes appear with an asterisk (*) next to the name. You cannot leave the field for a mandatory
attribute empty.
Paper Catalog offers you two sets of media attributes:
•
Printer (PPD) based (the default)
The choices listed for each PPD setting are determined by the PPD for the connected Fiery Server.
•
JDF (Job Definition Format)
JDF attributes are standard and are not dependent on the connected Fiery Server.
Fiery Command WorkStation
Managing server resources
189
Common media attributes
Attribute names appear in the column headers of the main Paper Catalog window, according to whether you have
selected PPD or JDF settings.
% Recycled Content
The percentage of recycled material in the media.
Back Coating
Indicates the type of pre-process coating applied to the back side of the
media sheet.
Back Color Profile
Default color profile applied only to the back side of the media. This
attribute can be overridden by specifying a different color profile in Job
Properties. Appears in both the PPD and JDF settings.
Back Gloss Value
The percentage of light reflected by the back side of the media when it is
viewed under illumination with a 75-degree angle of incidence. A higher
percentage of reflection indicates a higher gloss value.
Brightness
Light reflectance of the media used. Enter a value from 0% (low reflectance)
to 100% (high reflectance).
CIE Lab Color
The device-independent color of the media. Specify the color using CIE
L*a*b* values.
CIE Tint
Describes how neutral, unsaturated, or non-chromatic the media is. Specify
the media tint using values in the CIE xyz coordinate system. A coordinate
of 0 indicates a perfectly neutral tint in the red-green axis.
CIE Whiteness
Describes the amount of overall light reflected by the media, as measured
across the entire visible spectrum. Specify the reflection amount using
values in the CIE xyz coordinate system. A coordinate of (100, 100, 100)
indicates perfect whiteness.
Color
Color of the media used. To indicate translucent media, choose a "Clear"
color option.
Custom Color Name
Custom color of the media used. If your desired color does not appear in the
Color menu, type the name of your custom color into this field.
Description
Descriptive information that would enable a user to order more of this
media from a paper merchant. For example, the description might read
Hammermill Color Copy 10246-7 8 1/2” x 11" 105 gsm Photo White Ultra
Smooth.
Document Size
This PPD setting for the Document Size is the page size defined in your
application's Print Setup (or Page Setup) dialog box. The similar JDF
settings are Size and Feed Direction.
Feed Direction on page 191
Front Coating
The type of pre-process coating applied to the front side of the media sheet.
Front Color Profile
Default color profile applied only to the front side of the media. This
attribute can be overridden by specifying a different color profile in Job
Properties. Appears in both the PPD and JDF settings.
Front Gloss Value
The percentage of light reflected by the front side of the media when it is
viewed under illumination with a 75-degree angle of incidence. A higher
percentage of reflection indicates a higher gloss value.
Grade on page 191
Fiery Command WorkStation
Managing server resources
Grain Direction
190
Direction of paper grain on the media used. Choose from the following
options:
•
•
Short - Grain runs parallel to the short edge of the media, as defined by
Size.
Long - Grain runs parallel to the long edge of the media, as defined by
Size.
Hole Type
Pattern of punched holes (if any) on the media used.
Imageable Sides
Specifies which side(s) of the media support print imaging.
Media Color Profile
Default color profile applied to both the front and back sides of the media.
This attribute can be overridden by specifying a different color profile in Job
Properties. When you specify an individual profile for either Front Color
Profile or Back Color Profile, the Media Color Profile columns in the Paper
Catalog window display the individual profiles.
Media Unit on page 191
Media Weight
The PPD setting for weight of the media used, measured in grams per
square meter (gsm) or pounds (lbs). The similar JDF setting is Weight on
page 195.
Name
Descriptive name for the catalog entry, to describe the media to load in the
trays, such as 11" x 17" Hammermill 105 gsm. Type the desired name into
this field.
Opacity on page 192
Opacity Level %
The media's percentage of opacity. 0% represents full transparency, and
100% represents full opacity.
Paper Color
The PPD setting for the color of the paper to be used. JDF settings for color
of media include Color and Custom Color Name.
Paper Type
The PPD setting that includes categories that are similar to those in the JDF
Type, Type Details on page 193, and Texture on page 192 settings.
Pre-Printed
When the check box is selected, the media contains pre-printed content (for
example, stationery paper with a pre-printed letterhead). When the check
box is cleared, the media is not pre-printed.
Printing Technology
Choose from the available printing technologies.
Product ID
Part number, item code, article number, or other identifier for the media
used, as defined manually by the print operator, or by a Management
Information System (MIS).
Punched Paper
The PPD setting for possible hole-punch combinations. The similar JDF
setting is Hole Type.
Set Count
Defines the number of pieces in a grouped media set. For example, tab stock
with five pre-cut tabs has a Set Count of "5".
Size
Width and height dimensions of the media used. You can select a size or
enter a custom paper size in inches, millimeters, or points.
For information about specific Paper Size options, see Printing, which is part of the user documentation set.
Texture on page 192
Thickness
Thickness of the media used, measured in microns.
Fiery Command WorkStation
Managing server resources
Type
191
Stock type of the media used. Choose from the following options:
•
Paper - Standard fiber-based paper stock.
•
Transparency - Transparent media stock designed to be viewed
through projection.
Type Details on page 193
Tab Properties on page 192
US Basic Size on page 194
Weight on page 195
Feed Direction
The Feed Direction attribute specifies the orientation of the media as it feeds into the printhead.
Choose from the following options:
Long Edge Feed
Media feeds into the printhead along the long edge of the sheet, as defined
by Size.
Short Edge Feed
Media feeds into the printhead along the short edge of the sheet, as defined
by Size.
Grade
The Grade attribute indicates the surface quality of the media, expressed as a grade level from 1 to 5.
Note: This attribute is not usually used for media used in digital printing.
If required, use the following guidelines:
1
Gloss-coated paper
2
Matte-coated paper
3
Gloss-coated web paper
4
Uncoated white paper
5
Uncoated yellowish paper
Media Unit
The Media Unit attribute indicates the physical format of the media that is fed into the copier/printer.
Choose from the following options:
Sheet
Individually cut sheets.
Roll
Media that is continuously connected and wrapped around a spindle.
Continuous
Media that is continuously connected and folded, as in a fan-folded format.
Fiery Command WorkStation
Managing server resources
192
Opacity
The Opacity attribute indicates the level of transparency of the media.
Choose from the following options:
Opaque
The media is opaque. If the media is printed on both sides, the image on the
other side does not show through under normal lighting conditions.
Translucent
The media is partially transparent, under certain lighting conditions such as
back-lit viewing.
Transparent
The media is fully transparent, under all lighting conditions.
Tab Properties
When you specify JDF Settings for a new Paper Catalog entry, and select a tab stock from the Type Details menu, the
Tab Properties button is enabled.
Click the button to choose the following JDF tab settings:
Tab collation order
Applicable to sets of pre-cut tabs.
Tab width
The width along the tab edge as measured along the mid-line of the tab.
Each tab is centered within a space called the "tab pitch".
Tab edge
Indicates which edge (left, top, right, or bottom) of the media has tabs.
Tab extension distance
The positive distance in points that the tab extends beyond the body of the
other media.
Tab offset
The magnitude of the distance in points from the corner of the media to the
edge of the first tab pitch point of the first tab in the bank along the tab
edge. This distance is the same on both ends of the bank of tabs.
Tabs per bank
The number of equal-sized tabs in a single set if all positions are filled.
Texture
The Texture attribute indicates the surface texture of the media used.
Choose from the following options, or type in a custom description:
Antique
Surface that is rougher than vellum.
Calendered
Extra-smooth or polished uncoated paper.
Cockle
Surface that has a rough, wrinkled, irregular finish.
Dull
Machine-worn finish without gloss or luster.
Eggshell
Surface that has a texture similar to that of an eggshell.
Embossed Linen
Surface resembling coarse woven cloth, with a pronounced embossed
texture.
English
Surface that is smoother than Machine Finished, but rougher than Super
Calendared.
Felt
Finish applied by a special marking felt.
Laid
Surface with a pattern of vertical and horizontal lines.
Fiery Command WorkStation
Managing server resources
Light Cockle
Surface that has a rough, wrinkled, irregular finish, with less pronounced
wrinkles than in Cockle.
Linen
Surface that has the texture of coarse woven cloth.
Luster
Shiny surface.
Machine Finished
Extra-smooth or polished uncoated paper, rougher than English.
Matte
Dull finish without gloss or luster.
Mottled
Finish that shows diverse spots or blotches.
Parchment
Finish that resembles the appearance of parchment paper.
Satin
Smooth, dull finish that resembles satin fabric.
Semi-Vellum
Slightly rough finish, smoother than Vellum.
Silk
Smooth, dull finish that resembles silk fabric.
Smooth
Surface that has a smooth finish.
Stipple
Fine, pebbled finish.
Suede
Smooth, dull finish that resembles suede fabric.
Super Calendered
Smoothest, most polished, uncoated paper.
Super Smooth
Very flat and even finish. Smoother than Ultra Smooth.
Traditional Laid
Surface with a heavier pattern of vertical and horizontal lines than Laid.
Ultra Smooth
Very flat and even finish, but not as smooth as Super Smooth.
Uncalendered
Rough, unpolished, and uncoated finish.
Vellum
Slightly rough and dull finish.
Velvet
Smooth, dull finish that resembles velvet fabric.
Wove
Soft, smooth finish.
193
Type Details
The Type Details attribute describes additional details of the media stock type used.
Choose from the following options:
Plain
Choose this option if your media stock does not require a special
description. Some systems require a value of plain, but leaving this blank if
the detail is not needed would be better, if the print engine allows it.
Cardboard
Media made from cardboard stock.
Continuous Long
Opaque media composed of sheets continuously connected along the long
edge, as defined by Size.
Continuous Short
Opaque media composed of sheets continuously connected along the short
edge, as defined by Size.
Envelope
Media that can be used for conventional mailing purposes. Can either be
plain envelopes or envelopes with transparent address windows.
Envelope Plain
Envelopes that are not pre-printed and do not have address windows.
Envelope Window
Envelopes that have transparent windows for addressing purposes.
Full Cut Tabs
Media with a single long tab that extends along the full length of the sheet.
Fiery Command WorkStation
Managing server resources
194
Labels
Adhesive label stock, such as a sheet of peel-off labels.
Letterhead
Cut sheets of opaque media that contain a pre-printed letterhead.
Multi-Part Form
Media designed for use as a multi-layer form. Individual layers of the form
are detached from one another and may be drawn from separate paper trays.
It is more likely that the layers are pre-collated. These media tend to be
referred to as NCR - No Carbon Required.
Photographic
Cut sheets of opaque media designed to support photographic-quality
images.
Pre Cut Tabs
Media with two or more tabs that extend along an edge of the sheet.
Stationery
Cut sheets of opaque media. Generic paper falls under this category.
Tab Stock
Media with one or more tabs. Can be either Full Cut Tabs or Pre Cut Tabs,
or refer to media with enough thickness and stiffness to be used as a tab.
The media may or may not have tabs.
For example, the metric weight of a 50lb bond stock is calculated as follows:
Basis Weight x Conversion Factor = 50 x 3.76 = 188gsm
US Basic Size
The US Basic Size attribute indicates the type of media stock (measured in inches), as defined by US industry
standards.
The US basic size is the established size (in inches) of paper stocks upon which the basis weight for the stock is
calculated in the United States. The basic size of most paper stocks is also recognized by buyers and sellers as one
size that has common use requirements. Choose from the following options:
Paper stock
US basic size
Bond
17" x 22"
Ledger
17" x 22"
Thin (manifold, onion skin)
17” x 22”
Duplicator
17” x 22”
Safety
17” x 22”
Uncoated book
25” x 38”
Coated book
25” x 38”
Text book
25” x 38”
Cover Papers
20” x 26”
Fiery Command WorkStation
Managing server resources
Paper stock
US basic size
Index bristol
25.5” x 30.5”
Tagboard
24” x 36”
Blanks
22” x 28”
Printing bristol
22.5” x 28.5”
Wedding bristol
22.5” x 28.5”
Blotter
19” x 24”
Label
25” x 36”
Newsprint
24” x 36”
195
Weight
The Weight attribute indicates the weight of the media used, measured in grams per square meter (gsm) or pounds
(lbs).
The basis weights of most North American stock types are measured in pounds (lbs). To convert to gsm, multiply
the basis weight by the appropriate conversion factor for the listed stock type in the following table:
Stock type
Conversion factor
Bond
3.76
Ledger
3.76
Thin (manifold, onion skin)
3.76
Duplicator
3.76
Safety
3.76
Uncoated book
1.48
Coated book
1.48
Text book
1.48
Cover Papers
2.70
Fiery Command WorkStation
Managing server resources
Stock type
Conversion factor
Index bristol
1.81
Tagboard
1.63
Blanks
2.28
Printing bristol
2.19
Wedding bristol
2.19
Blotter
3.08
Label
1.48
Newsprint
1.63
196
Tray association
Tray association allows you to assign a Paper Catalog media entry to a copier/printer tray. Use this feature to allow
the copier/printer to automatically pull specific Paper Catalog assigned media for a job that uses a particular Paper
Catalog entry.
Note: Tray association is only supported if Paper Catalog is supported.
You can use the tray association feature to assign media from the Paper Catalog to the trays installed on the copier/
printer.
You can also use smart media to perform automatic tray association—for example, in a print shop, where the copier/
printer is configured with the same paper in the tray more than 90 percent of the time.
Tray association display
Tray association is displayed in:
•
Consumables tab
•
Paper Catalog window
•
Paper Catalog list in Job Properties Media tab
In the Consumables tab in Command WorkStation, all trays installed on the copier/printer are listed with the size of
the media loaded displayed.
If a media entry from Paper Catalog has been associated with a specific tray, that tray displays the name of the media.
If no media from the Paper Catalog has been associated, the tray displays as "Unassigned."
Note: When a Paper Catalog entry is assigned to a tray, any selection made for Input Tray for that media in Job
Properties will be ignored.
Fiery Command WorkStation
Managing server resources
197
You can assign media to a tray in a number of ways, but the media entry must match the paper attributes that are
loaded in that tray. Paper Catalog filters the entries shown for each tray by the paper attributes reported from the
Fiery Server.
Clicking the arrow to the right of each tray listed opens the Tray Information window.
•
To open this window, see Assign media to a tray on page 197.
•
To customize this window, see Change the column display2 on page 201.
You can also view the media supply in a tray.
•
See Monitor media status in a tray on page 200.
Tray association display
Tray association is displayed in:
•
Consumables tab
•
Paper Catalog window
•
Paper Catalog list in Job Properties Media tab
In the Consumables tab in Command WorkStation, all trays installed on the copier/printer are listed with the size of
the media loaded displayed.
If a media entry from Paper Catalog has been associated with a specific tray, that tray displays the name of the media.
If no media from the Paper Catalog has been associated, the tray displays as "Unassigned."
Note: When a Paper Catalog entry is assigned to a tray, any selection made for Input Tray for that media in Job
Properties will be ignored.
You can assign media to a tray in a number of ways, but the media entry must match the paper attributes that are
loaded in that tray. Paper Catalog filters the entries shown for each tray by the paper attributes reported from the
Fiery Server.
Clicking the arrow to the right of each tray listed opens the Tray Information window.
•
To open this window, see Assign media to a tray on page 197.
•
To customize this window, see Change the column display2 on page 201.
You can also view the media supply in a tray.
•
See Monitor media status in a tray on page 200.
Assign media to a tray
Use the tray association feature to assign media from the Paper Catalog to the trays installed on the copier/printer. If
the smart media feature is turned on in Paper Catalog Settings, you can perform automatic tray association.
Assign media to a tray from the Paper Catalog window
In Paper Catalog, you can associate media with a tray by right-clicking or by dragging and dropping.
1 Select Paper Catalog in Device Center > Resources.
Fiery Command WorkStation
Managing server resources
198
2 Do one of the following:
•
Right-click the media, select Associate to, and select the tray.
•
Drag and drop the media to the desired tray displayed in the Consumables pane.
Associate to will be displayed only if the media you select matches the specifications for the specific tray.
Similarly, you can only drag and drop a media entry that matches the specifications. For instance, you cannot
associate Letter size media to a tray intended for Tabloid, or Letter size media with a different weight or feed
direction.
Assign media to a tray from the Consumables tab
From the Command WorkStation Consumables tab, you can create or remove an association between media and a
tray.
1 In the main Command WorkStation window, click the Consumables tab in the bottom left pane.
2 Click the arrow to the right of a tray, or right-click on a tray listing and choose Assign Media.
Note: If media has been assigned to a tray previously, you can also choose Remove Association. If you click
Remove Association, the association is removed without any further action on your part.
3 In the Tray Information window, select one Paper Catalog entry.
All possible entries are listed for that tray. If the tray does not recognize any Paper Catalog information, you must
either create/modify a Paper Catalog entry that matches the copier/printer tray properties, or set the tray
properties on the copier/printer so that the desired Paper Catalog entries show up. Some copiers/printers have
many attributes, some have only size.
4 Click Assign Media.
The tray association is also displayed in the Paper Catalog window.
Smart media
Smart media performs automatic tray association when your favorite media is loaded.
This feature is intended for a specific environment, such as a print shop, where the copier/printer is configured with
the same paper in the tray more than 90 percent of the time. In this environment, users may be accustomed to attach
the paper labels onto the trays to remind the operators which paper to load. With the smart media feature, the Fiery
Server remembers these favorite media and performs an automatic tray association when any media with the same
attributes is loaded in the tray.
Smart media can be defined in one of the following workflows:
•
Adding new media from the tray
•
Adding new media from Paper Catalog
Note: To use smart media, you must turn it on in the Paper Catalog Settings dialog. See Turn on smart media on
page 199.
Fiery Command WorkStation
Managing server resources
199
Turn on smart media
You turn on smart media in the Paper Catalog Settings dialog box.
1 Do one of the following:
•
Click Device Center, and choose Resources > Paper Catalog.
•
Choose Server > Paper Catalog.
•
Click the Paper Catalog icon in the Job Center toolbar.
2 Click the Settings button.
3 Select PPD based.
Note: JDF based media attributes cannot be used when defining smart media.
4 If Enable Smart Media is not selected, select it.
5 Click Close or Manage.
Next steps
For information about the Manage dialog, see Managing smart media on page 200.
Add new smart media
You can add smart media from Paper Catalog, from the tray, or from the Manage Smart Media dialog box.
Add smart media from Paper Catalog
You can select media in Paper Catalog to add it as smart media.
1 Select Enable Smart Media in the Paper Catalog Settings dialog.
2 Click Manage.
3 Click Add in the Manage Smart Media dialog, then choose Add from Paper Catalog.
4 In Paper Catalog, select a media and click OK.
The selected media is designated as smart media in the Manage Smart Media dialog.
Add smart media from the tray
To add smart media, you can specify settings for loaded media on the copier/printer control panel and in the
New Media dialog box.
1 Select Enable Smart Media in the Paper Catalog Settings dialog.
2 Load media in the tray and specify media settings on the copier/printer control panel.
3 In Command WorkStation, click the tray in the consumables pane, and select Add New Media from the
menu.
The New Media dialog opens with the settings from the tray populating the matching fields. These settings
can not be edited.
Fiery Command WorkStation
Managing server resources
200
4 Specify more attributes for the new media in the New Media dialog, if required.
For more information about adding a new media in Paper Catalog, see Create a new Paper Catalog entry on
page 184.
5 Select the Add as smart media check box.
The new media is designated as a smart media, and every time a media with matching attributes is loaded in the
tray, the tray is automatically associated with the smart media.
Add smart media from the Manage Smart Media dialog box
You can select a tray and use the Manage Smart Media dialog box to add smart media.
1 Select a tray in the Consumables pane.
2 Choose Manage Smart Media from the contextual menu.
3 In the Manage Smart Media dialog, select a tray, click Add, and select Add from tray.
Managing smart media
When smart media has been created, it is listed in the Manage Smart Media dialog. In this dialog, all available trays
are listed, and for each tray, all smart media are listed.
The Manage Smart Media dialog can be accessed from the Paper Catalog Settings dialog or from the contextual
actions menu for a selected tray in the Consumables pane.
You can perform the following actions:
•
Add from either Paper Catalog or from a tray.
•
Remove a selected smart media.
•
Remove all smart media.
•
Modify the column headings.
The column headings are the available media attributes.
Monitor media status in a tray
If your copier/printer supports reporting media levels in each tray, you can check the status from the Consumables
pane.
1 In the main Command WorkStation window, click the Consumables tab in the bottom left pane.
Each tray displays a visual graphic of the media loaded.
2 Place your cursor on a tray listing to display the level as a percentage.
Fiery Command WorkStation
Managing server resources
201
Change the column display2
You can customize the column headings in the Tray Information window. You can also specify which page sizes
display in the window from the Show menu.
Change the order of these columns in the display, or add/delete the columns to present information useful to your
particular print environment. To adjust the width of a column, drag the column border to the left or right.
Note: Tray is always the first column heading and cannot be moved or deleted.
1 In the main Command WorkStation window, click the Consumables tab in the bottom left pane.
2 Click the arrow to the right of a tray.
3 In the Tray Information window, right-click any column below the window title bar.
4 Click Add and choose an item from the menu to add to the columns.
5 Click Delete to remove a column.
6 Click Move Left or Move Right to move a column in the desired direction.
7 To choose which paper sizes to display, select from the Show menu.
VDP resources
VDP (Variable Data Printing) jobs use master elements, and global and reusable resources for variable elements
inside jobs.
You can use FreeForm masters for any fixed-element data you might combine with different data from day to day.
For example, you can store a letterhead template as a FreeForm master and use it repeatedly as the background for
different letter content (the variable-element data).
Global resources are required images that must be downloaded to the Fiery Server for VDP jobs with variable
elements. These global resources are stored on the Fiery Server as a group inside each individual project.
VDP Resources allows an Administrator to manage disk space on the Fiery Server by:
•
Managing FreeForm masters
•
Viewing and deleting global resources
•
Allowing global resources to reside for future VDP jobs
•
Archiving and restoring global resources to the Fiery Server
To access VDP Resources, do one of the following:
•
Connect to the desired Fiery Server and click Device Center > Resources > VDP Resources.
•
Select Go > Device Center > VDP Resources.
Manage FreeForm masters
FreeForm variable data printing sends the master-element data for the job to the Fiery Server and rasterizes it
separately from the variable-element data.
The master-element data is stored on the Fiery Server in rasterized form as a FreeForm master, and can be used as
often as required with multiple sets of variable-element data.
Fiery Command WorkStation
Managing server resources
202
Once the master is created, use VDP Resources to view FreeForm master thumbnails and manage the master files on
the Fiery Server.
1 Connect to the desired Fiery Server and click Device Center > Resources > VDP Resources.
2 To view FreeForm masters, click FreeForm, select a FreeForm master, and then click List View or Thumbnail
View from the View menu (if your Fiery Server supports it).
3 To delete FreeForm masters, click FreeForm, select a FreeForm language or master file, and then click Delete.
4 To update current information, click Refresh (if your Fiery Server supports it).
Back up VDP resources
You can back up FreeForm masters and global resources.
Back up FreeForm masters for a project
Using Device Center’s VDP Resources feature, you can back up a FreeForm master in a separate file.
1 Connect to the desired Fiery print controller and click Device Center > Resources > VDP Resources.
2 Click FreeForm, select a FreeForm language, and then select a FreeForm master.
3 Click Backup.
4 Specify the location in which to save the file, and then click OK.
Back up global resources for a project
Using Device Center’s VDP Resources feature, you can back up projects in a separate file.
Backup and restore are not available for PDF/VT jobs.
1 Connect to the desired Fiery print controller and click Device Center > Resources > VDP Resources.
2 Click a VDP folder to display the list of available projects.
3 Select the project that you want to archive and click Backup.
4 Specify the location in which to save the file, and then click OK.
Restore VDP resources
You can restore FreeForm masters and archived global resources.
Restore FreeForm masters for a project
If you have backed up a FreeForm master in a separate file, you can restore it.
1 Click Restore.
Fiery Command WorkStation
Managing server resources
203
2 Navigate to the location of the archived master file, select the file, and then click Restore.
If you restore an archived file with an identical file name of an existing file, you are asked whether to overwrite
the existing file.
Restore archived global resources for a project
Archived jobs can only be restored to the Fiery Server where the files were originally archived.
Note: Except for FreeForm, VDP languages without global resources do not appear in VDP Resources. VDP
languages for which global resources have been restored appear in VDP Resources.
1 Click Restore.
2 Navigate to the location of the archived file, select the file, and then click Restore.
If you restore an archived file with an identical file name of an existing file, you are asked whether to overwrite
the existing file.
View and delete global resources
You can view global resources as well as job name information for a project.
1 Connect to the desired Fiery print controller and click Device Center > Resources > VDP Resources.
2 To view global resources, click a project and click List View or Thumbnail View from the View menu (if your
Fiery Server supports it).
3 To view submitted job name information and resources for a project, click a project and click Resources or
Jobs (if your Fiery Server supports it).
4 To delete global resources, click a VDP language or a project, and then click Delete.
5 To update current information, click Refresh (if your Fiery Server supports it).
Fonts
The Font Manager lists all PostScript and PCL fonts resident on the Fiery Server. With the Font Manager, you can
backup and restore only PostScript fonts on the Fiery Server, as well as print the complete Font List.
Manage fonts on the Fiery server
You can add, update, and delete fonts, as well as print a font list.
Note: The PCL option is available on a Fiery Server that supports it. Support is limited to viewing the PCL Font List.
PCL font downloading is not available.
1 Do one of the following:
•
Choose Device Center > Resources tab > Fonts.
•
Choose Fonts from the Go menu.
A list of the fonts that currently reside on the Fiery Server appears.
Fiery Command WorkStation
Managing server resources
204
2 Manage the fonts by using the toolbar buttons:
•
To add or update fonts, click Add New. (You can add Adobe PostScript Type 1 fonts.) Click Add to locate the
font that you wish to download, and then click OK and Refresh.
•
To delete a font, select an unlocked font in the Font List and click Delete. Locked fonts cannot be deleted.
•
To print the Font List, click Print.
Back up and restore fonts
You can back up and restore only PostScript fonts. All PostScript fonts are backed up or restored; you cannot select
individual fonts.
Note: You must be logged in as Administrator to back up and restore fonts on the Fiery Server.
1 Do one of the following:
•
Choose Device Center > Resources tab > Fonts.
•
Choose Fonts from the Go menu.
2 Click Backup or Restore.
3 In the window that appears, navigate to the folder where you want to back up or restore the fonts, and follow the
prompts. Observe these guidelines:
•
Do not back up fonts to an internal hard drive that also contains the Fiery Server.
•
You must restore fonts only to the same Fiery Server from which the fonts were originally backed up.
View user and group privileges
You can view user and group privileges. Administrators assign privileges from Configure, using default groups or
creating new groups. All users in a group have the same privileges.
You can use Compare Rights to display a quick summary table of Fiery Server privileges and user and group access
rights.
To modify user and group privileges, click Configure. For more information, seeAccess Configure on page 27.
Note: You must be logged in as an Administrator to view privileges and access Configure.
Access Users & Groups
The Users & Groups feature allows you to view privileges.
•
Do one of the following:
•
Connect to the desired Fiery Server and click Device Center > Users > Users & Groups.
•
Choose Go > Users & Groups.
Fiery Command WorkStation
Managing server resources
205
View detailed user and group privileges
You can view information such as the number of users in a group, user names, e-mail addresses, the LDAP setup,
and the total number of Fiery Server users and groups.
1 Connect to the desired Fiery Server and click Device Center > Users > Users & Groups.
2 Do one of the following:
•
Click a user or group on the left and view information about the particular user or group in the right window
pane.
•
Click Info to display information such as the total number of users in the group and a group description, if
available. The group's Fiery Server privileges are displayed under Privileges.
•
Click Users to display a list of users for that particular group along with their user names, names, and e-mail
addresses, if available.
•
Under LDAP Users & Groups, you can view the summary of LDAP Setup, such as whether LDAP is enabled,
and the total number of groups and users.
•
Under Local Users & Groups, you can view the total number of local Fiery Server users and groups. This does
not include the total number of members of LDAP groups.
3 Click Configure to change current Fiery Server Setup options. See Access Configure on page 27.
Compare rights
You can display a summary of Fiery Server privileges and user and group access rights.
•
Do one of the following:
•
Connect to the desired Fiery Server and click Device Center > Users > Compare Rights.
•
Choose Go > Compare Rights.
Next steps
Click Configure to change current Fiery Server Setup options. See Access Configure on page 27.
View or add Printing Groups
With Printing Groups, administrators can set up print groups and passwords.
Note: Printing Groups may not be supported for all Fiery Servers.
To modify user and group privileges, click Configure. For more information, see Change group privileges
(FS100/100Pro) on page 35.
Fiery Command WorkStation
Managing server resources
206
Access Printing Groups
The Printing Groups feature allows you to set up print groups and passwords.
•
Do one of the following:
•
Connect to the desired Fiery Server and click Device Center > Users > Printing Groups.
•
Choose Go > Device Center > Printing Groups.
Add a Printing Group
You can add, delete, or change the name of a printing group.
1 Connect to the desired Fiery Server and click Device Center > Users > Printing Groups.
2 Click Create New.
3 Enter a Group name and password, and verify the password.
4 Click OK.
5 (Optional) Do one of the following:
•
To modify the name or password of a Printing Group, select the Printing Group from the list, and then click
Edit.
•
To delete a Printing Group, select the Printing Group from the list, and then click Delete.
Next steps
For more information about Printing Groups, see your Fiery Server documentation.
Use the Job Log
The Job Log preserves a record of all processed and printed jobs, the date and time they were printed, and their
characteristics.
Note: If an Administrator clears the Fiery Server or installs new software, the Job Log may also be cleared.
An Administrator can set automated Job Log maintenance in Configure, such as scheduling a day and time to export
and clear the Job Log.
View the Job Log
1 Connect to the desired Fiery Server and do one of the following:
•
Click Device Center > Logs > Job Log.
•
Click Server > Logs.
2 Specify the date range of jobs you want to view in the From and To fields and click Go.
3 To view all jobs, click Show All.
If you select Proof Print for a job, the printed proof appears in the Job Log with a copy count set to one.
Fiery Command WorkStation
Managing server resources
207
Print the Job Log
1 Connect to the desired Fiery Server and do one of the following:
•
Click Device Center > Logs > Job Log.
•
Click Server > Logs.
2 Click Print.
3 Choose the printer that you want to print to: either Fiery (the Fiery Server you are currently connected to) or
Local Printer.
•
If you select Fiery, your job is printed.
•
If you select Local Printer, select a printer, and then click Print.
Export the contents of the Job Log
1 Connect to the desired Fiery Server and do one of the following:
•
Click Device Center > Logs > Job Log.
•
Click Server > Logs.
2 Click Export.
3 Select Current View to export the current date range view of the Job Log or select Complete Log to export the
entire Job Log, regardless of the date range specified in your view.
Export and/or clear the contents of the Job Log
1 Connect to the desired Fiery Server and do one of the following:
•
Click Device Center > Logs > Job Log.
•
Click Server > Logs.
2 Do one of the following:
•
Click Export and Clear.
•
Click Clear.
Fiery Command WorkStation
Graphic arts tools
208
Graphic arts tools
Fiery graphic arts features
Some graphic arts features of the Fiery Server are available through feature packages. To determine which packages
are supported by your Fiery Server, see the documentation that accompanies your Fiery Server.
•
Fiery Graphic Arts Package, Premium Edition on page 208
•
Fiery Productivity Package on page 209
Fiery Graphic Arts Package, Premium Edition
Fiery Graphic Arts Package, Premium Edition is a feature package for the Fiery Server. If this package is installed on
the Fiery Server, the following features are available in Command WorkStation:
•
Two-color print mapping on page 175
•
Control Bar on page 209
•
Trapping on page 211 (configurable)
•
Progressives on page 213
•
Halftone simulation for proofing on page 214 (with frequency settings per color)
•
Paper simulation white point editing on page 215
•
Preflight on page 216
•
ImageViewer on page 217
The following features of Fiery Graphic Arts Package, Premium Edition are not part of Command WorkStation:
•
Hot Folders filters
•
Postflight print option
•
Ugra/Fogra Media Wedge
•
Integrated Altona Visual Test
Fiery Command WorkStation
Graphic arts tools
209
Fiery Productivity Package
Fiery Productivity Package is a feature package for the Fiery Server that contains some graphic arts features.
If Fiery Productivity Package is installed on the Fiery Server, the following features are available in Command
WorkStation:
•
Spot colors on page 167 (part of the Spot-On feature)
•
Control Bar on page 209
•
Trapping on page 211 (configurable)
•
Paper simulation white point editing on page 215
•
ImageViewer on page 217
•
Advanced job management (if available on the copier/printer):
•
Rush Print
•
Print and Process Next
•
Reorder Jobs
•
Virtual printers on page 177
•
Secure Erase
The following features of Fiery Productivity Package are not part of Command WorkStation:
•
Hot Folders
•
Hot Folders filters
•
Postflight print option
Control Bar
If the Control Bar feature is supported by your Fiery Server, you can add a static color bar and dynamic job
information to each printed page at the user-defined location.
This is useful for proofing and checking the color accuracy of a job. You can set the feature as a server default or
override specific settings on a per‑job basis.
The default Control Bar fits the Fiery Server default paper size, Letter/A4, or larger. You can create Control Bars for
other paper sizes. Many jobs print satisfactorily with the default Control Bar, but if you require your own color bars,
create them by defining a custom Control Bar.
Duplicating a Control Bar displays all the values of the original Control Bar. You can edit and save the duplicate as a
custom Control Bar. Every page produced by the Fiery Server has a System Page Size. No two Control Bars can use
the same System Page Size values. These two numbers represent the width and height of the page, in points, as
processed by the system. If you edit and save a Control Bar as a custom Control Bar without changing these values, a
warning message is displayed.
A Control Bar is not a part of a job, so a document can be printed with one Control Bar and then with another one if
the Control Bar definition has changed. To keep the Control Bar and reuse it later, you must save the changes as a
custom Control Bar.
You can use the Control Bar, in conjunction with analytical tools such as Fiery Color Profiler Suite, to evaluate color
quality.
Fiery Command WorkStation
Graphic arts tools
210
Print a Control Bar on each page by default
You can add a Control Bar to each page to check color accuracy and proof a job. Selecting the Print Control Bar by
Default option prints a Control Bar on all pages sent to the Fiery Server.
1 In Device Center, click the Color Setup tab and click Control Bar.
2 Select Print Control Bar by Default.
View and edit a Control Bar
You can view the definition of a Control Bar and edit the settings of an existing Control Bar, except for System Page
Size. The System Page Size for the default Control Bar refers to different system page sizes. For other Control Bars,
values are displayed in the text field.
1 In Device Center, click the Color Setup tab and click Control Bar.
2 Select the Control Bar in the list on the left side and view the definition on the right side of the window.
3 Click Edit and define the values for each option.
• Description - Add a one-line description of the custom Control Bar for your future reference.
• Color Bar EPS File - The EPS file contains a color bar and any logo or static information that you want to
include on the page. The default is Standard. Select Custom to select a user-designed EPS file from your
computer, or select None to indicate that no EPS file is required.
• Job Information - The job settings that you select are printed with the color bar. The print options vary
depending on your model of Fiery Server.
• Text Location - This list allows you to select the location in which you want the job information printed on
the page. The text is oriented to be read along the specified page edge.
• Distance from the edge - These options allow you to define the distance from the lower-left corner at
which you want the job information to begin printing.
4 Click OK to save your edits.
Create a custom or duplicate Control Bar
You can duplicate a control bar or create a custom Control Bar that better fits your needs. For example, create a
Control Bar that uses a different EPS file as the Control Bar image.
When you open the Control Bar window for the first time, only the default Control Bar is available in the Control
Bar Definition dialog box.
1 In Device Center, click the Color Setup tab and click Control Bar.
2 Do one of the following
•
To duplicate a Control Bar, select the Control Bar, click Duplicate, and define the values for each option.
•
To create a custom Control Bar, click Create New.
3 Define the values for each option. To determine the System Page Size, see a previously printed Control Bar on a
document using the targeted paper size and orientation. A System Page Size label with two numbers is printed
with each Control Bar. These numbers are the exact numbers to enter when creating a custom Control Bar.
Fiery Command WorkStation
Graphic arts tools
211
4 Click OK to save the Control Bar.
Export, import, or delete a custom Control Bar
You can export a custom Control Bar from the Fiery Server to your computer as a file and share the local copy or
import it to another Fiery Server. Imported Control Bars are added to the list in the Control Bar tab and are
immediately enabled for use on the Fiery Server.
Note: You can delete a custom Control Bar from the list but you cannot delete the default Control Bar.
1 In Device Center, click the Color Setup tab and click Control Bar.
2 in the Control Bar window, do one of the following:
•
To export the Control Bar, click Export, browse to the location where you want to save the file, and click OK.
•
To import the Control Bar, click Import, locate and select the desired Control Bar, and click Open.
Note: If the imported Control Bar as the same name as an existing Control Bar in the list, you are prompted to
rename the Control Bar.
3 To delete the custom Control Bar, select a Control Bar in the list, click Delete, and then click Yes to confirm.
Restore the default Control Bar
You can delete all user-defined Control Bars and restore the default Control Bar to its original state.
1 In Device Center, click the Color Setup tab and click Control Bar.
2 Select a Control Bar in the list and click Edit.
3 Click Factory Default and click OK.
Trapping
Trapping is a technique to prevent white edges around objects, or “halos,” caused by the misalignment of color
plates. With trapping, objects are printed with slightly enlarged edges, or traps, to fill any gaps between objects.
Trapping is applied to a job when the Auto Trapping print option is enabled.
If configurable Trapping is supported by your Fiery Server, you have full control over the trapping settings used by
the Auto Trapping print option. The factory default settings of the Fiery Server are optimized for the copier/printer
using regular paper. Many jobs print satisfactorily with the default trapping settings, but if they do not provide the
results necessary for the media that you use, configure the trapping settings to meet your requirements.
For more information about Auto Trapping, see Color Printing, which is part of the user documentation set.
Set default auto trapping for all jobs
Selecting the Use Trap Settings by Default option sets the Fiery Server default value of the Auto Trapping print
option to On and applies trapping to all jobs sent to the Fiery Server by default.
1 In Device Center, click the Color Setup tab and click Trapping.
2 Select Use Trap Settings by Default.
Fiery Command WorkStation
Graphic arts tools
212
Specify the trap width
Trap Width values determine how thick the trapped area between objects is. You specify the width values relative to
the paper feed direction: Horizontal is perpendicular to the feed direction and Vertical is parallel to the feed
direction.
1 In Device Center, click the Color Setup tab and click Trapping.
2 For Trap Width, specify the horizontal and vertical widths. Or, if you want to force the values to be equal, select
the link icon displayed between the horizontal and vertical values. If the values are different when you select the
link icon, the higher of the two values is used for both.
• Horizontal - Defines the horizontal thickness of the trapped areas (0-10 pixels).
• Vertical - Defines the vertical thickness of the trapped areas (0-10 pixels).
The bitmap image provides a dynamic visual example of the selected values.
Specify trap color reduction
Trap Color Reduction values determine how much of each color is applied in the trap. The trap between two objects
of different colors can create a line of a third color that is a combination of the two colors. You can reduce the
appearance of this line using Trap Color Reduction.
The values you specify are the percent reduction of the toner. A 100% reduction results in no toner intensity applied
to the trap. A 0% reduction results in the same toner intensity as the object edge.
1 In Device Center, click the Color Setup tab and click Trapping.
2 Under Trap Color Reduction, specify the values for the color channels:
• Cyan - Defines the trap reduction in cyan (0-100%).
• Magenta - Defines the trap reduction in magenta (0-100%).
• Yellow - Defines the trap reduction in yellow (0-100%).
• Black - Defines the trap reduction in black (0-100%).
3 (Optional) If you want to force all the reduction values to be the same, select the link icon displayed between the
trap reduction values. If the values are different when you select the link icon, the highest value is used for all
values.
The icon to the left of each color provides a visual example of the selected value.
Specify trap shape
Trap Shape represents how a single pixel appears when trapped against a contrasting background. With elements
bigger than one pixel, the shape, or part of the shape, is only visible at the corners of objects.
1 In Device Center, click the Color Setup tab and click Trapping.
2 Under Trap Shape, select either Ellipse, Diamond, or Rectangle.
Fiery Command WorkStation
Graphic arts tools
213
Specify trap object types
When you do not select an option for Trap Object Types, only the trapping of objects (text and graphics) against
objects is applied. To apply trapping to images, use the settings under Trap Object Types.
1 In Device Center, click the Color Setup tab and click Trapping.
2 Under Trap Object Types, select any of the following:
• Trap Objects to Images - Trapping is applied to boundary areas between objects and images.
• Trap Images Internally - Trapping is applied to every individual pixel of an image. This option is available
only when you select Trap Objects to Images.
Progressives
The term “progressives” refers to printing any combination of the C, M, Y, and K separations in a multi-color
document. If the Progressives feature is supported by your Fiery Server, you can use it to diagnose problems in a job.
Most printing processes involving more than one or two colorants apply the colorants sequentially. Traditionally,
progressives are the intermediate states after some and before all colorants have been applied. The Progressives
feature lets you select which combinations of colors to print (up to four per original document page).
The sequence for Progressives does not have to represent the actual sequence applied by the printer. A different
sequence may be useful for analyzing the image composition.
With Progressives, you can see the influence of trapping, check the halftone interaction between two colorants,
verify registration of two plates relative to each other, and see the color separation parameters (making it easy, for
example, to visualize the GCR level when only the black plate, or all but the black plate are printed).
The Progressives feature shows the color separations used by the job when printed to the copier/printer. The feature
is not intended to be used to proof for another printer.
You can configure Progressives settings and then select the Progressives print option when you print a job. The job is
printed as separations in the sequence specified.
You cannot print a job with Progressives and Postflight at the same time. A constraint is set for these print options.
ImageViewer edits to separations do not affect Progressives. If you turn off one or more separations of a job in
ImageViewer and then print the job with Progressives turned on, the job is printed with the values specified for
Progressives.
View or edit Progressives settings
The default Progressives configuration prints four sheets for each document page. Each sheet adds another color, in
this order: Black, Cyan, Magenta, Yellow. If you want to customize the combinations of color channels or number of
sheets to print, edit the settings in the Progressives window.
1 In Device Center, click the Color Setup tab and click Progressives.
2 In the Progressives window, specify the color channels for each sheet, select the sheets to print, and click Apply.
At least one colorant (Cyan, Magenta, Yellow, or Black) must be selected for each sheet and at least one sheet
must be selected.
Fiery Command WorkStation
Graphic arts tools
214
Halftone simulation for proofing
For advanced proofing purposes, the Halftone Simulation feature offers user-controlled halftone generation. For
halftone resolutions that are lower than the copier/printer resolution, halftoned proofs can simulate the dots on
films or plates for offset printing that result from screening an image.
You can select preset halftone screens to print jobs with good results. If Halftone Simulation is supported by your
Fiery Server, you can define custom screening functions applied to your print job. The Fiery Server may also support
different frequency values for each color channel.
When color accuracy is more important than dot simulation, make sure that the Fiery Server is calibrated using the
particular halftone screen you use and that the output profile you print with is also matched to the halftone screen.
Changing a halftone screen usually modifies the color response of the copier/printer.
When dot simulation is more important than color accuracy, print with no CMYK simulation (with the CMYK/
Grayscale Source set to Bypass Conversion or None).
View or edit custom halftone screens
You can customize the values for a halftone screen by configuring a custom halftone screen and then selecting the
screen in the Halftone Simulation print option when you print a job.
You can specify up to three custom halftone screens that correspond to the User Screen 1, User Screen 2, and User
Screen 3 settings for the Halftone Simulation print option. For each of these screens, you can define the angle,
frequency, and dot shape.
Specify a custom halftone screen
You specify a custom halftone screen in the Halftone Simulation window.
1 In Device Center, click the Color Setup tab and click Halftone Simulation.
2 In the Halftone Simulation window, specify the angle and frequency for each color channel (Cyan, Magenta,
Yellow, and Black), and dot shape for a custom halftone screen.
• Angle - Angle in degrees (0-360) for each color.
• Frequency - Frequency refers to the number of rows of spots that combine to form a halftone dot, expressed
in Lines per Inch (LPI).
To constrain all four color channels to the same Frequency value, select the link icon.
If your Fiery Server does not support different Frequency values for each color, the Frequency value is applied
to all color channels.
• Dot shape - Select a shape from the list or select Custom to specify a custom shape.
Specify a custom dot shape
You can customize a dot shape if the standard dot shapes do not meet your needs.
1 In the Edit Dot Shape window, select a predefined shape from the Template list.
The PostScript function for the shape appears in the text field.
2 Modify the shape by editing the PostScript function, and then click Preview to view it.
Fiery Command WorkStation
Graphic arts tools
215
3 Change the size of the preview by moving the Area Coverage slider.
4 Save the custom shape and close the window by clicking OK.
Paper simulation white point editing
The Paper Simulation feature renders paper white as a printed color in the output, rather than leaving white areas of
the page unprinted. White point editing allows you to adjust the hue, brightness, and saturation of the simulated
paper white, which is defined in a CMYK source profile as the white point.
Many jobs print satisfactorily with the default white point setting used by the Paper Simulation print option. If Paper
Simulation with white point editing is supported by your Fiery Server, you can customize the white point if necessary
to achieve the result that you want.
Note: If you print a job with Paper Simulation, and you have defined a substitute color as C=0, M=0, Y=0, K=0, the
values defined in Substitute Colors override those for Paper Simulation.
Edit Paper Simulation white point values
The Paper Simulation white point editing feature lets you customize an existing CMYK source profile and adjust its
white point. You must also link the custom profile with a specific output profile. When you print a job, you must
select the customized CMYK source profile and its linked output profile to see the effect of the Paper Simulation
White Point editing.
Before you begin
If you want to preserve the existing CMYK source profile, make a copy of it before editing the white point. You can
copy a profile by exporting it and then importing it with a different name.
Note: You can edit the white point of a CMYK source profile but not an output profile.
If you have a spectrophotometer (such as an ES-2000), you can import measured color values directly. This feature
allows you to target a match based on the actual color of the paper. To use a spectrophotometer, install and set up
the spectrophotometer before you begin editing the white point.
Note: To use an X-Rite i1Pro 2, you must use an instrument obtained from EFI.
1 In Device Center, click the Resources tab and click Profiles.
2 Select a CMYK source profile to customize and click Paper Simulation.
3 Select the output profile to link with this CMYK source profile and click OK.
Note: When you print a job with the custom profile, you must select the same output profile.
4 Make sure that the correct monitor profile for your monitor is displayed under Monitor Profile. If the correct
monitor profile is not selected, select the correct monitor profile in Command WorkStation Preferences.
5 To measure a new white point using a spectrophotometer, click the spectrophotometer icon.
6 Place the spectrophotometer in its calibration cradle and click Calibrate. Calibration improves the accuracy of
measurements.
7 Place the spectrophotometer over the target color, making sure to center the sample aperture over the color.
8 Press the button on the spectrophotometer to take the measurement. The measured CMYK values are imported
into the CMYK fields, and the corresponding Lab values are displayed.
Fiery Command WorkStation
Graphic arts tools
216
9 Alternatively, or additionally, you can edit the Hue, Brightness, and Saturation values manually.
• Hue - 0.0 to 359.9
• Brightness - 0.0 to 100.0 (inclusive)
• Saturation - 0.0 to 100.0 (inclusive)
Edit the values by dragging the sliders or typing values in the text fields. The sliders do not show absolute
values. The slider position and associated values are relative to the paper white definition in effect when you
open the dialog box. View the changes in the preview patch in the upper-left corner of the dialog box and in
the Lab values displayed on the right.
10 To print a test page, click Print.
11 If the test page looks correct, click Save and close the Paper Simulation White Point dialog box.
Preflight
You can use the Preflight feature to check a job before printing, to reduce costly printing errors. Preflight checks the
most common areas of error to ensure that a job will print successfully and to the expected quality on the selected
printer.
Preflight generates a report of errors as well as information about the job, including security settings, page size, and
color spaces.
Preflight checking can be enabled in Hot Folders and Virtual Printers as well as in Command WorkStation.
Note: Processed jobs cannot be checked with Preflight.
The following file formats are supported for Preflight: PostScript, PDF, EPS, PPML, Creo VPS, and PDF/VT.
TIFF and PCL file formats are not supported for Preflight.
Preflight can check for the following categories of errors:
•
•
Fonts - Checks for missing fonts and Courier font substitution.
Spot Colors - Checks for missing spot colors. You can add missing spot colors in Command WorkStation Spot
Colors.
•
Image Resolution - Checks for image resolution less than a specified value.
•
VDP Resources - Checks for missing VDP resources. You can specify the number of records to check, to
prevent a potentially long processing time.
•
Hairlines - Checks for line thickness less than a specified value.
•
Overprint - Checks for overprint.
•
PostScript - Checks for PostScript errors.
You can configure Preflight to specify which categories of errors to check and how errors are reported. Preflight
configuration settings can be saved as a preset, which allows you to quickly select a Preflight configuration for a
particular job.
Fiery Command WorkStation
Graphic arts tools
217
Configure and run Preflight check
You can configure Preflight to specify which categories of errors to check and how errors are reported. Preflight
configuration settings can be saved as a preset, which allows you to quickly select a Preflight configuration for a
particular job.
1 In Job Center, select a held job and select Actions > Preflight.
2 Optionally, select a Preset (collection of settings) from the Preset list.
3 Select each category of error to check and specify any settings. Clear the check box to skip a particular category.
A skipped category is automatically given a Pass result.
4 Select a notification level (Critical or Warning) for each category of error.
5 Select Stop Preflight on first critical error if you want to stop running Preflight as soon as a critical error is
detected.
6 To save the settings as a new preset, select Save or Save As from the Preset list.
7 To perform the Preflight check with these settings, click Preflight.
Preflight runs and displays the results in a report. You can print and save this report, and you can also redisplay
the report in Job Center by selecting the job and clicking the link by the Preflight status.
ImageViewer
Fiery ImageViewer allows you to soft proof and edit colors or gray levels in a job before printing. You can use
ImageViewer to preview job placement, orientation, and content, as well as general color or grayscale accuracy.
ImageViewer displays the raster image of a processed job.
Color output
Unlike the Preview application, ImageViewer displays the job with the actual CMYK values that are sent to the
printer and therefore provides an accurate soft proof. The soft proof does not display the effects of calibration,
however, which can affect color.
You can edit the individual C, M, Y, and K response curves. You can save your edits and apply them to other color
jobs. You can also apply G7 calibration curves that were created using CHROMiX Curve2 or Curve3.
You can display the separation data for each process color independently or in combination with any other process
colors. If the job has Halftone Simulation settings, the preview shows a composite view of all separations at the dot
level. If you print pages from ImageViewer, the output includes composite color information for the separations that
are selected in ImageViewer.
Black-and-white output
ImageViewer allows you to adjust the gray levels in a job before printing. You make these adjustments visually, by
changing the response curve (a graphical representation of input vs. output density), and viewing the effect in a
preview of the job.
ImageViewer also allows you to install the response curve adjustments of the current job on the Fiery Server. The
same gray level adjustments are then applied to all jobs that are processed subsequently.
Fiery Command WorkStation
Graphic arts tools
218
Start ImageViewer
You can start ImageViewer from a job in Command WorkStation.
Note: You can also start ImageViewer from Command WorkStation Preview.
1 In Command WorkStation Job Center, select a job that has been processed and held.
If needed, select Actions > Process and Hold to move a job to processed/held status.
2 Do one of the following:
•
Select Actions > ImageViewer.
•
Right-click (Windows) or Ctrl-click (Mac OS) the selected job, and select ImageViewer from the menu that
appears.
Adjust the image preview
The Navigator pane controls what appears in the image preview. The area of the image preview can be enlarged to fit
the screen.
The bounding box in the Navigator pane contains the part of the image that is visible in the image preview. If the
bounding box is hard to see, change its color in Preferences.
1 To reposition the part of the image that shows in the preview, do one of the following:
•
Drag the bounding box in the Navigator pane.
•
Drag the image.
•
To center the preview on a specific location in the image, hold down the Shift key and click that location.
2 To rotate the image, do one of the following:
•
To rotate 90° clockwise, click the Rotate icon
•
To rotate 90°, 180°, or 270° clockwise, or to reset the preview to the original orientation, click View > Rotate
and click the appropriate selection.
The rotation applies only to the preview, not the printed job.
3 To enlarge the area of the image preview, click View > Full Screen.
The page thumbnails and the viewer controls are hidden and can be made to appear by moving the cursor to the
left and right sides of the screen, respectively.
Resize the image
In addition to the zoom control at the bottom of the screen, there are several ways to resize the image.
1 To zoom in so that each data pixel in the image is displayed as a single pixel on the screen, select View > Actual
Pixels.
The monitor resolution setting determines the actual size of the pixel display.
Note: If the job has Halftone Simulation settings and the zoom is set at 100% or higher, the halftone dot pattern
and shape are displayed. Depending on the frequency of the dot pattern, a dot will consist of several pixels.
Fiery Command WorkStation
Graphic arts tools
219
2 To zoom out so that the entire page fits in the image preview, click the Fit in Window icon next to the zoom
control or select View > Fit in Window
3 To display a magnified view of the area around the cursor location that moves with the cursor, click the Magnifier
icon or select View > Magnifier.
View color values in the image
For a color job, ImageViewer displays the job with the actual CMYK values that are sent to the printer. You can
inspect the CMYK value of any point in the image.
•
Hover over a pixel in the image.
The CMYK values are displayed in the Separations pane.
Display color separations
The Separations pane controls how color separations are displayed in the image preview and in printed output. Each
page in the job may have different separations enabled.
•
To display color separations, do any of the following:
•
To control which separations appear, select or clear the check box next to the separation name in the
Separations pane.
•
To invert the current selection of separations, select View > Separations > Invert Selection.
Inverting a selection makes unselected separations the new selection. For example, if Cyan and Magenta are
selected, inverting the selection displays Yellow and Black.
•
To quickly display all separations, choose View > Separations > Select All.
Edit color response or gray response using curves
You can edit the response curves in the Color Adjust pane (for color output) or Curve Edit pane (for black-and-white
output) to make precise edits to a job. This feature lets you customize the response curve for each color separation in
a color job or for the gray of a black-and-white job.
For a black-and-white job, edits to the gray response curve apply to all pages of the job.
Note: After you make curve edits for a color job, save the job before you switch to the Color Wheel tab. Otherwise,
all of your curve edits are lost.
1 For a color job, click the Curves tab in the Color Adjust pane and do any of the following to adjust how the
curves are displayed:
•
To show or hide a color curve, click the eye icon below the specific color block.
•
To select a specific color curve, click its color block, which brings the curve to the front.
•
Use the Page Up and Page Down keys to switch between the curves.
2 Do any of the following:
•
To add a point on the curve, click anywhere on the curve.
•
To edit a curve, drag a point on the curve to the desired response value.
Fiery Command WorkStation
Graphic arts tools
220
Note: In Windows, you can select a point and use the arrow keys to move the point 1% in any direction, or to
move a large amount, hold down the Shift key and press an arrow key.
•
To delete a point on a curve, select the point and press Delete.
You can also select a point and drag it over the point you want to delete.
•
In Windows, move from point to point by selecting one point on the curve and using Shift-Page-Up and ShiftPage-Down.
Edit colors using the color wheel
For a color job, you can edit colors using the color wheel in the Color Adjust pane.
Note: The edits that you make using the color wheel are kept if you switch to the Curves tab. But edits that you
make using curves are lost if you switch to the Color Wheel tab without first saving the job.
1 Click the Color Wheel tab in the Color Adjust pane.
2 Click a tonal range (Highlights, Overall, or Shadows) to set the tonal range for the edit.
Note: The tonal range selection does not apply to Brightness. Brightness always applies to the entire tonal
range.
3 To edit hue and saturation, click a new location inside the color wheel.
The image preview changes to show the result of the edit.
4 Fine-tune the edit by dragging the sliders for Hue, Saturation, Black, or Brightness, or type a new numeric
value to the right of the slider.
Edit gray response curve through image
For a black-and-white Fiery Server, you can use the gray response curve in the Curve Edit pane to make precise edits
to the gray response of a job.
Edits to the gray response curve apply to all pages of the job.
Note: The response curve under Curve Edit is not the response curve of the Fiery Server. In a processed job, the
gray levels have already been converted by the Fiery Server.
1 Move the cursor in the image to an area of gray that you want to adjust.
An image may contain many levels of gray in a small area. Make sure that you enlarge the image enough to locate
the desired gray precisely.
2 Ctrl-click at the cursor location.
The point on the response curve that corresponds to the gray level at the location is highlighted.
3 Move the selected point to the desired location using the arrow keys (Up for darker, Down for lighter) to adjust
the response curve.
Fiery Command WorkStation
Graphic arts tools
221
Apply color edits to one or all pages
For a color job, you can copy color edits from the current page and paste them to another page or to all pages in a
job.
1 Select Edit > Color Adjust > Copy.
2 Go to the target page and click Edit > Color Adjust > Paste, or click Edit > Color Adjust > Paste to All.
Apply color edits through a local file
For a color job, you can save color edits to a local file on your computer and then import the edits from the file to the
current page in ImageViewer. The current page may be in the same job or in a different job.
Note: For some types of Fiery Server, you can also save color edits as a server preset and apply the preset to a
different job.
Save color edits to file
1 Select File > Export > Color Adjust.
2 Type a name for the file and select a file type.
3 Browse to the location where you want to save the file and save it.
Import color edits from file
1 Select File > Import > Color Adjust.
2 Locate and select the desired color edits file.
3 Click Open.
The color edits are applied to the current page.
Apply color edits through a server preset
If your Fiery Server supports this feature, you can save color edits as a server preset. With a preset, you can apply the
same color edits to a different job in ImageViewer, and you can also apply the preset to a held job through Command
WorkStation Job Properties, without using ImageViewer.
Note: You can also save color edits to a local file on your computer and apply them to a different job in
ImageViewer.
Save color edits as a preset
1 Make the edits that you want to save.
2 In the Color Adjust pane, click Preset > Save As.
3 Type a name for the preset and click OK.
The preset is added to the list.
Fiery Command WorkStation
Graphic arts tools
222
Apply color edits through a preset in ImageViewer
1 In the Color Adjust pane, select the preset in the Preset list.
2 Click File > Save.
The preset is applied to the current job.
Apply color edits through a preset in Job Properties
1 In Command WorkStation Job Center, select a held job and click Actions > Properties.
2 Click the Color tab, select the preset in the Curves option, and click OK.
3 With the same job selected, click Actions > Process and Hold.
The color edits of the preset are applied to the processed job.
Note: After the job is processed, the color edits are incorporated in the job and no longer appear as edits in
ImageViewer.
Delete a preset
1 In the Color Adjust pane, select the preset in the Preset list.
The preset is applied to the image.
2 Click Preset > Delete, and click Yes to confirm.
The preset is removed from the list and from the image.
Apply color curve from Curve2/Curve3 file
For a color job, you can import a CMYK response curve that was created in CHROMiX Curve2 or Curve3 (G7
calibration software) and exported as a text file. When you import the curve in ImageViewer, it is applied to the
current page, replacing the existing response curve.
1 Select File > Import > Import Curve.
2 Locate and select the file that contains the curve.
3 Click Open.
Apply gray response curve edits
For a black-and-white job, you can save the edited gray response curve to a file on your computer and then apply the
same edits to a different black-and-white job.
The gray response curve is applied to all pages of a job.
Save gray response curve
1 Select File > Save Curve to File.
2 Type a name for the file.
3 Browse to the location where you want to save the file and save it.
Fiery Command WorkStation
Graphic arts tools
223
Import gray response curve
Note: You will lose any changes you have made to the current job when you import a curve from a file.
1 Select File > Load Curve from File.
2 Locate and select the desired gray response curve.
3 Click Open.
Print the job with edits
After you make edits to the job, you can print it.
For a color job, the printed page(s) include composite color information for the separations that are selected in the
Separations pane. Each page in the job may have different separations enabled.
1 For each page in a color job, set the separations in the Separations pane that you want to print.
2 Click File > Save.
3 Click File > Print.
4 Select the page range and click Print.
Export soft proof to PDF
For a color job, you can save a soft proof in PDF format for viewing at a different time or location. When you export
to PDF, you can control image quality and save selected pages. You cannot edit or print soft proof PDF files, but you
can add annotations.
Note: The soft proof does not display the effects of calibration, which can affect color.
When you export your soft proof to a PDF, you can set the image quality.
•
JPEG2000 compression downsamples the image to one-half of the printer resolution and applies JPEG2000
compression. The compression should not affect the quality of the images and color. Text using standard font
sizes and color densities should remain very legible. However, some fonts and line art might not appear as
smooth as they are in printed pages.
•
Highest image quality creates a full-resolution image that has the same resolution as the printer and lossless
compression. The resulting file can be much larger than the compressed file. Use this setting only if the
JPEG2000 compression setting does not produce an acceptable result.
You can set the resolution of the soft proof to a different value than the resolution of the job. The available settings
are the same as those that are available for the job.
1 Click File > Export > Soft Proof PDF.
2 Specify the page range. Use commas to separate page numbers or page ranges.
3 Specify the soft proof PDF options:
•
Select Save one PDF containing selected pages or Save each page as a separate PDF.
•
Select Highest image quality or Use JPEG2000 compression.
4 If available, select the desired resolution.
Fiery Command WorkStation
Graphic arts tools
224
5 Click OK.
6 Type a name for the file. The file type is always PDF.
7 Browse to the location where you want to save the file, and click Save.
Compare the monitor profile to the output profile
For color jobs, if Fiery Color Profiler Suite is installed on your computer, you can use Fiery Profile Inspector to view a
model of the gamut of your monitor profile compared to the gamut of the output profile specified for the job.
This comparison helps you generate an accurate soft proof. It gives you an idea of how the image you see in
ImageViewer might compare to the printed output.
•
In ImageViewer, select View > Compare Monitor Profile with Output Profile.
Note: If Fiery Color Profiler Suite is installed on your computer, you can click Create a Monitor Profile in
ImageViewer Preferences to create a new monitor profile in Fiery Monitor Profiler.
Install current edits on the Fiery Server
For a black-and-white Fiery Server, you can install the gray response curve edits of the current job on the server.
After you install the current curve edits, the same gray level adjustments will be applied to all jobs that are processed
subsequently.
You might use this feature if you find that you are making the same edits to many jobs.
Important: If you install curve edits on the Fiery Server and then later decide that you want to install a different set
of curve edits, be sure to restore the factory default state before you create the new curve edits.
1 Select Server > Install curve edits.
2 Click OK to confirm.
Restore the factory default response curve on the Fiery Server
For a black-and-white Fiery Server, if you want to undo the effect of installing gray response curve edits, you can
restore the factory default response curve. After you restore the factory default curve, no gray level adjustments will
be applied to jobs that are processed subsequently. The gray levels will be processed according to the default
behavior of the Fiery Server.
1 Select Server > Restore to factory.
2 Click OK to confirm.
Set ImageViewer preferences
For color jobs, you can specify ImageViewer preferences such as units and monitor profile.
The image size (dimensions) and resolution are displayed at the bottom of the screen.
1 Select Edit > Preferences (Windows) or ImageViewer > Preferences (Mac OS).
Fiery Command WorkStation
Graphic arts tools
225
2 Set any of these preferences in the Preferences dialog box:
• Units - Sets the units for displaying the dimensions and resolution.
• 'Clear' Separation Display Settings - If the Fiery Server supports a clear varnish separation in addition to
C, M, Y, and K separations, use this setting to specify Mask Color and Opacity of the clear separation as
shown in ImageViewer.
• Cross Hair Color Picker - Click the color block to select the color of the bounding box in the Navigator
pane.
• Monitor Profile - Either displays the operating system setting for the monitor profile or allows you to select
the monitor profile. To obtain an accurate soft proof, use a profile that is accurate for your monitor.
If Fiery Color Profiler Suite is installed on your computer, you can click Create a Monitor Profile to create a
new monitor profile in Fiery Monitor Profiler.
Fiery Command WorkStation
Booklet Maker
226
Booklet Maker
Booklet Maker imposition
Booklet Maker is an imposition feature that allows you to print multiple pages of a print job in a booklet style
without relying on more advanced imposition programs.
Imposition is the process of printing multiple pages on single sheets of paper. When the imposed sheets are folded
together as signatures, the pages follow in sequential or reading order.
Booklet Maker is designed for 2-up imposition, which imposes four individual pages from your document on a single
sheet that is printed duplex, where two document pages are printed on each side of a single sheet of paper. It is
capable of imposing jobs from nearly any application.
The order in which pages are imposed is determined by the binding method you select.
You can access Booklet Maker from the printer driver or from Command WorkStation Job Properties. You can work
with Booklet Maker in two ways:
•
Using the Booklet Maker wizard - Recommended for first-time or novice users
•
Specifying settings in the main Booklet Maker window - Recommended for experienced or advanced users
This Help describes 2-up imposition layouts. If your copier/printer is equipped with an advanced finisher, such as a
Perfect binder, see Printing, which is part of the user documentation set, for additional options.
About Booklet Maker and Fiery Impose
Booklet Maker settings are supported by Fiery Impose. You can open a job with Booklet Maker settings in Fiery
Impose to preview the imposition layout or further modify the imposition layout.
Fiery Impose translates and maps all Booklet Maker settings to Fiery Impose commands. When a job with Booklet
Maker settings has been edited in Fiery Impose, the job can no longer be edited in Booklet Maker. Fiery Impose
offers more settings than Booklet Maker and they cannot be mapped backward.
Note: To use the full functionality of Fiery Impose, you must have an active license for the application. Otherwise,
Fiery Impose is available for use in demo mode, which means that jobs are saved with a watermark.
For more information about Fiery Impose, see the Fiery Impose help.
Access Booklet Maker
You can access Booklet Maker from the printer driver or from Command WorkStation Job Properties.
Fiery Command WorkStation
Booklet Maker
227
Access Booklet Maker from the printer driver
Access Booklet Maker from the Layout tab in the Fiery Server printer driver.
1 In your application, choose File > Print, and select the Fiery Server from the list of printers.
•
On Windows, click Properties.
•
On Mac OS, select Fiery Features from the drop-down list.
2 Do one of the following:
•
On Windows, select the Fiery Printing tab.
•
On Mac OS, click Full Properties in the Quick Access pane.
3 Click the Layout tab, and then select the Booklet option.
Access Booklet Maker from Command WorkStation
Access Booklet Maker from the Command WorkStationJob Properties window.
1 Double-click your print job in the Held jobs list in Job Center, or right-click (Windows) or Ctrl-click (Mac OS)
the job, and select Properties from the Actions menu.
2 Select the Layout tab in the Job Properties window.
3 Select the Booklet option.
Create a booklet
When you select Booklet in the Layout tab of Job Properties (in Command WorkStation) or the printer driver,
Booklet Maker dynamically displays all of the controls applicable to creating a booklet. You can use the main Booklet
Maker window or the Booklet Maker wizard, which displays images for each step, to complete the process.
Create a booklet from the Booklet Maker window
If you don’t want to use the wizard, you can create a booklet by choosing options in the Booklet Maker window.
1 Select the Layout tab in the Job Properties window.
2 Select a Booklet Type: Saddle, Nested Saddle, or Perfect.
Note: If your copier/printer is equipped with an advanced finisher, such as a Perfect binder, the option of 1-up
Perfect binding may be available.
3 Select a binding method: Left, Top, or Right.
4 Specify a Paper Size:
•
Select from Paper Catalog (if Paper Catalog is supported on the Fiery Server).
•
Create a custom paper size.
•
Select Same as document size.
•
Shrink document pages to fit a selected paper size.
Fiery Command WorkStation
Booklet Maker
228
5 Select Page alignment to scale down the pages of your document while preserving the aspect ratio of the original
document.
6 Specify Creep compensation, if necessary (available for Saddle and Nested Saddle). To compensate for creep,
select the setting for your media type:
• Plain - Select this option for booklets with a large number of pages.
• Thick - Select this option for booklets printed on thick or heavyweight media. If you compensate for Thick
media, you must still specify the desired thick or heavy media in the printer driver or Command WorkStation
Job Properties (Media tab).
Note: If you compensate for Thick media, you must still specify the desired thick or heavy media in the printer
driver or Command WorkStation Job Properties (Media tab).
7 Specify cover settings, if you selected a Saddle booklet in step 2.
Note: Cover settings are only available for Saddle booklets. For more information, see Add a cover on page 245.
8 Click OK to save your settings, Cancel to cancel the job, or use the Print menu to select one of the options to
print or process or proof-print your job.
Create a booklet by using the Booklet Maker wizard
The Booklet Maker wizard guides you step by step in the process of creating a booklet.
1 Click the Layout tab, and then select the Booklet option.
2 Click Launch Wizard.
3 Use the following controls to navigate the wizard:
•
To advance from one window to the next, click Next.
•
To return to previous windows, click Back.
•
To cancel settings and exit Booklet Maker, click Cancel.
4 Follow the steps in the wizard.
Note: If Saddle or Nested Saddle are selected for Booklet Type, specify cover settings and content. If Nested
Saddle is selected, specify number of sheets in a subset.
5 View the settings summary.
6 Click Finish to save your booklet, Back to change any settings, or Cancel to cancel the job.
Booklet type
When creating a booklet you select the Booklet Type option and choose the binding method and binding edge.
The binding method determines the way the job is imposed. The binding edge determines the placement of the
spine, the layout orientation, and any rotation of page content in your booklet.
Fiery Command WorkStation
Booklet Maker
229
Binding methods
Booklet Maker supports the following binding methods:
•
Saddle binding on page 230
•
Nested Saddle binding on page 231
•
Perfect binding on page 232
•
1-up Perfect binding on page 233
If your copier/printer is equipped with an advanced finisher, such as a Perfect binder, see Printing, which is part of
the user documentation set, for additional binding methods.
Binding edge
Booklet Maker has three binding edge options:
•
Left Binding - Typically used for languages that read from left to right. The booklet opens from right to left.
•
Right Binding - Typically used for languages that read from right to left. The booklet opens from left to right.
•
Top Binding - Typically used for calendars, landscape- and cinema-size documents. The booklet opens upward.
With top binding that includes a cover, the outside of the back cover automatically rotates 180 degrees to match
the orientation of the front cover.
The following illustrations show 2-up imposition in relation to binding edge:
Left-edge binding
Figure 1: Left-edge binding
1 Front
2 Back
Figure 2: Right-edge binding
1 Front
2 Back
Fiery Command WorkStation
Booklet Maker
230
Figure 3: Top-edge binding
1 Front
2 Back
Saddle binding
Saddle binding, also called saddle-stitch binding, is the simplest binding method. In Saddle binding, the signatures
are folded together as a group, and then stapled or stitched along the center fold, or spine. In Saddle booklets, creep
is a factor.
Saddle binding includes pre-printed and inline cover options.
The following illustration shows the imposition signatures for a 12-page document imposed for left-edge saddle
binding:
1 Signature 3
2 Signature 2
3 Signature 1
The following illustration shows how the signatures of a 12-page saddle booklet are folded together as a group:
1
1 Signature 1
12
Fiery Command WorkStation
Booklet Maker
231
2 Signature 2
3 Signature 3
The following illustration shows how the signatures are stitched or stapled along the common fold:
Nested Saddle binding
Nested Saddle binding joins two or more saddle booklets (called “subsets”) to form a larger booklet. The subsets are
stacked along the common fold, or spine, for stitching or gluing after printing. In Nested Saddle booklets, creep is a
factor.
Number of sheets in a subset (saddle) - Use this option to specify the number of sheets in each subset.
The following illustration shows Nested Saddle, left-edge binding imposition for a 16-page document with two
sheets (equivalent to eight document pages) per subset:
1 Subset 1
2 Signature 2
3 Signature 1
4 Subset 2
5 Signature 4
6 Signature 3
The following illustration shows how the signatures of a 16-page Nested Saddle booklet are folded and the subsets
grouped together. Subset 1 iincludes Signatures 1 and 2; Subset 2 includes Signatures 3 and 4:
1
16
Fiery Command WorkStation
Booklet Maker
232
1 Signature 1
2 Signature 2
3 Signature 3
4 Signature 4
The following illustration shows how the subsets are joined together along the common fold for the nested saddle,
left-edge binding, booklete:
Perfect binding
In Perfect binding the signatures are folded individually and stacked along the common fold, which forms the spine
of the booklet.
A signature is a press sheet that is folded to form the pages of a booklet in sequential order. Each signature in a
booklet is folded in the same way. The Perfect binding process is more involved (the spine must be roughened to
flatten before it is glued to the cover) and tends to require a larger gutter. In Perfect booklets, creep is not a factor.
The following illustration shows perfect, left-edge binding imposition for a 12-page document:
1 Signature 1
2 Signature 2
3 Signature 3
The following illustration shows how perfect signatures are folded individually, and how the signatures are joined
together at the common fold:
1
1 Signature 1
2 Signature 2
3 Signature 3
12
Fiery Command WorkStation
Booklet Maker
233
The following illustration shows how the signatures are joined together at the common fold for the perfect, left-edge
binding booklet:
1-up Perfect binding
The 1-up Perfect binding method prints single body pages that are stacked together, so that the edges may be
trimmed (if desired) and glued, and then wrapped by a cover sheet.
To print a 1-up Perfect binding booklet, your copier/printer must be equipped with an advanced finisher that
supports Perfect binding.
If your copier/printer supports 1-up perfect binding, see Printing, which is part of the user documentation set, for
information.
You can specify Mixed Media settings in Booklet Maker for 1-up perfect binding methods.
Paper size
Paper size is the actual size of the sheet of paper (unfolded) on which your booklet will print.
When you select a paper size for your booklet, you have several choices:
•
Select from Paper Catalog (if Paper Catalog is supported on the Fiery Server)
•
Create a custom paper size
•
Select Document size
•
Shrink document size to fit a selected paper size
Note: The Shrink to fit option only scales down or reduces the document page size. Shrink to fit does not scale
up or enlarge. For more information, seeShrink to fit option on page 235 .
Custom page sizes
Booklet Maker supports custom page sizes for the body pages and cover pages of your booklet. When you access
Booklet Maker from the printer driver, you can also create a custom document size. The minimum and maximum
custom page sizes depend on your copier/printer or finisher capability.
For information about the supported custom size range for your copier/printer, see Printing, which is part of the user
documentation set.
Document size
Document size refers to the size of each page in your original document and is defined in your application’s Print
Setup (or Page Setup) dialog box. In designing your booklet, it may be useful to think of document size as the digital
input (the page size defined in your original document), and paper size as the physical output (the dimensions of the
actual piece of paper in the copier/printer tray).
Fiery Command WorkStation
Booklet Maker
234
Note: The size defined in your application's formatting menu may differ from the size defined in your application’s
Print Setup (or Page Setup) dialog box. The size that is relevant to Booklet Maker is defined in your application's
Print Setup (or Page Setup) dialog box.
Edge feed
Edge feed is the side of the paper that first enters the copier/printer. The feed direction (short-edge feed or long-edge
feed) is associated with certain paper sizes.
When you select a Document size in Print Setup (or Page Setup), it is not necessary to consider the edge feed
associated with the paper size you select. However, the finisher may require edge feed in a certain direction. In
Booklet Maker, paper sizes with feed direction that are not supported by the finisher are dimmed in the list of
available sizes.
Same as document size
Select this option to keep your document page size the same as in your original file. You must select a paper size that
is at least twice the size of your document page.
For example, an 8.5x11 in. document prints on an 11x17 in. sheet of paper. The document size (the input) is shown
on the left, the paper size (output) is shown on the right in the illustration below:
1
8
1
1 11 in.
2 8.5 in.
3 11 in.
4 17 in.
Or an A4-size document (297x210 mm) prints on A3 paper (297x420 mm). The document size (the input) is shown
on the left, the paper size (output) is shown on the right in the illustration below::
1
8
1
1 297 mm
2 210 mm
3 297 mm
4 420 mm
Note: The above examples illustrate paper sizes within the same series (A4 to A3) or standard (Letter to Tabloid).
Booklet Maker can also impose from one series to another (for example, A4 to Letter). For more information, see
Page alignment on page 237.
Fiery Command WorkStation
Booklet Maker
235
Shrink document page to fit a selected paper size
Scale down your document pages to fit a particular paper size, by selecting the desired size from the Paper size menu.
Booklet Maker automatically shrinks document pages to fit the selected paper size, preserving the aspect ratio of
your original document.
For example, if your document size is 8.5x11 in. and you select 8.5x11 in. from the Paper size menu, the document
pages are scaled down to fit two 5.5x8.5 in. side-by-side pages. The illustration below shows the document size
(input) on the left, and the paper size (the output) on the right:
1
8
1
1 11 in.
2 8.5 in.
3 8.5 in.
4 11 in.
Or, if your document size is A4 (297x210 mm) and you select A4 from the Paper size menu, the document pages are
scaled down to fit two 210x148.5 mm side-by-side pages. The illustration below shows the document size (input) on
the left, and the paper size (the output) on the right:
1
8
1
1 297 mm
2 210 mm
3 210 mm
4 297 mm
Note: The Shrink to fit option only reduces or scales down the document page size. Shrink to fit does not scale up or
enlarge. For more information, see Shrink to fit option on page 235.
Shrink to fit option
By default, Booklet Maker is designed to scale down the pages of your document to fit the paper size you select, while
preserving the aspect ratio of your original document.
Based on your document size and the paper size you select, Booklet Maker automatically calculates the scale factor
as follows:
Document size in relation to paper size
Scale factor
If document size is less than or equal (<) to one-half paper size 100%
Fiery Command WorkStation
Booklet Maker
Document size in relation to paper size
Scale factor
If document size is greater than (>) one-half paper size
Shrink to fit
236
Note: The Shrink to fit option only reduces or scales down the document page size. Shrink to fit does not scale
up or enlarge.
Shrink to fit On
Booklet Maker automatically scales document pages to fit on one-half the selected Paper size.
For example, a 13x19 in. document is scaled down to fit one-half of an 11x17 in. sheet of paper (one-half = 8.5x11
in.):
1 Document size - 13x9 in.
2 Paper size - 11x17 in. paper size (one-half = 8.5x11 in.)
3 Result - 13x19 in. document scalled to fit one-half paper size (8.5x11 in.)
Booklet Maker can impose differing or non-standard sizes.
For example, an A4 document is scaled down to fit Letter-size paper, which equals 5.5x8.5 in (one-half of an 8.5x11
in./Letter-size sheet of paper):
1
1
1 Document size - A4 (210x297 mm)
2 Paper size - 8.5x11 in. paper size (one-half = 5.5x8.5 in.)
3 Result - A4 document scaled to fit one-half paper size (5.5x8.5 in.)
Shrink to fit Off
If Shrink to fit is Off, the pages of your document print at 100%. Any page content that extends beyond one-half of
the selected paper size is clipped.
In some cases, clipping may be your intent. For example, if your document includes printer’s marks that extend the
document size beyond one-half the paper size, turn Shrink to fit off so that the content prints at 100%, otherwise
the entire page (including the printer's marks) is scaled down to fit within the specified paper size.
Fiery Command WorkStation
Booklet Maker
237
Likewise, if your document size is designed to be larger than one-half the paper size in order to ensure a full bleed,
turn Shrink to fit off so that the page content prints at 100%.
The following illustration shows an 8.5x11 in. page area (desired content) with printer's marks that extend the
document page size to 10.2x12.5 in. With Shrink to fit set to Off, the page content prints at 100% to fit on one-half
of the paper size:
1
1
1
4
1 Document size - 10.2x12.7 in. Desired content 8.5x11 in.
2 Paper size - 11x17 in. paper size (one-half = 8.5x11 in.)
3 Before clipping
4 Result - Desired content (8.5x11 in.) prints at 100 percent
Page alignment
Page alignment does not alter the page layout defined in your original document. Page alignment shifts the entire
page content, which is the printable area (the space assigned to the text and images) plus margins (the white or blank
space surrounding the printable area).
Booklet Maker has three options to position and fine-tune the placement of page content:
•
Align pages- Use this option to align page content with the spine or to center on the page.
•
Increase gutters by - Adds extra space (gutters) to allow for binding.
•
Creep compensation - Use this option to counteract the shift in page content that occurs in Saddle and
Nested Saddle booklets.
Note: The page alignment options do not change the scale factor. When you set the Shrink to fit option to Off,
clipping occurs if the document extends beyond the edge of the paper. If clipping is not your intent, you can use the
Align pages and Gutter options to adjust the position of page content.
Align pages
In the context of Booklet Maker, the Align pages option defines the initial position of page content (At the center
or At the spine), which can then be further adjusted by increasing the gutter value.
The Align pages option controls the initial position of page content, either at the spine or at the center.
Fiery Command WorkStation
Booklet Maker
•
238
Select Booklet in the Layout tab of Command WorkStation Job Properties and follow the prompts to set the
Align pages option.
• At the spine (default) - Aligns document page content flush with the spine, at the center of the sheet where
the fold will occur.
AA
• At the center - positions document page content at the center of one-half of the sheet size.
A A
Aligning pages with the Shrink to fit option
You can choose to align pages with the Shrink to Fit option On (enabled) or Off (disabled).
Aligning pages with Shrink to fit On
The following illustration shows page alignment when the document size is less than (<) one-half of the paper size:
A
AA
A A
1 Document size < one-half paper size
2 Pages aligned at the spine
3 Pages aligned at the center
The following illustration shows page alignment when the document size is equal to one-half of the paper size, in
which case there is no visible difference:
A
AA AA
1 Document size = one-half paper size
2 Pages aligned at the spine
3 Pages aligned at the center
Note: When the document size is greater than one-half of the paper size and Shrink to fit is On, the final printed
result is determined by the aspect ratio of the original document.
Fiery Command WorkStation
Booklet Maker
239
Aligning pages with Shrink to fit Off
The following illustration shows page alignment At the spine when the document size is greater than (>) one-half
of the paper size and Shrink to fit is Off:
1 Document size > one-half paper size
2 Pages aligned at the spine, Shrink to fit Off
3 Final printed result
The following illustrates page alignment At the center when the document size is greater than (>) one-half of the
paper size, and Shrink to fit is Off:
Fiery Command WorkStation
Booklet Maker
240
1 Document size > one-half paper size
2 Pages aligned at the center, Shrink to fit Off
3 Final printed result
Page alignment and gutters
A gutter is an additional margin designed to allow space for binding or other finishing options (any after-printing
process, such as folding, stapling, or binding).
In the context of Booklet Maker, the Align pages option defines the initial position of page content (At the center
or At the spine), which can then be further adjusted by increasing the gutter value. The Increase gutter by
option controls the distance (in millimeters or inches) between facing pages in your booklet.
Note: The value specified for gutter does not change the page margins or layout defined in your original document.
The gutter is an extra margin intended to allow space for binding.
For the supported range of gutter values for your copier/printer, see Printing, which is part of the user
documentation set.
Aligned At the spine with gutter
When pages are aligned at the spine, the distance of the page content from the spine equals one-half of the gutter
value.
The following illustration shows the initial alignment At the spine, the final printed result without a gutter, and
then the final printed result when a gutter is added:
Fiery Command WorkStation
Booklet Maker
A
AA
AA
A A
A A
241
1 Document size < one-half paper size
2 Aligned at the spine without gutter
3 Final printed result of Fig. 2
4 Aligned at the spine with gutter
5 Final printed result of Fig. 4
Aligned At the center with gutter
When pages are aligned at the center, the distance from the spine equals one-half of the gutter value, plus the initial
offset of the page alignment at center.
The following illustration shows the initial alignment At the center, the final printed result without a gutter, and
then the final printed result when the gutter is added:
A
A A
A A
A A
A A
1 Document size < one-half paper size
2 Paper size
3 Aligned at the center without gutter
Fiery Command WorkStation
Booklet Maker
242
4 Final printed result of Fig. 3
5 Aligned at the center with gutter
6 Final printed result of Fig. 5
Note: As you increase the gutter, the page content may be clipped if it reaches the edge of the sheet or the nonimageable of the paper.
Creep compensation
Creep occurs in booklets with saddle binding or nested saddle binding printed on heavy media, or with a large
number of pages.
As the sheets are folded to create signatures (folded sheets that form the pages of a booklet), each fold causes a small
incremental shift in the location of the page content. The result is that the outer margins become narrower toward
the center of the booklet when the booklet is trimmed. The page content may be clipped or finish up printed too
close to the outer edge.
1 Creep
Mixed Media with 1-up perfect binding
You can specify Mixed Media settings in Booklet Maker only for 1-up perfect binding jobs. The Mixed Media
enhancement integrates a Mixed Media dialog and viewer into the Booklet Maker window.
The Mixed Media viewer presents the actual pagination of the final product, providing a real-time representation of
the selections made in the Mixed Media dialog. You can view the layout of jobs as either pages or as sheets.
In Mixed Media for Booklet Maker 1-up Perfect binding, you can specify:
•
Chapter starts - When a chapter start is designated in a duplex job, implicit blanks are inserted.
•
Page ranges and media for the page ranges.
•
Blank inserts and media for the inserts - Blank inserts specified by the user are explicit blanks. Explicit and
implicit blanks have different designations in the Mixed Media viewer.
Note: Tab insert and cover definition settings can not be specified in Booklet Maker Mixed Media.
When you use Mixed Media in Booklet Maker, it is disabled in the Media tab. Selections made in Booklet Maker will
be displayed subsequently in the Media tab and in Fiery Compose.
Fiery Command WorkStation
Booklet Maker
243
Specify Mixed Media settings in Booklet Maker
The Mixed Media viewer is displayed when 1-up perfect binding is selected for the booklet type.
Before you begin
Not all copiers/printers support 1-up perfect binding. If 1-up perfect binding is not supported, the option is not
displayed in the Booklet Type menu.
1 Select your job in Command WorkStation Job Center and open Job Properties.
2 Select Booklet in the Layout tab.
3 Choose 1-up Perfect Binding for the Booklet Type.
4 Choose the Binding edge.
5 Specify Body Paper Size and Cover Paper Size.
Note: Define Cover is not available as a Mixed Media choice in Booklet Maker. Cover definitions are created
using the standard Booklet Maker options.
6 Specify cover settings and any other settings as required.
7 Scroll down to the Mixed Media viewer and specify settings using the following controls:
• Pages tab - Click to display layout of booklet organized by document pages of document and to show
relationship to sheets.
• Sheets tab - Click to display layout of booklet organized by sheets and to show relationship to pages.
• Chapter Start Page(s) field - Type page numbers that you designate as chapter starts, with commas in
between. Chapter start pages are designated in viewer by a marker. Implicit blanks are inserted as needed. The
graphic below shows the chapter start marker and the implicit blank inserted after page 10.
• New Page Range - Click icon or button to type page numbers and then apply media settings to specified
page range.
• New Insert - Click the icon or button to insert a blank page at specific location and apply media settings to
insert.
• Edit - Click the icon or button to modify Page Range or New Insert media settings.
• Delete - Click the icon or button to delete Page Range or New Insert settings.
Fiery Command WorkStation
Booklet Maker
244
Next steps
For information about the media settings that apply for your Fiery Server, see Printing and Utilities in the user
documentation set.
Navigate through jobs in Mixed Media
The Mixed Media viewer is displayed when 1-up perfect binding is selected for the booklet type.
•
In the Mixed Media viewer, navigate through the document in the following ways:
•
Scroll bars.
•
Standard navigational arrows - Click the inner arrows to move backward or forward to the adjacent page in
the sequence. Click the outer arrows to move to the beginning or end of the document. Arrows are disabled if
there is no possible navigation.
•
Action navigational arrows - Click the arrows to move to the next action in the sequence, either forward or
backward. The text field displays the action. Arrows are disabled if there is no possible navigation.
View the layout of a job as pages
You can choose to show the pagination of the job according to the pages or sheets. The document pages and sheets
are aligned with each other so you can see which pages print on which sheets.
•
To view a job as pages, click the Pages tab at the top of the viewer.
The illustration shows a job viewed as pages. The number after “Pages” on the tab indicates the number of document
pages, which are represented by the thumbnails in the top row. The pages are presented in linear order,
corresponding to the logical reading order of the source document.
The second row shows how the sheets will be ordered on the copier/printer. The content of the front cover, which in
this example comprises the first two pages of the document, is displayed in reading order at the beginning. The back
cover content, at the end of the job, can be displayed by used the scroll bar or the other navigation tools.
Fiery Command WorkStation
Booklet Maker
245
View the layout of a job as sheets
When you view the job as sheets, the order of sheets is the primary focus.
•
To view a job as sheets, click the Sheets tab at the top of the viewer.
The thumbnails in the top row represent the actual print order on the printercopier/printer. The second row shows
which pages will be printed on which sheets. For example, in the following illustration, the cover sheet includes the
content of the first two pages of the document as the front cover, the content of the third last page as the spine, and
the content of the last two pages of the document as the back cover.
Note: The cover is always displayed first, even if the cover is output as the last sheet on certain printers.
Booklet Maker Mixed Media limitations
The following actions cannot be done in Mixed Media for 1-up perfect binding.
•
Inserting pages before, between, or after the document pages whose content is allocated for the cover.
•
Inserting any pages outside of what will be the finished, bound book.
•
Inserting any pages that physically split the cover.
•
Specifying media of different sizes in one job. The media size selection for New Page Range and New Insert is
limited to the same size as the body signature.
Note: Copiers/printers that support half-Z-fold insertion allow media sizes two times the size of the body signature.
Add a cover
In Booklet Maker, you can add a cover to Saddle booklets and specify media for the cover.
For Saddle booklets only, Booklet Maker includes two cover options, either pre-printed or inline, for which you can
specify media. You can specify additional options for an inline cover. If your copier/printer is equipped with an
advanced finisher, such as a Perfect binder, see Printing, which is part of the user documentation set, for additional
cover options.
1 In the Layout > Booklet tab of the printer driver or Command WorkStation Job Properties, select Saddle for
Booklet Type and select a binding edge.
2 Specify the settings for Paper Size and Page Alignment for the body of the booklet.
Fiery Command WorkStation
Booklet Maker
246
3 From the Cover Content input menu, do one of the following:
•
To insert a pre-printed cover, select Pre-Printed. The pre-printed cover will be merged with the body pages of
your booklet, which print separately. If you select this option, the Front Cover and Back Cover options are
disabled.
•
To specify an inline cover, select Front & Back Separately. Specifying this option prints the cover pages and
body pages as a single job. Separate pages from your document are imposed on a single sheet that forms the
cover of your booklet.
You can specify an inline cover when your original document includes the cover pages and/or cover artwork
for your booklet. The cover content may be the first and last pages of your document, or the first two and last
two pages of your document, or any combination. If you select this option, you can specify the Front Cover
and Back Cover options.
• Front Cover and Back Cover (Inline covers only) - These options allow you to quickly decide whether your
front and back covers print duplex (on both sides of the sheet), single-sided, or both sides blank, without
needing to add blank pages in your original document.
Note: When you print an inline cover with top-edge binding, the outside back cover automatically rotates 180
degrees to match the orientation of the front cover.
4 Click Define Cover to open the Cover Media settings window, to specify media, size, and source tray. This
option is available for both pre-printed and inline covers.
5 Specify the media and paper size for the pre-printed insert, or for your inline covers.
6 Select the tray that contains the pre-printed inserts or inline covers, and click OK.
Change the document size within an application
Change the size of your original document in the Print Setup of the application in which you created the document.
Before you begin
Before you change the document size, to make sure your copier/printer supports the paper size.
1 Open your original document and choose File > Print Setup (or File > Page Setup).
2 Select your copier/printer from the Printer Name menu.
3 Select from the list of available paper sizes, and click OK.
Note: When you select a paper size from the available list, you do not need to consider the edge feed of the
paper.
Change the unit of measurement
You can use millimeters, point, or inches for measurement.
Note: In the printer driver, it is not possible to change the unit of measurement.
1 In Command WorkStation, go to Edit > Preferences.
2 Click the Size tab.
3 Select the unit of measurement (millimeters, points, or inches), and click OK.
Fiery Command WorkStation
Booklet Maker
247
Note: Changes are not effective until the next time Command WorkStation is started.
Next steps
Preview a booklet
You can preview a booklet in the Preview or Raster Preview window.
Note: It is not possible to preview jobs when working with Booklet Maker in the printer driver.
•
In the Command WorkStation Held list in Job Center, select your print job and select Actions > Preview.
•
If the job is spooled and held, the job is displayed in the Preview window.
•
If the job is processed and held, the job is displayed in the Raster Preview window.
Booklet workflow examples
The Booklet Maker workflow examples provide an overview of the steps to create the three standard types of booklet
using the wizard: Perfect, Saddle, and Nested Saddle.
•
Print a Perfect booklet on page 247
•
Print a Saddle booklet on page 247
•
Print a Nested Saddle booklet on page 248
Print a Perfect booklet
You can use a wizard to print a Perfect booklet.
1 Access Booklet Maker from the printer driver or Command WorkStation Job Properties.
2 Click Launch Wizard.
3 Select the Booklet Type and Binding edge, and then click Next.
4 Select the Paper Size, and then click Next.
5 Set the page alignment and gutter value (optional) and click Next.
6 Review the settings summary to confirm your booklet settings and click Finish to return to the Layout >
Booklet tab in the printer driver or Command WorkStation Job Properties.
7 Set other print options (optional) and finishing options (such as folding, stapling, or binding) in the printer driver
or Command WorkStation Job Properties, and then click OK.
Print a Saddle booklet
You can use a wizard to print a Saddle booklet.
1 Access Booklet Maker from the printer driver or Command WorkStation Job Properties.
2 Click Launch Wizard.
Fiery Command WorkStation
Booklet Maker
248
3 Select the Booklet Type, the Binding edge, and then click Next.
4 Specify cover source and content.
5 If you selected Front & Back Separately for cover source and content, specify how you want to print the cover:
Front and Back; Outside and Inside. Then click Next.
6 If you selected Insert for cover source and content, click Next.
7 Select the Paper Size, and click Define Cover.
8 In the Cover Media settings window, specify media, size, and source tray.
9 Click OK, and then click Next.
10 Set the page alignment, gutter value, and creep compensation (optional).
11 Review the settings summary to confirm your booklet settings and click Finish to return to the Layout >
Booklet tab in the printer driver or Command WorkStation Job Properties.
12 Set other print options (optional) and finishing options (such as folding, stapling, or binding), and then click OK.
Print a Nested Saddle booklet
You can use a wizard to print a Nested Saddle booklet.
1 Access Booklet Maker from the printer driver or Command WorkStation Job Properties.
2 Click Launch Wizard.
3 Select the Booklet Type and Binding edge, and then click Next.
4 Select the Paper Size and the number of sheets in a subset, and click Next.
5 Set page alignment, gutter value, and creep compensation (optional), and then click Next.
6 Review the settings summary to confirm your booklet settings and click Finish to return to the Layout >
Booklet tab in the printer driver or Command WorkStation Job Properties.
7 Set other print options (optional) and finishing options (such as folding, stapling, or binding) in the printer driver
or Command WorkStation Job Properties, and then click OK.
Booklet Maker limitations
Booklet Maker has constraints related to PDF files, queue type, and other limitations.
Secured PDF
Adobe PDF files can be saved with security settings that restrict opening, printing, or editing the PDF file (a
“Restricted Document”). Restricted Documents cannot be printed using Booklet Maker.
Queue type
Booklet Maker does not support jobs sent to the Direct queue. Booklet Maker print jobs must be sent to the Hold
queue or Print queue.
Fiery Command WorkStation
Booklet Maker
249
Print Options/Command WorkStation Job Properties
•
Variable Data Printing is not supported with Booklet Maker.
•
Mixed Media is not supported with Booklet Maker.
•
The Remove White PPT Background print option (designed for use with PowerPoint documents) is not
supported with Booklet Maker.
Booklet Maker glossary
These terms relate to the booklet-making process.
2-up imposition
Prints two document pages on each side of a single sheet of paper.
Administrator
Has full access to all Command WorkStation and Fiery Server control panel
functions. Administrator password is required.
Alignment
Alignment controls allow you to specify the placement of a page within its
predefined slot on the sheet. For example, if a page has been scaled smaller
than the slot, you can align the page to the top-left corner of the slot by
clicking the control that corresponds to that position.
aspect ratio
Relationship of width to height. In general, portrait equals a width less than
(<) the height. Landscape equals a width greater than (>) the height.
Back Color Profile
Choose the default color profile that will be applied only to the back side of
your media. This attribute can be overridden by specifying a different color
profile in Job Properties.
bleed
Extension of the content beyond a trim mark, used to ensure that the
printed area extends to the very edge of a trimmed page.
clipping indicators
Appear when specified scaling values will cause the page to print beyond the
edge of the sheet. When the window is in Layout mode, any clipped page
edge is highlighted in yellow. When the window is in Preview mode, the
Clipping icon appears to the left of the Scale Factor field. Also, the page
preview shows content truncating at the edge of the sheet.
creep
Creep, or binder's creep, is the shift of the content area caused by the
incremental fold of signatures in Saddle and Nested Saddle binding.
creep adjustment
Compensates automatically for binder's creep when saddle-stitched binding
is specified.
Creep Adjustment menu
The Creep Adjustment menu is used to compensate automatically for
binder's creep when saddle-stitched binding is specified.
Custom
Custom enables the Scale Factor and Finished Height and Width fields, so
that you can specify new scaling values. The original height and width values
are displayed for reference. When you specify a value, Impose automatically
updates the other fields to preserve the height-to-width aspect ratio of the
page.
duplex
Printing on both sides of the sheet.
edge feed
The side of the paper that first enters the copier/printer.
finisher
Any device designed for the after-printing process, such as folding, stapling,
or binding.
finishing
Any after-printing process, such as folding, stapling, or binding.
Fit Height
Scales page(s) to fill the height of each page slot on the sheet.
Fiery Command WorkStation
Booklet Maker
250
Fit Width
Scales page(s) to fill the width of each page slot on the sheet.
Fixed Page
Fixed Page mode allows you to impose documents that contain pages of the
same size.
fold mark
A dotted line that marks the location of a fold.
Front Color Profile
The default color profile that will be applied only to the front side of your
media. This attribute can be overridden by specifying a different color
profile in Job Properties.
Gang Up
Gang Up printing consists of grouping separate images, or pages, together
on a sheet rather than arranging each on a separate sheet.
Guest
Can download, view job status, edit preferences, change layouts, but cannot
access the Job Log, or make changes to Fiery Server Setup. No password is
required.
gutter
An additional margin that allows space for binding or other finishing
options (not to be confused with page margins).
imageable area
Area of the paper where marks can actually be made.
inline cover
Front and/or back cover matter that is printed with the body pages in the
same job.
job label
Stores descriptive text used for the job name, sheet information, and date
and time.
landscape
In a landscape document, the width is greater than (>) the height.
Layout view
Layout view mode displays numbered, generic pages that allow you to
determine the location of source document pages in the imposed jobs. You
can rotate individual pages in a layout view.
left edge
Specifies binding across the left edge of the booklet. The booklet reads from
left to right.
margins
White or blank space surrounding the printable area. Margins may vary
within a document.
Media Color Profile
The default color profile that will be applied to both the front and back sides
of your media. This attribute can be overridden by specifying a different
color profile in Job Properties.
Mixed Page
Mixed Page mode allows you to impose documents that contain pages of
different sizes.
nested saddle binding
A combination of saddle and perfect binding methods. As with saddle
binding, the signatures are folded together as a group, which forms a subset.
The subsets are then stacked on top of one another and glued, as with
perfect binding.
offline finishing
Cover matter printed separately and assembled with the body pages after
printing.
offsets
Offsets values are calculated in reference to the alignment position, and
reset to zero when you specify a new alignment.
Operator
Has access to all Job Center functions. In Device Center, does not have
access to Configure, Backup and Restore, changing passwords, and deleting
the Job Log. Can view Paper Catalog, virtual printers, and color
management functions, but cannot edit them. Operator password is
required.
Pan tool
Allows you to drag the desired portion of the job into view.
Fiery Command WorkStation
Booklet Maker
251
perfect binding
A group of individually folded signatures that are stacked along a common
fold for binding. The spine is flattened and glued together.
portrait
In a portrait document, the width is less than (<) the height.
post-inserter tray
A tray that allows input of any blank or pre-printed matter that bypasses the
copier/printer fuser.
Preview view
Preview view mode approximates the appearance of the final printed output.
It is sometimes called WYSIWYG (What You See Is What You Get).
printable area
Space assigned to page content (text and/or images).
printer's marks
Designate the location of folds, cuts, margins, gutters, and bleeds. Printer's
marks appear on the printed sheet outside the main content area of the job.
printer's spread
Shows pages in the order and layout in which they are printed as an imposed
job.
printing
For a Fiery Server, printing refers to transferring the raster image from the
Fiery Server to the copier/printer at high speed, freeing up RAM for the next
job. While the print job's file is usually saved to disk, raster images are held
in RAM during and after each print job. However, both users and operators
can request that the raster image is saved to disk along with the original
print job's file. Saving the raster image to disk offers some advantages raster files are already processed so they print quickly, and each part of the
raster file is still identified with a page in the original document, which
means that individual pages of a saved raster file can be accessed.
processed/held
Processing a job, or RIPping a job, involves creating a raster file (raster
image) after spooling, in preparation for printing. A processed/held job is
kept in the Hold queue until sent to the copier/printer.
reader's spread
Shows pages in the order and layout in which they are intended to be read.
right edge
Specifies binding across the right edge of the booklet. The booklet reads
from right to left.
RIPping
RIP stands for Raster Image Processing. RIPing refers to sending the job
through the first part of the print process. Print option preferences specified
for the job are interpreted, and a raster image file created. In this raster file
(raster image), color data is associated with each dot that can be rendered on
the copier/printer. The color data tells the copier/printer whether or not to
apply cyan, magenta, yellow, or black toner to each position on the page.
saddle binding
A group of folded sheets stitched or stapled on a common, centered fold
line. Saddle-stitched binding is the most basic type of binding and is the
most common for booklets.
Scale to Fit
Scales page(s) to best fill the sheet without printing past its edge. Scale to Fit
is the default mode.
sheet
Paper on which a printing job is imaged on a printing press.
signature
A press sheet that is folded to form the pages of a booklet in sequential
order. Each signature in a booklet is folded in the same way.
simplex
Printing on only one side of the sheet.
Size menu
The Size menu includes items representing all page sizes defined by the
currently selected copier/printer PostScript printer description (PPD) file.
spine
Where the signatures are joined at the center fold and then stitched or
bound.
Fiery Command WorkStation
Booklet Maker
252
spooled/held
Jobs are spooled and held on the Fiery Server in preparation for job
management by the operator. After the operator assigns a destination, the
job is spooled for processing.
spooling
The job, a file sent for printing, is saved on the Fiery Server hard disk. The
file may arrive in packets from the network, or be loaded from a disk. Jobs
appear in the queue in the order they arrive, and generally move through the
print workflow in the same order unless an operator intervenes. If a job's
movement is suspended, it is held in the spool queue pending further
instruction. For this reason, the spool queue may also be known as the Hold
queue.
top edge
Specifies binding across the top of the booklet.
trim marks
A solid line that defines the location of a cut.
Fiery Command WorkStation
Index
Index
% Recycled Content 189
1-up perfect binding 233
2-up imposition 226
A
about Paper Catalog 180
accessing Booklet Maker 226, 227
access levels 17
Actions menu 14
adding
new users 28
servers 17
Administrator password 43
aligning page content 237
allowed IP Ports 62
Allow Users to print without authentication 29, 31, 38
Antique 192
applying changes 28
attributes 188
authentication
allowing printing without 29, 31, 38
certificates, SSL 64
LDAP 49
SNMP 53
automatic rotation 245
automatic scaling 235
B
Back Coating 189
Back Gloss Value 189
balancing loads 79
basis weight 195
binary data, printing via USB port 48
binding edge 228
binding methods 228
binding options 227
Booklet Maker settings 226
Booklet Maker wizard 226, 228, 247
C
Calendered 192
Cancel Processing upon Mismatch 42
Cardboard 193
catalog entry
creating new 184
duplicating 185
editing 185
center
aligning pages at 237, 238
certificates 64
character set 38
CIE Lab Color 189
CIE Tint 189
CIE Whiteness 189
clipping of page content
how to avoid 237
Cockle 192
Color Name 189
column headers
77
Command WorkStation, displaying job previews 40
Configure, defined 27
configuring 78
connecting to server 17
contact information for supporting Print Server 46
Continuous format 191
Continuous Long 193
Continuous Short 193
cover
inline 230, 245
pre-printed 230, 245
cover settings 227, 245, 247
creating new catalog entry 184
creep
compensating for 237, 242
definition of 242
setting for many pages 227
settings 227
specifying 247, 248
Custom Color Name 189
custom page size 186
D
database
exporting 187
merging 187
replacing 187
resetting to defaults 188
Device Center 16
disconnecting server 18, 75
DNS name 79
document size
253
Fiery Command WorkStation
Index
changing in application 246
maintaining 234
Dull 192
duplex printing 226, 245
duplicating catalog entry 185
E
editing catalog entry 185
Eggshell 192
E-mail services 54
Embossed Linen 192
Enable Printed Queue 44
Enable Remote Desktop 38
Enable USB Port option 48
end-of-file (EOF) character, USB communication 48
English 192
Envelope 193
Envelope Plain 193
Envelope Window 193
erasing jobs 40
Ethernet Speed 48
exiting Configure 70
exporting the database 187
F
factory defaults 188
Felt 192
column headers 77
connecting to servers 74
customizing settings 77
Toolbar buttons 77
License Manager 77
Printer Groups 79
configuration 78
setup 78
Fiery print controller, connecting to 227
file types and USB port setup 48
finishers 79
finishing options 226, 245, 247, 248
first-time use 226
folding signatures 230–232
fonts, importing 203
Front Coating 189
Front Gloss Value 189
FTP services 52
Full Cut Tabs 193
G
Grain Direction 189
groups
adding users to 32, 33
changing privileges 35, 36
removing users from 34
gutter
definition of 240
specifying 247, 248
gutter measurements 240
H
heavy media
effects of printing on 242
Hole Type 189
I
Ignore EOF Character option 48
ImageViewer
previewing a job with 86
imposition 226
increasing gutters 237
installable options 79
Internet Fax (IFAX) 54
IP address
allowing 62
restricting 62
IP port
allowing 62
restricting 62
IPsec 63
J
job
sending to a Fiery server 116
job center 14
Job Log
using 206
job properties
about 98
overriding 99
viewing 98
jobs
reordering 116
Jobs Saved in Printed Queue 40
L
Labels 193
Laid 192
LDAP 49
left binding 230–232
Letterhead 193
License Manager
254
Fiery Command WorkStation
Index
77
Light Cockle 192
Linen 192
Line Printer Daemon - LPD 180
load balancing 79
logging out 18, 75
Long Edge Feed 191
Long grain 189
Luster 192
M
Machine Finished 192
Mac OS computers 79, 82
Mac OS X
Line Printer Daemon - LPD 180
mailboxes for scan users 33
main window 13
managing
fonts 203
Matte 192
measurement units
specifying 246
media attributes 188
Media Back Color Profile 189
Media Color Profile 189
Media Front Color Profile 189
Media Unit 191
merging databases 187
Mottled 192
Multi-Part Form 193
N
name of Print Server 38
Native Document 68
nested saddle 231
nested saddle booklet settings 248
O
Opacity Level % 189
Opaque 192
Operator password 43
orientation 228
overriding job properties 99
P
Paper Association 196
paper attributes 188
Paper Catalog 79
paper size
selecting 233–235
Paper Size 189
Parchment 192
passwords
Administrator 43
Operator 43
perfect binding 232
perfect booklet settings 247
Photographic 193
Plain 193
polling interval
Network Time Protocol server 39, 40
port 3389 62
Port 9100 51
Port Timeout in Seconds option 48
PostScript files, printing 48
PPML, path for objects in variable data printing 67
Pre Cut Tabs 193
Preferences
Animation 22
Application Language 22
Caching 22
Cube Rotation 22
Imposition Template Path 22
Monitor Profile 22
PS to PDF Conversion 22
Scale 22
setting 22
Temporary Path 22
Tooltips 22
Units 22
presets
deleting 103
renaming 103
specifying 103
previewing
scrolling pages 86
with ImageViewer 86
Preview While Processing 40
printer driver 226
Printer Groups
options 84
setup 79
printers 79
printing
PostScript files 48
USB port 48
printing defaults 79
print options, setting 99
print queues 79, 82
print settings
255
Fiery Command WorkStation
Index
choosing saved settings 103
deleting saved settings 103
renaming saved settings 103
Print Start Page 40
Print via E-mail 56
privacy, SNMP 53
processed jobs 247
Product ID 189
protocol, assigning IP addresses automatically 59
proxy server
scanning to FTP site 54
updating system software 46
Q
Quit 70
R
raster preview 247
Read Community, SNMP 53
reading layout 226
rebooting Print Server 70
Recycled Content 189
remote access of Print Server 38
removing server 19
replacing the database 187
resetting the database 188
restricting range of IP addresses 62
Roll format 191
rotation
automatic 245
S
saddle 230
saddle booklet settings 247
saddle-stitch 230
Sample Print 40
Satin 192
saving changes to Configure settings 28
scaling
automatic 235
scanning 54
Secure Erase 40
security 62
Semi-Vellum 192
server
changing user 19
disconnecting 18, 75
Server Name 38
Set Count 189
setting
job properties 99
Preferences 22
print options 99
settings
nested saddle 248
perfect booklet 247
saddle booklet 247
setup
Printer Groups 79
setup of Print Server 27
sheet 226, 231
Sheet format 191
sheet size 233
shifting page content 237
Short Edge Feed 191
Short grain 189
shrink to fit 235
Silk 192
single-sided printing 245
SMB 50
Smooth 192
SNMP
authentication 53
configuring 53
encryption 53
privacy 53
Read Community 53
Write Community 53
spine
aligning pages at 237, 238
spine placement 228
spooled jobs 247
spot colors 167
SSL 64
Start Page 40
Stationery 193
Stipple 192
stock types 195
subset 228, 231, 248
Suede 192
Super Calendered 192
Super Smooth 192
Support 46
T
Tab Stock 193
Time Zone 39
Toolbar
256
Fiery Command WorkStation
Index
customizing for 77
top binding with a cover 245
Traditional Laid 192
Translucent 192
Transparent 192
Tray and Paper Association 196
tray association 83
Two-Way Communication 227
Type Details 193
U
Ultra Smooth 192
Uncalendered 192
Undo 28
Units preference 22
US Basic Size 194
USB Media Auto Print option 48
USB Port Setup 48
USB Setup 48
Use Character Set option 38
users
adding to existing group 32, 33
changing privileges 35, 36
creating 28
deleting 37
removing from group 34
V
variable data printing (VDP) 67
VDP File Search Paths
about 84
Vellum 192
Velvet 192
viewing
job properties 98
virtual printers
deleting 178
duplicating 178
editing 178
printing to 179
publishing 178
setting up 177
viewing 178
VPS, path for objects in variable data printing 67
W
Web services 53
WebTools 82
Windows Printing 50
WINS server 61
Wove 192
Write Community, SNMP 53
257