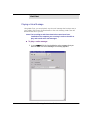
1
CLIENT APPLICATION USER GUIDE
NOTICE
The information contained in this document is believed to be accurate in
all respects but is not warranted by Mitel Networks™ Corporation
(MITEL®). The information is subject to change without notice and should
not be construed in any way as a commitment by Mitel or any of its
affiliates or subsidiaries. Mitel and its affiliates and subsidiaries assume no
responsibility for any errors or omissions in this document. Revisions of
this document or new editions of it may be issued to incorporate such
changes.
No part of this document can be reproduced or transmitted in any form or
by any means - electronic or mechanical - for any purpose without written
permission from Mitel Networks Corporation.
COPYRIGHT
6510 Unified Messaging Client Application User Guide
Release 1.2
July 2003
®,™ Trademark of MITEL Networks Corporation
©Copyright 2003, MITEL Networks Corporation
All rights reserved
TRADEMARKS
MITEL and Mitel Networks are trademarks of Mitel Networks
Corporation.
Microsoft and Windows NT areregistered trademarks of Microsoft
Corportion.
Other brands and their products are trademarks or registered
trademarks of their respective holders and should be noted as such.
Table of Contents
About This Guide 9
Document Overview 10
Intended Audience 11
Before You Begin 11
Conventions 11
Contacting Mitel Networks™ 12
CHAPTER 1
UM Client Manager and Desktop
Applications 13
Overview 14
Using the UM Client Manager 14
Signing On 14
Logging Off 17
UM Client Manager Connectivity 18
Configuring the UM Client Manager 20
Configuring Main Settings 21
Specifying Call Handling Settings 24
Configuring LanTalk 28
Configuring Notifications 30
Using the UM Call Manager 32
Using the Toolbar Buttons 33
Answering a Call 34
Removing a Call 34
Transferring a Call 35
Putting a Call on Hold 36
Taking a Message 37
Pulling a Caller out of Voicemail 37
Specifying Do Not Disturb 37
Adding a Call to the Contact Manager 37
Changing Your Status 38
6510 UM Client Application User Guide
3
Table of Contents
Using LanTalk 40
Sending a Message 40
Creating a Broadcast Message 44
Creating a Buddies List 45
Deleting Buddies Lists and Mailboxes 51
Sending a Message Using a Buddies List 52
Using the Outlook Toolbar 53
Message Tab 57
Telephony Options Tab 62
Setting Present Status in Outlook 64
Using LanTalk in Outlook 65
Web Client
CHAPTER 2
67
Overview 68
Starting Web Client 68
Running Grant Permissions 68
Connecting to the Web Client 70
Logging Off 71
Web Client Functions 72
Using the Scroll Buttons 72
Using the Main Toolbar Functions 72
Using the Inbox 73
Message Icons 74
Displaying Messages by Type 75
Using the Toolbar Buttons 76
Playing a Voice Message 77
Correcting a Voice Message Play Error 78
Viewing a Fax 79
Reading an E-mail 79
Refreshing the Display 80
Composing a Message 80
Creating a Voice Message 81
Creating a Text Message 83
4
6510 UM Client Application User Guide
Table of Contents
Creating a Fax Message 84
Adding an Attachment to a Message 86
Replying to a Message 87
Forwarding a Message 88
Copying a Message 88
Moving a Message 89
Deleting a Message 90
Maintaining Folders 91
Using the Toolbar Buttons 91
Creating a New Folder 91
Deleting a Folder 92
Renaming a Folder 92
Copying a Folder 93
Moving a Folder 94
Recovering Deleted Messages 95
Emptying the Deleted Items Folder 96
Maintaining the User Settings 96
Using the Toolbar Buttons 97
Specifying General Options 98
Specifying your Presence Status 98
Creating a Status Schedule 99
Editing a Status Schedule 100
Deleting a Status Schedule 101
Specifying a Password 101
Specifying a POP3 / IMAP4 Password 102
Specifying Collaboration 102
Specifying IMAP Settings 103
Maintaining Message Options 105
Sort/Order Messages 105
Specifying Message Forwarding 106
Specifying Playback/Record Options 108
6510 UM Client Application User Guide
5
Table of Contents
Maintaining Call Options 111
Specifying Transfer Options 111
Enabling the Call Forwarding Feature 113
Maintaining Addresses 114
Adding a Phone Address 114
Editing a Phone Address 116
Deleting a Phone Address 116
Creating a Phone Addresses Schedule 116
Specifying E-mail Addresses 118
Editing an E-mail Address 120
Removing an E-mail Address 120
Configuring an E-mail Settings Schedule 120
Specifying Fax Addresses 121
Configuring a Fax Number Schedule 122
VPIM Addresses 123
WAP Addresses 124
Other Addresses 125
Maintaining a Distribution List 126
Using the Toolbar Buttons 126
Creating a Private Distribution List 127
Editing a Distribution List 128
Deleting a Distribution List 128
Maintaining Notifications 129
Using the Toolbar Buttons 129
Creating a Notification Rule 129
Creating a Notification Address 132
Creating a Phone Notification Address 132
Creating a Beeper Notification Address 133
Creating an E-mail Notification Address 135
Removing a Notification Address 135
Editing a Notification Address 136
Creating a Notification Schedule 136
6
6510 UM Client Application User Guide
Table of Contents
Maintaining Wakeup Calls 138
Using the Toolbar Buttons 138
Creating a Wakeup Call 139
Cancelling a Wakeup Call 140
Maintaining Greetings 140
Using the Toolbar Buttons 141
Playing a Greeting 141
Recording a Greeting 142
Activating a Greeting 144
Deleting a Greeting 144
Using the Collaborate Feature 145
6510 UM Client Application User Guide
7
Table of Contents
8
6510 UM Client Application User Guide
About This Guide
In This Chapter...
Document Overview on page 10
Intended Audience on page 11
Before You Begin on page 11
Conventions on page 11
Contacting Mitel Networks on page 12
6510 UM Client Application User Guide
About This Guide
Document Overview
This guide has been developed to describe the configuration of the Client
Applications that are available with the 6510 UM server.
The availability of the Client Applications and their features and functionality is
determined by a user’s classification on the 6510 UM system.
As you read through the guide, you will see notations indicating which features are
available to a certain class of user.
As it pertains to the use of the Client Applications, the user classes are broken down
as follows:
Standard
Advanced
Unified
Definition
Integrated Messaging
users who use Outlook
and who have their
messages forwarded to
their email account for a
single view.
Integrated Messaging
users with Client
Applications licenses.
Unified Messaging users.
(The Client Applications
are included in the UM
license.)
Available
Client
Application
Functionality
Client Manager: Limited
Client Manager: Full
Client Manager: Full
Outlook Plug-in: Limited
Outlook Plug-in: Full
Outlook Plug-in: Full
Web Client: None
Web Client: Access to
mailbox settings. Access
to voice and fax mail (not
e-mail).
Web Client: Full
Your user class has been determined upon initial deployment of the system. If there
is any feature or functionality described in this document to which you require
access, please contact your System Administrator. Additional licensing may be
required for the applications.
This guide provides detailed instructions on using the UM Client Manager and the
Web Client application software.
10
6510 UM Client Application User Guide
About This Guide
Intended Audience
This document is intended for end users using the UM Client Manager and the Web
Client for their personal use.
Before You Begin
Before you can begin using the UM Client Manager and the Web Client software,
you first need to install the applications. Refer to the Client Application Installation
Guide for instructions.
Conventions
This guide uses the following conventions to convey specific information:
Note: Contains additional information about the task you are
performing.
Hint: Contains an alternative method of performing the task or
offers a solution if you run into a problem.
Caution: Information that alerts you to potential loss of data, or damage
to an application, system, or device.
Warning: Information that alerts you to potential personal injury.
6510 UM Client Application User Guide
11
About This Guide
Contacting Mitel Networks™
Contact us by mail at:
Mitel Networks Corporation
350 Legget Drive
Ottawa, ON K2K 2W7
Contact us by phone:
Tel: 613-592-2122
Fax: 613-592-4784
Contact us on the Web:
www.mitel.com
12
6510 UM Client Application User Guide
CHAPTER 1
UM Client Manager and Desktop Applications
In This Chapter . . .
Overview on page 14
Using the UM Client Manager on page 14
Configuring the UM Client Manager on page 20
Using the UM Call Manager on page 32
Changing Your Status on page 38
Using LanTalk on page 40
Using the Outlook Toolbar on page 53
6510 UM Client Application User Guide
UM Client Manager and Desktop Applications
Overview
The 6510 Unified Messaging system is an IP-based desktop application that allows
you to access several unique communication features, such as call control, instant
messaging, and unified messaging.
You can log into the UM server from any PC connected to the Internet. After you
enter the IP address of the 6510 UM server, you are logged in and can access the
available communication functionality.
Using the UM Client Manager
Signing On
Signing on allows you to begin the UM Client Manager program.
To log onto the UM server:
1. Click Start>Programs>UM Client Manager>UM Client Manager.
Hint: You can also double-click on the UM Client Manager icon on
the desktop.
The UM Client Manager will automatically load into your system tray after
authentication, and will sit awaiting call activity.
14
6510 UM Client Application User Guide
UM Client Manager and Desktop Applications
The status of your UM Client Manager session is represented by a number of icons:
Icons
Session Status
Available to
Logged In
All users
Logged In with New Message Awaiting
Advanced and
Unified users
Logged Out
All users
Disconnected (System detects Client Manager
settings, but no connection is established)
All users
(flashing)
The status of your availability is represented by several icons:
Busy
Advanced and
Unified users
In Meeting
Advanced and
Unified users
Do Not Disturb
Advanced and
Unified users
At Lunch
Advanced and
Unified users
Gone Home
Advanced and
Unified users
Away On Business
Advanced and
Unified users
On Vacation
Advanced and
Unified users
6510 UM Client Application User Guide
15
UM Client Manager and Desktop Applications
No Answer
Advanced and
Unified users
In Office and Logged In (Shown In LanTalk
Directory)
Advanced and
Unified users
In Office and Not Logged In (Shown In LanTalk
Directory)
Advanced and
Unified users
Standard User, no Desktop access (Shown In
LanTalk Directory)
Advanced and
Unified users
Note: When UM Client Manager is enabled by default, a
notification window will pop up above the UM Client
Manager icon whenever new messages are received. This can
be turned off in the Options/Notification Settings of the
Client Manager. The Notification window will display the
number of new voice, text, and fax messages if the Show
Message Count option is enabled in the Administration
console. Refer to Feature Groups>Mailbox Options in the
Server Configuration Guide.
16
6510 UM Client Application User Guide
UM Client Manager and Desktop Applications
Logging Off
Logging off closes the UM Client Manager and ends your session.
To log off from the UM Client Manager:
1. Right-click on the UM Client Manager icon and click Exit. The
following message appears:
2. Click Yes.
6510 UM Client Application User Guide
17
UM Client Manager and Desktop Applications
UM Client Manager Connectivity
At times when the UM Client Manager is unable to connect to the IMAP store or to
your mailbox, dialogs will appear that prompt you to regain connectivity.
To unlock mailbox:
1. When the system fails to establish a connection to the IMAP store,
the Unlock Mailbox dialog appears.
2. Click OK. The system attempts to re-establish the connection. If
connection is established, the Unlock Mailbox dialog will
disappear. If the connection is not established, the Unlock Mailbox
dialog will re-appear. Click OK again until the connection is
established.
To reconfigure IMAP settings:
1. When the system fails to establish a connection with a specific
mailbox in the IMAP store, the IMAP Settings dialog appears.
18
6510 UM Client Application User Guide
UM Client Manager and Desktop Applications
2. In the User Name field, enter your IMAP user name.
Note: The IMAP user name is the e-mail account user name that is
set on the Exchange server (in the Active Directory). See your
System Administrator if you do not know your IMAP user
name.
3. In the Old Password field, enter the old password associated to
your IMAP user name.
4. In the Password field, enter a new password for your IMAP user
name.
5. In the Confirm Password field, re-enter the new password for
confirmation.
6. Click OK. The system re-attempts to connect to the specific
mailbox in the IMAP Store.
To reset password when prompted:
1. When your account attempts to log into the UM Client Manager
and the password is not valid, the Set Password dialog appears.
2. In the Set Password field, enter the correct password for your
account.
3. Click OK. If the correct password is entered, the system logs you
into the UM Client Manager.
6510 UM Client Application User Guide
19
UM Client Manager and Desktop Applications
Note: If your connection to the 6510 server is lost at any time (due
to network issues), the Login dialog will appear. Click OK to
close the dialog and re-establish a connection with the 6510
server. The Login dialog will continue to appear
intermittently if connection to the server is not reestablished.
Configuring the UM Client Manager
Before you can use UM Client Manager, you must configure the application. While
the Main Settings are normally set when the application is installed on your PC, you
have the option of changing the settings.
Note: This task is only applicable to Advanced or Unified users. For
an explanation of the different user types, refer to the About
This Guide section in this document.
There are four main settings to configure for the application.
• Main Settings
• Call Handling
• LanTalk (Instant messaging) Settings
• Notification Settings
20
6510 UM Client Application User Guide
UM Client Manager and Desktop Applications
Configuring Main Settings
This function allows you to configure the personal settings required so that you can
log in successfully.
Caution: This information must be correct in order for the UM Call
Manager and the Outlook Forms to work properly.
To configure main settings:
Note: Skip this procedure if you have already configured the main
settings during the installation of the 6510 UM Client
Manager.
1. From your desktop, click on Start>Programs>UM Client
Manager>Configuration.
The 6510 UM Client Manager configuration window appears..
6510 UM Client Application User Guide
21
UM Client Manager and Desktop Applications
Note: The main mailbox, address and port information is
automatically populated by the system if you entered them
correctly during the installation process. If certain fields are
not populated, refer to the following steps 2-5 for details.
Proceed to step 6 if the main fields are already populated.
2. In the Company field, enter the company number name that your
account is associated with on the 6510 UM server.
Note: Contact your System Administrator if you do not know your
company number. The default value is 1.
3. In the Mailbox field, enter your mailbox number for voice mail.
4. In the UMST Server IP Address field, enter the UMST IP address so
that the system can authenticate you using TCP/IP.
Note: Contact your System Administrator if you do not know your
UMST Server IP Address.
5. In the UMST Server Port, enter the UMST server port number.
Note: Contact your System Administrator if you do not know your
UMST Server Port number. The default value is 13777.
6. In the Keep connection alive field, place a checkmark in the box if
you would like the UM Client Manager to maintain a connection
with the UMST.
Note: When this option is selected, the UM Client Manager will
attempt to reconnect to the UMST if the connection is lost
between the two components.
7. In the UM Client Language drop-down list, select the language
that is to be used.
8. In the Fax Viewer field, enter the file name and location of the
application you currently use to view .tiff files. If you leave this
field blank, 6510 UM Client Manager will use the default viewer
associated with your operating system.
22
6510 UM Client Application User Guide
UM Client Manager and Desktop Applications
9. Click Set Password to set your user password. The Set Password
dialog appears.
10. In the Set Password field, enter your new password, and then click
OK.
11. The 6510 UM Client Manager configuration window reappears.
Click OK to finish the configuration.
The initial setup of the 6510 UM Client Manager is now complete.
6510 UM Client Application User Guide
23
UM Client Manager and Desktop Applications
Specifying Call Handling Settings
The Call Handling tab allows you to define the call handling settings, including PIM
Integration, Default Action, New Call Popup, Public Contact Search, Auto Add
Record and User Extension.
Note: This feature is only available to Advanced or Unified users.
For an explanation of the different user types, refer to the
About This Guide section in this document.
To specify call handling:
1. Log into the 6510 UM Client Manager.
2. Click the Call Handling tab.
The Call Handling window appears.
3. Select New Call Popup to activate screen pops on incoming calls.
When you receive a new call, the Call Manager screen will appear.
24
6510 UM Client Application User Guide
UM Client Manager and Desktop Applications
Note: In order for call popups to occur, this checkbox must be
selected. In conjunction with this, the Transfer Options for
each user’s mailbox must have Pop selected. Refer to the Web
Client chapter in this guide for more details.
4. Select the Use Phone Formatting checkbox to enable phone
formatting.
5. From the PIM Integration drop-down list, select the Personal
Information Manager (PIM) application you are using on this PC to
integrate database look ups and screen pops on incoming calls.
The following table describes the related settings for each of the Personal
Information Manager (PIM) applications in the drop-down list.
Function
Related Fields
Maximizer
Select Auto Add Record on Not Found to
add the call record if it is not found in the
database. It takes the caller ID information
including the name and number, and creates a
new contact in Outlook or Act.
Goldmine
No related fields.
ACT!
Select Auto Add Record on Not Found to
add the call record if it is not found in the
database. It takes the caller ID information
including the name and number, and creates a
new contact in Outlook or Act.
6510 UM Client Application User Guide
25
UM Client Manager and Desktop Applications
Function
Related Fields
Outlook
Select Auto Add Record on Not Found to
add the call record if it is not found in the
database. It takes the caller ID information
including the name and number, and creates a
new contact in Outlook or Act.
Select Search Public Contacts to search the
public contact database on the office exchange
server for matching contact number.
Select Eliminate New Call Popup If Found
when you want to turn off call control and only
popup the contact information on incoming
calls.
Custom ActiveX
This allows a user with Visual Basic (VB) Script
experience to integrate the screen pops and
call controls into custom databases and
applications.
In the Class Name field, enter the file name of
the script created to do custom screen pops.
6. Select Eliminate New Call Popup, If Found if you do not want a
new call popup when a matching information is found for the
incoming call by the system.
7. From the Default Action drop-down list, select a default action. If
you do not click on any actions on the incoming screen popup, the
system will process the call based on the action you have assigned
in this field.
Note: You can override these default actions by the actions that you
may choose on an incoming screen pop.
26
Action
Function
Take Call
Take the call automatically
Take Message
Take a message automatically
Transfer Call
By default, transfer the call to another extension
6510 UM Client Application User Guide
UM Client Manager and Desktop Applications
8.
In the Use Ext. field, select the extension type to be used to
transfer a call, play back a voice message, and dial a number. You
can select an Internal, External, or Centrex extension type.
Note: Centrex is a telephone company provided service that allows
for PBX functionality through your telephones. In this
application, selecting the Centrex extension type will initiate
external dialing through the auto attendant, freeing your
existing trunk lines for outdialing.
9.
In the Country drop-down list, select the country that is associated
with the external extension.
10. In the City/Area Code field, enter the city area code for the
external extension.
11. In the Number field, enter the extension number you are using, or,
if you are using an external telephone number, enter the seven
digit phone number.
Note: If you do not enter a phone extension, the system will use
your extension.
12. Click OK to end and finish the configuration, or click another tab
to continue the configuration.
6510 UM Client Application User Guide
27
UM Client Manager and Desktop Applications
Configuring LanTalk
LanTalk is the instant messaging component of the 6510 UM system that allows
users to chat with each other over an IP network. LanTalk messaging can be
personalized so that each user can specify background and foreground colors, as
well as font type and size.
Note1: This feature is only available to Advanced or Unified users.
For an explanation of the different user types, refer to the
About This Guide section in this document.
Note 2: Check with your System Administrator whether you have
access to this feature. You need to have several options
enabled before you can access this feature.
To configure LanTalk:
1. Log into the 6510 UM Client Manager.
2. Click the LanTalk tab. The LanTalk window appears.
28
6510 UM Client Application User Guide
UM Client Manager and Desktop Applications
3. Click Background Color to set the color for the background screen.
4. Click Foreground Color to set the color of the text.
5. Click Font to configure the font type and size.
Note: For information on changing the color and font, refer to your
Windows NT® documentation.
6. Select the LanTalk Popup checkbox to turn on instant messaging.
7. Select the New LanTalk Window for every Session checkbox if you
want a new window for every new LanTalk session.
8. Click OK to save the LanTalk settings.
6510 UM Client Application User Guide
29
UM Client Manager and Desktop Applications
Configuring Notifications
The Notification tab allows you to customize the way that you are notified when
you receive new messages and when other users log in to the system.
Note: This feature is only available to Advanced or Unified users.
For an explanation of the different user types, refer to the
About This Guide section in this document.
To configure the notifications:
1. Log into the 6510 UM Client Manager.
2. Click the Notification tab. The Notification dialog appears.
• Select the When new messages arrive, make the icon flash checkbox to enable the 6510 UM Client Manager icon to flash when you
receive a new message.
30
6510 UM Client Application User Guide
UM Client Manager and Desktop Applications
• Select the When new messages arrive, popup notification window checkbox to enable the screen popup that notifies you of new
messages.
• Select the When others log in, popup notification window checkbox to enable the screen popup that notifies you when other users log
in to the system.
3. In the Sounds field, customize the sounds that you wish to use for
each function by using the Browse button to select the
appropriate sound files within the following fields:
New Message
Select the sound file you want played when
you receive a new message.
Urgent Message
Select the sound file you want played when
you receive an urgent message.
Record Beep
Select the sound file you want played for the
record beep.
New Call
Select the sound file you want played when
you receive a call.
LanTalk
Select the sound file you want played when
you receive a LanTalk message.
Logged in User
Select the sound file you want played when a
user logs in.
Note: The Notification Sounds feature only supports sound files in
.wav format.
4. Click OK to save your Notification settings.
6510 UM Client Application User Guide
31
UM Client Manager and Desktop Applications
Using the UM Call Manager
When a call comes through to your extension, the UM Client Manager displays a
screen pop that displays information about the phone call.
Note 1: This feature is only available to Advanced or Unified users.
For an explanation of the different user types, refer to the
About This Guide section in this document.
Note 2: The Contacts feature and button will only appear if you set
your PIM Integration Settings to use Outlook.
Note 3: You may not see all of the buttons as shown above. The
availability of some of the buttons depends on the PBX
integration of your system. Contact your System
Administrator for more information.
32
6510 UM Client Application User Guide
UM Client Manager and Desktop Applications
Using the Toolbar Buttons
There are eight buttons that allow you to perform various tasks within the UM Call
Manager display.
Note: You may not see all of the buttons shown below on your
system. The availability of some of the buttons depends on
the PBX integration of your system. Contact your System
Administrator for more information.
Button
Function
Transfers the call to the active extension that your user account has
been defined to. For more information, refer to Chapter 2 (Using the
Web Client) in this document. This feature is PBX dependent.
Transfers the call to another extension. Click the arrow key to define the
extensions.
Puts the incoming call on hold. Click the arrow key to select the length
of time that the call will be on hold.
Sends the call to voice mail. Click the arrow to select what greeting to
play the caller.
Allows you to pull a caller out of voice mail while they are leaving a
message.
Allows you to dial back a number that left a message or called. You can
go into contacts and used the dial button as well. This feature is PBX
dependent.
6510 UM Client Application User Guide
33
UM Client Manager and Desktop Applications
This button allows you to turn your do not disturb status on or off at
any time.
This launches the embedded UM Client Manager Contact database to
log call statistics and dial back. (Only functional in conjunction with
Outlook).
Answering a Call
When a call appears on the UM Call Manager display, click Answer to transfer the
call to your extension.
Note: The Answer button is disabled until you receive another call.
Removing a Call
UM Client Manager gives you the option of removing one or all of the calls on the
display.
To remove a call:
1. Highlight the call to be removed and click Clear. A dialog appears,
prompting you to confirm the deletion.
Note: To remove all calls from the display, click Clear.
2. Click OK. UM Client Manager removes the calls from the screen.
34
6510 UM Client Application User Guide
UM Client Manager and Desktop Applications
Transferring a Call
When a call comes to your extension, you can transfer the call to another extension.
After you specify the extension, it will be displayed in the Transfer drop down list
and is available to use again.
Note: The extension numbers that you enter are available until you
exit UM Call Manager.
To transfer a call:
1. Click the arrow key to select the extension to which to transfer the
call. To specify an extension, click Other. The Transfer Call dialog
appears.
2. Enter the mailbox number associated to the phone extension that
you want to transfer the call to and click OK.
Note: The Transfer button is disabled until you receive another call.
6510 UM Client Application User Guide
35
UM Client Manager and Desktop Applications
Putting a Call on Hold
When a call comes through to your extension, you can put the call on hold until you
have an opportunity to answer it.
To put a call on hold:
1. Click the arrow key beside the Hold button to select the length of
time that you want to put the call on hold for. Time selections
include 30 seconds, 1 minute, 2 minutes, or Other. If you select a
provided time selection, the call will be held for the specified
duration of time, and will then be transferred to your extension. If
Other is selected, the Hold Call dialog appears.
2. Enter the number of minutes that you want the call held for, then
click OK. After the time has expired, the call will be forwarded to
your extension.
Note: The Hold button is disabled until you receive another call.
36
6510 UM Client Application User Guide
UM Client Manager and Desktop Applications
Taking a Message
When a call comes through to your extension, you can choose to send the call
directly to your voice mail. When enabling this option from the UM Client Manager
interface, you can select which pre-recorded greeting to use to greet the caller.
To take a message:
1. Click the Take Msg arrow key and select the greeting type you
want the caller to receive. The UM Call Manager sends the caller to
the selected greeting to record a message.
Pulling a Caller out of Voicemail
When a caller is in the process of leaving a message in your voice mailbox, you can
choose to retrieve the caller from voicemail and speak to them directly.
To pull a caller out of voicemail:
1. While a caller is in a message recording session, click Recall. The
caller is transferred to your extension.
Specifying Do Not Disturb
Do Not Disturb (DND) allows you to activate a Do Not Disturb message when an
incoming call appears in the popup.
To specify do not disturb:
1. Click the Do Not Disturb icon.
Adding a Call to the Contact Manager
Note: This function is only available when PIM Integration is set to
Outlook.
If your PIM Integration is set to Outlook, after you answer a call, you can add
information about the caller to the Microsoft® Outlook Contact Manager. For more
information on how to use contacts, see your Outlook guide.
6510 UM Client Application User Guide
37
UM Client Manager and Desktop Applications
Changing Your Status
UM Client Manger provides you with the ability to inform callers when you are not
available to answer the phone. For example, if you are on holiday, you can instruct
the system to inform a caller that you are away and the date when you will be back
in the office.
For information on how to record a greeting, refer to Maintaining Greetings on
page 140 or your Telephone User Guide.
To change your status:
1. Right-click the UM Client Manager icon, then select Present Status.
2. Select the status that you want activated.
Status
Function
In Office
Rings your Active extension.
Busy
Goes to voice mail and plays your busy greeting.
Meeting
Goes to voice mail and plays your meeting greeting.
Do Not Disturb
Goes to voice mail and plays your do not disturb greeting.
Lunch
Goes to voice mail and plays the lunch greeting.
Gone Home
Goes to voice mail and plays the gone home greeting.
Away on Business
Goes to voice mail and plays the away on business greeting.
Vacation
Goes to voice mail and plays your vacation greeting.
No Answer
Rings your active extension.
If you select a Present Status other than In Office or No Answer, the Available At
dialog appears.
38
6510 UM Client Application User Guide
UM Client Manager and Desktop Applications
3. Select the Available At checkbox to activate the schedule.
4. Click on a date when you will be back in the office.
5. Enter a time, then click Ok. The selected status will be represented
by the corresponding icon in your Windows System Tray.
Note 1: You do not need to specify an Available At date and time.
This is an option that you may choose, which, if selected will
inform callers of the date and time when you will be
available.
Note 2: The system does not revert your status greeting back to "in
office" when your Available At time is met. The greeting
needs to be changed manually.
6510 UM Client Application User Guide
39
UM Client Manager and Desktop Applications
Using LanTalk
LanTalk is the instant messaging module that allows you to chat with other users
over the network. You can reach anyone who is logged into the same network
connection as the one that you are using, as well as send SMS messages.
Sending a Message
When logged in, you can send instant messages to others using LanTalk.
To send a message (to a single user):
1. Right-click on the UM Client Manager icon and select LanTalk. UM
Client Manager enables you to Launch, Broadcast, or view the
Directory.
2. Click Launch. The LanTalk dialog appears.
40
6510 UM Client Application User Guide
UM Client Manager and Desktop Applications
3. From the Select Destination drop-down list, select Select
Destination from LanTalk Directory. The LanTalk Directory dialog
appears, displaying a Buddies List compilation or a list of all users
online, defining their name, mailbox number, and online status.
6510 UM Client Application User Guide
41
UM Client Manager and Desktop Applications
4. Click the Company Directory tab, select a user, and click OK. The
selected user appears in the Select Destination drop-down list.
Note: The LanTalk Directory can also be accessed directly if you
right-click on the UM Client Manager icon, select LanTalk and
click Directory.
5. Select the Also Send by SMS checkbox to send to a mobile phone
(if applicable).
6. In the empty field, enter the message that you want to send.
42
6510 UM Client Application User Guide
UM Client Manager and Desktop Applications
Note: You can also select a previous message that you sent.
7. Click Send to send the message. The message is sent.
6510 UM Client Application User Guide
43
UM Client Manager and Desktop Applications
Creating a Broadcast Message
Using the Broadcast Message feature is useful if you want to send the same
message to everyone connected to the system.
To create a broadcast message:
1. Right-click on the UM Client Manager icon and select
LanTalk>Broadcast. The LanTalk dialog appears.
2. In the Select Destination drop-down list, select Broadcast.
3. In the empty field, enter the message that you want to send.
Note: You can also send the message by SMS. However, it is not
recommended to send Broadcast messages in this way.
4. Click Send. The message is broadcasted.
44
6510 UM Client Application User Guide
UM Client Manager and Desktop Applications
Creating a Buddies List
A Buddies List allows you to create a distribution list for Lan Talk broadcasts. After
creating a Buddies List, you must add mailboxes (users) to the list. By creating and
defining users on a Buddies List, you can send a broadcast message to the selected
"buddies" with one click.
To create a Buddies List:
1. Right-click on the UM Client Manager icon and select
LanTalk>Directory. The LanTalk Directory (Buddies List tab)
appears.
2. Click Tools>Add Buddies List. The Add Buddies List dialog appears.
6510 UM Client Application User Guide
45
UM Client Manager and Desktop Applications
3. In the List Number field, enter the list number that will identify
the Buddies List.
4. In the List Name field, enter a unique name for the Buddies List.
5. Click OK. The Buddies List appears in the Buddies List tab.
46
6510 UM Client Application User Guide
UM Client Manager and Desktop Applications
To rename a Buddies List:
1. In the Buddies List tab, select a Buddies List and click
Tools>Rename Buddies List. The Delete Buddies List dialog
appears.
2. Click Yes. The Rename Buddies List dialog appears.
6510 UM Client Application User Guide
47
UM Client Manager and Desktop Applications
3. In the Enter new name field, enter the new name for the Buddies
List.
4. Click OK. The Buddies List appears, labelled with its new name.
To add mailboxes to the Buddies List:
1. In the Buddies List tab, select the Buddies List and click Tools>Add
Mailbox. The Add Mailbox dialog appears.
You can either add mailboxes by searching for the mailbox number or by
user name:
• Select By Mailbox Number.
• In the Mailbox Number field, enter the mailbox number to search
for.
48
6510 UM Client Application User Guide
UM Client Manager and Desktop Applications
• Click Search. Any mailbox number that is found is displayed.
or
• Select By Name. The Last Name and First Name fields appear.
• In the Last Name field, enter the last name of the user you are searching for.
• In the First Name field, enter the first name of the user you are
searching for.
• Click Search. Any name that is found is displayed.
2. Select the user that you want to add and click Add to List. The user
appears in the Buddies List.
6510 UM Client Application User Guide
49
UM Client Manager and Desktop Applications
3. Repeat steps 1-2 to add all necessary users to your Buddies List.
50
6510 UM Client Application User Guide
UM Client Manager and Desktop Applications
Deleting Buddies Lists and Mailboxes
You can delete individual mailboxes from Buddies Lists or delete entire Buddies
Lists.
To delete a mailbox from a Buddies List:
1. In the Buddies List tab, select a user and click Tools>Delete
Mailbox. The Delete Mailbox dialog appears.
2. Click Yes. The mailbox is removed from the Buddies List.
To delete a Buddies List:
1. In the Buddies List tab, select a Buddies List and click Tools>Delete
Buddies List. The Delete Buddies List dialog appears.
2. Click Yes. The Buddies List is removed.
6510 UM Client Application User Guide
51
UM Client Manager and Desktop Applications
Sending a Message Using a Buddies List
Once a Buddies List is created and multiple users are assigned to it, you can
conveniently create Lan Talk messages that are sent to users specific to the Buddies
List that is selected.
Sending a message using a Buddies List:
1. Right-click on the UM Client Manager icon and select
LanTalk>Directory.
The Lan Talk Directory (Buddies List tab) appears.
2. Select the Buddies List to use and click OK. The Select Destination
field displays the selected Buddies List.
3. In the empty field, enter the message that you want to send.
4. Select the Also Send to SMS checkbox to send to a mobile phone
(if applicable).
5. Click Send to send the message. The message is sent to all users
that are defined in your Buddies List.
52
6510 UM Client Application User Guide
UM Client Manager and Desktop Applications
Using the Outlook Toolbar
The UM Client Manager Toolbar is integrated into the Microsoft Outlook
application, allowing you to send a voice, text, or fax message, as well as set your
Present Status and launch LanTalk sessions.
Note: In cases where there are multiple Profiles being used on the
same Outlook application, only the profile of the user who
installs the software has access to the UM Client Manager
Toolbar in Outlook.
6510 UM Client Application User Guide
53
UM Client Manager and Desktop Applications
Button
Function
Available to
All users
Compose a voice message
(New Voice Button)
All users
Compose a text message
(New Text Button)
All users
Send a fax message
(New Fax Button)
Set your Present Status
Launch a LanTalk
conversation
54
6510 UM Client Application User Guide
Advanced and Unified
users
Advanced and Unified
users
UM Client Manager and Desktop Applications
Note: In order for message type icons to appear in Outlook (for
Integrated Messaging and SMTP Forwarding), you must use
the VPIM Client to enable this feature. Follow the directions
below.
To enable message type icons in Outlook:
1. In your Windows Taskbar, click Start > Program Files > Mitel
Networks 6510 UM > VPIMClient. The VPIM Client window
appears.
2. Click Preferences. The Preferences tab appears.
6510 UM Client Application User Guide
55
UM Client Manager and Desktop Applications
3. Under TNEF, select the Send Always radio button.
4. Click Apply, and then OK. Exit the VPIM Client application.
56
6510 UM Client Application User Guide
UM Client Manager and Desktop Applications
Message Tab
The Message tab allows you to compose voice, text and fax messages.
To compose a voice message:
1. In Microsoft Outlook, click the New Voice button. The New Voice
Message tab appears.
2. In the To field, enter the e-mail address that you are sending the
message to.
3. In the Cc field, enter the e-mail address that you are carbon
copying the message to. (If applicable).
4. In the Subject field, enter the subject for the message.
5. Under Choose Message Type, ensure that Voice is selected.
The sound recording toolbar is used to record and playback voice
messages. There are buttons to record, clear, play, stop, rewind, and fast
forward the message.
6510 UM Client Application User Guide
57
UM Client Manager and Desktop Applications
allows you to adjust the message volume and speed.
6. Click
and begin recording the voice message with your
microphone. Click
7. Click
when finished recording.
to verify that you message is recorded. If the message
needs to be revised, click
your message.
to clear the message and re-record
8. In the text field at the bottom of the screen, enter any text that
you want included with the message.
9. Click Send. The composed message is sent.
58
6510 UM Client Application User Guide
UM Client Manager and Desktop Applications
To compose a text message:
1. In Microsoft Outlook, click the New Text button. The New Text
Message tab appears.
2. In the To field, enter the e-mail address that you are sending the
message to.
3. In the Cc field, enter the e-mail address that you are carbon
copying the message to. (If applicable).
4. In the Subject field, enter the subject for the message.
5. Under Choose Message Type, ensure that Text is selected.
6. In the text field at the bottom of the screen, enter your message.
7. Click Send. The composed message is sent.
Note: If you delete a message, the message must be purged in
order for it to be removed on the voice mail server. Purging
deleted messages in any supported Client application will
update the message count status on the voice mail server.
6510 UM Client Application User Guide
59
UM Client Manager and Desktop Applications
To compose a fax message:
1. In Microsoft Outlook, click the New Fax button. The New Fax
Message tab appears.
2. In the To field, enter the e-mail address that you are sending the
message to.
3. In the Cc field, enter the e-mail address that you are carbon
copying the message to. (If applicable).
4. In the Subject field, enter the subject for the message.
5. Under Choose Message Type, ensure that Fax is selected.
6. Click Add Attachments. The Open dialog appears.
60
6510 UM Client Application User Guide
UM Client Manager and Desktop Applications
7. Select the fax to attach to the message. The selected file appears
in the field.
8. In the text field at the bottom of the screen, enter any text that
you want included with the message.
9. Click Send. The composed message is sent.
6510 UM Client Application User Guide
61
UM Client Manager and Desktop Applications
Telephony Options Tab
The Telephony Options tab allows you to configure the voice format and device
options. Correctly configuring these options will allow you to listen to voice
messages that are received.
Note: Standard users do not have access to the Telephony Options
function. For an explanation of the different user types, refer
to the About This Guide section in this document.
To set telephony options:
1. In Microsoft Outlook, click the New Voice button. The New Voice
Message tab appears.
2. Click the Telephony Options tab. The Telephony Options tab
appears.
3. In the Voice Format drop-down list, select the voice file format to
use for playback.
4. In the Sound Device drop-down list, select Sound Card to listen to
voice messages through the sound card on your desktop and click
Apply. Or, select Phone to listen to voice messages through your
telephone. If Phone is selected, the Phone Extension field appears.
62
6510 UM Client Application User Guide
UM Client Manager and Desktop Applications
5. Enter your phone extension and click Apply. Once this is selected,
when a voice message is received and opened in Outlook, the
system will call your telephone extension and the voice message
will be played on your telephone.
6. Telephony Options are now configured.
Note: Voice messages recorded through a microphone on a desktop
cannot be played through the Phone sound device. It can only
be played through the Sound Card sound device.
6510 UM Client Application User Guide
63
UM Client Manager and Desktop Applications
Setting Present Status in Outlook
UM Client Manger provides you with the ability to inform callers when you are not
available to answer the phone. For example, if you are on holiday, you can instruct
the system to inform a caller that you are away and the date when you will be back
in the office.
Note: This feature is only available to Advanced or Unified users.
For an explanation of the different user types, refer to the
About This Guide section in this document.
To set present status in Outlook:
1. In the UM Client Manager Status Toolbar (Outlook), click the
Present Status drop-down list and select a status.
Status
Function
In Office
Rings your Active extension.
Busy
Goes to voice mail and plays your busy greeting.
Meeting
Goes to voice mail and plays your meeting greeting.
Do Not Disturb
Goes to voice mail and plays your do not disturb greeting.
Lunch
Goes to voice mail and plays your lunch greeting.
Gone Home
Goes to voice mail and plays the gone home greeting.
Away on Business
Goes to voice mail and plays the away on business greeting.
Vacation
Goes to voice mail and plays your vacation greeting.
No Answer
Rings your active extension.
2. Your Present Status is set.
64
6510 UM Client Application User Guide
UM Client Manager and Desktop Applications
Using LanTalk in Outlook
LanTalk is the instant messaging module that allows you to chat with other users
over the IP. You can reach anyone who is logged into the same IP as the one that
you are using. Integrated into Outlook, LanTalk is much more convenient for you to
use to communicate with individuals logged into your network.
Note: This feature is only available to Advanced or Unified users.
For an explanation of the different user types, refer to the
About This Guide section in this document.
To use LanTalk in Outlook:
1. In the UM Client Manager Status Toolbar (Outlook), click LanTalk
and select Launch, Broadcast, or Directory.
• To Launch a message, refer to To send a message (to a single user): on
page 40
• To Broadcast a message, refer to To create a broadcast message: on
page 44
• To use the Directory, refer to below.
2. Click Directory. The LanTalk Directory (Select Destination) dialog
appears.
3. Highlight a user and click OK. The LanTalk dialog displays the
user’s information.
4. From the Send Text drop- list, enter the message that you want to
send.
Note: You can also select a previous message that you sent.
5. Click Send to send the message.
6. Click Clear to clear the current conversation off of your IM screen.
6510 UM Client Application User Guide
65
UM Client Manager and Desktop Applications
66
6510 UM Client Application User Guide
CHAPTER 2
Web Client
In This Chapter . . .
Overview on page 68
Starting Web Client on page 68
Web Client Functions on page 72
Using the Inbox on page 73
Maintaining Folders on page 91
Maintaining the User Settings on page 96
Maintaining Message Options on page 105
Maintaining Call Options on page 111
Maintaining Addresses on page 114
Maintaining a Distribution List on page 126
Maintaining Notifications on page 129
Maintaining Wakeup Calls on page 138
Maintaining Greetings on page 140
Using the Collaborate Feature on page 145
6510 UM Client Application User Guide
Web Client
Overview
Web Client is a web-based interface that provides you with access to your 6510 UM
account and features over the Internet. You can check your e-mails, phone
messages, and faxes from anywhere in the world.
Note: This application is only available to Advanced or Unified
users. For an explanation of the different user types, refer to
the About This Guide section in this document.
Starting Web Client
Running Grant Permissions
Executing Grant Permissions allows each new user to utilise all available functions in
the Web Client (such as recording voice messages).
Make sure that you first run the Grant Permissions from the Web Client screen
before logging in to the Web Client.
Note: You may have already enabled Grant Permissions during the
installation of the client applications. Skip this procedure if
you have already enabled this function.
To run Grant Permissions:
1. Open your browser (using Microsoft Explorer 6.0 or greater or
Netscape Navigator 6.2 or greater). The Web Client screen
appears.
2. In the Address field, enter the IP address of the 6510 UM server,
and then click Go.
Note: If you do not know the IP address, contact your Network
Administrator.
3. Click Web Client. The Web Client dialog appears.
4. In the Getting Started drop-down list, select Grant Permission.
68
6510 UM Client Application User Guide
Web Client
5. Click Go. The File Download dialog appears.
6. Click Open. The Grant Permissions Installation begins, and the Set
Client-Side Permissions dialog appears.
7. In the http:// field, enter the IP address of your web server, and
then click OK. The Grant Permission dialog appears.
8. Click OK. Grant Permissions is now complete. You can proceed to
logging in and using the Web Client.
6510 UM Client Application User Guide
69
Web Client
Connecting to the Web Client
In order to access your 6510 UM account over the Internet, you must first start the
Web Client.
Note: Before using this application, make sure that SSL has been
enabled on the Web Client. Check with your System
Administrator if you are not sure if this has been done.
To connect to the Web Client:
1. Open your browser (using Microsoft Explorer 6.0 or greater or
Netscape Navigator 6.2 or greater). The Web Client screen
appears.
2. In the Address field, enter the IP address of the UM server
followed by /um and click Go.
Note: If you do not know the proper IP address, contact your
Network Administrator.
3. Click Web Client. The Web Client dialog appears.
4. Select a language interface from the selection on the left hand
side.
Note: The default is English.
5. In the Mailbox field, enter your mailbox number.
6. From the Company drop down list, select a company (if there are
multiple companies in the UM system).
7. In the Password field, enter your password and click Login. The
Top\Inbox\ screen appears.
Note: If you are accessing the Web Client from your computer
where the UM Client Manager is installed, then you may
right-click on the Client Manager icon and select My UM
Inbox to launch your Web Client mailbox.
70
6510 UM Client Application User Guide
Web Client
Logging Off
After finishing the Web Client session, you must log off.
To log off:
1. Click Log Off. A message appears prompting you to confirm log
off action.
2. Click OK. The Web Client screen appears.
6510 UM Client Application User Guide
71
Web Client
Web Client Functions
Using the Scroll Buttons
Scroll buttons allow you to scroll through the display of messages.
Button
Name
Function
First Record
Scrolls to the first record
Previous Record
Scrolls to the previous record
Next Record
Scrolls to the next record
Last Record
Scrolls to the last record
Note: Scroll buttons appear in both the Inbox and Folders
applications.
Using the Main Toolbar Functions
The left hand side of the screen displays the main toolbar functions.
Toolbar Function
72
Name
Purpose
Inbox
Displays all of your messages
Folders
Displays your folders
User Settings
Configure your user properties
Distribution List
Create and edit your distribution lists
6510 UM Client Application User Guide
Web Client
Notification
Sets up and configures notification
properties on new messages
Wakeup Call
Setup and configure a wakeup call
Greetings
Record and edit greetings
Collaboration
Initiates the defined collaboration
service
Log Off
Log off of Web Client
Using the Inbox
The Inbox displays all of the voicemails, faxes, and e-mails that have been sent to
your mailbox.
Note: If you are a first-time Web Client user with IMAP TSE
Gateway access, a significant amount of time is required for
your existing messages (if there is a large amount) to be
propagated to your Web Client inbox.
6510 UM Client Application User Guide
73
Web Client
Message Icons
There are seven message icons used to represent information about each message
in the Inbox.
Icon
74
Name
Function
Voice
Indicates a voice message that you
have not listened to
Voice
Indicates a voice message that you
have listened to
E-mail
Indicates an e-mail that you have not
read
E-mail
Indicates an e-mail that you have read
Fax
Indicates a fax message
Importance
Indicates the importance of the
message
Private / Certified
Indicates that the message cannot be
forwarded to another user. The icon
also indicates that you will receive a
message in your Inbox when the
recipient has listened to your voice
message.
6510 UM Client Application User Guide
Web Client
Displaying Messages by Type
You can display the messages in any folder either by type or all messages together.
The default is Show All.
6510 UM Client Application User Guide
75
Web Client
Using the Toolbar Buttons
There are nine buttons that allow you to perform various tasks within the Inbox.
Button
76
Name
Function
Compose new message
Compose a new voice message, e-mail, or fax
Reply
Reply to the message
Forward
Forward the message to another user.
Refresh
Refresh the display
Copy marked items
Copy a marked item
Move marked items
Move a marked item
Delete marked items
Delete a marked item
Add
Add a recipient
Remove
Remove a recipient
6510 UM Client Application User Guide
Web Client
Playing a Voice Message
Using Web Client, you can play back any voice mail message that has been sent to
your mailbox. If there are any attachments to the voice message, Web Client will
download the files to your PC.
Note: The Java Plug-In and Grant Permissions must have been
installed on the computer you are using in order to be able to
play and record voice mail messages.
To play a voice message:
1. In your Inbox, click the icon beside the voice message that you
want to hear. The Voice Message From dialog appears.
6510 UM Client Application User Guide
77
Web Client
The Windows Sound Player becomes active and plays the message automatically.
2. From the List of Attachments drop down list, select an attachment,
then click Open. The Save As dialog appears.
3. Select a directory to save the file to, then click Save. When the
download is complete, click Close.
4. To return to the Inbox, close the window.
Correcting a Voice Message Play Error
Due to a known sound card driver problem specific to certain sound cards, the
applet may crash if the Playback Speed bar is dragged when playing a message in
Web Client. If this error occurs, the error can be corrected.
To correct a voice message play error:
1. In your Windows Desktop, click Start>Settings>Control Panel. The
Control Panel window appears.
2. Double-click the Sounds and Multimedia icon. The Sounds and
Multimedia Properties dialog appears.
3. Click the Audio tab and under the Sound Playback box, click the
Advanced button. The Advanced Audio Properties dialog appears.
4. Click the Performance tab. The Performance tab appears.
5. In the Hardware Acceleration section, drag the bar to None and
click OK. The Sounds and Multimedia Properties dialog appears.
6. Under the Sound Recording box, click the Advanced button. The
Advanced Audio Properties dialog appears.
7. Repeat step 5 above and click OK.
8. Close all browser windows and restart Web Client.
78
6510 UM Client Application User Guide
Web Client
Viewing a Fax
If you have Fax Client installed on your PC, you can view any fax that has been sent
to your mailbox.
To view a fax:
1. In your Inbox, click the Fax icon. The fax message appears.
2. Select the fax from the List of Attachments drop-down list if the
fax is an attachment in the message. The fax message appears.
Reading an E-mail
Web Client gives you the ability to read your e-mails either in the office or from any
where in the world.
To read an e-mail:
1. In your Inbox, click the E-mail icon. The following dialog appears.
6510 UM Client Application User Guide
79
Web Client
2. From the List of Attachments drop down list, select an attachment,
and click Open. The Save As dialog appears.
3. Select a directory to save the file to, then click Save. When the
download is complete, click Close.
4. To return to the Inbox, close the window.
Refreshing the Display
Web Client refreshes the display automatically so that the most recent messages
always appear in your Inbox. However, you can also refresh the display manually by
clicking Refresh.
Composing a Message
Web Client gives you the ability to compose one of three types of messages: Voice,
Text, or Fax. The message can then be sent to the following types of users:
• UM
• VPIM
• AMIS
• E-mail
In addition, you can also send the mail to a Distribution list
80
6510 UM Client Application User Guide
Web Client
Creating a Voice Message
If you have a microphone attached to your PC, you can use Web Client to send a
voice message.
To create a voice message:
1. In your Inbox, click New in the toolbar.
2. Select Voice and click OK. The voice dialog appears.
3. From the Importance drop down list, select Normal or High
(Urgent) to specify the importance of the voice message.
4. Select Certified if you want to receive a message that the recipient
has listened to your voice message.
6510 UM Client Application User Guide
81
Web Client
5. Select Private (Not Forwardable) to prevent the receiver from
forwarding the voice mail message to another user.
6. Click Attachments if you want to attach a file to the voice
message.
7. Click To to specify the recipients. The To dialog appears.
Note: You can also enter the recipient’s extension.
8. Highlight a recipient, then click the Add arrow. When you have
finished adding all of the recipients, click OK. The From dialog
appears.
9. In the Subject field, enter the subject of the voice message.
10. Click Record to record the voice message. Click Stop when you
have finished recording. Click Play to review the voice message.
11. Click Send.
Web Client keeps a copy of your voice message in the Sent folder.
82
6510 UM Client Application User Guide
Web Client
Creating a Text Message
You can use Web Client to create a text message.
Note:
There is no limit to the length of the text message.
To create a text message:
1. In your Inbox, click New in the toolbar.
2. Select Text, then click OK. The text dialog appears.
6510 UM Client Application User Guide
83
Web Client
3. From the Importance drop down list, select Normal or High
(Urgent) to specify the importance of the text message.
4. Select Certified if you want to receive a message in your Inbox that
the recipient has read your text message.
5. Select Private (Not Forwardable) to prevent the receiver from
forwarding the text mail message to another user.
6. Click Attachments if you want to attach a file to the text message.
7. Click To to specify the recipients. The To dialog appears.
8. Highlight a recipient and click the Add arrow. When you have
finished adding all of the recipients, click OK.
9. Enter the text message and click Send.
Web Client keeps a copy of your voice message in the Sent folder.
Creating a Fax Message
You can create fax messages to send to your contacts.
To create a fax message:
1. In your Inbox, click New in the toolbar.
2. Select Fax and click OK. The fax dialog appears.
84
6510 UM Client Application User Guide
Web Client
3. From the Importance drop down list, select Normal or High
(Urgent) to indicate the importance of the message.
4. Select Certified if you want to receive a message in your Inbox that
the recipient has read your message.
5. Select Private (Not Forwardable) to prevent the receiver from
forwarding the message to another user.
6. Click Attachments if you want to attach a file to the message.
7. Click To to attach recipients to the fax. The To dialog appears.
8. Highlight a recipient and click the Add arrow. When you have
finished adding all of the recipients, click OK. The From dialog
appears.
9. In the Subject field, enter the subject of the fax.
10.In the Fax File field, enter the file you want to send and click Send.
11.Web Client keeps a copy of your voice message in the Sent folder.
6510 UM Client Application User Guide
85
Web Client
Adding an Attachment to a Message
Web Client allows you to add one or more attachments to your voice, text, or fax
message.
To add an attachment:
1. While composing any type of message in the From dialog, click
Attachments
. The Attachments dialog appears.
2. In the Attach File field, enter the directory and name of the file
and click Add.
Note: Click Browse to navigate to a directory.
3. Highlight the file, then click Remove to remove the file.
4. Click Clear All to remove all of the attached files.
5. Repeat step 2 to add another file, or click OK to return to the From
dialog.
86
6510 UM Client Application User Guide
Web Client
Replying to a Message
After you have read a message, you can reply to the sender with a comment using
Voice, Text, or Fax. You can also forward a copy of the message to another user and
include your comments.
To reply to a message:
1. To reply to a message from the Inbox, select the check box beside
it and click Reply.
Note: You can only reply to one message at a time.
2. If you are reading the e-mail, listening to a voice message, or
viewing a fax, click Reply. The Reply dialog appears.
3. Select the method that you want to use to reply to the message
and click OK. Depending on the reply method you selected, the
appropriate dialog appears.
4. Complete the dialog and click Send. Web Client puts a copy of the
message to each user in your Sent folder.
6510 UM Client Application User Guide
87
Web Client
Forwarding a Message
You can forward a message either from the Inbox or while you are reading it.
To forward a message:
1. Select the check box beside the message that you want to
forward, then click Forward.
Note: You can only forward one message at a time.
2. If you are reading the e-mail, listening to a voice message, or
viewing a fax, click Forward. The Forward dialog appears.
3. Select Add Comment if you want to add a comment and click OK.
The Voice, Text, and Fax options become active.
4. Select the method that you want to use to reply to the message
and click OK. Depending on the reply method you selected, the
appropriate dialog appears.
5. Complete the dialog and click Forward. Web Client puts a copy of
the forwarded message to each user in your Sent folder.
Copying a Message
Web Client allows you to copy one or more messages and store them in another
folder. This is useful if you would like to have copies of your messages stored in
more than one folder.
You can copy messages either from the Inbox (if you want to copy more than one),
or after you have read it.
To copy one or more messages:
1. Select the folder containing the messages that you want to copy.
2. Beside each message, select its check box, then click Copy marked
items. If you are reading the message, click Copy to another
folder. The Copy marked items dialog appears.
88
6510 UM Client Application User Guide
Web Client
3. Select the folder to copy the messages to, then click OK. The folder
that you copied the messages to appears on the desktop. The
folder that you copied the messages from still contains the original
messages that you copied.
Moving a Message
Web Client allows you to move one or more messages from one folder to another.
This is useful if you want to sort your messages by sender or subject.
To move one or more messages:
1. Select the folder containing the messages that you want to move.
2. Beside each message, select its check box, then click Move marked
items. If you are reading the message, click Move to another
folder. The Copy marked items dialog appears.
6510 UM Client Application User Guide
89
Web Client
3. Select the folder to move the messages to, then click OK. The
folder that you moved the messages to appears on the desktop
Deleting a Message
Once you have read a message, you can delete it from its folder.
To delete one or more message:
1. Select the folder containing the messages that you want to delete.
2. Beside each message, select its check box, then click Delete marked
items. If you are reading the message, click Delete.
Web Client removes the messages from the folder and puts them into the Deleted
Items folder.
90
6510 UM Client Application User Guide
Web Client
Maintaining Folders
You can create an unlimited number of folders to help organize your voice
messages, e-mails, and faxes.
Using the Toolbar Buttons
There are six buttons that allow you to perform various tasks within the Folders
application.
Button
Name
Function
Create a new folder
Creates a new folder
Delete the current folder
Deletes the current folder
Rename the current folder
Renames the current folder
Copy the current folder
Copies the current folder
Move the current folder
Moves the current folder
Empty Deleted Folder
Removes the contents of the Deleted
folder
Creating a New Folder
You can create a new folder to be at the same level as the default folders or to be a
sub-folder.
Note: If you want the new folder to be a sub-folder, select the
parent folder first.
To create a new folder:
1. Click Create a new folder. The New Folder dialog appears.
6510 UM Client Application User Guide
91
Web Client
2. Enter the name of the new folder, then click OK. Web Client
displays the folders in alphabetical order.
Deleting a Folder
You can delete any folder that you have created, with the exception of the five
default folders.
Caution: Deleting a folder deletes the contents of that folder, including
all sub-folders.
To delete a folder:
1. Click on the folder that you want to delete.
2. Click Delete the current folder. A message appears, prompting you
to confirm deletion.
3. Click OK. Web Client removes the directory from the display.
Renaming a Folder
You can rename any of existing folders.
Note: You cannot rename any of the default folders.
To rename a folder:
1. Click on the folder that you want to rename.
2. Click Rename the current folder. The Rename Folder dialog
appears.
92
6510 UM Client Application User Guide
Web Client
3. Enter the new name of the folder, then click OK. Web Client
displays the new name of the folder.
Copying a Folder
You can copy an existing folder to another folder. For example, you could have two
folders both named “Budgets.” One budget folder could be in the “This Year”
folder, while the other budget folder could be in the “Next Year” folder.
Note: You cannot copy any of the folders that come installed with
Web Client.
To copy a folder:
1. Click Folders, then select a folder.
2. Click the Copy the current folder icon. The Copy the Current Folder
dialog appears.
6510 UM Client Application User Guide
93
Web Client
3. Select a folder to copy the folder to, then click OK. The folder is
copied to the indicated folder.
Moving a Folder
You can move folders to other folders and directories.
Note: You cannot move the five default folders.
To move a folder:
1. Select a folder.
2. Click Move the current folder. The Move the current folder dialog
appears.
94
6510 UM Client Application User Guide
Web Client
3. Select where you want to move the folder and click OK. Web
Client displays the folder directory tree with the selected folder
moved into the new position.
Recovering Deleted Messages
Each time you delete a voice message, e-mail, or fax message, Web Client stores the
message in the Deleted Items folder. This allows you to recover deleted messages if
you change your mind about deleting one or more messages, you can move them
from the Deleted Items folder to another folder.
To recover a deleted message:
1. Click Folders, then Deleted Items. The Deleted Items dialog
appears.
2. Select the check box beside each message that you want to keep,
then click Move marked items. The Move marked items dialog
appears.
3. Select the folder to store the recovered messages and click OK.
Web Client moves the deleted messages into the selected folder.
6510 UM Client Application User Guide
95
Web Client
Emptying the Deleted Items Folder
Emptying the Deleted Items folder removes all of the deleted messages and folders
from Web Client permanently.
Caution: Once you empty the Deleted Items folder, you cannot recover
the deleted messages.
To empty the Deleted Items folder:
1. Click Inbox or Folders.
2. Click Empty Deleted Folder. A message appears, prompting you to
confirm deletion.
3. Click OK. The system deletes all items stored in the Deleted Items
folder.
Maintaining the User Settings
The User Settings function allows you to maintain your mailbox on Web Client. You
can specify a number of settings including:
• General Options
• Message Options
• Call Options
• Addresses
96
6510 UM Client Application User Guide
Web Client
Using the Toolbar Buttons
There are 12 buttons that allow you to perform various tasks within the User
Settings application.
Button
Name
Function
Save
Saves the mailbox
Refresh
Refreshes the display
Schedule (Status)
Create a status schedule
Schedule (Phone Addresses)
Create a Phone Addresses
Schedule
Schedule (E-mail Address)
Create a E-mail address schedule
Schedule (Fax Number)
Create a Fax Number schedule
Add
Add a phone address
Remove
Remove a phone address
Edit
Edit a phone address
Delete all
Delete all mailboxes
Add Item
Adds item
Delete item
Deletes item
6510 UM Client Application User Guide
97
Web Client
Specifying General Options
The General options screen allows you to specify:
• your presence status
• your passwords
• collaboration services
Specifying your Presence Status
Web Client provides you with the ability to inform callers when you are not
available to come to the phone. For example, if you are on holidays, you can
instruct the system to inform a caller that you are away and the date when you will
be back in the office.
Note: The Web Client setting overrides the setting that you
specified in the UM Client Manager.
To specify your presence status:
1. Click User Settings. The User Settings screen appears.
2. Click Status. The Status screen appears.
3. From the Status drop-down list, select your current status. An
appropriate greeting will play for each status.
98
6510 UM Client Application User Guide
Web Client
4. Select Available at if you want to specify a time when you will be
available. In the year, month, day, hour, and min fields, enter the
date and time when the selected status takes affect.
5. Click Save.
Creating a Status Schedule
Web Client provides you with the capability to create a schedule specifying when a
particular status greeting is played. For example, you can specify that the “In
Office” greeting plays Monday to Friday, between 9 am and 5 pm.
To create a status schedule:
1. Click Schedule. The Status Schedule dialog appears.
Note: Web Client automatically activates the schedule.
2. From the Default drop down list, select the default status greeting
that will run if the schedule expires.
3. From the From - year, month, and day drop down list, select the
year, month, and day when you want the voice menu to start
playing.
6510 UM Client Application User Guide
99
Web Client
4. From the To - year, month, and day drop down list, select the year,
month, and day when you want the voice menu to end playing.
Note: Select All Day if you want the voice menu to play all day.
5. Enter the From and To hours, in military format. For example, if
your company wants the voice menu to play from 9:00 AM to 5:00
PM, set the hours as From 09:00 and To 17:00. If no time is entered,
the system will assume all hours.
Note: A value of From 13:00 to blank indicates 1:00 PM to midnight.
The maximum value is 23:59 and the minimum value is 0:00.
Other than a Blank value, the From field cannot be greater
than the To field.
6. Select the days of the week on which the greeting is to play.
Note: If you want the message to run every day, select Every day.
7. From the Status drop down list, select the greeting that will run.
8. Click OK.
Editing a Status Schedule
The status schedule that you create can be edited at any time.
To edit a status schedule:
1. Click Schedule. The Status Schedule dialog appears.
2. Click the scroll bars to display the status schedule that you want to
edit.
3. Make the necessary changes, then click OK.
4. Repeat steps 2 and 3 to edit another status schedule, or click OK to
return to the General dialog.
100
6510 UM Client Application User Guide
Web Client
Deleting a Status Schedule
The status schedule that you create can be deleted any time.
To delete a status schedule:
1. Click Schedule. The Status Schedule dialog appears.
2. Click the scroll bars to display the status schedule that you want to
delete and click Delete Item. A message appears, prompting you
to confirm deletion.
Note: Click Delete All to delete all of the Status Schedules.
3. Click OK.
4. Repeat steps 2 and 3 to delete another status schedule, or click OK
to return to the General dialog.
Specifying a Password
When you login to the Web Client, the system prompts you for a password.
To specify a password:
1. Click User Settings. The User Settings screen appears.
2. Click Passwords. The Password screen appears.
6510 UM Client Application User Guide
101
Web Client
3. In the Numeric Password section enter a password in the Password
field.
4. Enter the password again in the Confirm Password field and then
click Save.
Specifying a POP3 / IMAP4 Password
POP3 is a protocol used by Web Client to retrieve your messages from the server. If
your system is not using POP3, it will use IMAP4. If your system is using either POP3
or IMAP4, you must specify a password for authentication.
To specify a password for POP3 or IMAP4:
1. In the Password screen, under the POP3/IMAP Settings section,
enter a user name in the User Name field.
Note: The IMAP user name is the e-mail account user name that is
set on the Exchange server (in the Active Directory). See your
System Administrator if you do not know your IMAP user
name.
2. In the Password field, enter a password for the user name.
3. In the Confirm Password field, enter the password again.
4. Click Save.
Specifying Collaboration
The Collaboration feature allows you to link to your desired Collaboration or
Meeting services. You can either specify a Company defined service, or a User
defined service. By default, the system is set to a Company defined service and the
WebEx website. You can choose to identity an alternate service by selecting the
User defined feature, and entering the corresponding personal collaboration url.
To specify the collaboration service:
1. Click User Settings. The User Settings (General) screen appears.
2. Click Collaboration. The Collaboration screen appears.
Note: By default, the system is already set to use the Company
defined service (WebEx).
102
6510 UM Client Application User Guide
Web Client
3. In the Active Collaboration Service drop-down list, select User
Defined Services. The User Defined Services field appears.
4. In the User Defined Services field, enter the URL for the service
that you want to use.
5. Click Save.
Specifying IMAP Settings
IMAP settings allow you to enable IMAP synchronization and unlock your user
account.
To set IMAP settings:
1. Click User Settings. The User Settings (General) screen appears.
2. Click IMAP Settings. The IMAP Settings screen appears.
6510 UM Client Application User Guide
103
Web Client
3. If the Locked checkbox is selected, it means that the system does
not currently accept the IMAP user login information. Deselect the
checkbox to unlock the account.
4. In the User Name field, enter the IMAP user name.
5. In the Password field, enter the IMAP user’s password.
6. In the Confirm Password field, re-enter the IMAP user’s password
for verification.
7. Click Save.
104
6510 UM Client Application User Guide
Web Client
Maintaining Message Options
Message Options allow you to specify message sorting and order, message
forwarding, and playback/record devices.
Sort/Order Messages
The Sort/Order messages feature allows you to specify the in order in which
messages should be played.
To sort/order messages:
1. Click User Settings. The User Settings (General) screen appears.
2. Click Sort/Order. The Sort/Order screen appears.
3. Select LIFO or FIFO.
Message Playback
Definition
FIFO (First In, First Out)
FIFO plays the oldest message first and the newest
message last.
LIFO (Last In, First Out)
LIFO plays the newest message first.
4. Click Save.
6510 UM Client Application User Guide
105
Web Client
Specifying Message Forwarding
Web Client allows you to forward your messages to another mailbox, distribution
list, AMIS or VPIM account, or an e-mail account. This is useful if you want to
designate where certain messages should be forwarded. Before specifying any
e-mail addresses, ensure that the e-mail client used for that address does not block
.wav file attachments and that the client machine has a device installed that can
play .wav attachments.
To specify message forwarding:
1. Click User Settings. The User Settings (General) screen appears.
2. Click Message Forwarding. The Message Forwarding screen
appears.
3. From the Address Type drop down list, select an address type.
Depending on the address type you select, you must follow the
corresponding steps listed in the following:
106
6510 UM Client Application User Guide
Web Client
For Mailbox and Distribution List:
1. In the Address drop-down list, select the mailbox or distribution
list to use.
2. In the After Hour(s)/Minute(s) fields, enter when message
forwarding should be enabled.
3. Select the Delete After Forward checkbox to delete each message
after forwarding.
Caution: If the Delete After Forward option has been selected, the
message will be permanently deleted from your mailbox on the
6510 system. In the event that the delivery was unsuccessful,
and the message does not arrive at its designated destination,
the message is still accessible from your SENT folder (if you have
Web Client access), or you may contact your System Administrator to retrieve the message from your SENT folder on your
behalf.
For AMIS or VPIM:
1. In the Remote Sites drop-down list, select the remote site.
2. In the Address field, enter the remote mailbox to use.
3. In the After Hour(s)/Minute(s) fields, enter when message
forwarding should be enabled.
4. Select the Delete After Forward checkbox to delete each message
after forwarding.
Caution: If the Delete After Forward option has been selected, the
message will be permanently deleted from your mailbox on the
6510 system. In the event that the delivery was unsuccessful,
and the message does not arrive at its designated destination,
the message is still accessible from your SENT folder (if you have
Web Client access), or you may contact your System Administrator to retrieve the message from your SENT folder on your
behalf.
6510 UM Client Application User Guide
107
Web Client
For E-mail:
1. In the Address field, enter the e-mail address to use.
2. In the After Hour(s)/Minute(s) fields, enter when message
forwarding should be enabled.
3. Select the Delete After Forward checkbox to delete each message
after forwarding.
Caution: If the Delete After Forward option has been selected, the
message will be permanently deleted from your mailbox on the
6510 system. In the event that the delivery was unsuccessful,
and the message does not arrive at its designated destination,
the message is still accessible from your SENT folder (if you have
Web Client access), or you may contact your System Administrator to retrieve the message from your SENT folder on your
behalf.
4. Click Save.
Specifying Playback/Record Options
The Playback/Record Options feature allows you to specify message playback
options as well as indicate the playback and record devices.
To specify message playback/record options:
1. Click User Settings. The User Settings (General) screen appears.
2. Click Playback/Record. The Telephony/Web Client options screen
appears.
108
6510 UM Client Application User Guide
Web Client
3. Select Say Date and Time if you want to hear the date and time
stamp before every message.
Note: All messages are tagged with a Date and Time stamp. Select
Say Date and Time if you want to hear the date and time
stamp before every message.
4. In the Playback Device drop-down list, select the device to use for
message playback.
5. In the Record Device drop-down list, select the device to use for
recording greetings and messages.
Note: If Phone is selected in either drop-down list, extra fields
become available.
6510 UM Client Application User Guide
109
Web Client
6. In the Address Type drop-down list, select the address type.
7. In the Country drop-down list, select the country that the phone is
located in.
8. In the Area/City Code field, enter the area/city code for the phone
number.
9. In the Number field, enter the phone number.
10. Click Save.
110
6510 UM Client Application User Guide
Web Client
Maintaining Call Options
Call Options allows you the flexibility to assign transfer options and enable/disable
call forwarding.
Specifying Transfer Options
By specifying the transfer options, the system will use the assigned active greeting
and call functions to receive callers.
To transfer options:
1. Click User Settings. The User Settings (General) screen appears.
2. Click Transfer Options. The Transfer Options screen appears.
3. From the Active Greeting drop down list, select the active greeting
that you want the system to play when a caller dials your
extension.
4. From the Caller ID drop down list, select the method that Web
Client will use to notify you of a call.
6510 UM Client Application User Guide
111
Web Client
Caller ID
Function
None
Turns off screen pops on Call Manager.
Ask
Prompts a caller to input their phone number before Web Client
transfers the call. The phone number is used in screen pops if you are
using Call Manager.
Pop
Provides a screen pop even if there is no caller ID information available.
Ask and Pop
Prompts the caller to manually input their number so it can be used in
the screen pop if no caller ID is available or it is not passed by the telco.
This guarantees that a number appears for all incoming calls to you.
Note: In conjunction with the Caller ID option selected in this
section, you must also enable the New Call Popup feature in
the UM Client Manager settings in for screen pops to appear.
Refer to the UM Client Manager and Desktop Applications
chapter of this guide for more details.
5. From the Personal Operator drop-down list, select the personal
operator extension that you want the call to be transferred to.
6. Select Call Screening if you want the system to instruct callers who
want to be transferred to an extension to state their name at the
tone.
Before the call is transferred, you will hear the caller's name followed by the system
prompt: "To accept the call press <1>, to reject the call press <#>, or to redirect the
call press <2>.” If you reject the call, the caller hears a no-answer message and is
given the choice of trying another extension, leaving a voice mail message, or
dialing the operator's extension. To redirect the call, press <2> and the destination
extension number, then hang up to transfer the call.
7. Select Call Queuing if you want incoming calls to be placed in a
queue when an extension is busy. Callers are informed of their
position in the hold queue and given opportunities to either
continue to hold or leave a voice message.
112
6510 UM Client Application User Guide
Web Client
Caution: Call Screening and Call Queuing are only available on telephone
systems that provide a busy tone. Most telephone sets with
multiple extension appearances do not produce a busy tone.
Note: Call Screening and Call Queuing are mutually exclusive. You
must choose one or the other, but not both.
8. Click Save.
Enabling the Call Forwarding Feature
When call forwarding is enabled, all calls will be forwarded to the assigned number.
To enable call forwarding:
1. Click User Settings. The User Settings (General) screen appears.
2. Click Call Forwarding. The Call Forwarding screen appears.
3. Select the Call Forwarding Enable checkbox if you want your calls
to be forwarded to another extension.
4. From the Call Forward to drop-down list, select the extension
where your calls will be forwarded to.
5. Click Save.
6510 UM Client Application User Guide
113
Web Client
Maintaining Addresses
Adding a Phone Address
You can add a phone address at any time.
To add a phone address:
1. Click User Settings. The User Settings (General) screen appears.
2. Click Phone. The Phone screen appears.
3. Click Add. The Add Address dialog appears.
114
6510 UM Client Application User Guide
Web Client
4. From the Address Type drop down list, select an address type.
5. If you select External or Centrex, the Country and Area/City Code
fields become active.
6. From the Country drop down list, select a country.
7. In the Area/City Code field, enter the area or city code.
8. In the Number field, change the extension.
9. Select Set as Default to specify the extension as the default, then
click OK.
6510 UM Client Application User Guide
115
Web Client
Editing a Phone Address
You can edit an existing phone address at any time.
Note: You cannot edit your extension from the General screen.
To edit the address type:
1. Highlight a phone address and click Edit. The Web Page dialog
appears.
2. Make the necessary changes, then click OK.
Deleting a Phone Address
You can delete an existing phone address at any time.
To delete an address type:
1. Highlight the phone address that you want to delete and click
Remove. A message appears, prompting you to confirm deletion.
2. Click OK.
Creating a Phone Addresses Schedule
You can create a Phone Addresses Schedule to specify which phone number the
system should use at certain times. This is useful if you work from different phone
numbers at different times or days.
To create a phone address schedule:
1. Click User Settings. The User Settings (General) screen appears.
2. Click Phone. The Phone screen appears.
3. Click Schedule. The Phone Addresses Schedule dialog appears.
116
6510 UM Client Application User Guide
Web Client
Note: Web Client automatically activates the schedule.
4. From the Default drop down list, select the default extension that
will be used if the schedule expires.
5. From the From - year, month, and day drop down list, select the
year, month, and day when you want the phone extension to start
being used.
6. From the To - year, month, and day drop down list, select the year,
month, and day when you want to stop using the phone
extension.
Note: Select All Day if you want the voice menu to play all day.
7. Enter the From and To hours, in military format. For example, if
your company wants the voice menu to play from 9:00 AM to 5:00
PM, set the hours as From 09:00 and To 17:00. If no time is entered,
the system will assume all hours.
Note: A value of From 13:00 to blank indicates 1:00 PM to midnight.
The maximum value is 23:59 and the minimum value is 0:00.
6510 UM Client Application User Guide
117
Web Client
Other than a Blank value, the From field cannot be greater
than the To field.
8. Select the days of the week on which you want the extension to
be called.
Note: If you want this extension to be reached every day, select
Every day.
9. From the Phone Addresses drop down list, select the phone
addresses that will run.
10. Click OK.
Specifying E-mail Addresses
Specifying e-mail settings allows you a number of e-mail addresses where you can
be reached when an unread message is received.
Note: If you are a Unified user, do not specify your corporate e-mail
address as it is already configured to receive messages.
To specify e-mail addresses and settings:
1. Click User Settings. The User Settings (General) screen appears.
2. Click E-mail. The E-mail screen appears.
118
6510 UM Client Application User Guide
Web Client
3. Select the Send E-mail with New Messages checkbox if you want to
send defined e-mails with the message.
Note: The Attach Voice File to E-mail selection becomes active if
you select Send E-mail with New Messages.
4. Select the Attach Voice File to E-mail checkbox if you want to
attach a voice message to an e-mail.
Note: The destination e-mail server must be able to receive .WAV
file attachments and the destination computer must have a
.WAV file player.
5. Select the Send E-mail with New Text Messages checkbox if you
want to send defined e-mails with the message.
6. Select the Attach Text File to E-mail checkbox if you want to
attach a text file to the message.
7. Click Add to add an e-mail address. The e-mail address dialog
appears.
6510 UM Client Application User Guide
119
Web Client
8. In the E-mail Address field, enter the e-mail address.
9. Select Set as Default if you want to make this e-mail address the
default address, then click OK.
10. Click Save.
Editing an E-mail Address
After specifying e-mail addresses, you can edit them at any time.
To edit an e-mail setting:
1. Highlight the e-mail address you want to edit and click Edit. The email address dialog appears.
2. Make the appropriate changes to the settings and click OK.
3. Click Save.
Removing an E-mail Address
You can delete e-mail addresses at any time.
To remove an e-mail setting:
1. Highlight the e-mail address you want to delete and click Remove.
The delete address dialog appears.
2. Click OK to confirm the deletion.
Configuring an E-mail Settings Schedule
An e-mail address schedule allows you to define when the system should send
unread messages to certain individual e-mail addresses.
To configure an e-mail settings schedule:
1. Click User Settings. The User Settings (General) screen appears.
2. Click E-mail. The E-mail screen appears.
3. Click Schedule. The e-mail schedule dialog appears.
4. Select the Schedule Enabled checkbox to enable the schedule.
120
6510 UM Client Application User Guide
Web Client
5. In the From Year/Month/Day drop-down lists, select the year,
month and day you want the schedule to begin.
6. In the To Year/Month/Day drop-down lists, select the year, month
and day you want the schedule to end.
7. Click the checkbox that represents the day or days you want the
schedule to be enabled or select the Every day checkbox to enable
the schedule everyday.
8. In the E-mail drop-down list, select the e-mail address that is to be
associated with the schedule.
9. Click OK.
Specifying Fax Addresses
You can specify and add Fax addresses.
To specify fax addresses:
1. Click User Settings. The User Settings (General) screen appears.
2. Click Fax. The Fax screen appears.
3. Select the Send E-mail with New Faxes checkbox if you want to
send defined e-mails with the message.
6510 UM Client Application User Guide
121
Web Client
4. Select the Attach Fax File to E-mail checkbox if you want to attach
a fax message to an e-mail.
5. In the Fax Number box, click Add to add a fax number. The Fax
Number dialog appears.
6. In the Internal/External drop-down list, select whether the fax
number is internal or external.
7. In the Country drop-down list, select the country in which the fax
number resides.
8. In the Area/City Code field, enter the area/city code of the fax
number.
9.
In the Number field, enter the fax number.
10. Select the Set as Default checkbox if you want to make this e-mail
address the default address and click OK.
11. Click Save.
12. To delete a fax number, highlight the number and click Remove.
13. To edit a fax number, highlight the number and click Edit.
Configuring a Fax Number Schedule
A Fax Number Schedule allows you to define when the system should send fax
messages to certain fax extensions.
To configure a fax number schedule:
1. Click User Settings. The User Settings (General) screen appears.
2. Click Fax. The Fax screen appears.
3. Click Schedule. The Fax Schedule dialog appears.
4. Select the Schedule Enabled checkbox to enable the schedule.
5. In the From Year/Month/Day drop-down lists, select the year,
month and day you want the schedule to begin.
6. In the To Year/Month/Day drop-down lists, select the year, month
and day you want the schedule to end.
122
6510 UM Client Application User Guide
Web Client
7. Click the checkbox that represents the day or days you want the
schedule to be enabled, or select the Every day checkbox to enable
the schedule every day.
8. In the Fax drop-down list, select the fax extension that is to be
associated with the schedule.
9. Click OK.
VPIM Addresses
The VPIM Addresses feature displays the user’s VPIM address. This address can only
be changed by the administrator in the 6510 UM Administration console.
To view VPIM addresses:
1. Click User Settings. The User Settings (General) screen appears.
2. Click VPIM. The VPIM screen appears, and displays all existing
VPIM addresses.
6510 UM Client Application User Guide
123
Web Client
WAP Addresses
Specifying a Wireless Application Protocol device address lets you define a WAP
location to contact for message notification.
To specify WAP addresses:
1. Click User Settings. The User Settings (General) screen appears.
2. Click WAP. The WAP addresses screen appears.
3. In the Country drop-down list, select the country in which the
WAP address is located.
4. In the Area/City Code field, enter the area/city code of the WAP
address.
5. In the Number field, enter the WAP number.
6. Click Save.
124
6510 UM Client Application User Guide
Web Client
Other Addresses
Specifying a SMS address lets you define a SMS location to contact for message
notification.
To specify other addresses:
1. Click User Settings. The User Settings (General) screen appears.
2. Click Other. The Other screen appears.
3. In the SMS field, enter the SMS address to send to.
4. In the Reply To field, enter an address that will appear in the
message that the receiver will be instructed to reply to.
5. Click Save.
Note: Your SMS address is provided by your cell phone or pager
service provider.
6510 UM Client Application User Guide
125
Web Client
Maintaining a Distribution List
Creating a distribution list provides you with an easy way to send messages to a
group of people. For example, if you frequently send voice mail to the sales team,
you can create a distribution list called “Sales Team", which contains the names of
all the members on the sales team.
You can use a distribution list to create either a voice mail or e-mail message.
Note: This option allows you to create and maintain up to 99
distribution lists.
Using the Toolbar Buttons
There are six buttons that allow you to perform various tasks within the Distribution
List application.
Button
126
Name
Function
Create Distribution List
Creates a distribution list
Delete Distribution List
Deletes a distribution list
Save Distribution List
Saves the distribution list
Refresh Distribution List
Refreshes the distribution list if you
make changes to it and do not click
Save.
Add to list
Adds name/address to the list
Remove from list
Removes name/address from the list
6510 UM Client Application User Guide
Web Client
Creating a Private Distribution List
You can create a private distribution list that includes a number of inboxes and email addresses. When unread messages are received, the system will utilize the list
and send the unread messages to the contacts on the private distribution list.
Note: Public distribution lists are created by the System
Administrator.
To create a distribution list:
1. Click Distribution List. The Distribution List screen appears.
2. Click Create Distribution List.
3. In the List Number field, enter the list number that you will
reference from a phone.
Note: For more information on accessing a distribution list from
your phone, refer to the Telephone User Guide.
4. In the List Name field, enter a descriptive name for the distribution
list.
5. In the Mailboxes field, enter the mailbox that you want to add to
the distribution list.
6510 UM Client Application User Guide
127
Web Client
Note: You can also highlight a mailbox, then click the Add to list
arrow.
To remove a mailbox, highlight it, then click the Remove from
list arrow.
6. The Remote Sites field displays all other networked locations via
AMIS or VPIM. Highlight a user, then click the Add arrow. The
Remote Sites dialog appears.
7. Enter the remote site address and click OK.
8. In the Email field, enter the e-mail address that you want to add to
the distribution list, then click Save Distribution List.
Editing a Distribution List
After a distribution list is created, its properties can be edited.
To edit a distribution list:
1. Click the scroll buttons until you find the distribution list that you
want to edit.
2. Make the necessary changes and click Save Distribution List.
Deleting a Distribution List
A distribution list can be deleted.
To delete a distribution list:
1. Click the Client scroll button to select a distribution list, then click
Delete Distribution List. A message appears, prompting you to
confirm deletion.
2. Click OK.
128
6510 UM Client Application User Guide
Web Client
Maintaining Notifications
When you are away from your desk or out of the office, you often do not have any
way of knowing if you have received an e-mail or voice message. Web Client has
the ability to notify you if you have received e-mail or voice message. For example, if
you have received a voice mail message, you can instruct Web Client to notify you
by an e-mail message or call to your cell phone, home phone, or another e-mail
account.
Using the Toolbar Buttons
There are six buttons that allow you to perform various tasks within the Notification
application.
Button
Name
Function
Save
Save the notification.
Refresh
Refresh the display.
Schedule
Display Notification Schedule dialog.
Add Item
Add a notification schedule.
Delete Item
Delete a notification schedule.
Delete All
Delete all notification schedules.
Creating a Notification Rule
Notification rules determine how Web Client will notify you when you receive an email, voice mail, or fax. For example, if you want to be notified each time you
receive a voice mail message, you can instruct the system to send you an e-mail. If
you are using a cell phone, you can instruct the system to also contact you on the
cell phone.
Note: You cannot have more than one notification rule running at a
time.
6510 UM Client Application User Guide
129
Web Client
To create a notification rule:
1. Click Notification. The Notification screen appears.
2. From the Notifying Mode drop-down list, select the mode to
search the numbers for notifications.
130
6510 UM Client Application User Guide
Web Client
Mode
Function
Restart from First
After going through all the numbers associated to a current
schedule once, Web Client begins from the first number again if it
has not notified you during a full cycle.
Restart after Last
Once going through a full cycle of the numbers with no successful
notification, Web Client begins from the last address dialed and
works its way backwards up the list.
3. In the Account Code field, enter your long distance access code if it
is required to make a long distance call from your office.
4. In the Notification Rules box, Select the media type you want to
set rules up for.
5. In the Voice Mail Rules box, select one or more voice mail rules.
These rules determine when Web Client will notify you when you
have received a message.
Media Type
Function
All
Notify on all messages.
Note: This is the default setting.
Certified
Notify only on messages marked certified.
Internal
Notify only on internal messages.
Urgent
Notify only on urgent messages.
Private
Notify only on private messages.
External
Notify only on external messages.
With Caller ID
Notify only on messages with caller ID.
Note: There are no rules for fax.
6. Click Save.
6510 UM Client Application User Guide
131
Web Client
Creating a Notification Address
Web Client allows you to specify phone and e-mail addresses that will be used to
contact you when you have a message. After you have specified the contact
methods, you can assign a schedule to a particular notification address.
Note: If the Phone, Beeper, or E-mail option buttons are not active,
contact your System Administrator.
There is no limit to the number of notification addresses that
you can add.
Creating a Phone Notification Address
Web Client will contact you via the phone numbers that you specify each time you
receive a voice message, e-mail, or fax.
To create a phone notification address:
1. In the Notification Addresses box, click Add. The Address dialog
appears.
2. Select Phone.
132
6510 UM Client Application User Guide
Web Client
3. From the Country drop down list, select a country
4. In the Area/City Code field, enter the phone number’s area code or
city code.
5. In the Number field, enter the phone number.
6. In the Call It field, enter the number of times that Web Client is to
call the phone number.
7. In the Busy field, enter the number of minutes that WebClient is to
wait before retrying the number if it is busy.
8. In the No Answer field, enter the number of minutes that Web
Client is to wait before retrying the number when there is a no
answer.
9. Click OK. The phone number appears in the Notification Addresses
field.
Creating a Beeper Notification Address
Web Client will contact you at the beeper numbers you create each time that you
receive a voice message, e-mail, or fax.
To create a beeper notification address:
1. In the Notification Addresses box, click Add. The Phone dialog
appears.
2. Click Beeper. The Beeper dialog appears.
6510 UM Client Application User Guide
133
Web Client
3. From the Country drop down list, select a country.
4. In the Area/City Code field, enter phone number’s area code or
city code.
5. In the Number field, enter the phone number
6. In the Call It field, enter the number of times that Web Client is to
call the phone number.
7. In the Between Calls field, enter the duration of time to wait
before retrying the number again. (In minutes).
8. In the Wait field, enter the duration of time to wait before
sending (in seconds).
9. In the Send field, enter the personal message that will appear
when you receive a notification. This feature allows you to
personalize your beeper notification, so that you will be aware of
where the notification is originating.
10. Click OK and then Save. The beeper number appears in the
Notification Addresses field.
134
6510 UM Client Application User Guide
Web Client
Creating an E-mail Notification Address
Web Client will contact you at the e-mail addresses that you create each time that
you receive a voice message, e-mail, or fax.
To create an e-mail notification address:
1. In the Notification Addresses box, click Add. The Address dialog
appears.
2. Click E-mail. The E-mail dialog appears.
3. In the E-mail field, enter the e-mail address, then click OK.
Removing a Notification Address
Individual notification addresses can be removed from a Notification List.
To remove a notification address:
1. Highlight the address that you want to delete, then click Remove.
A message appears, prompting you to confirm the deletion.
2. Click OK.
6510 UM Client Application User Guide
135
Web Client
Editing a Notification Address
The properties of individual notification addresses can be edited.
To edit a notification address:
1. Highlight the notification address, then click Edit. Depending on
the type of notification address you selected, the appropriate
dialog appears.
2. Make the necessary changes, then click OK.
Creating a Notification Schedule
The Notification Schedule feature allows you to assign a schedule to a particular
notification address. For example, you can create a schedule that instructs Web
Client to call you on your cell phone Monday to Friday, between 9 am and 5 pm.
Note: You must save all of your notification addresses before
creating a notification schedule.
To create a notification schedule:
1. Click Schedule. The Notification Schedule dialog appears.
136
6510 UM Client Application User Guide
Web Client
2. From the Default drop down list, select the notification address
that Web Client will use to contact you if the schedule expires.
3. From the From - year, month, and day drop-down lists, select the
year, month, and day that you want the schedule to begin.
4. From the To - year, month, and day drop-down lists, select the
year, month, and day that you want the schedule to stop.
Note: Select All Day if you want the schedule to run all day.
5. Enter the From and To hours, in military format. For example, if
your company wants the notification to play from 9:00 AM to 5:00
PM, set the hours as From 09:00 and To 17:00. If no time is entered,
the system will assume all hours.
Note: A value of From 13:00 to blank indicates 1:00 PM to midnight.
The maximum value is 23:59 and the minimum value is 0:00.
Other than a Blank value, the From field cannot be greater
than the To field.
6. Select the days of the week that you want the schedule to run.
Note: If you want the schedule to run every day, select Every day.
6510 UM Client Application User Guide
137
Web Client
Caution: If two notification schedules are created and the days that they
are designated to run overlap, the system will choose to use the
default address. If the default address is not one of the
addresses specified in the schedules, the system will randomly
select an address.
7. From the Notification Addresses drop down list, select the
notification addresses that will run.
8. Click OK.
Maintaining Wakeup Calls
You can use Web Client to act as an alarm clock to wake you up at a specified time.
Using the Toolbar Buttons
There are three buttons that allow you to perform various tasks within the Wakeup
Call application.
Button
138
Name
Function
Clear
Clears the fields of information.
Update
Updates the wakeup call.
Refresh
Refreshes the display.
6510 UM Client Application User Guide
Web Client
Creating a Wakeup Call
To create a wakeup call:
1. Click Wakeup Call. The Wakeup Call screen appears.
2. From the Country drop down list, select a country.
3. In the Area/City Code field, enter either an area code or a city
code.
4. In the Number field, enter the seven-digit phone number.
5. From the Date (month) drop down list, select the month.
6. From the Date (day) drop down list, select the day.
7. In the Time (hour) and Time (min) fields, enter the time when you
want Web Client to issue the wakeup call, then click Update.
6510 UM Client Application User Guide
139
Web Client
Cancelling a Wakeup Call
You can cancel a wake up if you do not want to woken at the specified time.
To cancel a wakeup call:
1. Select a wakeup call.
2. Click Clear. A message appears, prompting you to confirm
deletion.
3. Click OK. Web Client removes the wakeup call information from
the display.
Maintaining Greetings
The Web Client comes equipped with 10 basic status messages that can be used to
inform callers of your status (such as when you are on vacation, for example). You
can also record up to 99 optional greetings.
Note 1: Before you can record a greeting, you must have the Grant
Permissions and Java Plug-In software installed on your PC.
For more information, refer to the Client Application
Installation Guide or contact your System Administrator.
Note 2: You must have a microphone attached to your PC to record
a greeting. You can also record the greetings from your
telephone. Refer to the Telephone User Guide for more
information.
140
6510 UM Client Application User Guide
Web Client
Using the Toolbar Buttons
There are five buttons that allow you to perform various tasks within the Greetings
application.
Button
Name
Function
Delete
Deletes a greeting
Record
Records a greeting.
Play
Plays a greeting.
Refresh
Refreshes the screen.
Play
This icon appears beside a greeting if it a message has
been recorded for it.
Playing a Greeting
You can listen to your current or recorded greeting by using the Windows Sound
Player.
To play a status greeting:
1. Click the Play icon beside the greeting that you want to play. The
Windows Sound Player becomes active and plays the message.
2. To play another greeting, close the Windows Sound Player, then
repeat step 1.
6510 UM Client Application User Guide
141
Web Client
Recording a Greeting
Web Client allows you to create a greeting for each of the nine presence statuses.
Note: The status greeting for the Name status is recorded when the
System Administrator sets you up on the 6510 UM system.
However, you can change the greeting.
To create a status greeting:
1. Click Greetings. The Greetings screen appears.
2. From the Language drop down list, select the language that you
want to record the message in.
Note: The number of available languages depends on the
languages that were specified when the 6510 UM was
installed. For more information, contact your System
Administrator.
3. Select the greeting that you want to record and click Record. The
Windows Sound Recorder becomes active.
142
6510 UM Client Application User Guide
Web Client
4. In the Windows Sound Recorder, click Record and begin speaking.
The record button changes to the pause button.
5. When you have recorded your message, click Stop.
6. Click Play to listen to your recorded message.
7. If you are satisfied with the message, click Save.
Web Client places an Play icon beside the new greeting.
8. To play the greeting, select the radio button designated to the
greeting type and click Play.
6510 UM Client Application User Guide
143
Web Client
Activating a Greeting
To activate a recorded greeting, select the greeting and it will be activated.
Deleting a Greeting
Web Client allows you to delete any greeting that you have recorded.
To delete a greeting:
1. Select the greeting and click Delete. A message appears,
prompting you to confirm deletion.
Note: If you want to delete an Optional greeting, enter its number
in the Optional field.
2. Click OK. Web Client removes the Play icon from the greeting.
144
6510 UM Client Application User Guide
Web Client
Using the Collaborate Feature
Collaboration is a facility that is provided to link you with your desired
Collaboration/Meeting services. Once you define the collaboration service in the
User Settings, simply click the Collaborate button, a new window will open and
connect you to the defined Collaboration service.
Note: WebEx is defined by default.
6510 UM Client Application User Guide
145
®,™ Trademark of Mitel Networks Corporation
© Copyright 2003, Mitel Networks Corporation
All rights reserved