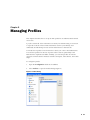
1
Allows for variable-width spine. Assume for now that spine is 1.25" wide; maximum spine width is 2.5". Juniper Networks, Inc. has sales offices worldwide. For contact information, refer to www.juniper.net. 530-010089-01, Revision 1 A book with .25" spine would cut here. A book with 2.5" spine would cut here. User Guide Juniper Networks, Inc. Printed on recycled paper Odyssey Access Client Juniper Networks, Inc. A 1.25" spine would fold here. A 2.5" spine would fold here. Cover size is 8.3 x 10.75". This is the hardware version: has blue line and blue bar Juniper Networks, Inc. 1194 North Mathilda Avenue Sunnyvale, CA 94089 USA Phone 408 745 2000 or 888 JUNIPER Fax 408 745 2100 ™ CORPORATE HEADQUARTERS M320 Internet Router Hardware Guide ™ M-series Routing Platforms www.juniper.net Juniper Networks Odyssey Access Client User Guide Unified Access Control Edition Enterprise Edition FIPS Edition Release 4.6 December 2006 Juniper Networks, Inc. 1194 North Mathilda Avenue Sunnyvale, CA 94089 USA 408-745-2000 www.juniper.net Part Number: ODR-ZA-ODYCAUG, Revision A00 Copyright© 2002-2006 Juniper Networks, Inc. All rights reserved. Printed in USA. Odyssey, Juniper Networks, and the Juniper Networks logo are registered trademarks of Juniper Networks, Inc. in the United States and other countries. All other trademarks, service marks, registered trademarks, or registered service marks are the property of their respective owners. All specifications are subject to change without notice. This product includes software developed by the OpenSSL Project for use in the OpenSSL Toolkit (http://www.openssl.org) and cryptographic software written by Eric Young ([email protected]). Juniper Networks, Inc. assumes no responsibility for any inaccuracies in this document. Juniper Networks, Inc. reserves the right to change, modify, transfer, or otherwise revise this publication without notice. Table of Contents About This Guide v Audience.......................................................................................................... v Conventions..................................................................................................... v Documentation ............................................................................................... vi Unified Access Control Documentation .................................................... vi Release Notes .......................................................................................... vii Web Access ............................................................................................. vii Context-Sensitive Help and Product Release Information ........................ vii Glossary................................................................................................... vii Contacting Customer Support ........................................................................ vii Chapter 1 Odyssey Access Client Overview 1 Connecting to a Network ................................................................................. 1 How OAC Operates in a Network..................................................................... 2 OAC in a Traditional Network .......................................................................... 2 OAC Authentication in a Traditional Network ............................................ 2 OAC in an Enhanced Security Network with Unified Access Control ................ 3 OAC Authentication in a UAC Network ......................................................4 Endpoint Security Enforcement ................................................................. 5 Quarantine and Remediation..................................................................... 5 Understanding Network Security...................................................................... 6 Chapter 2 Installing OAC 7 Before You Begin ............................................................................................. 7 Software Compatibility .............................................................................. 7 Requirements .................................................................................................. 8 Operating Systems .................................................................................... 8 Network Adapter Cards ............................................................................. 8 Network Hardware .................................................................................... 8 Browsers ................................................................................................... 8 Licenses..................................................................................................... 9 Installing OAC in a Traditional Network—EE and FE Only ............................... 9 Installing OAC in a UAC Network ..................................................................... 9 Using the Web Portal for Installing and Configuring OAC ........................ 10 Loading a Certificate to the Trusted Server Database ........................ 10 Automatic Trust Configuration for Infranet Controllers ............................ 10 Chapter 3 Using Odyssey Access Client Manager 11 Opening OAC Manager .................................................................................. 11 OAC Logon Credentials............................................................................ 11 Single Sign On................................................................................... 11 Overview of the OAC Manager Interface ........................................................ 12 Table of Contents iii Odyssey Access Client User Guide OAC Manager Display Layout .................................................................. 12 Menu Options ................................................................................................ 12 File Menu Options ................................................................................... 13 Forget Password ............................................................................... 13 Forget Temporary Trust .................................................................... 13 Close Window ................................................................................... 13 FIPS Mode On (FE Only) ................................................................... 13 FIPS Mode Off (FE Only) ................................................................... 13 Authentication Method for FIPS Mode............................................... 14 Tools Menu Options................................................................................. 15 OAC Administrator (EE and FE Only) ................................................ 15 SIM Card Manager (EE and FE Only) ................................................. 15 Survey Airwaves................................................................................ 15 Logs .................................................................................................. 15 Diagnostics ....................................................................................... 15 Run Scripts (EE and FE Only) ............................................................ 15 Check New Scripts (EE and FE Only)................................................. 16 Preferences ....................................................................................... 16 Windows Logon Settings (EE and FE Only) ....................................... 16 Options ............................................................................................. 17 Enabling Session Resumption ........................................................... 18 Enabling Temporary Trust.................................................................19 Enabling Automatic Reauthentication ............................................... 19 Help Menu Options.................................................................................. 20 Help Topics ....................................................................................... 20 View Readme File ............................................................................. 20 License Keys ..................................................................................... 20 Register Odyssey Access Client ......................................................... 20 Odyssey Access Client User Page ...................................................... 20 Juniper Networks, Inc. Home Page....................................................20 Purchase Information........................................................................ 21 About ................................................................................................ 21 Sidebar...........................................................................................................21 Adapters Folder ....................................................................................... 21 Infranet Controllers Folder....................................................................... 21 Configuration Folder................................................................................ 21 Profiles..............................................................................................21 Networks .......................................................................................... 21 Auto-Scan Lists.................................................................................. 22 Trusted Servers ................................................................................. 22 Adapters ........................................................................................... 22 Infranet Controllers ........................................................................... 22 Content Dialogs..............................................................................................22 Informational Graphics and Detailed Status ............................................. 23 Displaying Status Details ................................................................... 23 Signal Power Status........................................................................... 23 Connection Status ............................................................................. 23 Encryption Key Information.............................................................. 24 Endpoint Trust Status........................................................................ 24 Shortcut Keys.................................................................................... 24 Exiting from OAC Manager ............................................................................ 25 Chapter 4 Managing Network Adapters 27 Adding Network Adapters .............................................................................. 27 iv Table of Contents Table of Contents Renaming an Adapter.............................................................................. 28 Removing an Adapter.............................................................................. 28 Removing an Adapter Using the Adapter Dialog. .............................. 28 Removing an Adapter Using the Sidebar Icon. .................................. 28 Connecting to a Network ............................................................................... 29 Selecting an Adapter................................................................................ 29 Connecting to a Network ......................................................................... 30 Connecting to a Wireless Network ....................................................30 Connecting to a Wired Network ........................................................ 30 Configuring Multiple Simultaneous Network Connections........................ 31 Disconnecting from a Network ................................................................ 31 Scanning for Wireless Networks .............................................................. 31 Reconnecting to a Network ..................................................................... 32 Reauthenticating a Network Connection.................................................. 32 Checking Adapter Status.......................................................................... 32 Connection Status ............................................................................. 34 Interaction with Other Adapter Software........................................................ 35 Chapter 5 Managing Profiles 37 Adding or Modifying a Profile ........................................................................ 38 Specifying Profile Names......................................................................... 39 Specifying User Info ....................................................................................... 39 Specifying a Login Name ......................................................................... 39 Setting Passwords.................................................................................... 40 Using Certificates..................................................................................... 41 Using Certificates for Authentication ................................................. 42 Using Soft Tokens.................................................................................... 42 Enabling Soft Token Identification ....................................................43 Using SIM Cards (EE and EF only) ........................................................... 43 Setting a SIM Card ID ........................................................................ 43 Managing PIN Settings ...................................................................... 44 Configuring EAP-SIM Identity ............................................................ 44 Setting Up Authentication .............................................................................. 44 Selecting Authentication Protocols........................................................... 45 Validating a Server Certificate—Mutual Authentication............................ 46 Setting Tunneled Token Card Credential Options .................................... 46 Setting an Anonymous Name .................................................................. 47 TTLS Settings ................................................................................................. 48 Selecting an Inner Authentication Protocol .............................................. 48 EAP as an Inner Authentication Protocol ................................................. 50 Using Certificates with EAP-TTLS Authentication ..................................... 50 PEAP Settings................................................................................................. 51 Using Certificates with EAP-PEAP Authentication .................................... 52 EAP-POTP Run-Time Dialogs ......................................................................... 52 Configuring EAP-POTP as an Inner Authentication Method ..................... 52 Infranet Controller Profile Configuration—UAC Networks Only...................... 53 Setting JUAC as an Inner Authentication Protocol for TTLS ...................... 53 Setting JUAC as an Inner Authentication Protocol for PEAP ..................... 54 Setting the Preferred Realm and Role ...................................................... 55 Authenticating with Token Cards............................................................. 55 Removing a Profile......................................................................................... 55 Sample Profile Configuration ......................................................................... 56 Table of Contents v Odyssey Access Client User Guide Chapter 6 Managing Network Access 57 Configuring Network Settings......................................................................... 57 Adding or Modifying Network Properties ....................................................... 58 Network Settings ..................................................................................... 59 Specifying a Network Name (Network SSID) ..................................... 59 Connecting to Any Available Network ............................................... 59 Scanning for Available Networks....................................................... 59 Adding a Network Description .......................................................... 59 Specifying a Network Type................................................................ 60 Specifying a Channel......................................................................... 60 Specifying an Association Mode ........................................................ 60 Encryption Methods for an Association Mode ................................... 61 FIPS Association Mode (FE Only) ...................................................... 61 FIPS Secure Encryption (FE Only) ..................................................... 61 Authentication Settings............................................................................ 62 Authenticating with a Profile ............................................................. 62 Automatic Key Generation ................................................................ 62 Preconfigured Key Settings ............................................................... 62 Preshared Keys (WPA or WPA2) ....................................................... 63 Preconfigured Keys (WEP) ................................................................ 63 Removing a Network ..................................................................................... 64 Sample Network Configuration Setups ........................................................... 65 Sample Configuration for a Corporate Wi-Fi Network .............................. 65 Sample Configuration for a Wireless Hotspot Network ........................... 65 Sample Configuration for a Home Wireless Network ............................... 66 Chapter 7 Managing Auto-Scan Lists 67 Using the Auto-Scan List Dialog...................................................................... 68 Adding an Auto-Scan List......................................................................... 68 Removing an Auto-Scan List .................................................................... 69 Modifying an Auto-Scan List .................................................................... 69 Viewing the Names in an Auto-Scan List.................................................. 70 Chapter 8 Managing Infranet Controller Connections 71 Adding an Infranet Controller to the OAC Configuration ................................ 71 Connecting and Signing on to an Infranet Controller...................................... 72 FIPS Mode Constraint .............................................................................. 72 Web Portal for Installing and Configuring OAC........................................ 72 Loading a Certificate to the Trusted Server Database ........................ 72 Specifying a Preferred Realm and Role....................................................74 Connecting to Multiple Infranet Controllers ............................................. 74 Checking Infranet Controller Status ......................................................... 75 Compliance Failure and Remediation................................................ 75 Disconnecting from an Infranet Controller..................................................... 77 Chapter 9 Managing Trusted Servers 79 Overview of Trust Configuration .................................................................... 79 Configuring Trust in OAC ............................................................................... 80 Using the Simple Method to Configure Trust .................................................. 81 Adding a Trusted Server Entry.................................................................81 Server Identity .................................................................................. 82 Removing a Trusted Server Entry ............................................................ 82 vi Table of Contents Table of Contents Editing a Trusted Server Entry .................................................................83 Using the Advanced Method to Configure Trust ............................................. 83 Displaying a Trust Tree............................................................................ 83 Adding Certificate Nodes ......................................................................... 84 Adding Authentication Servers or Intermediate CA Nodes .......................84 Adding Identity ................................................................................. 84 Removing Nodes ..................................................................................... 86 Viewing Certificate Information ............................................................... 86 Managing Untrusted Servers.................................................................... 86 Chapter 10 Viewing Log Files and Diagnostics 89 Accessing Log Files—UE Only ........................................................................ 89 Accessing Diagnostics .................................................................................... 90 IPsec Diagnostics—UE only ..................................................................... 90 IPsec Configuration—UE Only .................................................................91 Network Agent Diagnostics— UE Only ....................................................91 Host Enforcer Configuration—UE Only....................................................91 Save All Diagnostics................................................................................. 92 Appendix A Network Security Concepts 93 Network Security ........................................................................................... 93 Encryption and Association for Secure Authentication............................. 94 Authentication Overview................................................................... 94 Odyssey Access Client Features for a Secure Network ............................. 95 802.11 Wireless Networking .......................................................................... 96 Types of 802.11 Wireless Networks......................................................... 96 Access Point Networks ...................................................................... 96 Peer-to-Peer Networks ...................................................................... 96 Wireless Network Names......................................................................... 97 Wired-Equivalent Privacy ....................................................................... 97 Wi-Fi Protected Access and its Encryption Methods ................................ 98 FIPS 140-2 Encryption Using AES and WPA2 or XSec .......................99 802.1X Authentication ................................................................................... 99 Extensible Authentication Protocol ........................................................100 Mutual Authentication .....................................................................101 Certificates ......................................................................................101 EAP-TLS ..........................................................................................102 EAP-TTLS ........................................................................................102 EAP-PEAP .......................................................................................103 EAP-FAST........................................................................................103 EAP-JUAC ........................................................................................103 EAP-POTP .......................................................................................103 EAP-SIM and EAP-AKA ....................................................................103 EAP-LEAP........................................................................................104 Reauthentication ...................................................................................104 Session Resumption ..............................................................................104 Appendix B Glossary 107 Index 121 Table of Contents vii Odyssey Access Client User Guide viii Table of Contents About This Guide This guide describes how to install, use, and configure Odyssey Access Client (OAC) for wired or wireless network access. It addresses three licensed editions of OAC: OAC Unified Access Control Edition (referred to in this guide as UE) OAC Enterprise Edition (referred to in this guide as EE) OAC Federal Information Processing Standards (FIPS) Edition (referred to in this guide as FE) These editions of OAC have similar but not identical sets of features. Where there are distinctions or differences in product features and options among them, the manual discusses and points out those differences where they apply. You can read this manual in PDF format. It is provided on the OAC CD and available on the Juniper Networks web site at http://www.juniper.net/customers/support/products/aaa_802/oac_client_user.jsp Audience This manual is intended for all users of OAC who need wired or wireless network access and who need to manage and configure the available features and controls. Depending on the corporate security policies in place at your company, some features of the OAC might be preconfigured and restricted to administrators. This manual is also intended for network administrators who are responsible for configuring and maintaining OAC configurations for users. Conventions Table 1 defines notice icons used in this guide, and Table 2 defines text conventions used throughout the book. Audience v Odyssey Access Client User Guide Table 1: Notice icons Icon Meaning Description Informational note Indicates important features or instructions. Caution Indicates that you might risk losing data or damaging your hardware. Warning Alerts you to the risk of personal injury. Table 2: Text conventions (except for command syntax) Convention Description Examples Bold typeface Indicates buttons, field names, dialog box names, and other user interface elements. Use the Scheduling and Appointment tabs to schedule a meeting. Plain sans serif typeface Represents: Examples: Code, commands, and keywords Code: URLs, file names, and directories certAttr.OU = 'Retail Products Group' URL: Download the JRE application from: http://java.sun.com/j2se/ Italics Identifies: Examples: Terms defined in text Defined term: Variable elements Book names An RDP client is a Windows component that enables a connection between a Windows server and a user’s machine. Variable element: Documents and Settings > username > Application Data > Juniper Networks > Odyssey Access Client > newScripts . Book name: See the Odyssey Access Client User Guide. Documentation The following sections describe how to access copies of the product documentation and the latest information about the release. Unified Access Control Documentation If you use OAC on a network that includes Juniper’s Unified Access Control security solution, refer to the Unified Access Control Administration Guide available on the Web at: http://www.juniper.net/techpubs/ vi Documentation About This Guide Release Notes Release notes are included with the product software and are available on the product CD or on the Web at: http://www.juniper.net/techpubs/ Release notes provide the latest information about features, changes, known problems, and resolved problems. If the information in the Release notes differs from the information found in the documentation set, follow the Release notes. Web Access To view Juniper product documentation on the Web, go to: http://www.juniper.net/techpubs/ Context-Sensitive Help and Product Release Information OAC includes online help that enables you to access this documentation from your computer. To invoke the Help system, select the Help > Help Topics menu command. To access context-sensitive help for the OAC, press F1 on the keyboard. The resulting help provides information that is relevant to your current OAC context. You can use the Help > View Readme File menu command located on the OAC to open the readme.txt file. The readme.txt file contains the latest information about features, changes, known problems, and resolved problems. If the information differs from the information found in the documentation set, defer to the information in the readme.txt file. Glossary This manual includes an extensive Glossary. Contacting Customer Support For technical support, contact Juniper Networks at [email protected], or at 1-888-314-JTAC (within the United States) or 408-745-9500 (from outside the United States). Contacting Customer Support vii Odyssey Access Client User Guide viii Contacting Customer Support Chapter 1 Odyssey Access Client Overview Odyssey Access Client (OAC) is networking software that runs on endpoints (PCs, laptops, notepad computers, and other supported wireless devices). OAC communicates with wireless access points, 802.1X switches, and network authentication servers such as Juniper Steel-Belted Radius or an Infranet Controller to provide authenticated, secure access to wired and wireless 802.1X networks. Corporate networks frequently have both a wired and wireless infrastructure to support mobile computing at work. Mobile computing must be secure, especially for wireless communications, because it is more vulnerable than a wired connection. OAC supports secure, authenticated network connections for both wired and wireless communication in the workplace, as well as wireless connections to wireless fidelity (Wi-Fi) hotspots and home wireless networks. OAC also provides extensive configuration options, making it an effective solution for any networking environment. Connecting to a Network OAC enables you to connect to a network easily and securely. You can use OAC to perform the following tasks: Configure and control connections for wired and wireless adapters (see“Managing Network Adapters” on page 27). Connect to access points and to peer-to-peer networks (see“Managing Network Access” on page 57). Configure profiles to enable you to gain authenticated access to various networks using different credentials (see“Managing Profiles” on page 37). Use a wide variety of powerful authentication methods, such as EAP-TTLS, EAP-PEAP, EAP-TLS, and EAP-FAST to keep your credentials secure. See “Authentication Settings” on page 62 and the “Glossary” on page 107. FE Only: Configure FIPS 140-2 certified encryption when you connect to your network. Connecting to a Network 1 Odyssey Access Client User Guide How OAC Operates in a Network When you attempt to connect to an 802.1X network, OAC requests authenticated access through a wireless access point or through an 802.1X switch. The authentication sequence is the same whether you use a wired or a wireless connection. In either case, your access to protected resources requires authentication by an AAA (authentication) server. With 802.1X, you get authenticated to a network based on matching authentication (EAP) protocols and on your user credentials, such as a password, certificate, or a token card. For details about configuring EAP protocols, see “Selecting Authentication Protocols” on page 45. For details about setting up credentials, see “Specifying User Info” on page 39. OAC can be deployed in two distinct network environments: A traditional network that manages authentication with a standard AAA server, such as Steel-Belted Radius. A network that uses Juniper’s Unified Access Control (UAC) solution for managing authentication and secure access for both the user and the computer (“endpoint”). OAC in a Traditional Network When deployed in traditional networks that do not include UAC components, OAC negotiates authentication to the network either through an 802.1X switch or through an 802.1X wireless access point. In a wireless network, the 802.1X authentication occurs after the client has associated to an access point using an 802.11 association method. Figure 1: OAC in a Traditional Network (without UAC) OAC Authentication in a Traditional Network The steps in a typical 802.1X authentication process are: 1. When a wireless client attempts to connect to an 802.1X network, it signals an access point that it is making an authentication request. This step is commonly known as association. 2 How OAC Operates in a Network Chapter 1: Odyssey Access Client Overview 2. In the case of either a wired or a wireless connection, the network access device (an access point or 802.1X switch) forwards the authentication request to the authentication server. The authentication process might involve a secure tunnel between the access point and the authentication server, depending on the authentication protocol being used, such as Tunneled Transport Layer Security (TTLS). 3. The authentication server examines the request and, in some cases, forwards the request to another server or manage the authentication directly. 4. If the authentication succeeds, the server informs the network access device to allow access to the client endpoint. 5. The network access device then informs the client that it has been authenticated and now has access to the network. Authentication for a wired connection is similar but, in this case, the client connects directly to an 802.1X switch on the network. The switch provides the authentication interface to the authentication server and there is no secure tunnel required. OAC in an Enhanced Security Network with Unified Access Control Unified Access Control (UAC) provides enhanced security measures that not only authenticate users but verify that the software running on the endpoint computer is in compliance with corporate security policies. See “Endpoint Security Enforcement” on page 5. UAC encompasses a variety of components that, together, provide secure authenticated access to network resources. These components include: Infranet Controller—A central policy management server that validates the user’s identity and the endpoint’s security compliance and manages network policies. Those policies are created on the Infranet Controller for configuring OAC, Host Checker, and access to protected resources. The Infranet Controller pushes the policies to OAC, the Host Checker, and the Infranet Enforcer. Infranet Enforcer—A Juniper Networks security device that operates with the Infranet Controller to enforce security policies. The Infranet Enforcer is deployed in front of the servers and protected resources. Host Checker—A software component of OAC that checks your computer for compliance to the security policies that your Infranet Controller administrator specifies. Examples of compliance might be that you have the correct antivirus software version and security setting or that you have the latest operating system patch level installed. Host Enforcer—A software component of OAC that protects your computer from attacks from other computers by allowing only the incoming and outgoing traffic that your Infranet Controller administrator specifies for your assigned role. (A role defines settings for your user account, such as which resources you can access.) OAC in an Enhanced Security Network with Unified Access Control 3 Odyssey Access Client User Guide In a UAC network, OAC communicates with the Infranet Controller to authenticate and establish security compliance. The Infranet Controller authenticates you as a user and determines which protected resources you can access based on your user name and the realm and role to which you belong. (See “Specifying a Preferred Realm and Role” on page 74.) The Infranet Controller then informs another appliance on the network, called the Infranet Enforcer, about the resources that you are allowed to access. The Infranet Enforcer is a firewall that enables or denies you access to the resources. For a broader discussion of UAC components and concepts, refer to the Juniper Networks Unified Access Control Administration Guide. OAC Authentication in a UAC Network In a UAC network, OAC users can authenticate to the network in the following ways: A wired (Layer 2) connection through an 802.1X switch. A wireless (Layer 2) connection through an 802.1X wireless access point. A direct (Layer 3) connection to an Infranet Controller. In this case, OAC connects to the Infranet Controller and authentication occurs using an EAP-over-HTTP. The Infranet Controller performs the authentication for each of these connection methods. You can also connect to both a network (wired or wireless) and to an Infranet Controller. Ask your network administrator for the recommended connection methods for your network. Figure 2 and Figure 3 show the difference in network connections for a network without 802.1X support and a network with 802.1X support. Figure 2: OAC Authentication in a Network without 802.1X (Layer 3) 4 OAC in an Enhanced Security Network with Unified Access Control Chapter 1: Odyssey Access Client Overview Figure 3: OAC Authentication in a Network with 802.1X (Layer 2) Endpoint Security Enforcement Networks that include an Infranet Controller perform security enforcement checking to ensure that all endpoints (computing devices) comply with the network’s security policy. The purpose of security checking is to enhance the security of the network and to reduce problems that can result from network security threats, such as viruses, spyware, and other software security problems. For endpoints that comply with network security policies, users can have full access to protected networks based on the policies configured in the Infranet Controller for a user’s realm and role. For endpoints that do not comply with network security policies, users can expect one of the following results: The endpoint might be denied network access until it meets compliance requirements. In some case, network access might be prevented only momentarily during automatic remediation— for example, while the endpoint’s anti-virus software settings are modified to conform to the network’s security policy. The endpoint might be granted access to protected networks while being brought into compliance in the background. The endpoint might be granted limited access to a special quarantine network or VLAN while being brought into compliance. Compliance involves performing the actions specified by remediation instructions, such as performing Windows update patches, after which the endpoint might be granted access to protected resources. Quarantine and Remediation The Infranet Controller checks your computer (endpoint) regularly for compliance with all prescribed security requirements, such as anti-virus software that is running on your computer. OAC in an Enhanced Security Network with Unified Access Control 5 Odyssey Access Client User Guide If an endpoint does not comply with an organization’s security policies, the Infranet Controller can isolate the endpoint to a restricted (quarantine) network. The quarantine network might provide access to limited network resources, such as a file server, but prevent the endpoint from connecting to (and possibly infecting) the rest of the organization’s network. Remediation is the process of bringing an endpoint into compliance with an organization’s security policies. The remediation process brings the endpoint into compliance by sending remediation instructions to the endpoint. In most cases, remediation happens automatically in the background. When a quarantined endpoint complies with the security policies of the protected network, the Infranet Controller redirects it to the protected network automatically. Note that remediation does not necessarily require quarantine. Some administrators choose to allow most or all endpoints onto the protected network while performing automatic remediation on those endpoints. Understanding Network Security To understand OAC and network authentication, it is useful to understand basic networking and security concepts. Appendix A, “Network Security Concepts,” describes the networking choices that you can make and how those choices allow you to use OAC to maximize the security of your connections over any wireless or wired network. 6 Understanding Network Security Chapter 2 Installing OAC Before installing OAC, you should be familiar with networking concepts relating to your wireless or wired network. See Appendix A, “Network Security Concepts,” for basic networking information. Before You Begin You must have administrative privileges on your computer to install OAC on Windows 2000 (with SP4) or Windows XP. The following network administration tasks should be performed before installing OAC: Select and prioritize the authentication protocols required for your authentication server. Your network administrator can provide the specific protocols required for your corporate network. Install your network adapter and associated driver software if your computer does not have one built in. Software Compatibility Running Remote Desktop (RDP) with Fast User Switching turned on can interfere with OAC operation and with RDP operation. Fast User Switching is disabled by default for computers that are part of a domain. However, for computers in a workgroup, you must disable Fast User Switching manually. To do this: 1. Go to Start > Control Panel > User Accounts > Change the way users log on or off. 2. Clear the setting for Fast User Switching. With Fast User Switching turned off, Remote Desktop and OAC can run together without a problem. Before You Begin 7 Odyssey Access Client User Guide Requirements The following sections describe hardware and software requirements for OAC. Operating Systems OAC runs on the following operating systems: Windows 2000 Professional with SP 4 Windows XP Home or Professional Network Adapter Cards OAC is compatible with any wireless adapter card that supports the standard 802.11 interfaces. Most wired adapter cards are compatible for use with OAC. FE Only: To use FIPS 140-2 compliant secure encryption, you must have an adapter driver installed that is compatible with the Juniper FIPS module. Network Hardware For network authentication, your network might include: At least one 802.1X-compliant switch (for wired authentication). At least one 802.1X-compliant access point (for wireless authentication). An AAA server. An Infranet Controller and an Infranet Enforcer. FE Only: To associate to a network using xSec, your network must include at least one switch that is capable of implementing the xSec protocol. OAC FE requires a modified driver to enable the wireless adapter to run 802.11i in FIPS mode. For more information about running in FIPS mode, see “FIPS Mode On (FE Only)” on page 13. There are no special adapter or driver requirements for running xSec in FIPS mode. Browsers If you are using the EE or FIPS Edition of OAC, Internet Explorer 5.5 or later is required. If you are using the UE Edition of OAC, Internet Explorer 6.0 is required. You can use other browsers as long as you have the required version of Internet Explorer installed. 8 Requirements Chapter 2: Installing OAC Licenses You must have a valid license to run OAC. Each OAC edition (UE, EE, and FE) has a corresponding license key. See your system administrator for information about your license or OAC edition. You can purchase licenses from Juniper Networks, Inc. For detail, select Help > License Keys from the OAC Manager display. Installing OAC in a Traditional Network—EE and FE Only This section discusses methods for accessing and installing Odyssey Access Client in a network environment that does not include an Infranet Controller. To install OAC, follow these steps: 1. Run the OAC installer using one of the following procedures: Insert the installation CD into your CD-ROM drive. The installation process starts automatically. If the installation process does not start up, double-click setup.exe on the CD. If you downloaded (or otherwise obtained) the OAC installer file, double-click the installer for OAC. 2. The installation wizard displays a series of questions. Your answers determine how the software is installed and configured. Follow the instructions as they appear. 3. Select Install to begin the installation process. 4. After you install OAC, a configuration wizard might prompt you for data that is required to operate OAC. NOTE: If your administrator configures the OAC single sign-on feature to sign you on automatically based on your Windows credentials, the prompt for credentials does not appear. Installing OAC in a UAC Network This section discusses methods for accessing and installing the UE (default) version of OAC in a network that includes Juniper’s Unified Access Control products for enhanced security. Methods of installing OAC in a UAC network include: OAC might be preinstalled on your computer by your network administrator or IT department. If so, see “Using Odyssey Access Client Manager” on page 11 for details about using OAC. Installing OAC in a Traditional Network—EE and FE Only 9 Odyssey Access Client User Guide You can install OAC by opening a Web browser and navigating to the IP address or URL for a particular Infranet Controller. Ask your administrator for the correct address information needed to access the Infranet Controller. If you use a Web browser to access protected resources on your corporate network and do not yet have OAC installed on your system, a captive Web portal might redirect you automatically to an Infranet Controller so that the OAC can be downloaded to your machine. This happens the first time only so that the OAC can be installed. The captive portal is optional and might not be present on your network. During the process of downloading OAC, a dialog box might prompt you to sign in to the Infranet Controller unless your administrator has configured the system to use your Windows logon credentials or has configured the Infranet Controller for single sign on. Once you have OAC installed and running and your computer meets your network’s security requirements, a dialog box prompts you to sign on to the Infranet Controller. Using the Web Portal for Installing and Configuring OAC If you attempt to access the Web or protected network resources on your corporate network without having OAC installed on your system, the network firewall might redirect you automatically to a special Web portal that installs and configures OAC on your machine so that you can sign on to an Infranet Controller and access protected resources. If an older version of OAC is already installed on your machine, the latest version will be installed. Depending on the configuration policy for your network, this installation process might include a dialog box that prompts you to sign in to the Infranet Controller. There might also be a prompt to trust the server certificate. See the next section, ”Loading a Certificate to the Trusted Server Database” for more information. Loading a Certificate to the Trusted Server Database The first time that you navigate to the Web portal, you might be prompted to add a certificate to your trusted server database. This happens only if you do not have the certificate on your endpoint and if the certificate is available from the local trust server. If you choose not to accept the certificate and do not have temporary trust enabled, authentication to that trust server will fail. Refer to the Odyssey Access Client User Guide for more information about the temporary trust option. Automatic Trust Configuration for Infranet Controllers OAC is automatically configured to trust an Infranet Controller if it can verify that the Infranet Controller is passing a valid certificate. For this verification to occur, the trusted root CA certificate for the Infranet Controller must be installed on the endpoint. If the CA certificate is not installed, you cannot sign into the Infranet Controller. During OAC installation, the Infranet Controller automatically installs the CA certificate on your computer. If you are prompted during installation, you must allow the installation of the CA certificate. If the trusted root CA certificate is pre-installed on your computer, then the prompt does not appear during installation. 10 Installing OAC in a UAC Network Chapter 3 Using Odyssey Access Client Manager This chapter discusses how to use the OAC Manager to configure OAC. Depending on the edition (license) of OAC that you are using, some sections might not apply and are identified clearly where they occur. Opening OAC Manager Once OAC is installed on your computer, it runs as a Windows service. However, the OAC user interface, called Odyssey Access Client Manager, might not be open yet on the desktop. To open OAC Manager, perform any of the following tasks: From the Windows Control Panel, double-click the OAC icon. From the system tray, double-click the OAC icon or right-click it and select Odyssey Access Client Manager. (The system tray is in the lower right corner of the monitor display where some program icons are shown.) From the Windows task bar, select Start > Programs > Juniper Networks > Odyssey Access Client > Odyssey Access Client Manager. When OAC runs, the Odyssey Access Client Manager startup screen (see Figure 4 on page 12) appears. OAC Logon Credentials The first time that you open Odyssey Access Client Manager after logging on to Windows, an OAC dialog box prompts you for your credentials. The credentials needed depend on how OAC has been configured. For example, you might be prompted for your username, your username and a password, a soft token, or a smart card PIN. Single Sign On If OAC has been configured for single (automatic) sign on, no logon prompt appears before Odyssey Access Client Manager opens. Opening OAC Manager 11 Odyssey Access Client User Guide Overview of the OAC Manager Interface This section describes the OAC Manager and the operations that you can perform. OAC Manager Display Layout The OAC Manager display consists of the following sections: Menu bar (see “Menu Options” on page 12) Sidebar (see “Sidebar” on page 21) Content dialogs (see “Content Dialogs” on page 22) A menu bar at the top of the display provides a range of pull-down options. Below the menu bar, the left panel is the sidebar. The sidebar contains folders for Adapters, Infranet Controllers, and Configuration. The content dialog to the right of the sidebar is for viewing status, establishing network connections, and making configuration settings based on a specific folder selection. Figure 4 shows the initial screen that appears when you open OAC Manager. Figure 4: Odyssey Access Client Manager Startup Screen Menu bar Sidebar Content dialog Connection status icons Menu Options At the top of the OAC display is a menu bar. The following sections describe each menu option and the individual sub-menu items. 12 Overview of the OAC Manager Interface Chapter 3: Using Odyssey Access Client Manager File Menu Options Forget Password Use this option if you want OAC to discard the current password or PIN that you use to start an authenticated network connection. If your password is required again, you will be prompted to enter it. When you are authenticated for the first time, you have to enter a valid password as part of the login process. OAC remembers the password that you enter and uses it for any subsequent authentications without prompting you again. Normally, OAC does not forget the password until you reboot your PC or restart OAC. However, if you leave your system unattended and want to protect it from unauthorized access or if you share a computer with other users (such as in a test lab), you might want to select the Forget Password setting as a security measure. Forget Temporary Trust Use this option to discontinue the temporary trust setting for a server. See “Enabling Temporary Trust” on page 19 and “Managing Trusted Servers” on page 79 for more information about trusted servers. Close Window Closes the OAC Manager display. FIPS Mode On (FE Only) Turns FIPS mode on. Use this option if your network security policy requires FIPS encryption. FIPS Mode Off (FE Only) Turns FIPS mode off. Enabling and Disabling FIPS Mode (FE Only) FIPS mode is an advanced feature. Consult your network administrator before changing any current FIPS mode configuration settings. To use the OAC FIPS 140-2 (level 1) compliant secure encryption module, you must satisfy the following requirements: You must have a FIPS-compliant adapter and network hardware: Install an adapter driver that is compatible with the Juniper Networks, Inc. FIPS encryption module. OAC FE requires a modified driver to enable the wireless adapter to run 802.11i in FIPS mode. Contact Juniper Networks for the latest list of verified wireless adapters. See “Adding Network Adapters” on page 27 for information about configuring adapters for use with OAC. You are not required to install a new driver if you use xSec association. See “FIPS Association Mode (FE Only)” on page 61. Menu Options 13 Odyssey Access Client User Guide See the OAC User Web Page for more information about the appropriate adapter drivers for use with the OAC FIPS module. There must be a user certificate installed on the client machine prior to configuring OAC for FIPS–compliant connections. This operation should only be performed by a network administrator. Note the following about the user certificate for FIPS–compliant network connections: For FIPS 140-2 compliance, the private key of a user's personal certificate must be protected using encryption that has been approved by the National Institute of Standards and Technology (NIST) for FIPS 140-2. Some cryptographic providers conform to this requirement. For example, the Microsoft Cryptographic provider used in the Microsoft Certificate Store conforms to these standards for the following operating systems: All versions of Windows XP Versions of Windows 2000 that have applied the correct service pack Some older versions of Windows do not meet the NIST standards for private key protection. In this case, you can use OAC to perform the FIPS-compliant encryption required to protect the private key on the system. In this case, you must make sure that the private key of the user certificate is marked as Exportable. You enable FIPS Mode by selecting File > FIPS Mode On. The profile that you create for your FIPS-compliant network must have the certificate-based EAP-TLS as the sole authentication method configured. See “Setting Up Authentication” on page 44 for profile configuration instructions. You must create a network that uses WPA2 (or xSec) association and AES encryption and associate the network with this profile. In addition, select FIPS mode required when you create or edit the network if you require FIPS encryption for all connections to this network. Otherwise, do not select this item. See “FIPS Secure Encryption (FE Only)” on page 61. You must configure trust for the network server. See “Managing Trusted Servers” on page 79. To disable FIPS mode, select File > FIPS Mode Off to turn off this feature. Do not select this setting if you require FIPS mode connections. Authentication Method for FIPS Mode When operating in FIPS mode, OAC protects all wireless data connections with FIPS-validated cryptology. Some authentication methods and features permit non-validated cryptography methods and are disabled when FIPS mode is on. The only outer authentication method supported for FIPS mode is EAP-TLS; no inner authentication methods are supported. This means that when FIPS mode is on, users cannot connect to an Intranet Controller. See “FIPS Mode Constraint” on page 72. 14 Menu Options Chapter 3: Using Odyssey Access Client Manager Tools Menu Options OAC Administrator (EE and FE Only) This is a set of special tools for managing and deploying OAC configurations. These are advanced tools and are available only if you have administrative privileges or an EE or FE license for OAC. SIM Card Manager (EE and FE Only) If you use a SIM card to autheticate to the network, use this setting to manage the PIN settings. Survey Airwaves Use this option to view information about the access point and peer-to-peer networks in your vicinity, including those that do not broadcast an SSID (the wireless network ID). This option is similar to the information that you see if you select Scan in the Network Properties dialog, except that Survey Airwaves provides considerably more detailed information. Survey Airwaves displays the relative signal strength of each network along with specific details about individual access points on the network. The display presents separate tabs for information about access point and peer-to-peer networks. Logs Use this option to display the OAC Log Viewer, which shows the current contents of the debuglog.log file. A Browse button takes you to the current location for the log files. You can set the level of logging information displayed by changing the Log level setting in the upper right corner of OAC Log Viewer. Log levels include Errors, Info, and Debug. See “Viewing Log Files and Diagnostics” on page 89 for more information about log files. Diagnostics Use this option to select and display the following categories of diagnostic information and send the data in an email message for troubleshooting: IPsec Diagnostics IPsec Configuration Network Agent Diagnostics Host Enforcer Configuration See “Viewing Log Files and Diagnostics” on page 89 for more information about log files. Run Scripts (EE and FE Only) Use this option to run scripts. Your network administrator might ask you to run a script to update your OAC configuration. The instructions from the administrator might include a path location for the script to run. A dialog might appear and prompt you to process updated scripts. Menu Options 15 Odyssey Access Client User Guide To run a script from a known location: 1. Select Tools > Run Script. 2. In the Select Script File dialog, navigate to the folder location containing the script that your administrator has instructed you to run. 3. Select the script and select Open to run the script. Check New Scripts (EE and FE Only) Use this option to check for new scripts or to run scripts. Your administrator might send you email with scripts to run, in which case you must save the scripts in the following directory before running them: Documents and Settings > username > Application Data > Juniper Networks > Odyssey Access Client > newScripts The /Application Data directory might be hidden on your machine. If so, contact your administrator. To check for new scripts: 1. Select Tools > Check New Scripts from the OAC options bar. The New Odyssey Client Scripts dialog displays a list of new configuration scripts. Select Run to run the script and update your OAC configuration. You can run only one script at a time. 2. Select Delete to delete the script. Preferences Use this option to toggle the display of: The OAC tray icon. The OAC control panel icon. The OAC splash screen. Windows Logon Settings (EE and FE Only) Use this option to override the default setting for network connection timing: Connect prior to logging on to Windows. Connect after logging on to Windows, but before your desktop appears. Connect after your desktop appears. This is the default option for Odyssey Client. Refer to the Odyssey Access Client Administration Guide for more information about configuring the timing of network connections in OAC. 16 Menu Options Chapter 3: Using Odyssey Access Client Manager Options Individual tabs in this dialog enable you to configure the settings for security, wireless suppression, preemptive networks, and EAP-FAST. Security Use these settings to enable or disable the following features: Enable session resumption—During a session, any subsequent authentications to the same network server can be accelerated by reusing information derived during the first authentication. If enabled, you can restrict session resumption for any session older than the length of time that you set. The default is 12 hours. See “Enabling Session Resumption” on page 18. The practical application for this feature is that enabling this option turns on wireless roaming so that you can take your wireless computer anywhere in the building and stay connected without having to reconnect or reauthenticate. Enable automatic reauthentication—If enabled, this option enables automatic reauthentication and sets the reauthentication frequency setting. The default is 1 hour. See “Reauthentication” on page 104 and “Enabling Automatic Reauthentication” on page 19. Enable server temporary trust—If enabled, this option enables temporary trust of a server and sets the maximum length of time for trusting that server. The default is 12 hours. Most of the time, you can use the Trusted Servers dialog to configure the servers you trust for authentication. However, there might be times when you authenticate to a network whose authentication server is not yet configured as trusted in the Trusted Servers dialog. In this case, you might want the ability to enable temporary trust for that untrusted server. See “Forget Temporary Trust” on page 13 and “Enabling Temporary Trust” on page 19. Prompt for smart card PIN (EE and FE Only)—With this option enabled, OAC prompts for a smart card Personal Identification Number (PIN). The PIN unlocks the certificate stored on the smart card so it can be used for authentication credentials. The option is enabled by default. With the option disabled, the smart card middleware manages PIN prompts and PIN caching. To use this option, your authentication profile must be configured with Permit login using my certificate and Use the login certificate from my smart card reader enabled. See “Using Certificates for Authentication” on page 42 for more information about using smart card certificates for authentication. Menu Options 17 Odyssey Access Client User Guide Cache PIN (EE and FE Only)—With this option enabled, OAC caches the PIN that you enter and does not prompt for a PIN. If you disable this option, OAC clears the PIN information from the cache and will not cache the PIN when a PIN prompt occurs. The cache is also cleared when you log out. This option is enabled by default. NOTE: Smart card prompts and caching are disabled with FIPS Mode turned on. (FE Only) Wireless Suppression If enabled, wireless suppression defaults to a wired network connection as long as you have one. Wireless suppression uses a wireless connection only if there is no wired connection available. To enable this feature, select Use wireless connection only when no wired (ethernet) connection is present. Contact your network administrator before changing this setting. See “Enabling Session Resumption” on page 18. Preemptive Networks (EE and FE Only) Use this option to connect to a preferred network or auto-scan list if it is present. See “Scanning for Available Networks” on page 59. EAP-FAST When you use EAP-FAST authentication, you can select from options that determine when to prompt for credentials. The options are: Prompt before acquiring credentials from a new server. Use this option to be prompted for new credentials whenever you authenticate with a new server. Prompt before replacing credentials from a known server when your existing credentials have failed. Use this option to be prompted for new credentials if a previous authentication attempt fails. Both EAP-FAST options are enabled by default. To restore the defaults, select Reset Defaults. Enabling Session Resumption After you have been authenticated to the network and a network connection is open, your network session begins. During a session, any subsequent authentications to the same network server can be accelerated by reusing the secret information that is derived during the first authentication. This is called session resumption. You can configure client-side session resumption features that apply to the certificate-based protocols (such as TLS) using OAC. See “Session Resumption” on page 104 for more information. To enable session resumption: 1. Go to Tools > Options > Security. 2. Select Enable session resumption. 18 Menu Options Chapter 3: Using Odyssey Access Client Manager 3. Set Do not resume sessions older than to the maximum number of hours that a session can last after initial authentication before requiring reauthentication. After the time limit has elapsed, the next reauthentication will be a completely new one. The number of hours can have up to three decimal places. By default, session resumption is enabled and an initial authentication is resumed for up to 12 hours. To disable this feature, clear the Enable session resumption setting. Enabling Temporary Trust In some circumstances, you might need to establish temporary trust with a server while you authenticate. You might decide at some point to change trust settings to trust a previously untrusted server. See “Managing Untrusted Servers” on page 86 for more information about establishing trust. To enable temporary trust: 1. Go to Tools > Options > Security. 2. Select Enable server temporary trust. If temporary trust is enabled, you have the following options: Trust an untrusted server temporarily when you attempt to authenticate to it. See “Managing Untrusted Servers” on page 86. Add the server to your trust tree in the Trusted Servers dialog. Consequently, the temporary trust feature serves as an alternative to configuring trusted servers through the Trusted Servers dialog. If temporary trust is not enabled, any authentication attempt that requires the validation of a server certificate fails when the server is not explicitly trusted. To disable this feature, clear the Enable server temporary trust field. 3. Set Maximum time for temporary trust to the maximum time (in hours) that you want OAC to continue to trust a server once you accept it. By default, temporary trust is enabled. The maximum time that a particular server is temporarily trusted after you accept it is 12 hours. NOTE: These settings do not apply to servers that you choose to trust permanently if you select Add this trusted server to the database when you are prompted for temporary trust. See “Managing Untrusted Servers” on page 86. Enabling Automatic Reauthentication When you are reauthenticated to your network, encryption keys are refreshed, and any new or updated security policies that are implemented on the network are applied to your network connection. You can configure automatic periodic reauthentication to the network using OAC. Menu Options 19 Odyssey Access Client User Guide Periodic reauthentication serves two purposes: As a general security measure, it verifies that you are still on a trusted network. It results in distribution of fresh shared keys to your PC and access point. The access point might use these shared keys to refresh the keys used to encrypt data. By frequently refreshing keys, you can thwart cryptographic attacks. To enable automatic reauthentication: 1. Go to Tools > Options > Security. 2. Select Enable automatic reauthentication. 3. Set the automatic reauthentication frequency, enter the time period (in hours) in the field next to Reauthenticate every. You can use up to three decimal places to indicate the number of hours. By default, automatic reauthentication is disabled. This is because your network administrator might have already configured your access points or authentication server to perform periodic reauthentication. Contact your network administrator for the proper settings for this option. To disable this feature, clear the Enable automatic reauthentication setting. See “Reauthentication” on page 104 for more information. Help Menu Options This section discusses each of the Help menu options. Help Topics Use this option to access online help files for OAC. Press F1 for context-sensitive help from any OAC dialog box. View Readme File Use this option to read about OAC requirements, new features, and other release-specific information. License Keys Use this option to determine when the current OAC license expires and to add or remove an OAC license key. Register Odyssey Access Client Use this option to register OAC. Odyssey Access Client User Page Use this option to open the Juniper Customer Support Web page. Juniper Networks, Inc. Home Page Use this option to access the home page for Juniper Networks. 20 Menu Options Chapter 3: Using Odyssey Access Client Manager Purchase Information Use this option to access the Juniper Networks Web page to buy other products. About Use this option to review the specific release version of OAC and to get information about how to buy OAC. Sidebar The sidebar contains a group of folders, each of which is described in the following sections. Each folder contains one or more items that you can select and configure or use for connecting to the network. The selection that you make determines which content dialog appears. If this is your first experience with the Odyssey Access Client Manager, explore the folders and the selections that you can make and notice how the content dialog changes for each selection. Adapters Folder The Adapters folder lists the wired and wireless adapters currently configured in OAC. If you select an adapter from this folder, a network connection dialog opens for that particular adapter, showing connection status for the selected adapter along with a Connect to the network check box to toggle the connection on or off. Infranet Controllers Folder The Infranet Controllers folder lists each Infranet Controller currently configured, the connection status, a check box to connect to or disconnect from the Infranet Controller, and current endpoint trust status information. Configuration Folder Use the Configuration folder to add, delete, or modify configuration settings for any of the options that appear in this folder. Profiles Use this option to set up login and authentication configuration information, such as your password or certificate used when you authenticate or log in to the network. See “Managing Profiles” on page 37. Networks Use this option to configure individual networks and their connection, encryption type, and whether to use 802.1X authentication. You can use this to set up an ordered list of networks to use with an auto-scan list. See “Managing Network Access” on page 57. Sidebar 21 Odyssey Access Client User Guide Auto-Scan Lists Use this option to set up an ordered list of wireless networks that you have configured. The auto-scan list is convenient when you are moving your computer from one wireless network to another. OAC uses it to scan the list of networks and make the first possible connection automatically. See “Managing Auto-Scan Lists” on page 67. Trusted Servers Use this option to add, remove, and configure trusted network servers and to set certificate and identity information for the servers that might authenticate you when you connect. Configuring this feature is required for protocols that implement mutual authentication and is a recommended security measure. See “Managing Trusted Servers” on page 79. NOTE: Contact your system administrator before changing any trust configuration settings. Adapters Use this option to configure wired and wireless adapters for your computer. See “Managing Network Adapters” on page 27. Infranet Controllers Use this option to configure individual Infranet Controllers to which you need to connect. See “Managing Infranet Controller Connections” on page 71. Content Dialogs A content dialog shows configuration options and controls for the folder option that you select. If you select an adapter from the Adapter folder, a Connection dialog displays the network address for the Infranet Controller, endpoint status information, and a button to connect or disconnect to or from a network. If you select an Infranet Controller from the Infranet Controllers folder, a Connection dialog displays connection and endpoint status information and a button to connect or disconnect to or from a network. Each of the selections in the Configuration folder has a corresponding content dialog for setting up and configuring options: 22 Content Dialogs Authentication profiles Wireless networks Auto-Scan lists Trusted servers Wired and wireless adapters Infranet Controllers Chapter 3: Using Odyssey Access Client Manager Informational Graphics and Detailed Status Graphical status icons appear in the lower right of the connection dialogs for an adapter or an Infranet Controller. They provide visual status for your connection. Use the mouse or the keyboard to view detailed connection status information from any of the status icons. Displaying Status Details There are two ways to see status details (Figure 5) for any given status icon: Use the mouse—Point to a graphical status button with the mouse and hold down the left mouse button. Use the keyboard—Press the Alt+1, Alt+2, or Alt+3 keys to select a graphical status button and hold down the space bar. Figure 5: Status Icon Details Signal Power Status The signal power graphic shows you how strong the signal is between your PC and the access point. The more bars that are filled in, the stronger the signal. You can interpret the signal power status graphic as follows: Strong signal power Moderate signal power Weak signal power Faint signal power No signal power Connection Status The connection status icon (the OAC “sail boat” icon) shows the state of your connection and whether you are authenticated. (outline) – Not connected (red) – Not connected, due to failed authentication Content Dialogs 23 Odyssey Access Client User Guide (black) – Connected, but authentication not in use (blue) – Connected and authenticated The status details that you see depends on your authentication method and access point and might include the following: Result of your last connection attempt Type of authentication Elapsed time (since last connection) Cipher suite used to secure credential exchange Access point identification information Encryption Key Information The encryption key information button indicates whether encryption keys are in use for this connection. (outline) – Data is not encrypted (black) – Data is encrypted using static keys (blue) – Data is encrypted using dynamic keys (802.1X) Status details for these icons can show the following types of information: Global encryption: The size (in bits) of global encryption keys Access point encryption: The size (in bits) of access point encryption keys NOTE: A WEP encryption key has a secret part whose length is either 40 or 104 bits and a 24-bit non-secret part that changes for each packet. Thus, the total key length is either 64 or 128 bits. OAC reports the length of the secret part, which is either 40 or 104 bits. Endpoint Trust Status In a UAC network, the Endpoint Trust Status section near the bottom of the Connection dialog includes an icon that indicates endpoint trust status. Status indicator and messages. Shortcut Keys In addition to using the mouse to access buttons, tabs, and dialogs on OAC, you can use your keyboard to access OAC features. On Windows XP systems, press the Alt key to see the shortcut keys available on any given screen. For older Windows versions, the shortcut keys are always underlined. 24 Content Dialogs Chapter 3: Using Odyssey Access Client Manager To move between the dialogs of the OAC, press the up and down arrows on your keyboard. You can use the keyboard arrows to move through option button (mutually exclusive) selections. You can use the following keyboard shortcuts to select the graphical information buttons on the Connection dialog: Alt+1 to display the signal power information Alt+2 to display the connection status information Alt+3 to display the encryption key information You can press Alt in conjunction with the appropriate arrow key on the keyboard to implement the corresponding arrow button features. Exiting from OAC Manager To exit from Odyssey Access Client Manager, right-click the OAC icon in the system tray and select Exit. Odyssey Access Client Manager closes but you can re-launch it at any time. OAC runs as a Windows service unless you remove it, so you can run OAC or re-launch Odyssey Access Client Manager at any time. Exiting from OAC Manager 25 Odyssey Access Client User Guide 26 Exiting from OAC Manager Chapter 4 Managing Network Adapters This chapter describes how to add or remove a wired or wireless network adapter in an OAC configuration and how to connect to a network using that adapter. You can set up one or more network adapters by opening the Configuration folder in the OAC Manager sidebar and selecting Adapters. The adapter must be installed on your computer before you can configure it in OAC. To select more than one adapter at a time, hold down Ctrl on the keyboard and select the entries using your mouse. At the top of the sidebar, the Adapters folder shows all of the network adapters configured currently in OAC. Adding Network Adapters When you add an adapter to the OAC configuration, OAC has control of that adapter as long as it is still configured in OAC. This means that you cannot use other software to connect to a network with that adapter unless you remove the adapter from the OAC configuration. See “Removing an Adapter” on page 28. You can configure an external wireless adapter in addition to the built-in adapters on your machine and, thus, have multiple wireless adapters configured at the same time. You can use each adapter to connect to the same or to different networks. See “Configuring Multiple Simultaneous Network Connections” on page 31. To add a network adapter: 1. Install or insert the network adapter card in your computer. If you are using a laptop computer, most current models have wired and wireless network adapters built in. 2. Open the Configuration folder in the sidebar on the left and click Adapters. 3. Click Add. The Add Adapter dialog appears. Note that only adapters that you have not yet added to the Adapters dialog appear in the display. 4. Select the adapter to be added from the list and click OK. NOTE: If you do not see your wireless adapter in the list, select All Adapters. Make sure that each of the adapters that you select under the Wireless tab is wireless. You cannot configure OAC for wireless connections unless you have a wireless adapter. Adding Network Adapters 27 Odyssey Access Client User Guide Renaming an Adapter When you add a adapter to the OAC configuration, the adapter appears in the sidebar in the Adapters folder. A wired adapter has the default name Ethernet. A wireless adapter has the default name WiFi. If you use multiple wireless adapters, you can rename them to help distinguish one from another. To rename an adapter: 1. Right-click the adapter icon in the sidebar. 2. Select the Rename option, which highlights the adapter name. 3. Replace the current, highlighted name with the new name. (This is the same method used to rename a file in a Windows Explorer directory tree.) Removing an Adapter There are two ways to remove an adapter. Removing an Adapter Using the Adapter Dialog. To remove an adapter using the Adapter dialog: 1. Open the Configuration folder in the sidebar on the left and click Adapters. 2. In the Adapter dialog, select the wired or wireless adapter(s) that you want to remove. 3. Click Remove. Removing an Adapter Using the Sidebar Icon. To remove an adapter using the sidebar icon: 1. Right-click the adapter icon in the sidebar. 2. Select Remove. 3. A dialog prompts you for confirmation before removing the adapter. Select OK to proceed. When you remove an adapter, OAC stops using it. While the adapter might still be installed on your system, it does not operate with OAC unless you add it back to the OAC configuration. NOTE: When you remove an adapter from the OAC configuration, check the Windows Control Panel setting to ensure that the adapter is enabled for Windows again. Go to Control Panel > Network Connections > adapter name > Properties > Wireless Networks and select the Use Windows to configure my network settings check box. 28 Adding Network Adapters Chapter 4: Managing Network Adapters Connecting to a Network This section describes how to use OAC to connect to a specific network from the Adapters dialog (Figure 6 on page 29). The dialog enables you to perform the following tasks: Select a wired or wireless adapter from the list of configured adapters. Connect to a specific network. Disconnect from the network. Scan for available wireless networks. Reconnect to the network Figure 6: OAC Adapter Connection Dialog Pull-down list Connection check box Selecting an Adapter If you or your administrator configured more than one adapter to use with OAC, select which adapter to use for the network connection. To select a network adapter: 1. Open the Adapters folder in the sidebar. 2. Select the wired or wireless adapter to use. Connecting to a Network 29 Odyssey Access Client User Guide Connecting to a Network When you connect to a network, OAC uses the adapter that you select to establish an authenticated 802.1X connection to the network. If you attempt a wired connection to a network switch that does not support 802.1X—for example, to a wired network at home—OAC makes the connection without any authentication. Before you can connect to a network with a wired or wireless adapter, you must configure at least one network and one authentication profile. See “Adding or Modifying Network Properties” on page 58 and “Adding or Modifying a Profile” on page 38. Connecting to a Wireless Network To connect to a wireless network: 1. Select a network from the Network pull-down list (Figure 6). (For a wired connection, the dialog a Profiles pull-down list.) The networks in this list are the ones that you have created already in the Networks dialog. To add a new network, see “Adding or Modifying Network Properties” on page 58. 2. Select Connect to the network to start the network connection. Connecting to a Wired Network To connect to a wired 802.1X network: 1. Select an authentication profile from the Profile pull-down list. (For a wireless connection, the dialog a Network pull-down list.) The profiles that appear in this list are the ones that you have created in the Profiles dialog. See “Adding or Modifying a Profile” on page 38. 2. Select Connect to the network to start the network connection. To connect to a different network: 1. Select the network adapter whose current network connection you want to change. 2. Clear the Connect to the network check box. 3. Based on the type of adapter you are using, wireless or wired, select a network or profile name from the pull-down list that corresponds to the network to which you want to connect. 4. Select Connect. 30 Connecting to a Network Chapter 4: Managing Network Adapters Configuring Multiple Simultaneous Network Connections Each adapter on your computer can connect to a different network. This means that if you have one wired and one or more wireless adapters, you can maintain simultaneous network connections. With both connection types configured, you can use a wired connection when you are at your desk and then unplug your wired connection and take your laptop to other locations in the building using a wireless connection as long as you have wireless access. Your administrator might recommend that you enable wireless suppression, which defaults to a wired connection whenever you have one. The purpose of wireless suppression is to conserve wireless bandwidth for users who do not have access to a wired connection. See “Enabling Session Resumption” on page 18. Use the Adapter list on the Connection dialog to switch between the adapters that you configured for multiple network connections and monitor the status of your network connections. Disconnecting from a Network Disconnecting from a network terminates the network connection between the adapter that you selected and the network to which you are currently connected with OAC. The adapter remains part of the OAC configuration unless you remove it from the list of configured adapters. Thus, you can use the same adapter to connect to a network later. To disconnect from the current wireless network: 1. Select the adapter from the Adapters folder that you want to disconnect from the network. 2. Clear the Connect to the network check box. When you disable the connection to the network, the adapter icon changes to gray. Scanning for Wireless Networks If you travel frequently, you might want to authenticate through locally available wireless networks that you have not configured already. To connect to a wireless network that is not configured: 1. Click Scan on the Connection dialog. OAC surveys the local air waves and displays a list of all wireless networks that are currently reachable. 2. Select the network from the scan list. 3. Select OK. Connecting to a Network 31 Odyssey Access Client User Guide NOTE: A beacon is a signal broadcast by a wireless access point to identify its location. Only wireless networks that are configured by an administrator to “send beacons” are visible to you when you scan. If “send beacons” is off, then you must specify the network from the Networks dialog or choose the default [any] network from the Connection dialog. Reconnecting to a Network Use the Reconnect button (located at the bottom of the Adapter dialog) to re-initialize your network connection if the current connection does not seem to be performing as expected. The reconnect option disconnects the existing connection for the currently selected adapter and starts a new connection to the network. The new connection might be to a different access point (on the same network) from your previous access point connection. If you are currently authenticated to the network, you will remain authenticated when the new connection starts. Any dynamic encryption keys will be refreshed with the reconnection. This option is useful when you are moving from one access point to another on the same network. Clicking Reconnect can sometimes provide a connection with an access point that provides better service. Reauthenticating a Network Connection When you click Reauthenticate at the bottom of the Connection dialog, OAC reauthenticates your existing connection shown in the display, without starting a new connection. If dynamic encryption keys are in use, they are refreshed automatically. Checking Adapter Status One way to check adapter status is to view the adapters in the Adapters folder. If an adapter is currently disconnected from the network, the adapter icon will have changed from color to gray (see Figure 7). Figure 7 shows that one of the Infranet Controllers is also disconnected. 32 Connecting to a Network Chapter 4: Managing Network Adapters Figure 7: Disconnected Adapter Status You can check other adapter status, as described below. To check adapter status: 1. Open the Adapters folder at the top of the sidebar. 2. Select the specific adapter whose status you want to check. The connection dialog opens on the right and displays the following information: The adapter name (such as Intel PRO/Wireless 2200BG Network Connection). The adapter type (“Ethernet” or “Wi-Fi”). A network name and, next to it, a pull-down list of the current configured networks. (See “Connecting to a Network” on page 30.) A Connect to the network check box for toggling a connection on or off. If you are using a wired adapter, use the Profiles pull-down list to select an authentication profile. If you are using a wireless adapter, use the Network pull-down list to select the network to which you want to connect. Connection status Endpoint status Connecting to a Network 33 Odyssey Access Client User Guide Connection Status Connection status shows summary information about the current adapter and network connection, which includes: Status: see Table 3 Elapsed time: the duration (in hours, minutes, and seconds) of current network connection Network SSID: the name of the wireless adapter to which you are connected Access point: the MAC address of the access point to which you are connected IP address: the IP address assigned to your computer when you logged on. Packets in/out: the number of data packets exchanged during the current network connection Table 3: Connection Status Information 34 Connecting to a Network Status Message Definition open and authenticated The connection is authenticated and you are connected. open / authenticating Reauthentication is in progress and you are connected. open / requesting authentication You have requested reauthentication and you are connected. open The connection is not authenticated but you are connected. peer-to-peer The network type is peer-to-peer (ad hoc) and you are connected. authenticating You are not yet connected but authentication is in progress. requesting authentication You are not yet connected but you have requested authentication from the access point. waiting to authenticate You are not yet connected and the last authentication failed but you are waiting to retry. If you see this message for a considerable length of time, there might be an association problem. If so, select the association mode required for your access point. searching for access point You are not connected and communication with an access point on the requested network has not been established. This might occur when your adapter does not support 802.1X or if your access point is not within range. disconnected You are not connected and Connect to the network might not be selected. See “Connecting to a Network” on page 30 for information about how to connect. OAC is disabled You are not connected and OAC has been disabled. Chapter 4: Managing Network Adapters Table 3: Connection Status Information (continued) Status Message Definition adapter not present You are not connected and the configured adapter is not currently available. This might occur when your adapter does not support 802.1X. cable unplugged You are not connected. This can occur if you have a wired connection but your cable is unplugged. adapter in use by another program Your adapter is being used by another program installed on your machine. disabled by wired connection Your wired connection has disabled your OAC wireless connection based on your security settings. See “Tools Menu Options” on page 15. Interaction with Other Adapter Software Your wireless adapter might come with its own user interface software to help you control its operation and might allow you to operate non-standard features of your wireless adapter to which OAC has no access. In most cases, OAC and the user interface that comes with your wireless adapter can coexist without problems. However, we recommend that you do not use both products for similar purposes to avoid conflicts that could result when both programs are attempting to control the adapter at the same time. If you use OAC for network communications, use the software supplied with your adapter to operate only those features that cannot be controlled by OAC. Interaction with Other Adapter Software 35 Odyssey Access Client User Guide 36 Interaction with Other Adapter Software Chapter 5 Managing Profiles This chapter describes how to set up an OAC profile for an authenticated network connection. A profile contains all of the information necessary for authenticating a connection to a specific network. This includes information such as your identity (user credentials) and the EAP protocols used to authenticate to that network. You must have a profile for each network to which you connect and authenticate. You can have profiles for various corporate office locations, particularly if the authentication requirements differ. Similarly, you can have profiles for various customer networks and for wireless networks at airports, train stations, and coffee shops. To configure a profile: 1. Open the Configuration folder in the sidebar. 2. Select Profiles to open the Profiles dialog (Figure 8). Figure 8: Profiles Dialog 37 Odyssey Access Client User Guide The Profiles dialog lists the configured profiles. The list might include a default profile, called Initial Profile, containing common settings. You can use this as a guideline for setting up other profiles. Your network administrator might have created profiles for you already. Adding or Modifying a Profile This section describes how to create an authentication profile. It describes each of the configuration settings and walks you through each element in the Profile Properties dialog. To add a profile, click Add. To modify profile properties, click Properties. Both dialogs display the same settings. You can use either one. Figure 9 is a sample Profile Properties dialog. Figure 9: Profile Properties Dialog Each profile reflects the logon and authentication information required for that network and contains the following categories of information: 38 Adding or Modifying a Profile Profile name—The name of the profile that you are creating or editing. User Information—Your login name and the means used to authenticate your identity (password, certificate, or other user credentials). Authentication—The authentication protocol to be used. Depending on the authentication protocol that you specify, there are other settings that might apply. See “Setting Up Authentication” on page 44. Chapter 5: Managing Profiles TTLS—The EAP-TTLS outer protocols and, where they apply, one or more inner protocols. See “TTLS Settings” on page 48. PEAP—The EAP-PEAP outer protocols and, where they apply, one or more inner protocols. See “PEAP Settings” on page 51. JUAC—If you intend to connect to and be authenticated by an Infranet Controller, you must use JUAC as an inner authentication protocol. See “Setting JUAC as an Inner Authentication Protocol for TTLS” on page 53 and “Setting JUAC as an Inner Authentication Protocol for PEAP” on page 54. Specifying Profile Names When you add a profile to OAC, specify a unique name for the profile in the Profile name field of the Profile Properties dialog. For example, you can use Office for the profile name of your corporate network and Home for your home network. You can use the IP address of the network for the profile name. If you use one or more hotspot networks frequently, you can add a named profile for each of them. You cannot change the name of a profile after you save it. However, you can modify any other profile properties. You can remove a profile and create a new one with a different name. Specifying User Info From the User Info tab, configure the login name and your password, certificate, soft token, or SIM card (if you are using EAP-SIM) based on the login credentials that you intend to use. See “Using SIM Cards (EE and EF only)” on page 43 for details about using SIM cards. This information is likely to be different for each network and requires a separate profile. Specifying a Login Name Enter your user name in the Login name field. This is the name presented to the network when you request a network connection. If you authenticate against a Windows Active Directory, use the form domain\user_name (for example, Acme\george). See your network administrator for the required format. The User Info tab has sections that you can configure from the following subtabs: Password—Configure this section when you use authentication protocols that require or permit a password (such as EAP-TTLS). You can specify how the password should be retrieved (“Setting Passwords” on page 40). Using Certificates—Configure this section when you use authentication protocols that require a client-side certificate (for example, EAP-TLS) or if you use a smart card for authentication (see “Using Certificates for Authentication” on page 42). Soft Token—Configure this section if you are required to use a soft token as part of authenticating to the network when you log in. Specifying User Info 39 Odyssey Access Client User Guide SIM Card—Configure this section when you use a mobile wireless device to authenticate to a network. Setting Passwords The following EAP authentication methods require a password: EAP-TTLS with an inner protocol of PAP EAP-TTLS with an inner protocol of CHAP EAP-TTLS with an inner protocol of MSCHAP EAP-TTLS with an inner protocol of MSCHAPV2 EAP-TTLS with an inner EAP protocol of MD5-Challenge EAP-PEAP with an inner protocol of MSCHAPV2 EAP-MD5-Challenge EAP-LEAP If you configure one the following protocols, you can use a password instead of a token: EAP-FAST EAP-PEAP with an inner protocol of GTC EAP-PEAP with an inner protocol of POTP To set a password, select Permit login using password on the Password subtab of the User Info tab of the Profile Properties dialog. This lets you enable the authentication methods that use your password for authentication. OAC can obtain your password in one of the following ways: Select Use Windows password if you want to authenticate to the network using the same password that you present when you log in to Windows. NOTE: Do not select this option if you plan to log in to your client device with a smart card PIN unless your administrator has installed the GINA module. (EE and FE Only) 40 Specifying User Info Select Prompt for password to have OAC prompt you when you connect to the network. In general, this is the most secure option. Chapter 5: Managing Profiles Select Prompt for login name and password to have OAC prompt you when you connect to the network. NOTE: This is the least secure option because the password prompt occurs before the pre-authentication health check on a UAC network and, thus, does not provide a security guarantee. Select Use the following password and enter a password in the box below this option to have OAC save your password and use it each time you authenticate with this profile. NOTE: If you change your Windows password, be sure to update the new password in the Use the following password field. (EE and FE only) If you select Prompt for password, you are usually prompted only the first time that you are authenticated after startup. OAC remembers your credentials and reuses them for the duration of your session. The credentials that you enter apply only to a profile. If you are authenticated using a different profile, you will be prompted again. You might be prompted to enter your password when connecting to the network under some conditions, including entering an incorrect password or if any other authentication failure occurs. This feature is in place, in part, to prevent accidental lockout due to the reuse of bad passwords. NOTE: When OAC prompts for your password, you can choose to disable the OAC network connection (temporarily) and use a wired network connection when one is available. To do this, click Yes when the prompt to disable your OAC connection appears. You can return to the Connection dialog to connect to a network using OAC at any time. Using Certificates OAC reads personal certificate information from one of the following sources: Your personal certificate store on your computer or device. Your smart card reader, if you have one installed to use with a smart card on your device. See “Security” on page 17 for more information about using smart cards and caching PIN information. You must use EAP-TLS, EAP-PEAP, and/or EAP-TTLS as an authentication protocol for this profile to negotiate authentication using certificate credentials. If you select EAP-PEAP, use EAP-TLS as the inner authentication protocol. See “PEAP Settings” on page 51 for configuring inner EAP-PEAP protocols. If you select EAP-TTLS, select one of the two certificate-based options on the TTLS Settings tab. Specifying User Info 41 Odyssey Access Client User Guide Using Certificates for Authentication To use certificate credentials for authentication: 1. Select the Certificate subtab of the User Info tab. 2. Select Permit login using my certificate to enable authentication methods that use your certificate for authentication. a. b. You can select Use automatic certificate selection and let OAC select your certificate automatically (from a smart card reader or from your personal certificate store) at authentication time. Note the following: With this option, you are not required to fill in a login name for this profile if you do not use any password-based authentication methods. When you select this option, OAC does not check that your certificate is installed. If your certificate is not installed at authentication time, your authentication request fails. If you have more than one certificate installed at authentication time, you are prompted to select the certificate. Select Use the following certificate then click Browse to select a personal certificate from your computer. A list of your personal certificates appears. Select a certificate and click OK. Once you configure a certificate, you can click View to view the certificate. NOTE: Before you can create a profile that uses a personal certificate from your computer, you must install the certificate in the current_user store of your computer. See your network administrator for information about installing and selecting a user certificate for authentication if you require one. c. If you have a smart card installed on your client machine, you can use the certificate from your smart card. For this option, select Use the logon certificate from my smart card reader. With this option, you can keep the default smart card reader selection (any reader) or select a specific smart card reader from the list of readers installed on your machine. (See “Security” on page 17 and read the section about Prompt for smart card PIN for the FIPS constraints.) Using Soft Tokens With certain token-based authentication options, you can use a software-based token rather than a token from a physical token card. To use software-based token information, enable this soft token feature and select the token from the Soft Token subtab of the User Info tab. 42 Specifying User Info Chapter 5: Managing Profiles Enabling Soft Token Identification To enable soft token authentication: 1. If you want to create a profile that uses only soft token authentication methods (recommended for soft token authentication configuration), clear the Permit login using password setting on the Password subtab of the User Info tab in the Profile Properties dialog. 2. Select Permit login using my RSA Soft Token on the Soft Token subtab of the User Info tab. 3. Select one of the following options: Select Use any token if you have only one token installed in your client machine. Select Use the following token and click Browse to choose a specific token that is installed in your client machine when you have more than one token installed. When you do so, the RSA Soft Tokens dialog appears. Select the soft token that you require and click OK to close the RSA Soft Tokens dialog. 4. Configure one of the soft token-based authentication options listed at the beginning of this section. 5. Click OK to save the profile. Using SIM Cards (EE and EF only) You can configure SIM card authentication from the SIM Card subtab of the User Info tab of the Profile Properties dialog. To use a SIM card when you connect to a network through OAC, you must configure an OAC user profile for use with your SIM card and assign EAP-SIM and/or EAP-AKA as the authentication protocol(s). Your SIM card contains an IMSI (international mobile subscriber identity)— the calling number issued by your service provider—for identification. If you do not use the IMSI from the SIM card for SIM authentication, OAC uses the name you specify as a Login name. See “Configuring EAP-SIM Identity” on page 44. To use OAC with your SIM card, select Permit login using my SIM card. You can configure three more items under the SIM Card subtab of the User Info tab. Setting a SIM Card ID You can configure OAC to make SIM card connections in one of two ways: Use any SIM card that is installed. For this option, select [any] from the SIM card ID list. Use a specific SIM card ID. For this option, enter your SIM card ID in the SIM card ID list or, if you have already inserted your SIM card into your PC, you can select your SIM card ID from the SIM card ID list. Specifying User Info 43 Odyssey Access Client User Guide Managing PIN Settings You might have already set a PIN on your SIM card hardware. You have two choices for the PIN field for OAC: Select PIN is not required (default) if you are not required to use the PIN for your connections (you have no PIN assigned to your SIM card). Select Prompt for PIN if you enable a PIN for your use with your SIM card and you want to be prompted for your SIM card PIN each time that you connect. You might want to use this option for security reasons. You must use this option when you select [any] under SIM card ID (as opposed to a specific SIM card ID). Select Use the following PIN to use the PIN that you have enabled for use with your specified SIM card ID. In this case, type the PIN in the box provided. With this option, the PIN is stored and you are not prompted to enter it when you make a network connection. Configuring EAP-SIM Identity You have options for how your EAP-SIM identity is presented to your provider for network authentication. The option that you choose depends on your provider’s requirements. You have two choices for entering your SIM identity: Select Use the IMSI from my SIM card (default) if your provider requires you to use your IMSI for identification. Select Use the login name I entered in this profile if you are required to use an identity (usually of the form username@realm) rather than your IMSI. In this case, make sure that your login name is in the form that is required by your provider. Note that when you select this option and if you allow more than one authentication protocol with this profile, there might be a conflict with your login name. If you are required to select this option, create a separate configuration for connections that use protocols other than EAP-SIM or EAP-AKA. Setting Up Authentication Corporate networks use different authentication methods and settings. You need the correct settings configured for your network. Before changing or specifying any authentication settings in OAC, consult your network administrator to determine if those changes reflect corporate policy. If your settings are incorrect, you might not be authenticated to access your network. In many cases, authentication settings might be preconfigured and possibly restricted by your network administrator. To specify network authentication protocols: Open the Authentication tab in the Profile Properties dialog (Figure 10). 44 Setting Up Authentication Chapter 5: Managing Profiles The authentication protocols specified on the Authentication tab are the outer authentication methods, which create a secure tunnel between OAC and the authentication server. Some authentication protocols, such as PEAP and TTLS, require that you specify an inner authentication method. Figure 10: Profile Properties for Authentication Settings NOTE: EAP-TTLS, EAP-PEAP, and EAP-FAST all use inner (tunneled) protocols. EAP-FAST uses EAP-GenericTokenCard as its inner protocol. You can choose one or more inner protocols for EAP-TTLS or EAP-PEAP. See “TTLS Settings” on page 48 and “PEAP Settings” on page 51. Selecting Authentication Protocols The Authentication protocols list shows the authentication protocols that you enabled. You can have one or more authentication protocols in the list and add more if necessary. If you have more than one protocol in the list, you can order them by preference (top down). The ordering affects the protocol that the server uses if it has more than one protocol in common with the ones that you select here. Consult your network administrator before changing these settings. NOTE: If FIPS mode is enabled, there is only one outer authentication protocol supported, EAP-TLS, and no inner authentication protocols. (FE Only) To add a protocol to the list: 1. Click Add to open the Add EAP Protocol dialog. 2. Select one or more protocols to add. 3. Click OK. Setting Up Authentication 45 Odyssey Access Client User Guide To select more than one protocol at a time, hold down Ctrl on the keyboard as you select them with your mouse. Any protocols already selected are not listed in this dialog. To remove a protocol from the list: 1. Select the protocol. 2. Click Remove. To reorder protocols: 1. Select a protocol. 2. Use the up or down arrow button on the Authentication tab to reposition the protocol in the list. Validating a Server Certificate—Mutual Authentication Certain protocols, such as EAP-TTLS, EAP-PEAP, and EAP-TLS, allow you to verify the identity of the authentication server as the server verifies your identity. This is called mutual authentication. Select Validate server certificate (set by default) to verify the identity of the authentication server based on its certificate when authenticating with EAP-TTLS, PEAP, and EAP-TLS. NOTE: If you select this option, you must have the same root CA or intermediate CA for the server certificate chain installed in the trusted root or intermediate certificate store of your machine. To check this on Windows systems, select Internet Explorer under Tools > Internet Options > Content > Certificates. Consult your network administrator for help with this. In general, select Validate server certificate. You have the option of turning off this important security precaution because there might be circumstances that require it. For example, if you are unable to configure trust because you do not have an intermediate root CA certificate installed on your machine, you might want to turn off certificate validation. Do this only if instructed by your network administrator. Setting Tunneled Token Card Credential Options There are two circumstances where EAP-GenericTokenCard can be the inner protocol for tunneled authentication: 46 Setting Up Authentication If you select EAP-FAST as an outer authentication method on the Authentication tab. EAP-GenericTokenCard is the inner authentication protocol used with EAP-FAST. If you select EAP-GenericTokenCard as the inner protocol for EAP-PEAP. Chapter 5: Managing Profiles If you use EAP-GenericTokenCard as one of the inner authentication methods or if you use EAP-POTP as the inner authentication method for EAP-PEAP, the Token Card Credentials settings in the Authentication tab apply. These settings allow you to choose to use your password credentials or your token card ID for authentication: Select Use my password if your network requires that you use the password credentials assigned with this profile instead of your token card ID for authentication. Select Prompt for token information if your network requires a token ID for authentication. NOTE: These token card settings do not apply when you configure EAP-GenericTokenCard or EAP-POTP as an EAP inner authentication method for EAP-TTLS. Additionally, these settings do not apply when you choose EAP-POTP or EAP-GenericTokenCard as an outer authentication method from the Setting Up Authentication tab. Setting an Anonymous Name With EAP-TTLS, EAP-PEAP, and EAP-FAST, you can appear to log in anonymously, while passing your actual login name through an encrypted tunnel. As a result, not only are your credentials secure, but your identity is protected as well. You can have two identities when you use any of the following protocols: An inner identity, your actual login name, which is taken from the Login name field in the User Info tab. An outer identity that can be completely anonymous. You can set your outer identity in the Anonymous name field. Note the following: Anonymous outer identities are implemented only when you enter a name in Anonymous name. When you leave Anonymous name blank, your inner identity is used as your outer identity. As a general rule, set Anonymous name to anonymous, the default value. Your network administrator can tell you how to configure this field correctly. In some cases, you might need to add additional text. For example, if this outer identity is used to route your authentication to the proper server, you might be required to use a format such as [email protected]. Setting Up Authentication 47 Odyssey Access Client User Guide It is possible that anonymous EAP-PEAP authentication does not work with your network authentication server, in which case leave the Anonymous name blank. NOTE: Your outer identity can be anonymous if your list of configured authentication protocols for this profile includes only EAP-TTLS, EAP-PEAP, and/or EAP-FAST. If you enable any other protocols, OAC cannot keep your identity private and the Anonymous name field is disabled. TTLS Settings Use the TTLS Settings tab to configure EAP-TTLS as an authentication protocol. These settings are relevant only if you select EAP-TTLS as an authentication protocol in the Authentication tab. EAP-TTLS creates a secure encrypted tunnel through which your credentials are presented to the authentication server. If you use EAP-TTLS with password credentials, an inner authentication protocol completes the authentication. See “EAP-TTLS” on page 102 for more information about this protocol. Selecting an Inner Authentication Protocol TTLS and PEAP support inner authentication tunnels. Inner authentication provides an additional level of security by transferring password credentials through an encrypted tunnel between the client and the authentication server. Table 4 on page 49 lists the compatible inner and outer authentication protocols for TTLS and PEAP. Use the Inner authentication protocol list to select the inner authentication protocol to use. Consult you network administrator for the recommended corporate settings for your network. 48 TTLS Settings Chapter 5: Managing Profiles Table 4: Outer EAP Protocols and Supported Inner Protocols Compatible Inner Authentication Methods EAP-TTLS for Outer Authentication EAP-PEAP for Outer Authentication PAP Yes No CHAP Yes No MS-CHAP (Note: not valid for Windows platforms) Yes No MS-CHAP-V2 Yes Yes PAP/Token Card Yes No EAP Yes No GenericTokenCard No Yes POTP No Yes TLS No Yes JUAC Yes Yes NOTE: When configuring an authentication profile for an Infranet Controller connection, you must select JUAC as an inner EAP protocol. To select an inner authentication protocol: 1. Select a profile and open the Profile Properties dialog. 2. Select the TTLS or the PEAP tab, based on the outer EAP authentication method being used. 3. Next to Inner authentication protocol, click the pull-down menu to display the list of inner authentication protocols. 4. Select a protocol from the list. To set up a preferred order of multiple inner authentication protocols, select a protocol from the list that you created and use the arrow buttons (located above the Add button) to move it up or down in the list. The most commonly used protocol, MS-CHAP-V2, authenticates you against user databases. PAP/Token Card is the protocol to use with token cards if you cannot use EAP-POTP authentication. When you use PAP/Token Card, the password value that you enter into the Password dialog is never cached, because any token-based password is good for one use. Select with your network administrator to determine which inner authentication protocols to use on your network. TTLS Settings 49 Odyssey Access Client User Guide EAP as an Inner Authentication Protocol If you select EAP as your inner authentication protocol, you must configure the Inner EAP protocols list on the TTLS Settings tab of the Profile Properties dialog with one or more protocols. To add an inner EAP protocol: 1. From the TTLS tab in the Profile Properties dialog, select EAP from the pull-down list of inner authentication protocols. 2. Click Add to display the list from which you can choose inner EAP protocols. 3. Select an inner EAP protocol from the list and click OK. 4. To add other inner EAP protocol to the list, repeat this procedure. See Table 4 on page 49 for a list of outer EAP protocols and the corresponding inner protocols. To remove a protocol: 1. Select the protocol to remove. 2. Click Remove. To reorder protocols: 1. Select a protocol to move. 2. Use the up and down arrow buttons on the TTLS Settings tab of the Profile Properties dialog to reposition the protocol on the list. Using Certificates with EAP-TTLS Authentication To select EAP-TTLS personal certificate options: 1. Select Permit login using my certificate on the Certificate subtab of the User Info tab. 2. In the TTLS tab of the Profile Properties dialog, select one of the following personal certificate options: 50 TTLS Settings Use only my certificate for authentication—Configure EAP-TTLS certificate-based authentication without a password. If you select this option and you do not select any password-based authentication methods for this profile, you can clear the Permit login using password setting on the Setting Passwords subtab of the Specifying User Info tab. See “Setting Passwords” on page 40 for a list of password-based authentication methods. Use my certificate and perform inner authentication—Configure EAP-TTLS certificate-based authentication and tunnel password credentials for use with an inner authentication protocol. Chapter 5: Managing Profiles None—Configure EAP-TTLS authentication without a client-side certificate. This option specifies the most typical use of EAP-TTLS authentication. Select this option unless you intend to use a client certificate as part of EAP-TTLS authentication. 3. Click OK. PEAP Settings If you select EAP-PEAP as an authentication method in the Authentication tab, Table 4 on page 49 shows the inner EAP authentication methods that are valid with PEAP. You can add, remove, or reorder any EAP-PEAP inner protocols from the PEAP Settings tab of the Profile Properties dialog. To add an inner PEAP protocol: 1. From the PEAP tab in the Profile Properties dialog, select EAP from the pull-down list of inner authentication protocols. 2. Click Add to display the list from which you can choose inner EAP protocols. Any protocols that you selected previously are not listed. 3. Select an inner EAP protocol from the list and click OK. To add other inner EAP protocol to the list, repeat this procedure. To remove a protocol: 1. Select the protocol to remove. 2. Click Remove. To reorder protocols: 1. Select a protocol to move. 2. Use the up and down arrow buttons on the TTLS Settings tab of the Profile Properties dialog to reposition the protocol on the list. If you select EAP-GenericTokenCard as one of your PEAP inner authentication methods, you can configure the EAP-GenericTokenCard settings under the Setting Up Authentication tab. These settings allow you to choose to use your password credentials or your token card ID for authentication. 3. Click OK to update the profile configuration. NOTE: If you select EAP-TLS as an inner authentication method, you must configure certificate-based user credentials on the Using Certificates subtab of the Specifying User Info tab. PEAP Settings 51 Odyssey Access Client User Guide Using Certificates with EAP-PEAP Authentication To select EAP-PEAP personal certificate options: 1. Select Permit login using my certificate on the Certificate subtab of the User Info tab on the Profile dialog. 2. In the PEAP tab of the Profile Properties dialog, select Use my certificate to authenticate to the network. 3. Select one of the following personal certificate options: Not performed—Inner authentication is not performed. Use my personal certificate. Optional—Inner authentication is optional (determined by the authentication server). Required—Inner authentication is required. Use my personal certificate as well. 4. Click OK. EAP-POTP Run-Time Dialogs You can configure OAC to use EAP-POTP as an inner authentication method for EAP-TTLS or EAP-PEAP. (You can configure EAP-POTP as an outer authentication method.) Configuring EAP-POTP as an Inner Authentication Method To configure EAP-POTP as an inner authentication method: 1. Configure a network connection that relies on EAP-POTP. 2. Select Connect to the network on the Connection dialog. OAC then presents one or more authentication dialogs based on your state in the token card authentication server response/challenge process. Enter the PIN followed by the current sequence of digits on your hardware token card. Under some circumstances, you might need to provide a new PIN. You might be offered the choice of creating your own PIN or using a system-generated PIN: 52 EAP-POTP Run-Time Dialogs Select System-generated PIN to use the PIN provided. Memorize this PIN for future use. Select User-defined PIN to define your own PIN and follow this procedure: a. Follow the instructions located after the text field to enter a new PIN under Please enter your PIN. b. Optionally, you can select Unmask to see your PIN as you type it. Chapter 5: Managing Profiles c. Re-type the PIN under Please confirm your PIN. d. Click OK. After you create your new PIN, you are re-prompted to enter your new PIN, followed by your token information. Infranet Controller Profile Configuration—UAC Networks Only Connecting to an Infranet Controller requires an authentication profile. Best practices recommend that you have an authentication profile for each Infranet Controller that you use to access protected network resources. The profile configuration requirements are similar to those for a network authentication profile. Configure the following settings: Profile name User name Password or other credentials Outer authentication protocol (TTLS or PEAP) Inner authentication protocol: EAP > JUAC (see “Setting JUAC as an Inner Authentication Protocol for TTLS” on page 53) Realm name and role (optional). For more information about realms and roles, see “Specifying a Preferred Realm and Role” on page 74. JUAC is an inner EAP protocol developed by Juniper Networks for authenticating access to an Infranet Controller. JUAC is compatible with TTLS and PEAP. This section describes how to set up JUAC as an inner authentication protocol for TTLS and for PEAP. Setting JUAC as an Inner Authentication Protocol for TTLS If you intend to connect to and be authenticated by an Infranet Controller, you must use JUAC as an inner authentication protocol. To add JUAC as in inner authentication protocol for TTLS: 1. Open the Profile Properties dialog. 2. Select the TTLS tab. 3. From the pull-down list of Inner EAP protocols, in order of preference, select EAP. 4. Click the Add button to display the Add EAP Protocol dialog and select JUAC and any other inner EAP protocols to add by highlighting one or more of them. 5. Click OK. Infranet Controller Profile Configuration—UAC Networks Only 53 Odyssey Access Client User Guide To set a preferred order of inner EAP protocols: 1. Select one of the inner EAP from the list. 2. Use the arrow button to move the protocol up or down in the list. 3. Repeat this procedure until the list reflects the preferred order. You can add, remove, or reorder any EAP-PEAP inner protocols from the TTLS Settings tab of the Profile Properties dialog. To remove JUAC as in inner authentication protocol for TTLS: 1. Select JUAC in the list of inner EAP protocols. 2. Click Remove. You can add, remove, or reorder any EAP-TTLS inner protocols from the TTLS Settings tab of the Profile Properties dialog. Setting JUAC as an Inner Authentication Protocol for PEAP If you intend to connect to and be authenticated by an Infranet Controller, you must use JUAC as an inner authentication protocol. PEAP supports the inner authentication protocols shown in Table 4 on page 49. If you have PEAP as an outer authentication protocol, JUAC is configured automatically as an inner EAP protocol. To set a preferred order of inner EAP protocols: If you have more than one inner EAP protocol selected, you can order the list of preferred protocols: 1. Select one of the inner EAP from the list. 2. Use the arrow button to move the protocol up or down in the list. 3. Repeat this procedure until the list reflects the preferred order. You can add, remove, or reorder any EAP-PEAP inner protocols from the PEAP Settings tab of the Profile Properties dialog. To remove JUAC as in inner authentication protocol for PEAP: 1. Select JUAC in the list of inner EAP protocols. 2. Click Remove. 54 Infranet Controller Profile Configuration—UAC Networks Only Chapter 5: Managing Profiles Setting the Preferred Realm and Role This section describes the JUAC tab in the Profile Properties dialog and how to specify a preferred realm and roll for connecting to an Infranet Controller. Part of connecting to an Infranet Controller might include specifying a realm and a role. The realm identifies the network that you have been authenticated to access. The role identifies the network resources that you are authorized to access. If you leave these fields blank, the Infranet Controller might prompt you for a realm and a role when you try to connect. To set a preferred realm and role: 1. Open the JUAC tab in the Profile Properties dialog. 2. In the Realm field, specify the name of your preferred realm. If you do not know the realms defined for you, see your network administrator. 3. In the Role field, specify the name of your preferred role. If you do not know the roles defined for you, see your network administrator. Having a preferred realm and role defined means that you do not have to re-specify those values each time you connect to the same Infranet Controller. Authenticating with Token Cards If you use one or more token card authentication methods and then click Connect to establish a network connection, an exchange of messages begins between OAC and the token card authentication server. The message exchange, known as the challenge-response dialog, takes place as the server prompts (challenges) the user to enter private information (response). OAC presents one or more authentication dialogs based on your state in the token card authentication server challenge-response process. If a service dialog appears, enter a valid PIN followed by the current sequence of digits displayed on your hardware token card. Under some circumstances, you might be required to provide a new PIN. To enter a new PIN: 1. Enter a new 4–8 digit PIN and click OK. Select Unmask to see your PIN in clear text before you click OK. 2. Re-enter a new 4–8 digit PIN and click OK. Removing a Profile To remove an authentication profile, select the profile name in the list and select Remove. Removing a Profile 55 Odyssey Access Client User Guide Sample Profile Configuration This section shows a sample authentication profile for a corporate network. (You do not a profile for a hotspot or a home Wi-Fi network.) Table 5: Sample Profile for a Corporate Network Setting Value Profile name ACME_NYC Login name this user Permit using password Yes Use Windows password Yes Authentication EAP-TTLS Validate server certificate Yes Token card credentials Use my password TTLS inner authentication EAP-JUAC &EAP-MS-CHAP-V@ (See Table 4 on page 49.) 56 Sample Profile Configuration Chapter 6 Managing Network Access This chapter describes how to define and configure the networks to which you intend to connect. Before you can connect to any network with OAC, you must configure it in OAC and name it. The networks that you define can include one or more corporate wired and wireless networks, your home wireless network, and one or more “hotspot” networks at airports, train stations, restaurants, or coffee shops. Configuration settings for each of these networks varies, so you must name and configure each one separately. Configuring Network Settings To configure the settings for connecting to a network: 1. Open the Configuration folder from the sidebar. 2. Select Networks. The Networks dialog (Figure 11) opens. Figure 11: Networks Dialog Each configured network appears in the dialog. Configuring Network Settings 57 Odyssey Access Client User Guide Adding or Modifying Network Properties Whether you add a network by clicking Add or modify network properties by clicking Properties, the dialogs display the same settings. Figure 12 is a sample configuration dialog. Figure 12: Sample Add Network Dialog The dialog has three configuration categories: Network—Use these settings to provide a name for the network that you are configuring, to configure the method used to connect to the network, and to specify the encryption method to use. NOTE: (FE Only) If you use the OAC FE edition, the Add Network and Network Properties dialog shows a FIPS mode required check box (Figure 12) next to the Encryption method field. If you are not using a FIPS license, the check box does not appear. If you require FIPS encryption each time that you connect to this network, select FIPS mode required. If not, leave the box cleared (no check mark). Contact your administrator before altering this setting. Authentication—Use these settings to specify whether you will use an authentication profile or WEP keys to authenticate. Pre-configured keys (WEP)—Use these settings to specify the WEP keys. Each network that you configure in OAC requires some or all of the network settings from the categories listed above. The settings required depend on whether the network that you are configuring uses authentication and encryption. 58 Adding or Modifying Network Properties Chapter 6: Managing Network Access Network Settings The following sections describe each of the Network configuration categories. Once you have defined a network, it is unlikely that you will need to change it unless your network administrator indicates that a change is necessary. Specifying a Network Name (Network SSID) The network name or SSID (service set identifier) is the actual name of the wireless network to which you want to connect. The format of network names that are currently configured appears in the Network Properties dialog. A network name can be up to 32 alphanumeric characters and is case-sensitive. You must enter the name correctly to connect. If the network is locally accessible, you might be able to determine the name using the Scan button in the Network Properties dialog. However, not all access points broadcast a network SSID. Contact your administrator to be sure of the correct network name and format. Connecting to Any Available Network OAC provides a special network configuration called [any] that you can use to connect to any available network, regardless of the network name. The [any] network is useful when you are moving between conferences, hotels, or other locations that provide network access. When you select the [any] network from the Connection dialog, you can connect to such networks without having to configure them individually. To do this, select Connect to any available network. NOTE: Although you can use WEP keys and profiles with [any], the more common (default) practice is to use [any] without 802.11 or 802.1X authentication. Scanning for Available Networks Instead of entering the name of a configured network in the Network name field, you can click Scan to select from a list of all currently visible networks; that is, all the networks that OAC can detect. If you are in the vicinity of the network that you are configuring, clicking Scan is easier than typing and guarantees that the network name is set correctly. Simply select the network from the scan list. Adding a Network Description Network names are arbitrary text chosen by an administrator, so two unrelated networks could have the same name. Use the Description field to add text to distinguish between networks that have similar names. You can use the network description field to distinguish connections to the same network using different profiles. For example, you might want to use different credentials at different times. The Description field is optional. Adding or Modifying Network Properties 59 Odyssey Access Client User Guide Specifying a Network Type If you do not click Scan to select a network, specify the type of network by choosing one of the options from the Network type drop-down list. Select Access point (infrastructure mode) if this network uses wireless access points to provide connectivity to the corporate network or the Internet. This is the most common setting. Select Peer-to-peer (ad-hoc mode) to set up a private network and connect directly with other PCs or laptops. Specifying a Channel If you select a Peer-to-peer (ad-hoc mode) network type, you must specify a channel on which all peers share data. There are 14 channels for 802.11b and 802.11g and 12 channels for 802.11a wireless networks. Choose the default channel or select a channel from the Channel list. Whoever initiates the peer-to-peer network connection chooses the channel on which the peer-to-peer session occurs. Specifying an Association Mode Before authentication can occur, your client must associate to an access point to request network access. The association mode that you choose depends on the access point hardware configuration. Your network administrator can help you configure the association mode that is required for your network. In a wireless hotspot, such as a coffee shop, you can typically obtain the access configuration information from an employee. In an airport or train station, select [any] as the network. The network prompts for credit card payment information to use to connect to the network. Finally, a Web page displays the configuration information for that network, such as the association mode and encryption method, if any. Choose one of the following association modes: 60 Open—Use this setting to connect to a network through an access point or switch that implements 802.1X authentication. Choose this mode if you are not required to select shared mode or Wi-Fi Protected Access (WPA). Shared—Use this setting to connect to a network through an access point that requires at least one preconfigured wired-equivalent privacy (WEP) key for association. WPA—Use this setting to connect to a network through an access point that implements WPA. WPA2—Use this setting to connect to a network through an access point that implements WPA2, the second generation of WPA that satisfies 802.11i. xSec (FE Only)— Use this for a Layer 2 secure encryption protocol. This requires Layer 2 xSec-compliant hardware in your network in addition to the access points. If you choose this option, you must select AES encryption. You must associate xSec networks with a profile that uses EAP-TTLS, EAP-PEAP, or EAP-TLS. See “Setting Up Authentication” on page 44 for more information. Adding or Modifying Network Properties Chapter 6: Managing Network Access Encryption Methods for an Association Mode Your choice of encryption method depends on the access point requirements. The choices available to you depend on the association mode you choose. See “Wired-Equivalent Privacy” on page 10 and “Wi-Fi Protected Access and its Encryption Methods” on page 11 for more information. You have the following options: None—Use this setting to select 802.1X authentication without WEP keys. This option is available to you only when you configure access point association in open mode. This is a typical setting to use for wireless hotspots. WEP—Use this setting to use WEP keys for data encryption. This is an option for open mode association and is required when you associate in shared mode. When you use WEP encryption, you must fill in at least one preconfigured WEP key at the bottom of the Add Network dialog, unless you authenticate using a profile and select Keys will be generated automatically for data privacy. You must choose WEP encryption when the access points in your network require shared mode association with WEP keys or when your access points require WEP encryption. TKIP—Use this setting to use the temporal key integrity protocol. Choose this option when the access points in your network require WPA or WPA2 association and are configured for TKIP data encryption. AES—Use this setting to use the advanced encryption standard protocol. Choose this option when the access points in your network require WPA or WPA2 association and are configured for AES data encryption. If your client hardware and access point support AES, use AES encryption when you associate in WPA2 or WPA mode. You must use this method for encryption when associating to hardware that supports xSec. FIPS Association Mode (FE Only) All FIPS network configurations require that you use TLS for EAP authentication. xSec and WPA2 are the only association modes supported for FIPS secure encryption. If you configure FIPS mode with WPA2 and AES, you can authenticate using either a passphrase or a profile. FIPS Secure Encryption (FE Only) If you require FIPS encryption each time that you connect to a specific wireless network, select FIPS mode required as part of setting up a configuration for that network. If not, leave the box cleared. Whether you configure xSec or WP2 as the association mode for FIPS security, you must use AES as the encryption method. NOTE: This is an advanced feature. Please see your network administrator if you have any questions about its use. If you are a network administrator and you require FIPS–compliant connections to this network, it is best to create and lock this network connection for your users using the tools in the Odyssey Access Client Administrator. Adding or Modifying Network Properties 61 Odyssey Access Client User Guide Authentication Settings Use the Authentication fields to specify whether or not to use 802.1X authentication for the network and how to generate encryption keys. Authenticating with a Profile To authenticate using your personal credentials: 1. Select Authenticate using profile. 2. Select the name of profile to use for authentication from the drop-down list next to the Authenticate using profile check box. You must have configured a profile previously that is appropriate for authenticating to this network. Use this configuration setting if you are using an EAP protocol that requires user authentication, such as EAP-TTLS or EAP-PEAP. Contact your network administrator about which EAP protocol has been implemented on your network. When you select Authenticate using profile and select a profile from the list of profiles next to the Authenticate using profile check box, OAC performs an 802.1X authentication using the options configured in the selected profile. NOTE: If the profile you select for this network specifies MD-5 Challenge or EAP-GenericTokenCard as an outer authentication method, you must use a preconfigured WEP key for data encryption to authenticate using 802.1X. See “Preconfigured Keys (WEP)” on page 63. Automatic Key Generation If the authentication method specified in the selected profile results in the creation of dynamic WEP keys for use between your PC and the access point, select Keys will be generated automatically for data privacy. Certain authentication methods, such as EAP-TTLS, EAP-PEAP, EAP-FAST, EAP-POTP, and EAP-TLS, generate keys; others do not. If you associate this network with a profile that uses EAP-TTLS, EAP-PEAP, EAP-FAST, EAP-POTP, or EAP-TLS as an authentication protocol, select this box. You can use any of these authentication methods if your access point implements 802.1X authentication. This option is more secure than using static (preconfigured) keys and is available with all encryption methods (other than None), as long as you are not associating in shared mode. Leave this option cleared if you are required to use preconfigured WEP keys or, in the case of WPA association, a preshared key. Preconfigured Key Settings The wireless network might require that you preconfigure WEP keys or that you preshare a passphrase in the case of WPA or WPA2 association. You can enter keys in the lower portion of your network properties description, based on the selected association method. 62 Adding or Modifying Network Properties Chapter 6: Managing Network Access Preshared Keys (WPA or WPA2) If you associate using WPA or WPA2 and if you do not generate encryption keys automatically when associating an authentication profile to the network connection, you must supply a preshared 8–63 character ASCII passphrase in the Passphrase field. The passphrase is used as a seed to generate the required keys. When you use a passphrase, you do not authenticate with a RADIUS server. Passphrases and static WEP keys apply if you are not connecting to a network that uses 802.1X authentication, such as home networks, hotspots, and small offices. NOTE: If you supply a 64-character passphrase that could form a hexadecimal number, Odyssey interprets it as a 32-byte hexadecimal value used as the master key. Preconfigured Keys (WEP) WEP keys serve the following purposes: They allow you to associate with an access point before a connection can be established (shared mode). They encrypt data between your PC and the access point (or other PCs in a peer-to-peer network). See “Wired-Equivalent Privacy” on page 10. You must configure at least one WEP key if you configure the following types of network configurations: You associate in shared mode. See “Specifying an Association Mode” on page 60. You select WEP encryption for the open association mode and you do not generate encryption keys automatically. See “Encryption Methods for an Association Mode” on page 61. If the network uses 802.1X authentication and if dynamic WEP keys are generated (if you select Authenticate using profile and Keys will be generated automatically for data privacy), you do not need to enter preconfigured WEP keys for data privacy. However, it is possible to use preconfigured WEP keys for authentication in addition to 802.1X. For example, EAP-MD5 does not generate WEP keys for data encryption, so you must supply an encryption WEP key when your profile is set to authenticate with this method. Enter the WEP keys in fields Key 0 through Key 3. The values entered here must match those of the access points or peer computer to which you connect. It is most common for Key 0 to be used, although your network might require other keys as well. You can enter keys either as ordinary text characters (ASCII) or hexadecimal characters. Adding or Modifying Network Properties 63 Odyssey Access Client User Guide WEP keys are either 40 or 104 bits long. This corresponds to either 5 or 13 characters when you enter them as ASCII characters or 10 or 26 characters when you enter them as hexadecimal digits. Table 6: WEP Key Specifications Bits in the Key ASCII Characters Hexadecimal Digits 40 5 10 104 13 26 To enter any preconfigured WEP keys: 1. In Format for entering keys, select ASCII characters or hexadecimal digits. 2. Type each WEP key that you want to preconfigure into the text fields Key 0 through Key 3, based on the specifications in Table 6. Removing a Network To remove a network: 1. Open the Network dialog. 2. Select a network from the list of configured networks. 3. Click Remove. 64 Removing a Network Chapter 6: Managing Network Access Sample Network Configuration Setups This section shows three examples of setting up wireless network configurations. The first is for a corporate wireless network. The second is for a wireless hotspot. The third is for a home wireless network. Sample Configuration for a Corporate Wi-Fi Network Table 7: Sample Configuration for a Corporate Wi-Fi Network Setting Value Network name (SSID) ACME_NYC_ Wi-Fi Connect to any available network No (setting is optional as long as your corporate network has been configured in OAC) Description Corporate office wireless network Network Type Access point (infrastructure mode) Association mode WPA2 Encryption mode AES Authenticate using profile ACME_NYC Keys will be generated automatically for data privacy Yes Sample Configuration for a Wireless Hotspot Network Table 8: Sample Configuration for a Hotspot Network Setting Value Network name (SSID) Hartsfield Airport Connect to any available network Yes Description Hartsfield Airport Wi-Fi Network Network Type Access point (infrastructure mode) Association mode open Encryption mode none Authenticate using profile Hartsfield Sample Network Configuration Setups 65 Odyssey Access Client User Guide Sample Configuration for a Home Wireless Network Table 9: Sample Configuration for a Home Wireless Network 66 Setting Value Network name (SSID) <MyHome Wi-Fi> Connect to any available network Yes Description Home wireless network Network Type Access point (infrastructure mode) Association mode open Encryption mode WEP Authenticate using profile home Sample Network Configuration Setups Chapter 7 Managing Auto-Scan Lists An auto-scan list is an ordered list of networks that you have configured. You can create one or more auto-scan lists and order them based on your preferences for using them. If you connect to a network using an auto-scan list, rather than to an individual network, OAC scans sequentially through the listed networks for the first available network. Using an auto-scan list means that you do not have to specify a new network connection each time that you move from one location to another. This is a convenient feature, especially when you move your client machine regularly to different locations and different networks. As an example, an auto-scan list could include your home network, your office network, and a favorite hotspot. A second auto-scan list could contain multiple corporate and customer networks that you visit regularly, along with the airport hotspots that you frequent when traveling from one customer to another. An auto-scan list contains as many networks as you like. When OAC uses an auto-scan list, it attempts to connect to the first SSID in the list, then the next one, and so on. OAC remembers this connection so that, if you disconnect and reconnect, OAC selects the last auto-scan connection automatically. An exception to this rule is that OAC goes through the auto-scan list from the beginning each time if the SSIDs are being broadcast. Having your office wireless network in the same auto-scan as a hotspot network across the street might increase the likelihood of accidentally connecting to the hotspot network. Refer to the Tools > Options > Preemptive Networks option to help control the list of wireless networks to which you connect. NOTE: Each of the networks in an auto-scan list must be configured in the Networks dialog. See “Adding or Modifying Network Properties” on page 58. 67 Odyssey Access Client User Guide Using the Auto-Scan List Dialog To set up or modify an auto-scan list, open the Configuration folder and select Auto-Scan Lists. The Auto-Scan Lists dialog (Figure 13 on page 68) opens. Figure 13: Auto-Scan Lists Dialog You can perform the following tasks in the Auto-Scan Lists dialog: Add an auto-scan list Remove an auto-scan list Modify an auto-scan list View the contents of an auto-scan list Adding an Auto-Scan List To add an auto-scan list: 1. Open the Configuration folder and select Auto-Scan Lists. 2. Click Add in the Auto-Scan Lists dialog. The Add Auto-Scan List dialog appears. 3. Enter a name for the auto-scan list in the Auto-Scan list name field. You must fill in this field in before you click OK. You cannot use the same name as another current auto-scan list. 4. Select networks to add to the auto-scan list from the list of configured networks listed under Available Networks on the left. Use the right arrows to move networks from the left to the Networks in list, in priority order on the right. 68 Using the Auto-Scan List Dialog Chapter 7: Managing Auto-Scan Lists 5. Order the selected networks based on the frequency with which you expect to connect to them. Place the highest priority networks at the top of the list. A network on this list is considered to be preferred over the networks listed below it. You can select one or more networks and use the up and down arrows to reorder the list. 6. Optionally, you can select Switch to preferred network when available, even if currently connected. If you use this option, OAC scans continuously through the networks in the list and forces a connection to the uppermost available network on this list any time that you connect to this auto-scan list from the Connection dialog. If the preferred network is available, OAC connects to that network even if you are connected to a different network on this list at the time. An access point must broadcast an SSID in order to connect to it using this option. 7. Click OK when you complete the set up for the auto-scan list See “Preemptive Networks (EE and FE Only)” on page 18 for information about creating an auto-scan list that is prepended to any network connection you configure on the Connection dialog of the OAC. This link provides information about how this option is treated when you or your administrator configure a preemptive auto-scan list. Removing an Auto-Scan List To remove an auto-scan list: 1. Select the name of the auto-scan list from the Auto-Scan Lists dialog. 2. Click Remove. Modifying an Auto-Scan List To modify an auto-scan list: 1. Select the name of the auto-scan list from the Auto-Scan Lists dialog. 2. Click Properties or double-click the name of the auto-scan list. The Auto-Scan List Properties dialog appears. 3. Make the necessary modifications to the current settings. 4. Click OK. Using the Auto-Scan List Dialog 69 Odyssey Access Client User Guide Viewing the Names in an Auto-Scan List To view the names in an auto-scan list: Double-click the name of the auto-scan list in the Auto-Scan List dialog. The Auto-Scan List Properties dialog then displays the networks in the auto-scan list in order of preference. NOTE: Test the network connection for each network in your auto-scan list separately. If a network connection on the auto-scan list is configured incorrectly so that authentication fails each time incorrect attempts are made to that connection, OAC does not skip that network to try the next network on the list. To test a single selected network connection, go to the Connection dialog of the OAC and select Connect to the network after selecting the network you want to test. 70 Using the Auto-Scan List Dialog Chapter 8 Managing Infranet Controller Connections This chapter describes how to add an Infranet Controller to your OAC configuration and how to connect and sign on to it. It also addresses connecting to and using multiple Infranet Controllers. If your network does not include an Infranet Controller, you can skip this chapter. After installing and running OAC, you can establish an authenticated connection to one or more Infranet Controllers. Therefore, you need an authentication profile configured for the Infranet Controller to which you are going to connect. The profile contains the configuration settings for your connection credentials and the EAP authentication methods that apply. Best practices recommend that you have an authentication profile for each Infranet Controller that you use to access protected network resources. See “Adding or Modifying a Profile” on page 38. The Infranet Controller configuration settings, including those for profiles and networks, might have been created by your administrator and downloaded as part of initial settings. For more information about Infranet Controllers and initial settings, refer to the Unified Access Control Administration Guide. NOTE: The initial OAC settings that an Infranet Controller installs on an endpoint might modify the existing OAC settings on that endpoint if the Infranet Controller requires OAC version or configuration updates in order to allow a connection. You may also be prompted to trust one or more servers. Ask your administrator if you are unsure of which servers to trust. Adding an Infranet Controller to the OAC Configuration To add an Infranet Controller: 1. Select Infranet Controllers in the Configuration folder located in the sidebar. 2. In the Infranet Controllers dialog, click Add to set up the configuration for that Infranet Controller. 3. In the Infranet Controller name field, assign a name for the Infranet Controller you are adding. Depending on how OAC has been installed on your machine, this information might be configured already. Adding an Infranet Controller to the OAC Configuration 71 Odyssey Access Client User Guide 4. In the Server URL field, enter the DNS name or the IP address of the Infranet Controller to which you intend to connect. 5. In the Authentication Profile field, specify the name of a profile for authenticating to a specific Infranet Controller. The profile provides all the information needed for authenticated access to that Infranet Controller. See “Adding or Modifying a Profile” on page 38 for details about setting up a profile. Connecting and Signing on to an Infranet Controller This section describes how to connect and sign on to an Infranet Controller. FIPS Mode Constraint The only outer authentication method supported for FIPS mode is EAP-TLS; no inner authentication method is supported, including JUAC. This means that, when FIPS mode is on, users cannot connect to an Intranet Controller. Web Portal for Installing and Configuring OAC If you attempt to access the Web or protected network resources on your corporate network without having OAC installed on your system, the network firewall might redirect you automatically to a special Web portal that installs and configures OAC on your machine so that you can sign on to an Infranet Controller and access protected resources. If an older version of OAC is already installed on your machine, the latest version will be installed. Depending on the configuration policy for your network, this installation process might include a dialog box that prompts you to sign in to the Infranet Controller. There might also be a prompt to trust the server certificate. See the next section, “Loading a Certificate to the Trusted Server Database” on page 72 for more information. Loading a Certificate to the Trusted Server Database The first time that you navigate to the Web portal, you might be prompted to add a certificate to your trusted server database. This happens only if you do not have the certificate on your endpoint and if the certificate is available from the local trust server. If you choose not to accept the certificate and do not have temporary trust enabled, authentication to that trust server will fail. See “Enabling Temporary Trust” on page 19 and “Validating a Server Certificate—Mutual Authentication” on page 46 for more information about managing trust. To connect and sign on to an Infranet Controller: 1. Open the Infranet Controllers folder (Figure 14) in the sidebar. 2. Double-click the Infranet Controller to which you intend to connect. There might be only one, your default Infranet Controller. 72 Connecting and Signing on to an Infranet Controller Chapter 8: Managing Infranet Controller Connections 3. An Infranet Controller dialog opens (Figure 14) and shows the IP address of the Infranet Controller in the Server URL field. Below that is a Connect to the Infranet Controller check box. Select the check box to enable a connection to the Infranet Controller. Figure 14: Infranet Controller Dialog Connected Compliance status Endpoint & Authentication Status Icons 4. Sign on to the Infranet Controller when the prompt appears (Figure 15). Figure 15: Infranet Controller Sign On Prompt. 5. Select a preferred realm if more than one appears. Contact your administrator if you need help with this. Refer to the Odyssey Access Client User Guide to read about realms. After selecting a realm, you might need to enter a password if your configuration does not use your Windows password. 6. Select a role if more than one is configured for you on the Infranet Controller. Contact your administrator if you need help with this. Refer to the Odyssey Access Client User Guide to read about roles. Once you are connected, the dialog displays your endpoint trust status. If the endpoint status does not meet security requirements, you might be redirected to a remediation VLAN before getting access to the Infranet Controller. For more information about remediation, see “Quarantine and Remediation” on page 5. Connecting and Signing on to an Infranet Controller 73 Odyssey Access Client User Guide Use the Reconnect button at the bottom of the dialog to reinitialize the connection. See “Menu Options” on page 12 for a discussion of this option. Specifying a Preferred Realm and Role This section describes how to specify a preferred realm and role. An authentication realm is a group of authenticated resources that you select when signing on to the Infranet Controller server. For example, your Infranet Controller administrator can create a realm called “LDAP” that uses an LDAP server to authenticate your user name and password. You can have more than one realm, depending on the authentication resources that you need to access. A role defines settings for your user account, such as which resources you can access on the network. For example, your Infranet Controller administrator can create a role called “Employees” that enables full access to all resources and another role called “Contractors” that has limited access. As part of configuring a valid authentication profile, you can set a preferred realm and role. Refer to “Infranet Controller Profile Configuration—UAC Networks Only” on page 53. Contact your network administrator for more information about what realms and roles to choose. To preconfigure a realm and a role in OAC: 1. Open the Configuration folder in the OAC Manager sidebar. 2. Select Profiles. 3. In the Profiles dialog, select the profile that you intend to use to connect to the Infranet Controller. 4. Click Properties (or double-click the name of the profile) to open the Profile Properties dialog. 5. Select the JUAC tab. 6. Specify the name of a preferred realm and a role that you will use to access the Infranet Controller. If you already have a default realm and role saved, those names appear in the realm and role fields by default. If you have multiple realms and roles defined, provide the realm and role you intend to use at the prompt that displays. Connecting to Multiple Infranet Controllers You can connect to multiple Infranet Controllers. However, you need to configure the connections to each Infranet Controller independently. This typically requires that you have an authentication profile for each Infranet Controller. You might need to do this if the protected resources you need to access are located in different places. For example, some of those resources might be available from the Infranet Controller in your building while other resources are at other locations and managed by a different Infranet Controller. 74 Connecting and Signing on to an Infranet Controller Chapter 8: Managing Infranet Controller Connections Checking Infranet Controller Status One way to check Infranet Controller status is to view the Infranet Controllers in the Infranet Controllers folder. If an Infranet Controller is currently disconnected from the network, the Infranet Controller icon turns gray and the Connect to the Infranet Controller box is not selected (see Figure 16). The Reconnect button is also disabled in this case. Figure 16: Disconnect Infranet Controller Status Dialog To check status of an Infranet Controller, open the Infranet Controller dialog. The dialog displays the following information: The Server name or address. A connection check box. Connection information. A Reconnect button, which is used to reinitialize an existing connection. Endpoint status (see “Compliance Failure and Remediation” and Figure 17 on page 76). Compliance Failure and Remediation If your computer does not comply with the network security policy, the connection might be rejected or you might need to update the endpoint software, such as the anti-virus settings or operating system patch level. This is called remediation. In some cases, remediation is automatic. In other cases, the connection dialog displays a message with instructions for what to do (Figure 18). Connecting and Signing on to an Infranet Controller 75 Odyssey Access Client User Guide Figure 17: Compliance Failure Dialog Compliance warning message Compliance warning icons When you click the How do I resolve this problem? link, another dialog provides you with specific instructions for updating your computer so that it meets compliance requirements. The remediation instructions that you see might vary from the sample shown in Figure 18. Your network administrator determines the detail level of information or instruction that you see. Figure 18: Sample Remediation Instruction Dialog 76 Connecting and Signing on to an Infranet Controller Chapter 8: Managing Infranet Controller Connections Disconnecting from an Infranet Controller To disconnect from an Infranet Controller: 1. Open the Infranet Controllers folder in the sidebar. 2. Select the Infranet Controller from which you intend to disconnect. 3. After a dialog opens showing the Infranet Controller name, clear the Connect to the Infranet Controller check box. Disconnecting from an Infranet Controller 77 Odyssey Access Client User Guide 78 Disconnecting from an Infranet Controller Chapter 9 Managing Trusted Servers This chapter describes trusted servers and the configuration tasks that pertain to managing trust, trusted servers, certificates, and certificate authorities. Use this feature to add, remove, and configure trusted network servers and to configure certificate and identity information for the servers that might authenticate you when you connect. Configuring this feature is required for protocols that implement mutual authentication and is a recommended security measure. See “Validating a Server Certificate—Mutual Authentication” on page 46. NOTE: Check with your network administrator before adding any trusted server or changing any current trust configuration settings. Specifying incorrect settings can prevent you from accessing your network. You can configure trust for authentication servers if you use EAP-TTLS, EAP-TLS, or EAP-PEAP authentication. When EAP authentication occurs using any of these protocols, the authentication server sends a server certificate to OAC. The certificate represents the server’s trust credentials. OAC must trust the server certificate before it can continue communicating with that server. If OAC does not trust the server, the authentication process terminates. Overview of Trust Configuration Trust configuration is fundamental to secure network communication between you and a network server. OAC gives you the tools to authenticate the server to which you are connecting and to ensure that you are connecting to the intended server. Authenticating server trust protects you from intrusion or hostile attacks from anyone who might be pretending to represent that server. This chapter describes how to perform the following trust-based tasks in OAC: Add a trusted server. Edit a trusted server. Remove a trusted server. Display the current trust tree hierarchy. Overview of Trust Configuration 79 Odyssey Access Client Administration Guide Add or remove certificate nodes. Add authentication servers or intermediate certificate authority (CA) nodes. Remove CA nodes. View certificate information. Manage untrusted servers (temporary trust). For more background about authentication, trusted certificates, and the protocols that use them, see the following topics: “Extensible Authentication Protocol” on page 100 “Certificates” on page 101 Configuring Trust in OAC There are two methods for configuring trust, a simple method and an advanced method. In most cases, the simple method is sufficient. The advanced method provides considerably more granularity for configuration and is intended for large enterprises. 1. Open the Configuration folder in the sidebar. 2. Select Trusted Servers to display the Trusted Servers dialog (Figure 19). Each trusted server that is currently configured appears in the Trust Servers dialog. 80 Configuring Trust in OAC Chapter 9: Managing Trusted Servers Figure 19: Trusted Servers Dialog NOTE: To configure a trusted server with OAC, the root Certificate Authority (CA) or intermediate CA for the server certificate chain must be installed in the trusted root or intermediate certificate store. When you configure OAC to trust a server, specify the name of the server and the certificate chain to which it belongs. You can allow OAC to trust any server that bears a specified signed certificate. Using the Simple Method to Configure Trust The simple method of trust configuration provides two options for creating a list of trusted servers in OAC: You can specify a list of servers to be trusted using domain names. To configure trust using the simple method: 1. Specify the authentication server or intermediate CA server domain name or the ending of the domain name (for example, acme.com). 2. Specify a certificate from any Certificate Authority in your certificate authority chain. This can be the certificate of a root or an intermediate certificate authority. Adding a Trusted Server Entry The simple method of configuring trust offers you two choices for adding a trusted server: Trust all servers whose certificates are issued by a specified (root or intermediate) CA. Using the Simple Method to Configure Trust 81 Odyssey Access Client Administration Guide Use an intermediate CA or authentication server domain name to filter the certificate chain when you install the certificate that specifies the issuer of the trusted server certificates. To add a trusted server: 1. Click Add in the Trusted Servers dialog to display the Add Trusted Servers Entry dialog to begin the server configuration. 2. You can configure trust for any server that has been issued a specified signed certificate, or you can specify one or more servers to be trusted using domain names when those servers are issued a specified signed certificate: To trust all servers that have a specified signed certificate, select Trust any server with a valid certificate regardless of its name. To specify servers by name, enter the identity of the trusted server in the Server name must end with field. 3. Set the Server certificate must be issued by field to the name of the certificate authority that must have directly or indirectly issued the server certificate. This field is set automatically when you select a root or intermediate CA-issued certificate. The name that appears in this field need not be the name of the certificate authority that directly issued the server certificate. The server certificate might be issued by any authority in the chain. To set Server certificate must be issued by field: a. Click Browse to display a list of certificates. The Select Certificate dialog appears. b. Select the required certificate from the list and click OK. 4. Click OK to close the Add Trusted Servers Entry dialog. Server Identity Each server has a unique identity. That name is usually located in the Subject CN field of the server certificate. A server identity might end with the name of a larger administrative domain to which the server belongs. For example, the Acme company might have a domain name, such as acme.com. The company might have multiple authentication servers that are identified as auth1.acme.com, auth2.acme.com, and auth3.acme.com. In this case, Acme might configure its server certificates with a common name (acme.com) and enter the Server name must end with field with acme.com. As in this example, by specifying the ending for a server name, you can configure trust for all the servers in an organization with a single entry. Removing a Trusted Server Entry To remove an entry from the trusted servers list: 1. Select the entry from the Trusted Servers dialog. 82 Using the Simple Method to Configure Trust Chapter 9: Managing Trusted Servers 2. Click Remove. Editing a Trusted Server Entry You might need to change the trusted server configuration. For example, you might want to change the setting from trusting any server with a valid certificate to just one or a small set of domain names. To edit an entry in the trusted servers list: 1. Select the entry from the Trusted Servers dialog. 2. Click Edit. The Trusted Server Properties dialog appears. From this dialog, you can change the server domain and select a different certificate. See the directions in “Adding a Trusted Server Entry” on page 81. Using the Advanced Method to Configure Trust Use the advanced method for more detailed control over trust configuration. This method displays the entire trust tree and shows trusted servers added using the simple method and those added using the advanced method. Each path through the trust tree defines a set of rules for matching a certificate chain. See “Displaying a Trust Tree” on page 83. OAC trusts an authentication server only if its certificate chain matches at least one path through the trust tree. NOTE: If you do not understand certificates and certificate chains, do not attempt to configure trust using the advanced method. Consult your network administrator as to how to configure trusted servers. A path through the trust tree contains two or more nodes: Each top-level node is the certificate of a root or intermediate certificate authority. Each intermediate node (if present) is the name of an intermediate certificate authority in the chain. Each final or leaf node is the name of an authentication server that you trust. The names of certificate authorities and servers might be specified as subject names or as domain names. In addition, you can specify that the name in a certificate must match the configured name exactly or that it must end in the configured name. Displaying a Trust Tree To display the trust tree, click Advanced on the Trusted Servers dialog. The dialog that appears enables you to navigate the trust tree and add certificates. Using the Advanced Method to Configure Trust 83 Odyssey Access Client Administration Guide Adding Certificate Nodes To add a new certificate to the top level of the trust tree: 1. Click the Add Certificate button. The Select Certificate dialog appears. 2. Select a certificate from the list and click OK. You can select a certificate from the list of intermediate or trusted root certificates. To display detailed information about any certificate before you add it: 1. Select the certificate. 2. Click View on the Select Certificate dialog. Adding Authentication Servers or Intermediate CA Nodes All nodes below the top level identify either authentication servers or intermediate Certificate Authorities (CAs). If the node is a leaf node, it is assumed to identify an authentication server. Otherwise, it is assumed to identify an intermediate CA. To add an authentication server or intermediate certificate authority to the tree, follow these steps from the Trusted Servers dialog: 1. Select the node in the tree below which you want to add the new item. 2. Click Add Identity in the Trusted Servers dialog. The Adding Identity dialog appears. Fill it in according to the directions in “Adding Identity” on page 84. 3. Enter the information that defines the rules that OAC uses to match a certificate in the server’s certificate chain to this node. 4. Click OK. Adding Identity When you click Add Identity in the Trusted Servers dialog, the Add Identity dialog appears. To set the matching rules for a single node in the trust tree from the Add Identity dialog: 1. For Trust a server or intermediate CA with a valid certificate, select one of the following: 84 Choose Regardless of its name to match any certificate, provided that it is signed by the certificate authority in the node above. Choose If its name matches the following name exactly to require that the name in the certificate match the name that you specify. Choose If its name ends with the following name to require that the name in the certificate is subordinate to the name you specify. For example, a certificate with name sales.acme.com would match an entry of acme.com. Using the Advanced Method to Configure Trust Chapter 9: Managing Trusted Servers 2. For Server or intermediate CA name, enter the name (or final elements of a name) that you want to match. This field is not required if you select Regardless of its name. The form of the name depends on your choice of Server or intermediate CA name type. 3. For the certificate authority Server or intermediate CA name type, indicate how the name is interpreted and where in the certificate the name is found. Select one of the following: Select Domain Name in Subject Alternative Name or Common Name if the domain name (for example, acme.com) is found in the Subject Alternative Name field in the certificate or, if that is not present, the Common Name within the Subject field of the certificate. This is the most typical choice. Select Domain Name in Subject Alternative Name if the domain name is found in the Subject Alternative Name field in the certificate. This is similar to but more restrictive than the previous choice. Select Subject Name if the name is an X.500 name and is found in the Subject field in the certificate. If you enter a full or partial Subject name, it must be in X.500 form. It matches any certificate Subject name that is equal or subordinate to it. For example, if you enter OU=acme.com, C=US, any of the following subject names match: O=sales, OU=acme.com, C=US CN=george, O=sales, OU=acme.com, C=US NOTE: If you enter text withs commas, enclose them with single quotation marks. 4. For Maximum number of intermediate certificates, set the number of certificates that might appear in the chain between this node and the node directly above this node. Select a number between 0 and 5 or Unlimited: If you choose 0, the certificate that matches this node must have been signed using the certificate that matches the node above this node. If you choose 1, the certificate that matches this node might have been signed by the certificate that matches the node above or by a certificate that in turn has been signed by the certificate that matches the node above. If you choose a number between 2 and 5, that number of certificates might appear in the chain between the certificate that matches this node and the one that matches the node above. If you choose Unlimited, any number of certificates might appear in the chain between the certificate that matches this node and the one that matches the node above. 5. Click OK. Using the Advanced Method to Configure Trust 85 Odyssey Access Client Administration Guide Removing Nodes To remove a node: 1. Select the node in the tree to remove. 2. Click Remove. The selected node and any node beneath it is removed from the tree. The node you remove can be any of the following: Top level certificate node Intermediate CA node Server node Viewing Certificate Information To display detailed information about any certificate at the top level of the trust tree: 1. Select the certificate. 2. Click View Certificate from the Trusted Servers dialog. Managing Untrusted Servers Under the following conditions, you can trust a previously untrusted server during network authentication: You have enabled temporary trust. The authenticating profile mandates server validation. The trusted root certificate authority that issued the server certificate is the trusted root CA of a certificate installed on your client machine. (In the example below, the certificate is issued by AcmeRootCA.) In this case, a Service dialog appears while you are authenticating to the network. The Service dialog shows the entire certificate chain between the authentication server and a trusted root certificate authority. To see detailed information for a certificate in the chain: 1. Select the certificate. 2. Click View. To trust this server temporarily while you authenticate and connect to the network, click Yes; otherwise, click No. You might be prompted to enter your password, depending on the profile that you set up for this connection. If you click Yes, temporary trust will be sustained until you restart OAC or select Forget temporary trust from the Tools menu. 86 Using the Advanced Method to Configure Trust Chapter 9: Managing Trusted Servers To trust a server permanently: 1. Select Add this trusted server to the database. 2. Select Yes. The server is added to the list of trusted servers, using the name shown in the Server name must end with field (see “Adding a Trusted Server Entry” on page 81). You can edit the server name. For example, if the server name is auth2.acme.com, you can change it to acme.com if you want to trust all authentication servers belonging to the acme.com domain. Using the Advanced Method to Configure Trust 87 Odyssey Access Client Administration Guide 88 Using the Advanced Method to Configure Trust Chapter 10 Viewing Log Files and Diagnostics This chapter describes how to access and view log files and diagnostics information. A Juniper Networks technical support member might ask you to access this type of information if you are troubleshooting an OAC problem. NOTE: The log file and diagnostic options presented here are only available for networks that include Unified Access Control (UAC) and at least one Infranet Controller. Accessing Log Files—UE Only A log file for OAC shows the events and transactions that transpire during a network session. Among those events and transactions might be messages that indicate a problem or an error. A technical support member can use information from the log file to isolate, detect, and diagnose specific problems that occur and might ask you to display the log file and possibly send the contents by email. To display a log file: 1. Select Tools > Logs to open the Odyssey Log Viewer that displays the log file contents (see Figure 20 on page 90). 2. Select a log level using the pull-down arrow in the Odyssey Log Viewer. The support staff member will instruct you which option to choose (Errors, Info, or Debug). To locate a log file, click the Browse button. Accessing Log Files—UE Only 89 Odyssey Access Client User Guide Figure 20: Odyssey Log Viewer Dialog Depending on the size of the log file or the specific contents of interest, you might need to copy and paste all or selected parts of the file and paste the information into an email message to the support member. Accessing Diagnostics There are four categories of diagnostics information available from the Tools > Diagnostics menu. Select one of the following diagnostics from the pull-down options. In a UAC network, access to protected resources behind an Infranet Enforcer can be configured to use IPsec to encrypt some protected data. This means that such data is encrypted while it is transferred between a server and an endpoint. IPsec diagnostics IPsec configuration Network Agent diagnostics Host Enforcer configuration IPsec Diagnostics—UE only IPsec Diagnostics (Figure 21 on page 91) shows you the current IPsec routing policies that have been downloaded to OAC from the Infranet Controller configuration and used with the IPsec service on your computer. The IPsec diagnostics information is global. It shows encrypted packets sent or received for all IPsec policies (for all Infranet Controllers connected) that currently apply. 90 Accessing Diagnostics Chapter 10: Viewing Log Files and Diagnostics Figure 21: Sample IPsec Diagnostics Dialog IPsec Configuration—UE Only IPsec Configuration shows you configuration information for the IPsec policies that apply to the current session and information about the Infranet Enforcers to which the OAC can connect. These are the current IPsec routing policies that have been downloaded to OAC from the Infranet Controller configuration and used with the IPsec service on your computer. The policies shown are for all of the Infranet Controllers to which you are currently connected. The UAC network might be configured for IPsec encryption and Network Address Translation-Traversal (NAT-T) to access protected resources. In this case, when you use the ipconfig command to check a machine IP address, you might notice addresses for multiple physical machine adapters as well as an IP address for a Juniper Network Agent Virtual Adapter. The appearance of a virtual adapter address indicates that NAT-T is part of the network configuration. This information might also appear in the configuration and diagnostic data for IPsec. Network Agent Diagnostics— UE Only Use this option if you are asked by your network administrator or by a technical support member to display the diagnostics and send the data in an email message for troubleshooting. Host Enforcer Configuration—UE Only Host Enforcer Configuration shows you configuration information for all of the Host Enforcer policies currently being enforced. OAC downloads these policies from the Infranet Controller after you sign in to the Infranet Controller. The policies shown are for all Infranet Controllers to which you are currently connected. If your Infranet Controller Role changes, additional policies might be applied or removed. Accessing Diagnostics 91 Odyssey Access Client User Guide Save All Diagnostics Save All Diagnostics collates the output of all the diagnostic functions and lets you save the output to a file. You can then archive the file or send it to the technical support member for analysis. NOTE: It can be very beneficial to the technical support staff if you can provide the approximate time for the event you are reporting. 92 Accessing Diagnostics Appendix A Network Security Concepts This appendix contains background information for anyone needing a better understanding of the concepts and protocols that show how Odyssey Access Client operates in a network, particularly from the standpoint of network security and authentication. Network Security Most organizations can rely on physical security to protect their wired networks. An attacker would have to be physically inside company offices to plug in to the LAN and generate or observe network traffic. With wireless networks, a person can use a wireless adapter and a laptop computer to access a network, even from a location outside of the building. Odyssey Access Client provides you with the ability to make secure network connections using protocols that adhere to one or more of these sets of standards: IEEE (Institute of Electrical and Electronic Engineers) standards for wireless LANs. These include 802.11a, 802.11b, and 802.11g. See “802.11 Wireless Networking” on page 96. IEEE 802.11i enhancements to 802.11. These were introduced to overcome some of the security weaknesses of 802.11. The Wi-Fi Alliance second generation of Wi-Fi protected access. Wi-Fi protected access 2 (WPA2) (with advanced encryption standard (AES) encryption) adheres to the strong 802.11i enhancements. See “Wi-Fi Protected Access and its Encryption Methods” on page 98 for definitions. WPA (with AES or temporal key integrity protocol (TKIP) encryption), which complies with a subset of 802.11i. While WPA is not as strong as WPA2, it addresses some of the security weakness of 802.11. See “Wi-Fi Protected Access and its Encryption Methods” on page 98 for definitions. The IEEE 802.1X standard. 802.1X supplements the 802.11 standards with secure server-based wireless or wired network connections. See “802.1X Authentication” on page 99. Network Security 93 Odyssey Access Client User Guide IPsec is a set of protocols used to secure (encrypt) IP data packets being exchanged on a network. Best practices for network security usually call for encrypting the data being transferred between protected network resources and endpoint computers. A Juniper UAC network can include a firewall that provides an IPsec gateway deployed in front of protected resources to enforce the security policy. Odyssey Access Client supports IPsec encryption as part of conforming to that policy. Encryption and Association for Secure Authentication To establish a wireless connection with an access point, a wireless client must associate with the access point. For a wireless client device to access a secure network, the user of the client device must be authenticated by the network. The following list briefly defines terminology necessary to understand association, data encryption, and authentication: Association is the method by which a client establishes a relationship with an access point. Data encryption is used to secure data that is exchanged between a client device and an access point (or another computer device). Encryption keys are a sequence of characters that an encryption algorithm uses make plain text unreadable unless you share the encryption keys to decode the encrypted message. Encryption keys are key components of data encryption algorithms. Encryption keys might also be used for access point association. Once a wireless client has associated with an access point, the user of that client device can be authenticated to the network. Authentication is used to secure the relationship between a user of a wireless-equipped computer device and an authentication server. For example, wireless network authentication that is based on the 802.1X standard can use cryptographically strong (and dynamically generated) encryption keys. Authentication Overview There are several methods for providing secure authentication over a wireless network. Each method requires data encryption and, consequently, requires some method for specifying or generating encryption keys. Some of these methods are known to be more secure than others: 94 Network Security Preconfigured secrets, called WEP (wired-equivalent privacy) keys. These keys are intended to encrypt the data transferred between the client and the access point and can be used to keep unauthorized users off the wireless network and to encrypt the data of legitimate users. See “Wired-Equivalent Privacy” on page 97 for a description of WEP-based encryption that complies with 802.11 standards. Network Security Concepts Preshared passphrases used to generate keys for WPA or WPA2 association. Preshared passphrases enable you to configure a simple phrase that is used to generate cryptographically strong encryption keys to be used with AES or TKIP encryption. AES and TKIP periodically change the encryption keys in use. The generated keys keep unauthorized users off the wireless network and encrypt the data of legitimate users. See “Wi-Fi Protected Access and its Encryption Methods” on page 98 for a description of AES or TKIP encryption methods that enhance the 802.11 standards. Authentication using an 802.1X-based protocol. This method uses a variety of underlying authentication protocols to control network access. The stronger protocols provide cryptographically protected mutual authentication of the user and the network. In addition, you can configure Odyssey Access Client so that keys that are used to encrypt wireless data are generated dynamically. 802.1X-based authentication can use WEP, AES, or TKIP encryption, depending on network hardware/firmware. See “802.1X Authentication” on page 99 for information about authentication using 802.1X. See “Wi-Fi Protected Access and its Encryption Methods” on page 98 for a description of some of the strongest available association and encryption modes. The 802.1X methods are viable for wired 802.1X-based network connections. Odyssey Access Client Features for a Secure Network You can use the following Odyssey Access Client features to make wireless networks secure: You can require user authentication. A user must be authenticated by the network before being allowed access to the network and make it safe from intruders. See “Extensible Authentication Protocol” on page 100 for an overview of the Odyssey Access Client authentication protocols. For protocol configuration details, see “Profile Properties” on page 42. You can require data encryption between the wireless client and the access point. The wireless connection between a client and an access point must be encrypted so that eavesdroppers cannot access private data. For configuration details, see “Network Properties” on page 70. You can configure server trust for mutual authentication. The network must be authenticated (trusted) by the user before the user enables their credentials to be released to the network to make a network connection. This prevents a wireless device that might be posing as a legitimate network from impersonating the network and gaining access to the user’s PC. For configuration details, see “Trusted Servers Panel” on page 84 and “Validate the Server Certificate” on page 58. You can use mutual authentication between user and network must be cryptographically protected. This type of mutual authentication requires 801.1X-based protocols and prevents connections to phony networks. For configuration details, see “Authentication” on page 56. Network Security 95 Odyssey Access Client User Guide 802.11 Wireless Networking There are many types of wireless communication. Odyssey Access Client is designed to work over networks that adhere to the IEEE 802.11 Wireless LAN standards, as well as the Wi-Fi Alliance enhancements to these standards. Many corporations deploy secure wireless 802.11 networks and 802.11 networks are commonly found in hotels, airports, and other “hotspots” as a means of Internet access. Types of 802.11 Wireless Networks Your wireless adapter (network interface card) enables you to connect to wireless networks of two types: access point networks and peer-to-peer networks. Access Point Networks Access point networking is the most common type of wireless networking, providing wireless access to a corporate network and the Internet. In this type of wireless network, your PC establishes a wireless connection to a device called an access point. The access point links your wireless PC to the rest of the network. An access point provides general network connectivity for many PCs. A single network can include many access points. Each access point typically has a range of several hundred feet. An enterprise that uses wireless networking can strategically place access points so that, wherever you are located in the company, you are always within range of an access point that can link you to the corporate network. You may find access points at other locations outside of your company building. For example, you might find access points at hotels, airports, or Internet cafes, or you might have your own access point on your home network. Some of these locations require that you log in. Others might provide network access to anyone within range. When you connect to a network via an access point, you are using the 802.11 infrastructure mode. See “Specify the Network Type” on page 74 and “Specifying a Network Type” on page 60 for information about configuring infrastructure network connections. Peer-to-Peer Networks Even when no access point is available, two or more wireless clients can use peer-to-peer networking to create a private wireless network. You might want to do this to share files, run groupware applications, or play games. The peer-to-peer network requires no additional equipment beyond a set of two or more wireless-enabled PCs that are located within range of each other. As a result, this networking mode does not involve an authentication server and cannot use 802.1X-based authentication. 96 802.11 Wireless Networking Network Security Concepts The 802.11 standard refers to peer-to-peer network connectivity as ad-hoc mode. See “Specify the Network Type” on page 74, “Adding a Network Description” on page 59, and “Specify the Association Mode” on page 75“Specifying an Association Mode” on page 60 for information about configuring ad-hoc network connections. Wireless Network Names Each wireless network has a name. The 802.11 standard refers to a network name as service set identifier (SSID). You can select the wireless network to which you want to connect by specifying its name. Network names allow for the coexistence of more than one wireless network in the same vicinity. For example, the company next door to yours might use wireless networking. Network names allow you to distinguish access points located within your enterprise wireless network from access points that are not within your corporate LAN. Network names do not offer any security and cannot prevent you from connecting to a phony network. A network name is a text sequence up to 32 characters long, such as Bayonne Office, Acme-Marketronics, or BE45789. A network name is case-sensitive. You always have the option to scan for available networks. Scanning enables you to select the network from a list, preventing any data entry errors. Wired-Equivalent Privacy You can use wired-equivalent privacy (WEP) to encrypt data transferred between your client device and the access point. When you use WEP for data encryption, you can configure access point association in one of two modes: Shared—Use this mode when the access point requires that you preconfigure a WEP key for association. When 802.11-based preconfigured (static) WEP keys are in use, the client and the access point share the same secret keys and a client is not allowed to access the network unless it can prove it knows the preconfigured WEP keys assigned to the access point. This is not as secure as authenticating with 802.1X methods. See “802.1X Authentication” on page 99. You can configure shared association according to directions in “Network Properties” on page 70. Open—Use this mode for WEP-based data encryption when the access point does not require that you preconfigure a static WEP key for association. You can configure open association according to directions in “Network Properties” on page 70. NOTE: You can obtain stronger network security when you use dynamic encryption key generation and 802.1X-based authentication. For shared association, a preconfigured key that is used only for access point association is still required. See “802.1X Authentication” on page 99 and “Extensible Authentication Protocol” on page 100 for more information. 802.11 Wireless Networking 97 Odyssey Access Client User Guide See the following topics: “Specifying an Association Mode” on page 60 for directions for selecting an association mode in Odyssey Access Clientfor directions on selecting a connection mode (infrastructure or ad-hoc). “Encryption Methods for an Association Mode” on page 61 for directions for selecting WEP encryption when using the shared or open association mode. “Preconfigured Keys (WEP)” on page 78 to use static WEP keys with Odyssey Access Client. NOTE: You can use preconfigured keys for WEP data encryption in peer-to-peer network connections. In this case, all clients in the peer-to-peer network must share the same WEP keys. Wi-Fi Protected Access and its Encryption Methods As an enhancement to the 802.11 wireless standard, the Wi-Fi Protected Access (WPA) and the stronger Wi-Fi Protected Access 2 (WPA2) association modes encompass a number of security enhancements to Wired-Equivalent Privacy. These enhancements include the following: Improved data encryption with the TKIP algorithm. TKIP provides stronger encryption than WEP. Improved data encryption with the AES algorithm. AES provides stronger encryption than WEP or TKIP. WPA and WPA2 can generate TKIP or AES encryption keys from a preshared passphrase. Although your passphrase might be simple, these encryption methods can generate cryptographically strong encryption keys from a simple passphrase. Consequently, these encryption methods are stronger than WEP encryption based on preconfigured WEP keys. If you configure a passphrase for key generation for your access points, you cannot use 802.1X-based authentication and you must configure the same passphrase in Odyssey Access Client. When the access points in your network require that you associate via WPA or WPA2, you can configure Odyssey Access Client to associate in that mode. If the access points are configured for TKIP or AES encryption, you can configure Odyssey Access Client for either of these enhanced data encryption methods. You should configure your access points and clients for network connections that use the strongest association and encryption methods that are supported by your network access points. NOTE: With access points enabled for WPA2 or WPA, you can obtain the stronger network security when you use dynamic encryption key generation and 802.1X-based authentication. See “802.1X Authentication” on page 99 and “Extensible Authentication Protocol” on page 100 for more information. 98 802.11 Wireless Networking Network Security Concepts See the following topics: “Specifying an Association Mode” on page 60 to use WPA2 or WPA association mode with Odyssey Access Client “Specifying an Association Mode” on page 60 to use AES or TKIP encryption with WPA2 or WPA association “Encryption Methods for an Association Mode” on page 61 to configure a passphrase that is used in encryption key generation. “FIPS Secure Encryption (FE Only)” on page 61 for information about this data encryption security module. NOTE: You can use a preshared passphrase to generate encryption keys for TKIP or AES data encryption for securing peer-to-peer network connections. In this case, all clients in the peer-to-peer network must share the same passphrase. FIPS 140-2 Encryption Using AES and WPA2 or XSec Federal Information Processing Standards (FIPS) that are issued by the National Institutes of Standards and Technology (NIST) include standards for cryptographic security (FIPS 140-2). With the appropriate licensing and configuration, Odyssey Access Client implements level 1 of this secure encryption standard using WPA2 or xSec association mode and AES encryption. Odyssey Access Client provides approved cryptographic algorithms and approved modes of operation for the Cryptographic Module Specification and provides the strongest cryptographic key management mechanisms. For instructions about operating Odyssey Access Client in FIPS mode, see “FIPS Mode On (FE Only)” on page 13. 802.1X Authentication The IEEE 802.1X protocol provides authenticated access to a LAN. This standard applies to wireless and wired networks. In a wireless network, the 802.1X authentication occurs after the client has associated to an access point using an 802.11 association method. The WEP protocol has various shortcomings when preconfigured keys are in use. Preconfigured WEP keys not only contribute to administrative overhead and poses security weaknesses. Although the encryption methods calculated from keys generated from preshared passphrases are stronger than WEP encryption calculated from static WEP keys, the use and distribution of passphrases can pose administrative and security problems. The use of 802.1X protocols in wireless networks addresses these problems. 802.1X Authentication 99 Odyssey Access Client User Guide When preconfigured WEP keys are used, it is the wireless client PC that is authenticated to the network. With 802.1X, it is the user who is authenticated to the network with the user credentials, which might be a password, a certificate, SIM (Subscriber Identity Module) card, or a token card. Moreover, the keys used for data encryption are generated dynamically. The authentication is not performed by the access point, but rather by a central server. If this server uses the RADIUS protocol, it is called a RADIUS server. With 802.1X, a user can log in to the network from any PC and many access points can share a single RADIUS server to perform the authentication. This makes it much easier for the network administrator to control access to the network. Extensible Authentication Protocol 802.1X uses the Extensible Authentication Protocol (EAP) to perform authentication. EAP is not an authentication mechanism but rather a common framework for transporting actual authentication protocols. The advantage of EAP is that the basic EAP mechanism does not have to be altered as new authentication protocols are developed. OAC supports a number of EAP protocols, enabling a network administrator to choose the protocols that work best for a particular network. The newer EAP protocols have an additional advantage. They can dynamically generate the WEP, TKIP, or AES keys that are used to encrypt data between the client and the access point. Dynamically created keys have an advantage over preconfigured keys because their lifetimes are much shorter. Known cryptographic attacks against WEP can be thwarted by reducing the length of time that an encryption key remains in use. Furthermore, encryption keys generated using EAP protocols are generated on a per-user and per-session basis. The keys are not shared among users, as they must be with preconfigured keys or preshared passphrases. OAC offers a number of EAP authentication methods, including the following: 100 802.1X Authentication EAP-TTLS (tunneled transport layer security) EAP-PEAP (protected EAP) EAP-TLS (transport layer security) EAP-FAST (flexible authentication via secure tunneling) EAP-JUAC (an inner EAP protocol for connecting to an Infranet Controller) EAP-POTP (protected one-time password) EAP-SIM and EAP-AKA (authentication and key agreement) EAP-LEAP (lightweight EAP) Network Security Concepts Mutual Authentication EAP-TTLS, EAP-PEAP, EAP-TLS, and EAP-FAST provide mutual authentication of the user and the network and produce dynamic keys that can be used to encrypt communications between the client device and access point. With mutual authentication, the network authenticates the user credentials and the client software authenticates the network credentials. Requiring mutual authentication is an important security precaution to take when using wireless networking. By verifying the identity of the authentication server, mutual authentication provides assurance that you connect to your intended network and not to some access point that is pretending to be your network. You can authenticate the network with Odyssey Access Client when you configure it to validate the certificate of the authentication server using EAP-TTLS, EAP-PEAP, or EAP-TLS. If the certificate identifies a server that you trust and if the authentication server can prove that it is the owner of that certificate, then you can safely connect to this network. These are the strongest authentication methods available and, consequently, it is highly recommended that you use these methods for network authentication within your enterprise wireless network. Certificates Certificates are based on public/private key cryptography (or asymmetric cryptography). Public/private key cryptography is used to secure banking transactions, online Web commerce, email, and many other types of data exchange. Prior to the use of modern cryptographic techniques for networking, if two people wanted to communicate securely, they had to share the same secret key. This one secret key had to be used to both encrypt and decrypt data. Sharing keys, however, is limiting. The more people with whom you share your key, the more likely it becomes that your key can be revealed. With public/private key cryptography, there are two keys that have different values but work together: A public key A private key You keep your private key secret, but reveal your public key to the whole world. Anyone can encrypt data using your public key with the certain knowledge that only your private key can decrypt it. Furthermore, only you can encrypt data with your private key and anyone can use your public key to decrypt the data. A certificate is a piece of cryptographic data that guarantees that a particular public key is associated with the private key of a particular entity. This entity can be an individual or a computer. A certificate contains many pieces of information that are used in mutual authentication, including a public key and the name of the entity that owns the certificate. Your enterprise certificate authority might issue certificates to smart cards. Odyssey Access Client supports all types of user certificates, including smart card certificates. 802.1X Authentication 101 Odyssey Access Client User Guide Each certificate is issued by a certificate authority. By issuing a certificate, the certificate authority warrants that the name in the certificate corresponds to the certificate’s owner (much as a notary public guarantees a signature). The certificate authority also has a certificate, which in turn is issued by a higher certificate authority. At the top of this pyramid of certificates is the root certificate authority. The root certificate authority is typically a well-known entity that people trust, whose self-signed certificate is widely known. For example, Verisign and Thawte are public root certificate authorities. Many corporations have set up their own private root certificate authorities. There is a date on which each certificate expires. Additionally, a certificate granting authority can revoke a certificate. Expired or revoked certificates are not valid, but certificates can be re-issued or renewed. A set of certificates in sequence, including any intermediate certificate authorities up to the root certificate authority is called a certificate chain. Certificate chains are typically no more than several certificates in length. In many cases, a chain consists of two certificates: An end entity certificate A root certificate Certificates are well-suited for authentication from a security perspective. The disadvantage of using certificates for authentication is that it is much harder to provide certificates to users. This is because at any given enterprise, the number of servers that might require certificates is relatively small, but the number of users can be enormous. Providing certificates to each employee can be a daunting management task and might require a level of administration that your company is not prepared to undertake. EAP-TLS EAP-TLS is based on the TLS protocol that is widely used to secure web sites. It requires that both the user and authentication server have certificates for mutual authentication. While EAP-TLS is cryptographically strong, it requires a certificate infrastructure that maintains and supplies certificates to all network users. EAP-TTLS EAP-TTLS is designed to provide authentication that is cryptographically as strong as EAP-TLS, while not requiring that each user be issued a certificate. Instead, only the authentication servers require certificates. EAP-TTLS authentication is performed using a password or other credentials. Password-type credentials are transported in a securely encrypted “tunnel” that is established using the server certificate. Within the EAP-TTLS tunnel, you can employ any of a number of inner authentication protocols. With tunneled password credentials, user authentication can be performed against the same security database that is already in use on the corporate LAN. For example, Windows Active Directory or an SQL or LDAP database might be used. See “TTLS Settings” on page 60 and “Selecting an Inner Authentication Protocol” on page 48 for more information about configuring inner protocols for tunneled authentication. 102 802.1X Authentication Network Security Concepts If your enterprise has a user-based certificate infrastructure in place, you have the option to configure user certificate-based credentials for EAP-TTLS authentication, with or without tunneled password credentials. See “Using Certificates with EAP-TTLS Authentication” on page 63. EAP-PEAP EAP-PEAP is comparable to EAP-TTLS, both in its method of operation and its security. However, EAP-PEAP is not as flexible as EAP-TTLS and it does not support the range of inside-the-tunnel authentication methods that EAP-TTLS supports. Commercial implementations of this protocol that started appearing at the beginning of 2003 had interoperability problems. Nevertheless, this protocol is in widespread use. EAP-PEAP is a suitable protocol for performing secure authentication against Windows domains and directory services. See “PEAP Settings” on page 64 for more information about configuring inner protocols for EAP-PEAP authentication. EAP-FAST EAP-FAST is an EAP authentication method that, like EAP-TTLS and EAP-PEAP, offers password-based 802.1X authentication that encapsulates user credentials inside a TLS tunnel. Unlike other tunneled protocols, however, a server certificate is not required as a means of establishing a tunnel. Without the protection of a server certificate, EAP-FAST authentication can be vulnerable to man-in-the-middle attacks (and subsequent off-line dictionary attacks). EAP-JUAC EAP-JUAC is an inner EAP protocol developed by Juniper Networks for authenticating access to an Infranet Controller. EAP-JUAC is compatible with TTLS and PEAP. EAP-POTP EAP-POTP is a protocol developed by RSA Security, Inc. With this protocol, users can request authentication using their RSA SecurID token cards for password credentials. This secure two-factor authentication protocol provides cryptographically strong end-to-end mutual authentication, AES data encryption, personal identification number (PIN) management, and session resumption. The EAP-POTP protocol does not rely on certificates or require a certificate infrastructure. EAP-POTP has strong encryption, data integrity, and authentication support. EAP-SIM and EAP-AKA EAP-SIM and EAP-AKA (authentication and key agreement) are the two EAP methods that you can use for wireless network authentication based on your SIM card credentials. 802.1X Authentication 103 Odyssey Access Client User Guide EAP-LEAP EAP-LEAP (Lightweight EAP, also known as EAP-Cisco Wireless) is a protocol that enables users to be authenticated using their Windows password credentials without the use of certificates. The data exchange in EAP-LEAP is fundamentally similar to the exchange that occurs when a user logs in to a Windows Domain Controller. EAP-LEAP is very convenient because it is Windows-compatible. However, because EAP-LEAP does not use server certificates, it relies on the randomness of the user password for its cryptographic strength. As a result, when user passwords are relatively short or insufficiently random, a wireless eavesdropper observing an EAP-LEAP exchange can easily mount a dictionary attack to discover these weak passwords. Reauthentication When you reauthenticate to your network, encryption keys are refreshed and any new or updated security policies that are implemented on the network are applied to your network connection. You can configure automatic periodic reauthentication to the network using Odyssey Access Client. Periodic reauthentication serves two purposes: As a general security measure, it verifies that you are still on a trusted network. It results in distribution of fresh shared keys to your PC and access point. The access point might use these shared keys to refresh the keys used to encrypt data. By frequently refreshing keys, you can thwart cryptographic attacks. See “Enabling Automatic Reauthentication” on page 19 for information about configuring this feature. Session Resumption When you first authenticate using EAP-TTLS, EAP-PEAP, EAP-POTP, or EAP-TLS, a fair amount of intensive computation occurs, both on your client PC and on the network authentication server. Private keys must be used to encrypt or sign data, signatures on certificates must be validated, and password credentials must be selected. Once you have authenticated a connection to the network, your network session begins. During a session, any subsequent authentications to the same network server can be accelerated by reusing the secret information that is derived during the first authentication. This is called session resumption. You can configure client-side session resumption features that apply to the certificate-based protocols using Odyssey Access Client. This feature is particularly useful when you have a wireless connection and are moving (“roaming”) from one access point location in a building to another. With this feature enabled, along with automatic reauthentication, your network connection is not interrupted and there is no need to reconnect or reauthenticate. 104 802.1X Authentication Network Security Concepts Recommended practice is to enable session resumption. The necessity for some form of reauthentication occurs fairly frequently in wireless networking, particularly when you are moving between access points. Each time you connect with a new access point, a new authentication occurs. The less time it takes to perform that authentication, the less likely you are to experience a momentary stall in your network applications. Additionally, using session resumption rather than reauthentication puts less load on the authentication server. Session resumption results in the distribution of new keys to the client and to the access point, just as a fresh authentication does. See “Enabling Session Resumption” on page 18 for more information about using this feature. NOTE: If your network does not permit session resumption, then any configured client-side session resumption features are ignored. 802.1X Authentication 105 Odyssey Access Client User Guide 106 802.1X Authentication Appendix B Glossary A AAA—Authentication, Authorization, and Accounting. Access Control List (ACL)—A listing of users and their associated access rights. Used to implement discretionary and or mandatory access control between subjects and objects. Accounting—Tracking users’ access to resources primarily for billing purposes. See also AAA. Advanced Encryption Standard (AES)—Standard approved by NIST for the next 20-30 years of use. Advanced Research Projects Agency (ARPA)—An agency of the US Department of Defense that promotes exploratory research in areas that carry long-term promise for military applications. ARPA funded the major packet-switching experiments in the US that lead to the formation of the Internet. Algorithm—A set of sequenced steps that are repeated each time. In encryption, the algorithm is used to define how the encryption is applied to the data. Alias—An assumed name (dummy) mail address that routes messages to all real addresses associated with the assumed name. American National Standards Institute (ANSI)—Represents the US in the ISO. A private standards body that develops, endorses, and publishes industry standards. Application programming interface (API)—Provides means to take advantage of software features. ARP—Acronym for Address Resolution Protocol. ASCII—American Standard Code for Information Exchange. ASCII is a code to represent letters, numerals, punctuation marks and control signals as seven-bit groups. It is used as a standard code by the transmission of data. Association—The method by which a client establishes a relationship with an access point. 107 Odyssey Access Client User Guide Asymmetric algorithm—A pair of key values, one public and one private, used to encrypt and decrypt data. Only the holder of the private key can decrypt data encrypted with the public key, which means anyone who obtains a copy of the public key can send data to the private key holder in confidence. Only data encrypted with the private key can be decrypted with the public key, this provides proof of identity, ensures nonrepudiation, and provides the basis for digital signatures. Asynchronous—Character-by character or cell-by-cell or data unit-by date unit transfer. Attribute certificate—Digital certificate that binds data items to a user or system by using a name or public key certificate. Auditing—Tracking users’ access to resources primarily for security purposes. Authenticate—To verify the identity of a user, user device, or other entity, or the integrity of the data stored, transmitted, or otherwise exposed to unauthorized modification in an IS, or to establish the validity of a transmission. Authentication—The process of validating users who want to access a secure network. See also AAA. Authorization—The process of identifying what a given user is allowed to do. See also AAA. Availability—Ensures any necessary data is available when it is requested. B Back door—A method of gaining access to a system or resource that bypasses normal authentication or access methods. Binding—The process of associating a specific communications terminal with a specific cryptographic key or associating two related elements of information. Biometrics—Authentication based on some part of the human anatomy, such as retina, fingerprint, or voice. Block cipher—Transforms a message from plaintext (unencrypted form) to cipher text (encrypted form) one piece at a time, where the block size represents a standard chunk or data that is transformed in a single operation. Brute force attack—The process of trying to recover a cryptographic key or password by trying all reasonable possibilities. C Centralized key management—A certificate authority that generates both public and private key pairs for a user and then distributes them to a user. Certificate—An electronic document attached to a public key by a trusted third party that provides proof that the public key belongs to a legitimate owner and has not been compromised. Also called a digital certificate. 108 Glossary Certificate Authority (CA)—An online system that issues, distributes, and maintains currency information about digital certificates. Abbreviated as CA. Certificate policy—A statement that governs the use of digital certificates. Certificate revocation—The act of invalidating a digital certificate. Certificate revocation list (CRL)—A list generated by a CA that enumerates digital certificates that are no longer valid and the reason they are no longer valid. Certificate suspension—The act of temporarily invalidating a certificate while its validity is being verified. Challenge Handshake Authentication Protocol (CHAP)—A session-based two-way password authentication scheme. Widely used authentication method in which a hashed version of a user’s password is transmitted during the authentication process (instead of passing the password itself). Using CHAP, a remote access device transmits a challenge string, to which the client responds with a message digest (MD5) hash based on the challenge string and the users’ password. Upon receipt, the remote access repeats the same calculation and compares the value sent to that value; if the values match, the client credentials are deemed authentic. Cipher—A method of encrypting text. The term is also used to refer to an encrypted message (although the term cipher text is preferred). Any cryptographic system in which arbitrary symbols or groups of symbols represent units of plaintext or in which units of plaintext are rearranged, or both. Clear text—Characters in a human-readable form or bits on a machine-readable form. Also called plaintext. COMSEC—Communications security. Compliance—In a UAC network, compliance means that the user and endpoint computer meet network authentication and security requirements and are, therefore, allowed to access protected resources on the network. Cookie—A file or token of sorts passed from the Web server to the Web client (your browser) that is used to identify you and could record personal information such as ID and password, mailing address, credit card number, and so on. Also called HTTP cookie. Credentials—Information passed from one entity to another and used to establish the sending entity’s access rights—commonly a user name and a password. Cross certification—When two or more Certificate Authorities choose to trust one another and issue credentials on each other’s behalf. Cryptographic module—Any combination of hardware, firmware, or software that implements cryptographic functions such as encryption, decryption, digital signatures, authentication techniques, and random number generation. 109 Odyssey Access Client User Guide D Data Encryption Standard (DES)—A cryptographic algorithm designed for protection of unclassified data and published by the National Institute for Standards and Technology in Federal Information Processing Standard (FIPS) Publication 46. Data integrity—Condition existing when data is unchanged from its source and has not been accidentally or maliciously modified, altered, or destroyed. Demilitarized zone—An area in your network that enables a limited and controlled amount of access from the public Internet. This network segment usually lies between the internal corporate network and public Internet. Denial of Service (DoS)—A type of attack that denies legitimate users access to a server or services by consuming sufficient system resources or network bandwidth. DES—Data Encryption Standard. Dictionary attack—A brute-force attack in which software is used to compare the hashed data, such as a password, to a word in a hashed dictionary. This is repeated until a match is found in the hash, with the goal being to match the password exactly to determine the original password that was used as the basis of the hash. Diffie-Hellman—The first public key algorithm, using discrete logarithms in a finite field. Invented in 1976. Digital certificate—A signed electronic document (digital ID) that notarizes and binds the connection between a public key and its legitimate owner. Its main purpose is to prevent unauthorized impersonation and provide confidence in public keys. Digital signature—A hash encrypted to a private key of the sender that proves user identity and authenticity of the message. Signatures do not encrypt the contents of an entire message. Also, in the context of certificates, a digital signature uses data to provide an electronic signature that authenticates the identity of the original sender of the message. Disaster recovery plan (DRP)—A plan outlining actions to be taken in case a business is hit with a natural or man made disaster. Domain—A domain represents a level of the hierarchy in the domain name space and is represented by a domain name. DNS—Acronym for domain name system. E Encrypt—To convert plaintext into unintelligible forms by means of a cipher system. Term encompassing both encipher and encode. Encryption algorithm—A mathematical formula or method used to scramble the information before transmitting it over an insecure media. Examples include RSA, DH, IDEA, Blowfish, MD5, DSS/DSA, and Firefly. 110 Glossary Encryption hash—A method in which a selection of data is mixed into a section data based on an algorithm. The result is called a hashed value. Encryption keys—A sequence of characters that an encryption algorithm uses to make plain text unreadable unless you share the same encryption key needed to decode the encrypted message. Extensible Authentication Protocol (EAP)—An IETF standard that provides for mutual authentication between a client and a AAA authentication server. EAP-JUAC—JUAC is an EAP authentication protocol specific to Juniper Unified Access Control networks and is required when connecting to a Juniper Infranet Controller. EAP-LEAP—Cisco Wireless. With LEAP, mutual authentication relies on a shared secret and the user's logon password, which is known by the client and the network. EAP-TLS—Uses digital certificates for both user and server authentication and supports the three key elements of 802.1X/EAP. EAP-TTLS— Tunneled Transport Layer Security extends the authentication negotiation by using the secure connection established by the TLS handshake to exchange additional information between client and server. EAP-PEAP—Uses a digital certificate for server authentication. For user authentication, PEAP supports various EAP-encapsulated methods within a protected TLS tunnel. PEAP supports the three main elements of 802.1X/EAP. Endpoint—An endpoint refers to the computer (desktop, laptop, or other mobile wireless computing device) that you use to access resources on a network. Extensible Markup Language (XML)—Like HTML, this flexible markup language is based on standards from the World Wide Webb Consortium. XML can be used to generate standard or fully customized content rich Web pages, documents, and applications. Extranet—A special internetwork architecture wherein a company’s or organization’s external partners and customers are granted access to some parts of its intranet and the services it provides in a secure, controlled fashion. F False negative—False negative acknowledgements of intrusion in an intrusion detection system, which means an intrusion has occurred but the IDS discarded relative events or traces as false signals. False positive—False affirmative acknowledgment of intrusion, which means intrusion detection has incorrectly identified certain events or traces as signaling an attack or intrusion when no such attack or intrusion is underway. Thus a false positive is a false alarm. FIPS—Federal Information Processing Standards. Created for the evaluation of cryptographic modules. 111 Odyssey Access Client User Guide Firewall—A hardware device or software application designed to filter incoming or outgoing traffic based on predefined rules and patterns. Firewalls can filter traffic based on protocol uses, source or destination address, and port addresses and can even apply state-based rules to block unwanted activities or transactions. G Granularity—The relative fineness to which an access control mechanism can be adjusted. H Hash value—The resultant output of data generated from an encryption hash when applied to a specific set of data. If computed and passed as part of an incoming message and then recomputed upon message receipt, a hash value can be used to verify the authenticity of the received data if the two hash values match. Hashing—A methodology used to calculate a short, secret value from a data set of any size (usually for an entire message or for individual transmission units). This secret value is recalculated independently on the receiving end and compared to the submitted value to verify the sender’s identity. Host Checker—A software component of OAC that checks your computer for compliance to the security policies that your Infranet Controller administrator specifies. Examples of compliance might be that you have the correct antivirus software version and security setting or that you have the latest operating system patch level installed. Host Enforcer—A software component of OAC that protects your computer from attacks from other computers by allowing only the incoming and outgoing traffic that your Infranet Controller administrator specifies for your assigned role. (A role defines settings for your user account, such as which resources you can access). Hotspot—A wireless access zone, could be used for public or private network access. HTML—Hypertext Markup Language. HTTP—Hypertext Transfer Protocol. Used by WWW servers and clients to exchange hypertext data. I IEEE—Abbreviation for the Institute of Electrical and Electronics Engineers. Infranet Controller—A server that verifies your identity and your computer’s compliance with security requirements before allowing you to access protected resources. Infranet Enforcer—A Juniper Networks security device that operates with the Infranet Controller to enforce security policies. The Infranet Enforcer is deployed in front of the servers and protected resources. 112 Glossary Integrity—A monitoring and management system that performs integrity checks and protects systems from unauthorized modifications to data, systems, and applications files. Normally, performing such checks requires access to a prior scan or original versions of the various files involved. Internet—The global set of networks interconnected using TCP/IP. Internet Key Exchange—A method used in the IPsec protocol suite for public key exchange, security association parameter negotiation, identification, and authentication. Intranet—A portion of the information technology infrastructure that belongs to and is controlled by the company in question. Intrusion Detection System (IDS)—A sophisticated software or hardware network protection system designed to detect attacks in progress, but not prevent potential attacks from occurring. IP—Abbreviation for Internet protocol. A protocol that moves packets of data from node to node. Works above layer 3 (network) of the OSI reference model. IP address—The standard way to identify a computer connected to the Internet. Each IP address consists of 8 octets expressed as 4 numbers between 0 and 255 separated by periods. For example: 129.86.8.1. IP Security (IPsec)—Used for encryption of TCP/IP traffic, IP Security provides security extensions to the version of TCP/IP known as Ipv4. IPsec defines mechanisms to negotiate encryption between pairs of hosts that want to communicate with one another at the IP layer and can therefore handle all host-to-host traffic between pairs of machines. In a UAC network, access to protected resources behind an Infranet Enforcer can be configured to use IPsec to encrypt data. For details about using IPsec in a UAC network, refer to the UAC Administration Guide. ISDN—Abbreviation for Integrated Services Digital Network. A network that supports transmission of voice, data, and imaged based communications in an integrated form. ISP—Internet Service Provider. IT—Information technology. K Kerberos—A trusted third party authentication protocol developed at MIT. Takes its name from the 3-headed beast that guards the gates of hell in Greek mythology. Currently a default security setting for Microsoft. Key—A sequence of symbols that when used with a cryptographic algorithm enables encryption and decryption. The security of the cryptographic systems is dependent on the security of the key itself. Key exchange—A technique in which a pair of keys is generated and then exchanged between 2 systems (typically and client and server) over a network connection to allow a secure connection to be established between them. 113 Odyssey Access Client User Guide Key Pair—A public key and its corresponding private key as used in public key cryptography. Key recovery—A mechanism for determining the key used to encrypt some data. L Layer 2 Tunneling Protocol (L2TP)—A technology used with VPN to establish a communication tunnel between communicating parties over insecure media. L2TP permits a single logical connection to transport multiple protocols between a pair of hosts. L2TP is a member of the TCP/IP protocol suite and is defined in RFC 2661. Lightweight Directory Access Protocol (LDAP)—A TCP/IP protocol that enables client systems to access directory services and related data. LDAP is defined in RFCs 1777 and 2559. Local Area Network (LAN)—A network that consists of a single type of data link and that can reside entirely within a physically protected area. M Man-in-the-Middle—An attack in which a hacker attempts to intercept data in a network stream and then inserts their own data into the communications with the goal of disrupting or taking over communications. Mandatory Access Control (MAC)—A centralized security method that does not allow users to change permissions on objects. MD4—Message digest algorithm 4. MD5—Message digest algorithm 5. Message digest—A unique snapshot image of data that can be used for alter comparisons. Change a single character in the message and the message will have a different message digest. Also called a hash code. Multifactor authentication—An authentication process that uses more than one authentication method to establish a users identity. (RSA SecurID is a multifactor authentication method with a pin and passcode required for authentication.) N Network—An organization of stations capable of intercommunications serviced by a single switching or processing station. Network Address Translation (NAT)—TCP/IP protocol technology that maps internal IP addresses to one or more external IP addresses through the of a NAT server. NAT enables conversation of public IP address space by mapping private IP addresses used in an internal LAN to one or more external public IP addresses to communicate with the external world. NAT also provides address-hiding services so that NAT adds both security and simplicity to network addressing. Network Intrusion Detection Systems—An IDS system that monitors traffic and activity on one or more network segments. 114 Glossary Node—A point of concentrated communications; a central point of communications. Nonrepudiation—The condition when a receiver knows or has assurance that the sender of some data did in fact send the data, even though the sender later might want to deny ever having sent the data. O OSI—Abbreviation for the Open Systems Interconnection. Usually refers to the 7-layered protocol model for the exchange of information between open systems. The 7 layers in order are physical, data-link, network, transport, session, presentation, and application. P Packet—A sequence of data and control characters (binary digits) in a specified formats that is switched/transferred as a whole. PAP—Acronym for Password Authentication Protocol. An authentication protocol that enables PPP peers to authenticate one another; it does not prevent unauthorized access but merely identifies the remote end. PCMCIA card—A credit card size memory or PC card that meets the PC Card Standard developed jointly by the Personal Computer Memory Card International Association (PCMCIA) and the Japan Electronic Industry Development Association (JEIDA). PKCS—Abbreviation for Public Key Cryptography Standard. A set of standards for public key cryptography developed in cooperation with an informal consortium (Apple, DEC, Lotus, Microsoft, MIT, RSA, and Sun) that includes algorithm specific and algorithm independent implementation standards. Point-to-point Tunneling Protocol (PPTP)—A TCP/IP technology used to create virtual private networks or remote access links between sites or remote access. PPTP is the work of a vendor group that includes Microsoft, 3Com, and Cooper Mountain Networks. It is generally regarded as less secure than L2TP and is used less frequently for that reason. Policy—A broad statement of views and position. A policy states high-level intent with respect to a specific area of security and is more properly called a security policy. Port number—A number carried in Internet transport protocols to identify which service or program is supposed to receive an incoming packet. Examples are Web services us port 80, email port 25, RADIUS uses either ports 1648-1649 or 1811-1812. Pretty Good Privacy (PGP)—A shareware encryption technology for communication that uses both public and private encryption technology to speed up encryption without compromising security. 115 Odyssey Access Client User Guide Private key—A piece of data generated by an asymmetric algorithm that’s used by the host to encrypt data encrypted with a public key. This technique makes digital signatures and nonrepudiation possible. Protocol—The procedures that two or more computer systems use so they can communicate with each other. Proxy—A facility that indirectly provides some service for another facility. Public branch exchange (PBX)—A telephone switch used on a company’s or organizations premises to create a local telephone network. Public key—A key used in public key cryptography that belongs to an individual entity and is distributed publicly. Others can use this key to encrypt data that only the key’s owner can decrypt. Public Key Infrastructure (PKI)—The framework established to issue, maintain, and revoke public key x.509 certificates. R RC4—Rivest cipher 4. RC5—Rivest cipher 5. Remediation—Remediation is the process of bringing an endpoint (computer) into compliance with an organization’s security policies. Remote Authentication Dial-in User Services (RADIUS)—An Internet protocol described in RFC 2138 used for remote access services. It conveys user authentication and configuration data between a centralized authentication server and a remote access device to permit the remote access device to authenticate requests to use its network access ports. Users present the remote access device with credentials, which are in turn passed to the RADIUS server for authentication. Remote monitoring (RMON)—An Internet protocol that extends the Simple Network Management Protocol (SNMP) functionality to include messages about and techniques for exchanging data between network systems and devices and a centralized network management application. Role—A role defines settings for your user account, such as which resources you can access. Router—An Internetworking switch operating at the OSI level 3 (network layer) that connects multiple network segments and routes packets between them. Routers also split broadcast domains. RSA—Referring to the principles: Ron Rivest, Adi Shamir, and Len Adleman. The RSA algorithm is used in cryptography and is based on the fact that it is easy to multiple two large prime numbers together, but hard to factor them out of the product. 116 Glossary S Secure channel—A means of conveying information from one entity to another such that an adversary does not have the ability to reorder, delete, insert, or read. (Examples are SSL and IPSEC.) Secure Hypertext Transfer Protocol (HTTPS)—An Internet protocol that encrypts individual messages used for Web communications rather than establishing a secure channel, like in SSL. Secure Multipurpose Internet Mail Extensions (S/MIME)—An Internet protocol governed by RFC 2633 and used to secure email communications through encryption and digital signatures for authentication. Secure Shell (SSH)—A protocol designed to support secure remote login, along with secure access to other services across an insecure network. SSH includes a secure transport layer protocol that provides server authentication, confidentiality, and integrity, along with a user authentication protocol and a connection protocol that runs on top of the user authentication protocol. Secure Sockets Layer (SSL)—An Internet protocol originally created by Netscape Corp. that uses connection oriented, end-to-end encryption to ensure that client/server communications are confidential and meet integrity constraints. SSL operates between the HTTP application layer protocol and reliable transport layer protocol. (usually TCP) SHA, SHA-1—Secure Hash Algorithm. SHA-1 being considered more secure. Simple Network Management Protocol (SNMP)—A UDP based application layer Internet protocol used for network management, SNMPO is governed by RFC 2570 and 2574. Single sign on (SSO)—The concept or process of using a single logon authority to grant users access to resources on a network regardless of what operating system or application is used to make or handle a request for access. The concept behind the term is that users need to authenticate only once but can then access any resources available on a network. Smart card—A credit card sized device that contains an embedded chip. On this chip, varying and multiple types of data can be stored, such as a driver’s license number, medical information, passwords or other authentication data, and even bank account data. Spoofing—A technique for generating network traffic that contains a different source address from that of the machine actually generating the traffic. It foils identification of the true source. Switch—A hardware device that manages multiple, simultaneous pairs of connections between communicating systems. Symmetric encryption—An encryption technique in which a single encryption key is generated and used to encrypt data. 117 Odyssey Access Client User Guide T TACACS+—An enhanced version of Terminal Access Controller Access Control System. TACACS+ is TCP based authentication and access control Internet protocol governed by RFC 1492. TCP—Abbreviation for Transmission Control Protocol. Verifies correct delivery of data from client to server; uses virtual circuit routing. Occupies layer 4 of the OSI reference model. TCP/IP—Abbreviation for Transmission Control Protocol/Internet Protocol. Token—This is hardware or software based system for authentication wherein two or more sets of matched devices or software generate matching random passwords with a high degree of complexity. Transport Layer Security (TLS)—An end-to-end encryption protocol originally specified in ISO standard 10736 that provides security services as part of the transport layer in a protocol stack. TLS refers to an Internet protocol defined also in RFC 2246. TLS is based on and similar to SSL v3.0, it is really misnamed because it operates at the application layer not the transport layer. Tunnel—A secure virtual connection through the Internet. U Unified Access Control (UAC)—An IP-based enterprise infrastructure that coordinates network, application, and endpoint intelligence and provides the control required to support network applications, manage network use, and reduce threats. UDP—Abbreviation for User Datagram Protocol. V Validation—The process of applying specialized security test and evaluation procedures, tools, and equipment needed to establish acceptance for joint usage of an IS by one or more departments or agencies and their contractors. Virtual Local Area Network (VLAN)—A software technology that enables grouping of network nodes connected to one or more network switches into a single logical network. Virtual Private Network (VPN)—A private network built atop a public network. Hosts within the private network use encryption to talk to other hosts. Vulnerability—A weakness in hardware or software that can be used to gain unauthorized or unwanted access to or information from a network or computer. 118 Glossary W Wired Equivalent Privacy (WEP)—A security protocol used in 802.11 wireless networking, WEP is designed to provide security equivalent to that found in regular wired networks. This is achieved by using basic symmetric encryption to protect data sent over wireless connections, so that sniffing or wireless transmissions does not produce readable data and so drive-by attackers cannot access a wireless LAN without additional efforts and attacks. WPA—Protocol enhancing the service and security offering delivered in WEP and basic 802.11. Includes support for TKIP and MIC encryption, a median step to supporting a true cryptographic algorithm such as AES. WPA2 (or 802.11i)—Recently ratified protocol enhancing the service and security offering delivered in WEP and 802.11. Includes support for 128bit AES encryption and support for access point pre-authentication fast roaming capability. WLAN—Wireless Local Area Network. Wireless Transport Layer Security (WTLS)—A security level for applications based on the Wireless Application Protocol (WAP). WTLS is based on transport layer security (TLS) but has been modified to work with the low-bandwidth, high latency, and limited-processing capabilities found in many wireless networking implementations. X X.509 digital certificate—A digital certificate that uniquely identifies a potential communications party or participant. An X.509 certificate includes a party’s name and public key, but it can also include organizations affiliation, service or access restriction, and a host of other access and security related information. 119 Odyssey Access Client User Guide 120 Index Numerics 802.11 ad-hoc mode .............................................................96 defined ......................................................................94 infrastructure mode...................................................96 802.1X authentication ...........................................................62 overview....................................................................99 A access point ad-hoc mode .............................................................60 infrastructure mode...................................................60 introduction...............................................................96 network.....................................................................96 adapter add network ..............................................................27 disable wired connection...........................................41 folder.........................................................................21 remove......................................................................28 select .........................................................................29 wireless .....................................................................27 ad-hoc mode defined ......................................................................96 setting .......................................................................60 AES configuration .............................................................61 overview....................................................................98 peer-to-peer...............................................................99 use with association mode ........................................61 airwaves survey .......................................................................15 anonymous name for logon....................................................................47 protocol restriction ....................................................48 set .............................................................................47 any as a network..............................................................59 network, configuring connections .............................59 SIM card, using..........................................................43 association mode defined ......................................................................94 methods ....................................................................60 open ..........................................................................60 shared .......................................................................60 WPA ..........................................................................60 WPA2 ........................................................................60 asymmetric cryptography ...............................................101 authentication 802.1X ......................................................................95 certificate-based ........................................................50 profile........................................................................38 protocols ...................................................................45 servers, adding ..........................................................84 setting in profile properties........................................44 specify protocol .........................................................44 status.........................................................................23 traditional networks.....................................................2 tunneled ....................................................................46 UAC networks..............................................................4 user ...........................................................................95 wireless .....................................................................94 without password ......................................................50 X.500 names .............................................................84 authentication protocols add ............................................................................45 inner most common....................................................49 order of ..............................................................49 multiple .....................................................................45 ordering.....................................................................45 remove ......................................................................46 select inner................................................................49 auto-scan list add ............................................................................68 defined ......................................................................67 modify.......................................................................69 preferred networks ....................................................69 preferred order of networks ......................................69 remove ......................................................................69 switching networks....................................................69 testing .......................................................................70 uses ...........................................................................67 view names in ...........................................................70 B beacon defined ......................................................................32 C certificate add to trusted server database.............................10, 72 defined ....................................................................101 for authentication ......................................................41 for inner authentication .............................................50 for Windows logon ....................................................41 overview..................................................................101 smart card .................................................................17 Index 121 Odyssey Access Client User Guide validate ..................................................................... 46 validation .................................................................. 46 certificate authority chain ......................................................................... 81 defined.................................................................... 102 intermediate.............................................................. 82 root ......................................................................... 102 certificate chain defined.................................................................... 102 trust trees.................................................................. 83 channel peer-to-peer............................................................... 60 compliance security policy ............................................................. 3 configuration adapter...................................................................... 27 folder ........................................................................ 21 network..................................................................... 57 profile ................................................................. 37, 38 connect to Infranet Controller................................................. 72 to network................................................................. 29 connection multiple network ....................................................... 31 status .................................................................. 23, 34 types ......................................................................... 31 content dialog............................................................. 12, 22 credentials secure ....................................................................... 47 data encryption purpose ..................................................................... 94 diagnostics Host Enforcer configuration ...................................... 91 IPsec ......................................................................... 15 IPsec configuration.................................................... 91 network agent ..................................................... 15, 91 options ...................................................................... 90 save to file................................................................. 92 view .......................................................................... 90 disconnect from Infranet Controller ............................................ 77 from network ............................................................ 31 from wireless network............................................... 30 DNS name Infranet Controller..................................................... 72 domain controller EAP interaction ................................................ 104 login name ................................................................ 39 driver software ................................................................... 7 dynamic encryption keys reconnection effects .................................................. 32 EAP protocols outer and inner .........................................................49 EAP-AKA configuration .............................................................43 overview..................................................................103 with SIM card ............................................................44 EAP-Cisco Wireless .........................................................104 EAP-FAST........................................................................100 credentials.................................................................18 overview..................................................................103 token card .................................................................46 tunneled method .......................................................46 EAP-JUAC ................................................................100, 103 overview..................................................................103 EAP-LEAP .......................................................................100 overview..................................................................104 EAP-over-HTTP ...................................................................4 EAP-PEAP .......................................................................100 generic token card options ........................................46 inner protocols, selecting...........................................51 overview..................................................................103 EAP-POTP .......................................................................100 and token card ..........................................................49 overview..................................................................103 password option........................................................46 PIN ............................................................................52 run-time dialogs ........................................................52 EAP-SIM configuration .............................................................43 identities ...................................................................44 overview..................................................................103 with SIM card ............................................................44 EAP-TLS..........................................................................100 FIPS profiles ..............................................................13 key generation ..........................................................62 overview..................................................................102 EAP-TTLS........................................................................100 certificate options......................................................48 generic token card options ........................................46 key generation ..........................................................62 overview..................................................................102 settings......................................................................48 encryption ........................................................................24 dynamic keys ............................................................62 method, Networks panel ...........................................61 methods ....................................................................98 methods for association mode ..................................61 pre-configured keys ...................................................58 private key ..............................................................101 secure..........................................................................8 status.........................................................................24 endpoint trust status .........................................................24 exportable, private key, FIPS .............................................14 Extensible Authentication Protocol .................................100 E F D EAP as inner authentication.............................................. 50 definition................................................................. 100 122 Index file menu options..............................................................13 FIPS adapter requirements ................................................13 Index certificate requirement ..............................................14 compliance..................................................................8 encryption .................................................................99 FIPS mode certificate requirements ............................................14 description ................................................................99 on/off ........................................................................13 required.....................................................................61 forget password...................................................................13 temporary trust .........................................................13 OAC in UAC network ...................................................9 intermediate CA adding .......................................................................84 advanced usage .........................................................83 overview..................................................................102 IP address Infranet Controller .....................................................72 IPsec configuration .............................................................91 K keyboard shortcuts............................................................24 G generic token card options ......................................................................47 H hardware-based token EAP-POTP dialogs......................................................52 help menu options............................................................20 Host Checker defined ........................................................................3 Host Enforcer configuration .......................................................15, 91 defined ........................................................................3 I identity server ........................................................................82 SIM............................................................................44 SIM card ....................................................................44 IMSI SIM card ....................................................................44 informational graphics......................................................23 Infranet Controller add to configuration ..................................................71 connect to .................................................................72 defined ........................................................................3 disconnect from ........................................................77 DNS name .................................................................72 folder.........................................................................21 IP address..................................................................72 profile requirements..................................................71 status.........................................................................75 Infranet Enforcer defined ........................................................................3 infrastructure mode access point...............................................................60 defined ......................................................................96 initial profile .....................................................................38 inner authentication .........................................................45 defined ......................................................................48 select protocol ...........................................................48 inner authentication protocols add ............................................................................50 EAP ...........................................................................50 remove......................................................................50 installation OAC in traditional network..........................................9 L LAN, defined.....................................................................93 Layer 2................................................................................4 Layer 3................................................................................4 LDAP...............................................................................102 leaf node...........................................................................83 LEAP...............................................................................104 license key check expiration ........................................................20 overview......................................................................9 types ...........................................................................9 lightweight EAP...............................................................104 log files options ......................................................................89 setting levels..............................................................15 view.....................................................................15, 89 log level set .............................................................................89 login credentials certificate...................................................................39 password ...................................................................39 SIM Card....................................................................40 soft token ..................................................................39 logon credentials...............................................................11 M menu bar ..........................................................................12 mutual authentication...............................................46, 101 802.1X ......................................................................95 explained.................................................................101 server trust ................................................................95 N network any network, configuring...........................................59 association.................................................................60 configuration .............................................................57 configuring connection to any...............................................59 description field.........................................................59 encryption methods ..................................................61 hardware requirements ...............................................8 multiple connections .................................................31 name SSID ...................................................................59 overview....................................................................59 Index 123 Odyssey Access Client User Guide peer-to-peer............................................................... 60 preemptive................................................................ 18 preferred ................................................................... 18 properties add or modify .................................................... 58 reconnecting ............................................................. 32 sample configuration................................................. 66 scan for available ...................................................... 59 scan for available connection .................................... 31 security policies........................................................... 3 select......................................................................... 57 settings...................................................................... 58 type........................................................................... 60 WEP keys .................................................................. 62 wireless 802.11 ......................................................... 96 Network Agent diagnostics ................................................................ 91 network connection set timing .................................................................. 16 network name defined...................................................................... 59 EAP-POTP .................................................................52 SIM card ....................................................................44 SIM card settings .......................................................44 preferred network auto-scan lists............................................................69 preshared passphrase .......................................................95 private key......................................................................101 profile add............................................................................38 configure ...................................................................37 defined ......................................................................37 initial .........................................................................38 modify.......................................................................38 name.........................................................................39 password...................................................................40 sample configuration.................................................56 user info ....................................................................39 user information........................................................43 provider-specific settings SIM............................................................................44 public key .......................................................................101 O R OAC RADIUS server ................................................................100 realm defined ......................................................................74 preconfigure ..............................................................74 reauthentication ...............................................................17 automatic ..................................................................19 purpose ...................................................................104 uses...........................................................................20 reconnecting effect on encryption keys ..........................................32 to network.................................................................32 release notes..................................................................... vii remediation ......................................................................75 defined ........................................................................6 instructions ...............................................................76 requirements browser .......................................................................8 installation...................................................................8 roaming..........................................................................104 wireless .....................................................................17 role defined ..................................................................3, 74 preconfigure ..............................................................74 root certificate authority .................................................102 RSA soft token ..................................................................42 defined........................................................................ 1 deployment environments .......................................... 2 in traditional network.................................................. 2 installing ..................................................................... 7 register...................................................................... 20 OAC Manager ................................................................... 11 exit............................................................................ 25 open mode WEP .......................................................................... 60 definition ........................................................... 97 operating system supported releases ...................................................... 8 P PAP/Token Card password caching...................................................... 49 passphrases hexadecimal.............................................................. 63 password caution ...................................................................... 41 configure in profile .................................................... 40 forget ........................................................................ 13 generic token card..................................................... 46 POTP options ............................................................ 46 PEAP overview ................................................................. 103 settings in profile properties...................................... 51 token card options .................................................... 46 peer-to-peer network definition................................................................... 96 IP addresses .............................................................. 96 personal certificate options for EAP-TTLS ................................................ 50 PIN caching...................................................................... 17 124 Index S scan list .............................................................................68 wireless networks......................................................15 scripts check new .................................................................16 run ............................................................................15 secure authentication methods ....................................................................94 secure encryption Index FIPS...........................................................................13 Layer 2 protocol ........................................................60 security enforcement................................................................5 settings......................................................................17 server identity......................................................................82 identity formats.........................................................82 name.........................................................................82 temporary trust .........................................................17 validate certificate .....................................................46 service set identifier .........................................................97 see SSID session resumption...........................................................17 defined ......................................................................18 enable .......................................................................18 limit...........................................................................19 shared mode WEP ..........................................................................62 defined...............................................................97 shortcut keys ....................................................................24 sidebar .............................................................................12 folders .......................................................................21 signal power, viewing........................................................23 SIM card any, selecting ............................................................43 configure ...................................................................43 for authentication ......................................................43 IDs, entering..............................................................43 IMSI...........................................................................44 login names...............................................................44 manager ....................................................................15 PIN ............................................................................44 PIN settings ...............................................................44 set ID.........................................................................43 simultaneous connections establishing ...............................................................31 single sign on....................................................................11 smart card certificate ..................................................................41 certificates...............................................................101 FIPS constraint ..........................................................18 PIN prompt ...............................................................17 soft token authentication options...............................................42 configuration .............................................................42 enable .......................................................................42 for authentication ......................................................42 software compatibility ........................................................7 SQL.................................................................................102 SSID auto-scan list switching..............................................69 defined ......................................................................97 status adapter......................................................................32 connection ..........................................................23, 34 encryption .................................................................24 endpoint trust............................................................24 Infranet Controller.....................................................75 signal power ..............................................................23 view...........................................................................23 switch 802.1X ......................................................................96 switching networks, lists ...................................................69 T temporary trust enable .......................................................................19 untrusted servers.......................................................86 TKIP implementing ............................................................61 overview....................................................................98 peer-to-peer ...............................................................99 use with association mode.........................................61 TLS overview..................................................................102 token card authentication dialogs................................................................52 password............................................................47 settings...............................................................48 run-time dialogs EAP-POTP ..........................................................52 tools menu options ...........................................................15 trust all servers ..................................................................81 configuration simple method ...................................................81 temporary .................................................................17 trust trees .........................................................................83 trusted server add ............................................................................81 add certificate......................................................10, 72 Advanced button .......................................................83 advanced method......................................................83 any ............................................................................81 editing .......................................................................83 entering .....................................................................81 leaf nodes ..................................................................83 removing ...................................................................82 TTLS overview..................................................................102 settings ......................................................................48 tunnel encrypted ..................................................................47 password credentials .................................................50 U Unified Access Control ........................................................3 untrusted server dialog ........................................................................86 user info SIM card settings .......................................................43 W Web portal ..................................................................10, 72 WEP keys..........................................................................58 any network connection ............................................59 defined ......................................................................97 Index 125 Odyssey Access Client User Guide dynamic .................................................................... 62 open mode................................................................ 97 peer-to-peer............................................................... 98 preconfigured...................................................... 62, 63 shared mode ............................................................. 62 specify....................................................................... 62 static ......................................................................... 62 use with association mode ........................................ 61 Wi-Fi network scan for ..................................................................... 31 Windows logon settings.................................................... 16 wired network connect to ................................................................. 30 Wired-Equivalent Privacy.................................................. 97 wireless beacon ...................................................................... 32 networks scan ................................................................... 31 wireless adapter compatibility ............................................................. 35 wireless network connect to ................................................................. 30 disconnect from ........................................................ 30 wireless roaming .............................................................. 17 wizard configuration............................................................... 9 WPA ................................................................................. 60 implementing............................................................ 60 overview ................................................................... 98 passphrases............................................................... 63 WPA2 ............................................................................... 60 overview ................................................................... 98 passphrases............................................................... 63 X X.500 names .................................................................... 84 xSec configuration wireless 802.1X ................................................. 60 encryption mode requirement .................................. 60 FIPS requirements....................................................... 8 hardware requirements............................................... 8 126 Index Juniper Networks Secure Access Administration Guide Allows for variable-width spine. Assume for now that spine is 1.25" wide; maximum spine width is 2.5". Juniper Networks, Inc. has sales offices worldwide. For contact information, refer to www.juniper.net. ODR-ZA-ODYCAUG, Revision A00 A book with .25" spine would cut here. A book with 2.5" spine would cut here. Juniper Networks, Inc. Printed on recycled paper Juniper Networks, Inc. A 1.25" spine would fold here. A 2.5" spine would fold here. NetScreen Secure Access NetScreen Secure Access FIPS Quick Start NetScreen Instant Virtual Extranet Platform Cover size is 8.3 x 10.75". This is the hardware version: has blue line and blue bar Juniper Networks, Inc. 1194 North Mathilda Avenue Sunnyvale, CA 94089 USA Phone 408 745 2000 or 888 JUNIPER Fax 408 745 2100 ™ CORPORATE HEADQUARTERS M320 Internet Router Hardware Guide ™ M-series Routing Platforms www.juniper.net