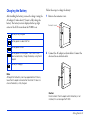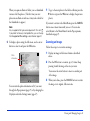
1
®
8VHU·V*XLGH
All rights reserved. No part of this publication may be reproduced, stored in a retrieval system, or transmitted in any form or by any means, electronic, mechanical,
photocopying, recording, or otherwise, without the prior written permission of SEIKO EPSON CORPORATION. The information contained herein is designed only for
use with this EPSON product. EPSON is not responsible for any use of this information as applied to other products.
Neither SEIKO EPSON CORPORATION nor its affiliates shall be liable to the purchaser of this product or third parties for damages, losses, costs, or expenses incurred
by the purchaser or third parties as a result of accident, misuse, or abuse of this product or unauthorized modifications, repairs, or alterations to this product, or (excluding
the U.S.) failure to strictly comply with SEIKO EPSON CORPORATION’s operating and maintenance instructions.
SEIKO EPSON CORPORATION shall not be liable for any damages or problems arising from the use of any options or any consumable products other than those
designated as Original EPSON Products or EPSON Approved Products by SEIKO EPSON CORPORATION.
SEIKO EPSON CORPORATION shall not be held liable for any damage resulting from electromagnetic interference that occurs from the use of any interface cables other
than those designated as EPSON Approved Products by SEIKO EPSON CORPORATION.
Trademarks
EPSON and EPSON Stylus are registered trademarks of SEIKO EPSON CORPORATION.
EPSON Software and the EPSON Software logo are trademarks, and EPSON Store and EPSON Connection are service marks, of Epson America, Inc.
Film Factory and the Film Factory logo are trademarks of A.I.Soft, Inc.
General Notice: Other product names used herein are for identification purposes only and may be trademarks of their respective owners. EPSON disclaims any and all
rights in those marks.
© 2003 by Epson America, Inc.
11/03
2
Contents
Introduction
Features. . . . . . . . . . . . . . . . . . . . . . . . . . . . . . . . . . . . . . . . 6
Using the Documentation. . . . . . . . . . . . . . . . . . . . . . . . . . 7
Chapter 1 Getting Started
Unpacking Your P-1000 . . . . . . . . . . . . . . . . . . . . . . . . . . . 9
P-1000 Parts . . . . . . . . . . . . . . . . . . . . . . . . . . . . . . . . . . . 10
About the AC Adapter . . . . . . . . . . . . . . . . . . . . . . . . . . . 12
Installing the Battery . . . . . . . . . . . . . . . . . . . . . . . . . . . . . 12
Charging the Battery . . . . . . . . . . . . . . . . . . . . . . . . . . . . . 14
Conserving Battery Power . . . . . . . . . . . . . . . . . . . . . 15
Placing the P-1000 in the Viewing Stand . . . . . . . . . . . . . 15
Turning On the Power . . . . . . . . . . . . . . . . . . . . . . . . . . . 16
Setting the Language, Date, and Time . . . . . . . . . . . . 16
Turning Off the Power . . . . . . . . . . . . . . . . . . . . . . . . . . . 17
Inserting and Removing a Memory Card . . . . . . . . . . . . . 18
Connecting a Computer to the P-1000 . . . . . . . . . . . . . . 19
Connecting an External Video Device. . . . . . . . . . . . . . . . 19
Connecting a CD-R/RW Drive . . . . . . . . . . . . . . . . . . . . 20
Chapter 2 Viewing and Managing Images
Using the Main Menu . . . . . . . . . . . . . . . . . . . . . . . . . . . .
Viewing Photos . . . . . . . . . . . . . . . . . . . . . . . . . . . . . . . . .
Zooming an Image . . . . . . . . . . . . . . . . . . . . . . . . . . .
Displaying Images on Your Computer Monitor . . . . .
Managing Photos in Albums . . . . . . . . . . . . . . . . . . . . . . .
Using the Pop-up Menu . . . . . . . . . . . . . . . . . . . . . . . . . .
Running a Slide Show . . . . . . . . . . . . . . . . . . . . . . . . . . . .
Locking an Image, Album, or Folder . . . . . . . . . . . . . . . . .
Unlocking an Image, Album, or Folder . . . . . . . . . . .
Rotating an Image . . . . . . . . . . . . . . . . . . . . . . . . . . . . . . .
Copying Photos. . . . . . . . . . . . . . . . . . . . . . . . . . . . . . . . .
Copying Photos From a Memory Card
to the P-1000 . . . . . . . . . . . . . . . . . . . . . . . . . . . . .
Copying Photos From the P-1000 to a
Memory Card. . . . . . . . . . . . . . . . . . . . . . . . . . . . .
Copying Photos Between a Computer and
the P-1000 . . . . . . . . . . . . . . . . . . . . . . . . . . . . . . .
Copying Photos Between a CD-R/RW and
the P-1000 . . . . . . . . . . . . . . . . . . . . . . . . . . . . . . .
Copying Photos to an Album . . . . . . . . . . . . . . . . . . .
Changing an Album’s Name. . . . . . . . . . . . . . . . . . . .
Deleting Photos. . . . . . . . . . . . . . . . . . . . . . . . . . . . . . . . .
Marking Photos, Folders, or Albums for Deletion . . .
21
22
24
25
25
25
27
28
28
29
29
29
31
31
32
34
36
37
38
Contents 3
Chapter 3 Direct Printing
Connecting the P-1000 to a Printer . . . . . . . . . . . . . . . . . 40
Selecting the Correct Printer Driver . . . . . . . . . . . . . . . . . 41
Printing Your Photos . . . . . . . . . . . . . . . . . . . . . . . . . . . . 42
Chapter 4 Customizing Settings
Adding an Album Shortcut . . . . . . . . . . . . . . . . . . . . . . .
Changing the Copy Mode Settings . . . . . . . . . . . . . . . . . .
Clear memory card after copying . . . . . . . . . . . . . . . .
Save images in album after copying . . . . . . . . . . . . . .
Default album for copied images . . . . . . . . . . . . . . . .
Changing the Display Settings . . . . . . . . . . . . . . . . . . . . .
Memory card or card folder view mode . . . . . . . . . . .
Unsupported files setting . . . . . . . . . . . . . . . . . . . . . .
Photo information setting . . . . . . . . . . . . . . . . . . . . .
Setting the Slide Show Options. . . . . . . . . . . . . . . . . . . . .
Slide show effect. . . . . . . . . . . . . . . . . . . . . . . . . . . . .
Slide show duration . . . . . . . . . . . . . . . . . . . . . . . . . .
Adjusting the LCD Brightness . . . . . . . . . . . . . . . . . . . . .
Turning the Sound On or Off. . . . . . . . . . . . . . . . . . . . . .
Setting the Power Save Options . . . . . . . . . . . . . . . . . . . .
Auto backlight control duration . . . . . . . . . . . . . . . . .
Auto power off duration. . . . . . . . . . . . . . . . . . . . . . .
44
45
45
46
46
46
46
47
47
47
47
47
48
48
48
48
48
Selecting the Video Out Signal . . . . . . . . . . . . . . . . . . . . . 49
Setting the Date and Time . . . . . . . . . . . . . . . . . . . . . . . . 49
Choosing the Language . . . . . . . . . . . . . . . . . . . . . . . . . . . 50
Chapter 5 Maintenance and
Troubleshooting
Cleaning the P-1000 . . . . . . . . . . . . . . . . . . . . . . . . . . . . .
Using the Printer Utilities . . . . . . . . . . . . . . . . . . . . . . . . .
Troubleshooting . . . . . . . . . . . . . . . . . . . . . . . . . . . . . . . .
Problems and Solutions . . . . . . . . . . . . . . . . . . . . . . . . . . .
Power Problems . . . . . . . . . . . . . . . . . . . . . . . . . . . . .
Image Display Problems . . . . . . . . . . . . . . . . . . . . . .
Image Operation Problems . . . . . . . . . . . . . . . . . . . .
Printing Problems . . . . . . . . . . . . . . . . . . . . . . . . . . .
Updating the Firmware and Printer Driver . . . . . . . . . . . .
Resetting the P-1000 . . . . . . . . . . . . . . . . . . . . . . . . . . . . .
Where to Get Help . . . . . . . . . . . . . . . . . . . . . . . . . . . . . .
51
51
52
56
56
57
57
58
58
58
59
Contents 4
Appendix A Notices
Safety Instructions. . . . . . . . . . . . . . . . . . . . . . . . . . . . . . .
When Using the P-1000. . . . . . . . . . . . . . . . . . . . . . .
When Using the Battery. . . . . . . . . . . . . . . . . . . . . . .
When Storing the Battery. . . . . . . . . . . . . . . . . . . . . .
When Disposing of the Battery . . . . . . . . . . . . . . . . .
When Using the AC Adapter . . . . . . . . . . . . . . . . . . .
When Using a Memory Card . . . . . . . . . . . . . . . . . . .
When Using the LCD . . . . . . . . . . . . . . . . . . . . . . . .
When Storing, Maintaining, or Transporting
the P-1000 . . . . . . . . . . . . . . . . . . . . . . . . . . . . . . .
FCC Compliance Statement for United States Users. . . . .
Warning. . . . . . . . . . . . . . . . . . . . . . . . . . . . . . . . . . .
Declaration of Conformity . . . . . . . . . . . . . . . . . . . . . . . .
Standards and Approvals . . . . . . . . . . . . . . . . . . . . . . . . . .
EPSON P-1000 . . . . . . . . . . . . . . . . . . . . . . . . . . . . .
AC Adapter . . . . . . . . . . . . . . . . . . . . . . . . . . . . . . . .
Specifications . . . . . . . . . . . . . . . . . . . . . . . . . . . . . . . . . .
General . . . . . . . . . . . . . . . . . . . . . . . . . . . . . . . . . . .
Electrical . . . . . . . . . . . . . . . . . . . . . . . . . . . . . . . . . .
Interface . . . . . . . . . . . . . . . . . . . . . . . . . . . . . . . . . . .
Battery . . . . . . . . . . . . . . . . . . . . . . . . . . . . . . . . . . . .
AC Adapter . . . . . . . . . . . . . . . . . . . . . . . . . . . . . . . .
Warranty. . . . . . . . . . . . . . . . . . . . . . . . . . . . . . . . . . . . . .
Index . . . . . . . . . . . . . . . . . . . . . . . . . . . . . . . . . . . . . . 71
60
60
61
62
62
62
63
64
64
65
65
66
66
66
66
67
67
67
68
68
68
69
Contents 5
Introduction
With the EPSON® P-1000, you can easily view, store, and
print pictures you have taken with a digital camera. Your
photos are displayed on a high-quality LCD to show them
off with the brightest colors and most vivid detail.
The P-1000 is a compact, versatile storage device you can
carry with your digital camera to back up images on the
road. Transfer the pictures from your memory card to the
P-1000’s 10GB hard drive, and your card is ready to hold
more photos. Later, you can transfer your pictures to your
computer or other storage device.
For fast and convenient printing, you can connect the
P-1000 directly to your EPSON Stylus® Photo printer. You
don’t need a computer.
Software™ Film
Features
The P-1000 lets you:
❍
View JPEG images of up to 6 megapixels with an aspect
ratio of 6:1 in high resolution anywhere, anytime,
without a computer
❍
Print images directly to your EPSON Stylus Photo
printer
❍
Store images on the P-1000’s internal 10GB hard disk
drive
❍
Copy pictures from and to a memory card
❍
Copy pictures from and to a computer
❍
Archive pictures to a CD-R/RW without using a
computer
❍
Display pictures on an external monitor, such as a TV
Factory™
Your P-1000 comes with EPSON
version 3.0 (on the CD-ROM). If you don’t have any photo
software already on your computer, you can install Film
Factory to help you copy and manage your photos. (See
your Quick Reference Guide for instructions.)
Introduction 6
The P-1000 supports Type I and Type II CF
(CompactFlash®) memory cards, including Microdrive™
(3.3 V). If you have a CompactFlash adapter, you can also
use the following types of memory cards:
❍
SD memory card
❍
Memory Stick®
❍
SmartMedia™ (3.3 V only)
❍
MultiMediaCard
❍
xD-Picture Card™
Chapter 5 covers maintenance and troubleshooting.
Please read the Safety Instructions on page 60 to make sure
you’re using your P-1000 safely.
Warning:
Must be followed carefully to avoid bodily injury.
Caution:
Must be observed to avoid damage to your equipment.
Note:
Contains important information and useful tips on the operation
of your product.
Using the Documentation
If you need assistance setting up or using your P-1000, see
“Where to Get Help” on page 59.
This books explains how to use the P-1000. You may want
to copy it to your computer; see the Quick Reference Guide
for instructions.
Your package also includes a Quick Reference Guide. Keep it
with the P-1000 for handy reference when you travel.
Chapter 1 covers unpacking the P-1000, charging the
battery, turning it on and off, and connecting other devices.
Chapter 2 explains how to view, copy, and delete images.
Chapter 3 describes how print directly to a printer.
Chapter 4 explains how to change the P-1000’s settings to
make it work best for you.
Introduction 7
Getting Started
Follow the instructions in this chapter to:
❍
Unpack the P-1000
❍
Install and charge the battery
❍
Turn the P-1000 on and off
❍
Insert and remove a memory card
❍
Connect a computer
❍
Connect an external monitor
❍
Connect a CD-R/RW drive
Getting Started 8
Unpacking Your P-1000
Make sure you have all the items shown below when you unpack your P-1000.
AC adapter and power cord
Quick Reference Guide
EPSON P-1000
Viewing stand
Type A USB cable
CD-ROM containing
Film Factory and this
online User’s Guide
Carrying case
Lithium-ion battery
Type B USB cable
Video cable
Getting Started 9
P-1000 Parts
Eject button
Memory card slot
Connector cover
Power switch
Video output
connector
Battery cover
RESET button
USB
interface
connector
AC adapter
connector
Control panel
Battery cover release
LCD
Getting Started 10
ACCESS light
Flashes orange when you turn
on the P-1000 or access data.
PRINT button
Displays the Print menu.
MENU button
Displays the Pop-up menu. (See page 25.)
Arrow button
Press l, r, u, or d to select a photo or
an option in a menu.
CHARGE light
Flashes green when the
battery is being charged.
Activity light
Flashes during power on and off,
printing, and certain other operations.
OK button
Selects a highlighted option,
opens the selected folder or
photo, and zooms into an image.
CANCEL button
Cancels the current operation and
returns to the previous screen.
Getting Started 11
About the AC Adapter
Installing the Battery
The P-1000 comes with an AC adapter. Use the adapter to
charge the battery and when the P-1000 is connected to a
computer, CD-R/RW drive, or printer. You might also
want to use it whenever possible to view your images, so you
can save battery power.
The P-1000 comes with a Lithium-ion battery. Follow these
steps to install it:
1 Slide the battery cover release button as shown below to
unlock the battery cover.
Warning:
Use only the AC adapter provided, which is designed for the
P-1000. Using another adapter could cause fire, electrical shock,
or injury.
Do not use the AC power cord or the adapter for any purpose
other than powering the P-1000.
If the AC plug does not fit your outlet, have a proper outlet
installed by a qualified electrician.
To avoid radiation danger, do not expose or remove the ferrite
core.
To prevent fire or electric shock, do not cover the AC adapter
with a blanket or similar covering.
Do not connect the AC adapter when the battery is not installed;
this can damage the P-1000.
2 Slide the cover off.
Do not remove the AC adapter from this device during
operations. You can, however, connect the adapter during
operations.
Getting Started 12
3 Insert the battery into the compartment, aligning the +
and – ends with those on the inside of the compartment.
5 Slide the battery cover release button as shown below to
lock the cover.
Note:
Place the battery on top of the clear plastic tab so the tab
sticks out; this will make it easier to remove the battery
later if you need to replace it.
4 Replace the battery cover.
Getting Started 13
Charging the Battery
Follow these steps to charge the battery:
After installing the battery, you need to charge it using the
AC adapter. It takes about 3.5 hours to fully charge the
battery. The battery status is displayed in the top right
corner of the LCD screen when the P-1000 is on.
1 Remove the connector cover.
Connector cover
Battery is fully charged.
:
Battery power is about half full.
:
Battery power is low.
:
Battery power is running out. The P-1000 is shut
down automatically. Charge the battery using the AC
adapter.
:
:
2 Connect the AC adapter as shown below. Connect the
other end to an electrical outlet.
Battery is charging.
Note:
Although the full battery icon may appear before 3.5 hours,
leave the AC adapter connected for the entire 3.5 hours to
ensure the battery is fully charged.
Caution:
Do not connect the AC adapter when the battery is not
installed; this can damage the P-1000.
Getting Started 14
The CHARGE light flashes green while the battery is being
charged. When the battery is fully charged, the CHARGE
light turns off. A fully charged battery lasts about 1 hour,
depending on how you use the P-1000. When it is running
out, you see the message Battery power is low. Connect
the AC adapter to ensure proper operation.
Placing the P-1000 in the Viewing
Stand
For a comfortable way to look at your pictures, you can put
the P-1000 in the viewing stand:
Conserving Battery Power
To conserve battery power and protect the LCD screen, the
P-1000 has two power-saving features. If no button has
been pressed and there has been no activity for 3 minutes,
the backlight on the LCD screen is turned off. After 5
minutes, the power is turned off.
Note:
You can change the number of minutes for these settings; see
“Setting the Power Save Options” on page 48.
This is especially convenient for watching a slide show.
If the screen goes dark because the backlight is turned off,
press any button on the P-1000 to resume operation. If the
P-1000 has been powered off, you need to turn it back on
with the power switch.
Note:
The power is also turned off if the P-1000 gets too hot. If this
happens, let it cool before turning it back on.
Getting Started 15
Turning On the Power
Setting the Language, Date, and Time
To turn on the power, slide the power switch down, as
shown below, and release it. After a few seconds the
ACCESS light flashes orange briefly and then the Main
Menu appears. (See page 21 for more information about the
menu.)
When you turn on the P-1000 the first time, you see the
language setting screen:
Language Setting
Language
English
Fran ais
ACCESS light
Deutsch
Italiano
Espanol
Portugues
Press OK to select and return to the previous screen. Press
cancel to disregard the selection.
Note:
If you see the Main Menu instead, the language has already
been selected. To change it or check the date and time, select
Settings from the Main Menu. Then select Language Setting
and follow the instructions below.
Note:
It may take 5 or 10 seconds for the power to come on.
1 Press l, r, u, or d on the arrow
button to select the language you
want. Then press the OK button.
Getting Started 16
You see the Date and Time Settings screen:
Date and Time Settings
Year:
2003
Hour:
12
Month:
01
Minute:
00
Day:
01
Format:
Turning Off the Power
Before you turn off the P-1000, make sure the ACCESS
light is off. Then slide the power switch as shown below,
and hold it down for about 2 seconds until the power is
turned off.
YYYY.MM.DD
Use the up or down button to select the year. Press OK to
apply the setting.
2 Press u or d on the arrow button to change the value
for the selected item (such as the year).
3 To go to the next option (Month or Day, for example)
press l or r. Then use u and d to change that setting.
4 After you finish making all settings, press the OK
button. You see the Main Menu (described on page 21).
Note:
If you remove the P-1000’s battery, the date and time settings
will be erased after about two days; so you’ll need to check and
possibly change the settings. You’ll also need to check the date
and time after replacing the battery to make sure they are set
correctly. See “Setting the Date and Time” on page 49 for
details.
Getting Started 17
Inserting and Removing a Memory
Card
To insert a memory card, make sure it is facing up, and slide
it in until it is securely seated in the slot.
When you are ready to remove a memory card, make sure
the ACCESS light is off. Then push the eject button and
pull out the card. If the button is not sticking out, press it
once to pop it out, and then press it again to eject the card.
Caution:
Never remove a memory card while the ACCESS light is on; this
can damage or erase data on the card or HDD.
Make sure the
card is face up
Note:
The eject button may not pop out when you insert the card.
If you are using a CompactFlash adapter, put the card into
the adapter and insert the adapter into the slot.
Note:
If you are using a memory card in a CompactFlash adapter,
remove the adapter from the P-1000; do not remove only the
memory card.
Caution:
Avoid using or storing the card in direct sunlight, or in places
that are extremely hot, humid, or dusty.
Getting Started 18
Connecting a Computer to the P-1000
You can connect a computer to display images on your
monitor and to copy images from one device to the other.
Follow these steps:
1 Connect the AC adapter to the P-1000.
2 Make sure your computer and the P-1000 are turned on
and the Main Menu is displayed on the LCD screen.
3 Connect the larger, flat end of the Type A USB cable to
your computer and connect the other end to the
P-1000.
Note:
Although the LCD screen is off while the USB cable is
connected, you can make it come on briefly by pressing any
button on the P-1000.
If your computer does not recognize the P-1000 right away,
you may need to refresh the view or restart your computer.
Now you can view your P-1000 images on the
computer’s monitor (as described on page 25) or copy
files to or from the computer (see page 31).
4 When you are done, close your application and/or click
the USB device icon on your screen (or drag it to the
trash icon) to stop the device. Then you can safely
unplug the USB cable.
Connecting an External Video Device
If you have an external monitor such as a TV that has a
composite video-in connector, you can connect it to the
P-1000 and view photos on the larger screen. Just connect
the monitor to your P-1000 with the video cable that came
with the P-1000.
The PC peripheral mode icon ( ) appears on the
P-1000 screen, then the LCD is turned off.
Note:
Check the Video Out signal as described on page 49 to make
sure it is correct for your video source (NTSC or PAL).
Getting Started 19
Connecting a CD-R/RW Drive
You can connect an external USB CD-R/RW drive to the
P-1000 to archive photos on a CD-R/RW. You can also
copy photos from a CD-R/RW to the P-1000 or a memory
card.
Now you are ready to copy photos. See page 32 for
instructions.
Follow these steps to connect the drive to the P-1000:
1 Make sure the P-1000 and the CD-R/RW drive are
turned off.
2 Connect the AC adapter to the P-1000.
3 Connect the CD-R/RW drive to the P-1000 using the
Type B USB cable that came with your P-1000:
4 Turn on the CD-R/RW drive, then the P-1000.
Getting Started 20
Chapter 2
Viewing and Managing Images
This chapter describes how to view, copy, delete, and
manage your images.
Note:
Progressive JPEG format files, non-JPEG images, some black
and white or CMYK images, video files, or sound files cannot be
displayed or played on the P-1000. However, it is possible to
copy these files to the P-1000’s HDD (for temporary storage).
RAW images from some digital cameras may be supported by
the P-1000. Depending on the RAW image, you may be able to
copy it to the P-1000 (and from there to a memory card or
computer), display it on the screen, and delete it—but you
cannot perform certain operations. For example, you cannot
print or rotate RAW images, include them in a slide show, or
use one as an album thumbnail.
When you view images with an odd number of pixels, such as
1601 × 1201, one line of pixels on the bottom and right sides is
not displayed.
Using the Main Menu
Whenever you turn on the P-1000, the Main Menu appears.
All operations are started here.
Battery icon
Main Menu
Shortcut
icons
Browse
Copy to the
HDD
Slide Show
Settings
Copy to
CD-R/RW
Browse pictures in the HDD, on a memory card, or CD-R/RW.
Press OK to continue.
Message
area
Viewing and Managing Images 21
The following table summarizes the Main Menu functions.
Battery icon
Indicates the charge remaining in the
battery. See “Charging the Battery” on
page 14 for details.
Browse
Lets you select which image(s) to
display.
Shortcut icons
Copy to the HDD
Let you go right to a favorite album. See
“Adding an Album Shortcut” on
page 44.
Lets you copy images from a memory
card to the P-1000’s Album Case or
Card Case. See page 29.
Slide Show
Displays the images in an Album as a
slide show. See page 27.
Settings
Lets you change the P-1000’s settings.
See page 44.
Copy to CD-R/RW
Copies images from the P-1000 to a
CD-R/RW. See page 32.
Message area
Displays messages about the current
selection or operation.
Viewing Photos
Follow these steps to view photos in thumbnail or
full-screen size:
1 Turn on the power.
2 In the Main Menu, select Browse and press the OK
button.
Main Menu
Browse
Copy to the
HDD
Slide Show
Settings
Copy to
CD-R/RW
Browse pictures in the HDD, on a memory card, or CD-R/RW.
Press OK to continue.
If you are viewing pictures or copying or deleting files, you
can return to the Main Menu by pressing the CANCEL
button one or more times.
Viewing and Managing Images 22
You see the Browse menu:
Shows
albums in
the P-1000’s
Album Case
Browse
Album Case
Shows memory
card folders in
the P-1000’s
Card Case
Card Case
Memory Card
Shows images
on a memory
card installed
in the P-1000
CD-R/RW
Press OK to browse the Album Case.
Shows images,
albums, or folders
on the CD-R/RW
attached to the
P-1000
The Album Case contains albums you have created to
organize your photos. (See page 25 for more
information about albums.)
The Card Case contains the folders that have been
copied from memory cards to the P-1000. Each time
you copy a memory card, a new folder of the images is
created in the Card Case.
Select Memory Card to display the photos on a
memory card inserted in the P-1000.
3 To display images stored on a memory card, insert the
card. (See page 18 for details.) To display photos on a
CD-R/RW, connect the drive as described on page 20
and insert the CD.
4 Press u or d on the arrow button to select the location
of the images you want to view, and press the OK
button.
5 If necessary, select a folder or album and press the OK
button.
Device or
storage icon
Storage location
Folder or album
1
2
3
20021218.001
20021218.003
20021218.004
Thumbnail of
first photo
Press OK to browse this card folder. Press Cancel to return to
the previous screen.
Select CD-R/RW to see the photos on a CD-ROM in a
CD-R/RW drive attached to the P-1000.
Viewing and Managing Images 23
When you open an album or folder, you see thumbnail
versions of all the photos. (The first time you view
photos in an album or card case, it may take a while for
the thumbnails to appear.)
Note:
Any unsupported file types are displayed with this icon: .
If you prefer to hide any incompatible files, you can change
the Unsupported files setting as described on page 47.
6 To display a photo using the full screen, use the arrow
button to select it and press the OK button.
Photo
information
Model Name
Date
Size
Focus Length
F Number
Shutter Speed(s)
Expousure Bias
Flash
Metering Mode
: PhotoPC 8100Z
: 2001.12.31 22:31
: 1600 × 1200
: 20.20m
: F2.8
: 1/258 M
: 0.0
: off
: Divided
7 To go to the next photo in the folder or album, press the
r button (or press the l button to display the previous
photo).
If you want to return to the Main Menu, press the CANCEL
button one or more times until you see it. You can also
select Return to the Main Menu from the Pop-up menu,
described on page 25.
Zooming an Image
Follow these steps to zoom into an image:
1 Display an image in full-screen format as described
above.
2 Press the OK button to zoom in, up to 5 times. Keep
pressing it until the image is the size you want.
You can use the arrow button to move to another part
of the image.
2
You can turn the photo information off, if you want,
through the Pop-up menu (page 27) or by changing the
Display mode in the Settings menu (page 47).
3 When you’re done, press the CANCEL button to return
the image to its original, full-screen size.
Viewing and Managing Images 24
Displaying Images on Your Computer
Monitor
You can connect your P-1000 to a computer to display its
photos on the monitor screen. First connect the computer to
the P-1000 as described on page 19. The P-1000 screen goes
dark and the activity light flashes blue. Then select the
image you want to display. You can select any image in a
folder on the Card Case or in an album using your photo
software, Windows® Explorer, Macintosh® Finder,™ or
other application. (You cannot display photos on a memory
card.)
Note:
Do not change the name of the Album Case (“Albums”), card
case (“Cards”) folders, or any folders inside these two folders.
Note:
You can also copy an album to the CD-R/RW. For details, see
“Copying Photos Between a CD-R/RW and the P-1000” on
page 32.
Using the Pop-up Menu
While you are looking at your photos, you can press the
MENU button to display a Pop-up menu which lets you
access a variety of functions.
For example, if you are
looking at a folder on a
memory card, and you
press the MENU
button, you see this
Pop-up menu:
Delete
Copy All Images to Album
Copy to Memory Card
Slide Show
Lock
Return to Main Menu
PC View Mode
Hide Unsupported Files
Press u or d
on the arrow
button to see
more options
Managing Photos in Albums
You can group your favorite images in an album which is
stored in the P-1000’s Album case. An album named
Favorites already exists as a default. You can add photos to
this album and other albums as you like.
You can also create up to three album shortcuts on the Main
Menu to access your favorite albums quickly. For details, see
“Adding an Album Shortcut” on page 44.
Viewing and Managing Images 25
The following table summarizes the Pop-up menu options
(which are described throughout this book). The options
available depend on what you are doing when you press the
MENU button.
Delete
Delete the selected image or folder. Then
select Yes in the dialog box to confirm the
deletion. (This option does not appear when
you select photos on a CD-R/RW.)
Lock/Unlock
Lock or unlock the selected image or folder.
When the item is locked, the
icon is
displayed and the image cannot be deleted
or rotated. Note that the images inside the
folder can be deleted even if the folder is
locked. Also, you cannot add images to a
locked album and the locked album is not
displayed.
Increase
Number of
Copies
Increase the number of copies to be printed
for the selected photo by one. The current
number of copies for the photo appears on
the thumbnail. You need to open the Pop-up
menu and select this option for each
additional copy. You can print up to 99
copies.
Rotate
Rotate the selected image in an album 90°
clockwise. (Album photos only.) Locked
images cannot be rotated.
Copy to
Album
Copy the selected image to an album.
Copy All
Images to
Album
Copy all selected images to an album.
Decrease
Number of
Copies
Decrease the number of copies to be
printed for the selected photo by one.
Copy to
Memory Card
Copy the selected image or card folder to a
memory card.
Increase
Number of
Copies for All
Copy to HDD
Copy the selected album or card folder on
the CD-R/RW to the P-1000’s Card Case or
Album Case.
Increase the number of copies to be printed
by one for all the images displayed. This
option is available in the Select Photos
screen. (You can select up to 99 copies.)
Reset Number
of Copies for
All
Reset the number of copies to 0 for all the
images displayed. This option is available in
the Select Photos screen.
Slide Show
Display the images in the selected album or
card folder as a slide show.
Viewing and Managing Images 26
Information
ON/OFF
Turn the information that is displayed with
the photo on or off. Information about the
image and the battery status icon is hidden
when this option is set to OFF.
Set as the
Album
(or Card)
Thumbnail
Use the selected image as an album or card
folder’s icon. (You cannot use an album that
has been copied to the P-1000 from another
source such as a computer.)
Return to
Main Menu
Close the Pop-up menu and return to the
Main Menu.
PC/DSC View
Mode
Change the view mode when you are
looking at the card folder contents. When
PC mode is selected, all images and folders
are displayed in the current folder. When
DSC mode is selected, only the images in
the correct folder are displayed. The default
setting is DSC mode.
The view mode of an album folder is always
PC mode.
(See “Memory card or card folder view
mode” on page 46.)
Select to
Copy/Undo
Copy
Command
Mark the selected album or folder to be
copied—or cancel the copy indicator. Any
copy marks are cleared when you select a
different folder.
Select to
Delete/
Undo Delete
Command
Mark the selected album or folder for
deletion (a trash can icon appears on it)—
or remove the deletion marks.
Show/Hide
Unsupported
Files
Display or hide unsupported file types.
Change
Album Name
Change the selected album’s name to one
in the displayed list. When you select a
name that already exists, a number is added
to the end of the new album’s name.
Running a Slide Show
To see a slide show of photos in the Card Case, on a
memory card, or in an album, follow these steps:
1 Select the folder you want.
2 Press the MENU button to display the Pop-up menu.
3 Select Slide Show and press the OK button. The slide
show starts and continues until all the photos have been
displayed or you press the CANCEL button.
Viewing and Managing Images 27
Here is another way to run a slide show of one of your
albums:
1 In the Main Menu, select Slide Show and press the OK
button.
Locking an Image, Album, or Folder
You can lock an image, album, or folder to prevent it from
being altered or deleted. Follow these steps:
1 Select the image, album, or folder you want to lock.
2 Press the MENU button to display the Pop-up menu.
Main Menu
Browse
Copy to the
HDD
Slide Show
Settings
Copy to
CD-R/RW
Start album slide show. Press OK to continue.
2 Select the album you want and press the OK button to
start the slide show. It continues until you press the
CANCEL button.
Note:
You can change the length of time each image is displayed on
the screen or turn the fade effect on or off. See “Setting the
Slide Show Options” on page 47.
3 Select Lock and press the OK button. The picture,
album, or folder is locked and you see the lock icon.
Note:
Although you cannot delete a locked album or folder, you can
delete individual photos inside the album or folder.
Unlocking an Image, Album, or Folder
If you want to unlock an image, album, or folder, first select
it. Then press the MENU button to display the Pop-up
menu, select Unlock, and press the OK button. The lock
icon disappears.
Viewing and Managing Images 28
Rotating an Image
If you want to rotate an image, follow these steps:
1 Select the image.
2 Press the MENU button to display the Pop-up menu.
3 Select Rotate and press the OK button. The picture is
rotated 90° to the right.
Note:
If the image is locked, you cannot rotate it; this option will not
appear in the Pop-up menu. Unlock it first, as described on page
28.
Copying Photos
The P-1000 offers great flexibility for copying photos. You
can copy images:
❍
From a memory card to the P-1000’s Card Case or
Album Case
❍
From the P-1000 to a memory card
❍
From the P-1000 to your computer and vice versa
❍
From the P-1000 to a CD-R/RW and vice versa
❍
From the P-1000’s Card Case, a memory card, or a
CD-R/RW to an album
Copying Photos From a Memory Card to the
P-1000
When you copy a memory card to the P-1000, all the
photos on the card are copied to a folder in the P-1000’s
Card Case. Alternatively, you can select to copy the files to
an album in the Album Case.
Note:
If the battery is low when you try to copy files, they may not be
copied correctly. Use the AC adapter if this happens.
1 Insert the memory card.
2 In the Main Menu, select Copy to the HDD and press
the OK button.
Main Menu
Browse
Copy to the
HDD
Slide Show
Settings
Copy to
CD-R/RW
Copy a memory card into the Card Case. Press OK to start
copying.
Viewing and Managing Images 29
If you see the message below, select Yes to
automatically delete the files from the memory card
after copying or No to leave them.
Copy to the HDD
Note:
You can select whether to display this Album menu when
copying or to automatically copy photos to an album. See
“Changing the Copy Mode Settings” on page 45 for details.
Copying starts and you see this message:
Do you want to delete all files
on the memory card? All files
are verified as copied before
deletion.
Yes
Copy to the HDD
No
Copying all files in the memory
card to the 20030214.001 in the
Card Case.
...
Press OK to disregard delete command.
Note:
You can select whether to display this confirmation
message before copying by changing the Copy Mode
settings. See page 45 for more information.
3 If you see the screen below, select the album in which
you want to store the copied photos. Then press the OK
button.
Press the Cancel button to cancel copying.
The copied images are stored in a card folder in the
Card Case (and in an album if you selected one). The
card folder is named according to the date you copied it
to the P-1000. For example, in the folder name
20040325.001, 2004 is the year, March 25 is the day,
and .001 means this is the first folder copied on this
day. If you copy memory card photos several times on
one day, you’ll know which was the first, second, and so
on.
Viewing and Managing Images 30
After the files are copied, you see thumbnails of the
photos. If you want to look at them, select one, press
the OK button to enlarge it, and then press l or r on
the arrow button to scroll through the photos.
4 Press the CANCEL button to return to the Main Menu.
Copying Photos From the P-1000 to a
Memory Card
You can copy individual photos or complete folders from
your P-1000 to a memory card. Although you cannot copy
an album this way, you can copy individual photos from an
album.
Note:
You cannot select an album, but you can select individual
pictures in an album.
3 Press the MENU button to display
the Pop-up menu:
4 Select Copy to Memory Card.
Then press the OK button. The
photos are copied to the memory
card.
Delete
Copy All Images to Album
Copy to Memory Card
Slide Show
Lock
Return to Main Menu
PC View Mode
Hide Unsupported Files
Copying Photos Between a Computer and
the P-1000
If you will be copying individual photos, it’s okay if the
memory card already contains photos—as long as there is
enough space to hold the new ones you will copy. If you are
copying one or more folders, the memory card must be
empty.
If you have connected a computer to your P-1000, you can
copy photos from one device to the other. Follow these
steps:
Follow these steps:
2 Use your photo software (such as Film Factory),
Windows Explorer, Macintosh Finder, or other
application to select the images you want to copy and
drag them to the desired location.
1 Insert a memory card in the P-1000. If you will be
copying folders, the card must be empty.
1 Connect the computer to your P-1000 as described on
page 19. The LCD is turned off.
2 Select a folder in the Card Case or a single image that
you want to copy.
Viewing and Managing Images 31
If you are copying to the P-1000, you can select
individual images and copy them to an existing Album
or Card Case on the P-1000. Do not change the name
of the Album Case (“Albums”), Card Case (“Cards”)
folders, or any folders inside these two folders.
3 When you finish, close the application and/or click the
USB device icon on your screen (or drag it to the trash
icon) to stop the device. Then you can safely disconnect
the USB cable from your computer.
You see the Main Menu again.
Note:
In Windows 98, if you remove the cable from the computer
without closing your program and turning off the P-1000,
you may see a blue screen. To avoid this, turn the P-1000 off
before removing the cable.
Copying Photos Between a CD-R/RW and
the P-1000
CD-ROMs provide a great way to efficiently archive your
photos. If you have an external CD-R/RW drive, you can
copy photos from the P-1000 to a CD-R/RW, and copy
photos from the CD to an Album Case, Card Case, or a
memory card.
Copying Photos to a CD
Follow these steps to copy files to a CD-R/RW:
1 Connect the CD-R/RW drive to the P-1000 as
described on page 20. Be sure to connect the AC
adapter.
2 Turn on the CD-R/RW drive, then the P-1000.
3 Insert a blank CD-R/RW in the drive.
Note:
If you have already copied to a CD-R/RW from the P-1000,
you can add more files to it. However, if the CD contains
photos copied from another device (such as a computer),
you cannot copy to it from the P-1000.
4 In the Main Menu, select Copy to CD-R/RW and press
the OK button.
Main Menu
Browse
Copy to the
HDD
Slide Show
Settings
Copy to
CD-R/RW
Copy albums or card folders to a CD-R/RW. Press OK to
continue.
Viewing and Managing Images 32
5 In the Copy to CD-R/RW screen, select the location
where the photos you want to copy are stored (Album
Case or Card Case), and press the OK button.
7 Select any other folders or albums you want to copy.
8 Press the MENU button to display the Pop-up menu
and select Begin copying to the CD-R/RW.
Copy to CD-R/RW
Copy to CD-R/RW
Album Case
1
2
Favourites
Copy
Birthday
Card Case
Size:128MB
Available Disk Space:400MB
Delete
All Images to Album
Slide Show
Lock
Return to Main Menu
Hide Unsupported Files
Begin copying to the CD-R/RW
Select to Delete
Press OK to copy albums.
Press OK to select this option. Press Cancel to finish making
settings.
6 Select a folder or album to archive, and press the OK
button. A red
icon appears on the selected folder or
album:
Copy to CD-R/RW
Album in
Album Case
or Folder in
Card Case
1
2
Favourites
Birthday
Size:128MB
Available Disk Space:400MB
Press OK to select this option. Press Cancel to finish making
settings.
Space
available
on CD
Photo(s) in
selected album
or folder appear
here
Note:
If you want to cancel the check mark, select it and press the
OK button again.
You see this message:
Copy to CD-R/RW
1
2
Size:128MB
Available Disk Space:400MB
Favourites
Birthday
Once you have started
copying to a CDR/RW,
do not cancel the operation.
Otherwise, the CD-R/RW
media will become corrupted.
Copying can take up to one
hour.
Press OK to start copying to a CD-R/RW. Press Cancel to
return to the previous screen.
9 Press the OK button to start copying to the CD-R/RW
drive.
Viewing and Managing Images 33
Depending on the number of photos you are copying
and the size of the files, copying can take a while—up to
one hour for a large amount of data. While the photos
are being copied, the LCD is turned off and the activity
light flashes blue.
10 When all the files are copied, you see the message
Copying is complete. Press the OK button to return to
the Main Menu.
Copying Photos From a CD to the P-1000
Follow these steps to copy photos from a CD-R/RW to the
P-1000’s Card Case or Album Case, or to a memory card:
1 Select Browse from the Main Menu and select
CD-R/RW.
2 To copy a folder (or album) on the CD to the P-1000’s
Card Case, select the folder and press the MENU button
to display the Pop-up menu. Then select Copy to HDD.
To copy single images or a folder on the CD to a
memory card, select the first image and press the
MENU button to display the Pop-up menu. Then select
Copy to Memory Card.
To select multiple images and then copy them all at
once choose the Select to Copy option and press OK
for each one, and then select Copy to Memory Card.
To copy single images or a folder on the CD to an
album, follow the instructions in the next section.
3 When you’re ready, press OK to copy the files.
Copying Photos to an Album
You may want to copy photos in the P-1000’s Card Case, a
memory card, or a CD-R/RW to an album in the P-1000’s
Album Case. Follow the steps in this section to copy
individual photos or complete folders to an album.
Viewing and Managing Images 34
Copying a Single Photo
Follow these steps to copy a single photo to an album:
1 Display the photo in the Card Case, on a memory card,
or a CD-R/RW that you want to copy to an album.
2 Press the MENU button to display the Pop-up menu.
Model Name
Date
Size
Focus Length
F Number
Shutter Speed(s)
Expousure Bias
Flash
Metering Mode
: PhotoPC 8100Z
: 2001.12.31 22:31
: 1600 × 1200
: 20.20m
: F2.8
Delete
: 1/258 M
Rotate
: 0.0
: off
Copy to Album
: Divided
Copy All Images
to Album
Copy to Memory Card
Slide Show
Lock
Increase Number of Copies
2
3 Select Copy to Album and press the OK button. You
see this screen:
Only three albums are displayed at a time, so press d on
the arrow button to scroll down to see more.
If you want to create a new album select New from the
list, and press the OK button. You see this screen:
Copy to Album
Select one of the following:
Favorites
Family
Travel
Hobbies
Christmas
Press OK to select the option. Press Cancel to return to the
previous screen.
4 Select an album name from the list (you can scroll down
to see more), and press the OK button. After you press
OK, the photo is copied.
Note:
If you select an album name that is already being used, a
number is added to the end of the new album’s name; for
example, Family2. (You cannot create your own name on
the P-1000.)
Viewing and Managing Images 35
Copying a Folder
Follow these steps to copy all the photos in a folder in the
Card Case, on a memory card, or on a CD-R/RW to an
album:
1 Open the folder you want to copy to the album. (You
must open the folder before you can copy its photos.)
2 Press the MENU button to display
the Pop-up menu:
3 Select Copy All Images to
Album and press the OK button.
The photos are copied to the album. It may take a few
moments to copy all of them.
Changing an Album’s Name
If you want to change the name of an album, follow these
steps:
1 Select the album in the Album Case.
Delete
Rotate
20021218.003
20021218.004
Copy to Album
Copy All Images to Album
Copy to Memory Card
Slide Show
Lock
Increase Number of Copies
You see this screen:
2 Press the MENU button to display
the Pop-up menu:
Delete
Copy All
Christmas
Images
to Album
Travels
Slide Show
Lock
Return to Main Menu
Hide Unsupported Files
Change Album Name
Select to Delete
4 Select the album where you want to store the photos,
and press the OK button. (To create a new album, follow
steps 3 and 4 in the previous section.)
Viewing and Managing Images 36
3 Select Change Album Name and press the OK button.
You see this screen:
Copy to Album
Select one of the following:
Favorites
Family
Deleting Photos
There are several ways to delete a photo, folder, or album.
The easiest way is to select the item and then hold down the
MENU button for several seconds. When you see the
message “Are you sure you want to delete the files?”,
select Yes to delete or No to cancel.
Travel
Hobbies
Christmas
You can also delete an individual photo or a folder as
follows:
Press OK to select the option. Press Cancel to return to the
previous screen.
1 Select an image, folder, or album to delete.
4 Select the new name from the list, and press the OK
button.
Note:
If you select an album name that is already being used, a
number is added to the new album’s name, such as
Favorites2. (You cannot create your own name on the
P-1000.)
2 Press the MENU button to display
the Pop-up menu:
3 Select Delete and press the OK
button.
Delete
Copy All Images to Album
Copy to Memory Card
Slide Show
Lock
Return to Main Menu
PC View Mode
Hide Unsupported Files
Note:
If the selected picture, folder, or album is locked, you
cannot delete it. (See page 26 to unlock it.) However, if you
are deleting a folder or album that is not locked but contains
one or more locked photos, the folder will be deleted.
4 If you see a message asking if you want to delete the
file(s), select Yes to delete or No to cancel. Then press
OK.
Viewing and Managing Images 37
Note:
You can select whether to display this confirmation
message. See “Changing the Copy Mode Settings” on
page 45.
5 When you finish marking the items you want to delete,
press the MENU button to display the Pop-up menu
and select Delete.
You see the message Are you sure you want to delete
Marking Photos, Folders, or Albums for
Deletion
If you want to delete several photos, folders, or albums, you
can mark them for deletion and then delete them all at once.
Follow these steps:
the files?
6 Select Yes to delete them or No to cancel and press the
OK button.
1 Select the first photo, folder, or album you want to
delete.
2 Press the MENU button to display the Pop-up menu.
3 Use the arrow button to choose Select to Delete and
press OK. A trash can icon appears in the thumbnail for
the image, folder, or album.
4 Repeat step 3 for any other items you want to delete.
If you change your mind about one of the marked
items, select it again, press the MENU button to display
the Pop-up menu, and choose the Undo Delete
command.
Viewing and Managing Images 38
Chapter 3
Direct Printing
You can print your photos directly on any of the following
EPSON Stylus Photo printers without connecting a
computer:
❍
Stylus Photo 820
❍
Stylus Photo 900
❍
Stylus Photo 1280
❍
Stylus Photo 2200
More printers may be supported; check the EPSON web
site to get the latest printer driver information:
http://support.epson.com.
You can use the following sizes and types of paper.
Paper
Size
Premium Glossy Photo
Paper
4 × 6 in., 10 × 15 cm, 5 × 7 in.,
Letter, A4
Premium Semigloss Photo
Paper
Note:
For details about paper, see your printer documentation.
The P-1000 comes with two USB cables; choose the one
that is correct for your printer.
Direct Printing 39
Connecting the P-1000 to a Printer
3 Connect the other end of the cable to the printer.
Follow these steps to connect the P-1000 to your printer:
1 Make sure the P-1000 and the printer are turned off.
2 Connect the small end of the USB cable to the P-1000.
Note:
Use the appropriate cable for your printer.
Direct Printing 40
Selecting the Correct Printer Driver
The first time you print, you need to select the correct
printer driver. Follow these steps:
3 Make sure Select Printer is highlighted and press the
OK button. You see the Select Printer screen:
1 Press the PRINT button. You see the Print screen:
Print
Print This Photo
Print All Photos
Select Photos
Number of Photos:
Utilities
Printer Settings
Press OK or Print to continue. Press Cancel to return to the
previous screen.
2 Select Printer Settings and press the OK button. The
Printer Settings screen appears:
4 Select your printer from the list (use the arrow button to
scroll down if necessary) and press the OK button.
Note:
If you don’t see your printer listed, you may need to update
the firmware with the latest version. For more information,
see “Updating the Firmware and Printer Driver” on
page 58.
5 Press CANCEL twice to close the Print Menu.
Direct Printing 41
Printing Your Photos
1 Make sure the printer is connected and paper is loaded.
To add images to be printed and select the number of
copies, choose Select Photos. You see this screen:
Press l or r to select an image.
2 Connect the AC adapter to the P-1000 before you print.
3 To print a single photo, select the image. If you want to
print multiple images in a folder or album, just open the
folder or album.
Select Photos
0001/0024
Date:2001.12.31 22:31
Resolution**:1600×1200
01
4 Press the PRINT button. You see the Print menu:
Total 01
09
09
00
00
Print
Press u or d to
choose the number
of copies to print, up
to 99.
Print This Photo
Print All Photos
Use the left or right button to select a photo. Use the up or
down button to select the number of copies to print. Press OK
or PRINT to select layout.
Select Photos
Number of Photos:1
Utilities
Printer Settings
Press OK or PRINT to continue. Press CANCEL to return to
the previous screen.
Note:
If a printer is not selected, the Printer Settings screen
appears. Select your printer from the list.
Select the images you want to print and the number of
copies for each one.
6 Press the OK button. You see the Print Settings menu:
Print Settings
Number of Copies
01
Print Date
5 To print only the selected image, choose Print This
Photo.
To print all the images in the selected folder or album,
select Print All Photos.
Paper
Print
A4
Premium Glossy Photo Paper
1 Picture
with borderless
Layout
Print Quality
High
Copy number affects the total number of copies. Press OK or
Print to start printing. The LCD display turns off.
Direct Printing 42
7 Press l or r on the arrow button to choose the settings
you want:
Number of
Copies
Select the number of copies, up to 99,
you want printed of the selected
photo(s).
Print Date
Set whether to print the date the photo
was taken—if the image includes date
information—or the date the file was
created.
Paper
Scroll through the list of paper types
and sizes and choose the one that is
loaded in the printer.
Layout
Choose Border or Borderless printing. If
you selected all the photos, you’ll want
to select how many per page. For A4
size, choose 3, 4, 8, or 20; for Letter
size, choose 3, 4, 9, or 20.
Print Quality
Select High or Super High (or Normal or
Normal High) speed.
8 Press the PRINT or the OK button when you are ready
to start printing.
During printing, the LCD is turned off.
Direct Printing 43
Chapter 4
Customizing Settings
You can easily change the P-1000’s settings to make it work
best for you. Select Settings in the Main Menu and press
the OK button. You see this menu:
Adding an Album Shortcut
You can select three album shortcuts to appear on the Main
Menu, which let you go straight to your favorite albums.
Follow these steps:
Settings
Album Shortcut
Copy Mode
Display
Slide Show
LCD
Sound
Power Save
Video Out
Date and Time
Language
Disk space available in HDD:8.2GB/R4CC810Ver.10.0
Press OK to select the album shortcut.
Each of these options is described in this chapter. Select the
one you want to change and press the OK button.
1 First select the photo to use as the album thumbnail
picture. To do this, open the album you want the
shortcut for and select a photo to be the thumbnail.
Note:
You cannot select an album that was not created on the
P-1000. For example, you cannot choose one you copied
from your computer.
2 Press the MENU button to display the Pop-up menu.
3 Select Set as the Album Thumbnail and press the OK
button.
4 Press CANCEL until you see the Main Menu.
Customizing Settings 44
5 Select Settings from the Main Menu, and then Album
Shortcut. You see this screen:
Album Shortcut Settings
Changing the Copy Mode Settings
This option lets you tell the P-1000 how to handle images
on a memory card during and after copying.
Shortcut 1:
Favorites
Copy Mode Settings
Clear memory card after copying:
Shortcut 2:
Travel
OFF
ON
Confirm
Save images in album after copying:
Shortcut 3:
Hobbies
OFF
ON
Confirm
Default album for copied images:
Use the left or right button to change the album shortcut.
Press OK to apply the setting and return to the previous
screen.
6 Press d or u on the arrow button to select Shortcut 1,
2, or 3. Then press l or r to scroll through the albums
to find the one you want for that shortcut. Do this for
each shortcut you want to create.
7 Press OK then CANCEL.
The new shortcut(s) appear in the Main Menu.
Favorite
Memory card data will be deleted without verification. Press OK
to apply the setting and return to the previous screen.
Clear memory card after copying
Select OFF if you do not want files on the memory card to
be deleted after they have been copied to the P-1000.
Select ON if you want photos on the memory card to be
automatically deleted, without a warning message, after you
copy them to the P-1000.
Select Confirm if you want the P-1000 to ask before
copying whether to delete the photos from the memory card
after copying.
Customizing Settings 45
Save images in album after copying
Changing the Display Settings
Turn this setting ON if you want images from a memory
card to be stored in the default album on the P-1000
automatically when you copy them from a memory card.
You can choose which album is the default; see the next
section.
Select Display and press OK to change the way your photos
are displayed. You see this menu:
Display Settings
Memory card or card folder view mode:
PC View Mode
DSC View Mode
Unsupported files setting:
Note:
The images are also copied to the Card Case.
Show
Hide
Photo information setting:
Show
Hide
Select Off if you do not want them copied to an album.
Show images in current folder in PC View mode. Press OK to
apply the selection. Press Cancel to disregard.
Select Confirm if you want the P-1000 to ask before
copying which album to store the photos in.
Default album for copied images
Press l or r on the arrow button to select the default album
where you want to store memory card images when the
Save images in album after copying setting is set to ON.
Memory card or card folder view mode
This option determines how photos on a memory card and
in the P-1000’s card case are displayed. Select PC mode to
show the hierarchy of folders and subfolders. In this mode,
you’ll need to open a folder to see the pictures it contains.
Select DSC mode to show all the images in the current
folder (including images in subfolders) at the same time
without opening (or showing) any folders.
Note:
You can also change the mode while looking at a folder or photo
through the Pop-up menu. See “PC/DSC View Mode” on
page 27 for more information. Albums are always displayed in
PC view mode.
Customizing Settings 46
Unsupported files setting
Setting the Slide Show Options
Select Show if you want to see all files and folders,
including non-compatible file types. Select Hide to show
only compatible photo files and folders.
Select Slide Show to change the settings for running a slide
show. You see this menu:
Note:
You can also choose whether to show unsupported files using
the Pop-up menu. See page 27.
Slide Show Settings
Slide show effect:
ON
OFF
Slide show duration:
Photo information setting
Set whether to display the photo information when an
image is displayed in full-screen format.
Note:
You can also turn the photo information on and off for individual
photos using the Pop-up menu. See page 27.
3s
5s
10 s
20 s
30 s
1 min
5 min
Select the desired item and press the OK button.
Slide show effect
Select ON for this option to fade from one photo to the
next. Select OFF if you do not want this effect.
Note:
When this setting is ON, the slide show duration setting is
invalid.
Slide show duration
If Slide show effect is turned off, you can set the length of
time you want each image to remain on the screen before
switching to the next. Press l or r on the arrow button to
move the slidebar, choosing an interval from 3 seconds to
5 minutes. The default setting is 10 seconds.
Customizing Settings 47
Adjusting the LCD Brightness
Setting the Power Save Options
Select LCD to adjust the brightness of the screen.
The Power Save options conserve battery power by turning
off the screen backlight and turning off the power after a set
interval of inactivity. Select Power Save to change the
time-out periods. You see this menu:
LCD Setting
LCD brightness:
Power Save Settings
Dark
Bright
Auto backlight control duration:
1 min
Use the left or right button to adjust the LCD screen
brightness. Press OK to apply the setting and return to the
previous screen.
5 min
Auto power off duration:
1 min
Press l or r on the arrow button to select the brightness
level.
10 min
The LCD screen goes dark when Photo Viewer is idle for this
period of time. Press OK to apply the setting and return to the
previous screen.
Turning the Sound On or Off
Auto backlight control duration
Select Sound to turn on or off the beeping sound the
P-1000 makes when performing certain operations.
This option determines the length of time after which the
LCD’s backlight is turned off if there is no activity. Press
l or r on the arrow button to move the slidebar from
1 minute to 5 minutes. The default setting is 3 minutes.
Sound Setting
Auto power off duration
Sound:
ON
OFF
Press OK to apply the Sound setting and return to the previous
screen. Press Cancel to disregard the change.
Press l or r on the arrow button to select the number of
minutes (from 1 to 10) before the power is shut off
automatically if there is no activity. The default setting is
5 minutes.
Customizing Settings 48
Selecting the Video Out Signal
Setting the Date and Time
If you have connected an external monitor (as described on
page 19), you may need to change the video output signal
method. When you select Video Out, you see this screen:
Select Date and Time to change these settings:
Date and Time Settings
Year:
2003
Hour:
12
Month:
01
Minute:
00
Day:
01
Format:
YYYY.MM.DD
Use the up or down button to select the year. Press OK to
apply the setting.
Press u or d on the arrow button to change the value for
the selected item (such as the year).
Choose NTSC or PAL. (Televisions sold for the North
American market are NTSC.) If you change the setting
while a device is connected, disconnect and reconnect the
Video cable.
To go to the next option (Month or Day, for example) press
l or r. Then press u or d to change that setting.
After you finish making all settings, press the OK button.
Note:
If you remove the P-1000’s battery, the date and time settings
will be erased after about two days; so you’ll need to check and
possibly change the settings. You’ll also need to check the date
and time after changing the battery to make sure they are set
correctly.
Customizing Settings 49
Choosing the Language
Choose a language from among eight languages:
Language Setting
Language
English
Fran ais
Deutsch
Italiano
Espanol
Portugues
Press OK to select and return to the previous screen. Press
cancel to disregard the selection.
Customizing Settings 50
Chapter 5
Maintenance and Troubleshooting
This chapter describes how to clean the P-1000, use the
printer utilities, and solve problems.
Cleaning the P-1000
Follow these guidelines when cleaning the P-1000:
Using the Printer Utilities
You can use the Printer Utilities to check the printer’s
status, clean the print head, and align the print head from
your P-1000.
❍
Turn the P-1000 off before cleaning.
1 Connect the printer to the P-1000 as described on
page 40.
❍
Use a clean, dry cloth to wipe it clean.
2 Press the PRINT button. You see the Print menu:
❍
Do not use harsh or abrasive cleaners.
❍
If necessary, clean the battery contacts with a dry cloth.
Print
Print This Photo
Print All Photos
Select Photos
Number of Photos:
Utilities
Printer Settings
Press OK or Print to continue. Press Cancel to return to the
previous screen.
Maintenance and Troubleshooting 51
3 Select Utilities and press the OK button. You see the
Utilities menu:
Ink Levels
Select this option to check the amount of ink remaining
in the ink cartridges.
Utilites
Head Cleaning
Head Alignment
Nozzle Check
Ink Levels
Head Alignment
Select this option to adjust the bi-directional printing
accuracy. (This option is not available on all supported
printers.)
Press OK to continue. Press Cancel to return
to the previous screen.
Troubleshooting
4 Select the option you want and follow the on-screen
instructions.
Head Cleaning
Select this option to clean the printer’s print head. Then
you can check the condition of the print head by
printing the nozzle check pattern.
Nozzle Check
When a problem occurs, an error message usually appears
on the LCD. Refer to the following table to diagnose an
error message. For more assistance, see “Problems and
Solutions” on page 56.
Error message
Description
A fatal error has occurred.
Cannot continue the
operation.
Turn the power off and on again.
If the error message appears
again, contact EPSON. (See
page 59.)
Select this option to print the nozzle check pattern to
check the condition of the print head. If the nozzle
check pattern is not printed clearly, select Head
Cleaning and clean the print head again.
Maintenance and Troubleshooting 52
Error message
Description
Error message
Description
A fatal error has occurred.
Failed to copy to the
CD-R/RW.
Turn the power off and on again.
If the error message appears
again, confirm that the CD-R/RW
and CD-R/RW drive are not
malfunctioning. Reconnect the
USB cable or try another CD.
Cannot continue deleting
files because an error has
occurred. Some files have
been deleted but others
have not. Go to next step.
Some files cannot be deleted or
the memory card may be
write-protected. Check the
memory card and try again.
A fatal error has occurred.
Press any button to turn
off power.
Turn the power off by pressing
any button and then turn it on
again. If the error appears again,
contact EPSON. (See page 59.)
Cannot find any card
folders. It seems that
nothing has been copied
yet.
There is no card folder in the
specified location. Make sure
the card folder exists and try
again.
A file access error has
occurred. Do not eject the
memory card while it is
being accessed.
Wait until the ACCESS light
turns off; then reinsert the
memory card and try again.
Cannot find the Album
Case. It may be renamed
or deleted.
There is no Album Case in the
specified location. Make sure
the Album Case exists and try
again.
An unusually high
temperature was
detected. Photo Viewer
will turn off soon.
The P-1000 is too hot. Let it cool
off before turning it on again.
Cannot find the album. It
may be renamed or
deleted.
There is no album assigned to
the album shortcut or in the
specified location. Make sure
the album exists and try again.
A printer error has
occurred.
Check your printer and clear the
error.
Cannot find the card case.
It may be renamed or
deleted.
Battery power is low.
Connect the AC adapter to
ensure proper operation.
Connect the AC adapter to
complete the operation and then
charge the battery.
There is no card case in the
specified location. Make sure
the card case exists and try
again.
Failed to save the result.
Cancel the operation and
return to the previous
screen.
Select to Copy could not be
executed correctly. Try again.
Maintenance and Troubleshooting 53
Error message
Description
Error message
Description
An error occurred while
accessing the HDD.
Please try printing again.
Printing was not successful. Try
to print the data again.
Select the correct printer driver.
See page 41.
HDD access error has
occurred. Failed to copy to
the CD-R/RW.
An error occurred while writing
to the CD-R/RW and the data
was not copied. Try to copy the
data again.
Printer does not match
the printer driver. Please
check the printer driver
setting.
Printer driver cannot be
found. Reinstall the printer
driver.
Memory card must be
empty to copy back a card
folder.
The memory card contains data;
it must be empty before you can
copy a folder to it.
Make sure the printer driver is
stored in the root folder of the
HDD or the memory card. (See
the instructions that came with
the firmware/printer upgrade.)
Parts inside the printer
require adjustment.
Please refer to the
printer’s documentation.
Some part of the printer needs
to be replaced or adjusted. See
your printer manual.
Printer Error: paper jam.
Clear the paper jam and
continue printing.
Remove the jammed paper from
the printer.
Printer Error: paper out.
Please load paper.
Load paper in the printer.
Please check the ink
cartridges.
The ink cartridges have run out
or have been installed
incorrectly. Check your printer
and replace or install the
cartridges correctly.
Some errors occurred
while copying. Any data
on the memory card will
not be deleted.
Some files to be copied or
deleted from the memory card
were skipped. The files may be
damaged. Check the memory
card and copy any missing files.
Please install the ink
cartridges.
Ink cartridges have not been
installed in your printer. See your
printer manual and install the ink
cartridges.
Some errors occurred
while copying. Copying
was canceled.
Some files were skipped. The
memory card may be
write-protected. Check the
memory card and try again.
Maintenance and Troubleshooting 54
Error message
Description
Error message
Description
Some errors occurred
while deleting files. The
operation was canceled.
Some files were skipped. The
memory card may be
write-protected. Check the
memory card and try again.
Select a compatible paper size.
See page 39.
The media is not available.
Please insert a blank
CD-R/RW.
The CD-R/RW inserted in the
drive is full. Insert a blank
CD-R/RW and try the operation
again.
The selected paper size
cannot be used with the
connected printer. Select
a paper size that is
compatible with the
printer.
The memory card is
smaller than the card
folder. Please insert a
memory card larger than
xx MB and try again.
All the selected images or
folders cannot be copied
because the total size is too
large. Insert a larger memory
card or reduce the number of
images.
The storage capacity of
the HDD is less than what
is needed for the files you
are copying. Copying was
canceled.
All the selected images or
folders cannot be copied
because the total size is too
large. Delete unnecessary
images on the HDD or reduce
the number of images to copy.
There are some invalid
images which cannot be
printed.
The image data may be
damaged. Check the image(s) in
your album and delete any
corrupted ones. Then try to print
again. You can also copy the
images to a computer and print
from there.
The storage capacity of
the HDD is less than what
is needed for the files you
are copying. Copying was
suspended.
All the selected images or
folders cannot be copied
because the total size is too
large. Delete unnecessary
images on the HDD or reduce
the number of images to copy.
This image cannot be
displayed.
The selected photo cannot be
displayed because the file type
is not supported.
This item cannot be
deleted because it is
locked.
Unlock the image, folder, or
album and then delete it. (See
page 28 and page 37.)
There is no response from
the printer.
Make sure the USB cable is
connected correctly. Check your
printer.
Maintenance and Troubleshooting 55
Error message
Description
Problems and Solutions
This operation is not
applicable for this printer.
The printer or selected option
may not be supported. See
page 39 for details.
Use the information in this section to diagnose problems
and find solutions.
This printer’s head
alignment function is not
supported.
This printer does not support the
Head Alignment function.
Power Problems
You must set the date and
time to ensure correct
operation. Please make
the Date and Time
settings.
Set the correct date and time.
(See page 49.)
The power does not turn on.
Cause
What to do
The P-1000 is booting up.
Wait a few seconds after turning
on the power to see if it comes on.
The battery has run out.
When the
icon appears on
the top right corner of the LCD,
the battery has run out. See
“Charging the Battery” on page 14
and charge the battery.
The battery is not installed
correctly.
Make sure that the battery is
installed correctly. See “Installing
the Battery” on page 12.
Maintenance and Troubleshooting 56
Image Operation Problems
Operation is locked.
Cause
What to do
Cannot copy.
An error has occurred.
Press the RESET button. See
page 58.
Cause
What to do
The space available on the
HDD is not sufficient to
copy all of the data in the
memory card.
Delete unnecessary images in the
P-1000’s HDD or reduce the
number of images to copy from the
memory card.
Trying to copy images to a
CD-R/RW that is full.
You cannot copy images to a full
CD-R/RW. Use another one.
The image data may be
damaged.
Try to copy a different image.
Image Display Problems
The image is not displayed.
Cause
What to do
The image format is not
supported.
Make sure the image is a supported
file type (JPEG).
The image data is
corrupted.
Copy the image again.
The LCD is too dark.
Adjust the LCD brightness as
described on page 48.
Cannot delete.
The battery is not installed Make sure the battery is installed
correctly.
correctly. See page 12.
The USB cable is connected No image is displayed on the LCD
to the P-1000.
when a USB cable is connected or
during certain operations.
Cause
What to do
The image is locked.
Unlock the image and then delete
it. (See page 28 and page 37.)
Trying to delete images in a You cannot delete images on a
CD-R/RW.
CD-R/RW.
Maintenance and Troubleshooting 57
Cannot store images to the CD-R/RW.
Cause
What to do
Trying to copy images to a
CD-R/RW that is full.
Use another CD-R/RW.
The total size of the images is Use another CD-R/RW.
larger than the space
available on the CD-R/RW.
EPSON will occasionally update the P-1000 firmware and
add support for additional printers. You can download the
latest version from EPSON’s Support web site:
http://support.epson.com. Instructions for updating the
firmware in your P-1000 will be included with the
download information.
Resetting the P-1000
Printing Problems
Cannot print.
Cause
Updating the Firmware and Printer
Driver
What to do
If the P-1000 locks up (stops working) or you want to
restore the default values, you can reset it. Press the RESET
button with a thin object.
RESET button
The printer is not supported. See page 39 to make sure your
printer is supported. Then select
your printer in the Printer Settings
screen (page 41). You may need to
update the printer driver. See the
next section for more information.
The printer’s power is off.
Turn on the printer.
The USB cable is not
connected correctly.
See “Connecting the P-1000 to a
Printer” on page 40 and reconnect
the P-1000 to the printer.
The P-1000 shuts off, resets its default values and comes
back on.
Maintenance and Troubleshooting 58
Where to Get Help
To speak to a technical support representative, dial:
EPSON provides technical assistance 24 hours a day
through the electronic support services and automated
telephone services listed below.
❍
U.S.: (562) 276-4365, 6 AM to 6 PM, Pacific Time,
Monday through Friday.
❍
Canada: (905) 709-3839, 6 AM to 6 PM, Pacific Time,
Monday through Friday.
Service
Access
World Wide Web
From the Internet, you can reach
EPSON Support at
http://support.epson.com. At this site,
you can download drivers and other
files, look at product documentation,
access troubleshooting information, and
receive technical advice through e-mail.
Automated
Telephone
Services
A variety of automated help services are
available 24 hours a day, seven days a
week. To use these services, you must
have a touch tone telephone and call
(800) 922-8911.
Toll or long distance charges may apply.
Before you call, please have the following information ready:
❍
Product name (EPSON P-1000)
❍
Product serial number (located on the bottom edge of
the P-1000)
❍
Proof of purchase (such as a store receipt) and date of
purchase
❍
Description of the problem
You can purchase ink cartridges, paper, manuals, and
accessories from EPSON at (800) 873-7766, or visit the
EPSON StoreSM at www.epsonstore.com (U.S. sales only).
In Canada, please call (800) 463-7766 for dealer referral.
Maintenance and Troubleshooting 59
Appendix A
Notices
Safety Instructions
❍
If this product emits unusual noises, odors, or smoke,
cancel the current operation and turn it off immediately.
Disconnect the AC adapter from the product, then
unplug the AC adapter from the power outlet. Contact
EPSON.
❍
Follow all warnings and instructions marked on this
product.
To prevent fire or electric shock, do not cover this
product with a blanket or other covering that may give
off a static electric shock.
❍
Do not insert objects into the slots or openings on this
product.
To prevent fire or electric shock, do not expose this
product or its options to rain or moisture.
❍
To prevent fire or explosion, do not use this product
where flammable or volatile gas is stored.
❍
Do not use this product outdoors during a
thunderstorm.
❍
Do not use this product after moving it between
extreme temperatures, which may cause condensation to
form on electronic parts.
Read all these instructions before using the EPSON P-1000,
and keep this guide handy for later reference. Follow all
warnings and instructions marked on the P-1000 and any
options.
When Using the P-1000
❍
❍
❍
❍
Do not touch the components inside this product unless
instructed to do so in the documentation. Never force
this product’s components into place. Although this
product is designed to be sturdy, rough handling can
damage it.
Never spill liquid onto this product.
Notices 60
When Using the Battery
❍
❍
If battery acid gets into your eyes or on your skin,
immediately rinse the affected area thoroughly with
water and seek medical treatment. If a battery is
swallowed, seek medical treatment immediately.
Use only an EPSON Lithium-ion battery for the
P-1000 according to the instructions in this manual.
❍
Do not charge the battery near open flame or in very hot
locations.
❍
Keep batteries away from heat sources.
❍
Do not insert objects into any openings as they may
touch dangerous voltage points or short-circuit
components.
❍
Prevent the battery from coming into contact with
metal objects that could short-circuit it, such as coins or
keys.
❍
Do not use the battery that comes with this product for
other devices.
❍
To protect against short-circuiting, do not remove the
outside sleeves of the battery.
❍
Do not insert the battery into power outlets or other
power sources such as car cigarette lighter sockets.
❍
Do not handle the battery with wet hands or use it near
water.
❍
Do not solder wires or terminals directly to the battery.
❍
Do not touch battery terminals.
❍
Do not expose the battery to water or high humidity.
❍
❍
Do not drop, puncture, disassemble, mutilate, or
short-circuit the battery.
Keep batteries away from open flame if they leak or
smell strange.
❍
❍
Do not place the battery near or into fire or water.
If overheating, discoloration, or distortion occur,
remove the battery from this product and do not use it.
❍
Do not use batteries that are leaking or damaged in any
way.
❍
Do not charge the battery on devices except this
product.
Notices 61
When Storing the Battery
❍
When not using this device for a long period, remove
the battery from this product and store it separately.
❍
Do not store batteries where the temperature or
humidity is very high.
❍
Store batteries out of children’s reach.
❍
Discharge the battery completely before storing it for a
long time.
❍
For North America and Canada Users:
This mark indicates that the battery will be
recycled by the RBRC. When you are ready to
dispose of the battery, contact the RBRC at
(800) 822-8837.
When Using the AC Adapter
❍
Use only the type of power source indicated on the AC
adapter’s label, and always supply power directly from a
standard, domestic power outlet with a power cord that
meets the relevant local safety standards.
❍
Place the AC adapter near an electrical outlet where the
power cord can be easily unplugged.
❍
The AC adapter is designed for use and provided with
this product. Do not attempt to use it with other
electronic devices unless specified.
❍
Do not remove the AC adapter from this device during
operations.
❍
The AC adapter included is designed for use with this
product. Use of any other adapter could result in fire,
electrical shock, or injury.
When not using the battery for a long time, charge the
battery and then discharge it completely about once a
year during storage.
When Disposing of the Battery
Before disposing of the battery, make sure you discharge it
completely.
Warning:
Be sure to securely cover the end of the battery with tape to
prevent combustion or explosion when disposing.
Do not dispose of batteries as ordinary refuse. Instead, dispose
of them in a collection or recycle box in accordance with local
laws.
Notices 62
❍
❍
Use only the power source that meets the power
requirements indicated on the label attached to the
product. If you are not sure of the power supply
specifications in your area, contact your local power
company or regulatory agency.
Make sure the total amperage of all devices plugged into
the power outlet does not exceed the power outlet’s
ampere rating.
❍
Do not place any objects on the power cord and the AC
adapter.
❍
Keep the power cord straight at the ends and at the
points where it enters the transformer.
❍
The power cord should be placed to avoid abrasions,
cuts, fraying, crimping, kinking, and other damage.
❍
If you cannot insert the plug into the power outlet,
contact an electrician.
❍
For US and Canadian users: Use the included power
cord or a 6 to 10 foot UL-approved type SPT-2 or
heavier type, 2 x 18 AWG cord with a 125 V 10 A plug
and 125 V 7 A connector.
❍
Do not use a damaged or frayed AC adapter.
❍
If you use an extension cord with this product, make
sure the total amperage of all devices plugged into the
extension cord does not exceed the cord’s amperage
rating.
❍
Never disassemble, modify, or attempt to repair the AC
adapter by yourself.
❍
❍
Do not use power outlets controlled by wall switches or
automatic timers.
Only memory cards designed for the product’s
specifications can be used. (See page 7.)
❍
❍
Do not use power outlets on the same circuit as large
motors or other appliances that may cause voltage
fluctuations.
The methods for using memory cards vary according to
card type. See the documentation included with your
memory card for details.
❍
❍
Avoid using outlets on the same circuit as photocopiers
or air control systems that regularly switch on and off.
Do not remove a memory card or turn off the product
while the ACCESS light is flashing.
❍
Position this product’s power cord so that it will not be
stepped on or run over.
When Using a Memory Card
Notices 63
When Using the LCD
❍
The LCD panel on this product may contain a few
small bright or dark spots. These are normal and do not
mean that your LCD panel is damaged in any way.
❍
If the LCD panel on this product is damaged, contact
EPSON.
❍
If the liquid crystal solution contained in the LCD panel
on this product leaks out and gets onto your hands,
wash them thoroughly with soap and water. If it gets
into your eyes, flush them immediately with water. If
discomfort or vision problems remain after a thorough
flushing, see a doctor immediately.
❍
When Storing, Maintaining, or Transporting
the P-1000
❍
Do not store this product outdoors.
❍
Do not store this product near water.
❍
Do not store this product in a location subject to high
temperature or humidity.
❍
Do not store this product in a location subject to rapid
changes in temperature or humidity.
❍
Do not store this product in a location subject to direct
sunlight or strong light sources.
❍
Unplug this product from the power outlet before
cleaning it. Use a damp cloth for cleaning and do not
use liquid or aerosol cleaners.
❍
Remove the battery and unplug this product and refer
servicing to qualified service personnel under the
following conditions: The power cord or plug is
damaged; liquid has entered this product or its options;
this product or its options have been dropped or the case
is damaged; this product or its options do not operate
normally or exhibit a distinct change in performance.
Use only a soft, dry cloth to clean the display. Do not
use liquid or chemical cleaners.
Notices 64
FCC Compliance Statement for United
States Users
This equipment has been tested and found to comply with
the limits for a Class B digital device, pursuant to Part 15 of
the FCC Rules. These limits are designed to provide
reasonable protection against harmful interference in a
residential installation. This equipment generates, uses, and
can radiate radio frequency energy and, if not installed and
used in accordance with the instructions, may cause harmful
interference to radio or television reception. However, there
is no guarantee that interference will not occur in a
particular installation. If this equipment does cause
interference to radio and television reception, which can be
determined by turning the equipment off and on, the user is
encouraged to try to correct the interference by one or more
of the following measures.
❍
Reorient or relocate the receiving antenna
❍
Increase the separation between the equipment and
receiver
❍
Connect the equipment into an outlet on a circuit
different from that to which the receiver is connected
❍
Consult the dealer or an experienced radio/TV
technician for help
Warning
The connection of a non-shielded equipment interface cable
to this equipment will invalidate the FCC Certification of
this device and may cause interference levels which exceed
the limits established by the FCC for this equipment. It is
the responsibility of the user to obtain and use a shielded
equipment interface cable with this device. If this
equipment has more than one interface connector, do not
leave cables connected to unused interfaces.
Changes or modifications not expressly approved by the
manufacturer could void the user’s authority to operate the
equipment.
For Canadian users
This Class B digital apparatus complies with Canadian
ICES-003.
Cet appareil numérique de la classe B est conforme à la
norme NMB-003 du Canada.
Notices 65
Declaration of Conformity
Standards and Approvals
According to 47CFR, Part 2 and 15 for Class B Personal
Computers and Peripherals; and/or CPU Boards and Power
Supplies used with Class B Personal Computers:
EPSON P-1000
We:
Located at:
EPSON AMERICA, INC.
MS 3-13
3840 Kilroy Airport Way
Long Beach, CA 90806
Telephone: (562) 290-5254
Declare under sole responsibility that the product identified
herein, complies with 47CFR Part 2 and 15 of the FCC
rules as a Class B digital device. Each product marketed is
identical to the representative unit tested and found to be
compliant with the standards. Records maintained continue
to reflect the equipment being produced can be expected to
be within the variation accepted, due to quantity production
and testing on a statistical basis as required by 47CFR
§2.909. Operation is subject to the following two
conditions: (1) this device may not cause harmful
interference, and (2) this device must accept any
interference received, including interference that may cause
undesired operation.
Trade Name:
Type of Product:
Model:
EMC
FCC Part 15 Subpart B Class
BCSA C108.8 Class B
AC Adapter
Safety
UL60950
CSA No. 60950
EMC
FCC Part 15 Subpart B Class B
CSA C108.8 Class B
EPSON
Photo Viewer
G881A
Notices 66
Specifications
Memory card:
CPU:
TMS320DM310
3.3V CompactFlash memory card
(Type I/ Type II, including
Microdrive); with adapter: SD memory
card, Memory Stick, SmartMedia,
MultiMedia Card, xD-Picture Card
LCD:
3.8 inches, EPSON VGA TFT LCD;
640 × 480 pixels; 262,144 colors;
212 ppi
Note:
A commercially available CF adapter is
needed to use any memory cards
other than CF cards.
Memory:
64MB SDRAM; 4MB flash ROM
HDD:
1.8 inch HDD, 10GB, FAT 32
(9GB for storage, 1GB for system
information and formatting)
Dimensions
and weight:
Height
3.6 inches (91.5 mm)
Width
5.59 inches (142 mm)
Depth
0.91 inch (23 mm)
Weight
Approx. 11.2 oz. (317 g),
including battery
General
Temperature:
Operating: 41 to 95 °F (5 to 35 °C)
Non-operating: –4 to 140 °F
(–20 to 60 °C)
Humidity:
(without
condensation)
Operating: 30 to 80%
Non-operating: 10 to 80%
Power sources:
Lithium-ion battery
AC adapter
Electrical
Input voltage
DC 6 V
Rated current
Maximum 2 A
Power
consumption
7.2 W (with the battery)
9.6 W (when using the AC
adapter)
Notices 67
Interface
USB connector:
Video output
connector:
AC Adapter
One USB (ver 1.1) interface for Host
and Slave connection
Composite Output (NTSC/PAL)
Battery
Type:
Rechargeable Lithium-ion battery
Model:
B6345
Size:
(H × W × D)
1.4 × 2.1 × 0.3 inches
(35.2 × 53 × 7 mm)
Ratings:
3.7 V, 1035mAh
Temperature:
Operating: 41 to 95 °F (5 to 35 °C)
Non-operating: –4 to 140 °F
(–20 to 60 °C)
Model:
P261 (Model: A211H)
Input:
AC 100 - 240 V
Output:
DC 6.0 V, 2.0 A
Power
consumption:
16 W
When storing for a long period, do not
keep in high temperatures.
Humidity:
(without
condensation)
Operating: 30 to 80%
Non-operating: 10 to 80%
Notices 68
Warranty
EPSON AMERICA, INC.
What Is Covered: Epson America, Inc. (“EPSON”)
warrants to the first retail purchaser that the EPSON
product enclosed with this limited warranty statement, if
purchased and used in the United States or Canada,
conforms to the manufacturer’s specifications and will be
free from defects in workmanship and materials for a period
of one (1) year from the date of original purchase. For
warranty service, you must provide proof of the date of
original purchase.
What EPSON Will Do To Correct Problems: Should your
EPSON product prove defective during the warranty
period, please call the EPSON ConnectionSM at
(562) 276-4303 for warranty repair instructions and return
authorization, if required. An EPSON service technician
will provide telephone diagnostic service to determine
whether the unit requires service. If service is needed,
EPSON will, at its option, repair or exchange the product
without charge for parts or labor. If the product requires
repair or replacement, it is your responsibility to package it
in its original container or an equivalent, along with proof of
the date of original purchase and ship it to EPSON.
Packaging and shipping costs incurred in presenting your
EPSON product for warranty service are your responsibility.
Return shipping costs from the EPSON repair facility are
EPSON’s responsibility. When warranty service involves the
exchange of the product or of a part, the item replaced
becomes EPSON property. The replacement product or
part may be new or refurbished to the EPSON standard of
quality, and, at EPSON’s option, may be another model of
like kind and quality. EPSON’s liability for replacement of
the covered product will not exceed the original retail selling
price of the covered product. Exchange products and parts
assume the remaining warranty period of your original
product covered by this limited warranty.
What This Warranty Does Not Cover: This warranty does
not apply to refurbished or reconditioned products. This
warranty covers only normal use in the United States and
Canada. This warranty is not transferable and will not apply
to products purchased from an end user. This warranty does
not cover damage to the EPSON product caused by parts or
supplies not manufactured, distributed or certified by
EPSON. This warranty does not cover third party parts,
components or peripheral devices added to the EPSON
product after its shipment from EPSON. EPSON is not
responsible for warranty service should the EPSON label or
logo or the rating label or serial number be removed or
should the product fail to be properly maintained or fail to
function properly as a result of misuse, abuse, improper
installation, neglect, improper shipping, damage caused by
Notices 69
disasters such as fire, flood, and lightning, improper
electrical current, software problems, interaction with
non-EPSON products, or service other than by an EPSON
Authorized Servicer. If a claimed defect cannot be identified
or reproduced, you will be held responsible for costs
incurred.
THE WARRANTY AND REMEDY PROVIDED
ABOVE ARE EXCLUSIVE AND IN LIEU OF ALL
OTHER EXPRESS OR IMPLIED WARRANTIES
INCLUDING, BUT NOT LIMITED TO, THE
IMPLIED WARRANTIES OF MERCHANTABILITY,
NON-INFRINGEMENT OR FITNESS FOR A
PARTICULAR PURPOSE. SOME LAWS DO NOT
ALLOW THE EXCLUSION OF IMPLIED
WARRANTIES. IF THESE LAWS APPLY, THEN ALL
EXPRESS AND IMPLIED WARRANTIES ARE
LIMITED TO THE WARRANTY PERIOD
IDENTIFIED ABOVE. UNLESS STATED HEREIN,
ANY STATEMENT OR REPRESENTATIONS MADE
BY ANY OTHER PERSON OR FIRM ARE VOID.
EXCEPT AS PROVIDED IN THIS WRITTEN
WARRANTY, NEITHER EPSON AMERICA, INC.,
NOR ITS AFFILIATES SHALL BE LIABLE FOR ANY
LOSS, INCONVENIENCE, OR DAMAGE,
INCLUDING DIRECT, SPECIAL, INCIDENTAL OR
CONSEQUENTIAL DAMAGES, RESULTING FROM
THE USE OR INABILITY TO USE THE EPSON
PRODUCT, OR FOR LOST DATA OR LOST
SOFTWARE, WHETHER RESULTING FROM
BREACH OF WARRANTY OR ANY OTHER LEGAL
THEORY.
In Canada, warranties include both warranties and
conditions.
Some jurisdictions do not allow limitations on how long an
implied warranty lasts and some jurisdictions do not allow
the exclusion or limitation of incidental or consequential
damages, so the above limitations and exclusions may not
apply to you. This warranty gives you specific legal rights,
and you may also have other rights which vary from
jurisdiction to jurisdiction.
Epson America, Inc., P. O. Box 93012
Long Beach, CA 90809-3012
Notices 70
Index
A
AC adapter
connecting, 14
connector, 10
safety instructions, 62 to 63
standards, 66
unpacking, 9
using, 12
ACCESS light, 11, 16, 18
Accessories, 59
Activity light, 11
Album
copying to, 26, 34 to 36, 46
customizing, 25
deleting, 37 to 38
locking, 28
renaming, 27, 36 to 37
shortcut, 44 to 45
unlocking, 28
viewing, 23
Album Case
managing photos, 25
viewing, 23
Aligning the print head, 52
Arrow button, 11, 16
Auto backlight control, 48
Auto power off, 15, 48
B
Backlight, power-off, 15, 48
Battery
charging, 14 to 15
cover, 10
disposing of, 62
icon, 14, 21 to 22
installing, 12 to 13
power, conserving, 15, 48
recycling, 62
safety instructions, 61 to 62
storing, 62
unpacking, 9
Brightness, LCD, 48
Browse option, 21 to 23
Index 71
C
CANCEL button, 11, 22, 24
Card Case, viewing, 23
Carrying case, 9
CD-R/RW
copying to and from, 32 to 34
problems, 58
viewing photos on, 23
CD-R/RW drive, connecting, 20
CD-ROM, P-1000, 9
CF adapter, 7, 18
Change Album Name option, 27, 37
Changing settings, 44 to 50
CHARGE light, 11, 15
Charging the battery, 14 to 15
Checking the ink level, 52
Cleaning the P-1000, 51
Cleaning the print head, 52
Clear memory card option, 45
CompactFlash, see Memory card
Computer
connecting, 19
displaying photos on, 25
Connecting
printer, 40
to a CD-R/RW drive, 20
to a computer, 19
to an external video, 19
Conserving battery power, 15, 48
Control panel, 10
Copy All Images to Album option, 26, 36
Copying
between a computer and the P-1000, 31 to 32
folder, 31, 36
from a CD to the P-1000, 34
from a memory card to the P-1000, 29 to 31
from the P-1000 to a memory card, 31
photos, 29 to 36
to a CD-R/RW, 32 to 34
to an album, 26, 34 to 36, 46
Copy Mode settings, 30, 45 to 46
Copy to Album option, 26, 35
Copy to CD-R/RW option, 21 to 22, 32
Copy to HDD option, 21 to 22, 26, 29, 34
Copy to Memory Card option, 26, 31, 34
Customizing settings, 44 to 50
D
Date, setting, 16 to 17, 49
Declaration of conformity, 66
Decrease Number of Copies option, 26
Default album setting, 46
Delete option, 26
Deleting photos, 26, 37 to 38
Direct printing, 39 to 43
Index 72
Displaying photos, 21 to 25
Display settings, 46 to 47
DSC view mode, 27, 46
E
Eject button, 10, 18
EPSON
accessories, 59
help, 59
Store, 59
Error messages, 52 to 56
External monitor, connecting, 19
F
FCC compliance, 65
Film Factory, 6, 9
Firmware, updating, 58
Folder
copying, 31, 36
deleting, 37 to 38
locking, 28
name, 30
unlocking, 28
H
Hard disk, internal, 6
Head Alignment utility, 52
Head Cleaning utility, 52
Help, EPSON, 59
Hide unsupported files, 24, 27, 47
I
Image display problems, 57
Increase Number of Copies for All option, 26
Increase Number of Copies option, 26
Information ON/OFF option, 27
Ink Levels utility, 52
Inserting memory card, 18
Installing battery, 12 to 13
J
JPEG images, 6, 21
L
Language setting, 16, 50
Layout option, 43
LCD, 10, 15, 48, 64
LCD setting, 48
Locking a photo, folder, or album, 28
Lock option, 26, 28
Index 73
M
P
Main Menu, 21 to 22
Managing albums, 25
Memory card
adapter, 7, 18
CompactFlash, 7, 18
inserting, 18
removing, 18
safety instructions, 63
slot, 10
viewing, 23
view mode, 46
MENU button, 11, 25 to 26
Message area, 21 to 22
Movie files, 21
PAL, 49
Paper
option, 43
types, 39, 43
PC/DSC View Mode option, 27, 46
Photo information, 24, 27, 47
Photos
copying between a computer and the P-1000, 31 to 32
copying from a CD to the P-1000, 34
copying from a memory card to the P-1000, 29 to 31
copying from the P-1000 to a memory card, 31
copying to a CD-R/RW, 32 to 34
copying to an album, 26, 34 to 36, 46
deleting, 26, 37 to 38
displaying, 22, 25
locking, 28
printing, 39 to 43
rotating, 26, 29
unlocking, 28
viewing, 21 to 25
zooming, 24
Pop-up menu, 25 to 27
N
Nozzle Check utility, 52
NTSC, 49
Number of Copies option, 43
O
OK button, 11
Index 74
Power
conserving, 15, 48
problems, 56 to 57
switch, 10
turning off, 17
turning on, 16
Power Save options, 15, 48
PRINT button, 11, 41, 42
Print Date option, 43
Printer
connecting, 40
driver, selecting, 41
driver, updating, 58
settings, 41 to 43
utilities, 51 to 52
Printing
nozzle check, 52
photos, 39 to 43
problems, 58
Print Quality option, 43
Problems
CD-R/RW, 58
copying, 57
deleting, 57
image display, 57
power, 56 to 57
printing, 58
solving, 52 to 58
Q
Quick Reference Guide, 7
R
RAW images, 21
Removing memory card, 18
Renaming album, 27, 36 to 37
RESET button, 10, 58
Reset Number of Copies for All option, 26
Resetting the P-1000, 58
Rotate option, 26
Rotating a photo, 26, 29
S
Safety Instructions, 60 to 64
Save images in album after copying, 46
Selecting printer driver, 41
Select to Copy/Undo Copy Command, 27
Select to Delete/Undo Delete Command, 27
Select to Delete option, 38
Set as Album Thumbnail option, 27
Index 75
Setting
album shortcut settings, 44 to 45
copy mode settings, 30, 45
date, 16 to 17, 49
display settings, 46
language, 16, 50
LCD brightness, 48
power save settings, 48
slide show settings, 47
sound setting, 48
time, 16 to 17, 49
video out setting, 49
Settings
changing, 44 to 50
Main Menu option, 21 to 22, 44
Shortcut icons, 21 to 22, 44 to 45
Show/Hide unsupported files, 27, 47
Slide show
duration, 47
effect, 47
main menu option, 21 to 22
pop-up menu option, 26
running, 27 to 28
settings, 47
Sound
files, 21
setting, 48
turning on/off, 48
Specifications, 67
AC adapter, 68
battery, 68
electrical, 67
general, 67
interface, 68
standards and approvals, 66
Status and error messages, 52 to 56
T
Technical support, 59
Television, connecting, 19
Time, setting, 16 to 17, 49
Troubleshooting
error messages, 52 to 56
image display problems, 57
image operation problems, 57
power supply problems, 56 to 57
printing problems, 58
Turning off
power, 17
sound, 48
Turning on
power, 16
sound, 48
Index 76
U
W
Unlocking a photo, folder, or album, 28
Unlock option, 26, 28
Unpacking the P-1000, 9
Unsupported files, 24, 27, 47
Updating
firmware, 58
printer driver, 58
USB
cable, 9, 19 to 20, 39 to 40
interface, 10
Warranty, 69 to 70
Z
Zooming, 24
V
Video
cable, 9, 49
connecting, 19
connector, 10
files, 21
Video Out
setting, 49
signal, 19, 49
Viewing photos, 21 to 25
Viewing stand, 9, 15
Index 77