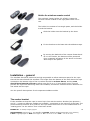
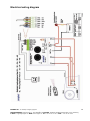
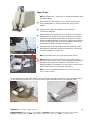
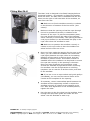
1
USER AND INSTALLATION
MANUAL
ENGBO ANCHOR WINCH
MAXI 31
MAXI 32
MAXI 34-series
MAXI 38
MAXI 40
Engbo MAXI products fit most boat models
Rev. 7-2010-01-04
According to NS-EN ISO 9001:2000
Part no. 117-00036
FCC ID: R78-RC-01
R78-MCU-01
ENGBO AS – et selskap i Engbo-gruppen
BESØKSADRESSE: Wirgenesvei 7, 3157 Barkåker POSTADR: Postboks 2288 Postterminalen, 3103 Tønsberg
E-MAIL: [email protected] WEB: www.engbo.no TLF: +47 33 00 31 50 FAKS: +47 33 00 31 60
INNHOLD
INTRODUCTION ......................................................................................................................................................... 3
GENERAL PROCEDURES FOR USING ENGBO MAXI WINDLASSES................................................................................ 4
OPERATING INSTRUCTIONS ....................................................................................................................................... 5
Anchor down ............................................................................................................................................................ 7
Anchor up................................................................................................................................................................. 7
The “Power” indicator information: ........................................................................................................................ 7
Forced operation of the windlass ............................................................................................................................ 7
A BRIEF DESCRIPTION OF THE ENGBO ANCHOR SYSTEM ........................................................................................... 8
ELECTRONIC CONTROL UNIT ................................................................................................................................................. 8
SWITCH PANELS ................................................................................................................................................................ 9
Standard touch panel .............................................................................................................................................. 9
Wireless remote control .......................................................................................................................................... 9
Holder for wireless remote control ........................................................................................................................ 10
INSTALLATION – GENERAL....................................................................................................................................... 10
The anchor bracket ................................................................................................................................................ 10
Hull conduit / Line guide ........................................................................................................................................ 11
Anchor rope ........................................................................................................................................................... 11
Safety line .............................................................................................................................................................. 12
Auto stop ............................................................................................................................................................... 12
WIRELESS REMOTE .................................................................................................................................................. 12
FITTING ANTENNA ........................................................................................................................................................... 12
CODING OF THE WIRELESS REMOTE CONTROL ........................................................................................................ 13
Procedure for wireless remote controls with serial no. above 8600 ...................................................................... 13
How to put the wireless control unit in code mode: .............................................................................................. 13
How to put the receiver unit in code mode:........................................................................................................... 13
DIMENSIONAL SKETCHES ........................................................................................................................................ 14
MAXI 31/40 – SERIES ...................................................................................................................................................... 14
MAXI 32 – SERIES ........................................................................................................................................................... 14
MAXI 33 – SERIES ........................................................................................................................................................... 15
MAXI 34-SERIES ............................................................................................................................................................. 15
MAXI 38-SERIES ............................................................................................................................................................. 15
TECHNICAL SPECIFICATIONS .................................................................................................................................... 16
ELECTRICAL WIRING ................................................................................................................................................ 17
SWITCH PANEL ................................................................................................................................................................ 17
Standard touch panel (Item no. 12-79000) ................................................................................................. 17
Connecting the switch panel .................................................................................................................................. 17
Connecting the auto stop switch ........................................................................................................................... 18
Connecting the motor and battery cables ............................................................................................................. 18
BATTERY CONNECTION ..................................................................................................................................................... 19
Main power switch ................................................................................................................................................ 19
Fuse and fuse holder .............................................................................................................................................. 19
ELECTRICAL WIRING DIAGRAM ............................................................................................................................... 20
FITTING INSTRUCTIONS ........................................................................................................................................... 21
GENERAL INFORMATION............................................................................................................................................ 21
Hinged platform roller ........................................................................................................................................... 21
Line guide in the stern........................................................................................................................................... 21
FITTING MAXI 31 ............................................................................................................................................................ 23
ENGBO AS – et selskap i Engbo-gruppen
BESØKSADRESSE: Wirgenesvei 7, 3157 Barkåker POSTADR: Postboks 2288 Postterminalen, 3103 Tønsberg
E-MAIL: [email protected] WEB: www.engbo.no TLF: +47 33 00 31 50 FAKS: +47 33 00 31 60
2
FITTING MAXI 32 ............................................................................................................................................................ 23
Maxi 32 box ........................................................................................................................................................... 24
FITTING MAXI 33 ............................................................................................................................................................ 25
FITTING MAXI 40 ............................................................................................................................................................ 26
FITTING MAXI 34-V ........................................................................................................................................................ 27
FITTING MAXI 34-D ........................................................................................................................................................ 28
FITTING MAXI 34-G ........................................................................................................................................................ 29
Drawing - Maxi 34-G – line wheel, rope guide, rope guard and fixing plate ......................................................... 30
FITTING MAXI 34-S ......................................................................................................................................................... 31
FITTING MAXI 34-H ........................................................................................................................................................ 32
FITTING MAXI 38 ............................................................................................................................................................ 33
AUTO STOP FUNCTION ...................................................................................................................................................... 34
Adjust the auto stop switch ................................................................................................................................... 34
Auto stop – fitting the stop indicator/brass wire ................................................................................................... 34
MAINTENANCE ........................................................................................................................................................ 36
Replacing the batteries in the wireless remote control ......................................................................................... 36
Replacing the line wheels ...................................................................................................................................... 37
Line guide – adjusting the tension spring .............................................................................................................. 38
Winter storage ....................................................................................................................................................... 38
Troubleshooting ..................................................................................................................................................... 39
INSTALLATION OF EQUIPMENT WITH HIGH CURRENTS - SPECIAL CONSIDERATIONS............................................... 40
Preface/introduction.............................................................................................................................................. 40
Battery ................................................................................................................................................................... 40
Battery-cables/lugs ................................................................................................................................................ 41
Battery connection ................................................................................................................................................ 41
Fuse connection ..................................................................................................................................................... 41
Main switch connection ......................................................................................................................................... 42
Control box connections ........................................................................................................................................ 42
Motor terminal connections .................................................................................................................................. 43
Introduction
Thank you for buying an Engbo anchor windlass. We hope you will find it useful and simple to
work with. To ensure that you do, it is essential that you fit and use it in accordance with the
instructions in this manual to ensure the best possible conditions for optimal windlass
operation. For example, the windlass motor must receive sufficient power, and the windlass,
rope and anchor bracket must all be positioned correctly.
Engbo has been active in the boat industry for more than 30 years, and are well aware of the
requirements made on the equipment on board. To meet the challenges posed by a boat
operating in wet conditions – often with limited power capacity – Engbo has invested heavily
in developing new, modern electronic control systems.
Most Engbo MAXI windlasses can be supplied for use with rope or chain. The descriptions for
rope or chain operation in this manual are therefore suitable for both.
IMPORTANT! This manual contains information you need to know before installing
the windlass. Therefore, please read it carefully.
ENGBO AS – et selskap i Engbo-gruppen
BESØKSADRESSE: Wirgenesvei 7, 3157 Barkåker POSTADR: Postboks 2288 Postterminalen, 3103 Tønsberg
E-MAIL: [email protected] WEB: www.engbo.no TLF: +47 33 00 31 50 FAKS: +47 33 00 31 60
3
General procedures for using Engbo Maxi windlasses
Read the operating manual carefully before installing and using the windlass.
Please note that strong forces are involved, so please use the windlass carefully and make
sure, for example, that:
You do not get your fingers caught up in the rope, chain, anchor, rollers or gypsies.
The rope/chain is always under observation when the anchor is being raised.
Everyone on board has been informed of how the windlass functions.
You always operate the winch from a place that provides an unobstructed view of the
anchor while it is being raised. This will help prevent “unpleasant surprises” that may
damage the boat.
You release the switch for a little while if the windlass is straining to raise the anchor.
When the boat has started moving backwards, you can start the windlass again. This
will make it easier for the windlass to operate, and it will use less power.
If the anchor is stuck on the seabed: Release some rope and make it fast to a cleat on
the boat. Then use the boat engine to free the anchor. Once the anchor has been freed,
use the windlass in the usual manner.
The windlass can run for max. 3 minutes at normal load.
The anchor must always be secured to the boat while the boat is travelling. Use the
securing lines supplied.
Disconnect the power to the windlass once the boat is underway.
Children must not operate the windlass.
Negligent use can result in unnecessary damage.
Always make sure the battery is well charged when using the windlass. Always have
the motor running when the windlass is in use.
The windlass features electronic overload protection. If necessary, let the winch cool
down for 15–20 min. and then try again. In the event of an emergency, you can
override the overload protection by disconnecting and then reconnecting the main
power switch for the windlass.
Engbo AS accepts no liability for injuries or damage resulting from the use of the
windlass.
IMPORTANT!
Always have the boat engine running while the windlass is in use.
Always disconnect the power from the windlass when it is not in use.
Make sure to fit and use the windlass and its accessories in such a way as to
prevent injuries to people and damage to the boat and/or its surroundings.
Installation must be done or checked by trained personel with special
knowledge regarding high current and low voltage.
Faulty installations or connections of any components to the windlass will
render all warranty given by Engbo void.
To avoid overload when anchoring, the anchor line/chain must be secured
properly.
If the anchor has got stuck at the seabed, if possible, pull the anchor from
different directions by moving the boat in different positions.
When doing this, it is recommended to fix the anchor line in the cleat to avoid
overload.
ENGBO AS – et selskap i Engbo-gruppen
BESØKSADRESSE: Wirgenesvei 7, 3157 Barkåker POSTADR: Postboks 2288 Postterminalen, 3103 Tønsberg
E-MAIL: [email protected] WEB: www.engbo.no TLF: +47 33 00 31 50 FAKS: +47 33 00 31 60
4
Operating instructions
Preparation before anchoring.
Landing.
Make sure the boat engine is running during anchoring.
Decide where you want to drop anchor.
Check that the safety line on the anchor has been
loosened.
Turn on the main switch of the windlass.
When the main switch of the anchor windlass has been
switched off, you must press the down button first.
Keep this button depressed for at least 1 second to drop
the anchor.
The windlass motor will run out for 1.5 seconds to
ensure the correct release function.
Fixed switch panel
Press the down button for at least 1 sec.
The anchor will drop.
The windlass is now released and the rope will run out
in step with the progress of the boat towards land.
Tie up the boat on land.
NB If you are using a free-fall chain windlass, the high
weight of the chain may result in the full length of the chain
being pulled out. If so, make sure to take up the slack once
you have tied the boat up.
Tighten up the slack of the anchor rope (or chain) by
pressing the up button so that the anchor settles firmly
on the seabed and pulls the boat away from land.
NB The windlass will always wind in slowly for 1.5 sec
before it switches to full speed. If you release the button
within 1.5 sec and press it again and then repeat the
process, the windlass will continue to wind in at low speed.
Setting off
Start the boat engine to charge the battery.
Check that the main switch of the windlass is
turned on.
Cast off from land.
Activate the windlass.
Keep the up button depressed, and the windlass will pull
the boat away from land. The windlass will pull the anchor
up at full speed until the first auto stop is activated.
NB This ONLY applies for rope windlasses and requires the
anchor rope to be correctly fitted with brass wire markers.
NB Keep an eye on the anchor when it leaves the
water and seats in the anchor bracket. This will
allow you to stop the windlass and prevent
damage if the anchor pulls up foreign objects
from the seabed.
ENGBO AS – et selskap i Engbo-gruppen
BESØKSADRESSE: Wirgenesvei 7, 3157 Barkåker POSTADR: Postboks 2288 Postterminalen, 3103 Tønsberg
E-MAIL: [email protected] WEB: www.engbo.no TLF: +47 33 00 31 50 FAKS: +47 33 00 31 60
5
NB If the windlass is straining while raising the anchor, it
would be a good idea (and save power) to run the windlass
in periods. Once the boat has begun to move backwards,
you can release the up button and then run the windlass in
periods.
Release the up button, press again and keep
depressed.
The windlass will continue to raise the anchor slowly
until the second auto stop is activated, stopping the
windlass completely.
The anchor will then be correctly seated in the anchor
bracket.
Attach the safety line to the anchor.
Turn off the main switch of the windlass.
Have pleasant sailing!
Wireless remote control
To switch on the remote control, keep one of the
buttons depressed for 1.5 sec. The green “power”
indicator will light up, and you will hear a brief audio
signal.
Every time you subsequently press a button, the
associated indicator will light up, and the remote will
emit an audio signal.
To ensure a long lifetime, the remote control switches
off automatically 5 min. after the last button was
pressed. Automatic shut-off is preceded by two short
audio signals and the “Power” indicator flashing.
ENGBO AS – et selskap i Engbo-gruppen
BESØKSADRESSE: Wirgenesvei 7, 3157 Barkåker POSTADR: Postboks 2288 Postterminalen, 3103 Tønsberg
E-MAIL: [email protected] WEB: www.engbo.no TLF: +47 33 00 31 50 FAKS: +47 33 00 31 60
6
Anchor down
When the remote control is switched on, you can drop
the anchor by pressing the “down” button in. Keep this
button depressed for at least 1 second to drop the
anchor.
The windlass will then run out for 1.5 seconds to
ensure the correct release function.
Anchor up
When the anchor has dropped to the seabed, press the
“up” button to take up the slack. The windlass will
continue to winch in as long as you keep the “up”
button depressed. If the remote control has switched
off automatically (i.e. if you have not pressed a button
for more than 5 min) it will first switch on and then
immediately start to wind in the anchor rope/chain. The
windlass always starts to operate for 1.5 sec at reduced
speed before increasing to full speed.
This means that you can keep the windlass operating at
low speed by releasing and pressing the “up” button
repeatedly as required.
The “Power” indicator information:
Green light indicates that the remote control is ready
for use.
Orange light indicates that the power supply to the
windlass is not optimal, or that the windlass is
overloaded and needs time to cool down.
Red light indicates a system error or that the battery
charge is too low for the windlass to operate.
Red light flashing slowly accompanied by short
audio signals indicates that contact with the electronic
unit (receiver) cannot be established.
NB These error notifications will continue for as long as a
button is depressed.
Forced operation of the windlass
If you need to raise the anchor a little further than the
second “auto stop” mark, you can do so by keeping the
“up” button depressed for more than 10 seconds. The
windlass will then operate at low speed for as long as you
hold the button in.
NB. The use of this function must be closely
controlled to prevent damage.
ENGBO AS – et selskap i Engbo-gruppen
BESØKSADRESSE: Wirgenesvei 7, 3157 Barkåker POSTADR: Postboks 2288 Postterminalen, 3103 Tønsberg
E-MAIL: [email protected] WEB: www.engbo.no TLF: +47 33 00 31 50 FAKS: +47 33 00 31 60
7
A brief description of the Engbo anchor system
Engbo MAXI windlasses is a common designation for
1000/1500 W, 12/24V Engbo windlasses. Some of the
models are most suitable for fitting aft, some fore, and
others both fore and aft. Engbo MAXI windlasses are
designed for boats larger than around 25 feet. These
windlasses – with the exception of type 33 – are
authentic free-fall windlasses, which means that a
neutral position in the windlass gears allows the anchor
to drop directly to the seabed immediately after the
“anchor down” (arrow down) button has been pressed.
The system is based on allowing the weight of the
anchor on the outside of the anchor bracket to define
how quickly the anchor drops. Therefore, it is
important to avoid unnecessary friction between rope
and hull, rollers and/or guides.
Example: If you fit the windlass with a Bruce anchor,
you will need to use the jointed anchor bracket and
ensure that the angle between horizontal and the rope
is at least 15–20º. If the angle is too narrow, the
anchor will “balance” and need “assistance” to tip out.
Electronic control unit
Engbo MAXI windlasses are fitted with modern
electronics that consist of:
Transistor-controlled power electronics that
replace the conventional cut-in relay. The new
electronic unit contains no open contacts and is very
flexible as regards voltage.
The control electronics are software-based and
feature an integrated radio receiver that
communicates with the wireless remote control, and
a built-in system to protect the windlass motor and
electronic components. Other functions controlled
electronically are two “up” speeds and two automatic
stop indicators for seating the anchor.
ENGBO AS – et selskap i Engbo-gruppen
BESØKSADRESSE: Wirgenesvei 7, 3157 Barkåker POSTADR: Postboks 2288 Postterminalen, 3103 Tønsberg
E-MAIL: [email protected] WEB: www.engbo.no TLF: +47 33 00 31 50 FAKS: +47 33 00 31 60
8
Switch panels
Standard touch panel
The windlasses are supplied as standard with 1 x
watertight (IP 68) touch panel (12-79000) for
installing in a readily accessible place in the cockpit.
If only this touch panel is to be fitted, it must, for
safety reasons, be positioned so as to allow the
operator a clear view of the anchor as it is raised and
seated in the anchor bracket.
12-79000
The panel comes with a self-adhesive surface, but if
you prefer, it can be seated more firmly using the
screws supplied.
Wireless remote control
Three different wireless controls are available;
12-47020 designed for controlling two separate anchor
winches, 12-47021 two winches and two thrusters and
12-47022 for controlling up to six different
anchor/mooring winches.
12-47020
The remote control is splash proof and features a
modern, compact design with strips of “anti-slip
material” on the rear surface. It will also float if
dropped over board.
Two-way narrow-band radio communication
guarantees the transmission of unique code to ensure
that the signal controls only your windlass.
An indicator light shows the voltage level or overload.
Range of more than 30 m in normal conditions.
12-47021
The remote control uses three standard AAA (LR03)
batteries – included. For normal operation, the
batteries have a service life of more than two seasons.
A wrist/neck strap is supplied as standard.
12-47022
ENGBO AS – et selskap i Engbo-gruppen
BESØKSADRESSE: Wirgenesvei 7, 3157 Barkåker POSTADR: Postboks 2288 Postterminalen, 3103 Tønsberg
E-MAIL: [email protected] WEB: www.engbo.no TLF: +47 33 00 31 50 FAKS: +47 33 00 31 60
9
Holder for wireless remote control
The enclosed, handy holder (12-47030), keeps the
wireless remote located in the right place when not in
use.
The holder kit consists of two single parts, and the holder
to and the bracket.
Slide the holder into the bracket by the slots.
Fix the bracket to the base with the adhesive tape.
By turning the backside of the remote forward and
fit it in the holder, the buttons will be protected
from unwanted activating of the winch or thruster
when kept in the pocket.
Installation – general
The windlass should be positioned as high as possible to allow maximum space for the rope
that will be stored below the windlass. The height from the bottom of the well where the rope
is stored to the bottom edge of the line wheel should be at least 50 cm, and the area
should be at least 40 x 40 cm to allow room for 50 m x 15 mm anchor rope. This will
prevent the rope from bunching under the windlass, and assure sufficient friction between the
line wheel and the rope.
See the specific descriptions for the separate windlass models.
The anchor bracket
Fit the windlass so that the rope is wound up in line with the anchor bracket (see pictures 1
and 2) – numerous different models are available – positioned on the exterior of the boat. The
anchor bracket functions as a guide for the rope when the anchor is on the seabed and as a
“seating point” for the anchor once it has been raised.
ENGBO AS – et selskap i Engbo-gruppen
BESØKSADRESSE: Wirgenesvei 7, 3157 Barkåker POSTADR: Postboks 2288 Postterminalen, 3103 Tønsberg
E-MAIL: [email protected] WEB: www.engbo.no TLF: +47 33 00 31 50 FAKS: +47 33 00 31 60
10
Picture 1
.
Picture 2
Hull conduit / Line guide
It will often be necessary to install a hull conduit with a
pulley that guides the rope with low friction through the
hull.
The hull conduit will also prevent large volumes of water
from leaking in. (When fitting the MAXI 34V or MAXI 40 on
the inside of the stern, it will often be possible to adjust
the hull conduit so as to prevent friction between the hull
and the rope.)
Anchor rope
Engbo supplies original woven anchor rope with a lead
core in the whole length of the rope along with a fine
special thimble that will not snag on the pulley or bracket
when the anchor is dropped. This rope has been specially
designed for Engbo anchor windlasses and is a
precondition for problem-free operation of the system.
Supplied in various lengths and dimensions. The Engbo
Maxi range generally uses 16 mm line. If the available
space for storing the line is limited, 14mm line could be an
alternative.
ENGBO AS – et selskap i Engbo-gruppen
BESØKSADRESSE: Wirgenesvei 7, 3157 Barkåker POSTADR: Postboks 2288 Postterminalen, 3103 Tønsberg
E-MAIL: [email protected] WEB: www.engbo.no TLF: +47 33 00 31 50 FAKS: +47 33 00 31 60
11
Safety line
Once the anchor is seated in the anchor bracket, it must
be secured with the safety line supplied. This prevents the
anchor from dropping unintentionally.
Auto stop
Engbo MAXI winches for anchor lines feature an advanced
electronic auto stop switch that stops the windlass
automatically, twice. The first stop comes just before the
anchor reaches the anchor bracket. The windlass can then
only be operated at low speed until it stops for the second
time once the anchor is seated correctly in its bracket –
ready to be dropped next time.
NB The fitting procedures for the different models are described in separate
chapters.
Wireless remote
Fitting antenna
Before starting to operate the wireless remote, the
electronic unit must be fitted with an aerial. In addition, the
remote control and electronic unit must be coded/
electronically instructed to communicate with one another.
Remove the left-hand rubber plug on the electronic unit
(the one closest to the Engbo logo).
Pierce the plug (to one side) with the aerial.
Depress the female socket of the aerial holder and press
the aerial fully into the clip.
Release the female socket and the aerial will be secured in
position.
Replace the rubber plug. Start by pressing the part of the
rubber plug through which the aerial has been inserted,
and continue around the edge until the plug is firmly
seated.
Make sure not to twist the plug and deform the aerial.
NB The remote control will function at short distances even if the
aerial is not fitted.
ENGBO AS – et selskap i Engbo-gruppen
BESØKSADRESSE: Wirgenesvei 7, 3157 Barkåker POSTADR: Postboks 2288 Postterminalen, 3103 Tønsberg
E-MAIL: [email protected] WEB: www.engbo.no TLF: +47 33 00 31 50 FAKS: +47 33 00 31 60
12
Coding of the wireless remote control
Procedure for wireless remote controls with serial
no. above 8600
Important!
If your wireless control has serial no. lower than 8600,
use the procedure enclosed your remote.
If coding a wireless control with serial no. above 8600 is
to be coded to a receiver with Soft Ware of previous version be
aware that the remote will be ready for operation after 10 sec.
How to put the wireless control unit in code mode:
Select the pair of switches on the remote control to be
coded.
Press down both switches simultaneously for
approximately 12 seconds. When you hear a short
sound signal and the green power light starts to flash,
the remote control is prepared for coding and will stay
in coding mode for 5 minutes or until the coding has
been finished.
(Image A)
Image A
How to put the receiver unit in code mode:
Image B
Image C
Image D
Image E
Alt. 1. Touch panel installed.
Press and keep both switches on the touch panel down
while simultaneously switching on the power to the
receiver unit.(Image B and C)
The receiver will now understand that coding is
requested and automatically connect to your wireless
control and the wireless remote control will immediately
be ready for use.
This will be confirmed by a short sound signal and the
green power light will turn from flashing to permanent.
Check that the wireless control is functioning.
Alt. 2. Joystick installed.
Turn the thruster main switch off.
Disconnect the cables to the joystick connected to 1, 2
and 3 on the green plug on the remote control unit
(RCU).
Prepare two short wires (5 cm). Remove the insulation
in both ends and connect these between 1 and 2 as well
as between 2 and 3 on the green plug. (Image D).
Turn the power on.
The receiver will now understand that coding is
requested and automatically connect to your wireless
control and will immediately be ready for use.
This will be confirmed by a short sound signal and the
green power light will turn from flashing to permanent.
Turn the thruster main switch off.
Disconnect the short wires and connect the joystick
cables.
Turn the power on and check that the wireless control is
functioning.
ENGBO AS – et selskap i Engbo-gruppen
BESØKSADRESSE: Wirgenesvei 7, 3157 Barkåker POSTADR: Postboks 2288 Postterminalen, 3103 Tønsberg
E-MAIL: [email protected] WEB: www.engbo.no TLF: +47 33 00 31 50 FAKS: +47 33 00 31 60
13
Dimensional sketches
Maxi 31/40 – series
A: Height
B: Length
C: Width incl. line wheel
D: Width excl. line wheel
200
370
230
160
mm
mm
mm
mm
A: Height above deck
B: Length above deck
C: Width above deck, incl. line wheel
D: Width excl. line wheel
E: Height below deck
200
255
230
160
150
mm
mm
mm
mm
mm
Maxi 32 – series
ENGBO AS – et selskap i Engbo-gruppen
BESØKSADRESSE: Wirgenesvei 7, 3157 Barkåker POSTADR: Postboks 2288 Postterminalen, 3103 Tønsberg
E-MAIL: [email protected] WEB: www.engbo.no TLF: +47 33 00 31 50 FAKS: +47 33 00 31 60
14
Maxi 33 – series
A: Total width below deck
B: Total length above deck (cover)
C: Total width above deck (cover)
D: Height above deck
E: Height below deck
350 mm
220 mm
160 mm
90 mm
160 mm
Maxi 34-series
A:
B:
C:
D:
200
271
220
120
mm
mm
mm
mm
Maxi 38-series
A: Total width
B: Total height
D: Total length
220 mm
230 mm
370 mm
ENGBO AS – et selskap i Engbo-gruppen
BESØKSADRESSE: Wirgenesvei 7, 3157 Barkåker POSTADR: Postboks 2288 Postterminalen, 3103 Tønsberg
E-MAIL: [email protected] WEB: www.engbo.no TLF: +47 33 00 31 50 FAKS: +47 33 00 31 60
15
Technical
specifications
ENGBO MAXI 31, 32, 33, 34, 38 and 40
Motor output, nom.
-12V DC / 1000 W
-24V DC / 1500 W
Rope
(for rope windlasses)
Woven lead rope: dia. 16 mm. Breaking strain: 4000 kg
Woven lead rope: dia. 14 mm. Breaking strain: 3300 kg
Length:
50 m, weight, 21.7 kg
75 m, weight, 32.0 kg
100 m, weight, 43.0 kg
Chain (for chain
windlasses)
6.5 mm, short link Norwegian std. Breaking strain: 2300 kg
8 mm DIN 766 std. Breaking strain: 4000 kg
Pulling power
(Electronically governed)
Rope windlasses:
1000 W, up to approx. 500 kg
1500 W, up to approx. 650 kg
Chain windlasses: up to approx. 850 kg
Pulling speed
20–25 m/min with a load of approx. 40 kg
Power consumption
80–200 A during normal operation
Recommended fuses
1000 W/12V and 1500 W/24V, 250 A
Recommended min.
battery capacity
12V/100Ah
24V/75 Ah
Weight: windlass with
motor and cables
Approx. 20 kg
Weight: electronic unit
2.3 kg
Auto stop function
Yes (NB Only for rope windlasses)
Recommended anchor/
weight
Engbo / Bruce / Spade /10–30 kg
Recommended boat size
Over 25-foot
Fitting
See the separate descriptions for the individual models
Standard equipment
Windlass incl. cables for electronic module, electronic
module, switch panel and main power switch
Supplementary
equipment
Anchor (Multiple types)
Anchor bracket (Multiple types)
Battery cable
Lead rope or chain
Fuse w/holder
Hull conduit for rope or chain
Wireless remote control
ENGBO AS – et selskap i Engbo-gruppen
BESØKSADRESSE: Wirgenesvei 7, 3157 Barkåker POSTADR: Postboks 2288 Postterminalen, 3103 Tønsberg
E-MAIL: [email protected] WEB: www.engbo.no TLF: +47 33 00 31 50 FAKS: +47 33 00 31 60
16
Electrical wiring
The label on the cover of the electronic unit also shows a diagram for connecting the electrical
cables, - but always verify correct connections with wiring diagram.
IMPORTANT
Always switch off the power at the main switch and/or disconnect the battery
before working on the wiring connections.
Switch panel
Standard touch panel (Item no. 12-79000)
The windlasses are supplied as standard with 1 x
watertight touch panel for installing in a readily accessible
place in the cockpit.
If only this touch panel is to be fitted, it must, for safety
reasons, be positioned so as to allow the operator a clear
view of the anchor as it is raised and seated in the anchor
bracket.
The panel comes with a self-adhesive surface, but if you
prefer, you can use the corner holes to screw it firmly in
position.
Drill an hole (dia. 18 mm) in the place where the panel
is to be fitted.
Run the panel cable through the hole.
Remove the protection tape from the rear surface of
the panel and affix the panel firmly to the surface.
Run the cable to the electronic control box.
Cut off any surplus cable and strip the ends of the
three wires that are to be connected to the terminal
clips as described in the connection diagram. (Picture
of control box).
Connecting the switch panel
The windlasses are supplied as standard with one switch
panel and 10 m of cable. Cut the wires to the required
length and strip approx. 10 mm from their ends. Twist
the wires in the separate cables and attach the cables to
the green terminal box by pressing in the orange button
above the appropriate hole and keeping it depressed
while you insert the cable. Release the button once the
cable is in place. Check that the cable is seated firmly
and that the insulation is inside the terminal clip so that
no loose wires are sticking out.
Connect the cables as follows:
1: White
2: Brown
3: Green
If you wish to connect additional panels, connect the
cables in parallel to 1, 2 and 3. (2 is the common 0 V).
(Spring-lock terminal clips have been chosen rather than
screw clips to prevent problems linked to vibrations
and/or changes in temperature causing the clips to
loosen).
ENGBO AS – et selskap i Engbo-gruppen
BESØKSADRESSE: Wirgenesvei 7, 3157 Barkåker POSTADR: Postboks 2288 Postterminalen, 3103 Tønsberg
E-MAIL: [email protected] WEB: www.engbo.no TLF: +47 33 00 31 50 FAKS: +47 33 00 31 60
17
Connecting the auto stop switch
NB Only applies to rope windlasses.
Auto stop switch
Connect the cables from the auto stop switch in the same
way as described above.
Connect the cables as follows:
4: Brown (BN) = +V
5: Black (BK) = Signal
6: Blue (BU) = Gnd
Connecting the motor and battery cables
It is best to connect the cables from the battery and
motor to the electronic unit first, before fastening the
unit upright against the bulkhead with the cables bent
down over it.
Start by connecting the motor cable marked (A1) to the
left. NB The lock nuts are on the left-hand side.
Then connect motor cable (D2) and then the black (-)
battery cable. Then connect the red (+) battery cable to
(D1) from the motor. Finally, connect (A2) from the
motor. (If necessary, remove in the reverse order). It is
best to use a pair of pliers, as shown in the picture.
The picture shows the correct connection and the
direction of the bolts and cables.
NB The cable shoes must be connected directly to the
copper bars without washers or anything else between.
Use flat washers between the bolt heads and the top
sides of the cable shoes, and between the plastic side of
the end panel and the locking nuts.
The M8 x 25 mm bolt is for the positive battery cable.
Please note that on this terminal, there are two cable
shoes that have to be connected.
NB Connect the cable shoes as shown in the picture to
ensure best possible contact.
NB When the cable length (one way) between the battery
and electronic unit is up to 5 m, use 35 mm2 cable. For
longer distances, use 50 mm2 cable.
ENGBO AS – et selskap i Engbo-gruppen
BESØKSADRESSE: Wirgenesvei 7, 3157 Barkåker POSTADR: Postboks 2288 Postterminalen, 3103 Tønsberg
E-MAIL: [email protected] WEB: www.engbo.no TLF: +47 33 00 31 50 FAKS: +47 33 00 31 60
18
IMPORTANT
The anchor winch shall not be installed in areas which may contain
flammable or explosive gasses.
In cases where this is not possible, the winch can be built into closed
space, but with ventilation to open air.
The MCU must be installed in dry place in such in a way that no cables
with current may be short circuited.
Battery connection
WARNING!
Check that none of the cables is short-circuited or damaged before
connecting the battery.
Check that all power cables and connection points are tightly secured –
post-tighten if necessary.
NEVER use washers between cable shoes and connection points in places
where high voltage currents pass.
A fuse and main power switch must be fitted to the positive battery cable, as close to
the battery as possible. (See the connection diagram).
The windlass must always be connected to the start battery.
Remember to turn off the main power switch when the windlass is not in use.
Main power switch
The picture shows the battery cable correctly
connected to the main power switch, with
rubber caps insulating the connection points.
Fuse and fuse holder
The fuse holder and fuse are to be fitted to the
(+) cable between the battery and the
electronic control unit of the windlass. See the
electrical connection diagram.
This picture shows correct connection of the
battery cable to the fuse-holder terminal.
NB The fuse must be fitted directly above the
cable shoe. There must NOT be any washers or
nuts between them.
Fit washers on both sides. Recommended
torque: 13–15 NM. Fit plastic caps on the top of
the cover.
Washer
Fuse
Cable shoe
Washer
ENGBO AS – et selskap i Engbo-gruppen
BESØKSADRESSE: Wirgenesvei 7, 3157 Barkåker POSTADR: Postboks 2288 Postterminalen, 3103 Tønsberg
E-MAIL: [email protected] WEB: www.engbo.no TLF: +47 33 00 31 50 FAKS: +47 33 00 31 60
19
Electrical wiring diagram
ENGBO AS – et selskap i Engbo-gruppen
BESØKSADRESSE: Wirgenesvei 7, 3157 Barkåker POSTADR: Postboks 2288 Postterminalen, 3103 Tønsberg
E-MAIL: [email protected] WEB: www.engbo.no TLF: +47 33 00 31 50 FAKS: +47 33 00 31 60
20
Fitting instructions
General information
Position the windlass as high as possible so that there is plenty of space for the rope under it.
The bottom edge of the line wheel should be at least 50 cm above the surface on which the
rope (or chain) is to lie. This will leave room for 50 m of 16 mm woven Robline anchor rope or
approx. 30 m of chain.
If the height is less than 50 cm, check that the rope (or chain) does not bunch up against the
underside of the windlass. If this is the case, use a shorter rope (or chain).
We recommend side position of the windlass. Avoid any conflict between the anchor and the
side wave that turns in directly behind the boat.
NB Remember to secure the rope to the boat beneath the windlass at the point where the
rope runs out.
Hinged platform roller
Fit the anchor bracket with the pulleys beyond the edge of
the platform so that the anchor/rope clears the platform
when the anchor is raised.
Line guide in the stern
Check that the opening in the hull for the rope is correct in
relation to the direction of the rope. To prevent unnecessary
wear, the rope should not touch the edge of the opening either
vertically or horizontally. The opening must be oval (from top
to bottom) to accommodate the play in the rope roller when
the windlass is used.
Art. nr. 68-00008
Line guide
If it is difficult to lead the rope directly from the line wheel
to the anchor roller, it is a good idea to use a hull conduit
with pulleys, for instance 68-00008 or the simple
39-79000 to lead the rope through the hull.
The hull conduit may be installed with studs as shown in
picture.
Art. nr. 39-73000
ENGBO AS – et selskap i Engbo-gruppen
BESØKSADRESSE: Wirgenesvei 7, 3157 Barkåker POSTADR: Postboks 2288 Postterminalen, 3103 Tønsberg
E-MAIL: [email protected] WEB: www.engbo.no TLF: +47 33 00 31 50 FAKS: +47 33 00 31 60
21
The anchor bracket
Standard platform roller, hinged platform roller, tilt bracket or anchor davit?
NB If the windlass is fitted low in relation to the bathing platform – such that the angle
between the bathing platform and the rope is small – and if you are using a Bruce anchor, you
should use an Engbo hinged platform roller.
Examples of different anchor brackets. See the Engbo catalogue for more akternatives.
Standard platform roller, long
Hinged platform roller
Tilt bracket
Anchor davit
ENGBO AS – et selskap i Engbo-gruppen
BESØKSADRESSE: Wirgenesvei 7, 3157 Barkåker POSTADR: Postboks 2288 Postterminalen, 3103 Tønsberg
E-MAIL: [email protected] WEB: www.engbo.no TLF: +47 33 00 31 50 FAKS: +47 33 00 31 60
22
Fitting Maxi 31
The Maxi 31 is designed for fitting outside on the stern or
inside on the stern side of a vertical bulkhead. The Maxi 31
has the line wheel on the right-hand side of the windlass,
seen from behind.
NB Make sure to fit the windlass correctly in relation to
the direction of rotation of the line wheel. (See sketch)
Position the windlass as high as possible on the stern.
Draw around the windlass. Use the enclosed drilling
template to mark the screw holes on the supporting
surface. Use bolts to attach the windlass. If necessary,
reinforce the inside of the hull with a panel.
If the surface on which the windlass is to be fitted is not
even so that the entire windlass rests against the
hull/supporting surface, the surface must be evened
out using an intermediate layer to prevent damage to
the hull and/or the windlass when the fixing bolts are
tightened.
Drill a hole for the cables and run these through the
hull. Use Sikaflex or similar to seal the hole for the
cables.
Run the rope via the line wheel on the windlass, down
through the rope/chain guide and under the line wheel.
Use the windlass to wind it up.
NB We recommend using an adapted container made of
plastic or other weather-resistant material beneath the
windlass to ensure that the rope is gathered up
efficiently.
Fitting Maxi 32
The Maxi 32 is designed for fitting outside on a rope box or
outside/inside on a horizontal surface. The Maxi 32 has the
line wheel on the right-hand side of the windlass, seen from
behind.
Maxi 32 for line
Maxi 32 for chain
NB Make sure to fit the windlass correctly in relation to
the direction of rotation of the line wheel. (See sketch)
Remove the four 8 mm fixing bolts from the bottom of
the windlass.
Position the enclosed template correctly, so that the line
wheel is on the correct side. Mark the position of the
holes for the fixing bolts, the hole for the part of the
winch that is to pass through the deck, and the opening
for the rope.
Align the winch and the roller to each other.
Then use four of the enclosed bolts to secure the
windlass firmly in position.
Fit the windlass so that there is at least 50 cm of free
height from the underside of the line wheel to the
bottom of the well where the rope or chain is to lie. The
area where the rope or chain is to be stored should
measure at least 40 cm x 40 cm.
NB This space is normally sufficient for 50 m x 16 mm
rope or 30 m chain.
ENGBO AS – et selskap i Engbo-gruppen
BESØKSADRESSE: Wirgenesvei 7, 3157 Barkåker POSTADR: Postboks 2288 Postterminalen, 3103 Tønsberg
E-MAIL: [email protected] WEB: www.engbo.no TLF: +47 33 00 31 50 FAKS: +47 33 00 31 60
23
Maxi 32 box
NB The Engbo line / chain box is supplied complete with
predrilled holes.
Drill a hole for the cables and run these through the
hull. Use Sikaflex or similar to seal the hole for the
cables.
Connect the cables according to the electrical
connection diagram.
When fitting the fibreglass box, the open end must be
adapted to the shape of the stern and fixed in position
using through-and-through bolts to connect the angle
bracket supplied directly to the hull. Adjust the brackets
to the correct angle and fix them internally, at the top
and bottom of the side panel of the box.
Run the rope via the line wheel on the windlass, down
through the rope/chain guide and under the line wheel.
Use the windlass to wind it up.
NB The length of the box must be at least 40 cm.
NB Remember to secure the end of the rope/chain to
the inside of the box. (Drill a hole through the bottom of
the box and through the platform, and then fit the
bracket supplied. Remember to drill holes in each of the
lower stern corners for drainage purposes.)
NB The box is normally sufficient for 50 m x 16 mm
rope or 30 m chain.
Fit a standard box roller (65-00001) or tilt roller (61-30006/ 61-20007) to the angled surface
on the stern end of the box. Fit the box roller with the angled side of the bracket down.
65-00001
61-30006/61-30007
ENGBO AS – et selskap i Engbo-gruppen
BESØKSADRESSE: Wirgenesvei 7, 3157 Barkåker POSTADR: Postboks 2288 Postterminalen, 3103 Tønsberg
E-MAIL: [email protected] WEB: www.engbo.no TLF: +47 33 00 31 50 FAKS: +47 33 00 31 60
24
Fitting Maxi 33
The Maxi 33 is designed for horizontal installation on the
fore or aft deck.
NB Make sure to fit the windlass correctly in relation to
the direction of rotation of the line wheel.
Start by locating the correct position for the windlass,
so that the direction of the chain is in line with the
anchor bracket. Then mark the centre of the windlass.
In most cases, it is simplest to use the windlass fixing
plate (see pos. 65 on the drawing on page 27) as a
template. Place the fixing plate on the boat and mark
the screw holes, the centre hole for the gear, and the
run-through hole for the chain.
Remember to round off the edge of the run-through
hole for the chain so that the chain does not catch on
sharp edges.
To ensure the chain does not come into conflict with
the motor on the inside, the gear should be mounted so
that the motor points in a different direction than the
run-through hole.
Then run the chain around the line wheel and down into
the hole.
Drawing – Maxi 33 Line wheel, axle and fixing plate.
ENGBO AS – et selskap i Engbo-gruppen
BESØKSADRESSE: Wirgenesvei 7, 3157 Barkåker POSTADR: Postboks 2288 Postterminalen, 3103 Tønsberg
E-MAIL: [email protected] WEB: www.engbo.no TLF: +47 33 00 31 50 FAKS: +47 33 00 31 60
25
Fitting Maxi 40
The Maxi 40 is designed for fitting inside on the stern or on
the bow side of a vertical bulkhead. The Maxi 40 has the
line wheel on the left-hand side of the windlass, seen from
behind.
NB Make sure to fit the windlass correctly in relation to
the direction of rotation of the line wheel. (See sketch)
The drilling template (only applies to the Maxi 40) is
designed to lie on the outside of the hull when you
mark the holes. For marking inside, you must reverse
the template so that the holes in the template match
the windlass.
Make sure that the opening in the hull for the rope is
positioned correctly in relation to the direction the rope
takes out through the hull. To prevent unnecessary
wear, the rope should not touch the edge of the
opening either vertically or horizontally. The opening
should be oval (top to bottom) to accommodate the
vertical play in the rope when the windlass is used.
Position the template correctly, so that the line wheel is
on the correct side. Mark the position of the opening for
the rope and then drill the hole.
NB Make sure to position the windlass correctly in
relation to the rope and anchor bracket so that the
windlass line wheel and the roller are in line.
Once you have made the opening for the rope in the
stern, you can install the windlass.
Use a clamp or similar to fit the anchor bracket
temporarily to the outside of the boat.
Run the anchor rope tightly between the external
anchor bracket and the track of the windlass line wheel.
Hold the windlass in place inside the boat and adjust
the position so that the rope is led correctly through
the opening in the stern. Once you have found the
correct position, mark around the windlass fixing plate
before removing the windlass.
Place the drilling template so that it matches the mark
you drew on the stern, and mark the holes for the
fixing bolts. Use a 9 mm bit to drill the holes, and then
fit the windlass.
NB If you are to use a rope conduit with guide pulleys
(68-00008), you can use the internal frame of the
conduit as the template for the opening.
Example of a Maxi 40 fitted to a
sailing boat
If necessary, use an intermediate panel between the
windlass and the hull to adjust the windlass in relation
to the direction of pull on the rope. After final
adjustment of the windlass position, tighten the bolts.
Run the rope via the line wheel on the windlass, down
through the rope/chain guide and under the line wheel.
Use the windlass to wind it up.
ENGBO AS – et selskap i Engbo-gruppen
BESØKSADRESSE: Wirgenesvei 7, 3157 Barkåker POSTADR: Postboks 2288 Postterminalen, 3103 Tønsberg
E-MAIL: [email protected] WEB: www.engbo.no TLF: +47 33 00 31 50 FAKS: +47 33 00 31 60
26
Fitting Maxi 34-V
The Maxi 34-V for vertical installation on a bulkhead is an
alternative to the Maxi 40 for situations in which it is best
to have the line wheel on the SB side of the windlass.
The Maxi 34-V is available with the line wheel on the right
or left-hand side of the windlass, as seen from the rear. In
principle, the Maxi 34-V is fitted in the same way as the
Maxi 40.
NB Make sure to fit the windlass correctly in relation to
the direction of rotation of the line wheel. (See sketch)
It is important that the opening in the hull for the rope
is positioned correctly in relation to the direction the
rope takes out through the hull. To prevent
unnecessary wear, the rope should not touch the edge
of the opening either vertically or horizontally. The
opening should be oval (top to bottom) to
accommodate the vertical play in the rope when the
windlass is used.
NB If you are to use a rope conduit with guide pulleys
(68-00008), you can use the internal frame of the
conduit as the template for the opening.
Make sure to position the windlass correctly in relation
to the anchor bracket so that the windlass line wheel
and the anchor roller are in line.
Once you have made the opening for the rope in the
stern, you can install the windlass.
Use a clamp or similar to fit the anchor bracket
temporarily to the outside of the boat.
Run the anchor rope tightly between the external
anchor bracket and the track of the windlass line
wheel.
Use the windlass fixing bracket as the template to
mark the fixing holes.
Hold the windlass in place inside the boat and adjust
the position so that the rope is led correctly through
the hole in the stern. Once you have found the correct
position, mark around the windlass fixing plate and the
hole in same before removing the windlass.
If necessary, use an intermediate panel between the
windlass and the hull to adjust the windlass in relation
to the direction of pull on the rope. After final
adjustment of the windlass position, tighten the bolts.
Run the rope via the line wheel on the windlass, down
through the rope/chain guide and under the line wheel.
Use the windlass to wind it up.
ENGBO AS – et selskap i Engbo-gruppen
BESØKSADRESSE: Wirgenesvei 7, 3157 Barkåker POSTADR: Postboks 2288 Postterminalen, 3103 Tønsberg
E-MAIL: [email protected] WEB: www.engbo.no TLF: +47 33 00 31 50 FAKS: +47 33 00 31 60
27
Fitting Maxi 34-D
The Maxi 34-D is designed for horizontal installation on the
fore or aft deck.
NB Make sure to fit the windlass correctly in relation to the
direction of rotation of the line wheel. (See sketch)
Start by locating the correct position for the windlass, so
that the direction of the rope is in line with the anchor
bracket. Then mark the centre of the windlass.
In most cases, it is simplest to use the windlass fixing
plate (see pos. 49 on the drawing on page 31) as a
template. Remove the white plastic cover and remove
the gypsies, rope guides and spring so that the fixing
plate is “clean”. Remove the six screws that hold the
fixing plate to the gear.
Place the fixing plate on the boat and mark the screw
holes, the centre hole for the gear, the hole for the auto
stop switch (on the front port side edge of the fixing
plate), and the run-through hole for the rope.
The simplest way to position the run-through hole for the
rope is to drill the fitting holes for the fixing plate and
then use a couple of screws to fasten this plate
temporarily to the boat. Put the plastic cover on and
mark the forward edge of the cover on the contact
surface. Use an appropriate hole-cutter and make sure
that the cover overlaps the outer edge of the hole by
around 5 mm.
Then make the holes with an appropriate drill and holecutter. Remember to sand the upper aft edge and the
lower fore edge of the run-through hole for the rope, to
prevent the rope from catching on sharp edges.
Then screw the fixing plate firmly in place on the boat.
Remember to draw the auto stop switch from the front
port side hole of the fixing plate before screwing the gear
firmly in place. To prevent the rope becoming entangled
with the motor on the inside of the boat, fit the gear so
that the motor is pointing directly forward, facing the
port or starboard side.
Example of an installation of
MAXI 34D into Joda 370
Then fit the anchor bracket and check that the anchor
seats correctly on the rollers.
Fit the gypsies and covers, the rope guard, the rope
guide and the spring. Then fit the auto stop switch in the
hole in the rope guard and adjust it so that the sensor
face protrudes approx. 1 mm towards the rope.
Then pull the rope through the hole in the cover, run it
between the line wheel and the rope guide and down
below the deck. Finally, fasten the cover in place.
ENGBO AS – et selskap i Engbo-gruppen
BESØKSADRESSE: Wirgenesvei 7, 3157 Barkåker POSTADR: Postboks 2288 Postterminalen, 3103 Tønsberg
E-MAIL: [email protected] WEB: www.engbo.no TLF: +47 33 00 31 50 FAKS: +47 33 00 31 60
28
Fitting Maxi 34-G
The Maxi 34-G is designed for fitting vertically on a
longitudinal bulkhead with the line wheel outside and the
windlass itself inside. The Maxi 34-G is available with the line
wheel on the right or left-hand side of the windlass, as seen
from the rear.
NB Make sure to fit the windlass correctly in relation to the
direction of rotation of the line wheel. (See sketch)
Place the enclosed template on the surface where the
winch is to be fitted – ideally as high up as possible – and
mark the drilling holes.
Alternatively, you can use the windlass fixing plate (See
the drawing on page 30, pos. 49) as a template. If you
choose to do so, remove the white plastic cover and take
off the gypsies and spring so that the fixing plate is free
of fitted parts. Remove the six screws that hold the fixing
plate to the gear.
Place the fixing plate on the surface where the windlass
is to be fitted and mark the screw holes, the centre hole
for the gear, the hole for the auto stop switch (on the
lower stern side edge of the fixing plate), and the runthrough hole for the rope. The simplest way to position
the run-through hole for the rope is to drill the fitting
holes for the fixing plate and then use a couple of screws
to fasten this plate temporarily to the boat. Position the
plastic cover, make sure that the cover overlaps the hole
by approx. 5 mm at the bottom, and then mark the lower
edge of the cover on the fitting surface. Then make the
holes with an appropriate drill and hole-cutter.
Remember to round off the outside upper edge and the
inside lower fore edge of the run-through hole to prevent
the rope from catching on sharp edges.
Then fasten the fixing plate to the boat. Remember to
draw the auto stop switch from the lower stern side hole
of the fixing plate before fitting the gear. To prevent the
rope becoming entangled with the motor on the inside of
the boat, fit the gear so that the motor is pointing
directly forward, facing slightly up or slightly down.
Then fit the anchor bracket and check that the anchor
seats correctly on the rollers.
Fit the gypsies and covers, the rope guard, the rope
guide and the spring (pos 52, 54 and 58, page 31). Then
fit the auto stop switch in the hole in the rope guard and
adjust it so that the reciprocal part sticks approx. 1 mm
out from the outside of the bracket, towards the rope.
Then pull the rope through the hole in the cover and run
it between the line wheel and the rope guide.
ENGBO AS – et selskap i Engbo-gruppen
BESØKSADRESSE: Wirgenesvei 7, 3157 Barkåker POSTADR: Postboks 2288 Postterminalen, 3103 Tønsberg
E-MAIL: [email protected] WEB: www.engbo.no TLF: +47 33 00 31 50 FAKS: +47 33 00 31 60
29
Put the white plastic cover in position. Mark the runthrough hole for the rope in the cover. Make an oval hole
– approx. 40 mm vertical and 20 mm horizontal – in the
cover. (for instance, cut 2 holes in towards each other
with a 20 mm hole-cutter. Then remove the material
between the holes.)
Example of a Maxi 34-4G fitted
to a Grandezza 31.
Drawing - Maxi 34-G – line wheel, rope guide, rope guard and fixing plate
NB The bolt (pos 17 page 39) that attaches the line wheel to the axle must be secured with contact
adhesive (e.g. Locktite or similar). Recommened torque for bolts, 20Nm.
ENGBO AS – et selskap i Engbo-gruppen
BESØKSADRESSE: Wirgenesvei 7, 3157 Barkåker POSTADR: Postboks 2288 Postterminalen, 3103 Tønsberg
E-MAIL: [email protected] WEB: www.engbo.no TLF: +47 33 00 31 50 FAKS: +47 33 00 31 60
30
Fitting Maxi 34-S
The Maxi 34-S is intended for vertical installation on a
vertical longitudinal bulkhead. It is an alternative to the
Maxi 34-G if you prefer to fit the entire windlass unit
inside your boat. The Maxi 34-S is available with the
line wheel on the right or left-hand side of the windlass,
as seen from the rear.
The windlass bracket is fitted to the bulkhead and the
rope is led out via a rope conduit.
NB Make sure to fit the windlass correctly in
relation to the direction of rotation of the line wheel.
(See sketch)
Make sure that the opening to lead the rope through
the hull is positioned correctly in relation to the
direction of the rope. To prevent unnecessary wear,
the rope should not touch the edge of the opening
either vertically or horizontally. The opening should
be oval (top to bottom) to accommodate the play in
the rope roller when the windlass is used.
NB Make sure to position the windlass correctly in
relation to the rope roller so that the windlass line
wheel and the roller are in line.
Once you have made the opening for the rope in the
stern, you can install the windlass. Run the anchor
rope tightly between the rope roller on the bathing
platform and the track in the line wheel. Hold the
windlass in position inside. This makes it easier to
establish where the windlass is to be placed to
ensure that the rope sits correctly in the opening in
the stern. Once you have found the correct position,
mark it in accordance with the windlass fixing plate.
Then remove the windlass and drill the required
holes.
NB If you are to use a rope conduit with guide
pulleys (68-00008), you can use the internal frame
of the conduit as the template for the opening.
If necessary, use an intermediate panel between
the windlass and the supporting surface to adjust
the windlass correctly in relation to the opening in
the hull. After final adjustment of the windlass
position, tighten the bolts.
Run the rope via the line wheel on the windlass, down
through the rope/chain guide and under the line wheel.
Use the windlass to wind it up.
ENGBO AS – et selskap i Engbo-gruppen
BESØKSADRESSE: Wirgenesvei 7, 3157 Barkåker POSTADR: Postboks 2288 Postterminalen, 3103 Tønsberg
E-MAIL: [email protected] WEB: www.engbo.no TLF: +47 33 00 31 50 FAKS: +47 33 00 31 60
31
Fitting Maxi 34-H
The Maxi 34-H is designed to be fitted hanging below a
horizontal surface – for example, by fitting the bracket
below the deck. The Maxi 34-H is available with the line
wheel on the right or left-hand side of the windlass, as
seen from the rear.
NB Make sure to fit the windlass correctly in relation
to the direction of rotation of the line wheel. (See
sketch)
Make sure that the opening to lead the rope through
the hull is positioned correctly in relation to the
direction of the rope. To prevent unnecessary wear,
the rope should not touch the edge of the opening
either vertically or horizontally. The opening should be
oval (top to bottom) to accommodate the play in the
rope roller when the windlass is used.
NB Make sure to position the windlass correctly in
relation to the rope roller so that the windlass line
wheel and the roller are in line.
Once you have made the opening for the rope in the
stern, you can install the windlass. Run the anchor
rope tightly between the rope roller on the bathing
platform and the track in the line wheel. Hold the
windlass in position inside. This makes it easier to
establish where the windlass is to be placed to ensure
the rope sits correctly in the opening in the stern.
Once you have found the correct position, mark
around the windlass fixing bracket before removing
the windlass. Use the fixing bracket as a drilling
template. Use a 9 mm bit to drill the holes, and then
fit the windlass.
NB If you are to use a rope conduit with guide pulleys
(68-00008), you can use the internal frame of the
conduit as the template for the opening.
If necessary, use an intermediate panel between the
windlass and the supporting surface to adjust the
windlass correctly in relation to the opening in the
hull. After final adjustment of the windlass position,
tighten the bolts.
Run the rope via the line wheel on the windlass, down
through the rope/chain guide and under the line
wheel. Use the windlass to wind it up.
ENGBO AS – et selskap i Engbo-gruppen
BESØKSADRESSE: Wirgenesvei 7, 3157 Barkåker POSTADR: Postboks 2288 Postterminalen, 3103 Tønsberg
E-MAIL: [email protected] WEB: www.engbo.no TLF: +47 33 00 31 50 FAKS: +47 33 00 31 60
32
Fitting Maxi 38
The Maxi 38 is designed to be fitted hanging below a
horizontal surface – for example, by fitting the windlass
below the deck or the bathing platform, as shown in the
picture to the left.
The Maxi 38 is available with the line wheel on the right or
left-hand side of the windlass, as seen from the rear.
Fit, for instance, the windlass together with a “gooseneck”
(68-00004), so the windlass fixing bolts are screwed into
the gooseneck from below with the platform or deck in
between.
Example of a Maxi 38 fitted to a
Bavaria 29 Sport
NB Make sure to position the windlass correctly in relation
to the rope roller so that the windlass line wheel and the
roller are in line.
Use the gooseneck as the template for marking the
fixing holes for the windlass.
NB It is important to ensure that there is sufficient space
between the anchor and the gooseneck, to prevent the
line splice getting stuck in the gooseneck.
Run the line via the line wheel on the windlass,
down through the rope/chain guide and under the
line wheel. Use the windlass to wind it up.
The rope is collected below the windlass. It is
important to ensure that there is sufficient space to
prevent the rope bunching below the windlass.
There must be at least 50 cm of free space below
the windlass, and the area where the rope is stored
must measure at least 40 x 40 cm.
ENGBO AS – et selskap i Engbo-gruppen
BESØKSADRESSE: Wirgenesvei 7, 3157 Barkåker POSTADR: Postboks 2288 Postterminalen, 3103 Tønsberg
E-MAIL: [email protected] WEB: www.engbo.no TLF: +47 33 00 31 50 FAKS: +47 33 00 31 60
33
Auto stop function
All Engbo Maxi line windlasses feature an electronic auto
stop function. An electronic auto stop switch is positioned
below the windlass gypsy and registers the brass wire
indicators attached to the rope. When the first brass wire
indicator passes the sensor, the windlass will stop. If you
release the button on the control panel or remote control
and then press it again, the windlass will continue to reel
in the anchor at low speed until the second brass wire
indicator passes the sensor. The windlass will then stop
again.
NB If you wish to continue to run the windlass after the
second auto stop, press the “up” button and hold it down
for 10 seconds.
Adjust the auto stop switch
This feature is normally correctly adjusted on delivery.
The flat end should usually protrude approx. 1 mm
from the holder towards the rope. If you need to
adjust it, loosen the bolt that holds the auto stop
switch in place and adjust it to the required position.
Then tighten the bolt again.
NB Make sure that the anchor line cannot snag on the
inductive sensor.
Auto stop – fitting the stop indicator/brass wire
An electronic auto stop switch is positioned below the rope guard. This switch triggers the
auto stop function when the anchor has been raised. To activate the switch, two brass
wire indicators are fitted to the rope to determine when the windlass is to stop. (Cut the
enclosed brass wire in two).
To position the brass wire indicators in the correct places on the rope, raise the anchor
until the thimble is approx. 30 cm below the anchor bracket (raise the anchor slowly
during the last stretch) and mark the rope right next to the auto stop switch.
Then carefully raise the anchor completely and seat it in the bracket. Set a new mark on
the rope by the sensor. Position the wire indicators by the marks (Picture 1)
Use an appropriate tool to pierce a hole through the rope (Picture 2).
Thread the brass wire through the rope and fold it lengthwise along the rope (Picture 3).
Wind the free end of the brass wire five (5) times around the rope and over the other end
of the wire (Pictures 4–5).
Wind the free ends together, cut the twist down to approx. 5 mm and bend it in under the
wire wrap so it cannot snag on anything (Pictures 6–9).
The outer diameter of the wire wrap should be almost the same as the outer diameter of
the rope so that the inductive sensor can detect the brass wire (Picture 10).
NB The brass wire indicators may become worn by the gypsy – especially under heavy loads
– and you must therefore check them regularly. Replace damaged wire if necessary
ENGBO AS – et selskap i Engbo-gruppen
BESØKSADRESSE: Wirgenesvei 7, 3157 Barkåker POSTADR: Postboks 2288 Postterminalen, 3103 Tønsberg
E-MAIL: [email protected] WEB: www.engbo.no TLF: +47 33 00 31 50 FAKS: +47 33 00 31 60
34
1
2
3
4
5
6
7
8
ENGBO AS – et selskap i Engbo-gruppen
BESØKSADRESSE: Wirgenesvei 7, 3157 Barkåker POSTADR: Postboks 2288 Postterminalen, 3103 Tønsberg
E-MAIL: [email protected] WEB: www.engbo.no TLF: +47 33 00 31 50 FAKS: +47 33 00 31 60
35
9
10
NB When you have used the windlass several times, the line may have stretched slightly,
resulting it may be lying a little deeper in the line wheel. If the anchor does not seat firmly in
the anchor bracket, you may need to post-adjust the brass wire indicator that signals the
second auto stop.
Maintenance
Replacing the batteries in the wireless remote control
The remote control uses three standard AAA/LR03
alkaline batteries. For normal operation, the
batteries have a service life of more than two
seasons.
To change the batteries, remove all five screws to
open the remote control.
NB The screws are different lengths and have Orings under their heads.
Replace the used batteries with new ones and
make sure that they are installed correctly (+ up
and – down towards the bottom edge) as shown in
the picture.
Replace the rear cover and carefully screw the
sections together until the gasket between the
sections is gently compressed.
The water-tightness of the remote control unit is
dependent on intact O-rings and undamaged,
correctly compressed packing.
NB To ensure a long service life, the remote
control unit features acid-resistant machine screws
and threaded bushes in the top cover.
Careless, excessive turning can force these screws
through the top cover.
(Not covered by the warranty).
ENGBO AS – et selskap i Engbo-gruppen
BESØKSADRESSE: Wirgenesvei 7, 3157 Barkåker POSTADR: Postboks 2288 Postterminalen, 3103 Tønsberg
E-MAIL: [email protected] WEB: www.engbo.no TLF: +47 33 00 31 50 FAKS: +47 33 00 31 60
36
Replacing the line wheels
If the line guide spring (see the drawing on the following page, pos. 46) is too
slack, or if there is not sufficient space for the rope below the windlass, the rope
can, in time, slip on the gypsy, resulting in the gypsy becoming worn. If you need
to replace gypsies (pos. 14 and 15), follow the procedure described below:
Loosen and remove the screws and washers (16 and 17).
Remove the outer gypsy and cover (13 and 15).
Loosen and remove the screws (25) and the rope guard/rope guide set
(29 and 4).
NB If necessary, remove the auto stop switch (6) by loosening the nuts (61)
and pull the switch out to access the screws.
Remove and replace the inner line wheel.
Reverse the process to assemble and fit the new outer gypsy.
NB Put contact adhesive (e.g. Locktite) on the screw (17) before tightening it.
NB Recommened torque for bolts, 20Nm
ENGBO AS – et selskap i Engbo-gruppen
BESØKSADRESSE: Wirgenesvei 7, 3157 Barkåker POSTADR: Postboks 2288 Postterminalen, 3103 Tønsberg
E-MAIL: [email protected] WEB: www.engbo.no TLF: +47 33 00 31 50 FAKS: +47 33 00 31 60
37
Line guide – adjusting the tension spring
The line guide is spring-loaded and
intended to press on the rope to ensure
sufficient friction between rope and gypsy.
If the spring becomes over-stretched, it may
be necessary to replace it. (Alternatively,
the spring can be shortened slightly).
NB It is important that the line guide
does not press too hard on the rope.
Too much friction between the rope
guide and the rope may prevent the
anchor from dropping at the required
speed.
The rope guide should be able to
move easily and freely above the
hinged bolt when the spring is not
fitted. Only then will the spring be
able to exert the required pressure
on the rope guide.
Winter storage
Remove the rope from the windlass before every period of winter storage. Soak it in a
mild soap solution overnight. Then wash it in soapy water and rinsing fluid to rinse out
all the salt residue and dirt. This will keep the rope flexible for many years. At the
same time, check the wire thread auto stop indicators and replace them if necessary.
Before winter storage, spray the windlass and all electrical points and connections with
a moisture repellent spray.
Make sure that the windlass is protected against snow and water during winter storage.
Do not wrap the windlass, as this may cause condensation to form during winter
storage.
It is also a good idea to wash the inside of the rope box and remove seaweed, dirt, etc.
ENGBO AS – et selskap i Engbo-gruppen
BESØKSADRESSE: Wirgenesvei 7, 3157 Barkåker POSTADR: Postboks 2288 Postterminalen, 3103 Tønsberg
E-MAIL: [email protected] WEB: www.engbo.no TLF: +47 33 00 31 50 FAKS: +47 33 00 31 60
38
Troubleshooting
ENGBO MAXI WINDLASSES WITH TRANSISTOR-CONTROLLED ELECTRONICS
(For connection, see the diagram in the Electrical wiring section)
Fault symptom:
1.
2.
3.
Carry out and/or pay attention to the
following:
The action leads to:
Result
NB You MUST make sure to shut off the main
power supply before connecting or
disconnecting cables and/or performing
mechanical work.
The windlass is
Check that:
completely “dead”.
- the main switch is in the ON position
Nothing works.
- the fuse is intact
- all connection points make
contact
- all connections are in accordance with
the diagrams in the manual
- there is a sufficient
voltage supply to the windlass
motor.
(See item 3)
The windlass will not Check that:
drop anchor and only the connections to the electronic control unit (1, 2 and 3) are in
winds in for 3 s.
accordance with the diagram. Swap connections 1 and 3 and the windlass
should function correctly.
The windlass does
not work or pulls
very poorly.
NB
Experience suggests this is the most
common source of error.
Check the main power supply:
Measure the voltage in the battery cables
where they join the windlass while the
windlass is running.
4.
If the windlass does
not function at all.
Disconnect the cables from points 1, 2 and 3.
--------
For the motor to run
normally, the voltage
should be at least 10.5V
when the windlass is
operating.
If the voltage is lower than 10.5V, find the
cause. Check all the connection points, such
as the main switch, the fuse, the battery
shoes, the battery voltage and, if appropriate,
the general condition of the battery.
If the voltage is above 10.5V but the motor
does not work, this may be because long
use/overload of the windlass has caused the
electronic protection function to shut down the
motor.
Leave to cool down for 20 min and try again.
Disconnects functions
normally controlled from
the switch panel so that
you can “force” the
windlass to operate
directly from the
electronic unit.
The switch panel is disconnected.
--------
-------Strip the ends of a loose piece of
cable (approx. 10 cm) and make contact
between the following points:
Cable between points 2 and 3
5.
If the auto stop
function does not
work.
(ONLY rope
windlasses)
Releases the windlass
and drops the anchor.
Cable between points 1 and 2
The windlass raises the
anchor.
Check that:
– the connections to 4, 5 and 6 are in
accordance with the diagram
– the voltage to the emitter (between 4 and 6)
is higher than 10 V DC.
– the auto stop wires are in position.
– the auto stop emitter is at the correct
distance from the rope.
The indicator lamp on the
emitter should light up
when the metal ring on
the rope is close to the
sensor.
If the windlass operates normally when you
carry out this procedure, it means that the
fault is to be found in the cable to the switch
panel or in the switch panel itself, which must
then be replaced.
If the voltage is OK and the distance between
the emitter and the rope is correct but the
lamp does not light up, the emitter needs to
be replaced.
(Can also be tested by
putting a screwdriver, for
example, near the
sensor).
If the windlass still does not function normally after you have carried out these procedures, the fault is in the windlass itself.
Contact your dealer or Engbo AS, Tønsberg. Tel. +47 3300 3150, Fax: +47 3300 3160, E-mail: [email protected]
ENGBO AS – et selskap i Engbo-gruppen
BESØKSADRESSE: Wirgenesvei 7, 3157 Barkåker POSTADR: Postboks 2288 Postterminalen, 3103 Tønsberg
E-MAIL: [email protected] WEB: www.engbo.no TLF: +47 33 00 31 50 FAKS: +47 33 00 31 60
39
Installation of equipment with high currents - special
considerations
Preface/introduction
Engbo has experienced that over 90 % of our service-/problem enquiries, is related to power
supply. This document has been made to try to address and help avoid the most common and
known problems that can arise.
General
There are special considerations that must be taken into account regarding installation, use
and maintenance of high current consumption equipment. It is therefore especially important
that only persons with the appropriate knowledge are set to do this kind of work.
The most common products which this document applies to are electrical bow and/or stern
thrusters, windlasses and electrical starters for main and/or help engines.
(Similar precautions must also be taken with generators and charging systems for batteries).
Such equipment have, or can have for shorter periods, many hundreds of ampere of current
consumption.
In-rush current in an electrical motor of this kind will typically be around 2-3 times nominal
current and can easily exceed 1000 A for short periods.
Currents of these sizes will generate heat in all components, including cables.
It is therefore very important that all components, including the connections of these
components, are done correctly to keep the connection resistance and the total resistance in
the electrical circuit as low as possible.
All connections between cable-lug and components shall always be directly copper against
copper, (or copper against brass).
There shall never be any washers of any kind, or anything else, between the
connections.
Wrong or improper use or wrong connection of such high currents
components will generate a lot of heat which in worst case can cause fire.
Battery
The battery capacity must be related to the connected equipment and the use of this. For
recommended size and capacity, please refer to the product specifications. Generally will a
battery with higher capacity give better performance. Start-type batteries can generally give
higher currents, (for a short period), than leisure/standard type and is therefore better suited
for the kind of equipment mentioned above. It is important to understand the difference
between battery voltage and battery capacity. An old or damaged big battery can have restcapacity equivalent of a small motorcycle battery while it is still possible to measure a correct
charging voltage of approx 14,4V DC and apparently a good no-load voltage of approx 12,8 V
DC. (No-load voltage must be measured directly on the battery-posts after a couple of hours
without charging from motor or land based supply.
Special “high-start-current” and similar kind of batteries are normally suited for only the
smallest thruster models and windlasses as they normally have too little capacity (Ah).
ENGBO AS – et selskap i Engbo-gruppen
BESØKSADRESSE: Wirgenesvei 7, 3157 Barkåker POSTADR: Postboks 2288 Postterminalen, 3103 Tønsberg
E-MAIL: [email protected] WEB: www.engbo.no TLF: +47 33 00 31 50 FAKS: +47 33 00 31 60
40
Battery-cables/lugs
Battery-cables must be related accordingly to the equipment
it is connected to. Please refer to the product specifications
for recommended relation between size and length.
Generally speaking, a thicker cable dimension will give
better performance, especially with longer cables. Use only
cable-lugs of high quality. These must only be mounted on
the cables with correct tool and correct according to the
procedure.
Never use a vise, wrench or similar to press on a cablelug. Although it may look like a good connection, over time
it may become a source of ignition.
The difference between two types of cable-lugs is clearly
shown in the picture. The left one illustrates a ring-type
cable-lug, and is acceptable for products with currents up to
ca 200A. The right cable-lug is of press-on type, and shall
be used on thrusters
Battery connection
The pictures show a correct connected battery cable.
Notice that the cable-lug is mounted onto the battery
post with washer and nut only on the upside of the
cable-lug. Nothing must be placed between the
battery terminal clamp and cable-lug.
It exists different kinds of battery connections. Use
only a type with bolts, and not any kind of ”spring”
or ”clip-on” solutions.
If more than one cable/cable-lug has to be mounted
on the same battery-post, the one with the greatest
current shall always be the lowest or closest to the
battery.
Follow the instructions for applying the correct torque
on the bolts.
After the cables have been mounted, protective and
isolating rubber-cap shall be mounted.
Fuse connection
The bolt itself is not an active current conductor, and
its only function is to assure a tight fit between the
fuse and the cable-lug.
The picture shows a correct connected cable to the
fuse holder. Please note that fuse and cable-lug is in
direct contact with a big washer over the fuse and
under the cable-lug. There must be nothing
between the fuse and the cable-lug.
Correct torque for a Stainless Steel bolt (A4),
is 20 Nm.
ENGBO AS – et selskap i Engbo-gruppen
BESØKSADRESSE: Wirgenesvei 7, 3157 Barkåker POSTADR: Postboks 2288 Postterminalen, 3103 Tønsberg
E-MAIL: [email protected] WEB: www.engbo.no TLF: +47 33 00 31 50 FAKS: +47 33 00 31 60
41
Main switch connection
The bolt itself is an active current conductor.
The pictures show a correct main switch connection.
Please note that the cable-lug is mounted directly
onto the terminal post, washer and nut is on top of
the cable-lug.
Different kinds of main switches with different kinds
of terminals exist. Correct torque is;
M8 Brass: 10 Nm
M10 Brass: 15 Nm
The picture shows isolating rubber-caps mounted on both
terminals. (For improved understanding, the interrupter is
not mounted on a wall.)
Control box connections
Tips for mounting:
Pre-cut correct cable-lengths and mount cable-lugs in
advance so mounting the cables on the box can be done
in a comfortable position before the unit is mounted in
the boat.
One will need 2 pcs 13mm spanners to secure the M8bolts.
A long-nosed VISE-GRIP plier may be useful to hold the
nut.
Correct torque is 20 Nm for the Stainless Steel bolts,
(A4).
Always begin the mounting/assembly from the left,
entering the bolt with a big washer into the hole from the
right.
All cable-lugs shall always be on the right side, in
direct contact with the copper-bar.
Use M8x20mm bolts for copper-bars number; 1, 2, 3, and 5
and M8x25mm for bar number 4. It shall also be mounted a
plain washer between cable-lug and lock-nut.
Mount the three first cables with the cable-lugs pointing in the
same direction, as shown in the pictures.
ENGBO AS – et selskap i Engbo-gruppen
BESØKSADRESSE: Wirgenesvei 7, 3157 Barkåker POSTADR: Postboks 2288 Postterminalen, 3103 Tønsberg
E-MAIL: [email protected] WEB: www.engbo.no TLF: +47 33 00 31 50 FAKS: +47 33 00 31 60
42
The mounting bolts are not active current leaders and
their only purpose is to assure a tight connection
between the cable-lugs and bars.
Shorter and thicker cables will give less voltage drop and
thus better performance.
Please notice how the cable-lugs on copper-bar number 4
is mounted, (turned towards each other to maximize
space and ease of montage).
Cable-lug for bar number 5 is turned the opposite
direction compared with number 1, 2 og 3.
If ever needed to dismount the cables, start from the
right side and reverse the above procedure.
Motor terminal connections
The terminal bolts are active current leaders.
The pictures show correct connected cables on the
motor terminals. Please note that cable-lug is
mounted to the terminal with brass washers on both
sides of the cable-lug, then another washer and nut
on top of the cable-lug.
Two types of terminals exist;
Correct torque is;
M8 Brass/copper: 10 Nm
M10 Brass/copper: 15 Nm
Finally, mount isolating rubber caps or plastic cap
nuts. (Not shown on picture).
ENGBO AS – et selskap i Engbo-gruppen
BESØKSADRESSE: Wirgenesvei 7, 3157 Barkåker POSTADR: Postboks 2288 Postterminalen, 3103 Tønsberg
E-MAIL: [email protected] WEB: www.engbo.no TLF: +47 33 00 31 50 FAKS: +47 33 00 31 60
43