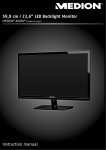
1
21.5” LED TV & DVD Combi MEDION® LIFE® E12009 (MD 21259) UK Medion Electronics Ltd. 120 Faraday Park, Faraday Road, Dorcan Swindon SN3 5JF, Wiltshire United Kingdom Hotline: 0871 37 61 020 (Costs 7p/min from a BT landline, mobile costs may be higher) Fax: 01793 71 57 16 To contact us by email please visit the „Service and Support“ section of our website at www.medion.co.uk. www.medion.co.uk IRE Medion Electronics Ltd. 120 Faraday Park, Faraday Road, Dorcan Swindon SN3 5JF, Wiltshire United Kingdom 03/2014 Hotline: 1 800 992508 (free phone) Fax: 01793 715716 21259 EN Aldi UK IE RC1 Cover.indd 1 To contact us by email please visit the „Service and Support“ section of our website at www.medion.co.uk. www.medion.co.uk Instruction Manual 08.01.2014 11:23:34 Contents EN 1. About these Instructions ............................................................................................................................................3 1.1. Warning Symbols and Keywords .......................................................................................................................................................... 3 1.2. Target Group................................................................................................................................................................................................. 3 1.3. Full HD............................................................................................................................................................................................................. 3 2. Safety Instructions ......................................................................................................................................................4 2.1. Operating Safety ......................................................................................................................................................................................... 4 2.2. Set-Up Location ........................................................................................................................................................................................... 4 2.3. Repairs ............................................................................................................................................................................................................ 4 2.4. Intended Environment.............................................................................................................................................................................. 5 2.5. Power Supply................................................................................................................................................................................................ 5 2.6. Battery Handling ......................................................................................................................................................................................... 5 2.7. Information about Conformity .............................................................................................................................................................. 6 2.8. DVD Player ..................................................................................................................................................................................................... 6 2.9. Contents ......................................................................................................................................................................................................... 6 3. Device Overview .........................................................................................................................................................7 3.1. Front ................................................................................................................................................................................................................ 7 3.2. Rear .................................................................................................................................................................................................................. 8 3.3. Remote Control ........................................................................................................................................................................................... 9 4. Start of Operation .....................................................................................................................................................10 4.1. Unpacking ...................................................................................................................................................................................................10 4.2. Installation ...................................................................................................................................................................................................10 4.3. Inserting Batteries into the Remote Control ..................................................................................................................................10 4.4. Connecting the TV Antenna .................................................................................................................................................................11 4.5. DVB-T Mode (Standard Definition and High Definition) ............................................................................................................11 4.6. Connecting the DVB-T Antenna ..........................................................................................................................................................11 4.7. Connect the Power Supply Adapter...................................................................................................................................................11 4.8. Switching the LED-Backlight TV on and off.....................................................................................................................................11 4.9. First Time Use .............................................................................................................................................................................................12 5. Operation...................................................................................................................................................................13 5.1. Channel Selection.....................................................................................................................................................................................13 5.2. Setting the Volume...................................................................................................................................................................................13 5.3. Picture Setting ...........................................................................................................................................................................................13 5.4. Displaying Information ...........................................................................................................................................................................14 5.5. Favourite Channel List.............................................................................................................................................................................14 5.6. Input Source Selection............................................................................................................................................................................14 6. Connecting External Devices ...................................................................................................................................15 6.1. Connecting Headphones .......................................................................................................................................................................15 6.2. Digital Amplifier via Coaxial Connection ........................................................................................................................................15 6.3. Connecting a Blu-Ray Player .................................................................................................................................................................15 6.4. Connecting a Video Recorder (VCR)...................................................................................................................................................15 6.5. Connecting a DVD Recorder .................................................................................................................................................................16 6.6. Connecting a Set Top Box (SAT, SD/HD DVB-T, Decoder, Etc.) ..................................................................................................16 6.7. Connecting a DVD/video recorder and SAT receiver ...................................................................................................................16 6.8. Connecting a Camcorder .......................................................................................................................................................................17 6.9. Device with HDMI or DVI Output ........................................................................................................................................................17 6.10. Connecting an External Device with HDMI Output .....................................................................................................................17 6.11. Connecting an External Device with DVI Output ..........................................................................................................................17 6.12. Connecting a PC or Notebook .............................................................................................................................................................17 7. Basic OSD Menu Settings .........................................................................................................................................18 7.1. Navigating within the Menu .................................................................................................................................................................18 7.2. Picture Menu ..............................................................................................................................................................................................19 7.3. Sound Menu ...............................................................................................................................................................................................19 7.4. Channel Menu............................................................................................................................................................................................20 7.5. Feature Menu .............................................................................................................................................................................................21 7.6. Setup Menu.................................................................................................................................................................................................24 8. Media Mode ...............................................................................................................................................................25 8.1. Media Mode and USB Connectivity ...................................................................................................................................................25 1 of 42 8.2. Recording via REC Button ......................................................................................................................................................................25 8.3. Switching between TV Mode and Media Mode ............................................................................................................................25 8.4. Media Menu System ................................................................................................................................................................................26 8.5. Media Player Access .................................................................................................................................................................................26 8.6. Media Player Menu...................................................................................................................................................................................26 8.7. Display of Photos / Images ....................................................................................................................................................................26 8.8. Audio Playback ..........................................................................................................................................................................................27 8.9. Video Playback ...........................................................................................................................................................................................27 8.10. Text Playback ..............................................................................................................................................................................................28 9. PVR Function .............................................................................................................................................................28 9.1. Direct Recording (Start/Stop) ...............................................................................................................................................................28 9.2. Scheduled Recording ..............................................................................................................................................................................28 9.3. Playback of Recorded Files ....................................................................................................................................................................28 10. EPG - Program Guide ................................................................................................................................................29 11. DVD Mode ..................................................................................................................................................................30 11.1. Switching from TV to DVD mode ........................................................................................................................................................30 11.2. Inserting a DVD..........................................................................................................................................................................................30 11.3. Button function .........................................................................................................................................................................................30 11.4. Navigating between Audio & Picture (MP3 & JPEG).....................................................................................................................31 11.5. DVD Player Setup ......................................................................................................................................................................................31 12. Troubleshooting........................................................................................................................................................34 12.1. Do You Need More Help? .......................................................................................................................................................................35 13. LED-Backlight TV pixel faults ...................................................................................................................................35 14. Cleaning .....................................................................................................................................................................36 15. Disposal .....................................................................................................................................................................36 16. Technical Data ...........................................................................................................................................................37 17. Legal Notice ...............................................................................................................................................................39 18. Index ..........................................................................................................................................................................41 2 of 42 1. About these Instructions EN Before using the device for the first time, you should read these operating instructions thoroughly and follow the safety advice. This device may only be used as described in the operating instructions. Always keep these operating instructions at hand but store them safely so that you can pass them on to a new owner should you sell the unit. 1.1. Warning Symbols and Keywords DANGER! Warning of immediate risk of fatal injury! WARNING! Warning: possible mortal danger and/or serious irreversible injuries! CAUTION! Warning: possible light or moderate injuries! CAUTION! Please follow the guidelines to avoid property damage. PLEASE NOTE! Additional information on using the device! PLEASE NOTE! Please follow the guidelines in the operating instructions. WARNING! Warning: danger of electric shock! WARNING! Warning: danger due to excessive volume! • Bullet point/information on operating steps and results Tasks to be performed 1.2. Target Group • • • • This unit is to be used only for receiving and playing back TV programmes. The range of connections supplied makes it possible to expand the input and output sources (e.g. receiver, DVD player, DVD recorder, video recorder, PC, etc.). This unit is intended for use in dry, indoor areas only. It is not suitable for use as a data monitor for office workstations. The unit is intended for private use only and not for industrial or commercial use. Using the device in extreme environmental conditions may result in it being damaged. 1.3. Full HD Your LED-Backlight TV is equipped with the feature “Full HD”. This means that it is capable of displaying high-resolution television programmes (HDTV). The prerequisite for this is a HDTV signal. 3 of 42 2. Safety Instructions 2.1. Operating Safety • Children should be supervised to ensure they do not play with this unit. This unit is not intended for use by people (including children) with reduced physical, sensory or mental abilities or for those without experience and/or knowledge, unless they are supervised by a person responsible for their safety or they have been instructed on its use. WARNING! Keep packaging material such as plastic film away from children. There is a risk of suffocation if used improperly. WARNING! Never open the housing of the LED-Backlight TV (electrical shock, short circuit and fire hazard)! • • • • • WARNING! Never insert any objects through the slots and openings of the LED-Backlight TV (electrical shock, short circuit and fire hazard)! The slots and openings on the LED-Backlight TV are for ventilation purposes. Do not cover these openings (overheating, fire risk)! Do not put any pressure on the display. There is a risk that the screen may break. The remote control has a class 1M infrared diode. Never use optical devices to look at the LED. CAUTION! There is a risk of injury if the screen is damaged! Recover all broken pieces using protective gloves and send them to your Service Centre for proper waste disposal. Then wash your hands with soap because chemicals may have leaked out. To avoid damaging the screen do not touch it with fingers or sharp objects. Contact customer services if: − the power cable is burnt or damaged − liquid has penetrated the device − the device is not operating correctly − the device has fallen, or the casing is damaged 2.2. Set-Up Location • • • • • In the first hours of operation, new devices may emit a typical, unavoidable but completely harmless smell, which will decline increasingly in the course of time. We recommend that you ventilate the room regularly, in order to counteract the formation of the smell. Keep your LED-Backlight TV and all connected devices away from moisture and avoid dust, heat and direct sunlight. Do not use the device outdoors because other effects such as rain, snow etc. can also damage the device. The device must not be exposed to water droplets or spray. Do not place objects that are filled with water (such as vases) on the device. The container may tip over and the liquid will impair the electrical safety. Do not operate the device near water and do not set it up near a wash-hand basin or bath, etc. CAUTION! Do not place any exposed sources of ignition (candles or similar) on or near the device. • • • • Make sure that there is enough clearance in the wall units! Ensure a minimum separation of 10 cm around the device for sufficient ventilation. Operate all components on a stable, level and vibration-free base, to prevent the LED-Backlight TV from falling over. Avoid dazzle, reflections and strong bright-dark contrast in order to protect your eyes. The optimal viewing distance is 5 times the screen diagonal. 2.3. Repairs • • • Repairs to your LED-Backlight TV should only be carried out by qualified specialists. Please contact our authorised service centre if you have any problems with your LED-Backlight TV. Make sure to use only replacement parts provided by the manufacturer. The device may sustain damage if unsuitable replacement parts are used. 4 of 42 2.4. Intended Environment • • • • EN The device can be operated at an ambient temperature of +5° C to +40° C and a relative humidity of 20% - 85% (non condensing). In the switched-off state the LED-Backlight TV can be stored from -20° C to +60° C. Keep the device at a distance of at least one metre from high frequencies and magnetic sources of interference (television, loudspeaker boxes, mobile telephones etc.) to avoid malfunctioning. WARNING! After transporting the LED-Backlight TV wait until the device has reached ambient temperature before switching it on. Large changes in temperature or fluctuations in humidity can cause moisture to build up due to condensation within the LED-Backlight TV, which can cause an electrical short circuit. During thunderstorms or if the device is not going to be used for long periods, remove the plug from the mains socket and the aerial cable from the aerial socket. 2.5. Power Supply • • • • • • • • Even when switched off, some components of the device are live. In order to disconnect the power to your LEDBacklight TV or to completely isolate the device from voltage sources remove the mains plug from the mains socket. WARNING! Do not open the device’s housing. There is a risk of electric shock when the housing is open. The device does not contain any parts requiring maintenance. Only plug the LED-Backlight TV into an earthed socket with 100-240 V~ 50/60 Hz. Contact you electricity provider if you are not sure if the socket is earthed or not. The socket must be near the LED-Backlight TV and easily accessible. In order to disconnect the power to your LED-Backlight TV or to completely isolate the device from voltage sources remove the mains plug from the mains socket. Always grab the plug firmly when unplugging it from the socket. Never pull on the lead. For extra safety, we recommend using an over-voltage protection device to prevent your LED-Backlight TV sustaining damage as a result of power surges or lightning strikes. If you are using an extension cable, make sure that it complies with UK and Ireland Electrical Safety requirements. If in doubt, contact your electrician. Position the cable so that nobody is able to step on it or trip over it. Do not place any objects on the cable to avoid damaging it. 2.6. Battery Handling WARNiNG! Batteries can contain combustible materials. If not handled correctly batteries can leak, become very hot, ignite or even explode, which could damage your device or/and your health. Please ensure compliance with the following advice: • Keep batteries away from children. Contact your doctor immediately if a battery is swallowed. • Never charge batteries (unless it is clearly indicated). • Never discharge batteries by high power output. • Never short-circuit the batteries. • Never expose the batteries to excessive heat such as sunshine, fire or similar. • Do take apart or deform the batteries. Your hands or fingers could get injured or battery fluids could get into your eyes or onto your skin. If this should happen then rinse the affected areas immediately with a large amount of clean water and contact your doctor immediately. • Avoid heavy impacts and vibrations. • Always observe the correct polarity. • Make sure that the plus (+) and minus (-) poles are correctly inserted in order to avoid short circuits. • Never mix new and old batteries or different types of batteries. This could cause your device to malfunction. In addition, the weaker batteries would discharge too much. • Immediately remove used batteries from the device. • Remove the batteries from the device if you do not intend to use it for a long period of time. • Replace all the old batteries in a device with new batteries of the same type. • Isolate the contacts of the batteries with sticky tape if you want to store or dispose of them. • Clean the contacts on the battery and device before inserting. 5 of 42 2.7. Information about Conformity The device fulfils electromagnetic compatibility and electricity safety requirements. Your device complies with the basic requirements and the relevant UK and Ireland EMC guidelines [electromagnetic compatibility] and the UK and Ireland electrical safety guidelines. This device fulfils the basic requirements and the relevant regulation of the Ecodesign Guideline 2009/125/EG (Commission Regulation 1275/2008). 2.8. DVD Player The DVD player is a class 1 laser product. The device has a safety system that prevents dangerous laser rays from escaping during normal use. To avoid eye injuries, never tamper with or damage the device’s safety system. 2.9. Contents Please check the items received in the box and inform us within 7 days from purchase if anything is missing. Your statutory rights are not affected. WARNING! Keep packaging material such as plastic film away from children. There is a risk of suffocation if used improperly. You should receive the following items: • • • • • • • 54.6 cm (21.5") Full HD LED-Backlight TV External power supply model DC12030012A Remote Control (E-14D) incl. Batteries (1.5V LR3/AAA) Stand (including 4 screws) AV-Adapter YUV-Adapter Documentation 6 of 42 3. Device Overview EN 3.1. Front INPUT 1 2 3 4 5 6 7 9 1) 2) 3) 4) 5) 6) 7) 8) 9) 8 INPUT: Select source MENU: Call up the on-screen menu to make settings on your device CH + /CH -: Select a channel or navigate in the menu VOL +/VOL -: Set the volume or navigate in the menu PLAY: For playing back DVDs EJECT: Eject button (DVD) POWER: Standby button: switches the device on or into standby mode Operating light: Lights up red when the appliance is in standby mode. Lights up green when the appliance is switched on. Infrared sensor: Reception field for the infrared signals from the remote control LCD screen 7 of 42 3.2. Rear Mini AV Common Interface 1 2 3 VGA SCART SPDIF COAX Out 9P$PD[ 5 6 USB Power 12V 12 1) 2) 3) 4) 5) 6) 7) 8) 9) 10) 11) 12) 13) 14) Headphone Out 3A 11 VGA Audio In VGA 10 9 SCART 8 4 HDMI RF Headphone Out Power VGA Audio In 12V 3A HDMI USB 9P$PD[ RF 13 Mini YPbPr Common Interface Mini Mini YPbPr AV 14 SPDIF COAX Out 7 MINI AV: Audio/video input (via included cinch adapter) COMMON I N T E R FACE ( C I+) : Card slot for connecting CI modules MINI YPBPR: Component inputs for connecting devices with component output (via included cinch adapter) RF: Aerial connection (DVB-T/analogue) USB / 5V DC MAX. 500mA: USB connection for connecting an external storage medium for playing back music, images and videos HDMI: HDMI connection for devices with HDMI output SPDIF COAX OUT: Digital audio output (coaxial) SCART: SCART connection VGA: Connection for connecting a PC VGA AUDIO IN: Audio connection for PC sound playback HEADPHONE OUT: For connecting headphones with a 3.5 mm jack plug 3A: Connection for the power supply adapter POWER DC IN 12V DVD player Fixing holes for a wall bracket (hole spacing 100 x 100 mm) PLEASE NOTE! When mounting the device, make sure that you use M4 screws. The length of the screws corresponds to the thickness of the wall bracket plus a max. of 8 mm. 8 of 42 3.3. Remote Control 1) 2) 3) 4) 5) 6) 7) 8) 9) 10) 11) 12) 13) 14) 15) 16) 17) 18) 19) 20) 21) 22) 23) 24) 25) 26) 27) 28) 29) 30) 31) 32) Eject button for the DVD player /MUTE: Mute the sound ASPECT: Select picture format SLEEP: Activate/deactivate the sleep timer FAV: Activate favourites list EPG: Digital TV: call up the electronic programme guide INPUT: Select input signal of connected devices Direction button : Move up in menu Digital TV: Select info bar for the current programme; Direction button : Move down in menu, Digital TV: Select info bar for the current programme; Direction button : Move left in menu; Direction button : Move right in menu OK: Confirm selection in certain menus EXIT: Leave the menu Number buttons: Programme selection : Set previous TV programme DISPLAY: Digital TV: Show information (e.g. current channel number); display elapsed time of current track, remaining track time, elapsed time of chapter, remaining chapter time; selected audio track, selected subtitles (all items depend on medium used) REC LIST: Call up recording list (PVR) CH /: Programme selection buttons TV: Select next (+) / previous (-) programme Colour buttons: Call up various functions in the OSD menu REVEAL/D.SUB: DVD: Show subtitles D.LANG/NICAM/A2: Analogue TV: Stereo/mono; digital TV: select audio language (if available); DVD: select disc language SUBPAGE/: DVD: next track/next chapter SIZE/: DVD: go to start of track/chapter; previous track/previous chapter HOLD/: DVD: fast forward INDEX/ : DVD: rewind TV/TXT/D.SET: DVD: open the DVD settings menu CANCEL/D.MENU: DVD: call up and close title menu (if available) VOL -/+: Decrease/increase volume REC: Start recording (PVR) MENU: Open and close menu TV/RADIO: Switch between TV and radio stations (if available) CH.LIST: Open/close station list SUBTITLE: Display subtitle selection (if available) PICTURE: Select picture mode SOUND: Select sound mode POWER: Switch LED-Backlight TV on/off (switch standby mode on/off ) 1 32 32:(5 087( 2 31 3 30 4 29 3,&785( 6281' $63(&7 6/((3 (3* )$9 68%7,7/( &+/,67 28 795$',2 ,1387 6 7 27 8 2. 26 9 0(18 (;,7 ',63/$< 25 24 5 11 12 5(& 10 13 5(&/,67 92/ &+ 14 15 23 22 797;7&$1&(/5(9($/1,&$0$ '6(7 '0(18 '68% '/$1 ,1'(;+2/'6,=(68%3$*( 16 17 21 18 20 19 9 of 42 EN 4. Start of Operation CAUTION! Before starting up please make sure that you read the “Safety instructions”section 4.1. Unpacking • • • • Select a suitable place for setting up the device. Open the box very carefully to avoid damaging the device. The device could be damaged if you use a knife with a long blade to open the box. The box contains a number of small items (including batteries). Keep these items out of reach of children; the parts are easy to swallow. Store the packaging material in a safe place; only use this box to transport the TV. WARNING! Keep packaging material such as plastic film away from children. There is a risk of suffocation if used improperly. 4.2. Installation Attach the base stand as shown in the drawing. Carry out this step before connecting the LED-Backlight TV. 4x 4.3. Inserting Batteries into the Remote Control Open the battery compartment cover on the back of the remote control. Insert two (AAA) 1.5-V batteries in the battery compartment of the remote control. Check the battery polarity (inscribed on the bottom of the battery compartment). Replace the cover. CAUTION! Remove the batteries if the device will not be used for long periods. The remote control can be damaged by leaking batteries. 10 of 42 4.4. Connecting the TV Antenna EN To connect to the house antenna or cable system, connect a double-screened cable from the antenna socket to the LED-Backlight TV. 4.5. DVB-T Mode (Standard Definition and High Definition) You will have the possibility of receiving DVB-T by means of a corresponding aerial, if it is offered at your location. An additional receiver will not be necessary to receive DVB-T channels. 4.6. Connecting the DVB-T Antenna Plug the connector of a DVB-T aerial into the aerial socket of the device. 4.7. Connect the Power Supply Adapter Connect the 3.5 mm jack of the included power supply adapter model DC12030012A to the POWER DC IN connection of the device. Plug the power cable of the powersupply adapter into a 100 - 240 V - 50 Hz mains socket CAUTION! Please only use the included power supply adapter model DC12030012A. The use of different power supply adapters may cause damages to the device. 4.8. Switching the LED-Backlight TV on and off Connect the power supply adapter to the device and plug it to the mains. The unit will switch to standby off mode when connected to the mains. To switch on the unit either press the button on the remote control or the POWER button of the unit. Press the button on the remote control or the POWER button of the unit to switch the device over to standby mode again. The unit continues to consume power in this mode. Disconnect the power cord from the mains to switch it off completely. PLEASE NOTE! If there is no input signal, the device will automatically switch to standby mode after five minutes. A countdown time will appear on the screen to show the remaining time. This function is not available for all sources. 11 of 42 4.9. First Time Use You will be guided through the AUTO INSTALLATION menu after you switch the device on for the first time. Auto Installation - Setup 1 Country : Germany UK France Italy Poland Next Page Move 2N OK ([LW Exit Select the country required with the directional buttons. The country setting will have an influence on the sequence in which the channels are stored. Press OK. Auto Installation - Setup 2 Language : German English French Italian Dutch Next Page Previous Page Move 2N OK ([LW Exit Select a language with the directional buttons and press OK. Auto Installation - Setup 3 Auto Search All ATV DTV Previous Page • • • Move 2N OK ([LW Exit Use the direction buttons to select the reception type: ALL (search for digital and analogue TV stations); ATV (search for analogue TV stations); DTV (search for digital TV stations) After you have finished making your settings, press OK. The search process starts. Auto Installation ATV channels found: DTV channels found: Radio channels found: &+ .+] Process 0HQX Skip ([LW Exit The device will search for the corresponding transmission types in order. Wait until the process is finished. You can use the EXIT button to cancel the search. PLEASE NOTE! You can always access the first-time installation screen again via SETUP > AUTO INSTALLATION and go through the settings again. 12 of 42 5. Operation EN 5.1. Channel Selection • • To select a channel, either press the buttons CH/ (on the device or on the remote control) or select the channel directly by pressing the appropriate numbers. For a two- or three-figure number, press the number buttons in the corresponding order. Press the button to select the last channel played. 5.2. Setting the Volume You can increase or decrease the volume by pressing the volume buttons VOL -/+ on the remote control or on the device. Use the button to switch the volume fully off and on again. Use the SOUND button to switch between the following sound modes: STANDARD, MOVIE, MUSIC, SPEECH, USER. The USER setting is defined under the menu option SOUND > SOUND MODE. Using the D.LAN button you can set the audio language if the current broadcast supports dual language mode (e.g. bilingual broadcasts). 5.3. Picture Setting Use the PICTURE button to switch between the following picture modes: STANDARD, MILD, USER, DYNAMIC. The USER setting is defined under the menu option PICTURE > PICTURE MODE. Depending on the program, the pictures are displayed in the formats 4:3 or 16:9. Use the ASPECT button to adjust the picture format: AUTO (not available for YPbPr, PC, MEDIA and DVD ): The format displayed is automatically adjusted to match the input signal. 4:3: Is used to display a standard picture (aspect ratio of 4:3) as this is its original format. 16:9: Here you can stretch the left and right sides of a normal picture (aspect ratio 4:3) by an equal amount to fill the full width of the TV screen. FULL: Exact representation of number of pixels (1:1). ZOOM 1 (not available for PC): The image is stretched to the upper and lower edges of the screen. ZOOM 2 (not available for PC): Additional zoom level after Zoom 1. The image is also stretched out left and right. PANORAMA (for DTV CINEMA) (not available for PC): This function zooms a widescreen image (aspect ratio 16:9) to fill the entire screen. JUST SCAN (not available for ATV, AV, YPbPr, PC, MEDIA and DVD): Reduced display of the image. 13 of 42 5.4. Displaying Information Press the DISPLAY button to show information about the current programme. You can get the same information when you switch over to a different channel. 5.5. Favourite Channel List In the CHANNEL > FAVORITE MANAGEMENT menu, you can add individual channels to up to four favourites lists. You have to have saved channels in the favourites list before you can open them as described in the following section. If you have saved channels in the favourites list, you can open them as follows: Open the menu by pressing FAV. Use the direction buttons to select one of the four favourites lists. With the red button you can change the name of the favourites list. Use the direction buttons to select a programme and open it by pressing OK. 5.6. Input Source Selection Use INPUT to call up the source selection list. The following sources are available: − DTV TV mode (digital signal) − ATV TV mode (analogue signal) − AV Device on AV input − SCART Device on SCART input − YPBPR Device on the video and audio input components − HDMI Device on HDMI 1 input − PC Device on PC input − MEDIA Playback of media via USB − DVD Integrated DVD player Use the direction arrows to go to the desired source. Confirm your selection with OK. 14 of 42 6. Connecting External Devices EN 6.1. Connecting Headphones The headphones are connected to the headphone socket. The headphone volume is controlled using the volume buttons and the button on the remote control. When headphones are connected, the sound output of the main speakers is switched off. WARNING! Using headphones at high volume generates excessive acoustic pressure and can result in permanent hearing damage. Before pressing play, set the volume to the lowest setting. Start playback and increase the volume to a comfortable level. Changes to the basic equaliser settings can increase the volume and thus damage your hearing permanently. WARNING! Using headphones to listen to a device at high volumes for an extended period can damage your hearing. 6.2. Digital Amplifier via Coaxial Connection By using the SPDIF COAX OUT connection, you have the possibility of outputting the audio signal of your LEDBacklight TV via a digital amplifier. To do this, connect a coaxial cable to the SPDIF COAX OUT output on the LED-Backlight TV and the corresponding input on the amplifier. 6.3. Connecting a Blu-Ray Player There are a number of options for connecting a Blu-Ray player: 6.3.1. AV Video/Audio Cable (3 x Cinch/RCA on 3.5 mm jack) Connect the AV adapter to the Mini AV connection on the LED-Backlight TV. Connect a stereo cinch/RCA cable (red and white jack) to the AV adapter and the audio outputs on the external device. Connect a video cinch/RCA cable (yellow jack) to the AV adapter and the video outputs on the external device. PLEASE NOTE! Please only use the included AV adapter. 6.3.2. Component Video Cable (3 x Cinch/RCA on 3.5 mm jack) If the Blu-Ray player has YUV outputs (Y Pb Pr), we recommend connecting the player to the Mini YPbPr input on the LED-Backlight TV via cinch/RCA cables and the included YUV adapter PLEASE NOTE! Please only use the included YUV adapter. For audio transmission connect the included AV adapter to the Mini AV connection and connect a stereo cinch/RCA cable (red and white plugs) to the corresponding connections of the adapter and the audio outputs of the device. PLEASE NOTE! Please only use the included AV adapter. 6.3.3. HDMI Cable If your device has a HDMI output, connect a HDMI cable (not supplied) to the HDMI input of the LED-Backlight TV and to the HDMI output of the external device. 6.4. Connecting a Video Recorder (VCR) Connect an antenna cable between the antenna socket on the LED-Backlight TV and the output on the video recorder. Connect an additional antenna cable between the antenna input on the video recorder and the antenna socket in the wall. 15 of 42 6.5. Connecting a DVD Recorder Connect an antenna cable to the antenna socket on the LED-Backlight TV and the antenna output on the DVD recorder. Connect an additional antenna cable between the antenna input on the DVD recorder and the antenna socket in the wall. 6.5.1. Component Video Cable (3 x Cinch/RCA on 3.5 mm jack) If the DVD recorder has YUV outputs (Y Pb Pr), we recommend connecting the recorder to the Mini YPbPr input on the LED-Backlight TV via cinch/RCA cables and the included YUV adapter PLEASE NOTE! Please only use the included YUV adapter. For audio transmission connect the included AV adapter to the Mini AV connection and connect a stereo cinch/RCA cable (red and white plugs) to the corresponding connections of the adapter and the audio outputs of the device. PLEASE NOTE! Please only use the included AV adapter. 6.5.2. HDMI Cable If the DVD recorder has a HDMI output, connect a HDMI cable (not included) between the HDMI input on the LEDBacklight TV and the HDMI output on the external device. 6.6. Connecting a Set Top Box (SAT, SD/HD DVB-T, Decoder, Etc.) There are different options for connecting a receiver (e.g. SAT, SD/HD DVB-T, Decoder, etc.) to your LED-Backlight TV. 6.6.1. AV Video/Audio Cable (3 x Cinch/RCA on 3.5 mm jack) Connect the AV adapter to the Mini AV connection on the LED-Backlight TV. Connect a stereo cinch/RCA cable (red and white jack) to the AV adapter and the audio outputs on the external device. Connect a video cinch/RCA cable (yellow jack) to the AV adapter and the video outputs on the external device. PLEASE NOTE! Please only use the included AV adapter 6.6.2. HDMI Cable If the external device has a HDMI output, connect a HDMI cable (not included) between the HDMI input on the LEDBacklight TV and the HDMI output on the external device. 6.6.3. Component Video Cable (3 x Cinch/RCA on 3.5 mm jack) If the device has YUV outputs (Y Pb Pr), we recommend connecting the device to the Mini YPbPr input on the LEDBacklight TV via cinch/RCA cables and the included YUV adapter PLEASE NOTE! Please only use the included YUV adapter. For audio transmission connect the included AV adapter to the Mini AV connection and connect a stereo cinch/RCA cable (red and white plugs) to the corresponding connections of the adapter and the audio outputs of the device. PLEASE NOTE! Please only use the included AV adapter. 6.7. Connecting a DVD/video recorder and SAT receiver If you want to connect a DVD or video recorder and a SAT receiver at the same time, you can do so as follows: Connect the receiver as described above. Now connect the receiver by plugging a SCART cable (not supplied) into the SCART output on the DVD recorder and the corresponding SCART input on the receiver. Connect an aerial cable between the aerial socket on the LED-Backlight TV and the aerial output on the recorder. Connect an additional aerial cable between the aerial input on the DVD recorder and the aerial output on the receiver. Connect the SAT receiver to the LNB on the parabolic antenna. 16 of 42 6.8. Connecting a Camcorder 6.8.1. EN Component Video Cable (3 x Cinch/RCA on 3.5 mm jack) Connect the AV adapter to the Mini AV connection on the LED-Backlight TV. Connect a stereo cinch/RCA cable (red and white jack) to the AV adapter and the audio outputs on the camera. Connect a video cinch/RCA cable (yellow jack) to the AV adapter and the video outputs on the camera. PLEASE NOTE! Please only use the included AV adapter 6.9. Device with HDMI or DVI Output HDMI (“High Definition Multimedia Interface“) in consumer electronics is the only interface that transmits audio and video data simultaneously. It handles all image and sound formats currently in use, including HDTV (High Definition TV), which means it can also display resolutions of 1080i without any loss in quality. Many consumer electronic devices, e.g. DVD players, are now equipped with HDMI outputs. 6.10. Connecting an External Device with HDMI Output Switch both devices off. Connect a HDMI cable (monitor cable; not supplied) to the HDMI input of the LED-Backlight TV and to the HDMI output of the external device. Switch the LED-Backlight TV on when the HDMI device is connected. Switch on the external HDMI playback device. 6.11. Connecting an External Device with DVI Output If the external device has a DVI output then you can also connect it to the HDMI input (HDMI is downwards compatible to DVI – “Digital Visual Interface”). For this you will need a HDMI-DVI adapter. The DVI output does not transmit sound so you will have to connect an audio cable in addition. Connect a stereo cinch/RCA cable with 3.5-mm jacks to the VGA AUDIO-IN socket to transmit sound. 6.12. Connecting a PC or Notebook The LED-Backlight TV is connected to your PC or Notebook like a monitor or additional monitor. The picture on your notebook or PC is then transmitted to the LED-Backlight TV. Connect the LED-Backlight TV to the PC as follows: Switch both devices off. Connect a VGA cable (monitor cable; not supplied) to the VGA input of the LED-Backlight TV and to the graphic card output of the PC or Notebook. Tighten up the screws of the monitor cable with your fingers, so that the plug is correctly seated in the socket. If you want to transmit a sound signal, connect an audio cable from the PC AUDIO-IN socket and PC/notebook Audio output First switch on the LED-Backlight TV. Use INPUT to select PC mode. The PC display appears on the LED-Backlight TV. Use the INPUT button to return to the TV mode. If you use the LED-Backlight TV as a second monitor for your PC you might have to change the display properties of your operating system. To do this please read the operating instructions of your PC/notebook to find out the operational requirements if more than one monitor is used. 17 of 42 7. Basic OSD Menu Settings You can customise certain functions of the OSD (On-Screen Display) menu. 7.1. Navigating within the Menu Press the MENU button to activate the OSD. The available options are displayed on the lower edge of the screen. You can use the direction keys to select the options from the main menu. Use to switch over to the menu entries. You can use the direction keys to select the options from any of the menus. Press MENU to return to the main menu. Use the direction button to access a sub-menu (not every menu has a sub-menu option). Press MENU to return to the next-higher menu. Use the direction buttons to enter a desired value or make another selection. Press EXIT to close the menu and also confirm your selection. Please remember that the menu will close automatically after a couple of seconds if you don’t press a button. You can select the following main menus: • Menu PICTURE • Menu SOUND • Menu CHANNEL • Menu FEATURE • Menu SETUP PLEASE NOTE! Technical changes to the device means the menus described here may differ from the menus actually displayed on the screen. Not all menus will be available, depending on the source you have selected. Switch to a different source to access all available menus. 18 of 42 7.2. Picture Menu EN Picture Picture Picture Mode Standard Brightness 50 50 Contrast Sound Sharpness 5 Colour 50 Channel Tint 50 Feature Colour Temperature Standard Aspect Ratio Auto Setup Menu Item PICTURE MODE BRIGHTNESS CONTRAST SHARPNESS COLOUR TINT COLOUR TEMPERATURE Move 2N OK ([LW Exit 0HQX Return Setting Select picture mode: DYNAMIC, STANDARD, MILD, USER. This function corresponds to the PICTURE button. Increase or decrease brightness (on a scale of 0 – 100). Increase or decrease contrast (on a scale of 0 – 100). Increase or decrease sharpness (on a scale of 0 – 5). Increase or decrease colour (on a scale of 0 – 100). Hue settings only available for NTSC reception. Select colour temperature: STANDARD, COOL and WARM. Set the picture format here. This function corresponds to the button ASPECT. This function reduces picture noise and improves image quality when the signal is weak. NOISE REDUCTION Choose between LOW, MIDDLE, HIGH and OFF. ASPECT RATIO 7.3. Sound Menu Sound Picture Sound Mode User Bass 50 50 Treble Balance 0 Surround Off Channel AVL Off Feature SPDIF PCM Sound Setup Menu Item SOUND MODE BASS TREBLE BALANCE SURROUND AVL SPDIF Move 2N OK ([LW Exit 0HQX Return Setting Select audio mode: STANDARD, MOVIE, MUSIC, SPEECH, USER. This function corresponds to the SOUND button. Increase or decrease bass (on a scale of 0 – 100). Increase or decrease treble (on a scale of 0 – 100). Set the balance between the left and right speakers. Activate/deactivate the surround sound effect. The function AVL (Automatic Volume Limiting) compensates for the various volumes of the different channels. If you set to OFF, you will hear the original volumes. If you set to ON, you will hear a balanced volume. Select the spdif mode. 19 of 42 7.4. Channel Menu Channel Picture Channel Management OK Favorite Management Country OK Australia Auto Search OK DTV Manual Search OK OK Sound Channel ATV Manual Search Feature Setup Menu Item CHANNEL MANAGEMENT FAVORITE MANAGEMENT COUNTRY AUTO SEARCH DTV MANUAL SEARCH (only in DTV mode) Move 2N ([LW Exit 0HQX Return Setting You will see the currently saved channel here. Each channel can be customised as follows: DEL(ETE) Select the channel that you wish to delete and press the red button. Press the EXIT button and confirm your choice by pressing OK if you are certain that you want to delete the channel. Select CANCEL if you want to cancel the process. LOCK Select the channel that you wish to lock and press the green button. The channel lock only works if the LOCK function is activated in the FEATURE menu. SKIP Select the channel that you want to skip while browsing through the channels by using the P+/- buttons and press the yellow button. You can still select this channel via the numeric pad. MOVE (only in ATV mode) Select the channel and press the blue button (the coloured highlight of the selected channel flashes). Now move the channel to the desired location using and press the blue button again. The other channels will be shifted up/down accordingly. In the Favourites Manager you can set up up to four favourites lists. Use to select the desired channel. The CH+- buttons bring you direct to the next/previous channel in the channel list. Now press the respective colour button to add the channel to one of the four favourites lists (FAV 1: red button, FAV 2: green button, FAV 3: yellow button, FAV 4: blue button). Close Favourites Management with EXIT. The settings are saved. Now you can call up your favourites lists by using the FAV button. Select the required country for the channel search. Choose the reception type: • ALL (search for digital and analogue TV stations); • ATV (search for analogue TV stations); • DTV (search for digital TV stations) After you have finished making your settings, press OK. Confirm the following query with OK if you want to start the channel search. Select CANCEL if you want to cancel the process. You can program individual channels in DTV mode manually here. CHANNEL FREQUENCY 20 of 42 OK Select the channel number. Select the desired frequency Menu Item Setting Select the bandwidth. BANDWIDTH Select START and press OK to start the manual search. The STRENGTH and QUALITY of the signal is displayed in percent. You can program individual channels in ATV mode manually here.. Use this to select the channel you would like to CURRENT CHANNEL address.. Frequency of the current channel FREQUENCY SEARCH Start the channel search with FINE TUNE Press to carry out the fine adjustment. PAL, SECAM, AUTO. For Australia, the colour COLOR SYSTEM system is set to PAL. SOUND SYSTEM BG, DK, I, L, L‘ Press the red button to save your settings SAVE ATV MANUAL SEARCH (only in ATV mode) PLEASE NOTE! The channels that are found can be saved after the search by pressing the red button on the remote control. 7.5. Feature Menu Feature 3LFWXUH 6RXQG &KDQQHO Menu Item Language Clock OK OK Sleep Timer Off Auto Power Off 4 Hours Off CI Info OK PVR/Pause TV OK 6HWXS Move OK Hearing impared )HDWXUH Lock 2N OK ([LW Exit 0HQX Return Setting You can use this to activate the settings LOCK ENABLE, PARENTAL GUIDANCE and HOTEL MODE You need to enter the password. The default password is: 0000. PLEASE NOTE! Make a note of the new password. It will not be reset if you restore the factory settings. Use 8899, the master password, if you have forgotten your password. LOCK LOCK CHANNEL Activate/deactivate the lock function. PARENTAL GUIDANCE Here you can select the age. This option is only available in DTV mode. Only available if the LOCK ENABLE is activated. An input field for entering the passwords will appear. CHANGE PIN CODE OLD PASSWORD Use the number buttons to enter the existing password. Delivery state: 0000.. NEW PASSWORD Enter a new four-digit password. CONFIRM NEW PASSWORD Enter the new password again. The appropriate message will appear. 21 of 42 EN Menu Item LANGUAGE CLOCK Setting HOTEL MODE In Hotel Mode you can make various settings which restrict the functionality and operation of the device. OSD LANGUAGE Select the language of the OSD menu or of the TT language. It will change immediately.. 1st PREFERRED SUBTITLE Select the first preferred subtitle language 2nd PREFERRED SUBTITLE Select the second preferred subtitle language 1st PREFERRED AUDIO Select the first preferred audio language 2nd PREFERRED AUDIO Select the second preferred audio language DTV TELETEXT LANGUAGE Select the DTV teletext language ATV TELETEXT LANGUAGE Select the ATV teletext language DATE/TIME Displays the set date and time. These entries cannot be changed. TIME ZONE Use to select the required value. The current time will be adjusted accordingly. DST Activate/deactivate summer time. SLEEP TIMER Here you can set the time interval for the sleep timer. Once the interval has been reached, the TV set switches itself off. AUTO POWER OFF Here you can set the time after which the LED-Backlight TV automatically switches itself off if no operation has been made via the operating panel or the remote control within the set time. This is a function which helps protect the environment. HEARING IMPARED (not in ATV mode) If the station transmits special audio signals for the hearing impaired, you can set the setting to ON to receive these signals. This option is only available in DTV mode. CI INFO You will have to register with the respective provider in advance, if you wish to watch channels with costs. You will receive a Conditional Access Module (CAM Module) and a special card from your provider after registration. You will find information about the settings in the documentation supplied with the Module. Install the CI components on your LCD TV in the following way: Switch the LCD TV off and pull out the mains plug. Place the CAM Module in the insertion position on the back of the LCD TV first. Then, insert the card. Pay attention to the fact that you must only insert or remove the CI Module if the device is in the STANDBY Mode or has been separated from the electricity network. The CAM Module must be inserted correctly; it cannot be inserted incorrectly. The CAM Module or the television device can be damaged if you attempt to push in the CAM Module with force. Connect the LCD TV to the electricity supply, switch it on and wait for a moment until the card is recognized. Some setting steps, which you can carry out in the CI Info menu, are necessary in addition in the case of some CAM Modules. 22 of 42 EN Menu Item Setting PVR/PAUSE TV RECORDING FILE FORMAT Select the recording file format for the USB storage medium (TS or PS) FORMAT Press the red button to format the USB storage medium. PARTITION SELECT SET DEFAULT PARTITION Press the green button to select the preset folder as storage location for recordings. PAUSE TV BUFFER Here you can set the duration of a timeshift recording (AUTO, 30 MINS, 1HR, 2HR) In this menu you will see an overview of all of the timer recordings that you have programmed. DEL Select the programmed timer recording that you want to delete. DEL ALL With this function you can delete all of the programmed timer recordings. RECORDER Activate/deactivate timer recording function TYPE Select the reception type DTV or RADIO. TIMER CHANNEL (not in ATV Select the required channel. mode) ADD START TIME Save a new timer Select the start time. recording. DURATION Select the duration. DATE Select the date. MODE Set whether you want the timer recording to be once, daily or weekly. EDIT Changes to existing timer recordings can be made here. Call up the recording list. You can delete the selected recordings with the RECORD LIST red button (DELETE). You can also call up the recording list directly using the REC LIST button on the remote control. Press OK to start the recording. You can also do this directly on the RECORDER remote control via the REC button. START 23 of 42 7.6. Setup Menu Setup Picture Sound Channel OSD Timer Off PC Setup OK Blue Screen Aus Reset TV Setting OK Auto Installation OK Software Upgrade OK Feature Setup Menu Item OSD TIMER PC SETUP BLUE SCREEN (not in DTV mode) RESET TV SETTING AUTO INSTALLATION SOFTWARE UPGRADE OTA UPGRADE 24 of 42 Move 2N OK ([LW Exit 0HQX Return Setting Set the time after which the OSD menu will close automatically. Change the PC settings in PC mode. If you want to shift the image, select AUTO ADJUST and press AUTO OK to move it back to the centre. This should be done in the full ADJUST image mode to ensure the settings match. H POSITION You can use to change the horizontal position of the picture. V POSITION You can use to change the vertical position of the picture. If the PC picture is not clear, you can use to adjust the picture PHASE signal to suit the LED-Backlight TV pixels. This will result in a clear image with an even, sharp display. With this setting, the picture signal is synchronised to match with the monitor’s pixel rate. This corrects errors that can appear as CLOCK vertical stripes in pixel-dense images (like tables or text with small fonts). Set the pixel frequency using . If the LED-Backlight TV is not receiving a signal, the screen will turn blue instead of displaying the “snow” or a black background. Restore the factory settings here. This allows you to reset the device or the memory. Here you can access the menu for the initial installation. Here you can carry out a software update for the device with the help of a USB storage medium. Here you can start the OTA upgrade (On-the-Air) when a new software is available for your LED-Backlight TV. The OTA upgrade only works in case that a new software is available. 8. Media Mode EN The LED-Backlight TV comes with 1 USB port (rear) that can be accessed via Media mode. 8.1. Media Mode and USB Connectivity Plug in your external USB device (USB memory stick, external hard disk drive) into the USB port of the TV. Drive numbers (C:\, D:\, E:\ etc) will be allocated depending on the partitions of the USB device (e.g. an external hard disk drive might have several partitions). For the definition of how drive numbers are assigned, please see “Drive Assignment Definition” below. (Please note that external USB memory devices of a capacity of up to 1 TB are supported. However, not all brands and drivers of external USB memory devices might be compatible with this LEDBacklight TV) You can select the drive for your recording session. Please note that the external USB device needs to be formatted first before the recording can be done. To do this, under DTV mode, in the OSD, go to PVR/PAUSE TV page then select PARTITION SELECT and “FORMAT”. Select disk drive by pressing “OK”. At the next screen you will have option to select USB device if there is more then one and to select drive with directional pad on the remote control (C:\, D:\ etc) Press “OK” to format. You can select to format the USB device into FAT32 file system or High Speed FS system by using directional pad on the remote control: − FAT32 is suitable for USB thumb drive (USB memory sticks) that will format the entire USB drive completely. (Attention: All data currently on the USB memory stick will be lost. Please save your data on your external USB memory stick prior to using it as a recording device) − High Speed FS is suitable for external USB hard disk drives that will allow choosing how large a new partition allocated for recording will be. − While recording, on your external USB device a new folder will be created labelled “PVR”. The OSD will show the file format and size selected, how many minutes of the TV program can be recorded in either SD quality or HD quality from the source media. After selecting the system type and size, press OK again will start the formatting. After the USB device has been formatted, it can be used for recording under DTV mode. The default recording drives will always be C:\, unless different drive is selected using method from 2-7. The recording function can be achieved in 2 ways: − Press the REC button directly while watching DTV programs. − Go to PVR/PAUSE TV page then select „RECORDER START“ 8.2. Recording via REC Button While watching DTV programs, press the REC button on the remote control. A symbol for recording will be shown in the upper left-hand corner of your screen. Make sure that the allocated capacity for the recording is sufficient to complete the recording of the program you want to save. (The capacity is determined by how large the formatted PVR file folder is allocated, or how large the USB thumb drive can support.) 8.2.1. Time Shift Function During any recording, you can press the “PLAY” button to start watching the program that is being recorded. The recording itself will continue in the background while you can watch the recorded program from the start. While watching/playing the recording program this way, you can use all the media functions (fast forward, fast backward and pause etc) for the playback. Press the STOP button to stop the watching session and return to the recording interface. 8.3. Switching between TV Mode and Media Mode Use INPUT to call up the source selection list. Use the direction buttons to go to Media. Confirm your selection by pressing OK. Repeat this process to return to TV mode but, instead of selecting Media, choose the option ATV or DTV, depending on the type of signal. 25 of 42 8.4. Media Menu System If you attach a USB storage medium to the LED-Backlight TV, you can play back photos, music, videos or text. The supported formats can be found in the technical data at the end of these instructions. PLEASE NOTE! Certain types of USB devices may not be compatible with this LED-Backlight TV. Connect the USB device directly. Do not use a separate cable, as compatibility problems may arise. Never remove the USB device while a file is being played. In particular, you should not plug in and unplug the USB device several times in quick succession. 8.5. Media Player Access Connect the USB storage medium to the USB connection on the side of the device. Press the KPRWV button and use to select the source OGFKGP. Press QM"to confirm. 8.6. Media Player Menu After accessing the media player via USB as described above, you are taken to the main menu. The following options are available: − PHOTO – for photo playback − MUSIC – for music file playback − MOVIE – for video file playback − E-BOOK – for text file playback Use to select the corresponding menu and confirm with OK. Now select the source from which you want to play the file (e.g. USB stick or hard drive). In the menu of the respective media PHOTO, MUSIC, MOVIE, E-BOOK you can delete an object using the red button. Use the green button to delete or accept all the files in the playlist. To leave the media player, press the KPRWV button and select another source (if required). 8.7. Display of Photos / Images If you select PHOTO from the main menu, all the available image files will be filtered and displayed on the screen. If there are several folders on the storage medium, use to select the folder and confirm with QM. Use to select the required photo and press QM to select it for the playlist. You can select several photos for the playlist using OK. You can also use OK to remove already selected photos from the playlist. By pressing the button, the previously selected photo will be shown. During playback press OK to call up the playback options. Use the buttons to select an option and confirm with QM. − PLAY/PAUSE /: Start/pause the slide show − STOP : Stop slide show playback − NEXT/PREVIOUS / : Show next/previous photo − ROTATE -/+ : Rotates the selected photo by 90 degrees clockwise/anticlockwise − ZOOM : Zoom in/out of the selected photo − INFO : Shows information about the displayed photo − PHOTO SETUP : Edit the following options: • REPEAT MODE: Set the repeat function for the slide show • BACKGROUND MUSIC: Turn background music on/off • MUSIC SOURCE: Select a source for the background music • SLIDE TIME: Set display time for the photos • EFFECT: Turn effects on/off − PLAYLISTS : Shows the photo playback list The buttons on the remote control can also be used for playing back files. Press the GZKV button to return to the previous menu. 26 of 42 8.8. Audio Playback EN If you select MUSIC from the main menu, all the available music files will be filtered and displayed on the screen. If there are several folders on the storage medium, use to select the folder and confirm with QM. Use to select the required music track and press QM to select it for the playlist. You can select several tracks for the playlist using OK. You can also use OK to remove already selected tracks from the playlist. By pressing the button, the previously selected music track will be played. Below the playback window you will find the playback options. Use the buttons to select an option and confirm with QM. − PLAY/PAUSE /: Start/stop music playback − STOP : Stop playback of the music track − FB/FF /: Fast rewind/forward − PREVIOUS/NEXT / : Play back previous/next track − GOTO TIME : Jump to a specific time within a track − REPEAT MODE : Set the repeat function for the tracks − INFO : Shows information about the selected track − DISPLAY ON/OFF : Switch the TV display on/off and the back light (the blue button has the same function) The buttons on the remote control can also be used for playing back files. Press the GZKV button to return to the previous menu. 8.9. Video Playback If you select MOVIE from the main menu, all the available video files will be filtered and displayed on the screen. If there are several folders on the storage medium, use to select the folder and confirm with QM. Use to select the required video and press QM to select it for the playlist. You can select several videos for the playlist using OK. You can also use OK to remove already selected videos from the playlist. By pressing the button, the previously selected video will be played. During playback press OK to call up the playback options. Use the buttons to select an option and confirm with QM. − PLAY/PAUSE /: Start/stop video playback − STOP : Stop playback of the video − FB/FF /: Fast rewind/forward − SLOW MOTION : Slow motion playback − STEP : Frame advance − SET A-B : Repeats a certain section of a video − PREVIOUS/NEXT / : Show previous/next video − PLAYLISTS : Shows the video playback list − INFO : Shows information about the displayed video file : Edit the following options: − MOVIE SETUP • PROGRAM: Make programming settings • SUBTITLE: Switch subtitles on/off • AUDIO: Make audio settings • REPEAT MODE: Set the repeat function for the videos − GOTO TIME : Start video from a certain time point The buttons on the remote control can also be used for playing back files. Press the GZKV button to return to the previous menu. 27 of 42 8.10. Text Playback If you select E-BOOK from the main menu, all the available text files will be filtered and displayed on the screen. If there are several folders on the storage medium, use to open the folder and confirm with QM. Use to select the required text and press QM to select it for the playlist. You can select several texts for the playlist using OK. You can also use OK to remove already selected texts from the playlist. Press the button to display the previously selected text. The following options are available: − RED BUTTON: Add/remove bookmarks − GREEN BUTTON: Jump to a specific location within a document − YELLOW BUTTON: Open/close overview of all bookmarks − BLUE BUTTON: Shows the text document playback list − PAGE +/-: Turn page forward/back The buttons on the remote control can also be used for playing back files. Press the GZKV button to return to the previous menu. 9. PVR Function You can use your LED-Backlight TV to record TV programmes on a USB storage medium (e.g. USB stick). You can store recordings directly, after a time delay or according to programmed settings. Channels that are encrypted with a CI+ module cannot be recorded. Before it is possible to make a recording, you must make the required settings in the FEATURE > PVR/PAUSE TV menu. 9.1. Direct Recording (Start/Stop) Start by selecting the TV channel that you want to record. Press the REC button. The recording starts. To stop the recording, press STOP. A prompt appears. Stop the recording with YES or press NO to continue recording. 9.2. Scheduled Recording You can programme broadcasts and record them at a predefined time, see FEATURE > PVR/PAUSE TV > TIMER menu. 9.3. Playback of Recorded Files Recordings are played back via the media player. All programmes can be found via the RECORD LIST on the corresponding data storage medium. The recording list can be called up directly using the REC LIST button. 28 of 42 10. EPG - Program Guide EN Open the Electronic Program Guide with the EPG button. This function will only be available to you in the DTV Mode. You will see the current and the next station in the Table. Select a program with. Go to the program guide of the program selected with Scroll through the stations with . Use the EXIT button to exit the programme guide. PLEASE NOTE! The program information displayed is created by the broadcaster. It will not be an error in your LED-Backlight TV if no program information is shown. The following Table shows the options for the PROGRAM GUIDE: Button Item Function Red button DAILY/WEEKLY Changes the programme guide display (daily/weekly view) Green button REMINDER Pressed once: Adds a reminder for the selected programme to the timer list. As soon as the programmed time is reached, the device automatically switches to the programmed broadcast. Pressed twice: Adds a timer recording to the recording list. As soon as the programmed time is reached, the device automatically starts recording the programmed broadcast. Yellow button PREV DAY Browses to the view of the previous day. By pressing the button repeatedly, you can browse back through several days (but not before the current day). Blue button NEXT DAY Browses to the view of the next day. By pressing the button repeatedly, you browse forwards through several days. DISPLAY INFO Shows a detailed description of the selected programme (if available) Press the button again to hide the description. 29 of 42 11. DVD Mode The built-in DVD player is run in DVD mode. 11.1. Switching from TV to DVD mode Use INPUT button to open the source selection list. Use the direction buttons to go to DVD. Confirm your selection with OK. To return to TV mode, repeat this process. But instead of DVD, now select the option ATV or DTV, depending on the type of signal. 11.2. Inserting a DVD PLEASE NOTE! The built-in DVD player drive only plays media (discs) with a 12 cm diameter. Do not insert media with a smaller or larger diameter into the DVD tray to avoid damaging the device. PLEASE NOTE! You must insert the DVD with the printed side facing towards the rear (the rear of the LED-Backlight TV). To enable you to insert a DVD into the DVD tray, the LED-Backlight TV must be in DVD mode. Insert the DVD in the slot with the printed side facing the rear. If the TV is in DVD mode, the DVD will be automatically recognised and drawn into the machine. The display CLOSE appears on the screen followed by LOADING. Normally, the DVD will start to play automatically. PLEASE NOTE! In some cases, you may need to start the playback manually. 11.3. Button function 11.3.1. Special screen message If you select a function that is not available on the inserted media or cannot be accessed in the current mode, the not valid symbol shown to the left will be displayed. The symbol disappears after a few seconds. 11.3.2. PLAY Press the (PLAY) button to start or pause playback. To resume playback, press the (PLAY) button again. 11.3.3. STOP Press (STOP) once to stop the playback. In this mode you can continue the playback from the same place using (PLAY). Press (STOP) again to completely stop the DVD. The device is now in stop mode. 11.3.4. SKIP During playback, press the SKIP or button to jump backwards or forwards (in DVDs: from chapter to chapter; otherwise: from title to title). PLEASE NOTE! Please note: on many DVDs, it is not possible to skip the track/chapter before the actual film starts (see licence notes). 11.3.5. Fast forward/rewind Press the or button during playback to fast forward or rewind. The speed increases if you press the button repeatedly: 2X > 4X > 8X > 16X > 32X. Pressing the button again or pressing (PLAY) returns to normal playback speed. 30 of 42 11.3.6. Audio Settings (Language) Press D.LAN repeatedly to select another audio setting on the DVD (e.g. two-channel audio or 5.1 channel surround sound) or the required spoken language. The change is made immediately and does not need to be confirmed. PLEASE NOTE! Please note that this function is not available on all DVDs. 11.3.7. Subtitle (Language) Press the D.SUB button repeatedly to select a different subtitle language – if subtitles are available on the DVD. The change is made immediately and does not need to be confirmed. 11.3.8. DVD Player Menu Using the red button and D.MENU, you can open the menus stored on the DVD. The D.MENU button usually opens the main menu and the red button the track menu. You navigate through the items in the DVD menus using the direction buttons. Confirm each selection with OK. PLEASE NOTE! Please note, it will depend on the DVD as to which requests open which menus. 11.4. Navigating between Audio & Picture (MP3 & JPEG) The music tracks on MP3 and JPEG data media may be organised into folders just like on other data media. Insert an MP3 or JPEG CD into the player. A menu appears on the screen, showing the top-level folder structure. If the data medium contains folders, they are listed above each other here. An MP3 file is displayed by an MP3 symbol. The surface of the active folder or file is shaded orange. The total number of the files in the folder appears in the top row. Use the arrow keys to navigate to a folder and confirm your selection with OK. The other sub-folders may also be opened (if available). In this case, you can return to the higher-level menu, using the left arrow key or via the top menu item. To listen to a particular track or view a particular picture, select it and confirm with (PLAY) or OK. JPEG Files (Photos & Images) With JPEG images you will see a preview of the image on the right-hand side of the menu. Select an image and confirm with OK to view the image full-screen. All of the images within the active folder will be displayed in succession after the selected image (“slide show”). Pressing the direction buttons during playback rotates the image. Please note that it may not be possible to display extremely large images. 11.5. DVD Player Setup In DVD mode, press the D.SET button. The SETUP menu main page appears on the screen. The following menus are active in DVD mode: GENERAL SETUP PAGE AUDIO SETUP PAGE DOLBY DIGITAL SETUP PREFERENCE SETUP PAGE 11.5.1. Navigating in the Menus Choose between the menus using . The active menu is shaded orange. Use to select the menu options. The selectable options are displayed on the right-hand side. The active setting is highlighted in brown. To change a setting, use to go to the right side and use to choose another item. Press OK to confirm. Press to return to the higher level menu. You can leave the setup menu at any time by pressing SETUP. 31 of 42 EN 11.5.2. Menu: General Setup Page TV Display Mode Here you set the unit’s display format to match that of the television. 4:3 PAN SCAN: Selection for televisions with a 4:3 format. The Pan Scan format displays 16:9 film formats at full height; side sections of the image are cut off. 4:3 LETTER BOX: Selection for televisions with a 4:3 format. The letterbox format reduces the 16:9 film format to the width of the screen. WIDE: Selection for televisions with a 16:9 format. DOLBY -- General Setup Page -TV Display Mode OSD Language Screen Saver Last Memory 16:9 ENG On On OSD Language Here you can set the OSD (on-screen display) language, i.e. the language for the device menus. Once you select a language, the menu changes immediately. Screen saver If the screen saver is activated, a screen saver will appear if no buttons are pressed for 3 minutes (but not during playback). Last Memory With this function, the DVD player remembers where the last DVD was at when it was stopped. When you reinsert the same DVD into the device, playback resumes automatically from the same position. The last position on the DVD will be remembered even if the device is switched off. 11.5.3. Menu: Audio Setup Page DOLBY Select the AUDIO SETUP PAGE menu item to set the sound mode. Audio Setup Page -- Audio Setup Page -Audio Setup Page If you use the analogue output, you can change the loudspeaker settings from this menu. SURROUND: Choose this setting if you wish to play surround sound. STEREO: This option produces stereo sound. Choose this setting when the sound is only being output via two speakers. 11.5.4. Menu: Dolby Digital Setup Dynamic The Dolby Digital sound format supports a dynamic setting which you can use to set the volume difference between quiet and loud passages on a scale of OFF to FULL in nine steps. DOLBY OFF: The sound is reproduced without changes, i.e. loud passages -- Dolby Digital Setup -and bass sounds are loud and quiet passages are quiet (cinema Dynamic sound). This setting is only appropriate if nobody will be disturbed. FULL: Volume differences are minimised, i.e. loud passages are quieter and quiet passages are louder. This setting is appropriate, for example, at night. To change the setting use to navigate to the scale on the righthand side and then use or to select the desired value. Press OK to confirm. 32 of 42 11.5.5. Menu: Preference Setup Page EN TV type Select the colour standard of your television here: PAL: Usual colour format in many European countries. MULTI: Format is set automatically. NTSC: Usual colour format in North America. Audio The DVD’s default language track is preset here, provided the DVD has multiple language tracks. DOLBY -- Preference Setup Page -TV T y p e Audio Subtitle Disc Menu Parental Password Default PAL ENG ENG ENG Subtitle Here you can set the default language for the subtitles stored on the DVD, provided it contains subtitles. Disc Menu Here you can choose the language for the menus stored on the DVD, provided multiple languages are available on the disc. Parental You can set the authorisation level for DVDs (parental control) here. Some DVDs and CDs are coded with the encryption signals of the authorisation classes established by the Motion Picture Association. The eight authorisation classes are: 1 KID SAFE: Suitable even for small children; 2 G: For all age groups; 3 PG: Recommended from age six, under parental guidance; 4 PG13: Recommended from age 12; 5 PGR: Recommended for children aged 16+, under parental guidance; 6 R: Not suitable for under 16s; 7 NC17: Not suitable for under 18s; 8 ADULT: Adults only. For example, if you have inserted a DVD that is coded with authorisation class 7 (18+) or 8 (ADULT) and you have selected authorisation classes 1 to 6, a message appears and the viewer must enter a password. Parts of a DVD – certain scenes, for example – may also be encoded with an authorisation class or a range of authorisation classes. Password Here you can set the password for activating or changing the authorisation classes. Confirm the CHANGE entry with OK. OLD PASSWORD: Enter the existing password using the number keys on the remote control. It comprises exactly four digits. If no password has been entered, the default password is valid: 123456. If you have entered the correct password, the next field is activated for your entry. NEW PASSWORD: Enter a four-digit password using the number keys on the remote control. The selection moves to the next field. CONFIRM PWD: Enter the four-digit number again. Press OK to confirm the new password. If you forget the new password, enter the master password 4711. Default Confirm the RESET twice with OK to restore the device to its factory settings. PLEASE NOTE! Please note that changed passwords will not be reset! 33 of 42 12. Troubleshooting Malfunctions can sometimes have quite trivial causes, but on other occasions they are the result of defective components. We would like to give you a few options for rectifying your problem. If these tips don’t do the trick, then we’ll be more than pleased to help you out. Just give us a call! You’ll find the phone numbers on the back inside cover, under the warranty conditions. Fault Solution There is no picture and no sound. • • • Check if the power cable is inserted properly into the socket and connected properly to the device. Check if the signal receiver is set to TV. Check to ensure the switch on the power cable is on. There is no picture. There is no AV picture. • • • Check to ensure the contrast and brightness settings are correct. Check if all external devices have been connected properly. Check to ensure you have selected the correct AV source. There is no sound. • • Ensure that the volume has not been set to the minimum level. Ensure the mute setting is not active. There is no picture and no sound. I can hear noise, though. • The reception might be poor. Check if the antenna is connected properly. The picture is not clear. • • The reception might be poor. Check if the antenna is connected properly. The picture is too bright or too dark. • Check the settings for contrast and brightness. The picture is not sharp. • • • The reception might be poor. Check if the antenna is connected properly. Check the settings for sharpness and noise reduction in the PICTURE menu. There is a double/triple picture. • • Check if the antenna is aligned properly. Waves might be reflected off buildings or mountains. The picture is pixellated. • There might be interference from cars, trains, power lines, neon lights, etc. There might be interference between the antenna and power cables. Position the cables further apart. • There are stripes on the display or the colours are faded. • • • Is there interference from another device? Transmission antennae on radio stations, amateur radios and portable phones can also cause interference. Operate the device as far as possible from the device that might be causing the interference. The buttons on the device are not working properly. • The child lock might be on. The remote control does not work. • Check if the batteries are fully charged and have been inserted in the right direction. Ensure the sensor field is not exposed to strong light. Switch off the device at the power cable and then on again. Check if the TV function is active by pressing the TV button on the remote control. • • • Disc The disc does not play even though (PLAY) has been pressed, or stops again immediately • • • • 34 of 42 Is the disc inserted with the title (printed) side facing forwards? Check whether the disc is damaged by trying another disc. If the disk is dirty, clean it carefully, wiping it from the centre to the edge with a soft, dry cloth. DVD: Does the DVD have the correct regional code (2)? If condensation has formed inside the device: leave the player for one to two hours to dry off. 12.1. Do You Need More Help? EN If the suggestions in the previous section did not rectify your problem please contact us. The following information would help us: • What is the MD Number? • What external devices are connected? • What messages appear on the screen? • When operating the device, at which step did the problem occur? • If you have a PC connected to the device: − How is your computer configured? − What software were you using when the problem occurred? • What steps have you already taken to try and rectify the problem? • Please provide your customer number if you have one. 13. LED-Backlight TV pixel faults 5 Pixel Rows 5 Pixel Despite the most modern production methods, the highly complex technology involved in producing this type of device means there may be individual or multiple pixel drop-outs (dead pixels). This is rare, however. For active matrix TFTs with a resolution of 1920 x 1080 pixels, which are each made up of three sub-pixels (red, green, blue), there are a total of approx. 6.2 Mio. control elements in use. Occasionally one or more pixels can fail or become incorrectly controlled because of this very high number of transistors and the associated extremely complex manufacturing processes used. Pixel blue green Sub-Pixel Pixel fault class Defect type 1 continuously lit pixel Defect type 2 continuously black pixel red Defect type 3 Defect sub-pixel lit black 0 0 0 0 0 I 1 1 2 1 0 1 3 5 II 2 2 5 5-n* 0 0 2xn* 10 III 5 15 50 50-n* 0 0 2xn* 100 IV 50 150 500 500-n* 0 0 2xn* 1000 n*=1.5 The permitted number of faults of the above-mentioned types in every fault class is based on a number of one million pixels and must be recalculated in accordance with the actual physical resolution of the display. 35 of 42 14. Cleaning You can increase the lifespan of your device as follows: WARNiNG! Always unplug the unit and disconnect all cables before cleaning. • • • • • • • To protect the LED-Backlight TV from scratches, protective film has been applied to the high-gloss finish. Remove the films after you have set up the LED-Backlight TV set correctly. If the high-gloss finish becomes dirty, wipe off the dust first. Then wipe down gently with a cleaning cloth. If you do not wipe off the dust first, or if you apply too much pressure when wiping down the high-gloss finish, you could scratch the high-gloss finish. Do not use solvents, corrosive or aerosol detergent to clean. Clean the screen with a soft, lint-free cloth. Ensure that no water droplets remain on the LED-Backlight TV. Water droplets may result in permanent discolouration. Do not place the screen in strong sunlight or near ultraviolet light. Store the packaging material in a safe place; only use this box to transport the LED-Backlight TV. ATTENTION! None of the parts inside the housing require cleaning or maintenance. 15. Disposal Packaging Your device has been packaged to protect it against transportation damage. Packaging materials are raw materials and can therefore be reused or recycled. Device At the end of its service life, the device should not be disposed of with the household rubbish. Ask your local authority on proper environmentally friendly disposal facilities. Batteries Do not dispose of used or defective batteries in the household rubbish. Batteries should be taken to a collection point for used batteries. 36 of 42 16. Technical Data EN LED-Backlight TV Device name: Nominal voltage Screen size Power consumption Power consumption on standby: Speaker output Physical resolution: TV system Programme positions E12009 (MD 21259) 100–240 V ~ 50 Hz 54.6 cm (21.5") LCD; 16:9 display max. 36 watts < 0.5 W 2 x 3 W RMS 1920 x 1080 PAL, SECAM, B/G, D/K, I, L/L' 199 (ATV), 400 (DTV) External power supply Model number Input Output DC12030012A AC 100-240V ~ 50/60Hz; 0,9A 3A; DC 12V Bands VHF (bands I/III) UHF (band U) HYPERBAND CABLE TV (S1–S20) / (S21–S41) DVB-T (free to air) Connections 1 x Antenna In 1 x USB In Video 1 x HDMI® In 1 x SCART 1 x VGA In (15 Pin D-Sub) 1 x Composite video In (3.5 mm mini-jack adaptor) 1 x Component In (YUV) (3.5 mm mini-jack adaptor) Audio Stereo Audio In for Composite Video / YUV (3.5 mm mini-jack adaptor) Headphone jack (3.5. mm jack) PC Audio In (3.5 mm jack) Digital Audio Out (SPDIF) (coaxial) Drives/storage media Drives Supported formats via USB1 Capacities: Supported formats via DVD1 Compatible disc formats Laser class DVD player Disk, USB Photo: JPG, PNG, BMP, JPEG Music: MP3, WMA, OGG Film: MPEG 1/2/4, MKV, Xvid, AVI, MP4, Quicktime Text: TXT USB max. 1 TB Photo: JPG Music: MP3 Film: MPEG 1/2/4, Xvid DVD+R/RW, DVD-R/RW, CD-R, CD-RW Class 1 laser PLEASE NOTE! These days, there are many non-standard CD recording methods, copy protection methods, and also a wide variety of blank CD-R and CD-RW discs. This can occasionally lead to read errors or delays. This does not mean that the device is faulty. COMPACT When playing audio CDs, please check the label. DIGITAL AUDIO 37 of 42 Remote control Transmission type: LED class Battery type Infrared 1 2 x 1.5V AAA 1 Dimensions/ambient temperatures Permissible ambient temperature Permissible relative humidity Dimensions without stand (W x H x D) Dimensions with stand (W x H x D) Weight with stand Weight without stand Wall mounting 5°C–35°C 20%–85% approx. 510 x 308 x 50 mm approx. 510 x 345 x 161 mm approx. 3.3 kg approx. 2.7 kg Vesa standard, hole spacing 100 x 100 mm2 2 1 2 Due to the large number of different codecs, it is not possible to guarantee playback of all formats Wall mount not supplied. When mounting the device, make sure that you use M4 screws. The length of the screws corresponds to the thickness of the wall bracket plus a max. of 8 mm. 38 of 42 17. Legal Notice EN Copyright © 2014 All rights reserved. This operating manual is protected by copyright. Mechanical, electronic and any other form of reproduction is prohibited without the written permission of the manufacturer Copyright is owned by the company: Medion AG Am Zehnthof 77 45307 Essen Germany The operating manual can be reordered via the service hotline and is available for download via the service portal at www.medion.com/gb/service/start/. You can also scan the QR code above and download the operating manual onto your mobile device via the service portal. 39 of 42 40 of 42 18. Index A Auto Installation .....................................................................12, 24 B Batteries .............................................................................................. 5 Blu-Ray Player .................................................................................15 C Channel menu ................................................................................20 Channel selection..........................................................................13 Cleaning............................................................................................36 Connecting Aerial ............................................................................................. 11 Blu-Ray player ............................................................................ 15 Headphones ............................................................................... 15 SAT receiver ................................................................................ 16 Video recorder ........................................................................... 16 D DVB-T mode ....................................................................................11 DVD mode........................................................................................30 DVD player .......................................................................................15 F Favourites .........................................................................................14 Feature menu..................................................................................21 Front ..................................................................................................... 7 Full HD ................................................................................................. 3 I Initial operation..............................................................................10 Installation .......................................................................................10 M Media mode ....................................................................................25 O Operating safety .............................................................................. 4 Operation .........................................................................................13 OSD menu ........................................................................................18 P Picture menu...................................................................................19 Picture settings...............................................................................13 Pixel faults ........................................................................................35 Power supply .................................................................................... 5 Program guide................................................................................29 PVR...............................................................................................23, 28 R Rear....................................................................................................... 8 Remote control ................................................................................ 9 S Safety instructions .......................................................................... 4 Operating safety ..........................................................................4 Power supply.................................................................................5 SAT receiver .....................................................................................16 Setup menu .....................................................................................24 Sound menu....................................................................................19 T Technical data .................................................................................37 Timeshift ...........................................................................................23 Troubleshooting ............................................................................34 V Video recorder ................................................................................16 Volume settings .............................................................................13 42 of 42 21.5” LED TV & DVD Combi MEDION® LIFE® E12009 (MD 21259) UK Medion Electronics Ltd. 120 Faraday Park, Faraday Road, Dorcan Swindon SN3 5JF, Wiltshire United Kingdom Hotline: 0871 37 61 020 (Costs 7p/min from a BT landline, mobile costs may be higher) Fax: 01793 71 57 16 To contact us by email please visit the „Service and Support“ section of our website at www.medion.co.uk. www.medion.co.uk IRE Medion Electronics Ltd. 120 Faraday Park, Faraday Road, Dorcan Swindon SN3 5JF, Wiltshire United Kingdom 03/2014 Hotline: 1 800 992508 (free phone) Fax: 01793 715716 21259 EN Aldi UK IE RC1 Cover.indd 1 To contact us by email please visit the „Service and Support“ section of our website at www.medion.co.uk. www.medion.co.uk Instruction Manual 08.01.2014 11:23:34