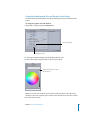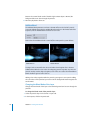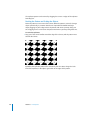
1
Motion HomePages.qxp 3/11/05 4:18 PM Page 2
Motion 2
Tutorials
Apple Computer, Inc.
© 2005 Apple Computer, Inc. All rights reserved.
Under the copyright laws, this manual may not be
copied, in whole or in part, without the written consent
of Apple. Your rights to the software are governed by
the accompanying software license agreement.
The Apple logo is a trademark of Apple Computer, Inc.,
registered in the U.S. and other countries. Use of the
“keyboard” Apple logo (Option-Shift-K) for commercial
purposes without the prior written consent of Apple
may constitute trademark infringement and unfair
competition in violation of federal and state laws.
Every effort has been made to ensure that the
information in this manual is accurate. Apple Computer,
Inc. is not responsible for printing or clerical errors.
Apple Computer, Inc.
1 Infinite Loop
Cupertino, CA 95014-2084
408-996-1010
www.apple.com
Apple, the Apple logo, Apple Cinema Display, Mac,
Macintosh, and QuickTime, are trademarks of Apple
Computer, Inc., registered in the U.S. and other
countries.
Finder is a trademark of Apple Computer, Inc.
Adobe is a registered trademark of Adobe Systems
Incorporated in the U.S. and/or other countries.
Other company and product names mentioned herein
are trademarks of their respective companies. Mention
of third-party products is for informational purposes
only and constitutes neither an endorsement nor a
recommendation. Apple assumes no responsibility with
regard to the performance or use of these products.
Tutorial media in /Users/Shared/Motion/Tutorial Media/
National Geographic folder was provided courtesy of
National Geographic Television and Film Library.
Tutorial media in /Users/Shared/Motion/Tutorial Media/
Getty Images folder was acquired from Getty Images.
The tutorial media is provided for use in the tutorials
exclusively and may not be used in any manner for any
reason except for the sole purpose of implementing the
tutorials for personal use.
1
Preface
5
5
Contents
Welcome to Motion 2
Getting Started
Tutorial 1
9
10
19
25
30
35
39
45
51
The Motion Interface
Getting Started
Motion Dashboards
Using the Inspector
Using the Timeline
The File Browser
Basic Object Manipulation
Applying Motion to an Object
Using Filters
Tutorial 2
55
56
84
Basic Motion Behaviors
Exercise 1: Previewing the Result Tutorial and Building the Starting Project
Exercise 2: Applying Behaviors
Tutorial 3
119
121
144
Working With Text
Exercise 1: Using Text
Exercise 2: Using the Sequence Text Behavior
Tutorial 4
161
162
178
191
203
Working With Particles
Exercise 1: Working With Particle Presets
Exercise 2: Using a Clip as a Particle Cell Source
Exercise 3: Using a Shape as a Particle Cell Source
Exercise 4: Particles and Simulation Behaviors
Tutorial 5
215
216
226
The Replicator
Exercise 1: Working With the Replicator
Exercise 2: Animating the Replicator
3
Preface
Welcome to Motion 2
Motion is a powerful, yet easy-to-use, motion graphics
application that lets you create content for broadcast and
video. The step-by-step lessons in this tutorial are
designed to introduce you to the basic workflow and
interface elements of Motion.
Motion graphics is a type of visual effects work most commonly associated with title
sequences and show openers, bumpers and interstitials, and interface design such as
DVD menus. It is also frequently used in technical settings for simulations of moving
systems such as scientific models, as well as graphics in corporate video presentations.
Motion graphics involves working with multiple objects simultaneously, and is usually
governed by design considerations and a strong sense of visual impact. Objects can
include still images, movies, logos, shapes, text, and so on. More sophisticated motion
graphics projects combine traditional layout and design techniques with tools
borrowed from special effects work such as keying, masking, compositing, and particle
systems to create dynamic moving designs.
Getting Started
The tutorials in this book assume that you have performed a default installation of
Motion, which places the tutorial project and movie files in the default library path
(/Users/Shared/Motion/Tutorial Media/Tutorial Projects). If you changed the default library
path during installation, you will need to open the tutorial project and movie files from
the new location. (If you can’t remember the location of the library path, you can find it
listed in the General pane of Motion Preferences, in the Content Library & Templates
section.)
5
Relinking Missing Media
When Motion cannot locate source files used by a project (for instance, if the project
source files have been moved to a different location since the project was saved), a
sheet appears that contains the message “The following items used to create this
project are missing,” and displays a list of the missing items. There are two ways of
relinking missing media: reconnecting and searching.
To relink missing source media using the reconnect method:
1 In the Missing Items sheet, click the first item in the list, then click Reconnect.
2 Navigate to the path where Motion Content was installed (default is /Users/Shared/
Motion/Tutorial Media). Any missing tutorial images, graphics, or movies can be found
in one of the four folders in the Tutorial Media folder.
m
To relink source media using the search method:
In the Missing Items sheet, click the first item in the list, then click Search.
Motion searches for the missing items. If they are not located, the manual reconnection
sheet appears, and you must navigate to the path where Motion Content was installed
(default is /Users/Shared/Motion/Tutorial Media).
Checking Preferences
Before you begin each tutorial lesson, make sure that Motion preferences are set up
properly.
Record
Make sure that the Record button is turned off. If Record is currently enabled, the
Record button will be red and, under the Mark menu, Record Animation will be
checked.
m
To disable Record:
Press A.
Object Creation
Make sure that Motion Preferences are set to create objects at the start of the project.
To set the preference for object creation:
1 Open Motion Preferences (press Command+,).
2 Click the Project icon.
3 In the Still Images & Objects section, make sure Create Objects At is set to “Start of
project.”
6
Preface Welcome to Motion 2
Time Display
Ensure that Motion Preferences are set to display time as Frames.
To set the preference for time display:
1 Open Motion Preferences (press Command+,).
2 Click the Project icon.
3 In the Time Display section, make sure Display Time As is set to Frames.
Preface Welcome to Motion 2
7
8
Preface Welcome to Motion 2
1
The Motion Interface
1
This tutorial introduces you to creating motion graphics
by exploring the Motion interface and basic workflow,
including behaviors, filters, and working with objects.
The tools commonly used for motion graphics fall into several categories, including
design, compositing, special effects, and timing tools. Motion includes all of these tools,
as well as a unique new toolset called behaviors. Behaviors make the creation of very
complex animations as simple as a drag and drop.
9
Although Motion has the depth to satisfy professional artists, the basic workflow is very
easy to learn. This tutorial explores the main windows and tools in the Motion interface,
as well as some basic steps that are common to most projects.
What You Will Learn
In this tutorial, you will:
• Become familiar with the general workings of the Canvas
• Manage objects and rearrange layer order in the Project pane
• Modify the timing aspects of the project in the Timeline
• Adjust frequently accessed parameters using the Dashboard
• Adjust parameters in the Inspector
• Apply behaviors, filters, and keyframes to objects to create effects
Getting Started
The easiest way to become familiar with Motion is to open and explore an existing
project, then import and manipulate additional elements in that project while learning
about the Motion flexible workflow. First, preview the result project that is created by
following the steps in this tutorial. Then, open the starting project and begin learning
how to create stunning motion graphics projects of your own.
Opening the Result Project
Open and preview the result project for this tutorial to see what you are trying to
achieve.
To preview the result project:
1 Once Motion is open, choose File > Open (or press Command+O).
2 In the Open dialog, navigate to /Users/Shared/Motion/Tutorial Media/Tutorial Projects.
Note: If you changed the default path during installation, you will need to open the
tutorial project and movie files from the new location. For more information, see
“Getting Started” on page 5.
3 Select Tutorial 1 Result, then click Open.
The 150-frame Tutorial 1 Result project opens and appears within the Motion interface.
The name of the project appears in the center of the project’s title bar. You can have
multiple projects open simultaneously, which allows you to drag objects and layers
back and forth between projects.
10
Tutorial 1 The Motion Interface
The basic Motion interface is comprised of the Utility window and the Canvas. The
Utility window is used to import media files, to preview, select, and apply effects, and
to edit and animate the controls for those applied effects. The Canvas is the main
working area in which you view your project and its elements, as well as select,
transform, and animate those elements.
Canvas
Utility window
4 Click the Play button located in the transport controls below the Canvas (or press the
Space bar) to play the project.
Play button
This project utilizes many of the elements commonly found in motion graphics
compositions. It contains text elements, a still image (the logo), a QuickTime movie
(used more than once), imported Adobe Photoshop graphics, and shapes created
within Motion.
Tutorial 1 The Motion Interface
11
It also incorporates several types of effects. Behaviors are used to move the colored
bars and control the opacity of different objects, while filters are used to colorize the
boxes, and keyframes are used to animate the graphics.
5 Choose File > Close (or press Command+W ) to close the project.
Important: If you made any changes to the project, Motion prompts you to save. Click
Don’t Save.
Opening the Starting Project
Open and preview the starting project for this tutorial. This project is identical to the
Tutorial 1 Result project, except that it does not include the animated boxes or logo.
This tutorial instructs you to add those graphic elements later in the steps.
To preview the starting project:
1 Choose File > Open (or press Command+O).
2 In the Open dialog, navigate to the Tutorial Projects folder (default is /Users/Shared/
Motion/Tutorial Media/Tutorial Projects).
3 Select Tutorial 1 Start, then click Open.
The 150-frame Tutorial 1 Start project appears.
4 Click the Play button (or press the Space bar).
12
Tutorial 1 The Motion Interface
The Play button is part of the group of controls known as the transport controls. The
transport controls let you navigate through your project in a variety of ways. In
addition to normal playback, you can step through your project frame by frame or
jump directly to the beginning or end. You can also set your project to loop or to mute
the audio component of your project.
Play from start
Loop playback
Play/Mute audio
Record
Go to next frame
Go to start
of project
Go to previous frame
Go to end
of project
Play/Pause
5 Click the Play button again (or press the Space bar) to stop the project playback.
6 Click the “Go to next frame” button to advance the project one frame at a time.
Note: You can also press the Right Arrow and Left Arrow keys, or the Page Down and
Page Up keys, to move forward or backward one frame at a time. Press Shift while
using the arrow keys to move the playhead in increments of ten frames.
7 Click the “Go to start of project” button to return to the beginning of the project.
Note: To quickly return to the start of the project, press Home.
Now that you’ve quickly reviewed the transport controls, explore more of the interface
in the next section.
The Motion Interface
In this section, tour the starting project for this tutorial to become familiar with the
Motion interface. To understand how this basic project is constructed, it is helpful to
view the different windows and panes in Motion.
Notice that the interface (shown on page 11) features two main components: the
Utility window and the Canvas. The Utility window contains three tabs. The first tab is
the File Browser, which is used to preview and import media files. The second tab is the
Library, which contains all of the effects that you can apply to objects, as well as all
template-related content. The Library Preview area allows you to preview any effect
before it is applied to an object. The third tab is the Inspector, which is used to edit and
animate the controls for those applied effects.
The Canvas is the main area in which to view your project and its elements, as well as
select, transform, and animate those elements.
Tutorial 1 The Motion Interface
13
In addition to the main work area of the Canvas, the Timing and Project panes (not
displayed by default) allow you to view and modify many attributes of the project. With
the intuitive design of Motion, you can easily show and hide interface components
when needed.
Customizing Your Workspace
Use the following guidelines to learn how to display and hide various panes, and how
to use preset window layouts.
m
To display the Project pane, do one of the following:
Click the Project icon in the Toolbar.
Timing icon
Project icon
m
Press F5.
m
Drag the divider on the left edge of the Canvas.
Drag the divider handle to
show the Project pane.
m
To display the Timing pane, do one of the following:
Click the Timing icon in the Toolbar.
m
Press F6.
m
Drag the divider on the bottom edge of the Canvas (below the Play button in the
transport controls).
You can create and save a custom interface. Once you set up a layout that you want to
save, choose Window > Save Current Layout. A dialog appears that allows you to enter
the name of your layout. For this tutorial, the standard interface layout is used.
14
Tutorial 1 The Motion Interface
m
To use the preset interface layouts, do one of the following:
Choose Window > Layouts > Alternate (or press Control+Shift+U).
The Project and Timing panes are hidden, and the Utility window is split into an upper
window containing the Inspector and a lower window containing the File Browser and
Library.
Inspector
File Browser and Library
m
If you are using an Apple Cinema Display, choose Window > Layouts > Cinema (or
press Control+Option+U).
This preset opens the Project and Timing panes and creates two Utility windows, with
the File Browser and Library on the left side of the Canvas, and the Inspector on the
right side. This layout is useful for projects requiring a lot of work in the Inspector.
Working in the Layers Tab
The Layers tab, located in the Project pane, is where you observe and manage the
order of the objects in a project. A project represents a single flow of image data built
from the bottom up—objects are stacked one above the other within a layer; layers are
stacked one above the other in the project. A layer is the resulting image of its objects
and any effects applied to those objects.
Objects include still images, image sequences, movies, shapes, masks, particle emitters,
generators, replicators, and text. Effects include filters and behaviors, and can be
applied to single objects or to a layer itself. When an effect is applied to a layer, all
objects within that layer are affected. Layers can also contain other layers.
Tutorial 1 The Motion Interface
15
In the Layers tab, you can select, reorder, lock, group and ungroup, and rename objects
and layers. You can also add and delete layers.
Compositing Basics
A project can also be referred to as a composite. Compositing is an essential part of
motion graphics, as it is the process of combining images and objects together to
create a single-layered, final image. Any time you have more than one object in the
Layers tab, you are compositing.
A composite can range from the very simple, such as a logo placed over an animated
background, to the very complex, such as keying multiple, highly paid actors shot in
front of a green screen over a background plate; performing color correction;
integrating 3D-generated drooling space monsters; and adding animated particle
effects.
Showing and Hiding Effects in the Layers Tab
This project utilizes three initial layers—boxes, dolphins, and titles. Each layer contains
several objects and effects.
Effects that are applied to an object appear beneath the object in the Layers tab and
can be displayed or hidden using the disclosure triangle (or by filtering what is
displayed in the Layers tab).
To inspect the layers:
1 If it is not displayed, show the Project pane (press F5).
2 Click the disclosure triangle next to the boxes layer.
The layer is expanded and the Fade In/Fade Out behavior appears, along with the four
box shape objects. The Fade In/Fade Out behavior is applied to the boxes layer and
appears below the layer (and slightly indented).
Behavior icon (applied to layer)
Disclosure triangle
Behavior icon (applied to object)
16
Tutorial 1 The Motion Interface
Notice the small behavior icon that appears next to the layer name. This indicates that
a behavior (Fade In/Fade Out) is applied to the layer. The dolphins and titles layers do
not have applied behaviors, so no icon appears. The objects in the boxes layer, such as
upper green box, have behavior icons next to their name. This indicates that at least one
behavior is applied to each object.
3 Click the disclosure triangle next to upper green box.
The Throw behavior appears below the upper green box object (and slightly indented).
The Throw behavior is applied to the box object—not to the layer. Behaviors and filters
applied to objects appear below the object to which they are applied.
4 Click the boxes disclosure triangle to collapse the layer.
Reorder Objects in the Layers Tab
You can rearrange the order of layers or objects to control what objects appear in front
of the others. In a project, an object at the top of the layer list appears in front of other
objects. An object at the bottom of the list appears behind other objects. In this
project, the colored boxes appear in front of the dolphin clips. You can easily move the
boxes behind the clips for a different effect.
To move a layer to a new position:
1 In the Layers tab, drag the boxes layer below the dolphins layer.
As you drag over the collapsed dolphins layer, the layer springs open. This allows you to
place objects inside layers. The position indicator appears when you can drop the
object. If the pointer does not contain the green add (+) pointer (indicating that you
can add a layer) and you release the mouse button, the layer is placed within the
dolphins layer. In this example, do not place the boxes layer within another layer. To get
the add pointer to appear, position the pointer slightly to the left of the object name.
Tutorial 1 The Motion Interface
17
2 Once the add pointer appears, release the mouse button to drop the boxes layer.
3 Play the project (press the Space bar).
All of the objects in the boxes layer appear below the dolphin clips.
4 Drag the boxes layer back to its original position.
Note: You can also choose Edit > Undo Reorder (or press Command+Z) to move the
boxes layer back to its original position.
18
Tutorial 1 The Motion Interface
Motion Dashboards
The Dashboard is a floating window that provides instant access to the most
commonly used parameters for the selected object or effect. You can quickly modify
layers, objects, or effects using the Dashboards. In fact, all objects and effects have
associated Dashboards. Different controls appear in the Dashboard depending on the
type of object or effect that is selected.
What Is a Parameter?
A parameter can be described as a property whose value determines the
characteristics or behavior of an object. In a basic example, a Scale parameter set to a
value of 200 at frame 1 and a value of 50 at frame 30, makes that object two times its
original size (200 percent) at frame 1 and scales it down to one-half its original size
(50 percent) at frame 30.
Using the Dashboard
Whenever an object or effect is selected or added to a project, the Dashboard for that
object or effect appears by default (if the Dashboard is not hidden). In this section,
adjust the Opacity parameter for a layer and an object within that layer. Since the layer
has an applied Fade In/Fade Out behavior that animates the opacity of the object (from
0 to 100 percent over the first 20 frames), go to a frame in which the opacity of the
layer is 100 percent.
To adjust opacity in the Dashboard:
1 Click in the Current Frame field, to the left of the transport controls.
2 Type 75, then press Return.
The playhead moves to frame 75.
Tutorial 1 The Motion Interface
19
Current Frame field
3 In the Layers tab, click the boxes layer to select it.
Note: If the Dashboard is not visible, press D.
A Dashboard appears and displays the available layer controls. Notice that the
Dashboard includes a title bar that displays the type and name of the currently
selected object, filter, or behavior. In this example, the Dashboard title reads “Layer:
boxes.” This indicates that the layer named boxes is selected.
A layer Dashboard contains controls for setting the opacity and blend mode of a layer,
as well as a checkbox to enable or disable a drop shadow. Once a drop shadow is
turned on, the opacity and blur parameters for the drop shadow become available. The
drop shadow controls are discussed later in this tutorial.
4 Drag the Opacity slider for the layer named boxes toward the left, to approximately 50
percent.
5 If necessary, play the project or advance to a frame in which the boxes are visible.
All of the colored boxes appear at 50 percent opacity.
Since the layer acts as a “parent” for all of its objects, adjusting the opacity of the layer
changes the apparent opacity of the objects. The actual opacity value of the individual
boxes is 100 percent.
6 In the Layers tab, click the disclosure triangle next to the boxes layer, then click one of
the objects, such as the upper green box object.
20
Tutorial 1 The Motion Interface
Observe that although the Opacity of the layer is 50 percent, the Opacity of the
selected box (a “child” object within that layer) is 100 percent.
7 Drag the Opacity slider for the upper green box to 50 percent.
Adjusting the Opacity value is additive, so the total Opacity value of the box is now 25
percent.
8 Set the Opacity of the boxes layer and the box object back to 100 percent by pressing
Command+Z two times.
Displaying Different Dashboards
In addition to displaying the different Dashboards for an object by selecting the object
in the Layers tab (or Canvas), you can use the Dashboard itself as a selection tool.
To select and modify objects in the Dashboard:
1 In the Layers tab, select the boxes layer.
2 In the Dashboard, click the disclosure triangle in the title bar.
A pop-up menu appears that contains the name of the selected object, and any
behaviors or filters applied to the selected object. When an item is selected in this list,
the Dashboard for the selected item appears immediately. In this case, there are two
choices: boxes (the general layer controls) and Fade In/Fade Out (the behavior
controls).
Tutorial 1 The Motion Interface
21
Note: You can also press D to cycle through the Dashboards for an object, or press
Shift+D to cycle in reverse.
3 Choose Fade In/Fade Out from the pop-up menu.
The Dashboard changes to the Fade In/Fade Out controls. You can change the duration
of the fade in or the fade out effect by dragging the left or right side of the control.
In this project, the layer is set to fade in, but not fade out.
4 Click the right edge of the fade control and drag to the left until the object is set to
fade out over 30 frames.
5 Play the project (press the Space bar).
The boxes fade in over the first 20 frames and fade out over the last 30 frames.
Important: You can interactively make changes to a project during playback.
Using the Dashboard to Change the Color of a Shape
Remember that the Dashboard provides access to different controls depending on
what type of object is selected. Objects created from within Motion, such as shapes
and text objects, have unique Dashboards. In this section, use the Dashboard to modify
the color parameters of a shape created within Motion.
To display the shape Dashboard:
1 If it is not already expanded, click the disclosure triangle for the boxes layer in the
Layers tab.
2 Click the upper green box object to select it.
22
Tutorial 1 The Motion Interface
The Dashboard for the upper green box object appears.
In addition to the Opacity and Blend Mode parameters, the shape Dashboard also
contains color settings for the Fill and Outline of the shape. You can also enable and
disable a drop shadow. By default, the Outline and Drop Shadow parameters are disabled.
3 Use the color well in the Dashboard to change the color of a shape. There are two color
picker options that are accessed in slightly different ways.
Note: All color wells in Motion work the same way, whether they appear in the
Dashboard or the Inspector.
To use the pop-up color palette to change the color of a shape:
1 In the Dashboard, Control-click the color well for the Fill parameter (and hold down the
mouse button).
A pop-up color palette appears.
2 Drag in the color spectrum to select a color.
The original color is displayed in the upper color well, and the new color is displayed in
the lower color well. As you drag, the color of the shape is immediately updated in the
Canvas.
3 When you have selected the color you want, release the mouse button.
Tutorial 1 The Motion Interface
23
To use the Colors window to change the color of a shape:
1 Click the color well once.
The Colors window appears. You can use one of the color selection modes to choose a
new color, or use the color picker tool to select a color from your Canvas.
Color selection modes
(wheel, slider, color palette, image palette, crayons)
Use the color picker
tool to pick a color
from the Canvas.
2 Click the color picker tool (the magnifying glass) in the Colors window.
3 Choose a green color from the water in the dolphins clip in the Canvas.
4 Click the close button in the upper-left corner to close the Colors window.
24
Tutorial 1 The Motion Interface
Turning Behaviors On or Off in the Layers Tab
As mentioned previously, you can tell that the boxes layer has a behavior (Fade In/Fade
Out) applied to it from the icon that appears to the right of the layer name in the
Layers tab. You can easily enable or disable the effect of a behavior in the Layers tab.
Behavior icon
Note: Similar icons appear for objects with applied filters or masks.
To turn the effect of the behavior on or off:
1 In the Layers tab, click the behavior icon in the boxes layer.
A red slash appears to indicate that the behavior is disabled.
2 Play the project (press the Space bar).
Notice that the boxes no longer fade in over the first 20 frames of the project, but
remain at 100 percent opacity.
3 Click the behavior icon again to reactivate the behavior.
Using the Inspector
While the Dashboard provides access to the most commonly used controls, the
Inspector contains every single parameter that can affect the object. Use the Inspector
to transform objects, change blend modes or colors of objects, adjust object and
footage properties, adjust the parameters of all behaviors or filters applied to an object,
create keyframes, and so on.
Adjusting Parameters in the Properties Tab
The Properties tab contains controls for the basic object properties, such as Position,
Rotation, Scale, Blend Modes, Opacity, and so on. In this section, shear the green shape
objects.
Tutorial 1 The Motion Interface
25
To show an object in the Inspector:
1 Make sure the upper green box object is selected.
2 Click the Inspector icon in the upper-right corner of the Dashboard.
Note: You can also do one of the following to display the Inspector:
• Click the Inspector tab in the Utility window.
• Press Command+3.
• Click the Inspector icon on the right side of the Toolbar.
The Inspector appears (is brought to the front). In the Inspector, four tabs divide the
various parameters into categories: Properties, Behaviors, Filters, and Shape (Object).
Note: The fourth tab is called the Object tab (in this example, the Shape tab), and
changes depending on the type of object selected. For example, if a mask is selected,
the last tab is the “Mask” tab.
3 Optionally, click the various tabs to see the controls available for the object.
4 Click the Properties tab.
5 In the Shear parameter row, drag the first value slider (drag in the value field) to set an
X shear value of approximately 40 degrees.
26
Tutorial 1 The Motion Interface
Note: The right value slider is the Y shear parameter. To see the individual X and Y
parameters, click the Shear disclosure triangle.
Shear X value slider
The box is sheared.
Sheared box
6 In the Layers tab or Canvas, select the lower green box object.
7 In the Shear parameter row, drag in the first value slider to set an X shear value of
approximately 40 degrees
8 Choose File > Save As (or press Shift+Command+S).
The Save sheet appears.
Tutorial 1 The Motion Interface
27
9 In the Save As text field, type a personalized name for the project, then choose a
location to save the file.
Important: You cannot save to the installed Tutorial Projects folder. You may want to
create a folder in which you can save your tutorial work.
Click to expand the Save sheet
to navigate to a different
10 Click Save.
Note: As when working with any application, it is wise to save your projects often.
Using the Value Sliders
The value slider allows you to type a specific number in the value field, or to drag in
the value field to set a value. Often, you can type a higher number in the value slider
than can be achieved by dragging the normal sliders. When using the value sliders,
you can use a modifier key to make normal, fine (press Option), or course (press Shift)
value adjustments. The value sliders are contextual, which means that the “normal,”
“fine,” and “coarse” increments are specific to the parameter. For example, a “normal”
increment for Opacity is 1, a “fine” increment is .1, and a “coarse” increment is 10.
Using the Behaviors Tab
The Behaviors tab contains all controls for any behaviors that are applied to the
currently selected object. If no behaviors are applied to the currently selected object,
the Behaviors tab is empty.
To modify a behavior in the Inspector:
1 With the lower green box object still selected, click the Behaviors tab.
28
Tutorial 1 The Motion Interface
The shape object has an applied Throw behavior, so the controls for that behavior
appear in the Behaviors tab.
2 In the Behaviors tab, drag the Throw Velocity slider toward the right.
In the Canvas, notice that the box moves toward the right. Since you are increasing the
rate of the throw, its speed is increased and the object travels faster in less time.
3 In the Behaviors tab, select the Throw behavior (it appears highlighted in gray). You can
click the word “Throw” or click anywhere in the gray area surrounding the Throw
parameters.
The Throw behavior Dashboard appears.
4 In the Dashboard, drag the arrow control toward the right while observing the Throw
Velocity parameter in the Inspector.
Any changes made to an object’s Dashboard are reflected in the Inspector, and vice
versa.
5 Press Command+Z two times to undo the Throw adjustments (from steps 2 and 4).
Tutorial 1 The Motion Interface
29
Viewing the Shape (Object) Tab
The fourth tab in the Inspector is the Object tab. The Object tab changes depending on
the type of object that is currently selected. In this example, the Object tab is the Shape
tab, because a shape is the currently selected object.
m
To view the Shape tab parameters:
Click the Shape tab.
The Shape tab contains parameters for modifying the shape, color, fill mode, outline,
softness, and so on, of the shape object.
Reset button
Animation menu icon
As you can see in the image above, most of the parameters in the Inspector have a
small “–” icon at the end of the parameter row. This is the Animation menu icon, and
indicates that the parameter can be animated. This pop-up menu contains controls that
allow you to set keyframes, enable and disable animation, show parameters in the
Keyframe Editor, and reset the individual parameter. The larger Reset button, the “x,”
resets all of the parameters within that parameter group. For this tutorial, do not use
the Animation menu or the Reset button.
Using the Timeline
The Timeline is the other major component of the Motion interface. It displays the
objects in your project, including behaviors, filters, masks, shapes, and text, laid out
over time. This lets you adjust an object’s placement in time and edit its In and Out
points.
30
m
To show the Timeline, do one of the following:
Click the Timing icon in the Toolbar.
m
Choose Window > Timeline.
m
Press Command+7.
Tutorial 1 The Motion Interface
The left side of the Timeline is called the Timeline Layer list, and is similar to the Layers
list in the Project pane. Like the Layers tab in the Project pane, you can select, reorder,
lock, group and ungroup, rename, and add or remove objects and layers in the
Timeline Layer list. Actions made in either list are reflected in the other.
In the right side of the Timeline, each object is represented by a colored bar that sits on
a gray, horizontal track. The object type is identified by the color of its bar. Layers
appear as blue bars in the Timeline.
The ruler that appears above the bars represents frames. In the above illustration, the
playhead is sitting at frame 96. This is also represented in the Current Frame field in the
Timeline Layer list (and to the left of the transport controls).
Tutorial 1 The Motion Interface
31
When an object is selected, notice that a single thin bar appears below the Canvas and
above the transport controls. This is called the mini-Timeline. The mini-Timeline is very
useful for manipulating a single object or layer at a time. It allows you to add objects to
your project, to move objects in time, and to trim the duration of an object, just like in
the Timeline.
Layer bar (dolphins) in
mini-Timeline
Modifying the Timing of Objects
In the Motion Timeline, many of the features ordinarily reserved for nonlinear editing
software are available. This means you can easily (and graphically) move, trim, and slip
objects.
32
Tutorial 1 The Motion Interface
To modify objects in the Timeline:
1 In the Timeline Layer list, click the disclosure triangle for the dolphins layer.
The layer is expanded and the three clips are displayed. The three dolphin clips are
staggered so that each one begins 20 frames later in time. You may have to scroll down
to see all the layers.
Notice that the dolphins layer bar contains an image of a “stack” of items on it, which
indicates that the layer contains three objects.
2 Click in the center of the dolphins2 bar and drag to the left to align it with the
beginning of the sequence (frame 1).
As you drag, the new In and Out points are displayed at the pointer, as well as the delta
value (the small triangle that represents amount of change).
3 Play the project (press the Space bar).
Since they are aligned in time, both dolphin clips begin (and fade in) at the same time.
4 Position the pointer over the left edge of the dolphins1 bar.
The pointer changes to a Trim pointer. When you drag the right or left edge of an
object, you trim that object, removing frames from the beginning or end and
shortening its overall duration. Since Motion is nondestructive, this has no effect on the
original source clips on your drives.
5 Drag the left edge of dolphins1 to the right by 20 frames.
The number of frames is displayed in the delta section of the tooltip.
Tutorial 1 The Motion Interface
33
The center dolphin clip appears first, and the left and right shots appear in sequence.
However, notice that the dolphin’s movement is now in sync between the left and
center shots.
To solve this, you can slip the dolphins1 clip. Slipping a clip changes which frames are
displayed without changing an object’s In or Out point. In other words, a slip allows you
to use a different portion of a clip without changing its duration or location in time.
Note: An object can only be slipped after the object has been trimmed. Because
behaviors and filters contain no footage, they cannot be slipped.
6 Position the pointer over dolphins1, then press Option.
The Slip pointer appears.
7 Option-drag dolphins1 20 frames to the right.
8 Play the project (press the Space bar).
The dolphins are properly staggered.
9 Choose File > Save (or press Command+S) to save the project.
Effects in the Timeline
Effects such as behaviors, filters, and masks appear as bars in the Timeline. This allows
you to control their placement in time and modify their start and end points
independently from the objects that they affect.
34
Tutorial 1 The Motion Interface
As in the Layers tab, you can see by the icon in the Timeline Layer list that each of the
dolphin objects has a behavior applied. You can view effects applied to objects the
same way you view the contents of a layer.
m
To view the effects for an object in the Timeline:
Click the disclosure triangle for the dolphins1 object.
The Fade In/Fade Out behavior appears as a purple bar. You can edit the effect bar
separately from the object to which it is applied.
Note: Filters also appear as purple bars in the Timeline. Masks appear as gray bars.
When audio is displayed in the Timeline, audio files appear as green bars.
The File Browser
Use the File Browser to locate, preview, and import media files from your computer or
network. Controls in the File Browser allow you to navigate your disk and find the files
you need to use for a project.
m
To show the File Browser, do one of the following:
In the Utility Window, click the File Browser tab.
m
Press Command+1.
At the top of the browser, the Preview area appears. This allows you to preview a file
before importing it into your project. If the file is an image sequence, movie, or audio
file, the file plays. The upper pane of the browser contains your hard drives, mounted
servers, and home folder. This is known as the Sidebar. The lower pane displays the
folders and folder contents from the location that is selected in the upper pane of the
browser. This portion of the browser is referred to as the stack.
Tutorial 1 The Motion Interface
35
Locating the Tutorial Files
In this section, learn to navigate the browser by locating the tutorial files.
To navigate in the File Browser:
1 In the Sidebar of the File Browser, click your hard drive.
The contents of the drive are displayed in the stack.
2 Double-click the Users folder to view its contents.
To move around within the file stack, use the navigation controls above the Sidebar.
Click arrows to move
forward or backward
through selection.
Click Icon or List View buttons to
display items in icon or list view.
Type in the Search field
to search for files.
3 In the File Browser, navigate to the Tutorial Media folder (default is /Users/Shared/
Motion/Tutorial Media), then double-click the National Geographic folder to view its
contents.
4 In the stack, select NatGeoLogo.psd.
When a file is selected, the Preview area displays information about that file. This
information includes file type, the frame size, color depth, and so on.
5 In the stack, select dolphins.mov.
The Play button changes to a Pause button as the dolphin clip plays in a loop in the
Preview area. To stop the preview, click the Pause button.
36
Tutorial 1 The Motion Interface
Note: By default, all files attempt to play in the Preview area. You can disable this
feature in the File Browser & Library section of Motion General Preferences. To access
the preferences, choose Motion > Preferences. For this tutorial, leave the “Play items
automatically on a single click” enabled in the preferences.
Importing Files
You can import files into your project using one of three different methods:
• The File Browser, which allows you to preview images and play clips (including audio)
prior to importing the media
• The File > Import command in the menu bar, which opens the Import Files dialog
• The Finder, which allows you to drag files into a project
To import a selected file into a project using the File Browser method, you can either
drag a file into your project (to the Canvas, Layers tab, or Timeline) or click the Import
button in the Preview area. In this section, import a single Photoshop image into the
project using the browser’s Import button.
To import a file:
1 In the Layers tab, click the Add New Layer button (the “+” in the upper-left corner) to
create a new empty layer.
A new layer is created called Layer.
2 In the File Browser, select the NatGeoLogo.psd file.
3 In the Preview area, click the Import button.
The file is imported into the project and is centered in the Canvas.
Tutorial 1 The Motion Interface
37
Objects imported this way are placed at the playhead position. The playhead indicates
which frame is currently displayed in the Canvas. The playhead is visible in both the
mini-Timeline and in the Timeline.
Playhead
If the playhead was not at the beginning of the project when you imported the file,
your Timeline may look like this:
The logo is not visible in the project until the object appears. You can remedy this
easily.
4 In the Timeline, drag the NatGeoLogo.psd object to the left until it lines up with the
beginning of the project.
Note: You can also drag the logo object in the mini-Timeline to begin at frame 1.
Alternately, you could have prevented this from happening by ensuring you were at
the first frame of the project (press Home) before importing the clip. This moves the
playhead to the first frame of the project.
You can also change a setting in the Motion Project Preferences so that all new objects
are created (and imported) at the start of a project.
5 Choose Motion > Preferences.
6 Click Project.
38
Tutorial 1 The Motion Interface
7 In the Still Images & Objects section, set the Create Objects At preference to “Start of
project.”
Newly created or imported objects now begin at the start of the project.
8 Click the close button to close the Preferences window.
9 Save the project (press Command+S).
Basic Object Manipulation
You can modify many aspects of an object by manipulating it directly in the Canvas.
You can use basic controls such as scale, rotation, and position, or more complex
operations such as controlling an object’s drop shadow. This section provides a brief
discussion of transforming objects using the onscreen controls.
To modify an object in the Canvas:
1 Click the National Geographic logo in the Canvas (it may already be selected).
2 Drag the object to position it in the lower-right corner of the Canvas.
Tutorial 1 The Motion Interface
39
If they are enabled, yellow Dynamic Guides appear automatically when the edges of
your selection align with edges or center points of other objects in the Canvas (or the
Canvas itself ). They also appear when an object aligns with the edges of the frame. To
temporarily disable the guides, press Command while you drag, or press N to turn
them on or off.
Note: You can also press Shift+Command+: to toggle the visibility of the Dynamic
Guides.
3 In the Toolbar, choose Dynamic Guides from the View pop-up menu to turn them off
(no checkmark appears).
4 Drag the object around the Canvas.
Notice that no guides appear.
5 Drag one of the corner handles inward to shrink the logo to 80 percent. Press Shift to
constrain the object to its original proportions.
6 Drag the rotation handle to rotate the object.
40
Tutorial 1 The Motion Interface
7 Rotate the object back to a horizontal position. Press Shift to constrain the rotation to
45-degree angles.
8 Reposition the object to the lower-right corner of the Canvas.
9 To nudge the object away from the edge of the Canvas, press Command and one of
the Arrow keys.
.
Selecting and Nudging Objects
An object (or layer) selected in the Layers tab appears highlighted in blue. An object
selected in the Canvas appears highlighted in gray in the Layers tab. In both cases, the
selected object has a bounding box in the Canvas. Once you have selected an object
in the Layers tab, you can nudge the object (in one-pixel increments) in the Canvas by
pressing Command and the Up/Down/Left/Right Arrow keys. For example, to nudge
two objects after they are selected in the Layers tab, press the Command+Up/Down/
Left/Right Arrow keys to nudge the objects in the Canvas. To nudge the object in 10pixel increments, press Shift with the Command and arrow keys.
To select the object above the currently selected object in the list, press the Up Arrow.
To select the object below the currently selected object, press the Down Arrow.
Note: The arrow keys are also used to step through the frames of your project. Press
the Left Arrow (or Page Up key) to move back a single frame or press the Right
Arrow (or Page Down key) to advance a single frame. There are several keyboard
shortcuts for the transport controls and additional frame navigation in the Mark
menu.
Important: Keep in mind that this is a tutorial. In the real world, objects that are very
close to the edge of the Canvas are cut off. Use the Safe Zones command in the View
menu to display action and title safe zones.
Tutorial 1 The Motion Interface
41
Different types of effects, such as shearing or anchor point adjustment can be made by
selecting a new object transformation mode. You can select different modes by clicking
and holding the Select/Transform tool in the Toolbar.
Select/Transform
Adjust Anchor Point
Adjust Shear
Adjust Drop Shadow
Adjust Four Corner
Adjust Crop
Adjust Control Points
Adjust Item
Pressing the Tab key cycles through all of the available object transform modes for the
selected object.
Note: The object parameters for the onscreen controls discussed in this section (move,
rotate, drop shadow, and so on) also appear in the Inspector > Properties tab. Although
the values are displayed in the Canvas at the pointer while transforming an object, it is
a bit easier to specify exact values in the Inspector. For example, to shear an object
precisely 10.25 percent in X, go to the Shear parameter in the Properties tab, and enter
that value in the X value field.
Adding a Drop Shadow
Every object in Motion has a drop shadow just waiting to be revealed. The shadow is
based on the existing transparency (alpha channel) of the object. In this section, add a
drop shadow to the National Geographic logo.
To add a drop shadow:
1 Control-click the National Geographic logo, then choose Drop Shadow from the
shortcut menu.
The pointer changes to the Drop Shadow pointer. You can see what tool is currently
selected in the Toolbar.
2 Drag the body of the logo toward the lower-right corner.
42
Tutorial 1 The Motion Interface
A drop shadow is created for the object. You can position the shadow in any direction
or distance from the object.
The softness of the shadow is controlled by dragging one of the corner points of the
object. Dragging toward the center of the object creates a harder shadow, while
dragging away from the object creates a softer shadow.
3 Drag any corner point of the shadow controls toward the center of the object to create
a harder shadow.
Note: For more precise control, use the Dashboard or Inspector to set a numeric value
for the drop shadow parameters.
Importing Photoshop Files
Next, import a multilayer Photoshop file by dragging the file from the File Browser to
the Canvas, rather than by using the Import button (as used for importing the logo).
Photoshop layered files can be imported into Motion in a variety of ways. You can
import a flattened version of the file, all of the layers independently, or select an
individual layer from the file.
To import a Photoshop file:
1 In the File Browser, navigate to the Tutorial Media folder (default is /Users/Shared/
Motion/Tutorial Media), then double-click the Graphics folder to view its contents.
2 Drag the GreenSquares.psd file to the Layers tab and pause over the layer that contains
the National Geographic logo.
Tutorial 1 The Motion Interface
43
A drop menu containing import options appears.
3 Drop the file on the Import All Layers pane.
A new layer is created inside the layer where you dropped the file, and inside that layer
the individual Photoshop layers are arranged just as they were in the Photoshop
application.
Note: You can also drag the file to the Canvas and pause over the Canvas to show the
same drop menu. Dragging to the Canvas allows you to select a position to drop the
file (importing to the Layers tab, Timeline, or by using the Import button automatically
places the imported object in the center of the Canvas).
Note: The result of this import operation is the same as if you were to select multiple
objects in a layer, then group the objects.
You can manipulate each individual object of the new GreenSquares layer, or you can
manipulate the layer itself, affecting all the objects simultaneously.
44
Tutorial 1 The Motion Interface
4 In the Layers tab, double-click the name of the layer containing the GreenSquares layer
and the National Geographic logo.
The text field is highlighted.
5 Type “graphics” as the new name for that layer, then press Return.
Applying Motion to an Object
In Motion, it is very easy to animate objects so they fly around the screen. In this
section, learn the difference between animating with a behavior and animating using
keyframes.
To duplicate a layer:
1 Press Home to move the playhead to the beginning of the project.
2 In the Toolbar, click the Select/Transform tool (or press Shift+S).
Note: When an object is selected, you can also press Tab to cycle through the different
onscreen tool modes in the Canvas.
3 Position the GreenSquares layer in the upper-right corner of the Canvas.
4 In the Canvas, press Option, then click the graphic and drag away from the original
green squares.
The object (the GreenSquares layer) is duplicated.
In the Layers tab, the copy is placed directly on top of the existing layer and named
GreenSquares copy by default. Since GreenSquares is a layer (not just an individual
object), the copy is also a layer and contains copies of all the individual objects within
the original.
5 Move the GreenSquares copy across the screen to the left side and slightly lower.
Tutorial 1 The Motion Interface
45
Using Behaviors
You can apply motion to an object in a number of ways. The easiest way to get an
object in motion is to use a Throw behavior. Behaviors animate an object by
automatically generating a range of values for that object’s parameters. For example, an
object with an applied Grow/Shrink behavior is automatically scaled up or down based
on the rate you set. The effect of a behavior can be adjusted using the simple graphical
controls in the Dashboard, or by accessing all controls for the behavior in the Behaviors
tab of the Inspector.
The Throw behavior automatically sets an object in motion in the direction and speed
of your choice. In this section, review two methods of applying the Throw behavior to
the GreenSquares copy object. The first method uses the Library, while the second
method uses the Add Behavior icon in the Toolbar.
Using the Library to Apply a Behavior
Until you are very familiar with the behaviors and filters in Motion, it is recommended
that you use the Library to preview and apply effects. The Library allows you to see a
preview of a behavior or filter before it is applied to an object. A text description of a
selected effect also appears in the Preview area. This is a great feature for helping you
remember, for example, exactly what a color correction filter does.
To apply a behavior from the Library:
1 In the Utility window, click the Library tab.
2 Select the Behaviors category, then select the Basic Motion subcategory.
The available Basic Motion behaviors appear in the stack.
3 In the stack, select the Throw behavior.
46
Tutorial 1 The Motion Interface
The Preview area of the Library plays a preview of the behavior and also displays a text
description of the behavior.
4 Drag the Throw behavior from the stack to the GreenSquares copy object (layer) in the
Canvas.
The Throw is applied to the object and the Throw Dashboard appears.
Note: If an object is selected, you can also click the Apply button in the Preview area to
apply the chosen behavior to the selected object.
5 Since you add the Throw behavior in a different manner in the next set of steps, select
the Throw behavior in the Layers tab and press Delete.
The Library
If you would like to take a slight detour, click around the different categories and
stacks in the Library to see previews of the available goodies in Motion. All behaviors,
a suite of more than 95 filters, particle systems, replicators, fonts, generators, as well
as any installed third-party filters are housed in the Library. The Library Preview area
makes browsing and selecting effects fast and fun. For example, you can see an
animated preview of a particle system before you bring the particles into your
project, or see exactly what a Text Sequence behavior does before you apply it to a
text object.
Using the Add Behavior Icon to Apply a Behavior
Once you become more familiar with the behaviors and filters in Motion, you can use
the Add Behavior or Add Filter icon to quickly apply effects.
To apply a behavior from the Toolbar:
1 Make sure that the GreenSquares copy is selected, then click the Add Behavior icon in
the Toolbar.
Note: To apply a behavior or filter using the Add Behavior or Add Filter icon in the
Toolbar, an object must be selected. If no object is selected, the icons are not available.
Tutorial 1 The Motion Interface
47
A pop-up menu appears containing all of the behaviors that can be applied to the
selected object.
2 Choose Basic Motion > Throw.
The Throw is applied to the object and the Throw Dashboard appears.
3 In the Dashboard, drag from the center of the control and create an arrow heading
straight to the right and about halfway across the graph.
Note: Press Shift to constrain the angle of the Throw to 45-degree angles.
Zoom slider
The direction of the arrow indicates the direction the object moves. The size of the
arrow indicates the speed that the object travels.
4 Play the project (press the Space bar).
The green squares float across the screen from left to right over the course of the
project. To move the squares faster or slower, adjust the Throw control accordingly.
48
Tutorial 1 The Motion Interface
Note: The Zoom slider controls the magnification of the Throw control. So if you drag
the arrow to be as large as it can be and the object is still not moving fast enough, you
can increase the Zoom amount to give the Throw control more range.
Creating Motion With Keyframes
Behaviors provide one quick and easy way to create movement in the Canvas.
Keyframes provide another (although, not so quick). Think of behaviors as applying a
rate of change to the parameters of an object over the duration of that object. In turn,
think of keyframes as setting specific values for the parameters of an object at specific
points in time.
To animate an object using keyframes:
1 Press Home to return to the first frame of the project.
2 Enable Record (click the Record button, or press A).
Record button
The Record button pulses red.
When Record is enabled, any changes you make to the parameters of an object are
applied at the current playhead position. This is called keyframing. If you set two
different values at two different points in time, Motion animates the values of the inbetween frames.
3 Position the GreenSquares object (layer) so the rightmost box is out of the visible area
of the Canvas.
4 Press End to go to the last frame of the project.
5 Drag the GreenSquares object to the left until the leftmost square lines up with the left
edge of the Canvas.
Tutorial 1 The Motion Interface
49
Note: Pressing Shift constrains the movement to 90-degree angles.
A red path appears indicating the direction and distance that the layer travels. This is
called an animation path. You can change the shape of keyframed animation paths
using onscreen controls. When behaviors are applied to an object, a behavior
animation path appears that displays the projected path of the object. This is very
helpful in determining the effect of the behavior on the object to which it is applied.
Behavior animation paths cannot be edited onscreen.
6 Disable Record (press A).
7 Play the project (press the Space bar).
Both sets of boxes fly in opposite directions, overlapping in the middle.
Keyframe Basics
You animate an object by creating at least two keyframes for a parameter, such as
Opacity, at different points in time in a project. A keyframe is a point in time that
records any change in the value of a parameter. For example, to create an animation
in which an object is completely transparent at frame 1 and becomes completely
opaque at frame 120, you create two keyframes: an Opacity keyframe set to a value
of 0 percent at frame 1, and an Opacity keyframe set to a value of 100 percent at
frame 120. The image fades in from 0 percent to 100 percent over the 120 frames. The
smooth, fade-in transition between the two keyframed values is called interpolation.
All keyframes for a specific parameter (such as Opacity or Rotation) are positioned on
a line over time. Different values for the keyframes change the shape of that line and
create what is called an animation curve. The type of curve from keyframe to
keyframe (interpolation) can be changed to create different animation effects. For
example, keyframes set to Bezier create smooth transitions in values. Keyframes set to
Linear create straight lines between the keyframes, for sharper changes in value. You
can modify keyframes and their animation curves in the Keyframe Editor, located in
the Timing pane. For more information, see Chapter 6, “Keyframes and Curves,” in the
Motion User Manual.
50
Tutorial 1 The Motion Interface
Using Filters
Another broad category of effects available in Motion is filters. Filters modify the visual
characteristics of an object. They can be as simple as a mild blur or as complex as a
kaleidoscope effect. Filters can further be animated so the effect can change over time.
You can also apply Parameter behaviors to the parameters of filters for nearly endless
possibilities.
Filters are applied to objects in the same manner as behaviors—using the Library or
the Add Filter icon. Again, it is recommended that you use the Library as a preview tool
until you become familiar with filters in Motion.
To apply filters:
1 In the Layers tab, make sure that the GreenSquares layer is selected.
2 In the Library, click the Filters category, then select the Color Correction subcategory.
3 In the stack, select Color Balance.
A preview of color balance adjustments on an image plays and the filter description
appears in the Preview area.
Tutorial 1 The Motion Interface
51
4 Drag the Color Balance filter to the GreenSquares object in the Canvas.
The filter is applied to the object and the Color Balance Dashboard appears.
5 Drag the Midtone Blue slider to approximately .32.
The boxes turn blue.
6 Play the project (press the Space bar).
Now the blue boxes and green boxes overlap creating an attractive effect.
The Final Touch
The National Geographic logo and the two sets of squares that you added all begin at
the first frame of the project, but unlike the rest of the elements, they do not fade in.
This can easily be remedied by applying a Fade In/Fade Out behavior to the graphics
layer.
Keep in mind that you can actively play back a project while applying and modifying
filters and behaviors. In this section, apply and adjust a behavior during playback.
To apply and modify a filter during playback:
1 If the project is not playing back, click the Play button.
2 In the Layers tab, select the graphics layer.
3 In the Toolbar, click the Add Behavior icon, then choose Basic Motion > Fade In/Fade Out.
52
Tutorial 1 The Motion Interface
The Fade In/Fade Out behavior is applied to the graphics layer and its Dashboard
appears. All of the elements within the layer fade in over the first 20 frames and fade
out over the last 20 frames (by default).
4 In the Fade In/Fade Out Dashboard, drag the right edge of the fade control to the left
until the object is set to fade out over 30 frames.
Like the boxes layer, the graphics layer objects fade in over 20 frames and fade out over
30 frames.
5 Press Command+S to save the project.
What You Have Learned
In this tutorial, you have learned the following:
• You can use the Layers tab to reorder objects in your project.
• Behaviors can be turned on and off in the Layers tab.
• Transport controls let you play back and step through your project frame by frame,
as well as jump to the start or end of your project.
• You can use preset interface layouts or customize and save your own.
• Dashboards can be used to modify an object’s most frequently used parameters.
• The Inspector can be used to modify all parameters for an object.
• Four different tabs appear in the Inspector, and the fourth tab changes depending
on the object that is selected.
• You can adjust behaviors in the Dashboard or in the Inspector.
• The Timeline displays all objects in your project, including effects, organized in
time.
• The mini-Timeline lets you quickly edit the timing of an object without displaying
the Timeline.
• You can use the File Browser to locate, preview, and import media files.
• Objects in the Canvas can be modified using onscreen controls, including the
creation of drop shadows, shears, and more.
• You can choose to import multi-layered Photoshop files as flattened files or
individual layers within a group, or import a single layer independently.
• You can apply a behavior or filter to an object using the Library or the Toolbar icons.
• When the Record button is enabled, any changes you make to an object are
recorded as keyframes.
Tutorial 1 The Motion Interface
53
2
Basic Motion Behaviors
2
Behaviors are the heart of Motion. In this tutorial, learn
how to use the Basic Motion behaviors to create motion
with just a drag, drop, and a nudge—without creating
keyframes.
Behaviors automatically create motion on an image or object without creating any
keyframes. The motion can be as simple as moving an object across the screen in a
straight line, or as complex as simulated interactions between multiple objects.
Behaviors work by automatically generating a range of values for an object’s
parameters. For example, an object with an applied Spin behavior automatically rotates
the object based on the rate and direction you set.
As another example, an object with an applied Attractor behavior automatically
attracts other objects. The “other” objects can include only objects within the layer to
which the behavior is applied, only objects that you specify, or all objects in the project.
There are five different types of behaviors in Motion: Basic Motion, Simulation,
Parameter, Particle, and Text behaviors, which are among the simplest to use. This
tutorial focuses on the Basic Motion behaviors. These behaviors animate specific
parameters of the object to which they are applied. Some affect position, such as
Throw, while others affect opacity, such as Fade In/Fade Out.
You can adjust the effect of a behavior using simple, graphical controls in the
Dashboard, or dig into all controls for the behavior in the Inspector.
55
Important: This tutorial encourages you to play back your project while working.
Performance of the project varies depending on the hardware configuration of your
computer. For more information on recommended systems, see the Before You Install
Motion document on the Motion DVD or on the Motion website,
http://www.apple.com/motion.
What You Will Learn
•
•
•
•
•
•
•
How to crop imported media
Applying and modifying the Basic Motion behaviors
How to create and animate shapes
How to move and trim objects in the Timeline
A quick introduction to adding and modifying text
How to apply a Text Animation behavior
How to animate a layer containing multiple objects using a Simulation behavior
While this tutorial focuses on the use of the Basic Motion behaviors, it also covers
additional information that you should learn about building a project. Since this is
quite a chunk of information, this tutorial is divided into two exercises.
Exercise 1: Previewing the Result Tutorial and Building
the Starting Project
In the first exercise, you preview the result project or the result movie. Then, you create
a new project and set the necessary project preferences. Next, you build the basic
project by positioning the imported media and creating the shapes to be animated in
the second exercise.
Previewing the Result Motion Project
You can preview the result of this tutorial in one of two ways: Open and preview the
result project for this tutorial or view the result project preview movie.
To review the result project:
1 Once Motion is open, choose File > Open (or press Command+O).
2 In the Open dialog, navigate to /Users/Shared/Motion/Tutorial Media/Tutorial Projects.
Note: If you changed the default path during installation, you will need to open the
tutorial project and movie files from the new location. For more information, see
“Getting Started” on page 5.
3 Select Tutorial 2 Result, then click Open.
The 150-frame Tutorial 2 Result project opens and appears within the Motion interface.
This project is based on the project from the first tutorial, “The Motion Interface,” with
additional elements and behaviors.
56
Tutorial 2 Basic Motion Behaviors
4 Click the Play button (or press the Space bar) to play the project.
5 Choose File > Close (or press Command+W) to close the project.
6 In the save sheet, click Don’t Save.
To review the result project preview movie:
1 In the File Browser, navigate to the Tutorial Projects folder (default is /Users/Shared/
Motion/Tutorial Media/Tutorial Projects).
2 In the file stack, select Tutorial 2 Result.mov.
The movie plays in the Preview area of the browser.
3 In the file stack, do one of the following:
• Double-click Tutorial 2 Result.mov and play the movie in the Viewer window.
• Control-click Tutorial 2 Result.mov, then choose Open in QuickTime Player from the
shortcut menu.
4 Close the player window.
Note: When Motion cannot locate source files used by a project (for instance, if the
project source files have been moved to a different location since the project was
saved), a sheet appears that contains the message “The following items used to create
this project are missing.” For more information on locating misplaced source files, see
“Relinking Missing Media” on page 6.
Creating a New Project
Create a new NTSC project for this tutorial. Next, change its background color and
duration, then set Motion Preferences so that objects are created at the start of the
project.
m
To create a new project:
Choose File > New (or press Command+N).
If you have not defined a default project preset, the Select Project Preset dialog
appears. If a default preset has previously been defined, a new project opens. This
tutorial uses the NTSC Standard Definition format. Use the following guidelines to
create an NTSC project so that your project matches the tutorial.
Note: NTSC is the American and Japanese standard television format. PAL/SECAM is the
European television standard.
Tutorial 2 Basic Motion Behaviors
57
m
If the Select Project Preset dialog appears:
Choose NTSC Broadcast SD from the Preset pop-up menu, then click OK.
If the Select Project Preset dialog does not appear, and a new project is
automatically created:
1 Close the new project.
2 Press Command+Option+N to display the Select Project Preset dialog.
Note: The New From Preset option does not appear in the standard File menu unless
you press Option. When a default project preset is defined and you create a new
project, that project is created at the default settings.
3 In the Project Properties dialog, turn off the “Create new documents using the default
preset” checkbox.
4 Choose NTSC Broadcast SD from the Preset pop-up menu, then click OK.
A new NTSC project is created.
By default, projects are created with a black background. For this project, set the
project background to white and the project duration to 150 frames.
58
Tutorial 2 Basic Motion Behaviors
Changing the Background Color and Duration of the Project
Use the Project Properties dialog to change the background color and duration of the
project.
To change the project color and duration:
1 Choose Edit > Project Properties (Command+J).
Project Duration field
Background Color well
2 In the Project Properties dialog, click the Background Color well.
3 In the Colors window, drag the slider to set the color to white.
Drag the slider to lighten or darken
the selected color.
Note: You can also use one of the color selection modes (along the top of the Colors
window), or the color swatches (at the bottom of the window) to set the color to white.
4 Close the Colors window.
Tutorial 2 Basic Motion Behaviors
59
5 Make sure that Frames is chosen from the pop-up menu (located below the fps text).
6 Double-click in the Duration field, type 150, then click OK.
The project background is set to white and the project duration is set to 150 frames.
Project Duration field
(located below Canvas)
Note: Properties changed in the Project Properties dialog apply only to the current
project.
Setting the Project Preferences
Motion Preferences are divided into seven different sets of controls that allow you to
customize your workspace and the interface for different types of projects, define the
presets for new projects and exported movies, define the starting point for created
objects, define how time is displayed (frames or timecode), and so on.
In this section, modify the Project settings so that objects that you create, as well as
files that you import, begin at frame 1 regardless of the playhead position (the current
frame). Next, limit the playback speed to the frame rate of the project.
To set the project preferences:
1 Choose Motion > Preferences.
2 Click Project.
3 In the Time Display group, make sure that Display Time As is set to Frames.
4 In the Still Images & Objects group, make sure that Create Objects At is set to “Start of
project.”
60
Tutorial 2 Basic Motion Behaviors
5 In the Playback Control group, turn on “Limit playback speed to project frame rate.”
Create Objects At
options
Depending on your system, your playback rate may exceed 30 fps unless “Limit
playback speed to project frame rate” is turned on.
All objects are now created at the beginning of the project. For example, if the
playhead is at frame 120, and you draw a shape, the shape exists from frame 1 to the
end of the project.
Note: You can also set the background color in Motion Preferences. Unlike properties
changed in the Project Properties dialog, properties set in Motion Preferences are
persistent. This means, for example, if you set the background color in Preferences, all
new projects are created with the background color (the new color does not take effect
until the next project is opened).
m
To turn on Dynamic Guides:
In the Toolbar above the Canvas, click the View menu and make sure that Dynamic
Guides are enabled (a checkmark appears next to the name).
Tutorial 2 Basic Motion Behaviors
61
Importing the Project Files
In this section, you use different methods to import the media and graphics files
required for the project: the File Browser and the File menu. You can import files for
immediate use, or import files directly to the Media tab for later use.
Note: Files imported into Motion, as well as files created within Motion, are referred to
as “objects.”
To use the File Browser to import the dolphin clip:
1 In the File Browser, navigate to the Tutorial Media folder (default is /Users/Shared/
Motion/Tutorial Media), then double-click the National Geographic folder to view its
contents.
2 In the file stack, select dolphins.mov.
Note: To view the items in the stack as thumbnails, make sure icon view is selected in
the File Browser.
Preview area
Click to show items in
stack in icon view.
62
Tutorial 2 Basic Motion Behaviors
3 Do one of the following:
• In the Preview area of the browser, click Import.
The file is imported and placed in the middle of the Canvas.
• Drag the file from the stack to the Canvas.
4 In the Canvas, position the dolphins object in the lower-left third of the Canvas.
To use the File menu to import the second dolphin clip:
1 Choose File > Import (or press Command+I).
2 In the Import Files dialog, navigate to the Tutorial Media folder (default is /Users/Shared/
Motion/Tutorial Media), then double-click the National Geographic folder to view its
contents.
3 Select dolphin jump.mov, then click Import.
The clip appears in the Canvas.
m
To show the Project pane, do one of the following:
Click the Project icon in the right side of the Toolbar.
Project icon
m
Choose Window > Show Project Pane (or press F5).
In the Layers tab, notice that a new layer is created with the new dolphin clip. When
files are imported using the File > Import command, the files are imported as a new
layer.
Tutorial 2 Basic Motion Behaviors
63
To delete the dolphin jump object from the Layers tab:
1 In the Layers tab, select Layer 1 (the object is highlighted in blue when selected).
2 Press Delete.
The layer is removed from the Layers tab. Removing imported media from the Layers tab
does not delete the media from the project. Imported media remains in the Media tab.
3 In the Project pane, click the Media tab.
The dolphin jump.mov clip is listed in the Media tab.
The Media tab is useful for importing and storing files for later use in your project.
You can also import files directly into the Media tab. Files imported directly into the
Media tab do not appear in the Layers list (until you drag the files into the Canvas).
To import a file directly into the Media tab:
1 In the Media tab, click the Add button.
Add button
2 In the File Browser, navigate to the Tutorial Media folder (default is /Users/Shared/
Motion/Tutorial Media), then double-click the Graphics folder to view its contents.
3 Select bigCircle.psd, then click Import.
The file appears in the Media tab list. This graphics file, as well as dolphin jump.mov, is
used later in this tutorial.
64
Tutorial 2 Basic Motion Behaviors
Cropping the Dolphins Clip
There are two ways to crop objects in Motion: in the Media tab of the Inspector, or in
the Properties tab of the Inspector. When an object is cropped in the Media tab of the
Inspector, all instances of that file in the project are cropped. When an object is
cropped in the Properties tab, only that instance is cropped.
Note: Cropping media (or any other changes to media files) in the Media or Properties
tab is nondestructive to any source media used in a Motion project. This means that
the originally referenced media on your hard drive or network is not changed.
The Media tab of the Inspector contains controls for changing an object’s alpha
channel interpretation, field dominance, frame rate, the end behavior of a clip (such as
loop or repeat), and so on. It also contains a list of any objects that are linked to the
selected file, including the name of the layer in which they exist. Making changes in
this tab affects all objects that are linked (such as a duplicate of the object) to the
selected media file.
To crop the dolphins.mov object:
1 In the Media tab of the Project pane, select dolphins.mov.
2 Show the Inspector (click the Inspector tab or press Command+3), and ensure that the
Media tab is active.
3 In the Media tab, click the Crop disclosure triangle.
Tutorial 2 Basic Motion Behaviors
65
4 Set the following values:
• Set the Left value to 22.
• Set the Right value to 6.
Crop controls
The object is cropped in the Canvas.
To duplicate and position the dolphin objects:
1 In the Canvas, press Option, then drag the dolphins.mov object toward the lowercenter third of the Canvas.
An instance (duplicate) of the dolphins.mov object is created. As you position the
duplicated object, use the Dynamic Guides as an alignment tool to align the object
with the center of the Canvas.
66
Tutorial 2 Basic Motion Behaviors
2 Option-drag the duplicate of the dolphins.mov object to the lower-right third of the
Canvas.
Note: To align the edges of objects with other objects, you can also use the alignment
tools in the Object menu.
3 In the Canvas, Shift-select the three dolphins.mov objects.
4 Choose Object > Alignment > Distribute Horizontal Centers.
An equal space is created between each object.
Tutorial 2 Basic Motion Behaviors
67
5 Position the objects in the lower center of the Canvas.
The guide appears when the group of objects is centered.
6 Click the Play button (or press the Space bar) to play the project.
Optional: Media Tab Cropping vs. Properties Tab Cropping
As mentioned above, when media is cropped in the Media tab of the Inspector, all
instances of that file in the project are cropped. When cropped using the controls in
the Properties tab, only the selected file is affected. To learn the difference, review the
following optional section.
To observe cropping objects in the Media tab:
1 Click a blank area of the Canvas to deselect any objects.
2 In the Media tab of the Project pane, select dolphins.mov.
3 In the Media tab of the Inspector, adjust one of the Crop values.
All of the dolphin objects are cropped. When an object is cropped in the Media tab, the
object is recentered and shifts its position in the Canvas.
4 Press Command+Z to undo the cropping change.
To observe cropping an object in the Properties tab:
1 In the Layers tab, select one of the dolphin objects.
2 In the Properties tab of the Inspector, turn on the Crop checkbox.
68
Tutorial 2 Basic Motion Behaviors
3 Drag one of the crop sliders.
Crop controls
In the Canvas, only the selected object is affected.
Note: The cropping values set in the Media tab of the Inspector are not changed.
4 Press Command+Z to undo the cropping change.
5 Turn off the Crop checkbox.
6 Choose File > Save (or press Command+S).
7 Enter a project name in the Save As field, select a location to save the project, then click
Save.
Tutorial 2 Basic Motion Behaviors
69
Good Housekeeping
In the Layers tab, notice that the duplicated dolphin objects are given default “copy”
names. When working with motion graphics projects, it is recommended that you give
your objects descriptive names to easily identify those objects when your project
becomes more complex.
To rename the dolphins objects:
1 In the Layers tab, double-click the name of the dolphins object.
The text field becomes active.
2 Type “dolphin-left.”
3 Press Return.
4 Rename dolphins copy to “dolphin-center” and dolphins copy 1 to “dolphin-right.”
Applying a Behavior to the Dolphin Objects
In this section, you apply a Fade In/Fade Out behavior to the first dolphin object. Next,
you apply a Fade In/Fade Out behavior to the second and third dolphin objects
simultaneously.
To apply the Fade In/Fade Out behavior to the first (left) dolphin object:
1 If the project is not playing, click the Play button (or press the Space bar).
2 In the Library (click the Library tab or press Command+2), select the Behaviors
category, then select the Basic Motion subcategory.
3 In the Library stack, select the Fade In/Fade Out behavior.
As with all items in the Library, a preview of the behavior plays in the Preview area.
70
Tutorial 2 Basic Motion Behaviors
4 Drag the Fade In/Fade Out behavior to the dolphin-left object in the Canvas. When the
green add pointer (+) appears, release the mouse button.
The behavior is applied to the object, the object is automatically selected, and the Fade
In/Fade Out Dashboard appears. By default, the object fades in over the first 20 frames
and fades out over the last 20 frames.
Note: If the Dashboard is not displayed, press D.
Remember that since behaviors are always applied to the beginning of an object’s
duration, you can apply a behavior no matter where the playhead is in time.
5 In the Fade In/Fade Out Dashboard, drag the fade out control (the right side of the
control) to the right until the fade out value is set to 0.
Tutorial 2 Basic Motion Behaviors
71
To apply the Fade In/Fade Out behavior to the second and third dolphin
objects:
1 In the Canvas, select the dolphin-center object, then press Shift and select the dolphinright object.
2 In the Library, select the Fade In/Fade Out behavior in the stack.
3 In the Preview area, click the Apply button.
Click to apply the
behavior to the selected
object.
The behaviors are applied to the two selected dolphin objects.
Behaviors applied to the
two selected dolphin
objects
4 In the Layers tab, select the dolphin-center Fade In/Fade Out behavior.
5 In the dolphin-center Fade In/Fade Out Dashboard, drag the fade out control to the
right until the fade out value is set to 0.
6 Press Up Arrow two times to select the dolphin-right Fade In/Fade Out behavior in the
Layers list.
7 In the dolphin-right Fade In/Fade Out Dashboard, drag the fade out control to the right
until the fade out value is set to 0.
All dolphin objects fade in over 20 frames and do not fade out.
8 Choose File > Save (or press Command+S).
72
Tutorial 2 Basic Motion Behaviors
Offsetting the Dolphin Objects in Time
Use the mini-Timeline to offset two of the dolphin objects so that the images appear in
sequence 20 frames apart. Although in this section you use the mini-Timeline to move
the objects in time, view the Timeline in order to get a better understanding of how
behaviors and objects are connected.
Note: As you modify objects in time, you can continue to play back the project.
m
To show the Timeline, do one of the following:
Click the Timing icon in the right side of the Toolbar.
Timing icon
m
Choose Window > Show Timing Pane (or press F6).
m
Choose Window > Timeline (or press Command+7).
The Timeline appears.
The Timeline provides a global, editable view of all objects (layers, behaviors, filters, and
so on) in your project, and the position and duration of those objects in time. In the
Timeline, each object is represented by a colored bar that sits on a gray, horizontal
track. In the track area of the Timeline, you can move, trim, and slip the objects in time,
as well as modify their duration.
The left side of the Timeline contains the Layer list, which mirrors the Layers tab of the
Project pane. The Timeline Layer list can also be used in the same manner as the Layers
tab—you can change objects’ stacking order, add or remove objects, apply effects, and
so on.
In the Timeline, objects appear as blue bars and behaviors appear as purple bars.
Tutorial 2 Basic Motion Behaviors
73
To move the dolphin objects in time:
1 In the Canvas or Layers tab, select the dolphin-center object.
2 In the mini-Timeline, located between the Canvas and transport controls, drag the blue
bar to the right until the In point is set to frame 20.
As you drag, the new In and Out points are displayed, as well as the total amount of
change (the delta).
Drag the object bar in the mini-Timeline.
The center object now fades in 20 frames later than the left object. In the Timeline,
notice that the fade behavior is moved with the object.
3 Select the dolphin-right object.
4 In the mini-Timeline, drag the dolphin-right blue bar to the right until the In point is set
to frame 40.
The right object now fades in 20 frames later than the center object.
Note: As the project plays, notice that any objects with an In point beyond the
playhead in time appear dimmed in the Layers tab and Timeline Layer list. These
objects can still be modified in the Inspector or Dashboard.
Moving Behaviors in Time
When an object is moved in time, any behaviors, filters, or masks that are applied to
that object are moved as well. You can also move an effect that is applied to an object
independently of that object.
74
Tutorial 2 Basic Motion Behaviors
To move the fade behavior that is applied to the dolphin-right object:
1 In the Layers tab or Timeline Layer list, select the Fade In/Fade Out behavior that is
applied to the dolphin-right object.
2 In the mini-Timeline or Timeline, drag the Fade In/Fade Out behavior bar to the left
until the In point is approximately frame 17.
In the Canvas, notice that because the behavior is moved in front of the object to
which it is applied in time, the dolphin-right object does not fade in. This is because the
fade-in frames (1-20) of the behavior occur before the beginning of the object itself.
3 Drag the behavior bar to the right until the In point is approximately frame 51.
Since the behavior does not begin until frame 51, it has no effect on the object to
which it is applied until that frame.
Tutorial 2 Basic Motion Behaviors
75
4 Drag the bar until the In point is aligned with the dolphin-right object (frame 40).
5 Click the Timing icon (or press F6) to hide the Timeline.
Creating Shapes to Use as Graphic Elements
In this section, you create and animate the rectangular boxes that move across the
screen. First, create a new layer to house the shapes. Next, you draw the first shape and
choose a color for the shape from one of the dolphin objects. Copy the shapes to make
a total of four, and then animate the shapes using the Throw behavior.
To create a new layer for the box graphic elements:
1 In order to maintain the “good housekeeping” rule, rename Layer to “dolphins” (in the
Layers tab) and click the disclosure triangle to collapse the layer.
2 In the Layers tab, click the Add New Layer button.
Add New Layer button
A new layer is created above the dolphins layer in the list.
3 Name the new layer “boxes.”
76
Tutorial 2 Basic Motion Behaviors
In the Canvas, notice that a transform control for the new boxes layer appears with no
surrounding bounding box. This is because the layer is currently empty and has no “size.”
A layer is resolution independent—it is the size of the objects contained within it.
Creating the Shapes
First, go to a frame in which the dolphin objects are visible in order to properly position
the shapes. Next, create the shapes.
To go to a frame where all objects are visible:
1 If the project is playing, click the Play button (or press the Space bar) to stop playback.
2 In the Current Frame field, type 60, then press Return.
Current Frame field
The playhead moves to frame 60.
To draw and color the first rectangle shape:
1 In the Toolbar, select the Rectangle tool.
Rectangle tool
The pointer changes to a “+” symbol, which indicates the shape drawing mode.
Tutorial 2 Basic Motion Behaviors
77
2 Drag over the dolphin objects to create a rectangle shape.
3 When you have created the shape you want, release the mouse button.
By default, the color of a shape is white.
4 In the Shape Dashboard, click the Fill color well.
Shape Fill color well
78
Tutorial 2 Basic Motion Behaviors
5 In the Colors window, click the color picker tool.
Color picker tool
6 Click a blue color in one of the dolphin images.
Position the color picker tool over the color
you want in the Canvas, then click.
The shape becomes the color of the sampled blue.
To modify and save the sampled blue color:
1 In the Colors window, you can drag the slider to lighten or darken the selected blue. In
this example, the slider is dragged up to slightly lighten the selected color.
Tutorial 2 Basic Motion Behaviors
79
2 Click the blue color bar (to the right of the color picker tool), and drag a color swatch to
the palette at the bottom of the Colors window.
Drag a swatch from the color bar to the
bottom of the window.
Drag the slider to lighten or darken the
selected color.
Drop the swatch onto the
palette to save the color.
The blue color is added to the palette and can be quickly applied to another object, or
used in a future project.
Duplicating and Modifying the Shape
In this section, you duplicate the blue rectangle and resize the duplicated shape. Next,
you copy the two shapes to create a total of four shapes. Change the color of two of
the shapes to green, and place the objects into their final positions.
To duplicate, position, and resize the shapes:
1 In the Toolbar, select the Select/Transform tool.
2 In the Canvas, ensure the shape is selected, then choose Edit > Duplicate (or press
Command+D).
Note: You can also copy and paste objects by choosing Edit > Copy (or press
Command+C), then choosing Edit > Paste (or pressing Command+V).
A duplicate shape is pasted directly over the first shape, and the “Rectangle copy”
object appears in the Layers tab.
80
Tutorial 2 Basic Motion Behaviors
3 Position the duplicated shape to the right at the bottom edge of the dolphin objects.
4 In the Toolbar, choose 200% from the Zoom Level pop-up menu.
Use the Zoom Level pop-up menu to
choose the Canvas zoom amount.
To quickly pan the Canvas to reposition the image, hold down the Space bar and click
the Canvas. When the pointer changes to the Pan tool, drag in the Canvas to reposition
the image.
Note: You can also select the Pan tool in the Toolbar.
5 With the Select/Transform tool, click the upper-center handle of the rectangle and
move it downward slightly (toward the anchor point of the object) to make the shape
“thinner” than the original shape.
Note: To temporarily disable the Dynamic Guides/snapping as you resize the object,
press Command. To resize the object from the upper and lower sides simultaneously,
press Option.
As you drag the handle, the amount of change is displayed at the pointer.
6 Set the Canvas zoom level back to 100 percent.
Tutorial 2 Basic Motion Behaviors
81
To duplicate the two shapes and change their color:
1 Select both of the shapes, press Option, then drag the objects in the Canvas.
2 In the Shape Dashboard, click the Fill color well.
3 In the Colors window, click the color picker tool, then click a green color in one of the
dolphin images.
4 Adjust the brightness of the color as necessary.
5 Save the green swatch in the Colors window palette.
6 Close the Colors window.
7 Use the following image as a guide to position and size the rectangles.
Note: To constrain the movement of an object, press Shift while dragging the object in
the Canvas.
You can use the onscreen controls to resize the shapes, or you can use the Properties
tab of the Inspector to change the scale of the shapes.
To resize a shape in the Inspector:
1 Select one of the shapes.
2 In the Inspector, click the Properties tab.
82
Tutorial 2 Basic Motion Behaviors
In the Scale parameter, a dot appears on the slider control. This indicates that a
nonproportional scale has been applied. Changing the size of the object by dragging
this slider scales the object in proportion.
A dot on the Scale slider
indicates a
nonproportional scale.
3 Click the Scale disclosure triangle.
The X and Y Scale parameters appear as individual controls.
4 While watching the shape in the Canvas, drag the X slider to scale the shape
horizontally, or drag the Y slider to scale the shape vertically.
Tutorial 2 Basic Motion Behaviors
83
5 Finish off this section with the housekeeping rule. In the Layers tab, rename the objects
using the following image as a guide.
Note: If necessary, reposition the objects in the Layers list to reflect the correct order.
6 Choose File > Save (or press Command+S).
Exercise 2: Applying Behaviors
In the first exercise, you set up the main body of the project. In this exercise, you apply
and modify Throw behaviors for each shape object (created in the first exercise) so that
the shapes move toward each other in the Canvas while the project plays back. Next,
you learn the difference between applying behaviors to individual objects and
applying behaviors to layers. In the last sections, you are introduced to creating text in
Motion and applying behaviors to text objects. Finally, you bring in additional graphics
elements and animate those elements using more behaviors.
To apply the Throw behavior to the first shape object:
1 Click the Play button (or press the Space bar).
2 In the Library, select the Behaviors category, then select the Basic Motion subcategory.
3 From the Library stack, drag the Throw behavior to the upper green box object in the
Layers tab.
84
Tutorial 2 Basic Motion Behaviors
4 Just as you would when dragging behaviors to objects in the Canvas, release the
mouse button when the add pointer (+) appears.
The Throw Dashboard appears.
5 Click the center of the throw control, then drag in different directions.
Notice that the direction of the arrow dictates the direction in which the shape travels.
Note: The Zoom slider in the Dashboard is used to zoom in or out once the control is
dragged to the limit, so you can drag again.
Tutorial 2 Basic Motion Behaviors
85
When the mouse button is released, a thin red line appears that extends from the
anchor point of the object. This line is called the behavior motion path, and displays
the projected path for the object. The motion path is very useful, because it helps you
see what kind of movement a behavior creates for the object to which it is applied.
A behavior motion path is not the same as an animation path created with keyframes,
and cannot be modified onscreen. Behavior motion paths are modified when you
adjust the parameters of the behavior, or when you apply other behaviors to the
behavior.
Note: You can enable and disable the animation path display in the View pop-up
menu.
6 Press Shift to constrain the arrow control to 45-degree increments, and position the
arrow so that it points to the left.
To apply a Throw behavior to the remaining shapes:
1 In the Layers tab, click between the thumbnail and the shape icon/name of upper blue
box, and drag downward to the lower blue box.
The three shapes are selected.
86
Tutorial 2 Basic Motion Behaviors
2 In the Toolbar, click the Add Behavior icon and choose Basic Motion > Throw.
Click to add a behavior to
a selected object.
The Throw is applied to the three selected objects.
3 Adjust each Throw behavior so that the upper green box and lower blue box move
toward the left, and the upper blue box and lower green box move toward the right.
Approximate position of shapes at
frame 1
Approximate position of shapes at
frame 75
Approximate position of shapes at
frame 150
Note: You can select the Throw behaviors in the Layers tab, or use the Up Arrow and
Down Arrow keys to move the selection up and down in the Layers list.
Controlling Basic Motion Behaviors in the Timeline
You can use the Timeline to control the effects of certain behaviors. The type of control
you have depends on the type of behavior with which you are working. For example,
you can control the start and stop points of most Basic Motion behaviors by trimming
or moving them in the Timeline.
To stop the Throw effect in the Timeline:
1 If the project is not playing, click the Play button.
2 In the Toolbar, click the Timing icon to show the Timeline.
Since the duration of the Throw behavior is the length of the object to which it is
applied, trim the Throw behavior bar to stop the Throw before the end of the object
(earlier in time).
Note: With the exception of most of the Text Sequence behaviors, the duration of a
behavior defaults to the same duration of the object to which it is applied. All
behaviors are applied at the start of the object.
Tutorial 2 Basic Motion Behaviors
87
3 In the Timeline, click the right end of the Throw behavior that is applied to the upper
green box object and drag the bar until the Out point is approximately frame 60.
The upper green box object stops moving at frame 60.
Modifying an object in the Timeline in this way is called trimming. When an object is
trimmed, the duration of the object is changed, without affecting its location in the
track or its content. Trimming an object is equivalent to setting new In or Out points.
4 Choose Edit > Undo Trim (or press Command+Z) to undo the trim.
Important: There are cases in which trimming the duration of a behavior in the
Timeline may not yield the desired result, such as the Grow/Shrink behavior. In such
cases, use the End Offset behavior parameter. For more information, see “Offsetting
Behaviors” on page 100.
Applying a Behavior to a Layer
The shapes move toward each other on the edges of the dolphin objects. Notice that the
dolphins fade in nicely over time, but the shapes are apparent from the first frame. To
put the finishing touch on the shapes, apply a Fade In/Fade Out behavior to the shapes.
Earlier in this tutorial, you applied behaviors to individual objects. Behaviors can also be
applied to a layer itself, affecting all objects within that layer.
Note: Filters can also be applied to individual objects or to layers. Often, it is more
efficient (in terms of processing speed) to apply a filter to a layer than to several objects
within the layer.
Important: Behaviors are applied to layers in the same manner as they are applied to
objects. This example lists all options for applying a behavior to a layer or object.
88
Tutorial 2 Basic Motion Behaviors
m
To apply the Fade In/Fade Out behavior to the boxes layer, do one of the
following:
From the Library, drag the Fade In/Fade Out behavior to the boxes layer in the Layers
tab or in the Timeline Layer list.
Like individual objects, you can drag a behavior to a
layer in the Layers list.
m
In the Layers tab or Timeline Layer list, select the boxes layer, then click the Add
Behavior icon in the Toolbar and choose Basic Motion > Fade In/Fade Out.
m
In the Layers tab or Timeline, select the boxes layer, select the Fade In/Fade Out
behavior from the Library, then click Apply in the Preview area.
You can also drag behaviors to a layer or individual
object in the Timeline Layer list.
m
In the Layers tab or Timeline, select the boxes layer, then drag the Fade In/Fade Out
behavior from the Library to the selected layer in the Canvas.
Tutorial 2 Basic Motion Behaviors
89
Important: When you want to apply a behavior to a layer or group of objects in the
Canvas, make sure that an individual object is not selected. In this example, as you drag
the behavior over the Canvas, notice that a gray box appears around individual objects
as you pass over them. If you drop the behavior on one of these selections, the
behavior is only applied to that single object, and not the layer itself.
m
To modify the Fade In/Fade Out behavior:
In the Fade In/Fade Out Dashboard, drag the fade out control (the right side of the
control) to the left until the fade out value is set to 30.
The rectangles fade out over the last 30 frames of the project.
Creating the Dolphin Titles
This section provides a quick introduction to working with text in Motion. When text is
created, it becomes a text object. Like all other objects in Motion, text objects can be
moved, rotated, scaled, and easily animated using the Basic Motion, Parameter, or
Simulation behaviors.
Text, however, has its own special set of text behaviors. The Text Animation and Text
Sequence behaviors create text animation by generating a range of values in the text
parameters specific to titling effects.
In the following example, create a new layer to house the titles. Next, create two text
objects and apply the Text Tracking behavior to one of the text objects. After the “titles”
are created, import a premade text object and apply the Spin and Grow/Shrink
behaviors to the object.
Note: For more information on using text and the text sequence behaviors, see
Tutorial 3: Working With Text. You can download the tutorial from
http://www.apple.com/motion/download.
To create a new layer for the title elements:
1 In the Layers tab, collapse the boxes layer (click the disclosure triangle).
2 Click the Add Layer button.
3 Name the new layer “titles.”
90
Tutorial 2 Basic Motion Behaviors
To add the first title:
1 With the titles layer selected, click the Text tool (or press T) in the Toolbar.
2 Click the middle of the Canvas. Since the default text color is white, be sure to click over
the dolphin image so you can see the text you create.
A blank text object is added to the Layers list, and the insertion point flashes in the
Canvas.
3 Type “dolphin,” then press Esc (Escape).
Once you press Esc, which is the equivalent of choosing the Select/Transform tool, the
text is selected as an object. The name of the text object in the Layers tab is updated to
reflect the actual text. By default, new text objects are white.
To modify the “dolphin” title:
1 In the Text Dashboard, click the color well.
2 In the Colors window, click the blue color swatch you saved earlier.
Click the blue color swatch to
color the text.
The title turns blue.
Tutorial 2 Basic Motion Behaviors
91
3 In the Text Dashboard, choose Center from the Alignment pop-up menu.
The position of the text object changes around its anchor point.
Like most Dashboards, the Text Dashboard contains a subset of the larger group of text
parameters. This is especially true for text, since text has such a large number of
parameters—so many, in fact, that the Text Inspector is divided into three panes of
controls.
4 In the Inspector, click the Text tab and make sure the Format pane is active.
The Format pane contains text basics, such as the font, size, and tracking parameters.
5 While watching the Inspector, drag the Size slider in the Text Dashboard.
The changes in the Dashboard are mirrored in the Inspector. Notice in the Dashboard
that it may be difficult to set the text to the exact point size you want, such as 50.
92
Tutorial 2 Basic Motion Behaviors
6 In the Inspector, double-click the Size value field, type 50, then press Return.
Size value field
Tracking value field
7 In the Dashboard or Inspector, set the Tracking value to 20.
Tutorial 2 Basic Motion Behaviors
93
m
To position the “dolphin” title:
Using the Dynamic Guides in the Canvas, center the dolphins text object in the
approximate upper third of the screen.
To add and modify the second title:
1 In the Toolbar, click the Text tool (or press T).
2 Click the Canvas, then type “[the aquatic acrobat]” and press Esc.
Note: To quickly enter text editing mode once the text is selected as an object, doubleclick the text object.
3 In the Dashboard, do the following:
a
b
c
d
e
Click the color well.
In the Colors window, click the saved blue color swatch.
Set Alignment to Center.
Set Opacity to 80 percent.
Set the text Size to 28.
4 Close the Colors window.
5 In the Toolbar, select the Select/Transform tool.
94
Tutorial 2 Basic Motion Behaviors
6 Using the guides in the Canvas, center the aquatic acrobat text object below the
dolphin text object.
Tip: Any effect that you modify in Motion, such as a behavior, combination of
behaviors, filter, generator, text style, and so on, can be saved to the Library for later
use. (You will save two modified behaviors later in this tutorial.) Objects and layers can
also be saved. For example, you can simply drag the aquatic acrobat text object from
the Layers tab to a location of your preference in the File Browser or Library. The object
is saved with its name (from the Layers tab) and the file appears with the Motion icon.
The object can be dragged into any project. Once the object is added to a project, it
can be modified just like it was created in that project.
Applying a Text Animation Behavior
For the dolphin text object, you set a static Tracking value in the Dashboard or
Inspector. For this text object, create a Tracking animation without creating keyframes
by applying the Text Tracking behavior. Text behaviors are applied to text objects in the
same manner as all other behaviors.
To apply the Text Tracking behavior:
1 In the Library, select the Behaviors category and the Text Animation subcategory.
2 Drag the Text Tracking behavior to the aquatic acrobat text object.
3 If the project is not playing, click the Play button (or press the Space bar).
By default, a tracking rate of 2 is applied to the text. This means that the tracking value
(the uniform space between each text character) animates at 2 pixels per second.
Tutorial 2 Basic Motion Behaviors
95
In the Format pane of the Text Inspector, notice the small behavior icon in the Tracking
parameter row. This indicates that an applied behavior affects that parameter. As the
project plays, the Tracking slider and value update.
Behavior icon indicates that an
applied behavior is affecting
this parameter.
4 In the Tracking Dashboard, set the Rate to approximately 3.
Note: As previously mentioned, you can enter specific parameter values in the
Inspector fields when necessary. In this example, you can enter a specific value in the
Rate value field of the Behaviors tab of the Inspector.
Rate value field
Adding a Text Graphic Element to the Project
In this section, you add a circular text graphic to the project. Next, you apply the Spin
and Throw behaviors to animate the text graphic.
96
Tutorial 2 Basic Motion Behaviors
Add the text graphic:
1 In the File Browser, navigate to the Tutorial Media folder (default is /Users/Shared/
Motion/Tutorial Media), then double-click the Graphics folder to view its contents.
2 An object named circleText.psd appears in the Graphics folder.
3 Drag the circleText.psd file to the Layers tab, and position the object below the dolphin
text object in the list.
Tutorial 2 Basic Motion Behaviors
97
4 Using the following image as a guide, position the circleText object in the lower-right
corner of the Canvas.
You can create text on a path in Motion. For more information on using text, see
Tutorial 3: Working With Text.
To apply the Spin and Grow/Shrink behaviors:
1 In the Library, select the Behaviors category and the Basic Motion subcategory.
2 In the stack, Command-click the Spin and Grow/Shrink behaviors.
98
Tutorial 2 Basic Motion Behaviors
3 Drag the behaviors to the circleText object in the Canvas or Layers tab.
Both behaviors are applied to the circleText object.
4 Choose File > Save (or press Command+S).
To modify the Spin behavior:
1 If the project is not already playing, play the project.
2 In the Layers tab, select the Spin behavior.
3 In the Spin Dashboard, click the top center area of the spin control, and drag
counterclockwise.
Tutorial 2 Basic Motion Behaviors
99
The further you drag the arrow around the circle, the faster the spin. You can “spin the
dial” multiple times as well. Use the above image as a guide to set the speed of the
spin for this tutorial.
To modify the Grow/Shrink behavior:
1 In the Layers tab, select the Grow/Shrink behavior.
2 In the Grow/Shrink Dashboard, click the edge of the box and drag inward very slightly
(so the Scale Rate in the Inspector is no less than -5).
The object spins and shrinks over time.
In the Grow/Shrink Dashboard, dragging inward shrinks the object over time, dragging
outward grows the object over time. To grow or shrink the object on a single axis, drag
the small white control points inward or outward.
Offsetting Behaviors
Earlier in this tutorial you stopped the effect of the Throw behavior by trimming it in
the Timeline. It was mentioned that there are cases where this may yield undesirable
effects. The Grow/Shrink behavior is a good example of one of those cases.
To offset the Grow/Shrink behavior:
1 Show the Timeline (click the Timing icon or press Command+7).
100
Tutorial 2 Basic Motion Behaviors
2 In the Timeline, click the right end of the Grow/Shrink behavior and trim it to
approximately frame 100.
3 If the project is not playing back, click the Play button (or press the Space bar).
Notice that during playback, when the playhead reaches the end of the behavior’s bar,
the circleText object jumps back to its original size.
4 Choose Edit > Undo Trim (or press Command+Z) to undo the change, or drag the end
of the bar back to frame 150.
5 Hide the Timing pane (click the Timing icon or press Command+7).
So, what do you do if you want to end the effect of the behavior prior to the end of the
object to which it’s applied? You use the End Offset parameter in the Inspector.
6 Show the Behaviors tab of the Inspector.
Notice that the Grow/Shrink behavior controls contain a parameter called End Offset.
This parameter allows you to specify the number of frames that the effect of the
behavior is offset from the end of the object to which it’s applied. If you set an End
Offset value of 50 here, for example, the “shrinking” stops at frame 100, or 50 frames
prior to the end of the object.
Many behaviors contain Start Offset and End Offset parameters. The Start Offset
parameter works in the same way as the End Offset parameter, but affects where the
behavior begins.
Note: There is no visual indication in the Timeline for the End Offset value.
Tutorial 2 Basic Motion Behaviors
101
7 Set the End Offset to 45.
End Offset
When the playhead reaches frame 105 (45 frames from the end of the object), the
object stops shrinking, but remains at the correct size.
Saving Custom Behaviors
As mentioned earlier, a very powerful feature is the ability to save nearly anything to
the Library for later use, such as customized behaviors, filters, generators, particle
emitters, and so on. In this section, save the behaviors applied to the circleText object as
a custom behavior. Although you can save the behaviors in any Library category, this
example uses the Favorites category.
To save a custom behavior:
1 In the Library, select the Favorites category.
2 In the Layers tab, Shift-select the Spin and Grow/Shrink behaviors.
3 Drag the behaviors to the Library stack and hold the mouse button down.
102
Tutorial 2 Basic Motion Behaviors
4 When the drop menu appears, position the pointer over the “All in one file” option and
release the mouse button.
The behaviors are saved as a single file. The custom icon appears on the saved behavior.
5 To name the file, do one of the following:
• Control-click the icon, choose Rename from the shortcut menu, then type a
descriptive name.
• Select the icon, click “Untitled,” then type a descriptive name.
Note: When you Control-click the icon, the Edit Description option is available. This is
a handy tool that allows you to enter custom notes about an item saved in the
Library. Once you choose Edit Description, enter your notes in the text field and click
OK.
Tutorial 2 Basic Motion Behaviors
103
Fading in the Titles
As a final touch for the titles objects, apply a Fade In/Fade Out behavior to the layer. You
can duplicate an existing behavior in the project and apply it to the titles layer. In this
example, the titles should fade in over the first 20 frames of the project and not fade out.
Since the Fade In/Fade Out behavior for the boxes layer is set to fade out over 30 frames
and the Fade In/Fade Out behaviors for the dolphin objects do not fade out, use a
behavior applied to one of the dolphin objects as the source behavior for the titles layer.
To apply a duplicate Fade In/Fade Out behavior to the titles:
1 In the Layers tab, expand the dolphins layer and the dolphin-right object.
2 Press Option and drag the Fade In/Fade Out behavior (from the dolphin-right object) to
the titles layer.
When the behavior is duplicated from the dolphin-right object and applied to the titles
layer, it is applied at the start of the titles layer object even though the dolphin-right
object’s In point is frame 40.
Like the dolphin objects, the titles fade in for 20 frames and do not fade out.
3 In the Layers tab, collapse the titles and dolphins layers.
104
Tutorial 2 Basic Motion Behaviors
Adding and Animating Graphic Elements
In this section, you add a new layer to house more graphics elements. Drag the
bigCircle.psd file you imported earlier (into the Media tab) to the Canvas to add it to the
new layer of the project. Modify the object and apply a Spin behavior. Next, you import
a layered Photoshop file and apply a Simulation behavior to the layer (created by
importing the layered file).
To create a new layer:
1 In the Layers tab, click the Add New Layer button.
2 Name the new layer “graphics.”
To drag an object into the new layer from the Media tab:
1 Click the Media tab.
The Media tab contains the dolphin clip and graphic that you imported earlier. Notice
that the text title objects and shapes do not appear in the Media tab. This is because
objects created within Motion do not appear in the Media tab. Only imported still
images, image sequences, movies, and audio files appear in the Media tab.
2 Drag the bigCircle.psd object to the Canvas. Use the following image as a guide for
placement of the object.
Tutorial 2 Basic Motion Behaviors
105
3 In the bigCircle Dashboard, drag the Opacity slider to 40 percent.
To apply a behavior to the circle:
1 With the bigCircle object selected, click the Add Behavior icon in the Toolbar and
choose the Spin behavior from the Basic Motion submenu.
2 Use the Spin Dashboard to rotate the object in a clockwise direction.
The bigCircle and circleText objects rotate in opposite directions.
To import the additional graphic elements:
1 In the File Browser, navigate to the Tutorial Media folder (default is /Users/Shared/
Motion/Tutorial Media), then double-click the Graphics folder to view its contents.
2 Drag the GreenSquares.psd file to the graphics layer in the Layers tab, and hold the
mouse button down over the layer.
The pointer becomes an arrow with a transparent thumbnail of the image. Since the
file is a layered Photoshop file, the import options appear in the drop menu.
106
Tutorial 2 Basic Motion Behaviors
3 Position the arrow/thumbnail pointer over Import All Layers, then release the mouse
button.
The objects are added as a layer (containing each Photoshop layer) called GreenSquares
in the graphics layer. Just like any other layer in Motion, each object can be individually
modified, or the layer itself can be modified, affecting all objects within the layer.
Tutorial 2 Basic Motion Behaviors
107
4 In the File Browser, navigate to the Tutorial Media folder (default is /Users/Shared/
Motion/Tutorial Media), then double-click the National Geographic folder to view its
contents.
You can click the back arrow in the browser to quickly move back to the previous level.
Click to move back to the previous level.
5 Drag the NatGeoLogo.psd file to the graphics layer in the Layers tab.
The GreenSquares layer and the NatGeoLogo object appear in the center of the Canvas.
6 In the Layers tab, turn off the activation checkbox for the NatGeoLogo object.
The activation checkbox controls the visibility of the object. Objects that are turned off
are not exported in the final project.
Animating the Squares
In this section, you animate the squares so that the center square stays in place while
the adjacent squares move away from the center square. Although this is a tutorial
about the Basic Motion behaviors, this section takes a Simulation behavior for a test
drive to quickly accomplish this task.
Some Simulation behaviors, such as Gravity, animate the parameters of an object in a
way that simulates a real-world phenomenon. Other Simulation behaviors, such as
Attractor and Repel, affect the parameters of one or more objects surrounding the
object to which they are applied. These behaviors allow you to create some very
sophisticated interactions among multiple objects in your project with minimal
effort—and the best part—no keyframing.
108
Tutorial 2 Basic Motion Behaviors
To position and animate the squares:
1 In the Layers tab, select the GreenSquares layer.
2 In the Canvas, center the GreenSquares layer over the dolphin title.
3 To deselect the GreenSquares layer, press Shift+Command+A.
4 In the Library, select the Behaviors category, then select the Simulations subcategory.
5 In the stack, select the Repel behavior.
Like all behaviors, a preview of the animation plays in the Preview area.
6 Drag the Repel behavior to the middle square of the GreenSquares layer in the Canvas.
7 While holding the mouse button down, position and hold the pointer over the center
square (the dark green object). When the square’s outline becomes highlighted, release
the mouse button.
The Repel behavior is applied to the center square, and the surrounding squares move
rapidly away. By default, the Affect parameter is set to Related Objects. When Related
Objects is selected, all objects that exist in the same layer as the object to which the
Repel behavior is applied move away from that object.
Tutorial 2 Basic Motion Behaviors
109
Note: If the layer is selected (with the bounding box active) in step 7, the behavior is
applied to the layer, not to an individual object.
To adjust the Repel parameters:
1 In the Repel Dashboard, choose All Objects from the Affect pop-up menu.
All objects in the project are repelled from the object. This is not the desired effect.
When the Affect parameter is set to Specific Objects, a list appears in the Behaviors tab
of the Inspector to which you can drag individual objects that you want to be affected
by the behavior. These options in the Simulation behaviors provide a powerful way to
create complex interactions between objects.
2 Set the Affect parameter back to Related Objects.
3 Lower the Strength parameter to approximately 3.
The Strength parameter defines the speed at which the repelled squares move away
from the center square (the repelling object), so the squares move less rapidly away
from the center square. However, the squares still move off the screen too early.
4 Go to the end of the project (if the project is playing, press End two times), and adjust
the Drag parameter (in the Dashboard) until the squares are just off the screen.
The Drag parameter reduces the distance that the repelled squares travel away from
the center square.
110
Tutorial 2 Basic Motion Behaviors
Fading Out the Center Square
To put the finishing touch on the center square, modify a Fade In/Fade Out behavior so
that the object fades out as the other squares move away.
To apply and modify the Fade In/Fade Out behavior:
1 In the Layers tab, select the dark green object.
2 In the Toolbar, click the Add Behavior icon, then choose the Fade In/Fade Out behavior
from the Basic Motion submenu.
3 In the Dashboard, drag the fade in control (the left side of the control) to the left until
the fade in value is set to 0.
The center square fades out over the last 20 frames.
4 In the Layers tab, collapse the GreenSquares layer and the bigCircle object.
Animating the Logo
In this section, you use the Motion Path behavior to quickly animate the National
Geographic logo to drop into position.
The Motion Path behavior lets you create a motion path for an object to follow. The
default motion path is a straight line that contains two points. The first point is the
position of the object in the Canvas at the first frame of the behavior, and the second
point is the position of the object at the last frame.
To position and animate the logo:
1 Go to frame 1 (press Home).
2 In the Layers tab, turn on the NatGeoLogo object.
3 In the Canvas, position the logo in the upper-right corner of the project.
4 In the Toolbar, click the Add Behavior icon, then choose the Motion Path behavior from
the Basic Motion submenu.
Tutorial 2 Basic Motion Behaviors
111
The default motion path is applied to the object.
In the Canvas, click the second point (the right point) and drag it down to the lowerright corner of the screen.
5 Play the project (or press the Space bar).
The logo travels down the motion path.
Modifying Motion Path Behaviors
You can reshape the motion path by adding Bezier control points to the path to create
curves.
To modify the path:
1 Double-click or Option-click anywhere on the path.
If you are using the double-click method, you can add a point when the tool changes
to an arrow (Adjust Item tool). If you are using the Option-click method, you can add a
point when the tool changes to a pen with a “+” symbol.
112
Tutorial 2 Basic Motion Behaviors
2 Drag the control point to a new position.
3 Drag the tangent handles to further adjust the shape of the curve.
The logo follows the shape of the modified path.
4 Press Command+Z until you return to the path created in step 4 of the previous
section.
Note: To move an object more quickly along a motion path, you can shorten the
duration of the Motion Path behavior in the Timeline. The shape of the path is not
affected; the object completes its movement from the first point to the last point on
the path over the duration of the behavior.
Tutorial 2 Basic Motion Behaviors
113
Fading in the Logo
As a finishing touch on the logo object, fade in the logo over time.
To apply and modify the logo fade in:
1 Make sure the NatGeoLogo object is selected.
2 In the Toolbar, click the Add Behavior icon, then choose the Fade In/Fade Out behavior
from the Basic Motion submenu.
3 In the Fade In/Fade Out Dashboard, set the logo to fade in over 30 frames and to not
fade out.
4 In the Behaviors tab of the Inspector, set the Start Offset value to 90.
The fade in effect does not begin until frame 90. Since the fade in is set to 30 frames,
the logo is fully opaque by frame 120.
To reorder the graphics layer:
1 In the Layers tab, collapse the graphics layer.
2 Drag the graphics layer below the dolphins layer.
Remember to position the pointer slightly to the left to get the add pointer (the green
“+”) in addition to the position indicator. If you drop the layer here without the add
pointer, the layer is added to the dolphins layer.
The logo and circle object are placed behind the dolphin, title, and box objects.
114
Tutorial 2 Basic Motion Behaviors
Optional: Adding a Second Dolphin Clip
As a final optional step, you can add the second dolphin clip to the project and—you
guessed it—fade the clip! Once the new clip is imported, change the color and blend
mode of the circleText object.
To add the dolphin jump clip from the Media tab:
1 In the Layers tab, select the graphics layer.
2 Click the Media tab.
3 Drag the dolphin jump object to the center of the Canvas.
4 By default, the object is added above the other objects within the graphics layer.
5 In the Layers tab, move the dolphin jump object to the bottom of the graphics layer.
The dolphin jump object is the bottommost object in the project.
To apply and modify the fade in:
1 Make sure the dolphin jump object is selected.
2 In the Toolbar, click the Add Behavior icon, then choose the Fade In/Fade Out behavior
from the Basic Motion submenu.
3 In the Fade In/Fade Out Dashboard, set the logo to fade in over 30 frames and to fade
out over 30 frames.
4 In the Behavior tab of the Inspector, set the Start Offset value to 20.
The dolphin jump object fades in from 0 to 100 percent from frame 20 to frame 50, and
fades out over the last 30 frames.
Tutorial 2 Basic Motion Behaviors
115
Changing the Color and Blend Mode of the Circle Text
You can quickly change the blend mode of an object. In this last step, modify the blend
mode of the circle text graphic.
Note: There are at least seven ways to change the blend mode of an object.
To change the blend mode of the object:
1 In the Layers tab, collapse the graphics layer and expand the titles layer.
2 Select the circleText object.
3 In the Dashboard, choose Color Dodge from the Blend Mode pop-up menu.
4 Choose File > Save (or press Command+S).
116
Tutorial 2 Basic Motion Behaviors
What You Have Learned
• When a default project preset is defined, you can press Command+Option+N to
force the File > New From Preset command.
• Cropping a media file in the Media tab and cropping a media file in the Properties
•
•
•
•
•
•
•
•
tab are not the same thing. An object that is cropped in the Media tab crops all
instances of that file in the project. A file that is cropped in the Properties tab crops
only that object.
Since behaviors are always applied to the beginning of an object’s duration, you
can apply a behavior no matter where the playhead is in time.
You can drag a behavior to a non-selected object in the Canvas, Layers tab, or
Timeline. To apply a behavior using the Add Behavior icon or the Apply button in
the Library Preview area, you must first select an object.
An effect that is applied to an object can be moved independently of that object in
the Timeline.
You can save color swatches in the Colors window.
Modifying the duration of a behavior in the Timeline changes the effect of the
behavior. The type of effect depends on the type of behavior with which you are
working. For example, to stop the effect of a Throw behavior prior to the end of the
duration of the object to which it is applied, you can trim the behavior in the
Timeline to set a new Out point. To stop the effect of a Fade In/Fade Out or Grow/
Shrink behavior, however, use the Offset parameters in the Inspector rather than
trimming the behavior in the Timeline.
Behaviors can be applied to individual objects, or to a layer itself. When a behavior
is applied to a layer, all objects within that layer are affected.
You can save modified behaviors to the Library as your own custom behaviors.
A layer is resolution independent—it is the size of the objects contained within it.
Tutorial 2 Basic Motion Behaviors
117
3
Working With Text
3
Text is the mainstay of motion graphics. Motion gives you
the ability to create a multitude of dazzling text effects.
Text is an important part of most motion graphics projects, and Motion gives you full
control over text in your project. You can add text, change text properties, add filters
and behaviors to text, and create text sequences, which let you animate multiple text
parameters simultaneously.
This tutorial assumes basic knowledge of the Motion interface. You are encouraged to
complete Tutorials 1 and 2 before beginning this one.
This tutorial describes how to add text to your project, edit text properties, apply
different behaviors to text, and create custom text sequences.
What You Will Learn
•
•
•
•
•
Adding a text object to a layer
Masking and positioning a text object
Changing font, size, and other text properties using the Dashboard and Inspector
Applying behaviors to text objects, and adjusting behavior parameters
Applying text sequences, adding parameters, and adjusting parameters
Previewing the Result Motion Projects
You can preview the results for the two exercises in this tutorial in one of two
ways: Open and preview the result project for each exercise or view the result project
preview movies.
To review the result projects:
1 Once Motion is open, choose File > Open (or press Command+O).
2 In the Open dialog, navigate to /Users/Shared/Motion/Tutorial Media/Tutorial Projects.
Note: If you changed the default path during installation, you will need to open the
tutorial project and movie files from the new location. For more information, see
“Getting Started” on page 5.
119
3 Select Tutorial 3 Exercise 1 Result or Tutorial 3 Exercise 2 Result, then click Open.
The selected result project opens and appears within the Motion interface.
4 Click the Play button (or press the Space bar) to play the project.
5 Choose File > Close (or press Command+W) to close the project.
Important: If you made any changes to the project, Motion prompts you to save. Click
Don’t Save.
To review the result project preview movie:
1 In the File Browser, navigate to the Tutorial Projects folder (default is /Users/Shared/
Motion/Tutorial Media/Tutorial Projects).
2 In the file stack, select Tutorial 3 Exercise 1 Result.mov or Tutorial 3 Exercise 2 Result.mov.
The selected movie plays in the Preview area of the browser.
3 In the file stack, do one of the following:
• Control-click Tutorial 3 Exercise 1 Result.mov or Tutorial 3 Exercise 2 Result.mov, choose
Open in QuickTime Player from the shortcut menu, then play the movie.
• Double-click Tutorial 3 Exercise 1 Result.mov or Tutorial 3 Exercise 2 Result.mov and play
the movie in the Viewer.
4 Close the player window.
Note: When Motion cannot locate source files used by a project (for instance, if the
project source files have been moved to a different location since the project was
saved), a sheet appears that contains the message “The following items used to create
this project are missing.” For more information on locating misplaced source files, see
“Relinking Missing Media” on page 6.
Creating a New Project
Create a new NTSC project for this tutorial. Next, change its background color and
duration, then set Motion Preferences so that objects are created at the start of the
project.
m
To create a new project:
Choose File > New (or press Command+N).
If you have not defined a default project preset, the Select Project Preset dialog
appears. If a default preset has previously been defined, a new project opens. This
tutorial uses the NTSC Standard Definition format. Use the following guidelines to
create an NTSC project so that your project matches the tutorial.
Note: NTSC is the American and Japanese standard television format. PAL/SECAM is the
European television standard.
120
Tutorial 3 Working With Text
m
If the Select Project Preset dialog appears:
Choose NTSC Broadcast SD from the Preset pop-up menu, then click OK.
If the Select Project Preset dialog does not appear, and a new project is
automatically created:
1 Close the new project.
2 Press Command+Option+N to display the Select Project Preset dialog.
Note: The New From Preset option does not appear in the standard File menu unless
you press Option. When a default project preset is defined and you create a new
project, that project is created at the default settings.
3 Turn off the “Create new documents using the default preset” checkbox.
4 Choose NTSC Broadcast SD from the Preset pop-up menu, then click OK.
A new NTSC project is created.
By default, projects are created with a black background. For this project, set the
project background to white and the project duration to 150 frames for Exercise 1.
Exercise 1: Using Text
In this exercise, you add several text objects to a new project, change text properties
using the Dashboard and Inspector, apply several behaviors to the text objects, and
adjust parameters for the behaviors.
Importing a Movie File
Before you add text to the tutorial project, you import a QuickTime movie file, mask it,
and reposition it in the Canvas.
You import movies, still images, and other objects by dragging them from either the
File Browser or the Finder into the Canvas. You can also drag objects into the Layers or
Media tab of the Project pane to import them.
Tutorial 3 Working With Text
121
To import a movie:
1 In the File Browser, navigate to the Tutorial Media folder (default is /Users/Shared/
Motion/Tutorial Media), then double-click the National Geographic folder to view its
contents.
2 Click the sunset.mov file.
3 In the Preview area, click Import.
The movie appears centered in the Canvas.
To mask the movie:
1 Make sure the “sunset.mov” object is selected in the Canvas.
Selected objects are surrounded by a thin white border.
2 Click the Rectangle Mask tool in the Toolbar.
Note: The Mask tools are only available when an object that can be masked is selected.
3 Drag a rectangle across the section of the image containing the sun as illustrated below.
122
Tutorial 3 Working With Text
4 Select the movie object, then drag it so that it remains vertically centered in the top
third of the Canvas.
When you position the movie object, the mask moves with it.
5 Open the Layers tab by choosing Window > Layers (or press Command+4).
6 In the Layers tab, double-click the name of the layer containing the movie object and
mask, then type “Sunset.“
7 Press Return to accept the name.
Organizing Your Project
Layers are a great way of organizing your project to help you keep track of everything.
Name your layers with descriptive names to take that idea even further. Since you are
about to add several text objects, you need to create a new layer for them.
To create a new layer:
1 Click the Add Layer button (+) just under the Layers tab to add a new layer.
A new layer is created at the top of the Project pane, called Layer.
2 Double-click the name, then type “Titles.”
3 Press Return to accept the new name.
Tutorial 3 Working With Text
123
Adding a Text Object
In Motion, you add text by creating a text object and typing into the text object. You
can edit the text, change text properties, and edit the text object in a variety of ways.
To create a text object:
1 In the Layers tab, select the Titles layer.
Without a layer selected, new objects are created in the topmost layer. If you want a
newly created object to appear in a different layer, select the layer before adding the
object to your project.
2 Click the Text tool (or press T) in the Toolbar.
3 Click in the Canvas near the center of the Sunset object.
A flashing text insertion point appears where you click.
4 Type “the serengeti” in the Canvas.
The text “the serengeti” appears in the new text object. By default, text is white, 48
points, in the Geneva font, and is aligned along the left of the insertion point.
5 Press the Esc (Escape) key to exit text-edit mode.
Important: Whenever you have finished typing your text, be sure to press Esc or select
another tool on the Toolbar—do not use a keyboard shortcut. When the Text tool is
selected, you are in text-edit mode, so if you press S to choose a Select/Transform tool,
an “S” is added to your text rather than the tool being changed.
Changing Text Properties Using the Dashboard
When you select a text object in the Canvas, the Dashboard displays the most
commonly used text properties of the object. You can change these text properties in
the Dashboard.
To change text properties using the Dashboard:
1 Click the Select/Transform tool in the Toolbar (or press Shift+S).
2 Select the text object in the Canvas.
The Dashboard displays the basic text controls.
124
Tutorial 3 Working With Text
3 If the Dashboard is not visible, choose Window > Show Dashboard (or press D).
4 In the Dashboard, do the following:
a Control-click the color well (to the right of the Font and Style pop-up menus), then
choose a yellow color from the Colors window. Make sure the color you select allows
the text to be seen over the sunset.
b Choose Center from the Alignment pop-up menu.
Using Dynamic Guides to Position Text
As with any other object in your project, you can position a text object using Dynamic
Guides. If Snap is turned on, and Dynamic Guides are turned on in the View menu (in
the Toolbar), they appear as yellow lines when you drag an object in the Canvas.
m
To toggle Snap:
Choose View > Snap (or press N).
m
To position text using Dynamic Guides:
Drag the text object with Snap turned on.
As you drag, Dynamic Guides appear when the text object aligns with the center or a
border of either the Canvas or another object in the Canvas.
Now, center the text object you just created near the top edge of the sun.
Tutorial 3 Working With Text
125
To center the text object:
1 Make sure that Snap and Dynamic Guides are turned on.
2 Drag the object so that a vertical yellow Dynamic Guide appears in the center of the
Canvas.
3 Drag the object until it is near the top of the sun.
Applying Text Tracking
You can set the amount of space between each letter of the text by adjusting the
Tracking slider in the Dashboard. If you want the tracking to change over time, you
either need to set keyframes or use a behavior.
The Text Tracking behavior animates the tracking of a text object, making the text
object grow wider (or narrower, with negative tracking).
To apply the Text Tracking behavior:
1 In the Library, choose the Behaviors category, then choose the Text Animation
subcategory.
The Text Animation behaviors appear in the Library stack.
2 Drag the Text Tracking behavior onto the text object in the Canvas.
3 Click the Play button (or press the Space bar) to see the default effect of the Text
Tracking behavior.
The letters spread out over time.
4 Stop playback when you’ve finished previewing the text object.
Adjusting Behavior Settings
You can adjust the rate of text tracking, and when the effect ends, in the Inspector or
the Dashboard.
126
Tutorial 3 Working With Text
To adjust the rate of text tracking:
1 If it’s not already selected, select “the serengeti” text object.
2 Click the Inspector tab.
3 Click the Behaviors tab of the Inspector.
4 If the Text Tracking parameters are not visible, click the disclosure triangle to reveal
them.
5 Set the Rate value slider to 3.90.
You can also adjust the end offset, which controls how far from the end of the project
the tracking stops, measured in frames.
6 Play the project.
The text spreads out more quickly.
7 Stop playback when you are finished viewing the new settings.
8 Choose File > Save (or press Command+S).
The file is saved.
Animating Text Properties
As with other objects in your project, you can change text properties and other
parameters of text objects over time. In this example, you set the text color to change
over time.
To animate the text color:
1 Press Home to move the playhead to frame 1.
2 Click the Inspector tab.
Tutorial 3 Working With Text
127
3 Click the Record button (or press A) to turn on animation recording.
Record button
4 In the Layers list, select “the serengeti” object.
5 In the Inspector, click the Text tab, then click the Style pane.
6 Under the Face controls, click the color well.
The Colors window appears, showing the yellow color already selected.
7 Press End to move the playhead to the end of the project (frame 150).
8 Click a red or orange color in the Colors window.
9 Close the Colors window.
10 Click the Record button (or press A) again to turn off recording.
11 Play the project.
The text now changes from yellow to red over the duration of 150 frames.
Important: Be sure to turn off animation recording when you are done, or else any
changes you make later will continue to be recorded.
Applying a Fade In
Now you can apply a Fade In behavior to the text object, and adjust the length of the
fade in. Fading in an object is a common way of drawing viewers’ attention to the
object as it appears.
128
Tutorial 3 Working With Text
To apply a Fade In:
1 In the Library, click the Behaviors category, then click the Basic Motion subcategory.
2 Drag the Fade In/Fade Out behavior from the Library onto the text object in the
Canvas.
The Dashboard updates to show the controls for the Fade In/Fade Out behavior.
3 In the Dashboard, drag the Fade In triangle to 30 frames.
4 Drag the Fade Out triangle to 0 frames.
The text object now fades in over the first 30 frames and does not fade out.
Adding a Second Object
This project requires another text object. This provides an opportunity to review the
steps you just completed.
To create the second text object:
1 Select the Titles layer in the Layers list.
2 Select the Text tool and click the Canvas.
3 Type the word “africa” in lowercase letters.
4 Press Esc or choose the Select/Transform tool and position the text object in the center
of the Canvas.
Tutorial 3 Working With Text
129
5 Use the Dynamic Guides to position the text object along the bottom edge of the
Sunset object and align the left edge along the center point of the Canvas.
6 In the Text tab of the Inspector, open the Format pane, and use the Size slider to
increase the font size to 123 points, so the right edge of the text hits the right edge of
the Sunset object.
Applying a Gradient
Now you can add a gradient to the new text object, and change the gradient’s colors
to create a custom gradient. You’ll also save the custom gradient to use later.
To apply a gradient to a text object:
1 Make sure the “africa” text object is selected in the Canvas.
2 In the Inspector, click the Text tab, then click the Style pane.
3 In the Face controls, choose Gradient from the “Fill with” pop-up menu.
The color indicator changes to a gradient and the text is instantly filled with the default
gradient colors.
4 Click the Gradient disclosure triangle to expose the gradient options.
5 Drag the Angle value slider to 90 degrees.
Clicking the small squares (color tags) below the left and right edges of the Gradient
Editor lets you set the start (left) and end (right) colors for the gradients.
130
Tutorial 3 Working With Text
6 Click the left color tag.
The color controls beneath the gradient become active.
7 Click the color well to open the Colors window.
8 In the Colors window, click the color picker (the magnifying glass icon at the top).
The pointer turns into a large magnifying glass.
Tutorial 3 Working With Text
131
9 Move the pointer over the Canvas until a dark shade of orange from the Sunset object
is in the crosshairs of the pointer, then click to select it.
After sampling the color in the Canvas, you can adjust it in the Colors window.
10 Double-click the right color tag of the Gradient Editor to set the end color of the
gradient.
Double-clicking automatically opens the Colors window if it is not already showing.
11 Click the color picker in the Colors window and select a bright shade of brown from the
Canvas.
132
Tutorial 3 Working With Text
12 Close the Colors window.
13 Move the triangle (spread control) underneath the gradient to the left to change the
balance of color filling the text to be heavier on the brighter side.
After you create a custom gradient, you can save it in the Library to use later or to use
in another project.
To save a custom gradient:
1 Choose Save Gradient from the Gradient Preset pop-up menu.
The Save Preset to Library dialog appears.
2 Type “Serengeti Sunset” as a name for the gradient, then click Save.
The saved preset appears in the Gradients section of the Library and in the Gradient
Preset pop-up menu.
Text Sequence Behaviors
There is a category of behaviors specifically designed to affect the individual characters
in a text object one after another. These are called Text Sequence behaviors. These can
be used to quickly create complex effects that would ordinarily require applying an
effect to each character individually.
Applying a Text Sequence Behavior
Now you can apply the Behind Camera text sequence behavior to the text object, and
adjust the behavior parameters. The Behind Camera text sequence behavior causes
each letter to fall into place one after another, growing smaller as they fall.
Tutorial 3 Working With Text
133
To apply the text sequence behavior:
1 In the Library, click the Behaviors category, then click the Text Sequence subcategory.
The Text Sequence categories appear in the Library stack.
2 Double-click the Text-Zoom folder to display its contents.
3 Drag the Behind Camera behavior from the Library to the “africa” text object in the
Canvas.
4 Play the project to see the Behind Camera effect with its default settings.
5 When you are finished previewing the project, press the Space bar to stop playback.
To customize the behavior settings:
1 In the Inspector, click the Behaviors tab.
2 If necessary, click the disclosure triangle to display the controls for the Behind Camera
behavior.
3 Double-click in the Scale field, type 300, then press Return.
This sets the maximum size of the text to 300 percent.
4 Check that the Opacity slider is set to 0 (zero).
5 Press Home to set the playhead to frame 1.
134
Tutorial 3 Working With Text
6 Press the Space bar to play the project.
Each character in the text object begins at 300 percent and completely transparent,
then returns to its original size and opacity as it falls into place.
7 Press the Space bar to stop playback when you are finished.
8 Choose File > Save (or press Command+S) to save the project.
Adding the Third Text Object
Now you add a third text object, to which you apply a different behavior.
To add the third text object:
1 Select the Text tool and click near the left edge of the sun in the Canvas to set the
position of the new text object.
2 Type “kenya | bila shaka pride” into the text object.
Note: The vertical line is the “pipe” character, which is on the Backslash key.
3 Press Esc to exit text-edit mode.
4 Position the new text object along the bottom edge of the Sunset object.
Applying Changes to Selected Text
You can select text in a text object, and apply changes to only the selected text, instead
of the entire object. You must be in text-edit mode to do this. Either select the Text
tool, or double-click the object.
Tutorial 3 Working With Text
135
To apply changes to selected text:
1 In the new text object, select the word “kenya.”
2 In the Format pane of the Inspector, click the Family value list, then choose Apple
Chancery for the selected letters.
3 Using the Size slider in the Dashboard, adjust the font size of “kenya” to 54 points to
match the rest of the line more closely.
Changing Opacity
Now you change the opacity of the new text object.
To change the opacity of a text object:
1 Choose the Select/Transform tool.
If the object was previously in text-edit mode, the object is automatically selected. If
you had already clicked off of the object, click it again to select it.
2 In the Dashboard or the Properties tab of the Inspector, drag the Opacity slider to 70
percent.
Applying the Crawl Left Behavior
Now you send the text in from the right edge using the Crawl Left behavior.
To apply the Crawl Left behavior:
1 In the Canvas, select the “kenya | bila shaka pride” text object.
2 In the Toolbar, click the Add Behavior icon.
A pop-up menu appears.
3 Choose Text Animation > Crawl Left.
Before adjusting the Crawl Left behavior parameters, you may want to play the project
and watch the default behavior. Since the text should finish its movement with all the
letters revealed, you need to start the animation with letters hidden.
4 Select the text object and shift it to the right along the bottom edge, until just the first
word “kenya” is visible.
136
Tutorial 3 Working With Text
5 In the Dashboard (or the Behaviors tab of the Inspector), adjust the following
parameters:
a Drag the Rate slider to 90.
b Drag the Position Offset slider to 15.
c Drag the End Offset slider to 5.
6 Play the project.
The text moves across the screen from right to left, ending at the object’s original
position. The End Offset parameter instructs the object to reach its final position 5
frames before the end of the object. If your “kenya | bila shaka pride” object is not fully
visible at the end of the project, you can move it to the left in order to correct this.
7 Press Command+S to save the project.
Creating an Animated Glow
Now you animate a glow effect on a duplicate of the original. In this case, you use the
first text object you created.
To create the animated glow:
1 If it’s not already visible, display the Project pane by clicking the Project icon in the
Toolbar.
2 In the Layers list, select the text object “the serengeti,” then choose Edit > Copy (or
press Command+C).
3 Choose Edit > Paste (or press Command+V).
Tutorial 3 Working With Text
137
The pasted object appears at the top of the Titles layer.
Before
After
4 Double-click the word “copy” in the name of the new object to rename it and type
“glow.”
5 Press Return to accept the new name.
The new object inherited all the properties of its source, but you don’t want the glow
to fade in.
6 Select the Fade In/Fade Out behavior under “the serengeti glow,” then press Delete.
7 Drag the object in the Canvas upward and left of its position to offset it slightly from its
original.
You may have to turn off Snap to move it the exact amount you want. Press N if you
want to toggle Snap off. Be sure to turn it back on if you want to use Dynamic Guides
again.
8 In the Inspector, click the Text tab, then click the Style pane.
9 In the Style controls, click the Glow checkbox to turn on the glow effect.
10 Click the Color well for the Glow parameter, then choose a yellow color for the glow.
11 Close the Colors window.
12 In the Style controls, adjust the following parameters:
a Drag the Opacity slider to 80 percent.
b Drag the Radius slider to 15.
c Drag the Blur slider to 2.
138
Tutorial 3 Working With Text
13 Click the activation checkbox next to Face to turn off the text face so this object
contains only the glow effect.
Since the face and glow are separate objects, you can manipulate them separately. To
make the text tracking more dramatic, you can increase the rate of the text tracking on
the glow.
14 In the Layers list, select the Text Tracking behavior attached to “the serengeti glow.”
15 In the Behaviors tab of the Inspector, increase the Rate to 5.0.
Next, you can take advantage of the separate face and glow objects even more.
To apply a behavior to the glow:
1 Select “the serengeti glow” object in the Layers tab.
2 In the Library, choose the Behavior category, then choose the Text Sequence
subcategory.
3 In the Library stack, double-click the Text-Fade behavior category, then select the Fade
Out Random behavior.
4 Click the Apply button in the Preview area at the top of the Library.
The Fade Out Random behavior turns various text characters on and off in a random
pattern. By default, the Fade Out Random behavior has a duration of 60 frames. You
need to increase the duration of the behavior to affect the entire object.
5 If the Timeline is not visible, choose Window > Timeline (or press Command+7).
6 In the Timeline, drag the right edge of the Fade Out Random behavior all the way out
to 150 frames.
Tutorial 3 Working With Text
139
7 Play the project to see the results.
The characters glow and fade out above the main text as both elements spread out in
sync.
8 Press Command+S to save the project.
Adding More Movie Elements
Next, you add more movie footage in a new layer. You apply a Throw behavior to the
layer so both objects are moved together.
To add the additional movie objects:
1 Press Home to move the playhead to frame 1.
2 In the File Browser, navigate to the Tutorial Media folder (default is /Users/Shared/
Motion/Tutorial Media), then double-click the National Geographic folder to view its
contents.
3 Command-click the lioness1.mov and the lioness2.mov files so they are both selected.
4 Drag the two clips into the empty area of the Layers tab.
A new layer is created above the existing layers and the two files are added to the layer.
The movie clips appear directly on top of one another centered in the Canvas. With
clips of the same size, it appears as if there is only one clip.
140
Tutorial 3 Working With Text
5 Double-click the name of the new layer to rename it, type “Clips,” then press Return to
accept the new name.
6 In the Layers list, select “lioness 2,” and using the Dynamic Guides, slide the movie file
to the left of the “lioness 1” clip.
7 In the Layers tab, click the layer containing the two objects.
Both clips appear selected in the Canvas.
8 Drag the two objects down and off the left edge of the Canvas, so just the edge of the
rightmost clip is barely visible.
This puts the objects in a starting position to move across the screen from left to right.
Tutorial 3 Working With Text
141
Applying a Throw Behavior
Now you apply a Throw behavior to the “lioness” objects to move them across the
screen.
To apply a Throw behavior:
1 In the Layers tab, select the layer containing the two lioness clips.
2 Click the Add Behavior icon in the Toolbar, then choose Basic Motion > Throw from the
pop-up menu.
The Dashboard changes to show the Throw control.
3 In the Dashboard, drag the center point of the Throw control to the right. Pressing the
Shift key constrains the Throw arrow to 45-degree increments.
Inspector button
The direction of the arrow indicates the direction the object travels. The size of the
arrow indicates the speed at which it travels. You can view these same controls
numerically by looking in the Inspector.
4 Click the Inspector button in the upper-right corner of the Dashboard.
The Throw behavior parameters appear in the Inspector.
5 In the Inspector, click the disclosure triangle to expand the Throw Velocity parameter.
6 Set the X velocity to 80 and confirm that the Y velocity is still set to 0.
142
Tutorial 3 Working With Text
7 Play the project.
The lioness movie clips move from left to right across the screen. But the lioness clips
are obscuring the wonderful text objects! You need to move them beneath the text.
8 In the Layers tab, select the Clips layer and drag it just above the Sunset layer.
9 Play the project.
That looks much better.
The Final Touch
The project is nearly complete. All that remains is to place the National Geographic logo.
To place the logo:
1 Select the Titles layer.
2 In the File Browser, navigate to the National Geographic folder.
3 Drag the NatGeoLogo.psd file from the File Browser into the lower-right corner of the
Canvas.
Fading the Logo In and Out
The logo should be faded in at the beginning of the project and faded out at the end.
This can be accomplished in one step by applying the Fade In/Fade Out behavior.
To apply the Fade In/Fade Out behavior:
1 Make sure the logo object is still selected.
2 Click the Add Behavior icon in the Toolbar, then choose Basic Motion > Fade In/Fade
Out from the pop-up menu.
3 Play the finished project.
4 Press Command+S to save your work.
The exercise is complete. When you play the project, you see each text object change
with the behaviors you’ve applied.
5 Close your project when you’ve finished admiring your handiwork.
Tutorial 3 Working With Text
143
Exercise 2: Using the Sequence Text Behavior
The Sequence text behavior is a special kind of behavior that lets you animate
attributes of a text object (such as font size or rotation) for each character or word in
the text object sequentially. The Behind Camera effect used in the first exercise is an
example of a preset Text Sequence behavior. That behavior animates the size and
opacity of each character, flowing from the left to the right.
144
Tutorial 3 Working With Text
Motion provides many different preset Text Sequence behaviors, categorized in the
Library. You can adjust the parameters of each behavior to customize it for your needs.
The Sequence Behavior
Once you get familiar with using the preset Text Sequence behaviors, you can
experiment with the basic Sequence behavior that allows you to adjust whichever
parameters you want with a great degree of control.
The Sequence behavior works a bit differently than other behaviors: When you drag
the Sequence behavior onto a text object, nothing happens until you add parameters
to the text sequence and apply changes to them.
In this exercise, you apply text sequences to several text objects, then add and adjust
different parameters for each text sequence.
Tutorial 3 Working With Text
145
Creating the Project
To start, you create a new tutorial project and import a QuickTime movie as a
background element.
To create the project:
1 Choose File > New.
2 In the Select Project Preset dialog, choose NTSC Broadcast SD from the Preset pop-up
menu, then click OK.
A new, blank project appears.
3 Choose Edit > Project Properties (or press Command+J) to open Project Properties.
4 Click the Duration field, type 120 to set the duration of the project to be 120 frames,
then click OK.
5 Choose File > Save (or press Command+S) to display the Save As sheet.
6 Type “Text Sequence Tutorial” for the project name.
7 Browse to the location where you want to save the project, then click Save.
To import the movie file:
1 In the File Browser, locate the National Geographic folder, then double-click it to display
its contents.
2 Drag the hippos.mov file to the center of the Canvas, using the Dynamic Guides to
assist you.
Adding Text
Now you add a text element and set the text style to prepare for the sequence effect.
To add text:
1 Click the Text tool in the Toolbar.
2 Using the Text tool, click the Canvas to add a text object, and type “Huge & Hungry”
into the text object.
3 Press Esc to exit text-edit mode and select the text object.
4 Use the Dashboard to change the font to Apple Chancery.
5 Set the font size to 56 points.
146
Tutorial 3 Working With Text
6 Choose the Select/Transform tool and position the text in the upper-left corner of the
Canvas.
7 Click the Text tab in the Inspector, then click the Style pane.
8 Click the color well in the Face section.
The Colors window appears.
9 Click the color picker at the upper-left corner of the Colors window and choose a color
from the Canvas.
Choose the brightest color in the water highlights.
10 Click the checkbox next to the Outline section in the Inspector.
An outline appears around the text in the Canvas.
11 Click the color well for the outline.
The Colors window becomes active again.
12 Click the color picker again and this time, choose a darker color from the water ripples
in the Canvas, then close the Colors window.
Tutorial 3 Working With Text
147
The border is set to this darker color. Although the border is barely visible in the Canvas
at this moment, it becomes more apparent once the Sequence behavior is applied and
configured in the following steps.
Applying the Sequence Behavior
Next, you apply the Text Sequence behavior and add parameters for it to affect.
To apply the Text Sequence behavior:
1 Make sure that the text object is selected in the Canvas, click the Add Behavior icon in
the Toolbar, then choose Text Animation > Sequence Text from the pop-up menu.
The Sequence Text behavior is applied to the text object, and the Behaviors tab of the
Inspector appears. Since this behavior requires further settings, nothing changes in the
Canvas.
In order for the Sequence Text behavior to have an effect, you must select the
parameter you want to modify.
2 In the Parameter section, choose Format > Scale from the Add pop-up menu.
The Scale parameter is added to the Behaviors tab.
148
Tutorial 3 Working With Text
By default, the parameter is set to 100 percent. The value you set in this parameter
determines the scale that each letter in the object reaches as the Sequence behavior
takes effect. Once the letter has reached that size, it returns to its default size.
3 In the Inspector, use the value slider to set Scale to 130 percent.
You can see the results in the Canvas.
If the playhead is sitting at frame 1, you may not notice any effect. Play the project to
see the effect. Each letter grows to 130 percent, then returns to its default size over the
duration of the behavior effect.
Adding Additional Parameters
The Text Sequence behavior can animate more than one parameter at a time.
To add parameters to the Sequence Text behavior:
1 Choose Face > Opacity from the Add Parameter pop-up menu.
The Opacity parameter appears below the Scale parameter in the Behaviors tab.
2 Set the Opacity slider to 20 percent.
3 Play the project.
The Sequence Text behavior applies whatever parameters you chose to affect the text
object, one letter at a time. All parameters reach their ultimate value at the same time.
In this case, the letters become exactly 20 percent opaque at the same frame that they
reach 130 percent scale.
If you wanted an effect where the two parameters worked at different speeds, you
could apply two Sequence Text behaviors, and set each one individually.
4 Choose Outline > Width from the Add Parameter pop-up menu.
The Width parameter appears in the Behaviors tab.
5 Set the Width parameter to 4.
Now as the letters grow and fade out, their border grows. This looks less than
spectacular.
Tutorial 3 Working With Text
149
To remove a parameter from the Sequence behavior:
1 Click the Remove parameter pop-up menu next to the Add Parameter pop-up menu.
The menu lists all of the parameters currently applied to the behavior.
2 Choose Outline > Width to remove that parameter from the Sequence Text effect.
Adjusting Text Sequence Timing
There are many additional controls to affect the way the Text Sequence behavior works.
To control the overall duration of the effect, adjust the behavior’s bar in the Timeline.
To adjust the behavior’s duration:
1 Click the Timing icon in the Toolbar (or press Command+7) to display the Timeline.
In the Timeline, the Sequence behavior appears as a purple bar below the Huge &
Hungry text object.
2 Drag the right edge of the behavior to the left until it reaches frame 50.
150
Tutorial 3 Working With Text
Now the Sequence behavior happens much more quickly. The text object remains
onscreen for the remainder of the project, but the Sequence behavior no longer
affects it.
Smoothing Out the Sequencing Effect
By default, the sequencing effect activates the letters, one at a time, returning the letter
to its original state before affecting the next letter. This can create a staccato or jumpy
effect with fast moving sequences like this one.
You can smooth out the effect by adjusting the Spread slider in the Behaviors tab of
the Inspector. With a higher spread value, the animation of one letter can begin before
the one before it is entirely finished. This means that each letter gets more time to go
through its transformation, creating a smoother effect but still finishing in the same
amount of time.
m
To change the Spread value:
Adjust the Spread slider in the Behaviors tab of the Inspector. Experiment with different
settings.
The higher the setting, the more letters are affected at once. If the number is too high,
the nature of the sequencing effect is lost. The best setting depends on how many
letters are in the text object, and the overall duration of the effect.
Spread set to 2
Heavy lines indicate character
currently being sequenced.
Thin lines indicate width
of spread.
Spread set to 5
You can use decimal places to create a more precise effect.
Tutorial 3 Working With Text
151
Setting the Sequence Selection
In addition to sequencing a text object letter by letter, the Sequence text behavior can
affect objects line by line or word by word.
To change the Sequence behavior selection:
1 In the Behaviors tab of the Inspector, choose Word from the Select pop-up menu.
Now the Sequence effect happens one word at a time instead of one letter at a time.
The Spread setting still applies, except now it sets how many words are sequenced at
the same time. Because this object has only three words, any setting above 2 defeats
the sequencing effect.
2 Set the Spread slider to 1.
3 Play the project.
Adding Another Text Element
For this project, you need one more text element, with another Sequence behavior
applied. Although a completely different effect is required, the same behavior is used.
Before performing the next steps, make sure that in the Project pane of Motion
Preferences, Create Objects At is set to Current Frame.
To create the second text element:
1 Position the playhead at frame 40 of the project.
2 Click the Text tool in the Toolbar, then click the Canvas to create a new text object.
3 Type “hippopotamus” all in lowercase letters.
4 Press Esc to exit text-edit mode and select the text object.
5 Use the Dashboard to set the following:
•
•
•
•
152
Opacity: 80 percent
Size: 75
Tracking: 2
Color: Match the color of the Huge & Hungry object.
Tutorial 3 Working With Text
6 Position the text centered in the lower quarter of the Canvas.
7 In the Inspector, click the Text tab, then click the Style tab.
8 Click the activation checkbox next to the Outline section and leave the color at the
default red.
Tutorial 3 Working With Text
153
9 Click the Library tab and choose the Sequence Text behavior in the Text Animation
subcategory of the Behaviors category.
10 Make sure the “hippopotamus” object is selected, then click the Apply button in the
Preview area at the top of the Library.
The Sequence Text behavior is applied to the text object, and again has no immediate
effect.
Configuring the Sequence Text Behavior
The desired effect for this object is a sequential compressing of the letters from left to
right, then a sequential stretching of the letters from right to left. This can easily be
done with a single Sequence Text behavior.
To configure the Sequence behavior:
1 In the Inspector under the Behaviors tab, choose Format > Scale from the Add
Parameter pop-up menu.
The Scale parameter appears in the Behaviors tab.
154
Tutorial 3 Working With Text
2 Click the disclosure triangle next to the Scale parameter to display the X and Y sliders.
3 Set the Y slider to 25 percent.
4 Smooth out the effect by setting the Spread slider to 4.
5 Play the project.
The letters are sequentially flattened to 25 percent.
Adding a Second Parameter
To further enhance the effect, the Text Glow effect can be used.
To add the Text Glow effect to the Sequence behavior:
1 Choose Glow > Radius from the Add Parameter pop-up menu.
2 Adjust the Glow Radius to 25.
3 Play the project.
Nothing happened. Why? Because the Glow effect must first be activated in the Text
tab of the Inspector before the behavior can sequence it.
4 Click the Text tab in the Inspector, then click the Style pane.
5 Click the activation checkbox next to the Glow effect controls.
Now the Glow effect is turned on.
6 Play the project.
The letters now glow as they are compressed.
Tutorial 3 Working With Text
155
Repeating the Sequence Effect
Any sequencing effect can be set to apply multiple times over the duration of the
effect.
To change the number of times the sequence occurs:
1 Click the Behaviors tab in the Inspector again, to return to the Sequence Text behavior
controls.
2 Set the Loops slider to 2.
3 Press the Space bar to play the project.
Now, the sequence effect happens twice during the duration of the hippopotamus
object. However, rather than simply repeating again and again, you can control the
nature of the repetition.
4 Choose Ping-Pong from the Traversal pop-up menu (right above the Loops slider).
This instructs the behavior to go from left to right, then to go back from right to left. If
the Loops slider was set to 4, the effect would go back and forth twice.
Keyframing the Sequence Behavior
Once you get the hang of working in the Sequence Text behavior, you can create an
unlimited array of interesting effects. The behavior becomes even more powerful when
you consider that you can keyframe most of the parameters in the Sequence Text
behavior or even use Parameter behaviors to control their values. For more information
about Parameter behaviors, see Chapter 5, “Using Behaviors,” in the Motion User
Manual.
In this exercise, the goal is to have the letters get compressed going from left to right,
and then get stretched as they go back from right to left. This can be quickly achieved
with keyframing.
To keyframe the Sequence Text behavior:
1 Move the playhead to the part of the project after the Sequence Text effect has
completed its left-to-right movement, but hasn’t yet begun going right to left (at
approximately frame 80).
156
Tutorial 3 Working With Text
2 In the Behaviors tab of the Inspector, click the Animation menu next to the Scale Y
parameter, then choose Add Keyframe.
A black diamond appears on the Animation menu to indicate that the parameter is
now keyframed and that the current frame contains a keyframe.
Due to the way keyframing works, adding a single keyframe does not change the effect
at all. It takes at least two keyframes to create a change over time.
3 Press Page Down to move the playhead forward one frame.
4 Click the Animation menu, then choose Add Keyframe again.
5 Use the value slider to set the Y value to 150 percent.
This creates a second keyframe with a different value than the first. Now, the sequence
shrinks the letters to 25 percent from the beginning until the first keyframe, and then
stretches the letters to 150 percent from the second keyframe until the end of the
effect.
Tutorial 3 Working With Text
157
6 Play the project.
On the way from left to right
And on the way back to the left
Finishing the Effect
To make this project look its best, a couple of Fade In/Fade Out behaviors can be
applied.
To finalize the project:
1 Select the hippopotamus object in the Canvas if it is not still selected.
2 Click the Add Behavior icon in the Toolbar, then choose Basic Motion > Fade In/Fade
Out.
This fades the word “hippopotamus” in and out.
3 In the Timeline, select the layer containing all of the objects.
4 Click the Add Behavior icon in the Toolbar, then choose Basic Motion > Fade In/Fade
Out.
This fades the background image and the Huge & Hungry text object in and out,
creating a finished-looking piece.
158
Tutorial 3 Working With Text
5 Play your project one final time.
6 Press Command+S to save your work.
What You Have Learned
•
•
•
•
•
Adding a text object to a layer
Masking and positioning a text object
Changing font, size, and other text properties using the Dashboard and Inspector
Applying behaviors to text objects, and adjusting behavior parameters
Applying text sequences, adding parameters, and adjusting parameters
Tutorial 3 Working With Text
159
4
Working With Particles
4
Particle emitters have myriad uses. Use them to highlight
text elements, as background elements, as borders—the
possibilities are endless.
Particles can be integral to your motion graphics project, and Motion gives you the
ability to generate particles from any object. In addition, Motion contains a library of
particle presets that can be used as is or modified to suit your needs. Both modified
presets and particle systems you create can be saved to the Library for future use.
This tutorial assumes you are familiar with the Motion interface. You are encouraged to
complete Lessons 1, 2, and 3 before beginning this lesson.
What You Will Learn
•
•
•
•
•
•
•
•
•
How to add a particle emitter from the Library to your project
How to modify the parameters of a particle emitter
How to modify the shape of a particle emitter
How to save the particle emitter to the Library for later use
How to import a particle preset
How to create a particle system from a clip
How to customize a particle emitter from a shape
How to use Simulation behaviors with a particle system
How to add a Parameter behavior to a Simulation behavior
Previewing the Result Motion Projects
You can preview the results for the four exercises in this lesson in one of two
ways: Open and preview the result project for each exercise or view the result project
preview movies.
To review the result projects:
1 Once Motion is open, choose File > Open (or press Command+O).
2 In the Open dialog, navigate to /Users/Shared/Motion/Tutorial Media/Tutorial Projects.
161
Note: If you changed the default path during installation, you will need to open the
tutorial project and movie files from the new location. For more information, “Getting
Started” on page 5.
3 Select the lesson result you want to see, then click Open.
The selected result project opens and appears within the Motion interface.
To review the result project preview movie:
1 In the File Browser, navigate to the Tutorial Projects folder (default is /Users/Shared/
Motion/Tutorial Media/Tutorial Projects).
2 In the file stack, select the result movie file you want to see.
The selected movie plays in the Preview area of the browser.
3 In the file stack, do one of the following:
• Double-click the result movie to play it in the Viewer window.
• Control-click the result movie, then choose Open in QuickTime Player from the
shortcut menu.
4 Close the Viewer window.
Note: When Motion cannot locate source files used by a project (for instance, if the
project source files have been moved to a different location since the project was
saved), a sheet appears that contains the message “The following items used to create
this project are missing.” For more information on locating misplaced source files, see
“Relinking Missing Media” on page 6.
Exercise 1: Working With Particle Presets
In this exercise, you add a particle preset to a project, modify its parameters, and save it
to the Library for later use.
Opening the Starting Project
For this exercise, a project has been created to help you get started.
To open the starting project:
1 Once Motion is open, choose File > Open (or press Command+O).
2 In the Open dialog, navigate to the Tutorial Projects folder (default is /Users/Shared/
Motion/Tutorial Media/Tutorial Projects).
3 Select Tutorial 4 Exercise 1, then click Open.
162
Tutorial 4 Working With Particles
The selected starting project opens and appears within the Motion interface.
Adding a Particle Preset
Open the Project pane (press F5), then take a moment to look at the Layers tab to see
how the project is organized. There are three layers: titles, particles, and background.
Remember that the more complex your projects become, the more important it is to
keep them organized. Also, remember that the order in which the layers appear from
top to bottom in the Layers tab reflects the order of layering in the project—the layer
listed at the top is the topmost layer, and so on.
Add the particle emitter to the currently empty particles layer.
To add a particle preset to the project:
1 In the Layers tab, select the particles layer.
2 In the Library (press Command+2), select the Particle Emitters category.
3 Select the SciFi subcategory.
Tutorial 4 Working With Particles
163
4 In the file stack, select the Embryo particle preset.
A preview of the particle system appears in the Preview area.
5 In the Preview area, click Apply to add the preset to the project.
The Embryo preset appears in the Canvas and in the particles layer, along with the
particle emitter’s cell source, an object named Blur01. The Blur01 object is a PNG file.
Examine the source file in the Media tab.
To view the Embryo cell source:
1 Click the Media tab.
2 Select Blur01.png.
164
Tutorial 4 Working With Particles
3 Control-click Blur01.png, then choose Open in Viewer from the shortcut menu.
The object is displayed in a Viewer window.
4 Close the Viewer when you are finished.
Back in the Layers tab, note that the source object used to create the emitter is
automatically turned off and is not visible in the project.
Positioning the Particle Emitter
Rename the emitter and move it into position.
1 In the Layers tab, double-click the particle emitter’s name, Embryo.
2 Type a new name, Blue Lights, then press Return.
3 Using the following image as a guide, position the particle emitter with its bottom
edge near the lower edge of the background, slightly off-center to the left.
Since the playhead is at frame 1, no particles appear, as they have not yet been
generated. Move the playhead back and forth along the Timeline to examine the
appearance of the particles. When you are done previewing the particles, leave the
playhead at frame 30.
Tutorial 4 Working With Particles
165
Note: To quickly navigate to a specific frame, click in the Current Frame field (to the left
of the transport controls), type a frame number, then press Return.
4 Save your project as a copy of the original (press Shift+Command+S).
Adjusting the Gradient of the Particle Emitter
The particle emitter has been added to the project, but its default colors do not match
the color scheme already set up in the project. This can be changed easily.
To change the gradient used by the particle emitter:
1 Select the Blue Lights emitter object in the Layers tab or Canvas if it is not already
selected.
2 In the Inspector (press Command+3), select the Emitter tab.
3 Choose Atlantic Blue from the Gradient Preset pop-up menu under the Color Mode
parameter.
166
Tutorial 4 Working With Particles
The new gradient’s colors match the background more closely.
Although the gradient is a preset, it can be customized to better match the
background by using colors selected from the actual background.
Customizing the Gradient
Use the Gradient Editor to tailor the emitter for your specific needs.
To customize the gradient used by the particle emitter:
1 In the Cell Controls, click the disclosure triangle next to Color Over Life to display the
Gradient Editor.
Tutorial 4 Working With Particles
167
The Gradient Editor is divided into three areas:
• The thin rectangle at the top displaying the opacity bar
• The thin rectangle at the bottom displaying the color bar
• The thicker rectangle in the middle displaying the effective color gradient,
incorporating both opacity and color
The small squares above and below the gradient and opacity bar are color and opacity
tags. These tags indicate color and opacity and their position within the gradient. Once
a color tag is selected, a small triangle appears between the selected color tag and the
adjacent tag. These triangles are spread controls.
Opacity bar
Opacity tag
Color tag
Spread control
Color bar
The spread controls specify the midpoint of a color gradient, where the colors specified
in the adjacent color tags are equally mixed. You can move the midpoint of the
gradient by moving the spread control. For these particles, moving the spread control
close to a color tag creates more narrow bands of color.
2 Advance the playhead to frame 150.
3 Double-click the color tag in the lower-left corner of the Gradient Editor.
The Colors window appears.
168
Tutorial 4 Working With Particles
4 Click the color picker (the magnifying glass icon) in the Colors window.
The color picker appears.
5 Position the color picker over a sky-blue color in the Canvas, then click.
The left side of the gradient changes to that color.
Next, remove the color tag in the center of the Gradient Editor to create a two-color
gradient.
6 Drag the color tag in the center of the Gradient Editor downward, away from the bar.
With a poof, the color tag disappears.
7 Click the color tag in the lower-right corner of the Gradient Editor.
8 Click the color picker in the Colors window.
9 Select a dark blue color from the Canvas.
The right side of the gradient changes to that color.
10 Close the Colors window.
11 Save your project (press Command+S).
Adjusting the Opacity of the Emitter
In order to vary the opacity of the individual particles over their life, make adjustments
to the opacity bar. By default, the Atlantic Blue gradient has a single opacity tag at
position 0, and it is set to 100 percent opacity. This means that the particles are
completely opaque when they are born, and remain opaque until they die. Although
changes have been made to the color tags in the preset gradient, the default opacity
tags are still present.
Just as the color gradient affects the color of the particles over time, the opacity
gradient affects the opacity of the particles over time. Make adjustments to the opacity
gradient to generate particles that individually fade in and then out over their lifetime.
Tutorial 4 Working With Particles
169
To change the opacity of the particles:
1 In the Emitter tab of the Inspector, select the leftmost opacity tag on top of the
opacity bar.
The Opacity parameter becomes active.
2 Using the Opacity slider below, set Opacity to 0 percent.
The gradient now appears entirely black, and the particles are no longer visible,
because the gradient is set to 0 percent opacity over the entire bar.
Add two more opacity tags to the gradient.
3 Click twice in the opacity bar to add opacity tags as shown below.
4 Click the leftmost opacity tag to display the spread control between the first two tags.
Note: A spread control is displayed only when a color or opacity tag is selected.
170
Tutorial 4 Working With Particles
Now, drag the spread control toward the leftmost opacity tag until the Location value
is approximately 15 percent.
Note: You can also use the Location parameter to change the Location value.
This ensures a quick fade-in for the particles.
5 Click the opacity tag near the center of the Gradient Editor.
6 Set the Opacity parameter to 100 percent.
7 Set the Location parameter to 45 percent.
The particles fade out more slowly.
8 Click the spread control between the last two tags of the opacity gradient.
9 Set Location to 91 percent.
10 Play the project.
Tutorial 4 Working With Particles
171
Because the current blend mode of the Blue Lights emitter object is Normal, the
background does not show through the particles.
11 Move the playhead to frame 30.
Additive Blend
The Additive Blend parameter can have a dramatic effect on the look of a particle
system. By default, Blue Lights has Additive Blend turned on. In the Emitter tab of the
Inspector, click the Additive Blend checkbox to turn it off.
Notice that when Additive Blend is turned off, the entire particle system darkens.
Additive Blend on
Additive Blend off
Turning it back on intensifies the colors and makes them brighter. This is because
Additive Blend adds the color values of overlapping particles together. Any time one
particle overlaps another, higher (brighter) color values are created. Click the Additive
Blend checkbox again to turn it back on.
Adding color values together within the particle system gives it more punch. Adding
the color values of the particles layer to those of the background better integrates the
two elements.
Changing the Blend Mode of the Layer
Change the blend mode of the layer so that the background can be seen through the
particles.
To change the blend mode of the particles layer:
1 Select the particles layer in the Canvas or Layers tab.
2 In the Inspector, click the Properties tab.
172
Tutorial 4 Working With Particles
3 In the Blending controls, choose Add from the Blend Mode pop-up menu.
Note: You can also Control-click the particles layer in the Layers tab and choose Blend
Mode > Add from the shortcut menu.
Now, the color values of the particle system are added to the color values of the
background instead of replacing them, so the background shows through.
4 Save your project (press Command+S).
Tutorial 4 Working With Particles
173
Adjusting the Shape of the Particles
In this section, adjust the shape and scale of the particles by modifying the emitter
parameters.
Important: Remember that manipulating the source object within Motion does not
affect the particle emitters using that object. In other words, to change the particles,
change the emitter, not the source object.
For this project, change the default shape of the particles by changing the scale of the
particle cell.
To change the scale of the particle cells:
1 In the Layers tab, select the Blue Lights emitter.
2 In the Emitter tab of the Inspector, click the disclosure triangle next to Scale.
Notice the dot on the Scale slider control, which indicates that the Scale X and Scale Y
parameters have been adjusted to different values. If both are set to the same value,
the dot does not appear.
3 Set Scale X to 100 percent.
4 Set Scale Y to 50 percent.
The particles change shape with each adjustment.
174
Tutorial 4 Working With Particles
Saving the Particle Emitter to the Library
After a particle system has been adjusted to your liking, you can save it to the Library
for easy reuse.
To save the particle emitter to the Library:
1 In the Library (press Command+2), select the category in which you want to save the
customized particle emitter, for example, the Favorites category.
Note: You can also save the emitter to the Particle Emitters category.
2 Drag the Blue Lights emitter object from the Layers tab to the Favorites file stack.
The customized Blue Lights emitter is added to the Favorites category.
If you drag an emitter to an inappropriate category (for example, the Filters category),
the emitter is automatically saved to the Particle Emitters category.
Next, use the Blue Lights custom emitter as the starting point for another emitter.
To use a custom emitter from the Library:
1 Set the current frame to 32, to see the position of the letter J in “jellies.”
2 In the Layers tab, select the Particles layer.
3 In the Library tab, select the Favorites category.
Tutorial 4 Working With Particles
175
4 Drag the Blue Lights emitter from the stack to the Canvas, on top of the letter J.
The customized emitter is added to the Particles layer. Since the layer already contains
an object named Blue Lights, the newly-added emitter is named Blue Lights 1.
5 Save your project (press Command+S).
Like all other particle emitters, customized emitters can be modified once added to a
project. In this section, change the size of the particles and modify the number of
particles that are generated.
To change the scale of the particles:
1 In the Layers tab, select Blue Lights 1.
2 In the Emitter tab of the Inspector, click the disclosure triangle next to Scale.
3 Set Scale X to 40 percent.
4 Set Scale Y to 3 percent.
Next, add a few more particles to the list by adjusting the Birth Rate.
To add more particles to the simulation:
1 In the Emitter tab of the Inspector, set Birth Rate to 50.
The Birth Rate determines how fast particles are spawned.
2 Set Speed to 10.
Speed determines how fast the particles move.
3 Set Speed Range to 100.
Important: A number of the parameters in the cell controls have an associated range
parameter, such as Speed followed by Speed Range. The range parameter, if adjusted
to a non-zero value, introduces a random variation in the value of the associated
parameter, thus assuring all its generated values are not the same.
176
Tutorial 4 Working With Particles
4 Move the playhead to frame 150.
Next, move the two particle systems into their final positions.
To place the particle emitters in their final position:
1 In the Canvas, drag the Blue Lights 1 particle emitter so that the particles are centered
on the letters of the jellies text object. Position the anchor point on top of the letter J.
2 Select the Blue Lights particle emitter.
3 Drag the Blue Lights particle emitter so that the particles are centered over the
phantoms of the deep (center) text object. Position the anchor point slightly offscreen to
the left.
Play back your project. That’s it! Save your project when you’re finished.
Tutorial 4 Working With Particles
177
Exercise 2: Using a Clip as a Particle Cell Source
In this exercise, use a shape with a gradient as a background for a project, add a
particle preset, change its cell source, and use a clip as a particle emitter. The resulting
project includes a scene complete with sky, sun, and butterflies.
Creating a New Project
Create a new project for this lesson.
m
To create a new project:
Choose File > New (or press Command+N).
If you have not defined a default project preset, the Select Project Preset dialog
appears. If a default preset has previously been defined, a new project opens. This
lesson uses the NTSC Standard Definition format. Use the following guidelines to create
an NTSC project so that your project matches the lesson.
Note: NTSC is the American and Japanese standard television format. PAL/SECAM is the
European television standard.
m
If the Select Project Preset dialog appears:
Choose NTSC Broadcast SD from the Preset pop-up menu, then click OK.
If the Select Project Preset dialog does not appear, and a new project is
automatically created:
1 Close the new project.
2 Hold Option and choose File > New from Preset (or press Command+Option+N) to
display the Select Project Preset dialog.
Note: The New from Preset option does not appear in the standard File menu unless
you press Option. When a default project preset is defined and you create a new
project, that project is created at the default settings.
3 In the Project Properties dialog, turn off the “Create new documents using the default
preset” checkbox.
178
Tutorial 4 Working With Particles
4 Choose NTSC Broadcast SD from the Preset pop-up menu, then click OK.
A new NTSC project is created.
Adding a Shape
This project uses a shape filled with a gradient as the background.
To add a shape to the project:
1 Select the Rectangle tool from the Toolbar.
2 Draw a rectangle slightly larger than the size of the Canvas.
3 In the Inspector, click the Shape tab.
4 Choose Gradient from the Fill Mode pop-up menu.
The red-and-blue default gradient fills the rectangle.
5 If it is not already visible, display the Project pane (press Command+4 or F5).
6 In the Layers tab, double-click the shape name Rectangle and type a new name: Sky.
7 Press Return to accept the new name.
Tutorial 4 Working With Particles
179
Modifying the Gradient
Next, modify the gradient to more closely resemble a sky at sunset.
To modify the colors of the gradient:
1 In the Shape tab of the Inspector, click the disclosure triangle next to Gradient.
The Gradient Editor is displayed. As indicated in the Gradient Editor, the left side
represents the top of the gradient filling the shape, and the right side the bottom.
2 In the Gradient Editor, click the red color tag at the bottom left.
3 Click the color well below the Gradient Editor.
The Colors window appears.
4 Click in the color wheel, and select a yellowish-orange color.
The top of the Sky object changes to this color.
5 Select the blue color tag at the bottom right of the Gradient Editor.
6 Select a red color in the Color wheel.
The bottom of the shape changes to this color.
7 Close the Colors window.
180
Tutorial 4 Working With Particles
The Canvas should look similar to the image below.
With either of the color tags at the bottom of the Gradient Editor selected, a triangleshaped spread control appears between the two. The Gradient Editor works the same
way for shapes as it does for particles.
8 Click the spread control between the two color tags.
9 Set the Location value to 60 percent.
10 Save your project (press Command+S).
Now that the sky is in place, add the sun.
Tutorial 4 Working With Particles
181
Importing a Particle Cell Source
The Library contains a Sun particle preset, which needs no modification for this project.
Simply add the Sun particle preset to the project, and you are finished.
To add the sun particle preset:
1 In the Library, select the Particle Emitters category, then select the Nature subcategory.
2 Drag the Sun particle preset to the upper-left corner of the Canvas.
The Sun particle preset appears where you release the mouse button.
182
Tutorial 4 Working With Particles
3 Click in an empty part of the Layers list so that no objects are selected.
4 Play the project (press the Space bar).
5 Stop playback when finished.
6 Save your project (press Command+S).
Creating a Particle System From a Clip
The Library contains an animated clip of a single butterfly. In this exercise, this clip is
used as a cell source for a new particle emitter. The particle systems created in Exercise
1 of this tutorial were based on images. This time, the particle system created is based
on a multiple-frame clip.
To add the butterfly clip:
1 In the Library, click the Content category, then select the Particle Images subcategory.
2 In the stack, select Butterfly.mov.
3 In the Preview area, click the Apply button.
The Butterfly.mov clip appears in the center of the Canvas.
4 Play the project (press the Space bar).
Tutorial 4 Working With Particles
183
A single butterfly flaps its wings in the center of the Canvas, then disappears. A quick
glance at the mini-Timeline shows the object’s duration.
5 Stop playback, then move the playhead to frame 30.
6 Save your project (press Command+S).
To use the clip as a particle emitter cell source:
1 With the clip selected, click the Make Particles icon in the Toolbar (or press E).
A new particle system is created with a duration of 300 frames. The original butterfly
object, now a cell source, is turned off, and a new emitter is created using the butterfly
movie as its particle cell source.
2 In the Layers tab, double-click the emitter’s name, Emitter, and change it to Butterflies.
The large number of butterflies are all the same size, too large, and too close together.
Change this with a few quick adjustments to the emitter. Make adjustments starting
from the top of the Inspector and work your way down.
184
Tutorial 4 Working With Particles
To adjust the Butterflies emitter:
1 With the Butterflies emitter selected, click the Emitter tab of the Inspector.
2 In the Cell Controls group, set Birth Rate to 3.
The number of butterflies decreases by a significant factor.
3 Set Scale to 60.
Each butterfly particle is scaled down to 60 percent of its original size. In order to create
variation in the size of the butterflies, change the Scale Range parameter.
4 Set Scale Range to 50.
Tutorial 4 Working With Particles
185
Now some of the butterflies are larger than 60 percent, and some are smaller.
Although the butterfly clip is only 40 frames long, the particle system’s duration is
determined by the length of the project. The Life parameter determines the duration of
individual particles.
5 Play the project.
6 Save your project (press Command+S).
Using Custom Gradients
The default colors of the butterflies do not match the background. Use the gradient of
the Sky object as the gradient for the Color Over Life parameter of the particles. This
can be accomplished in one of two ways: by saving the gradient used in the Sky object
as a custom gradient, and then applying it to the particle system; or by picking the
colors from the background in the same manner as Exercise 1.
In this lesson, save the shape’s gradient to the Library and apply it to the butterfly cells.
Change the color properties of the butterflies to better integrate them with the
project’s background.
m
To modify the colors:
In the Emitter tab, choose Over Life from the Color Mode pop-up menu.
Over Life applies a color tint to a particle during its lifetime, beginning with the color
on the left side of the color bar, and ending with the color on the right.
186
Tutorial 4 Working With Particles
To save a custom gradient from the shape:
1 In the Layers tab, select Sky.
2 In the Shape tab of the Inspector, choose Save Gradient from the Gradient Preset popup menu.
3 In the Save Preset to Library dialog, type Sunset Sky, then click Save.
The new gradient is added to the Gradients category in the Library and appears in the
Gradient Preset pop-up menu.
To apply the custom gradient to the butterflies:
1 In the Layers tab, select the Butterfly emitter.
2 In the Emitter tab of the Inspector, choose Sunset Sky from the Color Over Life pop-up
menu.
Tutorial 4 Working With Particles
187
Now, over the butterfly particles’ lives, their color is tinted according to the Sunset Sky
gradient.
The gradient colors can easily be flipped.
To flip the gradient colors:
1 Click the Reverse Tags icon next to the color gradient. One arrow reverses the opacity
tags, and the other reverses the color tags.
Reverse Tags icon (opacity)
Reverse Tags icon (color)
The butterflies start out tinted red, and are tinted more yellow as they go.
2 Click the Reverse Tags icon again to restore the original gradient.
Applying Behaviors to Particles
For more lively butterflies, apply the Throw behavior to make them move across the
screen. Because you want the individual particles in the Butterflies emitter to move
rather than the emitter itself, apply the Throw behavior to the cell source, not the
emitter. That way, particles will move from the origin point of the emitter, rather than
along the path of a moving emitter.
To apply the Throw behavior to the butterfly:
1 In the Layers tab, select the Butterfly object under the Butterflies emitter.
188
Tutorial 4 Working With Particles
2 In the Library, select Behaviors, then select Basic Motion.
3 In the stack, select Throw.
4 In the Preview area, click the Apply button.
Note: Alternatively, you can select the Butterfly object in the Layers tab and click the
Add Behavior icon in the Toolbar.
The Throw behavior is added to the butterfly particles.
To adjust the Throw parameters:
1 In the Behaviors tab of the Inspector, click the disclosure triangle next to Throw
Velocity.
Tutorial 4 Working With Particles
189
2 In the Dashboard, drag from the center of the circle to the right as far as you can.
Notice that in the Inspector the Throw Velocity has changed to a value of
approximately 100, if your zoom slider is in the same position as the screenshot above.
We want the butterflies to have a Throw Velocity of approximately 200, so use the
zoom slider in the Dashboard. If your zoom level is higher than indicated above, the
next two steps will not be necessary.
3 In the Dashboard, drag the zoom slider upward until it is a little more than halfway up.
4 Now drag the arrow to the right until the Throw Velocity in the Inspector is
approximately 200.
Notice that the butterflies should not pop into existence at the center of the Canvas.
For a more realistic effect, move the emitter offscreen to the left at the beginning of
the project.
To move the emitter off-screen:
1 Move the playhead to frame 1 (press Home).
2 In the Layers tab, select the Butterflies emitter.
190
Tutorial 4 Working With Particles
3 In the Canvas, drag the emitter to the left until it is completely off-screen, using the
screenshot below as a guide.
4 Play the project to see the result.
Notice that some of the butterflies disappear before exiting the Canvas on the right
side. Change the Life parameter so the butterflies remain visible.
5 Stop playback.
6 In the Emitter tab of the Inspector, set Life to 8.
7 Play the project.
The butterflies now all remain visible.
8 Save your project (press Command+S).
All done!
Exercise 3: Using a Shape as a Particle Cell Source
This exercise demonstrates how a particle emitter can be used to generate an exciting
element that can be used in a more complex project. Start with a simple shape as the
particle cell source, then create and customize the particle system.
Throughout this exercise, experiment with the various parameter values suggested to
get a feel for the effect of each parameter.
Creating a New Project
Create a new project for this lesson.
To create a new project:
1 Choose File > New (or press Command+N).
2 In the Select Project Preset dialog, choose NTSC Broadcast SD from the Preset pop-up
menu, then click OK.
Tutorial 4 Working With Particles
191
Note: If the Select Project Preset dialog does not appear, and a new project is
automatically created, see “Creating a New Project” on page 178.
Adding a Shape and an Emitter
First, add a star shape from the Library. Next, add an emitter to the project using the
shape as the particle cell source. Let the project play as you go through the steps of
this tutorial; you will get immediate feedback on each of the changes you make!
To add the shape to the project:
1 In the Library, select Shapes, and then select “5-sided star” from the stack.
2 Click Apply in the Preview area.
A five-sided star shape appears in the center of the Canvas.
Note: As with all Library objects, you can drag shapes to the Canvas, Layers tab, or
Timeline Layer list to add them to your project.
192
Tutorial 4 Working With Particles
To use the star shape as a particle cell source:
1 With the star object selected, press E.
A new particle system with a duration of 300 frames is created.
2 Play the project (press the Space bar).
Since the particles are so large, the system quickly becomes a solid white mass. But
with a few changes, you can make the background more distinct.
3 In the Layers tab, double-click the name of the emitter, Emitter. Type a new name, Stars,
then press Return.
Next, soften the edges of the star shape, to create a more interesting (and visible)
effect. You can soften the edges of a shape by increasing the Feather parameter.
Modifying the Cell Source
First, alter the original object, then change the cell source to modify the emitter in
order to more clearly see what the emitter is doing.
To feather the star object:
1 In the Layers tab, select the original 5-sided star shape.
The shape has the shape icon next to it, and is highlighted below.
When a particle system is created, the cell source is automatically turned off. In order to
edit the Feather parameter, the cell source shape must be active.
2 Turn the shape on by clicking the checkbox next to the 5-sided star shape in the On
column of the Layers tab.
3 In the Dashboard (press D or F7), adjust the Feather parameter to 32.
Now the edges of the particles are feathered.
4 Turn the 5-sided star shape off.
Changes made to a cell source change all the cells in the particle system.
One of the reasons that it is difficult to see what the emitter is doing is because the
particles are too large. Make them smaller.
Tutorial 4 Working With Particles
193
To change the scale of the particles:
1 In the Layers tab, select the 5-sided star cell source, which has the particle icon next to
it.
2 In the Particle Cell tab of the Inspector, change Scale to 20.
3 Save your project (press Command+S).
Customizing the Particle Gradient
To make each particle stand out, add more colors to the gradient across its range.
To add a gradient to the particle system:
1 In the Layers tab, select the Stars emitter.
2 In the Emitter tab of the Inspector, choose Over Life from the Color Mode pop-up
menu.
The default red to blue color gradient appears, and the stars in the Canvas become
more blue toward the edges of the Canvas. Each particle in a particle system has a
Life—a length of time the particle is visible, measured from the time it is created. At
the end of its specified Life, the particle disappears. As this is a function of time, when
the Color Mode is set to Over Life, individual particles change color over the course of
their lifetime.
To change the blend mode of the star object:
1 In the Layers tab, select the Stars emitter.
2 In the Emitter tab of the Inspector, click the checkbox to activate Additive Blend.
The overlapping stars now interact more dramatically, as the stars’ color values are
added together when they overlap.
Now you can also see the effect of Additive Blend.
Additive Blend on
Additive Blend off
To add color tags:
1 Click the Color Over Life disclosure triangle to display the Gradient Editor.
Next, add three more color tags to the gradient.
194
Tutorial 4 Working With Particles
2 Click in the color bar at the bottom of the Gradient Editor at three different points
along the range of the gradient.
With each click, another color tag appears under the Gradient Editor.
Now change the red to blue color scheme, using the Colors window.
To adjust the color tags:
1 From left to right, double-click each of the color tags under the Gradient Editor, and fill
them with the following approximate colors: yellow, orange, a red-orange, red, and
pink.
2 Close the Colors window.
Next, make modifications to the opacity of the particle system. Add two tags to the
opacity gradient in exactly the same way as in the color gradient. The particles’ opacity
changes over their lifetime at the same time their colors change.
To adjust the opacity tags:
1 Click the opacity bar at two different points along its range, using the screenshot below
as a guide.
2 Select the first opacity tag.
The Opacity parameter becomes active.
3 Set Opacity to 0 percent.
The left end of the opacity bar displays black, indicating complete transparency.
4 Select the last tag in the opacity bar.
Tutorial 4 Working With Particles
195
5 Set Opacity to 0 percent.
The right end of the opacity bar displays black as well. With these settings, the particles
will fade in quickly, become 100 percent opaque, then fade out slowly, reaching 100
percent transparency before the end of their Life.
6 Click the disclosure triangle next to Color Over Life to hide the Gradient Editor.
Next, make changes to the Scale and Scale Range parameters, to vary the size of the
particles.
m
To vary the size of the particles:
Set Scale Range to 25.
Now the particles are not all the same size. Next, alter the Birth Rate parameter to
decrease the number of particles, and adjust the Birth Rate Range as well.
To adjust and vary the rate of particles emitted:
1 Set Birth Rate to 20.
The particles are now generated at a slower rate.
2 Set Birth Rate Range to 12.
A non-zero value for Birth Rate Range causes the rate at which the particles are
released to vary, and therefore the release pattern is not as uniform.
196
Tutorial 4 Working With Particles
Emitter Shapes
The shape of the emitter plots where particles appear as they are generated. If the
emitter shape is set to a point, all the particles are generated from the same point. If
the emitter shape is set to a line, particles are generated along the path of a line.
Change the shape of the emitter to change the distribution of particles in this system.
m
To change the shape of the particle emitter:
In the Emitter tab, choose Line from the Shape pop-up menu.
Now the particles are emitted along the path of a line. Edit the line either by adjusting
the Start and End Points directly, or by changing the X and Y parameter values for each.
To move the Start and End Points of the line emitter:
1 In the Toolbar, click and hold the Select/Transform tool.
The tool options appear.
2 Select the Adjust Item tool (the last tool in the list).
The emitter’s onscreen controls appear in the Canvas, as circled crosshairs at the
endpoints of the line emitter.
Note: You can also Control-click the Canvas (on the selected emitter object) and
choose Emitter from the shortcut menu to display the Emitter Shape’s onscreen
controls.
Tutorial 4 Working With Particles
197
3 One at a time, select one of the two end points of the emitter, and drag to reposition it.
Set a low speed while in line mode for a nice effect.
4 In the Emitter tab, set Speed to 20.
Changing the shape of the emitter can have a significant effect on the pattern of
generated particles. Now, change the emitter shape to a circle.
m
To change the particle emitter shape to a circle:
Choose Circle from the Emitter Shape pop-up menu.
The particles are now emitted within the circle.
Since the Adjust Item tool is still selected, the circle is visible in the Canvas. Change the
Fill Pattern so the particles are emitted from the circumference of the circle.
198
Tutorial 4 Working With Particles
m
To change the pattern of the emitter:
Choose Outline from the Arrangement pop-up menu.
Next, make the circle smaller and center it in the Canvas.
To change the size of the circle emitter shape:
1 Move the Adjust Item tool until it is hovering over the circle shape.
The circle shape becomes highlighted.
2 Drag the pointer inward to decrease the size of the circle.
Tutorial 4 Working With Particles
199
To center the circle in the Canvas:
1 Move the Adjust Item tool until it is either inside or outside the circle.
2 Drag to reposition the circle in the center of the Canvas.
Important: If the emitter shape is highlighted, dragging the tool resizes the shape. If it
is not highlighted, dragging the tool repositions the shape.
Changing a few other Cell Controls puts the finishing touches on this emitter.
Fine-Tuning the Emitter
The default values listed in the Cell Controls group of the Emitter tab are designed for
uniformity rather than variety. Change these values to generate more variety.
To adjust the life of the particles:
1 In the Cell Controls, set the Life parameter to 2.
The number of particles generated is the same. However, their lives are shorter.
Because of this, the particles now cycle through their color gradient faster.
2 Set Life Range to 1.
Changing the Life Range adds a small amount of variance to the particles, so they
change colors at different rates. Next, move the particles faster.
To adjust the speed of the particles:
1 In the Cell Controls, set the Speed parameter to 200.
The faster-moving particles now travel a greater distance over the course of their short
lifespan.
Change the Speed Range so that the particles do not all move at the same speed.
200
Tutorial 4 Working With Particles
2 Set Speed Range to 30.
Some of the particles shift position slightly, because some of their individual speeds
have been altered.
Next, use a Parameter behavior to add spin to the particles. Normally, adding spin to a
particle system changes the particles so they all spin in the same direction as they are
generated. Think of adding spin with a parameter behavior as adding spin with a twist.
Adding a Parameter Behavior to a Particle Emitter
Just as behaviors are time savers when you manipulate objects, Parameter behaviors
are time savers when you manipulate parameters. Parameter behaviors can simulate
actions that would normally demand keyframing. For example, if you want a parameter
to oscillate over time, it’s as easy as applying the Oscillate behavior to that parameter.
Give the particles an ever-changing value for Spin, greatly increasing their variety, by
adding an Oscillate behavior to the Spin parameter.
To oscillate the spin of the particles:
1 In the Cell Controls, Control-click the Spin parameter, then choose Oscillate from the
shortcut menu.
Tutorial 4 Working With Particles
201
The particles all spin in different directions. In the Inspector, the Behaviors tab is
automatically selected, and the Apply To field is set to Object.Spin.
2 Set Amplitude to 150.
The Amplitude controls how far back and forth the angle of Spin changes. Setting it to
150 means the smallest Spin value is -150 and the largest Spin value is 150.
3 Set Speed to 50.
The particles change the direction of their spin faster.
Now the particles spin at different rates, and in different directions. To access the
Oscillate parameters again, you must select the 5-sided star particle cell, not the Stars
emitter.
4 Save the project (press Command+S).
You’re all done!
202
Tutorial 4 Working With Particles
Exercise 4: Particles and Simulation Behaviors
This exercise demonstrates the effects of adding Simulation behaviors to particle
systems. Simulation behaviors are a fast way of generating complex simulations
without having to keyframe objects. This project uses the result project from Exercise 3.
Opening the Exercise Project
A starting project has been created to get you right to the subject of this exercise, or
you can use the project you created in Exercise 3.
To open the exercise project:
1 Once Motion is open, choose File > Open (or press Command+O).
2 In the Open dialog, navigate to the Tutorial Projects folder (default is /Users/Shared/
Motion/Tutorial Media/Tutorial Projects).
3 Select Tutorial 4 Exercise 4 Start, then click Open.
The selected result project opens and appears within the Motion interface.
To open the project created in Exercise 3:
1 Once Motion is open, choose File > Open (or press Command+O).
2 In the Open dialog, navigate to the location where you saved the project you created in
Exercise 3.
3 Select the name of the project you created, then click Open.
The selected project opens and appears within the Motion interface.
Play the project (press the Space bar) as you are working to see changes to the particle
system as you make them.
To modify the particle system:
1 In the Layers tab, select Stars.
2 In the Emitter tab of the Inspector, choose Point from the Emitter Shape pop-up menu.
Tutorial 4 Working With Particles
203
All the particles are now generated from a single point.
3 In the Dashboard, drag the dot on the edge of the Emission Range control until its
value in the Inspector is approximately 20 degrees.
The range of emission, now narrowed, focuses the particles into a stream.
204
Tutorial 4 Working With Particles
4 In the Dashboard, drag the arrow until the Emission Angle value is approximately 45 in
the Inspector.
5 In the Inspector, set Birth Rate to 12.
Fewer particles are released over time.
6 Set Life to 4.
Although there are now fewer of them, the particles last longer.
7 Set Speed to 200.
The particles move faster.
Depending on the graphics card in your machine, a sheet may appear cautioning you
that the size of the Stars object is too large to render, and that it will be cropped. With
certain graphics cards, objects are limited to a maximum size of 2048 by 2048 pixels.
Dismiss this sheet by pressing the OK button.
8 Set Scale to 15.
The average scale of the particles is now 15 percent of the original size.
9 Set Scale Range to 10.
The scale of the particles now ranges from 5 to 25 percent of the original size.
If it is not already selected, choose the Select/Transform tool.
10 In the Toolbar, click and hold on the Adjust Item tool.
The tool options appear.
11 Select the Select/Transform Tool (the first tool in the list).
Tutorial 4 Working With Particles
205
12 In the Canvas, drag the Stars emitter toward the bottom-right of the Canvas.
13 Save your project (Command+S).
Adding a Simulation Behavior
Simulation behaviors are a shortcut to creating effects that would be extremely timeconsuming to keyframe. Adding a single Simulation behavior can change a project
dramatically. One such Simulation behavior is Edge Collision.
To add Edge Collision to the particle emitter:
1 In the Layers tab, select the Stars emitter.
2 In the Library tab, select Behaviors, then select Simulations.
206
Tutorial 4 Working With Particles
3 In the stack, select Edge Collision.
4 In the Preview area, click the Apply button.
Tutorial 4 Working With Particles
207
The particles with a long enough life now collide with the edges of the Canvas and
bounce back before finally disappearing.
Now, add Gravity to the same particle emitter.
To add Gravity to the particle emitter:
1 In the stack, select Gravity.
2 In the Preview area, click the Apply button.
The particles are pulled down by the force of gravity. The default Gravity settings do
not have much of a visible effect, so increase the pull of gravity.
3 In the Gravity Dashboard, drag the Acceleration value to 80.
Note: You can set an Acceleration value greater than 100 in the Behaviors tab of the
Inspector.
208
Tutorial 4 Working With Particles
Increasing the acceleration to that value slows the particles’ ascent, and also decreases
the maximum height they reach.
Simulations and Multiple Objects
The simulations used so far have been applied to, and have affected, a single object or
emitter. Some of the simulations work by interacting with multiple objects
simultaneously, such as Orbit Around. In this next section, add an object and the Orbit
Around behavior.
To add a shape to the project:
1 In the Library, select Shapes.
Drag the “5-sided star” from the stack to the Canvas.
2 In the Layers tab, double click 5-sided star 1, and type a new name: “Big Star.”
Tutorial 4 Working With Particles
209
3 In the Canvas, press Shift and drag a corner of the shape’s bounding box to scale down
the star, until it is about 35 percent of its original size.
4 In the Shape Dashboard, click the Fill color well.
The Colors window appears.
5 Click the color picker (the magnifying glass icon), then click one of the orange stars in
the Canvas.
The star is now a more satisfying orange color.
6 Close the Colors window.
Now, add the Orbit Around Simulation behavior. Since the particles should orbit around
Big Star, add the behavior to the particles.
To add the Orbit Around behavior:
1 In the Layers tab, select Stars.
2 In the Toolbar, click the Add Behavior icon, choose Simulations, then choose Orbit
Around.
Nothing changes. The reason for this is that the objects do not yet know which object
around which they are to orbit. Choose this object now.
210
Tutorial 4 Working With Particles
To set the particles to orbit the Big Star object:
1 Press F7 or D to display the Dashboard.
2 Drag the Big Star object from the Layers tab to the Object well in the Inspector.
Important: When selecting the Big Star object, be sure to click and drag in one
movement. If you click the object and release the mouse button, the object is selected
and its Inspector appears.
The particles now orbit the Big Star object.
3 In the Layers tab, select Big Star.
Tutorial 4 Working With Particles
211
Because the default Orbit Around parameters are pulling the particles around Big Star
strongly, the other simulations are not as evident. Move Big Star to the lower-left corner
of the Canvas.
What you now see is a complex interaction of simulations, using Gravity, Edge Collision,
and Orbit Around. These simulations, used together, produce something much more
complex than what you could achieve in the same amount of time with keyframing. In
addition, the interactions automatically adjust as objects are moved and parameters
are changed. Experiment with the parameters of the various simulations to watch their
interaction.
The final step is to spin the Big Star object.
To add a Spin behavior to Big Star:
1 In the Layers tab, select Big Star.
2 In the Toolbar, click the Add Behavior icon, then choose Basic Motion > Spin.
3 In the Behaviors tab of the Inspector, change Spin Rate to 300 degrees.
Big Star spins, as if driving the orbit of the particles.
4 Save your project (press Command+S).
All done!
212
Tutorial 4 Working With Particles
What You Have Learned
•
•
•
•
•
•
•
•
•
How to add a particle emitter from the Library to your project
How to modify the parameters of a particle emitter
How to modify the shape of a particle emitter
How to save the particle emitter back to the Library for later use
How to import a particle preset
How to create a particle system from a clip
How to customize a particle emitter from a shape
How to use Simulation behaviors
How to add a Parameter behavior to a simulation
Tutorial 4 Working With Particles
213
5
The Replicator
5
The replicator creates a pattern of repeating elements
from a single object, altering the duplicated objects over
the course of the pattern. The replicator can change the
simplest object into something unexpected.
Although the replicator shares some parameters with particle emitters, they have
different uses. The basic idea of a particle emitter is to create a moving flow of objects,
whereas the basic idea of a replicator is to create a fixed pattern of objects. The
replicator allows you to transform simple shapes into striking patterns in a few short
steps. A new sequence behavior, specifically for use with replicators, can modify the
pattern of a replicator in ways that would normally require time-consuming
keyframing. In addition, Motion contains a library of replicator presets that can be used
as is or modified to suit your needs. Both modified presets and the replicator patterns
you create can be saved to the Library for future use.
This tutorial assumes you are familiar with the Motion interface. You are encouraged to
complete tutorials 1, 2, 3, and 4 before beginning this lesson.
What You Will Learn
•
•
•
•
•
•
•
How to create a replicator pattern with a shape
How to modify the parameters of a replicator pattern
How to modify the shape of a replicator pattern
How to customize a replicator pattern from a shape
How to use the Sequence Replicator behavior
How to add a Parameter behavior to the Sequence Replicator behavior
How to add a Simulation behavior to a replicator pattern
Previewing the Result Motion Project
You can preview the result for the exercise in this tutorial in one of two ways: Open
and preview the result project for each exercise or view the result project preview
movies.
215
To review the result project:
1 Once Motion is open, choose File > Open (or press Command+O).
2 In the Open dialog, navigate to /Users/Shared/Motion/Tutorial Media/Tutorial Projects.
Note: If you changed the default path during installation, you will need to open the
tutorial project and movie files from the new location. For more information, see
“Getting Started” on page 5.
3 Select Tutorial 5 Exercise 1 Result, then click Open.
The selected result project opens and appears within the Motion interface.
4 Click the Play button (or press the Space bar) to play the project.
5 Choose File > Close (or press Command+W) to close the project.
Important: If you made any changes to the project, Motion prompts you to save. Click
Don’t Save.
To review the result project preview movie:
1 In the File Browser, navigate to the Tutorial Projects folder (default is /Users/Shared/
Motion/Tutorial Media/Tutorial Projects).
2 In the file stack, select Tutorial 5 Result.mov.
The selected movie plays in the Preview area of the browser.
3 In the file stack, do one of the following:
• Double-click Tutorial 5 Result.mov and play the movie in the Viewer window.
• Control-click Tutorial 5 Result.mov, then choose Open in QuickTime Player from
the shortcut menu.
4 Close the Viewer window.
Note: When Motion cannot locate source files used by a project (for instance, if the
project source files have been moved to a different location since the project was
saved), a sheet appears that contains the message “The following items used to create
this project are missing.” For more information on locating misplaced source files, see
“Relinking Missing Media” on page 6.
Exercise 1: Working With the Replicator
In this exercise, you will replicate a shape, then modify the parameters of the
resulting replicator pattern.
Opening the Starting Project
For this exercise, a project has been created to help you get started.
To open the starting project:
1 Once Motion is open, choose File > Open (or press Command+O).
216
Tutorial 5 The Replicator
2 In the Open dialog, navigate to the Tutorial Projects folder (default is /Users/Shared/
Motion/Tutorial Media/Tutorial Projects).
3 Select Tutorial 5 Start, then click Open.
The selected starting project opens and appears within the Motion interface.
Replicating the Shape
Begin by replicating the object.
To replicate the shape:
1 Select the shape in the Canvas.
2 Click the Replicator icon in the Toolbar.
The shape is replicated. The replicator bounding box appears in the Canvas. Each X
indicates the anchor point of each object in the pattern.
Tutorial 5 The Replicator
217
The replicator pattern can be resized by dragging the corners or edges of the replicator
bounding box.
Resizing the Pattern and Scaling the Objects
Resize the pattern to cover more of the Canvas. When the pattern is resized, it changes
shape symmetrically, in a manner related to its shape. With the default Rectangle
shape, dragging any of its edges resizes the pattern with mirror symmetry along one
axis. Dragging from a corner resizes the pattern with mirror symmetry along both axes.
m
To resize the replicator:
Drag one of the corner handles toward the edge of the Canvas, until the pattern more
than fills the Canvas.
By default, the replicator pattern is five columns by five rows. Now, change the Scale
End of the replicator, so the objects get smaller at the edges of the pattern.
218
Tutorial 5 The Replicator
m
To change the scale of the objects in a replicator pattern:
In the Replicator tab of the Inspector, change the Scale End parameter to 50 percent.
Now, the object in the center of the pattern is 100 percent of its original scale, and the
objects at the corners are 50 percent of the original scale. The scale of the objects in
between the center and the corners are scaled between the start and end values.
To more clearly see the basic properties of a pattern, add a multicolored gradient to it,
then change its default Origin.
Adding a Gradient
Although a pattern is already apparent with the default parameters, adding a gradient
emphasizes its basic features and design.
To add a gradient to the replicator pattern:
1 In the Replicator tab of the Inspector, choose Over Pattern from the Color Mode pop-up
menu.
Tutorial 5 The Replicator
219
The default colors of the gradient appear in the pattern, with the red starting at the
center and moving toward blue at the edges of the Canvas.
2 Choose Rainbow from the Gradient Preset pop-up menu.
Now, change the Origin parameter in the Replicator tab to further emphasize the basic
properties of the pattern.
m
220
To change the origin of the replicator pattern:
Choose Upper Left from the Origin pop-up menu.
Tutorial 5 The Replicator
Now you can more clearly examine how the pattern is built.
Origin and Build Style
The replicator takes a source object and builds a pattern with it. With the Origin set to
Upper Left, a rectangular pattern is “built” starting in the upper-left corner and
moving out toward the lower-right corner of the Canvas.
The color of the objects steps from green at its upper-left corner to green again at
the lower-right corner, following the Rainbow gradient from left to right. The scale of
the objects changes at the same rate, in this example, from 100 percent in the upperright corner to 50 percent in the lower-right corner, based on the values set in the
Scale and Scale End parameters.
To change the replicator so that the objects in the pattern are all unique, change the
Build Style to Row.
Tutorial 5 The Replicator
221
m
To change the build style of the replicator:
In the Replicator tab of the Inspector, choose By Row from the Build Style pop-up
menu.
The Build Style parameter arranges the pattern from left to right, top to bottom. With
this Build Style selected, each object in the pattern is unique. Depending on your
monitor and other factors, some of them may appear to be the same, but there are
subtle differences.
Experiment with different Origins and Build Styles to examine the various ways in
which the replicator pattern is built. Not all Origins allow Build Style selection.
Bottom Origin
Upper Right Origin, By Column Build Style
When you have finished experimenting, change the Origin back to Upper Left and
Build Style back to Across. Now, add another parameter change to the
replicator: Angle End.
222
Tutorial 5 The Replicator
To change the Angle End of the replicator pattern:
1 In the Inspector, change Angle End to 50.
Now, as the array is built, the object at the Origin starts at zero degrees of rotation, and
the last object is rotated 50 degrees.
2 Save your project (press Command+S).
Replicator Patterns
The Replicator tab has three Arrangement options: Outline, Tile Fill, and Random Fill.
Outline uses the outline of the Replicator shape when building the array. Tile Fill (the
default) fills the shape with a number of objects based on the number of columns
and rows in the pattern. And Random Fill populates the area with a number of
objects equal to the Points parameter.
Outline Pattern, Points = 16
Random Fill, Points = 16
Now, you’ll change the shape of the pattern, and add more objects.
Tutorial 5 The Replicator
223
To change the replicator shape and add more arms:
1 Choose Burst from the Shape pop-up menu.
The shape of the pattern changes to a Burst.
2 Set Number of Arms to 6.
The Burst pattern now has six arms, which are evenly spread over the 360 degrees of
the pattern. Now, change the character of the arms of the Burst by changing the Origin
parameter.
m
To change the Origin parameter of the replicator pattern:
In the Inspector, choose Edge from the Origin pop-up menu.
Examine the objects on each arm of the burst. The outermost object on each arm has a
rotation of zero degrees, and the innermost object has a rotation of 50 degrees.
Aligning the angles with the arms of the burst provides rotational symmetry to the
pattern.
224
Tutorial 5 The Replicator
m
To align the angles of the objects to their related arms:
Turn on the Align Angle checkbox.
Now, the objects are aligned with each arm of the burst to which they are attached,
giving the burst rotational symmetry.
Now, shrink the Burst so it occupies an area just around the center of the Canvas.
To shrink the Burst pattern:
1 In the Inspector, change Radius to 45.
2 Save your project (press Command+S).
Tutorial 5 The Replicator
225
Exercise 2: Animating the Replicator
Now that you have a basic setup for a replicator pattern, you can animate it. Use a
Parameter behavior, the Sequence Replicator behavior, and a Simulation behavior to
animate the pattern. Continue with the project you started in the previous exercise.
Animating the Offset
Animate the pattern’s Offset parameter by applying a ramp to it. The ramp will adjust a
parameter over time from a starting value to an end value.
To ramp the Offset:
1 In the Inspector, Control-click the Offset parameter, then choose Ramp from the
shortcut menu.
The Behavior tab is displayed, and the Ramp parameter is selected.
2 Set Start Value to 120 percent.
As with many parameters, you can adjust Start Value in any of several ways:
•
•
•
•
Adjust the slider.
Type a number in the value field.
Drag in the value field.
Click the increment or decrement arrow in the value field.
3 Set End Value to -80 percent.
4 Play the project (press the Space bar).
226
Tutorial 5 The Replicator
Notice that the arms of the Burst array begin the animated sequence separated, but
come together as the animation plays.
Shuffle Order
The Replicator tab features a parameter that shuffles the stacking order of the objects
being replicated. When turned on, Shuffle Order takes the Replicate Seed parameter
and uses it to determine the objects’ stacking order.
Note: This parameter only changes the stacking order of the objects.
Shuffle Order off
Shuffle Order on
Adding a Sequence Replicator Behavior
With the Sequence Replicator behavior, sequenced animation of objects is easy. You
can make shapes rotate, change color, change opacity, grow, shrink, and move. These
transformations can be done sequentially or in series. The Sequence Replicator
behavior also gives you the ability to control how many objects in the replicator are
affected simultaneously. The good thing about using the Position parameter in a
Sequence Replicator behavior instead of manually animating objects is that the
movements are automatically synchronized during the sequence.
Custom Setting
In the Sequence Replicator behavior, the basic settings for Sequencing are To, From,
Through, and Through Inverted. These settings move parameters from a start value to
an end value, or seesaw parameter values back and forth. More complex effects can
be generated using the Custom setting. This tutorial only covers the basic settings for
the Sequence Replicator behavior. For more information about the Custom setting,
see Chapter 9, “Using the Replicator,” in the Motion User Manual.
m
To add the Sequence Replicator behavior:
Click the Add Behavior icon in the Toolbar, then choose Replicator > Sequence
Replicator.
Tutorial 5 The Replicator
227
The Sequence Replicator behavior does nothing until you animate one of its
parameters. In this example, animate the Rotation parameter.
To add Rotation to the Sequence Replicator behavior:
1 In the Inspector, choose Rotation from the Add Parameter pop-up menu.
The Rotation parameter appears in the Inspector.
2 Set the Rotation control to –360 degrees.
3 Play the project (press the Space bar).
One by one, the shapes that share the same color rotate -360 degrees. By default, the
Unit Size parameter of the Sequence Replicator behavior is set to Object. This means
that the Rotation transformation is applied, in series, to the number of units indicated
by the Spread parameter. If Spread were set to 2, the Rotation transformation would be
applied to two units simultaneously, with the second unit beginning its rotation when
the first unit was halfway through its rotation.
The ratio of Spread to duration of transformation is one of the most important
concepts of the Sequence Replicator behavior. Think of it as dividing the time it takes
to do each transformation into a number of segments equal to the Spread. If an object
is rotating 100 degrees, and the Spread is set to 4, the second object starts its rotation
when the first object has rotated 25 degrees. If Unit Size is set to All, the Spread
parameter does not appear.
Now, change the behavior to rotate all the objects at once.
228
Tutorial 5 The Replicator
m
To make the objects in the pattern rotate at the same time:
Choose all from the Unit Size pop-up menu.
Sequence Replicator Loops
The Loops parameter determines the number of times the transformations applied to
the replicator pattern are repeated during the duration of the behavior. To see what
this parameter does, increase the number of Loops.
With the project playing, set Loops to 3.
Now, over the duration of the Sequence Replicator behavior, each of the objects
rotates -360 degrees three times. The objects spin three times as fast as they did in
the previous example. Any additional parameters added to the Sequence Replicator
behavior would repeat the same number of times.
Set Loops back to 1 when you are finished.
Loops set to 1
Loops set to 3 at the same frame
Now, add color to the Sequence Replicator behavior. Make the target color red.
To add color to the Sequence Replicator behavior:
1 In the Behaviors tab of the Inspector, choose Color from the Add Parameter pop-up
menu.
2 Click the color well.
The Colors window appears.
Tutorial 5 The Replicator
229
3 In the Colors window, choose a red color.
The color of each shape in the pattern moves toward the selected red color over the
course of its life. With the current color scheme of the pattern, these color transitions
don’t work well. Change the color gradient of the replicator pattern to something less
garish.
To change the color gradient of the replicator pattern:
1 In the Inspector, select the Replicator tab.
2 Choose Sundown from the Gradient Preset pop-up menu.
The color gradient of the objects in the pattern changes to reflect the new gradient.
3 Click the Additive Blend checkbox.
The colors of the burst are now added together when they overlap, brightening the
burst as a result.
Additive Blend off
The next parameter to add is Opacity.
230
Tutorial 5 The Replicator
Additive Blend on
To add an opacity change to the Sequence Replicator behavior:
1 In the Inspector, select the Behaviors tab.
2 Choose Opacity from the Add Parameter pop-up menu.
3 Set Opacity to 0 percent.
With Opacity set to 0, the objects in the replicator move from 100 percent opacity at
the beginning of the Sequence Replicator behavior to 0 percent at the end.
To add a scale change to the Sequence Replicator behavior:
1 Choose Scale from the Add Parameter pop-up menu.
2 Set Scale to 85 percent.
The objects in the pattern begin their life at a scale of 100 percent, and end at a scale of
85 percent.
3 Save your project (press Command+S).
Finally, add an animateable parameter to the Sequence Replicator behavior: Position.
Parameter Behaviors
Don’t forget, you can add a Parameter behavior, such as Oscillate, Random, or Ramp,
to any of the Sequence Replicator parameters.
Experiment by adding Parameter behaviors to your Sequence Replicator parameters.
To add a position change to the Sequence Replicator behavior:
1 Choose Position from the Add Parameter pop-up menu.
2 In the Layers list, select the pattern.
Tutorial 5 The Replicator
231
3 Move the pattern to the top-right corner of the Canvas.
4 In the Layers list, select the Sequence Replicator behavior.
5 In the Behaviors tab of the Inspector, click the Position disclosure triangle to display the
X and Y Position controls.
6 Go to frame 300 (press End).
7 Using the X value slider, set X to 440.
8 Using the Y value slider, set Y to -315.
Position indicator
9 Play the project (press the Space bar).
232
Tutorial 5 The Replicator
Now the pattern moves from the top-left corner of the Canvas to the bottom-right
corner over the course of its life.
Add a Fade In/Fade Out behavior so that the pattern doesn’t pop into view on the
Canvas.
To add a Fade In/Fade Out behavior to the replicator pattern:
1 In the Toolbar, click the Add Behavior icon, then choose Basic Motion > Fade In/Fade
Out.
2 In the Dashboard, drag the left side of the fade in control to the right until it indicates a
40-frame fade in.
Because the Sequence Replicator behavior reduces the opacity of the replicator to 0,
there is no need for a fade out.
3 Drag the right edge of the fade out control all the way to the right.
4 Play the project (press the Space bar).
Now, over the course of its life, the pattern moves from the top left to the bottom right
of the Canvas. You can achieve a more organic look by feathering the edges of the
original shape.
To feather the shape:
1 In the Inspector, select the original shape, listed last on the Layers list.
Tutorial 5 The Replicator
233
2 In the Shape tab of the Inspector, set Feather to -22.
The edges of the shape are feathered inward, giving a striking, organic look to the
pattern.
Traversal
The Traversal parameter changes the animation curves that are generated by the
Sequence Replicator behavior. Changing Traversal alters how each change made by
the Sequence Replicator behavior appears over the course of the sequence, and thus
modifies the appearance of the pattern. Changing the Traversal mode can subtly alter
the look of a pattern at a given frame.
Experiment with different Traversal options.
Set Traversal back to Constant Speed when you are finished.
Traversal set to Constant Speed
Traversal set to Ease In/Out at the same frame
At this point, you have created a regular, symmetrical pattern. One final touch: Add a
Simulation behavior to the pattern to give it irregularity.
234
Tutorial 5 The Replicator
To add a Simulation behavior to the replicator:
1 In the Layers tab, select the pattern.
2 In the Toolbar, click the Add Behavior icon, then choose Simulations > Random Motion.
3 In the Behaviors tab of the Inspector, set Amount to 35.
4 Play the project (press the Space bar).
5 Save your project (press Command+S).
Now the pattern begins its life with symmetry, and ends with chaos.
What You Have Learned
•
•
•
•
•
•
•
How to create a replicator pattern with a shape
How to modify the parameters of a replicator pattern
How to modify the shape of a replicator pattern
How to customize a replicator pattern from a shape
How to use the Sequence Replicator behavior
How to add a Parameter behavior to the Sequence Replicator behavior
How to add a Simulation behavior to a replicator pattern
Tutorial 5 The Replicator
235