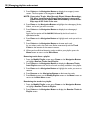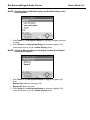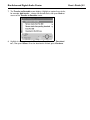
1
Rio Advanced Digital Audio Center User’s Guide
First Edition, November, 2001
Part Number 52260049-001
User’s Guide
Important safety information
© 2001-2002 SONICblue Incorporated. All Rights Reserved.
Laser class notes
Neither SONICblue Incorporated nor Rio assumes any responsibility for errors or omissions in this document or
make any commitment to update the information contained herein.
Rio is a registered trademark of RioPort, Inc. in the United States and/or other countries
and is used under license.
Microsoft Windows Media and the Windows Logo are trademarks or registered trademarks
of Microsoft Corporation in the United States and/or other countries.
All other brand and product names may be trademarks of the companies or organizations
with which they are associated.
Gracenote is CDDB, Inc. d/b/a “Gracenote.” CD and music-related data from Gracenote CDDB® Music
Recognition ServiceSM © 2000, 2001 Gracenote. Gracenote CDDB Client Software © 2000, 2001 Gracenote. U.S.
Patents Numbers #5,987,525; #6,061,680; #6,154,773, and other patents issued or pending. CDDB is a registered
trademark of Gracenote. The Gracenote logo and logotype, the Gracenote CDDB logo and logotype, and the
“Powered by Gracenote CDDB” logo are trademarks of Gracenote. Music Recognition Service and MRS are
service marks of Gracenote. Your Rio Advanced Digital Audio Center comes with a complete CDDB database
containing track information and a one year on-line look up subscription from Gracenote. For on line updates of
the CDDB information after one year from your first on-line lookup you will need to contact Gracenote CDDB to
purchase additional subscriptions. Music recognition technology and meta-database are provided by Gracenote and
the Gracenote CDDB® Music Recognition ServiceSM. Gracenote is the industry standard in music recognition
technology and related content delivery. For more information visit www.gracenote.com.
Gracenote software license agreement:
This product contains technology and data from Gracenote of Berkeley,
California (“Gracenote”). The technology from Gracenote (the
“Gracenote Embedded Software”) enables this product to do disc
identification and obtain music-related information, including name,
artist, track, and title information (“Gracenote Data”), which is included
on the Gracenote Database (the “Gracenote Database”).
You agree that you will use Gracenote Data, the Gracenote Database, and Embedded Software for your own
personal non-commercial use only. You agree that you will access Gracenote Data only by means of the standard
end user functions and features of this product. You agree not to assign, copy, transfer or transmit the Embedded
Software or any Gracenote Data to any third party. YOU AGREE NOT TO USE OR EXPLOIT GRACENOTE
DATA, THE GRACENOTE DATABASE, OR GRACENOTE COMPONENT, EXCEPT AS EXPRESSLY PERMITTED
HEREIN.
You agree that your non-exclusive license to use the Gracenote Data, the Gracenote Database, and Embedded
Software will terminate if you violate these restrictions. You agree that Gracenote may enforce its rights under this
Agreement against you directly in its own name.
The Embedded Software and each item of Gracenote Data are licensed to you “AS IS.” GRACENOTE DISCLAIMS
ALL WARRANTIES EXPRESS OR IMPLIED, INCLUDING, BUT NOT LIMITED TO, IMPLIED WARRANTIES OF
MERCHANTABILITY, FITNESS FOR A PARTICULAR PURPOSE, TITLE, AND NON-INFRINGEMENT.
GRACENOTE DOES NOT WARRANT THE RESULTS THAT WILL BE OBTAINED BY YOUR USE OF THE
GRACENOTE COMPONENT OR ANY GRACENOTE SERVER. IN NO CASE WILL GRACENOTE BE LIABLE
FOR ANY CONSEQUENTIAL OR INCIDENTAL DAMAGES OR FOR ANY LOST PROFITS OR LOST
REVENUES.
CAUTION
As the laser beam used in the Compact Disc player is harmful to the eyes, do not attempt to disassemble
the product. Refer servicing to qualified personnel only.
DANGER
Invisible laser radiation is possible when Compact Disc player door is opened and interlock failed or
defeated. Avoid direct exposure to beam.
This product contains sub-assemblies that are classified as Class 1 Laser Products.
LASER RADIATION
DO NOT STARE INTO BEAM
CLASS 1 LASER PRODUCT
IMPORTANT
Gallium Arsenide (GaAs) is a substance used in some of the components and/or sub-assemblies found
within this product. GaAs dust and fumes are toxic. Do not break, cut or pulverize or use chemicals to
dissolve the Laser/Optic components found within this product. When disposing of this product follow
appropriate local laws; do not dispose of this product with other industrial waste or domestic garbage.
CAUTION WHILE CARRYING THIS UNIT
When moving this unit do not tip or place on its side or top while CD is inside of drive.
WARNING
•
•
•
•
•
•
•
•
To reduce the risk of fire or electric shock, do not operate or expose this unit to rain, moisture or
wet locations.
To avoid electrical shock, do not open this cabinet with Public Switched Telephone Network (PSTN),
communication network or local power cable connected. Refer servicing to qualified personnel only.
This product is not disconnected from the AC power source as long as it is connected to the wall
outlet, even if the apparatus itself is turned off.
To reduce the risk of fire use only No. 26 AWG or larger telecommunication line cord.
No data transmission cables should be connected or disconnected during lightning storms.
Use this device only in environments where temperatures do not exceed 95° F. Always ensure
proper ventilation during use.
Do not use in places exposed to strong magnetic or electrostatic fields. Do not use in places where
the humidity is excessively low.
This product contains telephone network interfaces which are susceptible to Telephone Network
Voltages (TNV) exceeding those of Safety Extra Low Voltage (SELV). Only equipment meeting the
proper separation requirements between TNV and SELV as outline in UL60950 are allowed to be
connected to these ports. Any other equipment not meeting these requirements may result in
damage to the equipment or personal injury.
Rio Advanced Digital Audio Center
User’s Guide | 1
Table of Contents
Chapter 1: Getting Started
Setting up your Rio Advanced Digital Audio Center
The first time you use the Rio Advanced Digital Audio Center
Start using the Rio Advanced Digital Audio Center without adjusting the settings
Adjusting the settings
Chapter 2: Using your Rio Advanced Digital Audio Center
The display
The Main Window
The Status/Feedback bar
The buttons
The remote control
Playing music CDs
Converting music CDs into digital audio files
Managing playlists and content
Creating playlists
Modifying playlists
Deleting playlists
Deleting content
Playing recorded music
Writing custom CDs
Shuffle and repeat
Add to ‘Now Playing’ list
Creating or going to audio bookmarks
About your Rio Advanced Digital Audio Center
Chapter 3: Setting up the software
The Setup menu
Accessing the Setup Menu
Adjusting the display contrast and brightness
Setting recording quality
Configuring internet connection/settings
ISP settings
Network configuration
Setting the clock
Restoring factory (default) settings
Selecting keyboard type
Enter emplode password
emplode on your PC
Installing emplode
Using emplode
Registering your Rio Advanced Digital Audio Center
Chapter 4: Sharing music with your other devices
Other Rio home products
Rio Receiver
Portable digital audio players
Your home computer
3
4
5
6
7
11
12
12
13
13
15
18
20
24
24
26
30
31
35
37
40
42
45
47
49
50
50
51
52
55
57
63
65
68
69
70
72
72
72
75
77
78
78
80
82
2 | Rio Advanced Digital Audio Center
Chapter 5: Advanced features
Games
Upgrade your Rio Advanced Digital Audio Center
Appendix A: Technical specifications
Appendix B: Regulatory information
FCC certification
DOC notice for Canada
EU declaration of conformity
Appendix C: Warranty information
One year limited warranty
Appendix D: Frequently Asked Questions (FAQ)
FAQ and troubleshooting
Appendix E: Customer care information
Technical support - United States
Customer service - United States
Appendix F: Menu Tree
Index
User’s Guide
85
86
87
91
93
94
95
97
99
100
101
102
105
106
106
107
109
Rio Advanced Digital Audio Center
Chapter 1: Getting
Started
User’s Guide | 3
1
4 | Setting up your Rio Advanced Digital Audio Center
The Rio Advanced Digital Audio Center connects to your home stereo system,
your PC, and the Internet. In this chapter, you will learn how to connect the Rio
Advanced Digital Audio Center, and run initial setup.
Link (green) and
Data Activity (yellow)
LEDs
RCA
Output
Phoneline Jack
Optical
Output
Fan Runs automatically as needed to regulate the
internal temperature
Pass-Through Jack
USB Port 1
Use to connect
to PC
USB Port 2
Use to connect to
networking devices,
keyboards, and so on
Power Port
Power Switch
NOTE: At this time, USB hubs are not supported, and may cause
unreliable operation.
Setting up your Rio Advanced Digital Audio
Center
White RCA
Jack
Red RCA
Jack
Phoneline Jack
Pass-Through Jack
Connect the Rio Advanced Digital Audio Center to your
home stereo system
The Rio Advanced Digital Audio Center comes with an RCA cable with red and
white connectors at each end, to connect it to your home stereo system.
1. Plug the red RCA connector (right audio channel) to the Red RCA Jack and
the white RCA connector (left audio channel) to the White RCA Jack on
the back of your stereo receiver.
2. Plug the other end of the RCA cable’s red RCA connector to the Red RCA
Jack and the white RCA connector to the White RCA Jack on back of the
Rio Advanced Digital Audio Center.
Plug the Rio Advanced Digital Audio Center into the nearest
phone jack for Internet and network access
The Rio Advanced Digital Audio Center has a built-in 56K modem, and a Home
Phoneline Networking (Home PNA) card. The modem allows you to access
digital music databases on the Internet, and firmware upgrades for your Rio
Advanced Digital Audio Center. The Home PNA capability allows you to connect
via your standard phonelines to your computer — if you have an optional Home
PNA card installed on your computer — or to your Rio Receiver.
Rio Advanced Digital Audio Center
User’s Guide | 5
Please see “Rio Receiver” on page 78 or visit our Web site at
http://www.riohome.com for more information about the Rio Receiver.
1. Plug one end of the included phone cord into the Phoneline Jack on the
back of the Rio Advanced Digital Audio Center.
2. Plug the other end into the nearest Wall Jack in the room where your Rio
Advanced Digital Audio Center is located.
NOTE: The Pass-Through Jack allows you to plug a phone or other
device requiring access to the Wall Jack into this port to share
the Wall Jack with the Rio Advanced Digital Audio Center.
For more information about setting up your Rio Advanced Digital Audio Center
for Internet and network access, including a list of supported USB Ethernet
adapters, see “Network configuration” on page 63.
Plug the Rio Advanced Digital Audio Center into the nearest
power source
Power Port
1. Plug the included Power Cable into the Rio Advanced Digital Audio Center’s
Power Port, and into the nearest electrical outlet in the room where your
Rio Advanced Digital Audio Center is located. Your Rio Advanced Digital
Audio Center is now ready to be powered on.
2. Press the Power Switch to the ON position.
NOTE: It is not necessary to power the Rio Advanced Digital Audio
Center off with the Power Switch every time you finish using it.
Pressing the Standby Button to put the Rio Advanced Digital
Audio Center into Sleep mode is sufficient, and
recommended.
The first time you use the Rio Advanced Digital
Audio Center
After you press the Power Switch and turn on the Rio Advanced Digital Audio
Center the first time, you are greeted by the Welcome... screen, and prompted
to make some decisions about software settings before using the device.
Power Switch
6 | The first time you use the Rio Advanced Digital Audio Center
1. Press Continue (right) on the Navigation Button, to display the License
Agreement screen.
2. Press Down on the Navigation button to read through the license
agreement Indicate whether you Accept or Decline the agreement by
pressing the Navigation Button.
If you choose to Decline the license agreement, the Rio Advanced Digital
Audio Center immediately displays the message:
“You must accept the license agreement or return the product to the point of
sale for a refund.”
The Navigation Icon gives you the option to go Back.
When you press Accept on the Navigation Button, the Rio Advanced
Digital Audio Center displays a menu of setup options:
The Navigation Icon
on the screen always
displays the current
functions of the fourway Navigation
Button on the Rio
Advanced Digital
Audio Center.
Select Your Timezone is automatically highlighted as the first menu option.
You may choose to adjust these settings now or to Start Using your Rio
Advanced Digital Audio Center.
Start using the Rio Advanced Digital Audio Center without
adjusting the settings
1. Press Down on the Navigation Button until you highlight Start Using
your Rio Audio Center.
2. Press Select on the Navigation Button to display the Now Playing
screen.
Rio Advanced Digital Audio Center
Adjusting the settings
Timezone
1. Press Select on the Navigation Button to display the Select Timezone
screen.
2. Press Down on the Navigation Button to highlight the timezone in which
you have your Rio Advanced Digital Audio Center.
NOTE: This product is designed and sold for use within the United
States. The laws of other countries may limit use of this
product.
3. Press Select on the Navigation Button to enter that choice, and to return
to the Setup screen.
User’s Guide | 7
8 | The first time you use the Rio Advanced Digital Audio Center
Navigation Icon
Time & Date
1. Press Down on the Navigation Button to highlight Set The Time and
Date.
2. Press Select on the Navigation Button to display the Set Time & Date
screen.
Hint: Previous and
Next move the
cursor between the
boxes and buttons.
+ and - increase and
decrease values.
3.
4.
Navigation Icon
5.
6.
7.
Time is displayed with fields for hour : minutes : seconds. Time is in military
time (24 hour clock).
Date is displayed with fields for date : month : year.
Automatic Internet Synchronization allows the system to recheck the
clock settings each time it logs onto the Internet.
Below that are Time Zone and Done buttons.
Press Previous or Next on the Navigation Button to navigate to a
different field.
Press + and - on the Navigation Button to Increase or Decrease the
values in each of the fields to match the correct time and date.
Press Next to move to Automatic Internet Synchronization box.
The Navigation Icon options change to Previous, Toggle, Next, and
Toggle.
If you do not want the Rio Advanced Digital Audio Center to automatically
recheck its time and date settings when online, press either Toggle button to
unmark the box.
Press Next on the Navigation Button to highlight the Done button.
Press OK on the Navigation Button to exit the Set Time & Date screen.
Rio Advanced Digital Audio Center
User’s Guide | 9
Recording quality
The Rio Advanced Digital Audio Center is set up to record your music CDs at
optimal compression rates. It is configured to record your CD music and convert
it into high quality digital audio files that are less compressed for the Rio
Advanced Digital Audio Center to play or smaller, more highly compressed files
to transfer to your portable Rio digital audio player.
Approximate recording capacity (number of CDs worth of
music) at various quality settings
Standard Recording Settings
Portable
Recording
Settings
128kbps
160kbps
192kbps
256kbps
320kbps
None
668
535
446
334
267
64kbps
446
382
334
267
223
96kbps
382
334
297
243
206
128kbps
334
297
267
223
191
Capacity estimated using 60 minute CDs and 38.5 GB of available hard drive
space. Actual performance may vary.
Customize standard recording settings
1. Press Down on the Navigation Button to highlight Customize Standard
Recording Settings.
2. Press Select on the Navigation Button to display the Current Standard
Recording Quality screen.
The currently available compression rates are listed in Kbps with the default
speed highlighted. At the bottom of the list is the Advanced option.
3. Highlight the recording rate you want to use by pressing Up or Down on the
Navigation Button, and then press Select to return to the setup screen.
Hint: Kbps stands for
Kilobits Per Second.
In this instance it
refers to the
number of bits used
to make up one
second of sound.
128 Kbps means it
takes 128,000 bits
to produce one
second of sound.
10 | The first time you use the Rio Advanced Digital Audio Center
Create your own recording quality level
When you are in the Current Standard Recording Quality screen,
1. Press Down on the Navigation Button to highlight Advanced.
2. Press Select on the Navigation Button to display an extended list of
recording rates.
3. Press Down on the Navigation Button to highlight the compression rate
you wish to use.
4. Press Select on the Navigation Button to select that compression rate and
to go to the Now Playing screen.
NOTE: The same steps apply to the Customize Portable Recording
Settings. However, you have the additional option to Disable
Portable Copy Recording. This prevents the Rio Advanced
Digital Audio Center from creating a version of the song for
playback on your portable digital audio player, saving space on
your Rio Advanced Digital Audio Center’s hard drive.
Once you have completed adjusting these settings, press Down on the
Navigation Button to highlight Start Using your Rio Audio Center, then
press Select.
Rio Advanced Digital Audio Center
Chapter 2: Using your
Rio Advanced
Digital Audio
Center
User’s Guide | 11
2
12 | The display
The Rio Advanced Digital Audio Center condenses all your music into a single
manageable database. Simple as a CD player but smart as a PC, it holds more than
650 CDs worth of songs, and lets you experience the freedom of digital music
streaming on your home system. In this chapter, you will learn the functions of the
buttons on the Rio Advanced Digital Audio Center and on the remote control,
how to play music CDs, convert music CDs into digital audio tracks, manage your
music, play recorded music, write custom CDs, use functions like Shuffle and
Repeat, Add to Now Playing List, Audio Bookmarks, and more.
The display
Now Playing Screen
Main Window
Status/Feedback Bar
The display is divided into two sections: the Main Window and the Status/
Feedback Bar.
The Main Window
The Main Window is the larger portion at the top of the display. By default the
Main Window shows the Now Playing screen.
In Now Playing Mode, the main window displays information regarding the
music the Rio Advanced Digital Audio Center is currently playing, which could be
music Tracks on a CD or on the hard drive, the music by a particular Artist, the
tracks in a Playlist, Genre, and so on.
In Menu Mode, the main window displays Menu screens you can select to
perform various actions, for example, encoding music CDs, creating or editing
playlists, playing music CDs, recording custom CDs, and so on.
Rio Advanced Digital Audio Center
User’s Guide | 13
The Status/Feedback bar
The Navigation Icon
on the screen always
displays the current
functions of the fourway Navigation
Button.
The Status/Feedback bar is the darker band at the bottom of the display. It
provides the following information:
• Current player action.
• Album, Artist, and Track information.
• Progress Bar.
• Compression Setting for the track currently playing.
• VU Meters illustrate current output level for the left and right channels.
• Navigation Icon, which illustrates how to use the Navigation Button.
Current Player Action
Progress Bar
Artist, Album, and Track
Information (when CD is in tray)
Compression
Setting
Navigation Icon
VU Meters
The buttons
CD Eject
Play/pause
Now Playing
Standby
Menu
Front USB Port
(not a button)
Infrared receiver for the
remote control (not a button)
Play/Pause
•
•
Press the Play/Pause button to play the highlighted track on the Now
Playing screen.
If a track is currently playing, press the Play/Pause button to pause the track.
Navigation (four-way
directional control)
14 | The buttons
Now Playing
Press this button to go to the Now Playing screen from anywhere in the menu
system. The Now Playing screen is shown below.
Standby
Hint: If you press the
Standby button
while a track is
playing, when you
press it again, the
track resumes play
right where it left
off.
Pressing the Standby button toggles the Rio Advanced Digital Audio Center
between Sleep Mode and Wake Mode. We recommend that you use the
Standby button to put the Rio Advanced Digital Audio Center into Sleep
Mode instead of using the Power Switch at the back. Using Standby allows you
to get to your music faster because you avoid the Rio Advanced Digital Audio
Center’s boot sequence.
A clock displays on the screen when the Rio Advanced Digital Audio Center is in
Sleep mode. An analog clock face displays by default — with the time shown
with clock hands — and the date displayed below. Press the Navigation Button
to adjust the appearance of the clock. For more information about the clock
feature, see “Setting the clock” on page 65.
The Rio Advanced Digital Audio Center can still stream music to your Rio
Receivers while in Sleep mode.
Menu
This button activates the Main Menu screen, which displays over the Now
Playing screen, from anywhere in the menu system.
Sub-menu icon
on the right side of
the screen
indicates that a
sub-menu exists
for the menu
option.
Once you are in the Main Menu screen, press Back (left) on the Navigation
Button to return to the previous screen.
Rio Advanced Digital Audio Center
User’s Guide | 15
Main Menu options
• Play from Playlists, CD's, or Tracks
• Manage Playlists and Content
• Shuffle and Repeat Menu
• Record from CD Tray
• Add To 'Now Playing' List
• Transfer to Portable or Writable CD
• Create or Go To Audio Bookmarks
• Setup Menu
• Games Menu
• About Your Rio Advanced Digital Audio Center
Navigation
Navigation Button
The four-way button helps you navigate through the functions and menus available
on the Rio Advanced Digital Audio Center, and allows you to control the music
you listen to. The four directions (clockwise) are Up, Right, Down, and Left.
Their functions change depending on the screen in the Main Window and the
prompts given by the Navigation Icon in the Status/Feedback Bar.
NOTE: More in-depth instructions on the Navigation Button and the
Navigation Icon are given throughout this chapter as we go
into the many functions and screens in the Rio Advanced
Digital Audio Center menu system.
Eject
Pressing the Eject button stops the CD, and opens and closes the CD
compartment.
The remote control
From the top, the buttons on the remote control include:
Standby
Standby toggles the Rio Advanced Digital Audio Center between Sleep and
Awake modes. If a track is playing when you press Standby, when you press
Standby again the track resumes play where it left off.
Visuals
If the Visuals option is selected in the menu system, press this button to cycle
through visual display choices, some of which are coordinated to move in time
with the music.
Display
Press the Display button to turn the Rio Advanced Digital Audio Center’s
backlight on and off.
Hint: The directions
for the Navigation
Button and
Navigation Icon
are described in
clockwise order in
the User’s Guide.
16 | The remote control
Edit
The Edit button displays a screen where you can add or change information
about the current track, including Title, Artist, Album (CD), Genre, and Year.
Press Edit again to hide the edit screen.
Alphanumeric keypad
The Alphanumeric Keypad can be used to enter letters and numbers, such as
when you are naming playlists or entering your Internet Service Provider (ISP)
information.
Each alphanumeric key contains both upper and lower case letters, as well as the
number value. Press a particular key multiple times to cycle through the values
associated with that key. For example: Each time it is pressed, the number 2
button cycles through a, b, c, 2, A, B, and C. That means that to have a capital B
you would have to press the number 2 button 6 times.
Press a key to select it, wait a moment, then press the next key.
Special characters
The 1 (one) key includes , (comma), space (for entering a blank space) and 1.
The 0 (zero) key includes *, #, and 0.
NOTE: The first letter of a playlist will appear as a capital unless you
cycle through the letters to the lower case version. If you
capitalize a letter in the middle of a playlist, the next letter will
also appear as an upper case letter unless you cycle through
the letters to the lower case version.
Remote Control
Num lock
The Num Lock button works much like the Num Lock button on a computer
keyboard. Press Num Lock to change the alphanumeric keypad into a numeric
keypad. Press Num Lock again to turn it off.
Caps lock
The Caps Lock button works much like the Caps Lock button on a computer
keyboard. When you press Caps Lock, it allows you to type in all capital letters
with the alphanumeric keypad instead of cycling through the available letters and
numbers to select upper case letters. Press Caps Lock again to turn it off.
Backspace
The Backspace button allows you to erase/back up in an input box. For
example, if you are typing in a playlist name and decide to change the name, press
the Backspace button to erase the entire name or only a few letters.
Enter
The Enter button is equivalent to highlighting and selecting the Done button on
screens that call for user input. After typing in a name or a number, press Enter
to input that information into the Rio Advanced Digital Audio Center.
Rio Advanced Digital Audio Center
Clear
The Clear button cancels the last action you’ve performed. In screens with fields
for adding or changing information, press Clear to erase the contents of an
entire field.
Now playing
The Now Playing button takes you to the Now Playing screen from anywhere in
the menu system.
Main menu
The Main Menu button takes you to the Main Menu screen from anywhere in
the menu system.
Four arrow keys
The Four Arrow keys function the same as the four-way Navigation Button on
the Rio Advanced Digital Audio Center.
Change now playing
Press Change now playing to go to the Play from Playlists, CDs, or Tracks Main
Menu option, where you can choose music from your collection.
Rec CD
Press Rec CD to display a screen for selecting tracks to record from an audio
CD. For more information about recording from CD, see “Option 2” on
page 21.
Rewind
Press the Rewind button once to return to the previous track. Press and hold
the Rewind button to scan back through the current track.
Stop
The Stop button stops the current track and resets the track counter to zero.
Play/Pause
Press the Play/Pause button once to play the track currently highlighted on the
Now Playing screen. Press Play/Pause again to pause the current track.
Fast Forward
Press the Fast Forward button once to skip to the next track. Press and hold
Fast Forward to scan through the current track.
Random
Press the Random button to play tracks in random order. Press Random again
to turn random play off.
Repeat
Press the Repeat button to repeat the track currently playing. Press Repeat
again to repeat all tracks. Press Repeat again to turn repeat play off.
User’s Guide | 17
18 | Playing music CDs
Playing music CDs
1. Press the Eject button to open the CD Compartment.
2. Place a CD label up in the CD tray, and press the Eject button again to close
the CD Compartment.
The Rio Advanced Digital Audio Center then:
• Displays the Reading CD message.
• Displays the “Never recorded this CD” screen.
• Prompts you with “Do what with CD?”
The Status/Feedback Bar displays (from left to right):
• The Stop symbol next to the Artist, CD Title, and Track Name of the
CD being read in the CD-ROM drive.
• The Navigation Icon with the options Play CD, Record & Play,
Record, and Back.
3. Press Play CD on the Navigation Button to select Play CD.
Rio Advanced Digital Audio Center
User’s Guide | 19
The Now Playing screen displays a list of the Track Titles on the CD,
followed by the Track Time of each track.
Navigation Icon
As each track plays, the Track Time Elapsed displays along with the Total
Track Time.
Hint: The Navigation
Icon in the Now
Playing screen
reads Previous
Track, Details,
Next Track, and
Visuals.
20 | Converting music CDs into digital audio files
Converting music CDs into digital audio files
NOTE: You may not be able to record certain tracks onto the Rio
Advanced Digital Audio Center’s hard drive, if the tracks are
from a data CD, or a copy of a CD, due to copyright
restrictions.
Some types of CDs, for example, custom audio CDs you create, will not be in the
Gracenote CDDB database of CD information that the Rio Advanced Digital
Audio Center uses to get track details when converting music CDs into digital
audio files. If the Rio Advanced Digital Audio Center can’t find a CD in the
database, it gives you the option to remove the CD from the lookup process by
selecting it on the Ignore screen.
Option 1
1. Press the Eject button to open the CD Compartment.
2. Place a CD in the CD tray, and press the Eject button again to close the CD
Compartment.
The Rio Advanced Digital Audio Center then:
• Displays the message, “Please wait while tray closes and CD is read”.
• Displays the message, “Never recorded this CD.”
• Prompts you with “Do what with CD?”
The Status/Feedback Bar displays:
• The Stop symbol next to the Artist, CD Title, and Track Title of the
CD being read in the CD-ROM drive.
Rio Advanced Digital Audio Center
• The Navigation Icon with the options Play CD, Record & Play,
Record, and Back.
3. Press Record or Record & Play on the Navigation Button.
The Rio Advanced Digital Audio Center will return to the Now Playing
screen and the Status/Feedback Bar displays the CD Artist Name and
Track Name of the tracks being recorded along with a status bar to let you
know what percentage of the track has been recorded.
If you selected Record & Play, the Now Playing screen displays a list of the
Track Titles on the CD, followed by the Track Time of each track.
As each track plays, the Track Time Elapsed will show along with the Total
Track Time.
If for any reason you wish to change the CD or track information, press the
Edit button on the remote control. For more information on using the Edit
commands, see “Edit” on page 16.
Animated gears display
in the lower left corner of
the Status/Feedback bar to
indicate that the recorded
track(s) are being encoded
into MP3 format. When
the Status/Feedback bar
displays the message
“encoding completed”,
recording (and encoding)
is finished.
Option 2
1. With a CD already in the CD Compartment, press the Menu button to
display the Main Menu screen.
2. Press Down on the Navigation Button to highlight Record from CD
Tray.
User’s Guide | 21
Navigation Icon
Hint: Selecting
Record instead of
Record & Play
results in faster
recording of music
tracks.
22 | Converting music CDs into digital audio files
3. Press the Select on the Navigation Button to display the Record from
CD Tray screen.
Current CD will automatically be highlighted as the first option.
4. Press Select on the Navigation Button to display the Album (CD) Title
screen.
All tracks will automatically be selected — indicated by darkened boxes — to
record from the CD.
Navigation Icon
Hint: As soon as you
press Down on the
Navigation
Button to scroll
through the menu
options, the
Navigation Icon
will add Up to the
top of the icon,
allowing you to
scroll back up
through the list.
5. Use the Navigation Button to highlight and select one of the options:
By selecting Confirm Selection you instruct the Rio Advanced Digital Audio
Center to record all tracks on the CD.
By selecting Deselect All, you clear all of the boxes next to the tracks and
the Total Time shown at the top of the screen next to Confirm Selection.
Selecting individual tracks to record from the CD
1. Press Down on the Navigation Button to highlight tracks.
2. Press Select on the Navigation Button to choose the highlighted tracks.
As you choose tracks, the boxes next to them fill with a dark square and the
Total Time at the top of the screen next to Confirm Selection increases.
3. When you are all done choosing tracks to record, press Up on the
Navigation Button to highlight Confirm Selection.
4. Press Select on the Navigation Button to enter Confirm Selection.
Rio Advanced Digital Audio Center
You will be prompted to confirm your choice to record those tracks.
5. Press Confirm.
NOTE: If the CD in the CD Tray has already been recorded, the Rio
Advanced Digital Audio Center will display the Track X is
already recorded screen and will display the options: Skip this
track, Make a copy of this track, Replace previous recording,
and Cancel recording. Highlight the option you prefer and
press Select on the Navigation Button to proceed.
The Rio Advanced Digital Audio Center returns to the Now Playing screen.
It displays the selected Track Titles plus their individual Track Times.
The Status/Feedback Bar displays the CD Artist Name and Track Title
being recorded with a status bar to indicate the percentage of the track that
has been recorded.
Recording multiple CDs
Recording multiple CDs is a fast way to get your music on the Rio Advanced
Digital Audio Center. Use this option if you want to record a lot of CDs, and you
do not want to select individual tracks to record.
NOTE: The fastest way to record is to record without any music
playing.
Follow these steps to record multiple CDs quickly:
1. Press Menu.
2. Select Record from CD in Tray.
3. Select Multiple CDs.
4. This will record the entire CD, open the CD Tray, and record the next CD as
soon as you replace it in the CD Tray, and press the Eject Button.
User’s Guide | 23
24 | Managing playlists and content
Managing playlists and content
Creating playlists
Once you have recorded your music CDs and created MP3 files, you can organize
those files into playlists based on Artist, Album (CD), Genre, Year, what you like
to listen to during different times of the day, for workouts or other activities, and
so on. The same MP3 file can be used in multiple playlists without duplicating the
file, which saves hard drive space.
The emplode software program, located on the Rio Advanced Digital Audio
Center installation CD, can be installed on your PC, and used to create and
maintain your digital audio database. See “emplode on your PC” on page 72,
for instructions on how to install and use the emplode program.
Playlists can also be created directly on the Rio Advanced Digital Audio Center
— using the Alphanumeric Keypad on the included remote control or using a USB
keyboard (not included) — plugged into the front USB Port or USB Port 2 on the
back of the Rio Advanced Digital Audio Center.
Creating playlists using the remote control or USB keyboard
1. Press the Menu button to display the Main Menu screen.
2. Press Down on the Navigation Button to highlight Manage Playlists and
Content.
3. Press Select on the Navigation Button to display the Manage Playlists
and Content screen.
Rio Advanced Digital Audio Center
Create Playlist is automatically highlighted as the first option.
4. Press Select on the Navigation Button to display the Create Playlist
screen.
5. Type a name for the new playlist in the Name field using the Alphanumeric
Keypad on the remote control or a USB keyboard plugged into the Rio
Advanced Digital Audio Center.
6. When finished, press Next on the Navigation Button to highlight the
Done button on the screen.
7. Press OK on the Navigation Button to confirm the playlist name. This
displays the Add Tracks to Playlist screen with the following list of search
options.
• Artist
• Album (CD)
• Genre
• Year
• Tracks
• Most Recently Played
• Newest Recordings
• Top 40 (Most Played)
• Least Recently Played
8. Press Down on the Navigation Button to highlight a search option.
9. Press Select on the Navigation Button to display that category’s menu
screen.The first option in all categories is Add All. The rest of the options
are listed in alphabetical order.
NOTE: If you select Tracks, Most Recently Played, Newest Recordings,
Top 40 or Least Recently Played, that category’s screen will
automatically list the option Add All followed by a list of tracks.
Skip steps 10 & 11 if this is the case.
10. Press Down on the Navigation Button to highlight the subcategory (Artist,
Album, and so on) you want to search.
11. Press Select on the Navigation Button to display that subcategory’s menu
screen.
User’s Guide | 25
26 | Managing playlists and content
Again, the first option is Add All, followed by the list of tracks in alphabetical
order.
12. Press Down on the Navigation Button to highlight each track you wish to
select.
13. Press Select on the Navigation Button to choose each track.
As you choose tracks, the track name you’ve selected flashes momentarily and
the Track Count at the bottom of the screen increases.
14. When you have finished choosing tracks to add to your playlist, press the
Menu button to return to the Main Menu.
Modifying playlists
You can add or remove tracks from your playlists at any time to keep them up-todate with your interests or you can change the order in which the tracks play.
Modifying a playlist
1. Press the Menu button to display the Main Menu screen.
2. Press Down on the Navigation Button to highlight Manage Playlists and
Content.
3. Press Select on the Navigation Button to display the Manage Playlists
and Content screen.
4. Press Down on the Navigation Button to highlight Modify Playlist.
5. Press Select on the Navigation Button to display the Select Playlist
screen.
Rio Advanced Digital Audio Center
All of the playlists that you have created and stored on your Rio Advanced
Digital Audio Center are listed in alphabetical order.
6. Press Down on the Navigation Button to highlight the playlist you wish to
modify.
7. Press Select on the Navigation Button to display the Modify Playlist
screen.
Adding tracks to a playlist
Add Tracks to Playlist is automatically highlighted as the first item in the
list.
1. Press Select on the Navigation Button to display the Add Tracks to
Playlist screen.
2. Press Down on the Navigation Button to highlight the category from
which you want to select your tracks. Categories include:
• Artist
• Album (CD)
• Genre
• Year
• Tracks
• Most Recently Played
• Newest Recordings
• Top 40 (Most Played)
• Least Recently Played
User’s Guide | 27
28 | Managing playlists and content
3. Press Select on the Navigation Button to display that category’s menu
screen. The first option in all categories is Add All.
NOTE: If you select Tracks, Most Recently Played, Newest Recordings,
Top 40 or Least Recently Played, that category’s screen will
automatically list the option Add All followed by a list of tracks.
Skip steps 4 & 5 if this is the case.
4. Press Down on the Navigation Button to highlight the subcategory (Artist,
Album, and so on) you want to search.
5. Press Select on the Navigation Button to display that subcategory’s
screen.
Again the first option will be Add All, followed by the list of tracks in
alphabetical order.
6. Press Down on the Navigation Button to highlight each track you wish to
select.
7. Press Select on the Navigation Button to choose each track.
As you select tracks, the track name flashes momentarily and the Track
Count at the bottom of the screen increases.
8. When you have finished choosing tracks to add to your playlist, press the
Menu button to return to the Main Menu.
Removing tracks from a playlist
1. From the Modify Playlist screen press Down on the Navigation Button
to highlight Remove Tracks from Playlist.
2. Press Select on the Navigation Button to display the Remove Tracks
from Playlist screen with the list of tracks currently available in that playlist.
3. Press Down on the Navigation Button to highlight the tracks you want to
remove.
4. Press Remove on the Navigation Button to eliminate the tracks.
5. Press Back to return to the Modify Playlist screen or the Menu button to
return to the Main Menu screen.
Reordering the tracks in a playlist
1. From the Modify Playlist screen press Down on the Navigation Button
to highlight Reorder Tracks in Playlist.
2. Press Select on the Navigation Button to display the Reorder Tracks in
Playlist screen.
Rio Advanced Digital Audio Center
3.
4.
5.
6.
7.
The list of songs included in the selected playlist display in the order in which
they were originally selected.
Press Down on the Navigation Button to highlight the track you want to
select.
Press Pick Up on the Navigation Button to select that track. The Track
Title flashes briefly.
Press Up on the Navigation Button to move up the list of tracks to the
position where you want to place the track.
Press Drop on the Navigation Button to place the track in its new
location. The Track Title flashes briefly again.
Press Back on the Navigation Button to return to the Modify Playlist
screen or the Menu button to return to the Main Menu.
Renaming a playlist
1. From the Modify Playlist screen press Down on the Navigation Button
to highlight Rename Playlist.
2. Press Select on the Navigation Button to display the Rename Playlist
screen.
The current name of the playlist you selected, and the instructions to enter a
new name appear on the display.
3. Press the Cancel button on the remote control to delete the current name.
4. Enter a new name into the Name field using the Alphanumeric Keypad on
the remote control.
User’s Guide | 29
30 | Managing playlists and content
5. Press Enter on the remote control when you are done.This changes the
name of the playlist to the one you have selected and returns you to the Now
Playing screen.
Deleting playlists
You can delete playlists you no longer want to listen to. Deleting a playlist does
not delete the tracks within the playlist.
1. Press the Menu button to display the Main Menu screen.
2. Press Down on the Navigation Button to highlight Manage Playlists and
Content.
3. Press Select on the Navigation Button to display the Manage Playlists
and Content screen.
4. Press Down on the Navigation Button to highlight Delete Playlist.
5. Press Select on the Navigation Button to display the Select a Playlist
menu screen.
All of the playlists that you have created and stored on your Rio Advanced
Digital Audio Center are listed in alphabetical order.
6. Press Down on the Navigation Button to highlight the playlist you wish to
delete.
7. Press Select on the Navigation Button to display the Confirm Delete
screen.
Rio Advanced Digital Audio Center
The Confirm Delete screen will prompt you with the question, “You are
about to delete X playlist, are you sure?” X represents the name of the playlist
you selected.
A large Navigation Icon displays the options Select, Change List,
Cancel, and View List.
• Press Select on the Navigation Button to delete the playlist.
• Press View List to take a look at the contents of that playlist.
• Press Change List to change the playlist’s contents.
• Press Cancel if you decide not to delete the playlist.
Deleting content
You have several options available to you when it comes to eliminating unwanted
music files from the Rio Advanced Digital Audio Center’s hard drive. You can
select your music to delete by Artist, Album, Genre, Year or Track. You can
choose to delete all of your music or only certain tracks.
1. Press the Menu button to display the Main Menu screen.
2. Press Down on the Navigation Button to highlight Manage Playlists and
Content.
3. Press Select on the Navigation Button to display the Manage Playlists
and Content screen.
4. Press Down on the Navigation Button to highlight Delete Content.
You also have the option to delete the content on your Rio Portable Digital
Audio Player, by selecting Delete Portable Content on the Manage
User’s Guide | 31
32 | Managing playlists and content
Playlists and Content screen. To delete portable content, your portable
player must be connected to the Rio Advanced Digital Audio Center by its
USB cable, and turned on.
5. Press Select on the Navigation Button to display the Delete Content
screen.
6. Press Down on the Navigation Button to highlight the category in which
you wish to search for the content you want to delete. The options are
Artist, Album (CD), Genre, Year, and Tracks.
7. Press Select on the Navigation Button to display the Find Tracks to
Delete by X screen. X represents the name of the category you selected.
Selecting Artist, Album, Genre or Year, gives the option to Delete All of
the tracks in that category or to select a subcategory of tracks in which to
search.
Selecting the Tracks category gives the option to Delete All tracks or to
select individual tracks to delete.
Deleting tracks by artist
If you select Artist on the Delete Content screen, the Find Tracks to
Delete by Artist screen displays the options to Delete All tracks or to select
Artist 1 (# of tracks), Artist 2 (# of tracks), and so on. Delete All is
automatically highlighted as the first item in the list.
Deleting all of the tracks
1. Press Select on the Navigation Button.
This will take you to the Permanently Delete Tracks screen where the
selected songs are listed.
2. Press Continue on the Navigation Button to go to the Confirm Delete
screen. There you are prompted to decide if you want to press:
• Select to confirm the deletion,
• Edit List to make changes to the selected list of tracks to be deleted,
• Cancel to stop the process
• or View List to review the selected tracks.
3. Press Select on the Navigation Button. The Permanently Delete
Tracks screen displays for a moment while it finishes deleting the selected
tracks, then returns to the Now Playing screen.
Rio Advanced Digital Audio Center
Deleting specific tracks
1. Press Down on the Navigation Button to highlight the Artist you want to
select tracks from.
2. Press Select on the Navigation Button to display the Find Tracks to
Delete by Album screen.
Delete All (Artist Name) is automatically highlighted as the first item in
the list.
3. Press Select on the Navigation Button to delete all of the tracks by that
artist.
If you prefer to delete certain tracks from an album, press Down on the
Navigation Button to highlight the Album you wish to search.
4. Press Select to display the Select the Track to Delete screen.
Delete All (Album Title) is automatically highlighted as the first item in the
list.
5. You can either:
• Press Select on the Navigation Button to delete all of the tracks in
that album. This will take you to the Permanently Delete Tracks
screen where the selected songs are listed.
• Press Down on the Navigation Button to highlight and eliminate
individual tracks.
6. Press Select to fill in the box next to the track to indicate that it is to be
deleted, and to display the Permanently Deleted Tracks screen, which
displays the tracks selected for deletion.
7. Add more tracks to this list by pressing Select More Tracks on the
Navigation Button and repeating the earlier steps or press Continue to
reach the Confirm Delete screen.
8. Press Select to delete the selected tracks.
Deleting tracks from the tracks category
Here, all of the tracks you have stored on your Rio Advanced Digital Audio
Center are listed in alphabetical order by title, not by artist or album or playlist.
Therefore, if you have an extensive collection of songs, you will have to scroll
down through the entire contents of your hard drive to find those tracks you
want to eliminate. Delete All is automatically highlighted as the first item in the
list.
Deleting all tracks
1. Press Select on the Navigation Button.
The Permanently Delete Tracks screen appears and lists the selected
songs.
2. Press Continue on the Navigation Button to display the Confirm
Delete screen. You are prompted to decide if you want to press:
• Select to confirm the deletion,
• Edit List to make changes to the selected list of tracks to be deleted,
• Cancel to stop the process
• or View List to review the selected tracks.
User’s Guide | 33
34 | Managing playlists and content
3. Press Select on the Navigation Button.
The Permanently Delete Tracks screen appears for a moment while it
finishes deleting the selected tracks.
Then, the Now Playing screen displays.
Selecting specific tracks
1. Press Down on the Navigation Button to highlight individual tracks.
2. Press Select to fill in the box next to the track to indicate that it is to be
deleted and to display the Permanently Deleted Tracks screen, which
displays the tracks selected for deletion.
3. Add more tracks to this list by pressing Select More Tracks on the
Navigation Button, and repeating the earlier steps or press Continue to
reach the Confirm Delete screen.
4. Press Select to delete the selected tracks.
Rio Advanced Digital Audio Center
Playing recorded music
Once you have recorded your CDs on the Rio Advanced Digital Audio Center,
you can select music to listen to by Playlist, Artist, Album (CD), Genre, Year, or
other categories.
1. Press Menu to display the Main Menu screen.
Play from Playlists, CDs, or Tracks is automatically highlighted as the first
choice.
2. Press Select to display the Play from Playlists, CDs or Tracks screen.
The options to choose from are Playlists, Artist, Album (CD), Genre,
and Year, which break down further into subcategories, and Tracks, Most
Recently Played, Newest Recordings, Top 40 (Most Played), and
Least Recently Played, which display tracks for you to choose from.
3. Press Down on the Navigation Button to scroll down through the list of
options or press Up on the Navigation Button to scroll back up through
the list until you highlight the option you want.
User’s Guide | 35
36 | Playing recorded music
4. For this example highlight Least Recently Played, and press Select on the
Navigation Button.
Play All is automatically highlighted as the first option in the Least Recently
Played screen. Below that is a list of tracks that have been played the least
recently since being recorded in the order of least to most recently played.
5. Press Down on the Navigation Button to scroll down through the list of
tracks until you highlight the track you want to hear.
6. Press Select on the Navigation Button to play that track and to return to
the Now Playing screen.
Rio Advanced Digital Audio Center
Writing custom CDs
Once you have recorded your audio CDs on the Rio Advanced Digital Audio
Center, you can create a custom CD of your favorite music.
NOTE: You may not be able to write certain tracks, if the tracks are
from a data CD, or a copy of a CD, due to copyright
restrictions.
1. Press Menu to display the Main Menu screen.
2. Press Down on the Navigation Button to highlight Transfer to Portable
or Writable CD.
3. Press Select on the Navigation button to display the Select device
screen.
4. Highlight Data CD or Audio CD, then press Select to display the main
Transfer to Data CD or Transfer to Audio CD screen. Data CD refers
to MP3/WMA format. Audio CD is regular Red Book audio CD format.
User’s Guide | 37
38 | Writing custom CDs
Both the Transfer to Data CD and the Transfer to Audio CD screens
contain same options. To choose an option, press the Navigation Button to
highlight an option, then press Select. From the sub-menu screens, press
Back to return the main Transfer to Data CD or Transfer to Audio CD
screen.
5. Set Title of CD Enter a name for your CD using the alphanumeric keypad
on the included remote control or a USB keyboard (not included). For more
information about using the alphanumeric keypad on the remote control, see
“The remote control” on page 15.
6. Add Tracks to CD Search for tracks to add by Playlist, Artist, Album (CD),
Genre, and/or Year. For Data CDs, the Rio Advanced Digital Audio Center
selects the “standard” bitrate version of the track to write to the CD.
Press the Navigation Button to highlight a track to add to your CD, then
press Select.
Your selection displays on a new screen. Highlight and press Select to choose
the specific Playlist, Artist, Album, Track, and so on, or choose “Add All”. An
error message will display if you try to choose a copy protected track.
NOTE: The CD percent used shown on the left part of the screen
increases when the track has been successfully selected.
Press Back on the Navigation Button to choose the next track.
When you are finished choosing tracks, press Back to return to the main
Transfer to Data CD or Transfer to Audio CD screen.
CD percent
used
Both the Add
Tracks and
Remove Tracks
screens show the
CD percent used.
Copy
protected
track icon to
the right of the
title indicates
that the track
can not be
selected.
Rio Advanced Digital Audio Center
7. Remove Tracks from Transfer Queue This option shows the tracks you
have selected for your CD. CD percent used displays in the left part of the
screen. If the CD is over 100% full, use this screen to choose tracks to
remove from the CD by highlighting them, then pressing Select. The Rio
Advanced Digital Audio Center prompts you with an ‘...are you sure?’
message. Press Yes to delete the track.
8. Erase CD Choose this option to erase your rewritable CDs. The CD must
be an erasable type for this option to work.
9. Record CD Now Choose this option to start writing the CD. The Rio
Advanced Digital Audio Center creates a CD image, then writes the CD.
When the CD is finished, a ‘Record Complete’ message displays, and the CD
automatically ejects if you selected the Eject CD When Completed box.
10. Eject CD When Completed Select this box to automatically eject the CD
when recording is completed. Scroll down on the main Transfer to Data
CD or Transfer to Audio CD screen to see this box.
User’s Guide | 39
40 | Shuffle and repeat
Shuffle and repeat
Hint: Pressing Back
on the Navigation
Button will cancel
your current action
and take you to the
previous screen.
Pressing the Menu
button will return
you to the Main
Menu screen.
Whether you want to listen to a track or a playlist continuously or you want to
play the entire music collection randomly you can configure the Rio Advanced
Digital Audio Center to meet your needs using the Shuffle and Repeat functions.
1. Press the Menu button to display the Main Menu screen.
2. Press Down on the Navigation Button to highlight Shuffle and Repeat
Menu.
3. Press Select on the Navigation Button to go to the Shuffle and Repeat
menu screen.
Hint: The Shuffle and
Repeat functions
only affect tracks in
the Now Playing
list.
The available menu options are:
• Normal Play, Once Through
• Normal Play, All Repeated
• Random Play, Once Through
• Random Play, All Repeated
• Advanced Shuffle
• Advanced Repeat
4. Press Down on the Navigation Button to highlight the option you want.
5. Press Select to make that selection or Back to return to the Main Menu
screen.
Rio Advanced Digital Audio Center
NOTE: Selecting Advanced Shuffle displays the Shuffle Settings screen
and its options.
1. Press Down on the Navigation Button to highlight the option you want
to select.
2. Press Select on the Navigation Button to save your selection. This
automatically returns you to the Now Playing screen.
NOTE: Selecting Advanced Repeat will display the Advanced Repeat
screen and its options.
1. Press Down on the Navigation Button to highlight the option you
want.
• Repeat One repeats the current track.
• Repeat All repeats all tracks.
2. Press Select on the Navigation Button to save your selection. This
automatically returns you to the Now Playing screen.
User’s Guide | 41
42 | Add to ‘Now Playing’ list
Add to ‘Now Playing’ list
1. Press the Menu button to display the Main Menu screen.
2. Press Down on the Navigation Button to highlight Add to ‘Now Playing’
List.
3. Press Select on the Navigation Button to display the Add to ‘Now
Playing’ List screen.
The two options available are:
• Insert Music (automatically highlighted) Inserts music after the track
currently highlighted in the ‘Now Playing’ List.
• Append Music Inserts music at the end of the ‘Now Playing’ List.
4. Press Select on the Navigation Button to display the Insert Music
screen.
Rio Advanced Digital Audio Center
A list of categories display. They include:
• Playlists
• Artist
• Album (CD)
• Genre
• Year
• Tracks
• Most Recently Played
• Newest Recordings
• Top 40 (Most Played)
• Least Recently Played
5. Press Down on the Navigation Button to highlight the category you wish
to search.
6. Press Select on the Navigation Button to display the next search menu.
If you selected Artist for example, you would now see the Artist menu
screen with Insert All at the top and a list of the artists available on your Rio
Advanced Digital Audio Center in alphabetical order.
7. Press Down on the Navigation Button to highlight the Artist you wish to
search.
8. Press Select on the Navigation Button to display that Artist’s menu
screen.
Insert All (Artist Name), followed by a list of the Artists’ album titles,
displays.
9. Press Down on the Navigation Button to highlight the Album you wish to
search.
10. Press Select on the Navigation Button to display that Album’s menu
screen.
The option to Insert All (Album Title) is followed by a list of the Tracks
included in that Album.
11. Press Down on the Navigation Button to highlight the Tracks you wish to
insert.
12. Press Select on the Navigation Button to return to the Now Playing
screen.
The Track you inserted now appears after the highlighted Track Title on the
Now Playing Screen.
For example: If you had 30 tracks in the Now Playing screen before you
inserted Track 31 and Track 16 was highlighted, after inserting Track 31, the
Now Playing screen would show Track 16 still highlighted, but Track 31 would
User’s Guide | 43
44 | Add to ‘Now Playing’ list
be listed below it with Track 17 after that. Track 31 would then be the next
song to play in the Now Playing list.
NOTE: Appending Music takes the same steps to complete, but adds
the track at the end of the Now Playing list rather than after
the track currently highlighted for play.
Rio Advanced Digital Audio Center
Creating or going to audio bookmarks
If you would like to save a position in a track for future reference, create an audio
bookmark. You can go to your saved bookmarks at a later time. Bookmarks save
the entire music lineup, so if you made a complex selection of tracks they are
saved along with the track currently playing, and the shuffle state.
Creating a bookmark
1. Select the track or playlist you wish to bookmark from the Now Playing
screen or by selecting it from the Play From Playlists, CDs, or Tracks
screen.
2. Press the Menu button to display the Main Menu screen.
3. Press Down on the Navigation Button to highlight Create or Go to
Audio Bookmarks.
4. Press Select on the Navigation Button to display the Bookmarks screen.
NOTE: The three Bookmark options access bookmarks you have
created, while the Set options allow you to create the
bookmarks you want.
5. Press Down on the Navigation Button to highlight Set 1.
6. Press Select to return to the track or playlist you selected or Back to return
to the Main Menu screen.
7. Press Play/Pause to play the track or playlist. This marks the track or playlist
as Bookmark 1.
User’s Guide | 45
46 | Creating or going to audio bookmarks
Going to a bookmark
1. Press the Menu button to display the Main Menu screen.
2. Press Down on the Navigation Button to highlight Create or Go to
Audio Bookmarks.
3. Press Select on the Navigation Button to display the Bookmarks screen.
Bookmark 1 is automatically highlighted as the first bookmark. It displays
bookmarked track or playlist information next to Bookmark 1.
4. Press Select to play Audio Bookmark 1 or Back to return to the Main
Menu screen.
Rio Advanced Digital Audio Center
About your Rio Advanced Digital Audio Center
This Main Menu option displays pertinent technical information about your Rio
Advanced Digital Audio Center.
1. Press the Menu button to display the Main Menu screen.
2. Press Down on the Navigation Button to highlight About your Rio
Audio Center. The following information displays. Scroll through the
information by pressing Up or Down on the Navigation Button.
• Copyright date
• Rio’s Web site address
• MAC address
• IP address
• DHCP address
• Devices supported
• Support phone number
• Disk usage with a bar graph and percentile
User’s Guide | 47
48 | About your Rio Advanced Digital Audio Center
Rio Advanced Digital Audio Center
Chapter 3: Setting up
the software
User’s Guide | 49
3
50 | Accessing the Setup Menu
The Rio Advanced Digital Audio Center gives music lovers freedom and
convenience never before possible for a home audio system. In this chapter, you
will learn how to customize the Rio Advanced Digital Audio Center display,
recording quality, Internet connection settings, network configuration, clock
function, and more, and use the emplode music database PC software included on
the CD.
The Setup menu
Accessing the Setup Menu
1. Press the Menu button on the front of the Rio Advanced Digital Audio
Center. The Main Menu screen displays:
2. Press Down on the Navigation Button to scroll down through the Main
Menu choices. Highlight Setup Menu.
3. Press Select on the Navigation Button to display the Setup Menu screen.
Setup Menu options include:
• Display
• Recording Quality
• Internet Connection/Settings
• Network Configuration
• Set Time & Date
• Restore Factory Settings
• Select Keyboard Type
• Enter emplode Password
Rio Advanced Digital Audio Center
User’s Guide | 51
Adjusting the display contrast and brightness
1. Under the Setup Menu highlight Display and press Select on the
Navigation Button to display the Display Settings screen.
2.
3.
4.
5.
Here you can adjust the Contrast and Brightness of the display. Contrast
will automatically be highlighted as the first option.
Press Less or More on the Navigation Button to adjust the level of
Contrast in the display.
Press Down on the Navigation Button to highlight Brightness.
Press Less or More on the Navigation Button to adjust the level of
Brightness in the display.
When you have finished adjusting Contrast and Brightness, press Down to
highlight the Done button.
The Navigation Icon will show a change in the Navigation Button
choices. They will now be UP, OK, Down, and Cancel.
Navigation Icon
52 | Setting recording quality
Setting recording quality
Hint: 64 Kbps means
64,000 bits were
used to create one
second of music.
128 Kbps means
128,000 bits were
used to create one
second of music.
The Rio Advanced Digital Audio Center is configured to record your CD music
and convert it into high quality digital audio files that are less compressed for the
Rio Advanced Digital Audio Center to play, or smaller, more highly compressed
files to transfer to your portable Rio digital audio players.
Since the portable players often have limited space available for storing music,
recording the digital audio files at a higher compression rate like 64 Kbps creates
smaller file sizes, and allows you to put more music on your portable Rio digital
audio player. When digital audio files are recorded at “CD quality” (approximately
128 kbps) or better, they are less compressed, use more bits to create one
second of music, and take up more hard drive space.
Customizing the recording quality
1. Press the Menu button to display the Main Menu.
2. Press Down on the Navigation Button to highlight Setup Menu.
3. Press Select on the Navigation Button to display the Setup Menu screen.
4. Press Down on the Navigation Button to highlight Recording Quality.
5. Press Select on the Navigation Button to display the Customize
Recording Quality screen.
Rio Advanced Digital Audio Center
User’s Guide | 53
Customize Standard Recording Settings is automatically highlighted as
the first item in the list.
The other option available is Customize Portable Recording Settings.
6. Press Select on the Navigation Button to display the Current Standard
Recording Quality screen.
The currently available compression rates will be listed in Kbps with the
default speed highlighted. At the bottom of the list is the Advanced option.
7. Highlight the recording rate you want to use by pressing Up or Down on the
Navigation Button and then press Select to make that selection and to
return to the Now Playing screen.
Hint: Kbps stands for
Kilobits Per Second.
In this instance it
refers to the
number of bits used
to make up one
second of sound.
128 Kbps means it
takes 128,000 bits
to produce one
second of sound.
54 | Setting recording quality
Creating your own recording quality level
When you are in the Current Standard Recording Quality screen,
1. Press Down on the Navigation Button to highlight Advanced.
2. Press Select on the Navigation Button to display an extended list of
recording rates.
3. Press Down on the Navigation Button to highlight the compression rate
you wish to use.
4. Press Select on the Navigation Button to select that compression rate and
to return to the Now Playing screen.
NOTE: The same steps apply to the Customize Portable Recording
Settings. However, you have the additional option to Disable
Portable Copy Recording. This prevents the Rio Advanced
Digital Audio Center from creating a version of the song for
playback on your portable digital audio player, saving space on
your Rio Advanced Digital Audio Center’s hard drive.
Rio Advanced Digital Audio Center
Configuring internet connection/settings
1. Press Menu to display the Main Menu screen.
2. Press Down on the Navigation Button to highlight Setup Menu.
3. Press Select on the Navigation Button to display the Setup Menu screen.
4. Press Down on the Navigation Button to highlight Internet
Connection/Settings.
5. Press Select on the Navigation Button to display the Internet
Connection/Settings screen.
6. Press Down on the Navigation Button to highlight each option.
7. Press Select on the Navigation Button to select each option.
User’s Guide | 55
56 | Configuring internet connection/settings
Getting track details from Internet
This features allows the Rio Advanced Digital Audio Center to go online and get
the track details — artist name, album title, track length, and so on —
automatically, so you do not have to fill out each track’s entry manually. This
feature makes it convenient to record all of your favorite music CDs onto your
Rio Advanced Digital Audio Center without having to spend time typing in track
information.
1. This option will automatically be highlighted. Press Select on the Navigation
Button to go to the Get Track Details from Internet screen.
Yes is automatically the highlighted choice. However, if you do not want the
Rio Advanced Digital Audio Center to connect automatically to the Internet
to locate track information, press Down on the Navigation Button to
highlight No.
2. Press Select on the Navigation Button to enter your choice and to return
to the Internet Connection/Settings screen.
NOTE: If the ISP Configuration screen appears, you may set up your
connection now by pushing Continue on the Navigation
Button. See “ISP settings” on page 57.
Rio Advanced Digital Audio Center
Checking online now for software update
This feature allows the Rio Advanced Digital Audio Center to go online and look
for updates to its firmware. These updates provide improvements to the Rio
Advanced Digital Audio Center’s functionality, which may occasionally include
new features.
1. Press Down on the Navigation Button to highlight Check Online Now
for Software Update.
2. Press Select to display the Check Online Now for Software Update
screen.
NOTE: If the ISP Configuration screen appears, go to the following
section for further instructions.
ISP settings
Follow these simple steps to configure your ISP Settings. This is important
because these settings control how your Rio Advanced Digital Audio Center
contacts the nearest available ISP to enable downloading software updates and
track information. When you select this option, the ISP Configuration screen
will appear.
You will also reach this screen if your ISP settings were not set up before you
chose Get Track Details From Internet or Check Online Now For
Software Update.
User’s Guide | 57
58 | ISP settings
ISP configuration Step 1: Enter area code and first three digits
1. Use the remote control or a USB keyboard to enter your Area Code and
the first three digits of your Telephone Number. For information on using
the remote control, see “The remote control” on page 15.
2. Press Next to highlight Done.
3. Press Continue. This will allow your Rio Advanced Digital Audio Center to
search for access numbers that correspond to your location.
NOTE: If there are no local access numbers for your Rio Advanced
Digital Audio Center to dial into, you can decide if you wish to
dial into a long distance access number, which may then accrue
charges on your phone bill. Some phone calls in the same area
may be billed as “local long distance”. Check with your
telephone company to determine whether the dial-up number
is a toll call for your area.
ISP configuration Step 2: Disable call waiting/caller ID
1. If you have call waiting, caller ID or you have to dial a number to dial out to an
outside phoneline, enter the Dialing Prefix on this screen using the remote
control or a USB keyboard.
You can enter special characters using the numeric keys on the remote
control. The 0 (zero) key includes *, #, and 0. The 1 (one) key includes ,
(comma), space (for entering a blank space) and 1. For more information
about using the remote control, see “The remote control” on page 15.
2. Press Next on the Navigation Button to highlight Done.
3. Press Continue on the Navigation Button.
Rio Advanced Digital Audio Center
ISP configuration Step 3: Enter zip code
1. Using the remote control or a USB keyboard, enter your five digit Zip Code.
2. Press Next on the Navigation Button to highlight Done.
3. Press Continue on the Navigation Button.
ISP configuration Step 4: Choose local phone number
The Rio Advanced Digital Audio Center dials a toll free number to retrieve a list
of local phone numbers to choose from.
1. Press Next or Previous to highlight a local number from the list displayed on
the screen.
2. Press Continue on the Navigation Button.
User’s Guide | 59
60 | ISP settings
ISP configuration Step 5: Select dialing method
1. This screen prompts you to select the appropriate dialing method for your
area.
2. Press Continue on the Navigation Button when you are finished. The
Step 6: ISP setup complete screen displays.
Rio Advanced Digital Audio Center
Automatic connection settings
You can also configure the Rio Advanced Digital Audio Center to automatically
look online for its software updates and track details when it is in Awake mode.
Choosing these options eliminates having to check online for this information on
a regular basis. You also avoid the possibility of missing an important software
update when it becomes available.
1. On the Internet Connection/Settings screen, press Down until you
highlight Automatic Connection Settings.
2. Press Select on the Navigation Button to display the Automatic
Connection Settings screen.
Connection for Track Details will be highlighted as the first option.
3. Press Select on the Navigation Button to display the Connection for
Track Details screen.
User’s Guide | 61
62 | ISP settings
4. This screen asks you to decide if you want the Rio Advanced Digital Audio
Center to Connect Automatically to the Internet to gather CD
information each time you put a new CD in, to Prompt Me Before
Connecting to the Internet or Never Connect to the Internet.
Prompt Me Before Connecting is automatically highlighted as the default
choice.
5. Press Up or Down on the Navigation Button to highlight the option you
prefer.
6. Press Select on the Navigation Button to return to the Automatic
Connection Settings screen.
7. Press Down on the Navigation Button to highlight Connection for
Software Downloads.
8. Press Select on the Navigation Button to display the Connection for
Software Downloads screen.
Yes (automatically check for software updates when connected to the
Internet) is highlighted as the default option.
9. To change this to No, press Down on the Navigation Button to highlight
No.
10. Press Select on the Navigation Button to enter that choice.
This will return you to the Automatic Connections Settings screen.
Rio Advanced Digital Audio Center
Network configuration
You can connect the Rio Advanced Digital Audio Center to an existing Home
PNA or Ethernet network to share files with your PCs or Rio Receivers or to
connect to the Internet. You can also create a network connection between your
Rio Advanced Digital Audio Center and a single Rio Receiver.
Home Phoneline Networking (Home PNA)
Your Rio Advanced Digital Audio Center can use your standard phonelines to
create a Home PNA network connection between it and any Rio Receivers or
computers with Home PNA network adapters you have plugged into the same
phonelines. It is a simple solution to your networking needs.
1. Plug the included phone chord into the Phoneline Jack on the back of the Rio
Advanced Digital Audio Center.
2. Plug the other end of the phone cord into the nearest Wall Jack.
Ethernet
To connect the Rio Advanced Digital Audio Center into an Ethernet network,
you need a USB Ethernet adapter (not included). Plug the USB Ethernet adapter
into USB Port 2 at the back of the Rio Advanced Digital Audio Center (or into
the front USB Port) and into an Ethernet cable plugged into an Ethernet Jack.
NOTE: At this time, supported USB Ethernet adapters include:
• LinkSys USB10T
• LinkSys USB100TX
• Dlink DSB-650TX (not DSB-650C)
• SMC 2202USB/ETH
Please visit our Web site support section for the most current list of
supported USB Ethernet adapters.
NOTE: At this time, USB hubs are not supported, and may cause
unreliable operation. However, Ethernet hubs (with an
appropriate Ethernet adapter) will work fine.
Broadband
If you have a broadband internet connection — direct subscriber line (DSL) or
cable modem — connect your Rio Advanced Digital Audio Center the same way
you connect your computer to your cable modem or DSL. This generally includes
connecting your Rio Advanced Digital Audio Center to Ethernet using a USB
Ethernet adapter and Ethernet cable, then either:
• With a hub, use normal cables or for direct connect use crossover cable or
• Without a hub, use Ethernet cable.
Your broadband internet provider should be able to give you the details of your
particular setup.
On the Rio Advanced Digital Audio Center
The default network option is Home PNA. The Network Configuration screen is
titled Network Configuration - Home PNA if you are using Home PNA as your
network connection. If you plug a USB Ethernet adapter into the Rio Advanced
User’s Guide | 63
64 | Network configuration
Digital Audio Center, when you Select Network Configuration, you are presented
with a submenu where you can select either Home PNA or Ethernet as your
networking option. The only difference between the two Network Configuration
screens is the title.
1. Press Menu to display the Main Menu screen.
2. Press Down on the Navigation Button to highlight Setup Menu.
3. Press Select on the Navigation Button to display the Setup Menu screen.
4. Press Down on the Navigation Button to highlight Network
Configuration.
5. Press Select on the Navigation Button to display the Network
Configuration screen.
6.
7.
8.
9.
By default the Automatic radio button is selected as the Configuration
type. You should only select Manual if you are using a system with a static IP
and know your network IP settings. Select the Manual radio button if you
wish to enter a static IP address.
Press Next on the Navigation Button until the dotted line box surrounds
Use this adapter for Internet lookup.
Press Toggle on the Navigation Button to place a mark in that option’s
box.
Press Next on the Navigation Button until the Done box is highlighted.
Press OK on the Navigation Button to enter your settings changes and to
return to the Setup Menu screen.
Rio Advanced Digital Audio Center
Setting the clock
The clock feature comes on the display when the Rio Advanced Digital Audio
Center is in Sleep mode. By default an analog clock face will display — with the
time shown with clock hands — and the date displayed below. There are three
other options for the Sleep mode display: a digital clock with military time (24
hour), a digital clock with standard time, and a blank screen.
Even if the power is completely removed from the Rio Advanced Digital Audio
Center, the clock will maintain the correct time and date for more than a week.
Adjusting the appearance of the clock
1. Press the Standby button to put the Rio Advanced Digital Audio Center into
Sleep mode.
2. Press the Right Navigation Button to change the clock face to a digital
clock with military time.
3. Press the Right Navigation Button a second time to change to a digital
clock with standard time.
4. Press the Right Navigation Button a third time to change to a blank
screen.
5. Press the Right Navigation Button a fourth time to change back to the
original analog clock face.
Setting time and date
1. Press the Standby button to wake up the Rio Advanced Digital Audio
Center.
2. Press the Menu button to display the Main Menu screen.
3. Press Down on the Navigation Button to highlight Setup Menu.
4. Press Select on the Navigation Button to display the Setup Menu screen.
User’s Guide | 65
66 | Setting the clock
Navigation Icon
5. Press Down on the Navigation Button to highlight Set Time & Date.
6. Press Select on the Navigation Button to display the Set Time & Date
screen.
Hint: Previous and
Next move the
cursor amongst the
boxes and buttons.
+ and - increase and
decrease values.
Navigation Icon
Time is displayed with fields for hour : minutes : seconds. Time is in military
time (24 hour clock).
Date is displayed with fields for date : month : year.
Automatic internet synchronization allows the system to recheck the
clock settings each time it logs onto the Internet.
Below that are Time Zone and Done buttons.
7. Press Previous and Next on the Navigation Button to move to a different
field.
8. Press + and - on the Navigation Button to Increase or Decrease the
values in each of the fields to match the correct time and date.
9. Press Next to move to Automatic internet synchronization, which will
then have a box around it.
The Navigation Icon options will change to Previous, Toggle, Next, and
Toggle.
If you do not want the Rio Advanced Digital Audio Center automatically
recheck its time and date settings when online, press Toggle to unmark the
box.
10. Press Next to highlight the Timezone button.
Rio Advanced Digital Audio Center
The Navigation Icon will change to read Previous, Select Timezone, and
Next.
11. Press Select Timezone to display the list of timezone options.
12. Press Down on the Navigation Button to highlight the timezone you wish
to select.
If your timezone is not listed, select the Advanced option to choose the
timezone for your region.
13. Press Select to enter that option and to return to the Set Time & Date
screen.
14. Press Next on the Navigation Button to highlight the Done button.
15. Press Ok to exit the Set Time & Date screen, and to return to the Setup
Menu screen.
User’s Guide | 67
68 | Restoring factory (default) settings
Restoring factory (default) settings
If you wish to return to the basic settings and start over, follow these steps to
restore the factory default settings. Choosing Restore Factory Settings does not
delete the music on your Rio Advanced Digital Audio Center.
1. Under the Setup Menu, select Restore Factory Settings.
This displays the Restore Factory Settings screen.
2. Choose Yes or No. The Navigation Icon displays the options Up, Select,
and Back.
3. As No is automatically highlighted as the default choice, to restore the factory
settings, you have to press Up on the Navigation Button to highlight Yes.
4. Press Select on the Navigation Button to automatically erase any settings
changes you have made, and reboot the Rio Advanced Digital Audio Center.
The system will return to the settings it had when you took it out of the box.
Rio Advanced Digital Audio Center
Selecting keyboard type
If you use a USB keyboard with your Rio Advanced Digital Audio Center, choose
this option to identify the language that your keyboard uses.
1. To change the Rio Advanced Digital Audio Center to use your keyboard
language, press Menu to display the Main Menu.
2. Press Down on the Navigation Button to highlight Setup Menu.
3. Press Select on the Navigation Button to display the Setup Menu screen.
4. Press Down on the Navigation Button to highlight Select Keyboard
Type.
5. Press Select on the Navigation Button to display the Select Keyboard
Type screen.
6. Press Down on the Navigation Button to highlight your language choice.
7. Press Select on the Navigation Button to enter your selection.
The Rio Advanced Digital Audio Center will make the change and return to
the Now Playing screen.
User’s Guide | 69
70 | Enter emplode password
Enter emplode password
You have the option to specify a password for your Rio Advanced Digital Audio
Center, to prevent any unauthorized access from a computer using the emplode
software. We recommend setting a password especially if the unit is connected to
the Internet full time (via a broadband connection). If you are not going to copy
music from your PC to your Rio Advanced Digital Audio Center, then an emplode
password is not necessary.
NOTE: In order for your PC and the Rio Advanced Digital Audio
Center to communicate over an Ethernet or HomePNA
network, the ‘Allow emplode to connect over network’ box
must be selected on the Enter emplode password screen.
1. Press Menu to display the Main Menu screen.
2. Press Down on the Navigation Button to highlight Setup Menu.
3. Press Select on the Navigation Button to display the Setup Menu screen.
4. Press Down on the Navigation Button to highlight Enter emplode
Password.
5. Press Select on the Navigation Button to display the Enter emplode
Password screen. The Allow emplode to connect over network box
must be marked for your Rio Advanced Digital Audio Center and your PC to
talk to one another via an Ethernet or HomePNA network.
6. To enter a password, press Next on the Navigation Button until a cursor
appears in the Password field and a highlighted Abc... appears to the far
right.
Rio Advanced Digital Audio Center
7. Using the remote control or a USB keyboard, type in the password of your
choice. If you forget your password, you can enter a new password.
For more information on using the remote control, see “The remote control”
on page 15.
8. Press Next on the Navigation Button to highlight the Done button.
9. Press OK on the Navigation Button to enter your choice and to return to
the Setup Menu screen.
User’s Guide | 71
72 | Installing emplode
emplode on your PC
emplode is software for your PC. Use emplode to create, organize, and search
your digital audio collection.
NOTE: Exit the Menu system on the Rio Advanced Digital Audio
Center before using emplode. To exit the menu system, press
the Now Playing button on the Rio Advanced Digital Audio
Center.
Installing emplode
1. Make sure your PC and the Rio Advanced Digital Audio Center are connected
either via a network or using the included USB cable.
2. Place the Rio Advanced Digital Audio Center Installation CD in your
PC’s CD-ROM drive.
3. When the Installation Wizard appears on the monitor, click Install
emplode.
4. Follow the instructions on the screen to complete the installation process.
If the CD does not autoload:
1. Place the Rio Advanced Digital Audio Center Installation CD in the
PC’s CD-ROM drive.
2. Click Start at the bottom-left side of the PC’s desktop.
3. Click Run.
4. Type in X:\Setup32.exe where X is the letter corresponding to your PC’s
CD-ROM drive.
5. Press the Enter key.
This displays the Installation Wizard on the CD and allows you to install
the available programs.
Using emplode
1. Once emplode is finished installing, click Start on your computer screen,
then navigate to Programs > Rio emplode > emplode.
This will launch the emplode program, which will first locate your Rio
Advanced Digital Audio Center on your network or USB port.
Rio Advanced Digital Audio Center
User’s Guide | 73
2. When the program prompts you for the password, type in the same
password you entered in the Enter emplode Password screen.
3. Click OK.
This displays the Main emplode screen for your Rio Advanced Digital Audio
Center.
Hint: A track title in
emplode may show
up under Artist,
Album, Genres,
Years, and All Tracks,
while only existing as
one file on the Rio
Advanced Digital
Audio Center.
NOTE: For more in-depth information on using emplode, including
how to create and edit playlists, please refer to the Online Help
feature provided within the program by clicking your mouse on
Help and selecting Help Topics.
74 | Using emplode
This Playlist tab example from emplode shows:
• Midiboy as a sub-folder of Artists.
• Stating The Obvious as a sub-folder of Albums.
In addition, Archaic is shown as a track in the Midiboy folder, the Stating The
Obvious folder, as well as in its particular Genres and Years folders and the All
Tracks folders.
Yet, the Archaic song track only exists on the Rio Advanced Digital Audio
Center’s hard drive once. You can create a Playlist of all of Midiboy’s albums or
combine a few of Midiboy’s tracks with other tracks from other artists, but those
tracks are not duplicated on the hard drive. Only the emplode database shows
multiple entries for the same track.
Searching the database
If you want to find a particular song on the Rio Advanced Digital Audio Center’s
hard drive, you can do a search for it within the emplode database.
1. Click your mouse on the Search tab next to the Playlists tab to display the
Search screen.
You can search for a song by Title, Artist, Source, Genre, or Year.
2. Click your mouse in the box next to Title to darken that option heading.
3. Type all or part of a track title in the Title field.
4. Click Search Now at the bottom of the screen.
emplode will search the database of music and display the location, and
information for matching tracks in the Results window to the right of the
Search menu.
Rio Advanced Digital Audio Center
Registering your Rio Advanced Digital Audio
Center
Register your Rio Advanced Digital Audio Center to:
• Ensure that you will be notified of future enhancements to your Rio Advanced
Digital Audio Center.
• Give you the option of being notified of new products that will further
enhance your digital music experience.
• Allow you to receive technical support for your product.
To register your Rio Advanced Digital Audio Center, while on the Internet, visit
our Web site at: http://www.riohome.com/registration.
User’s Guide | 75
76 | Using emplode
Rio Advanced Digital Audio Center
Chapter 4: Sharing
music with your
other devices
User’s Guide | 77
4
78 | Other Rio home products
Would you like to access all the music on your Rio Advanced Digital Audio
Center from another room, or take your music on the go? In this chapter, you will
learn how to share music with your other devices, including configuring your Rio
Advanced Digital Audio Center for use with the Rio Receiver, downloading music
to Rio portable digital audio players, and sharing music between the Rio Advanced
Digital Audio Center and your home PC.
Other Rio home products
Rio Receiver
You can stream digital audio files from your Rio Advanced Digital Audio Center to
other rooms in the house via an Ethernet or Home Phoneline Network (Home
PNA) connection to a Rio Receiver. For more information about the Rio
Receiver, please visit our Web site at http://www.riohome.com.
Connecting via Home PNA
You can either connect the Rio Receiver directly to the Rio Advanced Digital
Audio Center through the included phone cord plugged into the Rio Advanced
Digital Audio Center’s Phoneline Jack and the Rio Receiver’s Wall Jack or by
creating an Home PNA connection between the two devices via the phonelines in
your home.
Connecting via Ethernet
To create an Ethernet network connection between the two devices, you must
have a USB Ethernet Adapter, (not included), plugged into USB Port 2 or
plugged into the front USB Port on the Rio Advanced Digital Audio Center.
For a list of supported USB Ethernet adapters, see “Network configuration”
on page 63.
Setting the Rio Advanced Digital Audio Center network configuration
1. Press Menu to display the Main Menu screen.
2. Press Down on the Navigation Button to highlight Setup Menu.
3. Press Select on the Navigation Button to display the Setup Menu screen.
4. Press Down on the Navigation Button to highlight Network
Configuration.
Rio Advanced Digital Audio Center
5. Press Select on the Navigation Button to display the Network
Configuration screen.
6.
7.
8.
9.
Automatic should be selected for Configuration.
Serve receiver units should be selected.
Use this adapter for internet lookup should be selected.
Press Next on the Navigation Button to move down through the options.
As you press Next, options are highlighted or have a dotted line box around
them.
Press Toggle on the Navigation Button to mark or unmark options.
Once you have made the necessary changes, press Next on the Navigation
Button until Done is highlighted.
Press OK on the Navigation Button to enter your changes and to return
to the Setup Menu.
Now, when you power up both the Rio Receiver and your Rio Advanced
Digital Audio Center, the Rio Receiver should be able to play digital music files
from your Rio Advanced Digital Audio Center, even when the Rio Advanced
Digital Audio Center is in Sleep mode.
User’s Guide | 79
80 | Portable digital audio players
Portable digital audio players
You can download digital audio files from the Rio Advanced Digital Audio Center
to your Rio portable digital audio player using the player’s USB cable.
Rio Advanced Digital
Audio Center’s front
USB port.
NOTE: At this time, supported Rio portable digital audio player’s
include:
• Rio 600
• Rio 800
• Nike psa[play
Please visit our Web site support section for the most current list of
supported Rio portable digital audio players.
1. Plug one end of the player’s USB Cable into the USB Port on the front of
the Rio Advanced Digital Audio Center.
2. Plug the other end into the USB port on your Rio portable digital audio player.
3. Turn on your Rio portable digital audio player.
4. Press the Menu button on the Rio Advanced Digital Audio Center to display
the Main Menu screen.
5. Press Down on the Navigation Button to highlight Transfer to Portable
or Writable CD, then press Select.
6. The Select Device screen displays. Press Down to highlight your portable
player, then press Select.
Rio Advanced Digital Audio Center
7. The Transfer to Portable screen displays. Highlight an option from the list,
for example, Add tracks..., choose the desired tracks, then press Back to
return to the Transfer to Portable screen.
8. Highlight the last option on the Transfer to Portable screen, Download
to..., then press Select. Once the download is finished, press Continue.
User’s Guide | 81
82 | Your home computer
Your home computer
While it is not necessary to have a home computer to use the Rio Advanced
Digital Audio Center, it is possible to share digital audio files between your home
computer and the Rio Advanced Digital Audio Center, and to access the home
computer’s hard drive for additional digital audio files via Home Phoneline
Networking (Home PNA), Universal Serial Bus (USB) or Ethernet. This
is convenient if you already have an extensive music library on your computer and
you don’t want to re-record your music CDs onto your Rio Advanced Digital
Audio Center.
NOTE: In order for your PC and the Rio Advanced Digital Audio
Center to communicate over an Ethernet or HomePNA
network, the Allow emplode to connect over network box
must be selected on the Enter emplode password screen.
Connecting via Home PNA
Phoneline Jack
NOTE: To use this option, your PC must have an Home PNA Adapter
installed and connected to the phoneline via a standard phone
cord.
1. Plug one end of the included Phone Cord into the Phoneline Jack at the
back of the Rio Advanced Digital Audio Center.
2. Plug the other end of the Phone Cord into the nearest Wall Jack.
Connecting via Ethernet
For a list of supported USB Ethernet adapters, see “Network configuration”
on page 63.
NOTE: To use this option, your PC must have an Ethernet Adapter
installed and you must have a USB Ethernet Adapter plugged
into the USB Port 2 on the back of the Rio Advanced Digital
Audio Center.
1. Plug one end of an Ethernet cable (not included) into a USB Ethernet Adapter
(not included).
2. Plug the other end of the Ethernet cable into either:
• an available Ethernet Jack, if you have a hub, or
• directly into a PC network card.
Connecting via USB
USB Ports
1
2
NOTE: To use this option, your PC must have a USB Port and an
operating system that supports USB.
1. Plug one end of the included USB Cable into the USB 1 Port on the back
of the Rio Advanced Digital Audio Center.
2. Plug the other end of the USB Cable into the PC’s USB Port.
NOTE: See “Network configuration” on page 63 and “Enter emplode
password” on page 70 to make sure the Rio Advanced Digital
Audio Center is properly configured to talk over the network
to emplode and your PC.
Rio Advanced Digital Audio Center
User’s Guide | 83
emplode
1. Make sure that your PC and the Rio Advanced Digital Audio Center are both
On and connected either via a network or using the included USB cable.
2. Click the Start button in the bottom-left corner of your PC’s desktop.
NOTE: Exit the Rio Advanced Digital Audio Center Menu system
before using emplode.
3. Click Programs > Rio emplode > emplode.
The emplode program will open up with the Search screen.
4. When it locates your Rio Advanced Digital Audio Center, click OK.
5. Type in the emplode password.
6. Click OK.
The Main emplode Window displays with the contents of the Rio
Advanced Digital Audio Center in the Playlist Column.
7. Double-click on the All Tracks folder to open that folder and to display all of
the available tracks on the Rio Advanced Digital Audio Center.
8. Leave that window open on your PC’s desktop.
9. Click on the Start button at the bottom-left of your computer’s desktop.
10. Select Program Files > Windows Explorer.
11. When the Windows Explorer window opens, position it so that you can see
both it and the Main emplode window.
12. Locate the folder that contains your existing digital music files in Windows
Explorer.
13. Open the music folder.
Hint: For convenience
keep all of your
digital music files on
your computer in
one main folder. For
example: My Music.
84 | Your home computer
Synchronise Button
14. Highlight the files you want to transfer to your Rio Advanced Digital Audio
Center.
15. Click Edit > Copy in the Windows Explorer title bar or press the Ctrl
and the C keys on your keyboard. This makes a copy of the highlighted files.
16. Click on the title bar of the Main emplode window to bring it to the
foreground.
17. Right-click on the Playlists Column under All Tracks and select Paste or
press Ctrl-V on your keyboard.
This command pastes a copy of the selected music tracks into your emplode
database and makes them available for transferring to the Rio Advanced
Digital Audio Center. You can also click and drag a file from Windows
Explorer.
Once the tracks exist in All Tracks, emplode reads their ID3 tags and creates
Artist, Album, Genre, and Year folders to accommodate the new tracks.
18. Click File on the emplode title bar and select Synchronise or click the
Synchronise button on the tool bar.
Synchronise transfers any files you have
added to the database to the Rio
Advanced Digital Audio Center. It also
updates the Rio Advanced Digital Audio
Center hard drive to reflect any changes
you have made to Playlists, Artists,
Albums, and so on. If you delete playlists
or tracks, they are also deleted from the
Rio Advanced Digital Audio Center
during Synchronisation. This process can
take some time if you are copying a lot of
files over to the Rio Advanced Digital
Audio Center.
When it completes this process, the Rio
Advanced Digital Audio Center’s hard
drive contains the same tracks as your
computer’s hard drive, and they are
organized by their ID3 tag information,
and the changes you made in the emplode database.
If a track was recorded on the Rio Advanced Digital Audio Center, the track
information will appear in the emplode database after sychronisation; however,
there will not be a copy of the track on the PC hard drive.
NOTE: You will lose any changes in emplode since the last
synchronisation with your Rio Advanced Digital Audio Center
if your PC drops into hibernation while the emplode software
is running.
Rio Advanced Digital Audio Center
Chapter 5: Advanced
features
User’s Guide | 85
5
86 | Games
In this chapter, you will learn about games included on the Rio Advanced Digital
Audio Center, and how to upgrade the Rio Advanced Digital Audio Center’s
firmware.
Games
For your entertainment, we have provided several free games written by third
parties on the Rio Advanced Digital Audio Center. Instructions on how to play
each game are included. Choose from:
• Certain Death via Space Things
• Munchman
• SDLroids
• SDL Lopan
You can use a USB joypad (not included) to access and play games on your Rio
Advanced Digital Audio Center.
NOTE: The Rio Receiver will not function while games are being
played.
Playing games
1. Press Menu to display the Main Menu.
2. Press Down on the Navigation Button to highlight Games.
3. Press Select on the Navigation Button to display the Games menu.
Rio Advanced Digital Audio Center
4. Press Down on the Navigation Button to highlight the game you want to
play.
5. Press Select on the Navigation Button to display a screen where you can
choose to:
• Get instructions on how to play the selected game
• Learn more about the game, or
• Start playing the game.
Upgrade your Rio Advanced Digital Audio
Center
Occasionally new firmware is released for the Rio Advanced Digital Audio Center
to improve available features or to fix issues that may arise. There are three
options for updating your Rio Advanced Digital Audio Center’s firmware.
Software upgrade CD
You can purchase Software Upgrade CDs by contacting our Customer Care
department at 1(800)-468-5846 or 1(541)-967-2450.
1. Press the Eject button to open the CD Tray.
2. Place the Software Upgrade CD in the CD Tray and press the Eject
button again to close the CD Tray.
The Rio Advanced Digital Audio Center displays a message that it is reading
the CD and then identifies it as a data CD with a software upgrade. It displays
the message, “Software upgrade available from CD. Do what with
CD?”
3. Press Apply Upgrade on the Navigation Button.
The Rio Advanced Digital Audio Center reboots to the Software Upgrade
screen with the question, “Upgrade to version ##?” where ## is the
version number of the new firmware.
The Navigation Icon displays three options: Upgrade Now, Restore “As
New”, and Cancel.
NOTE: If you choose the Restore “As New” option, the software
upgrade will delete all the files on your Rio Advanced Digital
Audio Center’s hard drive, load the new firmware, and leave
your unit with a clean hard drive. All CDs you recorded onto
your unit will be gone and you will have to record your music
again. When it finishes the upgrade you will also be prompted
to agree to the license agreement again, and set up the time,
date, timezone, and recording quality settings.
4. Press Upgrade Now.
The Rio Advanced Audio Center displays the Upgrading Player screen with
a status bar, then the Initializing Music Storage screen with a status bar
before displaying the Upgrading Database screen with a status bar.
When it has finished upgrading the firmware, the system reboots to refresh its
settings, and then returns to the Now Playing screen.
User’s Guide | 87
88 | Upgrade your Rio Advanced Digital Audio Center
Downloading upgrades
There are two options for downloading your upgrade files to your Rio Advanced
Digital Audio Center: Dial-Up and Internet.
NOTE: Downloading software upgrades is faster using a broadband
internet connection rather than using a modem. Using a
modem to download software upgrades may take a minimum
of one hour.
Dial-Up
Dial-Up occurs over the built-in modem and requires the following:
• Plug the included phone chord into the Phoneline Jack and a Wall Jack in
your home or office.
• See “ISP settings” on page 57 and follow the instructions given there to
configure the Rio Advanced Digital Audio Center with your connection
information so it can connect to an ISP.
Internet
You can connect to the Internet to download updates through either an Ethernet
or Home PNA connection. It requires the following:
• Plug the included phone chord into the Phoneline Jack and a Wall Jack in
your home or office.
OR
Plug a USB Ethernet adapter into the USB Port 2 on the back of the Rio
Advanced Digital Audio Center and into an Ethernet Jack in your home or
office to connect to an existing Ethernet network.
• See “Network configuration” on page 63 to configure your Rio
Advanced Digital Audio Center for Home PNA or Ethernet Internet
connections.
You can configure the Rio Advanced Digital Audio Center to find and download
software upgrades automatically on its own.
1. Press Menu.
2. Press Down on the Navigation Button to highlight Setup Menu.
3. Press Select on the Navigation Button.
4. Press Down to highlight Internet Connections/Settings.
Rio Advanced Digital Audio Center
User’s Guide | 89
5. Press Select.
6.
7.
8.
9.
Press Down to highlight Automatic Connection Settings.
Press Select.
Press Down to highlight Connection for Software Downloads.
Press Select.
10. Press Select.
This will enter in that choice and return you to the Automatic
Connections screen.
When the Rio Advanced Digital Audio Center is connected to the Internet, it
checks our web site for software upgrades to download. It then prompts you with
the Software Upgrade Available screen. If you do not want to configure the
Rio Advanced Digital Audio Center to find and download software upgrades
automatically, you can also choose Check online now for software update on
the Internet Connections/Settings screen.
11. Press Apply Upgrade on the Navigation Button.
The system then restarts and initiates the upgrade process.
12. Press Upgrade Now on the Navigation Button.
The display changes to the Upgrading Player screen with a status bar.
Once the status bar finishes, the display changes to the Upgrading
Database screen with another status bar. Once the Upgrading Database
status bar completes, the system restarts and resumes normal functions.
Hint: If you select
Restore to “as
new”, the upgrade
software updates the
Rio Advanced Digital
Audio Center,
eliminates all stored
music files, and
resets the Rio
Advanced Digital
Audio Center back
to factory settings.
90 | Upgrade your Rio Advanced Digital Audio Center
Rio Advanced Digital Audio Center
Appendix A: Technical
specifications
User’s Guide | 91
A
92 | Technical specifications
User’s Guide
Audio line out
•
•
•
•
•
•
•
•
Max. Output Level
Frequency response:
(20Hz to 20kHz)
Channel Separation
At 1kHz (dB)
At 16kHz (dB)
Dynamic Range
(A-weighted, ref. to 0dB)
Signal to Noise Ratio
(A-Weighted, ref. to 0dB)
THD plus Noise (w/997Hz)
At 0dB FS(%)
At -20dB FS (%)
Linearity Error (at -90dBs)
Interchannel Phase Error (at 20KHz)
+ 1.510V
+ 0, -0.227 dB
115.000
100
98.000
101.500
0.002
0.016
0.45 dB
0.260 degrees
Power supply
• Power Consumption
40 Watts max.
• Input Voltage
100 - 250V AC, 50/60Hz
This device is a Class II device in accordance with IEC950.
Environmental conditions
Operating temperature
Storage temperature
Relative Humidity (operating)
Relative Humidity (non-operating)
Cooling:
Mechanical dimensions
Length = 15.3 in.
Width = 17.0 in.
Height = 4.7 in.
Weight =12.0 lbs.
0...40°C,
-20...+65°C
20...80% (non condensing)
10...80% (non condensing)
Natural Convection
Forced Convection
(regulated internally)
Rio Advanced Digital Audio Center
Appendix B:
Regulatory
information
User’s Guide | 93
B
94 | FCC certification
FCC certification
NOTE: This equipment has been tested and found to comply with the limits for
Class B digital device, pursuant to Part 15 of the FCC Rules. These limits are
designed to provide reasonable protection against harmful interference in a
residential installation. This equipment generates, uses and can radiate radio
frequency energy and if not installed and used in accordance with the instructions,
may cause harmful interference to radio communications. However, there is no
guarantee that interference will not occur in a particular installation. If this
equipment does cause harmful interference’s to radio or television reception,
which can be determined by turning the equipment off and on, the user is
encouraged to try to correct the interference by one or more of the following
measures:
• Connect the equipment into an outlet on a circuit different from that to which
the receiver is connected.
• Consult the dealer or an experienced radio / TV technician for help.
• Increase the separation between the equipment and receiver.
• Reorient or relocate the receiving antenna.
CAUTION:
Changes or modifications not expressly approved by the party responsible for
compliance could void the user’s authority to operate the equipment.
TESTED TO COMPLY WITH FCC STANDARDS
FCC Part 68
Ringer Equivalence: 0.3
Please look on your product label for the FCC Part 68 number.
FCC Regulations, Part 68 places the following restrictions on using this class of
equipment. It is prohibited to connect the modem to party lines or coin operated
telephone services. Part 68 also requires that shielded cables must be used for
connection of any device external to this product.
Notifying the telephone company prior to connecting a modem is not required;
however, at the Telephone Company’s request, indicate which line it is connected
to. You should provide the registration number and ringer equivalence, both of
which are shown on the label located on the back or bottom of the product.
If this equipment causes harm to the telephone network, the telephone company
will notify you in advance that temporary discontinuance of service may be
required. If advance notice isn't practical, the telephone company will notify the
customer as soon as possible. Also, you will be advised of your rights to file a
complaint with the FCC if you believe it is necessary.
The telephone company may make changes in its facilities, equipment, operations,
or procedures that could affect the operation of the equipment. If this happens,
the telephone company will provide advance notice in order for you to make the
necessary modifications in order to maintain uninterrupted service.
If the trouble is causing harm to the telephone network, the telephone company
may request you to remove the equipment from the network until the problem is
resolved.
Rio Advanced Digital Audio Center
If your modem needs repairs, you must arrange for the manufacturer to make
them if you are to keep the modem’s FCC registration valid.
If you need to return the product, first obtain a Return Merchandise
Authorization (RMA) number from Technical Support (541-967-2450) or from
Customer Service (1-800-468-5846).
Our mailing address is:
SONICblue Incorporated
7101 Supra Drive SW
Albany, OR 97321 USA
If necessary, consult your dealer or an experienced radio or television technician.
You may find this booklet helpful: “How to Identify and Resolve Radio and TV
Interference Problems” (Stock No. 004-000-00345-4), prepared by the FCC and
available from the U.S. Government Printing Office, Washington DC 20402. See
individual modems for FCC ID and registration numbers.
Compliance information statement
Responsible Party:
SONIC|blue Incorporated
2841 Mission College Blvd.
Santa Clara, CA. 95054
Telephone: (408) 325-7000
Fax: (408) 325-7070
Type of Equipment: Analog Modem Telecommunication Interfaces
Model numbers: RIO HSX109
DOC notice for Canada
The Canadian Department of Commissions (DOC) label identifies certified
equipment. This Certification means that the equipment meets certain
telecommunication network protective operational and safety requirements. The
Department does not guarantee the equipment will operate to the user's
satisfaction.
Before installing this equipment the user should ensure that it is permissible to be
connected to the facilities of the local Telecommunication Company. This
equipment may also be installed using an acceptable method of connection. In
some cases the companies inside wiring associated with a single line individual
service may be extended by means of a certified connector assembly (telephone
extension cord). The customer should be aware that compliance with these
conditions may not prevent degradation of service in some situations.
Repairs to certified equipment should be made by an authorized Canadian
maintenance facility designated by the supplier. Any repairs or alterations made by
the user to this equipment, or any equipment malfunctions may give the
telecommunications company cause to disconnect the equipment.
Users should ensure for their protection that the electrical ground connections of
the power utility, telephone lines and internal metallic water pipe system, if
User’s Guide | 95
96 | DOC notice for Canada
present are connected together. This precaution may be particularly important in
rural areas.
CAUTION: Do not attempt to make such connections yourself; contact the
appropriate inspection authority or electrician.
IC Ringer Equivalency Number (IC REN): 0.3
The IC Ren number assigned to each terminal device denotes the percentage of
the total load to be connected to a telephone loop used by the device, without
overloading. The termination of a loop may consist of any combination of devices
subject only to the requirement that the total of the Load Number of all devices
does not exceed 100. This requirement is to prevent overloading of the
telephone loop. This digital apparatus does not exceed the Class B limits for the
radio noise emissions from the digital apparatus set out in the Radio Interference
Regulation of the Canadian Department of Communications.
Le present appareil numerique n’emet pa de burits radioelectriques depassant les
limites applicables aux appareil numerique de la classe B prescritesdans le
Reglement sur le brouillage radioelectrique edicte par le minestere des
Communication du Canada.
Caution: Always disconnect modem from telephone system when installing or
when covers are removed from the host product.
Attention: Debrancher la carte modem du reseau telephonique lors de
l’installation les couvercles de l’appareil hote sont enleves.
International standards
This product was designed to meet the requirements applicable to the following
Directives:
Low Voltage Directive (72/23/EEC) as modified by amending Directive (93/68/
EEC) thereby covering the standards of:
• IEC 950 / EN60950 2nd Edition, 1991+Amd.1, 1992+Amd.2, 1993+Amd.3,
1995+Amd.4, 1996. Safety Requirements of Information Technology
Equipment
• EN60825-1: 1998, Safety of Laser products-Part 1: Equipment classification,
requirements and user's guide.
EMC Directive (89/336/EEC) as modified by amending Directive (93/68/EEC)
• EN55013: 2000, Limits and methods of measurement of Radio disturbance
characteristics of broadcast receivers and associated equipment.
• EN50082-1: 1997, Generic Immunity Standard Part 1: Residential,
Commercial and Light Industry
Commission Decision [(98/482/EC) CTR21] Attachment requirements for panEuropean approval for Connection to the Analog PSTN Networks.
However, due to differences between the individual PSTN’s provided in different
countries the compliance of CTR21 does not of itself give an unconditional
assurance of successful operation on every PSTN termination point. In the event
of problems, you should contact your equipment supplier in the first instance.
Rio Advanced Digital Audio Center
EU declaration of conformity
We;
DIAMOND Multimedia Systems Vertriebs GmbH
Moosstrasse 18b
D-82319, Starnberg
Germany
On behalf of;
SONIC | blue Incorporated
2841 Mission College Blvd.
Santa Clara, CA. 95054
U.S.A.
Hereby declare under our sole responsibility that the following product (s) conform to
the requirements of the European Parliament Council Directive 1999/5/EC dated 9th
March 1999. And to which this declaration is related the product (s) listed are in conformity with the following relevant harmonized European Standards or other normative
documents, the references of which have been published in the Official Journal of the
European Communities / European Union.
Product (s):
RIO Advanced Digital Audio Center – HSX109
Harmonized Standards:
EN 55013: 2000
EN 50082-1: 1997
TBR21 / CTR21: 1998
Limits and methods of measurement for radio
disturbance characteristics of Broadcast
receivers and associated equipment.
Generic Immunity Standard – Part 1:
Residential, Commercial and Light Industry
Attachment requirements for pan-European
approval for Connection to the Analog
PSTN Networks.
EN/IEC 60950: 2nd Ed:1991 Safety requirements for Information Technology
A1:92, A2:93, A3:95, A4:96 Equipment.
In accordance with the terms of Directives 1999/5/EC, 89/336/EEC, 73/23/EEC and
Council Decision 98/482/EC the original signed Declaration is retained by us in the product compliance folder. Upon request photocopies may be available.
Date: 02 April 2001
Place: St. Ingbert, Germany
Name of Authorizing Person
Scott Naccarato
Regulatory Compliance Manager
User’s Guide | 97
98 | EU declaration of conformity
Rio Advanced Digital Audio Center
Appendix C: Warranty
information
User’s Guide | 99
C
100 | One year limited warranty
One year limited warranty
Our warranty to you
SONICblue Incorporated warrants that your product will be free from defects in
materials and workmanship for a period of one year from the date of original retail
purchase. If you discover a defect covered by this warranty, we will repair or replace the
product at our option using new or remanufactured components. SONICblue
Incorporated’s liability is limited solely to the repair or replacement of the defective
product. This warranty is extended to the original end user purchaser only and is not
assignable or transferable to any other party. Any parts or boards removed in the
replacement or remanufacture process shall become the property of SONICblue
Incorporated.
How to obtain service under this warranty
To obtain service under this warranty, please contact the dealer from whom you
purchased this product or SONICblue Incorporated’s Customer Care Center at (541)
967-2450 for return instructions.
You must deliver the product and the original sales receipt to the dealer from whom you
purchased this product or to SONICblue Incorporated in order to obtain service under
this warranty. If you return the product to SONICblue Incorporated, you must pay for
shipping to SONICblue Incorporated.
Our mailing address
SONICblue Incorporated
7101 Supra Drive SW
Albany, OR 97321 USA
Product failures not covered by this warranty
This warranty covers defects in manufacture that arise from correct use of the device. It
does not cover damage caused by abuse, misuse, improper modification or repair,
moisture, extreme heat or cold, corrosive environments, shipping, or high voltage surges
from external sources such as power line, telephone line, or connected equipment. This
warranty does not cover wear and tear on covers, housing or wiring. This warranty also
does not apply to any product with an altered or defaced serial number.
Limits of liability
We are only responsible for the repair of this product. We will not be liable to you or
anyone else for any damages that result from the failure of this product or from the
breach of any express or implied warranties. These include damage to other equipment,
lost data, lost profits, or any consequential, incidental, or punitive damages. In no event
will SONICblue Incorporated be liable for any amount greater than the currently
suggested retail price of this product.
This written warranty represents the entire warranty agreement between SONICblue
Incorporated and you. This warranty is given in lieu of all other warranties, express or
implied, including without limitation implied warranties of merchantability and fitness for
a particular purpose. This warranty is limited to the term specified above. No warranties,
either express or implied, will apply after this period. This warranty may not be altered in
any way other than in writing by an officer of SONICblue Incorporated. This warranty
gives you specific legal rights and you may also have other rights, which vary, from state to
state. Some states limit what warranties may be excluded as well as how long an implied
warranty lasts, so the above limitations may not apply to you.
Rio Advanced Digital Audio Center
Appendix D:
Frequently Asked
Questions (FAQ)
User’s Guide | 101
D
102 | FAQ and troubleshooting
FAQ and troubleshooting
Problem: I’m unable to view the contents of the Rio Advanced Digital
Audio Center via the included emplode software.
Troubleshooting measures:
1. The Rio Advanced Digital Audio Center is password protected to prevent any
unauthorized access. On the Rio Advanced Digital Audio Center, press the
Menu button, then navigate to Setup menu > Enter emplode password.
2. Select the box titled ’Allow emplode to connect over network’.
3. Enter a Password in the field provided, then select ’Done’.
4. In the emplode software on your PC, enter the same password for access to
the unit.
Problem: All my MP3’s are encoded at 192Kbps. Is there a way I can
change that value?
Troubleshooting measures:
1. By default, the Rio Advanced Digital Audio Center is set to encode at
192Kbps. To change the value, press the Menu button, then navigate to Setup
menu > Recording quality > Customize standard recording settings.
2. Choose from the 3 options available, or select ’Advanced’ to view a larger list
of choices you can select from.
Problem: I decided that I no longer want to create an MP3 for a
portable device. What steps can I take to prevent future recordings,
and delete the existing Portable content?
Troubleshooting measures:
1. To disable Portable Copy Recording, press the Menu button, then navigate to
Setup menu > Recording quality > Customize Portable recording settings.
2. Enable the option ’Disable Portable Copy Recording’.
3. To delete the Portable content, navigate to Menu > Manage Playlists and
Content > Delete Portable Content.
4. Select the ’Yes’ option to permanently delete all Portable content on your Rio
Advanced Digital Audio Center.
Problem: I’m having trouble using my USB Ethernet adapter with the
Rio Advanced Digital Audio Center.
Troubleshooting measures:
At this time, supported USB Ethernet adapters include:
• LinkSys USB10T
• LinkSys USB100TX
• Dlink DSB-650TX (not DSB-650C)
• SMC 2202USB/ETH
Rio Advanced Digital Audio Center
Problem: I’m having trouble using my USB keyboard and joypad that
are plugged into the Rio Advanced Digital Audio Center via a USB hub.
Troubleshooting measures:
At this time, hubs are not supported and may cause unreliable operation. Plug one
device into the front USB port, and another into rear USB Port 2. Additional
devices may be interchanged without rebooting the Rio Advanced Digital Audio
Center.
Problem: While encoding Multiple CDs, I get a message that I’ve run
out of space. What can I do?
Troubleshooting measures:
1. The out of space message on the screen should tell you whether there will be
space in the future or whether there will never be enough space.
2. In the former case you will have to wait a period of time while the internal
encoding is finished, then re-select record Multiple CDs.
3. In the later case you will have to delete existing content to free up space on
the Rio Advanced Digital Audio Center. To delete content, press the Menu
button, then navigate to Manage Playlists and Content > Delete Content.
Problem: My Rio Receiver is unable to stream music from the Rio
Advanced Digital Audio Center.
Troubleshooting measures:
1. Verify that the Rio Advanced Digital Audio Center is set to serve to a
receiver. On the Rio Advanced Digital Audio Center, press the Menu button,
then navigate to Setup menu > Network Configuration, and make sure the
option ’Serve receiver units’ is selected.
2. Verify that the Home PNA DHCP values are set on the Rio Advanced Digital
Audio Center. On the same menu as above, select the option 'Receivers…'
and ensure your DHCP settings are consistent with your Home PNA
network.
3. Check the link light on the back of the Rio Receiver.
4. Recycle the power (unplug and replug) to the Rio Advanced Digital Audio
Center and Rio Receiver. Turn both off, then turn the Rio Advanced Digital
Audio Center on first.
5. Check to make sure you have the cables plugged in correctly.
6. If the Rio Receiver still does not find the Rio Advanced Digital Audio Center,
try connecting the Receiver directly to the Rio Advanced Digital Audio
Center to rule out any issues with the wiring.
User’s Guide | 103
104 | FAQ and troubleshooting
Problem: How do I tell what IP Address the Rio Receiver is using?
Troubleshooting measures:
1. On the Rio Receiver, go to the Rio Receiver Menu and select ’About
Receiver’.
2. Press the Volume/Select knob to enter your selection.
3. The Rio Receiver software and license information will scroll by followed by
the Server IP and the Local IP. The Local IP is the IP address to the Rio
Receiver.
Problem: How do I tell what IP Address the Rio Advanced Digital
Audio Center is using?
Troubleshooting measures:
1. On the Rio Advanced Digital Audio Center, navigate to Menu > About Your
Rio Advanced Digital Audio Center.
2. The Rio Advanced Digital Audio Center software version information will
scroll by followed by the Home PNA IP and the Home PNA DHCP IP. The
Home PNA IP is the IP address to the Rio Advanced Digital Audio Center.
Problem: The Rio Advanced Digital Audio Center does not
automatically receive an IP when connected to my network.
Troubleshooting measures:
1. It may be necessary to manually set an IP for your Home PNA or USB
ethernet card on your PC.
2. On your PC, click Start > Settings > Control Panel.
3. Double-click the Network icon.
4. Click the TCP/IP component installed for your Home PNA or USB ethernet
card.
5. Click the Properties button.
6. On the IP Address tab, click Specify an IP address.
7. In the IP Address box, type 192.168.0.x (where x is a number between 2 and
254).
NOTE: The IP Address should be one that is not currently in use by
another computer on your network. If you are using Windows
Me, uncheck the ’Detect connect to network media’ box.
8. In the Subnet Mask box, type 255.255.255.0.
9. Click OK twice, then click Yes when prompted to restart your computer.
Rio Advanced Digital Audio Center
Appendix E:
Customer care
information
User’s Guide | 105
E
106 | Technical support - United States
Technical support - United
States
Customer service United States
Web site
http://www.riohome.com
Technical Support Wizard
http://www.riohome.com
Email
[email protected]
Email
[email protected]
Telephone
1(800)-468-5846 or 1(541)-967-2450
Telephone
1(541)-967-2450
Fax
1(541)967-2485
Fax
1(541)967-2401
Rio Advanced Digital Audio Center support
With every Rio Advanced Digital Audio Center you receive the following support services
•
•
•
Unlimited access to the Rio web-based technical information resources, which are available 24 hours a
day at http://www.riohome.com. Here you will find FAQ files, a knowledge base search engine,
product updates, and other useful tools.
Unlimited email support for the duration of your Rio Advanced Digital Audio Center hardware
warranty period.
Access to the latest software updates and enhancements for the Rio Advanced Digital Audio Center via
our web site.
Rio Advanced Digital Audio Center
User’s Guide | 107
Appendix F: Menu Tree
F
108 | Menu Tree illustration
User’s Guide
Main Menu
Play from Playlists...
Playlists...
List of playlists
Manage Playlists...
Create Playlist...
List of playlists
List of Artists
Add tracks to playlist...
Album (CD)...
Artist
Album (CD)
Genre
Year
Tracks
List of Albums
Genre...
List of Genres
Add to 'Now Playing'...
Current CD
Insert Music...
List of tracks
Playlists...
Artist...
Album (CD)...
Genre...
Year...
Tracks...
Most Recently Played...
Newest Recordings...
Top 40 (Most Played)...
Least Recently Played...
Mutliple CD's
Advanced Repeat
Remove tracks from playlist...
Year...
Record from CD...
Normal play, once...
Normal play, all...
Random play, once...
Random play, all...
Advanced Shuffle
Random
Least often played
Least recently played
By year
Off
Modify Playlist...
Artist...
List of Years
Tracks...
Most Recently Played...
Newest Recordings...
Top 40 (Most Played)...
Least Recently Played...
Shuffle & Repeat...
List of tracks
Reorder tracks in playlist...
Append Music...
Off (Normal play)
Repeat One
Repeat All
Playlists...
Album (CD)...
Year...
List of tracks
Rename playlist...
Delete Playlist...
Most Recently Played...
Newest Recordings...
Top 40 (Most Played)...
Least Recently Played...
List of playlists
Delete Content...
Artist
Album (CD)
Genre
Year
Tracks
Delete Portable Content...
Main Menu (Cont.)
Transfer to Portable or Writable CD
Rio XXX Internal Memory
Add tracks to Rio XXX
Remove tracks from Rio XXX
Remove tracks from pending...
Format Rio XXX
Download to Rio XXX now
Rio XXX External Memory
Add tracks to Rio XXX
Remove tracks from Rio XXX
Remove tracks from pending...
Format Rio XXX
Download to Rio XXX now
Data CD ... or Audio CD
Set title of CD
Add tracks from CD
Remove tracks from transfer queue
Erase CD
Record CD now
Eject CD when completed
...Audio Bookmarks...
Bookmark 1
Bookmark 2
Bookmark 3
Set 1
Set 2
Set 3
Setup Menu
Display...
Recording Quality...
Customize standard recording...
Customize portable recording...
Internet Connection/Settings...
Games...
Certain Death...
Munchman
SDLroids
SDL Lopan
Get Track Details from Internet (X discs)...
Check online now for software update...
ISP Settings...
Automatic connection settings...
Connection for Track Details...
Connection for software downloads...
Network Configuration...
Set Time & Date...
Restore factory settings...
Select keyboard type...
United States
United Kingdom
French
German
Enter emplode password...
About your Rio...
Rio Advanced Digital Audio Center
Index
A
about screen 47
adding to now playing 42
adding tracks to playlists 27
advanced features
games 86
upgrading firmware 87
alphanumeric keypad on remote control 16
automatic connection 61
B
backspace button on remote control 16
bookmarks
creating 45
going to 46
broadband internet access 63
buttons
eject 15
menu 14
navigation 15
now playing 14
play/pause 13
standby 14
C
caps lock button on remote control 16
CD eject button 15
CE certification 97
change now playing button on remote control 17
checking online for software update 57
clear button on remote control 17
clock and calendar 65
configuring for broadband internet access 63
connecting Rio Advanced Digital Audio Center
to home stereo 4
to power source 5
to telephone line 4
contrast and brightness 51
converting CDs 20
creating bookmarks 45
creating playlists 24
customer care 106
D
deleting content 31
deleting playlists 30
deleting tracks 31
User’s Guide | 109
disabling call waiting 58
disabling caller ID 58
display
main window 12
status feedback bar 12
display button on remote control 15
display settings 51
E
edit button on remote control 16
eject button 15
eliminating music files from hard drive 31
encoding CDs 20
enter button on remote control 16
enter emplode password 70
entering special telephone dailing prefixes 58
ethernet network configuration 63
EU declaration 97
F
fastforward button on remote control 17
Federal Communications Commission (FCC) 94
four-way button 15
frequently asked questions (FAQ) 102
G
games 86
getting track details from internet 56
going to bookmarks 46
H
home computer 82
home phoneline networking (Home PNA) 63
Home PNA network configuration 63
I
initial setup
clock and calendar 8
recording quality 9
time and date 8
timezone 7
international regulatory standards 96
internet connection settings
automatic 61
checking online for software update 57
getting track details from internet 56
ISP settings 57
internet service provider (ISP) 57
ISP configuration 57
M
main window 12
managing audio content 24
110 | Index
managing playlists 26
menu button 14
menu tree illustration 107
modifying playlists 26
N
navigation button 15
network configuration 63
now playing button 14
now playing button on remote control 17
now playing list 42
num lock button on remote control 16
P
play/pause button 13
play/pause button on remote control 17
playing CDs 18
playing games 86
playing recorded music 35
playlists
adding tracks to 27
creating 24
deleting 30
editing 27
modifying 26
removing tracks 28
renaming 29
reordering tracks in 28
plugging in Rio Advanced Digital Audio Center 5
portable digital audio players 80
R
random button on remote control 17
random play 40
Rec CD button on remote control 17
recording CDs 20
recording multiple CDs 23
recording quality settings 52
regulatory information 94
remote control 15
remote control buttons
alphanumeric 16
backspace 16
caps lock 16
change now playing 17
clear 17
display 15
edit 16
enter 16
fastforward 17
now playing 17
User’s Guide
num lock 16
play/pause 17
random 17
Rec CD 17
repeat 17
rewind 17
special characters 16
stop 17
visuals 15
removing tracks from playlists 28
removing tracks from Rio Audio Center 31
renaming playlists 29
reordering tracks in playlists 28
repeat button on remote control 17
repeating tracks and playlists 40
restore factory settings 68
rewind button on remote control 17
Rio Receiver 78
S
screen 12
select keyboard type 69
setting the clock 65
setting up Rio Advanced Digital Audio Center 4
setup menu
default settings 68
display 51
enter emplode password 70
network configuration 63
recording quality 52
restore factory settings 68
select keyboard type 69
setting the clock 65
shuffle and repeat 40
standby button 14
status/feedback bar 12
stop button on remote control 17
T
technical specifications 92, 108
technical support 106
transfer to writable CD 37
troubleshooting 102
U
upgrading firmware 87
USB Ethernet adapters 63
using Rio Advanced Digital Audio Center with DSL
or cable modems 63
using Rio Advanced Digital Audio Center with Rio
Receiver 78
Rio Advanced Digital Audio Center
using the remote control 15
V
visuals button on remote control 15
W
warranty 100
writing CDs 37
User’s Guide | 111
112 | Index
User’s Guide
Important safety information
© 2001-2002 SONICblue Incorporated. All Rights Reserved.
Laser class notes
Neither SONICblue Incorporated nor Rio assumes any responsibility for errors or omissions in this document or
make any commitment to update the information contained herein.
Rio is a registered trademark of RioPort, Inc. in the United States and/or other countries
and is used under license.
Microsoft Windows Media and the Windows Logo are trademarks or registered trademarks
of Microsoft Corporation in the United States and/or other countries.
All other brand and product names may be trademarks of the companies or organizations
with which they are associated.
Gracenote is CDDB, Inc. d/b/a “Gracenote.” CD and music-related data from Gracenote CDDB® Music
Recognition ServiceSM © 2000, 2001 Gracenote. Gracenote CDDB Client Software © 2000, 2001 Gracenote. U.S.
Patents Numbers #5,987,525; #6,061,680; #6,154,773, and other patents issued or pending. CDDB is a registered
trademark of Gracenote. The Gracenote logo and logotype, the Gracenote CDDB logo and logotype, and the
“Powered by Gracenote CDDB” logo are trademarks of Gracenote. Music Recognition Service and MRS are
service marks of Gracenote. Your Rio Advanced Digital Audio Center comes with a complete CDDB database
containing track information and a one year on-line look up subscription from Gracenote. For on line updates of
the CDDB information after one year from your first on-line lookup you will need to contact Gracenote CDDB to
purchase additional subscriptions. Music recognition technology and meta-database are provided by Gracenote and
the Gracenote CDDB® Music Recognition ServiceSM. Gracenote is the industry standard in music recognition
technology and related content delivery. For more information visit www.gracenote.com.
Gracenote software license agreement:
This product contains technology and data from Gracenote of Berkeley,
California (“Gracenote”). The technology from Gracenote (the
“Gracenote Embedded Software”) enables this product to do disc
identification and obtain music-related information, including name,
artist, track, and title information (“Gracenote Data”), which is included
on the Gracenote Database (the “Gracenote Database”).
You agree that you will use Gracenote Data, the Gracenote Database, and Embedded Software for your own
personal non-commercial use only. You agree that you will access Gracenote Data only by means of the standard
end user functions and features of this product. You agree not to assign, copy, transfer or transmit the Embedded
Software or any Gracenote Data to any third party. YOU AGREE NOT TO USE OR EXPLOIT GRACENOTE
DATA, THE GRACENOTE DATABASE, OR GRACENOTE COMPONENT, EXCEPT AS EXPRESSLY PERMITTED
HEREIN.
You agree that your non-exclusive license to use the Gracenote Data, the Gracenote Database, and Embedded
Software will terminate if you violate these restrictions. You agree that Gracenote may enforce its rights under this
Agreement against you directly in its own name.
The Embedded Software and each item of Gracenote Data are licensed to you “AS IS.” GRACENOTE DISCLAIMS
ALL WARRANTIES EXPRESS OR IMPLIED, INCLUDING, BUT NOT LIMITED TO, IMPLIED WARRANTIES OF
MERCHANTABILITY, FITNESS FOR A PARTICULAR PURPOSE, TITLE, AND NON-INFRINGEMENT.
GRACENOTE DOES NOT WARRANT THE RESULTS THAT WILL BE OBTAINED BY YOUR USE OF THE
GRACENOTE COMPONENT OR ANY GRACENOTE SERVER. IN NO CASE WILL GRACENOTE BE LIABLE
FOR ANY CONSEQUENTIAL OR INCIDENTAL DAMAGES OR FOR ANY LOST PROFITS OR LOST
REVENUES.
CAUTION
As the laser beam used in the Compact Disc player is harmful to the eyes, do not attempt to disassemble
the product. Refer servicing to qualified personnel only.
DANGER
Invisible laser radiation is possible when Compact Disc player door is opened and interlock failed or
defeated. Avoid direct exposure to beam.
This product contains sub-assemblies that are classified as Class 1 Laser Products.
LASER RADIATION
DO NOT STARE INTO BEAM
CLASS 1 LASER PRODUCT
IMPORTANT
Gallium Arsenide (GaAs) is a substance used in some of the components and/or sub-assemblies found
within this product. GaAs dust and fumes are toxic. Do not break, cut or pulverize or use chemicals to
dissolve the Laser/Optic components found within this product. When disposing of this product follow
appropriate local laws; do not dispose of this product with other industrial waste or domestic garbage.
CAUTION WHILE CARRYING THIS UNIT
When moving this unit do not tip or place on its side or top while CD is inside of drive.
WARNING
•
•
•
•
•
•
•
•
To reduce the risk of fire or electric shock, do not operate or expose this unit to rain, moisture or
wet locations.
To avoid electrical shock, do not open this cabinet with Public Switched Telephone Network (PSTN),
communication network or local power cable connected. Refer servicing to qualified personnel only.
This product is not disconnected from the AC power source as long as it is connected to the wall
outlet, even if the apparatus itself is turned off.
To reduce the risk of fire use only No. 26 AWG or larger telecommunication line cord.
No data transmission cables should be connected or disconnected during lightning storms.
Use this device only in environments where temperatures do not exceed 95° F. Always ensure
proper ventilation during use.
Do not use in places exposed to strong magnetic or electrostatic fields. Do not use in places where
the humidity is excessively low.
This product contains telephone network interfaces which are susceptible to Telephone Network
Voltages (TNV) exceeding those of Safety Extra Low Voltage (SELV). Only equipment meeting the
proper separation requirements between TNV and SELV as outline in UL60950 are allowed to be
connected to these ports. Any other equipment not meeting these requirements may result in
damage to the equipment or personal injury.
Rio Advanced Digital Audio Center User’s Guide
First Edition, November, 2001
Part Number 52260049-001
User’s Guide