1
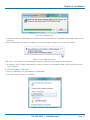
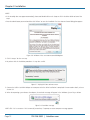
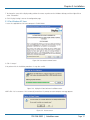
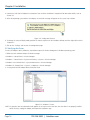
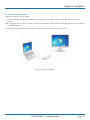
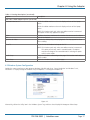
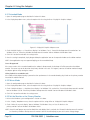
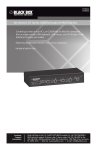
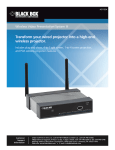
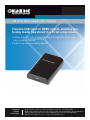
VSC-USB-HDMI USB 3.0 to HDMI Adapter User’s Manual Converts USB input to HDMI output, enabling you BLACK BOX to play media files stored in a PC on a big screen. ® • Add on a monitor, LCD, or projector through a single USB 3.0 port hot plug; no reboot required. • Supports up to six user display adapters. Customer Support Information Order toll-free in the U.S.: Call 877-877-BBOX (outside U.S. call 724-746-5500) FREE technical support 24 hours a day, 7 days a week: Call 724-746-5500 or fax 724-746-0746 Mailing address: Black Box Corporation, 1000 Park Drive, Lawrence, PA 15055-1018 Web site: www.blackbox.com • E-mail: [email protected] Trademarks Used in this Manual/Disclaimer Trademarks Used in this Manual Black Box and the Double Diamond logo are registered trademarks of BB Technologies, Inc. AMD, AMD-K6, Athlon, and Duron are registered trademarks of Advanced Micro Devices, Inc. Intel, Pentium, and Celeron are registered trademarks of Intel Corporation. Windows, Windows Vista, and Windows XP are registered trademarks of Microsoft Corporation. Any other trademarks mentioned in this manual are acknowledged to be the property of the trademark owners. Disclaimer Black Box Network Services shall not be liable for damages of any kind, including, but not limited to, punitive, consequential or cost of cover damages, resulting from any errors in the production information or specifications set forth in this document and Black Box Network Services may revise this document at any time without notice. We‘re here to help! If you have any questions about your application or our products, contact Black Box Tech Support at 724-746-5500 or go to blackbox.com and click on “Talk to Black Box.” You’ll be live with one of our technical experts in less than 30 seconds. Page 2 724-746-5500 | blackbox.com FCC Statement/CE Notice/WEEE/Safety Instructions Federal Communications Commission and Industry Canada Radio Frequency Interference Statements This equipment generates, uses, and can radiate radio-frequency energy, and if not installed and used properly, that is, in strict accordance with the manufacturer’s instructions, may cause interference to radio communication. It has been tested and found to comply with the limits for a Class A computing device in accordance with the specifications in Subpart B of Part 15 of FCC rules, which are designed to provide reasonable protection against such interference when the equipment is operated in a commercial environment. Operation of this equipment in a residential area is likely to cause interference, in which case the user at his own expense will be required to take whatever measures may be necessary to correct the interference. Changes or modifications not expressly approved by the party responsible for compliance could void the user’s authority to operate the equipment. This digital apparatus does not exceed the Class A limits for radio noise emission from digital apparatus set out in the Radio Interference Regulation of Industry Canada. Le présent appareil numérique n’émet pas de bruits radioélectriques dépassant les limites applicables aux appareils numériques de la classe A prescrites dans le Règlement sur le brouillage radioélectrique publié par Industrie Canada. CE This equipment is in compliance with the requirements of the following regulations: EN 55 022: CLASS B WEEE For EU (European Union) member users: According to the WEEE (Waste electrical and electronic equipment) Directive, do not dispose of this product as household waste or commercial waste. Waste electrical and electronic equipment should be appropriately collected and recycled as required by practices established for your country. For information on recycling of this product, please contact your local authorities, your household waste disposal service, or the shop where you purchased the product. Safety Instructions Always read the safety instructions carefully: • Keep this User’s Manual for future reference. • Keep this equipment away from humidity. • If any of the following situation arises, get the equipment checked by a service technician: - The equipment has been exposed to moisture. - The equipment has been dropped and damaged. - The equipment has obvious sign of breakage. - The equipment has not been working well or you cannot get it to work according to the User’s Manual. 724-746-5500 | blackbox.com Page 3 NOM Statement Instrucciones de Seguridad (Normas Oficiales Mexicanas Electrical Safety Statement) 1. Todas las instrucciones de seguridad y operación deberán ser leídas antes de que el aparato eléctrico sea operado. 2. Las instrucciones de seguridad y operación deberán ser guardadas para referencia futura. 3. Todas las advertencias en el aparato eléctrico y en sus instrucciones de operación deben ser respetadas. 4. Todas las instrucciones de operación y uso deben ser seguidas. 5. El aparato eléctrico no deberá ser usado cerca del agua—por ejemplo, cerca de la tina de baño, lavabo, sótano mojado o cerca de una alberca, etc. 6. El aparato eléctrico debe ser usado únicamente con carritos o pedestales que sean recomendados por el fabricante. 7. El aparato eléctrico debe ser montado a la pared o al techo sólo como sea recomendado por el fabricante. 8. Servicio—El usuario no debe intentar dar servicio al equipo eléctrico más allá a lo descrito en las instrucciones de operación. Todo otro servicio deberá ser referido a personal de servicio calificado. 9. El aparato eléctrico debe ser situado de tal manera que su posición no interfiera su uso. La colocación del aparato eléctrico sobre una cama, sofá, alfombra o superficie similar puede bloquea la ventilación, no se debe colocar en libreros o gabinetes que impidan el flujo de aire por los orificios de ventilación. 10. El equipo eléctrico deber ser situado fuera del alcance de fuentes de calor como radiadores, registros de calor, estufas u otros aparatos (incluyendo amplificadores) que producen calor. 11. El aparato eléctrico deberá ser connectado a una fuente de poder sólo del tipo descrito en el instructivo de operación, o como se indique en el aparato. 12. Precaución debe ser tomada de tal manera que la tierra fisica y la polarización del equipo no sea eliminada. 13. Los cables de la fuente de poder deben ser guiados de tal manera que no sean pisados ni pellizcados por objetos colocados sobre o contra ellos, poniendo particular atención a los contactos y receptáculos donde salen del aparato. 14. El equipo eléctrico debe ser limpiado únicamente de acuerdo a las recomendaciones del fabricante. 15. En caso de existir, una antena externa deberá ser localizada lejos de las lineas de energia. 16. El cable de corriente deberá ser desconectado del cuando el equipo no sea usado por un largo periodo de tiempo. 17. Cuidado debe ser tomado de tal manera que objectos liquidos no sean derramados sobre la cubierta u orificios de ventilación. 18. Servicio por personal calificado deberá ser provisto cuando: A: El cable de poder o el contacto ha sido dañado; u B: Objectos han caído o líquido ha sido derramado dentro del aparato; o C: El aparato ha sido expuesto a la lluvia; o D: El aparato parece no operar normalmente o muestra un cambio en su desempeño; o E: El aparato ha sido tirado o su cubierta ha sido dañada. Page 4 724-746-5500 | blackbox.com Table of Contents Table of Contents 1. Specifications..........................................................................................................................................................................5 2. Overview................................................................................................................................................................................7 2.1 Introduction....................................................................................................................................................................7 2.2 Features..........................................................................................................................................................................7 2.3 Applications....................................................................................................................................................................7 2.4 What’s Included.............................................................................................................................................................8 2.5 System Requirements.....................................................................................................................................................8 2.6 Hardware Description.....................................................................................................................................................9 2.6.1 Front Panel............................................................................................................................................................9 2.6.2 Back Panel.............................................................................................................................................................9 3. Installation............................................................................................................................................................................ 10 3.1 Installing the Software.................................................................................................................................................. 10 3.1.1 For Windows 7 and 8 Users................................................................................................................................. 10 3.1.2 For Windows Vista Users..................................................................................................................................... 11 3.1.3 For Windows XP Users........................................................................................................................................ 13 3.2 Verifying the Driver....................................................................................................................................................... 14 3.3 Installing the Hardware................................................................................................................................................ 15 4. Using the Adapter................................................................................................................................................................ 16 4.1 Utility Settings.............................................................................................................................................................. 16 4.2 Windows System Configuration................................................................................................................................... 17 4.2.1 Extended Mode................................................................................................................................................... 18 4.2.2 Mirror Mode....................................................................................................................................................... 18 4.2.3 Set the Monitor as the Primary Monitor.............................................................................................................. 18 4.3 Windows Shortcut........................................................................................................................................................ 19 5. Advanced Operation............................................................................................................................................................20 5.1 Advanced Settings........................................................................................................................................................20 5.2 Adjust the Resolution...................................................................................................................................................20 5.3 Using Multiple Adapters...............................................................................................................................................20 5.4 Disconnect the Adapter................................................................................................................................................ 21 6. Uninstall the Adapter and Driver..........................................................................................................................................22 7. Troubleshooting....................................................................................................................................................................23 7.1 Problems/Solutions.......................................................................................................................................................23 7.2 Contacting Black Box................................................................................................................................................... 24 7.3 Shipping and Packaging............................................................................................................................................... 24 724-746-5500 | blackbox.com Page 5 Chapter 1: Specifications 1. Specifications Table 1-1. General specifications. Compatible Operating Systems Windows XP, Vista, 7, 8 Connectivity Up to (6) USB 3.0 to HDMI adapters on a computer Housing ABS Plastic Modes Supported Extended Desktop (Default), Mirrored Desktop, Primary Display RAM 512 MB DDR2 SDRAM Resolutions, Refresh Rate, and Color Depth See Table 2-2. System Requirements Intel dual-core 1.8 GHz, 512 MB RAM, (1) available USB 3.0 port, 30 MB of available HDD space NOTE: Interlaced modes and reduced blanking modes are not supported. Interface Host: USB 3.0; Video: HDMI Connectors Host upstream link: (1) USB 3.0 Micro B female; Video output: (1) HDMI female Power Mode: Bus powered; Consumption: Operating Power: 340 mA Dimensions 0.7"H x 2.2"W x 3.3"D (1.8 x 5.6 x 8.5 cm) Weight 1 lb. (0.45 kg) Table 1-2. Supported Resolutions. Resolution Name Refresh rates available at 16-bit color quality Refresh rates available at 32-bit color quality 640 x 480 VGA 60, 72, 75, 85 60, 72, 75, 85 800 x 600 SVGA 56, 60, 72, 75, 85 56, 60, 72, 75, 85 1024 x 768 XGA 60, 70, 75, 85 60, 70, 75, 85 1280 x 720 720p 60 60 1280 x 768 WXGA+ 60, 75, 85 60, 75, 85 1280 x 800 WXGA 60 60 1280 x 1024 SXGA 60, 75, 85 60, 75 1366 x 768 WXGA+ 60 60 1400 x 1050 SXGA+ 60, 75, 85 60, 75, 85 1600 x 1200 UXGA 60 60 1680 x 1050 WSXGA+ 60 60 1920 x 1080 1080p 60 60 1920 x 1200 WUXGA 60 60 2048 x 1152 QXGA 60 60 NOTE: Interlaced modes and reduced blanking modes are not supported. Page 6 724-746-5500 | blackbox.com Chapter 2: Overview 2. Overview 2.1 Introduction The USB 3.0 to HDMI Adapter connects a second display device to a computer using a USB 3.0 port. With this convenient design, it can connect up to six display devices to a computer without installing extra video cards. Once the driver has been installed, the USB-attached monitor will be enabled immediately. There is no function key on the adapter and you don’t need to reboot the operating system after unplugging the USB adapter. System performance is an important issue when using multiple monitors. This adapter uses little computer resources for quality display without compromising computer performance. 2.2 Features • Add-on monitor, LCD, or projector through a single USB 3.0 port hot-plug; add or remove monitor without system reboot. • Small unit; works with all DVI-I displays. • Supports high resolutions up to 2048 x 1152. • Video streaming is supported up to 1080p. • Supports Extend and Mirror modes. • Resumes from hibernation and suspend modes. • Supports up to (6) USB display adapters working simultaneously. 2.3 Applications Office workstation • View your large spreadsheets across two screens with display continuity. • Multitask more effectively without overlapping windows. • Edit on one screen while surfing the Internet for information on the other. On the road • Do multiple screen presentations without bringing another computer. • Easily provide multiple screen exhibitions at a trade show. Graphics workstation • Use second display for palettes/tools. • Get a panoramic view of large documents. Editing workstation • Type documents on one screen while viewing reference material on the other. • Compare two documents simultaneously across two screens. Financial analysis • Have one monitor per data stream. • View charts and live data at the same time. Entertainment • View videos/TV on one screen and reviews on the other. • Get additional perspectives when playing games. 724-746-5500 | blackbox.com Page 7 Chapter 2: Overview 2.4 What’s Included • (1) USB 3.0 to HDMI Adapter • (1) CD-ROM containing software drivers and this user’s manual in PDF format • (1) quick start guide • (1) USB cable 2.5 System Requirements Hardware The minimum requirements for the PC are: • Single-core CPU at 1.2 GHz or higher processor clock. Intel® Pentium®/Celeron® family, AMD® K6®/Athlon®/Duron® family, or compatible processor • 512 MB memory • At least one USB 3.0 port • 30 MB of available disk space • Super VGA (800 x 600) or higher resolution monitor NOTE: Although this adapter can connect to a USB 2.0 connector, the quality might be poor using high-resolution displays. This adapter does not support USB 1.0/1.1. To play DVD on the adapter-attached monitor, the following requirements should also be met: • Dual-core CPU at 2.0 GHz processor clock. • Set the adapter screen resolution to 800 x 600 with 32-bit color. We recommend that you close all other unnecessary applications if the video playback is not smooth. For 1–2 monitors, use for increased productivity. The adapter may not provide full frame-rate DVD playback at full screen. • 1.2 GHz single-core CPU • 512 MB memory For 3 monitors, use for one DVD video and productivity and business applications. Supports only one video of DVD resolution at full screen. • 1.6 GHz CPU • 1 GB memory For 6 screens, use for one screen running full-screen DVD video. • 1.8 GHz Core Duo • 1 GB memory Software • Windows XP, Vista, 7, and 8 Page 8 724-746-5500 | blackbox.com Chapter 2: Overview 2.6 Hardware Description Figures 2-1 and 2-2 show the front and back panels of the adapter. Table 2-1 describes its components. 2.6.1 Front Panel HDMI connector Figure 2-1. Front panel. 2.6.2 Back Panel Micro USB connector Figure 2-2. Back panel. Table 2-1. VSC-USB-HDMI components. Component Description HDMI connector Connects to a desired HDMI monitor. Micro USB connector Connects to an available USB connector on a computer. 724-746-5500 | blackbox.com Page 9 Chapter 3: Installation 3. Installation CAUTION: DO NOT connect the USB to HDMI Adapter to a computer before installing the provided driver. 3.1 Installing the Software NOTE: The following strings and screen shots shown on this user's manual may vary slightly from each operation. 3.1.1 For Windows 7 and 8 Users 1. Insert the supplied driver CD into a computer’s CD/DVD-ROM. 2. Click “Run Setup.exe” to start the installation. Figure 3-1. Windows 7 and 8 setup screen. NOTE: If the AutoPlay does not appear automatically, locate and double-click on the Setup.exe file in the driver folder to launch the setup. Enter the administrator password, and then click “Yes” to start the installation if a User Account Control dialog box appears. Figure 3-2. User account control dialog box. 3. Click “I Accept.” 4. Be patient with the installation procedure—it may take a while. Page 10 724-746-5500 | blackbox.com Chapter 3: Installation Figure 3-3. Installation screen. 5. Connect the USB 3.0 to HDMI Adapter to a computer after the driver installation is completed. For connection details, refer to Section 3.3. 6. When the operating system detects the adapter, the reminder message will appear on the system tray as below. Figure 3-4. New display found screen. NOTE: Click “Yes” to restart or “No” to manually restart later if a prompt to restart computer message appears. 7. To change the status of display mode, position the mouse anywhere on the Windows desktop, and then right-click to select “Screen Resolution.” 3.1.2 For Windows Vista Users 1. Insert the supplied driver CD into a computer’s CD/DVD-ROM. 2. Click “Run Setup.exe” to start the installation. Figure 3-5. Windows Vista setup screen. 724-746-5500 | blackbox.com Page 11 Chapter 3: Installation NOTES: • If the AutoPlay does not appear automatically, locate and double-click on the Setup.exe file in the driver folder to launch the setup. • Enter the administrator password and then click “Allow” to start the installation if a User Account Control dialog box appears. Figure 3-6. Windows Vista user account control dialog box. 3. Click “I Accept” for the next step. 4. Be patient with the installation procedure—it may take a while. Figure 3-7. DisplayLink Core software screen. 5. Connect the USB 3.0 to HDMI Adapter to a computer after the driver installation is completed. For connection details, refer to Section 3.3. 6. When the operating system detects the adapter, the reminder message will appear in the Windows System Tray as below. Figure 3-8. Reminder message. NOTE: Click “Yes” to restart or “No” to manually restart later, if a prompt to restart computer message appears. Page 12 724-746-5500 | blackbox.com Chapter 3: Installation 7. To change the status of the display mode, position the mouse anywhere on the Windows desktop, and then right-click to select “Personalize.” 8. Click “Display Settings” to enter the configuration page. 3.1.3 For Windows XP Users 1. Insert the supplied driver CD into a computer's CD/DVD-ROM. Figure 3-9. User account control screen. 2. Click “I Accept”. 3. Be patient with the installation procedure—it may take a while. Figure 3-10. DisplayLink Core Software installation screen. NOTE: Click “Yes” to restart or “No” to manually restart later if a prompt to restart computer message appears. Figure 3-11. Restart screen. 724-746-5500 | blackbox.com Page 13 Chapter 3: Installation 4. Connect the USB 3 to DVI Adapter to a computer after the driver installation is completed. For connection details, refer to Section 3.3. 5. When the operating system detects the adapter, the reminder message will appear on the system tray as below. Figure 3-12. Display found screen. 6. To change the status of display mode, position the mouse anywhere on the Windows desktop, and then right-click to select “Properties.” 7. Click on the “Settings” tab to enter the configuration page. 3.2 Verifying the Driver To verify the adapter’s driver, follow the steps below to open the Device Manager on a Windows operating system. 1. Follow the path as below to open the device manager: • Windows 8: Control Panel—>Device Manager • Windows 7: Control Panel—>System and Security—>System—>Device Manager • Windows Vista: Control Panel—>System Maintenance—>Device Manager • Windows XP: Control Panel—>System—>Hardware—>Device Manager 2. A string similar to USB Adapter device should be listed. Figure 3-13. Windows 7 screen. NOTE: If a question mark or exclamation mark appears in the screen next to the item, then the driver is not properly installed. Delete the item, unplug the adapter, and repeat the installation steps. Page 14 724-746-5500 | blackbox.com Chapter 3: Installation 3.3 Installing the Hardware Follow these steps to install the adapter: 1. Plug one end of the DVI cable into the adapter’s DVI connector, and the other end of the DVI cable into a monitor’s DVI connector. NOTE: To connect different types of monitors, you may need an adapter. Contact Black Box Technical Support at 724-746-5500 or [email protected]. 2. Plug the micro USB connector into the adapter’s micro USB connector and the other end into a PC. Figure 3-14. Typical installation. 724-746-5500 | blackbox.com Page 15 Chapter 4: Using the Adapter 4. Using the Adapter There are several ways to use the monitor attached to the adapter. You can configure the add-on monitor to use either “mirror mode,” “extended mode,” or be the primary display, as described in this section. • Mirror mode: Duplicate the primary display and mirror to the add-on monitor(s). • Extended mode: The Windows Desktop will be spread to the add-on monitor(s). • Primary mode: Assign the add-on monitor to the primary display. NOTE: The following screen shots in this section are using Windows 7 operating system. It may not match your operating system, but the definitions of buttons, tabs, and menus are the same. 4.1 Utility Settings The supplied utility allows you to configure the display mode, screen rotation, screen resolution, and physical arrangement of your monitors. 1. Click on the Utility icon in the Windows System Tray. NOTE: The Utility icon may be hidden in the Windows System Tray. Click on the Arrow icon to bring up more icons if this happens. 2. Click on the preferred option. Figure 4-1. Utility screen. Table 4-1. Settings descriptions. Option Description DisplayLink Manager Enable the Windows screen resolution page. Check for Updates Check the latest driver and download if available. USB 3.0 to HDMI Adapter Options Screen Resolution Click to select an available resolution. NOTE: This function is invalid in mirror mode, because the resolution is defined as the resolution of the primary monitor. Screen Rotation Rotate the screen according to the desired orientation. Extend To Extend the screen according to the desired orientation. Set as Main Monitor Set this screen to the main screen. Page 16 724-746-5500 | blackbox.com Chapter 4: Using the Adapter Table 4-1. Settings descriptions (continued). Option Description USB 3.0 to HDMI Adapter options (continued) Notebook Monitor Off Switch the add-on monitor to the main display and turn off the laptop screen. Switch the add-on monitor to the main display and turn off the laptop screen. NOTE: This function works only when one add-on monitor is connected. This option will also only appear on a laptop. Mirror Duplicate the primary monitor to the monitor that connects to the adapter. Off Turn off the monitor. Optimize for Video Optimize the video quality when playing back. Text may appear less clear when enabling. Fit to TV Adjust the size of Windows Desktop on the TV. NOTE: This function works only when one add-on monitor is connected. This option will also only work in extended mode. The add-on monitor will change to the extended mode if selecting this option while in mirror mode. Audio Setup Enable the Windows audio configuration page. This function works only in specific models. Video Setup Enable the Windows screen resolution page. 4.2 Windows System Configuration Position the mouse anywhere on your computer desktop, right-click and select “Screen Resolution” on Windows 7 or 8, Personalize—> Display Settings on Windows Vista, or Properties —>Settings on Windows XP. Figure 4-2. Alternatively, click on the Utility icon in the Windows System Tray, and then select DisplayLink Manager or Video Setup. 724-746-5500 | blackbox.com Page 17 Chapter 4: Using the Adapter 4.2.1 Extended Mode 1. Open the configuration page as described in Section 4.2 above. 2. In the Display drop-down menu, select the option with the string similar to “DisplayLink Graphics Adapter.” Figure 4-3. DisplayLink Graphics Adapter screen. 3. Check“Multiple Displays —> Extend these displays” on Windows 7 or 8, “Extend the desktop onto this monitor box” on Windows Vista, or “Extend my Windows desktop onto this monitor” box on Windows XP/Windows 2000. 4. Click “OK” to confirm and close the settings screen. 5. Once the setting is completed, simply drag and drop the application icons or the opened windows to the add-on monitor. NOTE: Some applications may not support displaying on the extended desktop. Cursor disappeared If the status remains in the extended mode but the adapter is disconnected, the desktop will still be panned to the add-on monitor. The cursor may not be found on the primary monitor in this case. If it happens, connect the add-on monitor through the adapter again or keep moving the mouse. Video playback in extended mode If the video or DVD playback quality is poor or has low performance in the extended mode, play it back on the primary monitor instead of the add-on monitor. 4.2.2 Mirror Mode 1. Open the configuration page as described in Section 4.2 above. 2. In the Display drop-down menu, select the option with the string similar to “DisplayLink Graphics Adapter.” 3. Check “Multiple Displays —> Duplicate these displays” on Windows 7/8, uncheck the ”Extend the desktop onto this monitor” box on Windows Vista or “Extend my Windows desktop onto this monitor” box on Windows XP/Windows 2000. 4. Click “OK” to confirm and close the settings screen. 4.2.3 Set the Monitor as the Primary Monitor 1. Refer to the Windows system configuration in Section 4.2 above. 2. In the “Display” drop-down menu, select the option with the string similar to “DisplayLink Graphics Adapter.” 3. Check ”Make this my main display” box on Windows 7/8/Windows Vista, or “Use this device as the primary monitor” box on Windows XP/Windows 2000. NOTE: Some PCs and laptops may need to disable the main display (that is, uncheck the “Extend the desktop onto this monitor” or “Extend my Windows desktop onto this monitor” box for the main display) as part of the same settings change. Page 18 724-746-5500 | blackbox.com Chapter 4: Using the Adapter 4. Click “OK” to confirm and close the settings screen. 4.3 Windows Shortcut Press < (Windows) > + <P> button to bring up the menu as below, and then select a desired option. NOTE: This function is available for Windows 7 and 8 only. Figure 4-4. Windows shortcut. 724-746-5500 | blackbox.com Page 19 Chapter 5: Advanced Operation 5. Advanced Operation 5.1 Advanced Settings 1. Refer to the Windows system configuration section to open the configuration page. 2. To change the refresh rate or other options, click on “Advanced settings.” For more detailed adjustments, refer to the operating system’s instruction manual. 3. Click “OK” to confirm and close the settings screen. 5.2 Adjust the Resolution Extended Monitor By default, the adapter will configure the settings for the add-on monitor automatically, such as screen resolution, color quality, refresh rate, etc. Users can also configure these settings. The maximum resolution and refresh rate depend on the monitor’s specifications. Mirror Monitor In mirror mode, both monitors will be configured to the same resolution, which may not be the maximum resolution of the monitors. The resolution of the primary and add-on monitors may be changed to a lower resolution. For example, if the primary monitor does not support the resolution of 1920 x 1080, then 1920 x 1080 is not possible to set, even if the connected adapter supports 1920 x 1080. Supported Resolution Before adjusting the resolution, refer to Table 1-2 in Chapter 1, Specifications for the supported resolutions. NOTE: Interlaced modes and reduced blanking modes are not supported. 5.3 Using Multiple Adapters Up to six adapters can be connected to one computer simultaneously. To connect multiple adapters, install the drive as described in Chapter 3 and then connect the adapters to a computer. Figure 5-1. Installation using multiple adapters. NOTE: Only the first connected adapter can be configured to extended mode. The others will be forced to mirror mode if you are using a low-end computer. Page 20 724-746-5500 | blackbox.com Chapter 5: Advanced Operation 5.4 Disconnect the Adapter The add-on monitor goes blank when the operating system goes into standby, hibernate mode, or disconnection. All windows and icons will move to the primary screen. Once the system is activated or reconnected again, the display mode will return to the previous mode before disconnecting. NOTE: Some windows or icons may not remove back to the screen of add-on monitor. 724-746-5500 | blackbox.com Page 21 Chapter 6: Uninstall the Adapter and Driver 6. Uninstall the Adapter and Driver 1. Open the Control Panel—>Device Manager on Windows 8, “Control Panel—> Programs—> Programs and Features” on Windows 7/Windows Vista, and “Add or Remove Programs” on Windows XP. 2. Select “DisplayLink Graphics” and click “Uninstall or Remove.” Figure 6-1. Uninstall or remove screen. 3. Click “Yes” to remove the driver. Figure 6-2. Remove the driver. 4. Click “Yes” to restart your computer and then unplug the adapter. Figure 6-3. Restart the computer. Page 22 724-746-5500 | blackbox.com Chapter 7: Troubleshooting 7. Troubleshooting 7.1 Problems/Solutions Problem: The display on the add-on monitor is blank. Solutions: • If the monitor power is on (LED lights green in most cases), wait a moment for the monitor to show the video because sometimes it takes time for the add-on monitor to show the video. You can also reboot your system to try again. Make sure the computer is not in standby or hibernation mode; this can cause the add-on monitor to be blank. • If the monitor power is in standby (LED lights red in most cases), check the connection. If the problem still exists, uninstall the driver, unplug the adapter, and re-install the driver again. Problem: The add-on monitor is flickering. Solutions: This is usually caused by a low refresh rate. To solve this problem, refer to the steps below. • In mirror mode, increase the refresh rate of the main monitor. This will increase the refresh rate of the add-on monitor. • In extended mode, increase the refresh rate of the add-on monitor. Problem: When playing an MPEG file with Windows Media Player on the extended monitor, the display becomes abnormal when switching it to full-screen mode. Solution: Upgrade the Windows XP from SP1 to SP2. Problem: When playing the video in full-screen mode, the motion is not smooth. Solutions: • Reduce the resolution of the display to 640 x 480 or 800 x 600. • Use the adapter in extended mode. • Terminate any other CPU intensive applications running on the computer. • Some media players require DirectX hardware support to correctly operate, so try a different media player that requires less DirectX support. • Drag the media player to the add-on screen and close the player. Restart the player. It should open on the add-on monitor. Now try playing the media file again. • Try reducing the hardware acceleration level of the primary display (NOT the add-on monitor) to levels 1, 2, or 3 and restarting the media player. You can find the hardware acceleration by right-clicking on your desktop and click on Properties—> Settings—>Advanced—>Troubleshoot. Some players use this setting even when playing on a different display. • The video playback may be unusual when the add-on monitor is mirroring the primary display and there is another extended screen connected to the computer. The extended screen must be disabled before the content will be correctly cloned to the add-on monitor. 724-746-5500 | blackbox.com Page 23 Chapter 7: Troubleshooting Problem: In extended mode, the add-on monitor appears to have a black border around the desktop. Solution: This happens when the resolution used by the add-on monitor is larger than the resolution used by the primary monitor. To solve this problem, configure the add-on monitor to use the same resolution as the primary monitor. 7.2 Contacting Black Box If you determine that your USB 3.0 to HDMI Adapter is malfunctioning, do not attempt to alter or repair the unit. It contains no user-serviceable parts. Contact Black Box Technical Support at 724-746-5500 or [email protected]. Before you do, make a record of the history of the problem. We will be able to provide more efficient and accurate assistance if you have a complete description, including: • the nature and duration of the problem. • when the problem occurs. • the components involved in the problem. • any particular application that, when used, appears to create the problem or make it worse. 7.3 Shipping and Packaging If you need to transport or ship your USB 3.0 to HDMI Adapter: • Package it carefully. We recommend that you use the original container. • If you are returning the unit, make sure you include everything you received with it. Before you ship for return or repair, contact Black Box to get a Return Authorization (RA) number. Page 24 724-746-5500 | blackbox.com NOTES 724-746-5500 | blackbox.com Page 25 NOTES Page 26 724-746-5500 | blackbox.com NOTES 724-746-5500 | blackbox.com Page 27 Black Box Tech Support: FREE! Live. 24/7. Tech support the way it should be. Great tech support is just 30 seconds away at 724-746-5500 or blackbox.com. About Black Box Black Box provides an extensive range of networking and infrastructure products. You’ll find everything from cabinets and racks and power and surge protection products to media converters and Ethernet switches all supported by free, live 24/7 tech support available in 30 seconds or less. © Copyright 2013. Black Box Corporation. All rights reserved. Black Box® and the Double Diamond logo are registered trademarks of BB Technologies, Inc. Any third-party trademarks appearing in this manual are acknowledged to be the property of their respective owners. VSC-USB-HDMI user’s manual, version 1 724-746-5500 | blackbox.com