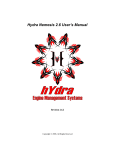
1
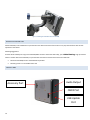
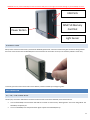
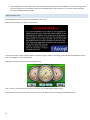
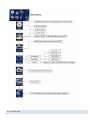
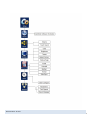
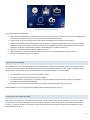
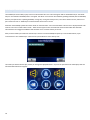
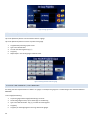
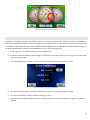
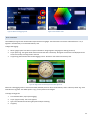
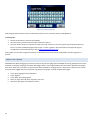
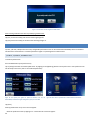
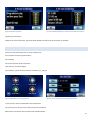
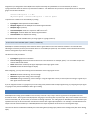
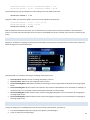
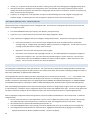
DashDAQ Series II
Instruction Manual
1
Dear Customer,
Congratulations! You have just purchased the most powerful, sophisticated, and easy to use automotive data logger ever created. The
DashDAQ Series II gives everyone access to the powerful information embedded in their vehicle. When it comes to automotive
performance, knowledge is horsepower.
The DashDAQ Series II works with any OBDII vehicle. It can also be fitted to any other vehicle using optional add-ons. Now you have a
device that captures information on your new vehicle as well as your vintage one.
This is an exciting time for vehicle performance, and the more you know about your vehicle the more you can get out of it. The
DashDAQ gives automotive enthusiasts the edge in knowing their vehicle, new or old.
Drew Technologies would like to thank you on your decision to buy the DashDAQ Series II. However you use your DashDAQ, we know
you will be satisfied with all aspects of the product. You demand the best, we deliver the best.
Thank You,
Drew Technologies, Inc.
2
Table Of Contents
Installation............................................................................................................................... 9
SAFETY FIRST! ......................................................................................................................................... 9
OBDII Connector..................................................................................................................................... 9
Cable Routing ......................................................................................................................................... 9
Attaching Windshield Mount ................................................................................................................. 9
Windshield Mounting........................................................................................................................... 10
Connections.......................................................................................................................................... 10
SD Memory Card .................................................................................................................................. 11
Basic Operation ..................................................................................................................... 11
Off / On / Low Power Mode................................................................................................................. 11
Menu Navigation.................................................................................................................................. 12
Main Menu ........................................................................................................................................... 13
Setup Menu Map.................................................................................................................................. 14
New Vehicle Setup ............................................................................................................................... 15
Display Dimmer/Display Brightness ..................................................................................................... 16
Auto Power Off..................................................................................................................................... 16
GPS Navigation Setup........................................................................................................................... 16
Custom splash screen........................................................................................................................... 17
Installing Files From SD Card ................................................................................................................ 17
DashDAQ Media Player ........................................................................................................................ 18
Gauge Setup & Navigation .................................................................................................... 19
Navigating Gauges:............................................................................................................................... 19
Assign a Signal to a Gauge.................................................................................................................... 19
Set Gauge Min/Max Values.................................................................................................................. 20
Set Gauge Low Warning / High Warning.............................................................................................. 20
3
Warning Sounds ................................................................................................................................... 21
Media PLayer........................................................................................................................................ 22
Setting Signal/Graph Colors ................................................................................................................. 22
Data Logging......................................................................................................................................... 23
Global Data Logger ............................................................................................................................... 24
Diagnostic Code Reader ........................................................................................................ 25
Performance Measurements ................................................................................................. 26
1/4-mile, 1/8-mile, 0-60mph Test........................................................................................................ 26
User Defined Speed Tests .................................................................................................................... 27
Calculators ............................................................................................................................ 28
Installing a calculator driver ................................................................................................................. 28
Setting the parameters for aNY calculator driver ................................................................................ 29
Dyno Calculator .................................................................................................................................... 29
Fuel Economy Calculator...................................................................................................................... 30
Rescale Signal Calculator...................................................................................................................... 31
Statistics Calculator (Min / Max / Average) ......................................................................................... 33
Analog Inputs......................................................................................................................... 33
Connections and Wiring ....................................................................................................................... 34
Linear Analog input driver Setup ......................................................................................................... 34
LInear Analog driver Correction Factor and Correction Offset............................................................ 34
Converting an Analog Voltage into Physical Units ............................................................................... 35
Non Linear Analog input driver Setup.................................................................................................. 35
non linear Analog input configuration ................................................................................................. 36
NON Linear analog input driver configuration file............................................................................... 36
Device Manager/Third Party Accessories ............................................................................. 37
Licensed DashDAQ Drivers........................................................................................................................ 37
4
Using Device Manager.......................................................................................................................... 38
Adding support for Enhanced OBD2 DATA .......................................................................................... 39
Adjusting Driver Parameters ................................................................................................................ 40
Updating DashDAQ ................................................................................................................ 41
Install the DashDAQ Recovery Tool ..................................................................................................... 41
Updating DashDAQ............................................................................................................................... 43
APPENDIX .............................................................................................................................. 49
Support 49
Technical Specifications ....................................................................................................................... 49
Limited Warranty ................................................................................................................................. 50
Appendix a: Accessory Cable Pin Out................................................................................................... 51
Appendix b: English to metric conversion unit names......................................................................... 52
5
Components
Included with DashDAQ
Display Unit
Software CD
USB Cable
OBD2 Cable
Windshield Mount with four screws
Optional DashDAQ Accessories
6
DashDAQ Accessory Cable
SD Memory Card.
for analog and serial connection. For
adding up to two 0-5 volt sensors and
other third party data collection devices.
Order the DashDAQ Accessory cable
directly from Drew Technologies or a
DashDAQ dealer.
For data logging on DashDAQ. Order the
SD Memory card directly from Drew
Technologies or a DashDAQ dealer.
110V Power Supply
CAN Accessory Cable
GPS Receiver
This is the OBD2 cable without the
J1962 end attached. This cable is useful
when hard-wiring to CAN, J1850, or
ISO9141 connections such as standalone EFI systems without an OBD2 plug
and CAN-based sensors.
The GPS receiver allows users to collect
GPS data right alongside any other input
DashDAQ can monitor. Speed, latitude,
longitude, and altitude are just a few of
the parameters available.
7
IMPORTANT!
THIS IS A HIGH PERFORMANCE PRODUCT, USE AT YOUR OWN RISK
Do not use this product until you have carefully read the following terms and conditions for the use of this product. The installation of
this product indicates the BUYER has read and understands this agreement and accepts its terms and conditions. This agreement takes
precedence.
DISCLAIMER OF LIABILITY
Drew Technologies and its successors, distributors, jobbers, and dealers (hereafter SELLER) shall in no way be responsible for the
product’s proper use and serviceability.
THE BUYER HEREBY WAIVES ALL LIABILITY CLAIMS.
The BUYER acknowledges that he/she is not relying on the SELLER’s skill or judgment to select or furnish goods suitable for any
particular purpose and that there are no liabilities which extend beyond the description on the face hereof and the BUYER hereby
waives all remedies or liabilities, expressed or implied, arising by law or otherwise, (including without any obligations of the SELLER with
respect to fitness, merchantability, and consequential damages) or whether or not occasioned by the SELLER’s negligence. The SELLER
disclaims any warranty and expressly disclaims any liability for personal injury or damages. The BUYER acknowledges and agrees that
the disclaimer of any liability for person injury is a material term for this agreement and the BUYER agrees to indemnify the SELLER and
to hold the SELLER harmless from any claim related to the item of the equipment purchased. Under no circumstances will the SELLER be
liable for damages or expenses by reason of use or sale of any such equipment. The SELLER assumes no liability regarding the improper
installation or misapplication of its products. It is the installer’s responsibility to check for proper installation and if in doubt, contact the
manufacturer.
IN THE EVENT THAT THE BUYER DOES NOT AGREE WITH THIS AGREEMENT: THE BUYER MAY PROMPTLY RETURN THIS PRODUCT, IN A
NEW AND UNUSED CONDITION, WITH A DATED PROOF OF PURCHASE, TO THE PLACE OF PURCHASE FOR A FULL REFUND. THE
INSTALLATION OF THIS PRODUCT INDICATES THAT THE BUYER HAS READ AND UNDERSTANDS THIS AGREEMENT AND ACCEPTS ITS
TERMS AND CONDITIONS.
Warning: Minnesota and California state laws restrict the method of attachment and placement of objects to the
windshield and side windows of motor vehicles (See Minnesota Statutes 2005, Section 169.71 and California Vehicle
Code Section 26708(a)). Drew Technologies does not take any responsibility for any fines, penalties, or damages that
may be incurred as a result of disregarding the laws and statutes of the jurisdictions in which a DashDAQ is operated.
Similar laws may apply within your province or state. Please verify your provincial or state laws prior to installation.
Warning: When mounting the DashDAQ to the windshield, place the device in a location where it does not obstruct the
driver’s view of the road and does not interfere with vehicle controls and safety devices or the safe operation of the
vehicle.
8
INSTALLATION
SAFETY FIRST!
Install DashDAQ in such a manner that it does not interfere with the safe operation of the vehicle. If DashDAQ cannot be mounted in
such a manner, promptly return the DashDAQ, in new and unused condition, with a dated proof of purchase, to the place of purchase
for a full refund less a 20% restocking fee.
OBDII CONNECTOR
The OBDII or “data link” connector is necessary for DashDAQ operation in OBDII vehicles. Power and all vehicle information come
directly from this vehicle link. Some custom applications (aftermarket ECMs, aftermarket data acquisition equipment, etc.) may not
have an OBDII connector in the vehicle. In these cases the connection between the vehicle and DashDAQ is application specific.
Most OBDII connectors are found directly below the steering column. It should be in plain sight. If you cannot find the OBDII connector
have a local mechanic show you where it is.
CABLE ROUTING
The DashDAQ OBDII cable must be routed so that it does not interfere with safe operation of the vehicle.
Cable routing tips:
•
•
•
Find the OBDII connector first and work the cable to where DashDAQ is to be mounted on the windshield.
Route the DashDAQ OBDII cable between interior panel grooves to hold the cable as well as conceal it.
Use wire or zip ties to bundle any excess cable.
Cable routing “Don’ts”
•
•
•
•
Don’t let the cable dangle by your feet.
Don’t let the cable hang free.
Keep the cable away from the steering wheel and any steering column controls.
Golden Rule: If the cable looks to be poorly routed, it is. Reroute it.
ATTACHING WINDSHIELD MOUNT
1.
2.
3.
Remove these two items from packaging:
a. Display Unit
b. Windshield Mount
Line up the four holes on the windshield mount and thread each of the four screws into the display unit.
Using a Phillips head screwdriver, lightly tighten each of the four screws. Note: Over-tightening can possibly damage DashDAQ.
Tighten the screws so they are snug, no more.
9
Figure 1: Attaching the windshield mount to DashDAQ
WINDSHIELD MOUNTING
Mount DashDAQ on the windshield in a spot that does not obstruct the view of the road or in any way that interferes with the safe
operation of the vehicle.
Mounting Suggestions:
Find the vehicle’s OBDII port. Plug in the DashDAQ OBDII connector. Route the cable safely, (see “Cable Routing” Page 9) and note
where it reaches. Mount the DashDAQ in a spot that does not obstruct view based on where the cable ends.
•
•
Mount the DashDAQ as low to the dashboard as possible.
Mounting to left or in the middle works well.
CONNECTIONS
Accessory Port
Audio Output
OBDII Port
USB Update
Port
10
WARNING: Do not power DashDAQ from the PC with the USB ports on the right. Permanent damage to your DashDAQ can occur.
USB Ports
Power Button
MMC SD Memory
Card Slot
Light Sensor
SD MEMORY CARD
Always insert and remove the memory card with the DashDAQ powered off. Insert the card with the gold connections facing towards
the screen. Press the card into the DashDAQ until a click is heard. If the card sticks out at all, it has not been pushed in all the way.
To remove, press the card in until a click is heard. Release, and the card will eject enough to grab it.
BASIC OPERATION
OFF / ON / LOW POWER MODE
The Off / On/ Low Power mode button is located on the front left corner of the DashDAQ. It has three functions:
•
•
To shut off DashDAQ: Press the button and hold for 3 seconds. A screen will say “Shutting Down.” The screen will go black. The
DashDAQ is completely off.
To turn on DashDAQ: Press the power button again to power the DashDAQ back up.
11
•
To put DashDAQ in Low Power Mode: Press and release the button quickly while the DashDAQ is on. The screen will go off, but
the unit will still be on. Press the button again and the DashDAQ will instantly come back on. Low power mode saves power,
but makes DashDAQ instantly available.
MENU NAVIGATION
When DashDAQ first starts up, a boot screen will appear. Please wait.
Whenever this warning screen appears, read carefully.
To agree and continue, tap the [I Accept] button. If you do not agree to abide by the warning, please disconnect DashDAQ and contact
Drew Technologies for a return authorization.
Tapping the [I Accept] button will bring up the gauge screen:
The [<<] and [>>] arrow buttons at the bottom are used to cycle through different gauge layouts.
The [Exit] button in the lower left corner returns the screen to the main menu for accessing all of DashDAQ’s features.
12
MAIN MENU
13
SETUP MENU MAP
14
NEW VEHICLE SETUP
15
The DashDAQ was designed to be used on any OBDII vehicle. OBDII vehicles have many “signals” or “parameters” that can be viewed.
Each vehicle to which the DashDAQ is connected will have a different set of parameters or signals available. Run the Find Signals
function every time the DashDAQ is plugged into a different vehicle. If this is not done for each vehicle, parameters may show up on the
list that don’t work and parameters that are available may not be displayed.
The New Vehicle setup:
1.
2.
3.
4.
5.
6.
7.
Plug DashDAQ into the vehicle.
Turn the vehicle’s key to the on position. The engine does not need to be started.
Turn on the DashDAQ.
Go to the DashDAQ main menu. Tap [Setup], tap [Devices].
Tap [Find Signals].
Follow the on-screen instructions. When DashDAQ lists how many signals were found, DashDAQ has finished.
Repeat steps 1-6 every time DashDAQ is connected to a new vehicle.
DISPLAY DIMMER/DISPLAY BRIGHTNESS
The DashDAQ has a built in light sensor that adjusts the screen brightness according to its surroundings DashDAQ comes setup to
automatically change the brightness of the screen, however the automatic dimmer can be turned off or set a specific brightness level.
1.
2.
3.
Tap on [Setup] menu,
Tap on [Display]
Tap on [Brightness]
AUTO POWER OFF
The DashDAQ has an automatic power down feature that shuts down the DashDAQ when the vehicle is turned off. This feature watches
for Generic OBDII signals and automatically shuts the DashDAQ when no signals are observed from the OBDII connector. To enable Auto
Power Off:
1.
2.
3.
4.
Tap on [Setup] from the Main Menu.
Tap on [Power].
Tap on desired time for shutdown after key is turned off.
Tap [Ok].
GPS NAVIGATION SETUP
The DashDAQ can be purchased with or without GPS navigation. If a DashDAQ is purchased without GPS navigation, the GPS navigation
kit can be purchased separately.
If you purchased a DashDAQ along with a GPS kit:
1.
2.
3.
16
Insert the navigation SD card.
Connect the antenna cable to DashDAQ, and place the antenna on your vehicle dashboard for signal reception.
Turn on your DashDAQ and tap on the GPS icon.
Figure 2: DashDAQ main menu with GPS option
If your GPS kit is purchased separately:
1.
2.
3.
4.
5.
6.
When ordering the GPS-NAV-KIT at DashDAQ.com or through any other vendor, make sure you send the serial number of your
unit with the order ticket. This is how your unit becomes licensed for the GPS software.
Before your kit arrives you will get a notice E-mail that your DashDAQ has been licensed for GPS navigation.
Update your DashDAQ with the DashDAQ Recovery Tool (Section 0). Update your DashDAQ even if it has the latest software.
Make sure to pick all of the drivers that you currently use on the DashDAQ. When a particular DashDAQ is licensed for GPS
Navigation, the license is automatically installed in the DashDAQ when an update is performed.
After your unit has been updated, insert the navigation SD card.
Connect the antenna cable to DashDAQ, and place the antenna on your vehicle dashboard for signal reception.
Turn on your DashDAQ and tap on the GPS icon.
CUSTOM SPLASH SCREEN
The DashDAQ allows users to change the splash screen (the graphic that is displayed when DashDAQ starts) to anything they wish. A
user must first create a image file using image editing software. The image needs to be 480x272 and a .tga file. Most popular image
editing programs can save in this format. To install and specify your splash screen after it has been created:
1.
2.
3.
4.
Place your splash screen on a SD card in a folder called “transfer.”
Insert the SD card into the SD card slot and turn DashDAQ on.
From the Main Menu, tap on [Setup], then [Memory Card], then [Install], then [Splash Screen]. Select your image file. A
confirmation of installation will be displayed.
Go back to the Main Menu and tap on [Setup], then [Display], then [Splash Screen]. Select your image.
When DashDAQ starts, your image will now be displayed before DashDAQ completely starts up.
INSTALLING FILES FROM SD CARD
Various files can be installed on to DashDAQ from the SD card. Themes, Splash Screens, Sounds, Config File, and Licenses can all be
installed this way. In order for DashDAQ to see these files when a SD card is inserted, the files must be contained in a folder called
“transfer” in the parent directory of the SD card. A user can backup, install, uninstall, format and eject a SD by navigating to: Main
Menu>Setup>Memory Card.
17
DASHDAQ MEDIA PLAYER
The DashDAQ XL has the ability to play various sound and video files. This is done through an add-on called Media Player. The Media
Player is not installed on DashDAQ when it is shipped. This add-on is free and can be installed by updating DashDAQ with the DashDAQ
Recovery Tool (See Section “Updating DashDAQ” on Page 39). During the install process, at the driver selection screen, make sure to
put a check mark next to “Media Payer” which should be the last item in the list.
Now when the DashDAQ is powered on there will be an “Entertainment” icon in the Main Menu. Files that are to be played need to be
saved on a SD card in a folder called “media.” Most common types of music and video files can be viewed. Video files should be
reformatted to be no bigger than 480X272 and should be cut to around 10 frames per second.
After you have loaded your media onto the SD card, insert the card into DashDAQ and power up. From the Main Menu, tap on
“Entertainment” then “Media Player.” Select the file you would like to screen and tap “Ok.”
The media you selected will now play. Notice you have general playback buttons. If you hit the eject button the media player will turn
off and the Main Menu will reappear.
18
GAUGE SETUP & NAVIGATION
NAVIGATING GAUGES:
To access DashDAQ gauges, tap on [Gauges] from the Main Menu. The last gauge layout viewed, or this screen, will be displayed.
Figure 3: Layout with 3 round gauges
To change gauge layouts, tap on the [<<] and [>>] buttons. Two gauge layout examples:
Figure 4: Layout for graphing up to 8 signals
Figure 5: Layout for displaying up to 9 numeric signals
ASSIGN A SIGNAL TO A GAUGE
Before assigning signals to a gauge, make sure the New Vehicle Setup has been completed.
1.
2.
3.
4.
5.
6.
7.
Do the New Vehicle Setup for each new vehicle (section 0)
Select a gauge layout.
Tap on the gauge where the signal will be displayed. This screen will appear:
Tap on [Assign Signal].
Using the [<] and [>] buttons at the top of the screen and the scroll slider on the right side of the list, go through the available
signals.
Select the signal that you would like displayed on the gauge
Tap [Save].
19
Figure 6: Assign signal screen
SET GAUGE MIN/MAX VALUES
Tap on the [Minimum] button to set the bottom value for a gauge.
Tap on the [Maximum] button to set the top value of the gauge.
1.
2.
3.
4.
5.
Tap [Maximum] will bring up this screen:
Type in the desired value.
To make the value negative tap [+/-]
Tap [save]
Repeat steps 1-4 to set the gauge’s minimum value.
Figure 7: Entering maximum value for a gauge
SET GAUGE LOW WARNING / HIGH WARNING
For setting the visual representation of “redline” on a gauge. For example: this gauge has a “redline danger zone” between 5000 and
6000 RPM.
To set a High/Low Warning:
1.
2.
3.
4.
5.
20
Tap on the gauge where a High/Low Warning is to be set.
On the Assign Signal screen, tap on either High or Low Warning.
Type in the desired number. Tap [+/-] to make the value negative.
Tap [Save].
Tap [Save] on the Assign Signal screen to go back to the gauges.
Figure 8: Round gauge with a high limit warning
WARNING SOUNDS
DashDAQ has the ability to play either one of the pre-made or user made warning sounds when a specific parameter has gone above or
below a user specified range. Besides using the pre-packaged sounds, DashDAQ users can also create and use their own warning sounds
on DashDAQ. The Warning sounds option comes preloaded on new DashDAQs. If you are updating from a previous firmware, make sure
the Warning Sounds option is selected in the DashDAQ Recovery tool. To set a Warning Sound:
1.
Tap on a gauge that you want the warning sound to be apparent on.
2.
Tap on the crossed out speaker for either the High or Low warning. A sound will be played when the signal has crossed the High
or Low warning threshold.
3.
Tap on the black box next to “Sound” to select the audio clip to be played when the threshold is crossed.
Figure 9: High Warning sound set for RPM warning.
4.
The repeat rate is how often the sound will repeat while the threshold is crossed. 0 will repeat constantly.
5.
The “State” field will either enable or disable the warning. Tap [Save].
6.
Make sure your warning threshold for the high or low warning that you use is set, and make sure your signal for the gauge is
specified.
21
To upload your own sounds:
1.
Sound files must have these attributes:
Extension:
Encoding:
Size:
Sample Rate:
Channels:
Length:
.wav
PCM (uncompressed)
8 or 16 bit signed integer
22050, 11025, 5512 or 5513 KHZ
Stereo or Mono
Less than 10 seconds
2.
Once you have your sound file, put it in the transfer folder on your SD card.
3.
Insert the SD into the DashDAQ, and turn the unit on.
4.
From the Main Menu tap on [Setup], then [Memory Card], then [Install], then [Sound].
5.
Select which sound you wish to install and tap [Install].
You can now specify this warning sound for any High or Low warning in the gauges.
MEDIA PLAYER
The Media player can be accessed by tapping on [Entertainment] from the Main Menu. The Media player allows you to play various
audio and video files. To make media playable for DashDAQ, the media files must be placed in a folder called “media” on the SD card.
This folder must be located in the root directory of the card.
SETTING SIGNAL/GRAPH COLORS
Setting different colors for a gauge makes it easier to see, but is especially helpful on the graphing gauge. To change a gauge’s color:
1.
2.
3.
22
Tap on the red, green, and blue swatch in the corner of the box.
Tap on a color to select it. Tap [Save].
Tap [Save] to return to the gauges.
Figure 10: Button to change gauge color
Figure 11: Color selection screen
DATA LOGGING
The DashDAQ can log and save all information represented on the gauges. The information can saved as a Microsoft Excel *.csv, or
Logworks *.dif file directly to a inserted SD memory card.
To begin data logging:
1.
2.
3.
Select a gauge layout from which to capture information. Assign signals to the gauges to data log (section 0)
Tap on [Start Log]. The signals will be saved to the SD card with a timestamp. The signals will continue to be displayed on the
screen even as they are being saved to the card.
Tap [End Log] when finished with the data logging session. The data is now saved to the memory card.
Figure 12: Gauge screen with Start Log button in lower-right corner
Each time a data logging session is started and ended, DashDAQ saves one file to the SD memory card in a directory called “log.” Each
saved file has a log prefix. The default prefix is “log”, but the prefix can be changed.
To change the log prefix:
1.
2.
3.
4.
From the Main Menu, tap on [Data Logging].
Tap on [Log File Prefix]. This screen appears:
Type in the desired name of the log file prefix. Example: TestDrag.
Tap [Save].
23
Figure 13: Entering the logfile prefix
Now all log files will be saved in numerical order with the prefix that was entered. Example: TestDrag0000.csv.
To view log files:
1.
2.
3.
Remove the SD memory card from the DashDAQ.
Place the memory card into a SD card reader and attach to your PC.
Open the contents of the card. Log files are saved in the “logs” directory on the card. Log files may be opened in Microsoft
Excel or any other spreadsheet program that accepts *.csv files. Logworks *.dif can be viewed in the Logworks program
available from Innovate Motorsports for free at www.innovatemotorsports.com.
Note: log files may start with a negative timestamp. The DashDAQ records a few seconds of data before the [Start Log] button is
pressed.
GLOBAL DATA LOGGER
DashDAQ has the ability of logging any parameters setup on any particular gauge layout. DashDAQ can also log global parameters other
than what is specified in the gauges. The Global Data Logger allows a user to log parameters other than what is specified in the gauges
area. This is useful when a user wants to log more than what is available on one gauge layout, or when the user always wants a certain
set of parameters logged when they hit the [Start Log] button in the gauges. To setup the Global Data Logger:
1.
2.
3.
4.
5.
24
Tap on [Data Logging] from the Main Menu.
Tap on [Signals].
Tap on [Add]. Then [Assign Signal].
Select you signal, then tap [Save]. Tap [Save] once more.
Now notice your signal has showed up in the list.
Figure 14: Global Data Logging Screen
Figure 15: After adding a signal for global datalogging
The signals specified in the Global Data Logger (up to 16) will be logged alongside what is specified in the gauge layout that the user is
currently logging from. These parameters will not be logged until [Start Log] is tapped on a gauge layout screen.
DIAGNOSTIC CODE READER
To view and clear diagnostic trouble codes:
From the Main Menu tap on [Diagnostics].
This screen will appear:
Figure 16: Diagnostics screen for reading trouble codes
Note: Use the [<] and [>] buttons at the top to switch between Generic and Enhanced OEM information.
Turn the vehicle’s key to the on position. The vehicle does not need to be running.
Tap [Read Codes]. If the vehicle’s check engine light is on, diagnostic trouble code(s) (DTCs) will be displayed along with a short
description of each code.
Fix the diagnosed problem, or make note of it.
To clear the diagnostic trouble codes, tap [Clear Codes]. You will be asked to confirm that you want to clear the codes.
25
Figure 17: Confirmation to clear diagnostic trouble codes
Note: Clearing codes does not solve any underlying vehicle issues.
Tap [Yes] to clear the code(s) and turn the check engine light off.
Tap [No] to leave the code(s) set and leave the check engine light on.
PERFORMANCE MEASUREMENTS
1/4-mile, 1/8-mile, 0-60mph times and many configurable performance tests can be measured with DashDAQ. All that is needed to
calculate these measurements is a vehicle speed sensor signal or a speed signal from a GPS receiver.
1/4-MILE, 1/8-MILE, 0-60MPH TEST
To measure performance:
From the Main Menu tap on [Performance].
Tap on [Setup] and select the vehicle speed sensor. By tapping on the [Speed Sig] button in the top left corner. User specific tests can
also be setup in this menu. (See 5.2 User Defined Speed Tests)
Figure 18: First specify the signals for speed and distance. You can use
GenericOBD2, a standalone engine management system, or even a GPS
Figure 19: Next choose a speed-based or distance-based measurement
Tap [Save].
Now tap [Acceleration Test]. This screen will appear:
Select the performance test by tapping on it. A screen like this screen will appear:
26
Figure 20: Follow the instructions
Figure 21: DashDAQ will display your reaction time and other measurements
Tap [Start] to start the test.
Follow the on-screen instructions. The results will be posted in the left box at the end of the run. Example:
USER DEFINED SPEED TESTS
Create your own performance tests. To set up a specific test:
From the main menu tap on [Performance].
Tap on [Setup].
Tap on one of the four [User Test] buttons
“Edit User Test” screen will appear.
Tap on [Name]. Type in the name of the test. Example: 0_to_120_feet
Figure 22: DashDAQ has 4 user-configurable tests
Figure 23: You can customize the start/stop distance or speed
Tap on [Units] to select a measurement unit. Example: feet
Tap on [Start] to set the start value of the measurement. Example: 0
Repeat steps 7 and 8 to set Units and Stop value. Example 120 feet.
27
Tap [Save]. Make sure the speed gauge is set (section 0) and tap [save] once more.
At the performance menu, tap on [User Tests]. This screen appears:
Tap on [User Test 1].
Tap [Start] to start User 1’s test.
Follow the on-screen instructions. The results will be posted on-screen at the end of the run. Example of a results screen:
CALCULATORS
DashDAQ can calculate values for horsepower, fuel economy, or even subtract two signals. The calculators can be selected in the USB
Update Tool and can be installed using the Driver Manager.
INSTALLING A CALCULATOR DRIVER
Here’s an example of how to install the Fuel Economy calculator:
1.
2.
3.
4.
From the Main Menu tap [Setup] >> [Devices] >> [Manager]
In the Device Manager select the next blank, available row then tap [Add Device]. Figure 24 shows the Device Manager with
row “E” selected because it is the next available row.
Now tap on the driver you would like to install and tap “Install.”
You will now be prompted to select which port the driver will use. See figure 24.
Figure 24: Selecting the next unused row
28
Figure 25: Configure the driver and assign it to a port
SETTING THE PARAMETERS FOR ANY CALCULATOR DRIVER
Some calculators have some tunable parameters like: vehicle weight, fuel density, or engine displacement. Others may require you to
choose a signal for Vehicle Speed or Engine RPM. All of these decisions are ultimately your decision. You might specify Engine RPM from
GenericOBD2 connector but use a Vehicle Speed from a GPS for higher accuracy. Choose the setup that works best for your vehicle.
Figure 26: Parameters available for the Economy Calculator
To adjust parameters for a driver:
•
•
•
•
From the main menu tap on [Setup] >> [Devices] >> [Parameters]
Use [<] or [>] buttons to the Navigate to the “d-Economy Calculator” option
Select a row by tapping
Tap [Change]. Enter the number or text. Tap [Save] to confirm
DYNO CALCULATOR
DashDAQ can estimate instantaneous horsepower based on energy required to overcome inertia and accelerate (or decelerate!) the
vehicle’s mass. It looks at the change in kinetic energy ignoring air-resistance, rolling-resistance, and all forms of friction. During
acceleration this represents the engine’s power to move the vehicle forward. At cruising speed the numbers will show near-zero
because (ignoring air resistance) no power is needed to maintain speed. During deceleration the numbers will be negative representing
the force exerted by the brakes, resisting the forward-motion of the vehicle.
Make sure that the “Dyno Calculator” was selected when reflashing the firmware (section 0) and install the driver on an available port
(section 0).
29
Figure 27: Parameters for dyno calculator
Only three parameters are required for the calculation:
•
•
•
Input Speed Signal: Choose Vehicle Speed from GenericOBD2
Input RPM Signal: Choose Engine RPM from GenericOBD2
Input Vehicle Weight (lbs): Enter the vehicle weight in pounds
The other parameters can usually be ignored, but you can try tuning the values for increased accuracy:
•
•
•
Input Acceleration Filter Time:
Input Accel Calc Type:
Input Speed Filter Constant:
The driver generates two measurements that may be assigned to any gauge (section 0) and can be data logged just like any other signal
(section 0):
•
•
Calculated Horsepower:
Calculated Torque:
If you’ve assigned either statistic to a gauge but you’re not seeing values, double-check that you’ve assigned signals for both the Input
Speed Signal and Input RPM Signal parameters. Also try assigning the input signals to a gauge to verify that DashDAQ is actually able to
get a reading.
FUEL ECONOMY CALCULATOR
DashDAQ can calculate instantaneous fuel economy and display the results by distance (miles per gallon) or by time (gallons per hour).
Make sure that the “Statistics Calculator” was selected when reflashing the firmware (section 0) and install the driver on an available
port (section 0).
30
Figure 28: Parameters for Economy Calculator
This calculator uses airflow to find the amount of fuel entering the motor. Vehicles with a Mass Airflow Sensor can measure airflow
directly. In this case you’d only need to configure four parameters:
•
•
•
•
Air Fuel Ratio: 14.7 for gasoline
Fuel Density: 720 for gasoline
Speed Signal: Vehicle Speed from GenericOBD2
Mass Air Flow Signal: Air Flow Rate from MAF from GenericOBD2
If the vehicle does not have a Mass Airflow sensor, this driver provides a way to estimate MAF based on Manifold Absolute Pressure and
a few other variables. In this case you’d additionally need to set:
•
•
•
•
•
Mass Air Flow Signal: Calculated Mass Airflow from Economy Calculator
Intake Air Temperature: Intake Air Temperature from GenericOBD2
Manifold Pressure: Manifold Absolute Pressure from GenericOBD2
Engine Displacement: Based on the motor, in liters. For example, 2.7 for some Dodge Chargers
Volumetric Efficiency: Based on the motor. For example, enter 0.67 for 67% efficiency.
Once configured this driver provides two signals that you may assign to any gauge (section 0):
•
•
Fuel Economy vs Distance: Shows MPG or km/L depending on the Imperial/Metric setting
Fuel Economy vs Time: Shows gallons/hour or L/hour depending on the Imperial/Metric setting
If you’ve assigned a statistic to a gauge but you’re not seeing values, double-check that you’ve assigned signals for each parameter. Also
try assigning each input signal to a gauge to verify that the DashDAQ is actually able to get a reading.
Rescale Signal Calculator
DashDAQ can perform a multiplier/offset calculation. This can be used to rescale a signal, for example adjusting the vehicle speed to
compensate for tire size. Alternately this could be used to compare two signals, for example subtracting manifold absolute pressure
from atmospheric pressure to find turbocharger boost pressure.
The calculator implements a simple, linear scaling:
Output Signal = (Multiplier Signal) * Input Signal + Offset Signal
This provides the ultimate in flexibility because you can multiply two signals together, add/subtract two signals, multiply a signal by a
constant value, etc.
Make sure that the “Rescale Signal Calculator” was selected when reflashing the firmware (section 0) and install the driver on an
available port (section 0). This calculator can be installed several times; once for each signal that you wish to rescale. There are a few
critical parameters:
•
•
•
•
•
Input Signal: Signal to modify. Pick a signal for vehicle speed, voltage, or anything you want to rescale.
Multiplier Signal: Either a vehicle signal or “Constant Multiplier” described below
Multiplier Sign: Specify 1 to leave the multiplier unchanged, or -1 to make the multiplier negative
Offset Signal: Either a vehicle signal or “Constant Offset” described below
Offset Sign: Specify 1 to leave the offset unchanged (add), or -1 to make the offset negative (subtract)
The calculation is based on signals, so if you want to multiply/offset by a constant number you’ll need to create a signal with that
constant number. Fortunately this driver has two parameters that can generate signals with a constant value:
•
Constant Multiplier: Used to generate a signal called “Constant Multiplier”.
31
•
Constant Offset: Used to generate a signal called “Constant Offset”.
For example you could specify “3” as your Constant Multiplier value, pick Constant Multiplier as your Multiplier Signal, then your
calculation will multiply the incoming signal by 3. Finally, to keep things straight there are a few parameters to help you identify the
output signal:
•
•
•
Name: Abbreviation to identify this signal. Used as a gauge label and displayed on the assign signals screen.
Units: Physical units for the calculation. Any automatic Imperial/Metric occurs afterward. For example, if a calculation results in
°C the number could be automatically converted to °F before display.
Precision: Number of decimal digits to display.
The calculated value will be available when you assign signals to a gauge (section 0).
EXAMPLE: DISPLAYING RPM AS 0-8 INSTEAD OF 0-8000
Some people prefer a tachometer that displays RPM x1000 because the gauge face has fewer unnecessary zeroes and looks less
cluttered. This calculation looks like:
Adjusted Tachometer = Engine RPM / 1000
To perform this calculation on the DashDAQ, try setting:
•
•
•
•
•
•
Input Signal: Engine RPM from GenericOBD2
Multiplier Signal: Constant Multiplier from Rescale Signal
Multiplier Sign: 1 (Positive)
Constant Multiplier: 0.001. Represents the divide-by-1000
Offset Signal: Constant Multiplier from Rescale Signal
Constant Offset: 0 to add/subtract nothing
The calculated value will be available when you assign signals to a gauge (section 0).
EXAMPLE: CALCULATING BOOST
Many vehicles do not provide an enhanced signal for Turbo Boost but it’s pretty easy to calculate. We’ll assume that boost is the
additional manifold pressure above normal barometric pressure (~14.7psi). For example, MAP=19.7psi minus BARO=14.7psi implies that
the turbocharger is providing BOOST=5psi. This calculation looks like:
BOOST = MAP - BARO
To perform this calculation on the DashDAQ, try setting:
•
•
•
•
•
•
Input Signal: Manifold Absolute Pressure from GenericOBD2
Multiplier Signal: Constant Multiplier from Rescale Signal Calculator
Multiplier Sign: 1 (Positive)
Constant Multiplier: 1.0
Offset Signal: Barometric Pressure from GenericOBD2
Offset Sign: -1 (Subtract)
The calculated value will be available when you assign signals to a gauge (section 0).
EXAMPLE: ADJUSTING VEHICLE SPEED FOR TIRE SIZE
32
Imagine that you changed tires from 185/60-14 to 195/55-14 and now the speedometer is incorrect because you haven’t
reprogrammed the ECM. The internet says that there would be a -1.3% difference and you want to compensate for that on the speed
gauge. This calculation looks like:
Constant Multiplier = 0.987
Adjusted Speed = Constant Multiplier * Vehicle Speed
To perform this calculation on the DashDAQ, try setting:
•
•
•
•
•
•
Input Signal: Vehicle Speed from GenericOBD2
Multiplier Signal: Constant Multiplier from Rescale Signal Calculator
Multiplier Sign: 1 (Positive)
Constant Multiplier: 0.987. This represents 100% minus 1.3%.
Offset Signal: Constant Offset from Rescale Signal Calculator
Constant Offset: 0 to add/subtract nothing
The calculated value will be available when you assign signals to a gauge (section 0).
STATISTICS CALCULATOR (MIN / MAX / AVERAGE)
DashDAQ can calculate and display several statistics about a signal. Make sure that the “Statistics Calculator” was selected when
reflashing the firmware (section 0) and install the driver on an available port (section 0). This calculator can be installed several times;
once for each signal that you wish to average.
This driver has a few parameters:
•
•
•
•
Input Signal: Signal for this calculation.
Time to Average (s): Seconds of historical data to use in the calculation. For example, specify “1.5” to consider the past oneand-one-half seconds of data.
Name: Abbreviation to identify this signal. Displayed on the assign signals screen.
Precision: Number of decimal digits to display.
After configuring, you may choose among several calculations on the assign signals screen:
•
•
•
Minimum: Smallest value during “time to average”
Maximum: Largest value during “time to average”
Smoothed: Average value during “time to average”. Using this signal with a small (1-2 second) time to average is a great way to
filter signals that fluctuate wildly.
If you’ve assigned a statistic to a gauge but you’re not seeing values, double-check the Input Signal setting. Try assigning the input signal
to a gauge to verify that the DashDAQ is able to get a reading.
ANALOG INPUTS
DashDAQ has two analog inputs available on the accessory connector. They accept a 0-5v DC signal and are compatible with most
automotive sensors. These signals can be displayed on the gauge screens along with any other input. They can be rescaled from the 0-5v
scale into Fahrenheit, PSI, Air-Fuel ratios, or whatever the voltage represents. The analog inputs on DashDAQ have a 24.7 kiloohm input
impedance and may not be accurate when connected to a device with a high output impedance. For example, a narrowband O2 sensor
output cannot be connected directly to a DashDAQ because the output impedance of the sensor is in the megaohm range.
There are two drivers included with DashDAQ, the Linear Analog driver (Analog Input) and Non Linear Analog Driver (Non Linear Analog
Input).
33
The Linear Driver is for measuring signals that have a constant input voltage change for a given change in what’s being measured. An
example is a sensor that has a 0.1V output change for every temperature degree it’s measuring. 3 terminal sensors that have a voltage
input, a voltage output, and ground are often linear sensors.
The Non Linear Driver is for measuring signals that do not have a constant input change for a given change in what’s being measured.
An example is a NTC (negative temperature coefficient) type resistive temperature sensor, which is very common in vehicles. The NTC
temperature sensor will change resistance by a few ohms per degree at high temperatures and many thousands of ohms per degree at
cold temperatures. 2 terminal resistive temperature sensors are usually non-linear.
The 10-pin DashDAQ accessory cable must be purchased to connect these sensors and is always available at DashDAQ.com.
CONNECTIONS AND WIRING
Connect the analog input signal you wish to measure to either Analog In 1 or Analog In 2 on the DashDAQ. See the end of this manual
for the I/O cable wiring table.
LINEAR ANALOG INPUT DRIVER SETUP
To setup an analog sensor in DashDAQ (sensor pre-wired to accessory cable assumed, see section 0):
1.
2.
3.
4.
5.
From the DashDAQ Main Menu tap on [Setup], then [Devices], then [Manager].
A DashDAQ typically comes in original packaging with analog sensors pre-populated in the Device Manager. If you do not see
“Analog Input” in any of the driver slots (a-h) then tap on an empty slot and tap [Add Device].
Use the [<] or [>] buttons at the top to find the “Other” heading. Tap on [Analog Input] to highlight and tap [Install].
Select which port (analog-1 or analog-2) you would like to use. (Figure 29)
Your analog sensor is now specified as a input in the Device Manager and can be assigned to any gauge to be viewed as
voltage. To understand how to scale the signal to a specific unit see the next section (Section 0).
Figure 29: DashDAQ comes preloaded with both Analog Inputs. If you needed to
reinstall, you’d use Device Manager to install AnalogInput in an available slot
Figure 30: Then you’d specify either Analog-1 or Analog-2. To read both, just load
the driver twice in two different slots.
LINEAR ANALOG DRIVER CORRECTION FACTOR AND CORRECTION OFFSET
Let’s pretend that you have an Innovate LC-1 wideband controller and you’d prefer to see an Air-Fuel ratio instead of a raw voltage.
DashDAQ is able to convert a linear raw voltage signal into physical units using the following formula:
Corrected Value = Correction Factor * Raw Voltage + Correction Offset
This procedure will help you find values for Correction Factor and Correction Offset. The LC1-1’s instruction manual says that its 0-5v
analog output represents AFR=7.35 to AFR=22.39. With that information you can setup two equations:
34
Correction Factor * 0v DC + Correction Offset = 7.35
Correction Factor * 5v DC + Correction Offset = 22.39
The first equation is pretty easy because zero times anything is zero. We quickly realize that:
Correction Offset = 7.35
Using that number, and some basic algebra, you solve the second equation and determine:
Correction Factor * 5v DC + 7.35 = 22.39
Correction Factor * 5v DC = 15.04
Correction Factor = 3.008
With this procedure and two known-values, you can determine the Correction Factor and Correction Offset for most automotive
sensors. If you need assistance please post on the user forums at DashDAQ.com. Be sure to include a link to the user’s manual of your
sensor!
CONVERTING AN ANALOG VOLTAGE INTO PHYSICAL UNITS
Navigate to “Parameters” by tapping on [Setup] from the Main Menu, then [Devices], then [Parameters]. Use the arrows at the top to
find the analog input you would like to scale.
Figure 31: Setting parameters for an analog input
These parameters are used when converting an analog signal into physical units:
•
•
•
•
•
•
Correction Factor: Multiplier for the raw voltage. Described in section 0.
Correction Offset: Added to the raw voltage Describe in section 0.
Corrected Reading Name: Abbreviation to identify corrected signal. Used as a gauge label and displayed on the assign signals
screen.
Corrected Reading Units: Physical units for the calculation. Any automatic Imperial/Metric occurs afterward. For example, if a
calculation results in °C the number could be automatically converted to °F before display.
Corrected Reading Min: Default minimum value; used for round gauges and graphs. You can override this for each gauge on
the assign signals screen
Corrected Reading Max: Default maximum value; used for round gauges and graphs. You can override this for each gauge on
the assign signals screen
NON LINEAR ANALOG INPUT DRIVER SETUP
To setup an analog sensor in DashDAQ (sensor pre-wired to accessory cable assumed, see section 0):
1.
2.
From the DashDAQ Main Menu tap on [Setup], then [Devices], then [Manager].
Tap on an empty slot and tap [Change].
35
3.
4.
5.
Use the [<] or [>] buttons at the top to find the “Other” heading. Tap on [Non Linear Analog Input] to highlight and tap [Save].
Now notice which port is specified on the change device screen. The black box next to the [Port] button contains a sensor
number that should correspond to the number of the Analog Input that the sensor is connected to. If it does not tap the [Port]
button once for the other analog input.
Tap [Save]. The analog sensor is now specified as an input in the Device Manager and can be assigned to any gauge to be
viewed as voltage. To understand how to scale the signal to a specific unit see the next section (Section 0).
NON LINEAR ANALOG INPUT CONFIGURATION
The Non Linear Driver is configured by the use of a configuration file. The nature of the configuration file will be covered in the next
section. To configure the driver:
1.
From the DashDAQ Main Menu tap on [Setup], then [Devices], then [Parameters].
2.
Tap on the [<] or [>] until the letter for the Non Linear Driver being configured is shown.
3.
Tap on a parameter to highlight it and tap on [Change] to change that parameter. The parameter meanings are as follows:
•
Conversion Data Filename: This is the name of the configuration file name. By default the file is named either
“analog1.config” or “analog2.config”, depending on which port this driver is configured for. The file name root can be
anything, but the suffix must be .config in order to install it.
•
Signal Name: This is the name that will show up on the gauge.
•
Units Name: This is the physcial units type (degC, kPA, PSI, etc). This will be displayed on the gauge if the gauge has
enough room to display it in full. This is also used to do automatic English <-> Metric conversion. The units name
must be exactly match one of DashDAQ’s standard units values in order for English <-> Metric conversion to work
properly. The current units conversion set is shown in Appendix B.
NON LINEAR ANALOG INPUT DRIVER CONFIGURATION FILE
The analog inputs of DashDAQ have 10 bit A/D converters. This means that there’s 1024 discrete readings possible on each A/D input.
The actual input measuring range for the A/D converter is 0 to 5.035V in 1023 steps, with the 1024th step being anything over 5.035V, so
each step is (5.035/1023), or approximately 0.00492 volts.
The configuration file consists of 1024 ascii numbers separated by any non numeric character except ‘.’, ‘+’, or ‘-‘. Each number in the
configuration file is what will be displayed for that voltage step on the input. For example, if you created a file that had the ascii
numbers 1 to 1024 in it separated by spaces, for voltage inputs from 0-0.00492V the DashDAQ would display 1, for 0.00492-0.00984V
the DashDAQ would display 2, continuing to 5.030V to 5.035V would display 1023, and finally 5.035V or greater would display 1024.
Given the DashDAQ input impedance of 24.7 Kohm and knowing the resistance or voltage output of a given sensor over the range that
is to be measured, it’s possible to create a configuration file for most resistive and amplified sensor types. The sensor setup options and
calculations involved in creating the file are beyond the scope of this manual and will be covered in a separate application note.
Once an appropriate configuration file has been generated, it must be installed on DashDAQ from a SD card to be used. To install the
configuration file:
1. On a PC, insert a SD card into a card reader/writer in the PC, create a subdirectory called “transfer” on the SD card, and copy
the configuration file to the transfer directory on the SD card. NOTE: the configuration file name must end in “.config”.
2. Place the SD card into a powered off DashDAQ and then power it up.
3. From the DashDAQ Main Menu, tap on [Setup], then tap on [Memory Card], then tap on [Install], then tap on [Config File].
4. The configuration file should be shown on the Install screen. Highlight the confuration file by tapping on it and tap OK. A
popup should indicate the file was installed successfully. Tap OK on the popup.
36
5.
Configure the driver to use the installed file as described in the previous section.
DEVICE MANAGER/THIRD PARTY ACCESSORIES
Besides Generic OBDII information, the Device Manager allows you to select and add inputs you would like DashDAQ to monitor.
Enhanced drivers and Third Party Accessory drivers that are currently available for DashDAQ:
OEM Extended/Enhanced drivers:
•
•
•
•
GM vehicles
Ford vehicles
Chrysler LX platform vehicles
Subaru Vehicles
Third Party Accessory Drivers:
0-5V Analog Sensors
Blackline FUEL 10Hz GPS
Blackline FUEL 20HzGPS
AEM Plug-N-Play EMS
AEM Universal EMS
FAST XFI
Autronic SMC
Autronic SM2
Autronic SM4
HydraEMS Nemesis 2
Wolf EMS
Innovate DL-32
Innovate SSI-4
Innovate TC-4
Innovate LMA-3
Innovate LC-1
Innovate LM-1
Phidgets 8/8/8 USB analog input kit
Phidgets 0/16/16/ USB digital input kit
Phidgets USB K-Type Thermocouple and EGT
Haltech E6X
Haltech F10X
Haltech E6GMX
Haltech E8
Haltech E11V2
Haltech Interceptor
DTAFast S40 Pro
DTAFast S60 Pro
DTAFast S80 Pro
DTAFast S100 Pro
J1939 Equipped Heavy Duty Trucks
RS232 NMEA-Compliant GPS Modules
0-5V Analog Sensors
Dynojet Wideband Commander
Zeitronix ZT-2
AEM Wideband UEGO
FAST Air/Fuel Meter
FJO Wideband
NGK Wideband Kit
PLX Wideband
EMS Stinger 4
EMS 4860
EMS 6860
EMS 8860
LICENSED DASHDAQ DRIVERS
DashDAQ licenses are required for some of the drivers that Drew Technologies supplies. These licenses must be purchased from the
DashDAQ website. The drivers that require licenses /drivers include:
•
•
•
•
GM Enhanced
Ford Enhanced
Chrysler Enhanced
Subaru Enhanced
37
•
•
•
•
•
•
•
•
•
•
•
•
AEM
Autronic
DTAFast
EFI Technologies
Emerald
Fast XFI
Haltech
Hydra Nemesis
Innovate MTS Chain Devices
J1939
Phidgets
Wolf EMS
These licenses can be purchased from Drew Technologies at any time. Licenses do not need to be purchased when you buy your
DashDAQ. If a license is purchased later, you will need to update DashDAQ through the DashDAQ Recovery Tool (section 0).
Drew Technologies keeps an online database of what licensed DashDAQ drivers a DashDAQ owner has purchased. When the update
tool is used, a serial number query will be sent to the server and available licensed DashDAQ drivers will be listed. Select from the
available drivers list and continue with the DashDAQ Recovery Tool wizard. When the wizard finishes the licenses will automatically be
installed in DashDAQ. Please refer to section 0 for complete details on updating DashDAQ.
USING DEVICE MANAGER
The DashDAQ Device Manager is where all DashDAQ inputs are specified. Anything specified in the Device Manager will be available to
any gauge on the DashDAQ.
To access the Device Manager tap on [Setup] from the Main Menu, then [Devices], then [Manager].
Figure 32: Device manager screen
Figure 33: Selecting the next available slot
Notice that there are slots labeled from A-H. These are spots where the drivers are specified. To add a driver/input tap on a empty slot.
Slot [b] will be used for this demonstration.
Tap on [Add Device].
Next Tap on the driver you would like to install. Tap on [Install].
Next select which port to be used, then tap [Ok].
Now your device will be installed in the slot you specified. All installed devices can be assigned to any gauge.
38
ADDING SUPPORT FOR ENHANCED OBD2 DATA
If you purchased your DashDAQ with an OEM Enhanced driver, the license and driver will already be installed on your DashDAQ. If a
new enhanced driver was purchased or if you need to change drivers for any reason, the process is handled through the DashDAQ
Recovery Tool. When a software add-on is purchased at DashDAQ.com, we update our web server with the licenses for the software
add-ons you have purchased. After this happens, your licensed drivers are always available through the DashDAQ Recovery Tool. The
Recovery Tool queries the internet every time you update your DashDAQ and gets a list of licensed software add-ons available for you
unit based on serial number. This tool requires a connection to the internet every time you update your DashDAQ.
If a user buys a Chrysler Enhanced driver for example:
1.
2.
3.
4.
The user purchases the add-on at DashDAQ.com.
Next the user waits for confirmation of driver purchase from Drew Tech.
Next the user runs the update tool and selects the appropriate drivers. See Section 0
Lastly the driver is specified in the DashDAQ Device Manager. See Section 0
Select a blank Device Manager slot and Tap on [Add Device].
Figure 34: Tap [Driver] to choose and install a new driver
Figure 35: Select the driver for Chrysler enhanced obd2 data
Tap on an item to select it from the list. Chrysler Specific will be used for this demonstration. Tap [Install].
Tap j1962 and then Tap [Ok].
39
Figure 36: Tap [Save] to confirm the device installation
Figure 37: New signals will be available on E-ChryslerSpecific
Now that we see the Chrysler Specific driver populated in slot [E], we will now be able to view the Chrysler specific parameters on any
gauge after we run “Find Signals” again.
ADJUSTING DRIVER PARAMETERS
Parameters menu is used to customize how data is display, for example changing the units to metric, to change signal scaling, and other
options.
1.
2.
3.
From the main menu, tap on [Setup]
Tap on [Devices]
Tap on [Parameters]
Enhanced Drivers can also be modified through Main Menu>Devices>Parameters so that more or less parameters are searched for
through “Find Signals.” Each enhanced driver for each manufacturer has thousands of parameters. We organized these parameters into
a scale of usefulness:
0: Most Useful, Less parameters
1: Less Useful, More parameters
2: Even less Useful, Lots of parameters
To change the amount of parameters you will search for on an enhanced driver:
1.
40
Make sure the enhanced driver is installed in the Device Manager, and a “Find Signals” (Section 0) procedure has been
performed once.
2. From the Main Menu tap on [Setup], then [Devices], then [Parameters].
3. Use the [<] or [>] buttons at the top to find your enhanced driver.
4. Tap on [Complete Signal List] to highlight and tap [Change].
5.
6.
7.
Enter a 1 or a 2 on the number pad.
Tap [Save], then [Exit].
Run “Find Signals’ one more time to search the expanded list.
Figure 38: Parameters available for GM Specific
Figure 39: Increasing the number of signals that will be tested
UPDATING DASHDAQ
DashDAQ’s software is field updateable. The software necessary to update the DashDAQ is on the included CD.
INSTALL THE DASHDAQ RECOVERY TOOL
DashDAQ comes with a CD that contains the DashDAQ update software. This auto run website will appear after inserting the CD in a
computer:
41
Figure 40: Screen visible after inserting CD
42
1.
Click on number 3 “DashDAQ Recovery Tool”. This screen appears:
2.
Click on “Run.” If the ‘Run” option does not work, save this file (DashDAQ-PCTool-2.0.4.msi) to a memorable location and
double click on it to run the DashDAQ Update Tool installer. This screen will appear next:
3.
Click “Next.”
4.
Check the box by “I Accept the End-User License Agreement” if you agree to abide by the license agreement.
5.
Click “Next” to install DashDAQ into the specified directory.
6.
Click “Install.” The DashDAQ Update Tool will now be installed to the computer. Click “Finish” when the installer has finished.
UPDATING DASHDAQ
WARNING: Do not power DashDAQ from the PC with the USB ports on the right. Permanent damage to your DashDAQ can occur.
To update DashDAQ:
Establish an Internet connection on your computer. The DashDAQ Recovery Tools requires Internet access throughout the update
process.
Connect the USB cable to the single USB port located on the left side of DashDAQ. Any other USB port will not work. Connect the
opposite end of the USB cable to the computer’s USB port. Note: This USB port is used only for updating the DashDAQ.
43
DashDAQ’s screen will display: “USB link established Boot Halted. You may now attempt to recover.” This message is perfectly normal.
On the computer Click on Start select Programs > Drew Technologies Inc. > DashDAQ Update Tool. This program starts:
Figure 41: DashDAQ USB Update Software
Click once on your DashDAQ’s serial number to highlight.
Click “Update firmware.” This screen appears:
44
Click “Next.” This screen appears:
Click “Next.”
Use the drop down menu to select which firmware to install. For most users the most current firmware is the only option.
45
If you have purchased or want other drivers installed, select the components to be installed. “Generic OBDII” driver must always be
selected along with any other driver in order for the DashDAQ to function.
Figure 42: Choosing the firmware version and selecting which drivers to install
Click [Next]. This screen appears:
46
Click “Next.” This screen appears:
Optional: To save the firmware package that was just created to the computer, click “Save As” under “Optional.” Firmware saved to the
computer may be reloaded to DashDAQ in the future without Internet access.
Click [Next] to send the firmware to the DashDAQ. Wait. When DashDAQ has finished updating, the DashDAQ Recovery Tool will display
the screen below. DashDAQ is now up to date!
Click [Finish] to close the Recovery Tool.
47
48
APPENDIX
SUPPORT
Before contacting us, check our online FAQs. Submit all support questions to www.dashdaq.com/forum. The forums are constantly
monitored, and will provide you with the fastest answers.
TECHNICAL SPECIFICATIONS
Display
4” COLOR TFT w/touch panel
Resolution
480 x 272 (QWVGA) w 24-bit color display
System Processor
240MHZ ARM9
Vehicle Bus Processor
48MHZ ARM7
RAM
64MB SDRAM
Flash
16MB Flash
Memory Expansion
MMC/SD Card 128MB to 8GB+
Device I/O
touch-panel, ambient light sensor, 16-bit stereo line-out, 1W speaker, USB device port, programmable
button
Vehicle I/O
CAN, J1850VPW (GM Class 2), J1850PWM (Ford SCP), ISO9141, KWP2000
Expansion I/O
(2) USB Host Ports, (2) RS232 Ports, (2) 0-5V 10-bit analog inputs
Add-on sensors
Blackline GPS (up to 20HZ), 0-5V Wideband O2 Sensors, NMEA GPS, USB 3-axis Accelerometer, USB KType Thermocouple
Operating temperature
-35 to 85C
Operating voltage
6 to 30V
Current Draw
200mA at 100% backlight
Dimensions
4.6” x 2.75” x 1”
Weight
0.5LB
Operating System
Linux
Warranty
factory tested with 1 year warranty
Other Features
Real Time Clock, locking connectors, factory tested, field upgradeable firmware
Mounting Pattern
AMPS 4-HOLE standard
Package Contents
DashDAQ, Vehicle Cable, USB Cable, Windshield Pedestal, CD-ROM, users manual
49
LIMITED WARRANTY
Drew Technologies, Inc. guarantees that every DashDAQ Series II is free from physical defects in material and workmanship under
normal use for one year from the date of purchase. Warranty card must be mailed within 90 days of initial purchase to activate
warranty. If the product proves defective during this warranty period, email Drew Technologies Customer Support
([email protected]) in order to obtain a Return Authorization number and form. When returning a product, mark the Return
Authorization number clearly on the outside of the package and include a copy of your original proof of purchase and the form.
IN NO EVENT SHALL DREW TECHNOLOGIES, INC.' LIABILITY EXCEED THE PRICE PAID FOR THE PRODUCT FROM DIRECT, INDIRECT,
SPECIAL, INCIDENTAL, OR CONSEQUENTIAL DAMAGES RESULTING FROM THE USE OF THE PRODUCT, ITS ACCOMPANYING
SOFTWARE, OR ITS DOCUMENTATION.
Drew Technologies, Inc. makes no warranty or representation, expressed, implied, or statutory, with respect to its products or the
contents or use of this documentation and all accompanying software, and specifically disclaims its quality, performance,
merchantability, or fitness for any particular purpose. Drew Technologies, Inc. reserves the right to revise or update its products,
software, or documentation without obligation to notify any individual or entity. Please direct all inquiries to:
Drew Technologies, Inc.
3915 Research Park Dr
Suite A10
Ann Arbor, MI 48108
Phone: (734) 222-5228
Fax: (734) 222-5008
E-Mail: [email protected]
Warranty is void if software that has not been authorized by Drew Technologies, Inc. is installed
and/or run on the DashDAQ.
Warranty is void if the DashDAQ case is opened.
Warranty is void if DashDAQ is used in a manner not consistent with reasonable care.
50
APPENDIX A: ACCESSORY CABLE PIN OUT
If DashDAQ is connected via
OBD2 cable, this is the source
for vehicle power. If OBD2 is not
connected, vehicle power must
be applied here. Warning! Do
not attempt to power any
device from this output that
draws more that 500ma of
current. Failure to observe this
restriction could result in
permanent un-repairable
damage to your DashDAQ.
1
Red
Vehicle Power In/Out
2
Orange
Serial Port 1 Rx
Connect to pin 3 of PC DB-9
3
Yellow
Serial Port 2 Tx
Connect to pin 2 of PC DB-9
4
Blue
Serial Port 2 Rx
Connect to pin 3 of PC DB-9
5
Brown
Serial Port 1 Tx
Connect to pin 2 of PC DB-9
6
Black
Case Ground
1Meg Ohm to Gnd. For cable
shielding. Do not use as a
Ground.
7
White
Analog input 2
0.0 to 5.0 Volt input
8
Pink
5V @ 500ma Output
Resettable fuse protected.
9
Green
Analog input 1
0.0 to 5.0 Volt input
1
0
Shield
Ground
This is the signal ground.
Connect to pin 5 of PC DB-9
Note: For future compatibility tie 6 and 10 together.
51
APPENDIX B: ENGLISH TO METRIC CONVERSION UNIT NAMES
52
Conversion Type
English Unit Name
Metric Unit Name
Temperature
degF or °F
degC or °C
Speed
mph
kph
Distance
miles
km
Fuel Economy
mpg
L/100km
Fuel Consumption
Gph
lph
Pressure
psi
kpa
Pressure
psi
mbar
Pressure
inHg/PSI
mmHg/BAR
Flow Rate
lb/min
g/s or g/sec or gm/sec
Flow Rate
lb/hr
kg/hr
Weight
lbs
kg
Volume
gal
L