1
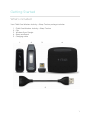
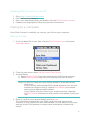
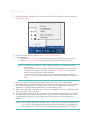
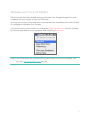
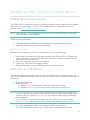
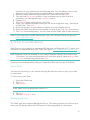
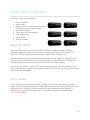
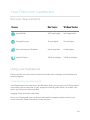
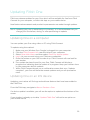
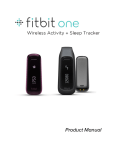
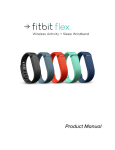
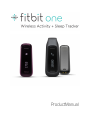
Table of Contents Getting Started .................................................................................................................................. 1 What’s included....................................................................................................................................1 Setting up Fitbit One on a computer ..........................................................................................2 Mac & PC Requirements ...................................................................................................................2 Installing Fitbit Connect on a computer .....................................................................................2 Installing Fitbit Connect on your Mac ......................................................................................2 Installing Fitbit Connect on your PC.........................................................................................3 Pairing to a computer .......................................................................................................................3 Pairing to a Mac ...............................................................................................................................3 Pairing to a PC .................................................................................................................................5 Wireless sync to a computer ..........................................................................................................7 Setting up Fitbit One on a mobile device ................................................................................. 8 Mobile device requirements........................................................................................................... 8 Before you begin............................................................................................................................ 8 Pairing to an iOS device .................................................................................................................. 8 Syncing to an iOS device ................................................................................................................ 9 Force Sync ....................................................................................................................................... 9 Background Sync........................................................................................................................... 9 Pairing to an Android device ........................................................................................................ 10 Syncing to an Android device ...................................................................................................... 10 Background Sync ........................................................................................................................... 11 Force Sync ....................................................................................................................................... 11 Using your One ................................................................................................................................ 12 Wearing your One ........................................................................................................................ 12 Using your One in wet conditions ........................................................................................... 12 Battery life and power .................................................................................................................... 13 Battery life ....................................................................................................................................... 13 Charging your One ....................................................................................................................... 13 Memory ................................................................................................................................................ 13 What Fitbit One tracks .................................................................................................................. 14 Beginner mode .................................................................................................................................. 14 Lefty mode.......................................................................................................................................... 14 Tracking sleep with Fitbit One ..................................................................................................... 15 Activity Recordings ......................................................................................................................... 15 Silent Alarms ...................................................................................................................................... 16 Setting up Silent Alarms from a computer........................................................................... 17 Setting up Silent Alarms on an iOS device ........................................................................... 17 Setting up Silent Alarms on an Android device.................................................................. 18 Dismissing Silent Alarms ............................................................................................................ 19 Your Fitbit.com Dashboard ......................................................................................................... 20 Browser Requirements .................................................................................................................. 20 Using your Dashboard ................................................................................................................... 20 Understanding the Dashboard ................................................................................................ 20 Device Info Preview...................................................................................................................... 21 Managing your One from Fitbit.com ...................................................................................... 21 Updating Fitbit One....................................................................................................................... 22 Updating One on a computer ..................................................................................................... 22 Updating One on an iOS device ................................................................................................. 22 Updating One on an Android device ........................................................................................ 23 Help .................................................................................................................................................... 24 Return policy and warranty ......................................................................................................... 25 Regulatory and Safety Notices .................................................................................................. 26 USA: Federal Communications Commission (FCC) Statement....................................... 26 Canada: Industry Canada (IC) Statement ............................................................................... 27 EU (European Union): .................................................................................................................... 28 Other: ................................................................................................................................................... 28 Safety Statement ............................................................................................................................. 28 Important Safety Instructions ..................................................................................................... 28 Built-in Battery Precautions ......................................................................................................... 29 Disposal and Recycling Information ......................................................................................... 29 Getting Started What’s included Your Fitbit One Wireless Activity + Sleep Tracker package includes: 1. 2. 3. 4. 5. Fitbit One Wireless Activity + Sleep Tracker Clip Wireless Sync Dongle Sleep wristband Charging cable 1. 2. 3. 4. 5. 1 Setting up Fitbit One on a computer Mac & PC Requirements Software Mac OS 10.5 and up Internet connection Hardware USB port Software Windows XP/Vista/7/8 Internet connection Hardware USB port Installing Fitbit Connect on a computer The free Fitbit Connect software allows you to sync stored data from your tracker to your Fitbit.com Dashboard. Installing Fitbit Connect on your Mac 1. Go to http://www.fitbit.com/start/one. 2. Click the Download button. 3. Go to your downloads folder and double-click the .dmg file. Note: If the file does not appear on your desktop, search for “Fitbit Connect” using the Spotlight search feature. 4. Run the Fitbit Connect installer by double-clicking Install Fitbit Connect. 5. Follow the onscreeninstructions to complete setup. 2 Installing Fitbit Connect on your PC 1. 2. 3. 4. Go to http://www.fitbit.com/setup. Click the Download button. Go to your downloads folder and double-click the Fitbit Connect .exe file. Choose your language and follow the onscreen instructions. Pairing to a computer Once Fitbit Connect is installed, you can pair your One to your computer. Pairing to a Mac 1. From the Menu Bar of your Mac, click the Fitbit Connect icon and choose Open Main Menu. 2. From the main menu, select Set Up A New Fitbit Device. 3. Account Setup: a. Select New to Fitbit if you don’t already have a Fitbit.com account. b. Select Existing User to log into your existing Fitbit.com account. Note: You can only have one Fitbit tracker paired to an account at any given time. If you currently have another Fitbit tracker linked to your account and plan to continue using it, choose Don’t Replace to continue setup using a different email address. If you’d like to use your One on your existing account, choosing Replace Tracker remove your other tracker, and replace it with your One. 4. Enter or confirm your personal details and click Next. This information personalizes your Fitbit experience and improves the accuracy of your calorie burn and distance data. You can adjust your privacy settings on the Fitbit website to control what information is shared with others. 3 5. Make sure that your Wireless Sync Dongle is plugged into your computer and that your Fitbit One is nearby. 6. Click the Fitbit One tile. Fitbit Connect will now begin searching for your One. 7. A pairing number will appear on your tracker’s display once the Fitbit Connect has located it. It may take up to 30 seconds for this number to appear. Note: If the number does not display, click “I don’t see a number starting with “0”. Make sure that your tracker’s battery is charged and the display is on. Fitbit Connect will resume looking for your tracker 8. Enter the number displayed on your tracker’s screen into your computer, and then click Next. 9. Your tracker will connect to Fitbit.com. This can take up to a minute. 10. Once your tracker has connected to Fitbit.com, enter a greeting, then click Next. The greeting is what you will see each time you pick up your Fitbit One and can be your name or any 8 character long combination of letters or numbers. 11. Your personalized greeting will now be sent to your tracker. This can take up to 30 seconds. 12. When your tracker has been linked with your Fitbit account, you will see a “You’re all set” screen. Take some steps with your tracker and sync it to your account to see your stats on your Dashboard. 4 Pairing to a PC 1. In the Windows System Tray, right-click the Fitbit Connect icon and choose Open Main Menu. 2. From the main menu, select Set Up a New Fitbit Device. 3. Account Setup: a. Select New to Fitbit if you don’t already have a Fitbit.com account. b. Select Existing User to log into your existing Fitbit.com account. Note: You can only have one Fitbit tracker paired to an account at any given time. If you currently have another Fitbit tracker linked to your account and plan to continue using it, choose Don’t Replace to continue setup using a different email address. If you’d like to use your One on your existing account, choosing Replace Tracker remove your other tracker, and replace it with your One. 4. Enter or confirm your personal details and click Next. This information personalizes your Fitbit experience and improves the accuracy of your calorie burn and distance data. You can adjust your privacy settings on the Fitbit website to control what information is shared with others. 5. Make sure that your Wireless Sync Dongle is plugged into your computer and that your Fitbit One is near it. 6. Click the Fitbit One tile. Fitbit Connect will now begin searching for your One. 7. A 4 digit pairing number will appear on your tracker’s display once the Fitbit Connect has located it. It may take up to 30 seconds for this number to appear. Note: If the number does not display, click “I don’t see a number starting with “0”. At this time, make sure that your tracker’s battery is charged and the display is on. Fitbit Connect will resume looking for your tracker 5 8. Enter the number displayed on your tracker’s screen into your computer, and then click Next. 9. Your tracker will connect to Fitbit.com. This can take up to a minute. 10. Once your tracker has connected to Fitbit.com, enter a greeting, then click Next. The greeting is what you will see each time you pick up your Fitbit One and can be your name or any 8 character long combination of letters or numbers. 11. Your personalized greeting will now be sent to your tracker. This can take up to 30 seconds. 12. When your tracker has been linked with your Fitbit account, you will see a “You’re all set” screen. Take some steps with your tracker and sync it to your account to see your stats on your Dashboard. 6 Wireless sync to a computer Fitbit Connect must be installed and your Wireless Sync Dongle plugged into your computer for your tracker to sync to Fitbit.com. Syncing occurs every 15 minutes when your tracker has new data and is within 15 feet of a plugged-in Wireless Sync Dongle. You can force sync your tracker by clicking the Fitbit Connect icon, which is located by the time and date on your computer, then selecting Sync Now. Note: If you experience any trouble syncing your tracker with your computer, you can visit http://help.fitbit.com for help. 7 Setting up Fitbit One on a mobile device Mobile device requirements The Fitbit One is capable of setting up and syncing with mobile devices that support Bluetooth 4.0 technology. To see if your mobile device is compatible with your tracker, visit http://www.fitbit.com/devices. Note: If your device is not compatible, you can still use the Fitbit App to view your data and track your progress. Additional Requirements: Charging cable and USB port for charging your device before pairing Internet Connection on your mobile device Before you begin Before you can setup your One on a mobile device, do the following: 1. Download and install the Fitbit App from the App Store (iOS) or Google Play Store (Android). If you already have the Fitbit App installed, make sure that you have the latest version. 2. Plug your charging cable into a USB port. 3. Insert your One into the charging cable. 4. Enable Bluetooth on your mobile device and within the app. Pairing to an iOS device Your tracker must be paired directly through the Fitbit App, and not through your iOS device’s Bluetooth preferences. To pair your tracker to you mobile device, do the following: 1. Open the Fitbit App. 2. Account Setup: a. Select Log in if you have an existing Fitbit.com account. b. Select Get started if you don’t have a Fitbit.com account yet. Note: You can only have one Fitbit tracker paired to an account at any given time. If you currently have another Fitbit tracker linked to your account and plan to continue using it, choose Don’t Replace to continue setup using a different email address. If you’d like to use your One tracker with your existing account, choose Replace Tracker, remove your other tracker, and replace it with your One. 3. If you’re prompted to, enter your personal details and tap Next. This information personalizes your Fitbit experience and improves the 8 4. 5. 6. 7. 8. 9. 10. 11. accuracy of your calorie burn and distance data. You can adjust your privacy settings on the Fitbit website to control what is shared with others. Enter the email address and password for Fitbit.com and tap Next. Tap the pink Set up Now button. If you’ve already set up your One on a computer, you can tap the pink Link Now button. Choose One. Tap Start to begin searching for your One. Once your tracker has been found, you will see a screen that says, “We found a Fitbit One!” Tap Next. Enter the number on your tracker’s display into your mobile device. When the Fitbit App shows the message “You’re all set!” tap Next to continue. Tap Done to complete setup. You can now use the Fitbit App to start tracking. Note: If you experience trouble pairing your One, you can get support by going to http://help.fitbit.com. Syncing to an iOS device Your One can sync directly to supported iOS devices via Bluetooth 4.0. To see if your iOS device is compatible with your Fitbit One, go to http://www.fitbit.com/devices. Note: Bluetooth must be enabled in your mobile device’s Settings, as well as in the Fitbit App. You can turn Bluetooth on in the Fitbit app by tapping More, then Devices, and switching Bluetooth to On. Syncing occurs automatically when you open the Fitbit App on your iOS device. Force Sync You can also Force Sync your tracker through the Devices menu to sync your data on command. To Force Sync your One: 1. Open the Fitbit App. 2. Tap More. 3. Tap Devices. Note: Make sure Use Bluetooth is set to On. 4. Tap One. 5. Tap the Force Sync icon. Background Sync The Fitbit App also supports Background Sync. This setting allows your One to sync with your iOS device while the Fitbit app is in the background, or minimized. 9 Note: Background Sync will only operate when your iOS device’s screen is turned on. If your iOS device’s screen is off, your One will not sync in the background until you wake your iOS device from sleep. Pairing to an Android device Your One must be paired directly through the Fitbit App, and not through your Android device’s Bluetooth preferences. 1. Open the Fitbit App. 2. Account Setup: Select Get started if you don’t already have a Fitbit.com account. Select Log in to log into your existing Fitbit.com account. Note: You can only have one Fitbit tracker paired to an account at a time. If you currently have another Fitbit tracker linked to your account and plan to continue using it, choose Don’t Replace to continue setup using a different email address. If you’d like to use your One on your existing account, choose Replace Tracker to remove your other tracker, and replace it with your One. 3. If you’re prompted to, enter your personal details and select Next. This information personalizes your Fitbit experience and improves the accuracy of your calorie burn and distance data. You can adjust your privacy settings on the Fitbit website to control what information is shared with others. 4. Enter the email address for your Fitbit.com and your password. 5. Tap Device Settings. Note: Make sure Bluetooth is set to On. 6. 7. 8. 9. Tap Set up New Device to begin. Choose One. Tap Start to begin searching for your One. Once your tracker has been found, a pairing number will appear on the display of your One. Enter that number into your mobile device and tap Next. 10. Once the Fitbit App shows the message “You’re all set!”, you can tap Next to continue. 11. Tap Done to complete setup. You can now use the Fitbit App to start tracking. Syncing to an Android device Your One can sync directly to supported Android devices via Bluetooth 4.0. To see if your Android device is able to wirelessly sync to your tracker, visit http://www.fitbit.com/devices. 10 Note: Bluetooth must be enabled both in the Android device Settings, as well as within the Fitbit App. You can turn Bluetooth on in the Fitbit app by tapping the menu button, then Devices, and checking the Use Bluetooth box. Syncing occurs automatically when you open the Fitbit App on your Android device. Background Sync The Fitbit App also supports Background Sync. This setting allows your One to sync with your Android device while the Fitbit app is in the background, or minimized. NOTE: Background Sync will only operate when your Android device’s screen is turned on. If your Android device’s screen is off, your One will not sync in the background until you wake your Android device from sleep. Force Sync You can also Force Sync your One through the Devices menu if you want to get the latest data synced. To Force Sync your One: 1. Open the Fitbit App. 2. Tap the menu button. 3. Tap Devices. Note: Make sure Use Bluetooth is checked. 4. Tap One. 5. Tap the Force Sync icon. 11 Using your One Wearing your One The Fitbit One is most accurate when worn on or very close to your torso. A clip designed to keep the tracker secured to your clothing is included in your package. A sleep wristband for your Fitbit One is also included in your package. The wristband should be worn while you sleep. It is should not be worn for tracking during the day. To prevent losing your tracker, wear it: 1. In your pocket. 2. Clipped on your pocket, facing inwards. 3. Clipped on your bra. Using your One in wet conditions The Fitbit One is sweat-proof and rainproof. It is not waterproof and should not be taken swimming. 12 Battery life and power Battery life Your One contains a rechargeable Lithium-ion polymer battery. With normal use, your One’s battery should last approximately five days before requiring a charge. You can check your tracker’s battery level by logging into your Dashboard and clicking on the gear icon in the upper right corner of the screen. The battery level at the time of its most recent sync will be listed to the right of the picture of your One. Charging your One Charge your One tracker by plugging your charging cable into a USB port, and then inserting the tracker into the charger, making sure the gold contacts on your tracker align with the gold dots in the charging cable. A battery indicator will appear when your tracker is first plugged into the charging cable. Press your tracker’s button while it’s charging to view its current battery level. A drained tracker should be charged for 1-2 hours for maximum performance and battery life. Memory The One tracker stores minute-by-minute data for one week. After 7 days, that data is converted to a daily total, which is stored for an additional 23 days. When you sync your tracker, its data is uploaded to your Fitbit.com Dashboard, and securely stored on Fitbit’s servers. As long as you sync your tracker within thirty days of activity, you’ll be able to transmit that data to your Fitbit.com Dashboard. Note: Every night at midnight, your tracker will reset itself. This means your goal progress and daily data will begin at zero again. This does not delete the data stored on your tracker. That data will be uploaded to your Dashboard the next time you sync your tracker. The time this reset occurs is based on the time zone set on your Fitbit.com profile. 13 What Fitbit One tracks Your One tracks the following: Floors climbed Steps taken Recent activity levels (represented by a flower that grows and shrinks) Distance traveled Time (clock and stopwatch) Calories burned Hours slept Quality of sleep Beginner mode When you first set up your Fitbit tracker, it will be in beginner mode. While in beginner mode, the name corresponding to the current display will appear. For example, “STEPS” will be displayed before “7482” and the steps icon. After the display has cycled through each screen 5 times, beginner mode will end, and you will be in normal mode. In normal mode, the value and icon is displayed immediately after you press your tracker’s button for faster viewing. Any time your tracker is reset, it will enter beginner mode. This will happen if you shut down and then restart your tracker, upgrade your device, or when your tracker’s battery drains completely. Lefty mode Your tracker can be displayed in Lefty mode, which orients the display to make it easier for left-handed individuals to read their trackers when holding them with their dominant hand. The One comes oriented for right-handed users by default. To change your tracker to lefty mode, go to your Device Settings and select the Left-handed button. 14 Tracking sleep with Fitbit One You can use your One to track how long and how soundly you sleep. The One will track your movement throughout the night to provide you with information about the quality of your sleep. To track your sleep with your One tracker, do the following: 1. Place your tracker into the slot in your wristband and wrap it around your non-dominant wrist. 2. Once you are in bed and ready to fall asleep, press and hold the tracker’s button for 2+ seconds. You will see a blinking stopwatch and clock. The other icons will also blink, indicating that your tracker is in sleep mode. 3. When you wake up, press and hold the button for 2+ seconds to stop the sleep recording. The icons will stop blinking to indicate you’ve exited sleep mode. Once you exit sleep mode, your tracker will resume, displaying your daily totals. 4. Once the data syncs, graphs on your Dashboard will reveal how long you slept and the number of times you woke up. Last night’s sleep will appear on today’s page. Note: If you forgot to press the button on your tracker, but were wearing it while you slept, you can enter the times manually in your online Sleep Log and your data will still appear once you sync your tracker. Activity Recordings An activity recording is similar to the trip mode on the odometer in a car. 15 You can use activity recording to track things like a tennis game or an exercise class so that you may later examine data from the time you were performing that exercise more closely. Recordings do not affect how your data is tracked or analyzed; they instead serve to bring greater visibility to a specified time frame. To start a recording, hold your tracker’s button down for 2-3 seconds until a flashing stopwatch and running numbers appear as they do in sleep mode. While in recording mode, the display icons will blink. When you press the tracker’s button to cycle between screens, the stats displayed will represent the activity that has occurred since the recording started. To exit recording mode, hold your tracker’s button down for 2-3 seconds until the icons and numbers on its display stop flashing. The next time you sync your tracker, the information from your recording will be displayed on your activities page, along with additional stats such as pace, duration of the recording, a graph of your speed, and more. To add an activity onto your Fitbit Dashboard, do the following: 1. Log into your Dashboard, and then go to the Log Activities page. 2. Start typing the activity you want to add in the box under Find an Activity to Log. 3. If the activity is already in the system, it will appear in the grey box. 4. If the activity is not in the system, you have the option to create your own activity by clicking the Add Custom Activity text that will appear in the drop-down menu. 5. Enter the duration, distance (if applicable) and start time of your activity, then click “Log Activity”. That activity will now appear under your Logged Activities. Silent Alarms You can make your tracker to gently vibrate to wake or alert you using the Silent Alarm feature. You can set these alarms on your computer or compatible mobile device. Silent Alarms can be configured to repeat on multiple days of the week. For example, you could arrange to be awoken at 7:00 AM every weekday. You can set up to eight alarms for your tracker at once. 16 Note: Setting multiple alarms may drain the battery life of your One. If you find that you must charge your battery more often, you may want to reduce the number of Silent Alarms configured on your One. Setting up Silent Alarms from a computer You can set Silent Alarms from your computer by using the Fitbit.com Dashboard. Your Wireless Sync Dongle must be plugged into your computer to sync the alarm to your tracker. 1. 2. 3. 4. 5. 6. 7. 8. 9. Log in to your Fitbit.com Dashboard. Click the gear icon, found in the upper right corner of your screen. Click Settings. Click Silent Alarms. Click the Add Alarm button. Enter the Time you want the alarm to alert you. Choose how often you want the alarm to occur: Once – Your alarm will alert you at the specified time, and not repeat. Repeats – You can choose which days you want this alarm to repeat (for example, at 7:00 AM every weekday). 10. Click Save. Your new alarm will be sent to your tracker the next time it syncs. Note: If you want to sync the alarm immediately, open Fitbit Connect and select Sync Now. Setting up Silent Alarms on an iOS device You can set Silent Alarms for your tracker using the Fitbit App for iOS. Bluetooth must be enabled in your iOS device settings, as well as the Fitbit App Devices screen. Your mobile device must also support Wireless Sync to set Silent Alarms. To see if your mobile device is supported, go to http://www.fitbit.com/devices. 1. 2. 3. 4. 5. 6. Open the Fitbit App. Tap More. Tap Silent Alarm. Tap Add a new alarm. Set the time by adjusting the click-wheel. If applicable, tap the days of the week you want this alarm to repeat. (for example, at 7:00 AM, every weekday) 7. Tap Save. 8. Sync you tracker to ensure that the alarm information is sent to it. 17 Your iOS device will now sync the alarm to your tracker. Note: If your One is out of range of a dongle, you can send the alarm to your tracker by tapping More, then Devices, choosing One and then tapping the Force Sync icon. Setting up Silent Alarms on an Android device You can set Silent Alarms on your tracker using the Fitbit App for Android. Bluetooth must be enabled in your Android’s device settings, as well as in the Fitbit App Devices screen. Your mobile device must support Wireless Sync to set Silent Alarms. To see if your device is supported, go to http://www.fitbit.com/devices. 1. 2. 3. 4. 5. 6. 7. 8. Open the Fitbit App. Tap the menu button. Tap Devices. Choose your tracker. Tap Silent Alarm Tap Add a new alarm, or the bell icon in the top right corner. Set the the time you’d like your alarm to go off at, then tap Done. If you’d like, you can tap the Repeats checkbox and choose the days of the week on which you want this alarm to repeat. 9. Tap Done. 10. Tap the Sync alarms with your tracker button. Your Android device will now sync the alarm to your One. 18 Note: Force Sync the alarm to your tracker by tapping the menu button, then Devices, choosing One and tapping the Force Sync icon. Dismissing Silent Alarms Your One will vibrate when your Silent Alarm goes off. This notification will repeat several times or until dismissed. You can dismiss the alarm by pressing its button. If you miss your alarm, your One will alert you again after a few minutes. 19 Your Fitbit.com Dashboard Browser Requirements Browser Mac Version Windows Version Apple Safari 5.0.5 and higher Not Supported Google Chrome 12 and higher 12 and higher Microsoft Internet Explorer Not Supported 8 and higher Mozilla Firefox 3.6.18 and higher 3.6.18 and higher Using your Dashboard Fitbit provides you with a free online tool to help track, manage, and evaluate your fitness progress. Understanding the Dashboard Your Dashboard is the where you will be taken when you log into your Fitbit account. It will show you an overview of your progress towards goals, allow you to edit your goals, and view your historical data. Logging Food, Activities, and Sleep From your Dashboard, you can launch individual log pages to keep track of your Food, Activities, Sleep, and other custom trackers. 20 Device Info Preview When you click on the gear icon in the upper right corner of your Dashboard you will be shown information about the time of your tracker’s last sync, battery level and upcoming alarms. Managing your One from Fitbit.com You can also manage your One from Fitbit.com. Click the gear icon in the top right corner and then select Settings. The Personal Settings screen allows you to change your Time Zone. This will impact when your tracker data resets, because your tracker will reset at midnight based on the time zone your tracker is set to. The Device Settings area allows you to monitor: The date and time of your Last Sync. Battery level of your device at the time of its last sync. The Firmware version running on your device. Your Time Zone. Sleep Tracking sensitivity. Whether you want your tracker to display in left-handed or right-handed mode. Greeting: You can choose how you would like your tracker to greet you from this space. You can also manage your Silent Alarms from the left sidebar of the Account Settings area. 21 Updating Fitbit One Fitbit may release updates for your One, which will be available for free from Fitbit Connect on your computer, or within the App on your mobile device. New feature enhancements and product improvements are made through updates. NOTE: Updating your One is demanding on its battery. It is recommended that you charge your One before, during, or after performing an update. Updating One on a computer You can update your One using a Mac or PC using Fitbit Connect. To update using this method: 1. 2. 3. 4. 5. Make sure your Wireless Sync Dongle is plugged into your computer. Click the Fitbit Connect icon near the time on your computer. Select Open Main Menu, and then select Check for device update. Log in to your account using your Fitbit.com credentials. Press the button on your One to wake it up. Fitbit Connect will now look for your tracker. 6. If an update has been found for your One, Fitbit Connect will display a progress bar indicating that the update is in progress. Keep your tracker close to your computer while it updates. 7. When Fitbit Connect shows you a confirmation screen that says, “Update complete”, your One will have the newest updates and you can proceed as usual. Updating One on an iOS device Updating your tracker will fix bugs and add new features that have been added to the Fitbit One. From the Fitbit app, navigate to More > Devices > One. If a device update is available, you will see the option to update at the bottom of the screen. If your tracker is already up to date, “Update Fitbit One” will not be an option on your mobile device. 22 Updating One on an Android device Updating your tracker will fix bugs and add new features that have been added to the Fitbit One. 1. From the Fitbit app, go to Menu button > Device Settings > One. If a device update is available, you will see the option to update. If your tracker is already up to date, “Update Fitbit One” will not be an option on your mobile device. 2. If “Update Fitbit One” is an option, bring your tracker near your mobile device and tap “Update Fitbit One”, then “Next”. 3. Once your tracker has been located, your update will continue. NOTE: You may need to wake up your One with a few presses of the button to make it easier to locate. 4. When your Fitbit One is up to date, a “You’re all set!” screen will appear on your mobile device and your tracker will restart. 23 Help Troubleshooting and assistance for your Fitbit One tracker can be found at http://help.fitbit.com. 24 Return policy and warranty Warranty information and the Fitbit.com Store Return Policy can be found online at http://www.fitbit.com/returns. 25 Regulatory and Safety Notices Model Name: FB103 USA: Federal Communications Commission (FCC) Statement This device complies with FCC part 15 FCC Rules. Operation is subject to the following two conditions: 1. This device may not cause harmful interference and 2. This device must accept any interference, including interference that may cause undesired operation of the device. FCC Warning Changes or modifications not expressly approved by the party responsible for compliance could void the user’s authority to operate the equipment. Note: This equipment has been tested and found to comply with the limits for a Class B digital device, pursuant to part 15 of the FCC Rules. These limits are designed to provide reasonable protection against harmful interference in a residential installation. This equipment generates, uses and can radiate radio frequency energy and, if not installed and used in accordance with the instructions, may cause harmful interference to radio communications. However, there is no guarantee that interference will not occur in a particular installation. If this equipment does cause harmful interference to radio or television reception, which can be determined by turning the equipment off and on, the user is encouraged to try to correct the interference by one or more of the following measures: Reorient or relocate the receiving antenna. Increase the separation between the equipment and receiver. Connect the equipment into an outlet on a circuit different from that to which the receiver is connected. Consult the dealer or an experienced radio/TV technician for help. This device meets the FCC and IC requirements for RF exposure in public or uncontrolled environments. 26 Canada: Industry Canada (IC) Statement IC Notice to Users English/French in accordance with RSS GEN Issue 3: This device complies with Industry Canada license exempt RSS standard(s). Operation is subject to the following two conditions: 1. this device may not cause interference, and 2. this device must accept any interference, including interference that may cause undesired operation of the device. Cet appareil est conforme avec Industrie Canada RSS standard exempts de licence (s). Son utilisation est soumise à Les deux conditions suivantes: 1. cet appareil ne peut pas provoquer d’interférences et 2. cet appareil doit accepter Toute interférence, y compris les interférences qui peuvent causer un mauvais fonctionnement du dispositive This Class B digital apparatus complies with Canadian ICES-003. Cet appareil numérique de la classe B est conforme à la norme NMB-003 du Canada. FCC ID XRAFB103 IC ID 8542A-FB103 27 EU (European Union): Declaration of Conformity with Regard to the EU Directive 1999/5/EC Fitbit Inc. is authorized to apply the CE Mark on One, Model FB103, thereby declaring conformity to the essential requirements and other relevant provisions of Directive 1999/5/EC. Compliant with the standard R&TTE 99/CE/05 Conforme à la norme R&TTE 99/CE/05 Other: N300321 Safety Statement This equipment has been tested to comply with safety certification in accordance with the specifications of EN Standard: EN60950-1:2006 + A12: 2011. The complete Declaration of Conformity can be found at www.fitbit.com/one/specs Important Safety Instructions Read these instructions. Keep these instructions. Heed all warnings Follow all instructions Do not attempt to open the tracker. Substances contained in this product and/or its battery may damage the environment and/or human health if handled and disposed of improperly. Do not tamper with your One. Do not use abrasive cleaners to clean your One. Do not place your One in a Dishwasher, Washing Machine or Dryer. Do not expose your One to extremely high or low temperatures. Do not use your One in a sauna or steam room. 28 Do not leave your One in direct sunlight for an extended period of time. Do not leave your One near open flames. Do not dispose of your One in a fire. The battery could explode. Do not attempt to disassemble your One, it does not contain serviceable components. Never allow children to play with the One; the small components may be a choking hazard! Built-in Battery Precautions Do not attempt to replace your One’s battery. It is built-in and not changeable. Charge the battery in accordance with the instructions supplied with this guide. Use only the charger that shipped with your product to charge the battery. Charge your One using a certified computer, powered hub or power supply. Do not attempt to force open the built-in battery For the most up-to-date Safety and Regulatory Information, please visit the product specific section at help.fitbit.com Disposal and Recycling Information The symbol on the product or its packaging signifies that this product has to be disposed separately from ordinary household wastes at its end of life. Please kindly be aware that this is your responsibility to dispose electronic equipment at recycling centers so as to help conserve natural resources. Each country in the European Union should have its collection centers for electrical and electronic equipment recycling. For information about your recycling drop off point, please contact your local related electrical and electronic equipment waste management authority or the retailer where you bought the product. Le symbole sur le produit ou sur son emballage signifie que ce produit à la fin de sa vie doit être recyclé séparément des déchets ménagers ordinaires. Notez que ceci est votre responsabilité d'éliminer les équipements électroniques à des centres de recyclage afin d'aider à préserver les ressources naturelles. Chaque pays de l'Union européenne a ses centres de collecte et de recyclage pour le recyclage des équipements électriques et électroniques. Pour plus d'informations ou trouver un centre de recyclage, contactez votre commune ou le magasin où vous avez acheté le produit. Do not dispose of the One with household waste. Batteries are not to be disposed of in municipal waste stream and require separate collection. 29 Disposal of the packaging and your One should be done in accordance with local regulations. Please recycle! For additional information on disposal and recycling, including contact details of a distributor in your region, please visit http://help.fitbit.com Pour plus amples renseignements sur le recyclage, y compris les coordonnees d'un distributeur dans votre region, visitez http://help.fitbit.com 30 31