1
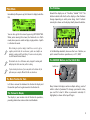
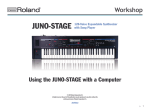
®ÂØÒňΠ™ Workshop Exploring the Fantom-Xa © 2005 Roland Corporation U.S. All rights reserved. No part of this publication may be reproduced in any form without the written permission of Roland Corporation U.S. 1 About the Fantom-Xa Workshop Booklets Understanding the Symbols in This Booklet Roland’s Fantom-Xa workstation keyboard provides lots of creative power at an affordable price. It shares many of the features of its more expensive siblings—the Fantom X6, X7, and X8—including killer sounds, 128-note polyphony, a fullfeatured 16-track sequencer, sampling capabilities, and so much more. The Fantom-Xa Workshop booklets discuss some of the things you can do with your Fantom-Xa. Each booklet focuses on one topic, and is intended as a companion to your Fantom-Xa Owner’s Manual. A note is something that adds information about the topic at hand. A tip offers suggestions for using the feature being discussed. Warnings contain important information that can help you avoid possible damage to your equipment, your data, or yourself. Getting Ready About This Booklet One of the best things about the Fantom-Xa is the inspiring way in which all of its elements come together to make the creative process such a complete musical experience. ����������� Throughout this booklet, you’ll come across information that deserves special attention—that’s the reason it’s labeled with one of the following symbols. �������� ����������� ��������� ������� You’ll want to listen to the Fantom-Xa as you go through this booklet, so plug a pair of headphones into the Fantom-Xa PHONES jack—you’ll need headphones with a 1/4” plug—or connect the Fantom-Xa‘s A (MIX) L (MONO) and R outputs to the left and right inputs, respectively, of your mixer or other monitoring system. For more about connecting the Fantom-Xa to headphones or your audio system, see your Fantom-Xa Owner’s Manual. ��������� ������ ����� ������� You’ll also need to connect the Fantom-Xa to a grounded AC power source using the supplied power cord, and then turn the Fantom-Xa on, of course. �������� This booklet provides a beginner’s tour of the Fantom-Xa, giving you a quick introduction to some of the things it can do. 2 Patch Mode Immediately after power-up, the Fantom-Xa display looks like this: The F Buttons Beneath the display are six “F buttons,” labeled “F1-F6.” The buttons interact with what’s on the display, so their functions change depending on what you’re doing. Each F button’s current job is shown on the display directly above the button. You can also get to this screen by pressing PATCH/RHYTHM. When you’re viewing this screen, the Fantom-Xa is in Patch mode, where you can select and play single patches. A patch is a Fantom-Xa sound. We’re referring to a patch as simply a “sound” here so as not to get too caught up in tech details for now. However, a patch can actually be an amazingly complex, multi-faceted thing. To learn more about patches, check the Fantom-Xa Owner’s Manual. The Fantom-Xa also has a Performance mode, designed for working with multiple patches at the same time, and for recording. In the Workshop booklets, when we refer to an F button, we put its current function in parentheses, as in “F1 (KBD).” The CURSOR Buttons and the VALUE Dial The VALUE dial If you’ve already stored some of your own patches in the Fantom-Xa, the patch name you see may be different that the one shown here. The Basic Fantom-Xa Tools Let’s take a moment to introduce the Fantom-Xa display and the controls you’ll use to get around on the Fantom-Xa. The Fantom-Xa Display The display is your window into all Fantom-Xa operations, providing information and constant visual feedback. Many Fantom-Xa displays contain multiple settings, each of which is called a “parameter.” To change a parameter’s value, you must first select it. When a parameter’s selected, it’s highlighted, as shown at the top of Page 4. 3 Selecting Patches and Rhythm Sets Selecting a Patch for the Fantom-Xa Keyboard Right now, the patch number “001” is highlighted, and therefore selected. 1. Press PATCH/RHYTHM to display the PATCH PLAY screen. (By default, this is the screen you see after power-up.) To select a parameter and change its value: 1. Press the appropriate CURSOR 3, 4, 5 and/or 6 button until the parameter is highlighted. 2. Turn the VALUE dial to choose the desired setting. The Keyboard and Pads In a sense, the Fantom-Xa is like two instruments in one: a synthesizer and a drum machine. Both of these instruments are always available. At any time you can: • • play a patch on the keys. play a rhythm set on the drum pads. 2. Press F1 (KBD) so the F button’s onscreen “KBD” label is solidly outlined, as circled in red above. If the keyboard part is already selected, nothing changes when you press F1 (KBD). 3. Press the CATEGORY button in the TRIGGER/CATEGORY area so it lights, as shown here. (If you’ve had your Fantom-Xa for much more than a few seconds, you’ve probably already discovered this.) In Patch mode, the keyboard typically plays a single patch up and down its entire length. The pads, on the other hand, typically play a “rhythm set.” A rhythm set is a special type of patch in which each pad plays its own sound. If you want, you can play a rhythm set on the keyboard—so that each key plays a different drum or percussion sound—or play a normal patch on the pads—so that the same sound plays on all pads, at different pitches. The CATEGORY screen appears. Square One This booklet’s text and screenshots assume you’ve just turned on your Fantom-Xa. 4 The Fantom-Xa patches are organized into categories that make them easy to find. You can quickly jump between categories by pressing any of the Fantom-Xa’s Pads 0-9 whenever the CATEGORY button is lit. Each pad is labeled for the group of patch categories it displays. Selecting a Rhythm Set for the Fantom-Xa Pads 1. Press PATCH/RHYTHM to display the PATCH PLAY screen. 2. Press F2 (PAD) so the F button’s onscreen “PAD” label is solidly outlined, as circled in red below. The PIANO pad is now lit, and the first of the Piano categories—Ac. Piano, for “Acoustic Piano”—is displayed. 4. Press any pad, and then view its patch categories by pressing 4 and 3. 5. Turn the VALUE dial to select the desired patch in the displayed category. 3. Press the PATCH SELECT button to display the RHYTHM SELECT PAD screen. You can audition the selected patch set by holding down F5 (PREVIEW), or by playing the keyboard. 6. Press F6 (SELECT) to confirm your choice. You can also select patches according to the memory locations—called “banks”—in which they’re stored. See the Fantom-Xa Owner’s Manual to learn more about banks. For the purposes of this booklet, press the PAD/VOX pad to select the Bright Pad category, turn VALUE to highlight USER :218 Strangers, and then press F6 (Select) before proceeding. On this screen you can select any of the onboard rhythm sets for playing on the pads. They’re stored in banks. 4. To select a bank of rhythm sets, press F1 (BANK↓) or F2 (BANK↑). 5. To navigate within the selected bank, use the F3 (←) and F4 (→) buttons. 6. To select the desired rhythm set within the selected bank, use 6 and 5 or turn the VALUE dial to highlight the rhythm set you want to use. You can audition the selected rhythm set by holding down F6 (PREVIEW), or by playing it on the pads. For the purposes of this booklet, select the User bank and Rhythm Set USER :001 StandardKit3, before proceeding. 7. Press EXIT when you’ve selected the desired rhythm set. 5 A Brief Realtime Detour The current patch, Strangers, responds in interesting ways to the Fantom-Xa’s realtime controllers. Press F1 (KBD) and play the keyboard: • • • Push the modulation lever located to the left of the keyboard forward, and then release it to hear how vibrato can be added to the sound, and then removed. Press ASSIGNABLE beneath the D Beam so it lights, and move your hand up and down over the D Beam to hear what it does to the pitch of the patch’s various elements. In the REALTIME CONTROLLERS area, press the button beneath “ARP/RHY” repeatedly until its ASSIGNABLE LED lights. Turn the four REALTIME CONTROL knobs as you play—hear how each changes the sound in some way. When one of the pads is playing a sustained sound, lighting HOLD—next to the TRIGGER button—causes the sound to continue playing after you’ve struck and released its pad. This is especially handy when a pad plays a sampled loop. Right now, it has no effect because the pads’ sounds are quick percussion sounds. 3. Press the ARP/RHY RHYTHM button so it lights—the pad lights go out because, when RHYTHM’s lit, the pads play rhythms. The Fantom-Xa offers extensive realtime manipulation of its sounds. For more, see your Fantom-Xa Owner’s Manual. Meet the Beats The Fantom-Xa contains a full-featured drum machine that’s perfect for jamming and songwriting. 1. Take a look at the TRIGGER/ CATEGORY area. The TRIGGER button’s lit, as are Pads 1-9. If the TRIGGER button isn’t lit, press it so it is. When TRIGGER’s lit, the pads play rhythm set sounds, or rhythms, as we’ll see. 2. Hit each lit pad to hear how it plays a sound from the currently selected pad rhythm set. 4. Hit Pad 1—its pattern plays and the pad flashes. 5. Now strike other unlit pads to hear different patterns. Rhythm groups allow you to assemble collections of rhythm patterns. There are built-in rhythm groups and you can create your own, as described in the Owner’s Manual. 6. Note how the Fantom-Xa switches between patterns without losing the beat. You can mix and match patterns to create your own rhythm arrangements. 7. Find a pattern you like and let it play. You can press the TEMPO button and turn the VALUE dial to change the rhythm pattern’s tempo if you like. Press F6 (Close) when you’re done. 6 8. Play along with the pattern on the keyboard. This isn’t just fun—it’s also often a great way to start writing a song. 9. Jam a bit to find something you’d like to record. If you’d like to select a different keyboard patch, press F1 (KBD) and do so, as described back on Page 4. 10. When you’re done, stop the rhythm by pressing the flashing pad or by pressing the RHYTHM button so it’s unlit. Clearing the Demo Song When you first purchase the Fantom-Xa, its demo song loads automatically. To clear it from song memory so you can record your own song in the next section of this booklet: Recording a New Idea The Fantom-Xa is always ready to record when inspiration strikes. It’s designed to let you record a new idea fast. 1. Press the Record button. Reset Stop Play Record All of the recording-related buttons are grouped together on the Fantom-Xa panel. The Realtime Rec Standby window pops open and the Fantom-Xa metronome starts playing. 1. Press SONG EDIT↔LIST to display the SNG EDIT (TRK) screen. If the SNG LIST screen appears when you press SONG EDIT↔LIST, press the button again. The button toggles between the two screens. 2. Press F3 (UTILITY) to display the Song Utility Menu. It’s not important in our tutorial, but the metronome’s handy when you’re not playing along with a rhythm. (You can also disable it if you prefer, as described in the Fantom-Xa Owner’s Manual.) The parameters in the Realtime Rec Standby window allow you to customize your recording session in a variety of ways. 3. Press F2 (SONG CLEAR). 4. When the Fantom-Xa asks if you’re sure you’d like to proceed, press F6 (EXEC)—”Song Clear Completed!” appears, and the Fantom-Xa is ready for a new song. You can set the Fantom-Xa so it doesn’t automatically load the demo at startup. See the Fantom-Xa Owner’s Manual for details. The Count In parameter is set by default to 1 MEAS, for “one measure,” meaning that you’d hear four beats go by before you’d start playing. When you’re recording with a rhythm, though, it’s a better idea to use the WAIT NOTE setting, so the recorder waits for the rhythm before recording starts. This ensures that the rhythm and metronome are in perfect time. 2. Set Count In to WAIT NOTE. 7 3. Strike a pad so its rhythm plays—recording begins and the Realtime Rec Control window opens. About Recording on the Fantom-Xa The Fantom-Xa’s recorder is a MIDI “sequencer” that captures MIDI data that the keyboard and rhythm section produce. When it plays it back, your performance is reproduced. 4. Let four beats go by so you can get used to the groove, and then play your idea on the Fantom-Xa keyboard. You can do all sorts of things to refine your music by editing the captured MIDI data, such as correct its timing, add or remove notes, change its sounds, and much more. You won’t need to do this for our tutorial, but you can remove extra measures at the front or end of a recording using the Delete editing tool, described in the Fantom-Xa Owner’s Manual. While the Fantom-Xa sequencer doesn’t actually record audio, its sampler certainly does, as we’ll see later. 5. Once you’ve played the idea, press Stop. That’s it—you’ve recorded your playing. 6. Press RHYTHM to turn off the rhythm pattern. 7. Press Reset, and then Play to hear your idea. We didn’t want to distract you earlier, but when the Realtime Rec Control window is open, you can rehearse without recording. Undoing Your Work If you’d like to start over again, you can “undo” your recording. 1. Press the UNDO button—a window pops open and asks if you’re sure you want to undo your last recording (or editing action, by the way). 2. Press F6 (EXEC) to complete the Undo procedure. 3. Now that you’re back to Square One, you can press RHYTHM and hit the desired pad to resume playback of your rhythm pattern, and then repeat the steps in the previous section of this booklet if you like. Once you’ve recorded something, you can move over to the sequencing area to add more instruments, or even sampled vocals. See the Fantom-Xa Owner’s Manual to learn more. The Arpeggiator The Fantom-Xa’s arpeggiator produces repeating note patterns called “arpeggios.” These patterns can provide dance grooves or add texturing to any kind of music. The arpeggiator can also automatically generate a bass line for any chord. Before we check out the arpeggiator, press PATCH/RHYTHM, and then turn VALUE to select User :001 A’Live Piano again. 1. Press ARPEGGIO so it lights. 2. Hold down a handful of notes on the keyboard—listen to how the arpeggiator takes the notes you’re playing and uses them in the currently selected arpeggio. 3. Let go of the keys. 4. Hold down SHIFT and press ARPEGGIO to display the Arpeggiator editing screen. 8 Style parameter On this screen, you can select a different arpeggio— referred to as a “style”—or even create your own. 5. If the Style parameter isn’t highlighted, press 5 until it is. 6. Hold down some notes on the keyboard with one hand. 7. While you’re holding down the notes, turn the VALUE dial to select different arpeggio styles. Listen to how they can do many different things with the same notes. 8. For even more fun, set the Motif parameter to Phrase, hold down some notes, and try out some more styles—Phrase can do very interesting things with the notes you play. 9. When you’re done experimenting, press ARPEGGIO once more to turn off the arpeggiator. The arpeggiator uses the same tempo as the Fantom-Xa rhythm patterns and sequencer, so when you use the sequencer, rhythms and the arpeggiator together, they stay perfectly in time with each other. 3. Press the blue SKIP BACK button. If the SKIP BACK button isn’t lit, you don’t have enough free sample memory available for Skip Back Sampling. See “If the SKIP BACK Button Isn’t Lit” on Page 10 in this booklet. The Fantom-Xa goes back in time and creates a new sample from the last five seconds of your playing. Skip Back Sampling can be pre-set to grab anywhere from the last five to 40 seconds of music. Five seconds is the default setting. 4. When the Fantom-Xa has captured your sample, it displays the ASSIGN TO PAD screen on which you can select a pad for playing the newly captured sample. Skip Back Sampling As you probably know, the Fantom-Xa contains a powerful sampler. What you may not know is that it’s always listening to what you do on the Fantom-Xa. If you know the sample’s tempo, you can automatically keep the sample in time with rhythms, arpeggios and the sequencer. To do this, press F1 (SYNC) so it’s checkmarked. This means that when you’ve just played something unexpected and great, the Fantom-Xa’s powerful Skip Back Sampling can easily retrieve it for you as a new sample. 5. You can select any pad from 1-9 by striking it or by pressing 3, 4, 5, or 6 to highlight the pad onscreen—the currently selected pad turns black on the display. 1. Select a patch you’d like to play. 2. Play anything you like on the keyboard, for about five seconds. Strike a pad to preview what’s currently assigned to it—this’ll help you quickly find the pad you want to use. 9 6. Once you’ve picked out a pad, press F6 (EXEC)—the Fantom-Xa asks if you’re sure you want to proceed. 7. Press F6 (EXEC) again to finish assigning the new sample to the selected pad. Once the process is complete, the Fantom-Xa takes you to the Sample Edit screen in case you want to refine the sample by editing it. If the SKIP BACK Button Isn’t Lit When your Fantom-Xa’s sample memory—or “sample RAM”— is full, the SKIP BACK button remains unlit and Skip Back Sampling isn’t available. You can run out of room if you’ve loaded a lot of samples or if you haven’t expanded your Fantom-Xa’s sample RAM and you’ve automatically loaded the Fantom-Xa demo samples at startup. You can always unload unnecessary samples to make room— see “Unloading Samples” in the Fantom-Xa Owner’s Manual. If you’ve turned on Tempo Sync, press 6 to display the Tempo parameter, and then set it to the sample’s tempo, or “BPM,” so the Fantom-Xa knows how to keep it in sync with the sequencer and/or arpeggiator. 8. Strike and hold down the pad you selected in Step 5 to listen the new sample. You can work with the sample just as you would any other Fantom-Xa sample: playing it, or even using it as the basis for a song. Check out the Fantom-Xa Owner’s Manual to learn more about sampling. In addition, you may want to turn off the Load Preset Samples at Startup parameter described on Page 193 in the Fantom-Xa Owner’s Manual. The End We hope you’ve enjoyed this quick tour of your Fantom-Xa. Keep an eye out for other Fantom-Xa Workshop booklets, all available for downloading at www.RolandUS.com. For the latest Fantom-Xa updates and support tools, visit the Roland U.S. Web site at www.RolandUS.com. If you need personal assistance, call our amazing Product Support team at 323-890-3745. Skip Back Sampling captures not only the sound produced by keyboard, but your rhythms and arpeggios as well. To avoid losing a sample when you turn off the Fantom-Xa, you must save it. To learn how to save a sample, see your Fantom-Xa Owner’s Manual. 10