1
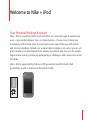
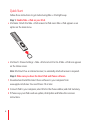
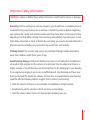
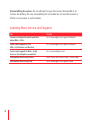
Nike + iPod
User Guide
KKApple Inc.
© 2008 Apple Inc. All rights reserved.
Apple, the Apple logo, iPod, and iTunes are trademarks
of Apple Inc., registered in the U.S. and other countries.
iTunes Store is a service mark of Apple Inc., registered in
the U.S. and other countries. NIKE and the Swoosh Design
are trademarks of NIKE, Inc. and its affiliates, and are used
under license. The Nike + iPod Sport Kit is covered by
one or more of U.S. patent numbers 6,018,705, 6,052,654,
6,493,652, 6,298,314, 6,611,789, 6,876,947, and 6,882,955,
either alone or when used in combination with a Nike +
iPod enabled iPod media player.
Mention of third-party products is for informational
purposes only and constitutes neither an endorsement
nor a recommendation. Apple assumes no responsibility
with regard to the performance or use of these products.
All understandings, agreements, or warranties, if any, take
place directly between the vendors and the prospective
users. Every effort has been made to ensure that the
information in this manual is accurate. Apple is not
responsible for printing or clerical errors.
Contents
5
5
6
12
12
14
14
14
14
15
16
16
16
17
18
18
Welcome to Nike + iPod
Your Personal Workout Assistant
Quick Start
Using Nike + iPod
Calibrating Nike + iPod
Setting the Units of Distance
Entering Your Weight
Locking iPod touch During a Workout
Getting Spoken Feedback
Using a PowerSong
Pausing a Workout
Changing Music During a Workout
Reviewing Recent Workouts on Your iPod
Creating and Selecting Custom Workout Shortcuts
Purchasing and Downloading Nike+ Workouts
Using a Nike + iPod Remote
3
19
Linking to Another Sensor
20 Putting the Nike + iPod Sensor to Sleep
21 Important Safety Information
22 Learning More, Service, and Support
4 Welcome to Nike + iPod
Your Personal Workout Assistant
Nike + iPod is a workout partner and coach all in one. Select the type of workout you
want—open-ended, distance, time, or calorie-burning—choose music to keep you
motivated, and then keep track of your progress every step of the way with spoken
and onscreen feedback. Upload your workout date to nikeplus.com, where you can set
goals, monitor your improvement from workout to workout, and even join the world’s
largest online running community, participating in challenges with runners from across
the globe.
Nike + iPod is supported by iPod nano (4th generation) and iPod touch (2nd
generation), as well as all previous iPod nano models.
5
Quick Start
Follow these instructions to get started using Nike + iPod right away.
Step 1: Enable Nike + iPod on your iPod.
mm iPod nano: Attach the Nike + iPod receiver to iPod nano. Nike + iPod appears as an
option on the main menu.
mm iPod touch: Choose Settings > Nike + iPod and set it to On. A Nike + iPod icon appears
on the Home screen.
Note: iPod touch has an internal receiver; no externally attached receiver is required.
Step 2: Make sure you have the latest iPod and iTunes software.
1 Download and install the latest iTunes software to your computer from
www.apple.com/itunes. You need iTunes 7.0 or later.
2 Connect iPod to your computer, select iPod in the iTunes sidebar, and click Summary.
3 If iTunes says your iPod needs an update, click Update and follow the onscreen
instructions.
6 Step 3: Insert the Nike + iPod Sensor in your Nike+ ready shoe.
mm Lift the insole of the left shoe, remove the foam insert from the pocket underneath,
and replace it with the sensor.
Lift the insole and place the
sensor in the pocket, flat side up.
You can leave the sensor in your shoe when you aren’t working out, but if you plan to
wear your shoes for a long time without working out, we recommend replacing the
sensor with the foam insert to save battery life.
7
Step 4: Choose a type of workout.
To choose
Do this
An open-ended workout
iPod nano: Choose Nike + iPod > New Workout > Basic.
A workout with a time goal
iPod touch: Choose Nike + iPod > Basic.
iPod nano: Choose Nike + iPod > New Workout > Time.
A workout with a distance goal
iPod touch: Choose Nike + iPod > Time.
iPod nano: Choose Nike + iPod > New Workout >
Distance.
A workout with a calorie burning
goal
iPod touch: Choose Nike + iPod > Distance.
iPod nano: Choose Nike + iPod > Settings > Weight
and enter your weight. Then click the Menu button,
and choose Nike + iPod > New Workout > Calorie.
iPod touch: Choose Settings > Nike + iPod > Weight
and set your weight. Then press the Home button, and
choose Nike + iPod > Calorie.
A custom workout shortcut
Note: You need to enter your weight only the first time
you start a calorie burning workout.
iPod nano: Choose Nike + iPod and choose a workout
shortcut.
iPod touch: Choose Nike + iPod, tap My Workouts, and
choose a workout shortcut.
Note: First-time users should see “Creating and
Selecting Custom Workout Shortcuts” on page 17.
8 Step 5: Choose music to accompany your workout.
To play
Do this
A Nike+ Workout mix
The currently playing song
Choose the mix (see page 18).
Choose Now Playing.
Songs from a playlist
Songs in random order
No music
Choose Playlists and choose a playlist.
Choose Shuffle Songs.
Choose None.
Step 6: Start your workout.
mm iPod nano: Press the Center button and begin walking or running.
mm iPod touch: Tap Play and begin walking or running.
9
Step 7: Monitor your progress.
Nike + iPod automatically displays your workout status on the iPod screen.
iPod nano
iPod touch
Periodically, Nike + iPod also gives you spoken feedback on your progress (see “Getting
Spoken Feedback” on page 14).
To get spoken feedback manually:
mm iPod nano: Press the Center button at any time during your workout.
mm iPod touch: Press the Home button at any time during your workout.
Note: iPod touch must be locked to get spoken feedback manually (see “Getting
Spoken Feedback” on page 14).
Step 8: End your workout.
You can end your workout at any time. If you continue working out after you reach
your time, distance, or calorie goal, iPod continues to monitor your progress.
10 To end your workout:
mm iPod nano: Press the Play/Pause (’) button to pause your workout. Then press the
Menu button and choose End Workout.
mm iPod touch: Press End Workout. If iPod touch is locked, press the Home button and tap
Pause. Then drag the slider to unlock iPod touch, and tap End Workout.
iPod stores your most recent workout data for future reference.
Step 9: Track your progress at nikeplus.com.
When you connect iPod to your computer, iTunes sends your workout data over the
Internet to nikeplus.com, where you can track your progress over time, view a record of
all of your past workouts, set and monitor goals, and compare your results with others.
You can even compete with other online Nike + iPod users in workout challenges.
To send your workout data to nikeplus.com:
1 After a workout, connect your iPod to your computer. iTunes opens automatically.
2 Click Send in the dialog that asks if you want to send your workout data to
nikeplus.com.
3 Click Visit in the dialog that asks if you want to go to nikeplus.com.
The nikeplus.com website opens with your most recent workout graphed on the
homepage.
4 Click Save Your Runs, then click Sign Me Up and follow the onscreen instructions.
Once you’ve set iTunes to send your workout data to nikeplus.com, iTunes sends
the latest data automatically over the Internet whenever you connect iPod to your
computer. The nikeplus.com website opens, and you’re logged in automatically.
11
When your iPod isn’t connected to your computer, you can go to www.nikeplus.com
and enter your Login ID and password. See the nikeplus.com website for Nike’s privacy
policy and terms and conditions.
Using Nike + iPod
Follow these instructions to get the most out of Nike + iPod.
Note: Some features are new with iPod nano (4th generation).
Calibrating Nike + iPod
The default calibration for Nike + iPod is quite accurate for many users. You can
improve the accuracy by calibrating Nike + iPod to your natural running and walking
style.
To calibrate Nike + iPod for running and walking:
1 iPod nano: Choose Nike + iPod > Settings > Sensor > Calibrate.
iPod touch: Choose Nike + iPod > Calibration.
2 Choose Run and enter a distance.
Note: You must travel at least a quarter of a mile for calibration to be successful.
3 Choose music to accompany your calibration workout.
4 iPod nano: Press the Center button.
iPod touch: Tap Play.
Then run the set distance at a steady, natural pace.
12 5 iPod nano: Press the Menu button and choose Done Calibrating.
iPod touch: Tap End Workout, and tap Done.
A message tells you if the calibration was successful.
6 Repeat steps 1–4, choosing Walk in step 2 and walking at a steady, natural pace in
step 4.
Note: Even after calibrating, the accuracy of the distance measurements may vary
depending on gait, running surface, incline, and temperature.
To calibrate using your latest completed workout:
You can calibrate Nike + iPod using the workout you just finished. This is useful if
you’ve traveled a known distance that doesn’t match the summary distance displayed
on your iPod. At the end of your workout:
mm iPod nano: Choose End Workout, and then choose Calibrate. Set the correct distance
you walked or ran, and press the Center button.
mm iPod touch: Tap End Workout, then tap Calibration and set the correct distance you
walked or ran. Tap Save, then tap Done.
iPod senses whether the workout was a walk or run and correctly uses the new
calibration to override the existing one.
To reset Nike + iPod calibration to the default setting:
mm iPod nano: Choose Nike + iPod > Settings > Sensor > Calibrate > Reset Walk or Reset
Run.
mm iPod touch: Choose Nike + iPod > Calibration > Run or Walk and then choose “Reset to
Default.”
13
Setting the Units of Distance
You can set Nike + iPod to measure your workouts in either miles or kilometers.
To set the units of distance:
mm iPod nano: Choose Nike + iPod > Settings, and set Distances to Miles or Kilometers.
mm iPod touch: Choose Settings > Nike + iPod > Distances, then choose Miles or Kilometers.
Entering Your Weight
To enter your weight:
mm iPod nano: Choose Nike + iPod > Settings > Weight and enter your weight.
mm iPod touch: Choose Settings > Nike + iPod > Weight and enter your weight.
For better accuracy in calculating calories burned, update your weight if it changes.
Locking iPod touch During a Workout
You can lock iPod touch so that its controls can’t be accidentally activated during a
workout.
To lock iPod touch:
mm Press the Sleep/Wake button.
To unlock, press the Sleep/Wake button or the Home button and drag the slider.
Getting Spoken Feedback
As you work out, Nike + iPod periodically gives spoken feedback on your status.
To get spoken feedback manually:
mm iPod nano: Press the Center button at any time during your workout.
mm iPod touch: Press the Home button while iPod touch is locked.
14 To set the voice type or turn spoken feedback off:
mm iPod nano: Choose Nike + iPod > Settings and set Spoken Feedback to Male,
Female, or Off.
mm iPod touch: Choose Settings > Nike + iPod > Spoken Feedback, then choose Male,
Female, or Off.
If spoken feedback is turned off, you can still get spoken feedback manually.
Note: On iPod nano, spoken feedback is available in some languages besides English. If
you set your iPod to one of these languages and connect your iPod to your computer
(which must be connected to the Internet), iTunes prompts you to download feedback
in that language. On iPod nano, you can have only one non-English version of spoken
feedback on your iPod at a time.
On iPod touch, all spoken feedback languages are supported automatically.
Using a PowerSong
You can choose a motivational song as your PowerSong. At any time during your
workout, you can jump to the song.
To choose a PowerSong:
mm iPod nano: Choose Nike + iPod > Settings > PowerSong, and choose any song.
mm iPod touch: Choose Settings > Nike + iPod > PowerSong, and choose any song.
To play your PowerSong:
mm iPod nano: Press and hold the Center button at any time during a workout. After a
short pause, the song plays.
mm iPod touch: Tap PowerSong on the workout screen. Or, if iPod touch is locked, press the
Home button twice, and then tap PowerSong.
15
Pausing a Workout
You can pause your workout at any time, temporarily stopping music and data
collection, and resume the workout later without losing any data.
To pause or resume a workout:
mm iPod nano: Press the Play/Pause (’) button.
mm iPod touch: Tap Pause. Or, if iPod touch is locked, press the Home button once, and then
tap Pause. Tap Play to resume your workout.
Changing Music During a Workout
You can change your music at any time during a workout. Because your workout is
paused during the transition, you can resume it without losing your workout data.
To change music during a workout:
1 iPod nano: Press the Menu button and choose Change Music. Your workout pauses.
iPod touch: If iPod is not locked, tap Pause. If iPod is locked, press the Home button,
drag the slider to unlock, and tap Pause. Tap Change Music.
2 iPod nano: Select music. Your workout resumes automatically.
iPod touch: Select music. Tap the top of the music screen to return to your workout,
then tap Play.
Reviewing Recent Workouts on Your iPod
Your iPod saves the date, time, duration, distance, pace, and calories burned for up to
your last thousand workouts.
16 To review recent workouts on your iPod:
mm iPod nano: Choose Nike + iPod > History.
mm iPod touch: Choose Nike + iPod, then tap History at the bottom of the screen.
To erase a single workout session:
1 Choose Nike + iPod > History and choose a workout session.
2 iPod nano: Choose a workout session, click the Center button, and choose Delete.
iPod touch: Tap Edit, choose a workout session, and tap Delete.
On iPod touch, you can delete all workout sessions from History by tapping Clear at the
top of the History screen.
Creating and Selecting Custom Workout Shortcuts
iPod nano (4th generation only) automatically saves your completed workouts as
shortcuts, and iPod touch lets you create workout shortcuts. You can then select a
custom workout shortcut to easily repeat a workout.
To create a custom workout shortcut on iPod touch:
mm Choose Nike + iPod and tap My Workouts at the bottom of the screen.
mm Tap Plus (+), choose the type of workout and the workout goal, select music, enter a
name for the workout, and tap Save.
Note: You can create custom workout shortcuts only on iPod touch (2nd generation).
To delete a custom workout shortcut on iPod touch:
mm Choose Nike + iPod and and tap My Workouts. Tap Edit, choose a shortcut, and tap
Delete. Tap Done.
17
To choose a custom workout shortcut on your iPod:
mm iPod nano: Choose Nike + iPod and choose a shortcut. Shortcuts are named according
to the type of workout and music. They can’t be deleted.
mm iPod touch: Choose Nike + iPod and tap My Workouts. Shortcuts are listed by the name
you specified when you created the workout.
Your most recent custom workout shortcut appears at the top of the list.
Purchasing and Downloading Nike+ Workouts
You can purchase and download Nike+ Workouts featuring continuous music mixed
with professional coaching. Choose mixes for your level and style of workout.
To purchase a Nike+ Workout:
1 Open iTunes and type “Nike Sport Music” in the iTunes search field.
2 Click the Buy button next to the Nike+ Workout of your choice.
3 Connect iPod to your computer and load the workout onto iPod.
When you purchase a Nike+ Workout, you get a single workout track with music and
voiceover, and you also get all the individual songs in the mix.
Note: The iTunes Store is available only to people age 13 or older, in the U.S. and many
other countries; for a list of countries, see www.apple.com/itunes/download. Terms
apply. You must have Internet access (fees may apply) to use the iTunes Store.
Using a Nike + iPod Remote
You can use a Nike+ compatible remote (sold separately) to control Nike + iPod
wirelessly while you work out. Before using a remote for the first time, you must link
the iPod nano receiver to it.
18 To link to a remote:
1 Connect the receiver to an iPod nano.
2 Choose Nike + iPod > Settings > Remote > Link, and follow the onscreen instructions.
To turn remote functionality on or off for iPod nano:
mm Choose Nike + iPod > Settings > Remote, and set Remote to On or Off.
To unlink a remote from iPod nano:
mm Choose Nike + iPod > Settings > Remote > Unlink, and follow the onscreen
instructions.
Linking to Another Sensor
You can use your iPod nano or your iPod touch with more than one Nike + iPod Sensor.
You may want to do this, for example, if there’s more than one person in your family
with a sensor and Nike+ ready shoes. Each time you use an iPod with a different sensor,
you must link to that sensor.
If you connect an iPod nano external receiver to a different iPod and use it with the
same sensor, the receiver remembers your settings, your workout history, and your
workout shortcuts. You don’t need to relink or recalibrate.
To link to another sensor:
1 iPod nano: Connect the receiver to an iPod.
2 Put on the shoes with the new sensor, and make sure there is no other Nike + iPod
Sensor nearby.
Walk around to activate the sensor so your receiver (internal or external) can detect it.
19
3 iPod nano: Choose Nike + iPod > Settings > Sensor > Link and follow the onscreen
instructions. A message says iPod is now linked to the new sensor.
iPod touch: Choose Settings > Nike + iPod > Sensor, tap Link New, and follow the
onscreen instructions.
Note: If you link to a previously linked sensor, Nike + iPod remembers your calibration
settings. You don’t need to recalibrate.
Putting the Nike + iPod Sensor to Sleep
The sensor is awake and on by default. If you want to store the sensor for a long period
of time or make it stop transmitting, you can put it to sleep.
To put the sensor to sleep:
mm Use a pen or a paper clip to press and hold the Sleep/Wake button for three seconds.
Sleep/Wake button
Press and hold for three seconds to put to sleep.
Press to wake.
Important: Put the sensor to sleep before taking it on an aircraft, to comply with
applicable government regulations.
To wake the sensor:
mm Use a pen or a paper clip to press the Sleep/Wake button.
20 Important Safety Information
WARNING:  Failure to follow these safety instructions could result in injury or damage.
Exercising Before starting any exercise program, you should have a complete physical
examination by your physician. Do a warmup or stretching exercise before beginning
any workout. Be careful and attentive while exercising. Slow down, if necessary, before
adjusting your iPod while running. Stop exercising immediately if you feel pain, or feel
faint, dizzy, exhausted, or short of breath. By exercising, you assume the risks inherent in
physical exercise, including any injury that may result from such activity.
Choking hazard The receiver and sensor are potential choking hazards. Keep them
away from children under three years of age.
Avoid hearing damage Permanent hearing loss may occur if earbuds or headphones
are used at high volume. Set the volume to a safe level. You can adapt over time to a
higher volume of sound that may sound normal but can be damaging to your hearing.
If you experience ringing in your ears or muffled speech, stop listening and have your
hearing checked. The louder the volume, the less time is required before your hearing
could be affected. Hearing experts suggest that to protect your hearing:
ÂÂ Limit the amount of time you use earbuds or headphones at high volume.
ÂÂ Avoid turning up the volume to block out noisy surroundings.
ÂÂ Turn the volume down if you can’t hear people speaking near you.
21
Disassembling the sensor Do not attempt to open the sensor, disassemble it, or
remove the battery. No user-serviceable parts are inside. Do not use the receiver or
iPod in or near water or wet locations.
Learning More, Service, and Support
22
For
Do this
Answers to frequently asked questions
about Nike + iPod
Service and support for the
Nike + iPod Sensor and Receiver
Service and support for Nike+ ready
shoes or the nikeplus.com website
Information about using iTunes
Information about using iPod
Go to www.apple.com/support/nikeplus.
Go to www.apple.com/support/nikeplus.
Go to www.nikeplus.com.
Open iTunes and choose Help > iTunes Help.
Go to www.apple.com/support/ipod.
Regulatory Compliance Information
FCC Compliance Statement
This device complies with part 15 of the FCC rules.
Operation is subject to the following two conditions:
(1) This device may not cause harmful interference, and
(2) this device must accept any interference received,
including interference that may cause undesired
operation. See instructions if interference to radio or
television reception is suspected.
Radio and Television Interference
This computer equipment generates, uses, and can
radiate radio-frequency energy. If it is not installed and
used properly—that is, in strict accordance with Apple’s
instructions—it may cause interference with radio and
television reception.
This equipment has been tested and found to comply
with the limits for a Class B digital device in accordance
with the specifications in Part 15 of FCC rules. These
specifications are designed to provide reasonable
protection against such interference in a residential
installation. However, there is no guarantee that
interference will not occur in a particular installation.
You can determine whether your computer system is
causing interference by turning it off. If the interference
stops, it was probably caused by the computer or one of
the peripheral devices.
If your computer system does cause interference
to radio or television reception, try to correct the
interference by using one or more of the following
measures:
• Turn the television or radio antenna until the
interference stops.
• Move the computer to one side or the other of the
television or radio.
• Move the computer farther away from the television
or radio.
• Plug the computer into an outlet that is on a different
circuit from the television or radio. (That is, make
certain the computer and the television or radio are
on circuits controlled by different circuit breakers or
fuses.)
If necessary, consult an Apple-authorized service
provider or Apple. See the service and support
information that came with your Apple product. Or,
consult an experienced radio/television technician for
additional suggestions.
Changes or modifications to this product not authorized
by Apple Inc. could void the EMC compliance and
negate your authority to operate the product.
This product was tested for EMC compliance under
conditions that included the use of Apple peripheral
devices and Apple shielded cables and connectors
between system components. It is important that you
use Apple peripheral devices and shielded cables and
connectors between system components to reduce the
possibility of causing interference to radios, television
sets, and other electronic devices. You can obtain Apple
peripheral devices and the proper shielded cables and
connectors through an Apple-authorized dealer. For
non-Apple peripheral devices, contact the manufacturer
or dealer for assistance.
Responsible party (contact for FCC matters only):
Apple Inc. Corporate Compliance,
1 Infinite Loop M/S 26-A, Cupertino, CA 95014-2084
23
Wireless Information
Exposure to Radio Frequency Energy
FCC Wireless Compliance for the Nike + iPod Sensor.
The antenna used with this transmitter must not be
colocated or operated in conjunction with any other
antenna or transmitter subject to the conditions of the
FCC Grant.
The radiated output power of the included devices is far
below the FCC radio frequency exposure limits.
Industry Canada Statement
This Class B device meets all requirements of the
Canadian interference-causing equipment regulations.
Cet appareil numérique de la Class B respecte toutes
les exigences du Règlement sur le matériel brouilleur
du Canada.
European Wireless EU Declaration of Conformity
This wireless device complies with the specifications EN
300 328, EN 301-489, EN 50371, and EN 60950 following
the provisions of the R&TTE Directive.
Industry Canada Statement
Complies with the Canadian ICES-003 Class B, RSS 200
specifications. Cet appareil numérique de la classe B est
conforme à la norme NMB-003 RSS 210 du Canada.
European Community
Complies with European Directives 72/23/EEC, 89/336/
EEC, and 99/5/EEC.
Disposal and Recycling Information
The Nike + iPod Sensor contains a battery. Dispose of
your Nike + iPod Sensor according to local
environmental laws and guidelines. When discarding
shoes, remove the Nike + iPod Sensor and dispose of
it properly.
For information about Apple’s recycling program, go to
www.apple.com/environment.
California: The coin cell battery in your sensor contains
perchlorates. Special handling and disposal may apply.
Refer to www.dts.ca.gov/hazardouswaste/perchlorate.
Deutschland: Dieses Gerät enthält Batterien. Bitte
nicht in den Hausmüll werfen. Entsorgen Sie dieses
Gerät am Ende seines Lebenszyklus entsprechend der
maßgeblichen gesetzlichen Regelungen.
Nederlands: Gebruikte batterijen kunnen worden
ingeleverd bij de chemokar of in een speciale
batterijcontainer voor klein chemisch afval (kca) worden
gedeponeerd.
Taiwan:
24 und Recycling werden die natürlichen Ressourcen
geschont und es ist sichergestellt, dass beim Recycling
des Produkts alle Bestimmungen zum Schutz von
Gesundheit und Umwelt beachtet werden.
European Union—Disposal Information:
The symbol above means that according to local laws
and regulations your product should be disposed of
separately from household waste. When this product
reaches its end of life, take it to a collection point
designated by local authorities. Some collection points
accept products for free. The separate collection and
recycling of your product at the time of disposal will
help conserve natural resources and ensure that it is
recycled in a manner that protects human health and
the environment.
Unione Europea: informazioni per l’eliminazione
Questo simbolo significa che, in base alle leggi e alle
norme locali, il prodotto dovrebbe essere eliminato
separatamente dai rifiuti casalinghi. Quando il prodotto
diventa inutilizzabile, portarlo nel punto di raccolta
stabilito dalle autorità locali. Alcuni punti di raccolta
accettano i prodotti gratuitamente. La raccolta
separata e il riciclaggio del prodotto al momento
dell’eliminazione aiutano a conservare le risorse naturali
e assicurano che venga riciclato in maniera tale da
salvaguardare la salute umana e l’ambiente.
Union Européenne : informations sur l’élimination
Le symbole ci-dessus signifie que vous devez vous
débarasser de votre produit sans le mélanger avec les
ordures ménagères, selon les normes et la législation
de votre pays. Lorsque ce produit n’est plus utilisable,
portez-le dans un centre de traitement des déchets
agréé par les autorités locales. Certains centres
acceptent les produits gratuitement. Le traitement
et le recyclage séparé de votre produit lors de son
élimination aideront à préserver les ressources
naturelles et à protéger l’environnement et la santé des
êtres humains.
Europeiska unionen – uttjänta produkter
Symbolen ovan betyder att produkten enligt lokala
lagar och bestämmelser inte får kastas tillsammans
med hushållsavfallet. När produkten har tjänat ut
måste den tas till en återvinningsstation som utsetts
av lokala myndigheter. Vissa återvinningsstationer tar
kostnadsfritt hand om uttjänta produkter. Genom att
låta den uttjänta produkten tas om hand för återvinning
hjälper du till att spara naturresurser och skydda hälsa
och miljö.
Europäische Union – Informationen zur Entsorgung
Das Symbol oben bedeutet, dass dieses Produkt
entsprechend den geltenden gesetzlichen Vorschriften
und getrennt vom Hausmüll entsorgt werden muss.
Geben Sie dieses Produkt zur Entsorgung bei einer
offiziellen Sammelstelle ab. Bei einigen Sammelstellen
können Produkte zur Entsorgung unentgeltlich
abgegeben werden. Durch das separate Sammeln
Apple and the Environment
At Apple, we recognize our responsibility to minimize
the environmental impacts of our operations and
products.
For more information, go to
www.apple.com/environment.
25
www.apple.com/ipod/nike
www.apple.com/support/nikeplus
034-4623-A
Printed in XXXX