1
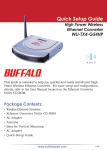
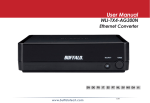
User Manual
High Power Wireless
Ethernet Converter
WLI-TX4-G54HP
www.buffalotech.com
v1.6
Table of Contents
Introduction
. . . . . . . . . . . . . . . . . . . . . . . . . . .
3
AOSS Installation . . . . . . . . . . . . . . . . . . . . . . . . . . . 5
Manual Configuration . . . . . . . . . . . . . . . . . . . . . . . . . . . 6
Ethernet Converter Manager . . . . . . . . . . . . . . . . . . . . . . . . 7
Configuration without Software . . . . . . . . . . . . . . . . . . . . . . . . . . . 11
Web-based Configuration . . . . . . . . . . . . . . . . . . . . . . . . . . . 13
Advanced Configuration . . . . . . . . . . . . . . . . . . . . . . . . . . . 17
Wireless Settings. . . . . . . . . . . . . . . . . . 18
Network Settings . . . . . . . . . . . . . . . . . . . . . . . . . . . 20
Management . . . . . . . . . . . . . . . . . . . . . . . . . . . 21
Troubleshooting . . . . . . . . . . . . . . . . . . . . . . . . 24
Warranty . . . . . . . . . . . . . . . . . . . . . . . . . . . . . . . . . . 26
Contact Information . . . . . . . . . . . . . . . . . . . . . . . . . . . 27
Congratulations on your purchase! Your new High Power Wireless Ethernet Converter
allows you to connect any device with an Ethernet port to a wireless network. AOSS
makes for effortless setup and our Turbo G High Power technology gives superb range
and speed.
Contents
• Wireless Ethernet Converter
• Ethernet Converter Utility CD-ROM
• 7ft. Ethernet Cable
• AC Adapter
• Quick Setup Guide
• Warranty Statement
If any items are missing, please contact the reseller from whom you purchased this
product.
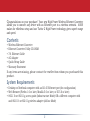
System Requirements
• Desktop or Notebook computer with an RJ-45 Ethernet port (for configuration)
• Web Browser (Firefox 1.0 or later, Mozilla 5.0 or later, or IE 5.0 or later)
• 802.11b or 802.11g access point (Infrastructure Mode) OR a different computer with
and 802.11b or 802.11g wireless adapter (Ad-hoc Mode)
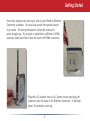
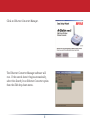
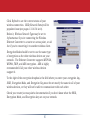
Getting Started
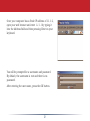
Screw the antenna into the top or side of your Wireless Ethernet
Converter as shown. You may also attach the optional stand
if you wish. For best performance, orient the antenna to
point straight up. If you want to substitute a different 2.4GHz
antenna, make sure that it has the correct RP-SMA connector.
Plug the A/C adapter into an A/C power source and plug the
connector into the back of the Ethernet Converter. It will take
about 30 seconds to boot up.
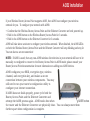
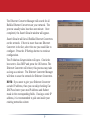
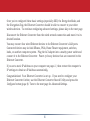
AOSS Installation
If your Wireless Router/Access Point supports AOSS, then AOSS can configure your wireless
network for you. To configure your network with AOSS:
• Confirm that the Wireless Router/Access Point and the Ethernet Converter are both powered up.
• Hold in the AOSS button on the Wireless Router/Access Point for 3 seconds.
• Hold in the AOSS button on the Ethernet Converter for 3 seconds.
AOSS will take about a minute to configure your wireless network. When finished, the AOSS LEDs
on both the Wireless Router/Access Point and the Ethernet Converter will stop blinking and stay lit. You now have a secure connection!
NOTES: If AOSS is used, then any non-AOSS wireless client devices in your network will have to be
manually re-configured to connect to the Router/Access Point in AOSS mode; please consult your
Router/Access Point documentation for more information on adding non-AOSS devices.
AOSS configures your SSID, encryption type, wireless
channel, and encryption key, and makes a secure
connection between your wireless components. You may
still need to run your router's configuration utility to
configure your internet connection.
If AOSS does not finish properly, power cycle both the
Router/Access Point and the Ethernet Converter and
AOSS button
attempt the AOSS process again. AOSS works best when
the router and the Ethernet Converter are physically close. You can always move them
further apart when configuration is complete.
Manual Configuration
If your wireless router/access point doesn't support AOSS, you'll need to configure
the access point manually. There are two ways to do this: you can use the Ethernet
Converter Manager software if you have a Windows PC on the network (98/ME/2000/XP
only), or you may use a web browser. Web browser configuration may be done with any
computer running a recent web browser, including Macintosh and Linux machines. Skip
to page 11 for web based configuration.
Configuration with Ethernet Converter Manager
If you have a Windows 98/ME/2000/XP machine with a CD-ROM drive available on your
computer network, the Ethernet Converter Manager makes it simple to configure the
Ethernet Converter. The following steps will guide you through configuring the Ethernet
Converter via the Ethernet Converter Manager.
Connect one of the Ethernet Converter's LAN ports to an open port on your network's
router, switch or hub with the included network patch cable. If there are no ports
available, you can temporarily remove a computer or other connected device and plug
the Ethernet Converter to that port. You can plug the Ethernet Converter directly to the
configuring computer, but will have to configure settings manually as described on page
17.
Once the network cable has been plugged in, plug the Ethernet Converter's AC Adapter
into an available power outlet. Then attach the power connector to the back of the
Ethernet Converter. The boot up process takes 30 seconds and is complete when both
the Wireless and Ethernet LEDs are lit.
Return to the PC designated for configuration and insert the included Ethernet Converter
CD-ROM into the PC's CD-ROM drive.
The Ethernet Converter Utility should launch automatically. If it does not, browse your
CD-ROM drive in Windows and run the setup.exe program.
Click on Ethernet Converter Manager.
The Ethernet Converter Manager software will
run. If the search doesn't begin automatically,
select the Search for an Ethernet Converter option
from the Edit drop down menu.
The Ethernet Converter Manager will search for all
Buffalo Ethernet Converters on your network. The
process usually takes less than one minute. Once
completed, the Search Results window will appear.
Search Results will list all Buffalo Ethernet Converters
on the network. If there is more than one Ethernet
Converter in the list, select the one you would like to
configure. Press the IP Settings button to continue
configuration.
The IP Address Setup window will open. Check the
box next to Use DHCP and press the OK button. The
Ethernet Converter will reboot; this process may take
as long as a minute. The Ethernet Converter Manager
will then re-scan the network for Ethernet Converters.
NOTE: If you want to give your Ethernet Converter
a static IP address, than you can skip checking Use
DHCP and enter your own IP Address and Subnet
mask in the cooresponding fields. If using a static IP
address, it is recommended to pick one inside your
existing network's subnet.
Search Results will appear again. If more than one
Ethernet Converter is present, select the proper
Ethernet Converter from the list. Then press the
Configure button.
The Ethernet Converter Manager will connect
you to the Ethernet Converter's web based
configuration tool. You will be prompted for a
username and password. By default, the username is root and there is no
password.
After entering the user name, press the OK button.
Please skip to page 13 to continue configuration.
10
Configuration without PC Software
You may also enter the Web-based Configuration Tool without using the software. This
may be necessary to configure the converter without the use of a Windows PC. Use this
method with Linux, Macintosh, other other non-Windows PCs to access the Web-based
Configuration Tool.
Refer to your operating system documentation on how to configure a Static IP address. The Ethernet Converter has an IP address of 1.1.1.1 by default. You'll need to configure
the computer to be on the same subnet; an IP address of 1.1.1.2 is recommended for the
computer.
With the included network patch cable, connect one of the Ethernet Converter's LAN
ports to an open Ethernet port on a router, switch, or hub on your network. Alternately,
you can plug the Ethernet Converter directly to the configuring computer's Ethernet port.
Once the network cable has been plugged in, plug the Ethernet Converter's AC Adapter
into an available power outlet. Then attach the power connector to the back of the
Ethernet Converter. The boot process takes less than a minute and is completed when
both the Wireless and Ethernet lights are lit.
11
Once your computer has a Static IP address of 1.1.1.2,
open your web browser and enter 1.1.1.1 by typing it
into the Address field and then pressing Enter on your
keyboard.
You will be prompted for a username and password. By default, the username is root and there is no
password.
After entering the user name, press the OK button.
12
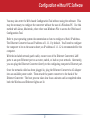
Web-Based Configuration Tool
The Web Based Configuration Tool lets you
change the Ethernet Converter's configuration. Through Web Based Configuration, you can
change the wireless network the Ethernet
Converter is associated with, the IP address of the
Ethernet Converter, and other important settings.
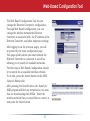
After logging in on the previous pages, you will
be greeted by the main configuration page. This page quickly shows you what network the
Ethernet Converter is connected to as well as
allowing you to search for available networks.
The first step in Web Based Configuration should
be to search for an available wireless network. To do this, press the Search button in the SSID
(Network Name) table.
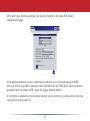
After pressing the Search button, the Search for
SSID program will find any networks in your area
that are broadcasting their SSIDs. Select the
wireless network that you would like to connect to
and press the Select button.
13
After selecting a wireless network, you will be returned to the main Web Based
Configuration page.
If the wireless network you are attempting to connect to is not broadcasting its SSID,
then you will be required to manually enter the SSID into the SSID field. After the field is
populated with the proper SSID, press the Apply Settings button.
If encryption is enabled on the wireless network you've selected, you will need to enter the
encryption key (see page 15).
14
Click Refresh to see the current status of your
wireless connection. SSID (Network Name) will be
populated now (see pages 13-14 if it isn't). Below it, Wireless Network Type may be set to
Infrastructure if you're connecting the Wireless
Ethernet Converter to a router or access point, or Ad
hoc if you're connecting it to another wireless client. Encryption Mode should be set to use the same type
of encryption as the other wireless devices on your
network. The Ethernet Converter supports WEP128,
WEP64, TKIP, and AES encryption. AES is highly
recommended if all your other wireless devices
support it.
To the right of the encryption dropbox is the field where you enter your encryption key.
SSID, Encryption Mode, and Encryption Key must be set exactly the same in all of your
wireless devices, or they will not be able to communicate with each other. Check your router/access point's documentation if you don't know what the SSID,
Encryption Mode, and Encryption key are on your network.
15
Once you've configured these basic settings (especially SSID, the Encryption Mode, and
the Encryption Key), the Ethernet Converter should be able to connect to your other
wireless devices. To continue configuring advanced settings, please skip to the next page.
Disconnect the Ethernet Converter from the wired network connection and move it to its
desired location.
You may connect four wired Ethernet devices to the Ethernet Converter's LAN ports. Connected devices may include XBoxes, PS2s, Home Theater equipment, switches,
hubs, or another computer system. Plug the AC Adapter into a nearby power outlet and
connect it to the Ethernet Converter. Power cycle any devices that are connected to the
Ethernet Converter.
If you set a static IP address on your computer on page 11, then restore the computer's
IP settings to obtain an IP Address automatically.
Congratulations! Your Ethernet Converter is set up. If you need to configure your
Ethernet Converter further, use the Ethernet Converter Search Utility and press the
Configure button (page 8). Turn to the next page for Advanced Settings.
16
Advanced Settings
Most users will never need to change any settings for their
Wireless Ethernet Converter besides the basic ones in the
main configuration window, covered on pages 13-15. If
you're one of the exceptions, you may access Advanced
Settings by pressing the blue Advanced button in the bottom
right corner of the configuration page. This is the Advanced Settings page. On the left, you
may choose from Wireless Settings, Network Settings, or
Management. When the page first opens, it's at Wireless
Settings. Changes on the Advanced Settings page are not
applied until the Set button is pressed.
17
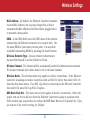
Wireless Settings
MAC Address - By default, the Ethernet Converter transmits
its own MAC address, but you may change this so that it
transmits the MAC address of the first device plugged into it
to transmit a data packet.
SSID - In the SSID field, enter the SSID name of the wireless
network that the Ethernet Converter is to connect with. Use
the same SSID as your router/access point. You may find
available broadcasting SSIDs by pressing the Search button.
Wireless Network Type - Choose between Infrastructure
(Access Point Based) or Ad-hoc (Client to Client).
Wireless Channel - The channel will be automatically selected in Infrastructure networks. For Ad-hoc networks, both clients must be set to the same channel.
Wireless Mode - The wireless mode only applies to Ad-hoc connections. If the Ethernet
Converter is making an Ad-hoc connection with an 802.11b client, then select 802.11b
from the drop down menu. If an 802.11g client is connecting to the Ethernet Converter
then select the Auto-802.11g-802.11b option.
BSS Basic Rate Set - The basic rate set only applies to Ad-hoc connections. Select the
proper rate set for the Ad-hoc client the Ethernet Converter is going to associate with. Older routers may require that you reduce the BSS Basic Rate set to Default(11b). If you
are unsure of the correct setting, try Default.
18
Wireless Settings
Frame Bursting Mode - Frame Bursting technology allows for quicker wireless network
speeds by reducing the overhead for each wireless packet. If your access point supports
it, 125* High-Speed Mode offers the best overall performance of the frame bursting modes.
You may leave this set to the 125* High Speed Mode at all times; if a compatable access
point is not available then the device will operate as a standard 802.11g device.
Wireless Output Power - The wireless output power setting changes the power of
the Ethernet Converter's internal radio. Reducing the output power can often reduce
interference with other devices. You should leave the output power set at 100% unless
you want to reduce range or interference with other 2.4 GHz devices is apparent.
Data Encryption - Select WEP 64, WEP 128, TKIP, or AES encryption from the dropbox. If
WEP is selected, then a WEP key or series of WEP keys must be entered into the WEP key
field(s). Please select whether the specific key is ASCII or HEX from the pull down list next
to the key fields. If TKIP or AES is used, then enter the pre-shared key in the WPA-PSK
field.
19
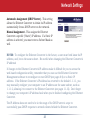
Network Settings
Automatic Assignment (DHCP Server) - This setting
allows the Ethernet Converter to obtain its IP address
automatically from a DHCP server on the network. Manual Assignment - This assigns the Ethernet
Converter a specific ("Static") IP address. If a Static IP
address is selected, you must enter a Subnet Mask as
well.
NOTES: To configure the Ethernet Converter in the future, a user must both know its IP
address, and, be on the same subnet. Be careful when changing the Ethernet Converter’s
IP address! If changes to the Ethernet Converter’s IP address make it difficult for you to access the
web-based configuration utility, remember that you can use the Ethernet Converter
Management software to reconfigure or reset DHCP (see pages 8-9) or a Static IP
address. If the Ethernet Converter's IP address has reverted to the default 1.1.1.1, you
may manually configure your computer to an IP address on the same subnet, such as
1.1.1.2, allowing it to connect to the Ethernet Converter (see pages 11-12). Don't forget
to change your computer's IP address back when you've finished configuring the Ethernet
Converter.
The IP Address does not need to be in the range of the DHCP server's scope to
successfully pass DHCP requests to network clients behind the Ethernet Converter.
20
Management
System Information - This page contains a summary of the
Ethernet Converter's settings. Settings cannot be changed
from this page. If the Ethernet Converter is obtaining its
IP address from a DHCP server, then release and renew
buttons will be present at the bottom of the page. Releasing
the IP address will make the Ethernet Converter impossible
to configure without re-initializing the device or using the
Ethernet Converter Manager.
Name and Password - These settings affect the naming and
password protection of the Ethernet Converter.
Ethernet Converter Name - The Ethernet Converter name
is a quick reference name for the Ethernet Converter. It is
recognized by the Ethernet Converter Manager.
Administrator Password - The administrator password
is used to protect the Ethernet Converter from unwanted
configuration changes. Setting the password protects
configuration changes from both web-based configuration
and the Ethernet Converter Manager.
21
Management
Configuration Limitations - Limits what kind of clients may configure the Ethernet Converter. Checking Prohibit Configuration from Wireless Clients prevents changes to configuration by clients
that are not connected directly to the Ethernet Converter. Checking Prohibit Configuration from
Wired Clients prevents configuration changes being made by any client that is directly connected
to the Ethernet Converter's LAN ports. Checking both boxes makes all further configuration
impossible. The Ethernet Converter must then be initialized before any changes to configuration
can be made. Be careful with these checkboxes!
Initialization and Reboot - This page contains settings that restart and re-initialize the Ethernet
Converter.
Initialize - Initializing the Ethernet Converter restores the
Ethernet Converter's settings to default settings. This will erase
all configuration changes made, including all passwords. All
configuration will have to be redone as though the product were
brand new. You may also initialize the Ethernet Converter with
the INIT button; see page 24.
Restart - Restarting the Ethernet Converter performs a simple
reboot similar to what would occur if the power was cycled off/on
the Ethernet Converter. No settings are lost in this case. It will take about 30-60 seconds to
reboot. The reboot is complete when the wireless LED is continuously lit.
22
Management
Firmware Update - This page allows you to update
the Ethernet Converter's Firmware. This involves
downloading a newer firmware from the Buffalo
Technology website and using this page to install it on
your Ethernet Converter. New firmware files contain new
software code that adds bug fixes, additional features,
increased performance, and revised interfaces.
To update the firmware, press the Browse button and search for the downloaded
firmware file, which you've probably downloaded to your desktop. Once you've located
it, press the Firmware Update button. The firmware update process takes about 90
seconds. Usually, your settings will be retained; you will probably not have to redo any
configuration.
Please visit http://www.buffalotech.com, select your region, and visit the support
section to check for product updates.
23
Troubleshooting
Initializing the Ethernet Converter returns it to default settings. This might be useful
if you cannot access configuration settings, have lost the password to the Ethernet
Converter, or desire to return the settings to the default factory settings.
To initialize the device, simply hold in the black INIT button on the side of the Ethernet
Converter for 5 seconds or until the DIAG light glows red. Allow a minute for the
initialization to complete. Afterwards, refer to the Quick Setup Guide or the beginning of
this User Manual to reconfigure the Ethernet Converter.
INIT button
24
FCC Compliance Statement - This device complies with Part 15 of the FCC Rules.
Operation is subject to the following two conditions: (1) This device may not cause
harmful interference, and (2) this device must accept any interference received, including
interference that may cause undesired operation.
R&TTE Compliance Statement - This equipment complies with all the requirements of
the DIRECTIVE 1999/5/EC OF THE EUROPEAN PARLIAMENT AND THE COUNCIL of
9 March 1999 on radio equipment and telecommunication terminal equipment and the
mutual recognition of their conformity (R&TTE).
* 54 Mbps is the IEEE 802.11g standard theoretical maximum data transfer rate including overhead. Actual wireless
network throughput is limited by environmental and system factors and will be less.
Copyright © 2004-2005 Buffalo Technology, Inc. All Rights Reserved.
Buffalo Technology (USA) Inc., is part of Buffalo Inc. (JAPAN), the global manufacturers of IT peripherals, including
memory, networking, and multimedia products, inside many of the world's computers. All trademarks are property of
their respective owners.
25
Warranty
6''"-0 &$)/0-0(: 130%6$5s $0.& 8*5) " 580:&"3 -*.*5&% 8"33"/5: '30. 5)&
%"5& 0' 163$)"4& 6''"-0 &$)/0-0(: 8"33"/54 50 5)& 03*(*/"- 163$)"4&3 5)&
130%6$5 (00% 01&3"5*/( $0/%*5*0/ '03 5)& 8"33"/5: 1&3*0% )*4 8"33"/5: %0&4 /05
*/$-6%& /0/6''"-0 &$)/0-0(: */45"--&% $0.10/&/54 ' 5)& 6''"-0 130%6$5
."-'6/$5*0/4 %63*/( 5)& 8"33"/5: 1&3*0% 6''"-0 &$)/0-0(: 8*-- "5 their
%*4$3&5*0/ 3&1"*3 03 3&1-"$& 5)& 130%6$5 "5 /0 $)"3(& 1307*%&% 5)& 130%6$5 )"4 /05 #&&/
46#+&$5&% 50 .*464& "#64& 03 /0/6''"-0 &$)/0-0(: "65)03*;&% "-5&3"5*0/s
.0%*'*$"5*0/4 03 3&1"*3s
)&/ 3&563/*/( " 130%6$5 */$-6%& :063 03*(*/"- 1300' 0' 163$)"4& &563/ 3&26&454
$"//05 #& 130$&44&% 8*5)065 1300' 0' 163$)"4& )*1.&/5 0' 3&563/&% 130%6$ts 50 6''"-0
&$)/0-0(: *4 5)& 3&410/4*#*-*5: 0' 5)& 163$)"4&3 -- &913&44&% "/% *.1-*&%
8"33"/5*&4 '03 5)& 6''"-0 &$)/0-0(: 130%6$5 -*/& "3& -*.*5&% */ %63"5*0/ 50 5)&
a#07& 1&3*0%
/%&3 /0 $*3$6.45"/$&4 4)"-- 6''"-0 &$)/0-0(: #& -*"#-& */ "/: 8": 50 5)&
64&3 '03 %"."(&4 */$-6%*/( "/: -045 130'*54 -045 4"7*/(4 03 05)&3 */$*%&/5"- 03 $0/4&
26&/5*"- %"."(&4 "3*4*/( 065 0' 5)& 64& 0' 03 */"#*-*5: 50 64& 5)& 6''"-0 130%6$54
6''"-0 &$)/0-0(: 3&4&37&4 5)& 3*()5 50 3&7*4& 03 61%"5& *54 130%6$54 40'58"3&
03 %0$6.&/5"5*0/ 8*5)065 0#-*("5*0/ 50 /05*': "/: */%*7*%6"- 03 &/5*5:
# ! # !
# # # " # ! # # # # " "
26
Contact Information - North America
Buffalo Technology (USA), Inc.
4030 West Braker Lane, Suite 120
Austin, TX 78759-5319
GENERAL INQUIRIES Monday through Friday
8:30am-5:30pm CST
Direct: 512-794-8533 | Toll-free: 800-456-9799 | Fax: 512-794-8520 | Email:
[email protected]
TECHNICAL SUPPORT North American Technical Support by phone is available 24 hours a day, 7 days a week.
(USA and Canada).
Toll-free: (866) 752-6210 | Email: [email protected]
27
Contact Information - Europe
Buffalo Technology UK Ltd.
176 Buckingham Avenue,
Slough, Berkshire, SL1 4RD
United Kingdom
GENERAL INQUIRIES Email: [email protected]
TECHNICAL SUPPORT Phone (UK only): 08712 50 12 60*
Phone: +353 61 70 80 50
Email: [email protected]
*Calls cost 8.5p per minute
Technical Support Operating Hours
Monday - Friday (GMT)
9:00 AM - 6:00 PM Monday-Thursday
9:00 AM - 4:30 PM Friday
28
GPL Information (North America)
Thank you for your interest in Buffalo products. Our GPL software delivery policy is outlined below.
For each individual product and revision, please send one individually packaged self addressed padded CD
shipping envelope, containing a blank CD-R to the following address:
Buffalo Technology USA Inc.
4030 W. Braker Lane Suite 120
Austin, TX 78759
Attn. GPL Department
Within the envelope containing the self addressed padded CD shipping envelope, please include a bank draft
or money order for $20 (USD) (Made out to: Buffalo Technology) to cover our handling fee, postage and CD
preparation. The CD-R should have the name of the product and revision number clearly written on the
actual CD-R (not on the insert).
We do not send GPL source in bulk on a DVD. And order confirmation is not required by the GNU General
Public License.
We are more than happy to comply with your request; however, we must ask you to comply with our GPL
distribution policy, which complies with the GNU General Public License.
Sincerely,
Buffalo Technology GPL Department
29
GPL Information (Europe)
Thank you for your interest in Buffalo products. Our GPL software delivery policy is outlined below.
For each individual product and revision, please send one individually packaged self addressed padded CD
shipping envelope, containing a blank CD-R to the following address:
Buffalo Technology Ireland Ltd
Free Zone East, Shannon, Co. Clare
Ireland
Attn. GPL Department
Within the envelope containing the self addressed padded CD shipping envelope, please include a bank draft
or money order for €20 (Euro) (Made out to: Buffalo Technology) to cover our handling fee, postage and CD
preparation. The CD-R should have the name of the product and revision number clearly written on the
actual CD-R (not on the insert).
We do not send GPL source in bulk on a DVD. And order confirmation is not required by the GNU General
Public License.
We are more than happy to comply with your request; however, we must ask you to comply with our GPL
distribution policy, which complies with the GNU General Public License.
Sincerely,
Buffalo Technology GPL Department
30