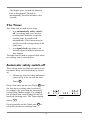
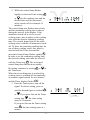
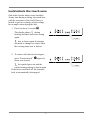
1
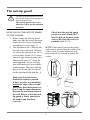
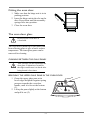
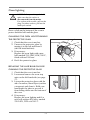
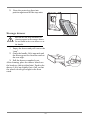
user manual
Cooker
EKC60752
Welcome to the world of Electrolux
You've chosen a first class product from
Electrolux, which hopefully will provide
you with lots of pleasure in the future.
Electrolux ambition is to offer a wide variety
of quality products that would make your
life even more comfortable. You can look at
some examples on the cover in this manual.
But now it's time to study this manual and
start using and enjoying the benefits from
your new machine. We promise that it'll
make your life a little easier. Good luck!
2
Contents
Safety ..................................................................................... 4
Installation ............................................................................. 6
Changing plinth height............................................. 6
Adjusting the level .................................................... 7
Anti-tip guard .......................................................... 8
Electrical connections............................................... 9
Base trim ................................................................. 9
Safety functions ..................................................................10
Child safety features .............................................10
Function lock...........................................................10
The cooling fan.......................................................11
The door lock..........................................................11
Description of product ...................................................12
The cooker .............................................................12
The oven ................................................................12
Before using for the first time ........................................13
Setting the clock ....................................................13
Heat the oven emty...............................................14
Removable telescopic runners .............................15
Using the ceramic hob......................................................17
Touch panel ...........................................................22
Touch panel functions ..........................................23
Timer ......................................................................28
Automatic safety switch-off ..................................28
Signal clock .............................................................30
Locking/unlocking the touch area .......................31
Using the oven....................................................................32
The oven functions.................................................32
Oven display ..........................................................33
Choice of oven functions ......................................34
Other functions .....................................................40
Oven safety switch-off ..........................................40
Practical use............................................................43
Cleaning and care ..............................................................50
Cleaning the cooker ...............................................50
Cleaning the ceramic glass plate .........................51
Cleaning the oven .................................................53
Technical data ....................................................................61
European Guarantee .............................................62
Practical advice and tips ...................................................64
Problems and remedies....................................................66
Disposal................................................................................67
3
Safety
Cooker development has progressed rapidly. You cannot always use your new cooker in the
same way as your old one. For this reason, you should read the instructions carefully and
familiarise yourself with your new cooker and what it can do. The cooker is intended for
normal household use. Please let us know if you have views or questions about your cooker
and its use. You can find our address and telephone number in the “Service” chapter.
Text marked with a WARNING TRIANGLE concerns safety. READ THIS TEXT VERY
CAREFULLY, so that you do not injure yourself or others, or damage the cooker.
Unpacking
Check that the cooker is in perfect
condition and not damaged. You must
notify the dealer immediately of any
damage that has occurred during
transport. For direct deliveries, any
transport damage must be notified to
Customer Services within seven days
according to the freight note.
The packaging can be recycled. Contact
your local authority if you do not know
where you can deposit it.
Do not forget to remove packing material
from inside the oven before it is used.
Installation
Any work required on the cooker must be
carried out by a QUALIFIED EXPERT. Any
work carried out by non-qualified people
can mean poorer cooker performance and
result in personal injury and/or damage to
property.
For cookers with a plug: Make sure
that the plug is completely pushed into
the mains socket.
The cooker is heavy. Edges and
corners with which you do not normally
come into contact, can be sharp. Use
gloves when moving the cooker.
THE ANTI-TIP GUARD must be fitted so
that you avoid the cooker tipping when
subjected to abnormal loading.
IMPORTANT! Do not place the cooker
on an extra plinth or other heightincreasing unit. This means more risk that
the cooker will tip over!
Children and the cooker
Children are by nature curious and
interested in most things, even cookers.
In the interests of safety, we should like to
mention a few things that you should
think about if you have children or
children come to visit:
There must be a clear surface of at least
40 cm (16") on both sides of the cooker.
If you have a HEATING PLATE GUARD for
your cooker, then this must be fitted. THE
DOOR LOCK must also function properly.
Never allow children to use the bladescraper.
Let children help you at the cooker,
but teach them that pots and pans, hobs
and ovens become very hot and retain
heat for some time after use. TOUCHING
THEM CAN RESULT IN BURNS.
How to use
The appliance get hot during use. Do not
touch the hob or the heatingelements
inside the oven when the appliance is in
use. Never use a cracked ceramic glass
plate. Liquids could, if they boil over, or
during cleaning, penetrate down into the
live electrical components. Switch off the
4
power supply to the cooker and contact
Service for repairs.
Never place metal objects such as
lids, knives and spoons on the hob. They
become hot if a heating zone is switched
on by mistake.
Never leave a deep fat fryer, melting
fat, paraffin or other easily flammable
substance unattended. In the event of fire,
turn off the cooker knobs and switch off
the fan. EXTINGUISH THE FIRE WITH A POT
LID, never use water.
Use only pans intended for use with
an induction hob or oven.
Check the bottoms of pots and pans.
Pans which bulge outwards tend to swivel
easily on the ceramic glass hob.
Check that the cooker is switched off
when not in use. All the knobs should be
turned to zero.
Warning! Alcohol and similar
substances, which can form explosive
gases, or other substances that can cause a
fire or explosion must not be used in the
oven.
The ceramic glass plate must be used
with the greatest care. For example,
flaming with brandy or other forms of
alcohol can result in traces of fat in the
fan igniting and causing serious fires.
Similarly, flames and burning fat spills
can cause injury to people.
Do not keep chemicals or cleaning
agents in the storage drawer.
damage to the hob. Be careful, the blade
scraper is extremely sharp.
Maintenance and service
Turn all knobs to zero before replacing a
defective oven light bulb.
Service and repairs should only be
carried out by a repair company approved
by the supplier. Use only genuine spare
parts.
At the end of the appliances
life
The symbol
on the product or on its
packaging indicates that this product may
not be treated as household waste. Instead
it shall be handed over to the applicable
collection point for the recycling of
electrical and electronic equipment.
By ensuring this product is disposed
of correctly, you will help prevent
potential negative consequences for the
environment and human health, which
could otherwise be caused by
inappropriate waste handling of this
product.
For more detailed information about
recycling of this product, please contact
your local city office, your household
waste disposal service or the shop where
you purchased the product.
Cleaning
Keep the ceramic glass hob and oven
clean. Fat and spilled material can cause
much smoke when heated and are also a
possible fire hazard.
Immediately after use (while the plate
is still hot) clean with the blade scraper to
remove sugar and spills with a high sugar
content, such as marmalade, and also any
melted plastic or foil, in order to avoid
5
Installation
Any work required on the cooker
must be carried out by a QUALIFIED
EXPERT. The cooker is heavy. Edges
and corners, with which you do not
normally come into contact, can be
sharp. USE GLOVES WHEN MOVING
THE COOKER.
When delivered, the cooker is adjusted to a
bench height of 900 mm (35.4"). The cooker
has a telescopic plinth. You can change the
height so that the cooker suits a bench height
from 848 mm (33.4") up to 933 mm (36.7").
Take care when positioning the cooker
that you do not block the ventilation outlets
(behind the cooker and at the top behind the
hood), the cooker must not be pushed in
under a tiled edge or similar.
The cooker must have a clearance on both
sides (see Safety).
Make sure that the cooker cable does not
get crushed when moving the cooker.
6
Adjusting the height of the base
If you wish to adjust the height, please read
the following points before you start.
1 Lay down the cooker gently
(SEE ILLUSTRATION). Use, for example,
the polystyrene from the packaging
between the cooker and the floor as
protection. Remember to locate a
protective layer under the lower rear
corners of the cooker sides to protect
the floor.
2 Unscrew the screws A (4 SCREWS, SEE
ILLUSTRATION). Pull out the inner base
slightly if you only wish to change the
height. Pull the brackets on which the
wheels and feet are fitted. NOTE! Be
careful, there are sharp edges under the
cooker.
3 Screw in the screws again A in one of
the holes for a bench height of 850 to
920 mm (33.4" to 36.2"). The distance
between the holes varies between
7 mm (0.28") and 14 mm (0.51")
(see illustration a).
4 Lift the cooker upright and connect it
up to the mains. Push the cooker back
into position and make sure that it is
absolutely level before fitting the
safety equipment.
Horizontal adjustment
The cooker must be level so that, for
example, fat spreads evenly in the frying pan.
Place a spirit level or a frying pan containing
water on the ceramic glass plate when you
want to check whether the cooker is level.
If necessary, from the front of the plinth,
you can adjust the cooker wheels and feet by
15 mm (0.6"). Use a screwdriver to adjust the
rear wheels and a Polygrip for the front feet.
7
A
A
A
A
14
920
A
7 7
14
14
850
14
The anti-tip guard
The anti-tip guard must be fitted to
prevent the cooker from tipping over
with abnormal loads.
The anti-tip guard only works
when the cooker has been pushed
into place.
HOW YOU FIX THE ANTI-TIP GUARD
TO THE COOKER :
1 Before fitting the anti-tip guard,
make sure that the cooker has been
adjusted to the correct height and
is standing level (see page 7).
2 The attachment (B) is fitted to the
left side when delivered. Measure
out where the anti-tip guard (A) is
to be located, 60 mm (2.4") down
from the edge of the ceramic glass
plate and 50 mm (2.0") from the
wall(cupboard). Screw it firmly
into solid material or use suitable
reinforcement. The entire anti-tip
guard (A+B) can also be located
on the right-hand side (SEE FIG. 1).
Check that the anti-tip guard
projects at least 20 mm (0.8")
into the hole in the back of the
cooker (B) when the cooker is
pushed in (SEE FIG. 2).
NOTE! If the space between the bench
cupboards is greater than the width of the
cooker, then you must adjust the side
measurement if you want to centre the
cooker..
Make sure that the surface
behind the cooker is smooth.
If there are tiles or a moulding
behind the edge of the ceramic
glass plate then there must be a
space with the same dimension
between the anti-tip guard and
the wall. This is so that the antitip guard is firmly attached to
the cooker and functions
correctly.
1
2
8
Electrical connections
Any work required on the cooker must
be carried out by a QUALIFIED EXPERT.
Any work carried out by non-qualified
people can mean poorer cooker
performance and result in personal
injury and/or damage to property.
The electrical installation is to include a
device whereby it is possible to separate all
the poles of the equipment from the power
supply, with a contact opening of at least
3 mm.
This requirement must be satisfied for
safety reasons.
The connected rating and voltage are
shown on the data plate. There is a wiring
diagram on the back of the cooker.
Decor plinth (optional accessory)
NOTE! Take due care when fitting
the base trim to the cooker. Edges
with which you do not normally come
into contact with can be sharp.
NOTE! ONLY FITS COOKERS WITH A HEIGHT
OF 900 MM (35.5").
Remove the protective plastic before use.
1 Remove the drawer from the cooker by
lifting it diagonally upwards and then
pulling it all the way out.
2 Fit the base trim by pressing it firmly
onto the base (snap fastener, no tools
needed).
3 Re-fit the storage drawer.
Bild 5
9
Safety features
Function lock
As security to prevent unauthorised use of the hob.
ENGAGING THE FUNCTION LOCK
1. Press the On/Off button
.
2. Press until a signal sounds
.
3. Then press an optional symbol
.
The function lock is now engaged.
is shown in the display if the hob turns
on. SAFE is shown in the ovendisplay if the
oven turns on.
DISENGAGING THE FUNCTION LOCK
1. Press the On/Off button
2. Press until a signal sounds
.
.
3. Then press an optional symbol
.
The display goes out and the function lock is
disengaged. The hob is automatically
switched off after a few seconds.
10
The cooling fan
The cooker is fitted with a cooling fan.
The purpose of the fan is to keep the
appliance cool.
The cooling fan starts automatically when
the oven is used. When only the hob is used,
the fan has a delayed start.
When the cooker is switched off, the fan
stops automatically when oven temperature
has decreased to 120oC.
The door lock
The door lock makes it more difficult for
children to open the door. The lock is
engaged when the cooker is delivered, but
can be disconnected as necessary.
TO OPEN THE DOOR
Move the lock to the right when you
want to open the door.
DISCONNECTING THE LOCK
Check that the oven is not hot!
Move the lock to the right, lift up and
move it further slightly to the right,
then lift the left-hand edge of the
button.
CONNECTING THE LOCK
Move the lock to the right and down.
11
Description of product
Cooker
1
2
3
4
5
1
Ceramic hob
Control panel
Oven
Storage drawer
Plinth
2
3
4
5
Oven
1
2
3
4
5
6
7
8
9
10
1
Top heat element
Heating element
Oven lighting, 40W
Meat probe socket
Fan cover
Oven lighting, 25W
Fan heating element
Bottom heat
Oven shelf runners, removable
Shelf positions
2
3
10
4
5
6
7
8
9
12
Before using for the first time
Setting the clock
When the power to the oven is connected, a
clock symbol
flashes until you have set
the time on the clock.
SET THE TIME LIKE THIS:
1 Press
or
to set the right time.
2 To change time already set, press
On/Off
. Then press until
flashes.
tills
Follow the
instructions in alternative 1.
After about 5 seconds the clock stops
flashing and the time is shown in the
display.
Now you can use the cooker.
The clock can only be changed if the child
proof lock is not activated, none of the clock
functions Cooking time
or Stop time
or any other oven function is set.
13
Heat the oven emty
Keep children under supervision!
The cooker becomes very hot.
Do not forget to remove all packing
material from inside the oven.
The oven must be burnt off before it is used for
the first time. This is done as follows:
1 Open the oven door and remove all
the accessories from the oven cavity.
2 Switch on the oven
. Select hot air
by using
or
. Select a
temperature of 200oC. The
temperature can be changed by using
and
. The oven door must be
closed.
3 Leave the oven at this setting for
about one hour.
4 Move over to the Max. grill function
by using
or
. Select a
o
temperature of 200 C. The
temperature can be changed by using
and
. The oven door must be
closed.
5 Leave the oven at this setting for
about 30 minutes.
6 Switch off the cooker
.
7 Then leave the oven door open for
about two hours and air out the
kitchen.
8 Clean the oven, the door and the
oven-step units with hot water and
washing-up liquid. Dry the oven
The first time an oven is used, there may still
be a slight smell. This will not affect the
food in any way and is not a health-hazard.
Clean the accessories
Wash the shelves, roasting pan, etc. in hot
water and washing-up liquid. Rinse and dry.
14
Telescopic runners
To prevent scratches during transport,
the telescopic runners are covered
with a protective coating when
delivered. This coating must be
removed from the runners before they
are used, otherwise it can burn fast
and damage the rails.
Note! Make sure that the cooker antitip guard is fitted, see page 8
The telescopic runners replace the ordinary
oven step units that are fitted in the cooker
when it is delivered. They consist of two
rails that can be pulled out. The shelves, the
roasting pan and the grid are laid on top of
the rails. A locating pin keeps the shelf in
position (see the illustration).
Use of the telescopic runners for facilitates
cooking. For example, when steak or chips
are to be basted, the roasting pan is easily
pulled out on the rails.
Fitting the rails
First remove the oven step units that are
fitted (see page 57). When fitting, the rails
are first inserted in the inner hole (1) and
then in the outer (2). Push into position.
MAKE SURE THAT THE LOCATING PIN IS
TURNED OUTWARDS TOWARDS THE OVEN DOOR.
The rails must be pushed in when the
oven door is closed.
15
Using grids, baking plates and roasting pan
It is important for the oven grid, the shelves
and the roasting pan to be fixed between the
stops in the front and rear edges of the rails
to prevent them from falling off the rails.
Place the baking plate/roasting pan/grid in
the rear edge and fix against the front edge.
The locating pin fits into a slot under the
edge of the baking plate/roasting pan, which
means that the baking plate/roasting pan is
held in position.The rails must be in their
pushed-in position when the grid/baking
plate/roasting pan is inserted. For the best
shelf stability, make sure that the bevelled
edge is inwards in the oven. Pull the
accessories carefully when using them so
that the plate/pan/grid does not fall off the
rails. Maximum load 20kg (44 lb.).
Using the oven grid
The locating pin is not needed when using
the grid. The oven grid shelf has a mark on
its upper surface. This marking must be at
the front (towards the oven door) when in
use. Make sure that food placed on the grid
is positioned behind the marking. Otherwise
there is a risk that it will not be cooked
properly at the front. The grid can be placed
in the roasting pan. The maximum weight to
be placed on the grid is 10kg (22 lb.).
NOTE! Make sure that the locating
pin hooks in under the baking plate
edge/roasting pan and that the baking
plate/roasting pan rests on the rails,
otherwise it can fall off the rails in the
pulled-out position. When the baking
plate/roasting pan is removed in the
pulled-out position, the rails must be
pushed back again so that the oven
door can be closed. Use oven gloves
because the rails are hot.
16
Using the ceramic hob
The hob can not be used if the oven is not switched on, see page 33.
The hob has four heating zones with:
• MIN./MAX. SIZE on the right rear zone.
• A SWIVEL WINDOW which provides
information about the zone.
• AUTOMAX, an automatic heaterwhereby the zone heats up rapidly to
the heating level you need (for
cooking/roasting) without it being
necessary to change the knob setting.
• HEAT WARNER. When you have
switched off a zone, the swivel
window lights up H as long as the
zone is hotter than about 55°C.
• AUTOMATIC SWITCH-OFF after a time.
The higher the heating level, the
earlier the zone is switched off.
The glass in the hob tolerates, heat, cold and
temperature shocks, but is sensitive to
impact. A spice jar or grinder falling onto the
plate could crack it. Never use the hob to
stand on, off-load materials onto or use as a
storage area.
17
Never use a cracked plate or an oven
with a cracked timer glass.
Liquids could, if they boil over, or
during cleaning, penetrate down into the
live electrical components. Turn off the
power supply to the cooker and contact
Service for repairs. Never lay metal
objects such as lids, knives and spoons
on the hob. They become hot if a
heating zone is switched on by mistake.
Immediately after use (while the hob
is still hot) clean with the blade
scraper to remove sugar and spills
with a high sugar content, such as
marmalade, and also any melted
plastic or foil, in order to avoid
damage to the plate.
Never leave a deep fat fryer, melting
fat, paraffin or other easily flammable
substance unattended. In the event of
fire, turn off the cooker knobs and
switch off the cooling fan.
EXTINGUISH A FIRE WITH A POT
LID, never use water.
Make sure that there is no sand, sugar
or salt on pots and pans. Sand can
cause scratches, while sugar and salt
can ruin the ceramic glass plate.
Always dry pots and pans before
placing them on the ceramic glass
plate. The coloured decor on the
ceramic glass plate can become worn
and scratched as it is used.
18
Changing zone size
MIN.
Press
for the cookingzone you want to
use and choose the disered heating setting
with
or
.
MAX.
1 Press
for the cookingzone you
want to use, the indication lamp for
the doublezone function lights.
2 Choose desired setting between 1 and
9. After being zeroed, the zone
automatically retains the setting latest
used.
Safety switch-off of the cooking zones
If one of the cooking zones is not switched
off after a certain time or the heating setting
is not changed, the cooking zone concerned
is switched off automatically.
Residual heating is shown by
(“hot”) in
the digital display for the cooking zone
concerned.
The cooking zones are switched off
automatically in accordance with the
following timetable:
•
Setting
,
•
Setting
,
•
Setting
,
after 6 hours
after 5 hours
after 4 hours
• Setting
,
,
,
after 1.5 hours
If one or more of the cooking zones should
shut off before the expiration of the stated
time, see the chapter “Problems and remedies”
19
Residual heat warner
After one or more heating zones have been
switched off, the digital display shows the
residual heat
(“Hot”) for the respective
cooking zone.
Even after the hob has been switched off, the
display does not go out until the cooking
zones have cooled down.
• The residual heat can be used to melt
foodstuffs or to hold food warm.
• Important! There is risk of burns as
long as the residual heat warner is
alight.
• Important! In the event of a power
cut, the symbol
goes out and
thereby the residual heat warning.
There is still the rusk of burns. Burns
can be avoided by being observant.
Choice of pan/frying pan
A cooker with a ceramic glass plate makes
greater demands on your pots and pans that a
cooker with heating plates. Remember the
following:
• Check the bottoms of pots and pans.
Pans with a convex bottom (bulging
outwards) tend to swivel on the
ceramic glass plate and provide poor
heating contact.
• Aluminium has good heat
conductivity, but can leave silvery
marks on the plate.
• Casseroles and pans that are made of
glass or are enamelled with deep
patterns cause more wear if they are
pulled backwards and forwards on
the plate than pots and pans made of
other materials.
20
In order to save both time and energy
the bottom of a pan or frying-pan
• must cover the zone completely. But
if the bottom is too small, then boilover can easily stick to the plate.
• must be smooth or finely patterned.
• must be absolutely flat. If the bottom
bulges too much outwards or
inwards, heating-up times become
longer.
When you buy new pans, it is advisable
to choose a stainless steel model with a
sandwich-bottom, that is to say a bottom
with layers of different metals. Certain pans
are concave when cold but become flat when
they are heated up.
21
Touch panel
3
2
1
9
4
6
5
1. Cooking zone indicators/Timer function
3. Doublezone is in use
5. Display
7. Timer
9. Heat setting selection
7
8
2.Timer display
4. On/Off with power indicator
6. Stop + Go
8. Lock
Digital display
Each of the cooking zones has a display which shows:
•
that the hob is switched on
•
selection of heat retention setting
•
-
•
Automax
•
Booster
•
residual heat
•
that the child-proof blocking unit (function lock) has been activated
•
Faulty function /Over-heating
, the selected position
22
Touch panel functions
In order to activate a function, hold one
finger on the desired area until the associated
control lamp lights up or goes out and the
desired function is activated.
Switching on the hob
If the hob is to work, the oven must be
switched on. Press
and the symbol
is
shown in the oven display.
The hob is switched on by using the touch
area “On/Off”
. Press On/Off
for
about 2 seconds. The digital display shows
~ 2 sek.
.
When you have pressed On/Off to start the
hob, a heating setting must be selected
within about 10 seconds or a time set on the
Timer (egg-timer function)
Switch off the hob
In order to switch off the hob completely,
On/Off
must be activated. Press
~ 1 sek.
“On/Off”
for about 1 second.
Erase the digital display.
When one of or all the cooking zones are
switched off, the residual heat is shown
(“Hot”) for the zone concerned in the digital
display.
Selection of heating setting
To set or change the setting from
for the desired cooling zone.
Area
increases the heat.
Area
decreases the heat.
to
23
Selection of heat retention
All four cooking zones are fitted with a heat
retention setting
Use area
position
.
to set the heat retention
.
Choose Stop+Go
The Stop+Go function switches all the
connected cooking zones to heat retention
setting at the same time and then back to the
earlier heating setting. This function is
suitable for a short interruption before
continuing with cooking, for example to
answer the telephone.
Press
and the heat retention position
is shown.
To switch off the function, press
and the
earlier heating setting is shown in the
display.
The Automax function
This cooker is fitted with a special automatic
heating system called Automax.
The function is engaged each time you
wish to use it. It works like this:
You select the setting for the heat that you
consider suitable for cooking/roasting. The
heating zone starts at the highest heat setting
and goes over automatically to the selected
setting after a certain time.
24
Cooking/roasting with Automax
This is how you activate the function.
NOTE! This must be done each time you
wish to use the automatic system.
1 Set the function AUTOMAX, A appears
in the display.
2 Then make the desired setting for
cooking/roasting. It takes about
5 seconds before A lights up in the
indication area.
The heater zone display shows A. This
implies that the heating zone operates at
maximum heat for a certain time, depending
on the heating setting selected. See the
diagram.
When the time has expired, there is
automatic switch-over to the set value and the
letter A is no longer shown.
If the setting is changed during heating
with AUTOMAX this function disappears and
re-setting must be carried out.
In general it can be said that settings 2–5
are suitable for cooking and settings 6–8 for
roasting. For heat retention, setting 1 is
suitable. But, as usual, you must experiment
to find the setting and heating zone that is
best for you and your pots and pans.
9
8
AUTOMAX approx. minutes
7
6
5
4
3
2
1
0
1
2
3
HEAT SETTING
4
5
6
7
8
Here is a little advice concerning the right
heating setting and suitable heating zone.
Each zone corresponds to a number in the
tables (SEE ILLUSTRATION).
Cooking
porridge (oats, rye)
Potatoes
PORTIONS
ZONE
SETTING
2
1,2,4
3
4
3
3
2-4
1,2,4
3-4
25
ONE
PORTION
3 pc
9
Cooking
PORTIONS
ZONE
SETTING
ONE
PORTION
2
1,2,4
2
3/4 dl
4
1,2,4
3
4-6
3
3
4-8
3
4-5
Melting butter
1,2,4
1
Melting block chocolate
1,2,4
1
Rice
Root vegetables
Roasting
Entrecôte
Pork chops
Meat balls
Pancakes
Potatoes,
raw
Eggs
ZONE
SETTING
3
7-8
5
7-8
3
6
5
6
3
6-7
5
6-7
3
7
5
7
3
6
5
6
3
6-7
5
6-7
1
2
5
26
4
3
Switching off a cooking zone
To switch off the heat retention setting, press
at the same time
with
and
or zero the area
.
Using the hob with activated locking function
(To engage the function lock, see the chapter Safety, page 10).
Even if the function lock is activated, the
hob can be used, but the next time that the
hob is switched on, the function lock is
again activated.
1. Switch on the cooking zones.
If the function lock is activated, this is
shown:
.
2. Press at the same time on two optional
areas for the heating positions and for
about 1 second
and
.
A signal sounds as confirmation.
The cooking zones and settings can be set
as usual until the hob is switched off again.
~ 2 sec.
~ 1 sec.
Disengaging the function lock
1. Switch on the cooking zones
If the function lock is activated, this is
shown
.
~ 2 sec.
2. Press the area “Function lock” for
about 3 seconds.
A signal sounds as confirmation.
~ 3 sec.
3. Press an optional heating setting
.
27
The display goes out and the function
lock is disengaged. The hob is
automatically switched off after a few
seconds.
The Timer
The Timer can be used in two ways:
• as a Automatically safety switchoff. A cooking time is set as for a
cooking zone and after a time the
cooking zone is switched off
automatically. This function can be
used for several cooking zones at the
same time.
• as a signal clock (egg-timer). An
acoustic signal is heard when the set
time expires.
The timer can be used as a signal clock when
no cooking zone is switched on.
Automatic safety switch-off
The cooking zones in which you want to use
automatic safety switch-off must be turned
on.
1. Choose the zone for which automatic
switch-off is to be set with the area
Timer
.
Press a few times on the area Timer
and
the first active cooking zone is selected
according to the clock and the associated
control lamp flashes rapidly. For example
the left-hand rear control lamp for the lefthand rear cooking zone. The Timer display
shows
.
Press repeatedly on the Timer area
select the next active cooking zone.
to
28
2. While the control lamp flashes
rapidly, set the area Timer setting
or
for this cooking zone and the
desired time until the automatic
safety switch-off (for example 15
minutes).
The control lamp now flashes more slowly
and the remaining cooking time is shown
during the process in the display. If the
automatic switch-off is set for several
cooking zones, then it applies to the cooking
zone with the shortest remaining cooking
time. The control lamps light for the other
cooking zones with the set automatic switchoff. To show the remaining cooking time for
one of these cooking zones, they must be
selected with the Timer area and the
associated control lamp flashes rapidly
.
In order to set the remaining cooking time,
the desired cooking zone must be selected
with the Timer area
. The associated
control lamp then flashes more rapidly.
Re-setting continues by setting
or
in
the Timer area.
When the set cooking time is reached, the
cooking zone is switched off automatically,
an acoustic signal sounds for two minutes
and the Timer display flashes
.
3. Press the Timer area to turn off the
signal. For faster setting, press or
until the desired figure is reached
or
If you press first on the Timer
~ 1 sec.
setting area
, the time setting
starts at 99 minutes.
If you press first on the Timer setting
area
, the time setting starts at 1
minute.
29
Switching off the automatic switch-off earlier
There are two possible ways to switch off
the automatic switch-off earlier:
SWITCH OFF THE COOKING ZONE AND THE
Re-set the desired cooking zone to zero
TIMER AT THE SAME TIME.
with
.
The cooking zone and Timer are disengaged.
THE TIMER IS DISENGAGED - THE COOKING ZONE REMAINS ACTIVE
1. Choose the desired cooking zone
with the Timer
.
The associated control lamp then flashes more rapidly.
2. Set the Timer
with Timer setting
.
Only the Timer is switched off, while the cooking zones remain active.
Signal clock
The hob must be connected but no cooking
zones may be switched on.
1. Press the Timer area
.
The Timer display shows
2. Set the desired time with the Timer
setting area
or
.
After a few seconds the signal clock is
activated and the remaining cooking time is
shown.
Press the Timer area to alter the residual
cooking time and change the time with the
Timer setting area or
.
After the set time has expired, an acoustic
signal is heard and the Timer display flashes
.
3. Press the Timer area
the signal.
to turn off
30
Lock/unlock the touch area
(THE OVEN TOUCH AREA IS ALSO LOCKED)
At any time during cooking, the touch area,
with the exception of the On/Off area, is
locked to prevent a change of the settings,
for example when drying the hob.
1. Press for about 1 second.
The display shows
during
locking and later shows the setting
again.
~ 1 sec.
this is shown again if attempts
are made to change set values when
the cooking zone area is locked.
2. To remove the function lock again,
press “Function lock”
about one second.
again for
the symbol goes out and the
earlier heating setting is shown again.
If the hob is switched off, the function
lock is automatically disengaged.
31
~ 1 sec.
Using the oven
It is normal for steam and condensation to form on the oven door. This condensation is
from the food being cooked and does not influence safety or oven function.
The oven is fitted with removable shelf steps with five levels
The oven functions
THE OVEN HAS THE FOLLOWING FUNCTIONS:
Hot air
Annular element and fan
Top/bottom heating
Top heating element and bottom heating
element (starts with automatic Quick start
which becomes top/bottom heating when the
selected temperature is reached)
Pie/pizza function
Lower element, annular element and fan switched on
Low temperature roasting
Annular element and fan (120oC for 10 minutes and then 80oC)
Turbo Max Grill (gratin preparation)
Max Grill (grill element and upper heating element) and fan
Max. Grill
Grill element and upper heating element
Heat retention setting
Upper element and lower heating elements. (Pre-set at 80oC)
Thawing/drying setting
Bottom heating element and fan (From 30oC)
Thawing
Lighting and fan.
Lighting
32
Oven display
USER INSTRUCTIONS
•
•
•
Switch on the oven by pressing
.
When the selected function lights up, the oven starts to heat up.
The user time shows how long the oven has been utilised. The time is shown
only if none of the clock functions, the Signal clock symbol
, Oven time
•
•
or End time
have been set.
The oven lighting goes on when an oven function is selected.
A signal is heard when the desired oven temperature has been reached.
•
Switch off the oven by pressing
.
Be aware of if you swithch off the oven the hob will be switched off as well!
To continue using the hob after finished using the oven, make sure that no ovenfuction
is in use but the ovendisplay still is on, see page 34.
33
Choice of oven functions
1 Start the oven with the
button.
2 Press
or
until the desired
oven function lights up in the display.
• A temperature starts to light in the
display.
• Unless the temperature is changed
within 5 seconds, the oven starts to
heat up.
THE OVEN FUNCTION CAN BE CHANGED WHILE THE OVEN IS IN OPERATION.
Changing the oven temperature
Press
or
temperature.
to increase or decrease
Switch off the oven function
Before switching off the oven, press
or
until no oven function is shown in the
display.
34
Switch off the oven
Switch off the oven by pressing the
button.
Heat indicator
HEATING UP
When the oven function has been selected,
the indicator starts to flash how much the
oven has heated up.
If Quick start is functioning, then a “running
pillar” is seen (this functions only for the
oven function top/bottom heating)
SWITCHING OFF
When the oven functions have been
switched off, the indicator lights up to show
that there is residual heat in the oven.
Using the clock functions
•
•
After a clock function has been selected. the associated function flashes for
about 5 seconds. During this time the desired times can be set or changed with
the button
or
.
After the desired time has been set, the function flashes again for about
5 seconds. Then the function lights up. The set time starts to count down.
Checking the set or remaining time
Press repeatedly on the button Function choice
flashes and the set or remaining time is shown.
until the respective clock function
Using the residual heat with the clock functions Cooking time
and Stop time
When the clock functions Cooking time
and Stop time
are used, the oven
switshes off the heating elements after 90% of the set or calculated time. The remaining
residual heat is used to continue the cooking process up to the end of the set time.
35
The signal clock
To programme a time. A signal sounds when the time has expired.
This function has no effect on the oven.
1. Press
Press the
. The clock symbol lights up.
button until
flashes.
2. Select the desired time with
the buttons.
or
The remaining time is shown after about
5 seconds. The signal clock
lights up.
A signal is heard when 90% of the time has
passed.
The signal sounds for one minute when the
set time is reached “00.00” and
flash.
Press one of the buttons to swiitch off the
signal and the symbol in the display.
36
Cooking time
Use this function to determine how long you
want the food to be in the oven.
1. Press
. The lamp lights up.
2. Select the oven function and temperature.
Press
until
flashes.
3. Select the desired time by pressing the
or
buttons (max. 09.59 hours.).
The cooking time
lights up.
When the time reaches “00.00” and Cooking
time
flashes, a signal sounds for
2 minutes. The oven is automatically
switched off.
In order to switch off the sound and the
symbol in the display, press one of the
buttons.
37
Stop time
Here you set the time that you want the oven
to switch off.
1. Press
. The lamp lights up.
2. Choose oven function and temperature.
Press
3.Use the
time.
untils Stop time
and
flashes.
buttons to select top
Stop time
lights up and the time is
shown in the display.
When the time reaches “00.00” and Stop
time
flashes a signal sounds for
2 minutes. The oven is switched off
automatically.
In order to switch of the sound and the
symbol in the display, press one of the
buttons.
38
Cooking time
and Stop time
Cooking time
and Stop time
used simultaneously.
can be
1. Press
. The lamp lights up.
2. Select oven function and temperature.
Press Cooking time
and set the desired
cooking time (for example 1 hour).
3. Press
to set the desired finishing time
when you want the food to be ready (for
example 2.05 p.m.).
Cooking time
and Stop time
light up
in the display.
The oven starts automatically after the preset time (for example 1.05 p.m.)
When the oven time has expired, a signal is
heard for 2 minutes and the oven is switched
off automatically (for example 3.05 p.m.).
To switch off the sound, press one of the
buttons.
39
Other functions
Switching off the display
You can save energy by switching off
the clock display
SWITCHING OFF THE CLOCK DISPLAY
1. If required, switch off the appliance
using the On/Off
2. Press the Selection
button.
button and
button at the same time until the
display goes out.
As soon as the oven is switched on
again, the display comes on
automatically. When the appliance is
switched off again, the cock display
goes out again. To have the clock
display on permanently again, you
must set the clock again.
SWITCHING ON THE CLOCK DISPLAY
1. If required, switch off the appliance
using the On/Off
2. Press the Selection
button.
button and
button at the same time until the
display is visible again.
Child safety device
As soon as the child safety device is set, the
appliance can no longer be switched on.
ACTIVATE THE CHILD SAFETY DEVICE:
1. If necessary, switch on the appliance
using the On/Off
button.
No oven function must be selected.
40
2. Press and hold the Selection
and
buttons at the same time, until
“SAFE” appears in the display.
The child safety device is now set.
CANCELLING THE CHILD SAFETY DEVICE
1. If necessary, switch on the appliance
using the On/Off
button.
2. Press and hold the Selection
and
buttons at the same time, until
“SAFE” disappears from the display.
The child safety device is now cancelled
and the appliance is again ready for use.
Button lock
To ensure that oven functions set are not
accidentally altered.
ACTIVATING THE BUTTON LOCK
1. If necessary, switch on the appliance
using the On/Off
.
2. Select the oven function.
3. Press and hold the Selection
and
buttons at the same time, until
“LOC” appears in the display.
The button lock is now engaged.
CANCELLING THE BUTTON LOCK
Press and hold the Selection
and
buttons at the same time, until “LOC”
disappears from the display.
The button lock is automatically lifted when
the oven function is switched off.
41
Oven safety switch-off
If the oven not swiched off after a
certain time, or if the temperature is
not modified, it switches off
automatically. The last temperature
set appears in the temperature
display.
THE OVEN SWITCHES ITSELF OFF WHEN
THE OVEN TEMPERATURE IS:
30 - 120oC
120 -
200oC
o
200 - 250 C
after
12.5 hours
after
8.5 hours
after
5.5 hours
250 - maxoC after
3.0 hours
USING THE APPLIANCE AFTER A SAFETY CUT-OUT
Switch the oven off completely.
It can then be switched on again.
The safety cut-out is cancelled, if the
clock function Cooking time
Stop time
/
or the oven function
Low temperature cooking
is set.
42
Practical use
Never place aluminium foil, a
roasting pan or a shelf directly on the
bottom of the oven. If the bottom
heater is blocked, the enamel can be
damaged by over-heating.
The oven becomes hot when used,
KEEP AN EYE ON CHILDREN.
If the temperature changes and/or the food is
placed unevenly, for example pizza, there is a
risk that it will warp. The shelf will return to
its original form when it cools down.
How do you utilise the various functions
when you use the oven? Here is some useful
advice and a few tips about the best way to
utilise the different oven functions for various
types of food preparation:
Baking
Test sponge cakes with a probe about five
minutes before the end of the cooking time.
Then you have the opportunity to shorten or
lengthen the cooking time. The result can be
affected by the recipe and the material,
colour, shape and size of the cake tin. TOP/
BOTTOM HEATING provides even colouring.
THE HOT AIR PRINCIPLE
An annular heating element round the fan
heats up the air, which is then spread through
the air channels in the oven rear wall by the
fan. The hot air circulates in the oven before it
is once again sucked in through the fan grille.
Heat is transferred quickly and effectively,
and this generally means that you can use a
lower oven temperature than with upper and
lower heating. Lower the temperature by 1520% if the recipe says that you should use a
temperature of between 160 and 225°C. The
higher the temperature, the greater the
decrease. At temperatures over 225°C it is
better to use upper and lower heating.
43
Baking with hot air
With HOT AIR, baking becomes more
rational, since two plates used at the same
time in the oven means a shorter overall
baking time. Browning can be rather
uneven, especially if the rolled-out dough
has not risen properly.
Is the result not what you expected? Read
“Practical advice & tips” on page 64, for tips
to solve your baking problems.
Cooking
Follow the recommendations in the table.
Preparing food using hot air
is used for cooking at several levels
at the same time, for example meat loaf and
meat balls as well as for the preparation of
complete meals, starters, main courses and
dessert. Remember to choose courses that are
to have the same temperature. If the courses
require different times, adapt the time that
you put them in the oven so that they are
ready to serve in the order you wish.
HOT AIR
44
Roasting
Roasting in the oven is convenient and
practical with both TOP AND BOTTOM
HEATING and HOT AIR. Beef steaks, such as
roast beef and fillets, are juiciest when
cooked at 125°C, but take a little longer time
than at a higher oven temperature. Choose an
oven-proof dish with low edges into which
the roast just fits, this avoids the stock from
drying in. Roasting a ham often results in alot
of stock. Therefore use a large roasting dish
or roasting pan and be careful when
removing it from the oven.
If you use a roasting bag, cut a hole in one
corner before putting it in the oven. This
decreases the risk of burns from hot steam
when the bag is opened.
Using the roasting thermometer
Be careful not to burn yourself on
the heating coils in the top of the
oven, or on the oven step units
when you connect or disconnect the
contact to the roasting thermometer.
Use oven gloves.
The roasting thermometer tolerates
temperatures of between 30 and 99°C. Before
starting the oven, remove the cover cap that
protects the thermometer outlet from dirt.
Use only the original thermometer and make
sure that no part of the thermometer comes
into contact with the top heating element.
For the best result, the tip of the
thermometer must be in the centre of the
steak which heat reaches last. Oven heat
influences the thermometer, therefore the
whole tube must be inside the meat.
Remember that the thermometer can show
the wrong temperature if it comes into
contact with fat or bone.
Put in the food from a cold oven.
45
SETTING
This is how to use the roasting thermometer:
1 Stick the thermometer into the meat.
2 Connect the thermometer into the
outlet in the oven (right-hand side).
3 Start the oven
.
4 60ºC is the pre-set temperature. You
can now set the desired temperature
by pressing
and then
or
.
The actual temperature and the
desired temperature are shown in the
information window
(SEE ILLUSTRATION). The information
window follows the temperature
increase in the meat.
5 Choose function and temperature.
When the desired temperature in the meat
is reached, a signal sounds and the oven
switches off.
6 To switch off the sound, press one of
the buttons.
The roasting thermometer is hot. You
can easily burn yourself when you
take the thermometer out of the oven
outlet.
7 Disconnect the thermometer from the
oven outlet and take out the steak.
NOTE! The oven and the thermometer
are hot.
46
To check or change the temperature
•
Press
until the roasting
•
thermometer function
flashes and
the chosen temperature shows in the
display.
If you want to change the
temperature, use
and
.
To check or change the oven temperature
•
If you want to change the
temperature, use
and
.
Turbo Max Grill
(gratin preparation)
With Turbo Max. Grill, the food is ready
faster and has more even colouring tham
with the grill function. Grill the heating
element provides more even colouring and
the fan circulates the hot air. Perfect for use
with “special” courses, such as grilled ham
which is to have the same colour all round.
Max. Grill
The size, marble pattern (interspersed fat),
the shape, quantity and temperature of the
meat to be grilled all affect the time and the
result. Fish and white meat (poultry, veal and
pork) do not brown as easily as red meat
(beef and game). Grill oil and/or grill spices
give a better colour, but increase the risk of
burning the surface of the meat.
The best grill result is achieved if the food
does not come directly from the refrigerator.
Dry it, put it on the oven grid and season as
desired. Place a roasting pan, preferably lined
with aluminium foil, under the grill to catch
the fat, etc. that drips off. Pork chops, steaks,
fish fillets, etc. should be placed high up in
47
the oven while thick spare ribs, etc. should be
placed in the lower part of the oven.
Select
and set the desired temperature,
max. 250ºC. Start grilling after 3-5 minutes
pre-heating. Watch carefully, and turn over
at least once during cooking. Grilling for too
long gives dry, tough and, in the worst case,
burnt food. The oven door must be closed
during grilling.
Pie/pizza position
This function works excellently when
preparing pies, gratin or pizza. When
preparing pizza, place it in the middle slot.
Use a baking shelf instead of a roasting pan
to prevent the edges from being burned.
When using light-coloured or glass forms,
place the food in the lower section of the
oven and when using dark-coloured forms,
for example with non-stick coating, place
the food in the middle of the oven.
Low temperature roasting
Choose function
and set the desired
programme (120oC or 150oC) Low
temperature roasting can be used for food
that is suitable for cooking at low
temperature for a longer time, about 4-5
hours. When roasting small steaks, complete
fillets or thick beef, they should be quickly
browned before being placed in the oven.
When planning cooking, remember that it
takes time before the food is ready.
Beef, pork, game and lamb steaks can be
cooked to advantage during the night. It is
advisable to use a roasting thermometer.
Low temperature cooking can also be
used to dry fruit and mushrooms.
48
Heat retention setting
To keep food warm.
Drying/Thawing
For thawing frozen food.
Thawing
When thawing meat, fish and glazed or filled
baked products, such as Swiss rolls, the
temperature should be set at zero.
Grids or shelves can be placed in several
slots when there is much to thaw. Timing can
not be precise, so it is always a good idea to
check with a probe.
49
Cleaning and care
Do not use a steam cleaner to clean
the cooker!
Cleaning the cooker
The easiest way to clean the oven is by using
a clean cloth, hot water and a little washingup liquid directly after the oven has been
used. NEVER USE SCOURING AGENTS OR
OTHER ABRASIVE SUBSTANCES.
Note that the anti-tip guard
does not function when you pull
the cooker out to clean behind it.
Handle
Never use scouring agents or other agents
that could cause scratches such as sponges
with an abrasive surface. Only use soft
sponges or cloths.
Cleaning stainless steel surfaces
(APPLIES ONLY TO STAINLESS STEEL COOKERS)
The easiest way to clean stainless steel
surfaces is by using a soft cloth and the clean
agent supplied. You can also try window
cleaning agents. If the surface is very dirty,
you can try spirit such as technical spirit.
NEVER USE SCOURING AGENTS or other
abrasive substances. Neither should you use
scouring materials such as wire wool or
sponges with an abrasive surface.
50
Cleaning the ceramic hob
Immediately after use (while the plate
is still hot) clean with the blade
scraper to remove sugar and spills
with a high sugar content, such as
marmalade, and also any melted
plastic or foil in order to avoid
damage to the plate.
IF THE HOB IS VERY DIRTY:
1 Remove stains with the blade scraper
(see below).
2 Use cleaning agents when the heat
warner has gone out. Shake the
bottle and spray a couple of narrow
strips onto the plate. Rub clean with a
damp cloth or kitchen tissue.
3 Remove any excess with a damp
cloth, otherwise it can etch into the
plate the next time that it is heated.
Wipe dry.
51
The blade scraper
KEEP THE BLADE SCRAPER OUT OF
THE REACH OF CHILDREN. Use the
blade scraper with care, the blade is
extremely sharp.
Use the scraper to remove anything that has
boiled over and stuck on the ceramic glass
plate. Do not use the scraper or other sharp
implements on the silicon edge since this
implies a safety risk and can cause damage.
HOW TO USE THE BLADE SCRAPER :
1 Pull back the guard so that the blade is
visible (SEE ILLUSTRATION).
2 Make sure that the blade is clean and
whole, otherwise it could damage the
plate. You can buy new blades at a
hardware store.
3 Hold the scraper at an angle of about
45° and scrape clean. You can press
the blade hard against the plate
without damaging it.
4 Carefully wipe off any dirt from
the blade with kitchen tissue.
5 After use, press the guard forward so
that it covers the blade. Store the
scraper out of the reach of children.
REPLACING THE BLADE:
1 Open the scraper by fully loosening
the screw (no screwdriver needed) and
fitting the new blade at the front edge.
2 Assemble the scraper and tighten
the screw again.
3 Press the guard as far forward as it
will go to protect the blade.
52
Cleaning the oven
In order to facilitate cleaning, the step units
or baking plate rails should be removed, see
page 57.
Removing the baking plate rails
The baking plate rails are removed in the
same way as the step unit, see page 57.
THE CATALYSIS ENAMEL on the oven walls and
top is porous and has a certain self-cleaning
effect. The oven bottom, on the other hand is
made of a SMOOTH and rather harder ENAMEL
from which you can scrape off spilled
material with a spatula or something similar.
CATALYSIS ENAMEL
The oven gets hot during use. Keep
an eye on children.
Dirt on the enamel is partly burnt off when
the oven is used. If there are flecks on the
enamel, burn off the oven at the highest
temperature with top/bottom heating for
30–60 minutes. Remove stubborn flecks, for
example fat, like this:
1 “Drench” the catalysis enamel with
soft soap and hot water. Use a nylon
brush on the flecks. Leave it alone for
one hour.
2 Then turn on
top and bottom
heating and the highest temperature.
3 Switch off the oven after three hours.
Never use oven cleaning compound or sharp
objects on the catalysis enamel.
53
THE SMOOTH ENAMEL
The following should be done if the oven
bottom is very dirty:
1 Spill or boil-over that has become
stuck can be loosened with a spatula
or something similar.
2 Spread soft soap on the bottom of the
oven with a sponge.
3 Close the door. Set the oven at 100°C
with
top and bottom heating for
about 10 minutes.
4 When the oven has cooled down,
rinse it with clean water or, if
necessary, rub carefully with a soap
pad. Wipe dry.
The oven door
The oven door can be removed for cleaming.
WHEN THE OVEN DOOR OPENS, THE LAMPS LIGHT AND
THE HOT AIR FAN STOPS.
Removing the oven door
1 Open the oven door about one-third
of the way (parking position).
2 Grasp the sides of the oven door with
both hands and pull the door off the
oven.
3 Lift off the door
54
Fitting the oven door
1 Make sure that the hinge unit is in its
parking position.
2 Insert the hinge unit in the slot on the
door. Press down until the assembly
spring clicks into position.
3 Close the oven door.
The oven door glass
Do not use the oven door as
a foot-hold.
The oven door is made up of two parts with
heat reflecting glass to give a lower surface
temperature. The inner glass panes can be
removed for cleaning.
CLEANING BETWEEN THE GLASS PANES
Take care that you do not damage the
door glass. Formation of cracks at
the edges could cause it to break after
being heated a few times.
REMOVING THE UPPER GLASS PANE IN THE OVEN DOOR
1 Grasp the upper glass pane at its
lower edge and push it against spring
pressure towards the oven door
handle, until it is free at the bottom
(1).
2 Lift up the pane slightly at the bottom
and pull it out (2).
55
REMOVING THE CENTRAL GLASS IN THE DOOR
1 Grasp the central glass pane at its
lower edge and push it towards the
oven door handle, until it is free at
the bottom (1).
2 Lift up the pane slightly at the bottom
and pull it out (2)
3. Clean the glass
FITTING THE CENTRAL GLASS PANES IN THE DOOR
1 Insert the central glass panes in order,
diagonally from above into the glass
retainer on the handle side (1).
2 Lower the central pane and push it
towards the lower edge of the door
until it will go no further against the
lower retainer (2).
FITTING THE UPPER GLASS IN THE DOOR
1 Insert the upper glass diagonally
from above into the glass retainer on
the handle side (1).
2 Lower the glass plate. Lay the pane
against spring pressure on the handle
side in front of the retaining profile
on the lower edge of the door and
push it under the retaining profile (2).
The glass pane must be firmly in
position!
56
Oven step units
It is possible to remove the oven step units
on both the right and left side walls to make
it easier to clean the side walls.
REMOVING THE OVEN STEP UNITS:
First pull out the step unit at the front from
the side of the oven (1) and then hook it off
at the back (2).
INSERTING THE OVEN STEP UNITS
The rounded edges of the bars must point to
the front!
Re-fit the oven step unit again by first
hanging it up at the back (1), insert it at the
front, and then push it into position (2).
Cleaning the baking shelf rails
Loosen the step units (see page 57). To
facilitate the removal of dirt and fat, they
can be soaked in water with washing-up
liquid. Wash by hand. NOTE! DO NOT USE
THE DISHWASHER. This removes all the fat
and impairs their function.
57
Super Clean accessories
These accessories have a dirt-repellent
coating and a long life if they are treated
correctly
NOTE! Do not place SUPER
CLEAN accessories on a hot ceramic
glass plate since this can damage
them.
The accessories tolerate a temperature
of up to 250°C. Never heat them
without food or dough.
Wash the accessories thoroughly in hot water
and washing-up liquid before using them for
the first time.
If you follow this advice and these tips,
then your SUPER CLEAN accessories will
last for a long time and remain easy to clean:
• Use tools made of plastic or wood
instead of metal, which can damage
the plate.
• Remember that pots and pans with
rough surfaces can damage the
accessories.
• Clean the accessories with a soft
sponge or a dish-brush in hot water,
with the possible use of washing-up
liquid. Never use the dishwasher.
• Never use wire wool or sharp objects
when cleaning.
58
Oven lighting
NOTE! Before you change the bulb,
make sure that the cooker is
disconnected from the mains.
For cookers with a cable, pull out the
plug. For other cookers, pull out the
multi-pole switch.
Place a cloth on the bottom of the oven to
protect both the bulb and the glass.
CHANGING THE OVEN LIGHT/CLEANING
THE PROTECTIVE GLASS
1 Check that the oven is not hot.
2 Unscrew the protective glass by
turning it to the left and clean it.
(SEE THE ILLUSTRATION).
3 If necessary:
Replace the oven light with a new
bulb marked 230–240V, 40W, 300°C,
fitted with an E14 base.
4 Re-fit the protective glass.
REPLACING THE LAMP BULB ON PAGE
CLEANING THE PROTECTIVE GLASS
1 Check that the oven is not hot.
2 Loosen and remove the oven step
units on the left-hand side (see page
57)
3 Loosen the protective glass with the
aid of a narrow, blunt object (such as
a teaspoon) and clean it. Hold your
hand under the glass to prevent it
from falling down onto the bottom of
the oven.
4 If necessary:
Replace the oven lighting and fit a
new bulb with an E14 base, marked
230-240V, 25W och 300° C.
59
5
Press the protective glass into
position again and fit the step units.
Storage drawer
NOTE! Do not keep chemicals or
cleaning agents in the storage drawer.
Do not stand in the oven drawer or on
the handle.
1 Empty the drawer and pull it out to the
“stop”.
2 Grasp the handle, lift it upwards and
the drawer goes free from the catch at
the rear edge.
3 Pull the drawer completely out.
After cleaning, place the drawer wheels on
the brackets. (SEE ILLUSTRATION). Push in the
drawer. Lift it up slightly first of all, so that
the wheels do not get caught in the front
catch.
60
Technical Data
We reserve the right to make changes. This appliance meets the requirements of EC Directives 89/336/EEC
and 73/23/EEC.
EKC60752
Width (mm):
596
Height when delivered (mm):
900
Depth:
595
ENERGY EFFICIENCY CLASS
A
ENERGY CONSUMPTION
Top/bottom heating (kWh):
0.92
Hot air (kWh):
0.79
COOKING TIMES
STANDARD LOAD
Top/bottom heating (min):
41
Hot air (min):
38
61
European guarantee
This appliance is guaranteed by Electrolux, in each of the countries listed in the following
page, for the period specified in the appliance guarantee or otherwise by law.
If you move from one of these countries to another of these countries the appliance
guarantee will move with you subject to the following qualifications:
• The appliance guarantee starts from the date you first purchased the appliance
which will be evidenced by production of a valid purchase document issued by
seller of the appliance.
• The appliance guarantee is for the same period and to the same extent for labour
and parts as exists in your country of residence for this particular model or range
of appliances.
• The appliance guarantee is personal to the original purchaser of the appliance
and cannot be transferred to another user.
• The appliance is installed and used in accordance with instructions issued by
Electrolux and is only used within the home, i.e. is not used for commercial
purposes.
• The appliance is installed in accordance with all relevant regulations in force
within your new country of residence.
The provisions of this European Guarantee do not affect any of the rights granted to
you by law.
62
63
Practical advice and tips
Problems
Cause
Remedy
Bread/yeasted doughs,
sponge cakes turn out
flat.
If the oven temperature is
too low, the mixture can rise
and then sink and become
flat.
Check the set temperature
against the recommended
temperature in the table or
recipe.
Bread/yeasted doughs have Check the rising time against
that recommended in the
not risen properly.
If the rising time after rolling recipe.
is too long, the result will be
flat. Bread/yeasted doughs
should rise at room
temperature, out of
draughts. The dough should
spring back after light
pressure on the surface.
Too little yeast or baking
powder.
Check in the recipe that you
have used the correct
quantities.
If the fat/liquid mixture is
too hot, it will affect the
yeast action.
The correct temperature of
the liquid is 37° for fresh
yeast; for dry yeast see the
instructions on the packet.
Too little liquid, too much
Bread/yeasted doughs,
sponge cakes turn out dry. flour or the wrong sort of
flour can give dry bread.
Check in the recipe that you
have used the correct type
of flour and the correct
quantities of flour/liquid.
Check that you have set the
If the oven temperature is
too low, the mixture has to correct temperature.
stay in the oven much longer
in order to be cooked
through and thus gets dry.
64
The cakes/oven dishes are If the oven temperature is
too high, the cakes/oven
too brown.
Check that you have set the
correct temperature.
dishes can be browned too
much before they are
completely cooked.
The food has been
Check in the table or recipe
that you have selected the
positioned too high in the
oven thus receiving too much correct position.
top heat when using top and
bottom heat, and the
opposite effect if placed too
low.
Cakes/oven dishes are too
pale.
The Quick start is switched
on.
Check that you have turned
the function knob to the
desired function.
Aluminium foil, a tray or
roasting pan on the bottom
of the oven is stopping the
bottom heat.
Make sure that there is
nothing on the bottom of the
oven.
Pale baking tins give paler
cakes than dark baking tins.
Change to darker baking tins.
65
Problems and remedies
Never do anything to the cooker that could cause injury to people or damage the
product. Below you will find suggestions as to what you can do yourself if there is a
problem. If you need help - contact Service.
Problems
Cause/Remedy
There is no power to the cooker
Check the following:
• that the FUSE/FUSES are in good condition
• that the POWER PLUG is properly inserted
• that any EARTH FAULT SWITCH is turned on
The cooker does not work
Check that the function lock is not
active (see page10)
It takes too long to boil/fry
Check that you have selected a suitable pan
with good heat conductivity (see page 20)
The oven light does not work
Replace the defective bulb (see page 59)
The door lock does not work
Activate the lock function (see page11)
The oven thermometer does not work
Check that the roasting thermometer is
properly connected in the oven; take it out
and then re-connect it. Programme the
desired temperature (see page 45)
The clock shows the wrong time or does
not work at all
Set the correct time (see page 13)
The signal clock does not work
Programme in a time (see page 36)
Sound is heard from the cooker even
though it has been switched off
The sound comes from the thermostatcontrolled fan which protects the cooker
electronics. No action required, since this is
completely normal.
66
Problem
Cause/Remedy
F9 lights up in the display
Pull the plug out of the wall outlet. Connect
up again and re-start the cooker
F11 lights up in the display
The roasting thermometer contact is not
properly inserted into the outlet in the
oven
Wrong code lights up in the display
(starts with F)
Contact Your Service support
Disposal
1 Disconnect the cooker from the
wall outlet.
2 Cut the cable as close to the
back of the cooker as possible.
3 Deactivate the door lock so
that children cannot be locked
inside the oven.
67
www.electrolux.com
349 54 77-01/A - 2007-07-18